gjdale
-
Posts
4,894 -
Joined
-
Last visited
Content Type
Profiles
Forums
Gallery
Events
Everything posted by gjdale
-
 Carvings look great Nigel. I'm with Nils though, it would seem a shame to paint them now. "Painting with wood" is very effective in its own right.
 -
That looks great with all the deck fittings in place Marc. Interesting choice to leave them off until the rigging is in place - I'm sure that will work very well.
- 525 replies
-
- 2
-

-
- cutty sark
- mantua
- (and 2 more)
-
Have to agree with Mark, Nigel - excellent work and a great start on the carvings. If this doesn't drive you mad first, they will be a lovely addition to your model.
-
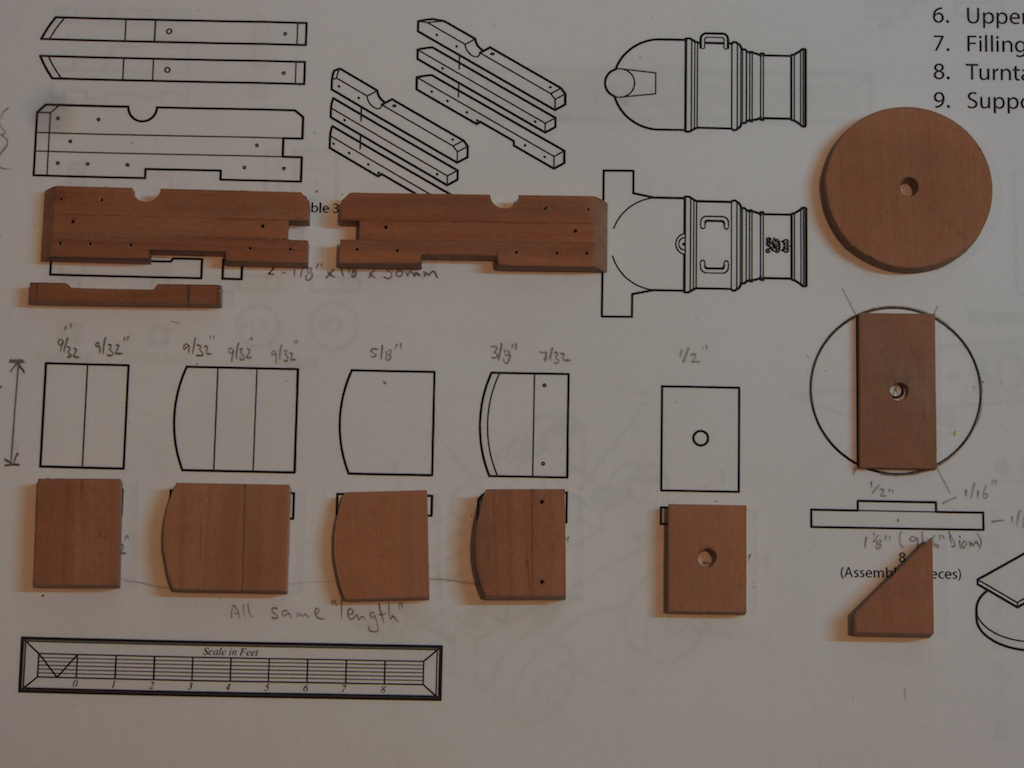
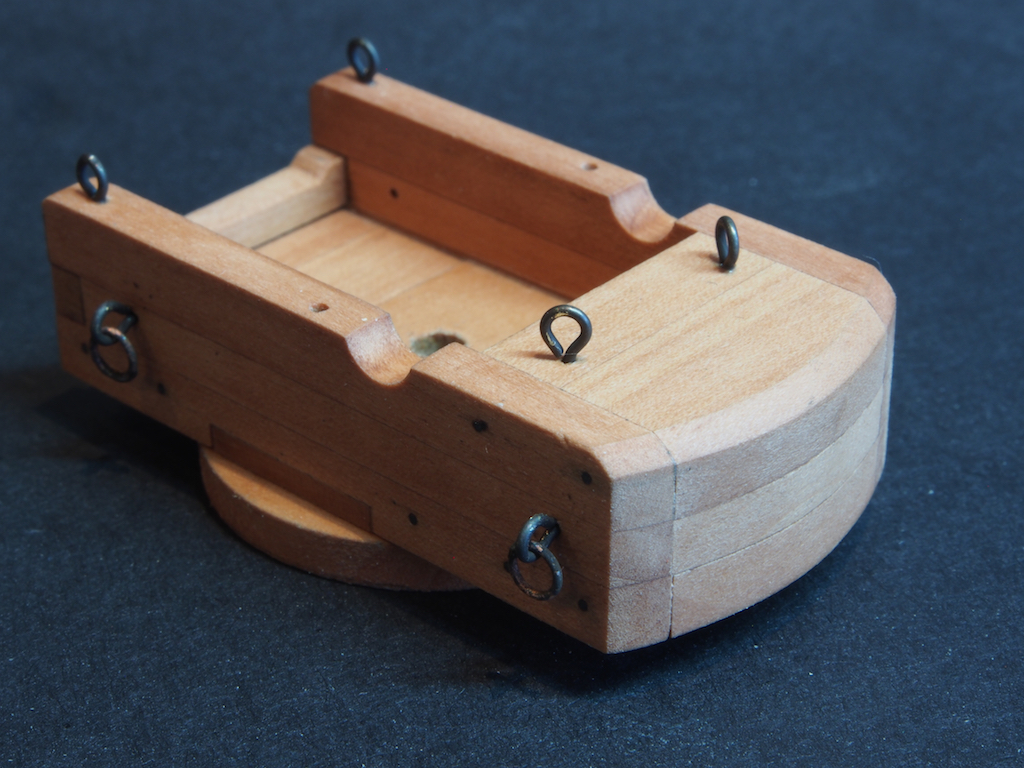
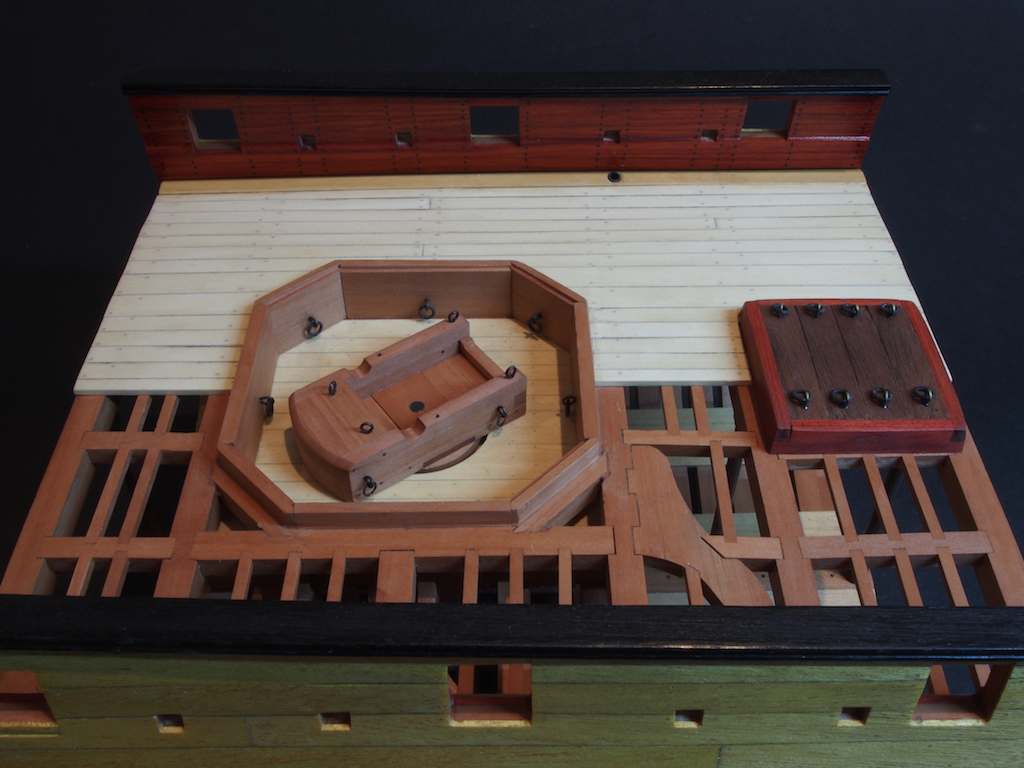
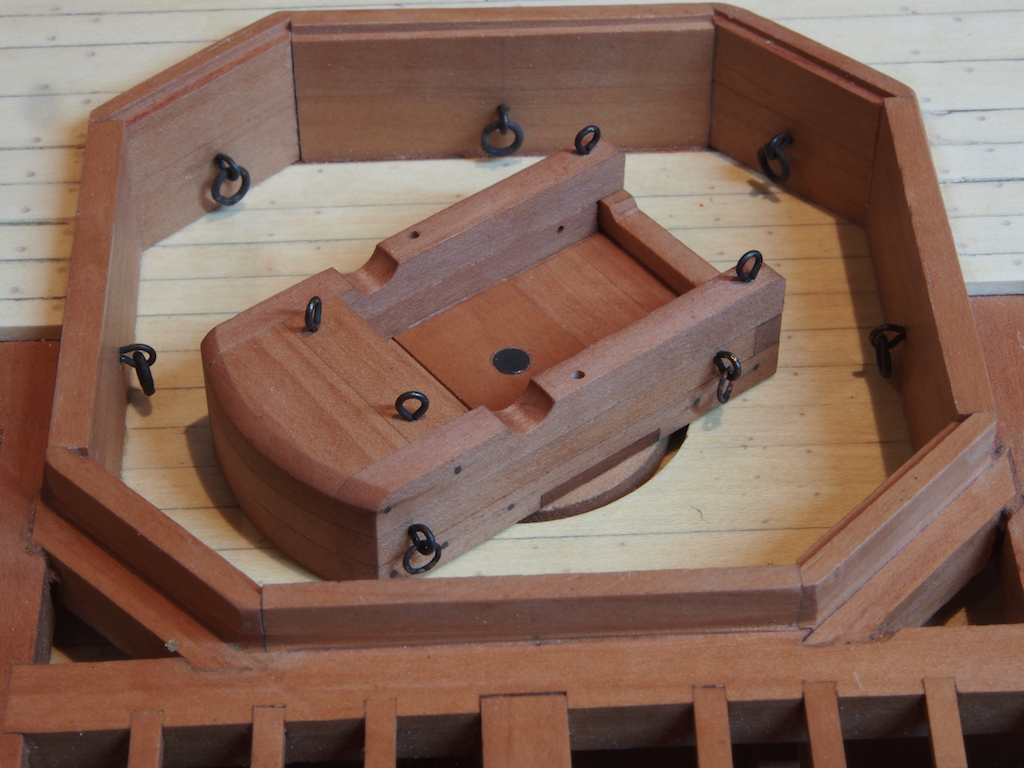
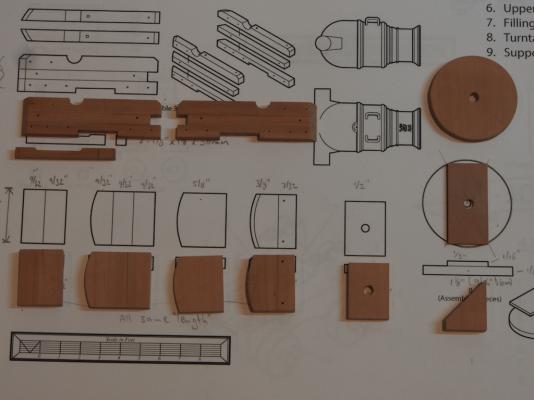
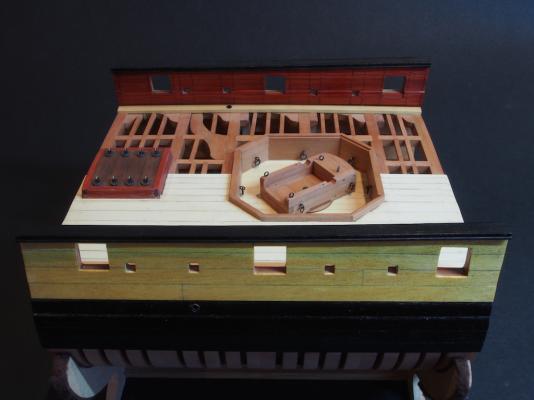
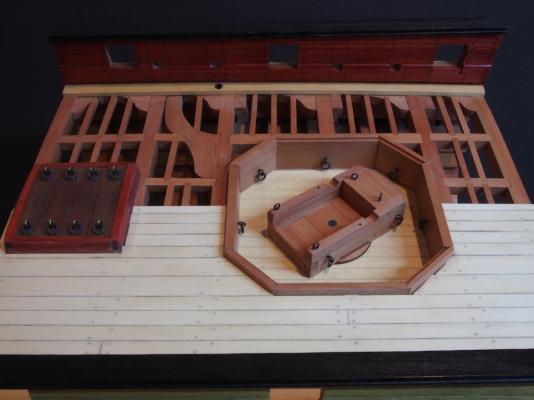
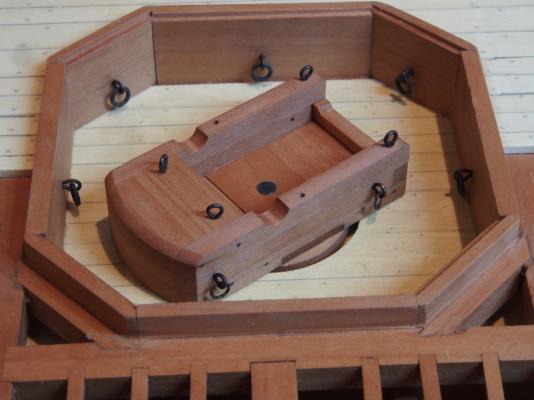
Thank you so much one and all for the very kind comments and all the "likes". The next job is construction of the Mortar Bed. The Mortar Bed The Mortar Bed is an interesting model in itself, although it is quite straightforward thanks to Jeff’s excellent drawings. All of the components are made from Swiss Pear of varying thicknesses. The side pieces are each comprised of three ‘strakes’ and after cutting stock to the appropriate sizes, these were made as a pair by spot-gluing the over-length stock together and completing all drilling and milling operations together to ensure symmetry. The groove for the trunnion was cut on the mill, and holes of various diameters for bolts and eyebolts were completed on the mini drill press. Three pieces in the base have a 1/8” hole to take a brass spigot which goes through into the deck below to allow the turntable to turn. Centring these holes was probably the trickiest part of the operation. Here are all the components overlaid on the drawings (a few of these ended up with a re-do): The rear of the mortar bed is rounded and a bevel is added to the top edge just to add a slight degree of difficulty. The rounding was done on each component piece individually using the Byrnes disc sander, and then the whole piece was touched up once assembled. The bevel was achieved by first marking the inner edge of the bevel by tracing around the edge of both top and side with a compass point set to the appropriate distance and then carefully filing to shape before finishing with a sanding stick. Eyebolts and Ringbolts were then added according to the drawings. I will leave the cap squares until the mortar and its trunnions have been fashioned. Finally, here’s a few shots of the mortar bed in position:


- 456 replies
-
- 25
-
-
- finished
- bomb ketch
- (and 2 more)
-
Great to see back Paul and nice to hear of your good news.
-
Great to see you back in the shipyard Augie.
- 2,191 replies
-
- 2
-
-
- confederacy
- Model Shipways
- (and 1 more)
-
Mine arrived in the post today! Complete with decorative towel, duly handed over to the Admiral. When I went to order from the website it said out of stock, so I sent them an email expressing my interest. They confirmed when they were expecting more in and politely asked me if I would like them to send me an invoice. I agreed, received the invoice, which I promptly paid vis PayPal, and my order was shipped the next day. Took about two weeks to get here, which seems to be pretty standard for anything ordered from overseas, regardless of country of origin.
-
Danny you are just a glutton for punishment! I hope your neighbour appreciates your kindness.
- 14 replies
-
- 6
-
-
- yacht
- restoration
- (and 1 more)
-
Cutter Cheerful 1806 by rafine - FINISHED
gjdale replied to rafine's topic in - Build logs for subjects built 1801 - 1850
Now that is just lovely Bob!- 525 replies
-
- 3
-
-
- cheerful
- Syren Ship Model Company
- (and 1 more)
-
Great work Nigel and thanks for showing your technique.
-
That's a very useful little tutorial on your broach Bob. Thanks for sharing - I've filed that one away for future reference!
- 277 replies
-
- 2
-
-
- model shipways
- 18th century longboat
- (and 1 more)
-
Congrats on the new job Wayne! And nice to see a little progress on your lovely Emma.
-
Just found your log Ken. Looks like a really interesting project so I might pull up a chair too. I think I can see a spot in the second row.
- 80 replies
-
- 6
-
-
- choctaw
- heinkel models
- (and 1 more)
-
Nice one Danny! I'll bet Pud was ducking for cover..... Glad to hear it was a false alarm. The braces look great.
-
Best wishes for a successful, damage-free move Ben. We'll keep a light burning in the stern gallery for you.
-
She sure is looking nice John. Can't wait to see her dressed up in Poly.
- 745 replies
-
- 4
-
-
- francis pritt
- mission ship
- (and 1 more)
-
Looks like you'll be kept off the streets for a while with this one Danny! I'm sure you'll turn this into a very nice finished model too.
- 59 replies
-
- 3
-
-
- norske lowe
- billing boats
- (and 1 more)
-
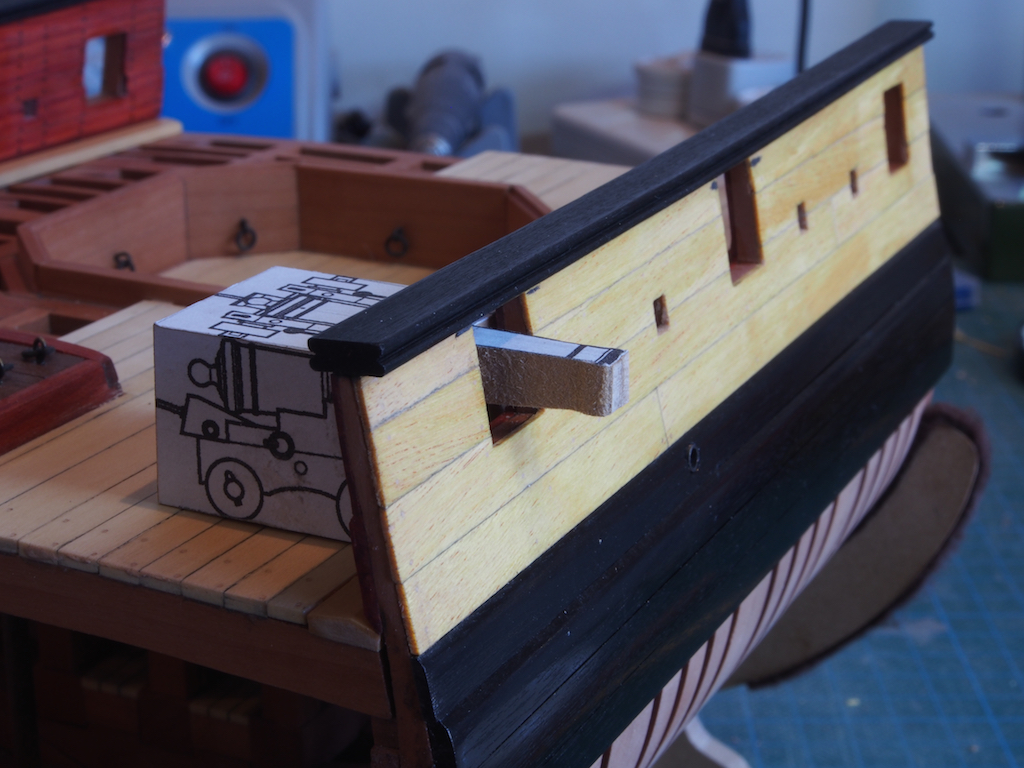
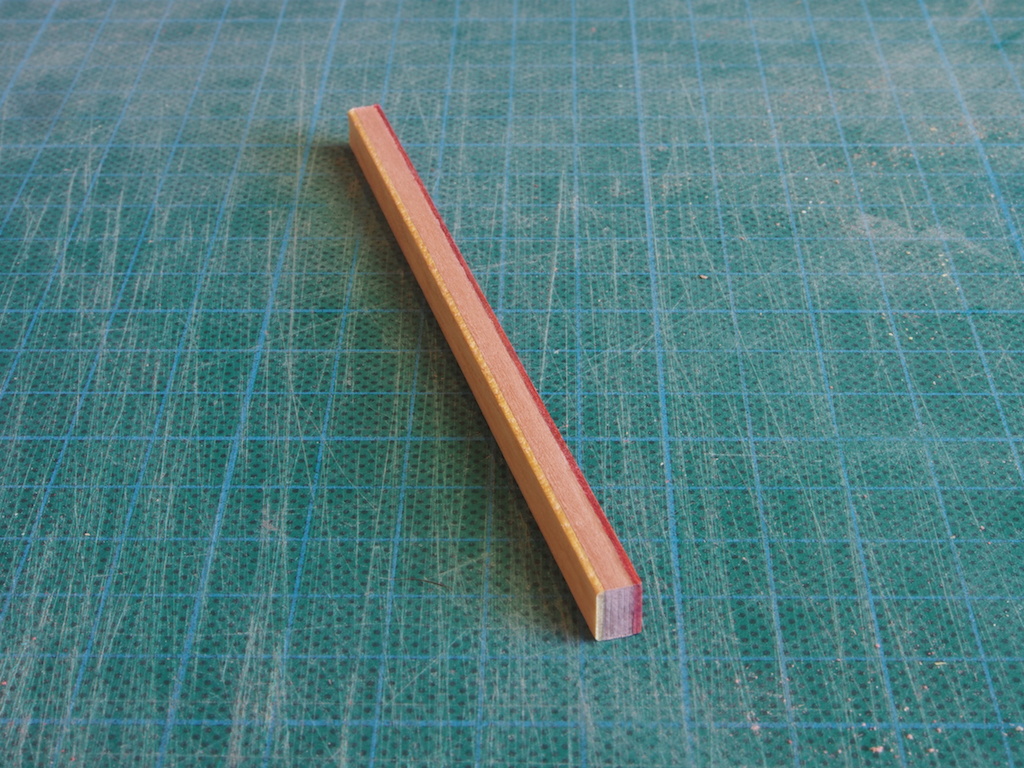
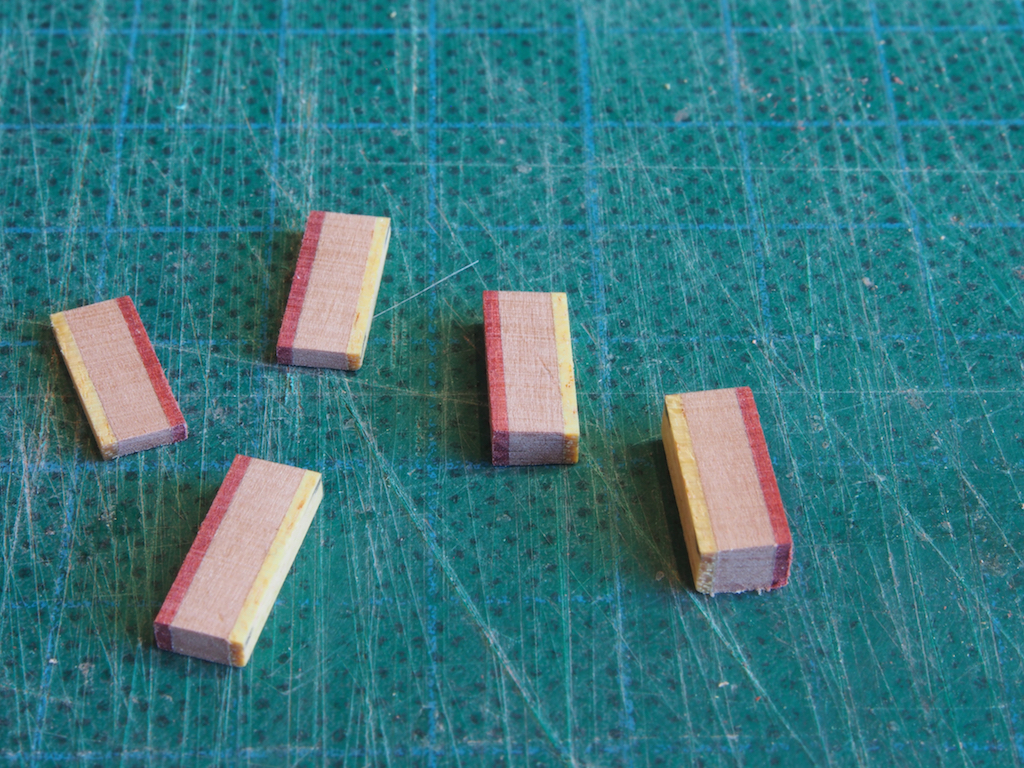
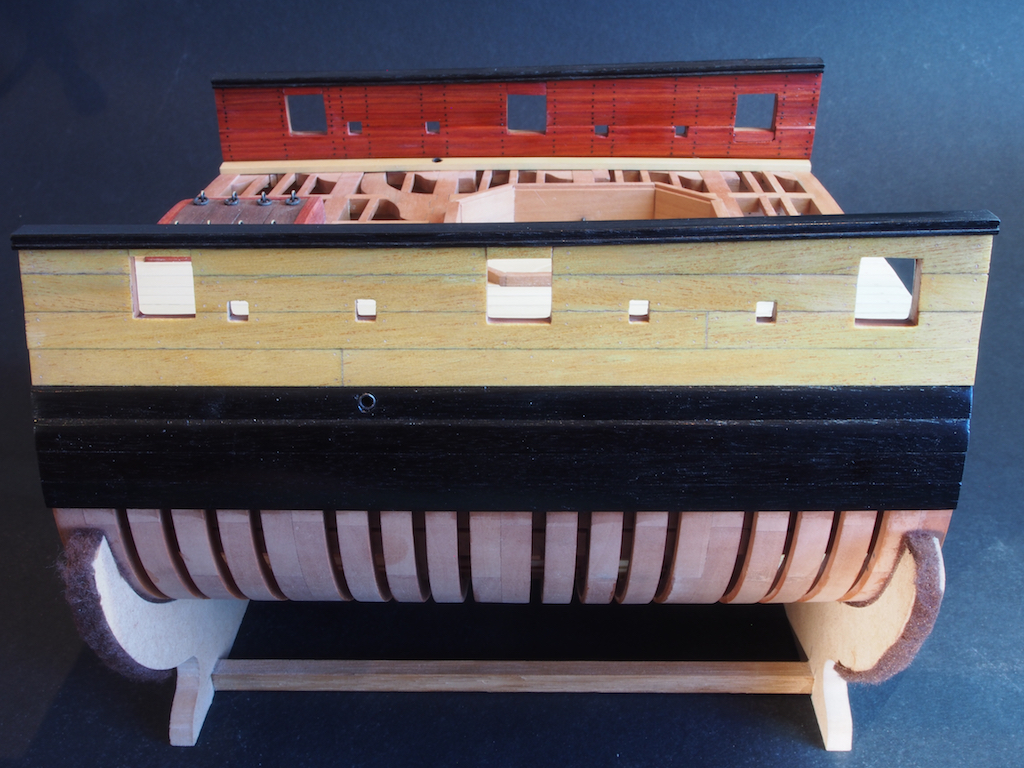
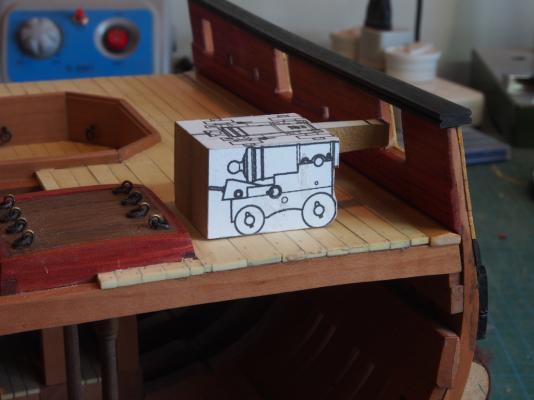
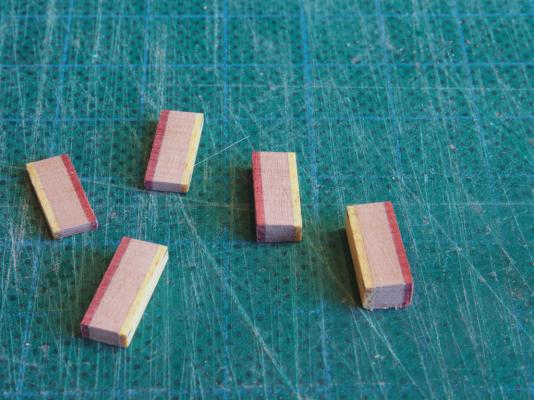
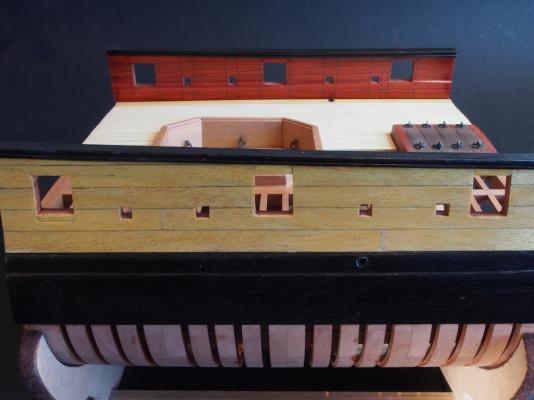
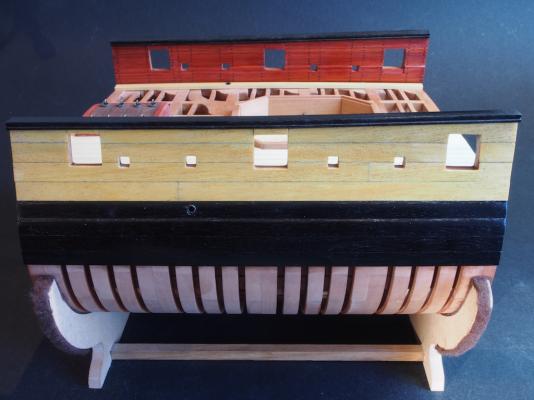
Gun Port Adjustments At this point, I would like to acknowledge the advice/assistance of master modeller Dan Pariser. After posting my previous progress report, Dan very kindly sent me a PM noting the discrepancies in the heights of the gunport openings. These are quite obvious in the last two photos of my previous update. The ports had been constructed according to the drawings, with only the aft port closed on all four sides, and the middle and forward ports being open to the sheer rail. There may also have been some accumulated error at play here as well. I had been feeling uneasy about this aspect myself, so when it was noted by Dan I just knew I couldn’t leave it as it was. First of all, I made up a rough dummy canon block from some scrap MDF to check the height of the lower edges of the ports: This showed that the aft port on the starboard side was considerably lower than the others on that side, so I had to extend the height of this port before adding a larger fillet to the bottom of it. Next, I made up some fillet stock by laminating some scraps of Pear, Yellow Heart and Red Heart: Then I cut some fillets roughly to length and then individually sized them to suit each gunport using the Byrnes disc sander: The fillets were then glued in place in their respective gunport. The surrounding area was given a light sand and a coat of Wipe-On Poly to blend with the surrounding area. Although there remain some visible joints, I think this looks better than the odd sized ports. With the 20/20 vision of hindsight, these fixes would have been better done prior to the addition of internal and external planking. Had I done this, the fix would have remained invisible. Lesson learned. Thanks again Dan for bringing this to my attention.


- 456 replies
-
- 20
-
-
- finished
- bomb ketch
- (and 2 more)
-
Glad to hear your glue swelling issue sorted itself out Nils. Mighty fine progress there.
- 2,625 replies
-
- 4
-
-
- kaiser wilhelm der grosse
- passenger steamer
- (and 1 more)