HOLIDAY DONATION DRIVE - SUPPORT MSW - DO YOUR PART TO KEEP THIS GREAT FORUM GOING! (89 donations so far out of 49,000 members - C'mon guys!)
×


gjdale
-
Posts
4,891 -
Joined
-
Last visited
Content Type
Profiles
Forums
Gallery
Events
Everything posted by gjdale
-
 Thanks Carl - and yes, partly to avoid splintering and partly to ensure that the hole started/finished in the right place as it would have been very difficult to judge the correct angle for the drill to do it in one go. As it is, the alignment is close enough to not notice any small discrepancies.
- 456 replies
-
- 7
-

-
- finished
- bomb ketch
- (and 2 more)
-
Thanks Mobbsie, For the scuppers, I drilled from both sides, starting with a quite small drill and gradually working up to the full size. The holes aligned pretty closely in the end. And you can relax, I'm unlikely to get any time in the shipyard this weekend, so you've got a week or two to catch up. Edit: just noticed the extremely "helpful" predictive text correction.......and corrected it!
- 456 replies
-
- 5
-
-
- finished
- bomb ketch
- (and 2 more)
-
Looks like a great mini project Richard, and these Woody Joe kits do look nicely done. Think I'll pull up a chair and follow along.
- 45 replies
-
- 3
-
-
- yakatabune
- woody joe
- (and 1 more)
-
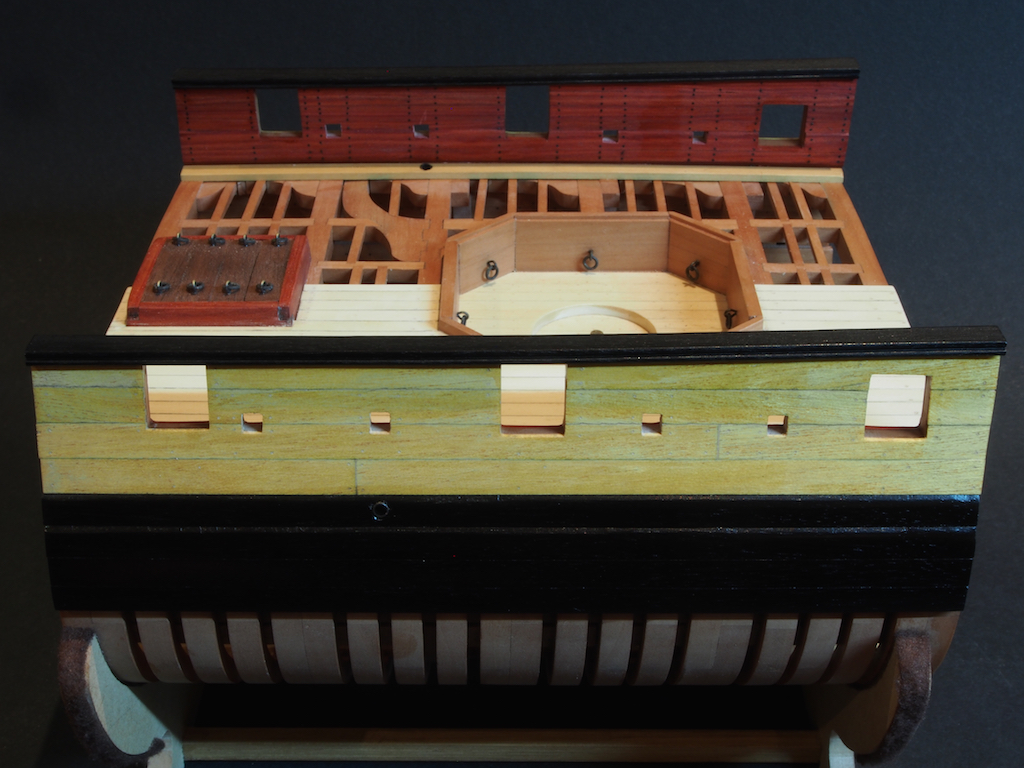
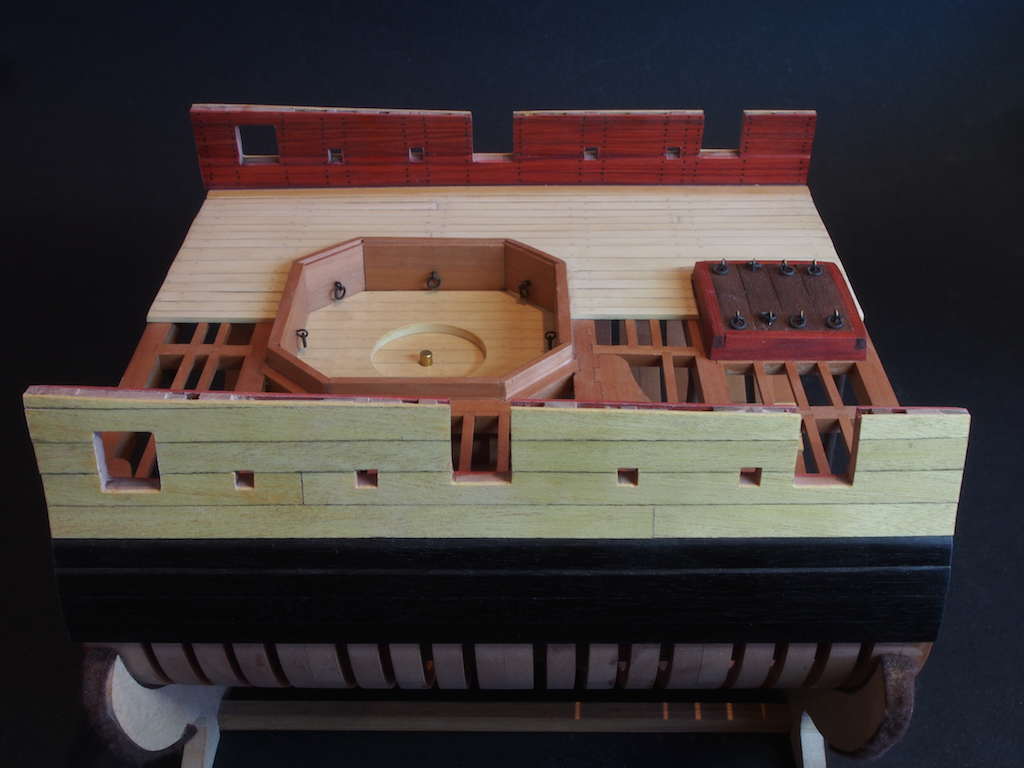
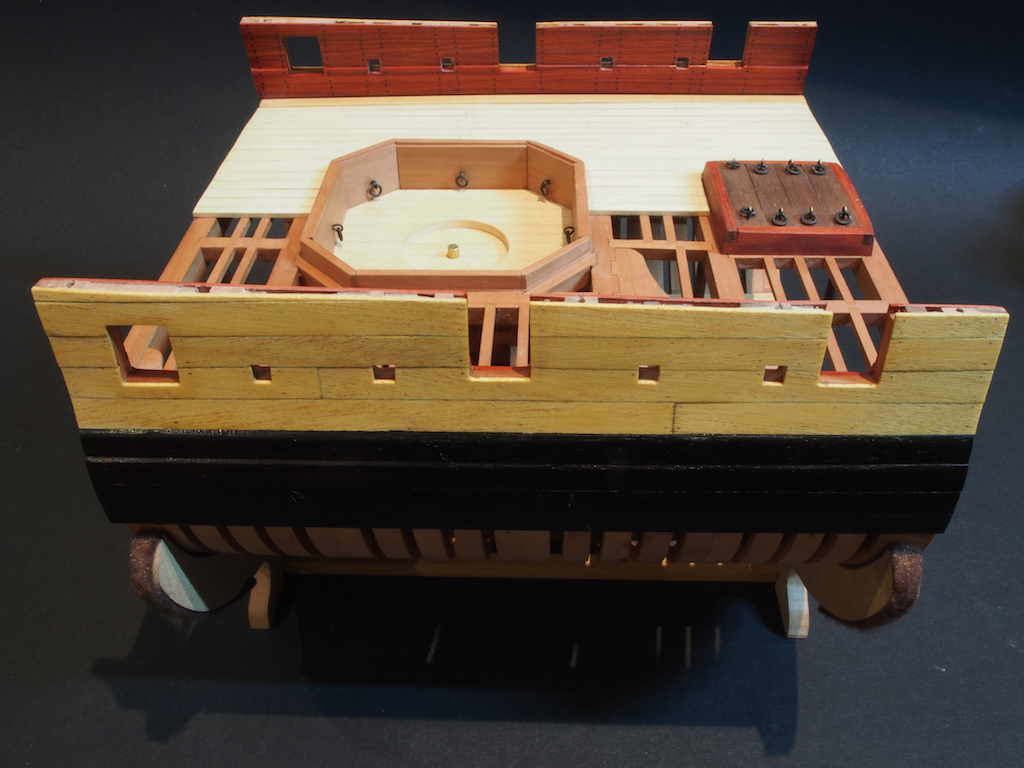
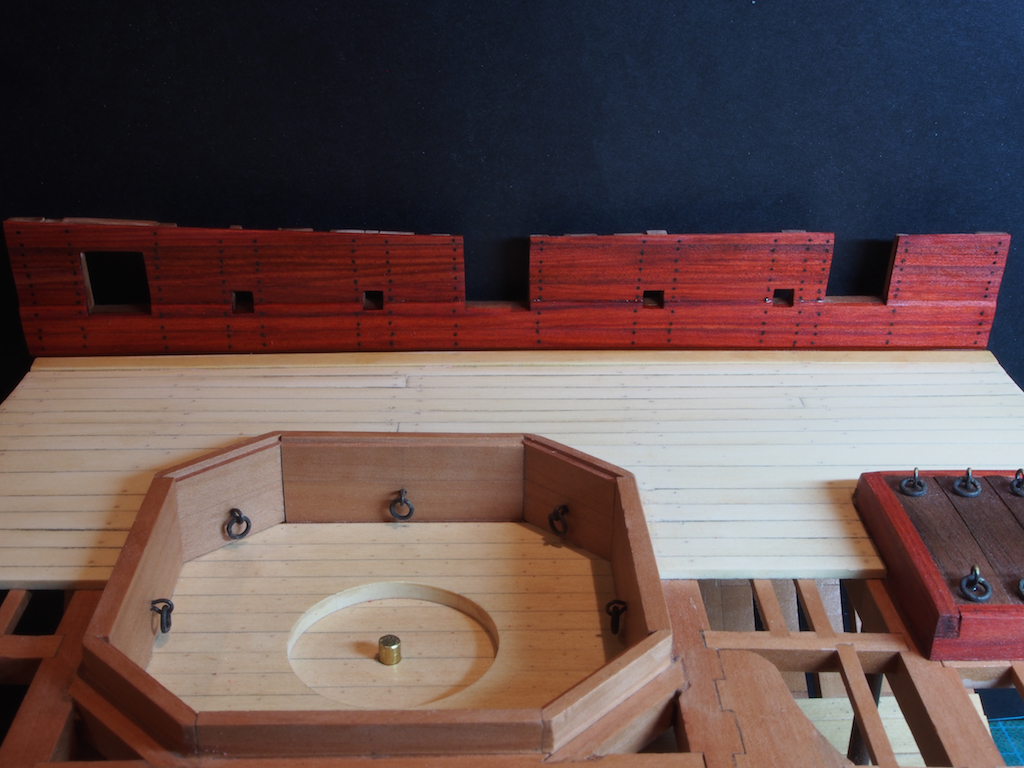
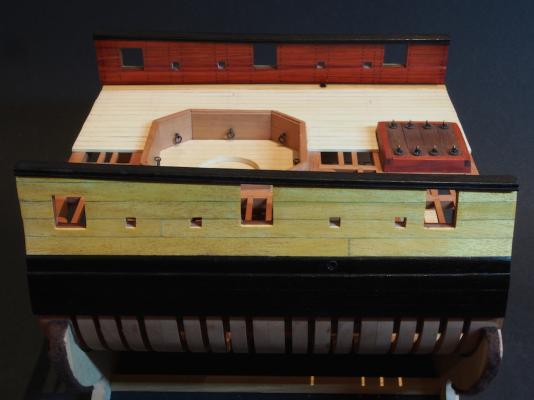
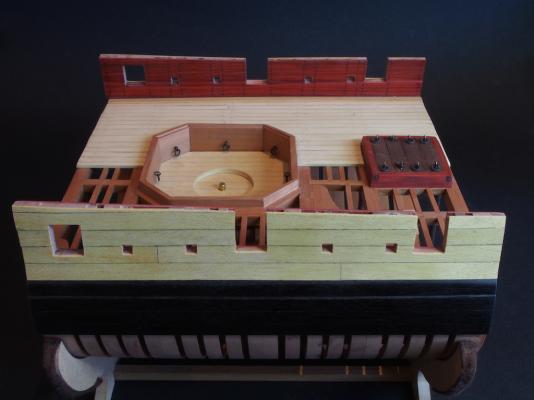
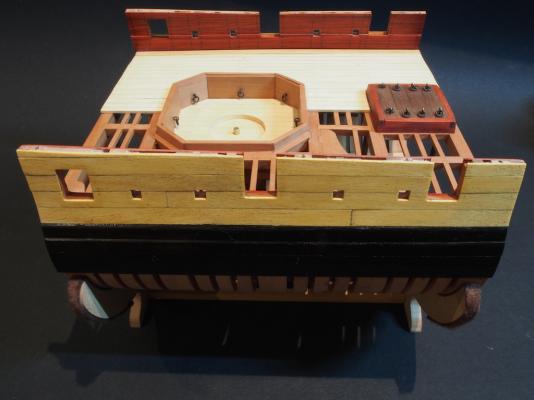
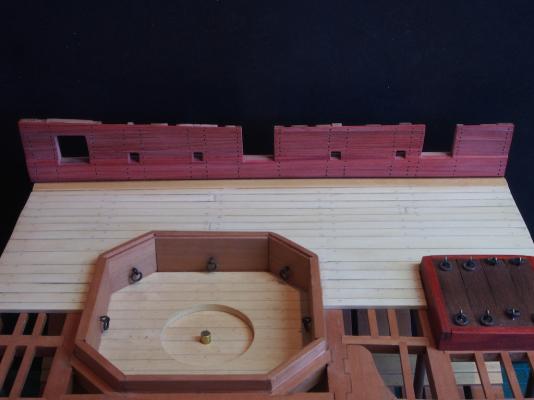
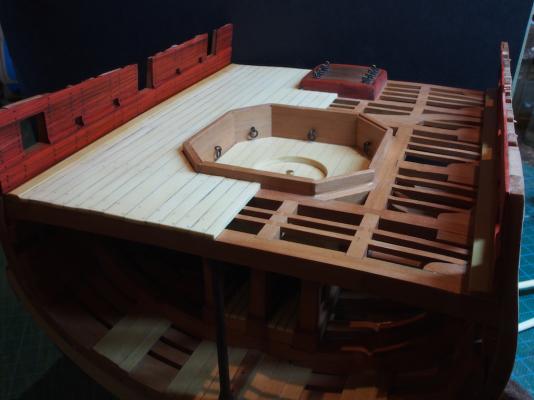
Thanks again everyone for the encouraging comments and the "likes". Sheer Rails (Continued) Here are the Sheer Rails with locating pins ready for installation: The Sheer Rails were then dry fitted and cut to final length before being glued in place using 5 minute Epoxy glue. The scuppers were then added by drilling a 1/8” (3.2mm) diameter hole in the waterway immediately below the second sweep port from forward, with a corresponding exit in the external planking in the Upper Main Wale. 1/8" diameter brass tubing was then cut to length, chemically blackened, and epoxied into place in each of the holes. All of the new additions were then given a coat of Wipe-On Poly. In the following photos, the scuppers can be seen in both the waterways and the Upper Main Wale. That completes this section of the build. Next up will be construction of the Mortar Bed. And yes, we’re getting close to the “elephant in the room” – turning of the Mortar barrel itself, along with canons and swivel guns………….


- 456 replies
-
- 19
-
-
- finished
- bomb ketch
- (and 2 more)
-
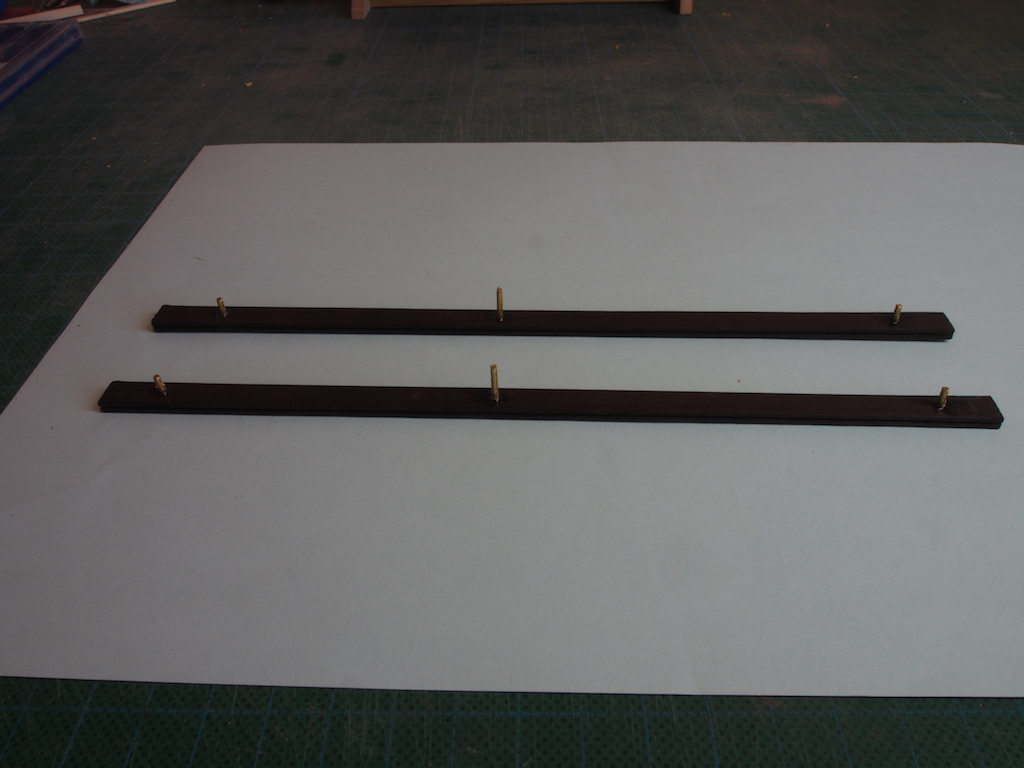
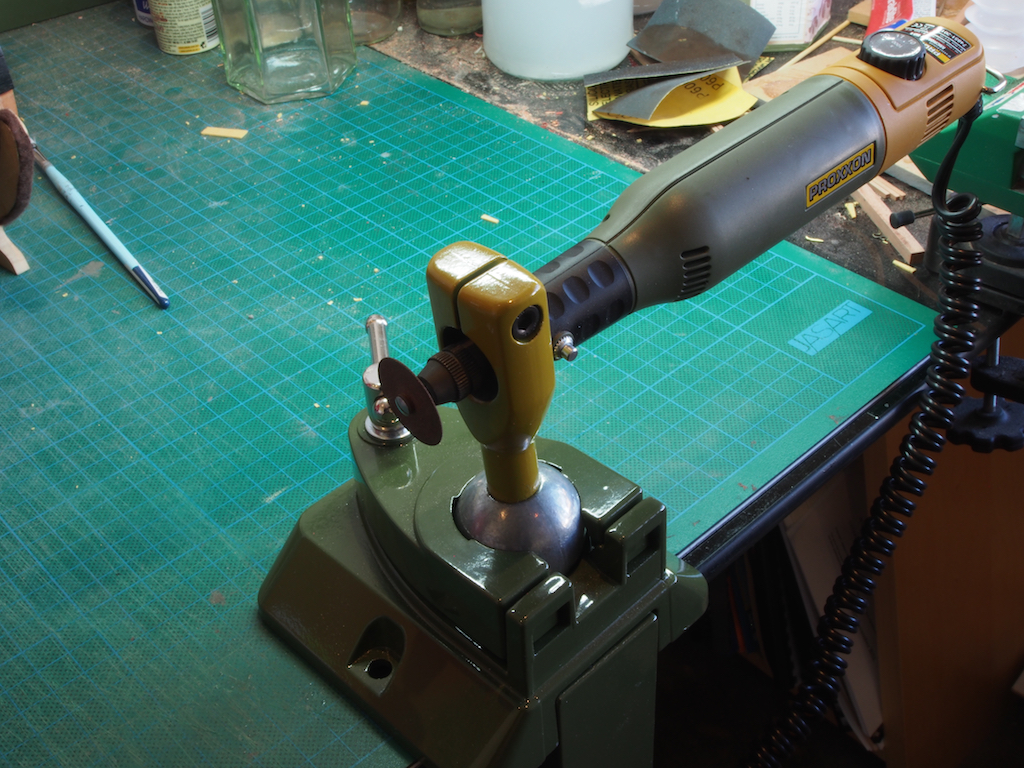
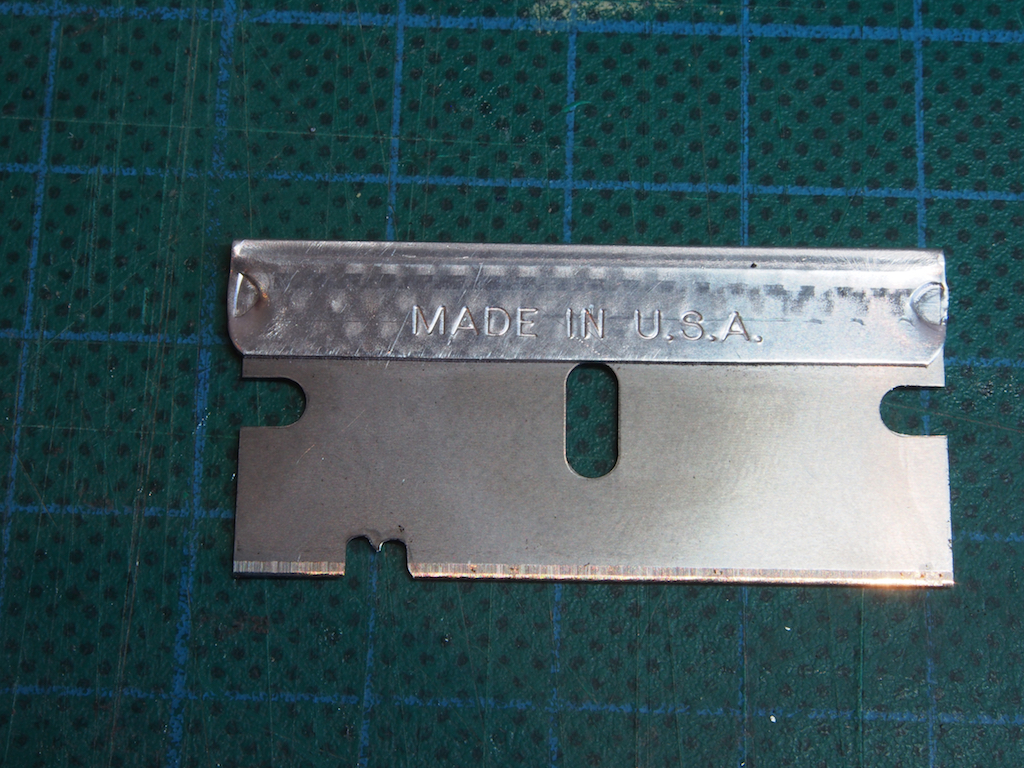
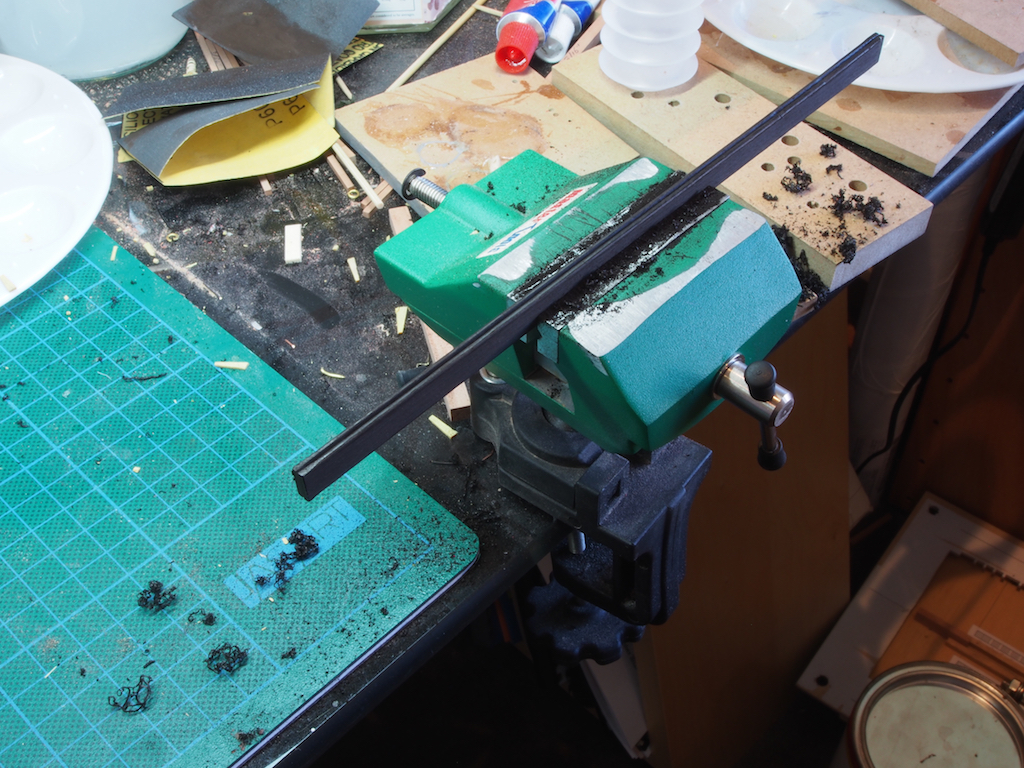
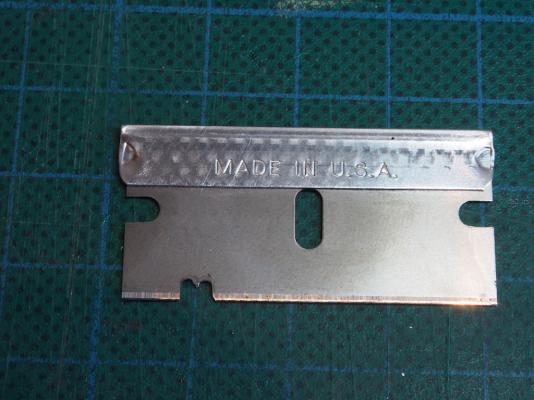
Thank you one and all for your very kind thoughts and words of sympathy and encouragement following the loss of Sam the Shipyard Supervisor. It's been a rough week, but life is starting to return to normal, including re-opening the Shipyard today. I must admit though, it does seem strange to be in there without him. His constant presence was somehow re-assuring. On with the build. External Planking and Sheer Rail External Planking consists of the Lower Main Wale, the Filling Wale, the Upper Main Wale, the Side Planking (above the Wales), and the Sheer Rail. The 3 components of the Wales are all of Ebony with variations in thickness. The Lower and Filling Wales are both 3/32” thick, while the Upper Wale is 1/16” thick. The Side Planking is of Yellow Heart that is 1/32” thick. This means that the Filling Wale and Upper Main Wale had to be reduced in thickness along their upper edges to blend into the next higher strake. Once again I used my miniature Japanese plane to achieve this relatively easily. Despite Ebony’s bad rap as being difficult to work with, I found that the plane took off nice thin curls of wood without too much “black dust”. I did of course vacuum up all of the shavings and dust immediately afterwards. The Yellow Heart was fairly easy to fit, although it does have a tendency to split and splinter fairly easily. I decided not to try and show any joints in the Ebony – figuring it just wouldn’t be seen anyway. I did however, decide to show some plank joints in the Yellow Heart. I also used a pencil along one edge of the Yellow Heart planking to define the caulking line. Here is how it looked once planking had been completed, but before treenailing. Once again, I used the “drill and fill” method for treenailing, using a 0.5mm drill and filling with my favourite water-based filler straight from the jar. Again, I opted not to attempt treenails in the Ebony. After a final light sand and clean-up, the whole of the side planking was given a coat of Wipe-On Poly. Under natural lighting, the Yellow heart does look more “yellow”. The Sheer Rail is made from 1/8” thick x 1/4” wide Ebony and requires a moulding profile to be cut on both inboard and outboard edges. I decided to try to do this using a scraper method. I used my Proxxon drill with a cut-off disc, mounted in a holding clamp, to cut the profile into a single edged razor. The Sheer Rails were cut slightly longer than required and mounted in a vice to have the mouldings cut using the scraper. Once again, despite it’s bad reputation, I found the Ebony quite workable. Even with this rudimentary cutter, the wood came away in nice shavings with just a little dust (again quickly cleaned up on completion). Here’s a picture of the profile being cut – notice the shavings in the background. To assist in locating the Sheer Rails correctly, three 1.5 mm diameter brass pins were epoxied into holes drilled in the underside of the Rails. Corresponding holes were drilled vertically into the frames. These will be fitted to the ship tomorrow - more pics on completion.


- 456 replies
-
- 21
-
-
- finished
- bomb ketch
- (and 2 more)
-
Nice to see you making some progress again Sjors.
- 1,616 replies
-
- 4
-
-
- caldercraft
- agamemnon
- (and 1 more)
-
That is a SERIOUSLY nice planking job Erik!
- 222 replies
-
- 2
-
-
- 18th century longboat
- model shipways
- (and 2 more)
-
Boyd, If you're interested in trying your hand at scratch building, I can thoroughly recommend the Bomb Vessel Cross Section (link to my build log below), or you could go for an Echo class or Triton cross section. Noting your aversion to painting, you can "paint with wood" as I am doing. The advantage of a cross section is that it introduces you to all of the skills/techniques of scratch building, without a mammoth undertaking. It's a great way to learn, and you end up with a pretty nice model to boot.
-
Just fabulous Daniel. Absolutely amazing work. You've really captured the essence of what it must have been like on the gun deck during battle.
-
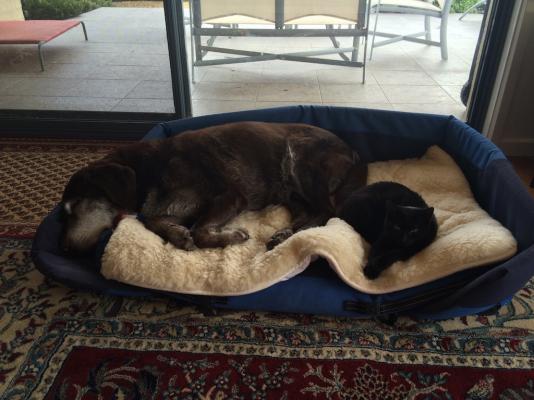
The shipyard has been closed for most of the weekend as we mourn the passing of the Shipyard Supervisor, Sam the Chocolate Labrador. After a lengthy battle with pharyngeal paralysis over the last year, Sam was put to sleep by our Vet on Saturday morning. He went peacefully, in his favourite bed in the sun in our family room, with the Admiral and I by his side. We miss him terribly but remember fondly the 13 years of love and devotion he gave us. I thought I would share a few photos of my best mate and shadow for so long. Sam came to us as a one-year-old pup: It didn't take him long to work out that the most comfortable seat in the house was mine. Here he is, a couple of years ago, aged 12: More recently, at the grand old age of 14, he's had a young playmate for company and he's been very tolerant of her: They liked to share the sunshine together: I miss him like crazy, but will always smile when I think of him with those doleful eyes and the tail that never stopped wagging.


- 456 replies
-
- 13
-
-
- finished
- bomb ketch
- (and 2 more)
-
The hull is looking just beautiful Nils. Great work!
- 2,625 replies
-
- 1
-
-
- kaiser wilhelm der grosse
- passenger steamer
- (and 1 more)
-
Just caught up with this log Erik. Beautiful job on the planking!
- 222 replies
-
- 3
-
-
- 18th century longboat
- model shipways
- (and 2 more)
-
Serving looks excellent Harvey.
-
Sorry to hear of the mishap Augie. I'd been wondering how you achieved that nice red colouring on your model - I guess your secret's out now!
- 2,191 replies
-
- 4
-
-
- confederacy
- Model Shipways
- (and 1 more)
-
Hey Danny, Welcome to the party! Glad to see you made it over. Mark is tending the bar (as usual), and Sjors occasionally drops by with the popcorn, so make yourself comfortable. A cross section of Vulture would be a great project for you. I'll look forward to following your log.
- 456 replies
-
- 5
-
-
- finished
- bomb ketch
- (and 2 more)
-
John, It certainly sounds like you're doing everything right. For my own use, I found a 50/50 dilution with distilled water worked best. This may seem a silly question, but are you certain it is "Pewter Black" that you have? I only ask because Jax do a range of patinas, including a brown. Failing all else, you might just have a "bad batch" - can you take it up with the supplier?
-
I agree with George, Marc - having the right tool for the job brings a whole new degree of satisfaction to the work.
- 525 replies
-
- 2
-
-
- cutty sark
- mantua
- (and 2 more)
-
Fabulous work on the rudder Nils, and your prop shaft housings are looking very smooth too.
- 2,625 replies
-
- 1
-
-
- kaiser wilhelm der grosse
- passenger steamer
- (and 1 more)
-
Glad to hear your mojo is back in residence Kevin. Nice start to the shrouds.
- 1,319 replies
-
- 1
-
-
- caldercraft
- Victory
- (and 1 more)
-
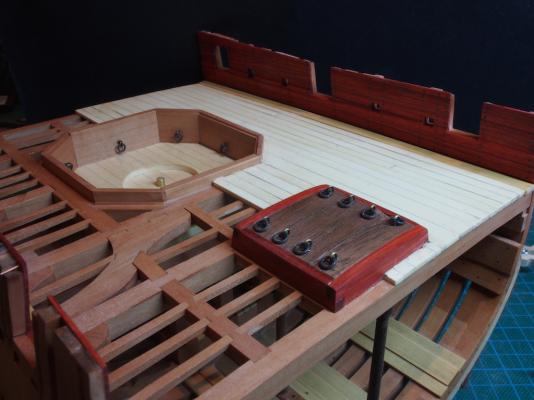
I've been away all week with work, but in my absence the Admiral very kindly cleaned up the hard disk so that I could upload my photos. So here is a slightly overdue update. Upper Deck Planking and Bulwark Lining The upper deck was next to be installed. Once again 3/16” x 1/16” Holly was used for the deck planks, with one edge darkened with a 2B pencil to simulate the caulking. I prefer the more subtle effect the pencil caulking gives. Treenails were fitted using the drill and fill method. The only issue here was that having done lots of testing for treenail filler earlier in the build I was a bit tired and was therefore too lazy to check back through the log to ensure I was using the right one, trusting to memory instead – big mistake! I subsequently used the wrong compound, and then had to re-drill before checking and then using the correct compound. I gave the deck a coat of Wipe-on-Poly to protect it from the inevitable “pink dust” that was about to be created with the Bulwark liner installation. Redheart was used for the Spirkiting and the Bulwark liner. The two strakes of spirkiting are 1/16” thick and the lower strake needs to be shaped to fit against the angled waterway. This was achieved in the same way as the waterway angle, by using a small hand plane. The upper strake was also angled to provide a smooth transition to the 1/32” thick bulwark lining. This upper strake also had to be cut to fit around the lower edges of gunports and sweep ports. After some consideration and discussion with my build buddy (Mobbsie), I decided to install “iron bolts/nails” in the Spirkiting/Lining using the same method of copper nails, blackened with Liver of Sulphur, as shown previously. Here is a picture showing the completed deck and the spirkiting/lining drilled and ready to accept the iron bolts. Once the bolts were installed and blackened, the sprikiting/lining was given two coats of Wipe-on-Poly. The following photos were taken after the first coat had been applied. The lighting conditions don’t really do it justice – it does look a little more red to the naked eye.

- 456 replies
-
- 21
-
-
- finished
- bomb ketch
- (and 2 more)
-
You could always ask that 9-yr old to come back and advise you on the "correct" way to do it John!
- 745 replies
-
- 7
-
-
- francis pritt
- mission ship
- (and 1 more)
-
Lovely work Bob - that lattice work sure does look delicate.
- 196 replies
-
- 2
-
-
- higaki kaisen
- woody joe
- (and 1 more)
-
Liver of Sulfer vs Casey's Brass Black
gjdale replied to Landlocked123's topic in Metal Work, Soldering and Metal Fittings
John, Liver of Sulfer (LoS) will not blacken Brass. It will however blacken Copper. If you use Copper in lieu of Brass, then use the LoS and yes, you can use it in situ without any ill effect to the surrounding timber. It is a good idea to wash of any excess with plain water though. You can see some examples where I've used it on my Bomb Vessel Cross Section build. Birchwood Casey Brass Black is good for blackening Brass, but must be rinsed thoroughly after use. It should NOT be used in situ.