


Baker
-
Posts
3,659 -
Joined
-
Last visited
Content Type
Profiles
Forums
Gallery
Events
Posts posted by Baker
-
-
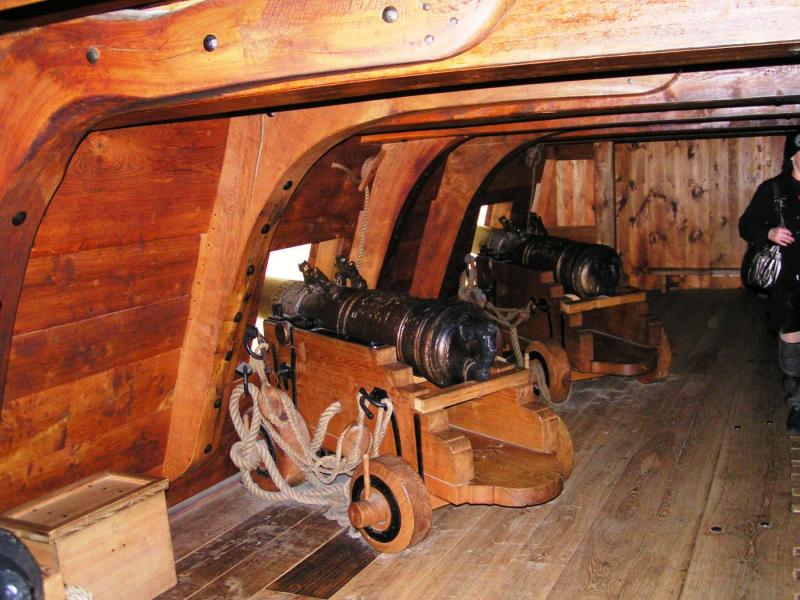
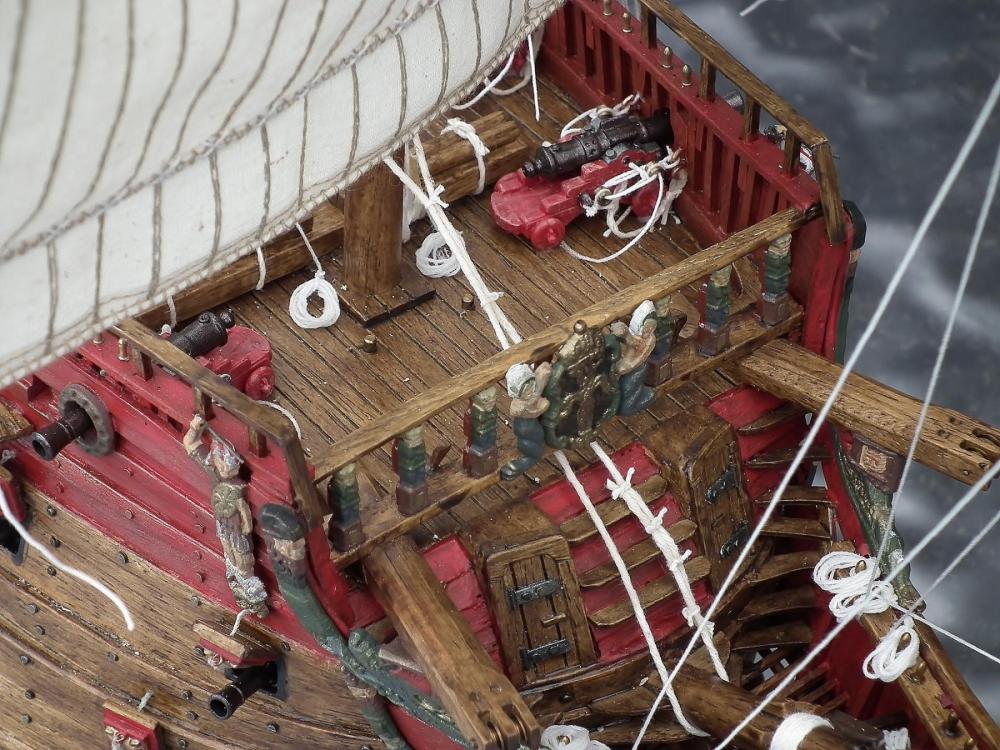
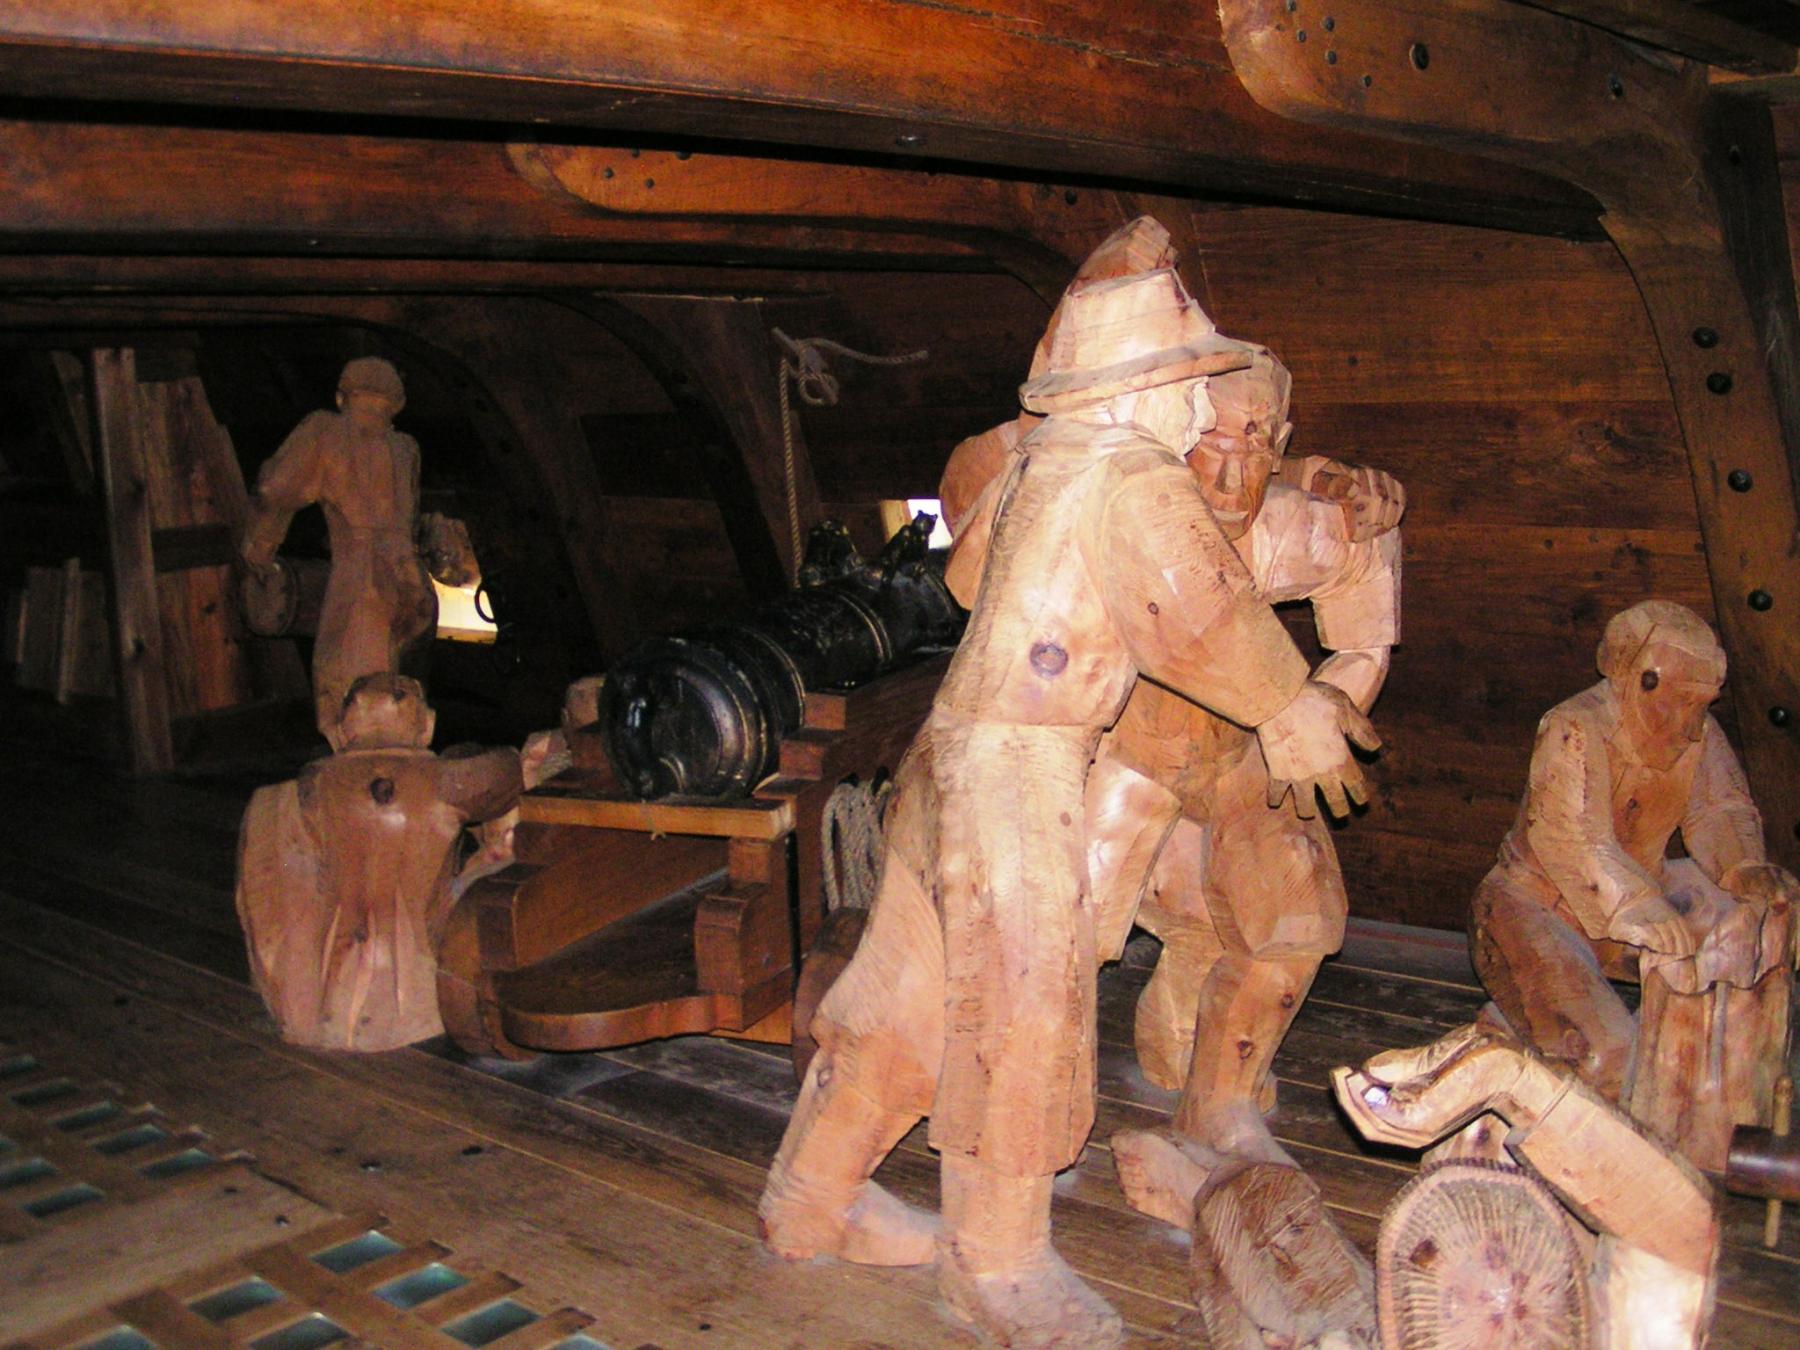
Maybe something like this.in the museum there is a reconstructed part of the hullSome of the guns are arranged inclined (angled).ps,You might get in trouble when the door must be opened .

 Greetings Patrick
- EJ_L, canoe21, baskerbosse and 3 others
-
 6
6
-
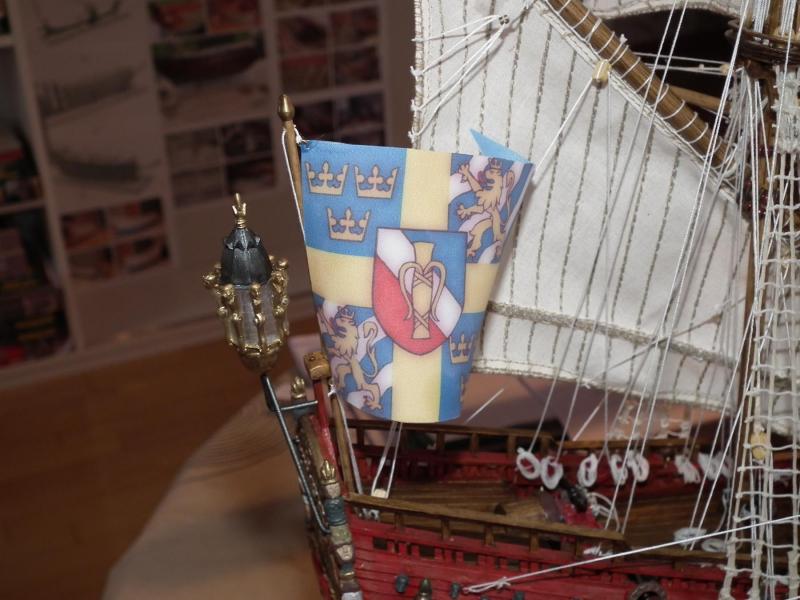
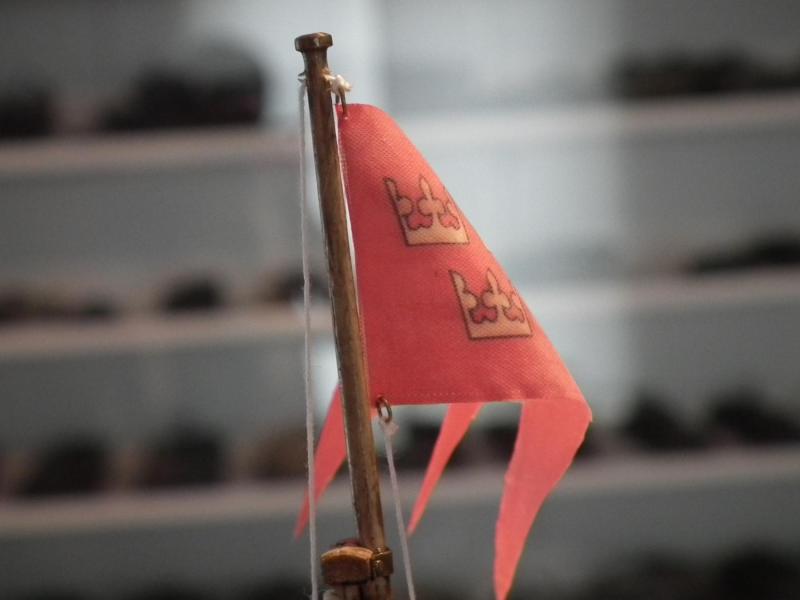
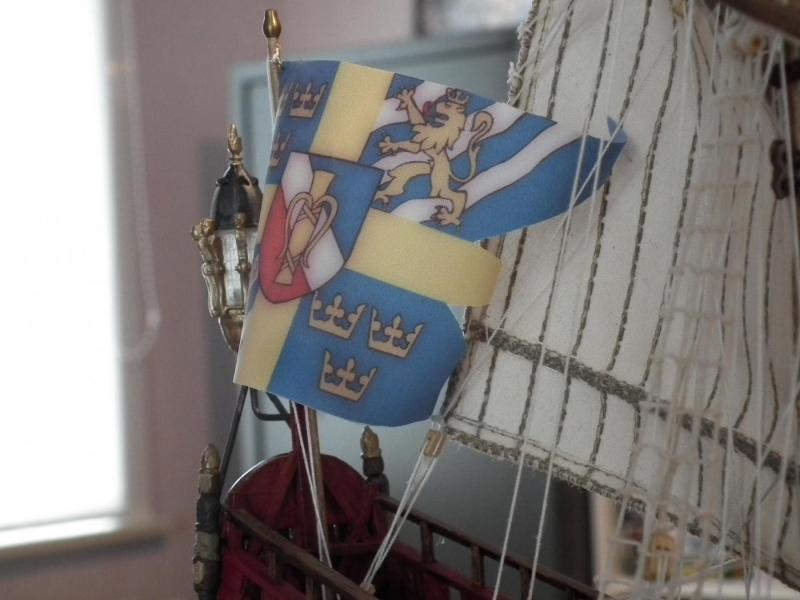
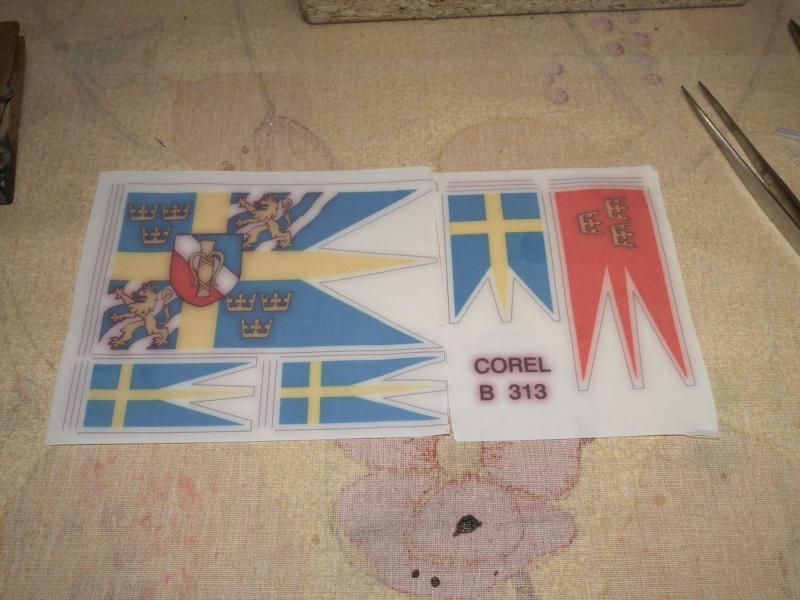
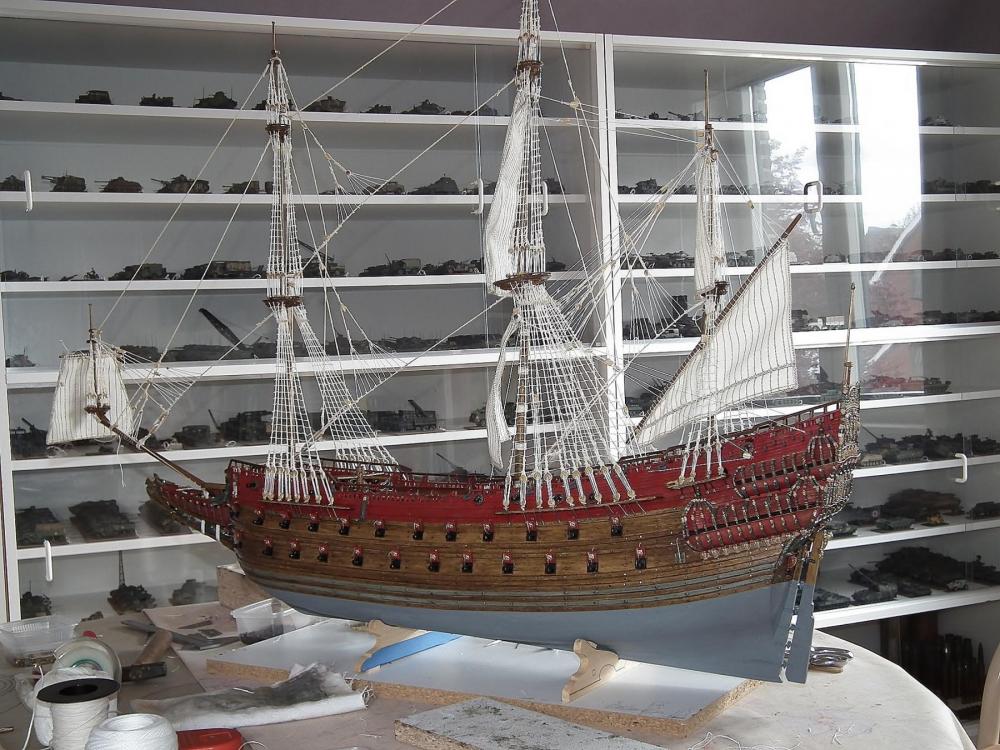
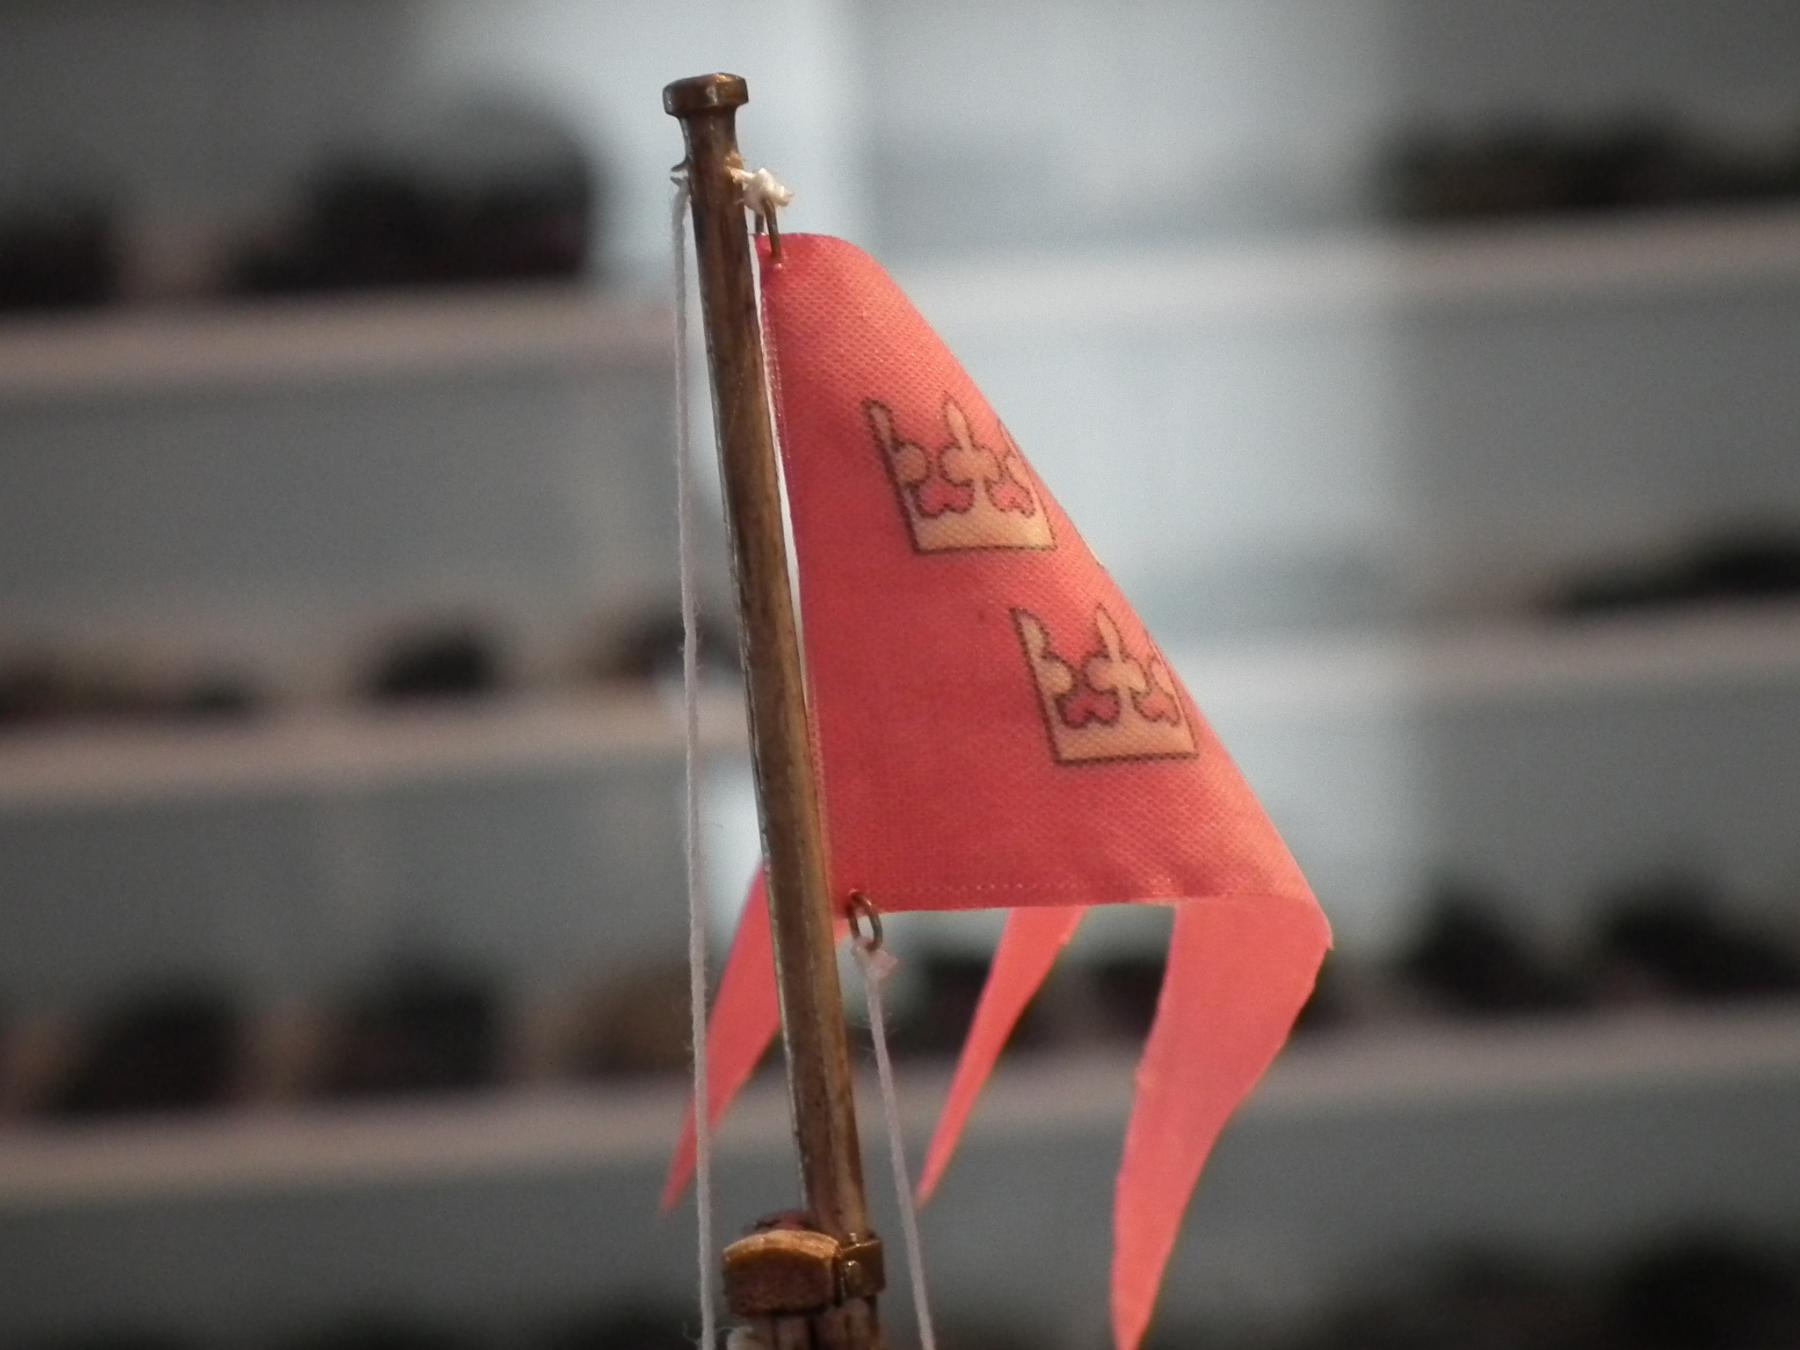
I found flags on the internet of the Wasa from Corel.For some reason they sent me two sets for the price of one
 The flags are cut out and fitted with brass rings and then mounted on the masts.Maybe there are more appropriate methods but I find its ok in this way.
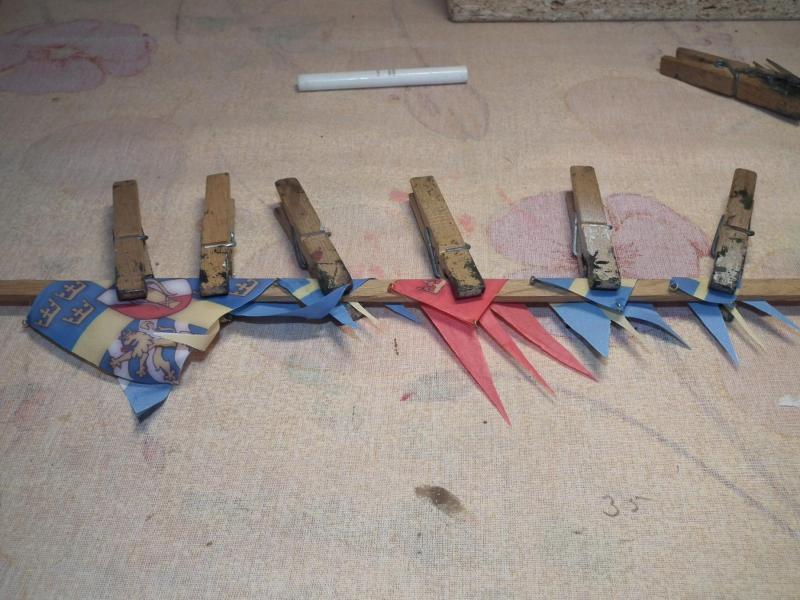
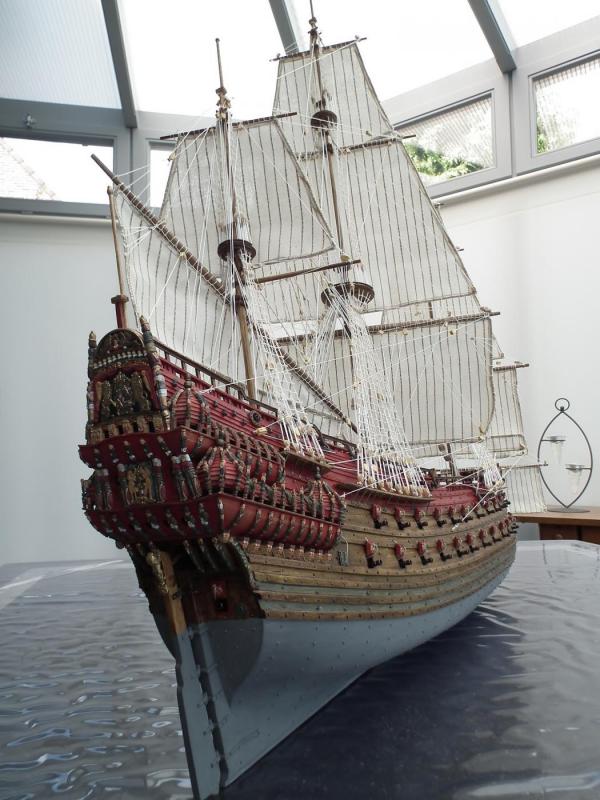
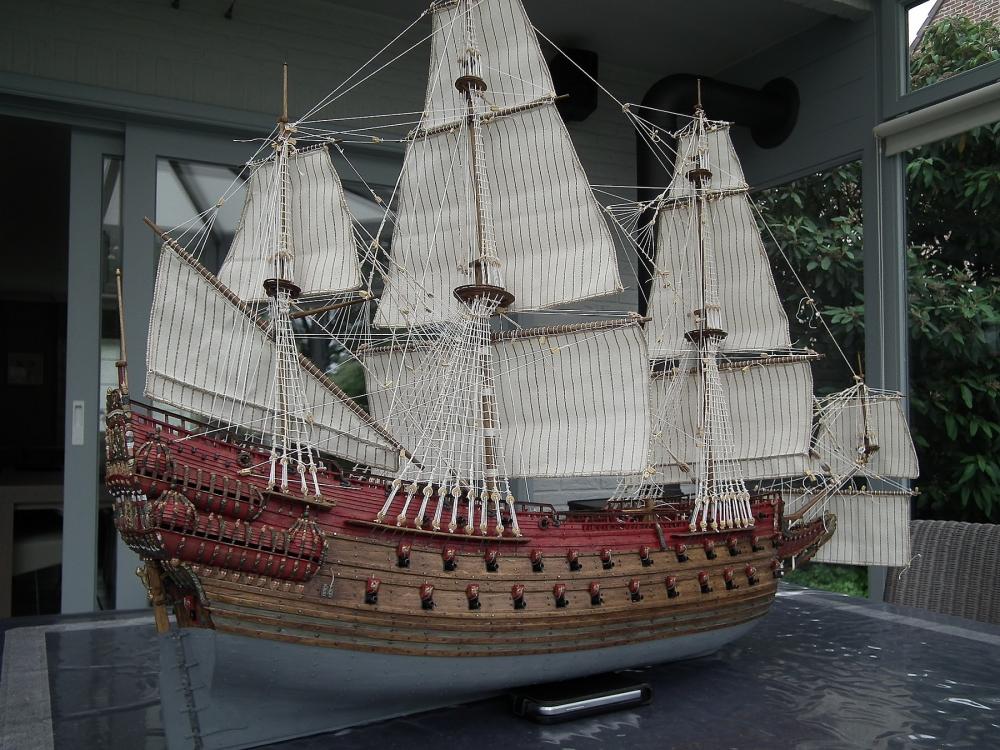
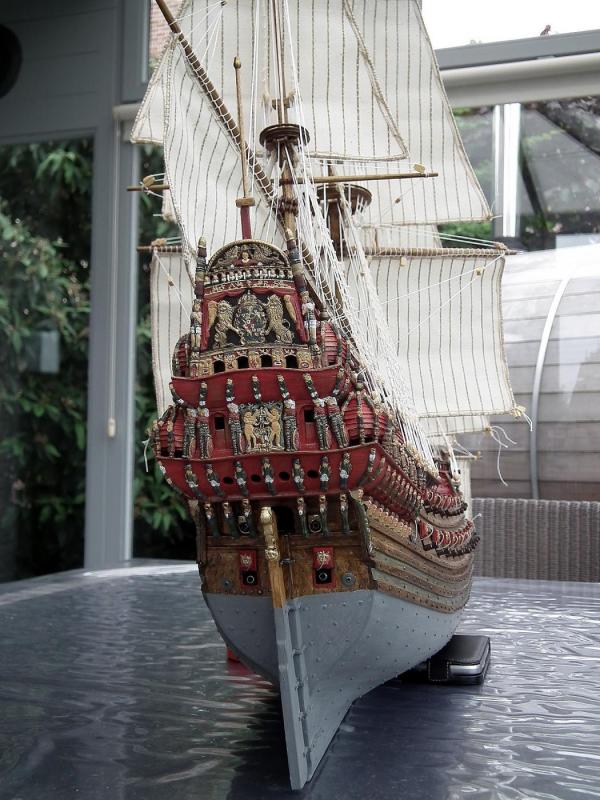
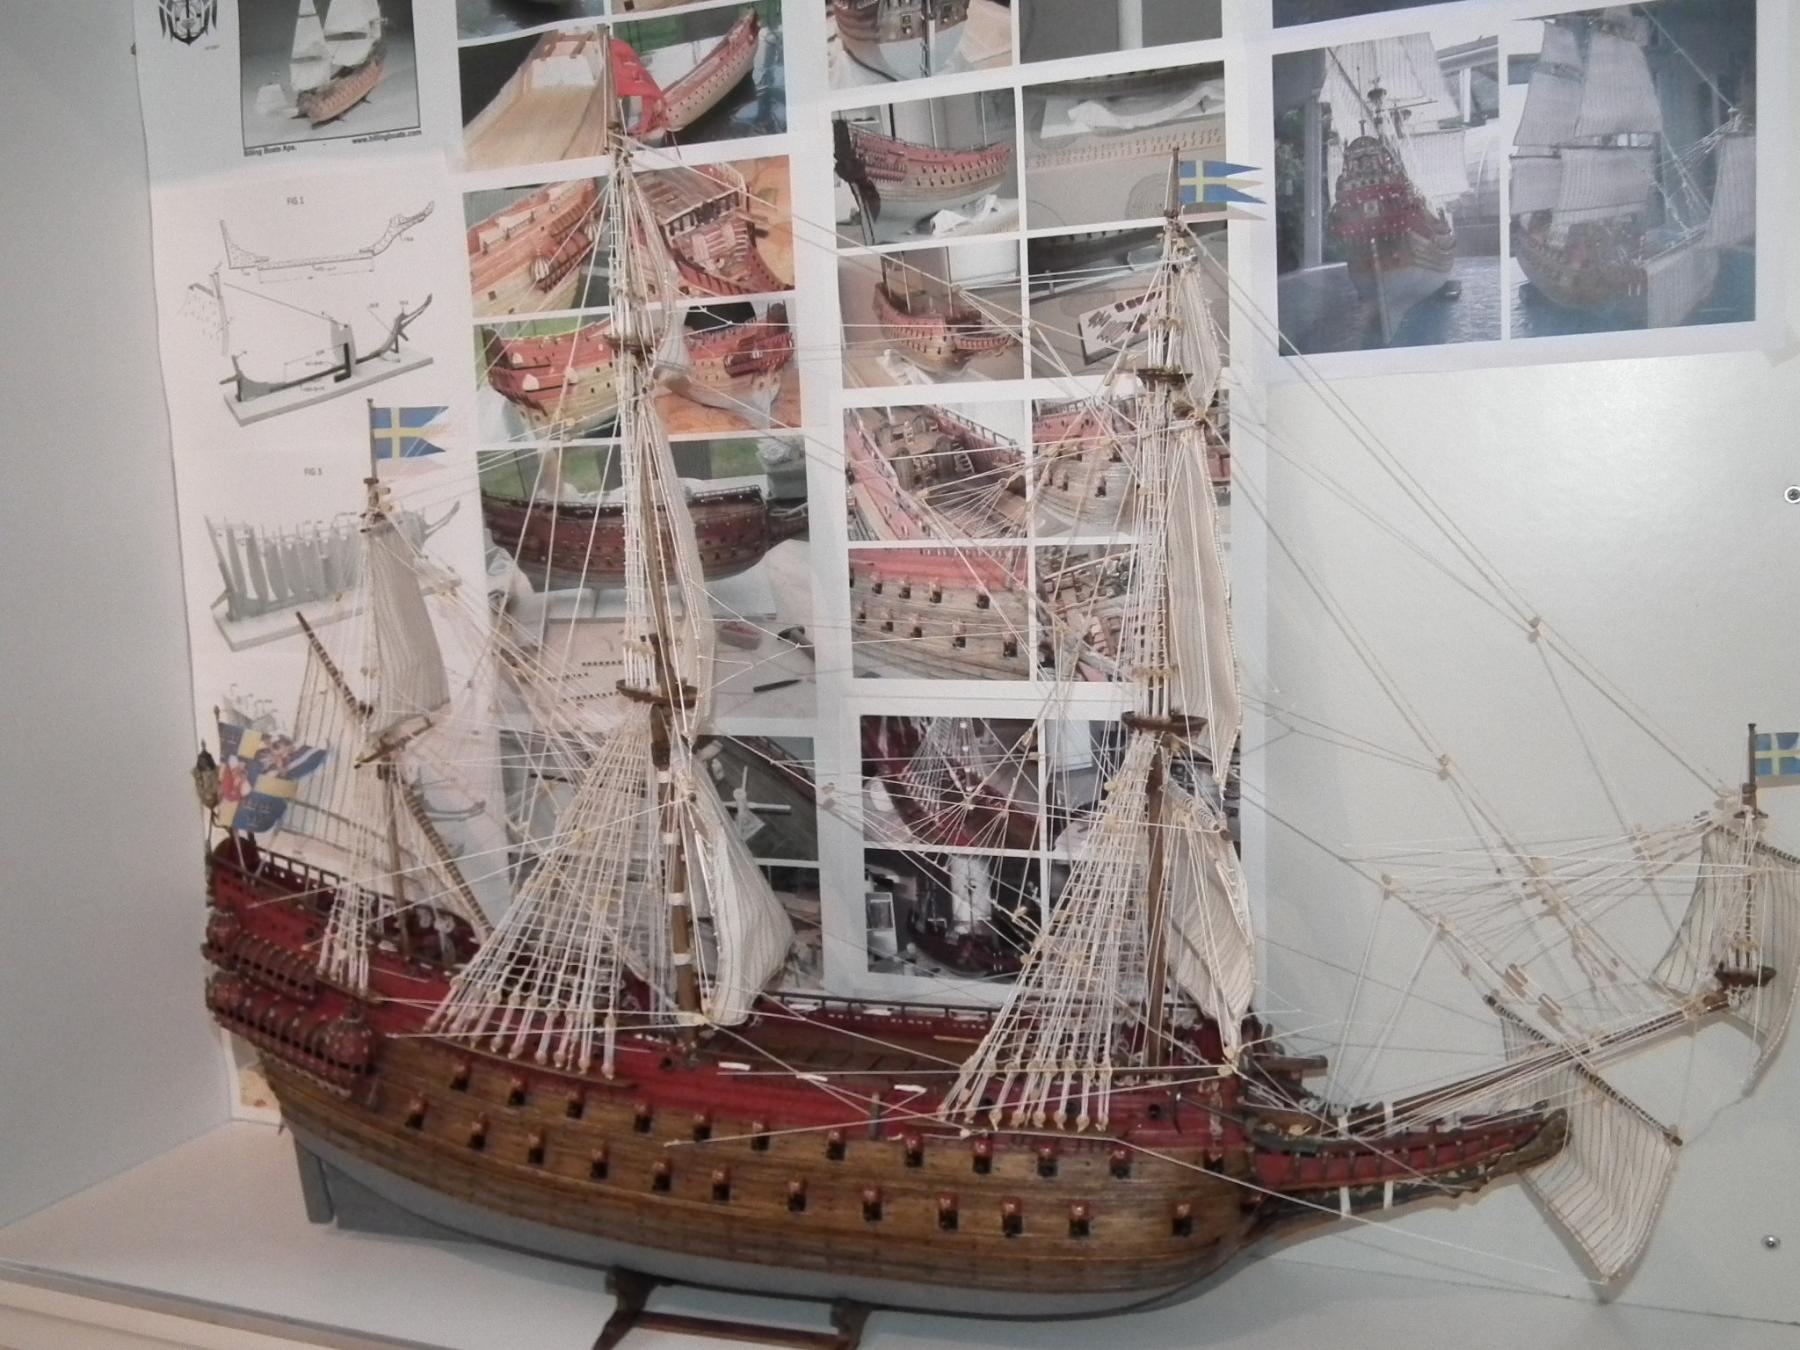
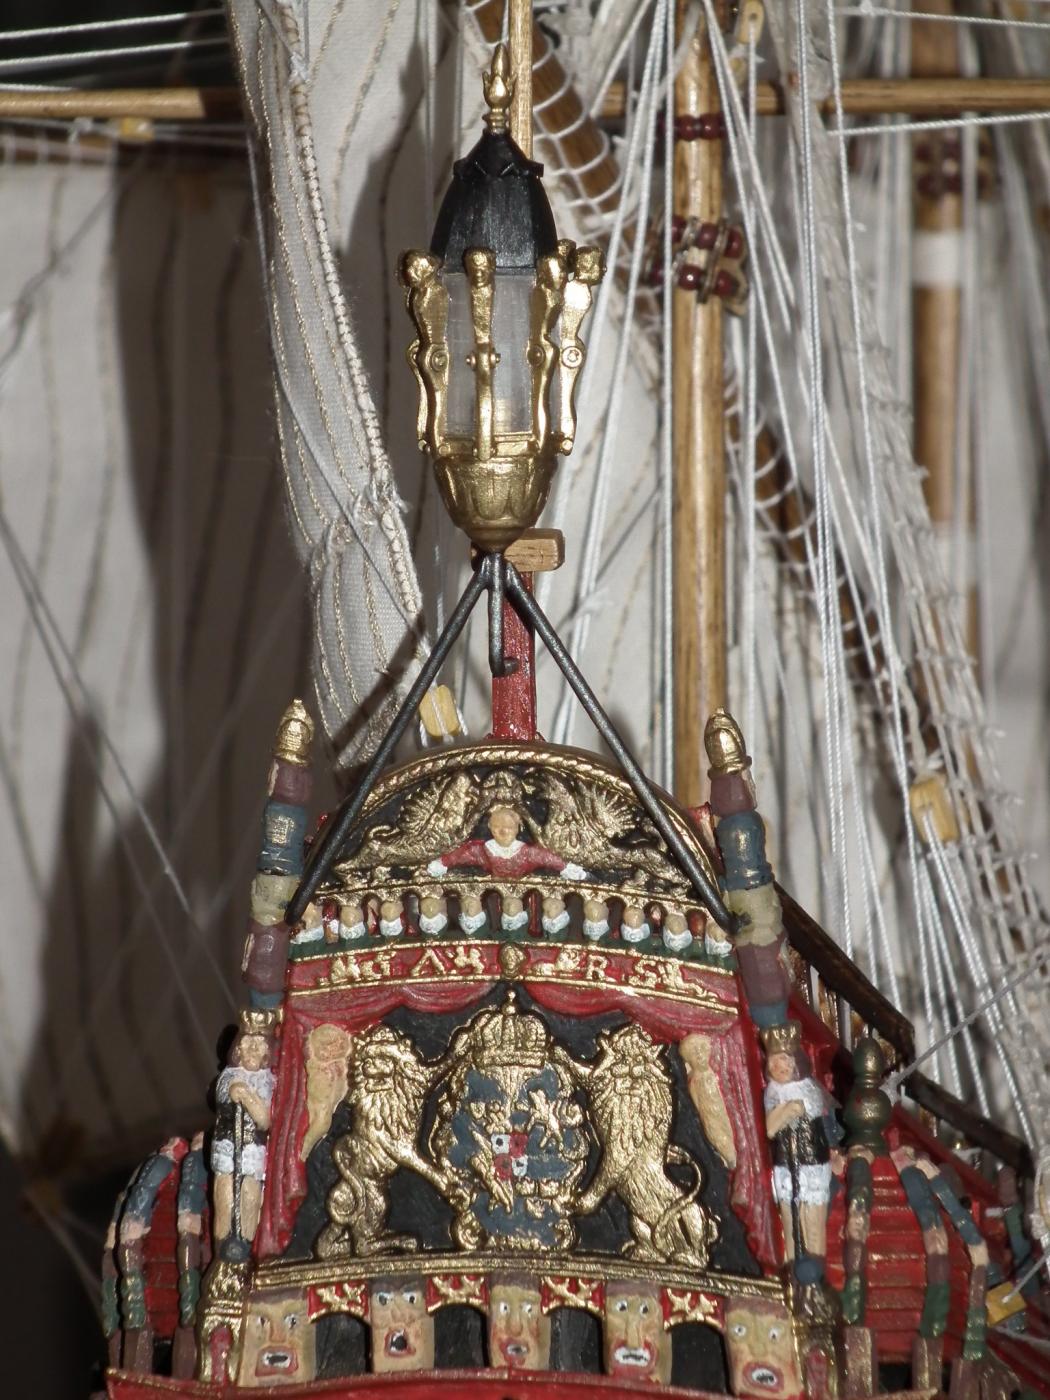
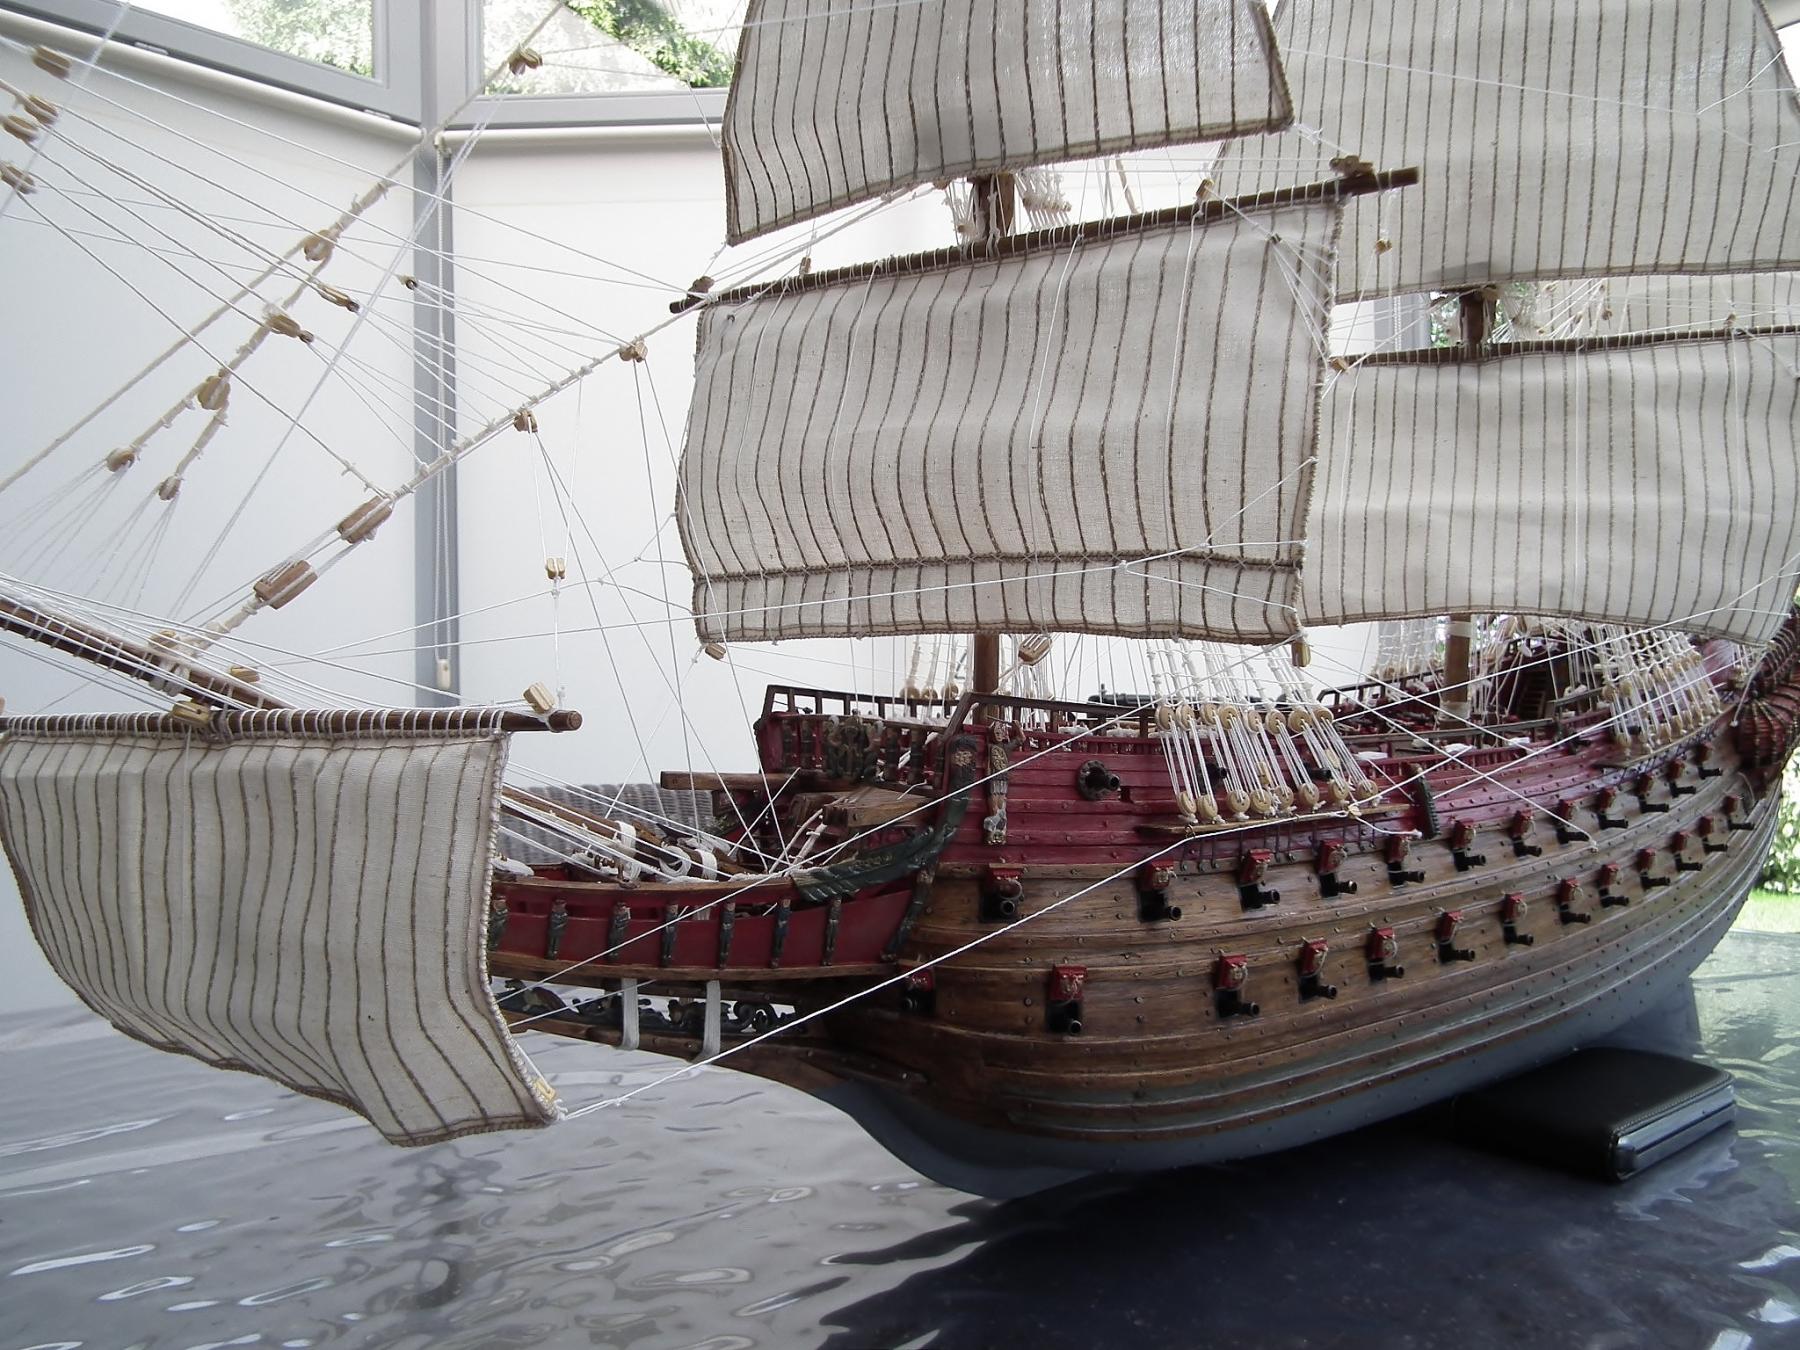
 My model is now finished
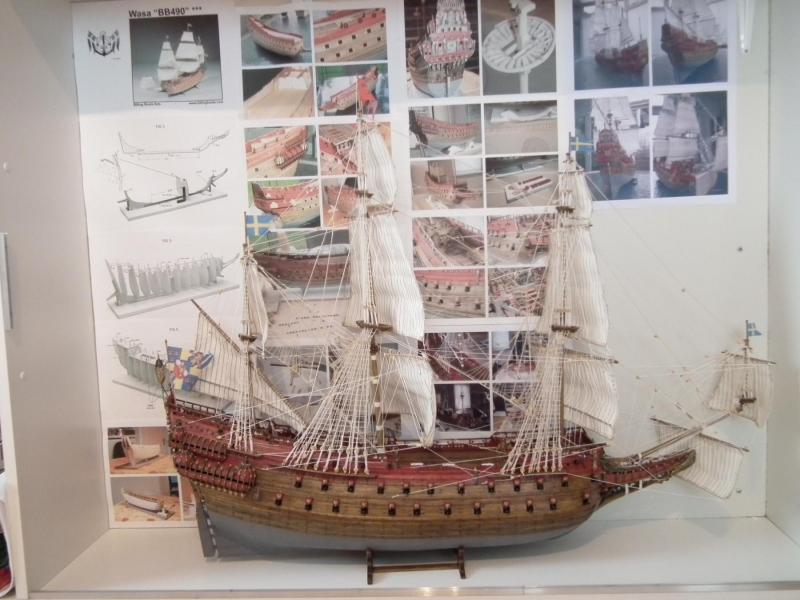
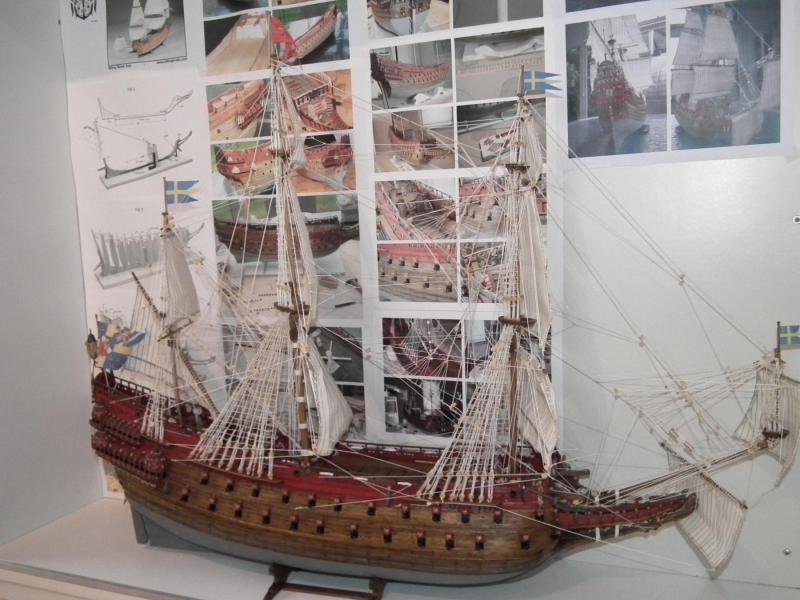
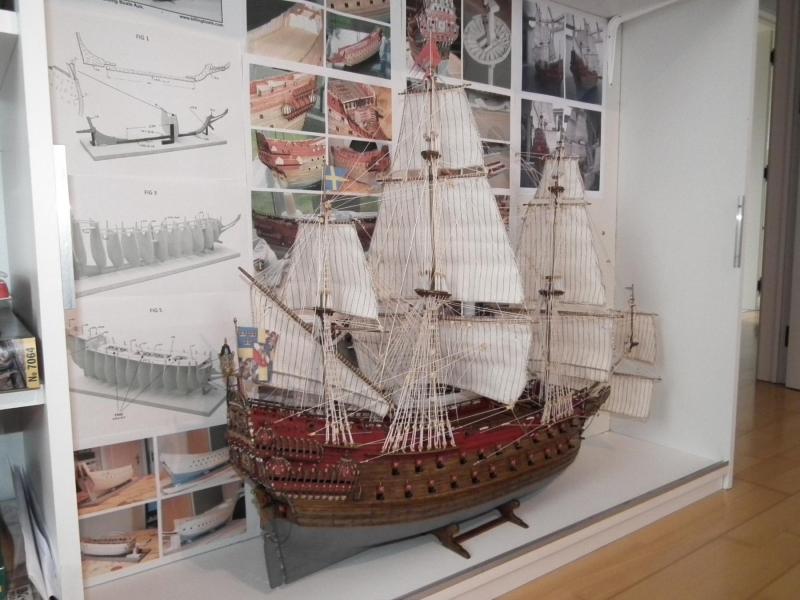
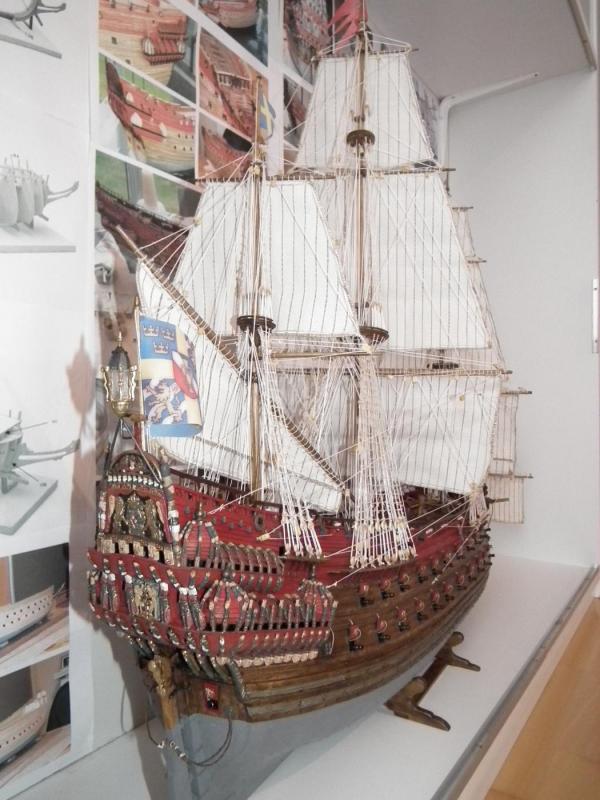
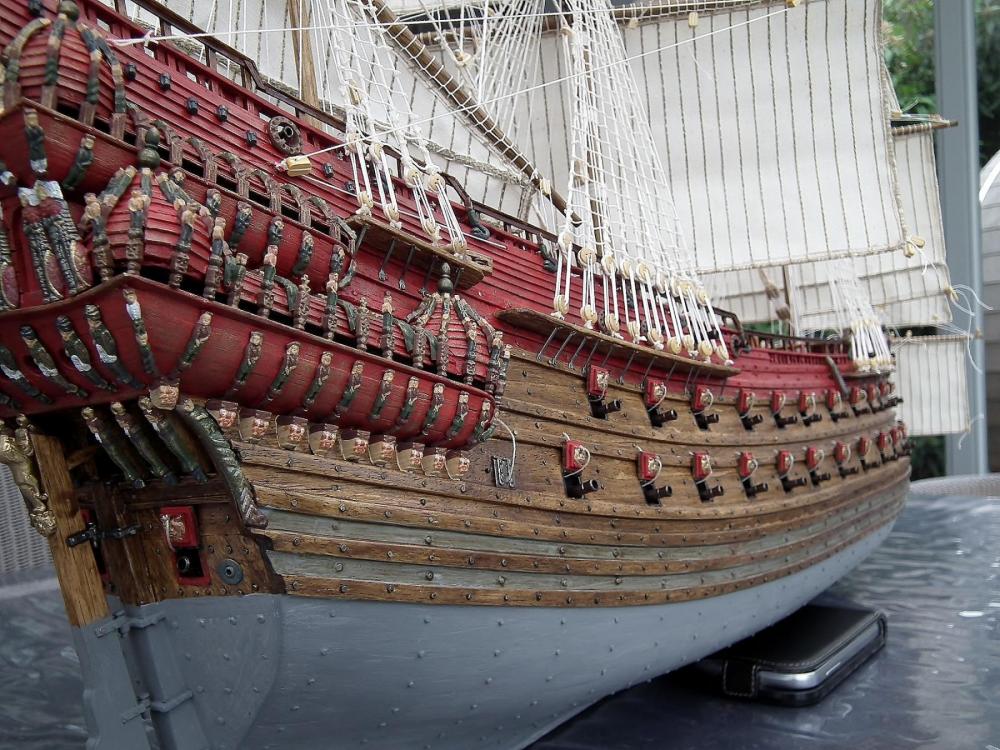
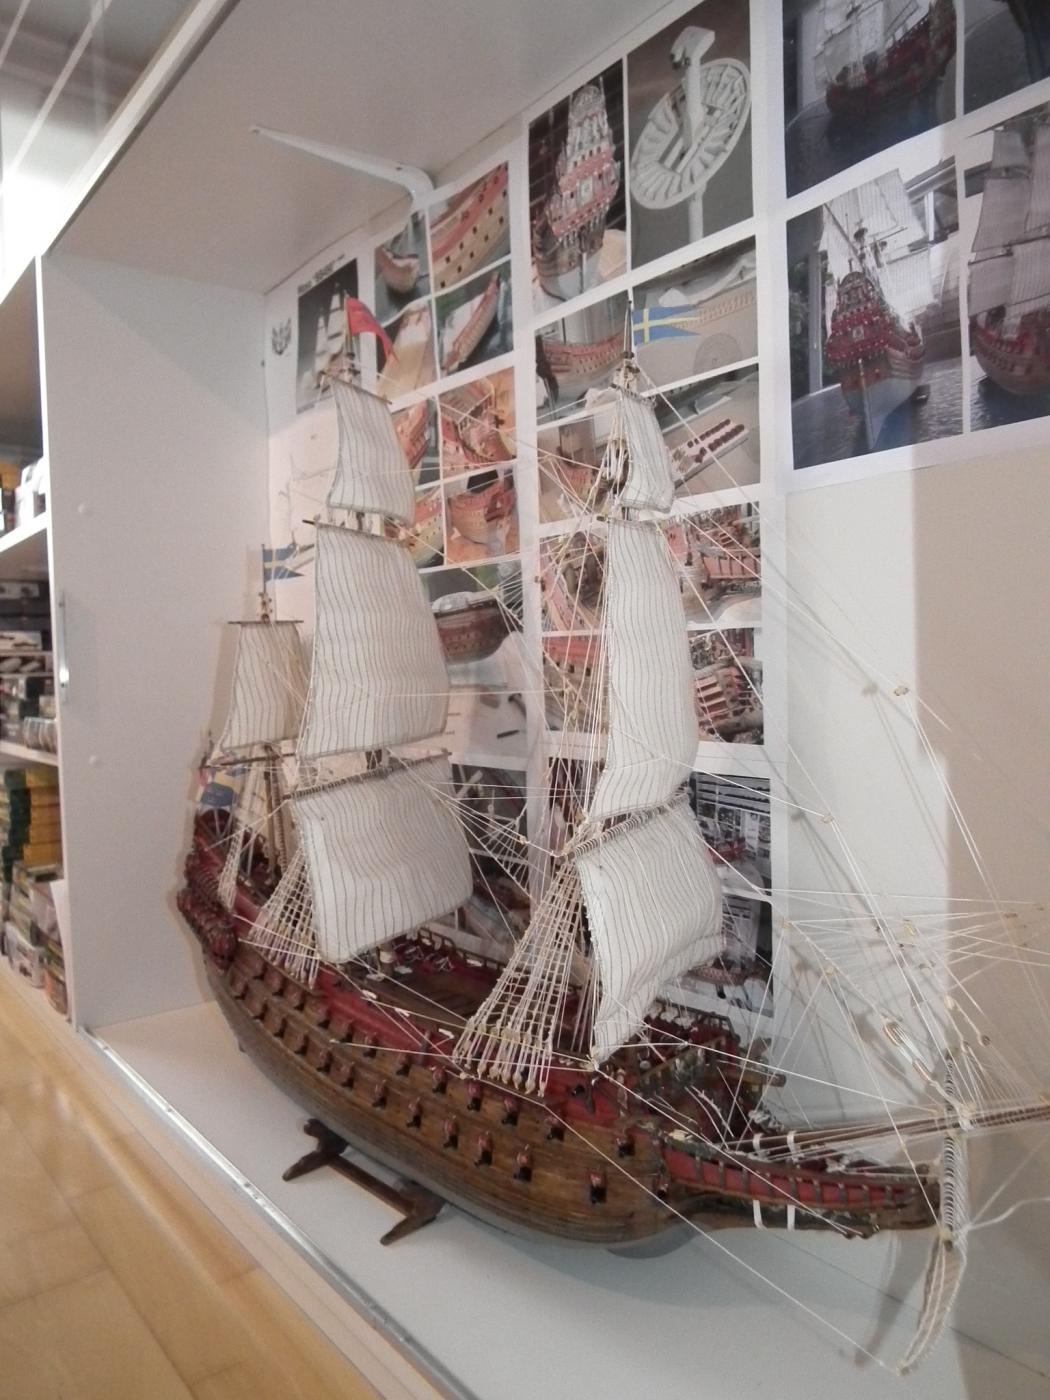
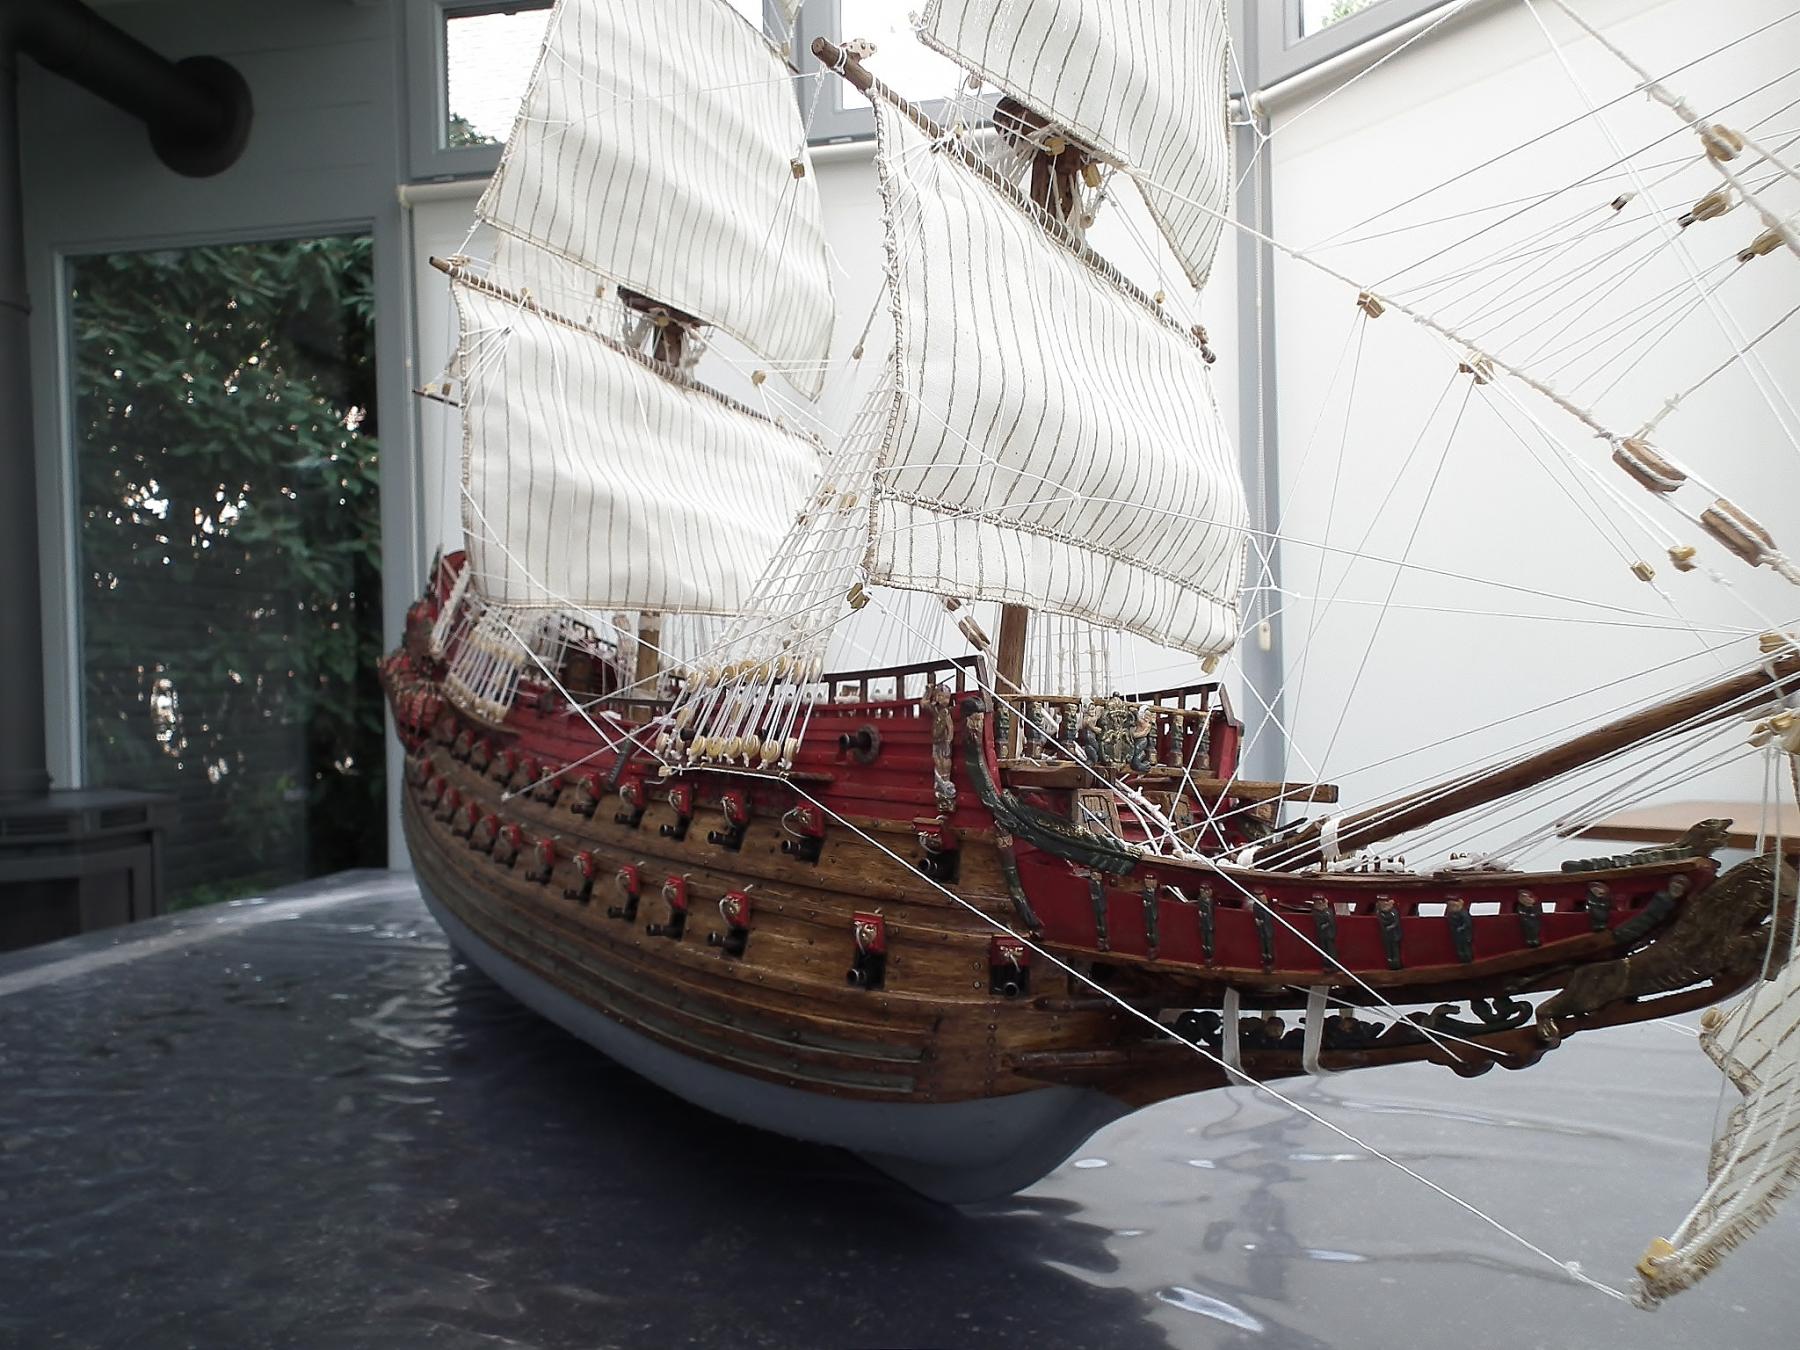
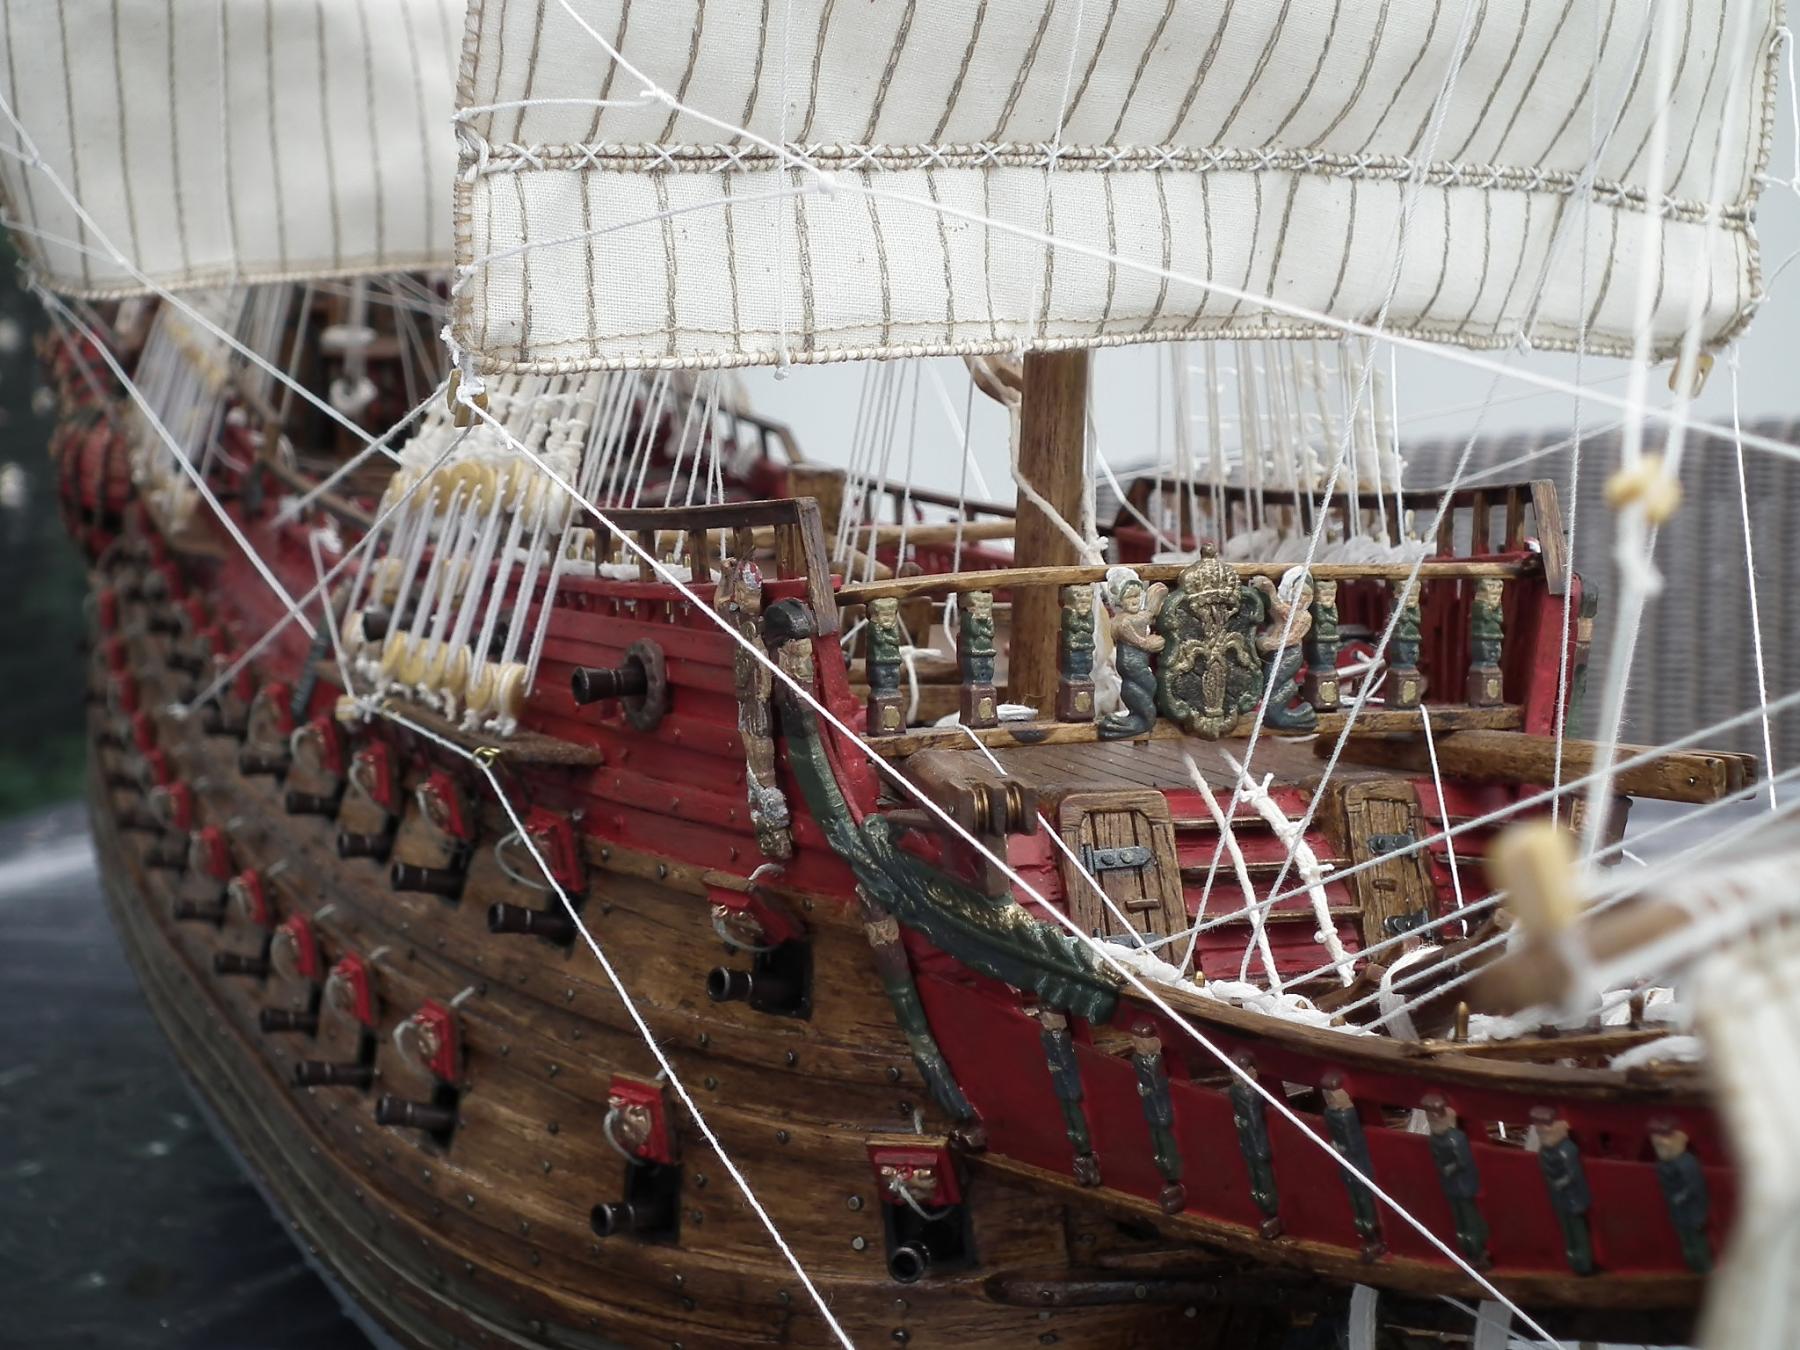
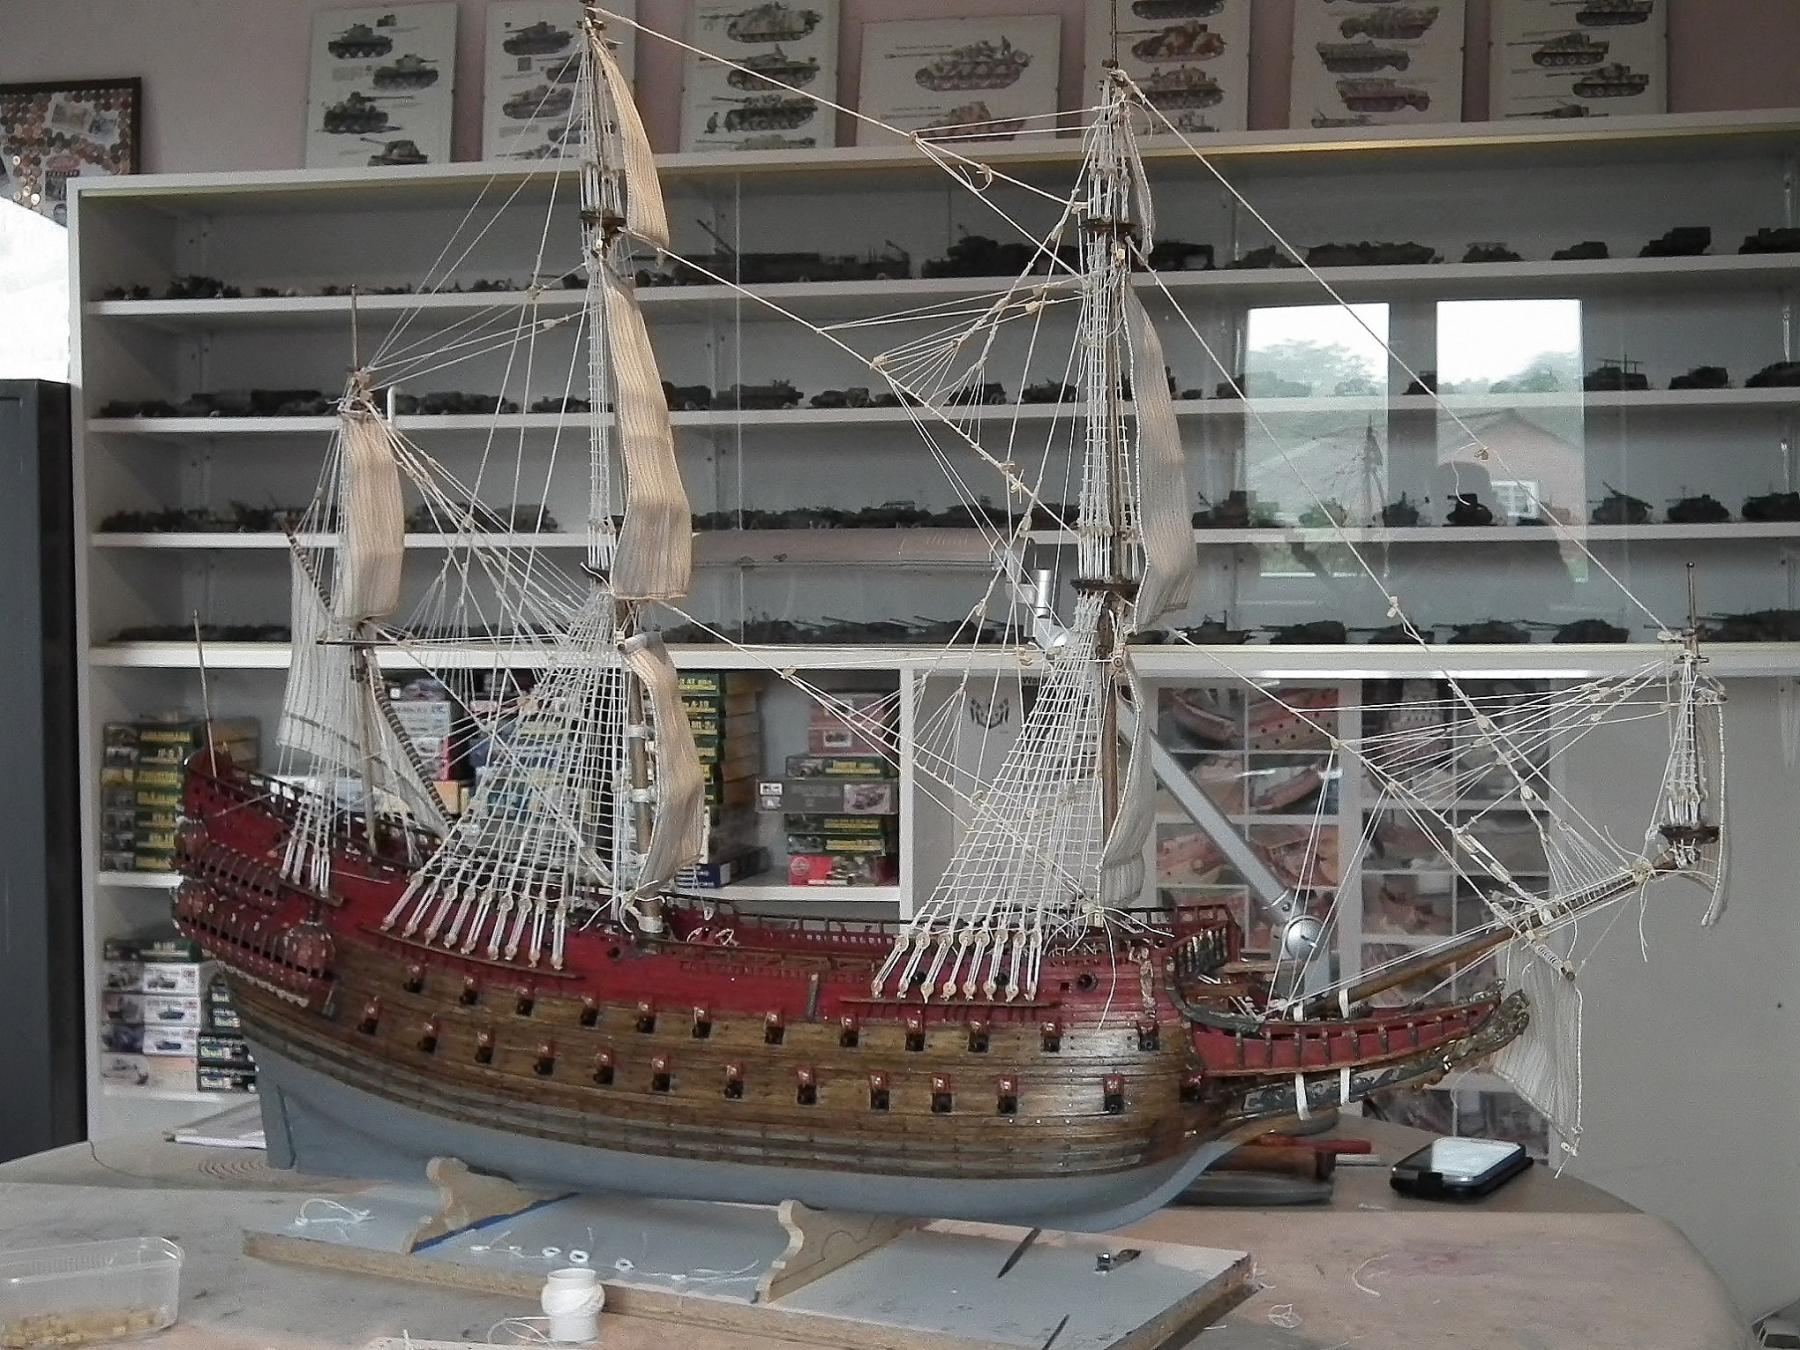
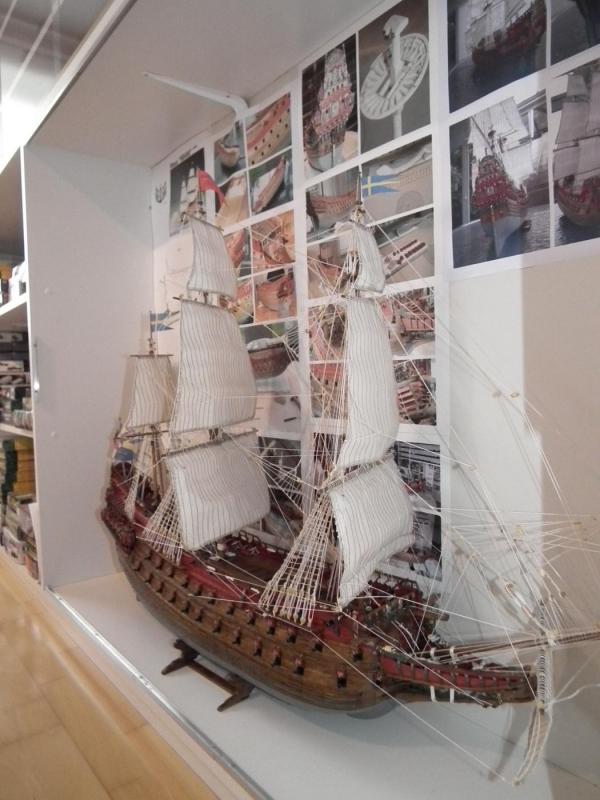 When I started in 2006 I wanted from the beginning to build a model as accurate as possible.For my. This was not completely successful. But I'm happy with the result !!( Apparently, the success rate to finnish your first wooden ship model is about 19%. So, happy my!! )When I started to build i had just the pictures of my visit to the museum.The drawings from Billing, a keel with frames that were partially built wrong and a box with wood and parts.Then, there were no correct color schemes available.So there is too mutch red paint on the hull. And the figures do not have the correct color.And, I did too many nails into the hull .....ConclusionThe model from Billing is a good model for a reasonable price.But there is a lot of extra work on it.Thanks to everyone who has followed my build log.Now it is first study time for my next project
 GreetingsPatrick
-
Try to degrease the figures with some acetone before you apply the base color.(The mold in which the figures in cast is probably first injected with a type of oil)This is what I do when i paint military models that are made in epoxy resin.But be carefulnot too much and not too long brushing on the figures !!
GreetingsPatrick
-
-
-
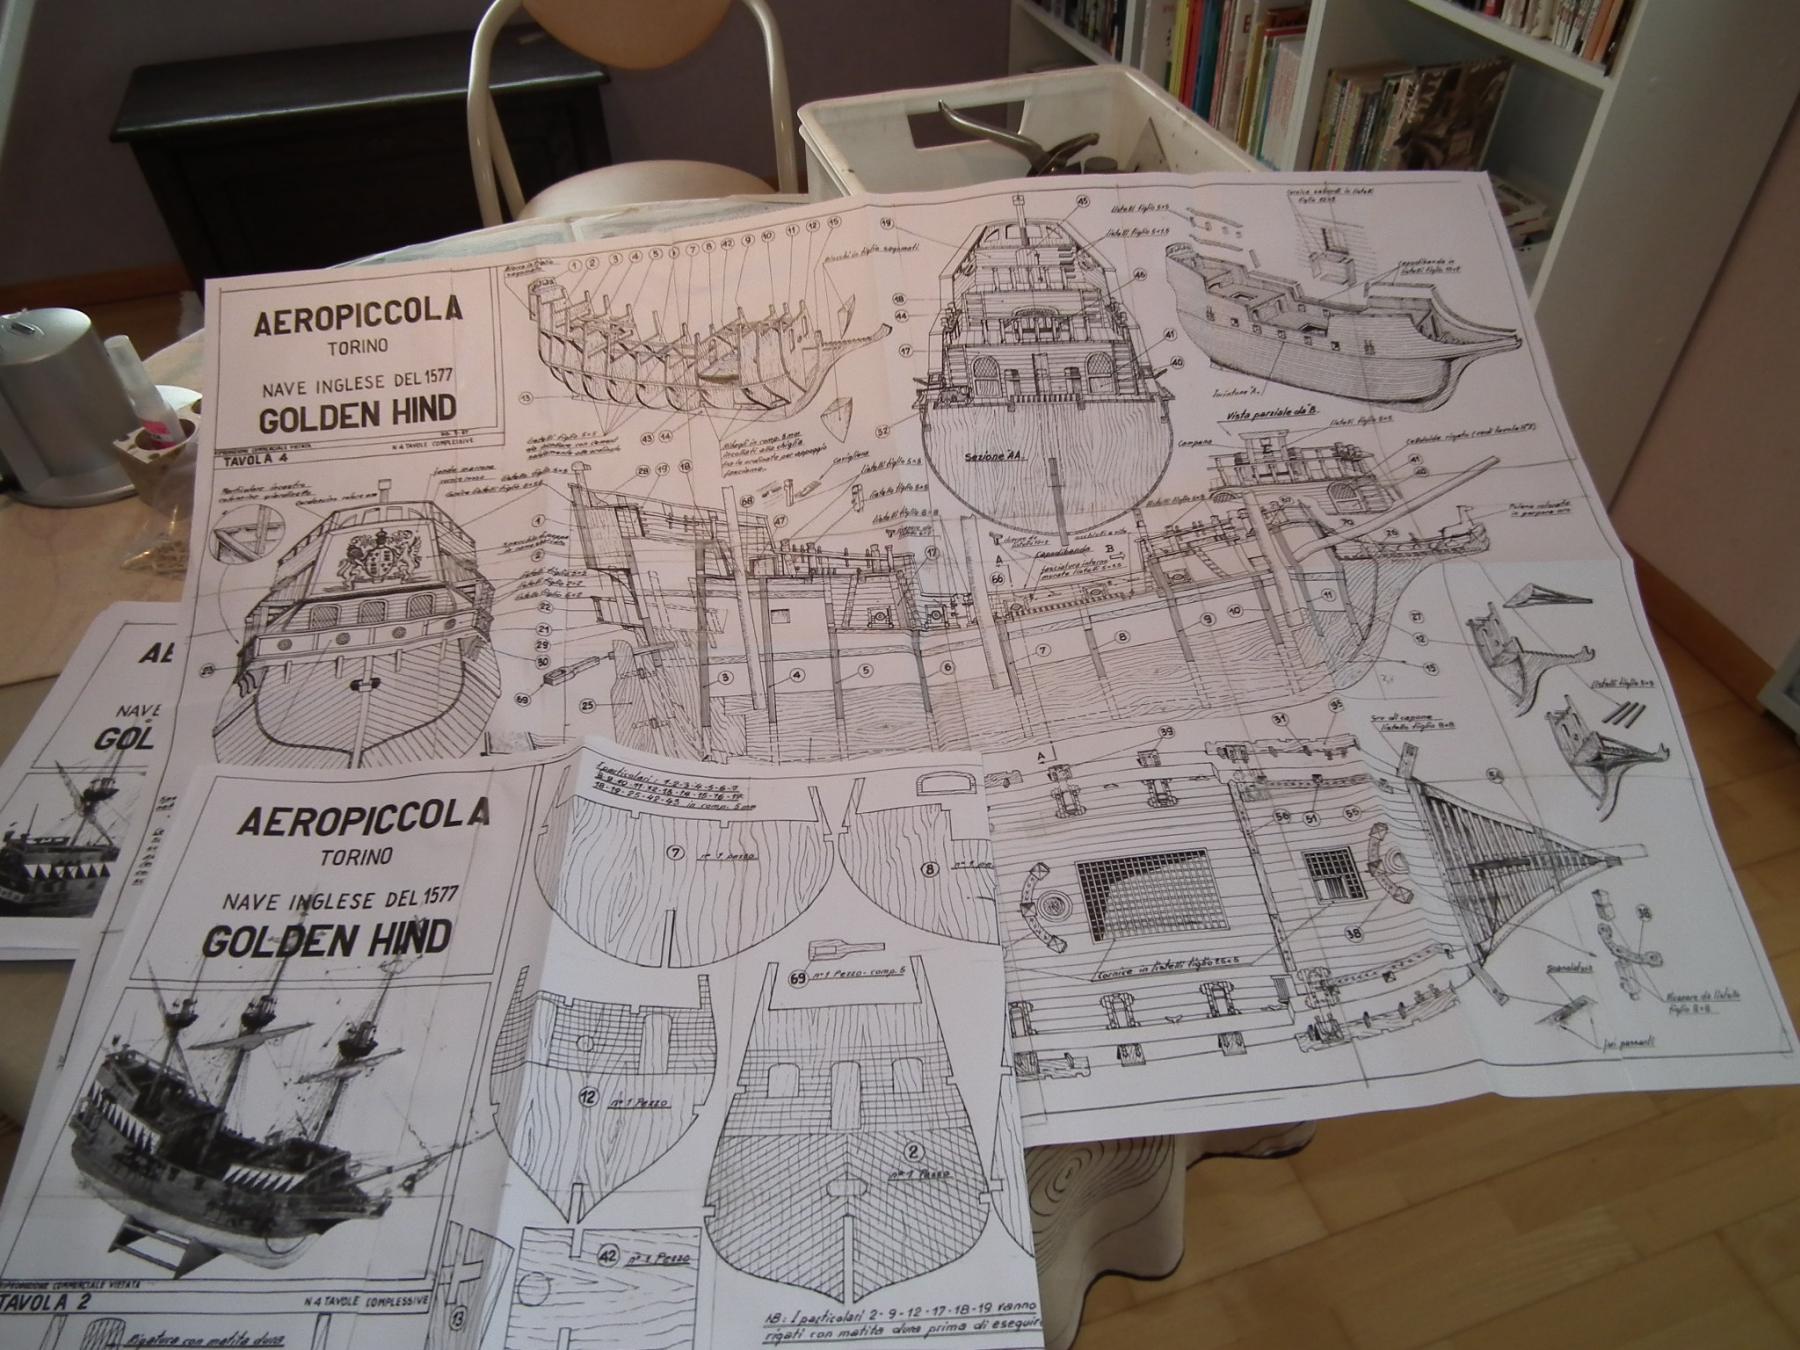
I have attached the plans from Billing Boats.The PDF is reduced to get below 2 mb but is still from good qualityNormally they can by downloaded from the site from Billing Boats. But apparently they are no longer available on their site.After the holiday period I'm going to order the flags.Patrick
-
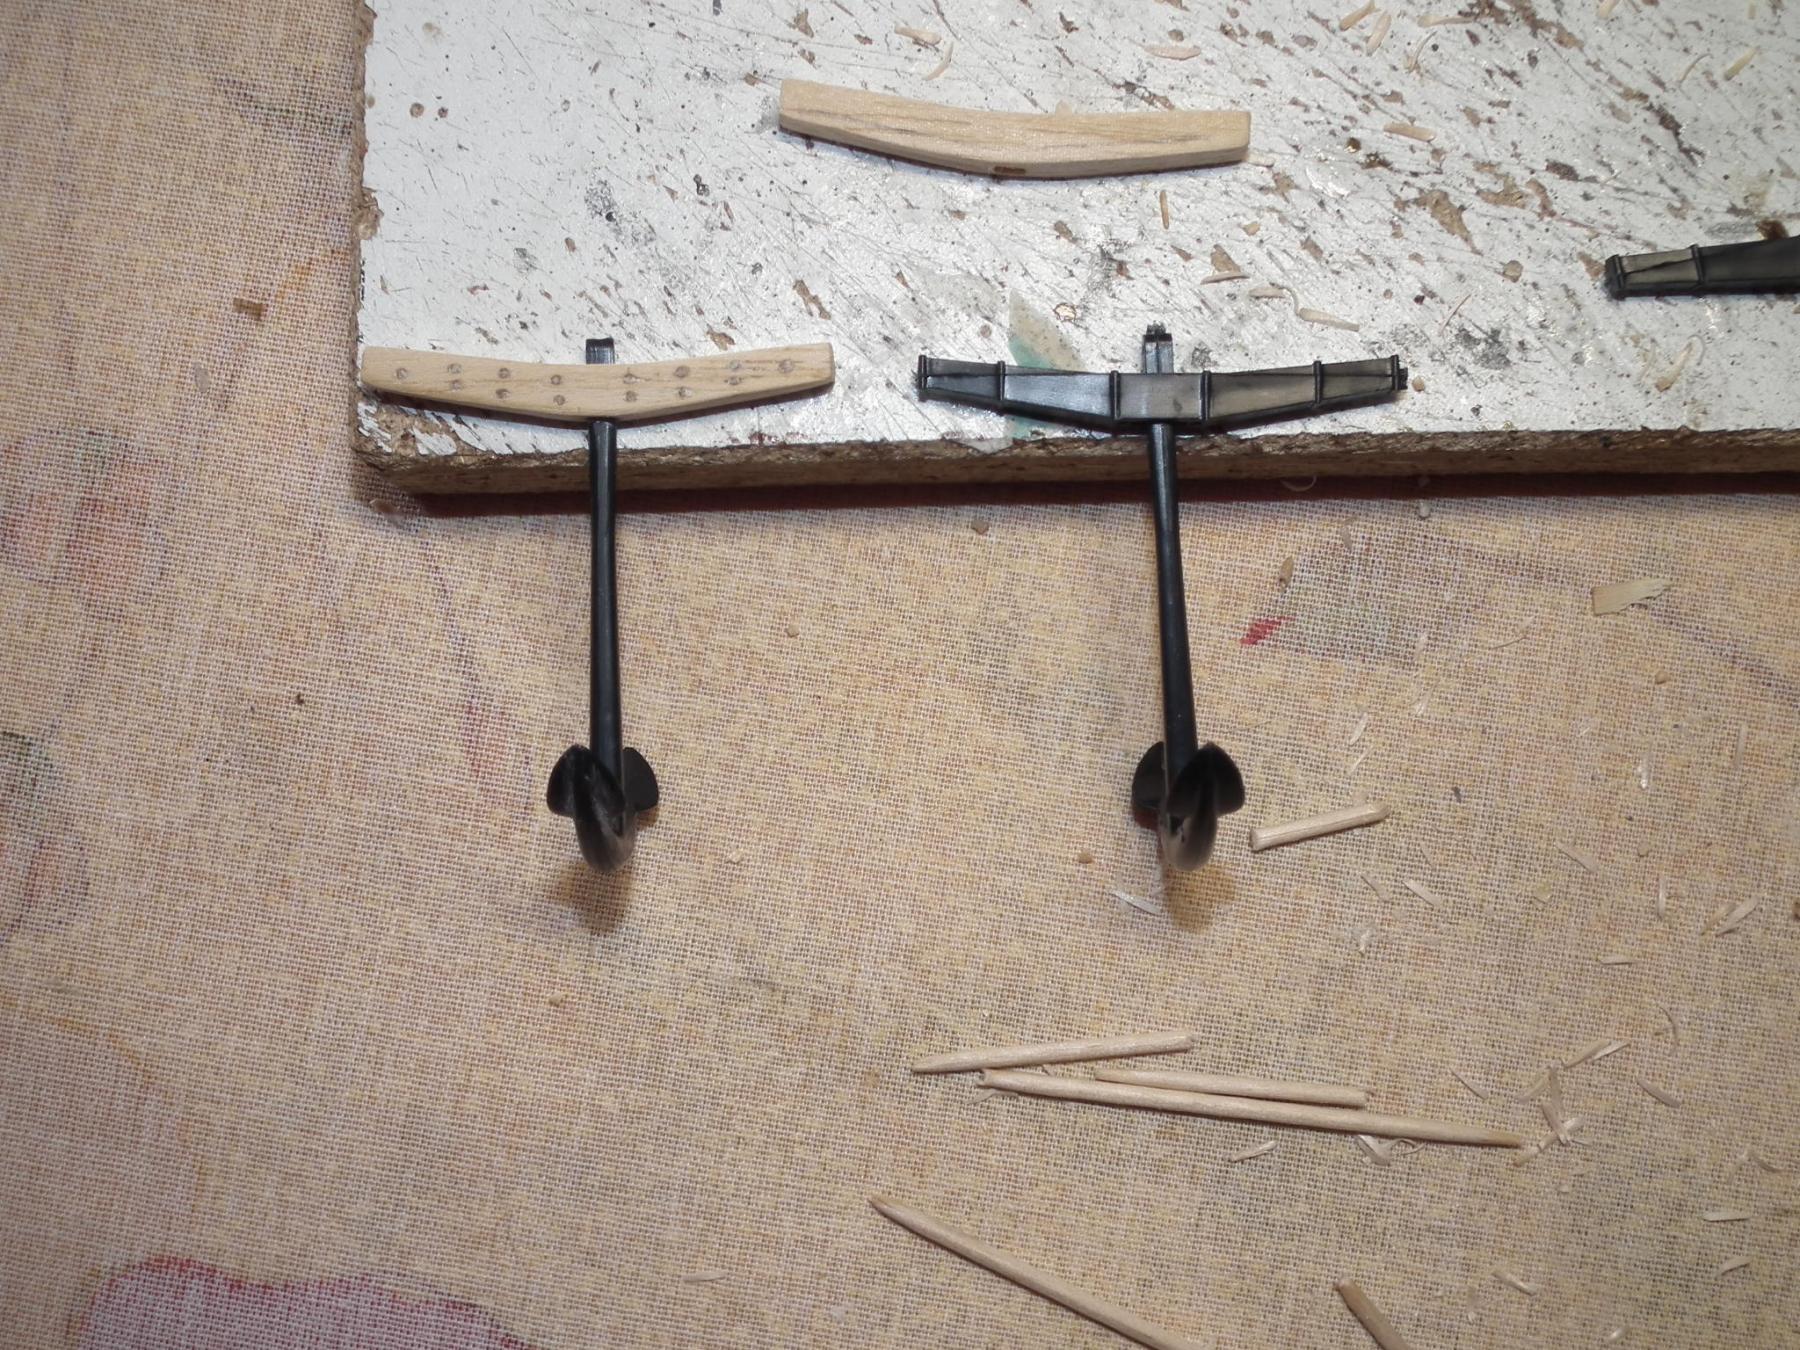
The anchor looks also great.I would not start painting it before you have the two anchors in your possession.Then they are painted in the same way.I painted my anchors in a gun metal base color.(See my build log of Wasa)Compared with the Billings Wasa this woodwork looks very neat and easy to build,I thinkPsYou really do need a bigger letterbox
GreetingsPatrick
-
Hello everyone
Jan,
I Hope you find our Belgian beers delicious
I stick to maximum two beers. Otherwise I have always a hangover the morning
well,
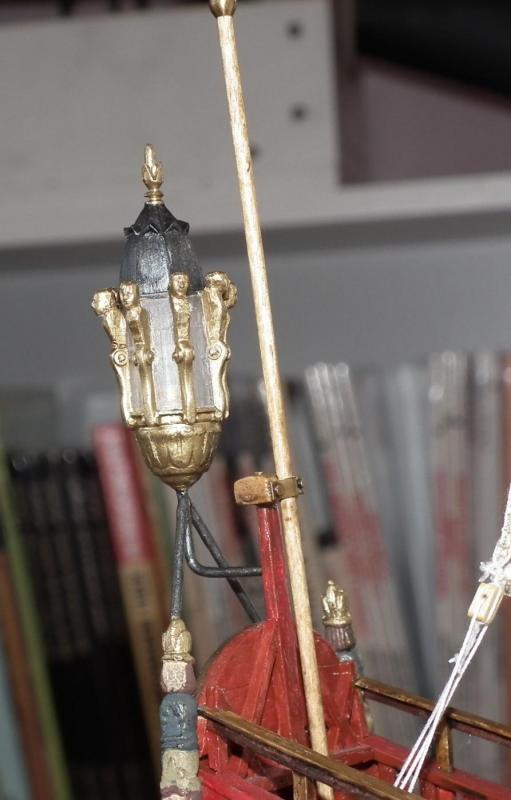
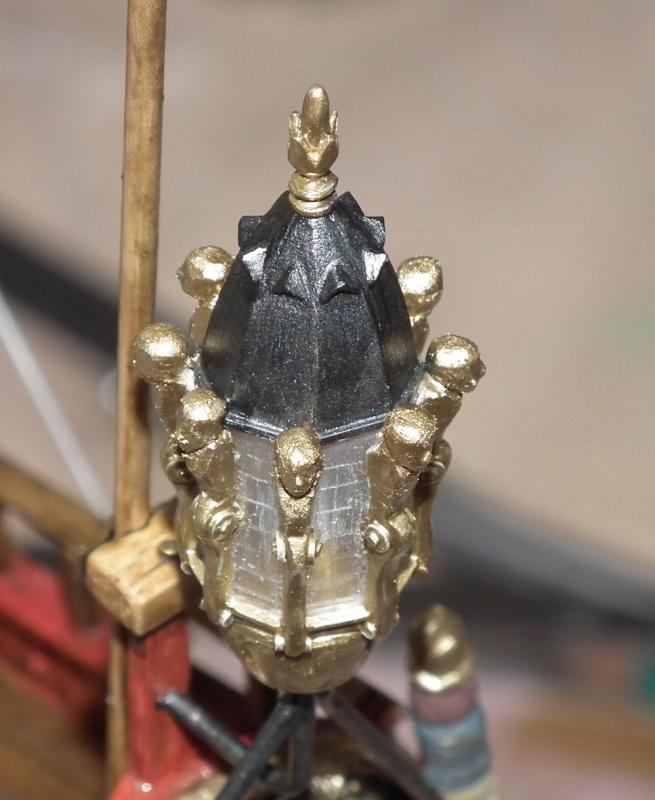
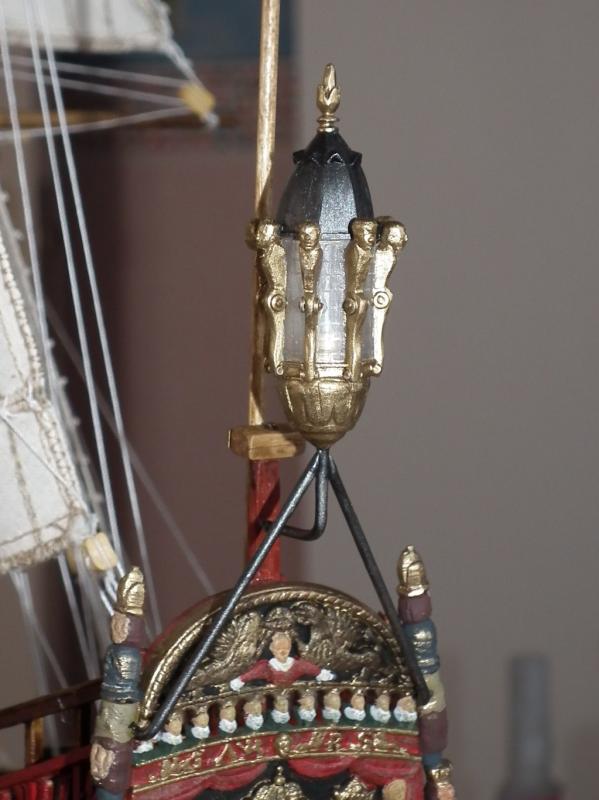
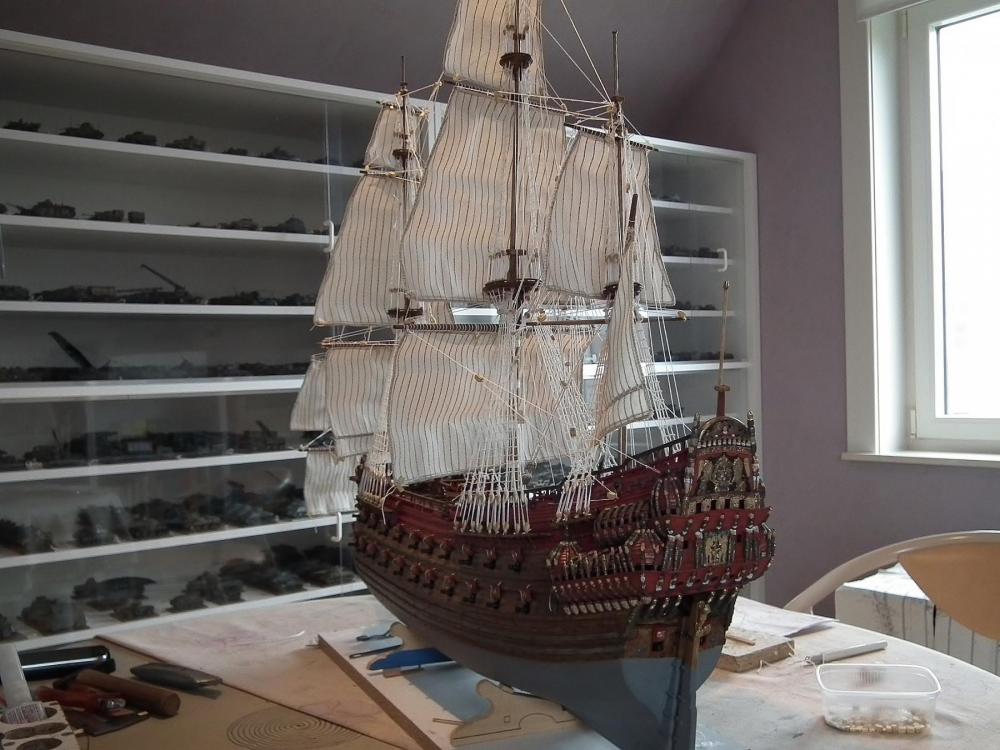
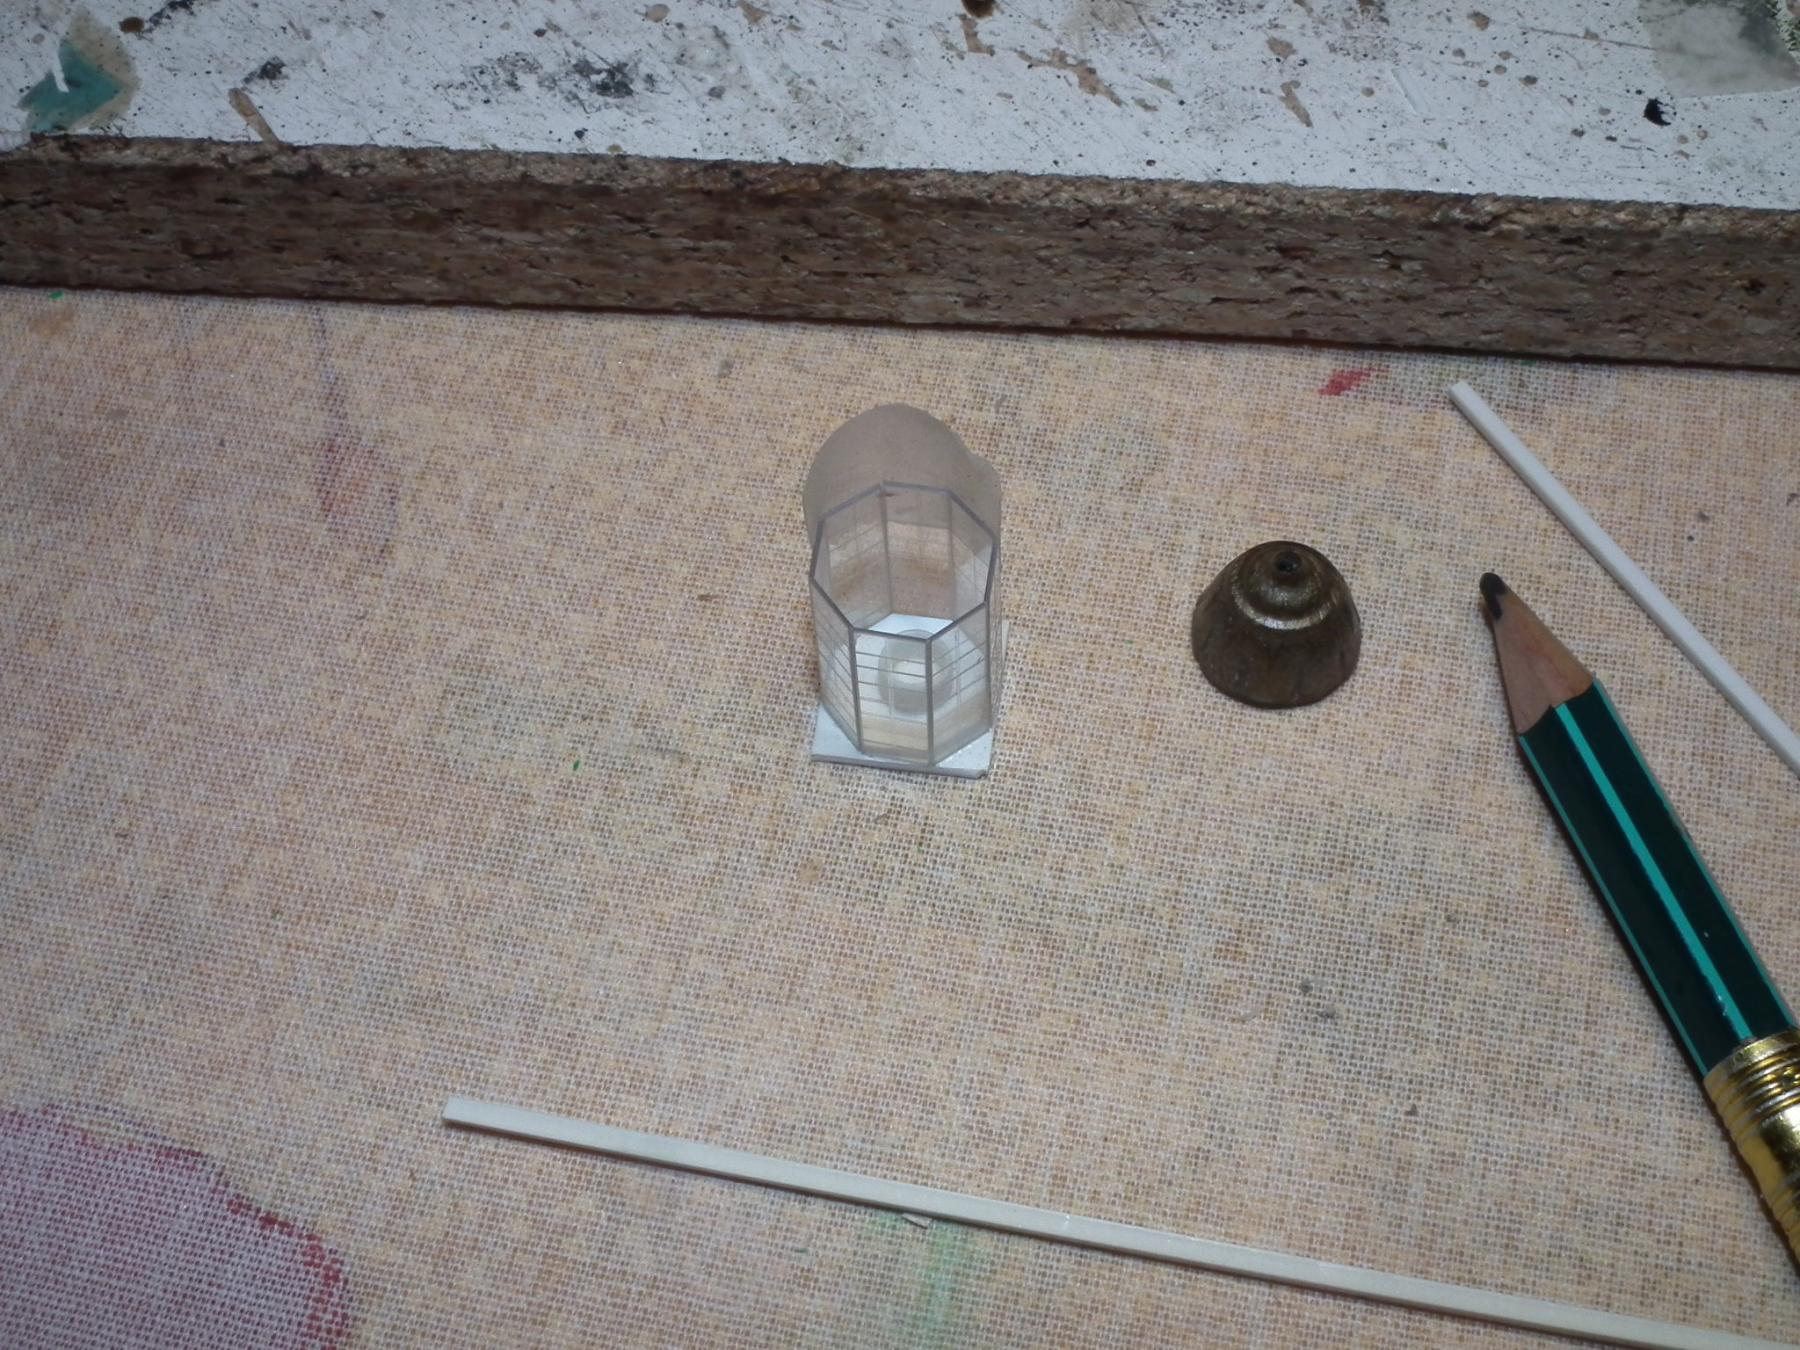
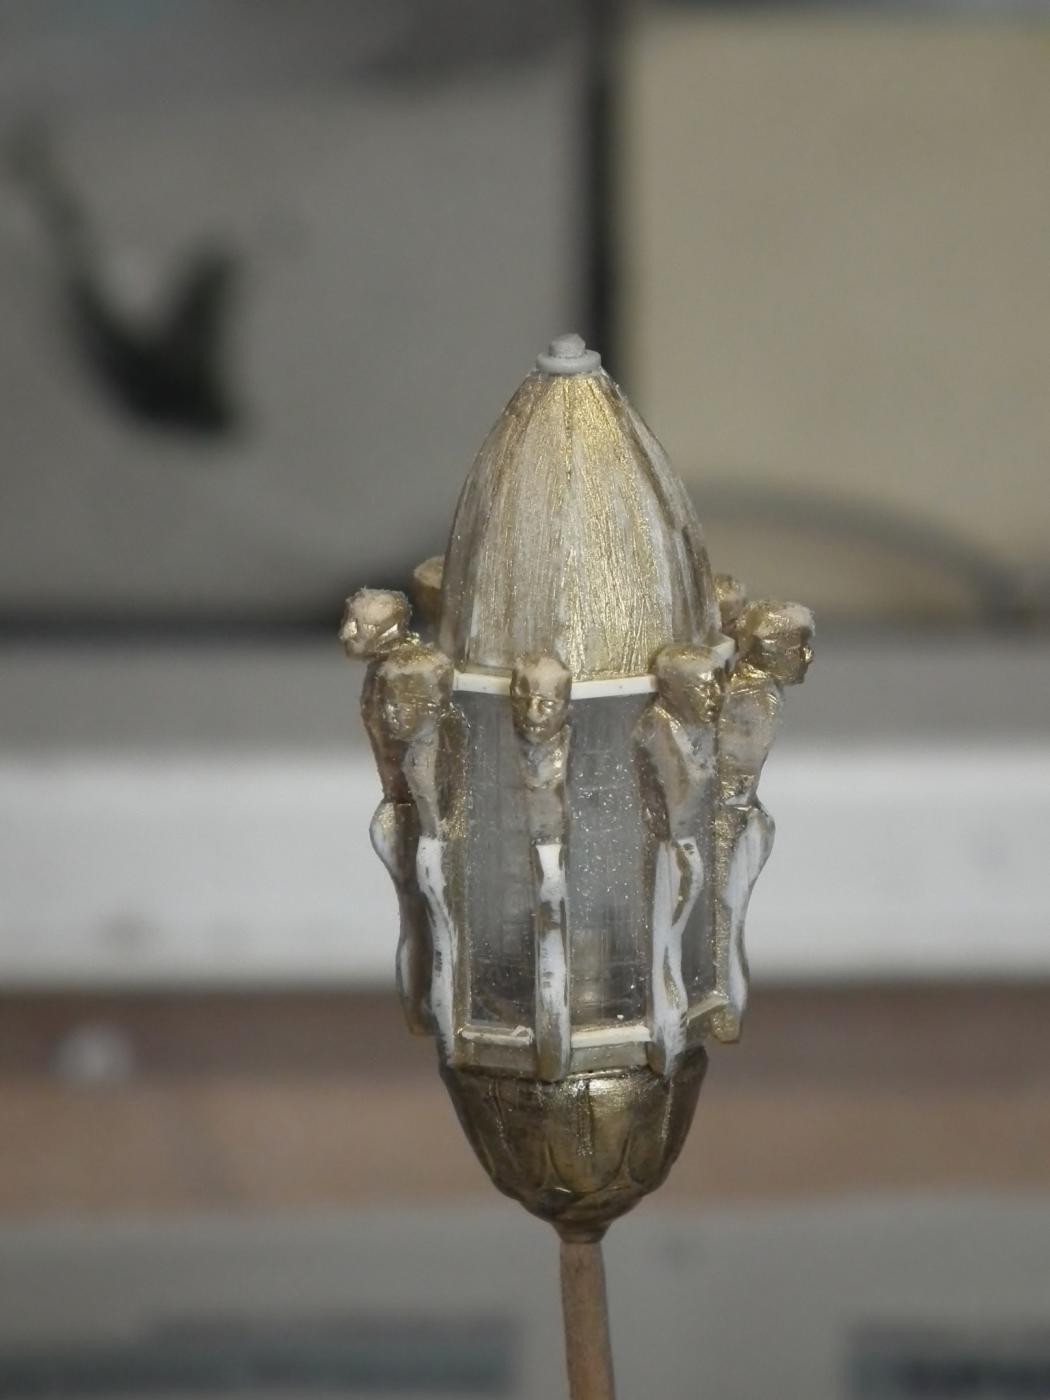
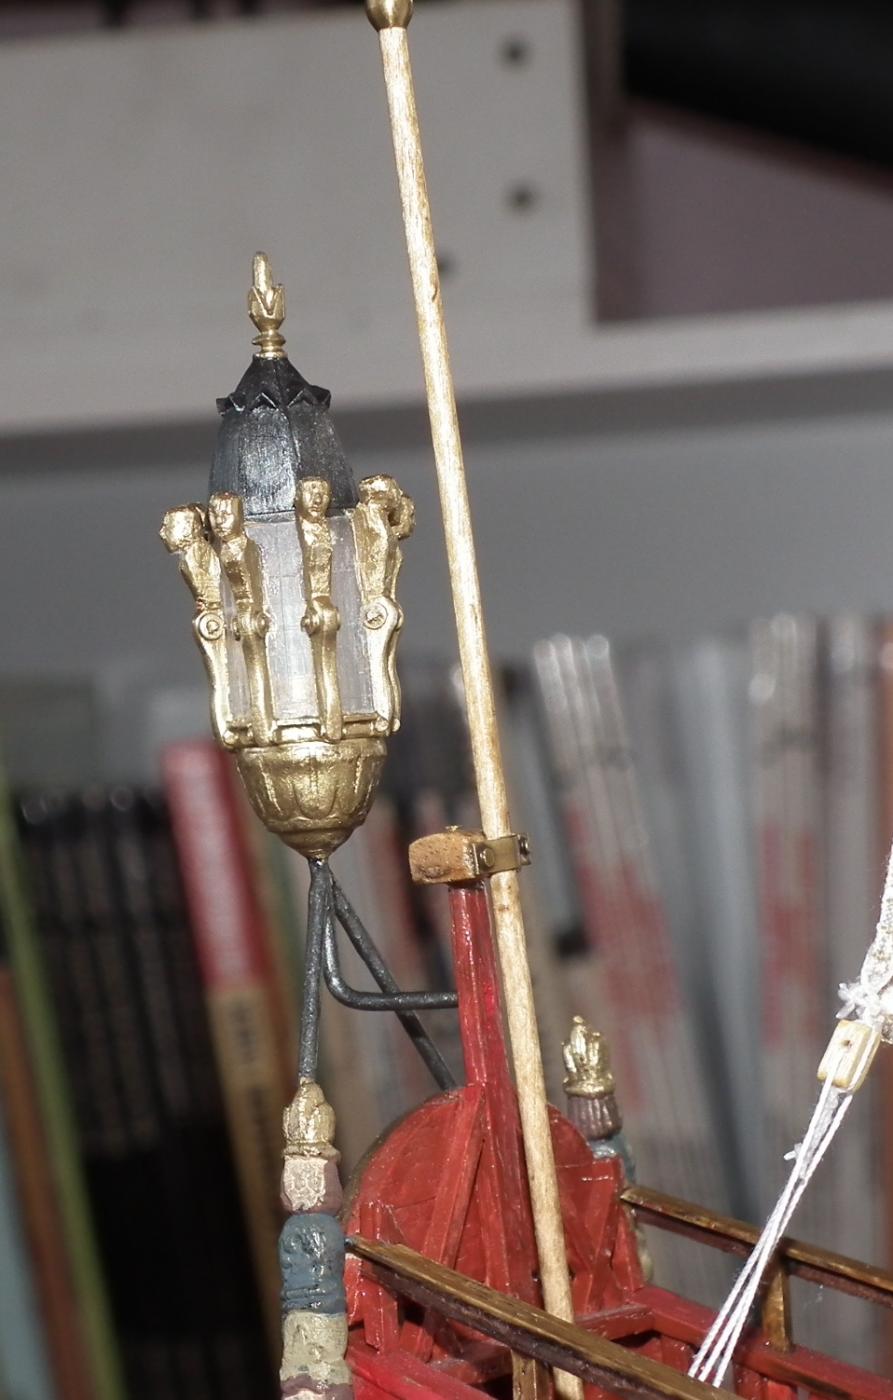
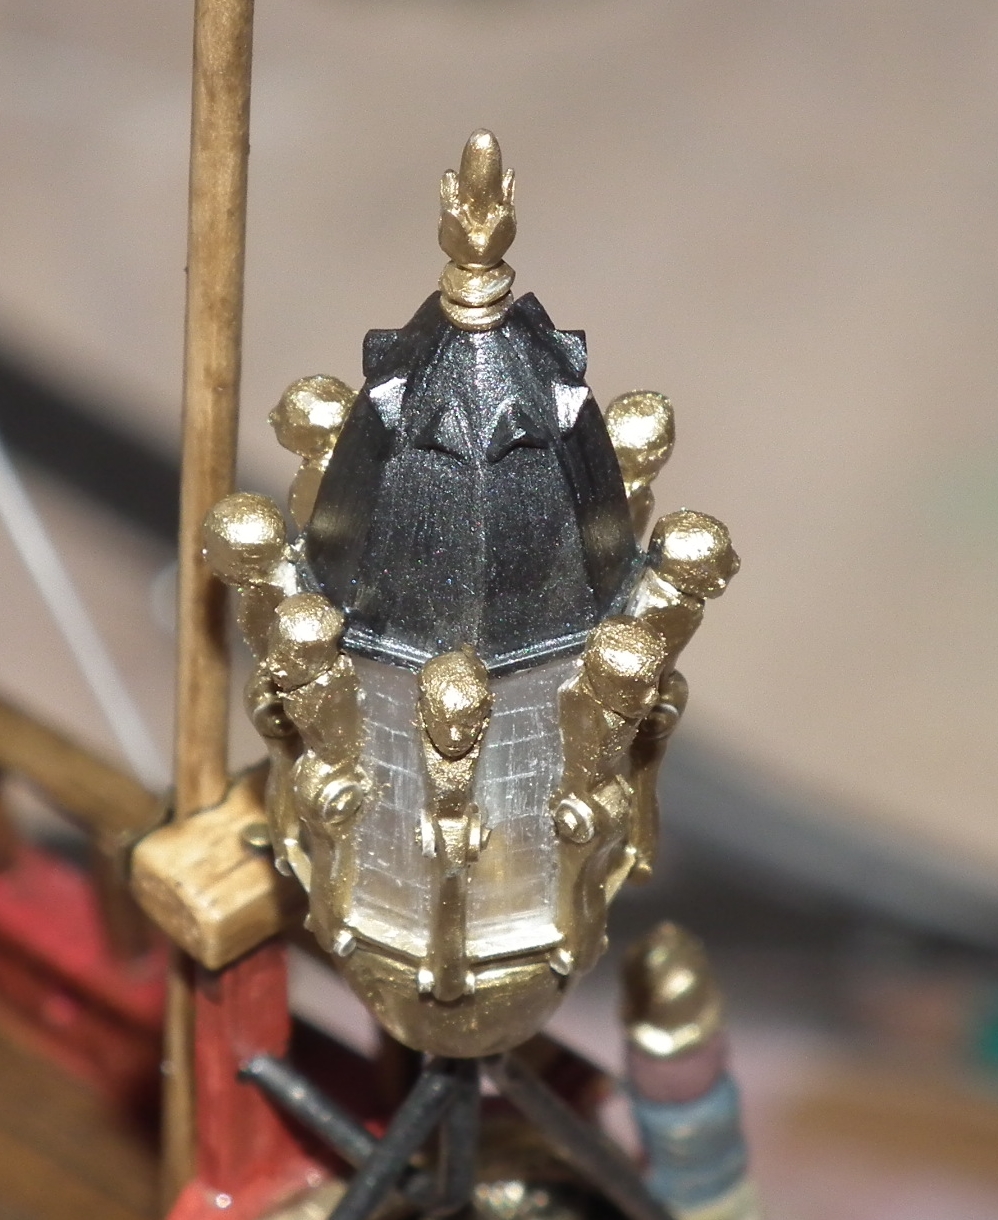
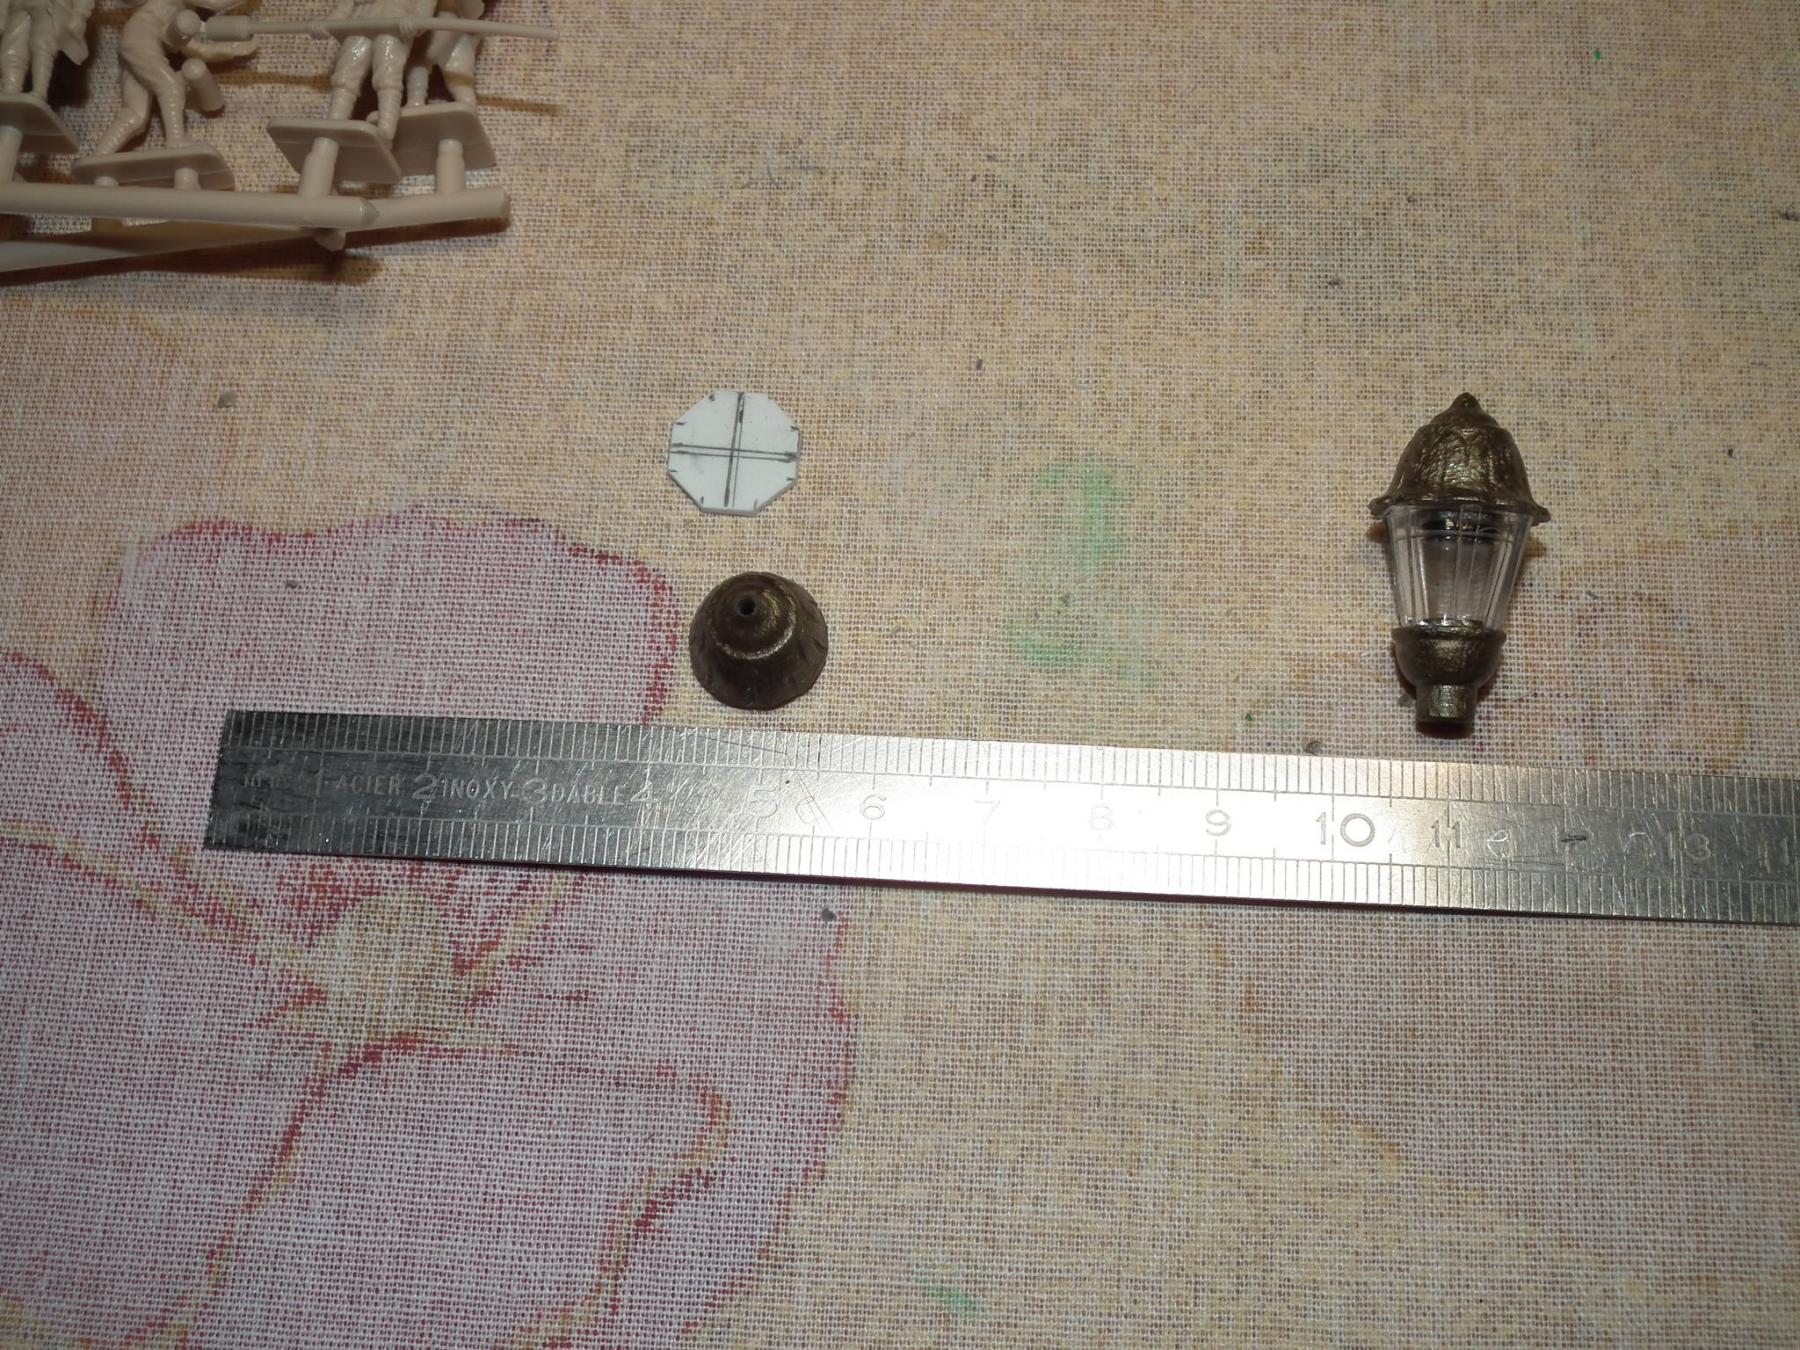
The lantern is fixed on the ship
It is not a plan or a plan b
But something in the middle.
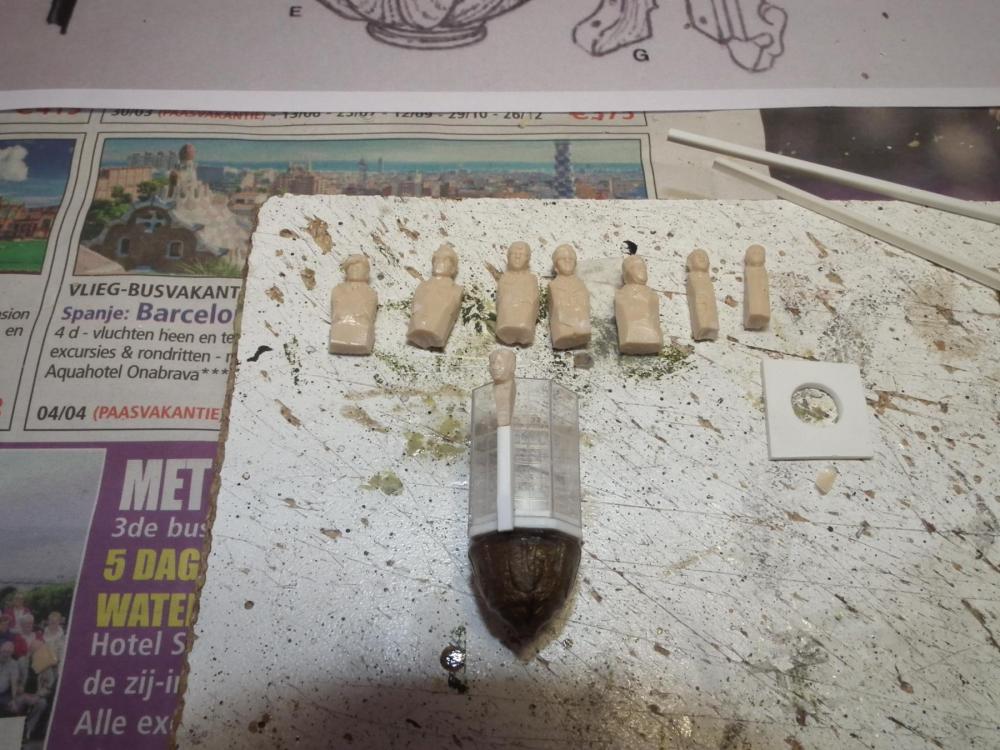
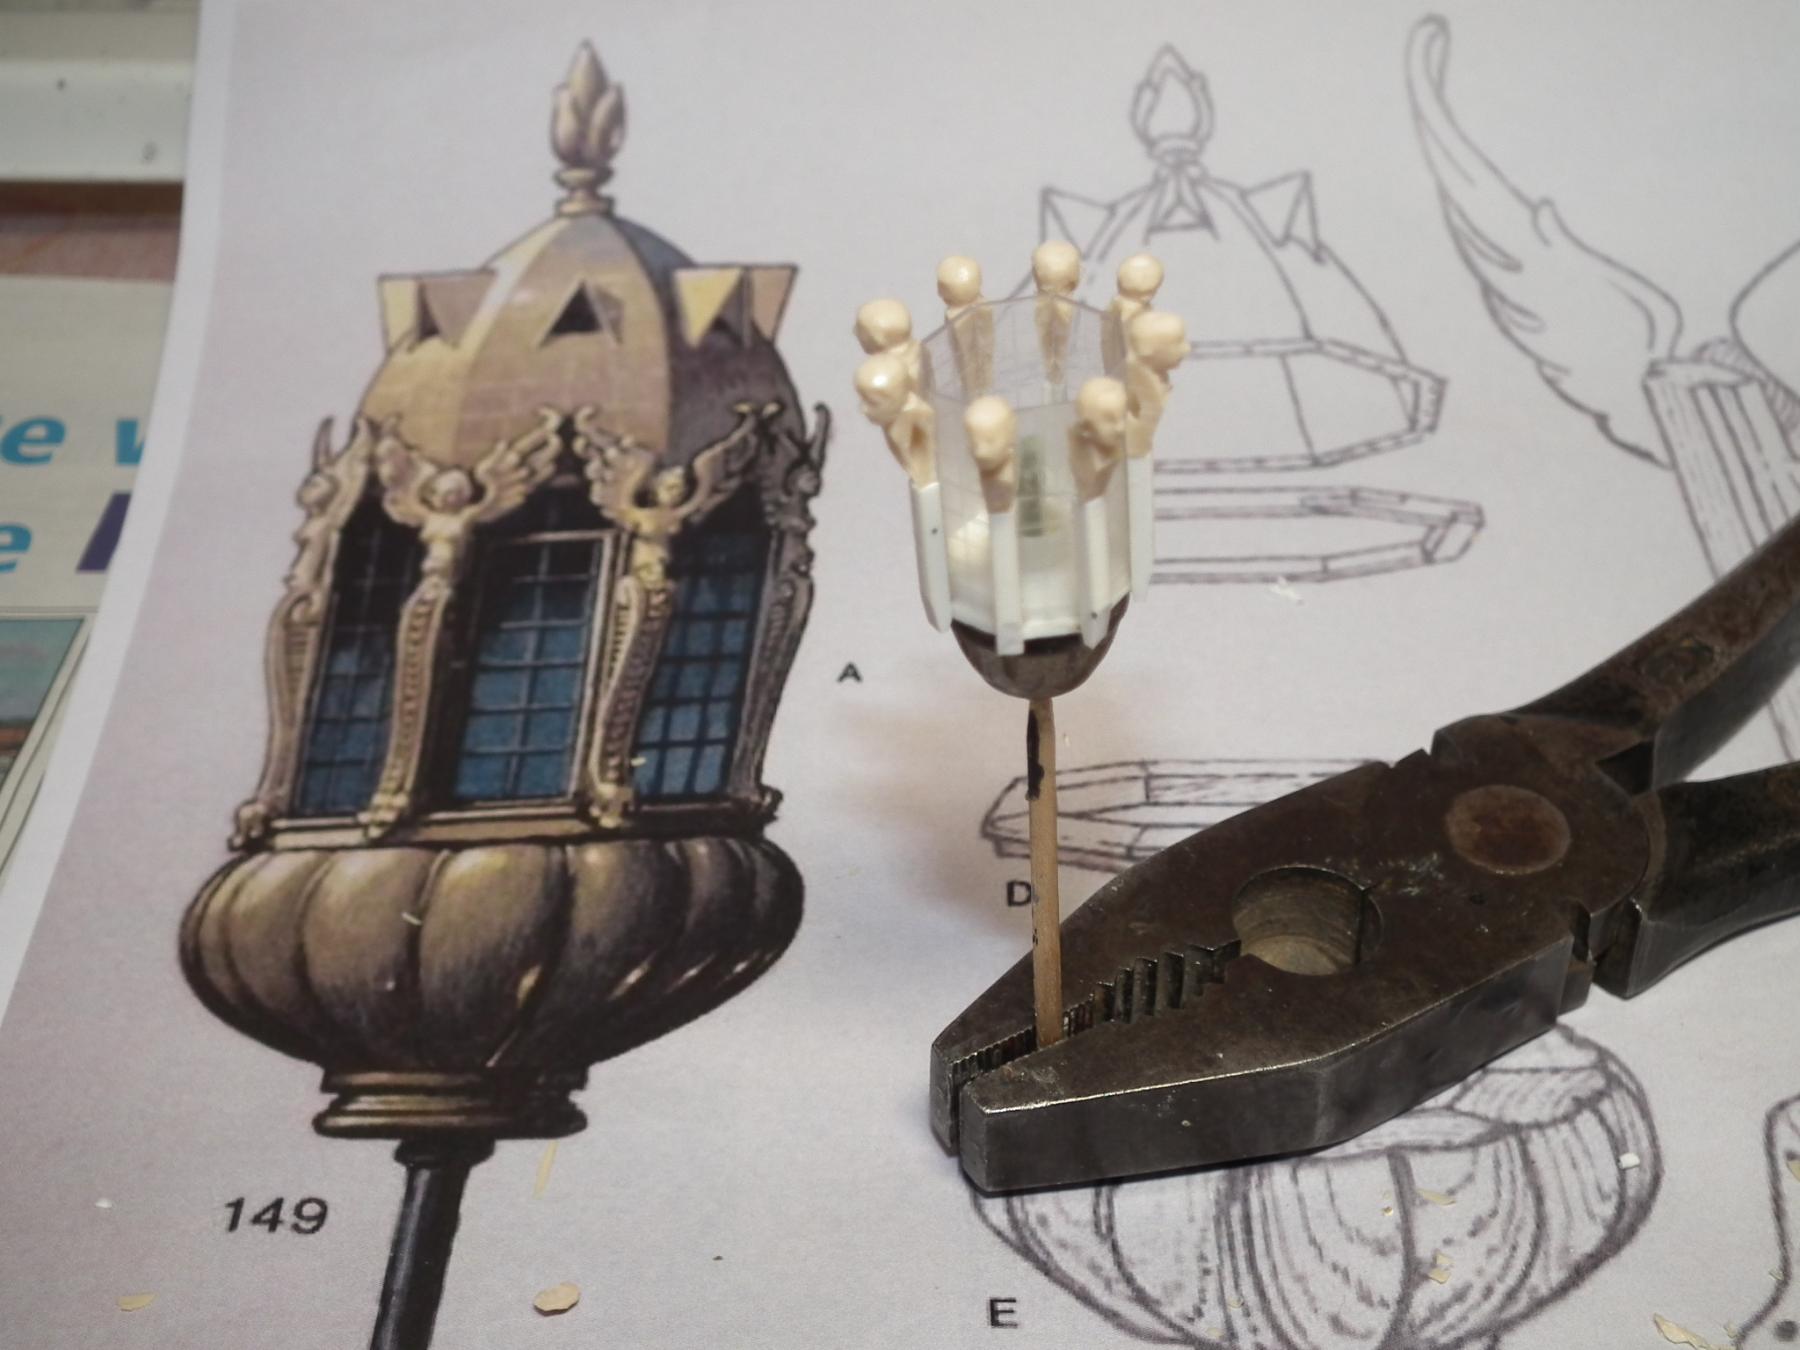
After three unsuccessful attempts to make wings for my angels. I decided that my angels will remain wingless.
I had reached my limits in scratch building.
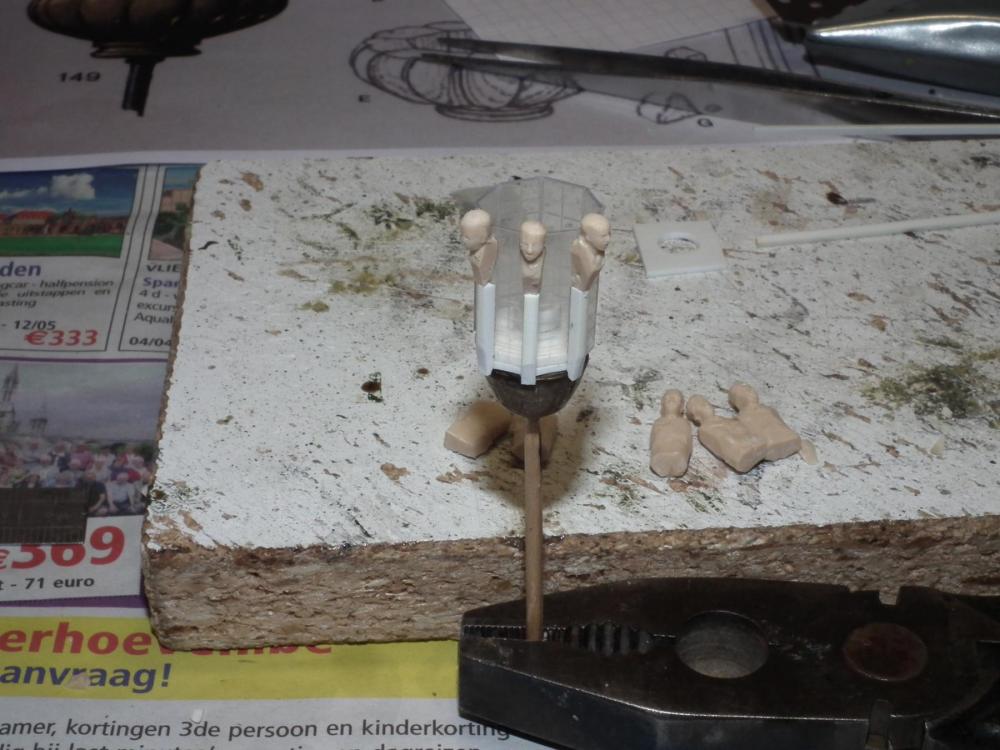
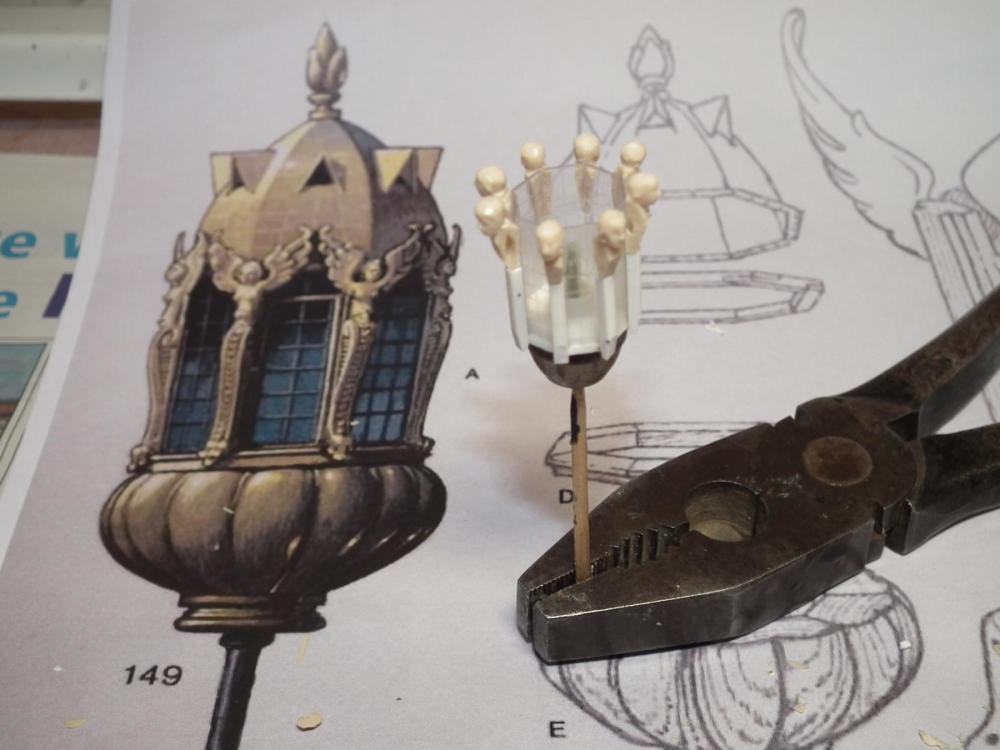
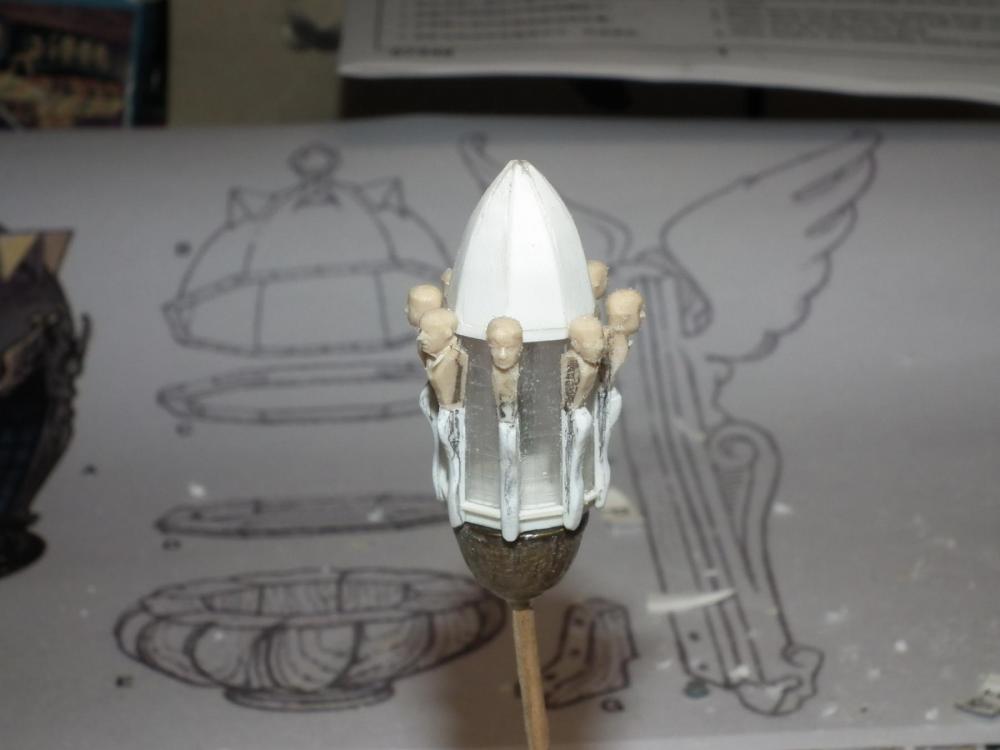
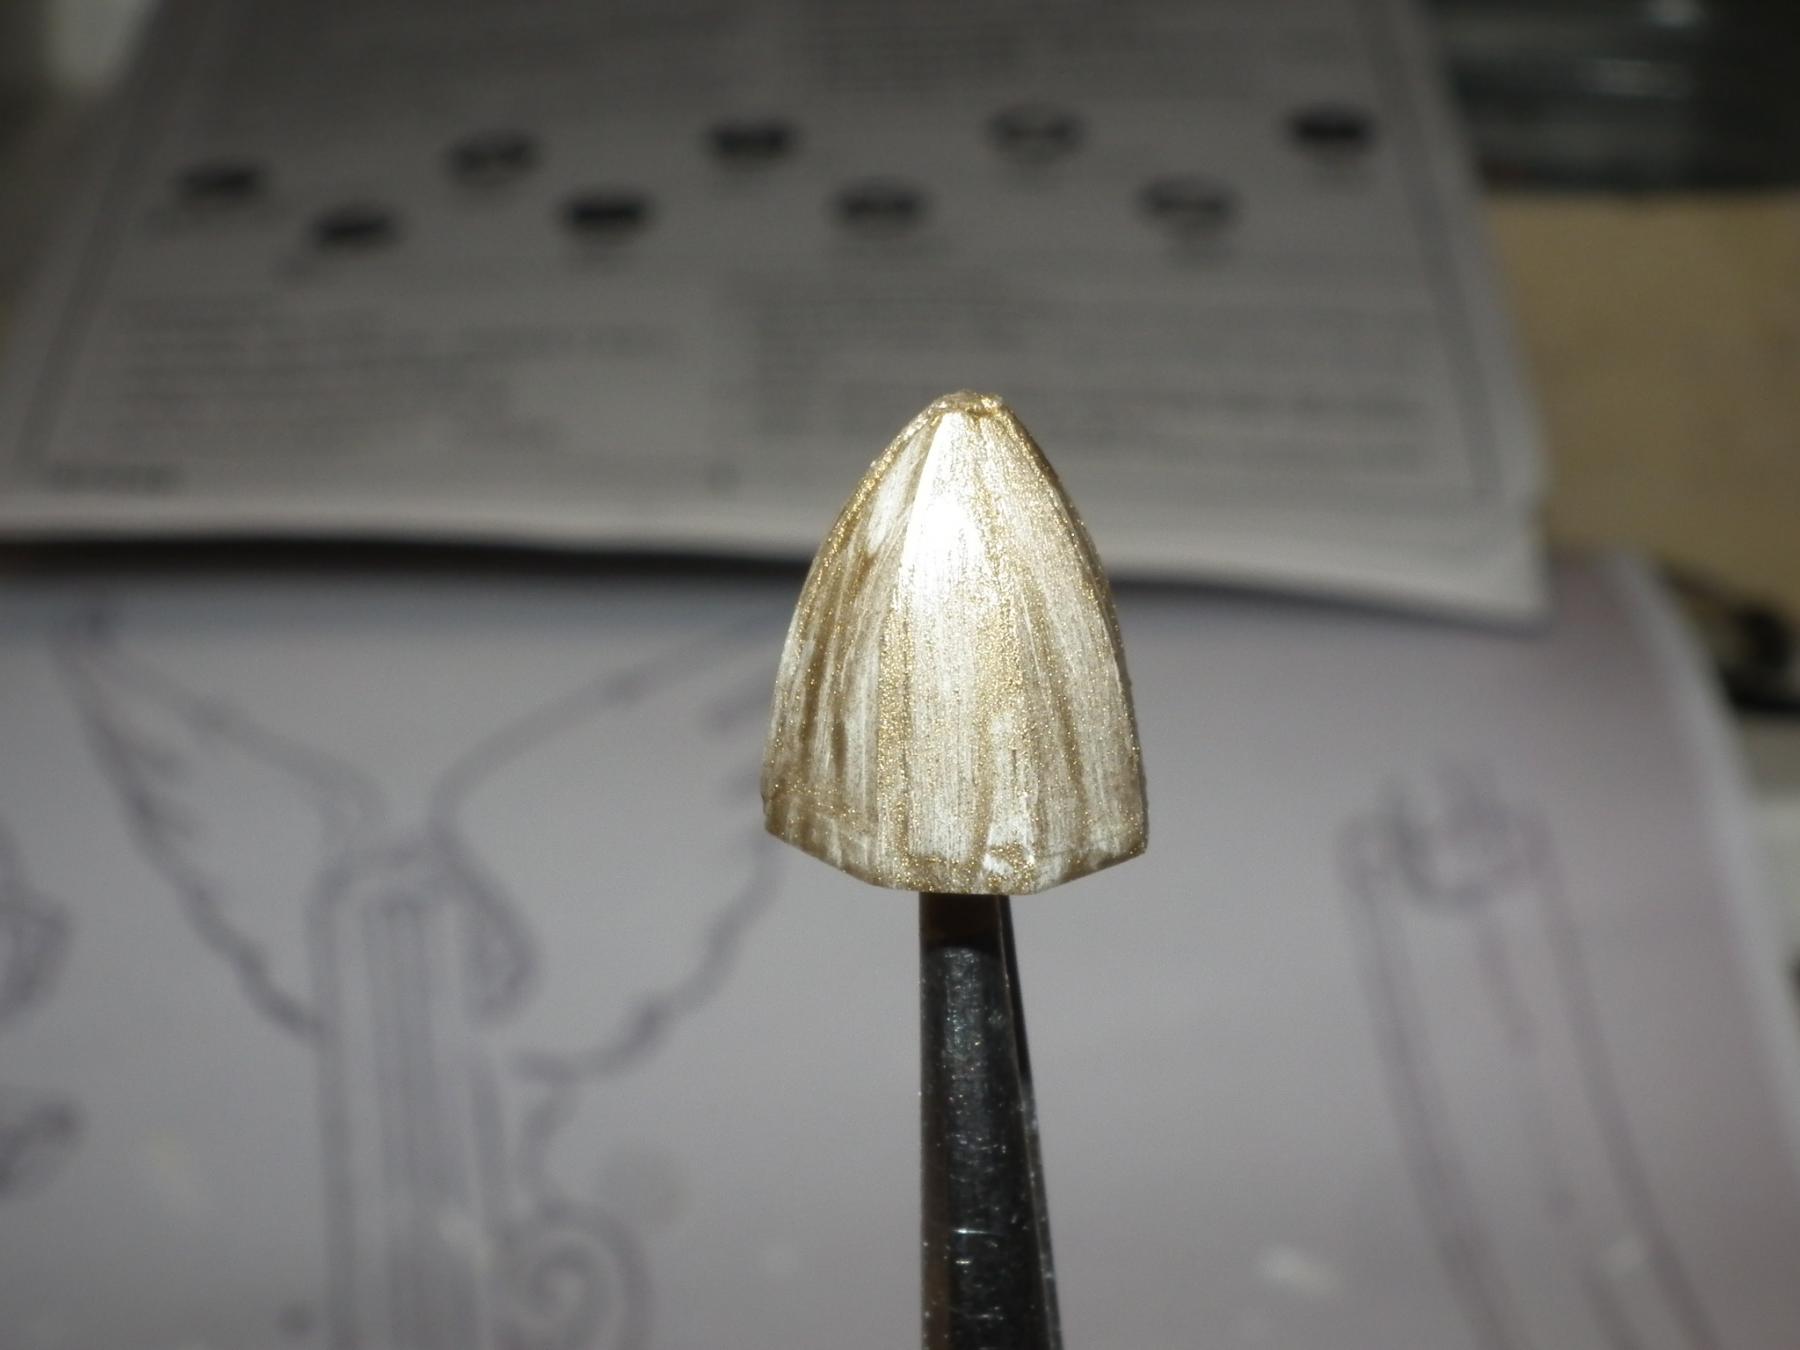
On my lantern I have used figures in 1/72 scale.
Therefore, there is not enough space between two figures to put wings on them.
But,
I found pictures of a lantern on the Duth VOC ship The Batavia (build in 1627-1628).
Here is shown a lantern with approximately the same figures, but without the wings.
Wasa and Batavia are both build by a dutch master
So why not go further with this example, I decided.
So if someone wants to build my lantern with angels and wings.
Make the lantern wider or use figures in scale 1/87
Any figures that you want to use, use figures without helmet. Saves a lot of work!!
I have attached a pdf with a drawing
Dimensions are in mm (1 millimeter = 0.0393700787 inches)
(Extra small details in plastic strip are applied on the lantern)
Painting is gold and gun metal)


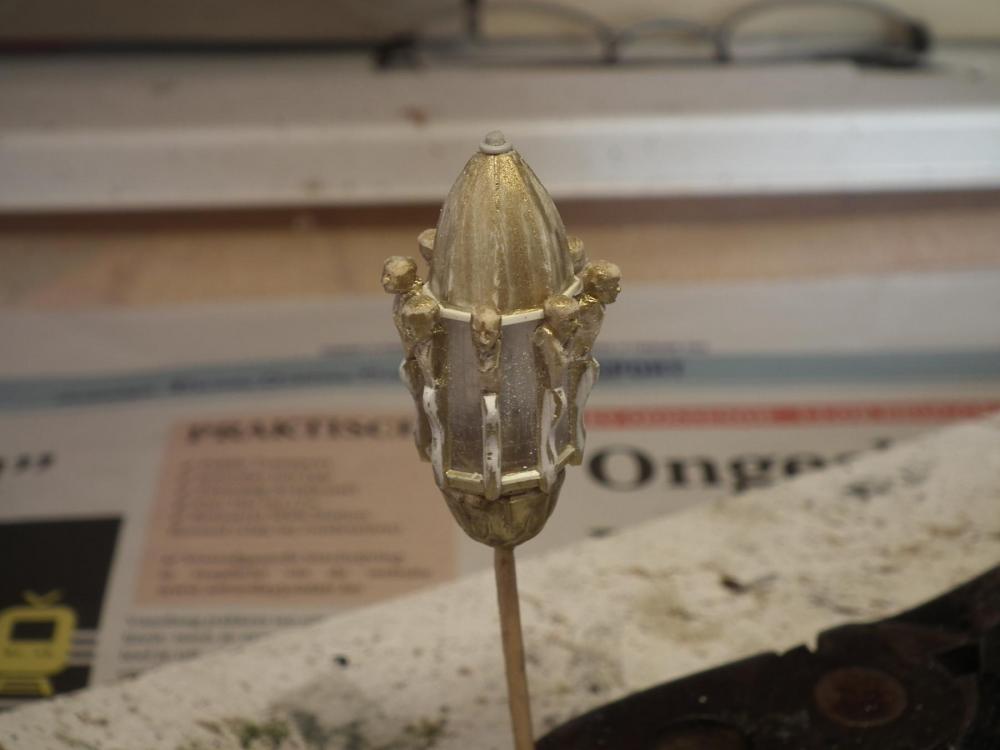

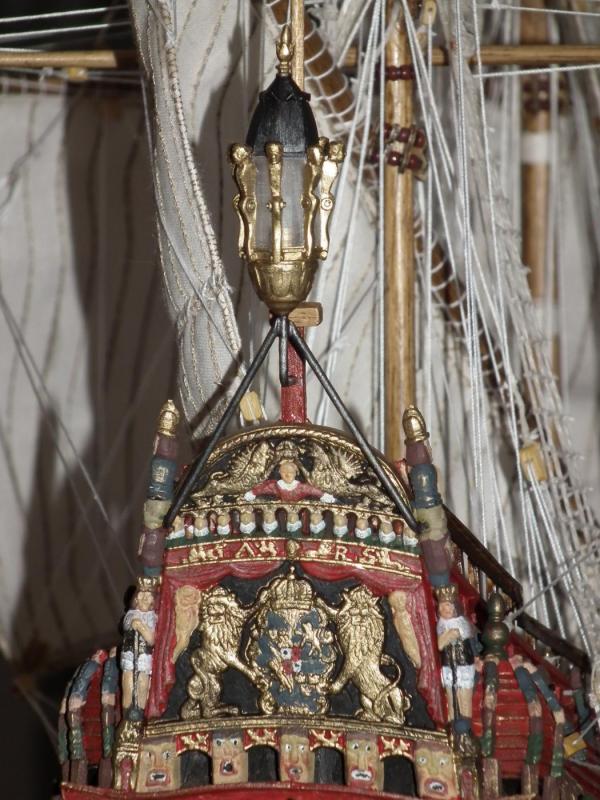
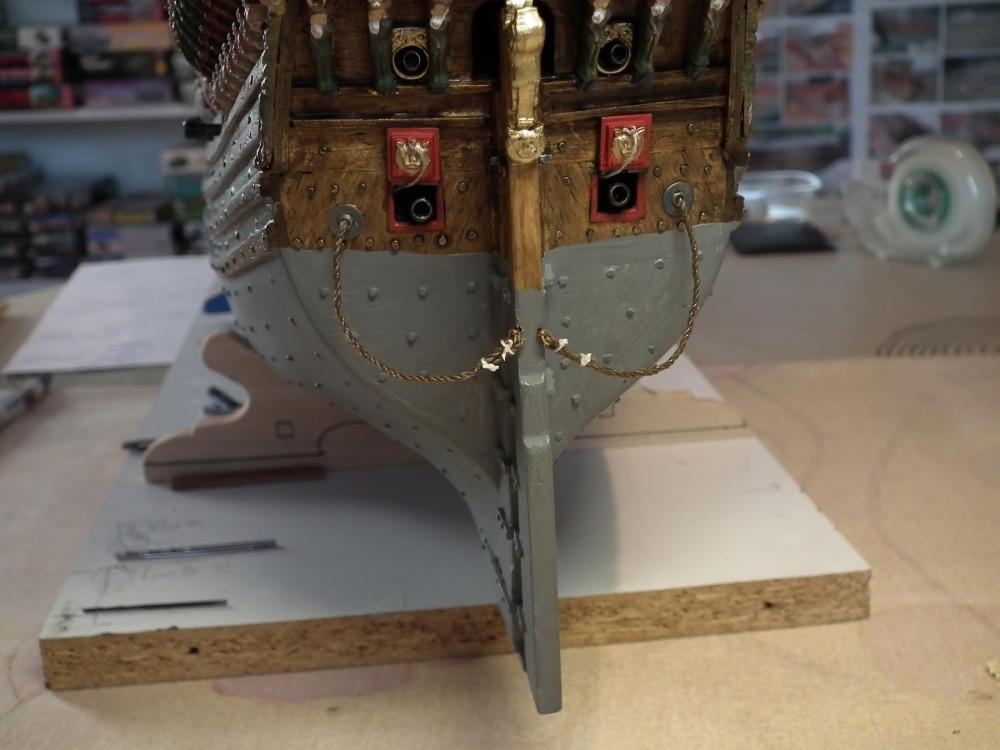
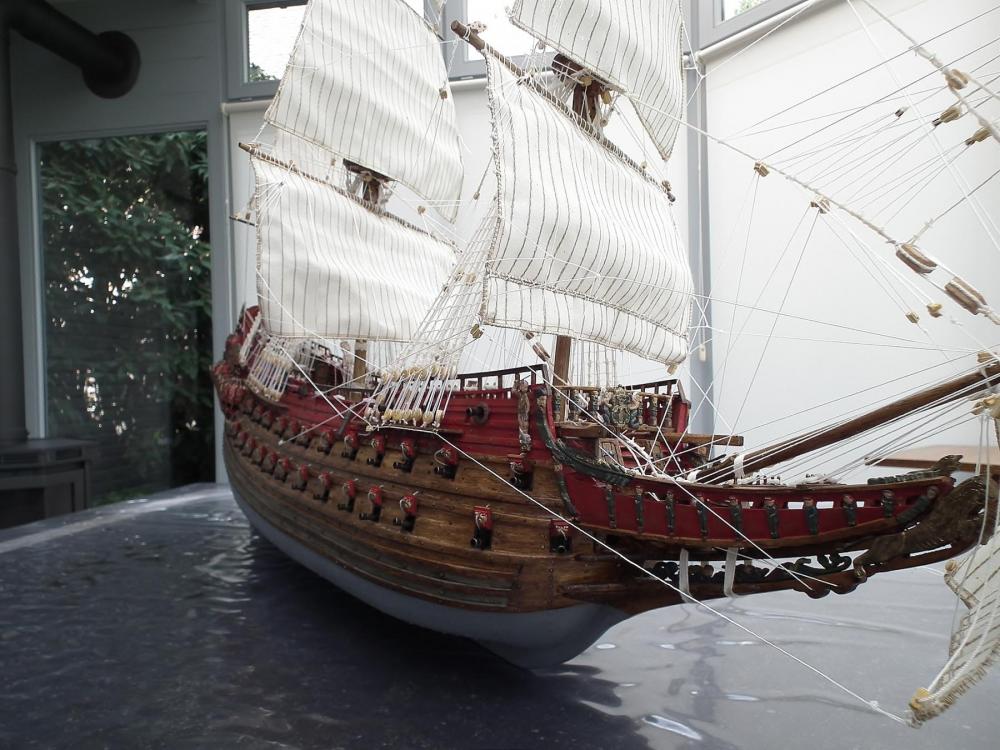
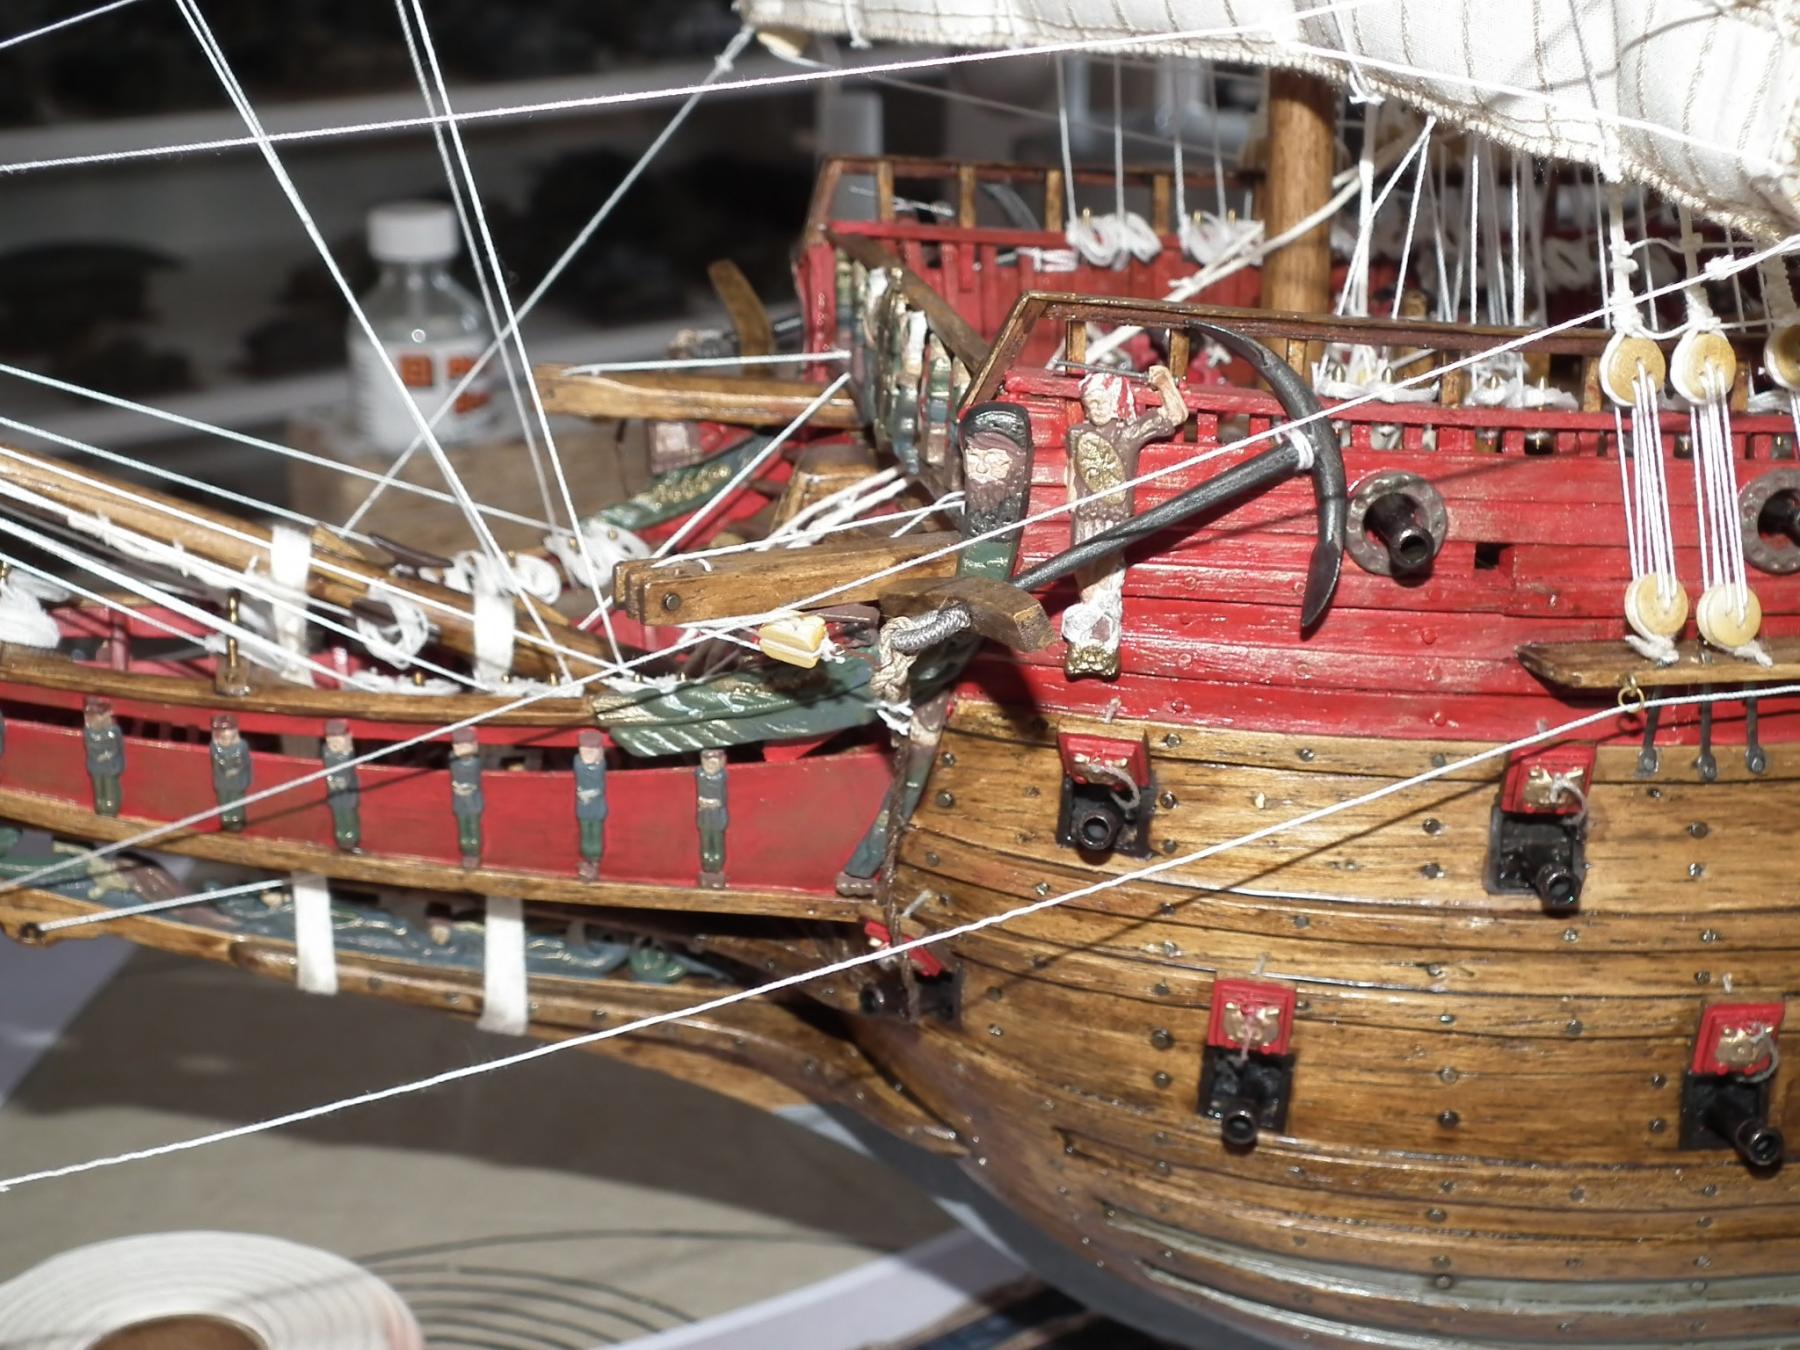
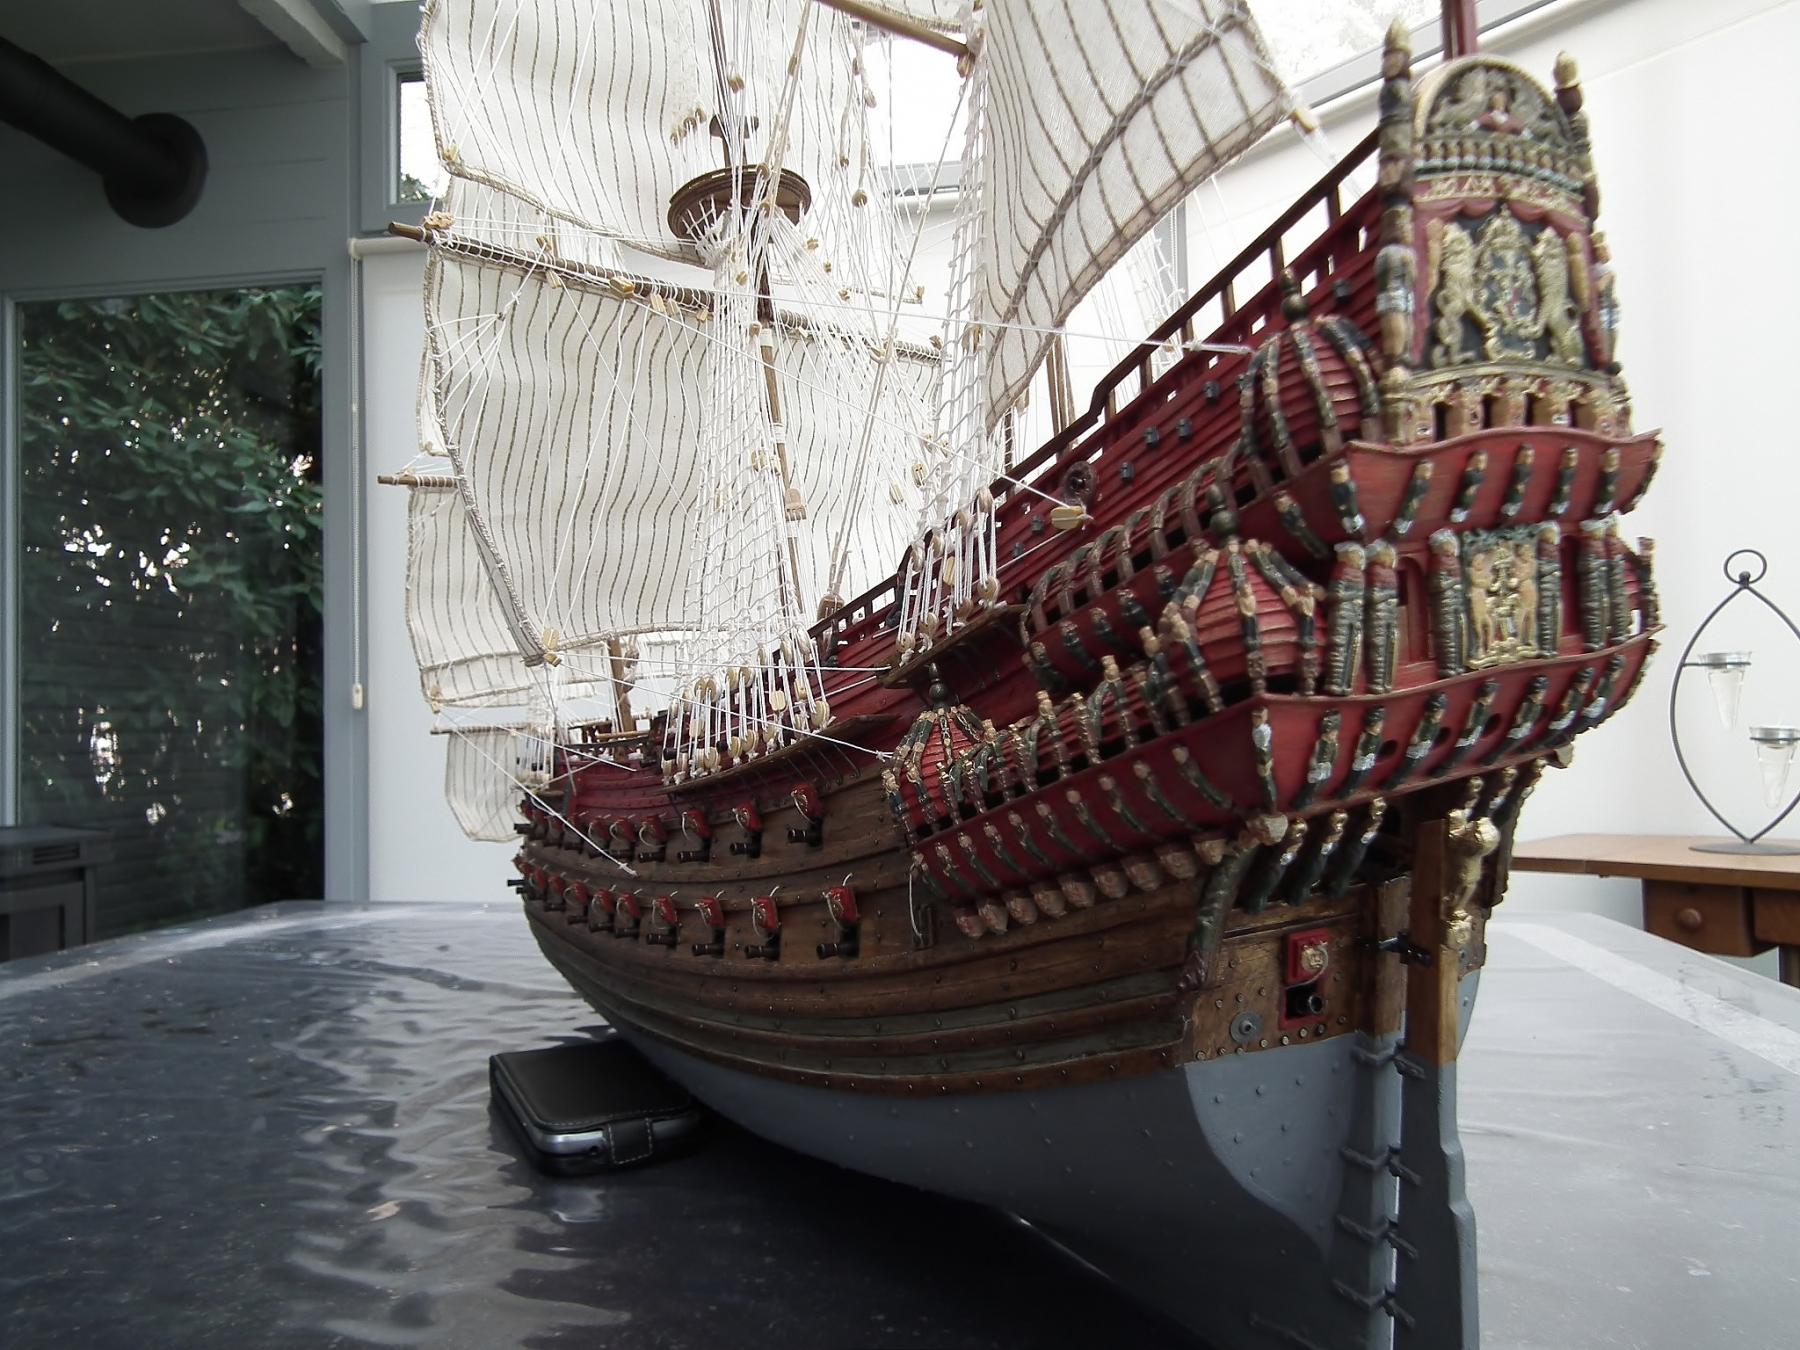
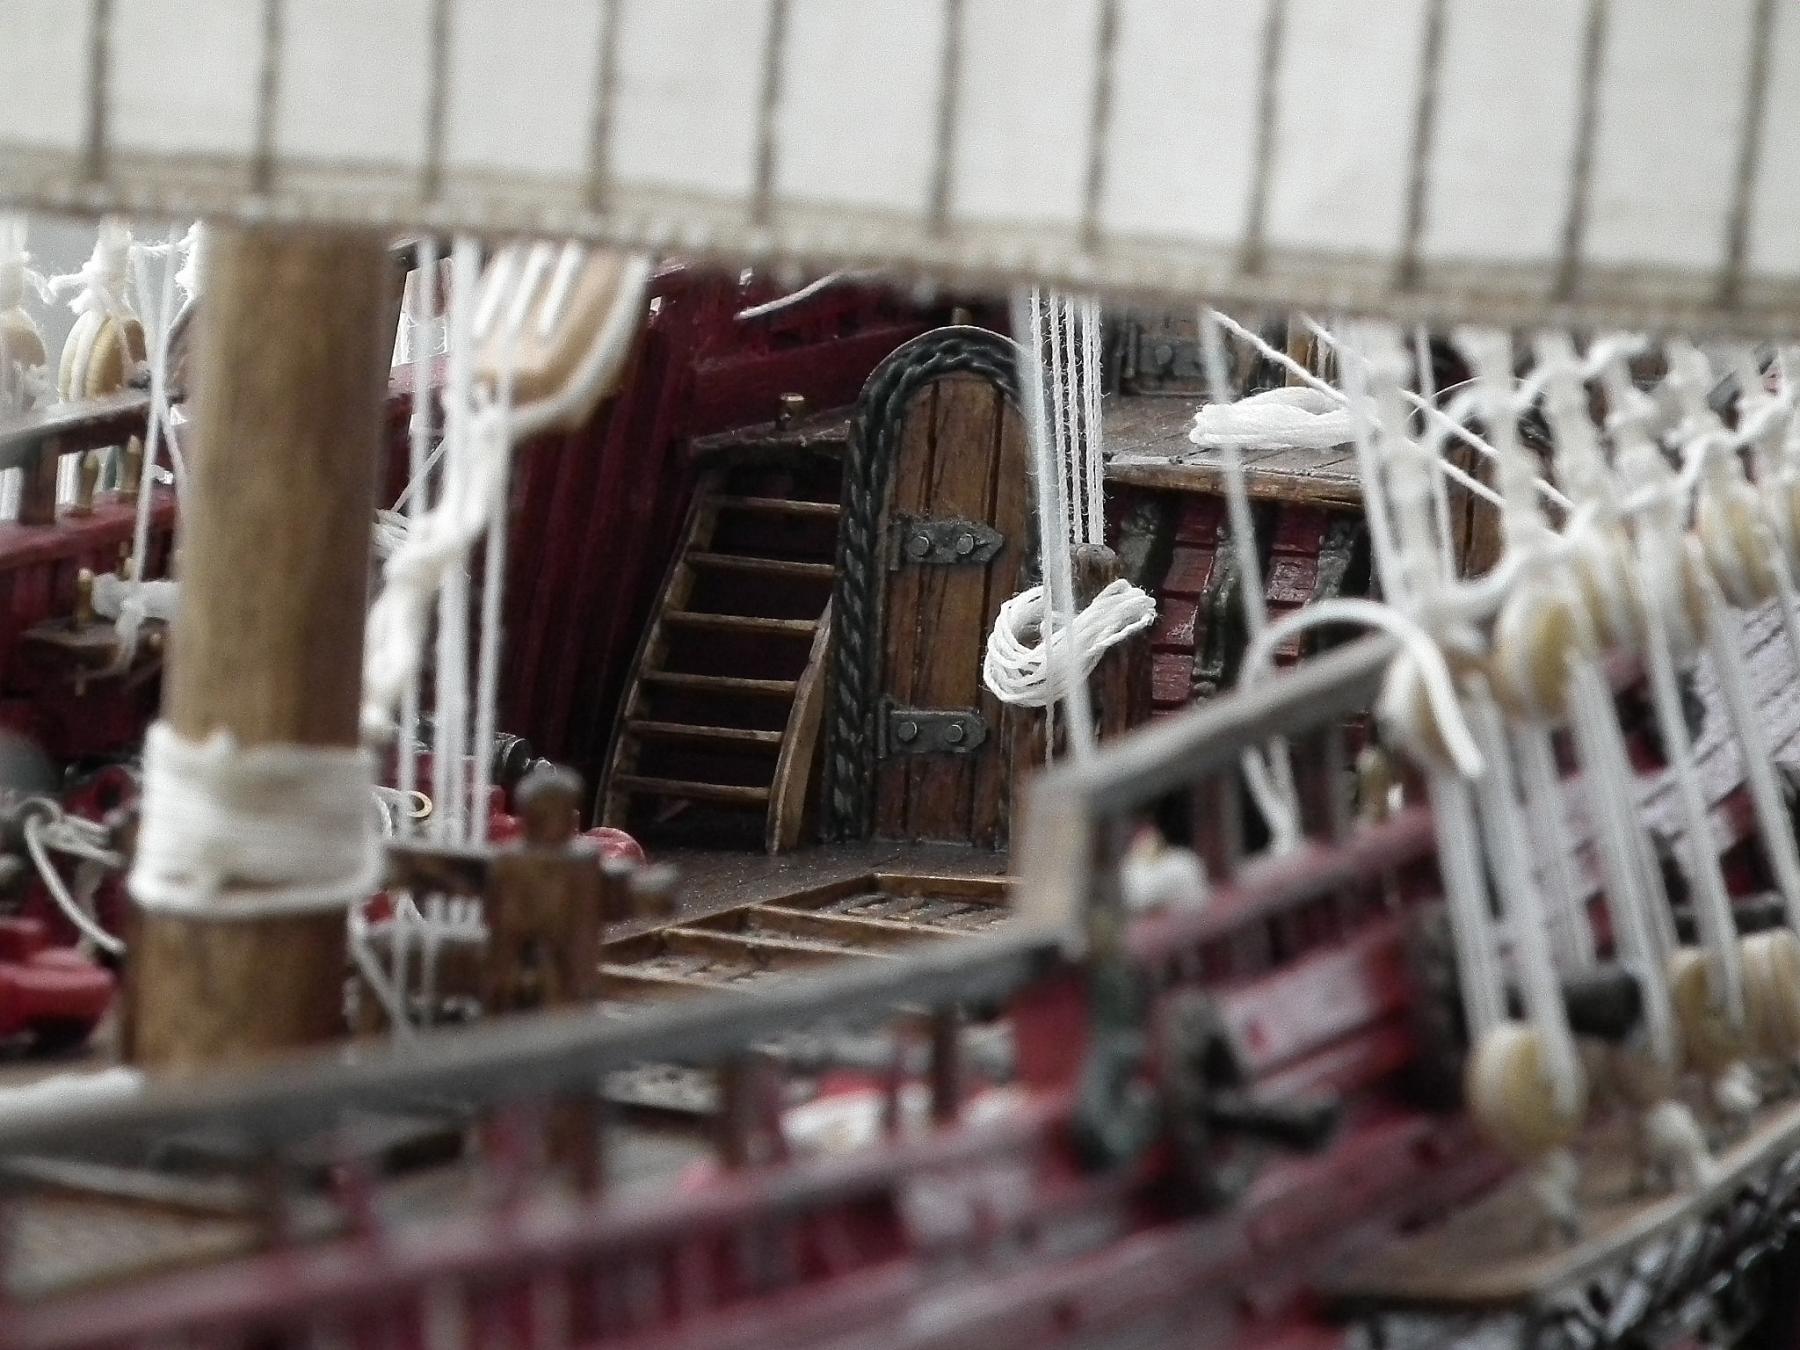
The rudder is fixed with rope and the anchors are in place

Now it is searching for flags and attach them. And then the model should be finished.
For now it's back to military modeling. And in the meanwhile think what model ship I'm going to build hereafter.
Patrick
- ships88, CaptainSteve, marktiedens and 9 others
-
12
-
-
-
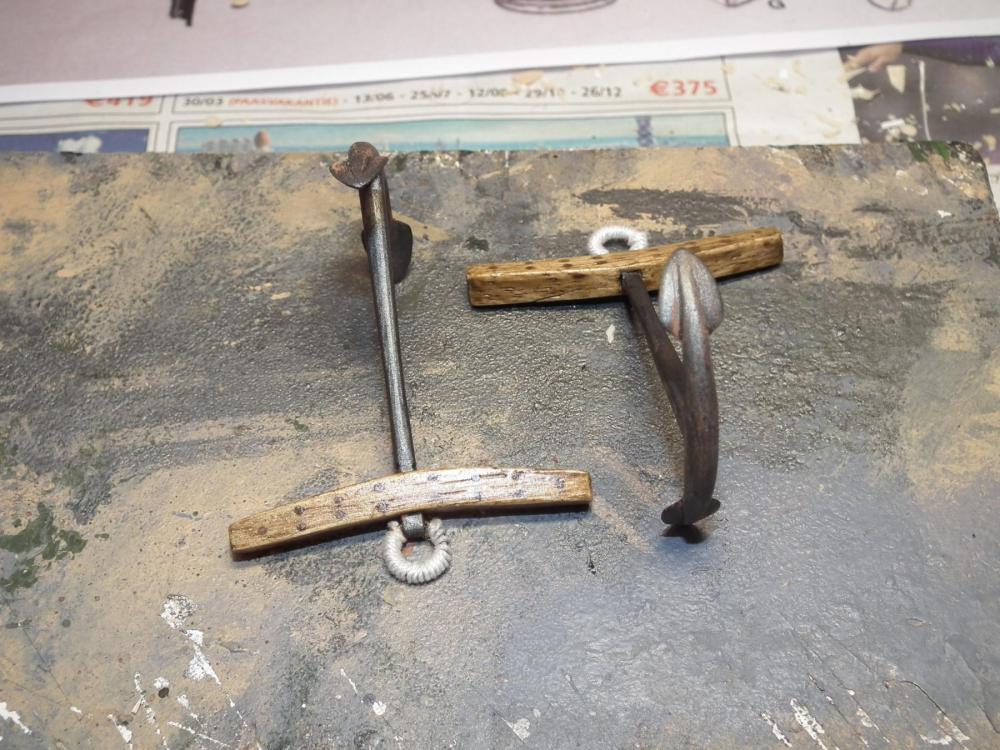
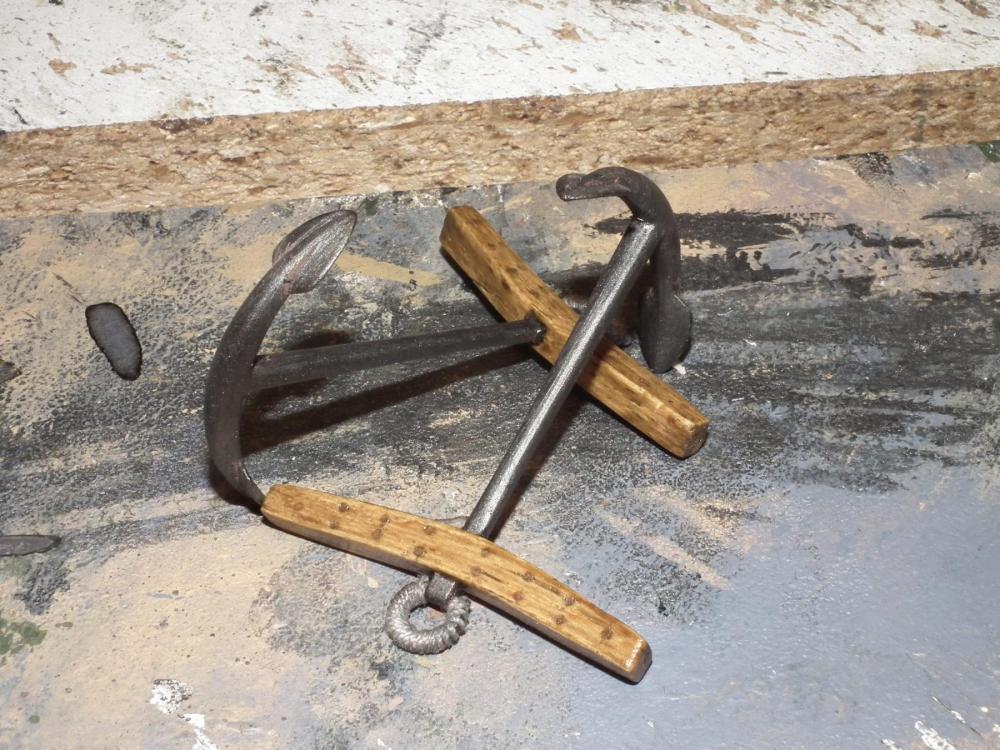
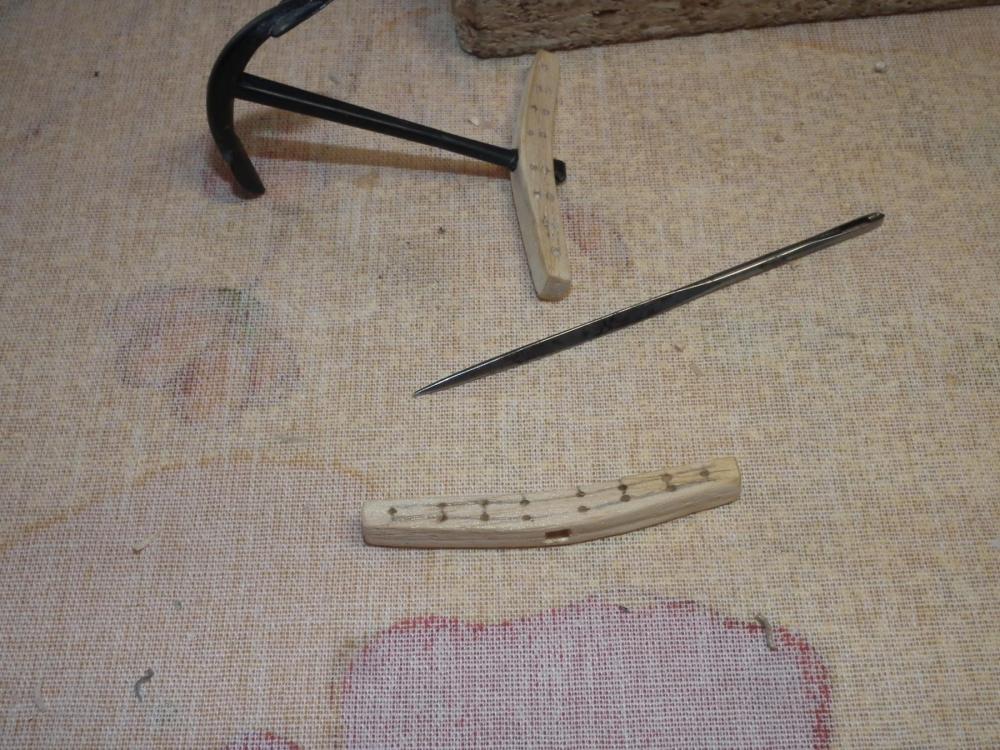
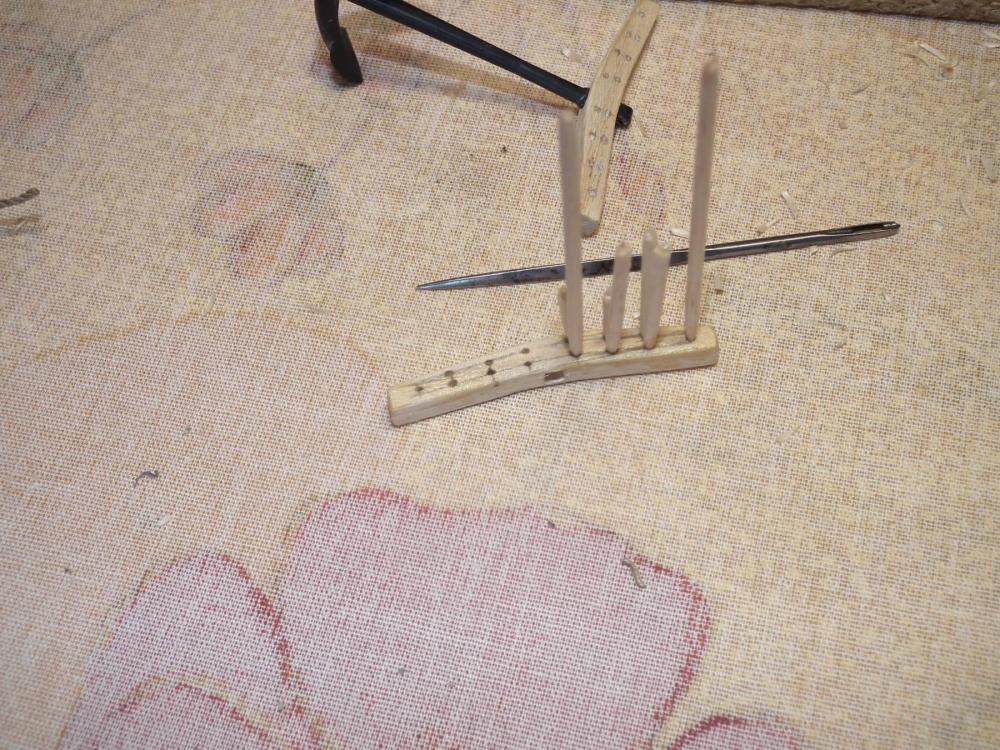
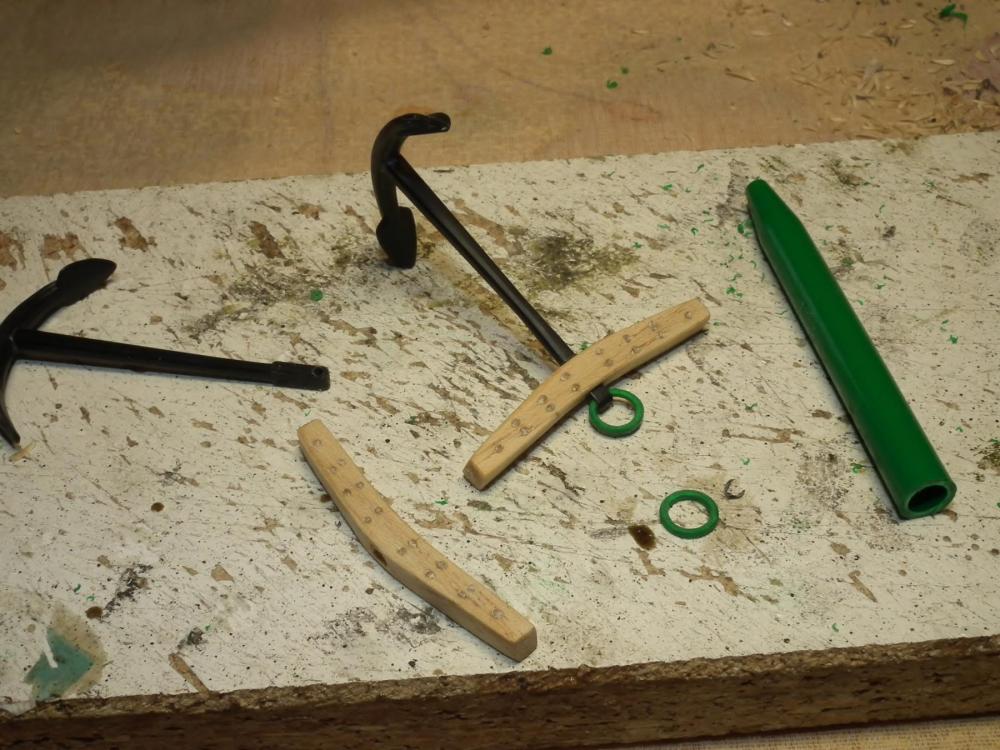
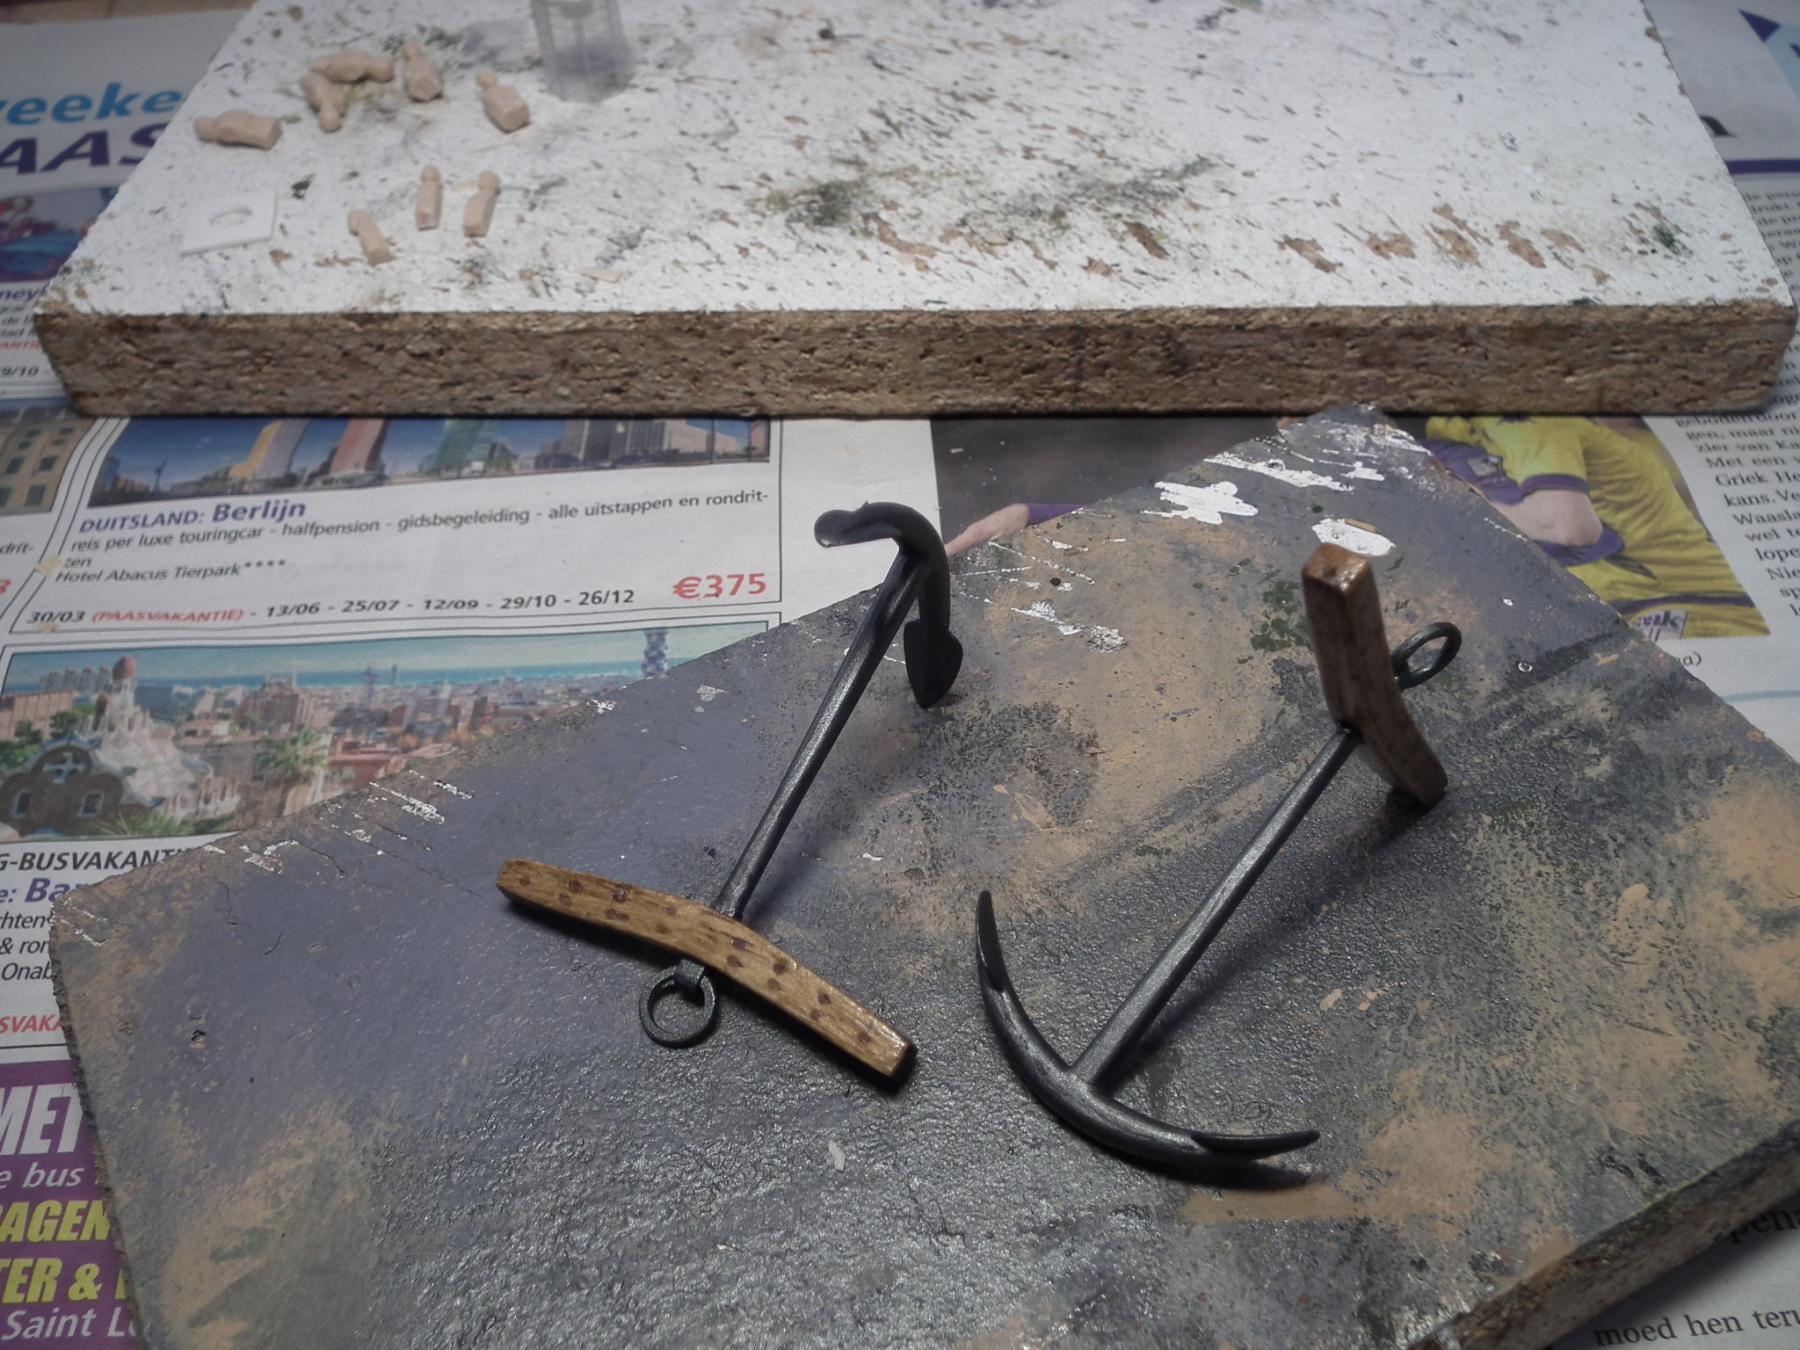
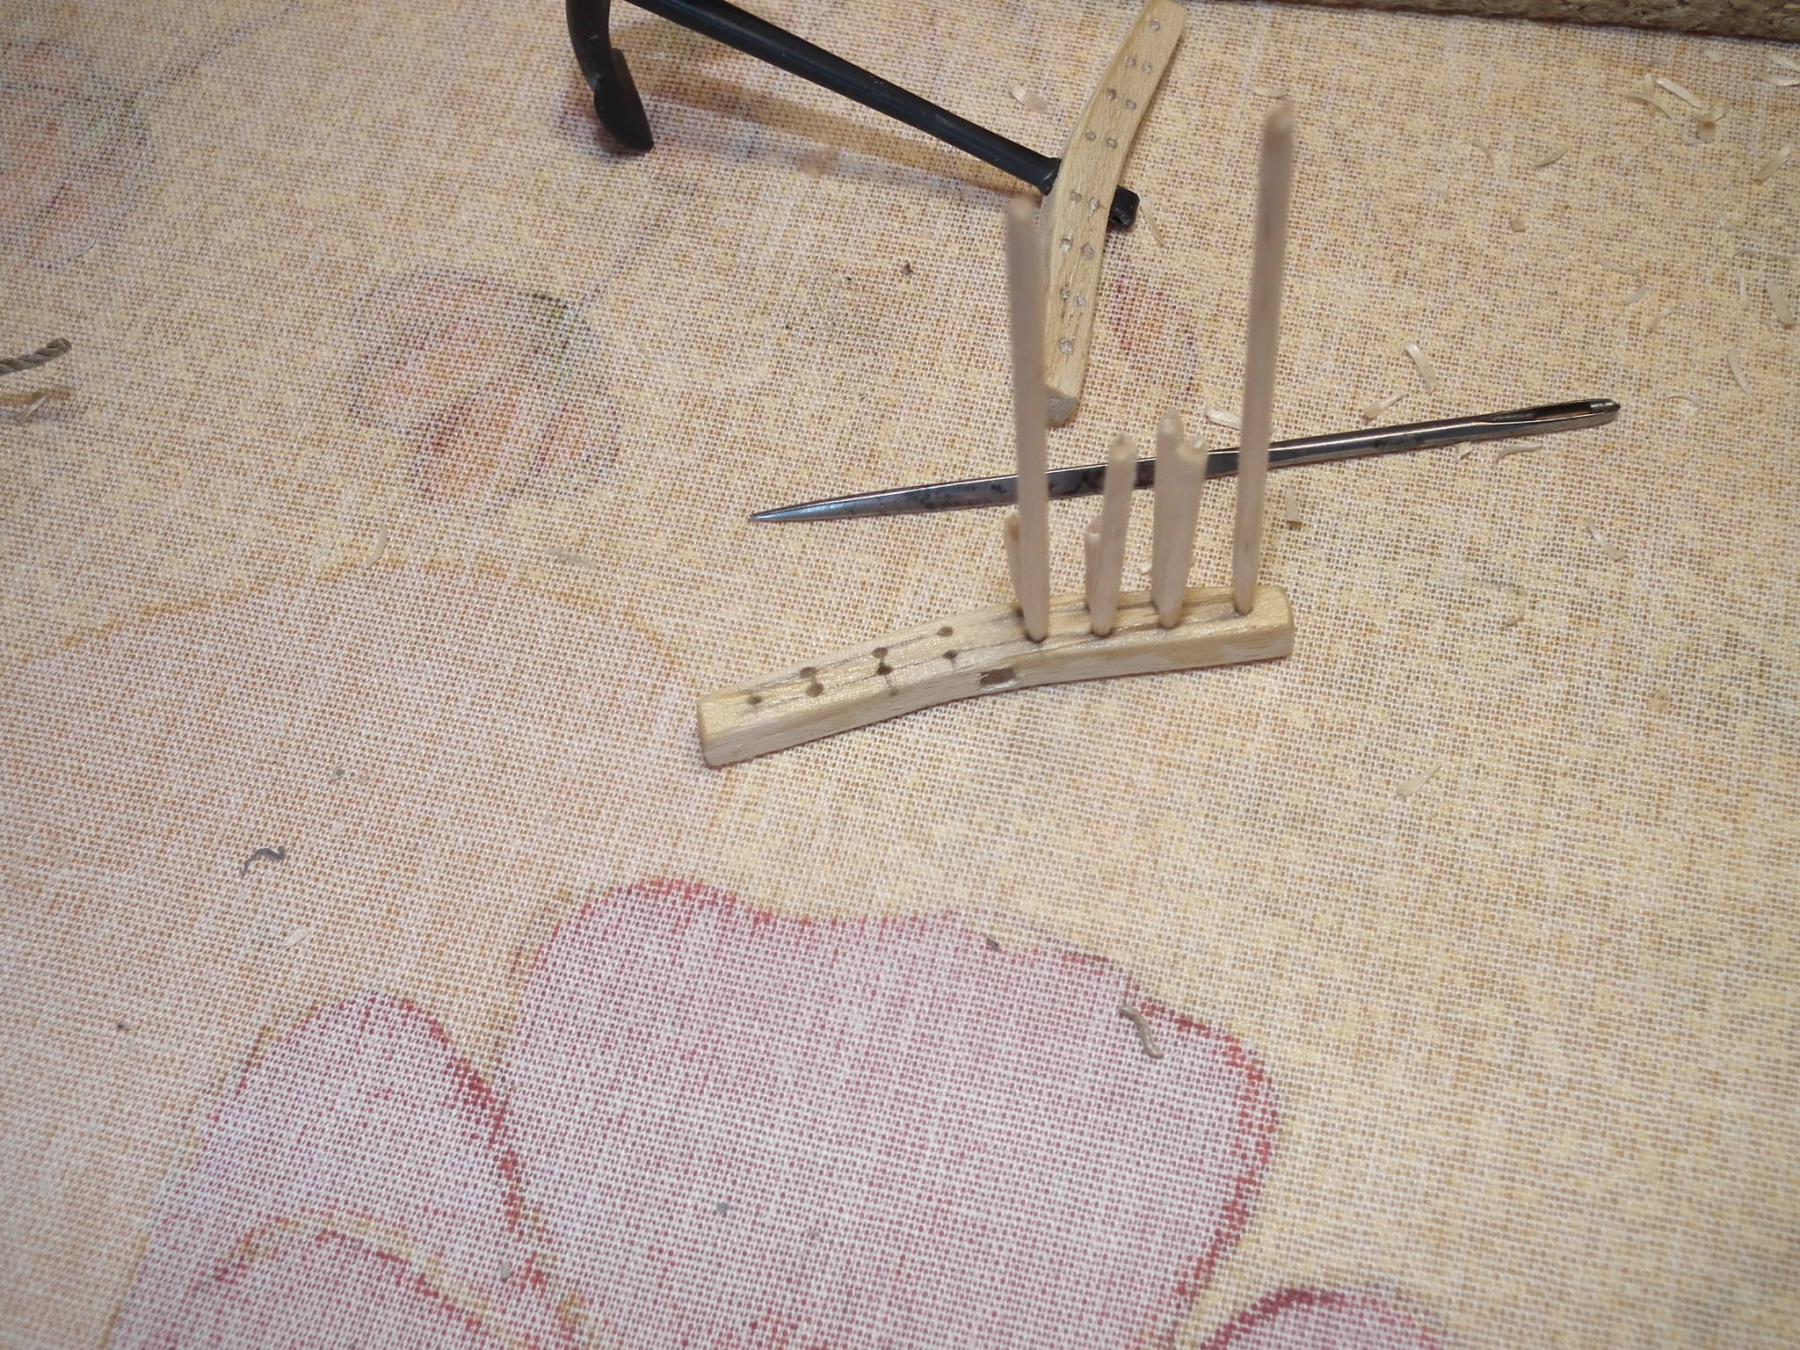
The anchors are finished.The wood parts are painted with oak varnish.The metal parts are painted with Tamiya acrylic paint
- Base coat :Gun Metal X10 + Flat base X21
- Let dry for 24h
- Apply a wash with a mixture of "home made" rust paint : Desert sand XF59 + Red Brown XF64 + thinner + water
- Let dry for 24h
- Attach the wire around the ring of the anchor
- Applay a wash with a mixture of Flat black XF1 + thinner + water
- Let dry for 24h and ready
They will be attached later on the model.
Patrick

- Barbossa, GrantGoodale, J11 and 6 others
-
9
-
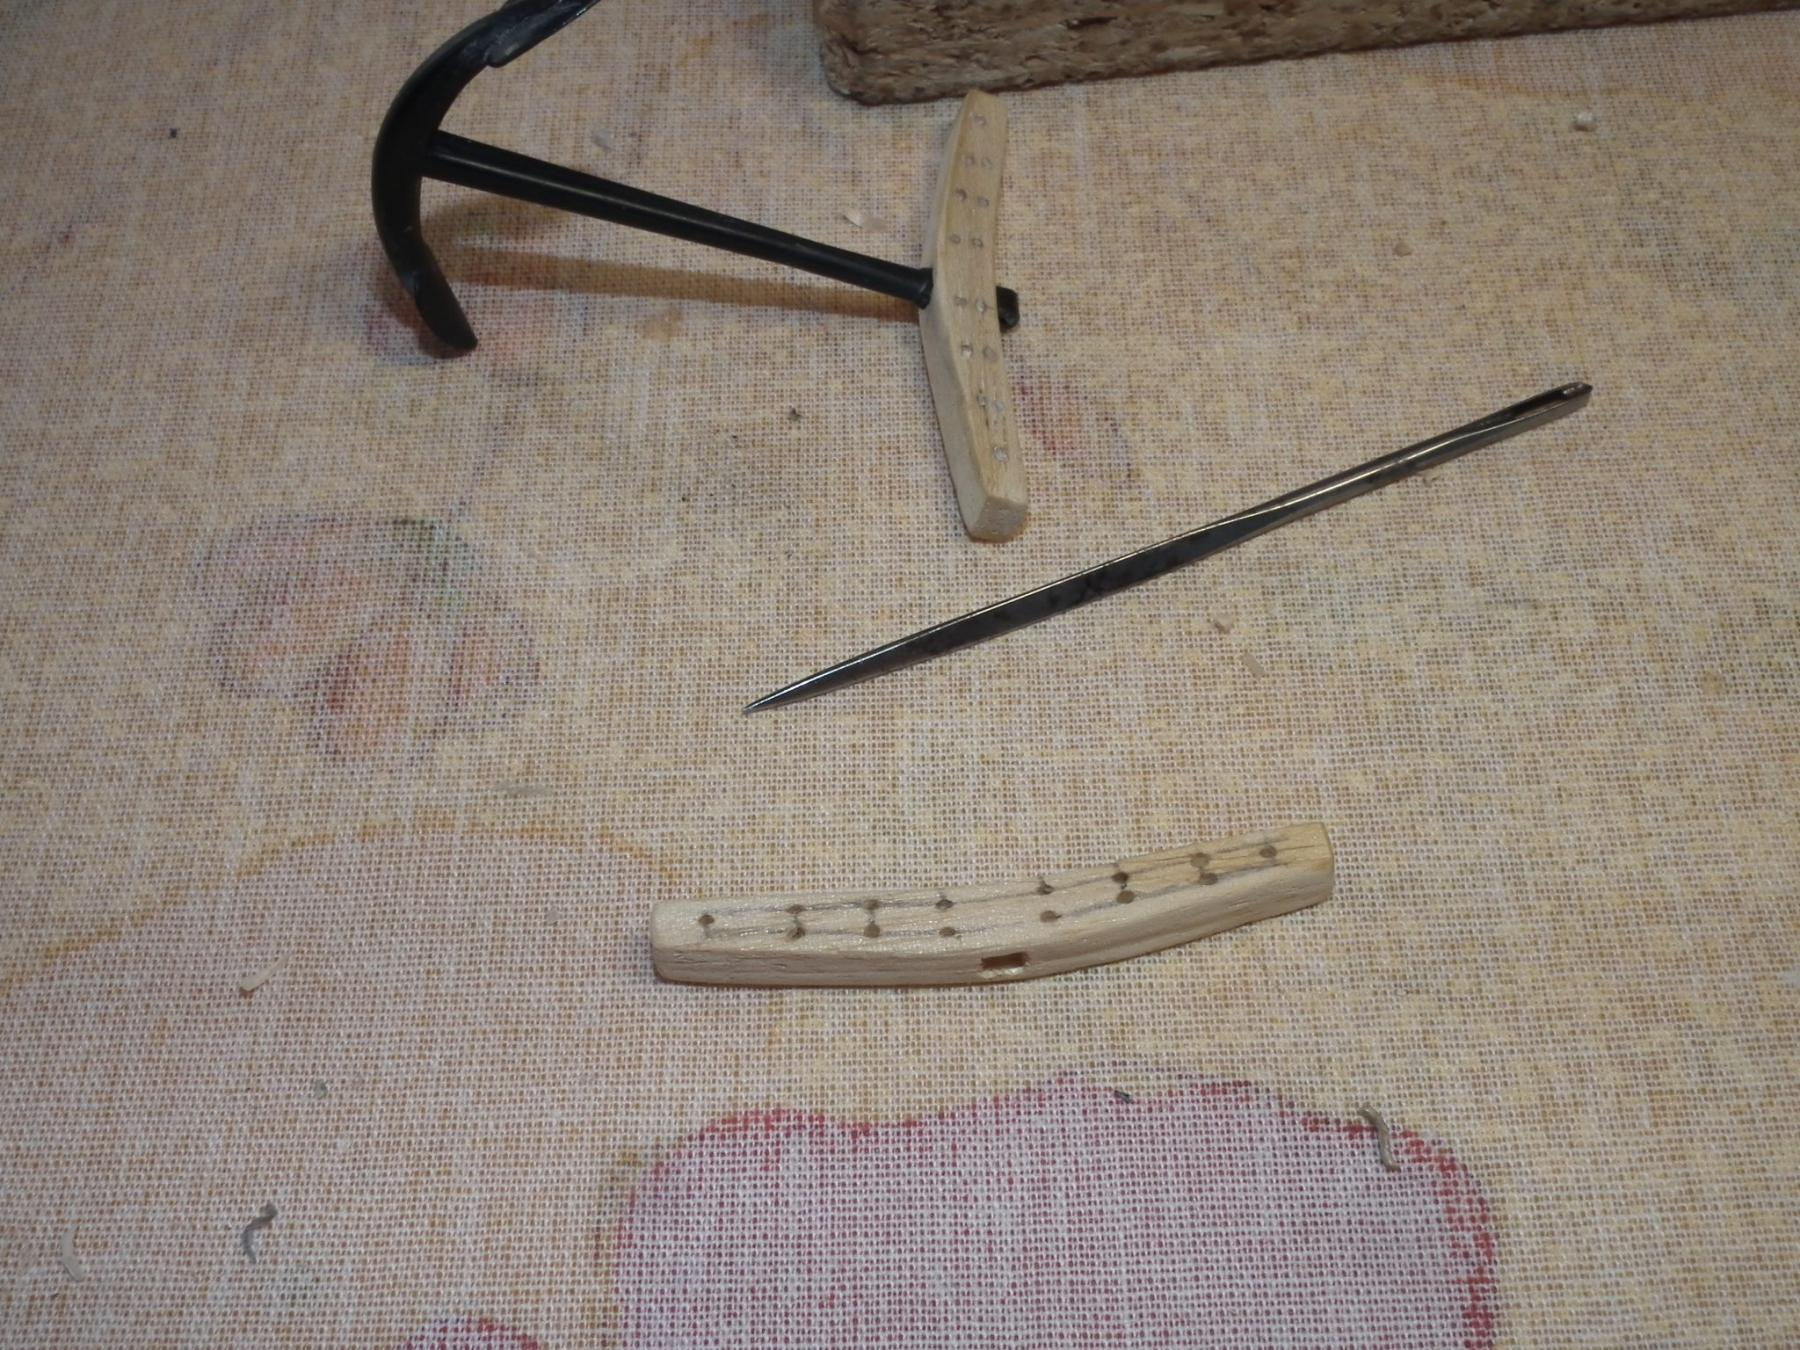
The anchors.I've made some new parts and now they are ready to varnish and paint.Patrick

- Elijah, mtaylor, GrandpaPhil and 3 others
-
6
-
-
Every time I see your model. I think (In Dutch) "jaa man, knap werk"In English : waw, great job!!
- CaptainSteve, md1400cs, EJ_L and 1 other
-
4
-
A little advice from a beginner to all new beginners.I started 10 years ago with my model of the Wasa.After 10 long years full of unexpected problems I approach finally the completion of my model.Have i 10 years just built this model? Certainly not, and certainly dont do this yourself. You will lose your interest in this hobbyIn summer i build a wooden ship, in winter my military models.When the ship starts to bore me, I switch to the military.so :Start with a model that is not too big, you got to have room for it when it is finished.But find a ship model that makes you feel good or you'll lose your interest in building the model.Not too expensive. if it fails, you just lost your money.If you are unsure of starting a build log, start it only when you have build something (like me).If you are unsure of the next step in building your model, search the Internet or ask advice on this forum.If someone at home asks you when will the model be ready?? Just say this is a hobby, there is no hurry, it's just fun building it.If you want to build a model ship :This is a great forum where you can always ask for help when you're in troubleBut,I go every year for a reunion (gathering) of plastic modeling.Every year I see the same faces...Every year we all are a year older....There are apparently few young newcomers who practice our hobby.If only one out of ten newcomers continues to carry out this hobbyThen we all should be happy, I think.
Greetings to all of you
- Dan Vadas, Scottish Guy, mtaylor and 3 others
-
6
-
Thanks Michael,
I go for the easiest solution (number 3)The lantern with the angels is far above my skill.I have some material to use as a base.But if that does not give the desired resultThen it will be something scrathbuild. Mayby in plastic and then painted.GreetingsPatrick -
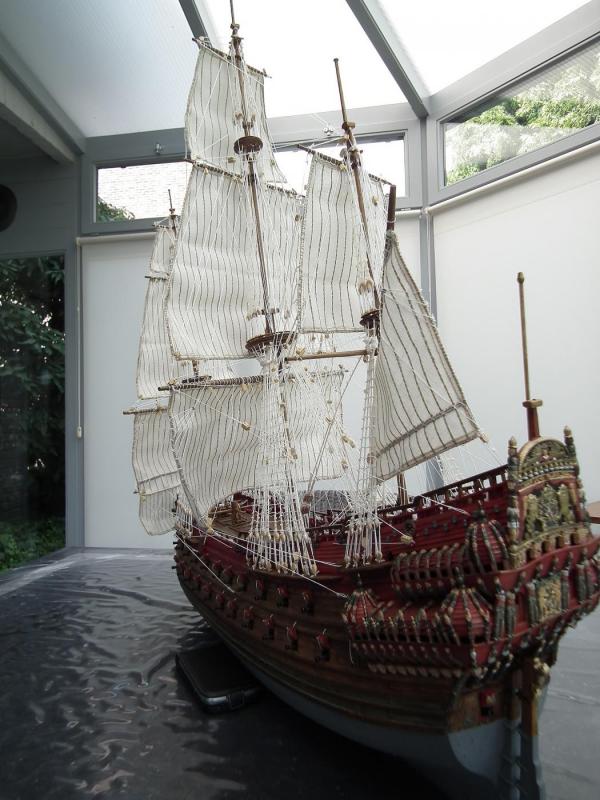
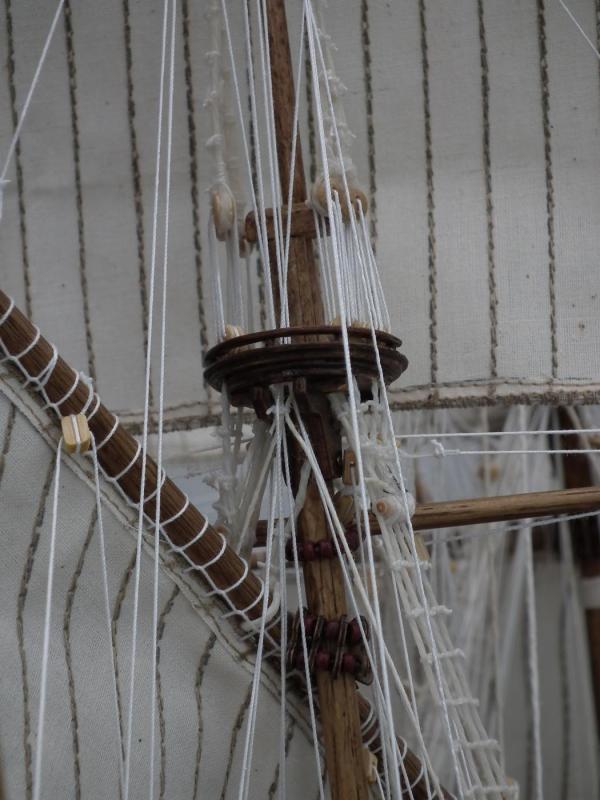
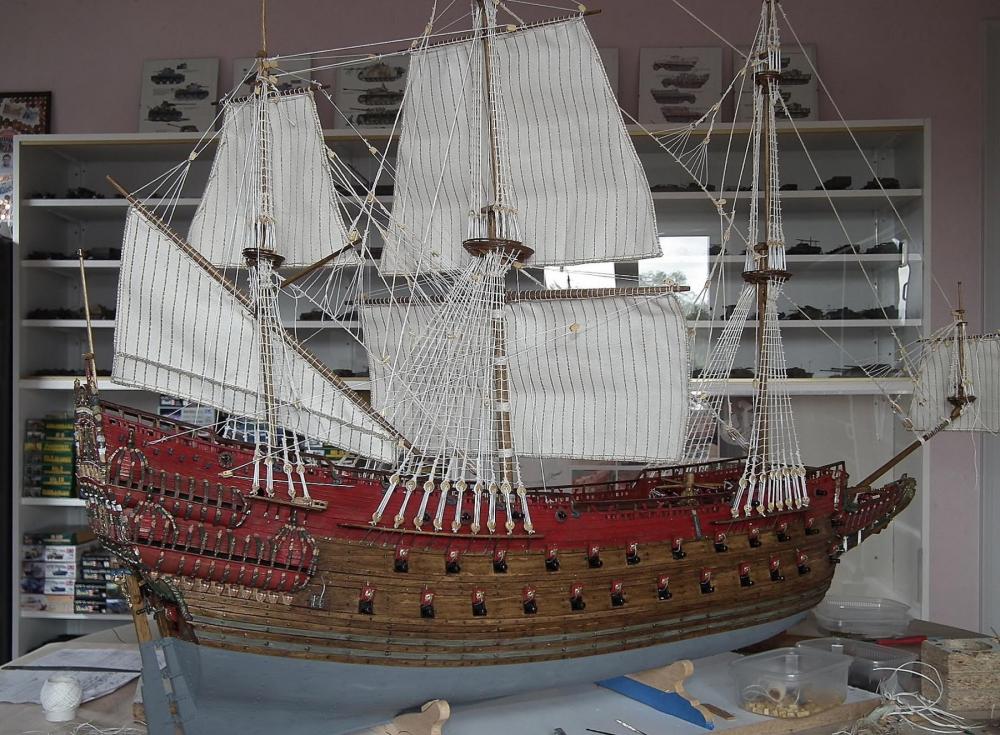
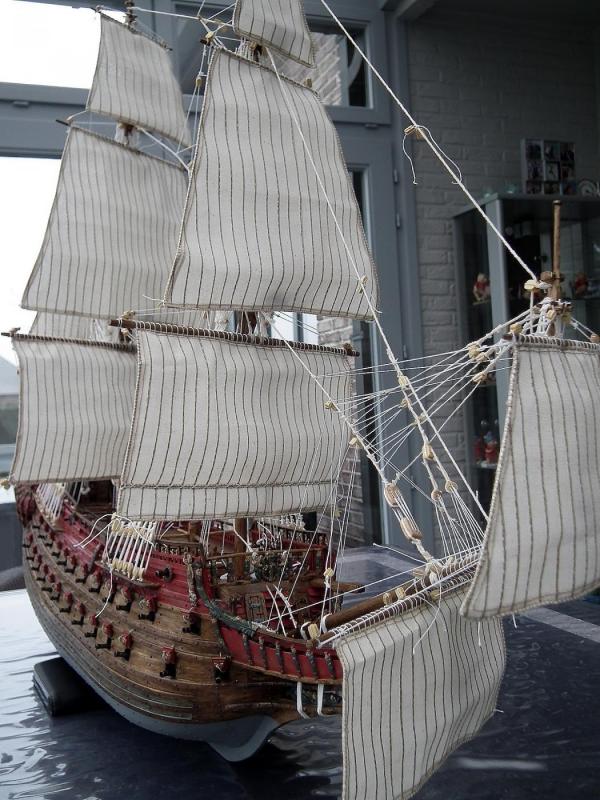
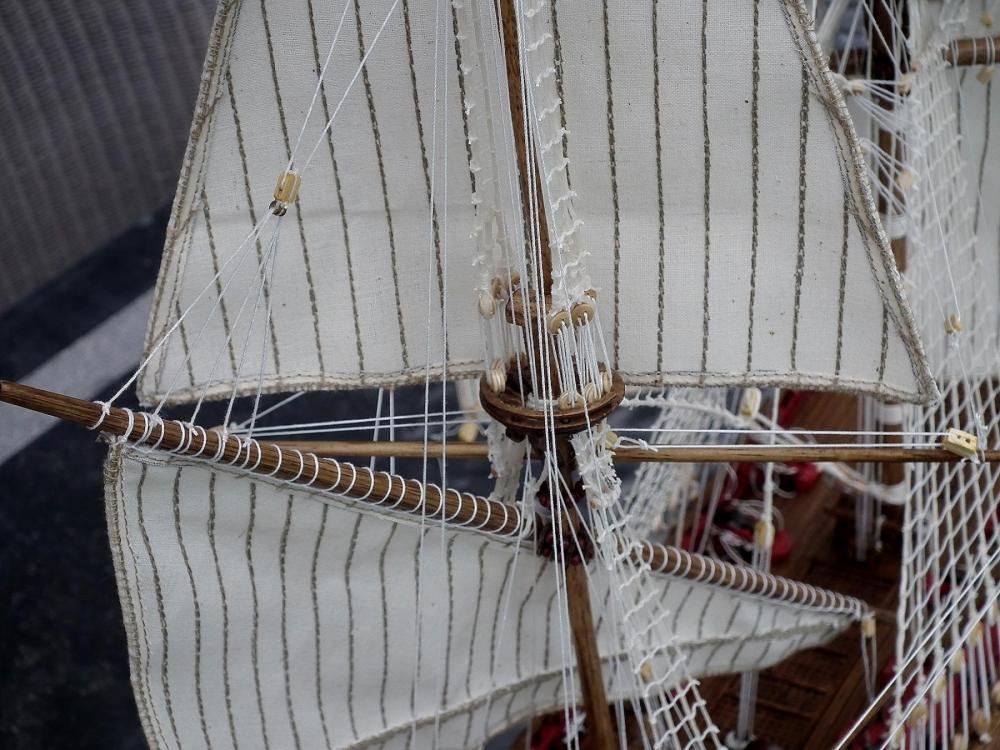
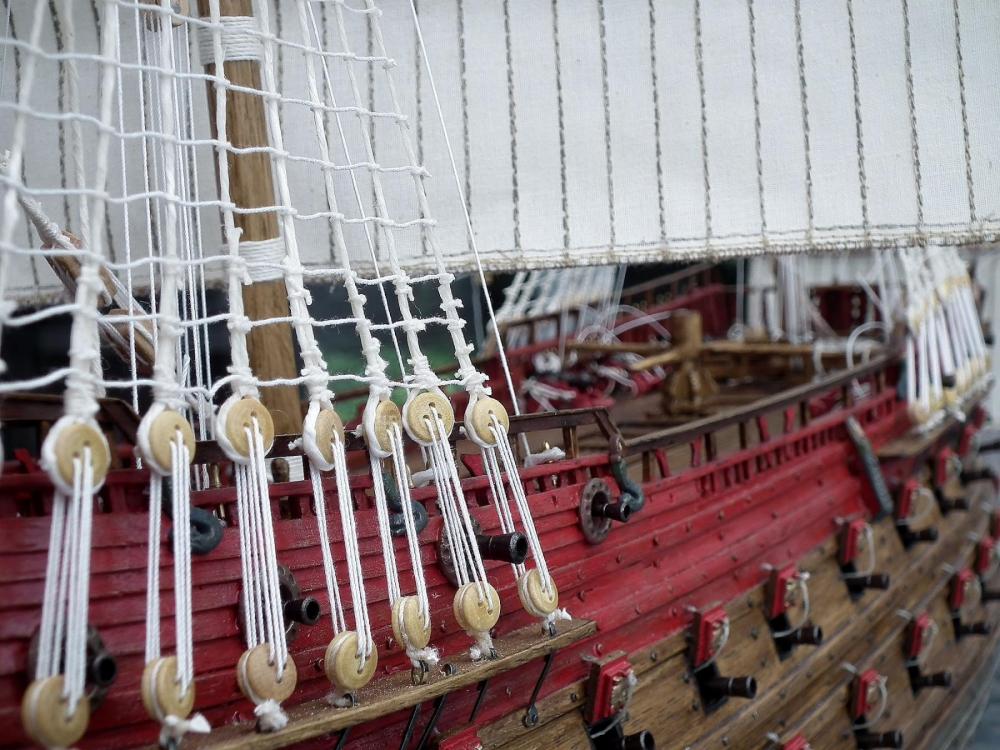
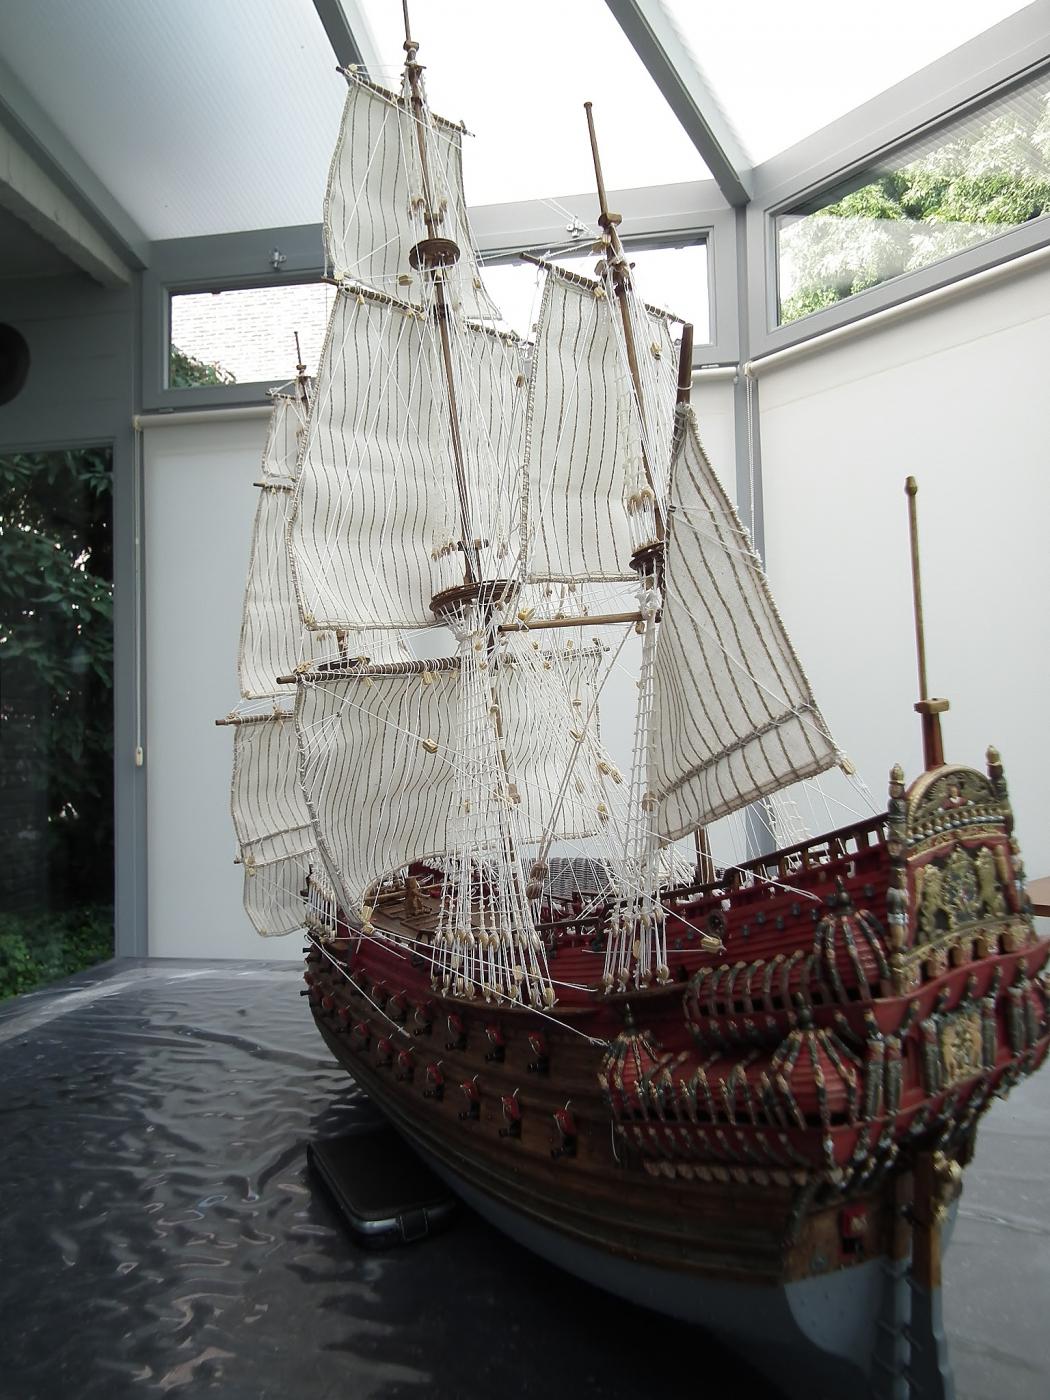
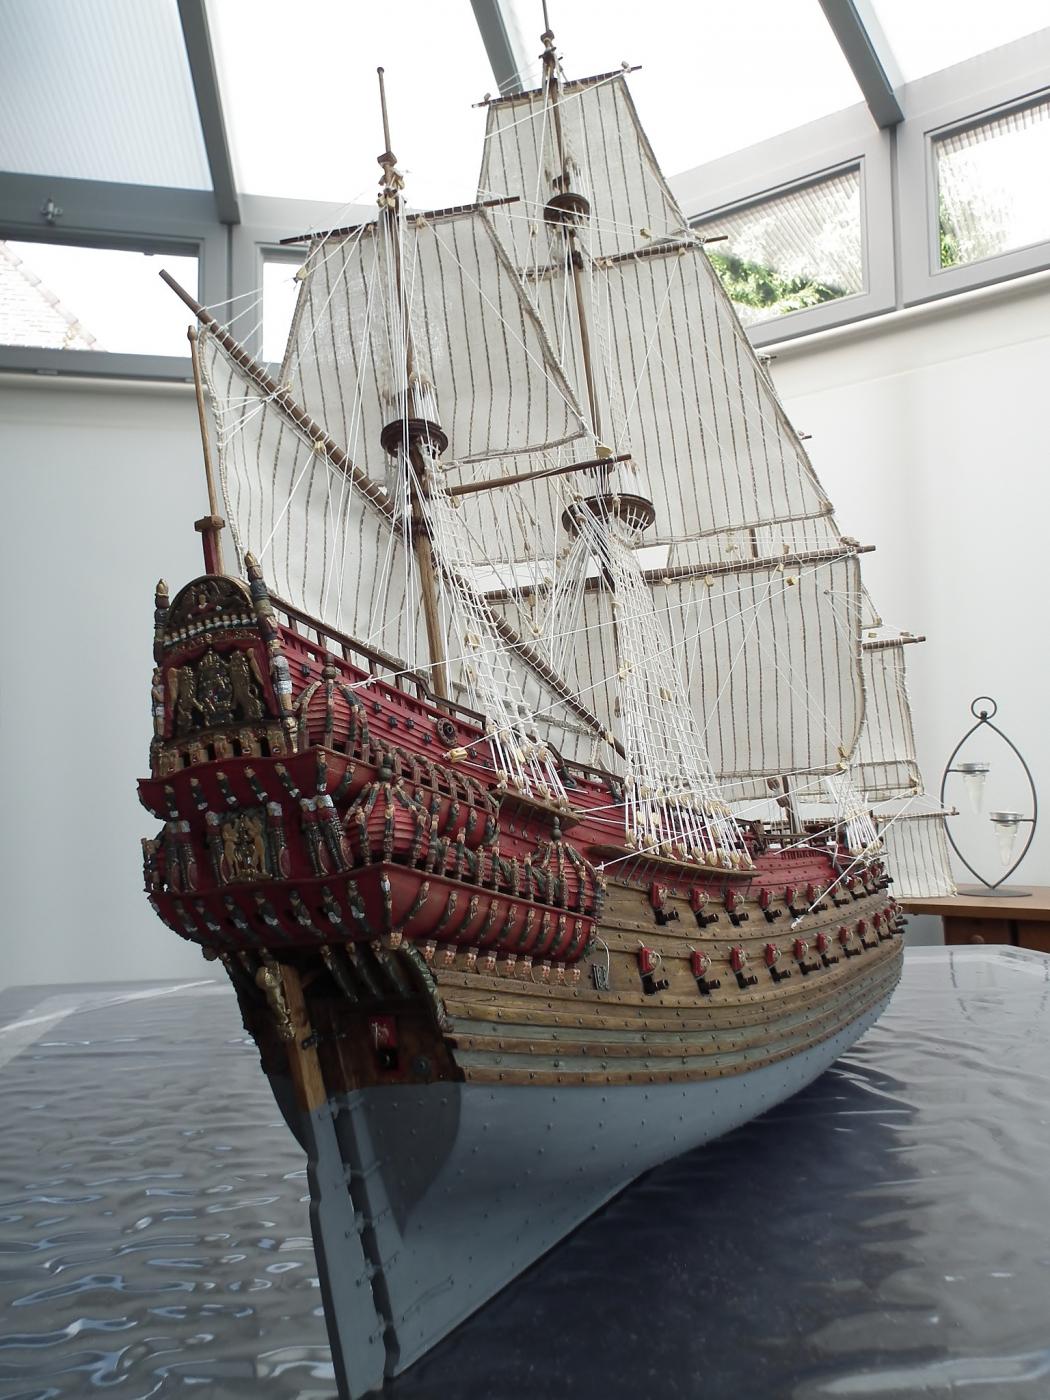
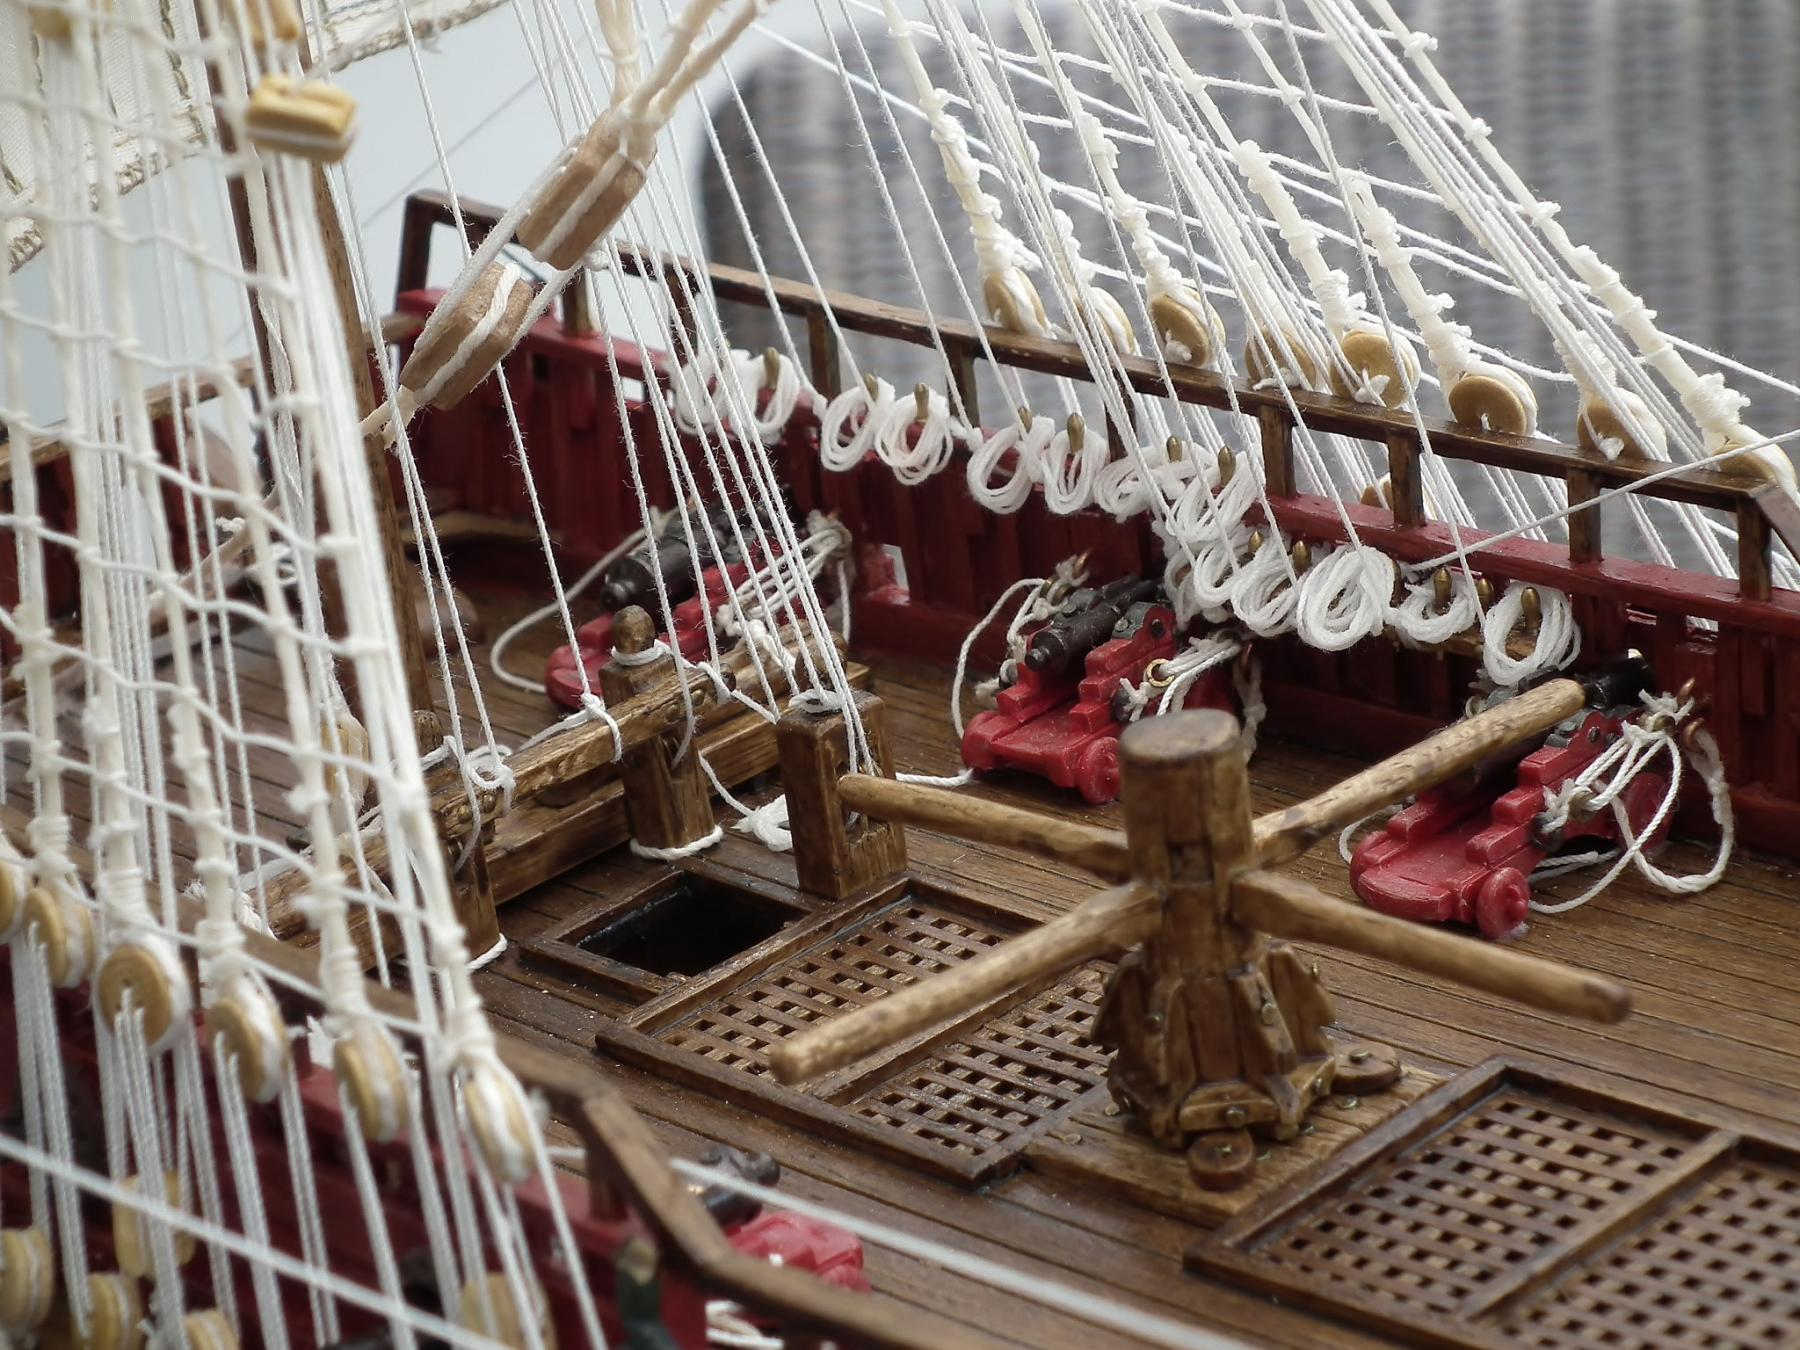
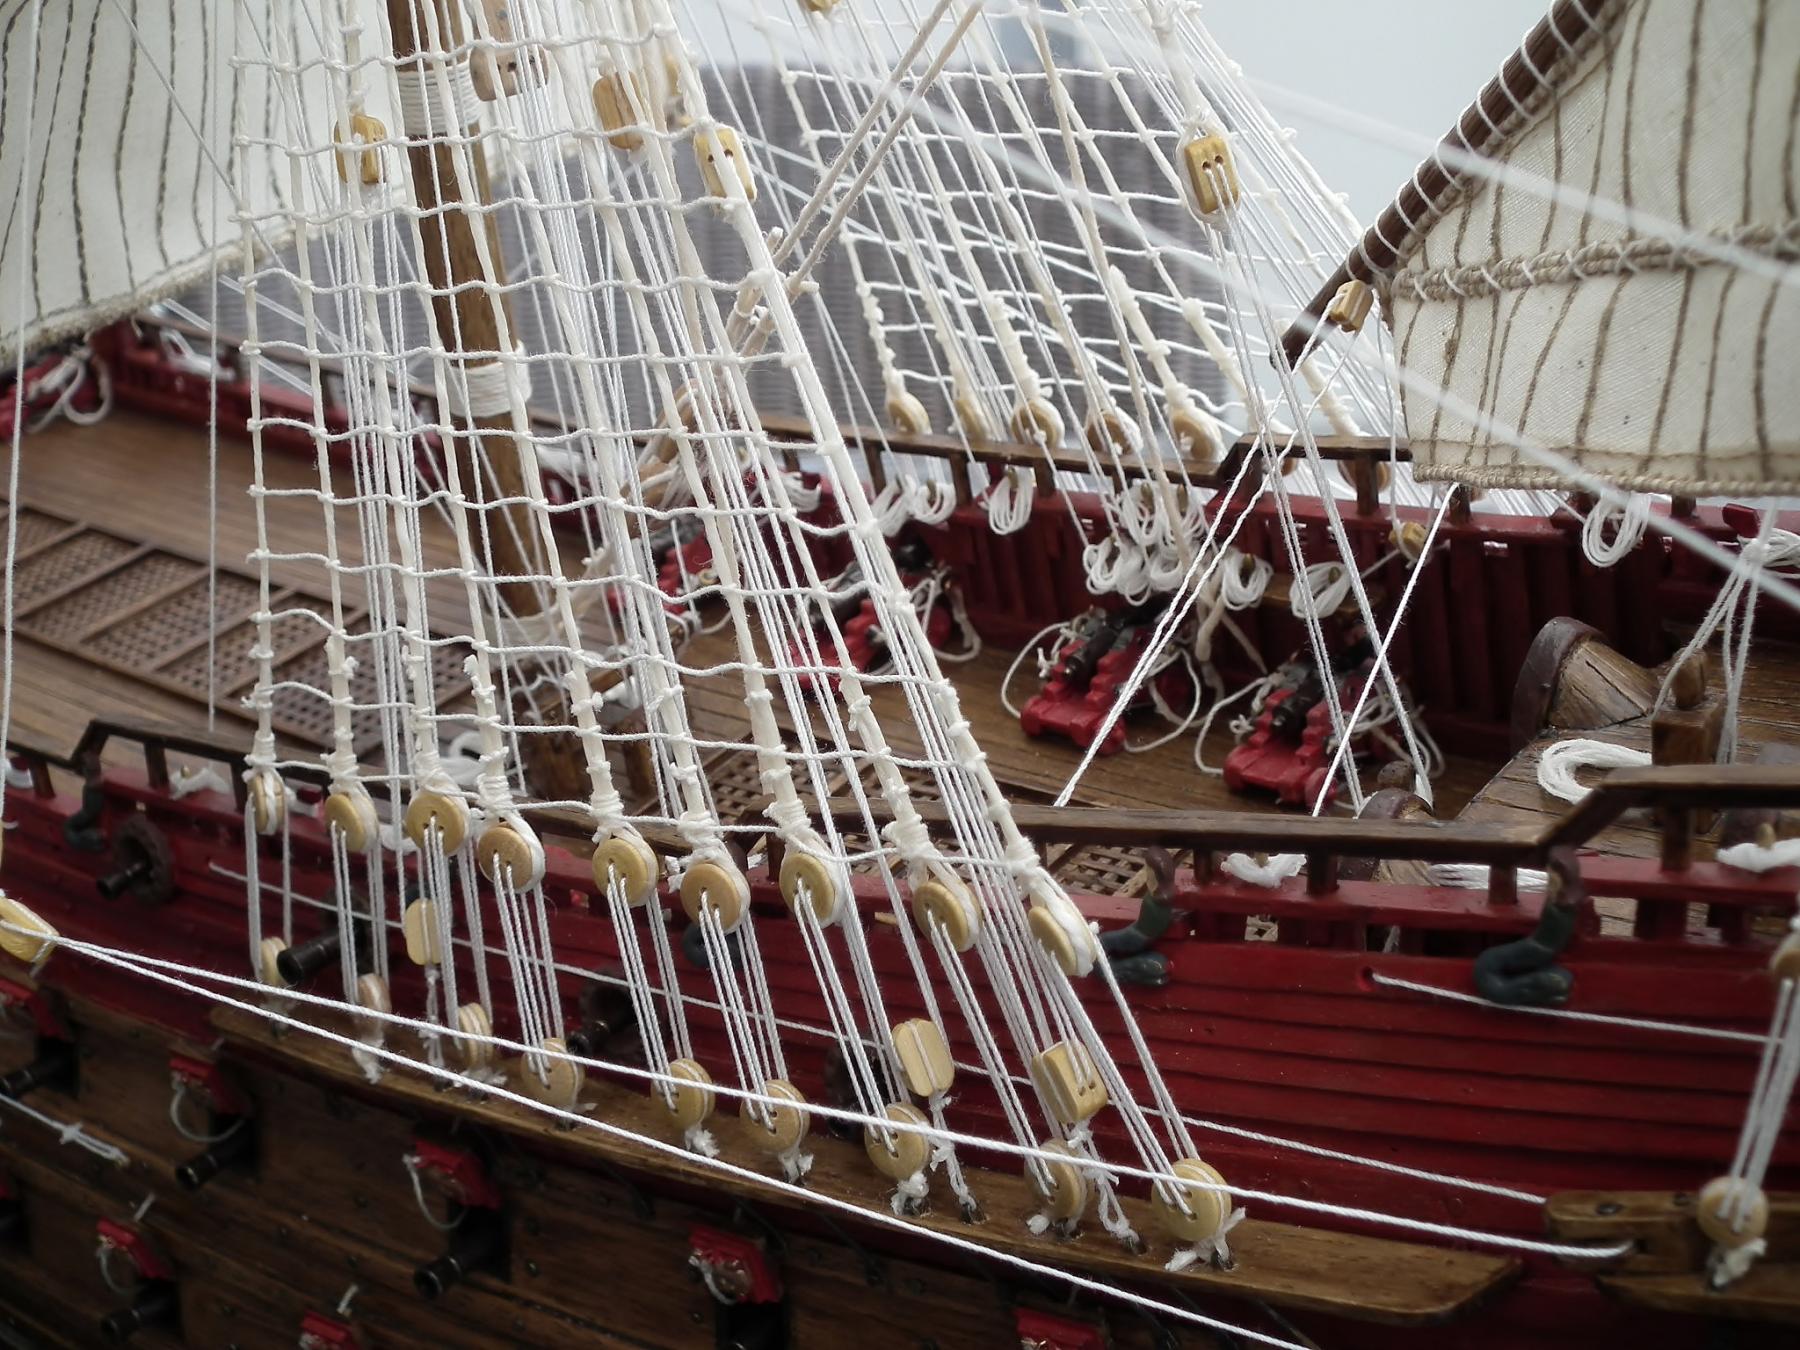
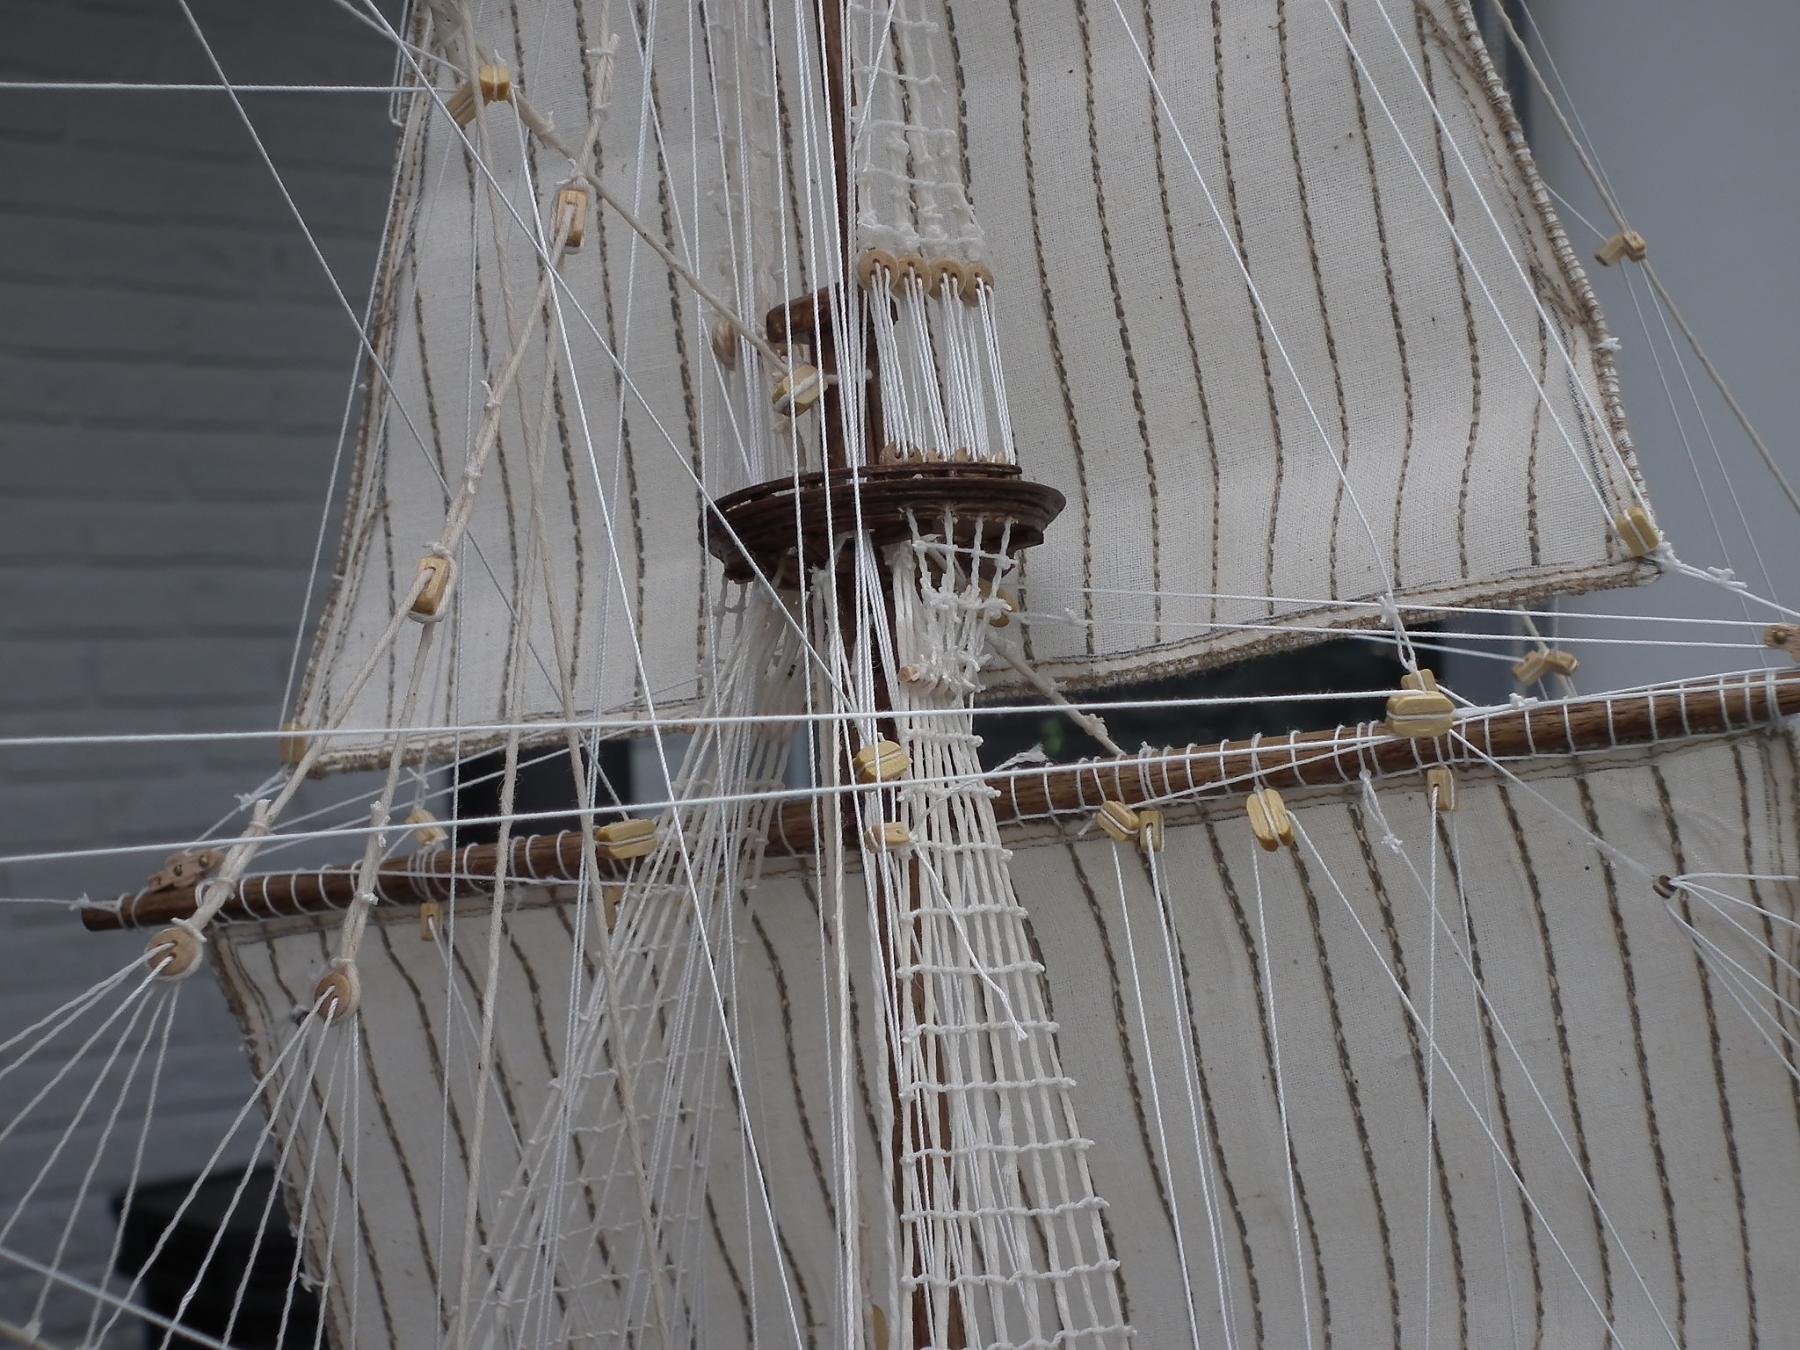
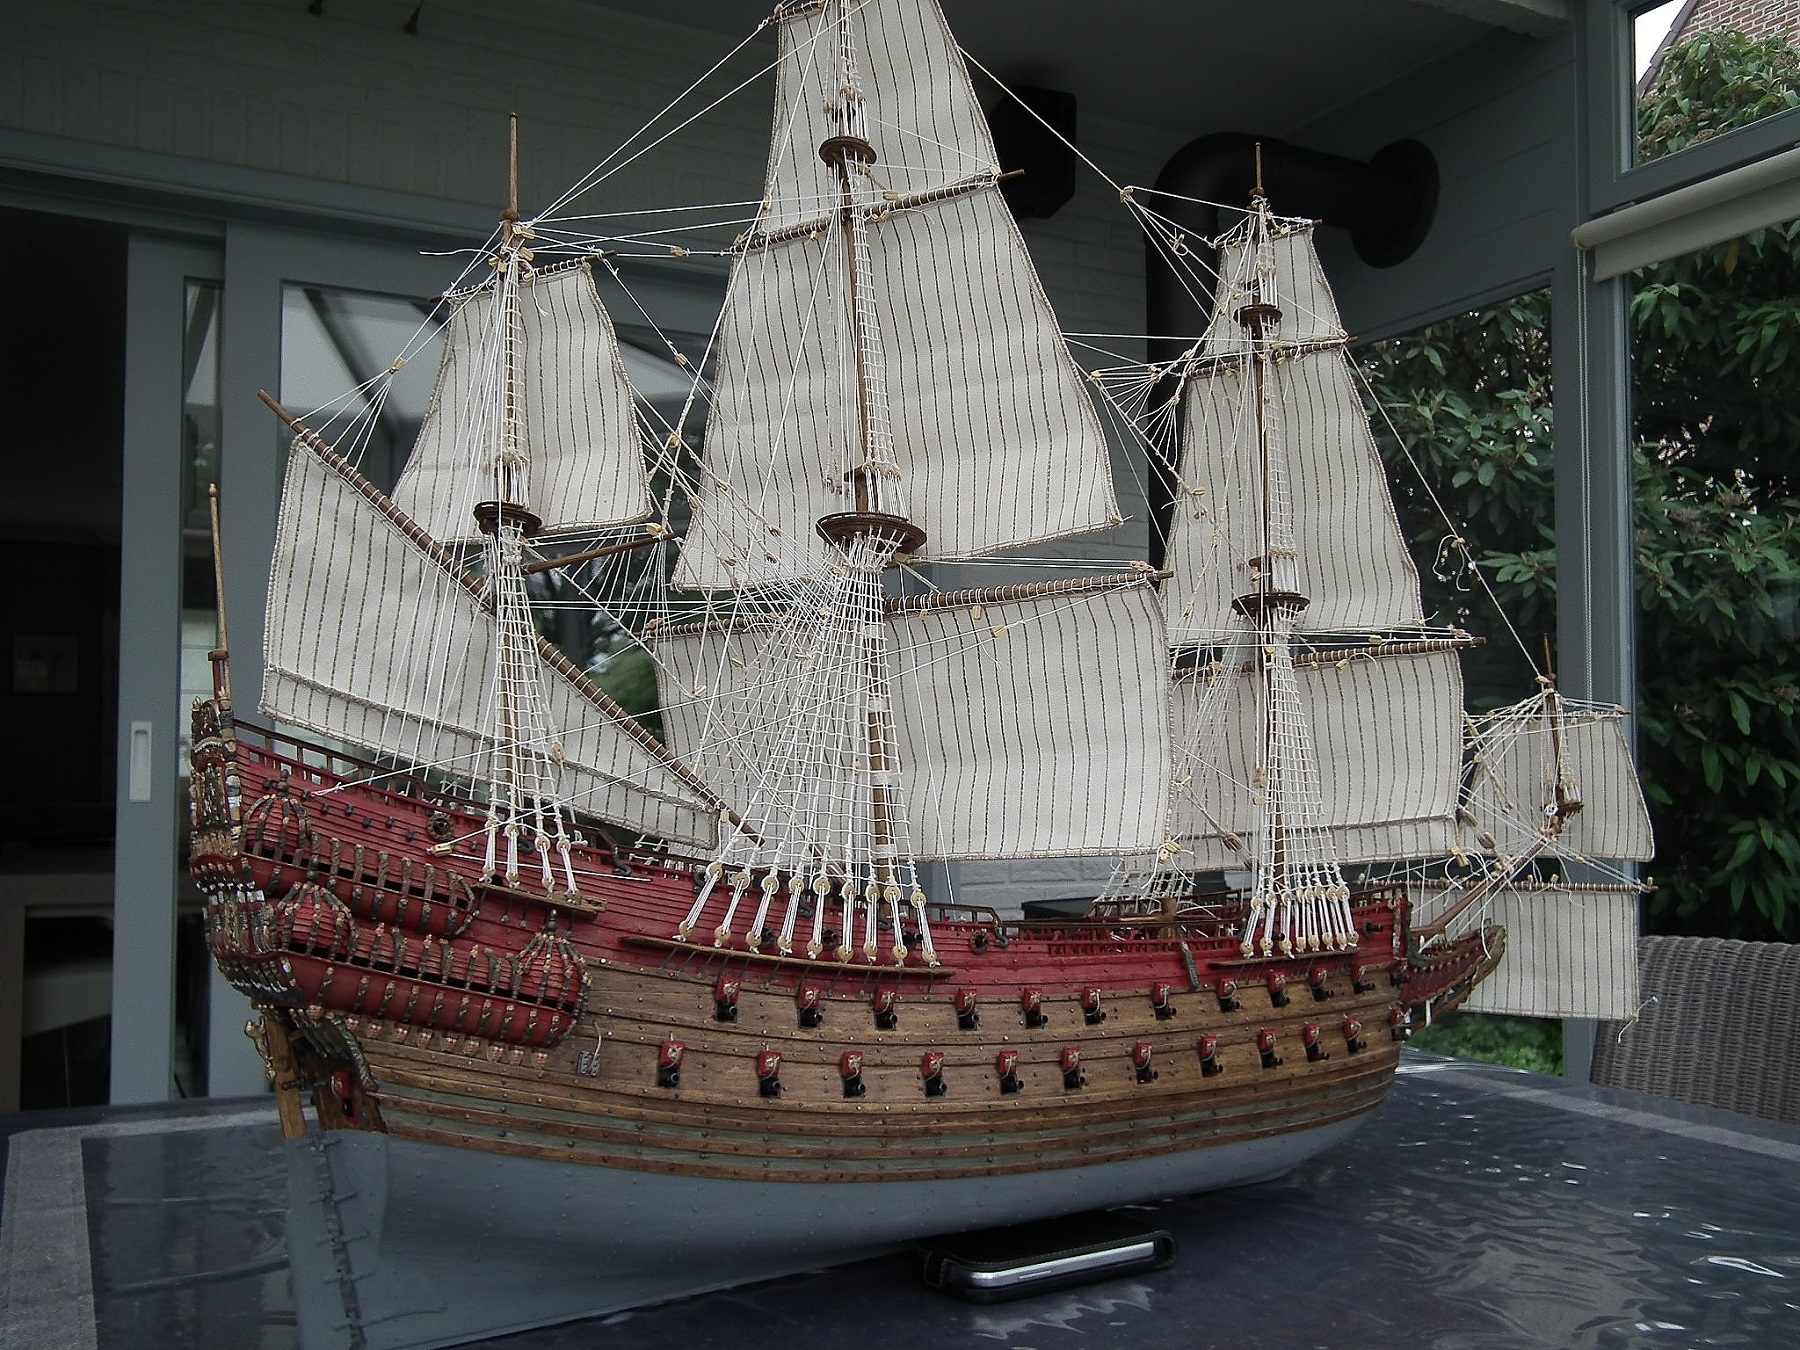
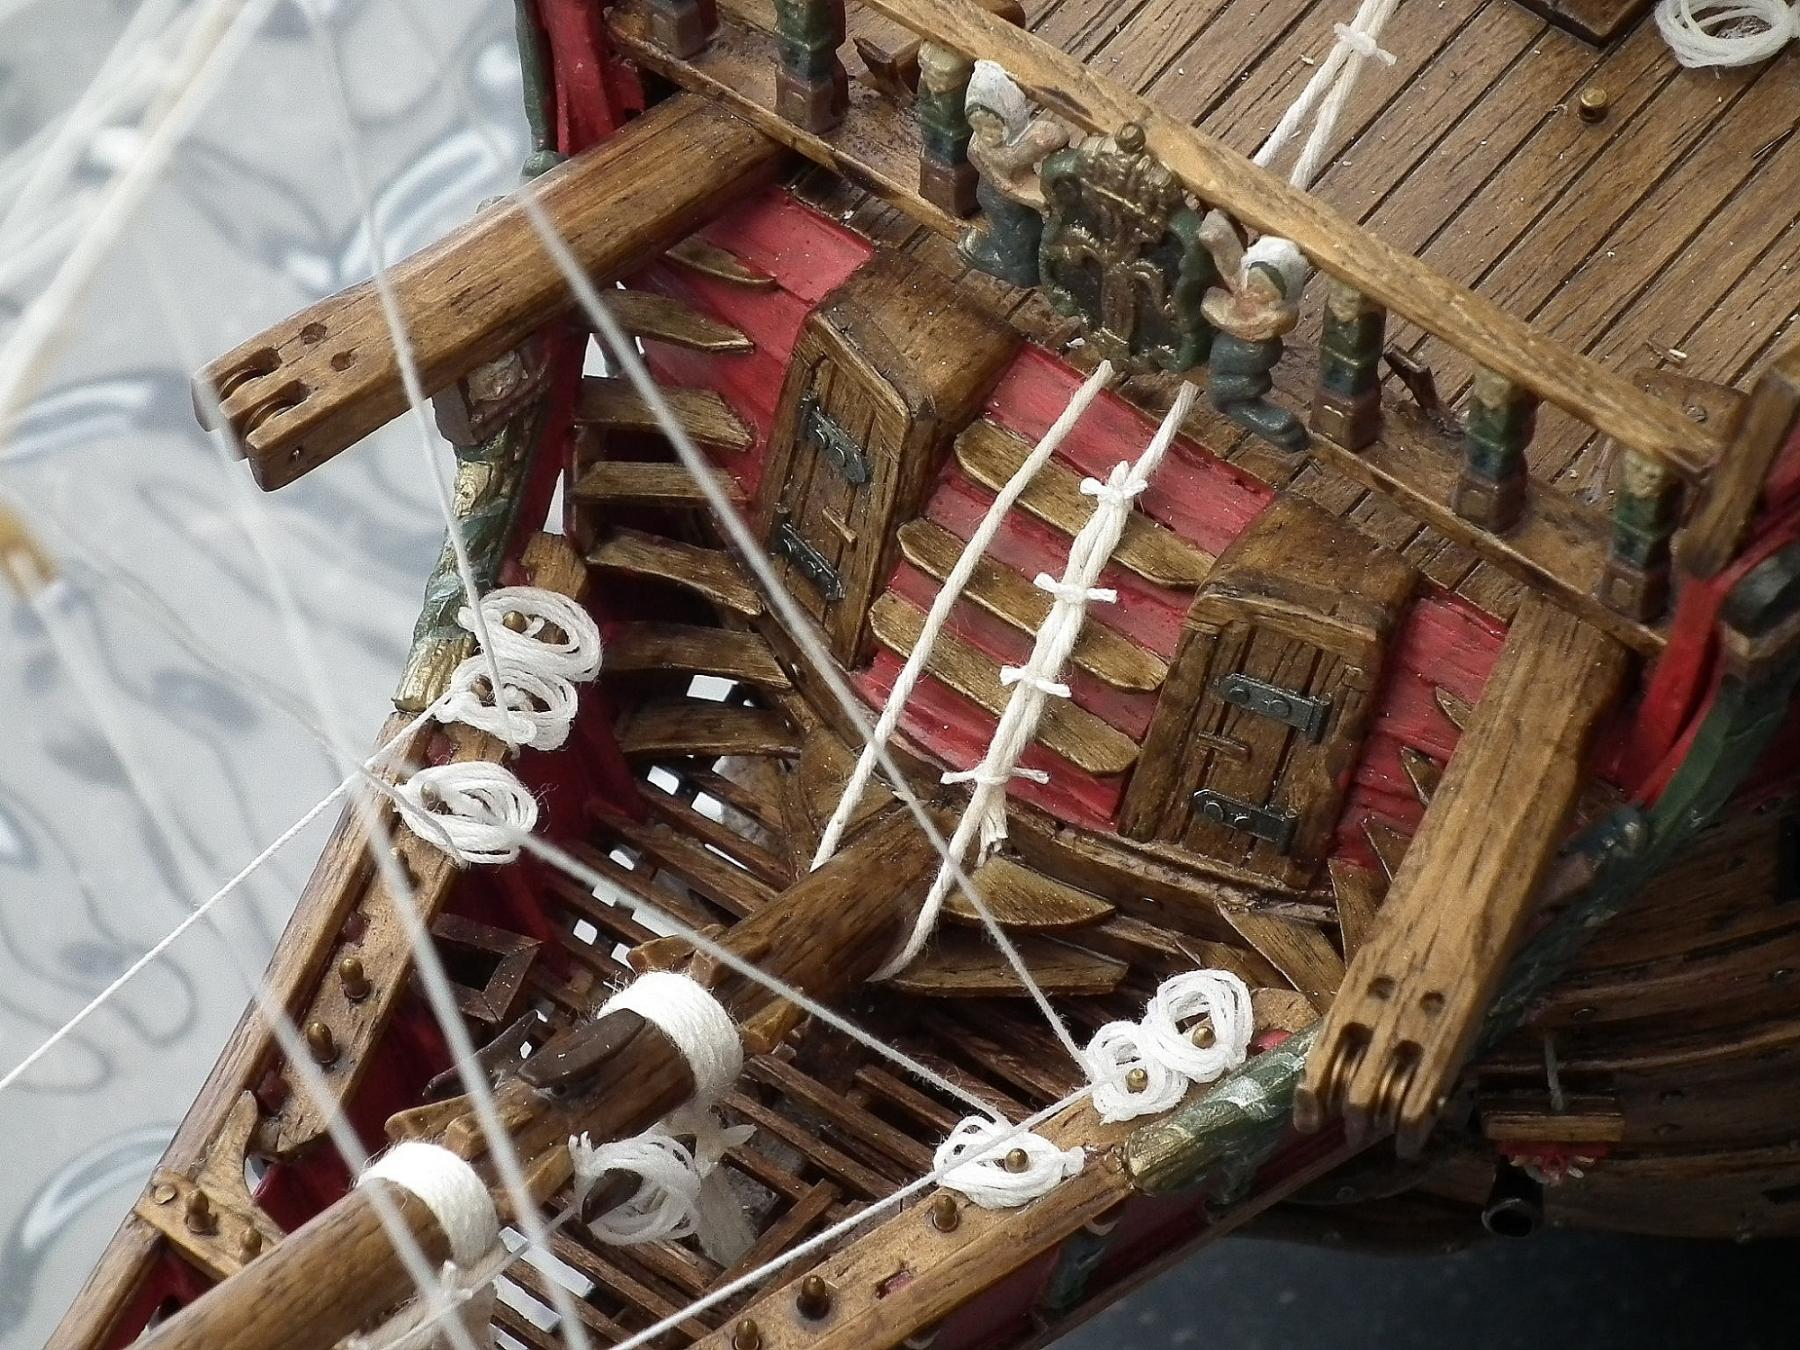
The rigging is now complete.Now still to do :flags
- The flags that come with the kit are a 30 year old and are a disaster...
Finishing the rudder with rope or chain- I should have done this at an earlier stage. I have now discovered
anchorsLantern??- Had the Wasa a lantern or not???
Creating a base for the model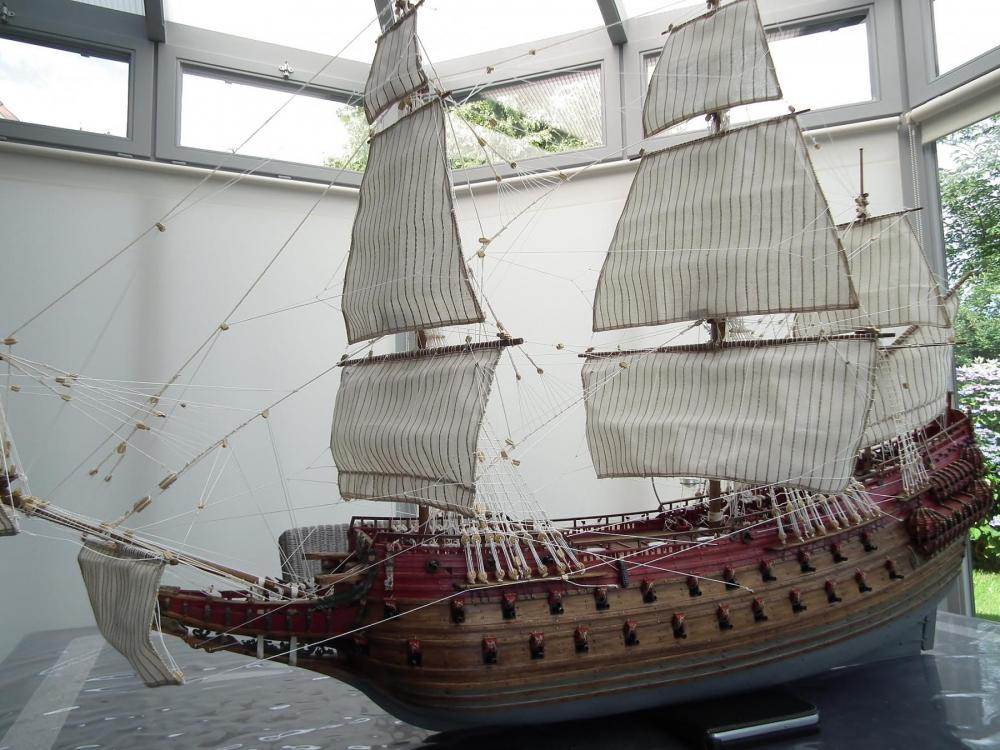


-
Thanks for the pdf,Unfortunately,I'm too far in the construction now too change this error on my model.
 And,Your model is and remains great !!!!To be jealous of
- md1400cs, WackoWolf and Salty Sea Dog
-
3
-
Frank, thank for your comments.
Thanks for likes, and dropping by (:-)
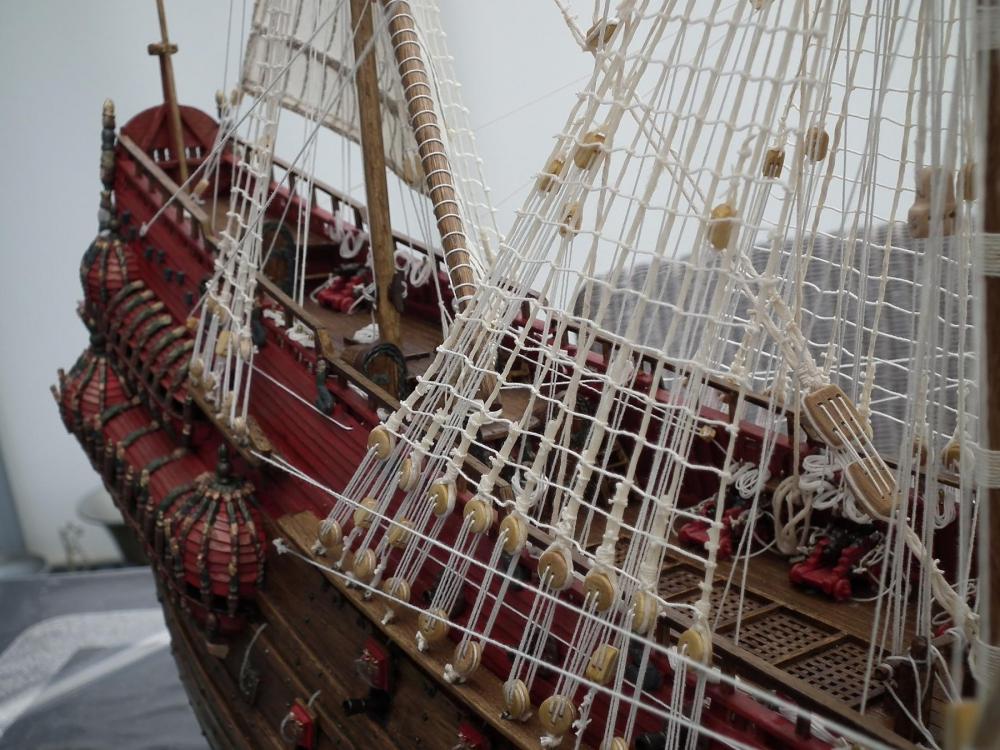
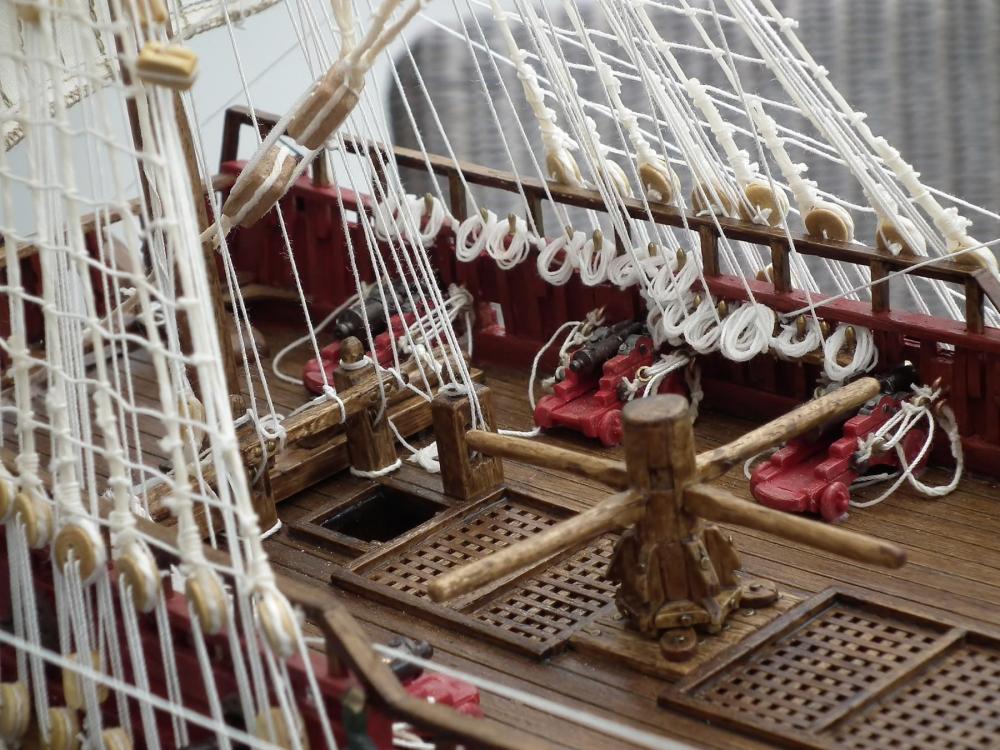
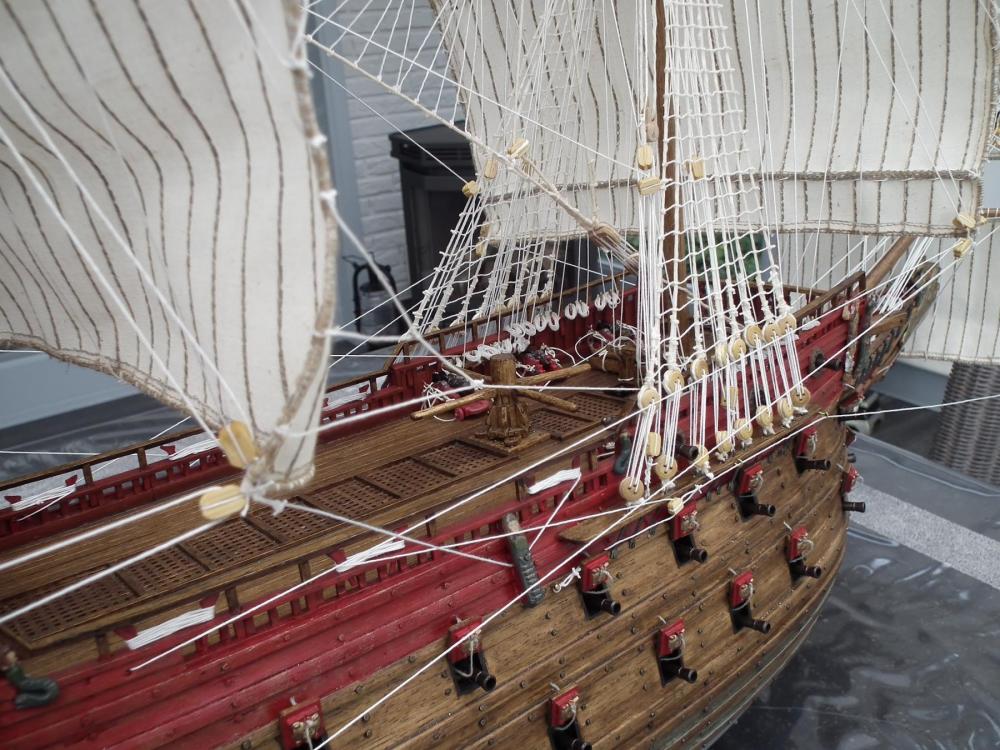
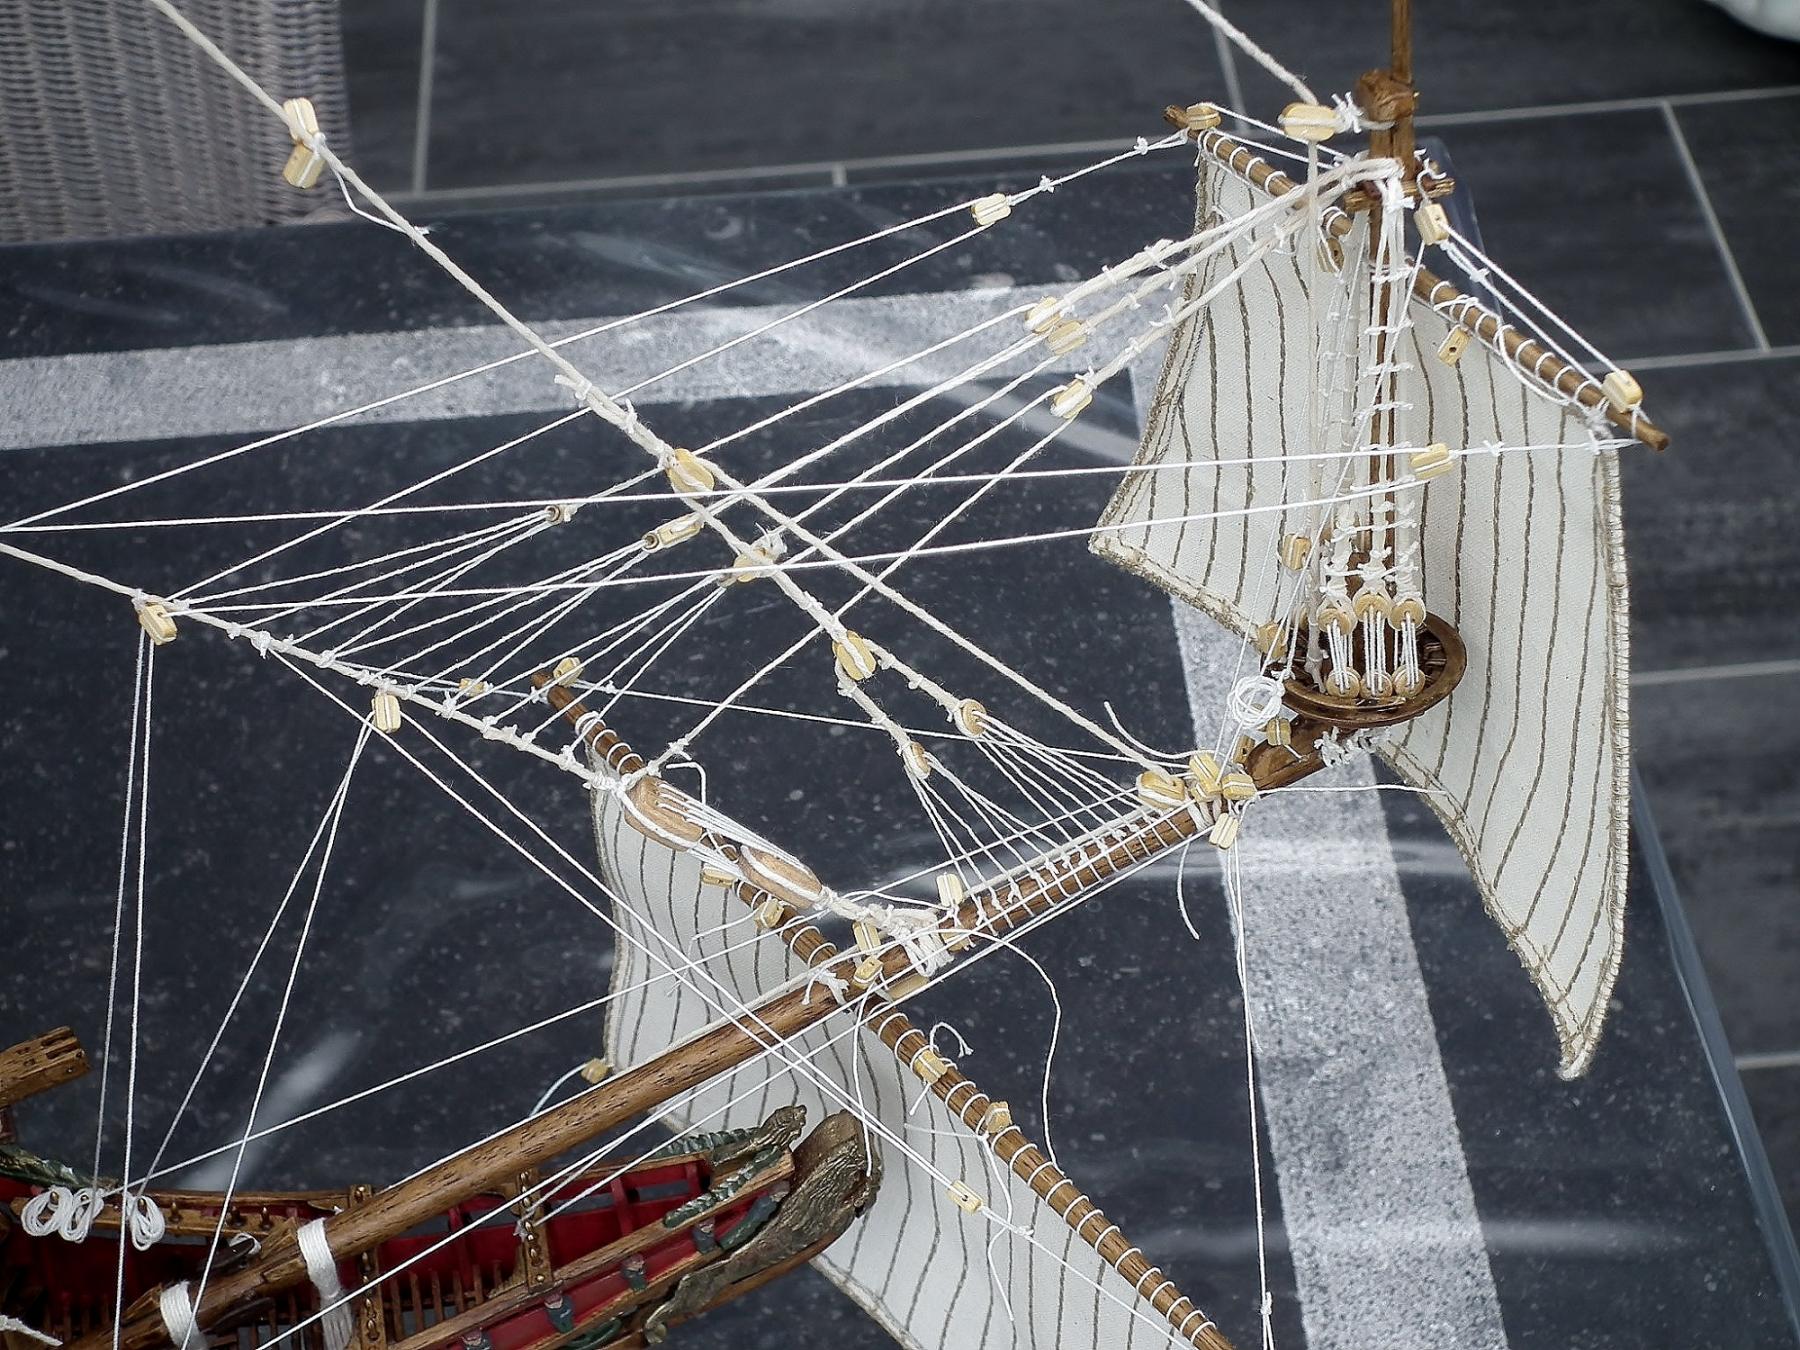
A few added small time consuming details, as I want to make sure that all needed items are in place before I attach the mainmast shrouds to their deadeyes.
Turns out that the pin rails that I had located at the quarterdeck were in error (first early photo). Fred Hocker said, “we got that wrong, those pin rails were added by mistake, it should have been kevels”
So pulled them out-did leave some scaring, and then put together a kevel for each side.
Aconcern from me :
I make the Wasa (Billing Boats) with sails and left these rails in place.
I will need every pin and kevel a can find for the needed rigging for these sails.
If you remove these pin rails i think that you wil not have enough kevels for your rigging if you add sails.
Greetings
Patrick
Ps,
If there are some misspellings in my english sorry
-
Thanks,With each step closer to the finish of this model i get more and more respect for builders of wooden model ships.With the military plastic models that i build, you need tho think always one step in advance. Or, you get in trouble !!With wooden ship models it's five steps !!!As i have discoverd over the past 10 years ....
-
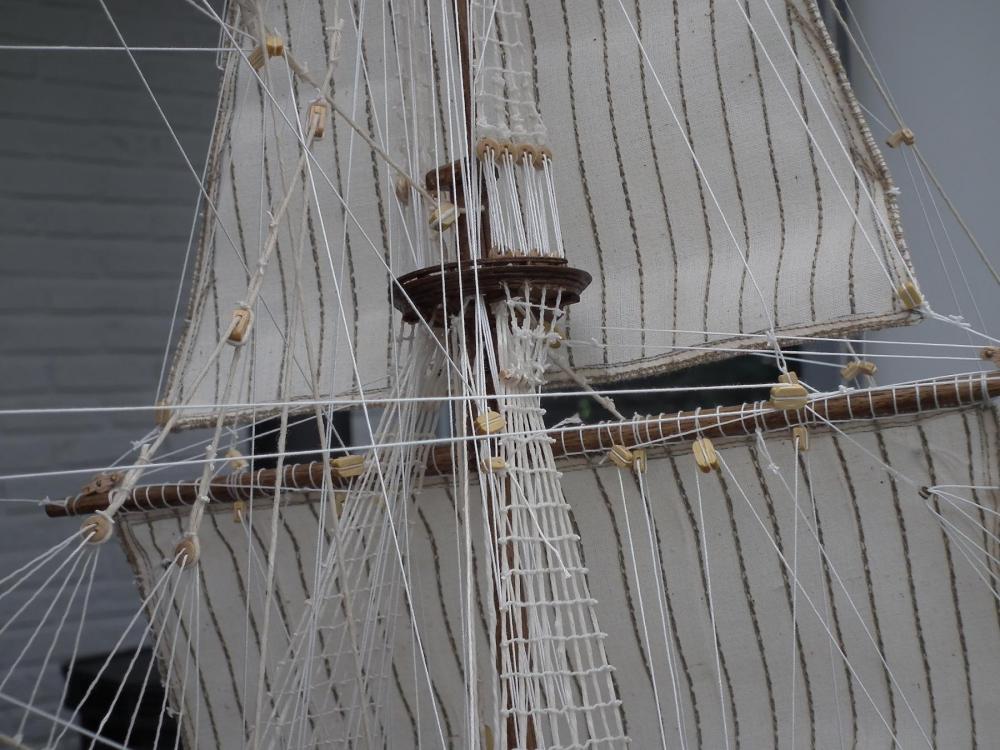
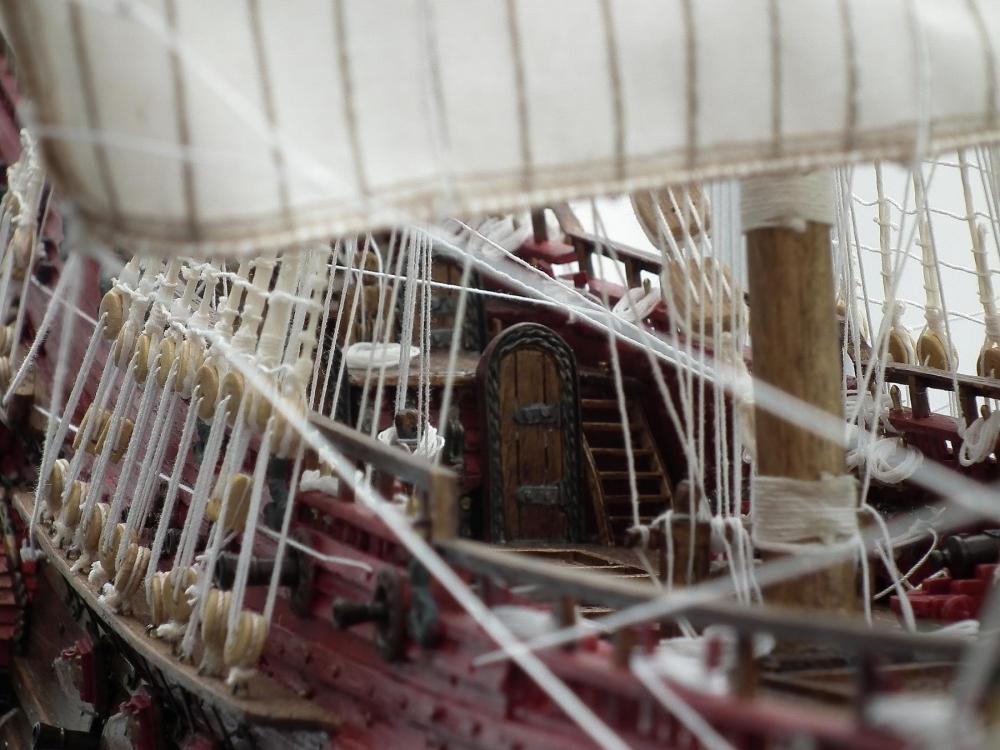
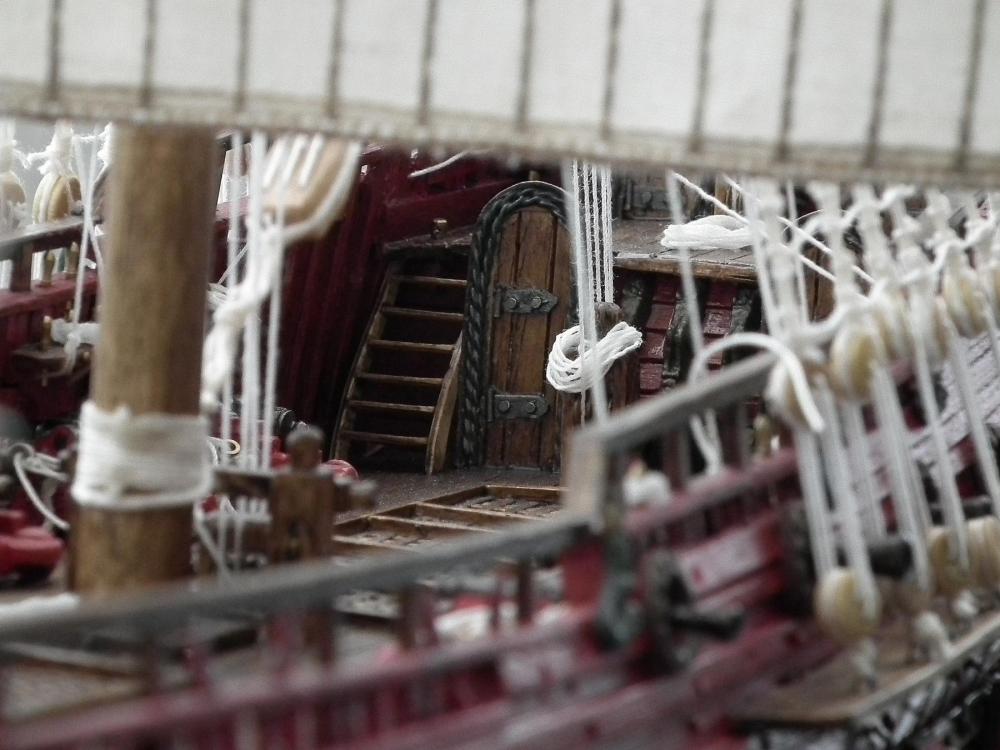
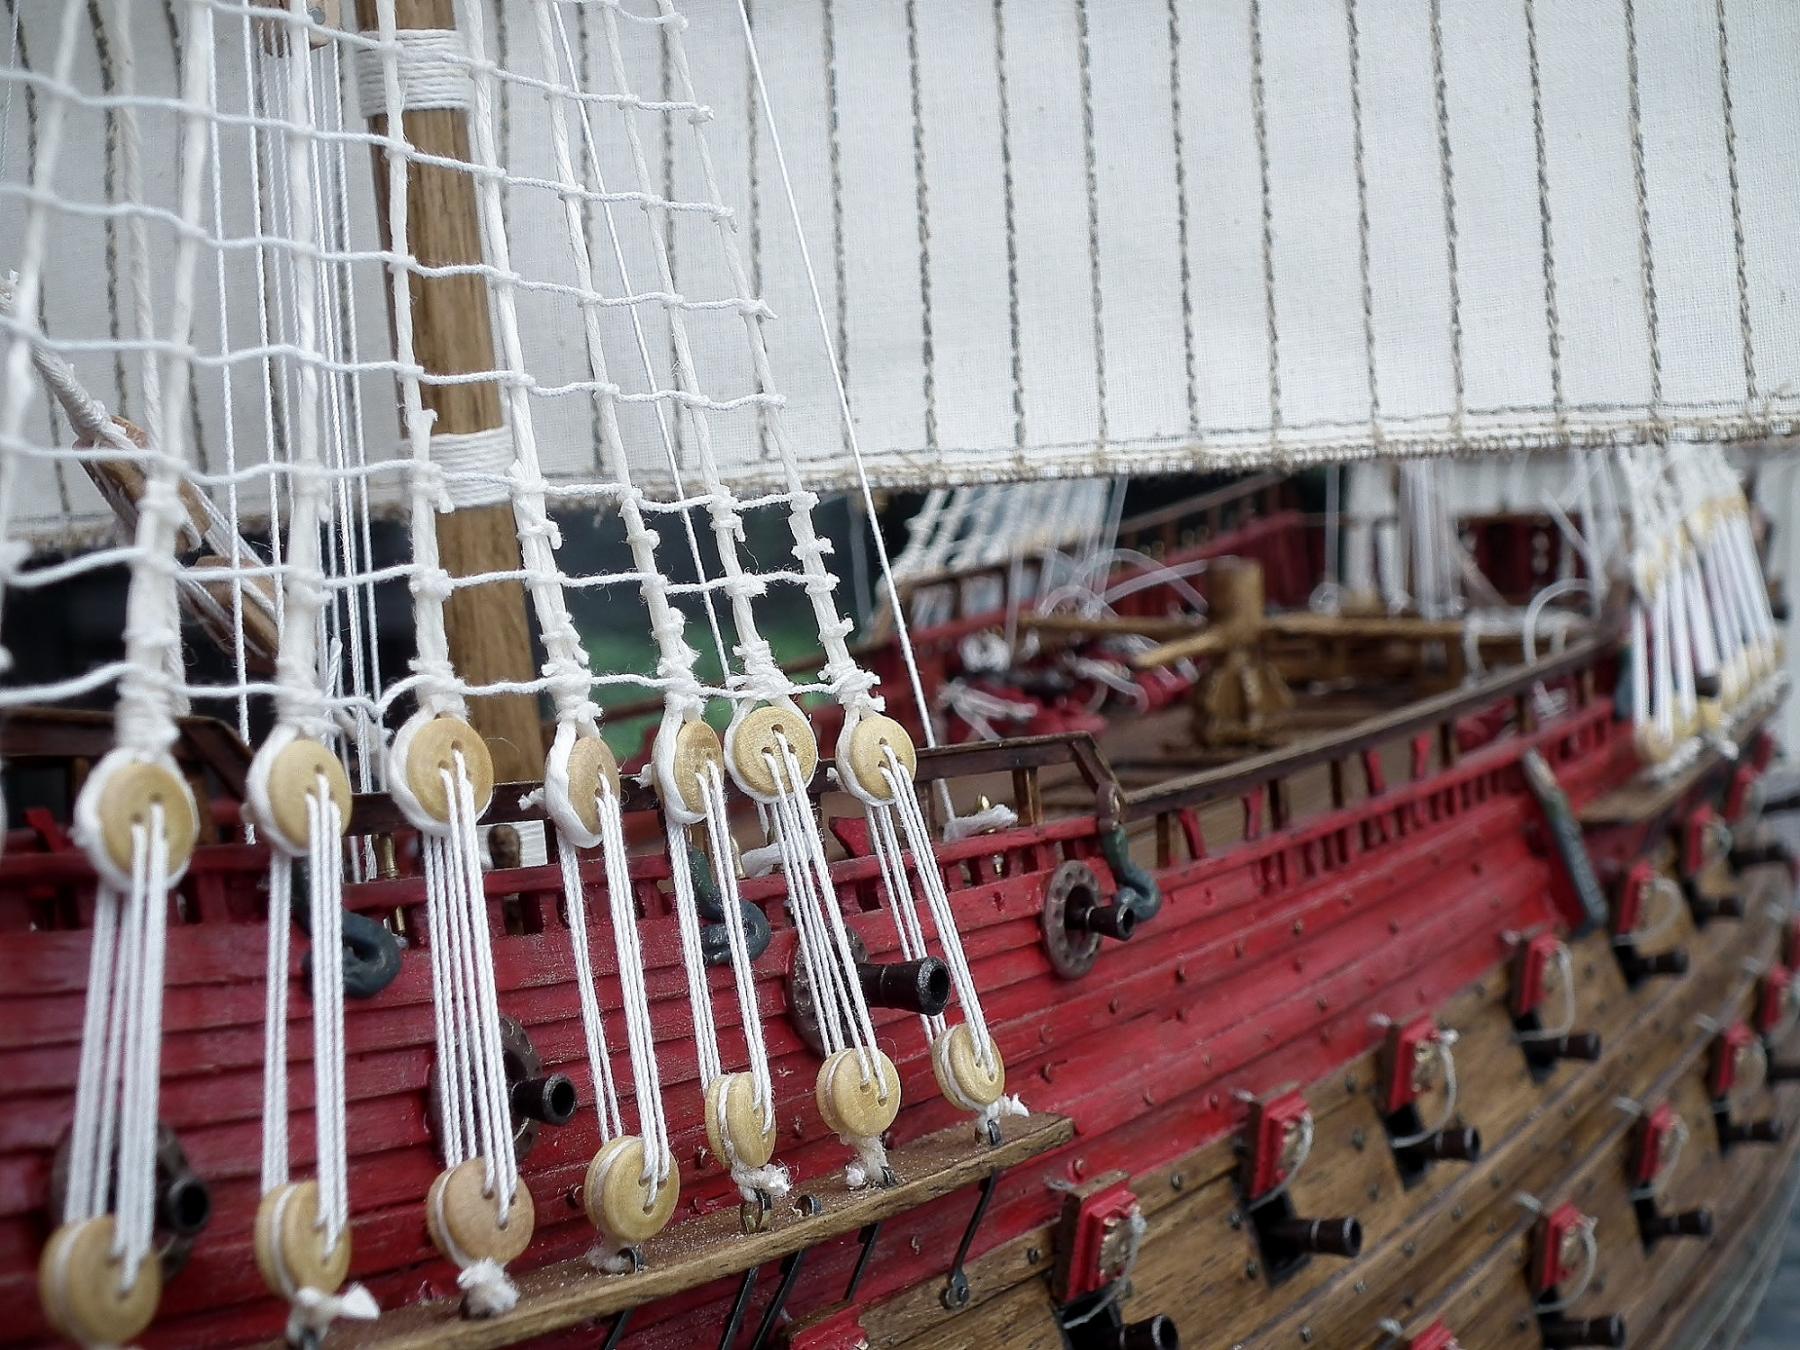
Hello everyone.I have attached the sails and part of rigging.It begins to look like a sailing ship.


- EJ_L, J11, Shotlocker and 16 others
-
19
-
The Vasa from Billing boats is a good kit.But with allot of extra work before you get a good model.Once the plastic figures are painted.What is then the difference with bronze figures? i dont now.I am building the Wasa from Billing also
View my model on :
http://modelshipworld.com/index.php/topic/13249-wasa-by-backer-billing-boats/
-
-


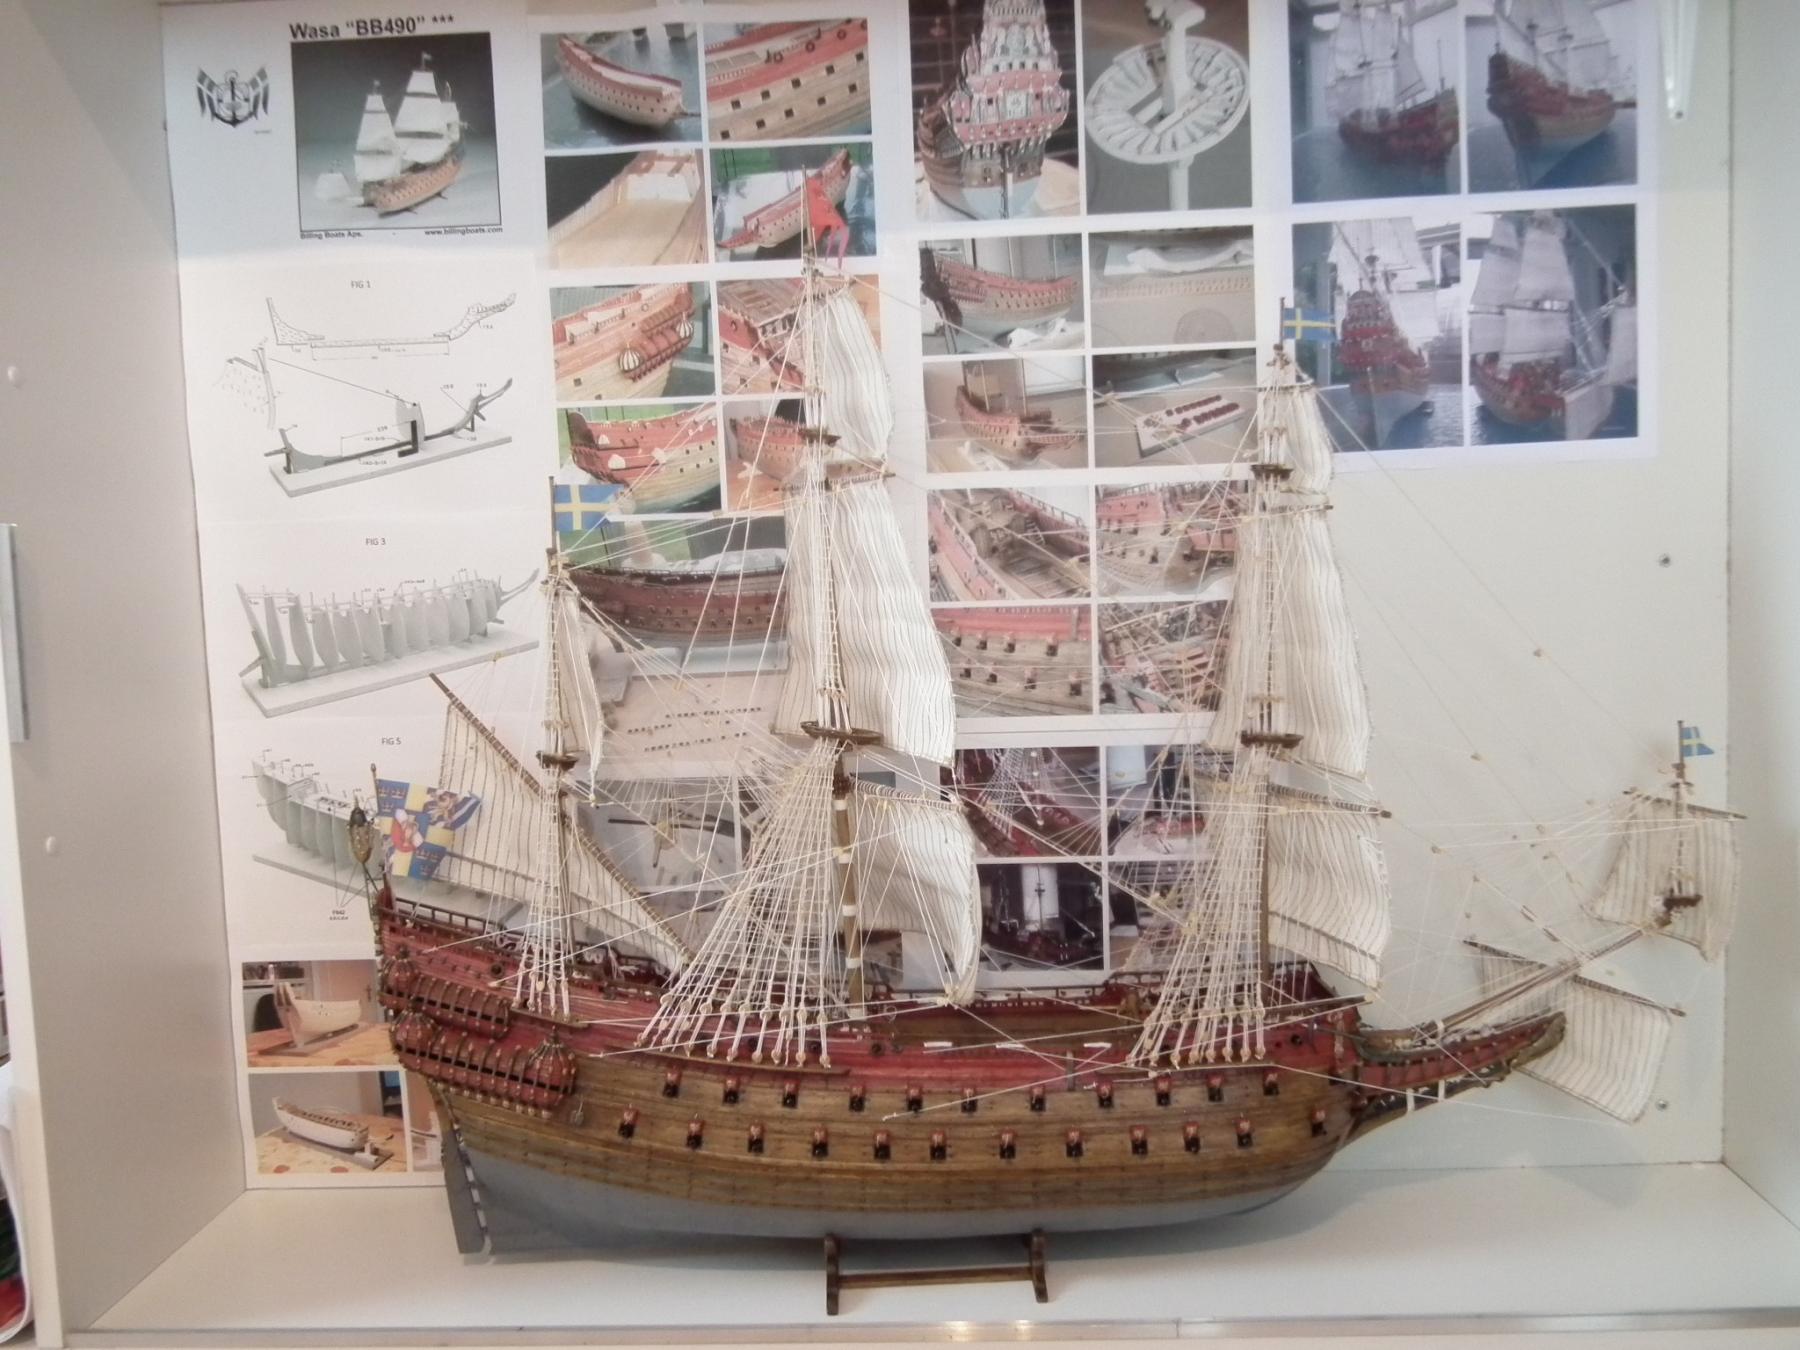


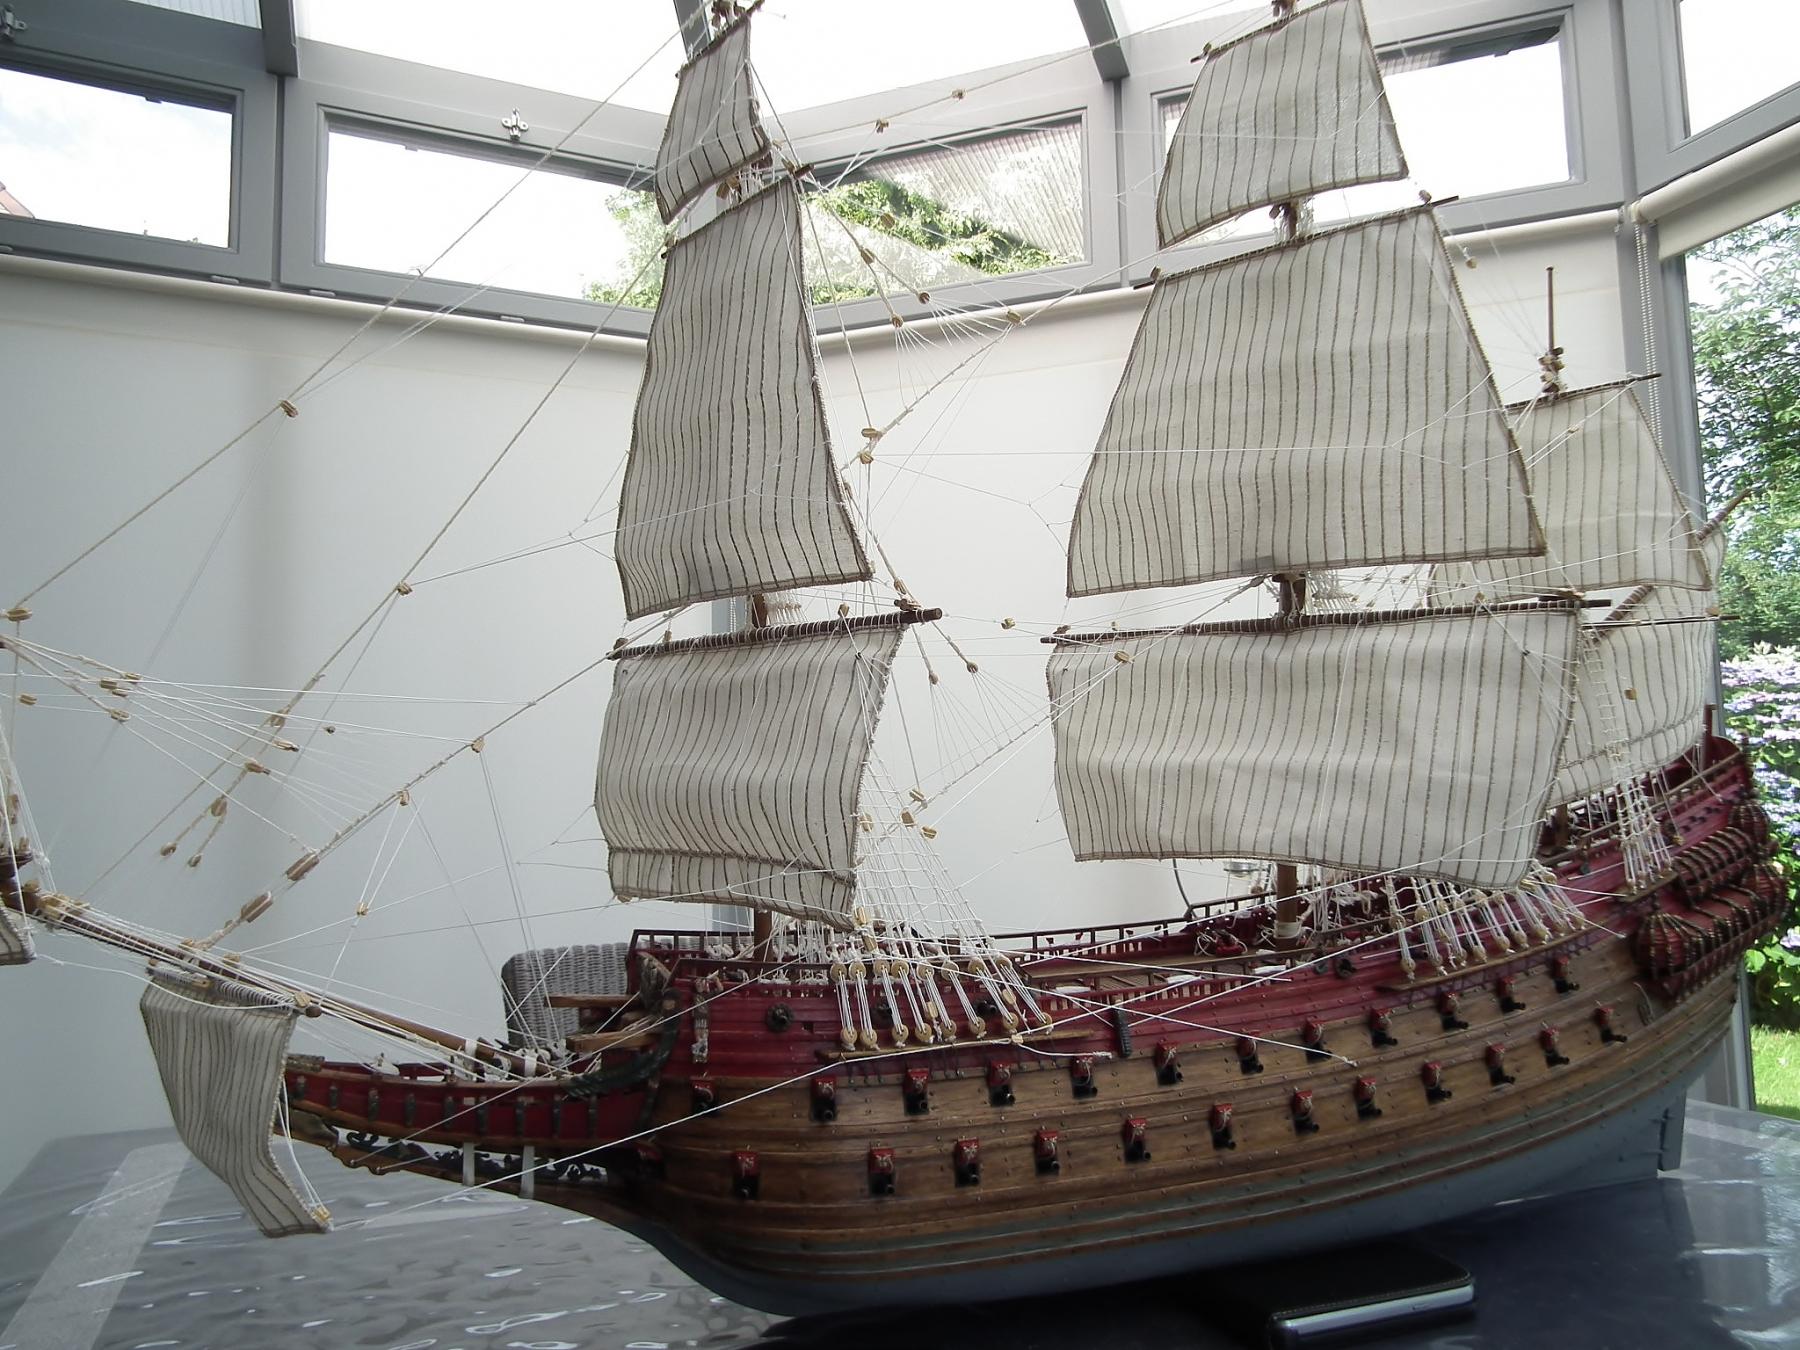


Vasa by Baker - FINISHED - Billing Boats Scale 1/75
in - Kit build logs for subjects built from 1501 - 1750
Posted
Thanks for the positive comments