petervisser
-
Posts
578 -
Joined
-
Last visited
Content Type
Profiles
Forums
Gallery
Events
Everything posted by petervisser
-
 Hey Luca, I am really enjoying your log of Cutty Sark. I intend this to be my next model so be warned, I will be poaching some of your great techniques! Hope you don't mind. Great photos too of great build. Cheers, Peter
- 121 replies
-
- 1
-

-
- cutty sark
- artesania latina
- (and 1 more)
-
Wow Popeye, I just got caught up with your Half Moon build. VERY well done. Einar Billing would be very pleased, I'm sure. You are one of those rare breed of ship model builders who seem to have real fun, building, improvising, and crafting different aspects of the build. And, passing on all these little nuggets of your experiences to others. A rare talent! Keep up the great work. Peter
-
Hi Alex, There is an article on the site which I cobbled together some time ago that may be a help. Go to MSW Site & Article Downloads link at the top of this page, then click Article/Downloads, then Furniture and Deck Fittings, then Building a Display Case. Believe me when I say, I am no capenter but I did build a rather large case for my last model. It does not use channelled wood to join the corners of the case. Instead it uses angle stock inside and outside the corners. It is quite strong in that I used glass to make up the case. However, you can use plexi-glass as it is lighter and probably safer. Have a look at the article. It might fit the bill. Cheers, Peter
-
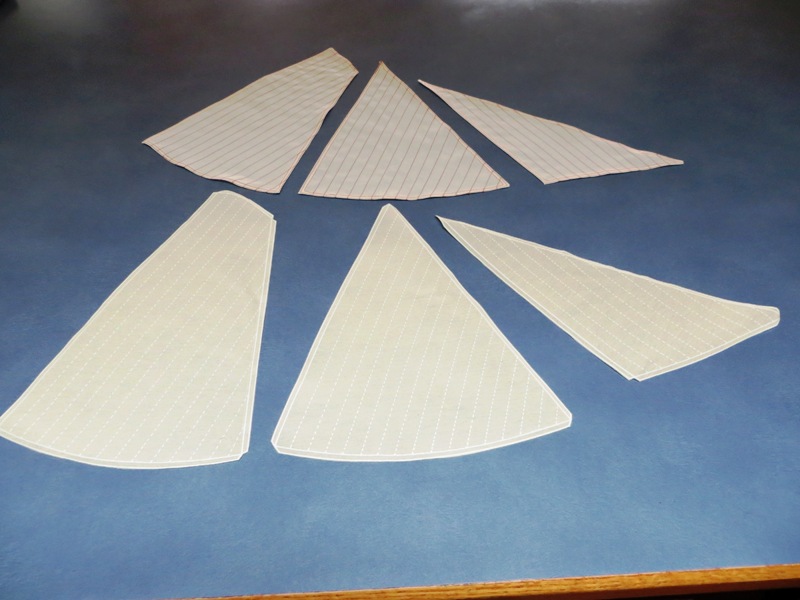
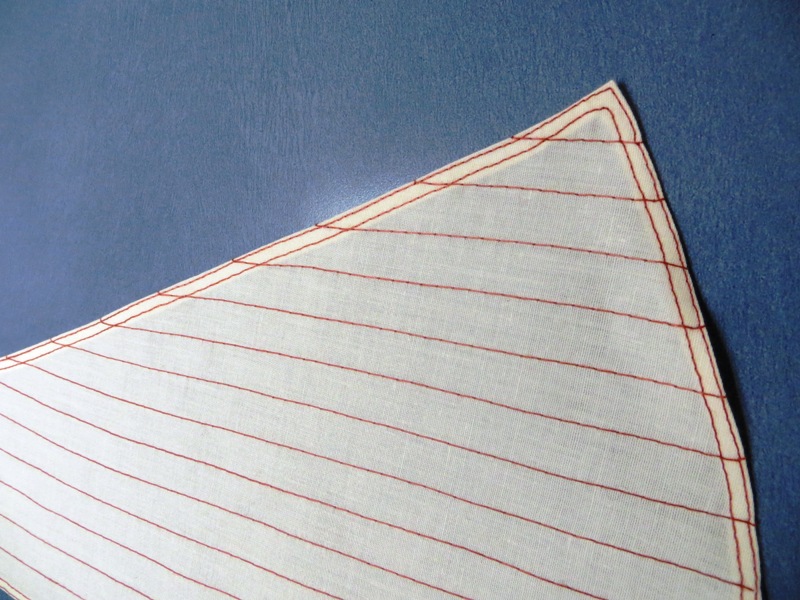
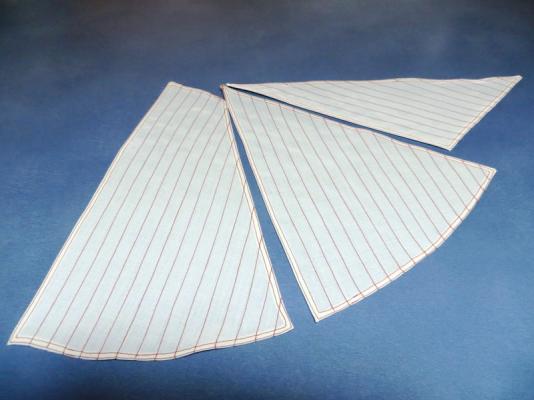
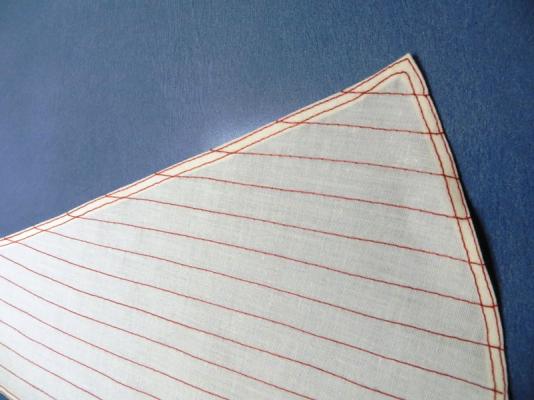
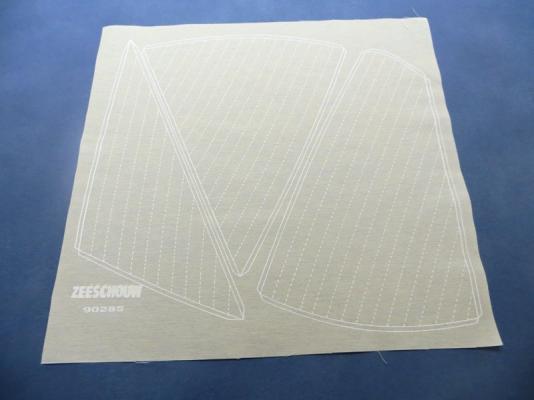
Another little update before work is interrupted. My wife has completed the sails. I have a bolt rope to attach still, but the hard part is complete. I am very happy with how they turned out so far and will have to make it up to her somehow. I'm sure she will fill me in on "how to" on this... Here are the "before" and "after" sails. The finished sails. A close up of her handy-work. A little teaser on the overall affect. I teased her a little this morning, telling her that my next model will be the Cutty Sark which has about 20 sails to be sewn. Her response..."Well, I guess I'm going to give you some sewing lessons" in a matter of fact tone... I'm thinking "bare poles" for that model. Peter

- 109 replies
-
- 5
-
-
- zeeschouw
- billing boats
- (and 1 more)
-
Yes Popeye, I am a lucky man. With my previous models I have hand sewn the sails, but they look a little unrefined. Passable, but they could look a little better. So this time I opted for some "professionally' sewn sails. I still intend to sew on a bolt rope which I can do myself. I enjoy sewing, but the machine is a little intimidating. Besides, if I am taught how to use it now, I will have totally forgotten how to do it again when the time comes. My next model won't have sails you see. The model will now take a little hiatus while the sails are being sewn. And I return to work in a few days which takes me away from model building. Oh well, the end is clearly in sight. Cheers, Peter
- 109 replies
-
- 1
-
-
- zeeschouw
- billing boats
- (and 1 more)
-
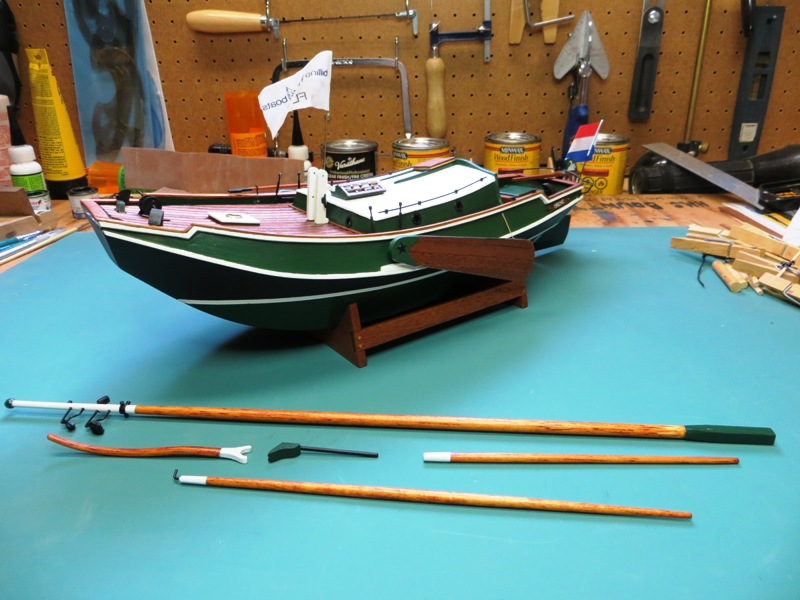
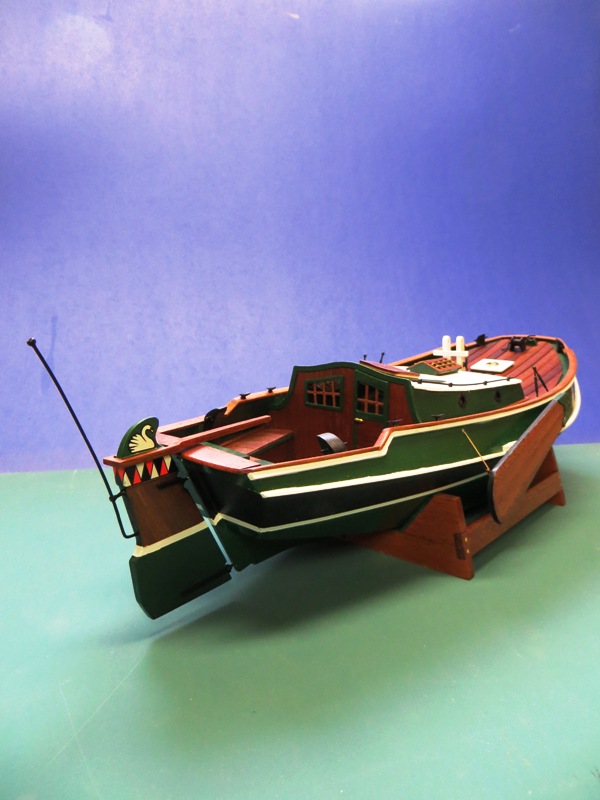
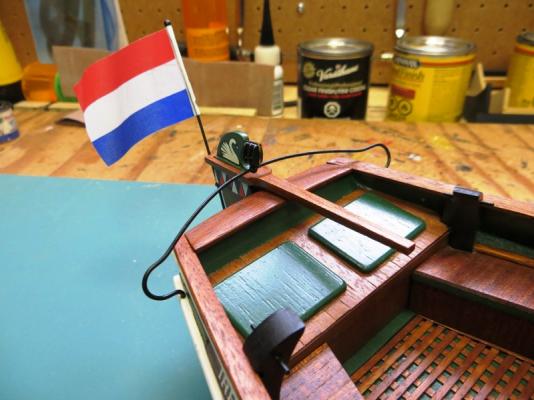
Attention zeeschouw fans... another minor update. I have been working on the mast and its jewelry along with the other spars. Just a matter of staining, varnishing and painting really, but it does take time to put it all together. I also managed to make an athwartship traveller for the boom. Believe or not, I managed it the first try. I was certain it was going to take several attempts at getting the right bends at the right size. The flag is also flying! I used the flag supplied with the kit and am pretty happy with how it turned out. So here are a few more pictures... The flag flying from the the stern. I used some varathane to soak the material and then wrapped the flag around several dowels to give it some curves and life. I used some scrap material to experiment with to find out what, and what not to do. A shot of the traveller for the main boom. A shot of the boat with the mast and spars ready for mounting. My wife has kindly offered to sew the sails on her machine. She's awesome! They are a work in progress so I will wait to step the main mast until I can get the sail bent on. Stay tuned...


- 109 replies
-
- 9
-
-
- zeeschouw
- billing boats
- (and 1 more)
-
Lilla Dan by Billing Boats - moved by moderator
petervisser replied to ronc's topic in Wood ship model kits
Hi Ron, I just stumbled onto your request of drawings for Lilla Dan. I completed this kit a number of years ago and yes, I still have the instruction book and the drawings. However, the sheet drawings are not in the best of shape and so they won't likely make great copies. If you like, I can get an estimate on how much it would cost to get copies made and into the mail for you. Let me know via PM. Cheers, Peter
-
Hi Vince, Just a great job so far. I am following along closely as I also have this model waiting in the wings. (Un)fortunately there are several models ahead of her. However, I will watch your progress and take some notes. Cheers, Peter p.s. Thanks for the great photos as well!
-
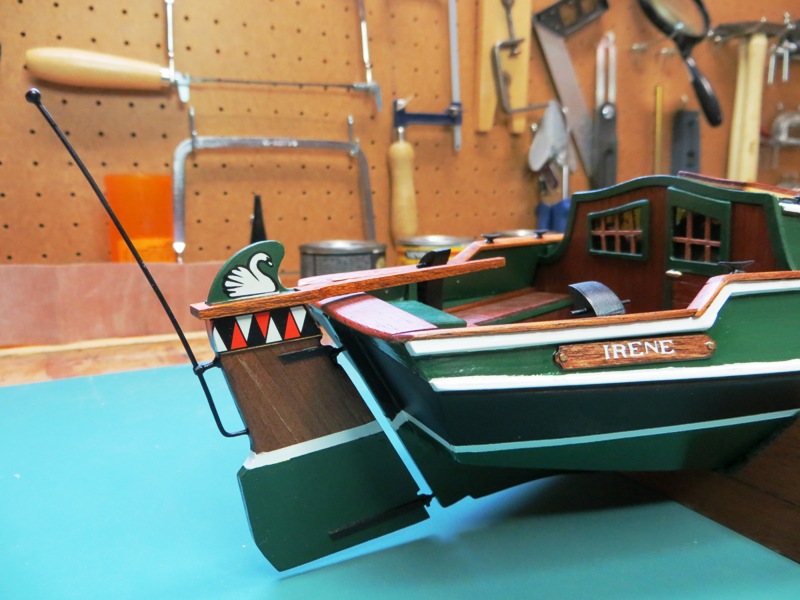
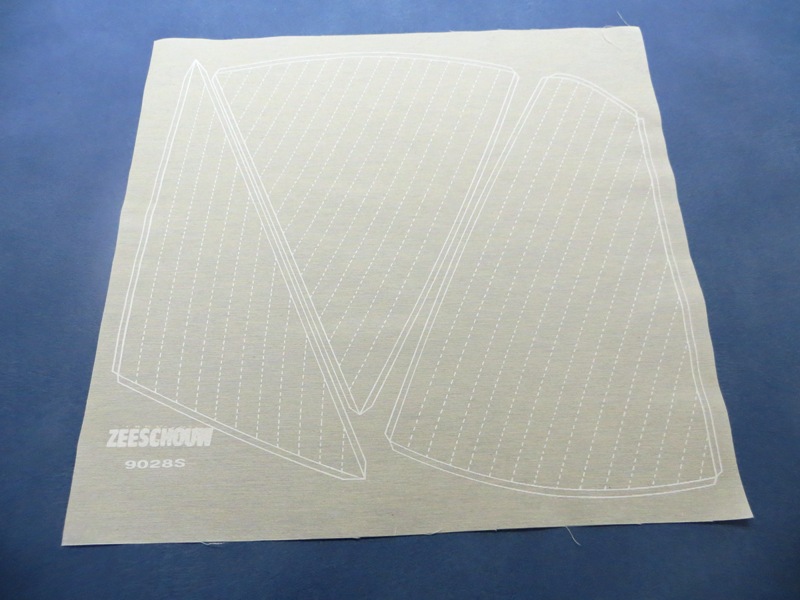
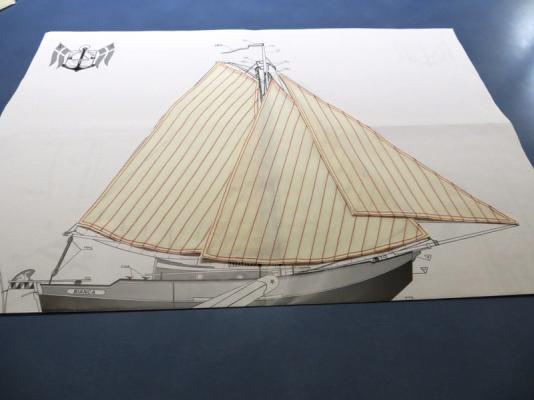
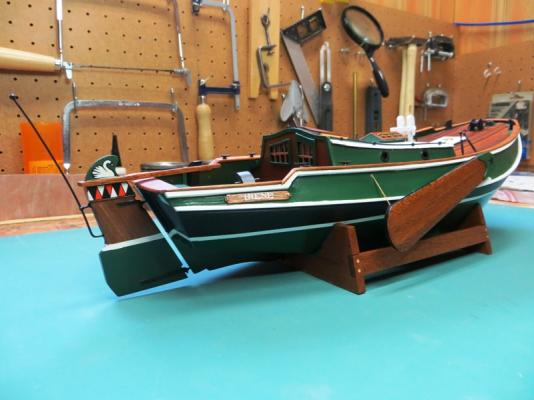
Funny you should ask Nils! I just put on her name boards and now she has a proper name. "IRENE". I named her after my sister. The kit's name is "BIANCA" but I don't know anyone personally by that name so I decided "Irene" had more significance. Here are some pictures with the new name board. Now I have to start work on the sails. I have put another coat of paint on the masts and they are drying in front of the gas fire. Billing has supplied a sheet with the pattern of the sails inked on them. However, the material is a bit too white and stiff. So I will use them as pattern pieces and use muslin cloth instead. I am hoping to get a sewing lesson from my wife who has a sewing machine and a serger. I will do a little experimenting and come up with the best solution. Stay tuned to this channel....

- 109 replies
-
- 11
-
-
- zeeschouw
- billing boats
- (and 1 more)
-
Thanks for the encouragement and nice words guys. Marc, the Amsterdam Maritime museum has a great selection of books. However, a few years ago, I tried buying some books there, but I could not actually enter the book shop. They had a counter person who would take the order and enter the shop to get it for you. I'm not certain if that's still the case, but you might want to think about the books you want before shopping there. The weather outside is awful with snow and sleet today soooo, I'm thinking I have free reign to hobby today! This is our first snow of the year really, so not much to complain about. Cheers guys. Peer
- 109 replies
-
- 2
-
-
- zeeschouw
- billing boats
- (and 1 more)
-
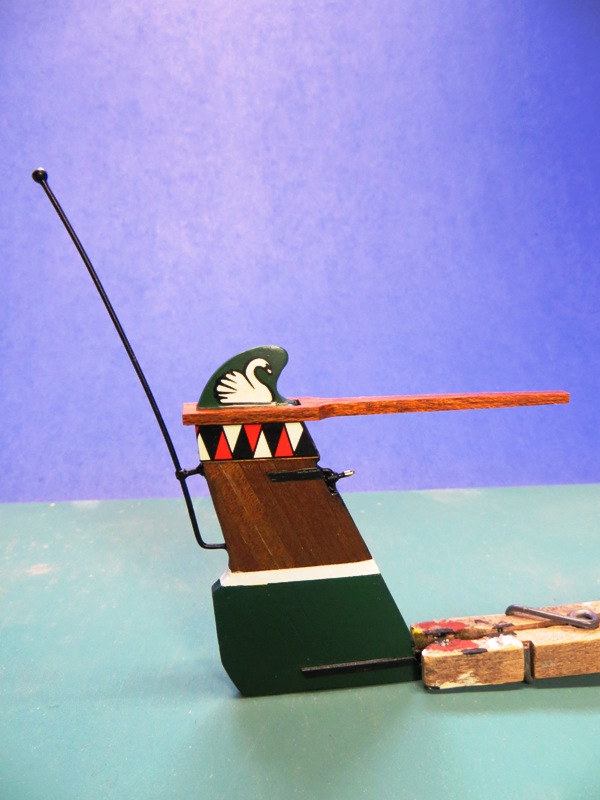
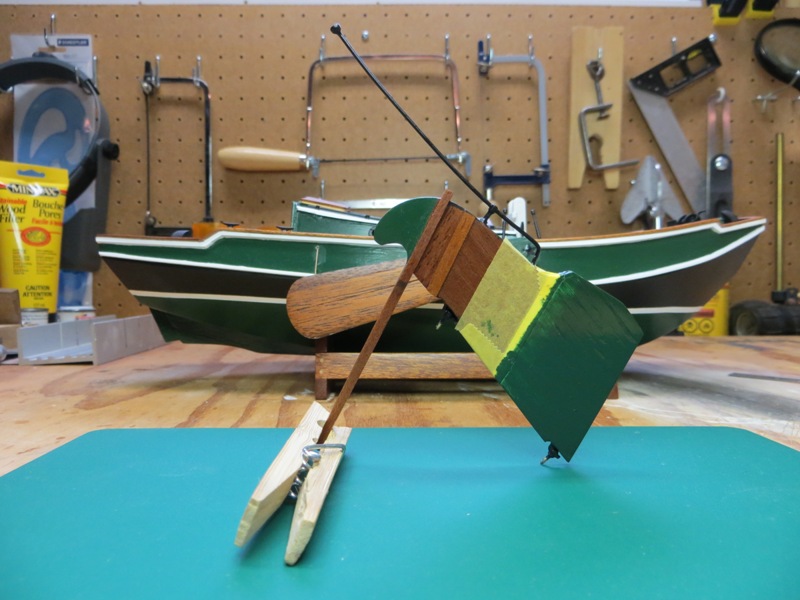
A quick little update guys while the paint on the mast and spars are drying. The rudder minus the flag is finally finished. Boy, what alot of steps for finishing this one piece. Cutting out the rudder, laminating the strips of mahogeny, fitting the tiller, multi-layers of different colour paints and lacquer, fitting the pintles and gudgeons and aplying the decals. It took days and days! The decals were a bit challenging because I had not done any for many many years. They were applied and then I coated them with a few coats of varathane. They're not going anywhere! Well here is the finished product and the rudder dry fitted to the transom... Cheers, Peter


- 109 replies
-
- 10
-
-
- zeeschouw
- billing boats
- (and 1 more)
-
Gil, Great idea in staining your rigging thread! An sollution for many of us with less than perfect rigging thread. I also like your fine detailing on the spars. Insprational! Peter
-
Marc, Yes, I have the Billing Friese tjalk also! And I also have a kit of Lemster sailing barge that is produced by Mamoli. I am very fond of the Dutch sailing vessels and I saw lots during a trip to Holland to see family. We rented a small motor yacht and sailed the canals of Friesland. Many many vessels of all types to see and admire. Popeye, Unfortunately, Billing has decided not to market these kits outside of Europe. I suppose they think only people who are familiar with these types of boats would want to build them. That's unfortunate because these kits are ideal for beginners. They are easy to put together and don't take a great deal of time to finish. They also offer beginners a fun intro to the hobby and allow them to acquire some basic skills. I purchased my kits in Holland while on vacation. They make packing challenging! Kip, I managed to find them at Lee Valley! I am going to have to go back and look at what else is on offer. Lot of things to spend money on there... Today I painted a bunch of fittings and stained the mast and spar. Pictures to follow soon. Peter
- 109 replies
-
- 2
-
-
- zeeschouw
- billing boats
- (and 1 more)
-
Thanks for the kind words guys. They are much appreciated. Today I must go out and try to find some tiny drill bits. The hardware stores have 1/16" but that sems to be the smallest they sell. Where do you guys get your bits? Peter
-
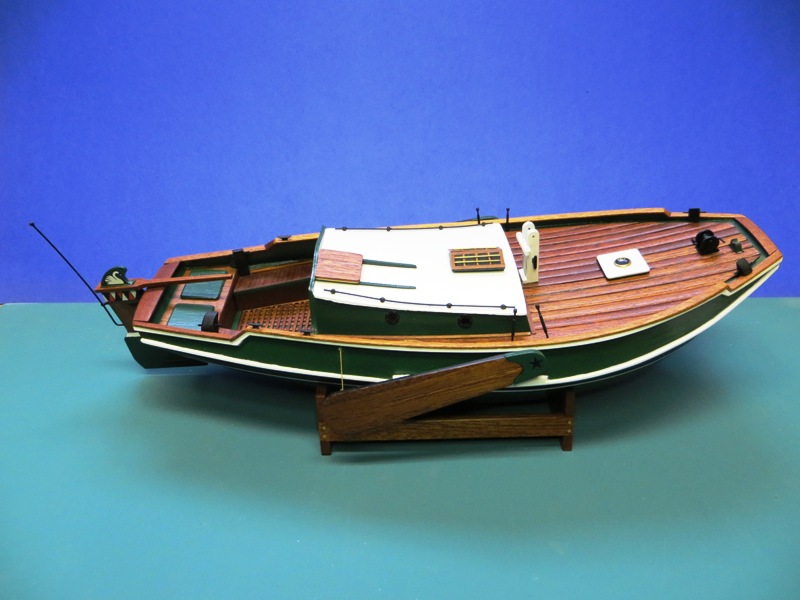
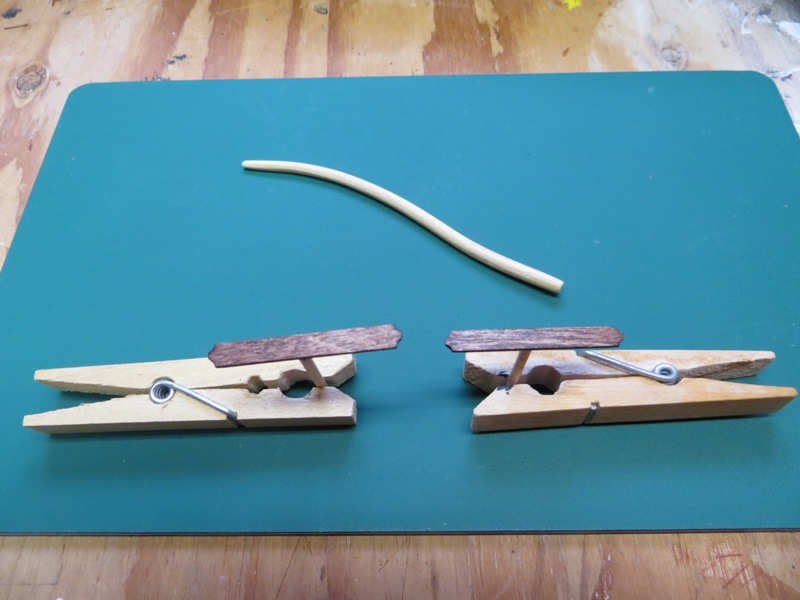
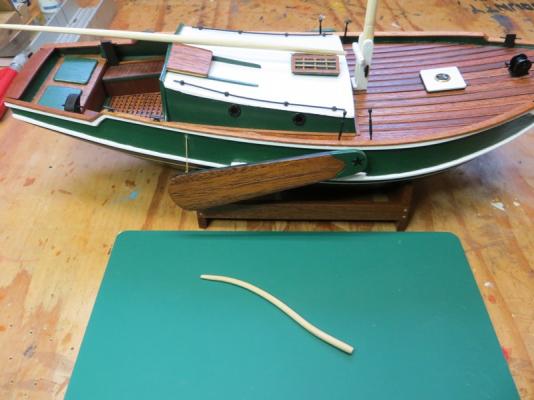
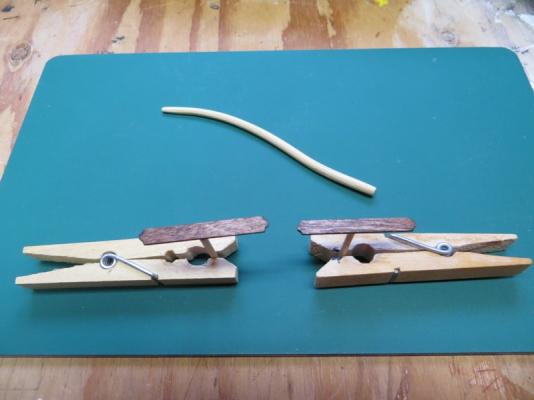
Well, a bit more progress was finally made. I am working on the rudder and have finished the lee boards. I am also working on the mast and other spars as well. A bit of light at the end of the tunnel all ready. Here are some pics... The rudder is assembled and I am now giving it a few coats of paint. Here the lee boards are in place and rigged up. I have dry fitted the main spars. The gaff required a bit of bending in two different directions. A few dowels met their ends trying to get it right... The kit provided some plaques for the name on the stern. I have stained them and will add some letra-set lettering I found in my cache of goodies to give my model a different name. Tommorow I will stain the spars and paint some fittings in preparation to fixing the mast. Cheers, Peter


- 109 replies
-
- 7
-
-
- zeeschouw
- billing boats
- (and 1 more)
-
Beautiful model Danny! Well done. I hope you plan a glass case to protect all your hard work and fine rigging. Peter
-
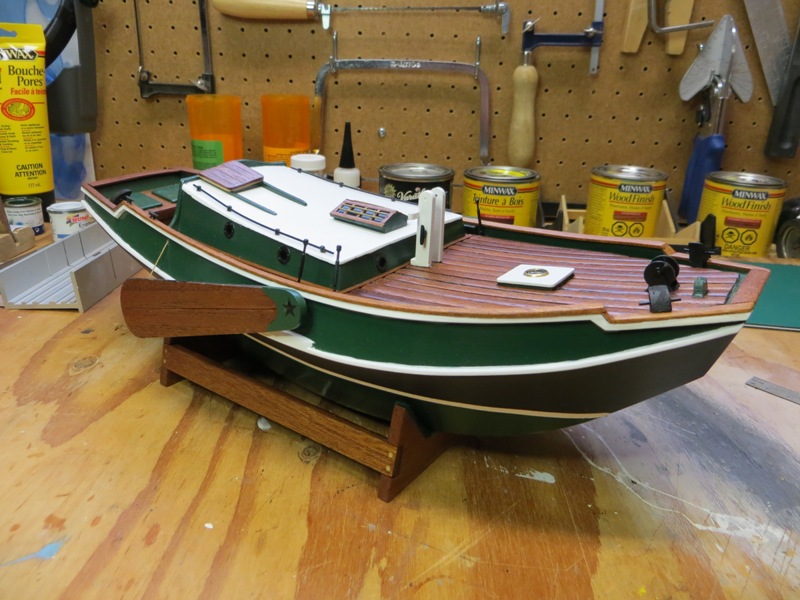
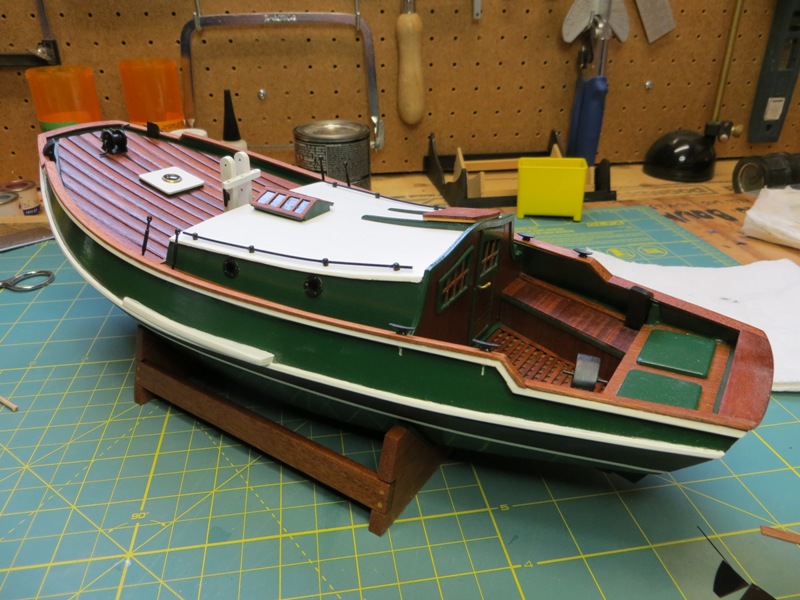
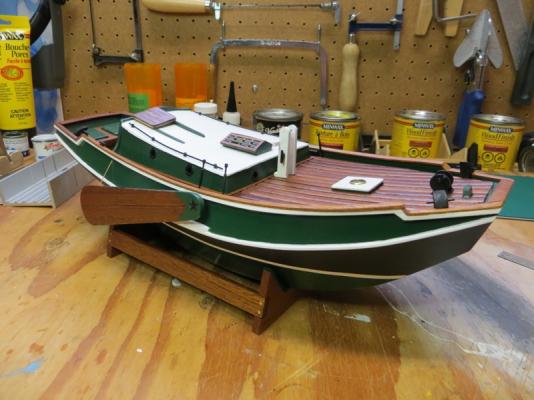
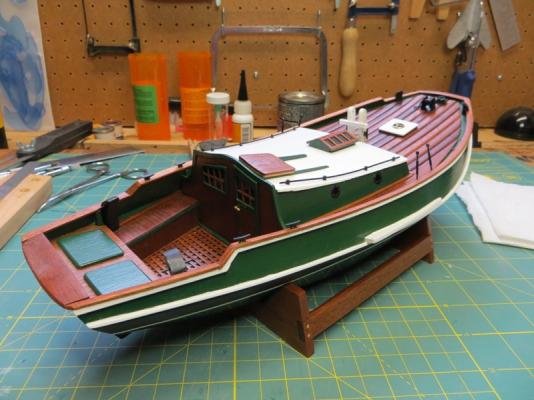
A busy week in the workshop. I have prepped, painted and installed all of the deck fittings. Not that there were that many... This is proving to be a fun build and relatively quick. A nice change from a square rigger, that's for sure. Here are some photos of the progress... Cheers, Peter

- 109 replies
-
- 7
-
-
- zeeschouw
- billing boats
- (and 1 more)
-
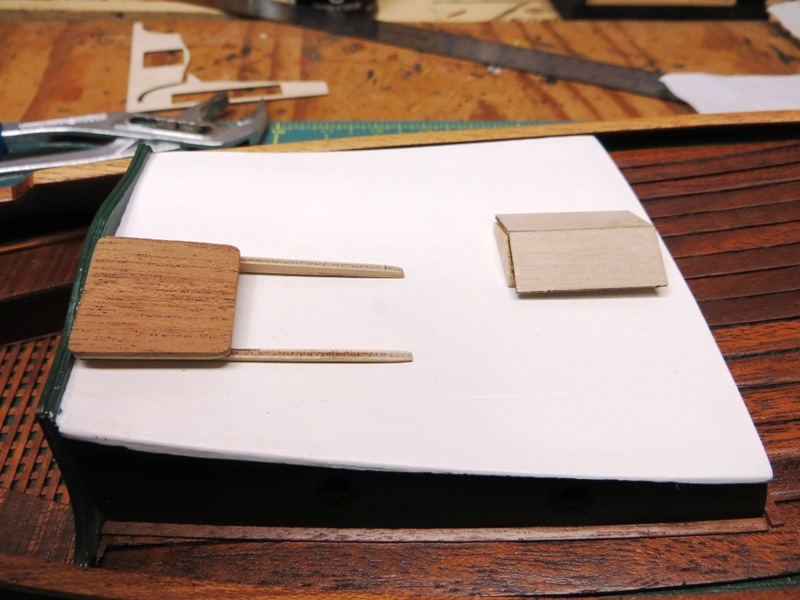
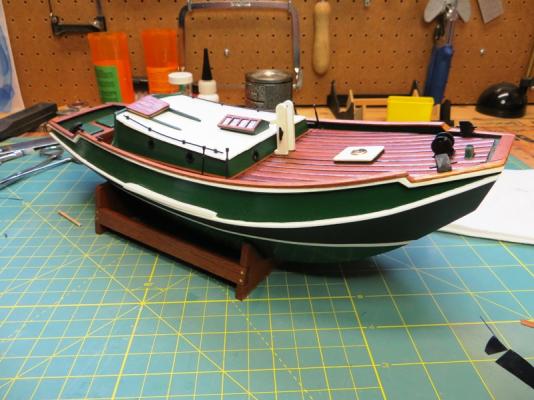
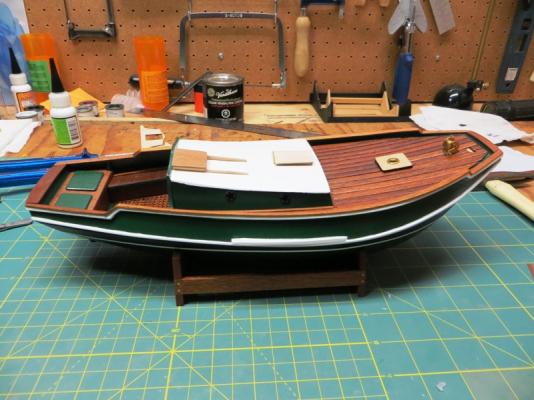
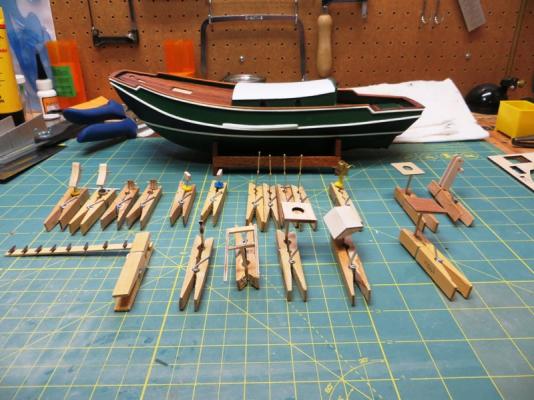
After many months of idle tools and a neglected model, it's time again to get back to "work". I have begun by prepping a number of itens that make up the deck fittings. For the most part an easy task because all the items are laser cut and simply need to be popped out of the sheet and sanded. I had to modify a couple of parts as they did not fit as advertised. A little scratch building was therefore required to keep me honest. Here are the results so far. Tomorrow a few more parts to prep and then I can start painting! I have dry fitted the sliding hatch and skylight. A closeup of the sliding hatch and skylight. And here a shot of all the parts so far ready for a few coats of paint. Stay tuned... Peter

- 109 replies
-
- 6
-
-
- zeeschouw
- billing boats
- (and 1 more)
-
Hi Kip, First of all - Happy New Year! I was very glad to hear that you have found relief from your tremor and can get back to a hobby you get so much enjoyment from. All the best with the rest of your build! Peter
-
Very nice work ZyXuz! I remember doing my own cannon during my build of the Unicorn. I rigged the guns fully in the waist and quarter deck where they were visible, but simply afixed the breeching tackle to the guns that were under the deck. It saved a bit of time and effort. Keep up the excellent work! Peter
-
Hi Freddy, I have enjoyed your build log very much and hope to learn alot from it. I have a newer version of this kit which is waitting patiently for some attention. I will follow along as you have lots of great info and pictures which I really appreciate. Cheers, Peter
-
Wow Ian, Incredible work so far. In the end I am sure you will be happy with the results. A satisfying experience to make the model the best it can be. I will continue to follow along as I enjoy seeing this kit built in so many ways. Peter
-
Hi Don, Great loking model so far. Bluenose is a classic looking vessel with beautiful lines. A real racer! Just a little tip, the main mast, the taller of the two is stepped aft. It would be tragic to have it all rigged up in the wrong place. ;-) Peter
-
Hello ZyXuz, I really like your paint scheme. It's nice to see someone do it a little differenty. Variety is the spice of life after all... You have completed one of the most difficult tasks in building a model ship, the hull. Good luck with the rest of the build! Peter
-
Thanks for all the detailed posts and pictures Gil. Plenty of great tips and tricks for all of us! Peter
- 755 replies
-
- 1
-
-
- finished
- caldercraft
- (and 1 more)