HOLIDAY DONATION DRIVE - SUPPORT MSW - DO YOUR PART TO KEEP THIS GREAT FORUM GOING! (Only 13 donations so far - C'mon guys!)
×

rdsaplala
-
Posts
602 -
Joined
-
Last visited
Content Type
Profiles
Forums
Gallery
Events
Everything posted by rdsaplala
-
 Hi B.E., Just catching up with your latest build, you're off to an excellent start, that's shaping up to be one slick-looking hull
- 574 replies
-
- 2
-

-
- cheerful
- Syren Ship Model Company
- (and 1 more)
-
Hi Mark, Just catching up on your build, you've done a beautiful job on your hull and deck planking. Wow! You've really taken gone deep into the dark-side doing your own laser-cutting, excellent work on those laser-cut guns and carriages
-
Hi Christian, Thank you for the kind words as well as the advise on using cloud as backup as well as taking out the external drive of the computer, I'll ask the computer shop to try out that option
-
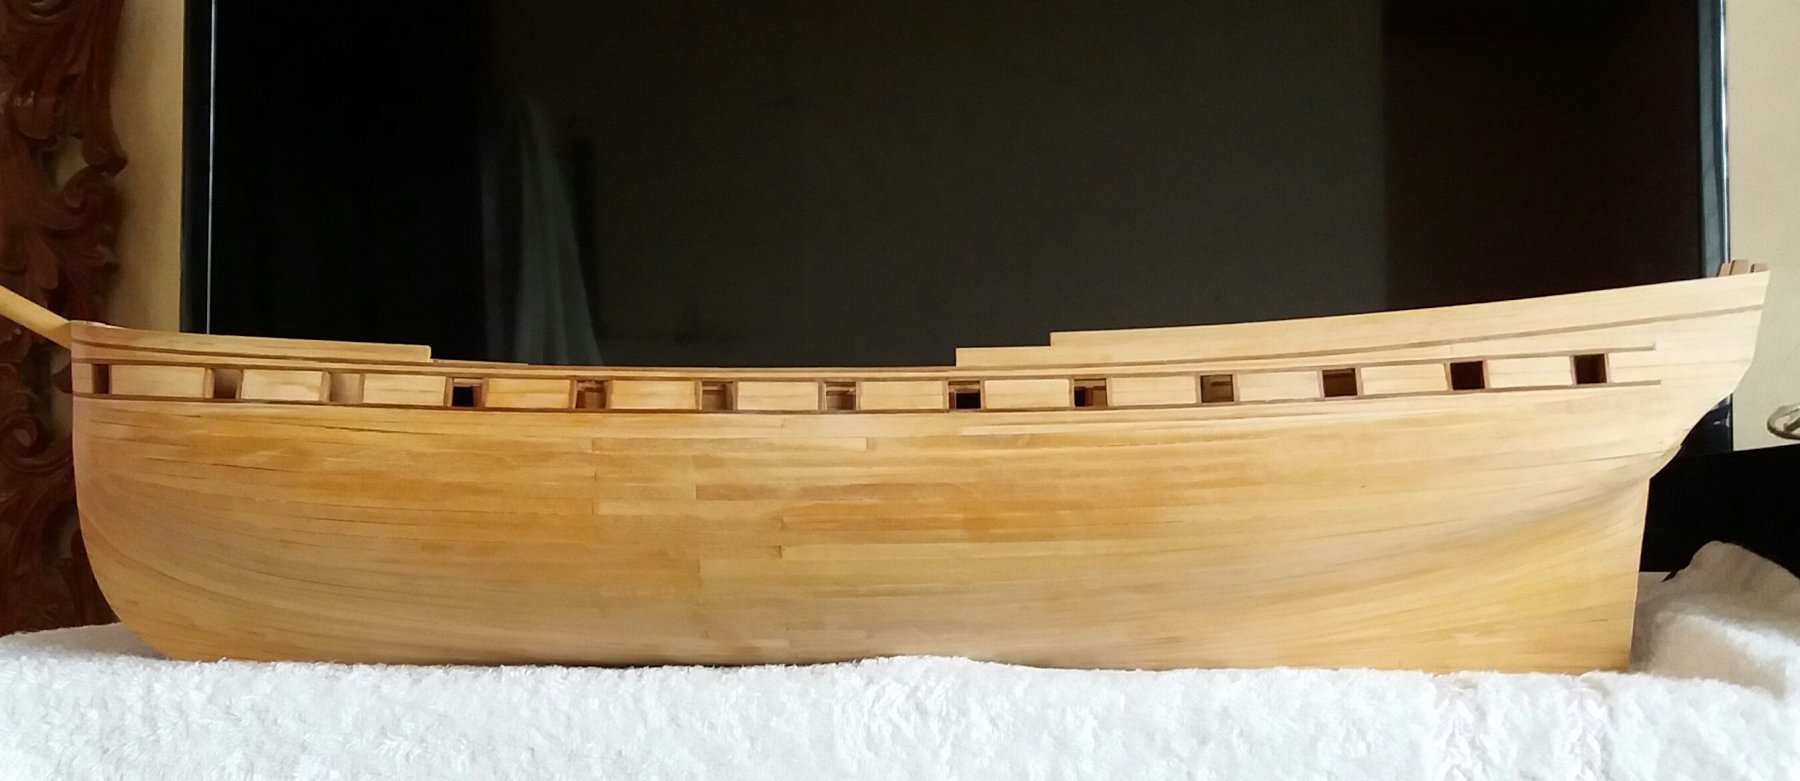
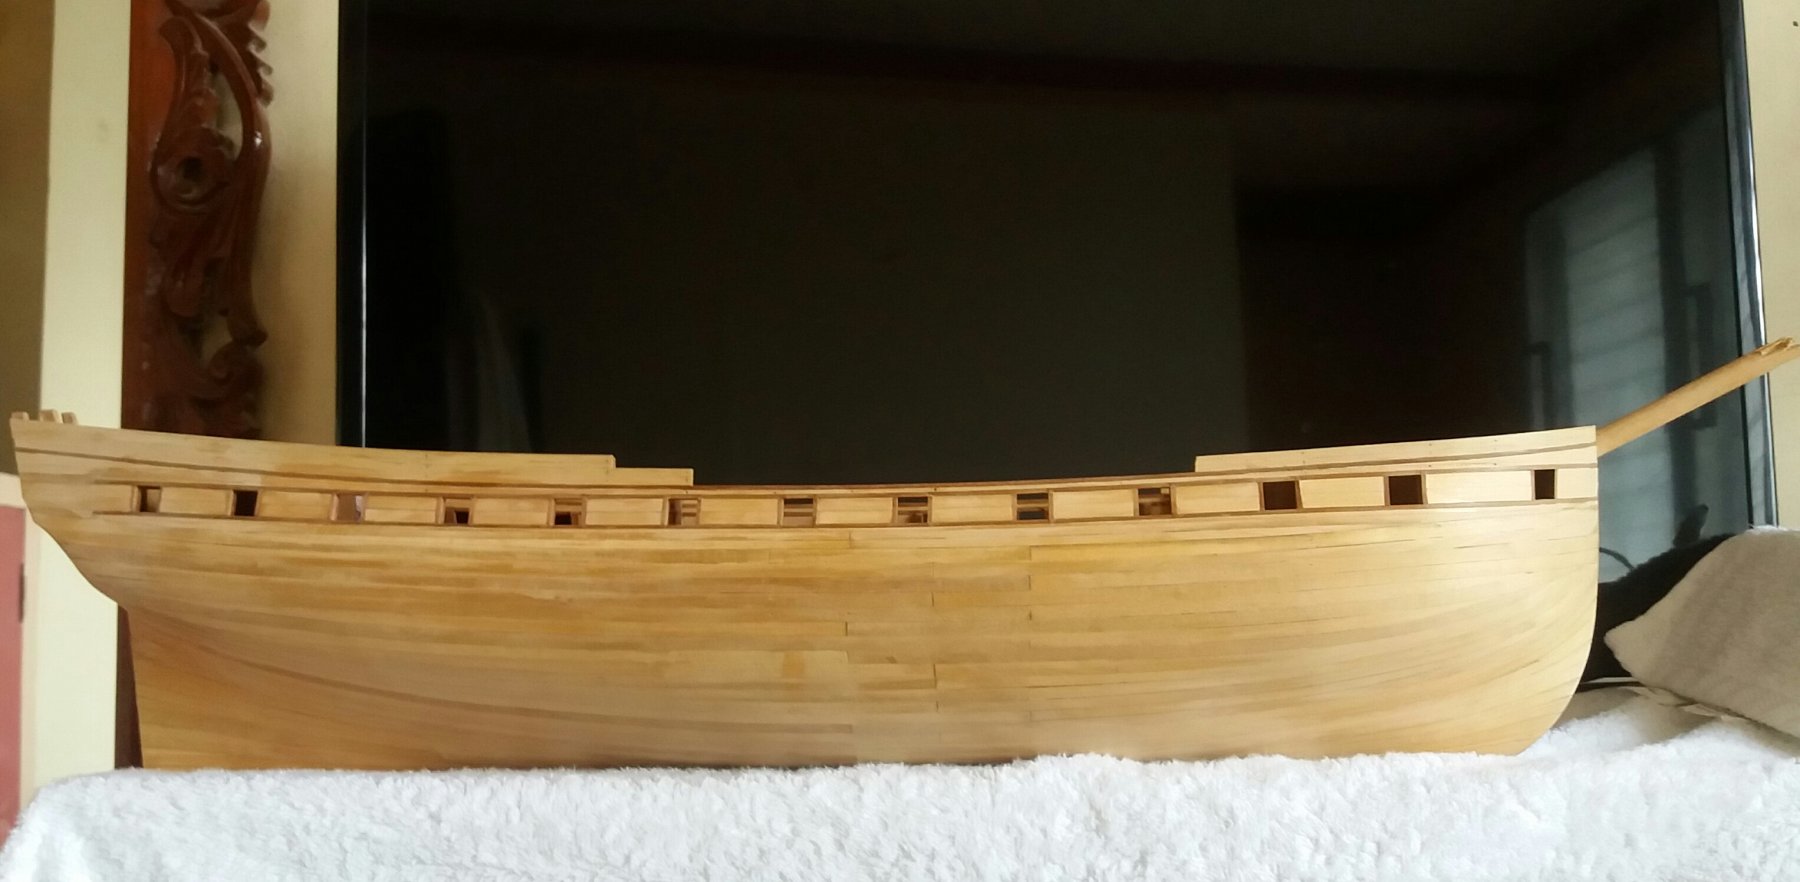
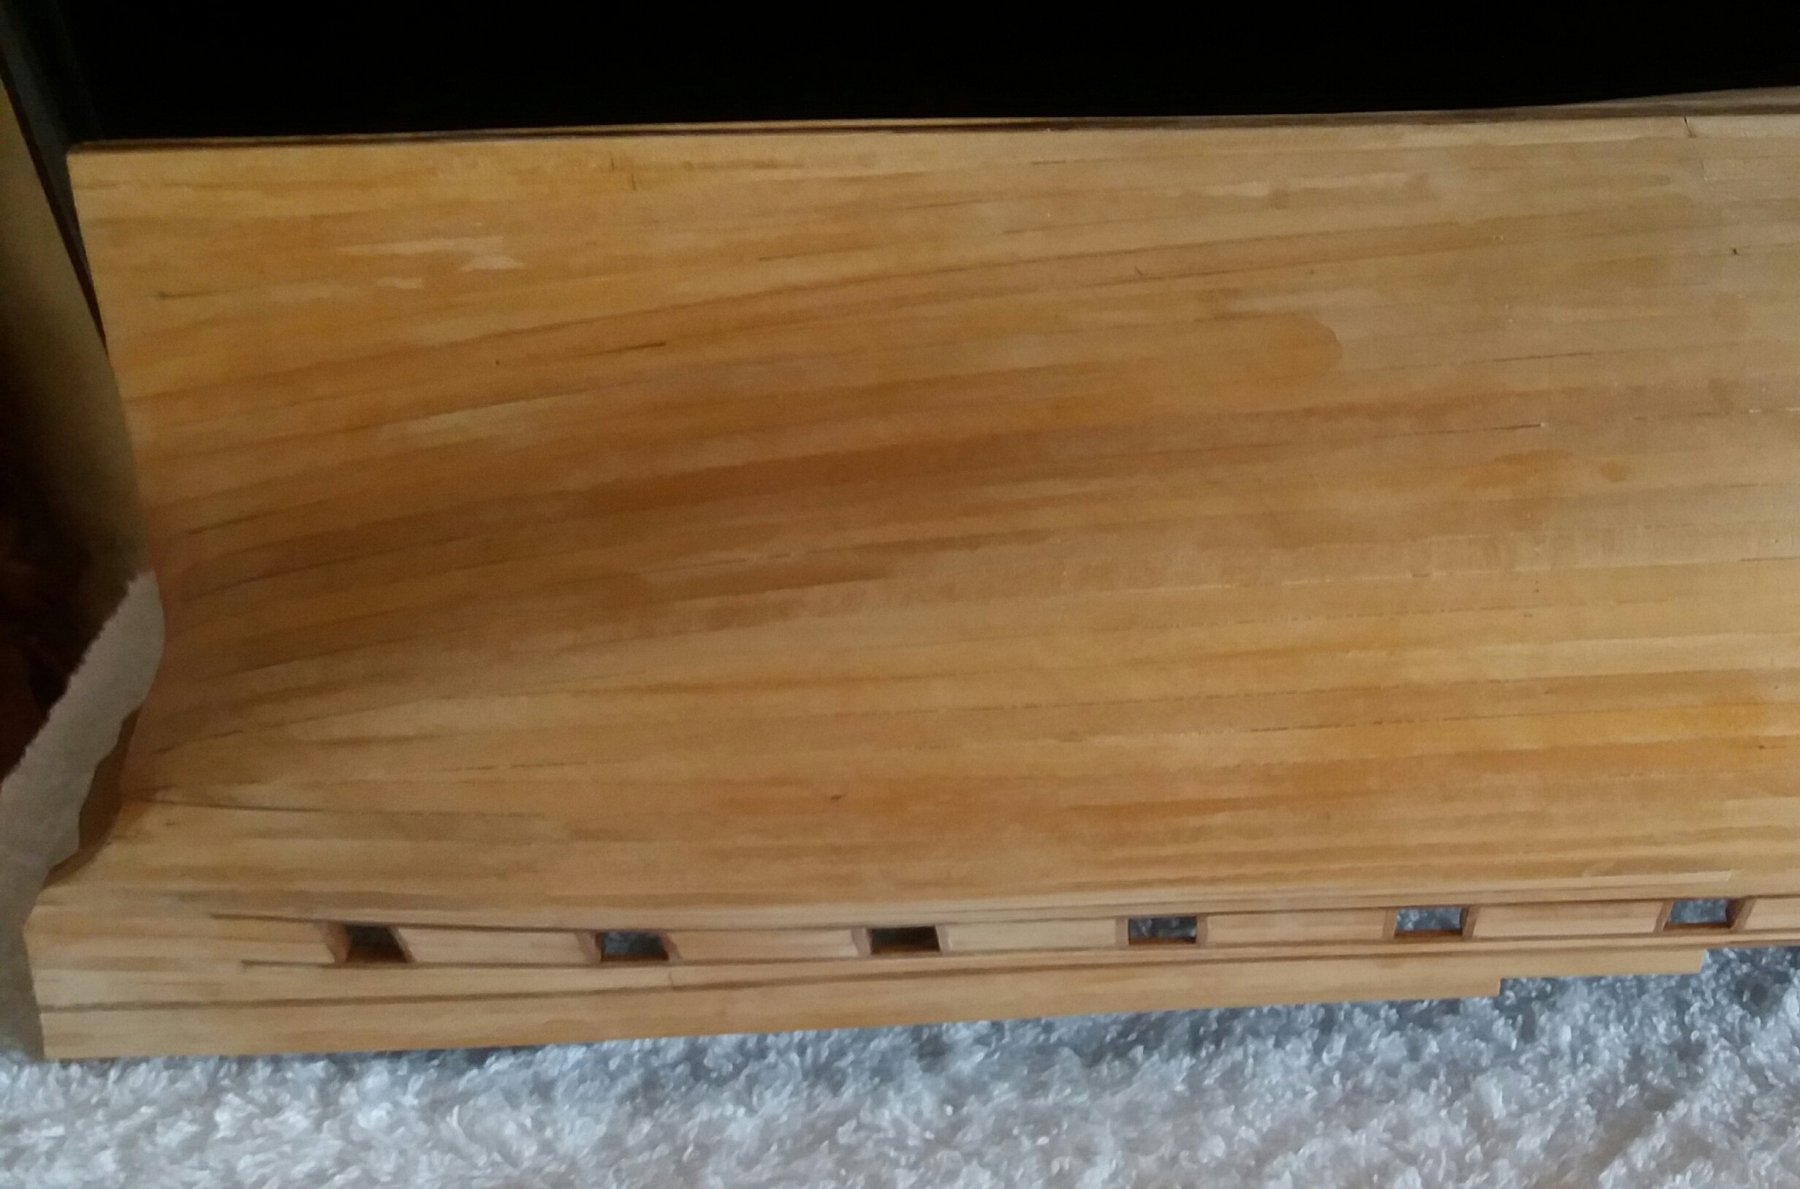
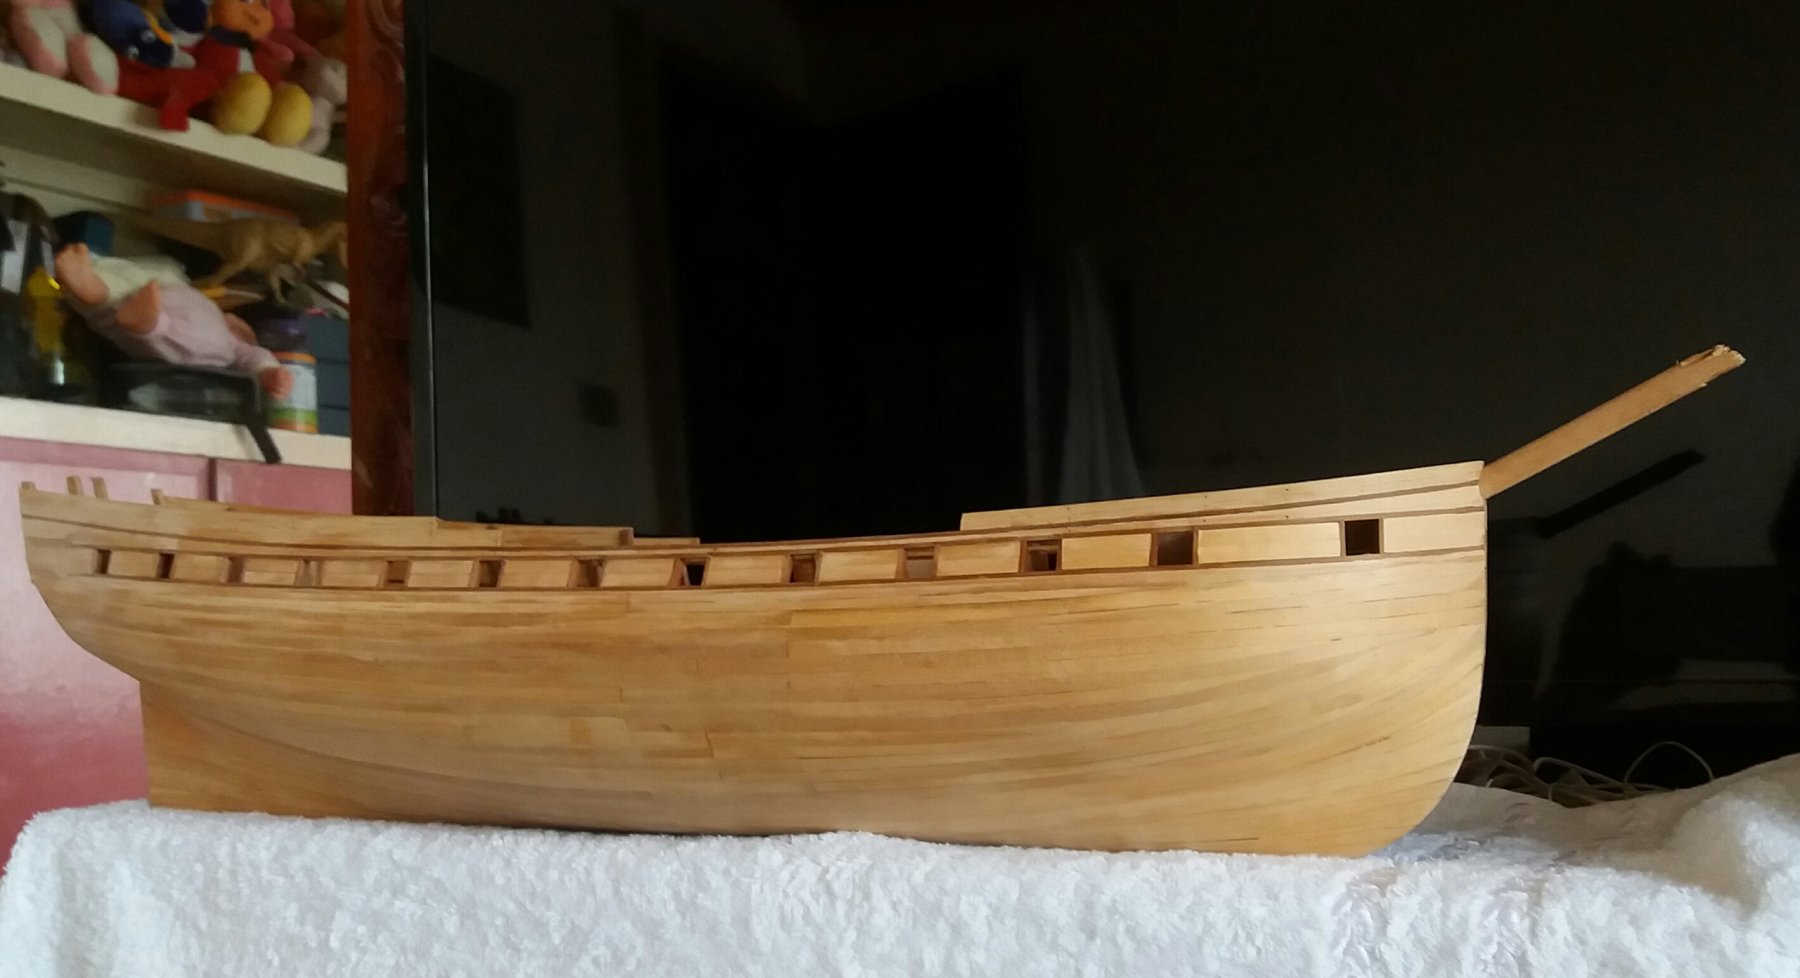
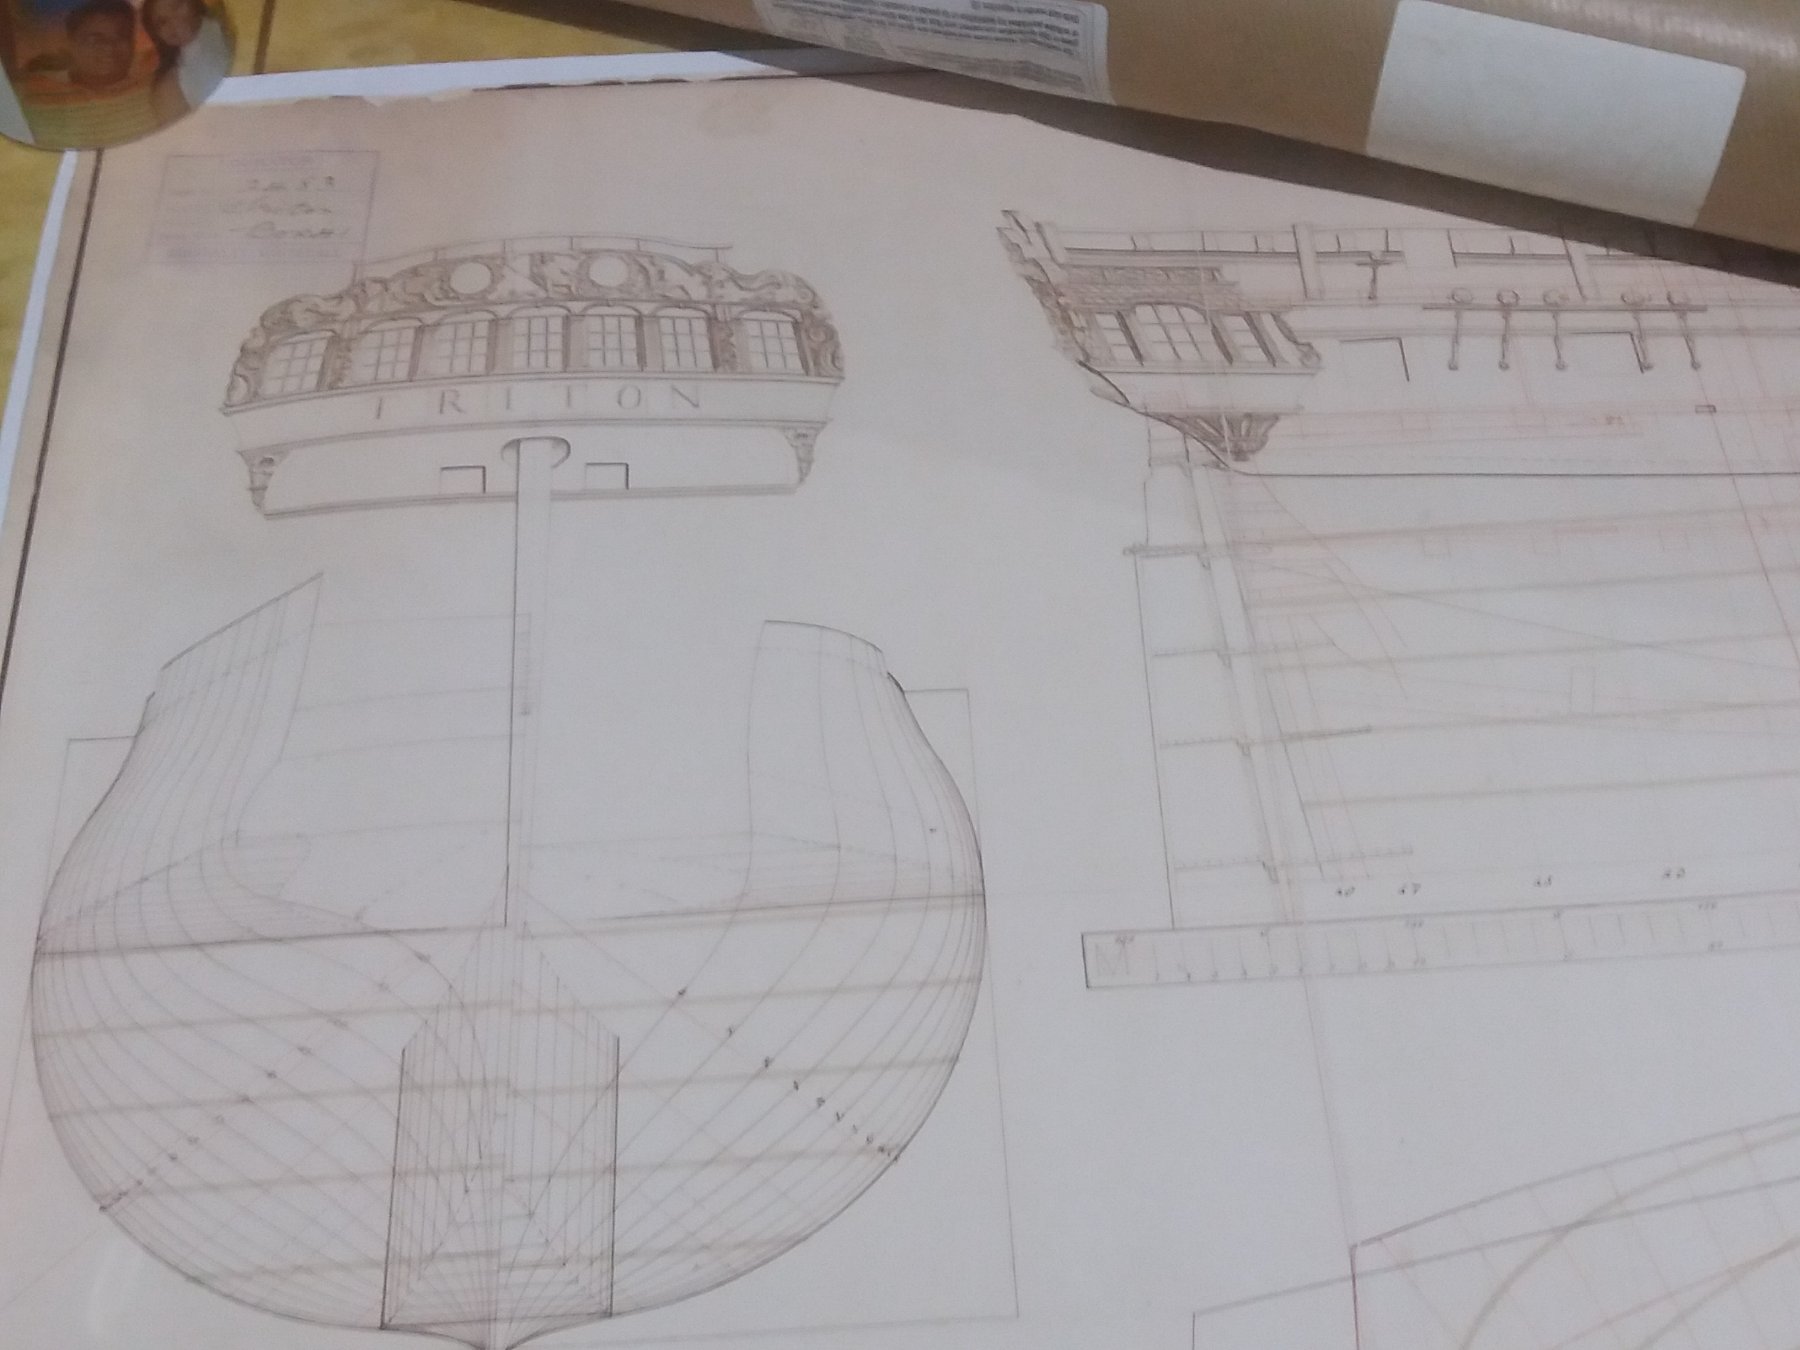
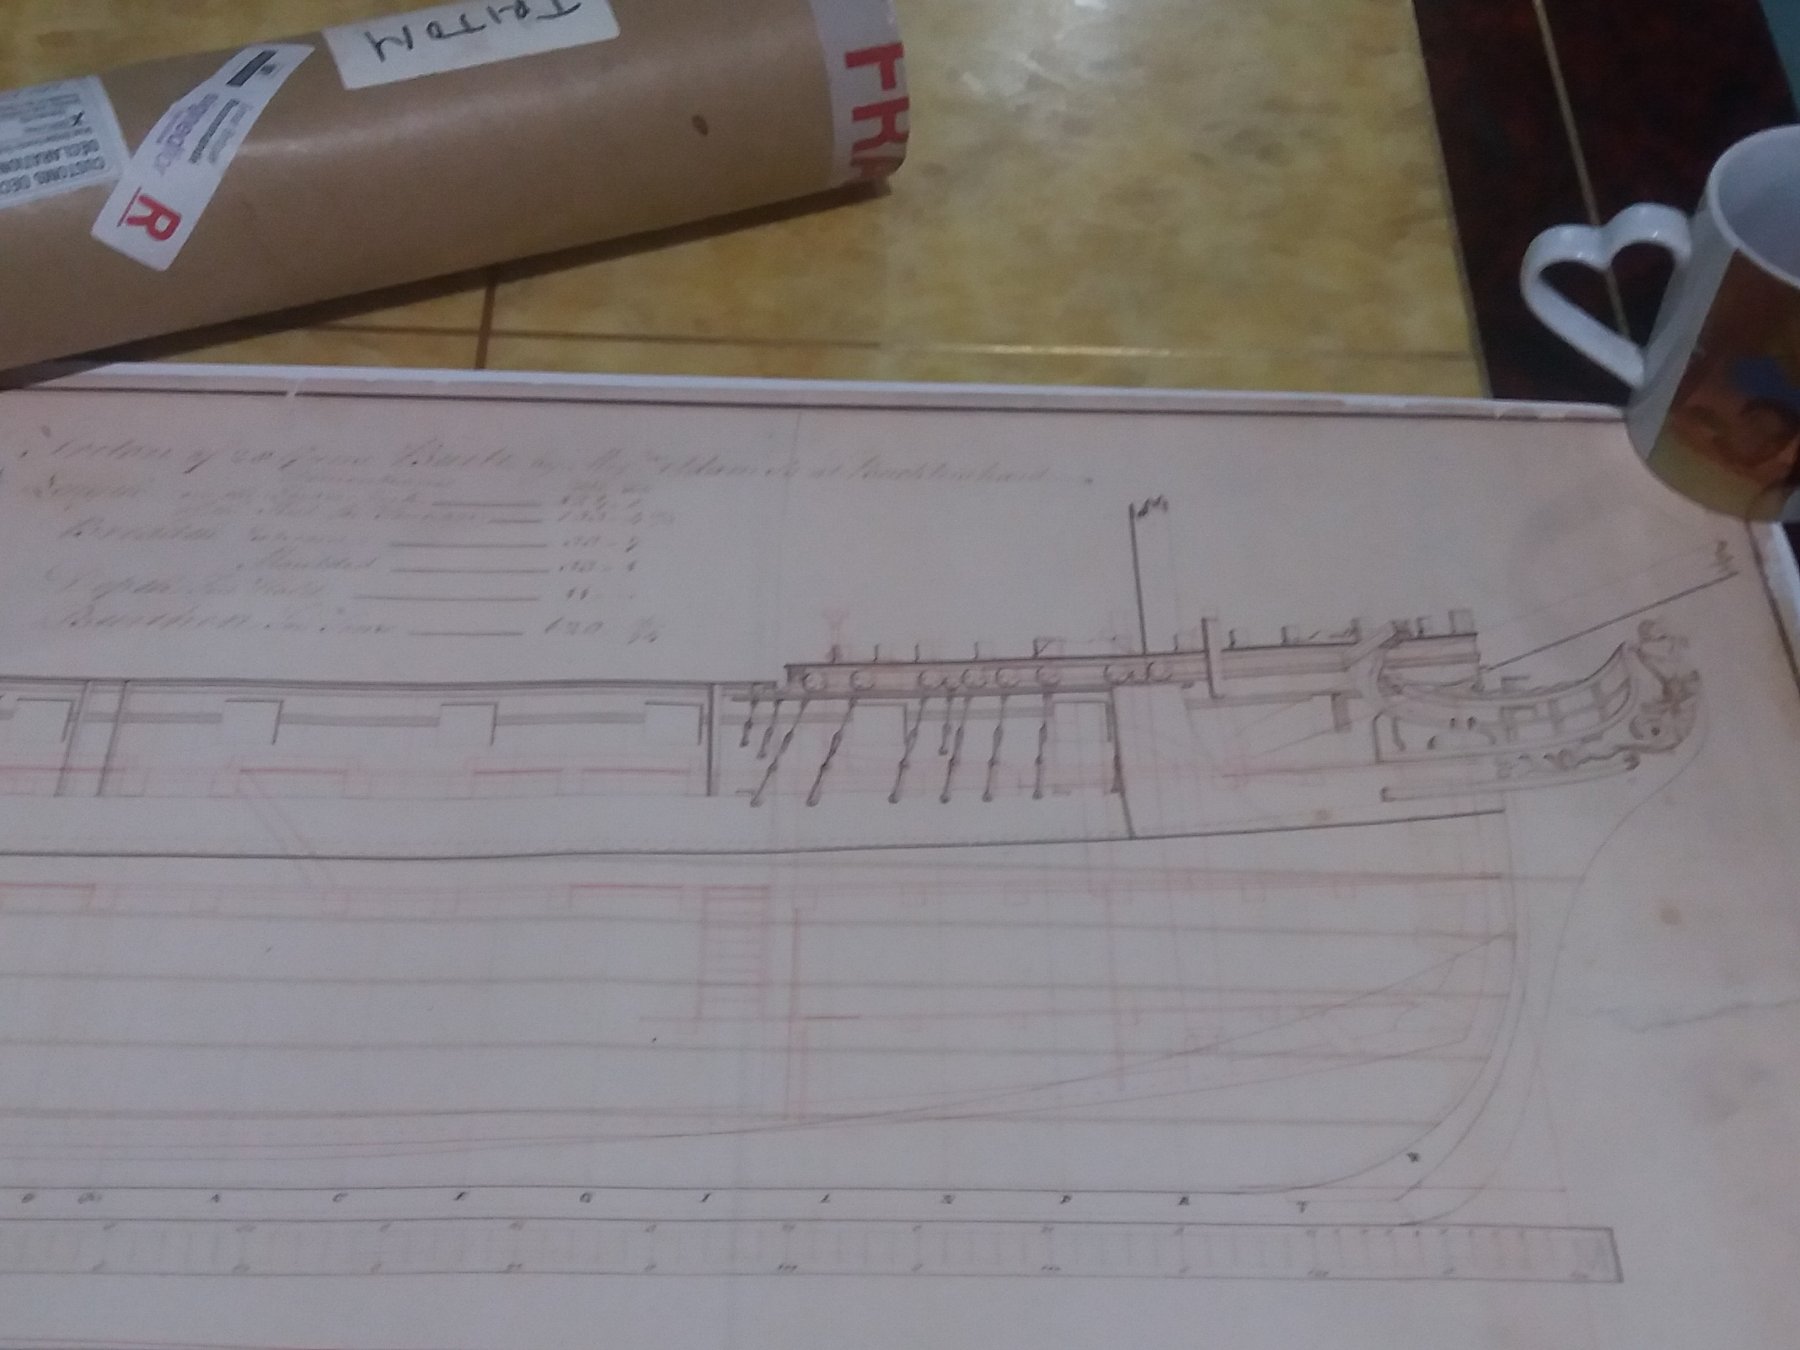
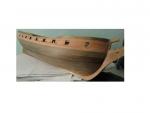
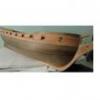
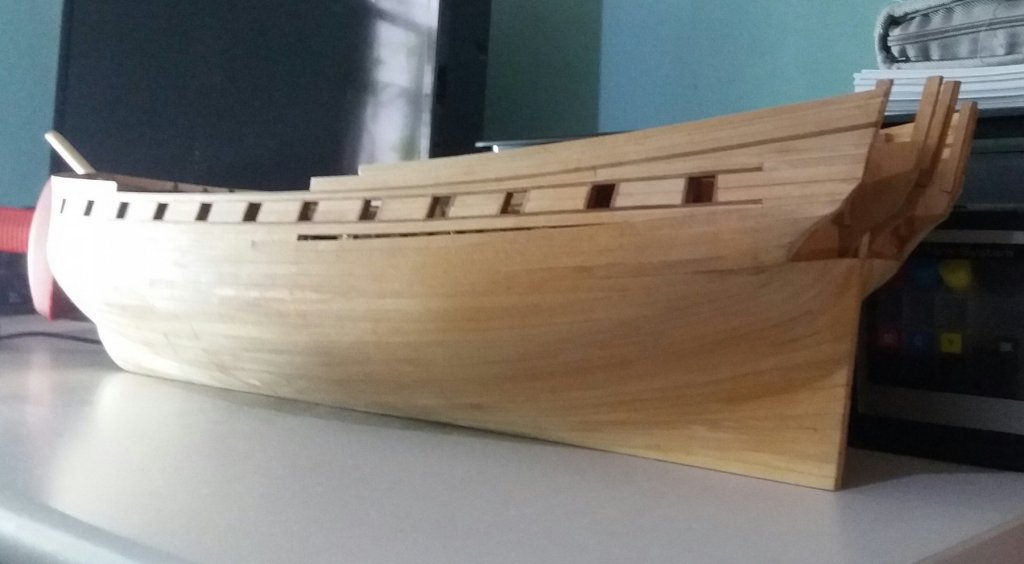
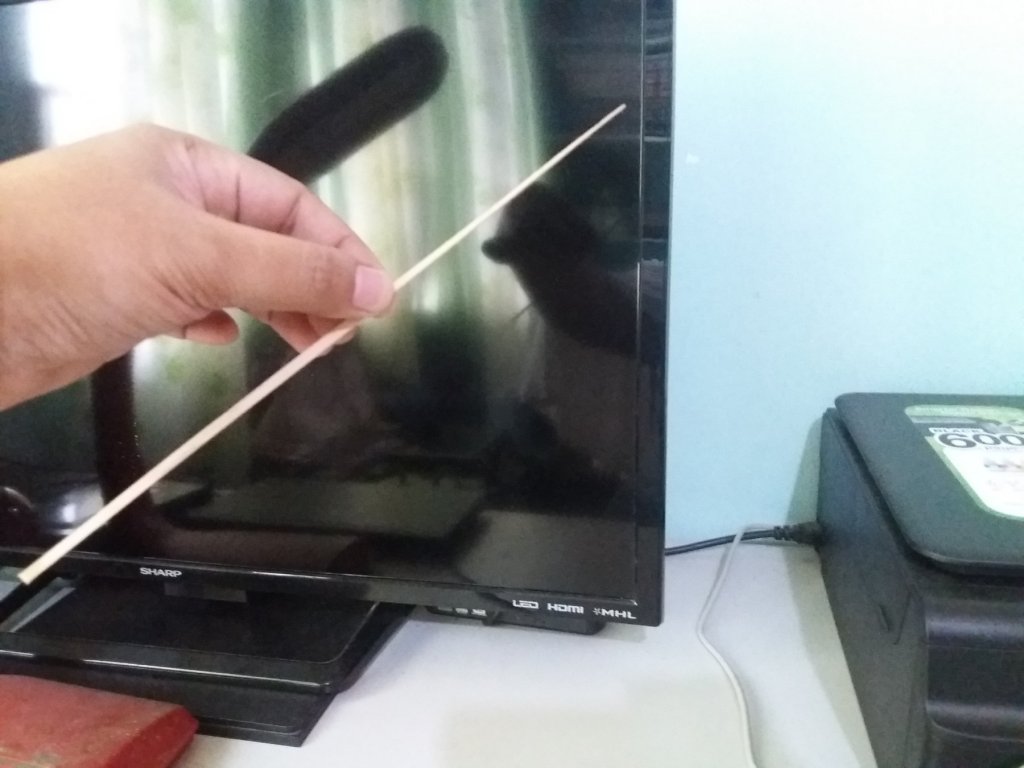
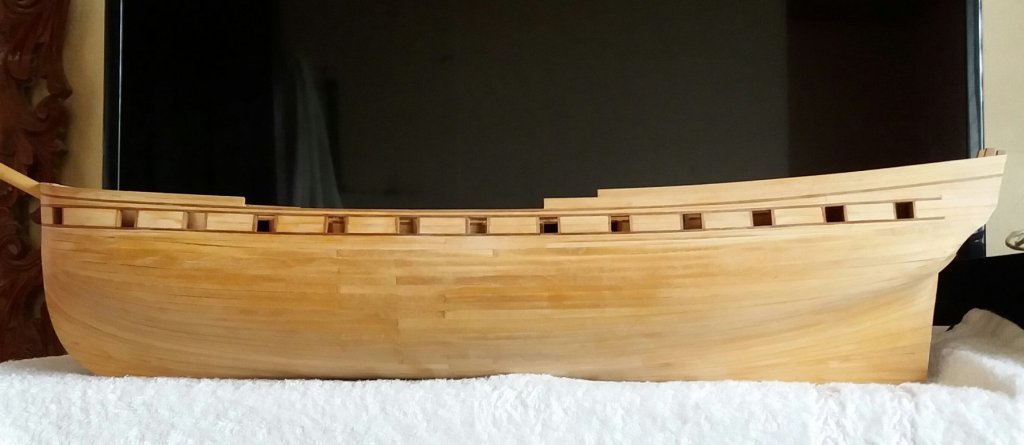
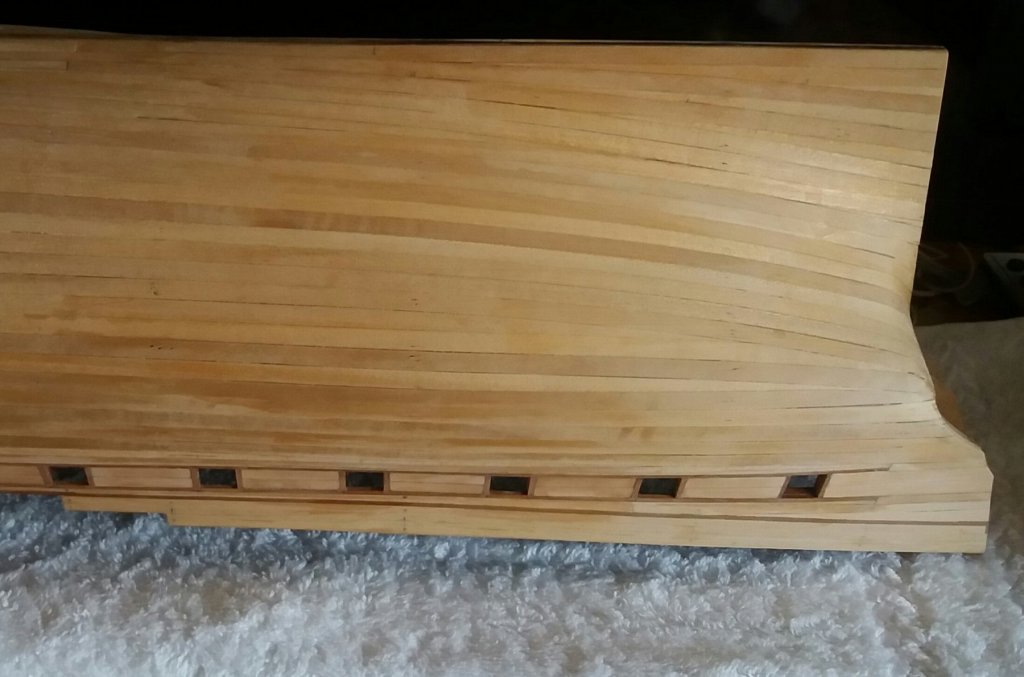
Hi guys, I just came from a long break from ship building My old computer, containing all my Triton CAD drawings crashed two years ago, plus I've been very busy with my health work ups, my job, as well as new hobbies that captured my interest, hence, shipbuilding took a backseat. Last night however, I chanced upon a documentary on HMAV Bounty so I was inspired to take a peek here and see how things are doing in the model-shipbuilding world. I thought I'd also post photos on the small bits of progress I've accomplished. Time sure flies, just a few years ago I was building Triton's hull, and now....... well, I'm still building Triton's hull I was finally able to finish the 1st planking and gun-ports today, thanks in no small part to that Bounty documentary Here she is awaiting her last plank: Whether scratch-building or building a kit, one of the most satisfying steps for me is sticking in that last plank... OK, it's a sharp, pointy plank that is a glaring violation of planking rules, but this is just the first planking so cut me some slack Once I start second planking, I'll decide whether I will properly pre-spile my planks like I did in my Pegasus or be a lazy violator of planking rules... if by chance I go with the lazy-violator route, please feel free to give me 40 lashes The Admiral is using my workshop so I'm left to take pictures on the TV stand I'm happy to report that the bulge on the aft portion has disappeared with the revised aft bulkheads I've taken from the NMM draught of Triton: The fore bulkheads were also taken directly from the NMM draught and I think the resulting shape seems acceptable enough based on this shot taken at an angle from the bow: NEWEST CHALLENGE TO HURDLE Like I said before, my computer crashed, taking with it all my Triton CAD drawings, including the expansion drawings that I made for the stern and its windows... I worked so hard on that and it took me such a long time just to get it done since I'm just a newbie at CAD. I was planning to have that stern and all those stern windows laser-cut to make my build easier, and to have window sills that look "to scale"... but now all those have gone pffft Up to now, all the computer shops here suggest reformatting the computer but that will delete all my saved files All I have left is this NMM Triton draught, which is too large to be scanned for uploading to my CAD program: I am left with 2 options: 1. Cut my NMM draught into smaller pieces that can fit my scanner so I can load it again on CAD. Then redo all the drawings that I previously made (I'm hesitant to do this since I was planning to frame my NMM Triton draught and hang it beside the model when I finish her, and more importantly, I feel too lazy to redo everything that I drew all over again). 2. Continue my search for a computer shop that can somehow retrieve my files from my computer so as to save myself from a redoing a lot of work. I've been going with the second option for the past 2 years, I'm just too lazy I guess


-
Those frames look great, Grant, beautiful and clean work, and amazingly fast too
- 456 replies
-
- 1
-
-
- finished
- bomb ketch
- (and 2 more)
-
Wow! you're working at an amazing speed Mobbsie, at this rate you'll finish her by next month, excellent work as always my friend, those frames look great
- 255 replies
-
- 1
-
-
- granado
- bomb ketch
- (and 2 more)
-
Hi Christian, It must have been quite a challenge to reconstruct Alert's framing without an existing disposition of frames plan specific to her, but you've pulled it off with flying colors, excellent work on the square frames Sir
-
Thanks for the confirmation Christian, I guess great minds think alike
-
Wow! I come back here after a few weeks and she's almost complete! Fantastic work and build speed as always, Popeye
- 956 replies
-
- 3
-
-
- andrea gail
- trawler
- (and 1 more)
-
Beautiful and clean work on the beams, knees, capstan and companion way Augie, it's details like these that bring out the beauty of these period ships
- 2,191 replies
-
- 3
-
-
- confederacy
- Model Shipways
- (and 1 more)
-
Guns are looking great Sjors, now she's armed to the teeth Very neat work on the bulkhead screens too, excellent color choice
- 1,616 replies
-
- 2
-
-
- caldercraft
- agamemnon
- (and 1 more)
-
Top-notch rigging, as always, Danny, thanks too for sharing your block-making techniques
-
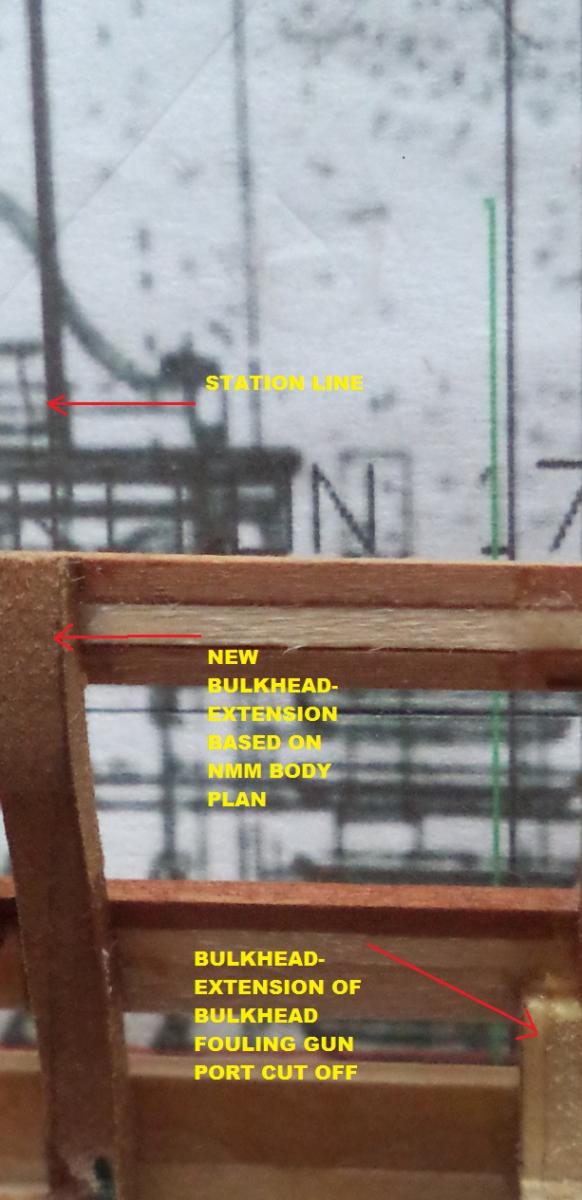
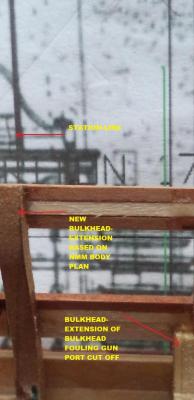
Thanks for dropping by and the good word guys Daniel, I think I'll also cover my ships the with blanket next time I mothball them, it's amazing how much dust can accumulate in these models when left alone for months Thanks for the picture, wow! that's a lot of mothballed ships Christian, thanks for the tip If I understand correctly, do you mean I should cut new bulkhead extensions based on the NMM plan and position them to their corresponding station lines on the NMM profile plan? If yes, then I think that was what I did:
-
Very nice work on the breech lines Sjors, just a few dozens more to go As said by the others, it'll go faster along the way
- 1,616 replies
-
- 3
-
-
- caldercraft
- agamemnon
- (and 1 more)
-
Sigh, this seems to be one of the greatest drawbacks of re-drafting contemporary plans Give a particular contemporary draught to five people for re-drafting, and the resulting lines would vary from one draughtsman to another. Reminds me of a class experiment on inter-observer bias wherein letting several students measure the volume of liquid in a graduated cylinder would result in varying results from each student
-
Very precise work on the placement of the deck beams Augie, getting them to lay symmetrically that way seems like a daunting task and you've pulled it off masterfully! Excellent work on the bulkhead screens too, I gotta hand it to Chuck, the design of those bulkhead screens with built in lights is pure genius
- 2,191 replies
-
- 2
-
-
- confederacy
- Model Shipways
- (and 1 more)
-
Nice work on the scaffolding popeye, that's a lot of neat drums you have there, be sure to secure them properly so they don't cause an oil spill
- 956 replies
-
- 3
-
-
- andrea gail
- trawler
- (and 1 more)
-
I've seen several kits use planks 0.5mm thin so I think it's very possible, you just have to be more careful with your sanding. One thing I'd like to try sometime is to spile planks from veneer sheet using scissors.... it should prove to be a fun experiment
-
A question about Lady Nelson by Amati
rdsaplala replied to CharlieZardoz's topic in Wood ship model kits
Based on the kit description from various sites, the Lady Nelson appears to be a "generic" representation of an 18th Century Cutter. The source of plans is anyone's guess, but I suspect that there are plenty of un-named cutter plans at NMM that could have been used for this. The kit being a generic representation gives you an advantage since you could super-detail her using any of the reference books on 18th Century Cutters without being too concerned about very specific details such as how many sweep ports did she have, did her gun ports have lids or not, was she clinker or carvel planked, and other various details that would need a ship's log/builder's contract of the actual ship. You could also get away with renaming her... HM Cutter Prince Zardoz seems to have a nice ring to it -
As Mark has said, opening a build log would be a great help, there are plenty of knowledgeable members here that could help you solve problems that commonly arise from building model ships. With regards to your kit's wood identification issues, European manufacturers generally use lime (pale cream colored, fine grain, soft) for first planking, walnut (brown and grainy) for second planking and tanganyika (pale yellow and grainy) for deck planking. That is of course a very general statement and it would be more helpful if you could take a few pictures of the timber as well as the chart and post it on this thread.
-
Wow! that's a lot of guns, I'd hate to be on the receiving end of your huge guns Sjors Very nice and clean work my friend
-
Looking great Popeye, very precise work on those railings I'm with the others on the port holes, mate, lining up with tape or paper strip then using gradually increasing sizes of drill bits and finishing off with a diamond file should do the trick.
- 956 replies
-
- 1
-
-
- andrea gail
- trawler
- (and 1 more)
-
Thanks Ben, will do, as long as my kidneys behave