-
Posts
3,220 -
Joined
-
Last visited
Content Type
Profiles
Forums
Gallery
Events
Everything posted by Hubac's Historian
-
The Speedwell is an excellent subject, IMO, and a really good melding of draftsmanship and kit design. I wanted my first POF build to be of a smaller subject, and this really fits the bill. I am excited about this!
- 1,784 replies
-
- winchelsea
- Syren Ship Model Company
-
(and 1 more)
Tagged with:
-
This is just incomparably better and more crisp than the stock stern plate and quarters. Mega-impressive!!
-
Yes, John, it is often noted of Laurent Hubac that he was among the most intransigent of the First-Marine shipwrights. And while the review between SR and the Royal Charles seems to favor the RC, SR was regarded as a maneuverable ship under sail, and a stable gun platform. Despite the additional width - that the building councils were trying to move away from, in favor of length - Msr. Hubac must have known a thing or two about building warships. As it pertains to deck access to the poop and poop-royal decks, that is definitely a problem that neither Tanneron nor Heller addresses with SR. However, Tanneron does address it on Le Brillant, albeit in an un-satisfactory way: Here, the foot of the poop deck ladder falls directly in front of a gunport. My answer to this problem will be to extend a short gangway from the poop and poop-royal decks, so that I can drop a ladder (oriented East/West) between the guns. I will likey craft a vestigial, inboard rail for these short gangways, that is ornamentally consistent with whatever I make up for the deck railings at those levels. As for the waist gangways, you raise an interesting question that I don’t really know the answer to. On the one hand, there is the outboard timberhead railing that would have been about waist high, in reality. I don’t think it would necessarily be wrong to craft a light stanchion railing, on the inboard side. I can’t say for sure, though, but I will look through my image files. What is lovely to look at is Marsalv’s amazing build of Le Gros Ventre. I am particularly intriqued by his treatment of the waist gangway. Just scroll to the more recent posts: What does seem sensible to add, for sure, are support stanchions, between the guns. I also like his lightly ornamental stool steps to the f’ocsle and quarter decks. By the way, you might recognize the stove, here. Although it is from a later time period, I chose Marsalv’s stove as the model for my own, as it was not wildly divergent from what is suggested in the SP monograph, and it seemed simple enough in its construction to be plausible for this earlier time. Regarding the discussion of exotic mouth meats, I suppose I’d be game. It isn’t as though the animals have a mean tobacco habit, or any other nasty things happening in their mouths. I’ve not yet tried it, though.
- 2,623 replies
-
- heller
- soleil royal
-
(and 9 more)
Tagged with:
-
UhOh! Are you inviting me to take you on a tour of Marc’s museum of wooden objects? AKA, the “Heirloom Furniture Project,” AKA things my children think of in terms of “all that careful surface prep, so please mind your skateboard in the house?” Those things that I’ve been diligently repairing and refreshing because they are my only true professional legacy? Back before my return to ship-modeling - when I was still making furniture - I kept a page on Fine Woodworking’s members’ gallery: https://www.finewoodworking.com/tag/marc-laguardia Interestingly, they appear to have taken down my Maloof rocking chair copy. The online edition of the magazine once used a picture of my rocker in a brief article exploring intellectual property theft. While the chair I made IS very faithful to the Maloof design, it was not made for sale; it was a gift. Further, I patterned the chair from Sam’s own video explaining how he goes about making them, and also with the help of a few coffee table books of his furniture. Anyway… THOSE WERE THE DAYS! Eric, I’ve always wanted a nice set of Stanley socket chisels, just to have them. I like that you finished your Dad’s project.
-
I think that the Captain’s supper was often a dish served cold, as galley cooking likely only happened when swells were manageable. That might be why Tourville was such a determined man - hell or high water, he wanted to run through the teeth of the enemy and get back to his warm hearth at home 🙃 C’est possible.
- 2,623 replies
-
- heller
- soleil royal
-
(and 9 more)
Tagged with:
-
Hi Keith, Your question is a good one, and I can only surmise that the fore and aft faces of the stoves are boarded-up to provide a buffer from the following wind. I wonder, also, whether the tall stern structure doesn’t provide some additional buffering effect for beneath the forecastle deck. The trouble, as far as I can see, with placing the stoves further aft is that there is less hull beneath the stoves to support their weight, and there is already a heavy super-structure above them. I am always happy if anyone can provide hard knowledge on this subject, as I am really just reasoning through it in my own mind.
- 2,623 replies
-
- heller
- soleil royal
-
(and 9 more)
Tagged with:
-
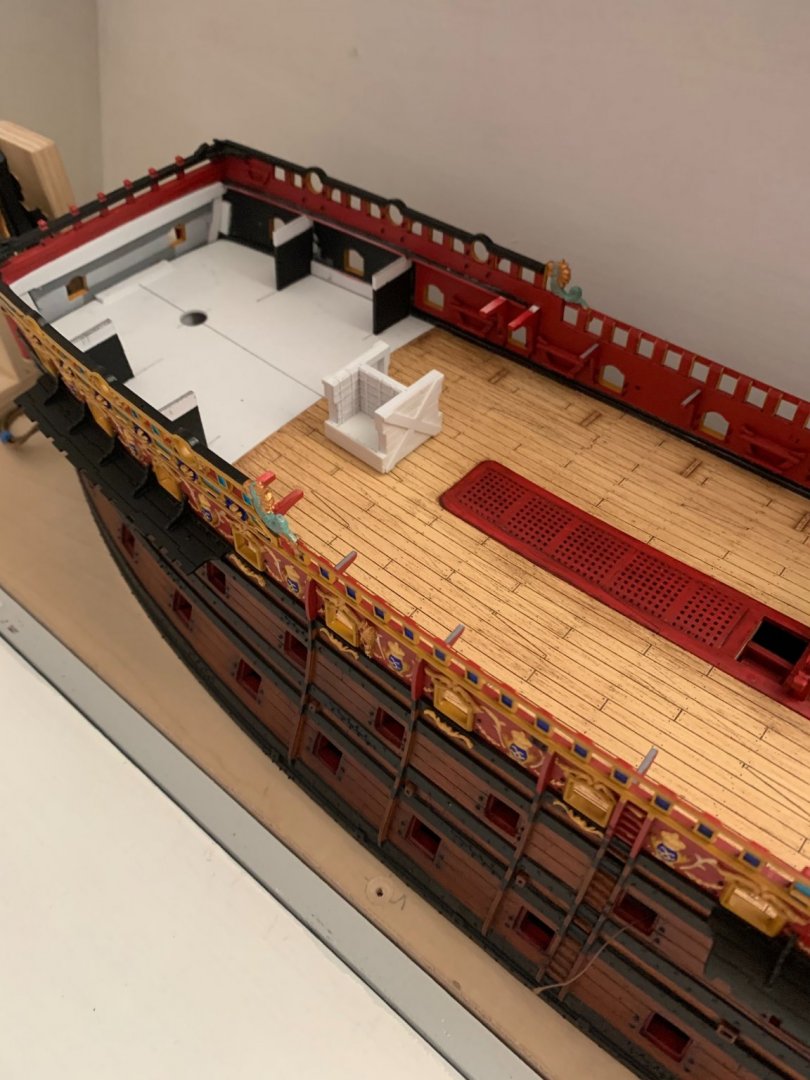
Hi John, On the SP, there is no forecastle deck to provide cover, so the stoves would need to be placed on the middle deck. For SR, it makes sense to place the stoves in the center of the main deck because there would be forecastle guns above where the vents need to be. Also, from a practical standpoint, this heavy counterweight is better managed - if it does need to be higher up on the main deck - along the ship’s centerline, as opposed to the ship sides, which are already balancing the weight of the guns. The other practical problem with placing the stoves between the guns is that it would make working the guns in that area that much more cramped and difficult. I’m really relying in the English dockyard models as evidentiary proof that the stoves on a French First-Rate, with a forecastle, should be placed centerline, beneath the forecastle deck.
- 2,623 replies
-
- heller
- soleil royal
-
(and 9 more)
Tagged with:
-
I am definitely interested in a POF model, but it isn’t something I would take on any time in the next five years, or so.
- 1,784 replies
-
- winchelsea
- Syren Ship Model Company
-
(and 1 more)
Tagged with:
-
Few people are, and at best - I’m making an educated guess, here.
- 2,623 replies
-
- heller
- soleil royal
-
(and 9 more)
Tagged with:
-
Very nicely done! I appreciate your fail-safe approach to glueing. I am similarly inclined.
-
Thank you, Mark. As best I understand the time, the stove would have had metal sheathing on the deck. The sleepers provide some extra separation from the stove box, and the box would be packed with sand, then a brick layer, and finally the bricks would be cloaked in these iron plates.
- 2,623 replies
-
- heller
- soleil royal
-
(and 9 more)
Tagged with:
-
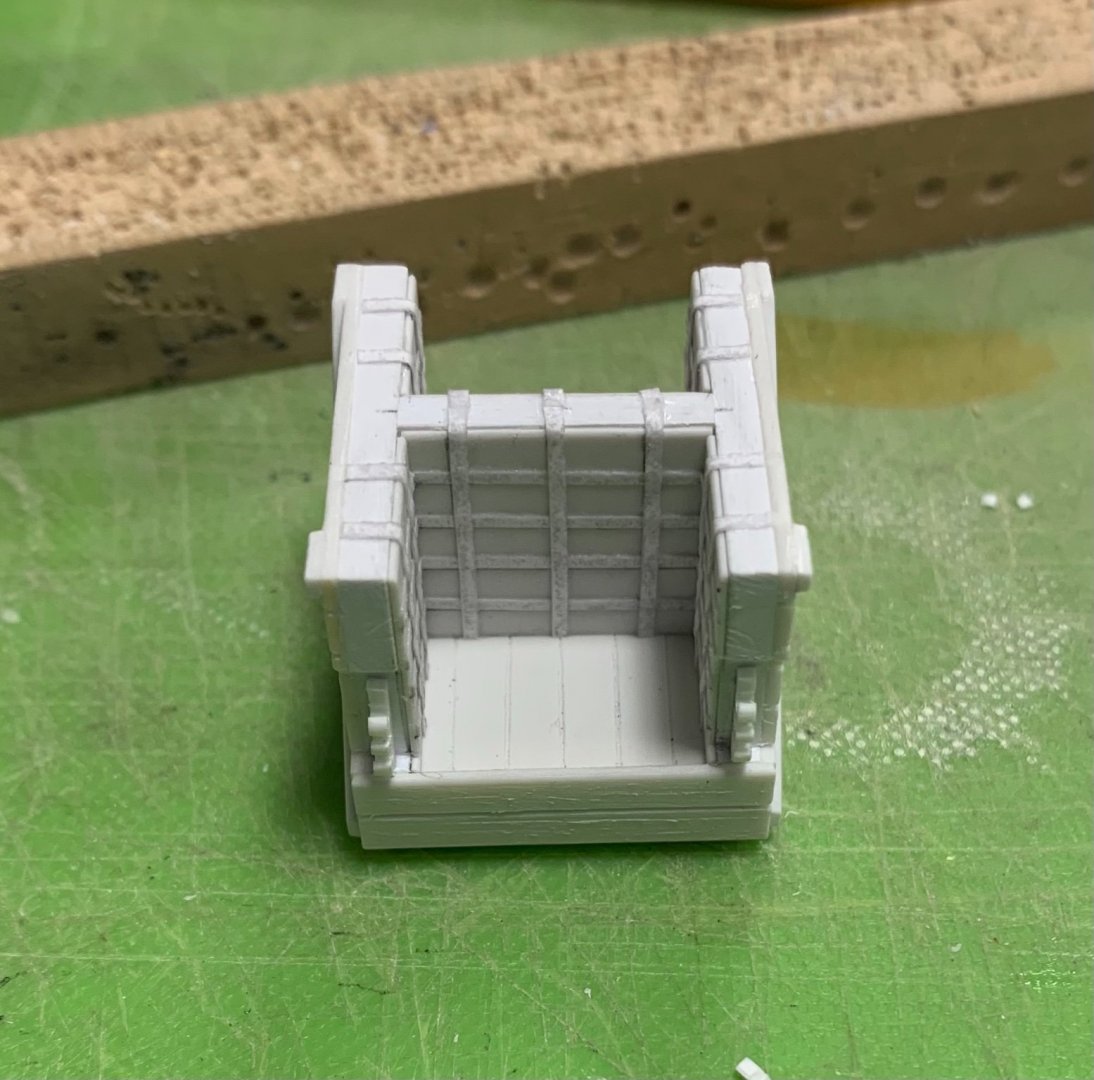
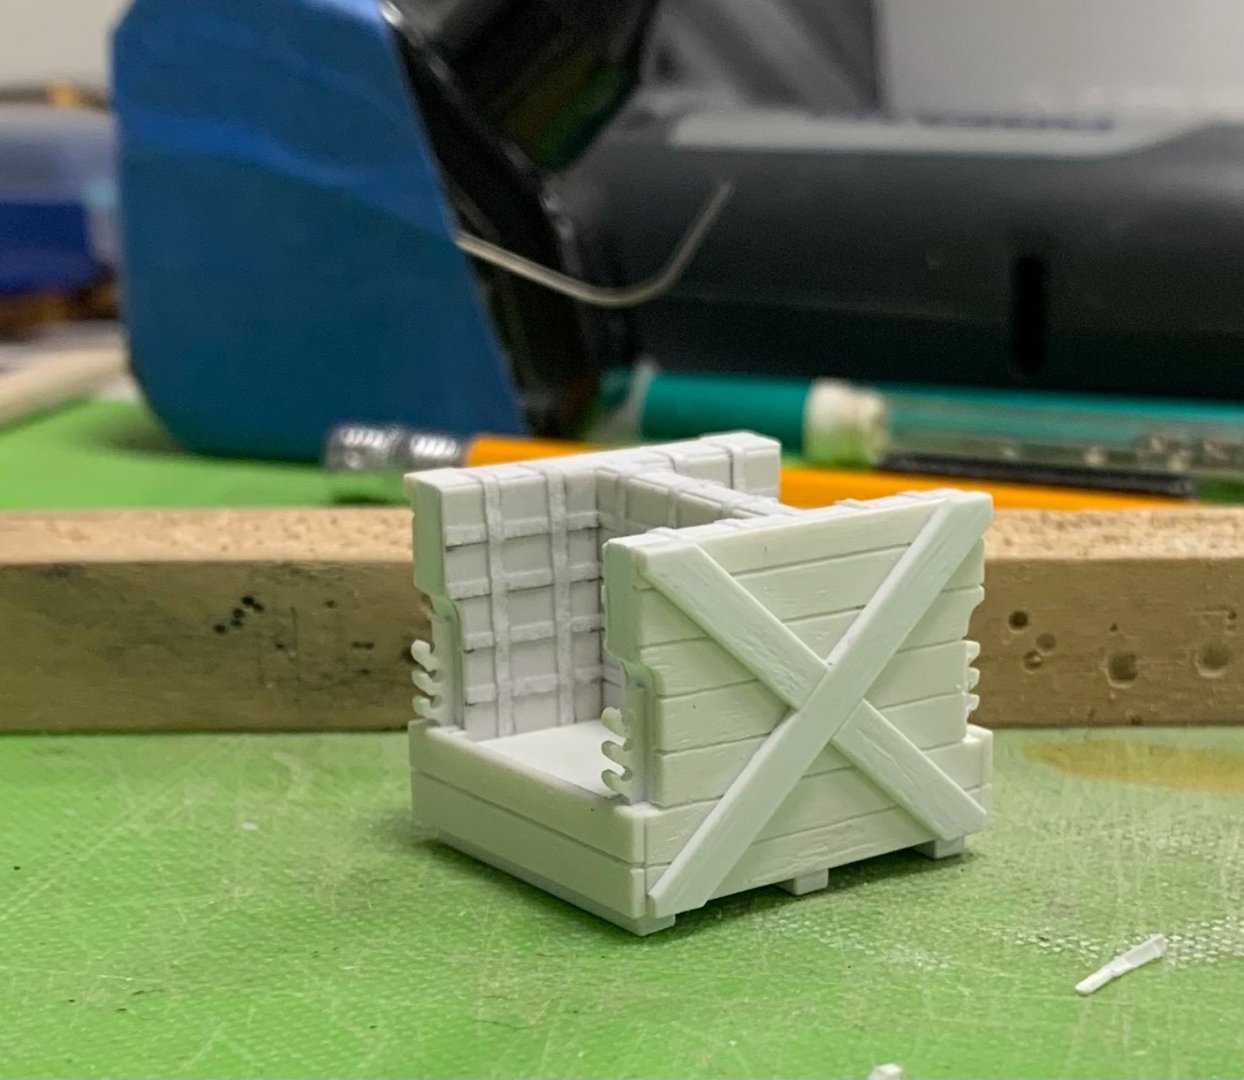
The stove is ready for paint: The best scale effect for the lining plate lattices was pedestrian typing paper cut into narrow strips and CA’d in-place. I sanded coarse scratches into the planking, so that the exterior will pick up the Van Dyke Brown distressing well. I still need to make the “metal” deck sheathing that goes beneath the stove sleepers, but that is a simple thing. I’m close to being ready for paint on the aft, starboard bulwark. I took even greater care in fitting this last piece because I did not want to deal with any putty at all, on the outside seam. Paint touch-up was a real pain for the three bulwarks prior. More to come! Thank you for your interest and for stopping by.
- 2,623 replies
-
- heller
- soleil royal
-
(and 9 more)
Tagged with:
-
I found this super clear photographic essay of the Winnie, on YT. Maybe most of you have seen this already, but it’s worth a look if you haven’t: That channel is an excellent one to subscribe to, as it does similarly excellent photo essays of a wide range of dockyard models.
- 1,784 replies
-
- winchelsea
- Syren Ship Model Company
-
(and 1 more)
Tagged with:
-
What about “hack,” as in a quick and easy hack to do so and so? I am already making use of your tips. The mirror chisel trick is really good when trying to square the ends of very small stock, like 1/8” square stock. So, thanks for that! Eric, thank you also for plugging my build! The check’s in the mail 😉 I appreciate the kind words, Keith! I also like to do that sort of cross-pollination of other builders’ work, and have often been delightfully surprised by someone else’s suggestion.
-
This is a very clever method for stropping that I will be adopting, myself. Is there a particular CA, or other adhesive that you like for closing the strop ends?
-
I am glad to be reminded of one of my all-time favorite models. Drazen, I hope you are well, and that we may soon see your latest progress. All the best, Marc
- 487 replies
-
- ship of the line
- 80 guns
-
(and 1 more)
Tagged with:
About us
Modelshipworld - Advancing Ship Modeling through Research
SSL Secured
Your security is important for us so this Website is SSL-Secured
NRG Mailing Address
Nautical Research Guild
237 South Lincoln Street
Westmont IL, 60559-1917
Model Ship World ® and the MSW logo are Registered Trademarks, and belong to the Nautical Research Guild (United States Patent and Trademark Office: No. 6,929,264 & No. 6,929,274, registered Dec. 20, 2022)
Helpful Links
About the NRG
If you enjoy building ship models that are historically accurate as well as beautiful, then The Nautical Research Guild (NRG) is just right for you.
The Guild is a non-profit educational organization whose mission is to “Advance Ship Modeling Through Research”. We provide support to our members in their efforts to raise the quality of their model ships.
The Nautical Research Guild has published our world-renowned quarterly magazine, The Nautical Research Journal, since 1955. The pages of the Journal are full of articles by accomplished ship modelers who show you how they create those exquisite details on their models, and by maritime historians who show you the correct details to build. The Journal is available in both print and digital editions. Go to the NRG web site (www.thenrg.org) to download a complimentary digital copy of the Journal. The NRG also publishes plan sets, books and compilations of back issues of the Journal and the former Ships in Scale and Model Ship Builder magazines.


