


drobinson02199
-
Posts
917 -
Joined
-
Last visited
Content Type
Profiles
Forums
Gallery
Events
Posts posted by drobinson02199
-
-
Thanks, HOF. I found them online and ordered both the general and rigging plans.
Regards,
David
-
Hof:
Not aware of "Campbell's Plans". What are they and how would I get them?
Thanks for the heads up. I have just started -- one of my planned steps is to look for previous build logs to see what people had to work through.
Regards,
David
-
-
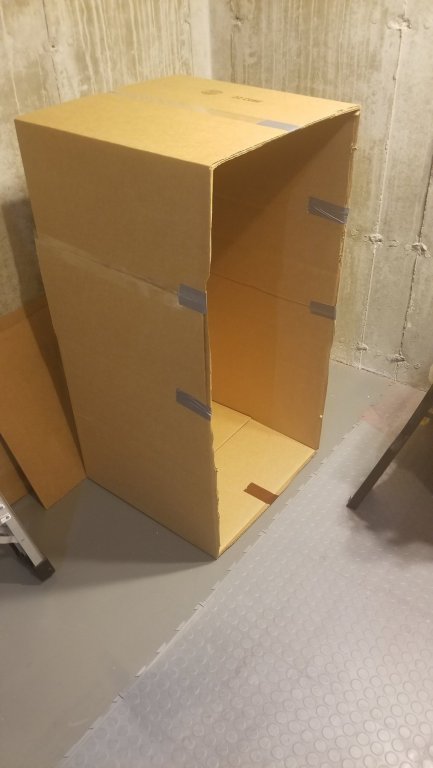
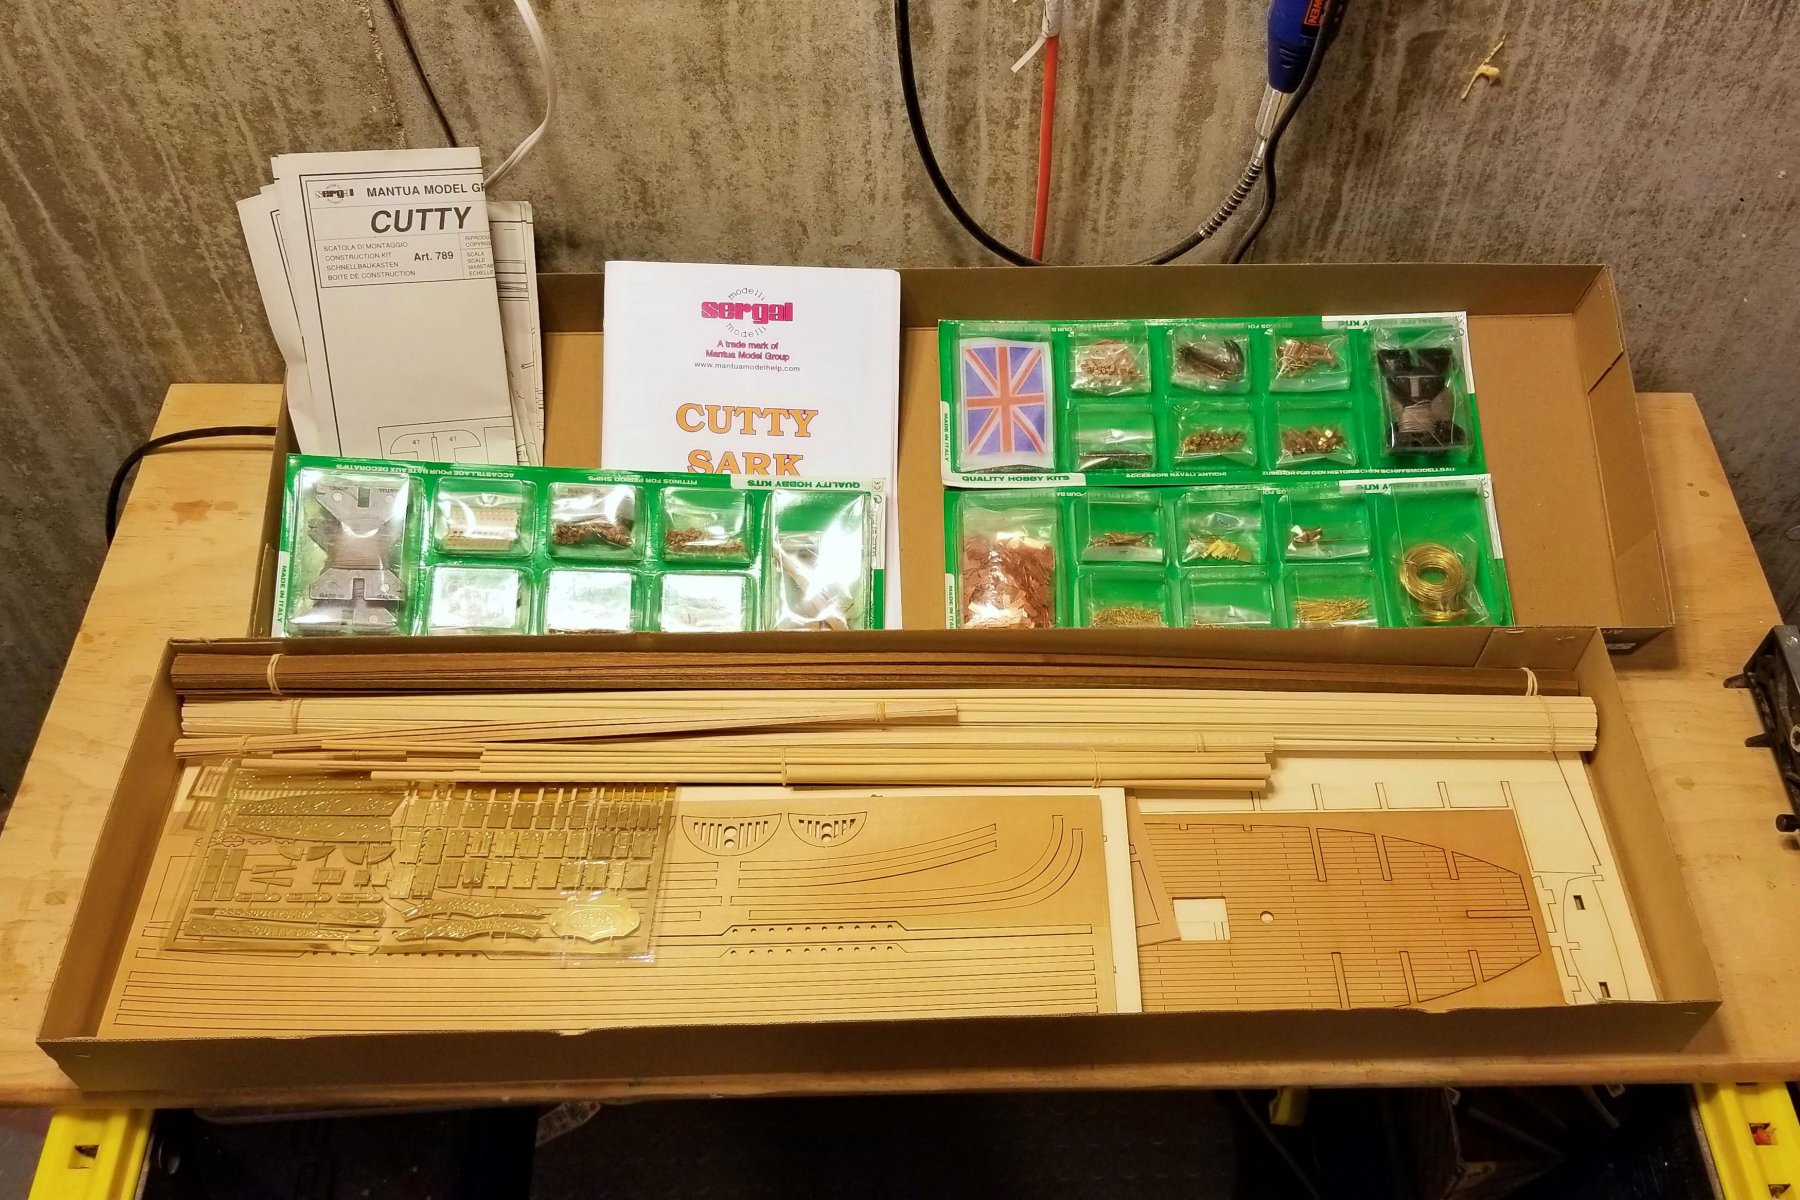
Beginning a new one after a short break. Here's the "what's in the box" picture.
This is my first Mantua kit, and I'll be interested to see differences from other kit makers. One thing I've noticed is that plans are printed on both sides of the paper, which may turn out to be cumbersome (vs. just posting them up on the wall).
Regards,
David

-
She's a beautiful build, Chris.
Regards,
David
- vossy and popeye the sailor
-
 2
2
-
-
Micro Marine:
Yeah -- I am constantly re-engineering my plan for my home office -- the only place I'm allowed to have them. This one will make 10.
You mentioned the St. Lawrence -- in July we'll be in the 1000 Islands Area, and out on the water one day, so I'll look for some CCs.
Regards,
David
-
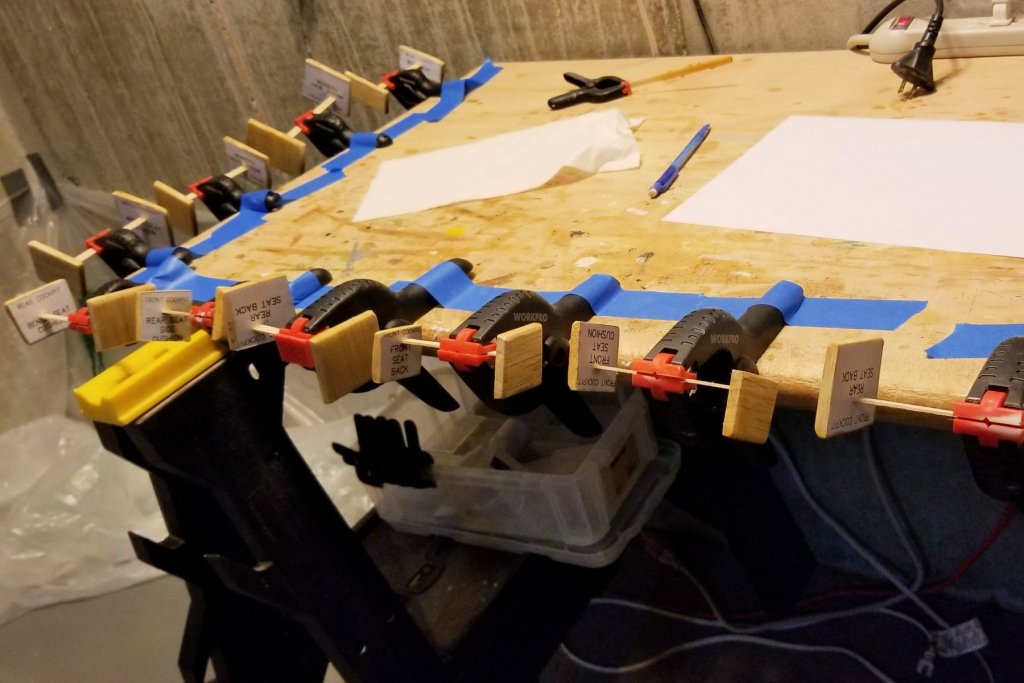
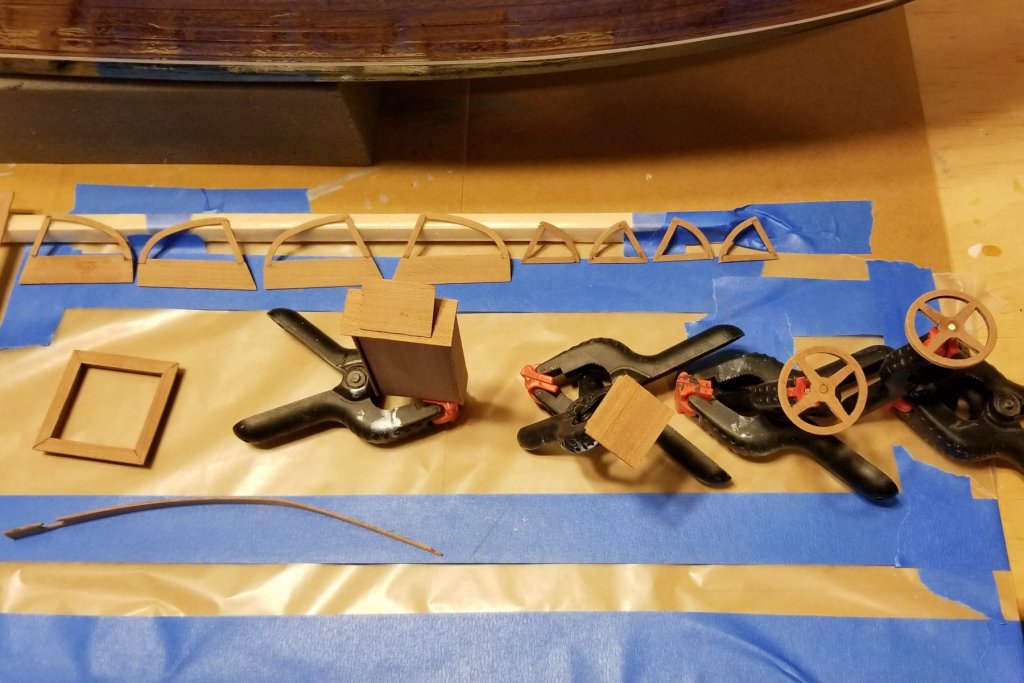
I have cut and shaped and dry-fitted the seat cushions. When I paint them, I want the paint to continue under the cushions a bit so that nothing of the back side edge is visible. But that makes painting more difficult. My solution was to glue a thin stick to the back of the cushions, two to each stick, and use clamps to hold them for drying. Here they are with sealer on the balsa waiting to dry. Then I'll use the same approach when I paint them, continuing the paint a bit under the edge to the back side.
The sticks will pop off and I can sand down any residue on the back.
Regards,
David
- BenF89, vossy, Kenneth Powell and 1 other
-
4
-
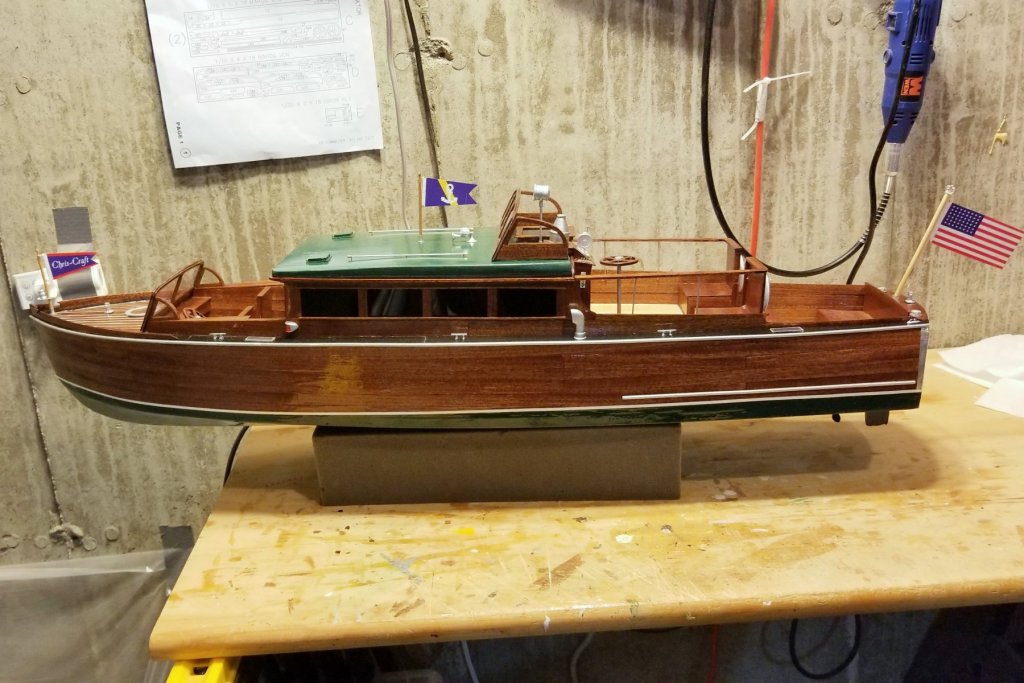
Everything is now done except for the seat cushions. I have to be careful with those because they are made of the hated balsa wood, which has given me so many fits building this model.

This went fast because once you get the finishing done, it's just assembly. BTW, it's supposed to have two horns, but one of mine was broken.
The seats will be hunter green, which should look really nice against the dark wood.
Regards,
David


- ScottRC, GrandpaPhil, coxswain and 7 others
-
10
-
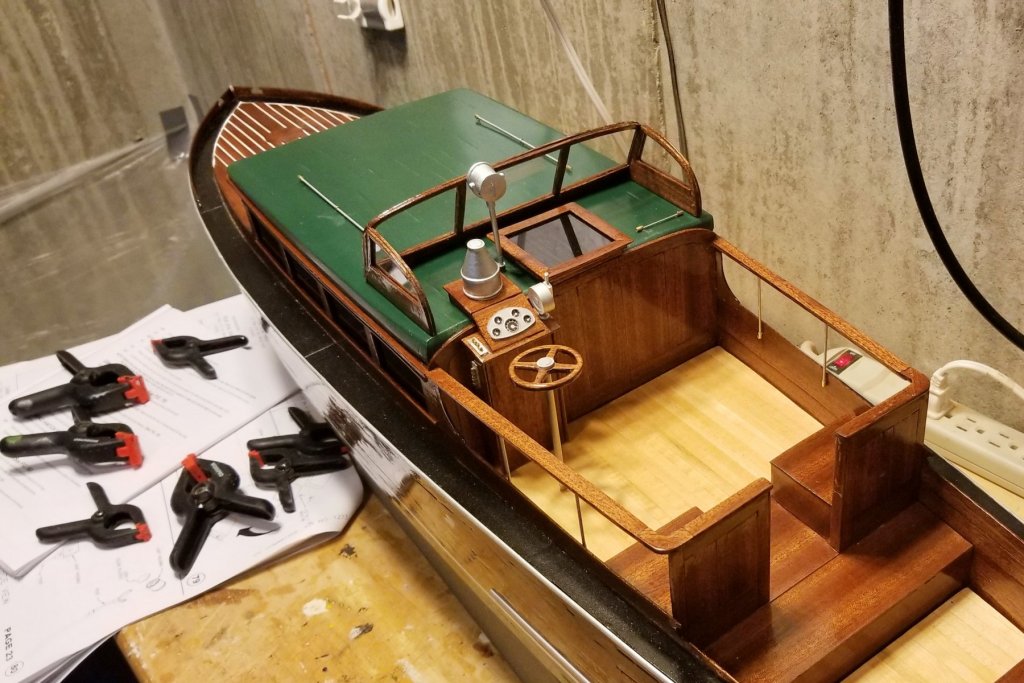
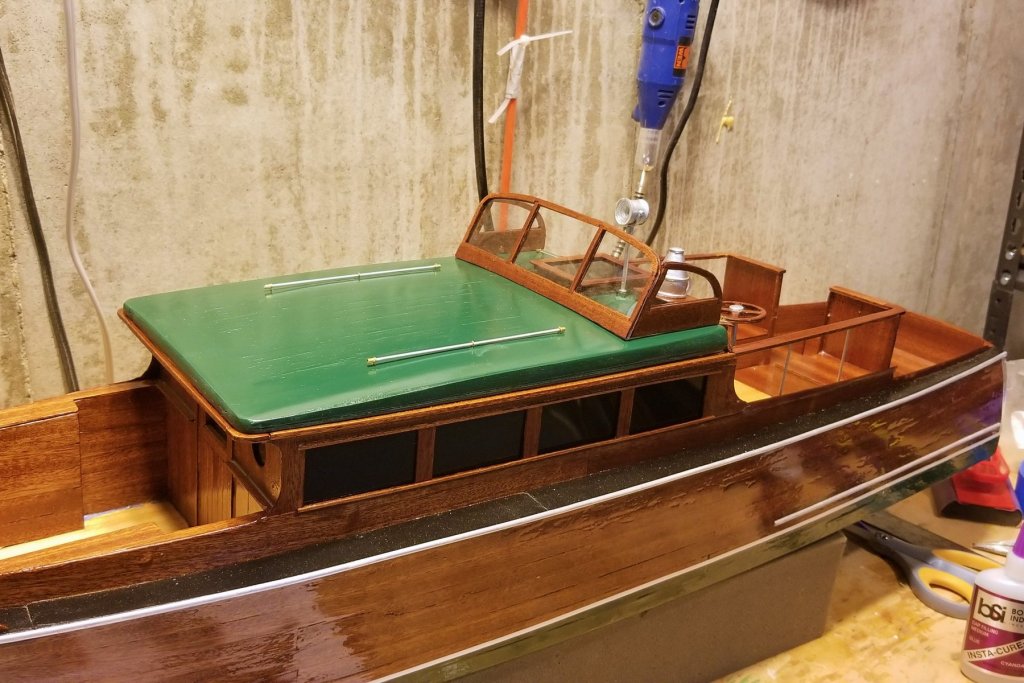
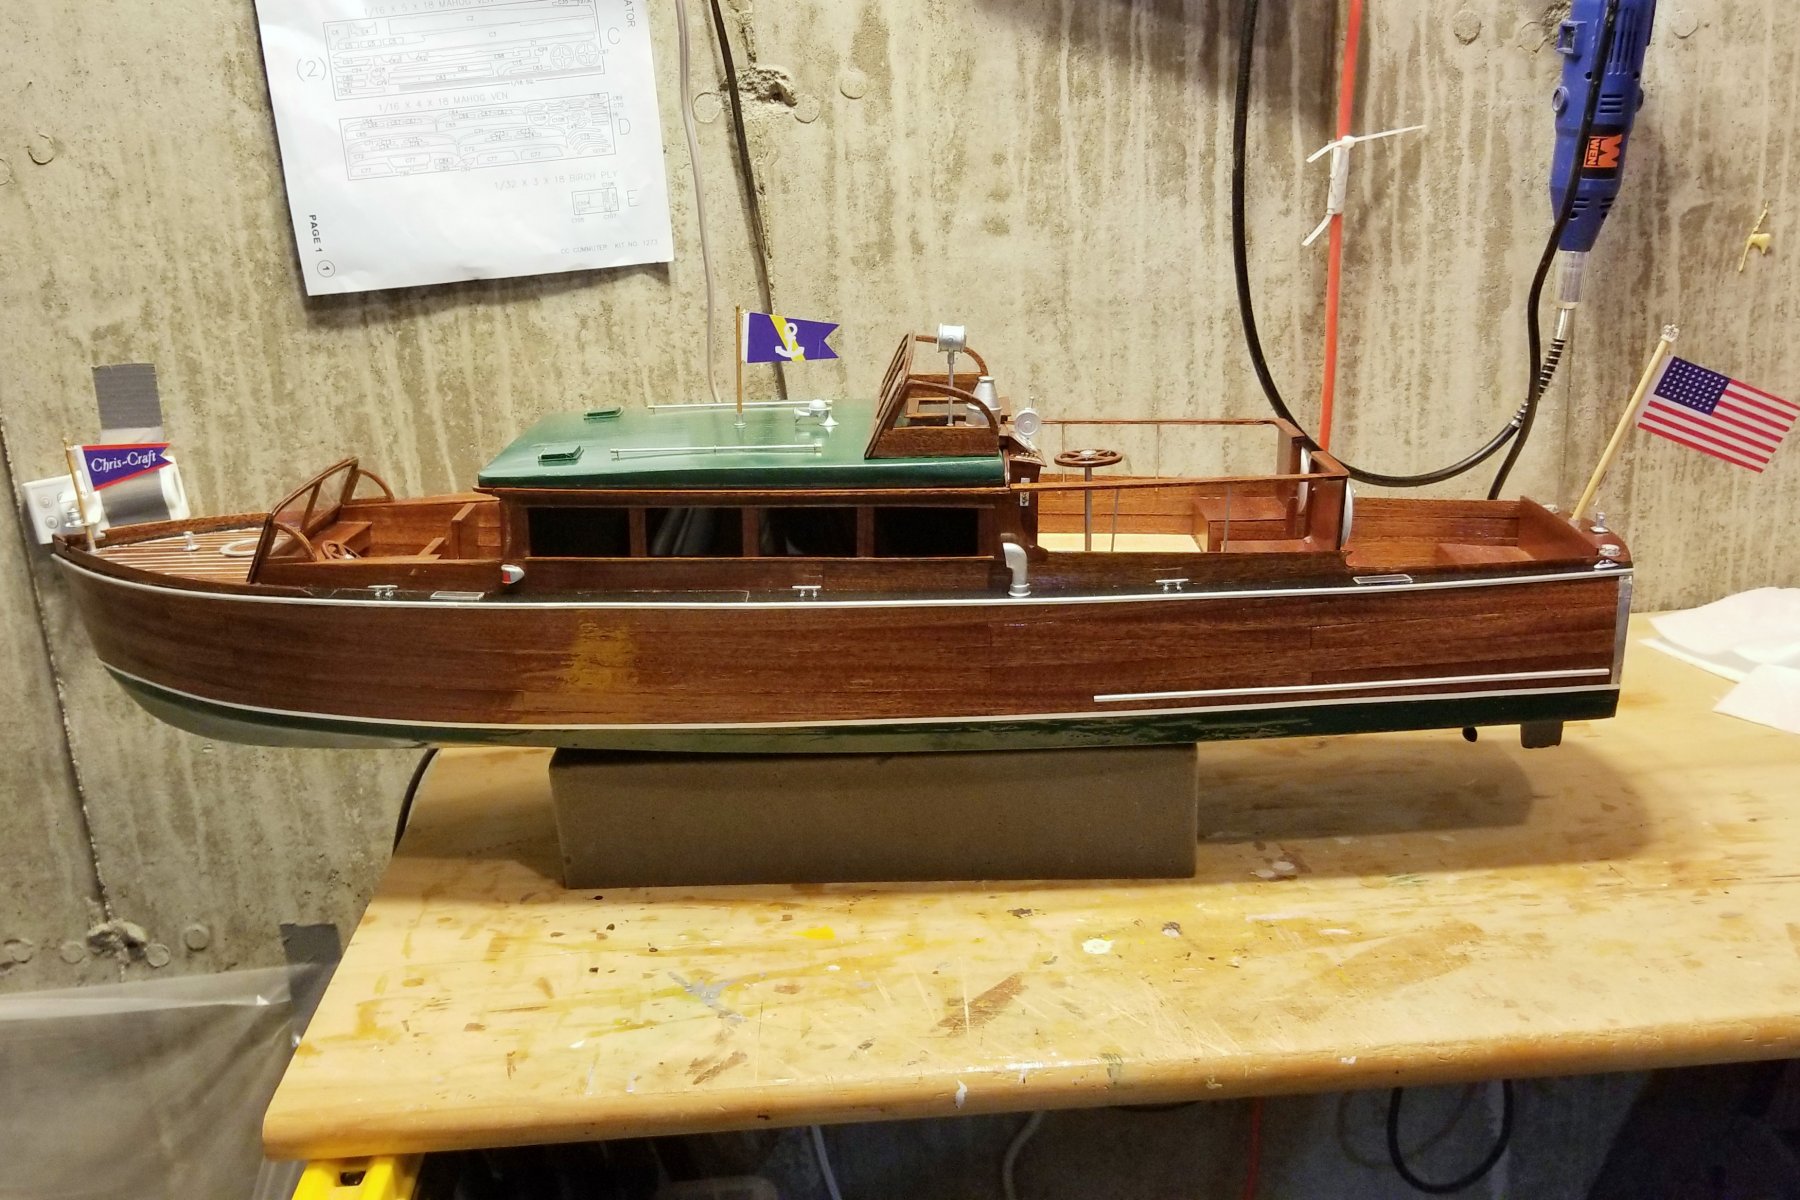
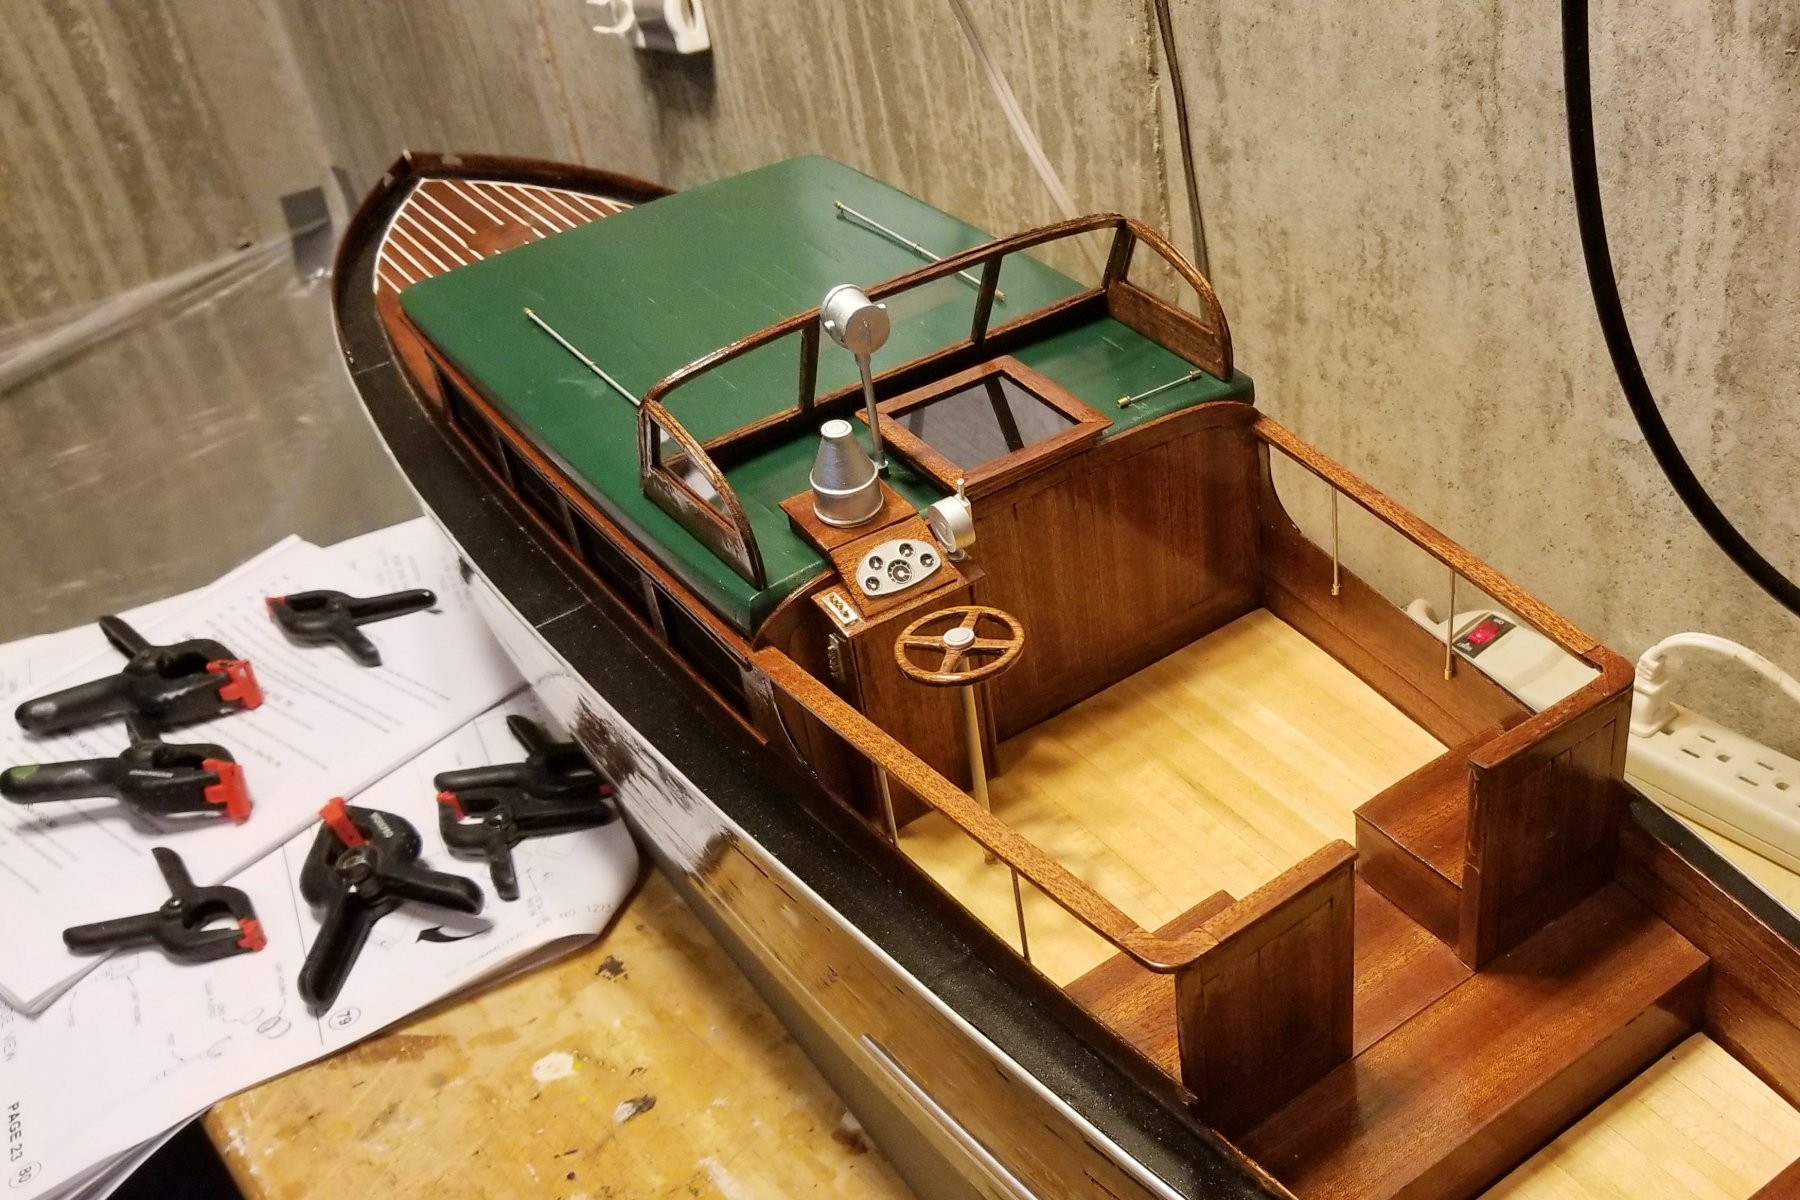
Rear console, windshield and grab rails now installed. There's a bit more detail needed on the roof. It's still just dry-fitted -- I won't glue it down until I have all of the detail (hatches, pennant, horns) installed.
For the smaller parts, I skipped the third epoxy coat, and it seemed to be fine, but I'm getting better at applying the first two. I would not recommend that for the hull, which is a large "mirror-like" surface and needs all 3 coats, but on the smaller parts, it doesn't seem to matter to my forgiving eye.
The cabin roof is made of balsa, and it's a bear to work with. I drilled a 1/8" hole for the spotlight, and it chipped away -- had to fill with wood filler and touch up. So for the grab rail eyelets, I just pushed them through without drilling. I'm modifying my approach to the rest of the roof details to make sure I don't do any more drilling on it.
Regards,
David
- Ryland Craze, Zapto, bruce d and 9 others
-
12
-
Wonderful detail inside the pilot house.
Regards,
David
- popeye the sailor and vossy
-
2
-
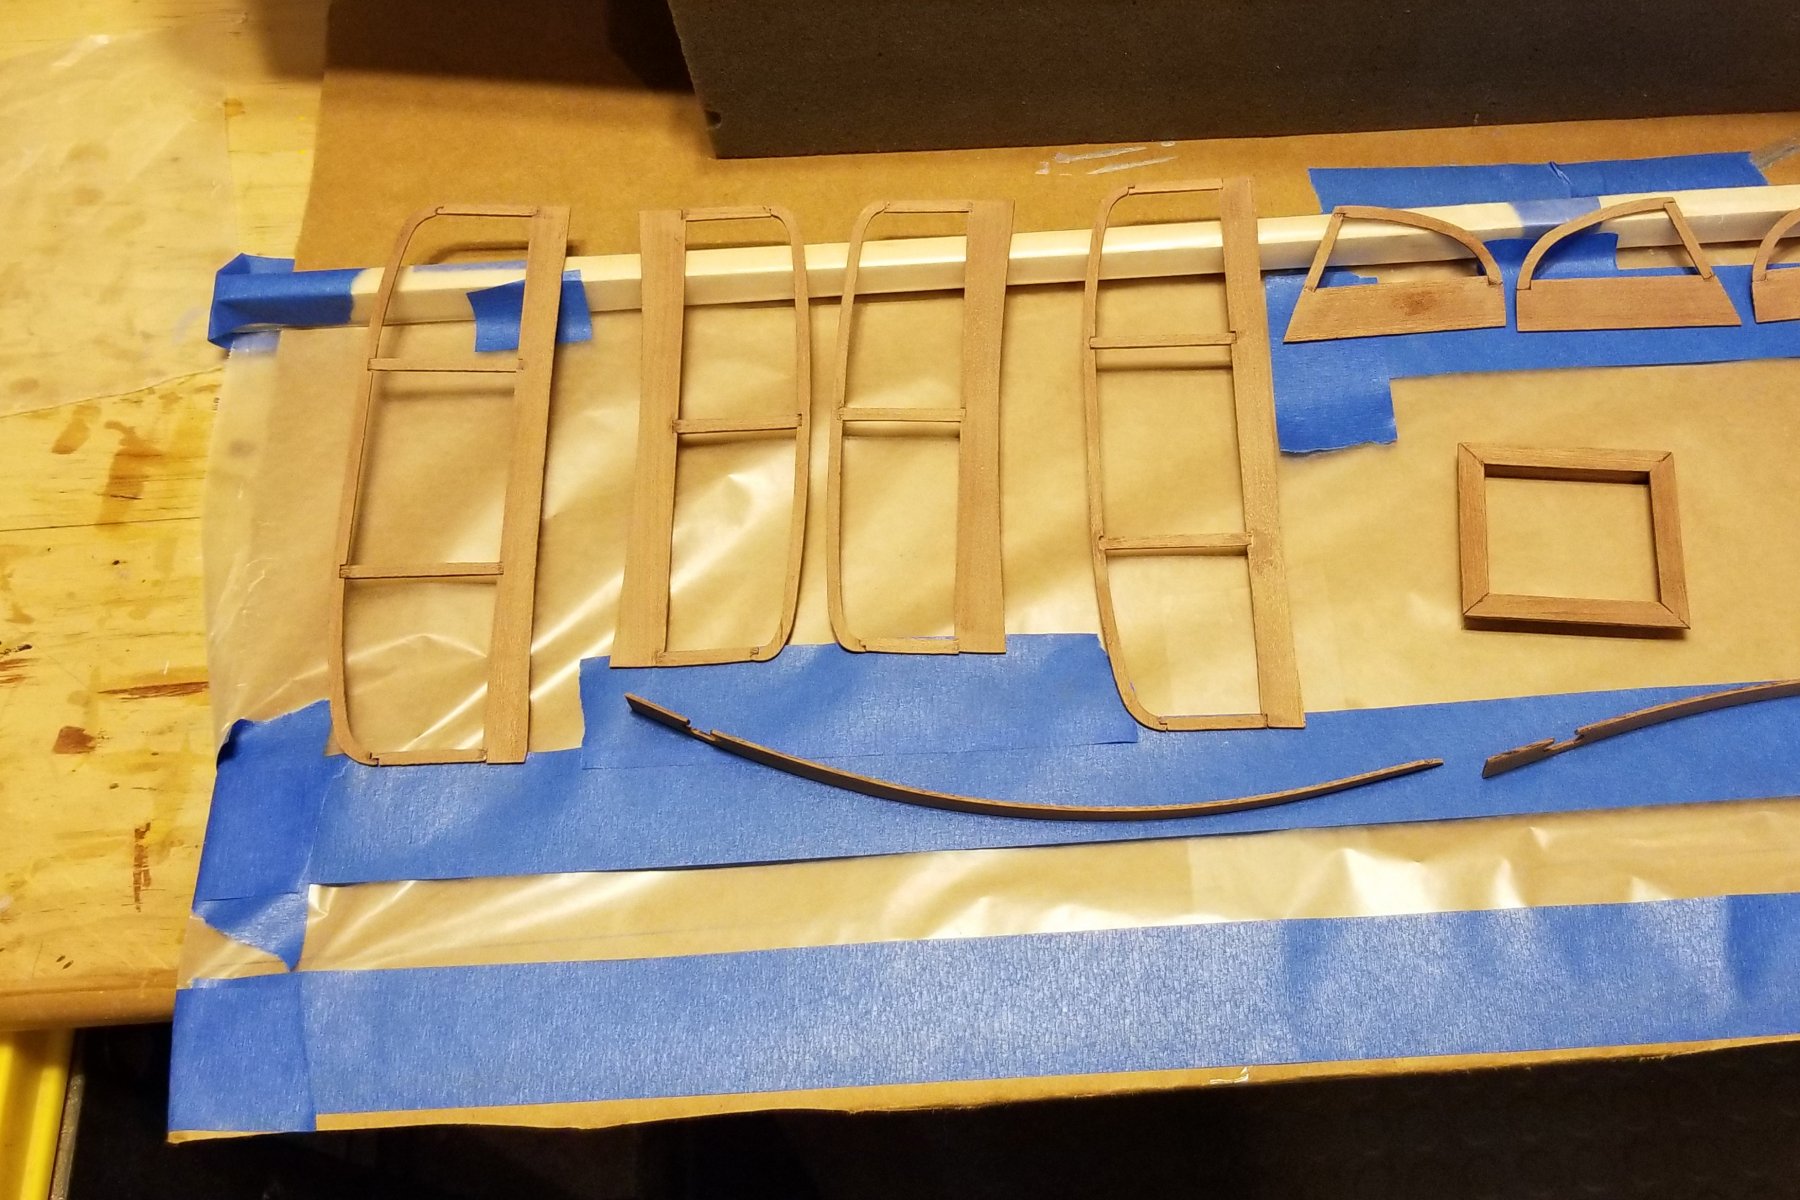
I'm now at the small parts stage, and with the epoxy finish process involving heat + mix + apply + hot box cure done 3 times plus at least one more spray coat, I decided to work ahead and prepare all of the remaining mahogany parts so I could finish them all at once. See pictures of the parts ready to begin the finishing process. Once these are finished, I can go back in the manual and start detailing the boat.
Regards,
David


- zappto, thibaultron, gjdale and 6 others
-
9
-
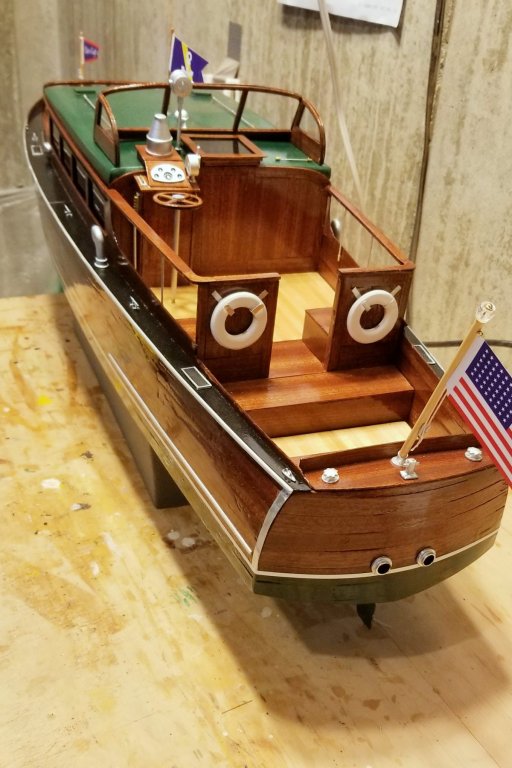
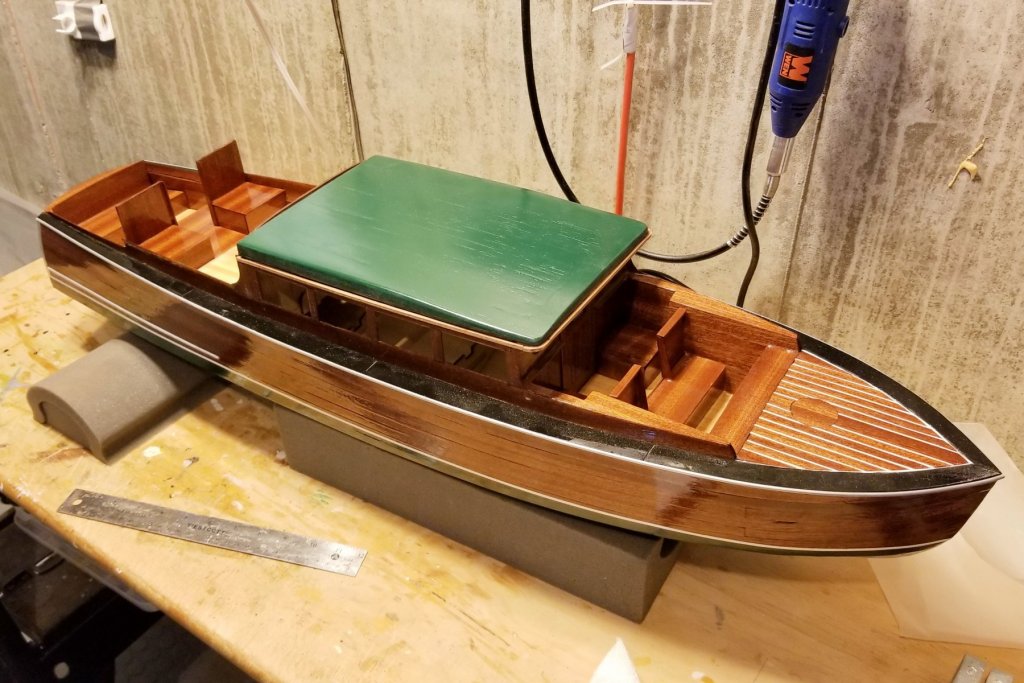
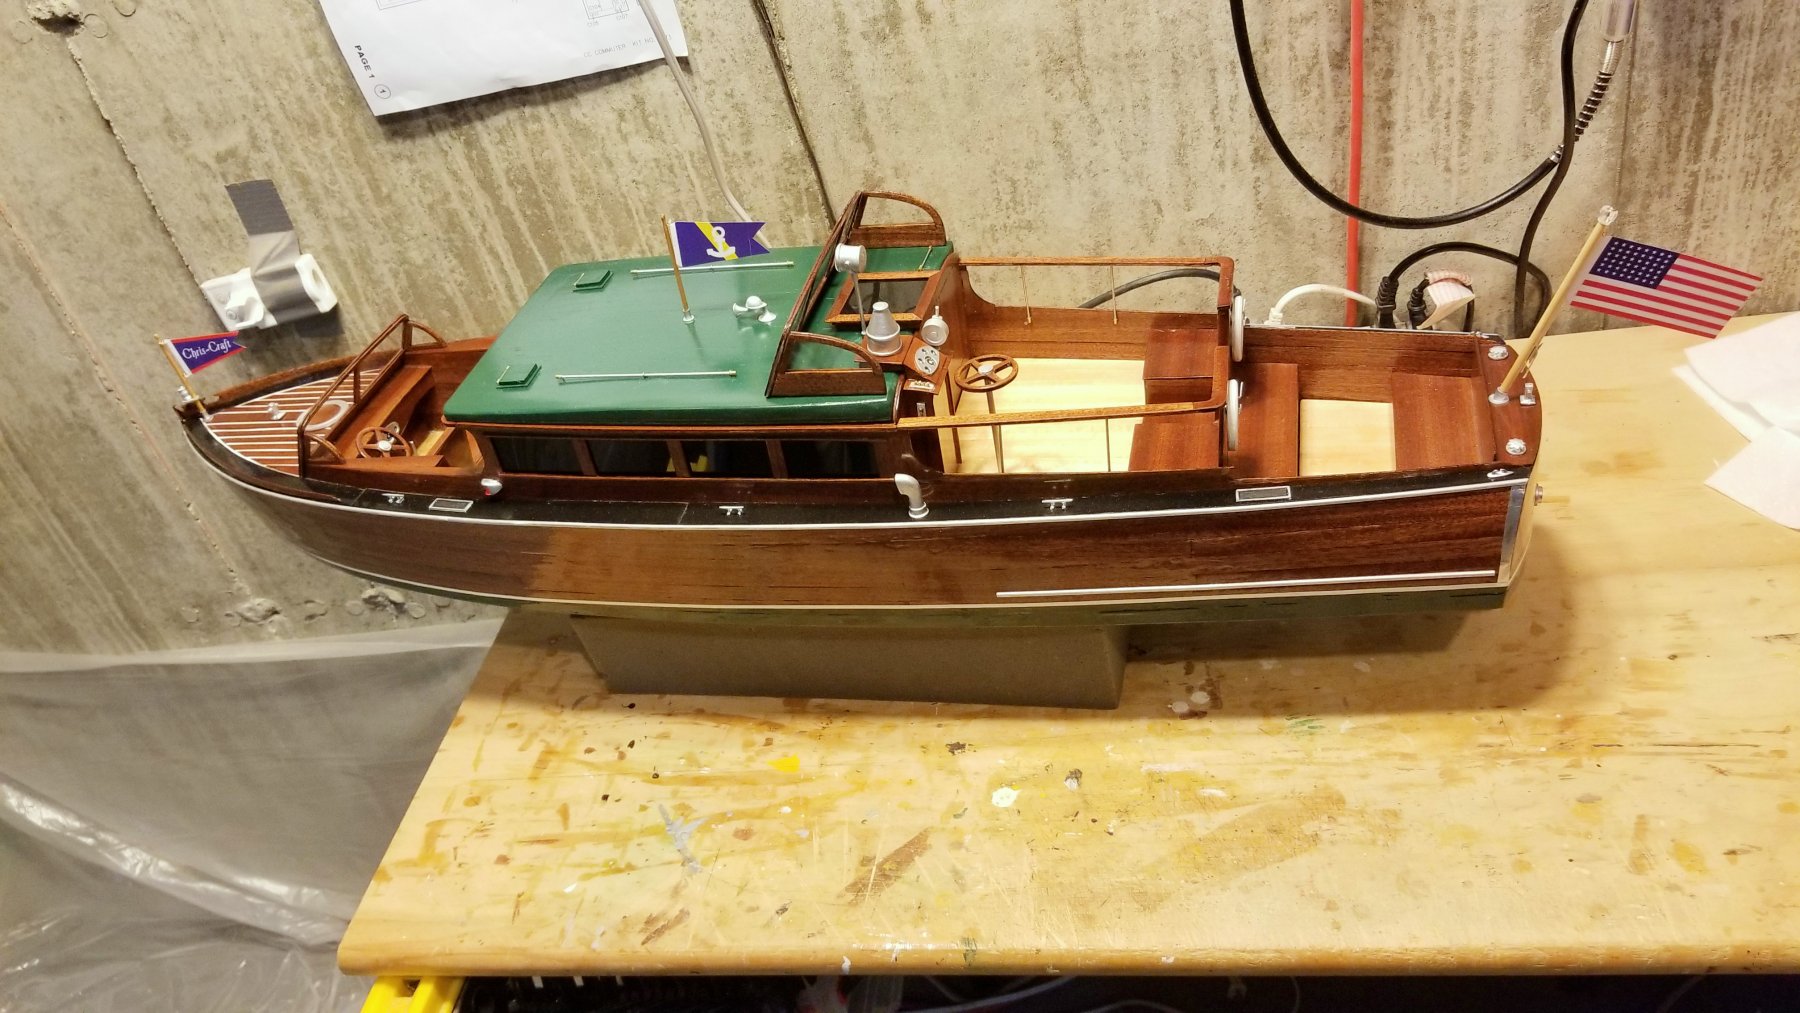
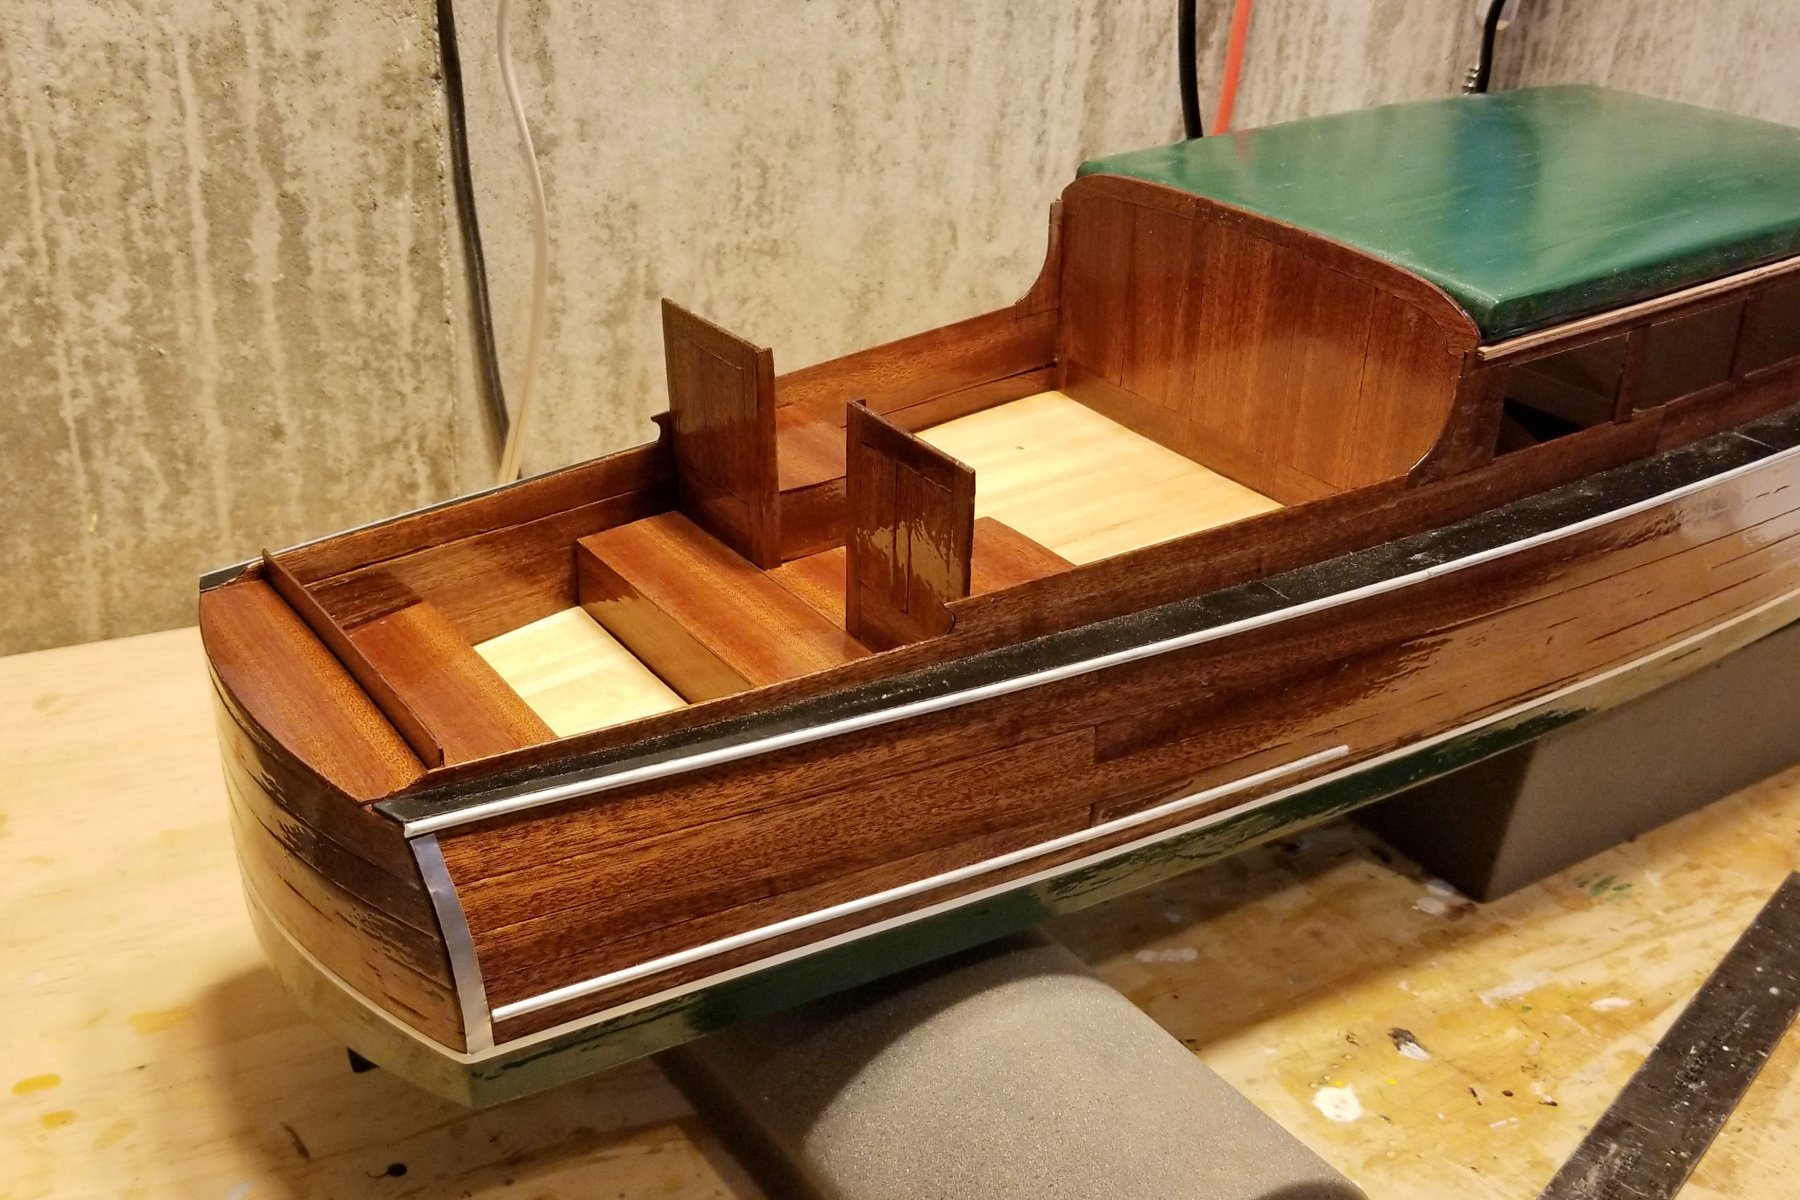
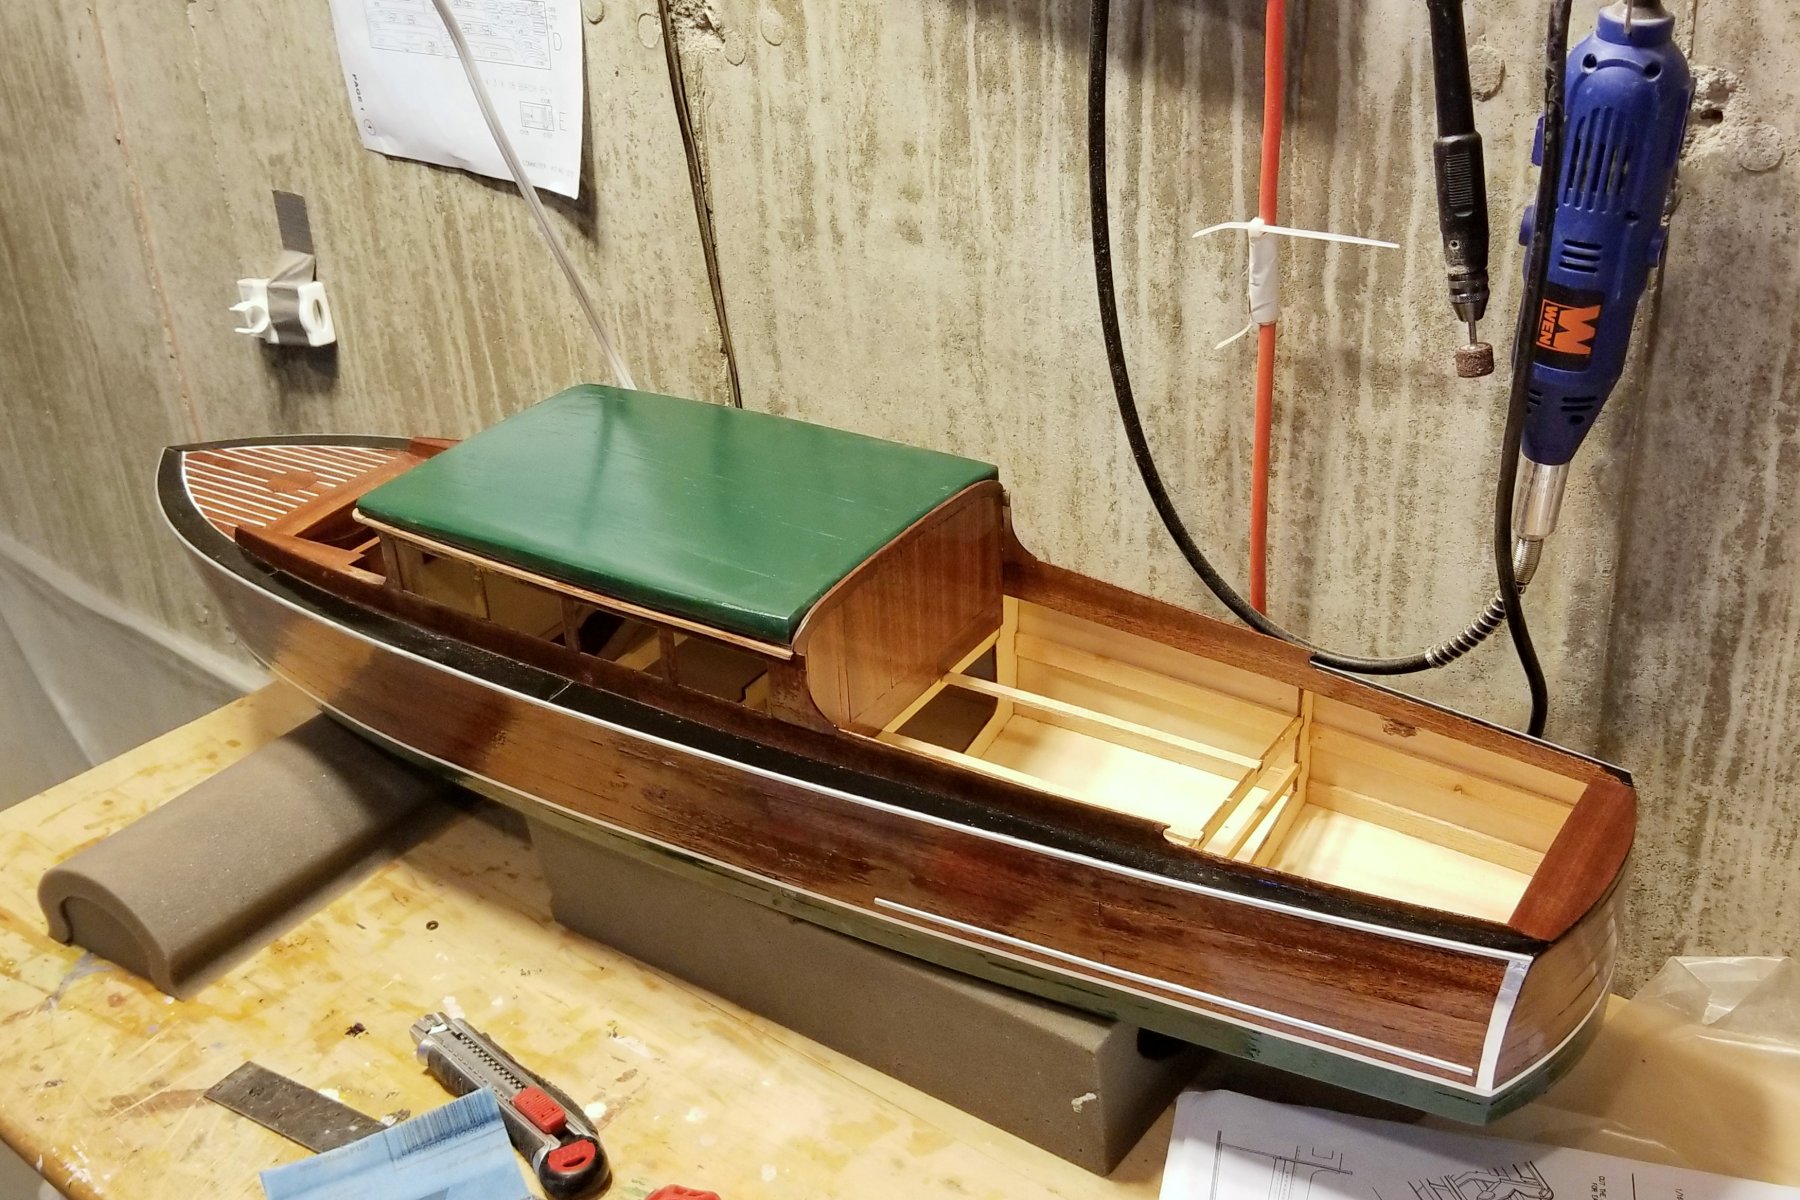
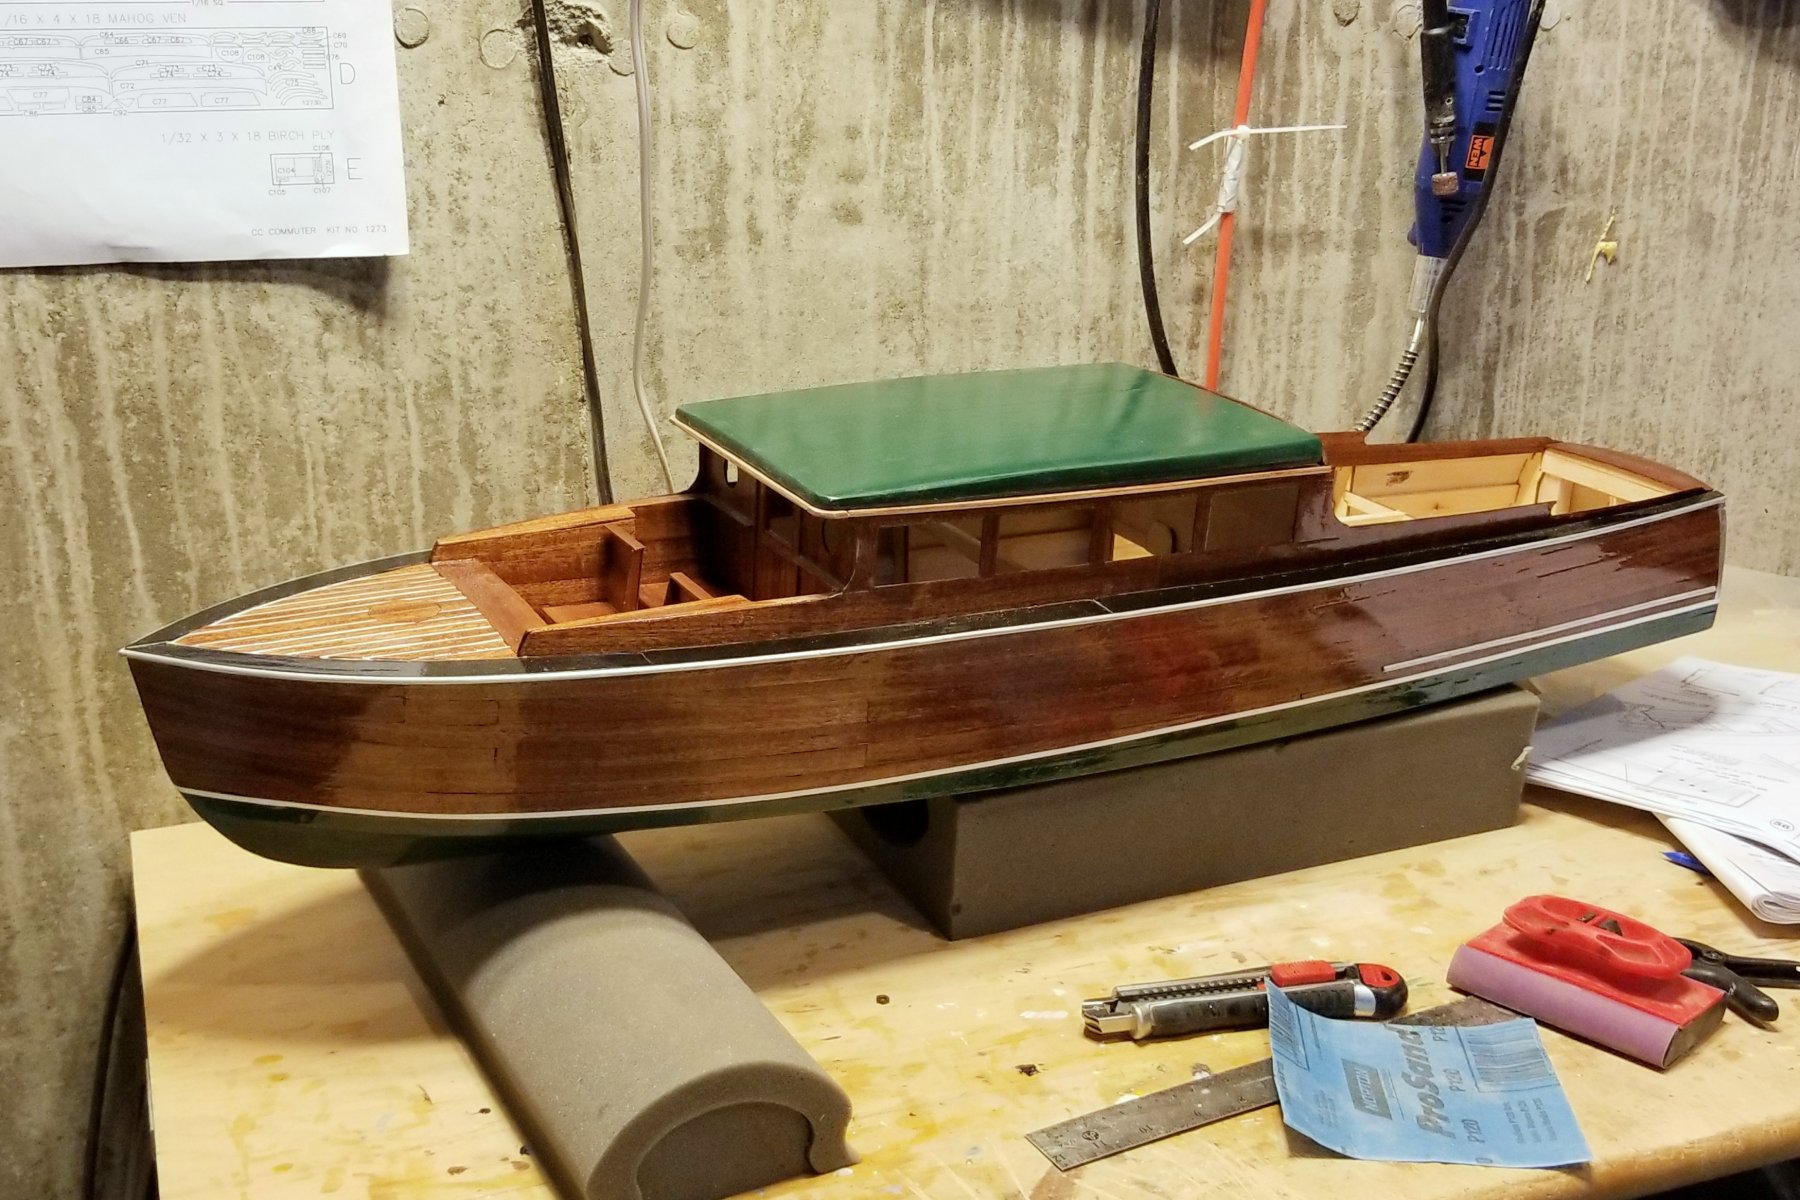
Rear cockpit now done, although lots of details left to do. The cabin roof is still not glued on, and the mahogany trim below it needs to be finished once the full handrail is done. The front seats are also just dry-fitted, but the rear is all glued in. Because it's a static model, I skipped a step to make part of the rear deck removable.
The instructions are interesting -- they say to finish the seats "with your favorite material", which implies regular varnish. That would be simpler, but it leaves the seats out of step with the finish on the rest of the boat, so I did all of the rear (and the front seats too) with the epoxy/spray treatment.
The epoxy/spray is not something you want to do a piece at a time, so I'm doing it in batches. My plan is just one more batch after this if construction permits that.
Regards,
David

- zappto, thibaultron, vossy and 5 others
-
8
-
-
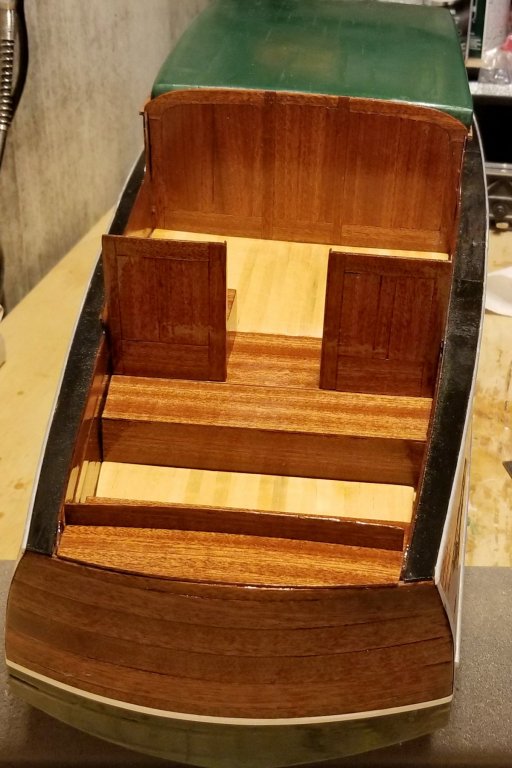
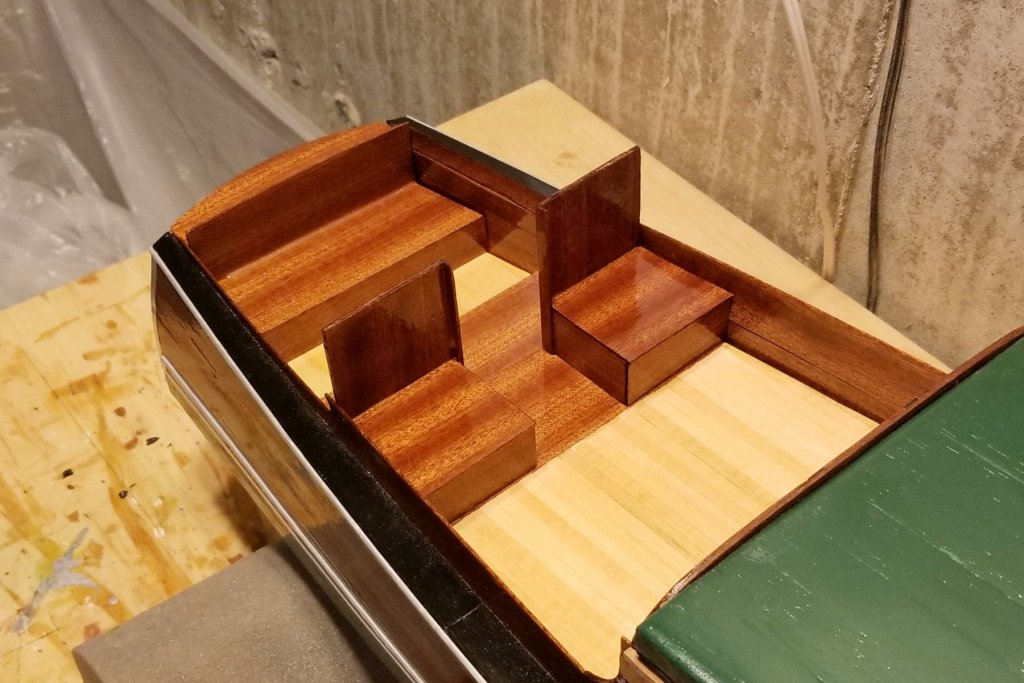
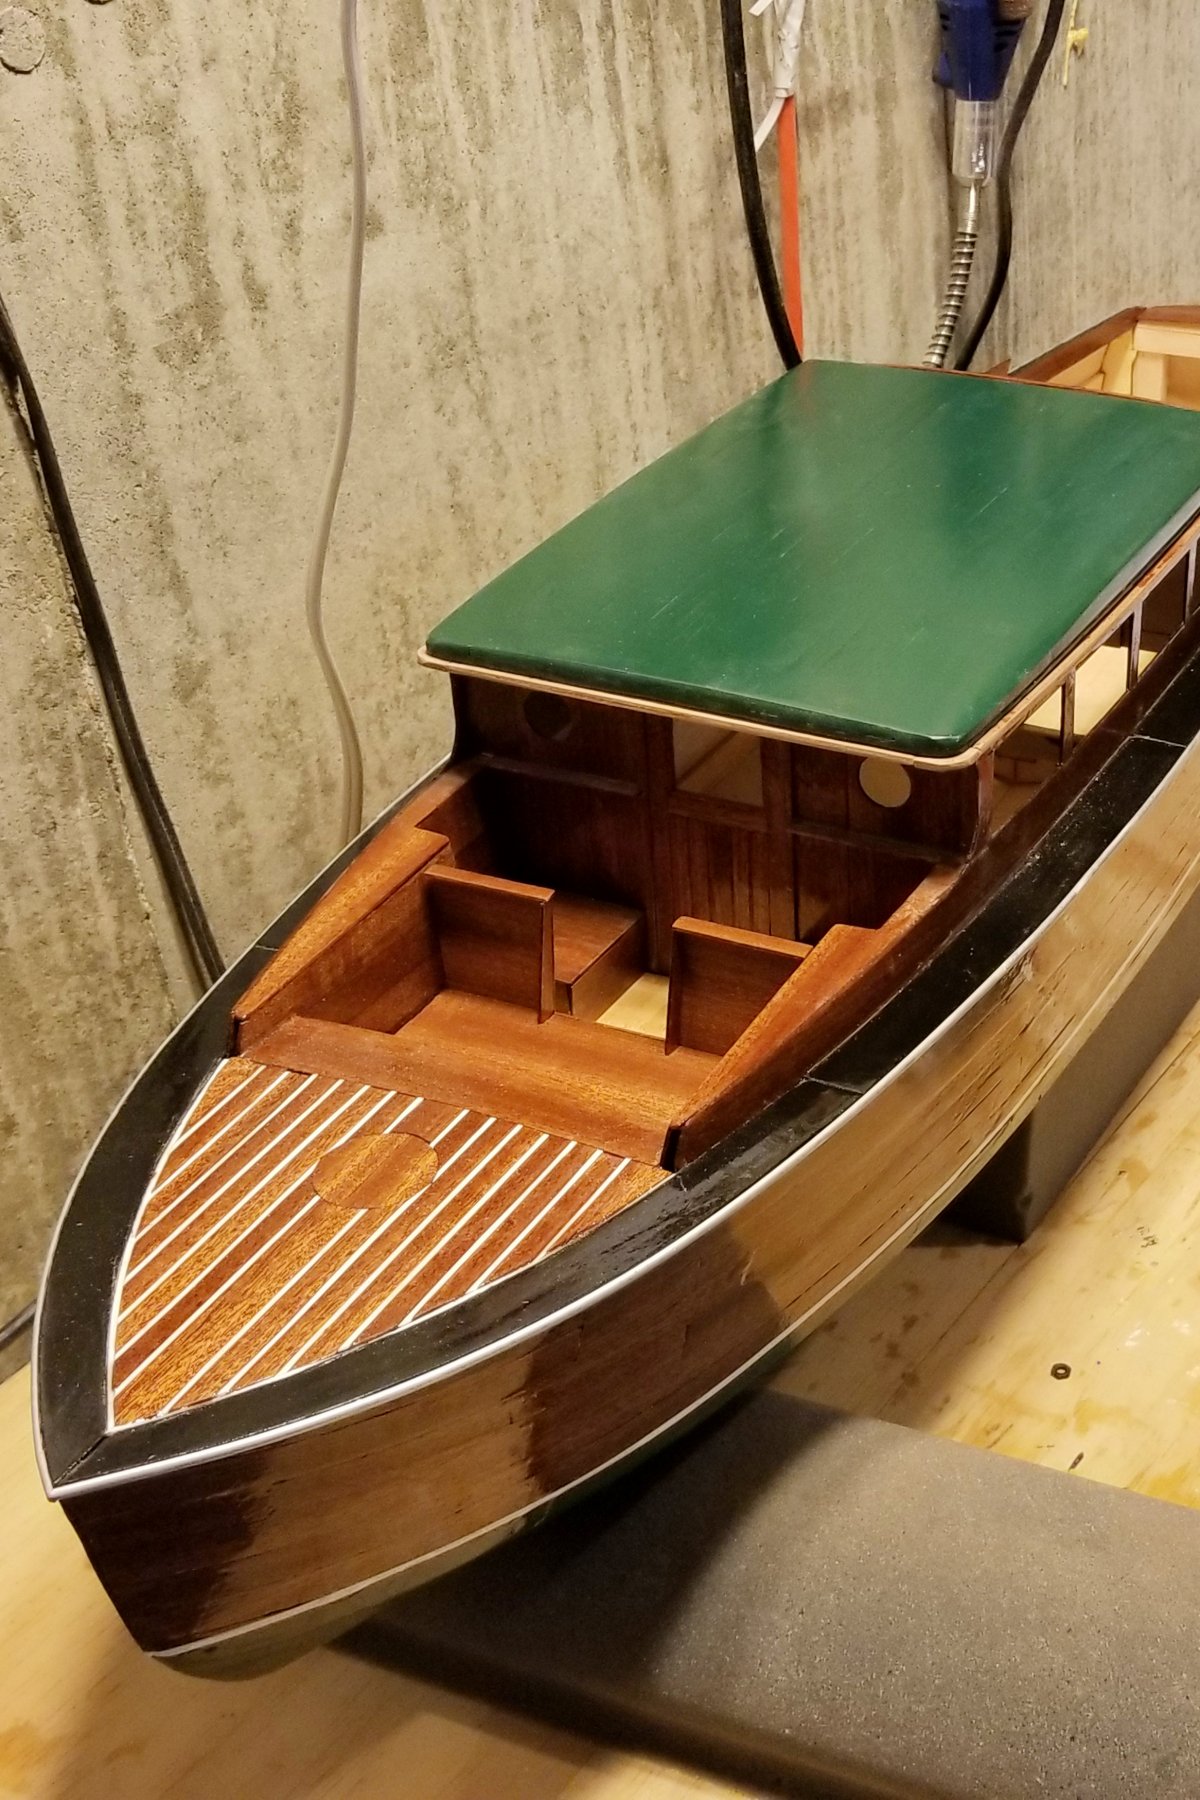
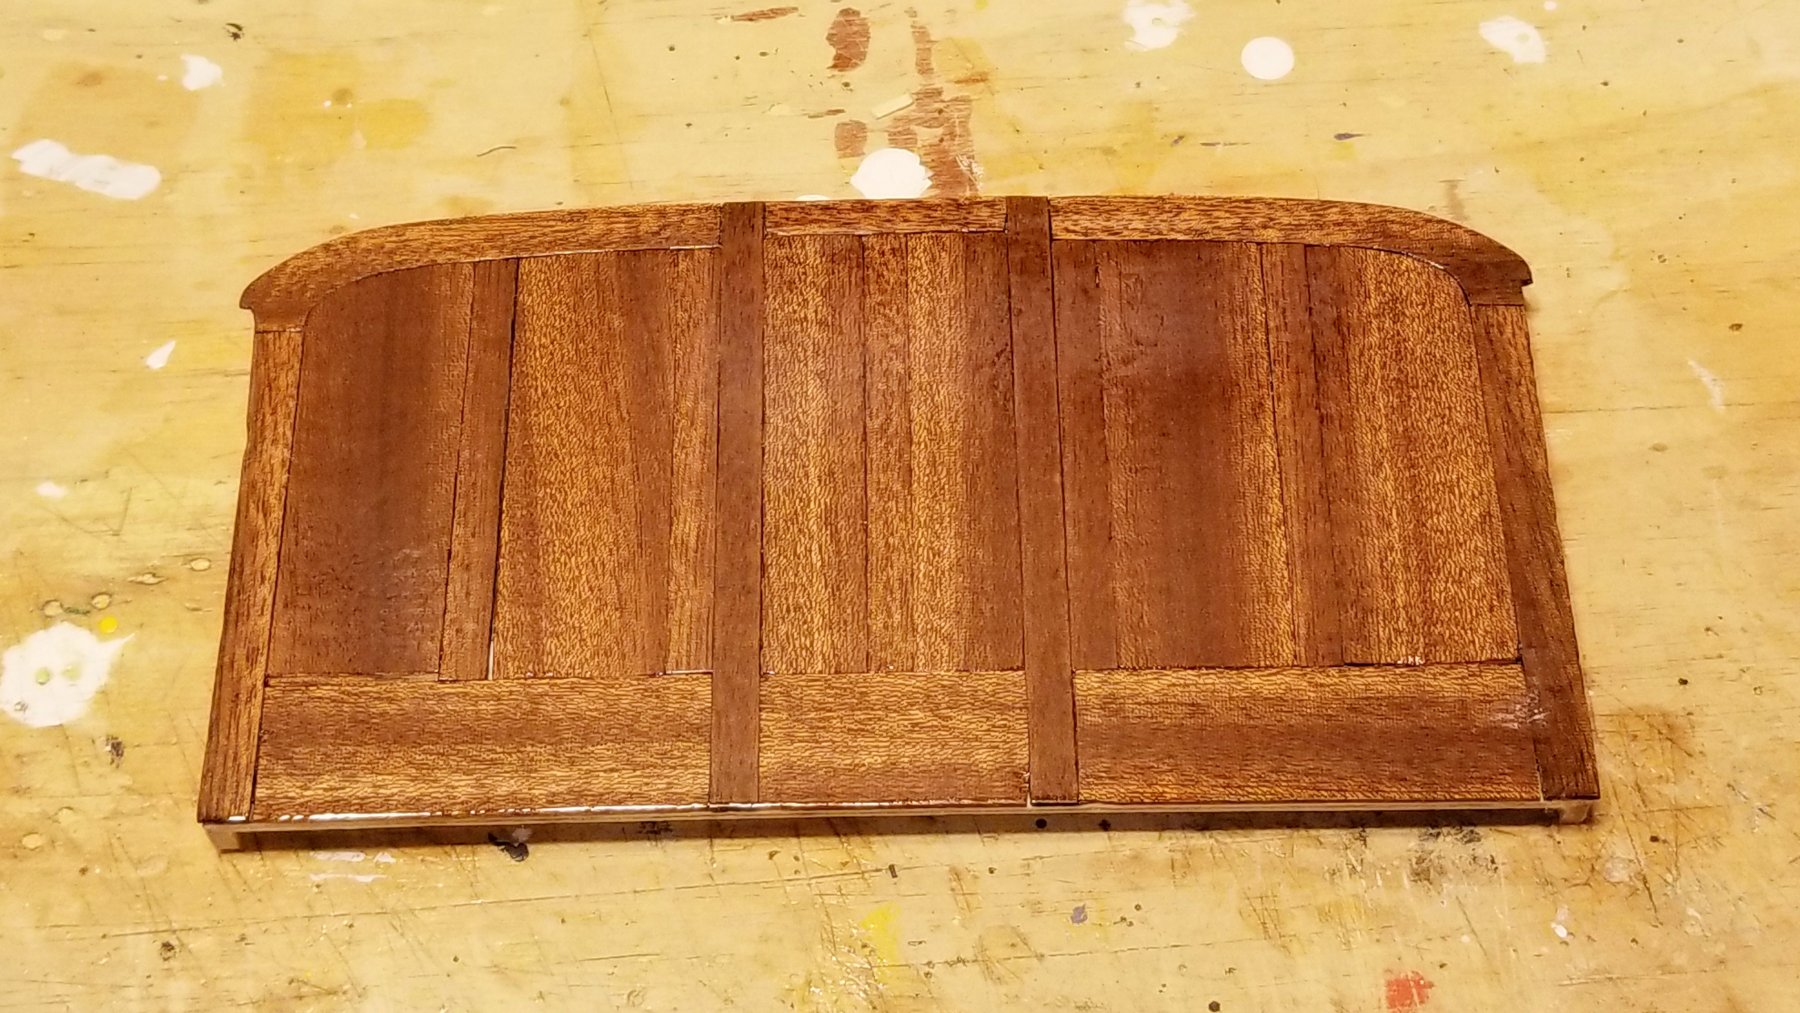
Here's the finished cockpit. The seats are done but only dry-fit for now, because I need access to detail the instrument panel before I glue them in. They will also have hunter green seat cushions on the completed boat.
I provided a few views, because the finish is so glossy that in some views you get weird light reflections or wood colors. That doesn't happen to the naked eye.
Regards,
David

- yvesvidal, thibaultron, coxswain and 4 others
-
7
-
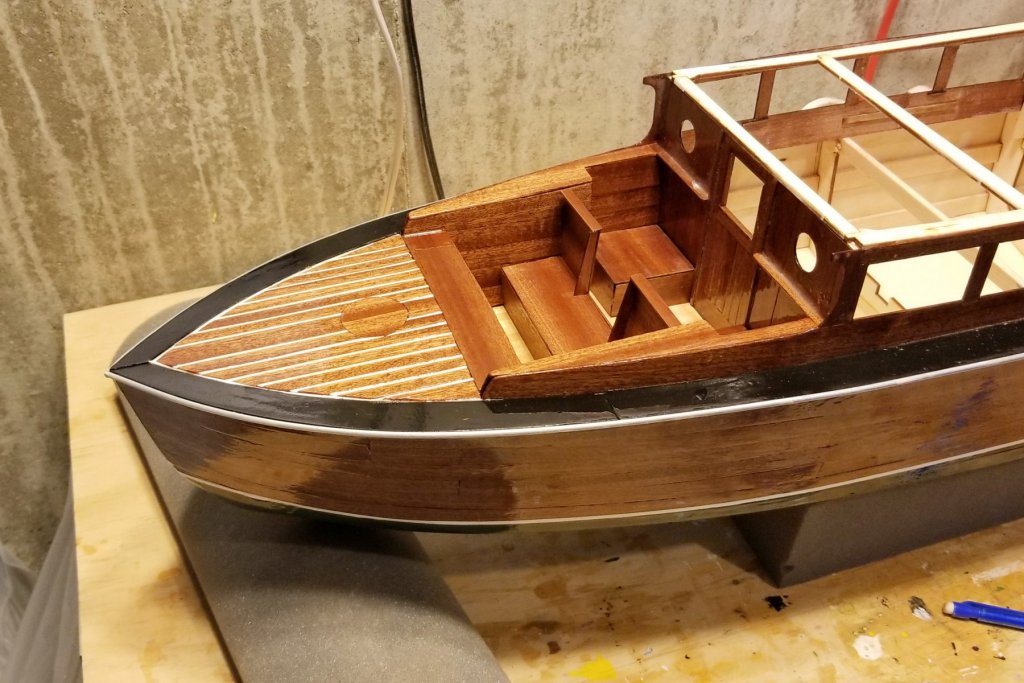
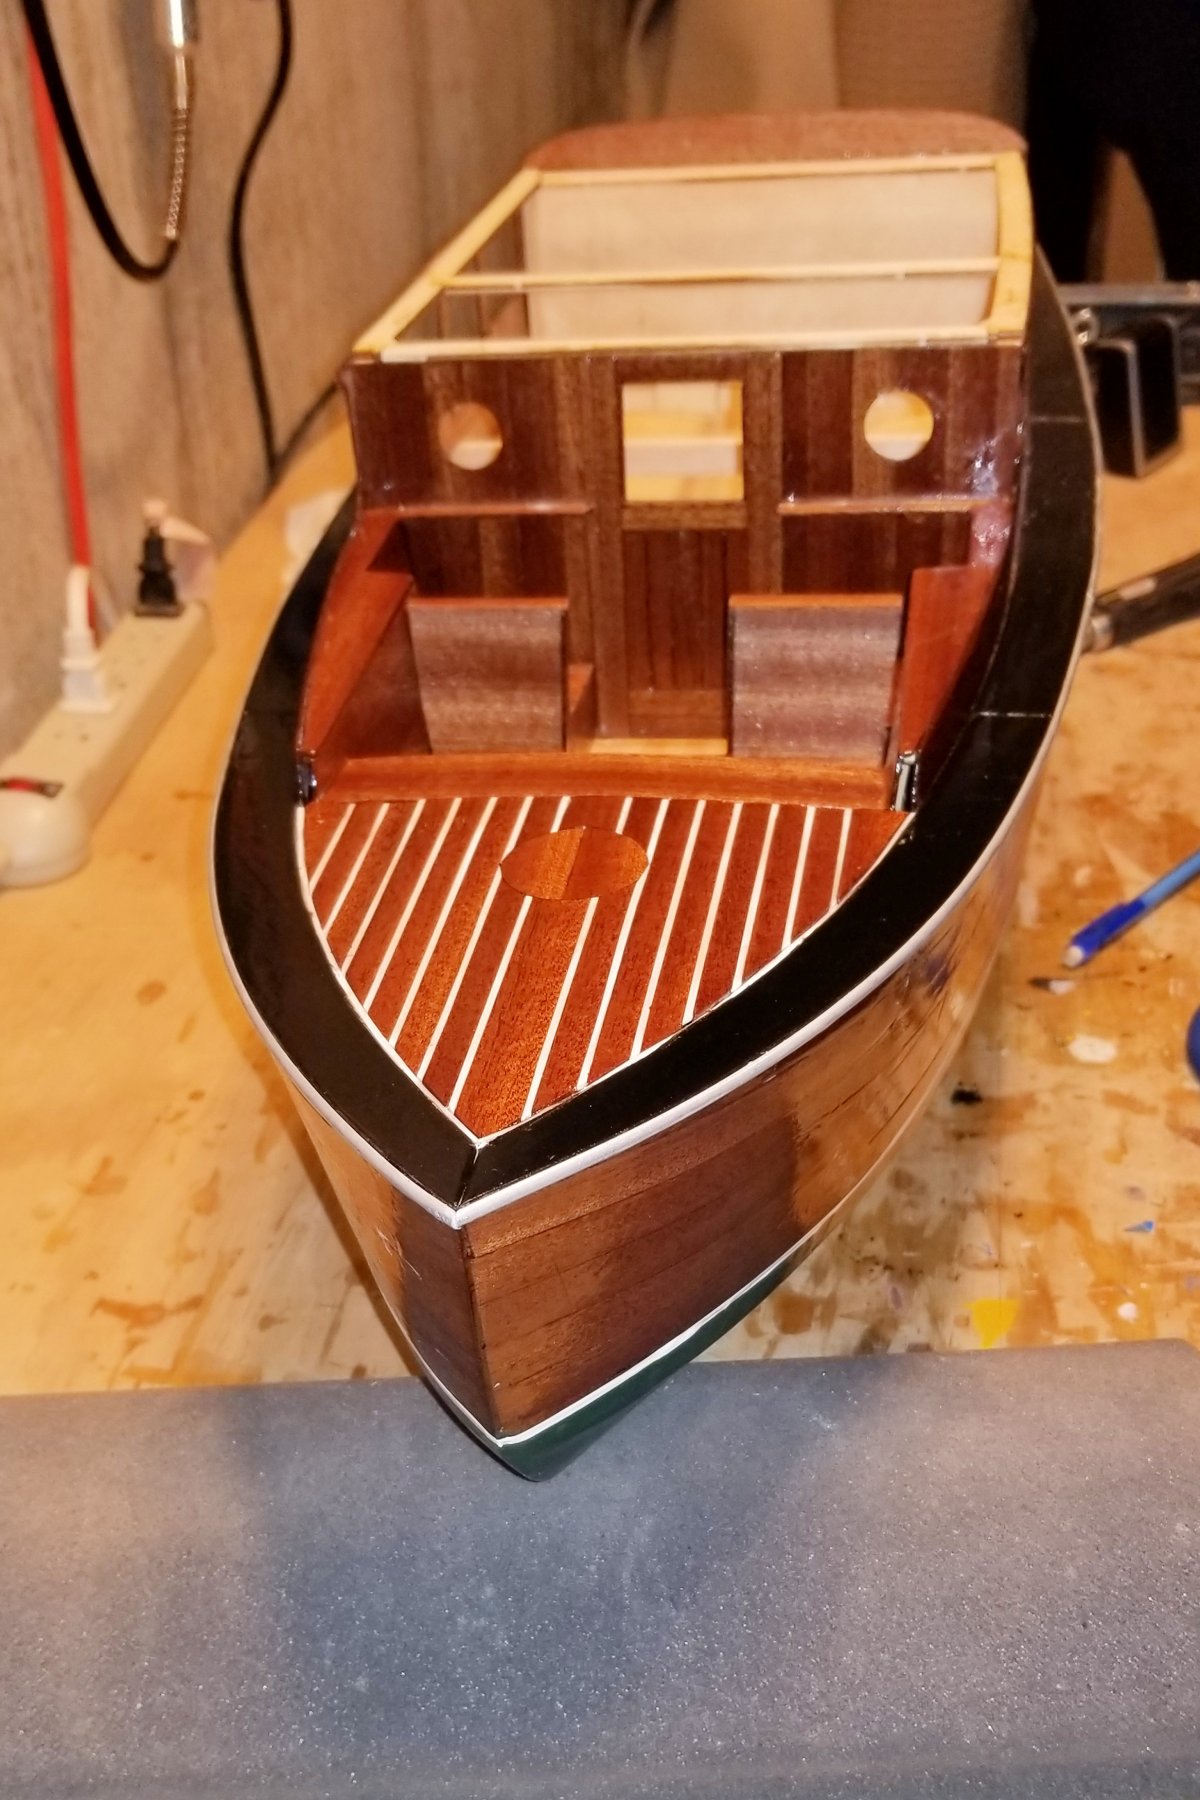
Front deck and cockpit after 1st coat of epoxy (not sanded).
Regards,
David
.thumb.jpg.6eb26fb03a5828337ce85dc176727d0b.jpg)
- yvesvidal, thibaultron and coxswain
-
3
-
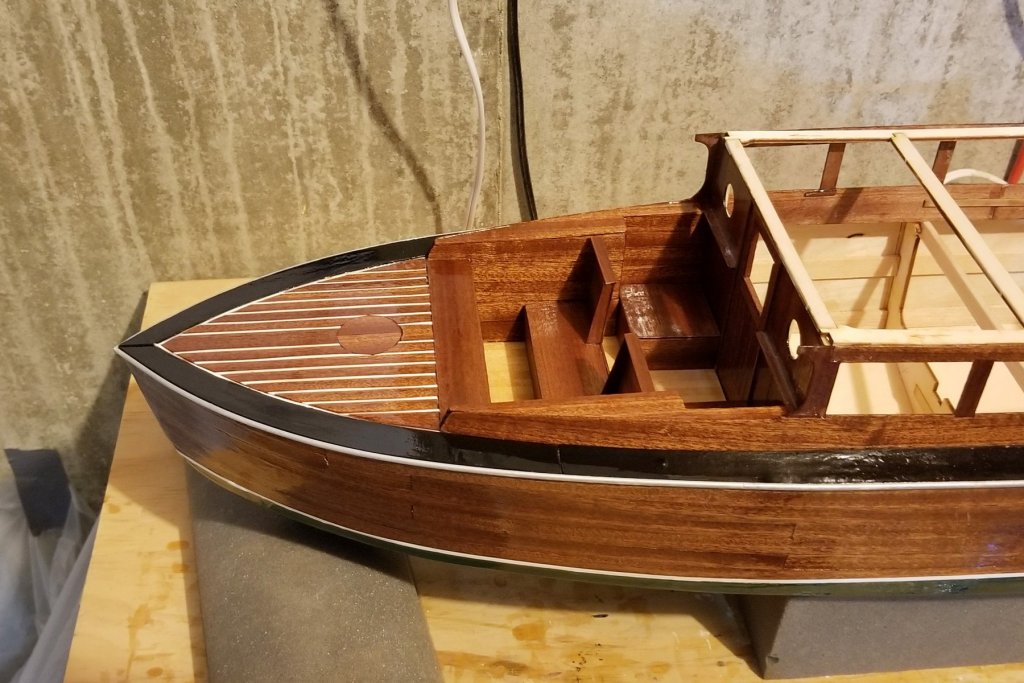
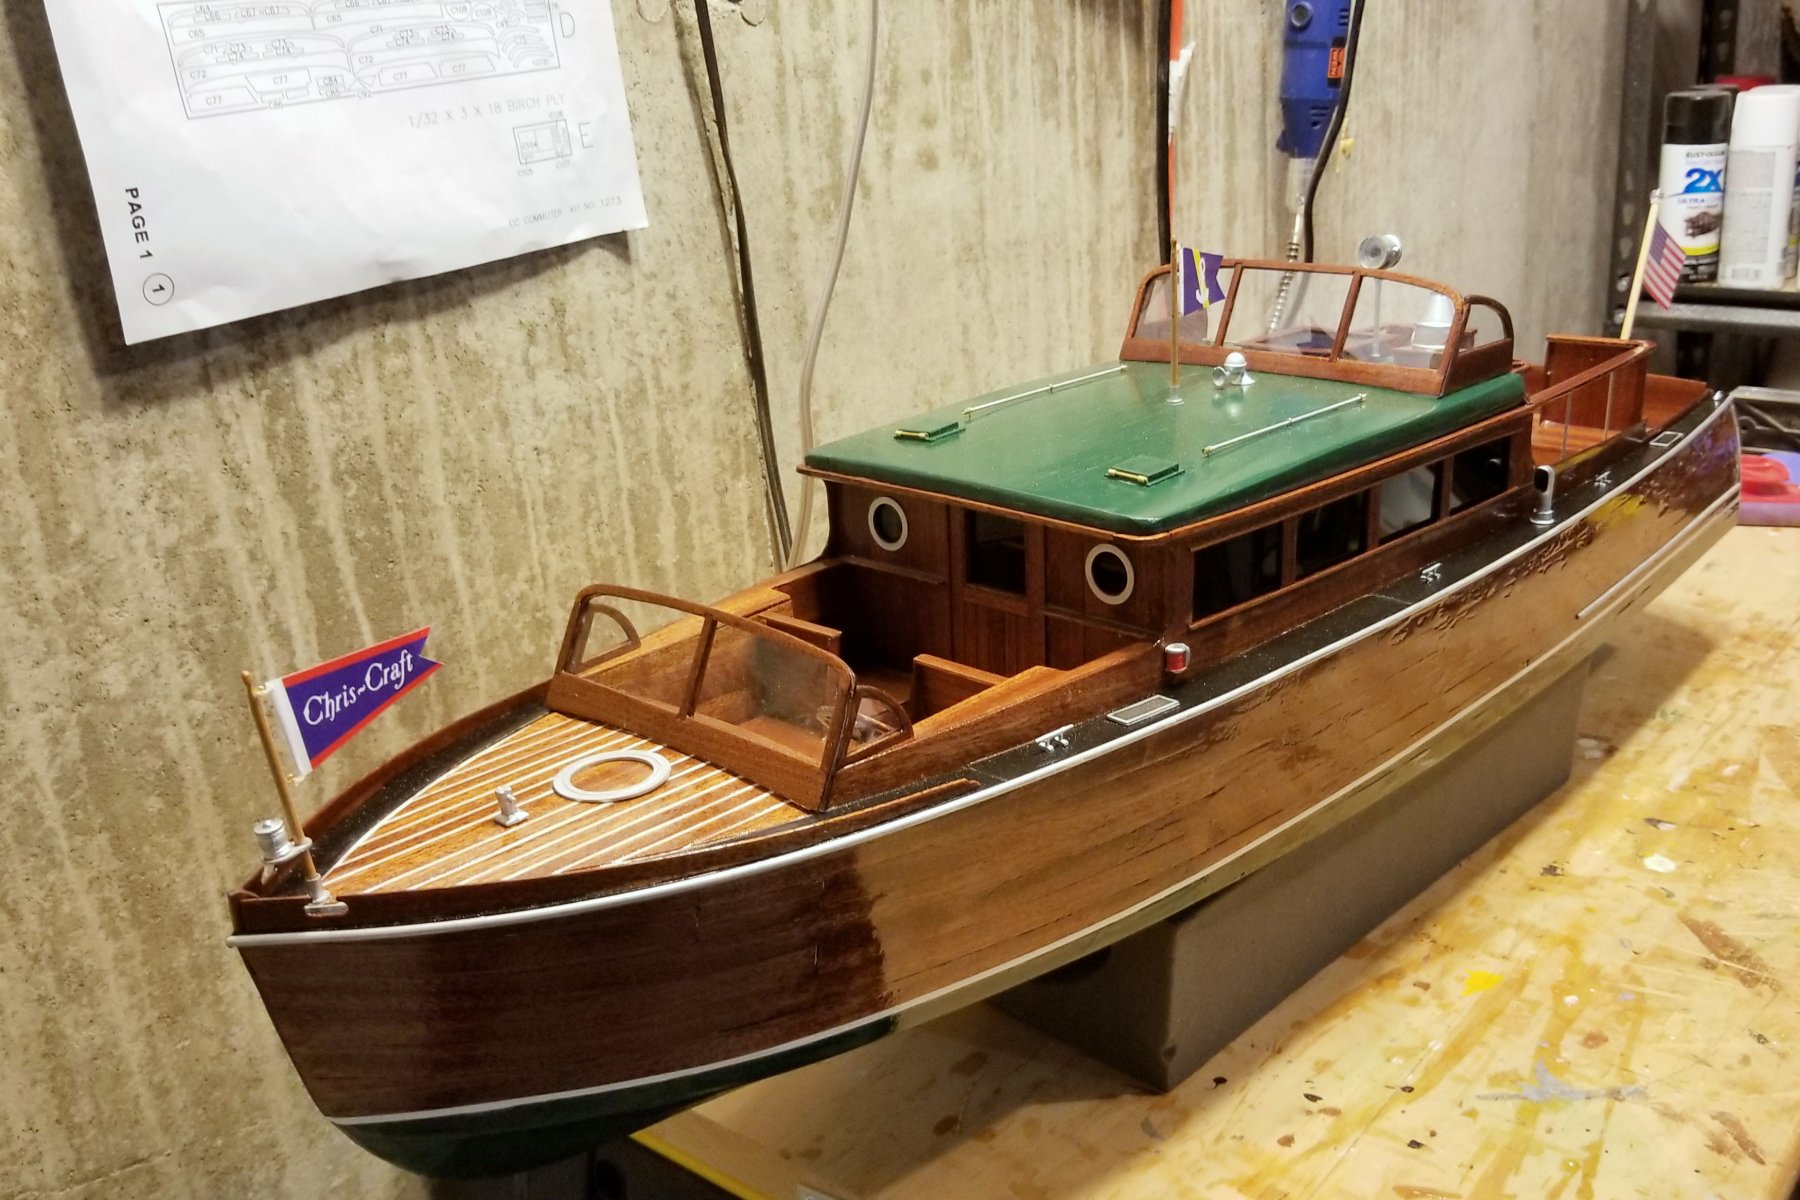
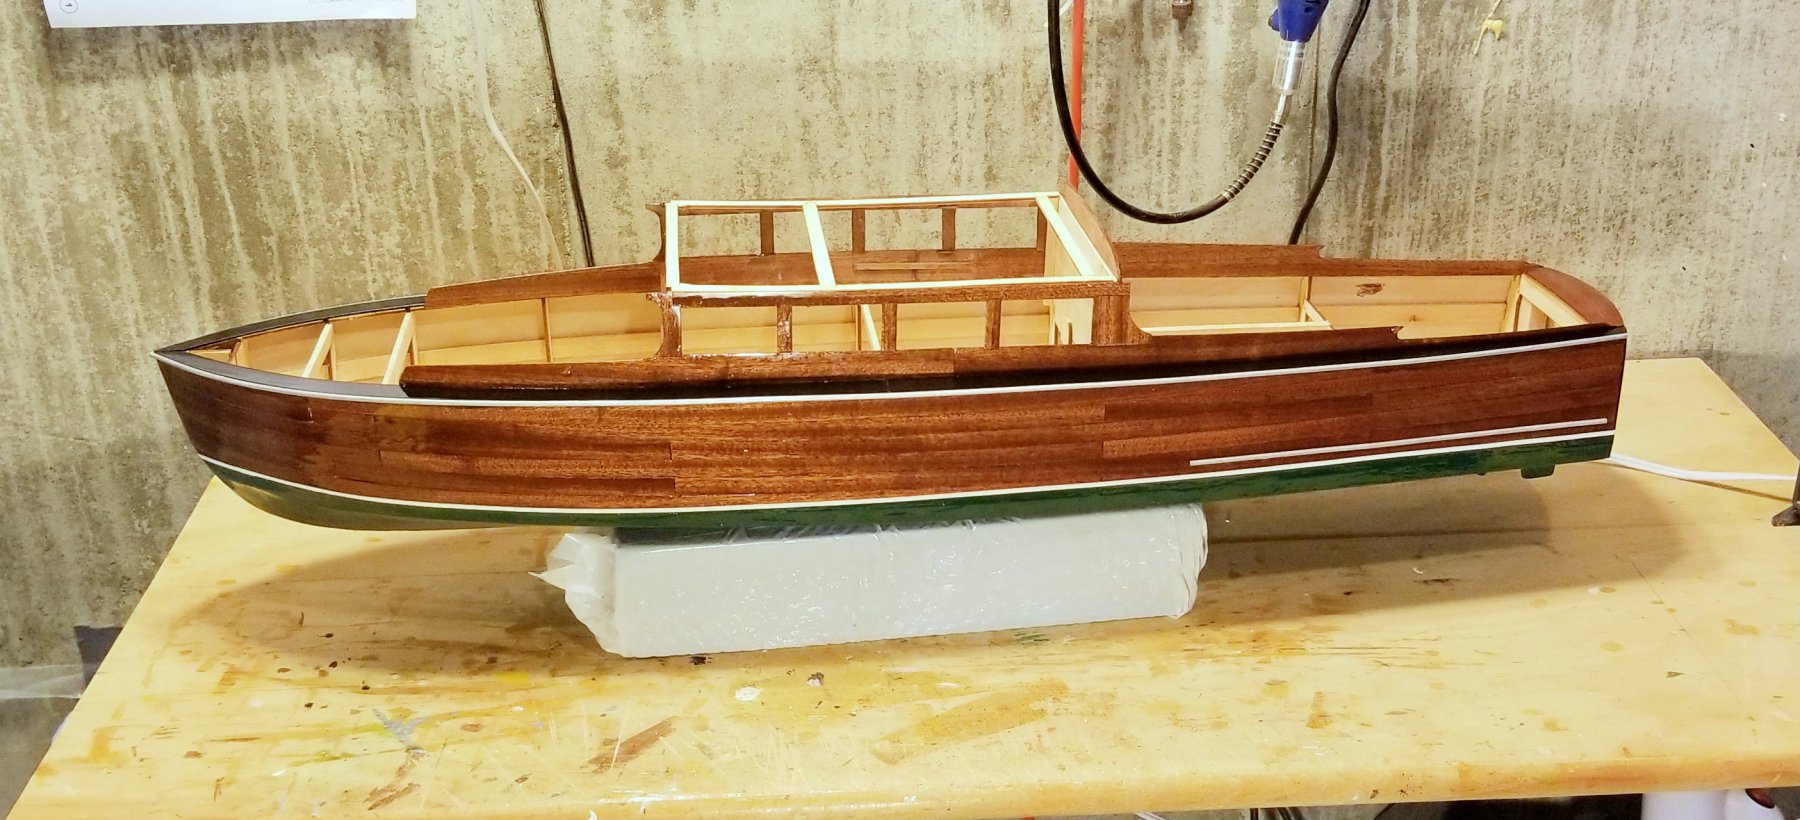
I've finished the basic structure including the hull, side frames, sideboards, and front and rear cabin bulkheads. I followed the Dumas pictures and painted the sideboards black, and I like the look.
Grant -- I only did one coat of wet look spray and then bailed out. I know I'm missing out on an even better finish, but this looks really good to me, and I didn't have the heart to go back and wet sand it. I also just looked at your log for your barrel back (beautiful!!), and I see the extensive shop you have and your level of craftsmanship and detailing, which puts me into the kindergarten of model building. But please don't stop giving pointers -- I need all the help I can get. 😀
Getting better at working with the epoxy. My learned techniques to date: (i) heat to 100 degrees + in a light box, (ii) small batches, (iii) keep the light on and put the mixing cup next to it to keep it hot while brushing the epoxy on.
Now on to the front cockpit. I'll put the rear fenders on soon as well.
Regards,
David

-
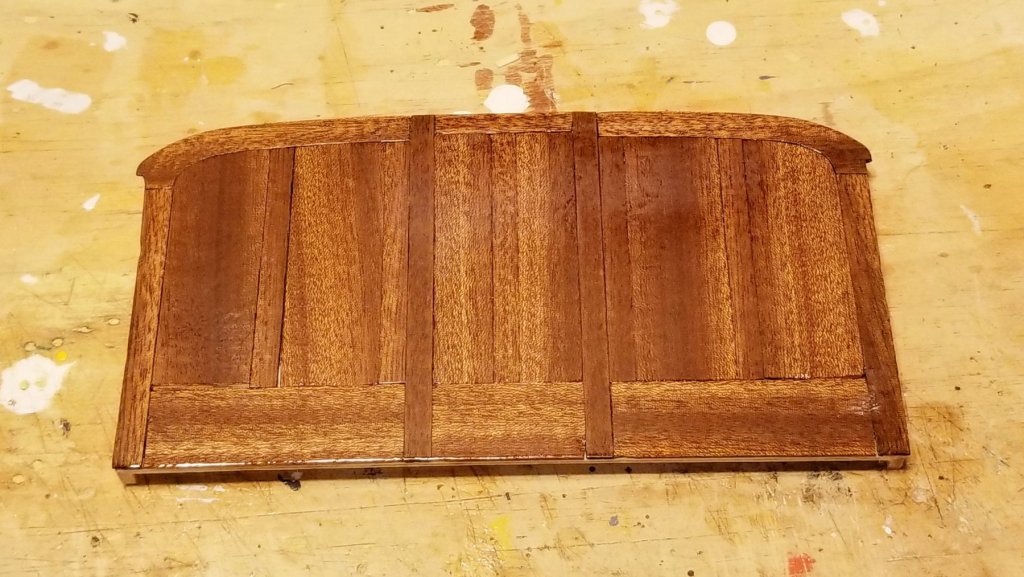
Here are the two cabin bulkheads, finally finished. I did the 3 coats of epoxy + wet sanding called for in the manual, but then just did one coat of the "wet look" spray lacquer. The instructions say 3-4 with more sanding, but they look great after just one coat -- which is fine, because this finishing process goes on and on.
Regards,
David
- yvesvidal, usedtosail, BenF89 and 3 others
-
6
-
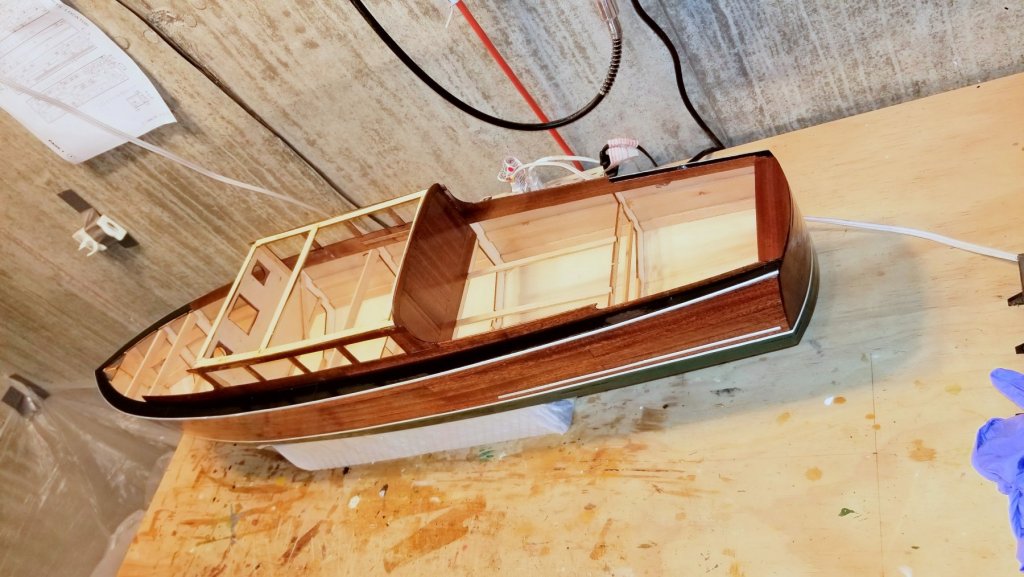
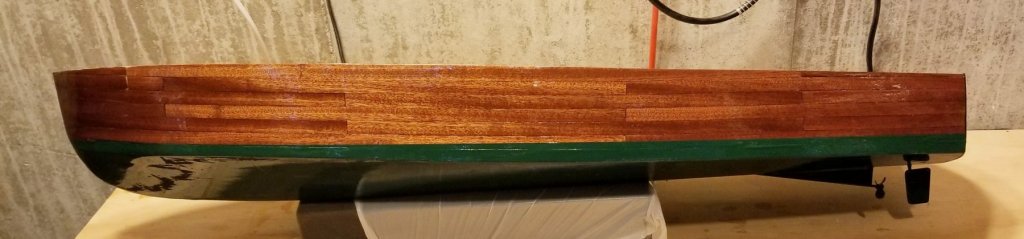
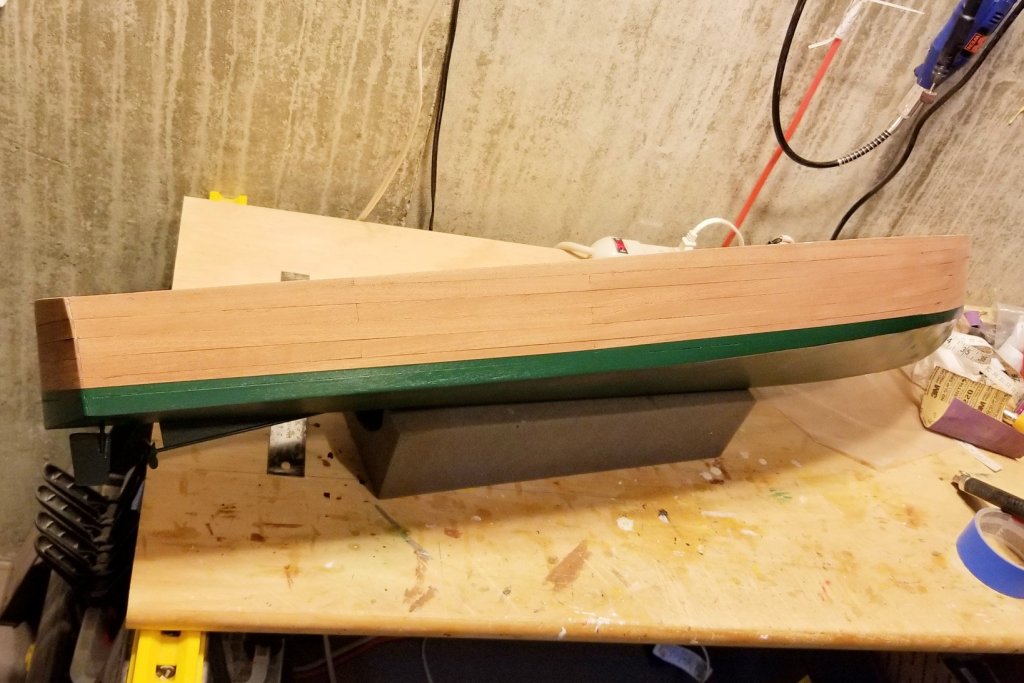
Here's a picture of the hull after the third coat of epoxy, but before I have sanded it. I think the epoxy really brings out the mahogany, and it looks good against the hunter green. The white flecks are light reflection.
Staging this is tricky. I have finished what you see, the cabin front and back bulkheads, and the cabin sides through three coats of epoxy. The next finishing step is more wet sanding, and then "wet look" spray varnish. But the instructions caution not to spray the hull until the rub rail is on, and that means I have to do the sideboards (which are painted black) so I can sand them down to meet the hull, and then mount the rub rail on that join.
So I think I will sand and spray finish the bulkheads and mount those, and then sand and mount the sides without spraying, then the sideboards, then the rub rail, and then I'll spray the hull and sides. Just a lot of sequencing based on different parts of the instructions that aren't linked to each other in the book. You have to read ahead.
Final note on the epoxy. On the second coat, I got some thick parts that I had to sand out, and figured that the epoxy wasn't hot enough, so I put it in a smaller box with the light and a thermometer and heated it to 110 degrees. That, plus small batches, produced a thinner mix that went on better -- but really only lasts about 5-6 minutes in the pot before thickening too much to apply.
Regards,
David
-
I'm working my way through the epoxy finishing process -- just started second of three coats. One lesson learned about this epoxy that Dumas supplies (actually made by BSI): the instructions on the bottle say that the pot life is 20 minutes, but there's no way that's the case. I ran into application issues at about 10 minutes, and had to remix. So smaller batches for coat 3.
I kept the mixed epoxy at temperature by putting the mixing cup into a bowl of hot water from the tap (ours is pretty hot).
Pictures will follow when I have something nice to show -- but the color of the mahogany with the epoxy sealer is gorgeous.
Regards,
David
- thibaultron and zappto
-
2
-
[NOTE: The website has a mind of its own and has posted the pictures out of order -- not the order I submitted them. But it should be OK to follow. Just ignore my text below when it says "first picture", etc]
Some construction notes:
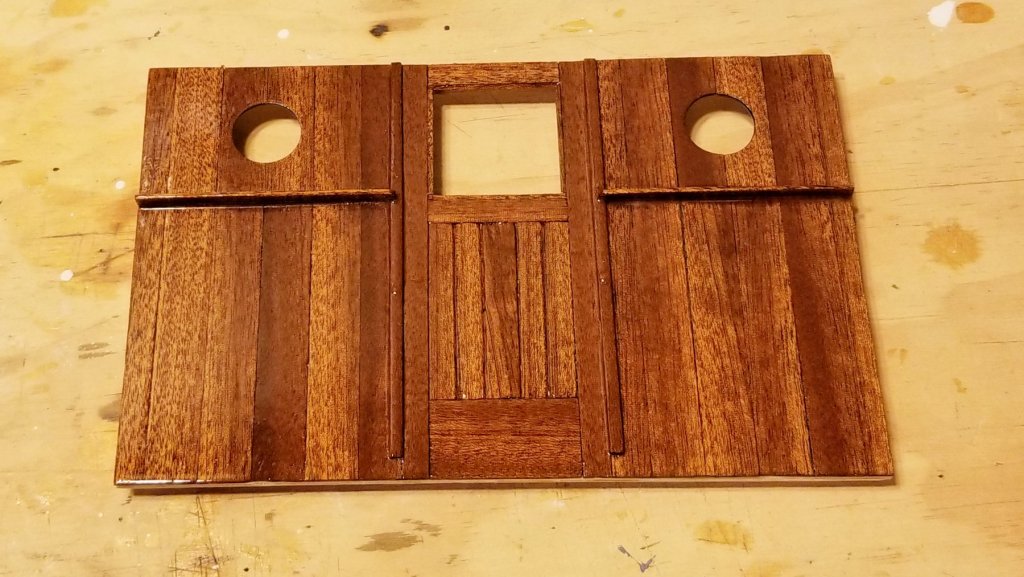
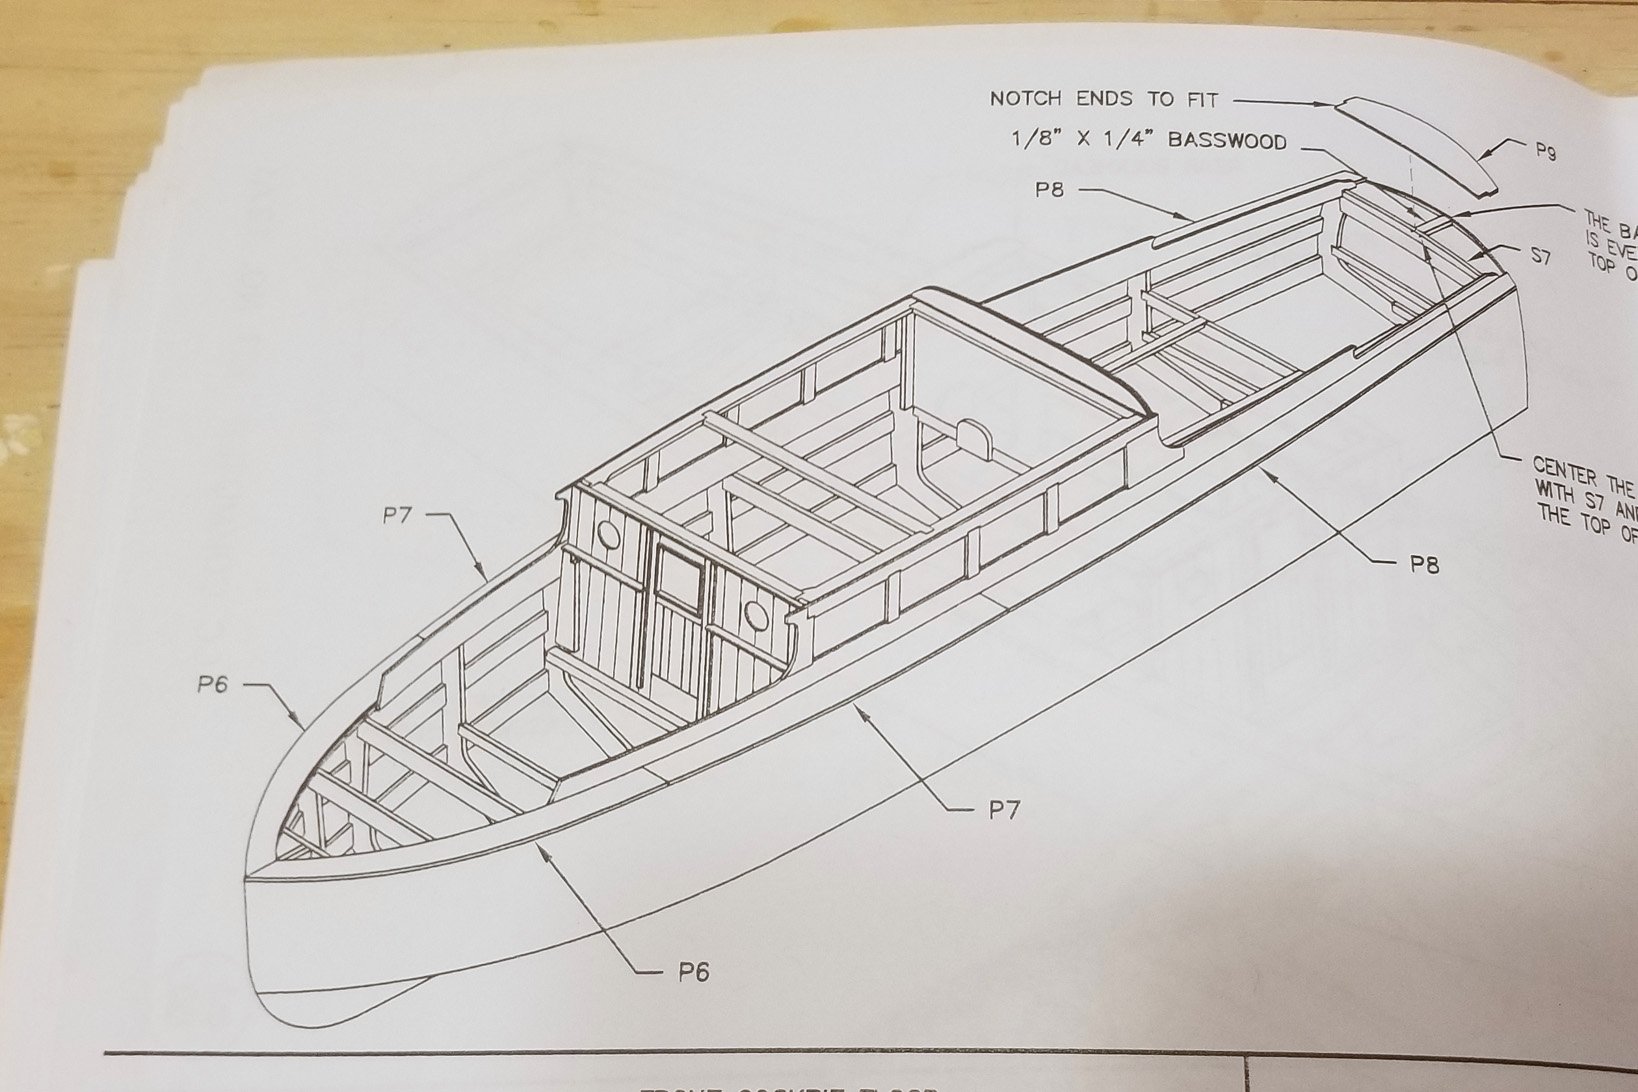
- The first picture of one of the drawings shows how the sides fit onto the boat. They side down inside the sheer, so there has to be clearance between the cabin bulkheads and the sheer. I wanted to make sure everything fit before I did my first round of epoxy finishing, so I dry fitted what you see in the drawing, and sure enough, one of the bulkhead sides needed to be sanded down. Better done before finishing (and certainly before installation!).
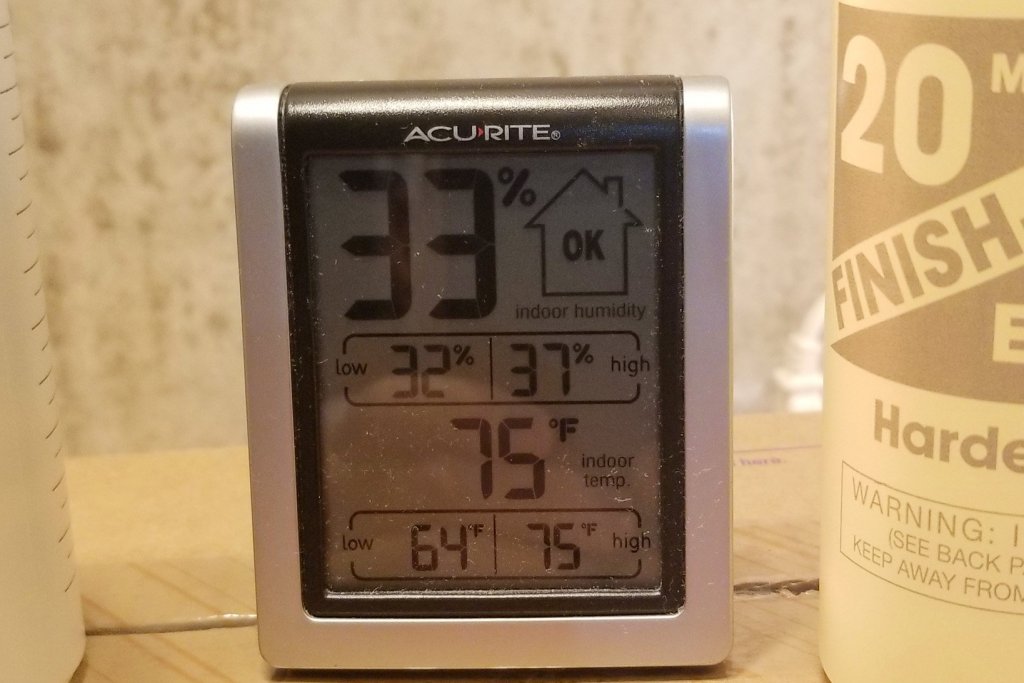
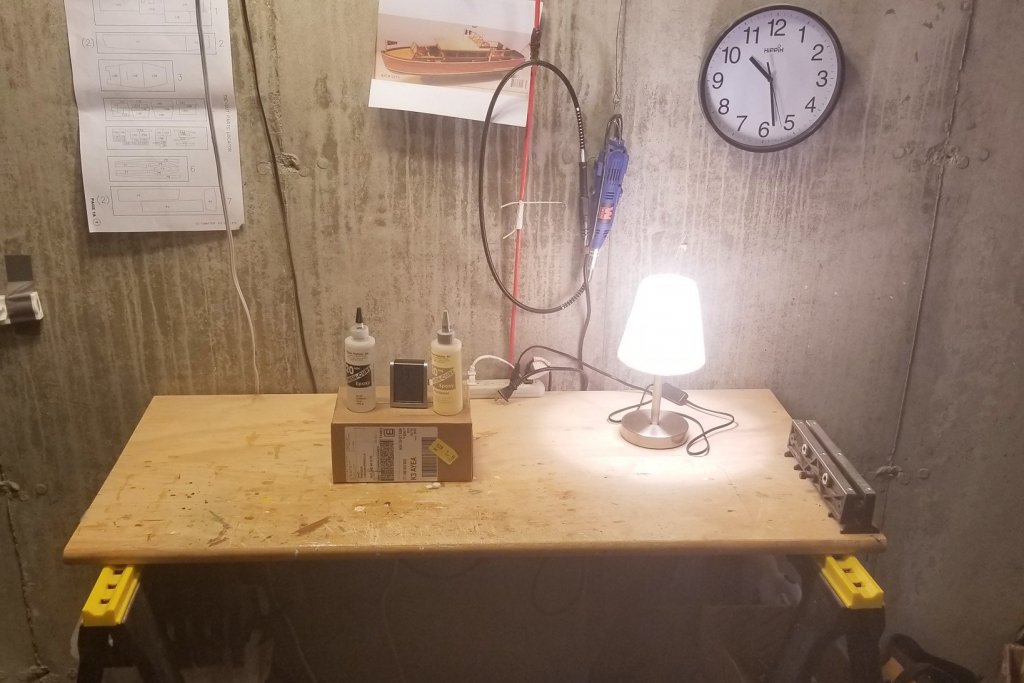
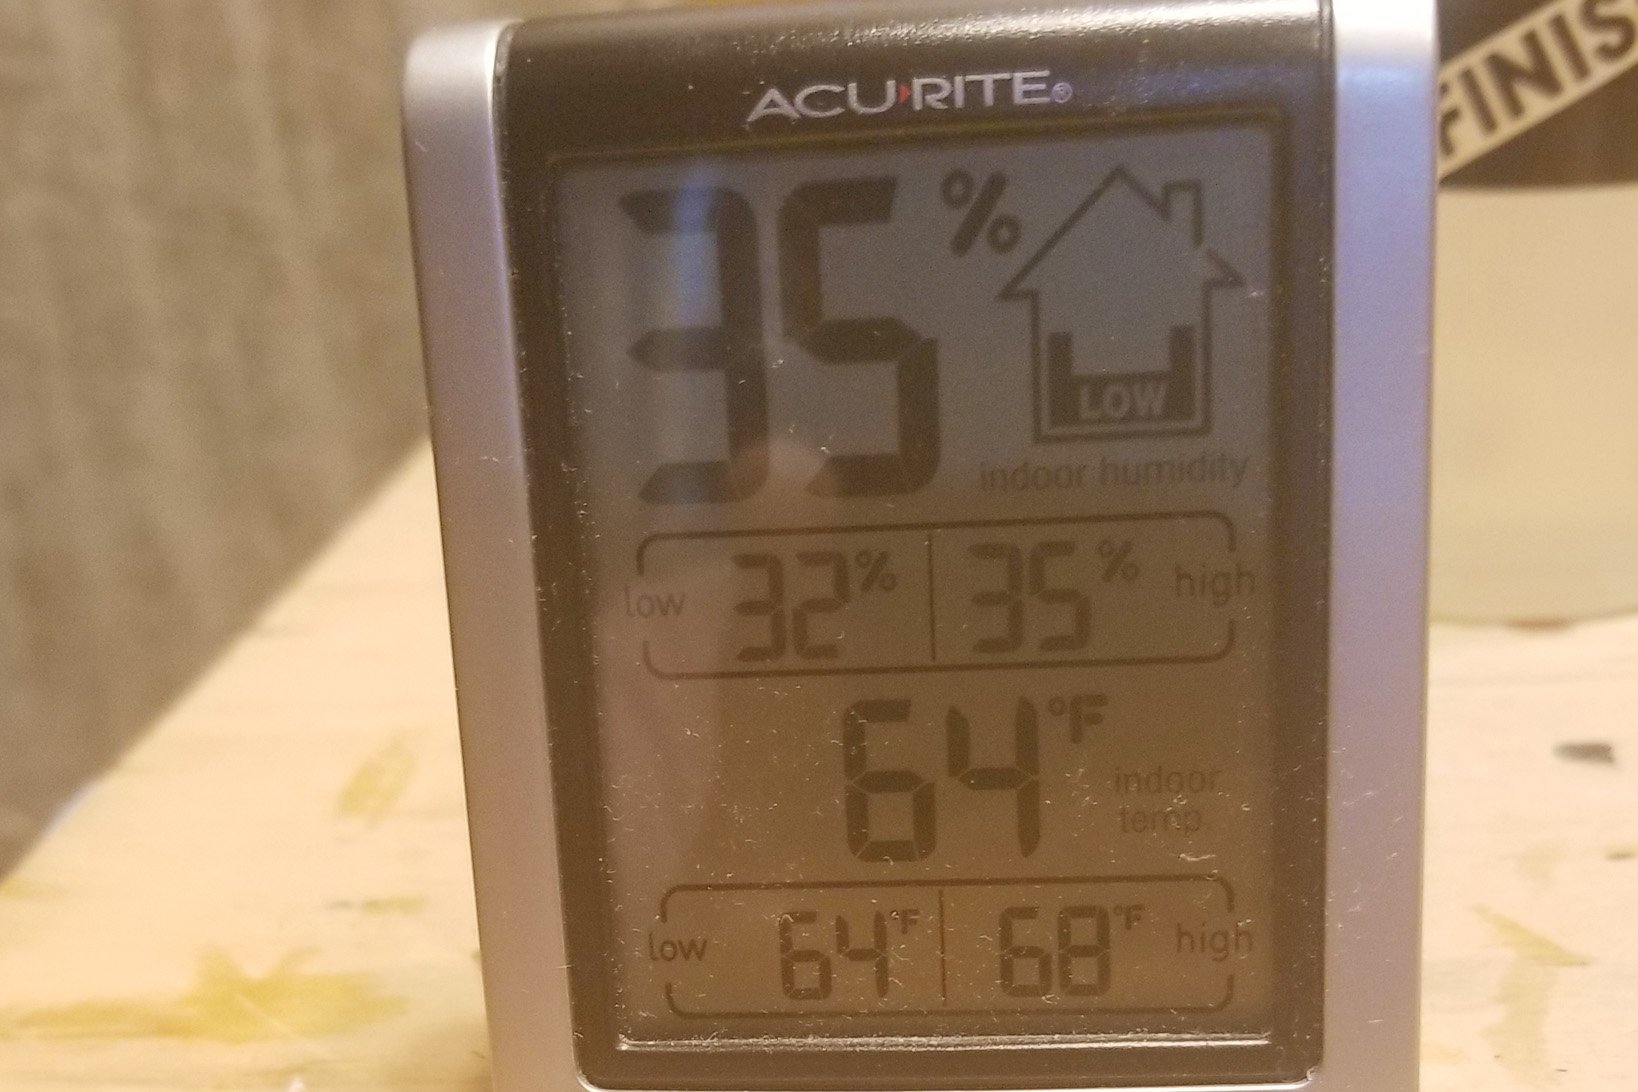
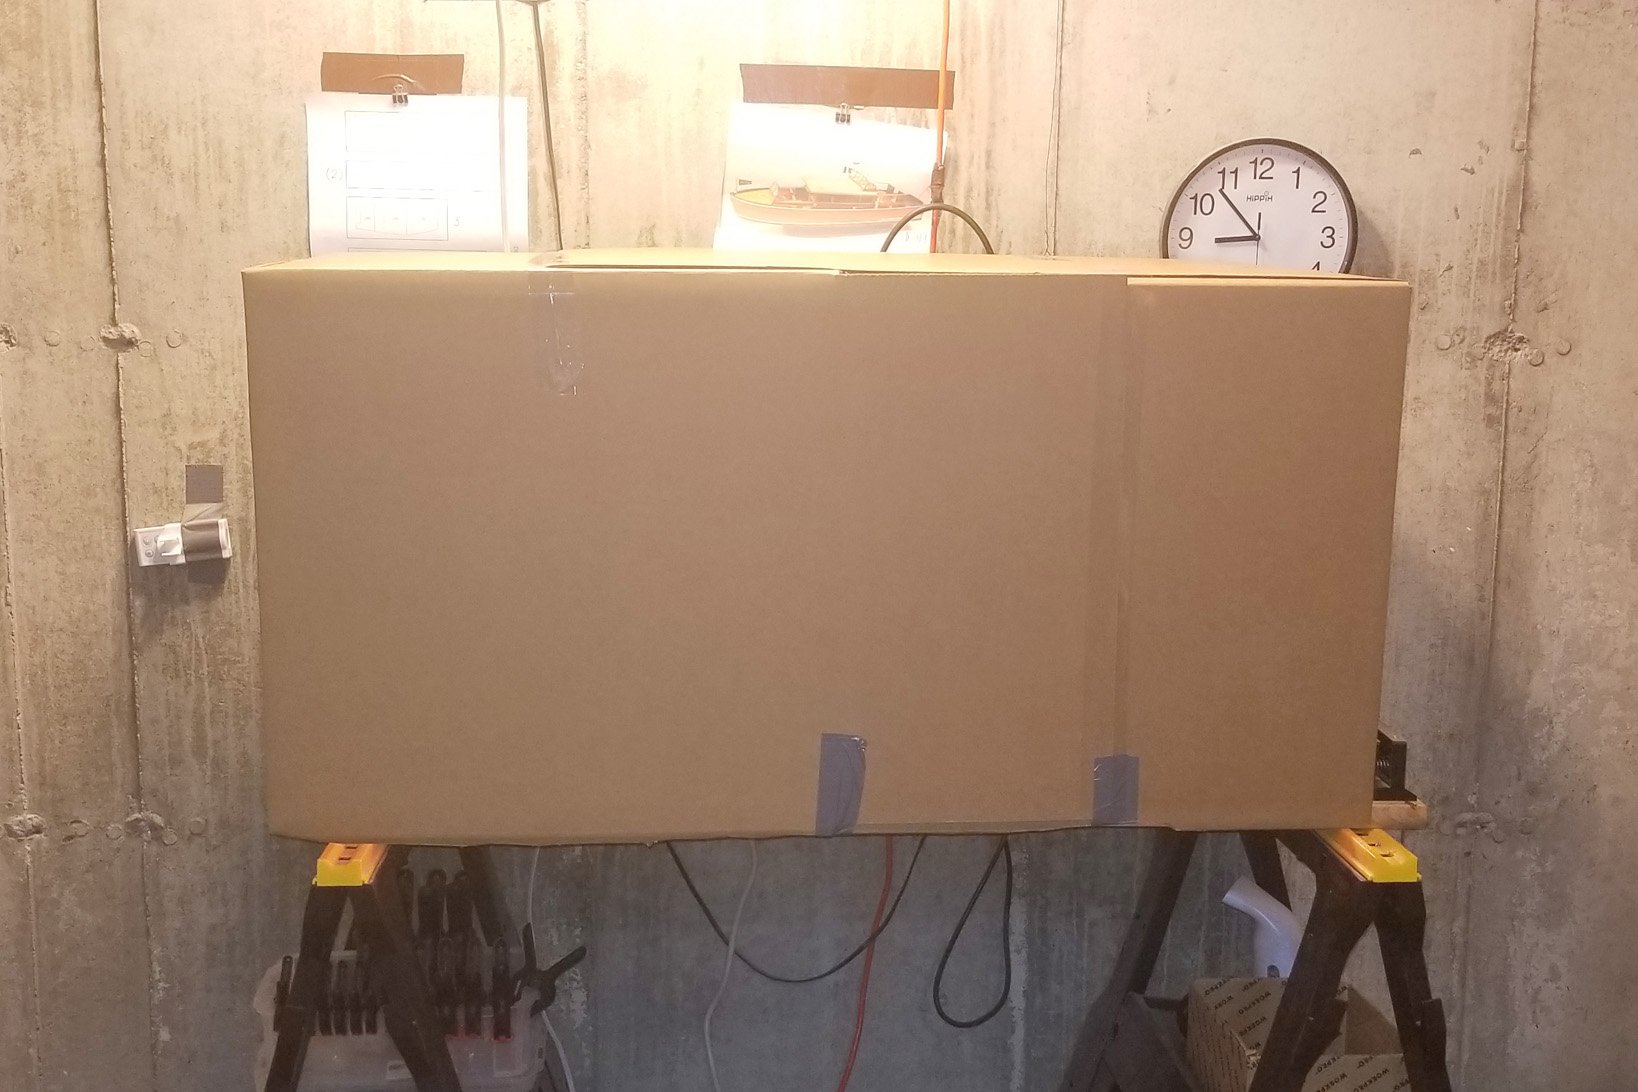
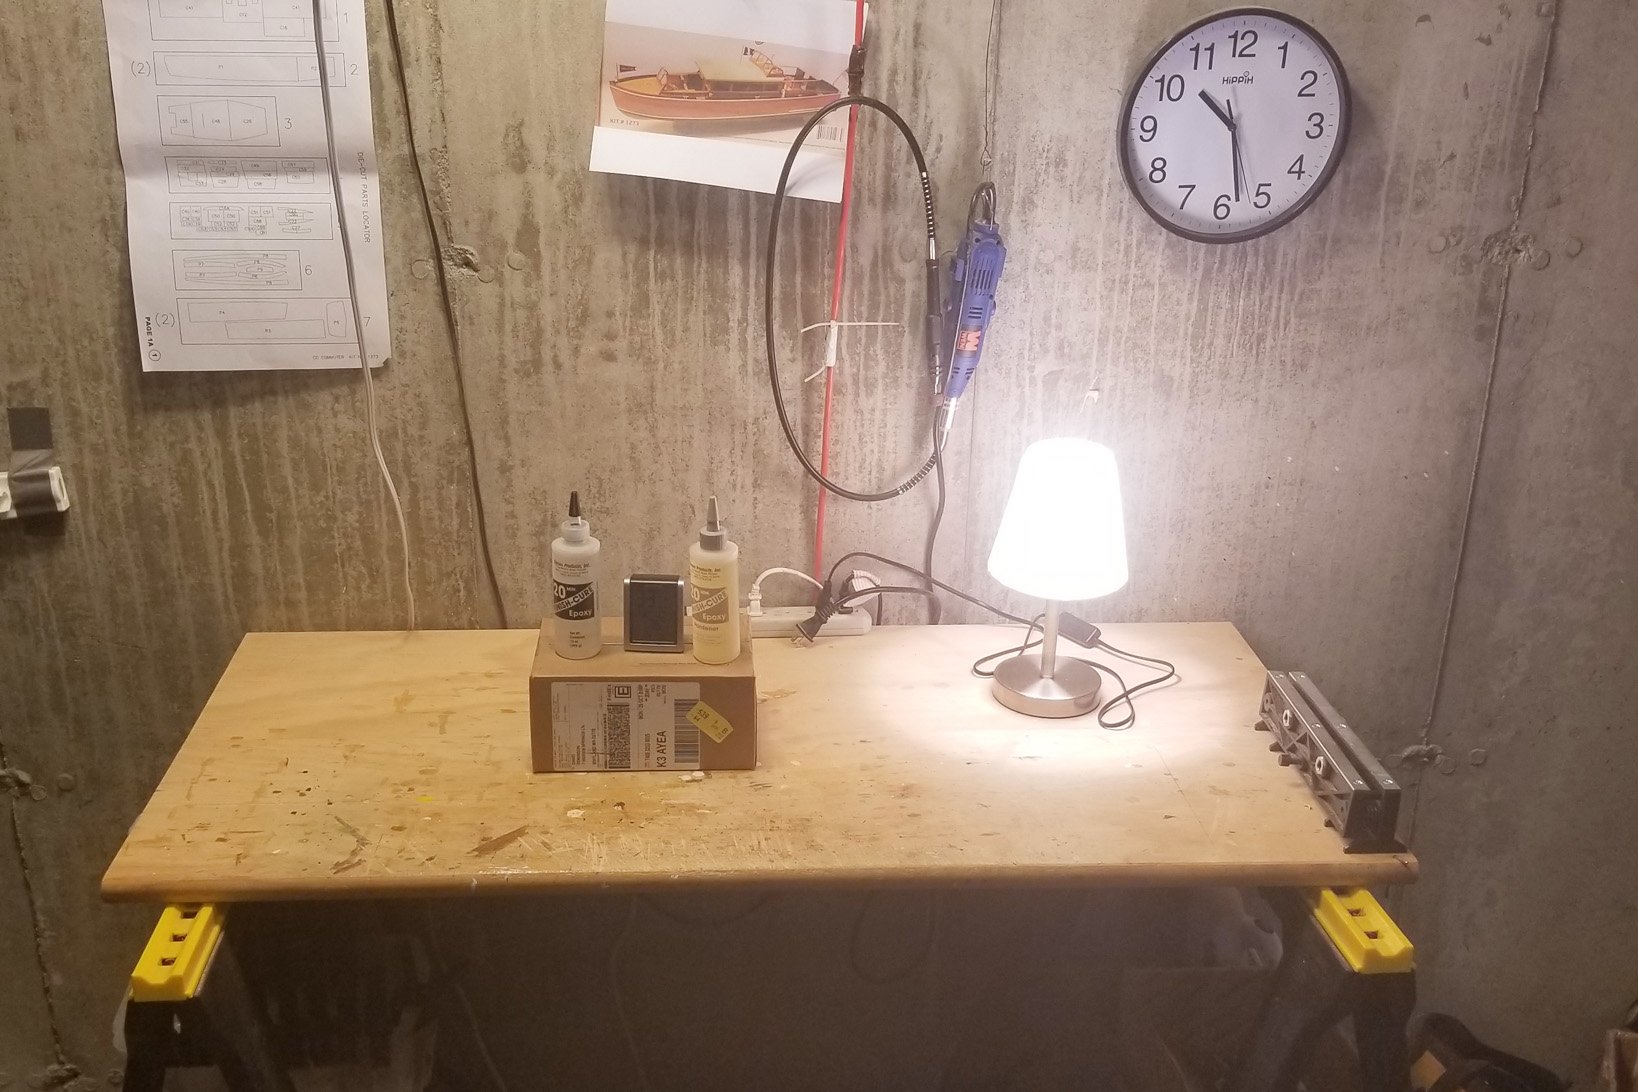
- The epoxy says that it has to be done and cured at 75 degrees F, but my workshop is much colder. They suggest using a box and light to achieve that, and as the pictures show, it works. It also has the virtue of warming up the epoxy, which the epoxy suggests be done in a microwave, but I can just imagine either the exploded bottle or the odors permeating that appliance. This way, the bottles are up above 75. The last shot shows 75 degrees, but as I write this it's around 77, which is perfect. Might get warmer with time, but that's fine.
Now I'm ready to start the finishing process for hull, front and back bulkheads, and sides. I'll do them separately and then assemble.
Regards,
David


- thibaultron, BenF89, coxswain and 1 other
-
4
-
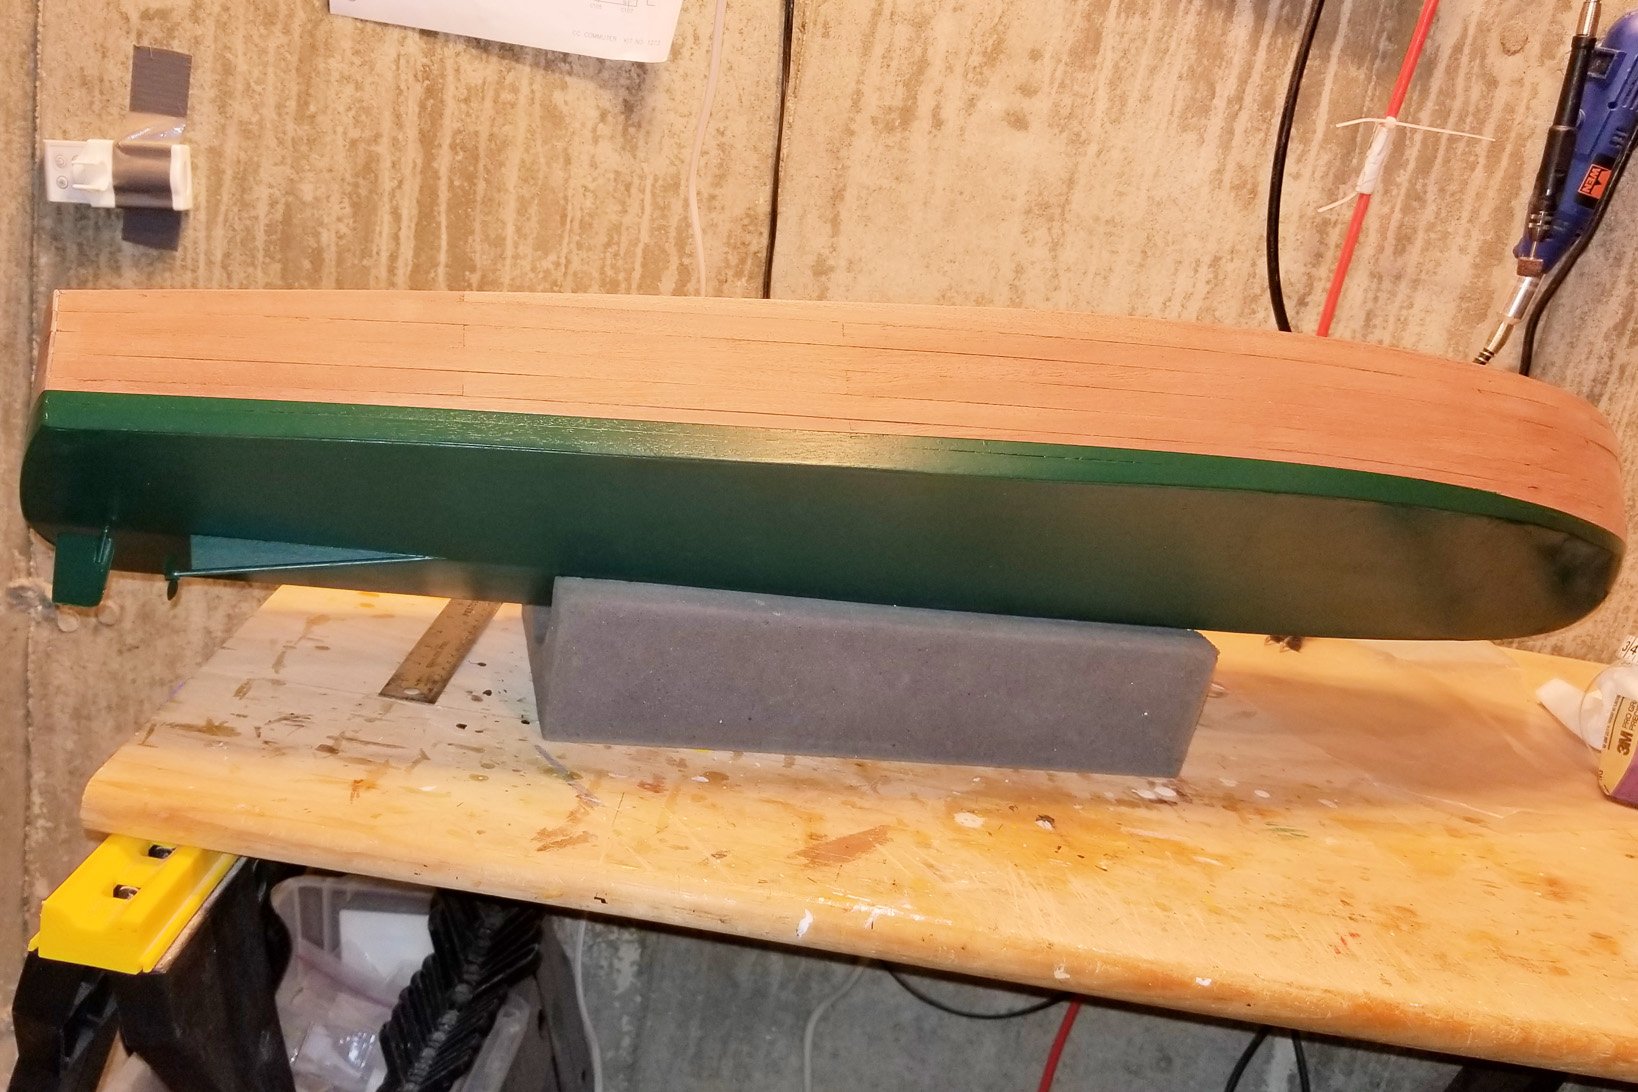
I have painted the bottom and the side up to the waterline in Hunter Green. Thanks again to Grant (gjdale) for his excellent tip above about using varnish to seal the edge of the masking tape. The edge really looks good. It will be finished with a striping tape, but having a clean edge to work with will make that better.
The instructions are ambiguous about when to do this. In one part, they say that they recommend painting the boat at the end. But I didn't want to be taping the boat with the cabins and details on, and this way I can use the same epoxy finish on the entire exterior hull.
So build a few more mahogany parts, and then tackle the epoxy finish on the mahogany.
Regards,
David

-
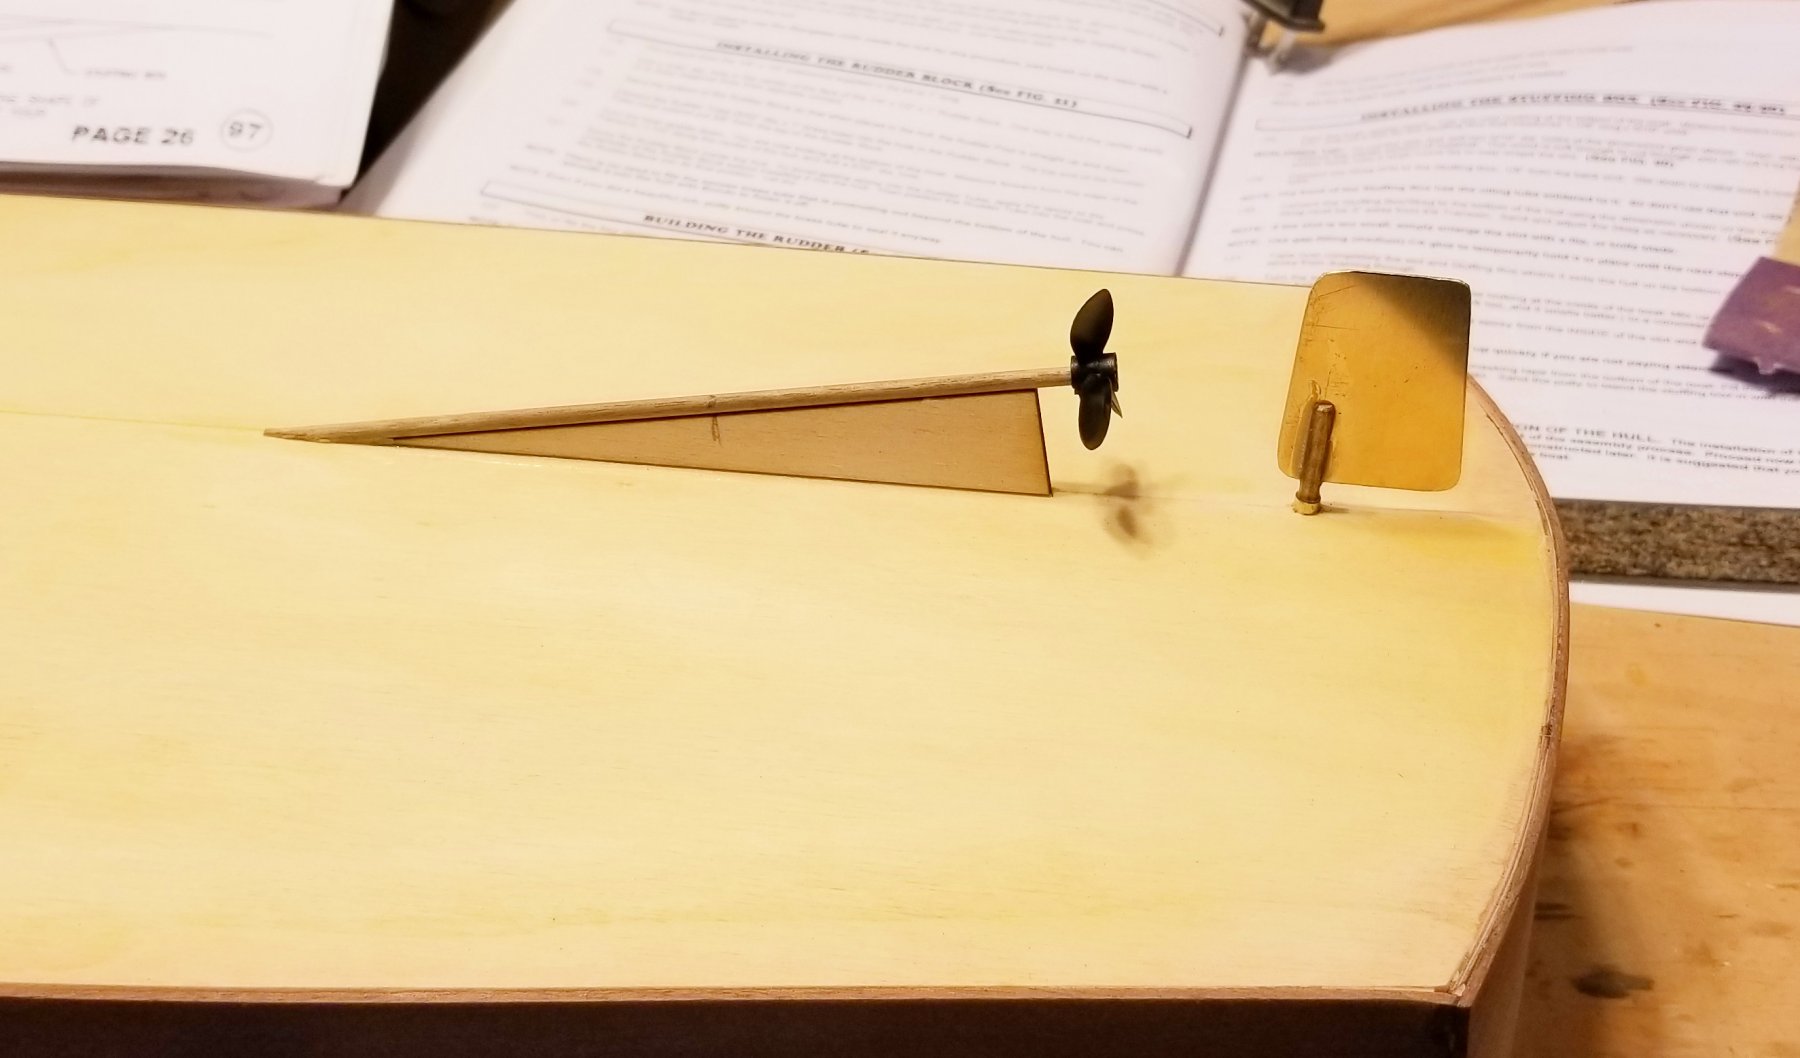
Interestingly, the kit comes with the rudder and some of the linkages for that, but if you don't buy the running hardware kit (which I didn't as this is a static model), you don't get the propeller or the shaft. But you DO get the skeg.
So I ordered a prop from Amazon and then fashioned the shaft from a walnut dowel. I have brass rod, but since the shaft doesn't need to penetrate the hull -- just be faired up to it as if it does -- I decided to use wood to make the fairing look smoother. All of this gets painted the same hunter green color.
I think the prop is probably too small, but it will do unless examined closely.
Regards,
David

- Tom E and thibaultron
-
2
-
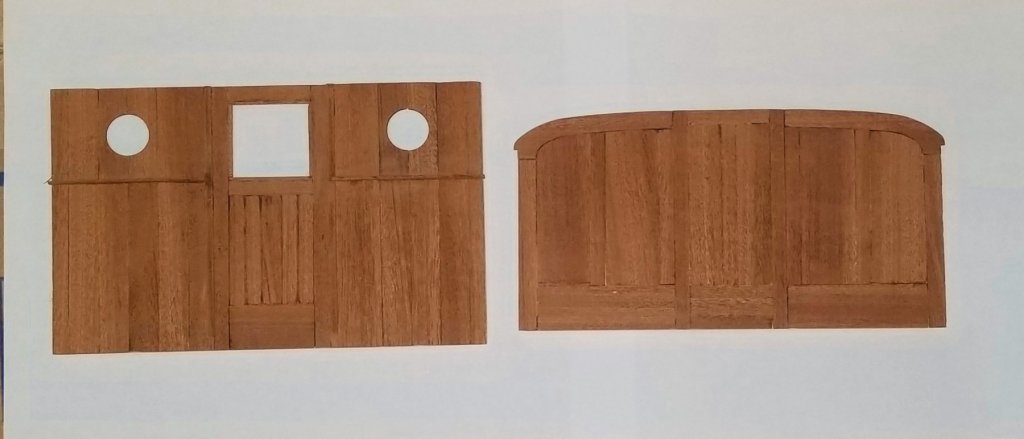
Here are the front & rear cabin bulkheads. Well-sanded except for final fine sanding, but not finished yet. I'm waiting to do that along with the hull, because it's a 3 step mixed epoxy process followed by 3 clear coat sprays, so I want to do a few things at once. Also need to paint the bottom first.
All of that will commence when I get back from a one week trip next week.
Regards,
David
- yvesvidal, usedtosail and thibaultron
-
3


.jpg.83034ccb755dbae5bc217b127946dcb1.jpg)


Cutty Sark by drobinson02199 - FINISHED - Mantua/Sergal - Scale 1:78
in - Kit build logs for subjects built from 1851 - 1900
Posted
Hull structure completed, frames tapered and ready for first planking. Picture attached.
This is my first Mantua kit. The materials quality appears to be very good -- the frames and keel went together perfectly. The instructions and plans sort of skim things at a high level, however, so I'm glad this wasn't my first (or even my third) kit. Lots of interpretation and prior experience judgment needed.
Regards,
David