Keith Black
-
Posts
6,691 -
Joined
-
Last visited
Content Type
Profiles
Forums
Gallery
Events
Everything posted by Keith Black
-
 Looks really good, Dave. Are things getting any easier now that you have a couple of months experience under your belt?
- 362 replies
-
- 2
-

-
- Amati
- Lady Nelson
- (and 2 more)
-
A very nice build and a successful completion. Congratulations, Kramer. They're called a 'ship's boat' not a tender. You should be able to use the MSW search engine to find build logs for a ship's boat. Again, congratulations.
-
Michael, hopefully tomorrow turns to gold.
-
What a little gem, Glen. Of all your SIBs I like this one best and it's not even finished.
- 177 replies
-
- 2
-
-

-
- Independence
- bottle
- (and 1 more)
-
kit review ENDURANCE by OcCre - 1/70 scale
Keith Black replied to ccoyle's topic in REVIEWS: Model kits
Tom, thank you. See below regarding 12mm stanchions. https://www.cornwallmodelboats.co.uk/cgi-bin/sh000001.pl?WD=12mm stanchions&PN=Caldercraft-Model-Boat-Fittings-2-Hole-Brass-Rail-Stanchion-Ball-Type-12mm-C66B0518.html#SID=2482 https://www.cornwallmodelboats.co.uk/cgi-bin/sh000001.pl?WD=hole single 12mm stanchions&PN=31700-Rail-Stanchion-One-Ball-12mm-31700.html#SID=69 -
Welcome to MSW. I hope you enjoy your first build, wishing you well.
-
Dave, the blocks look much better than (I'm guessing) the yellow blocks that came with the kit.
- 362 replies
-
- 1
-
-
- Amati
- Lady Nelson
- (and 2 more)
-
That's why God made sandpaper.
-
Glen. the hull is shaping up nicely. What type wood are you using for the hull?
- 177 replies
-
- 1
-
-
- Independence
- bottle
- (and 1 more)
-
Brian, thank you. I've already completed the gun tracks, see post #157.
-
Hey, Slugger, welcome to MSW.
-
Michael, nice to see you back in the shop.
-
Brian, with punches don't you only get the single hole and not a hole within a hole? When making the gun tracks for the Tennessee I tried using a large punch for the outside diameter and a smaller bunch to cut the inner diameter but it was impossible for me to cut the two with a consistent ring width.
-
Mike, what's the latest on the project?
-
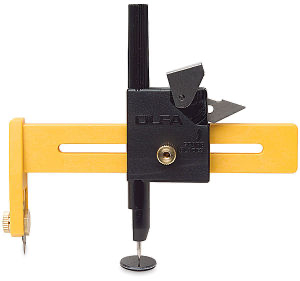
Birchwood Casey Brass Black and a compass circle cutter. Lynn, use the MSW search engine to find discussions on brass blackening, there are several. https://www.amazon.com/Mr-Compass-Circle-Circular-Cutting/dp/B08FRRV2ZT/ref=asc_df_B08FRRV2ZT/?tag=hyprod-20&linkCode=df0&hvadid=475864778819&hvpos=&hvnetw=g&hvrand=9216951676649442914&hvpone=&hvptwo=&hvqmt=&hvdev=c&hvdvcmdl=&hvlocint=&hvlocphy=9017387&hvtargid=pla-1125028214835&psc=1
-
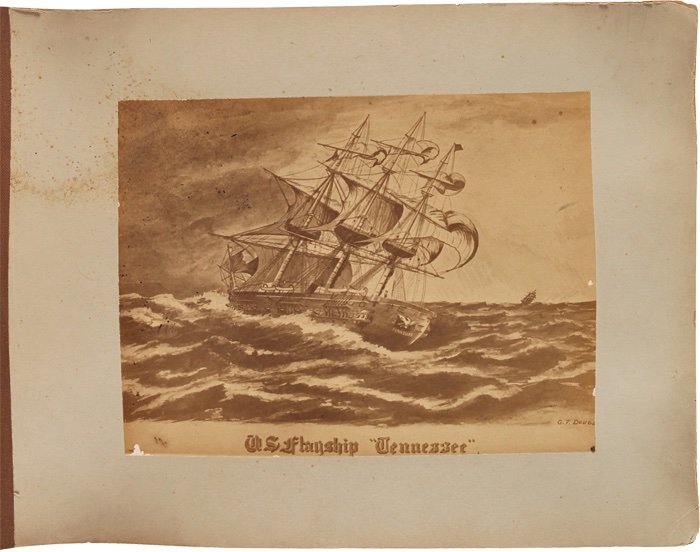
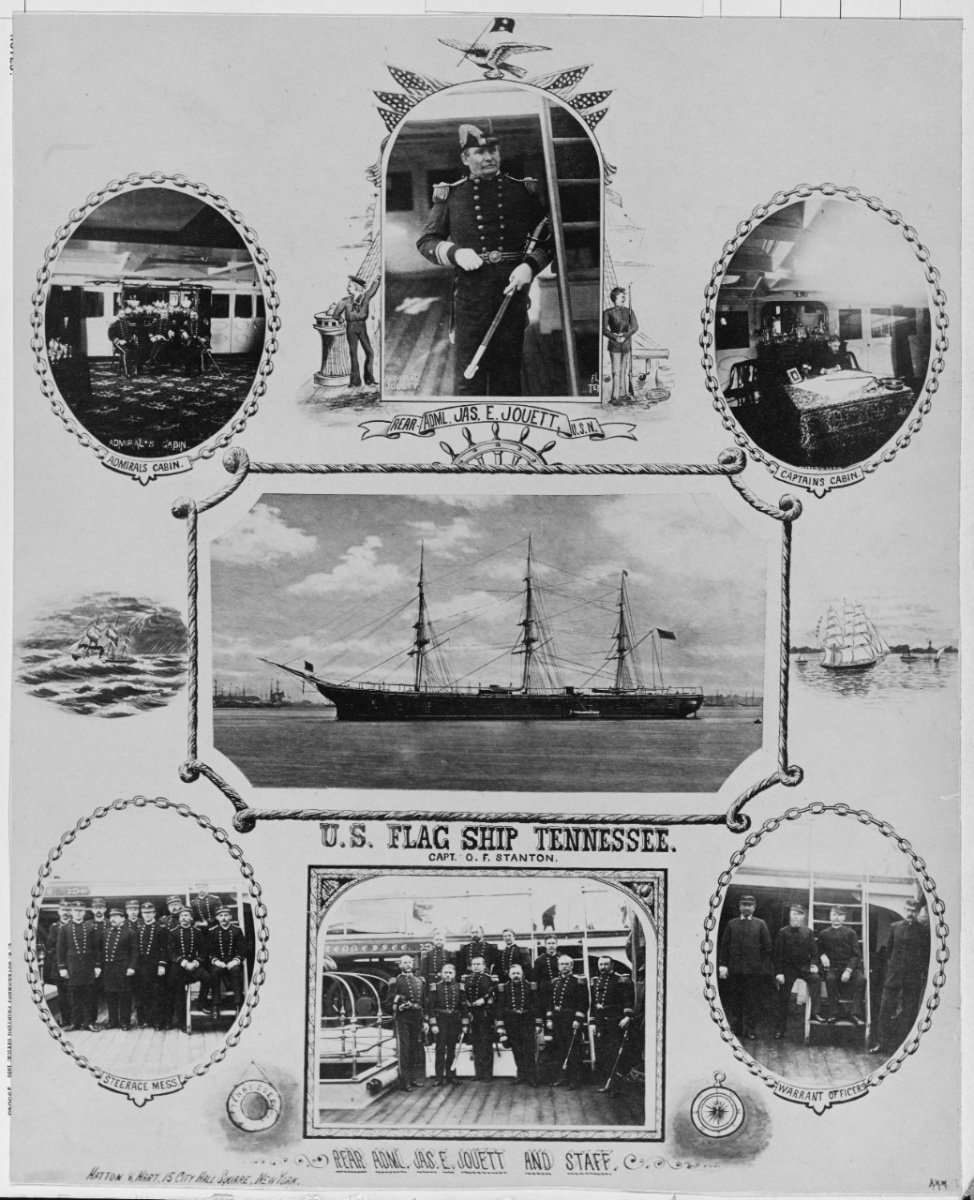
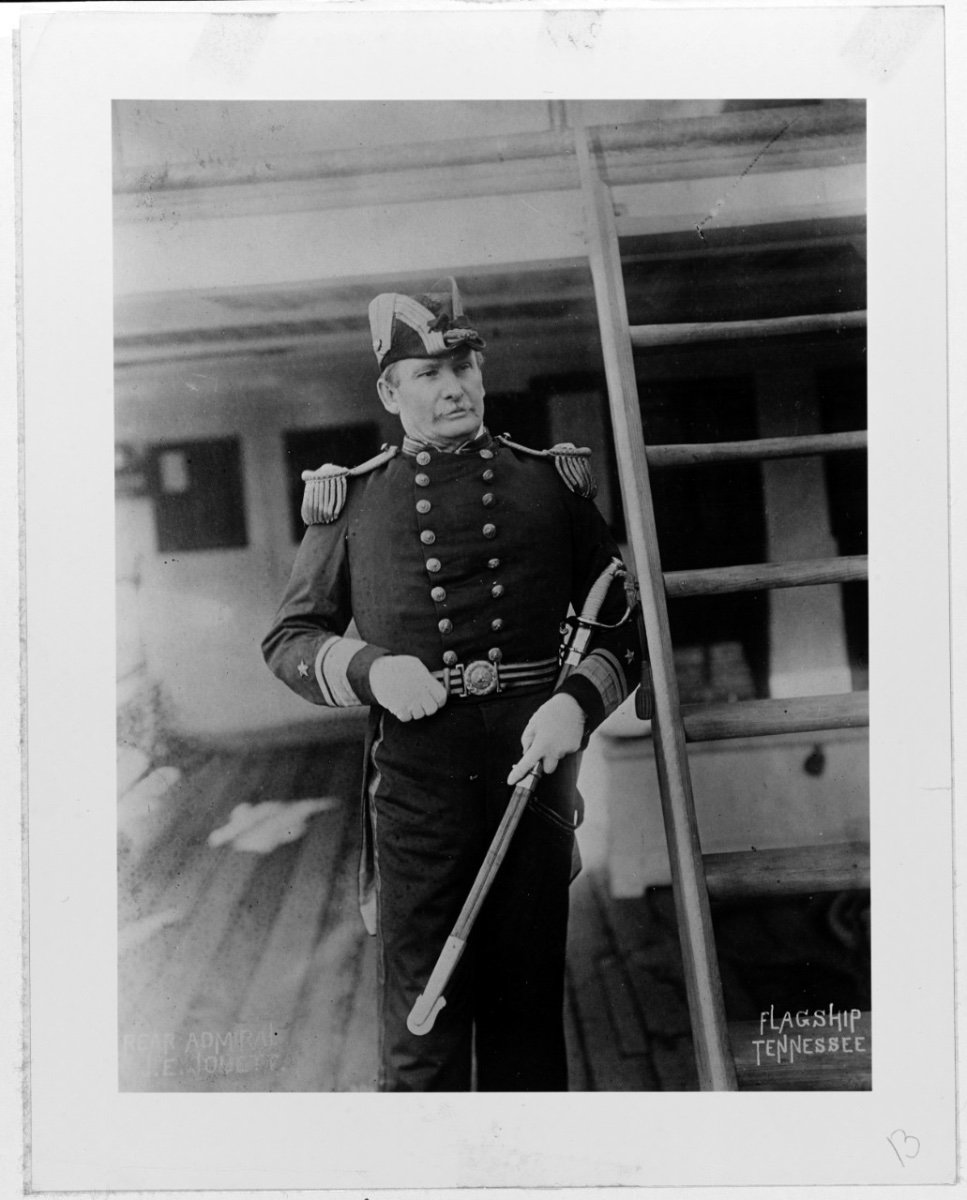
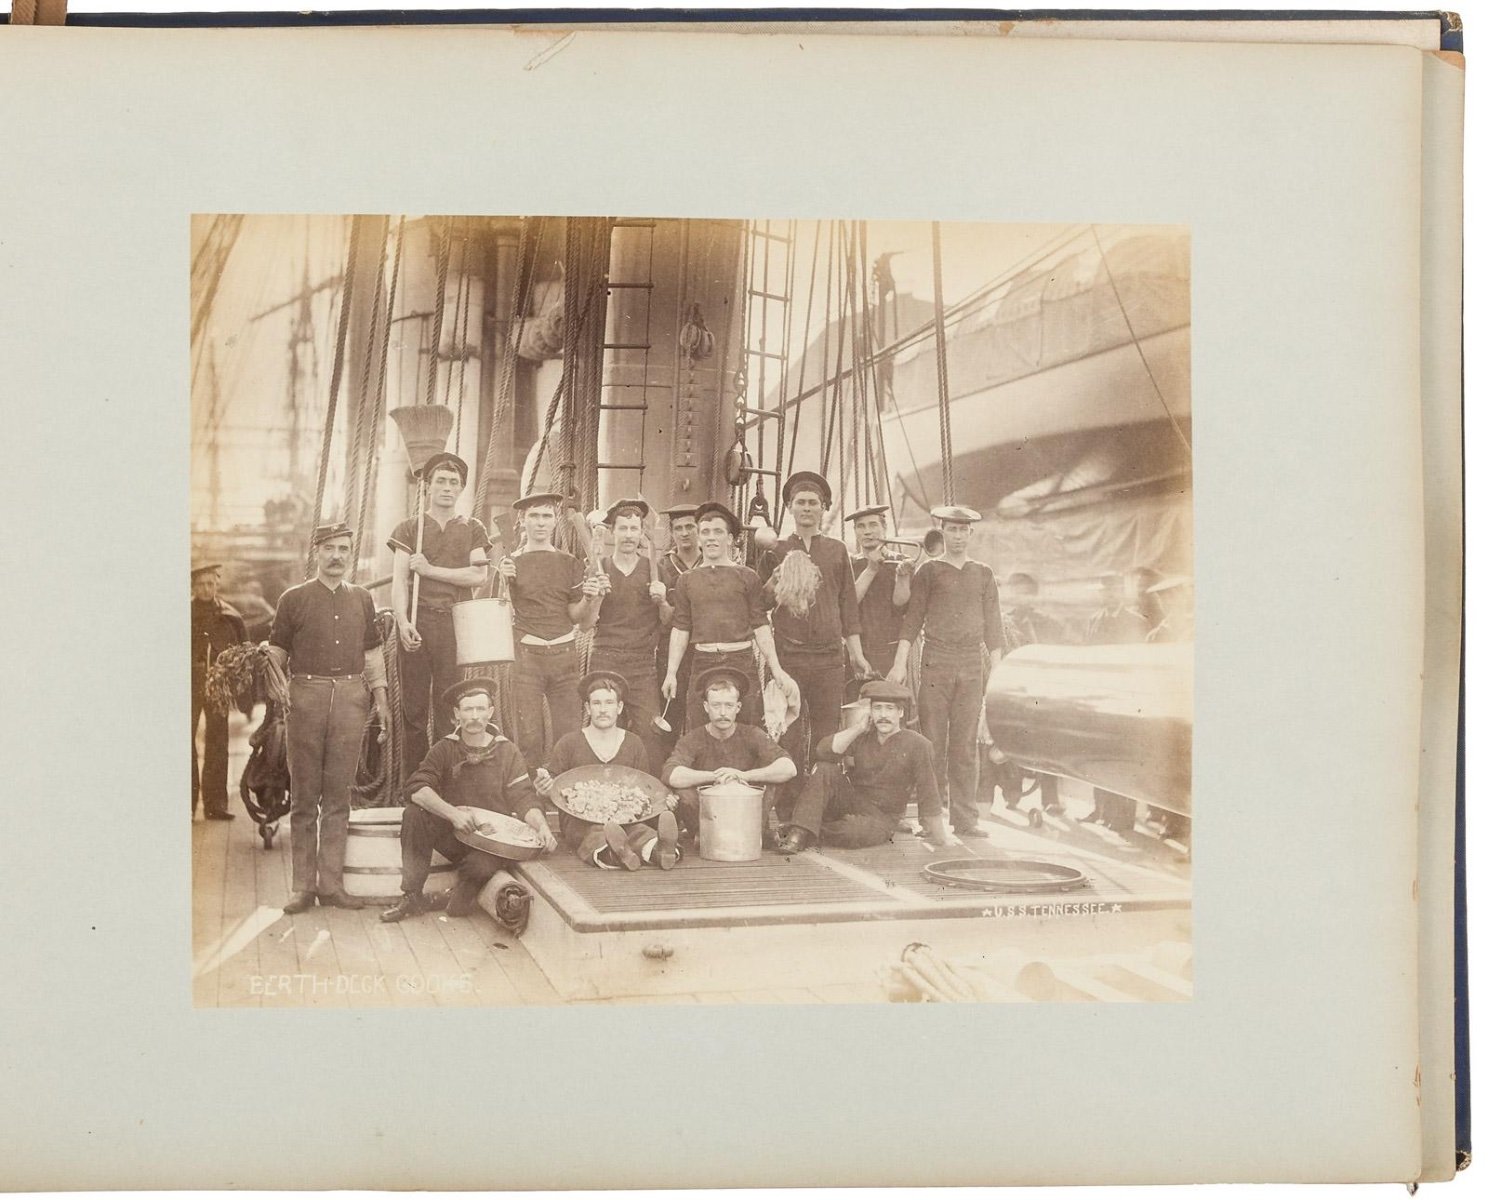
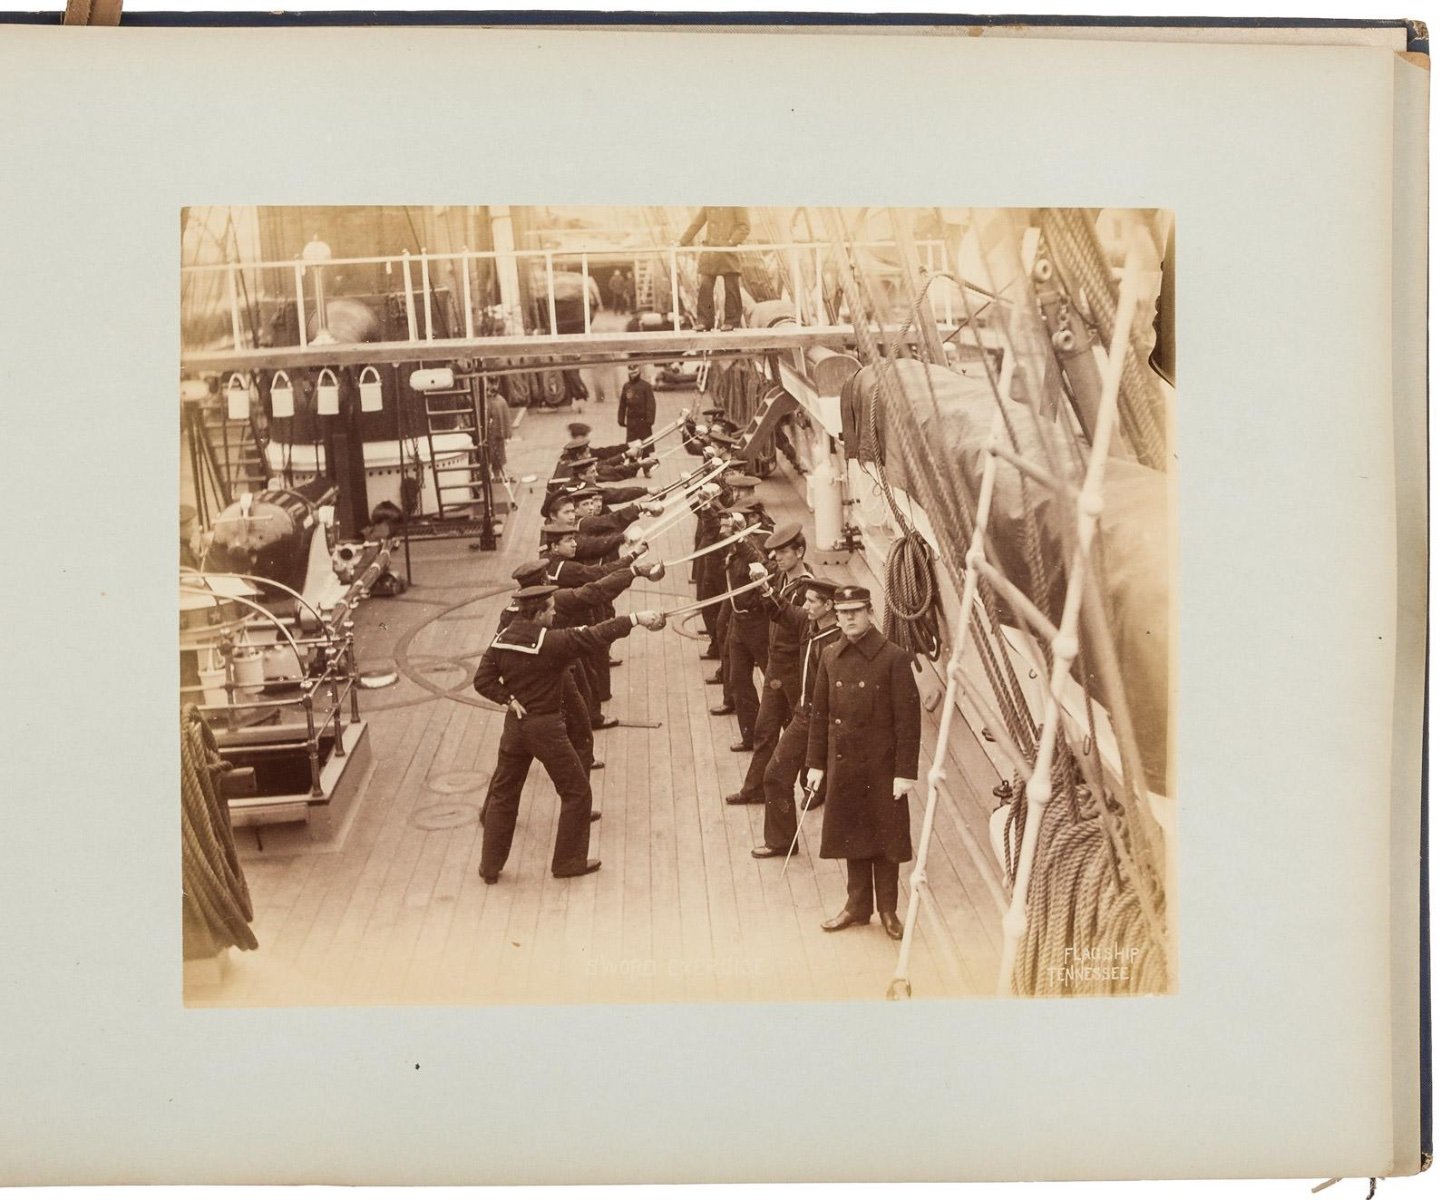
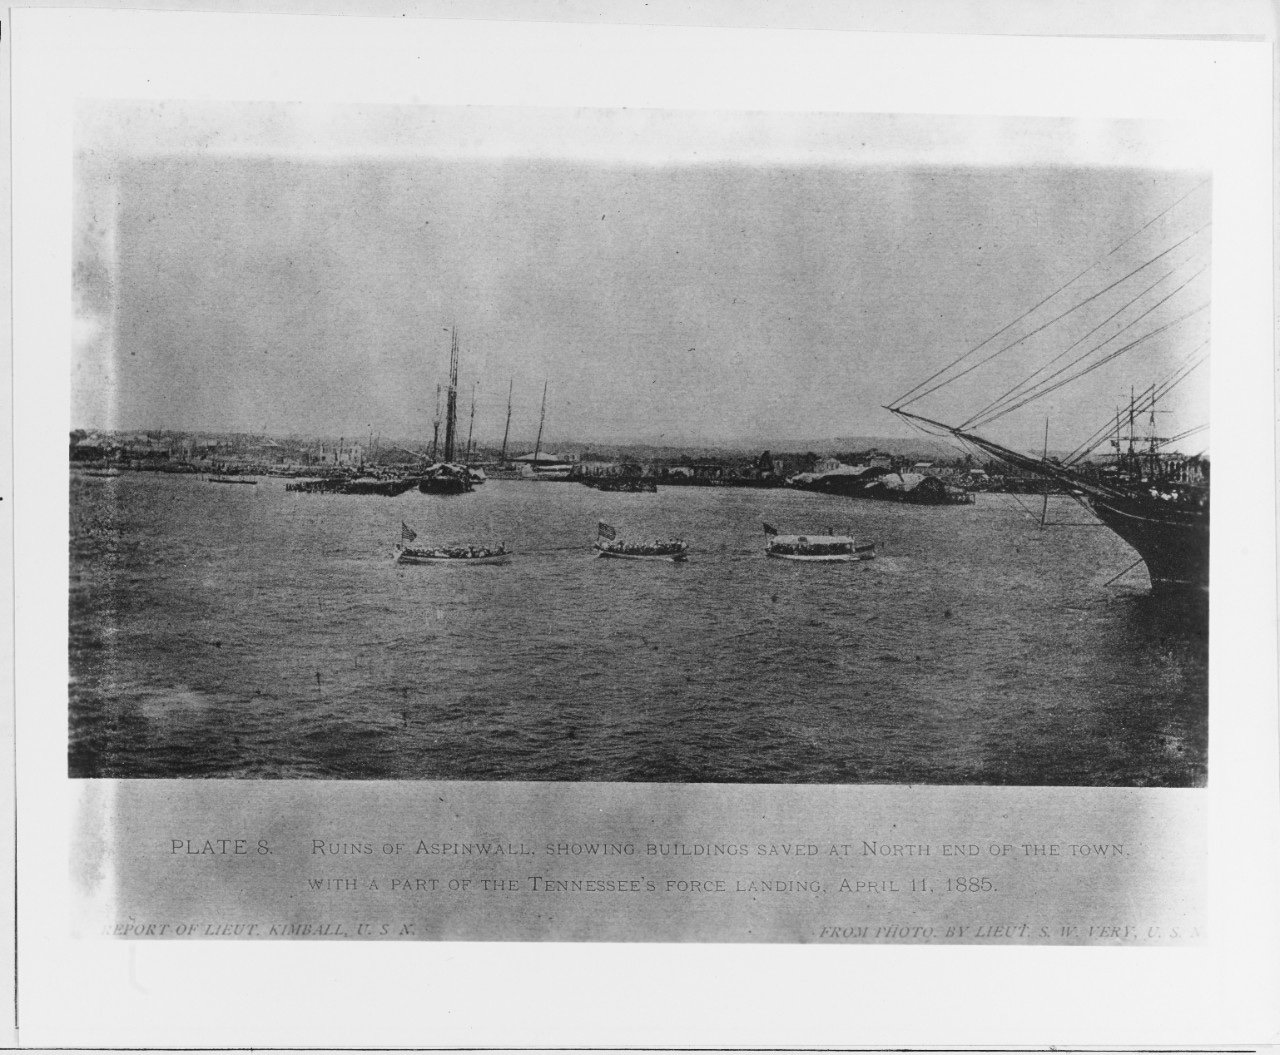
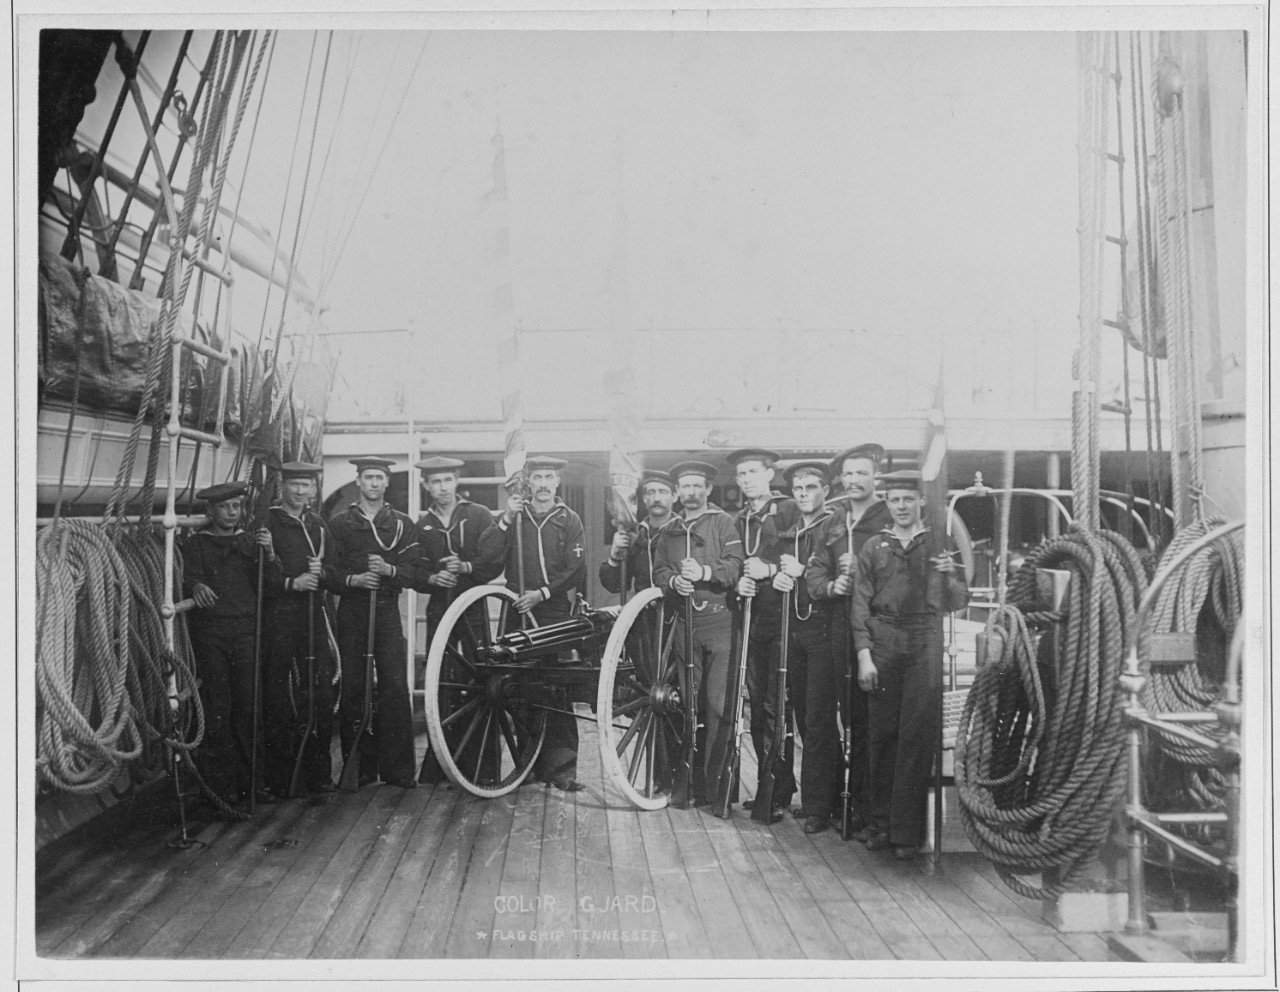
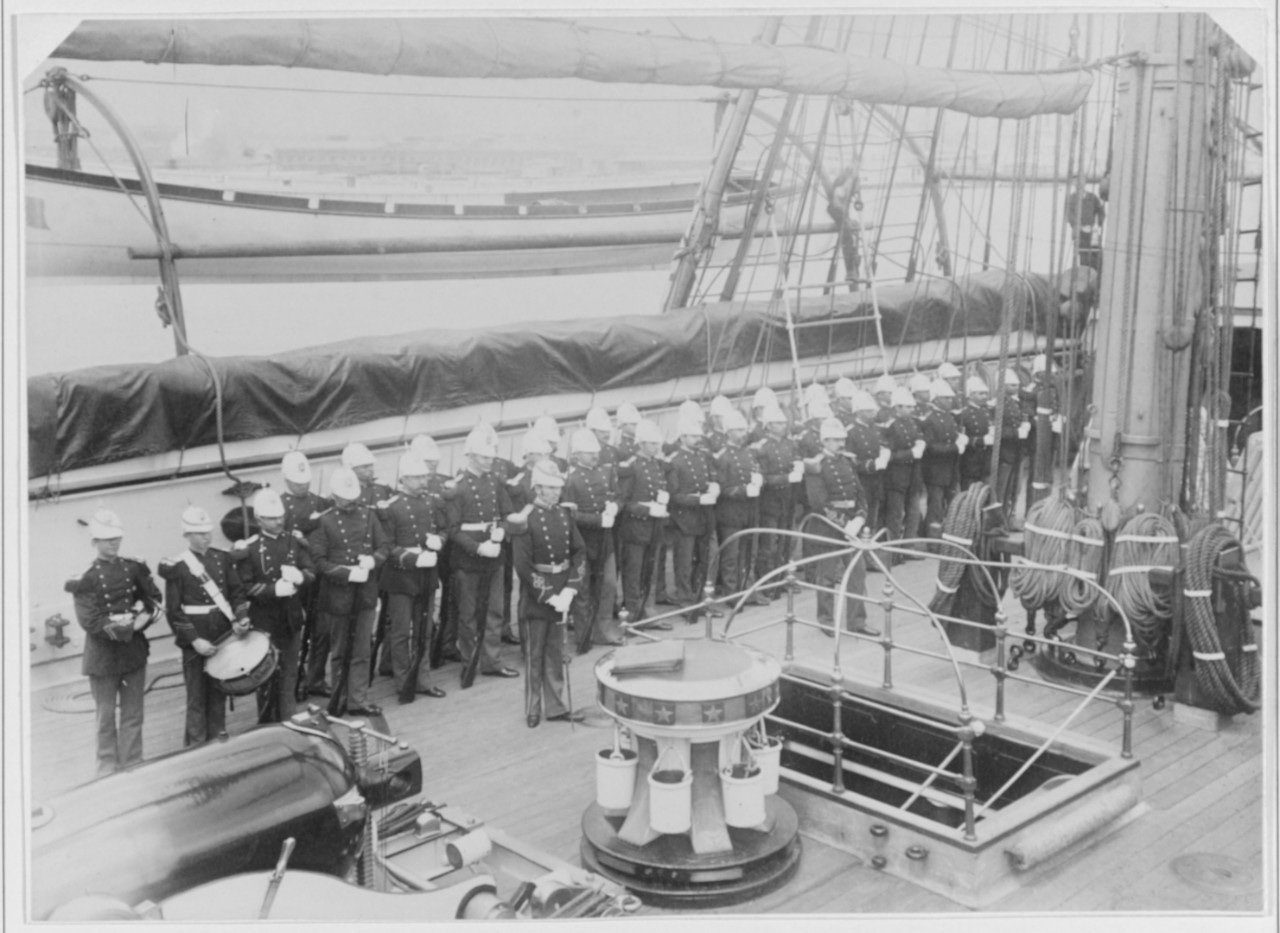
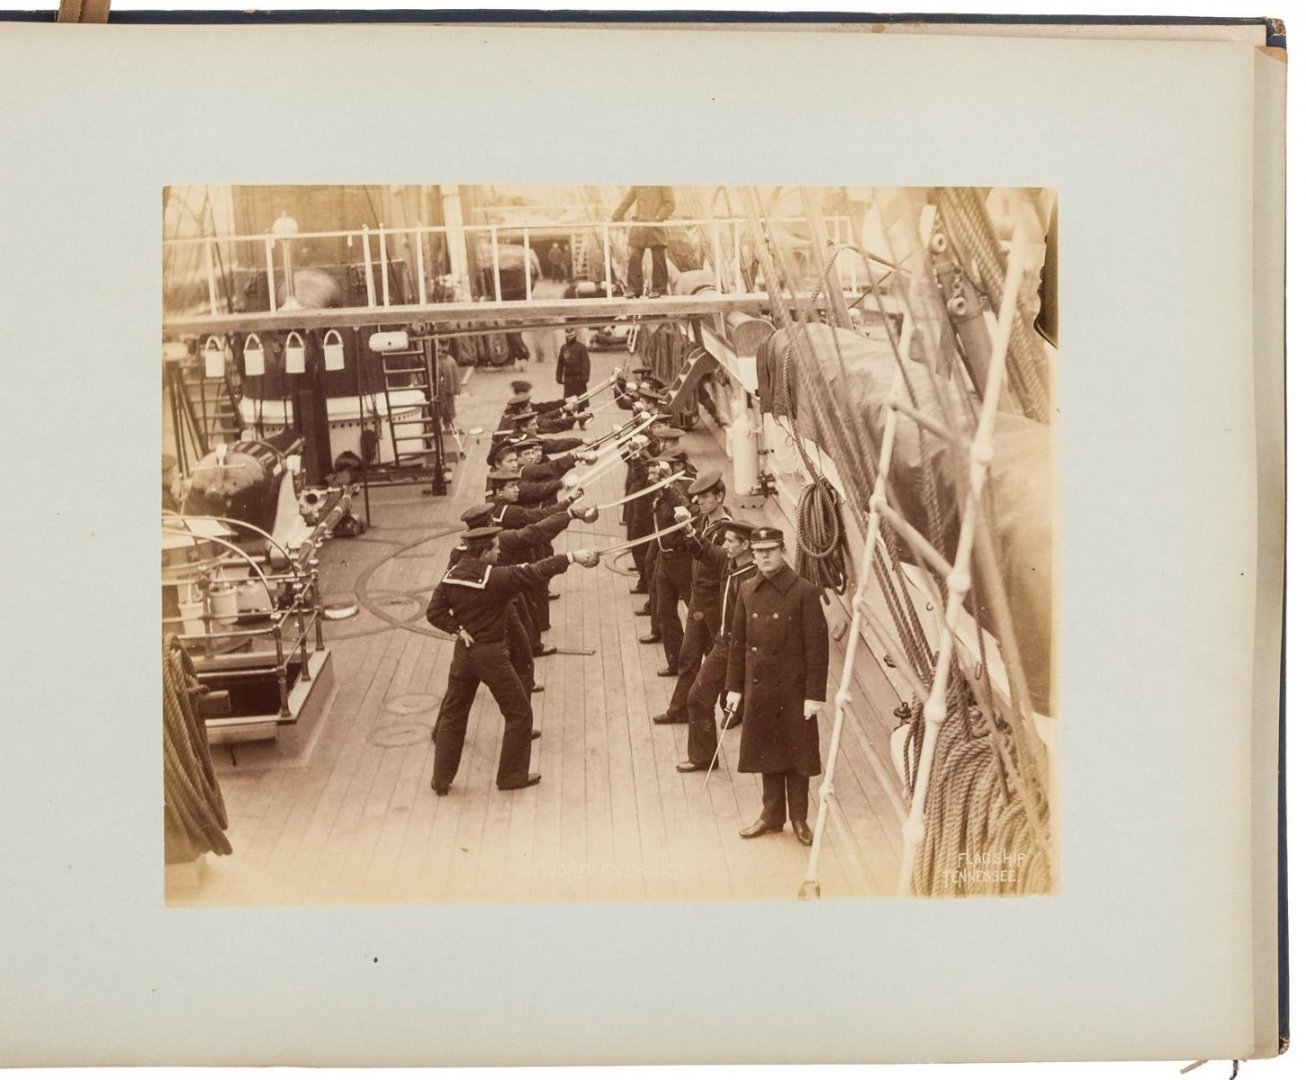
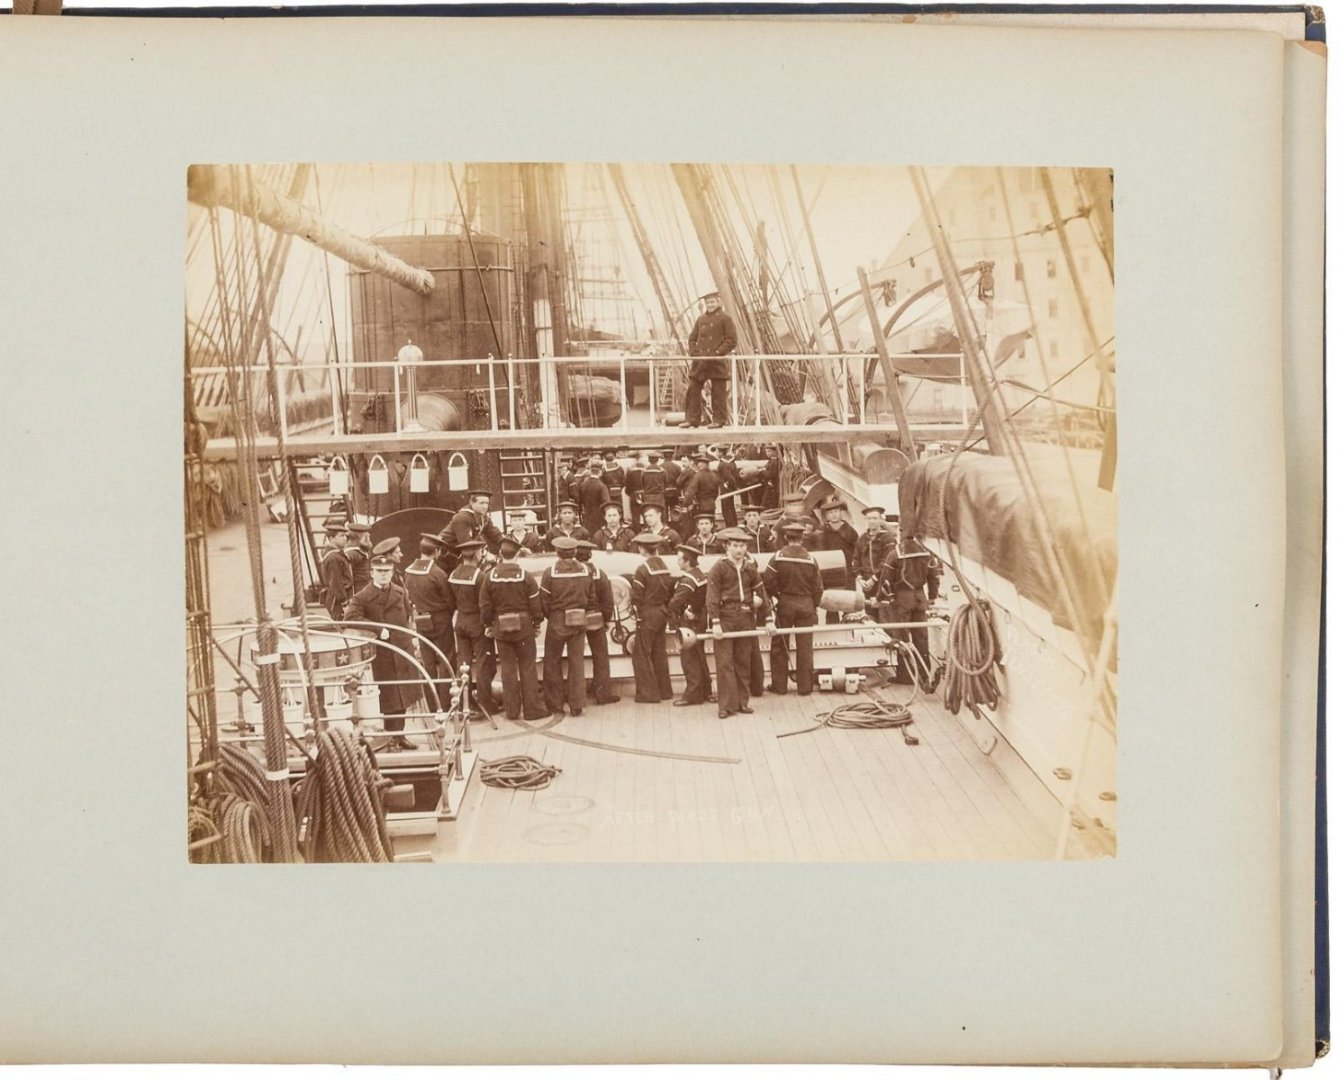
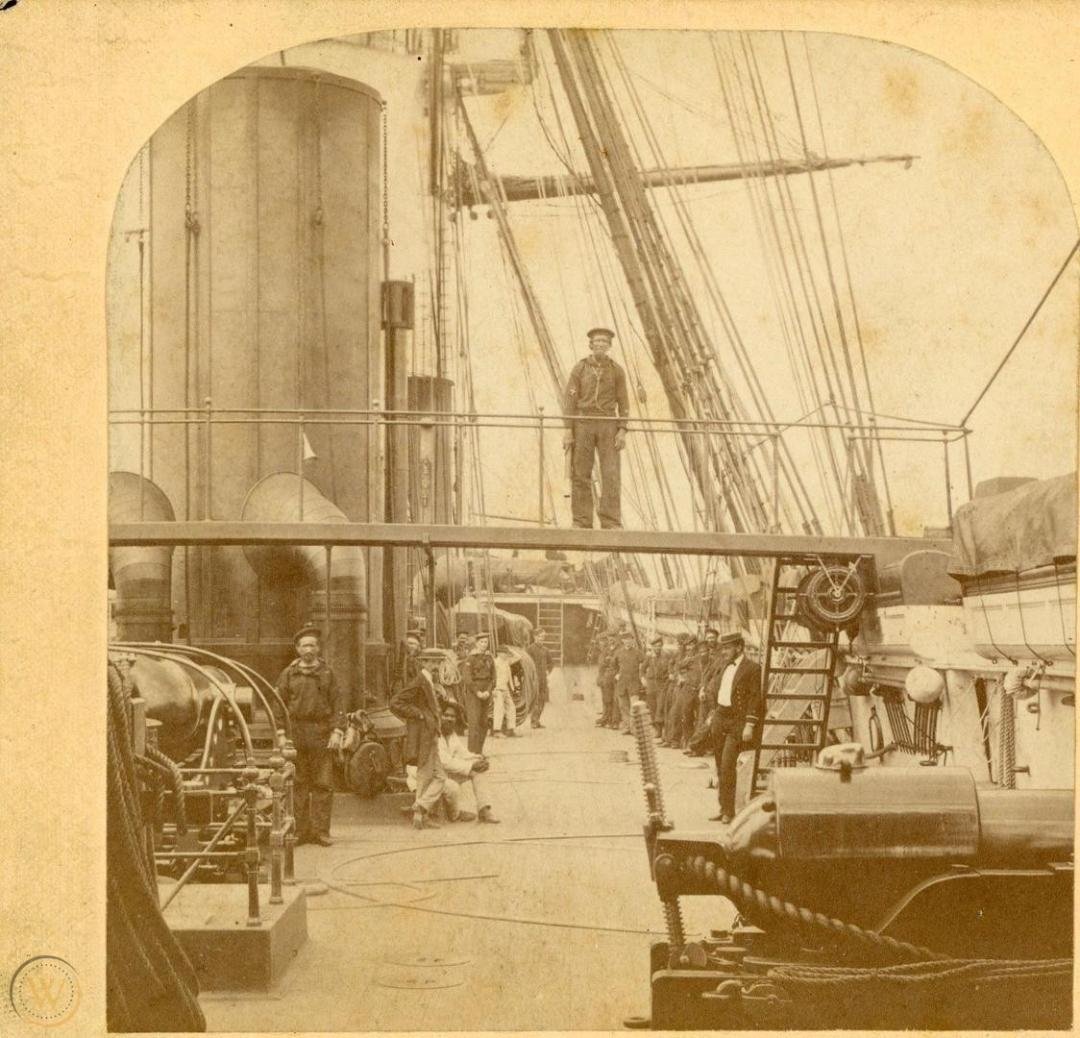
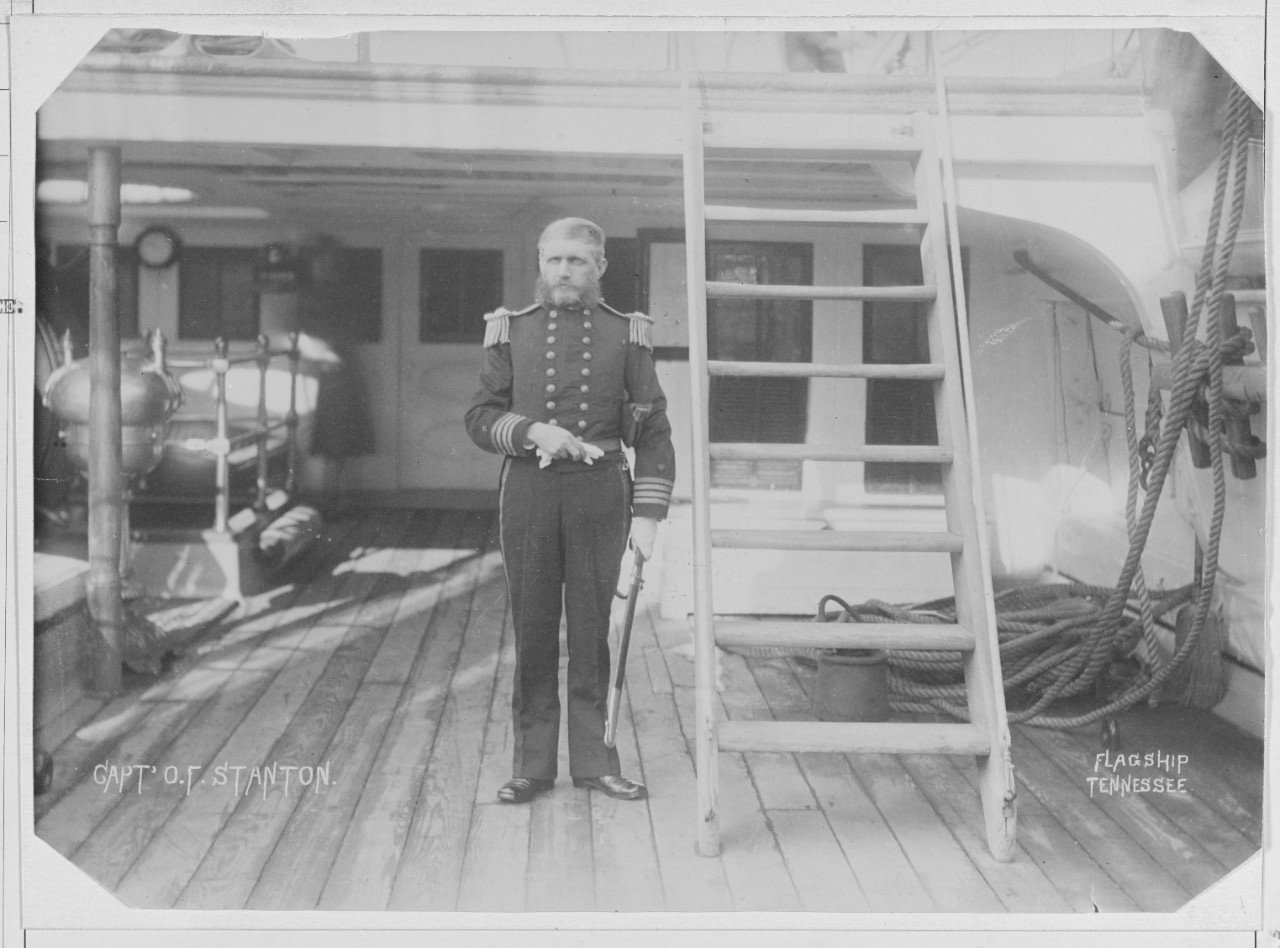
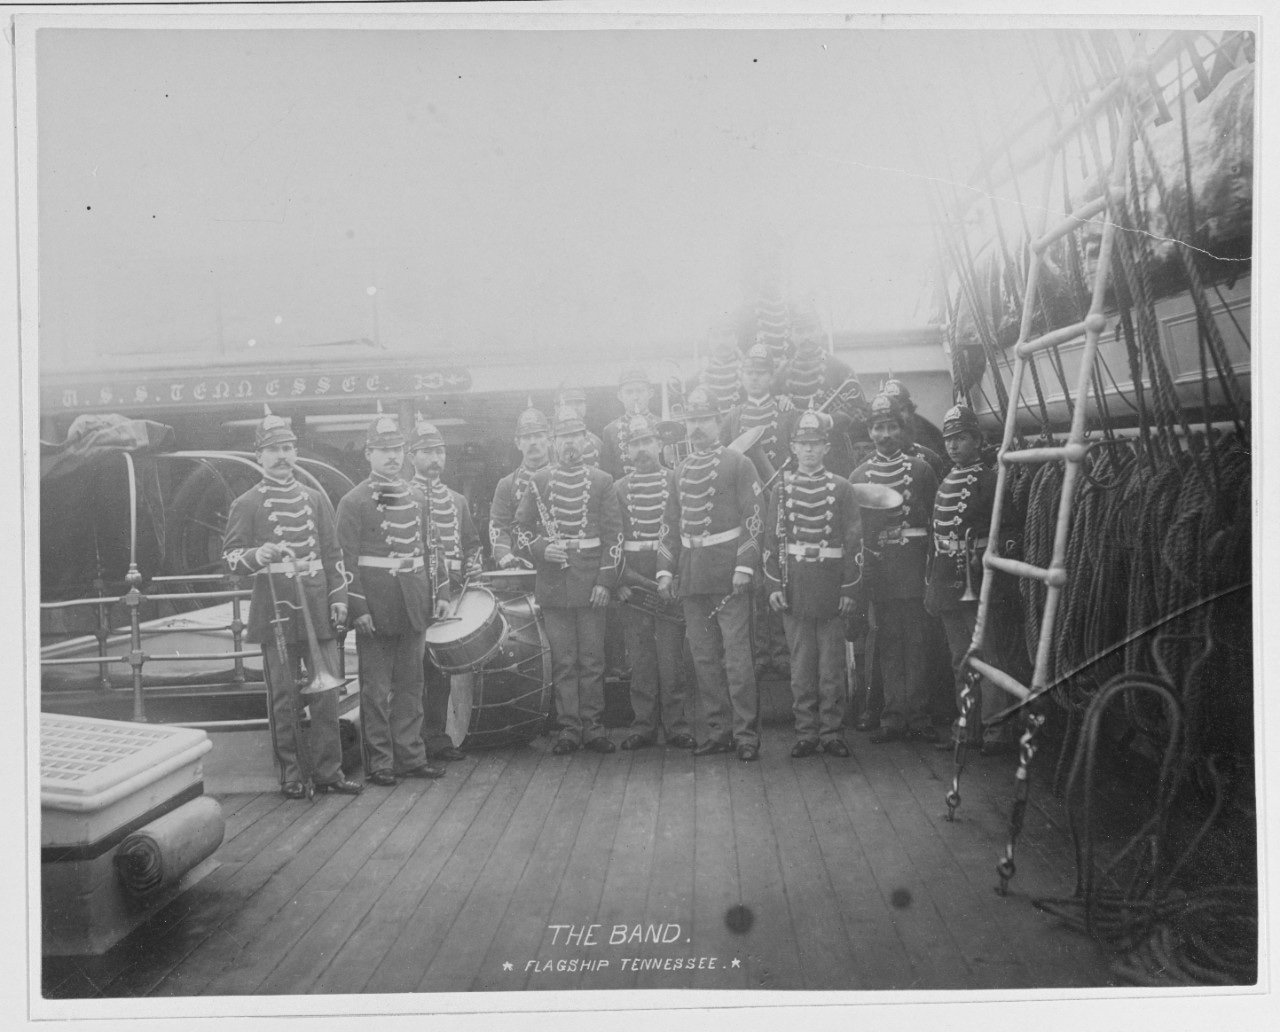
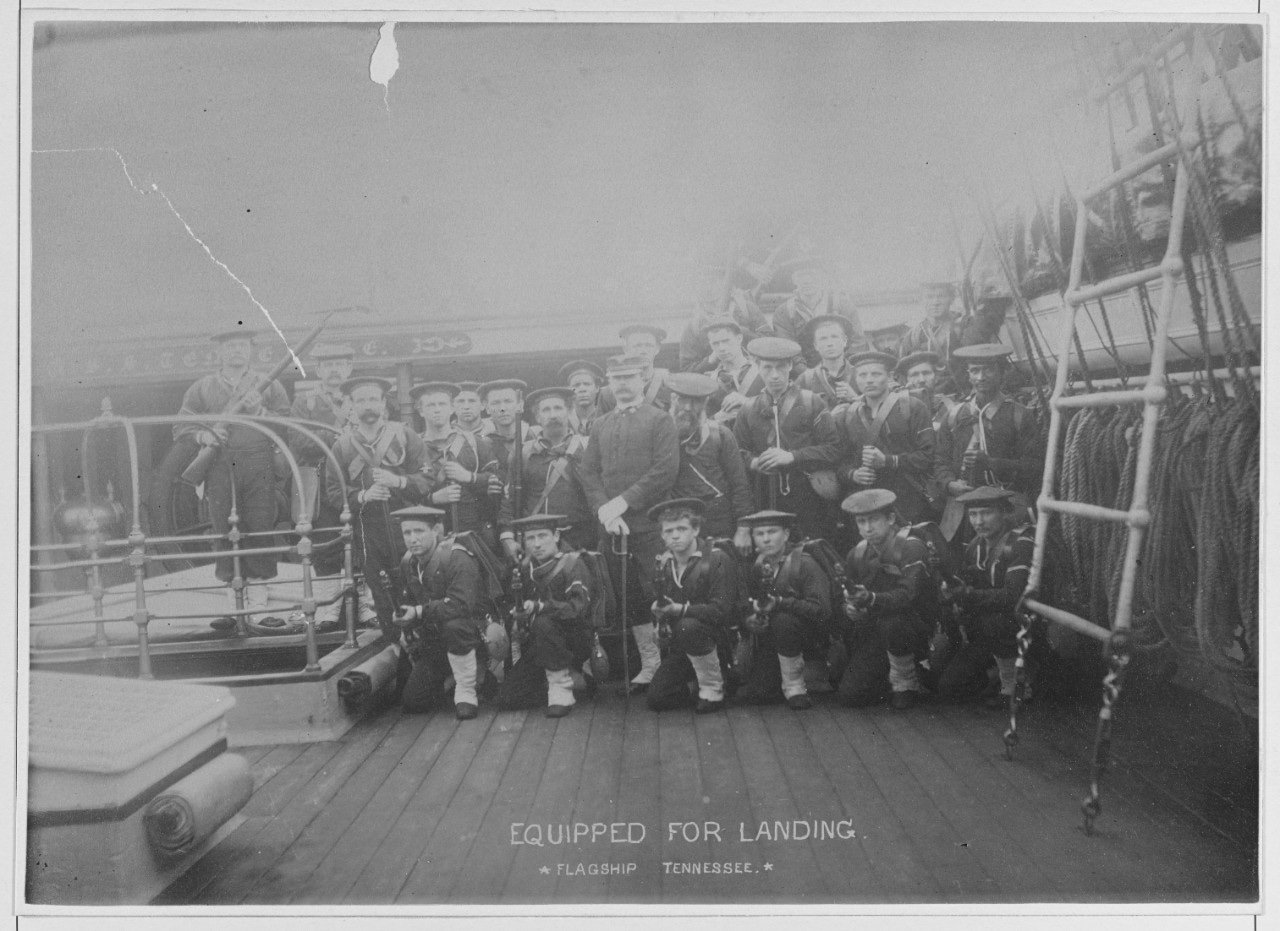
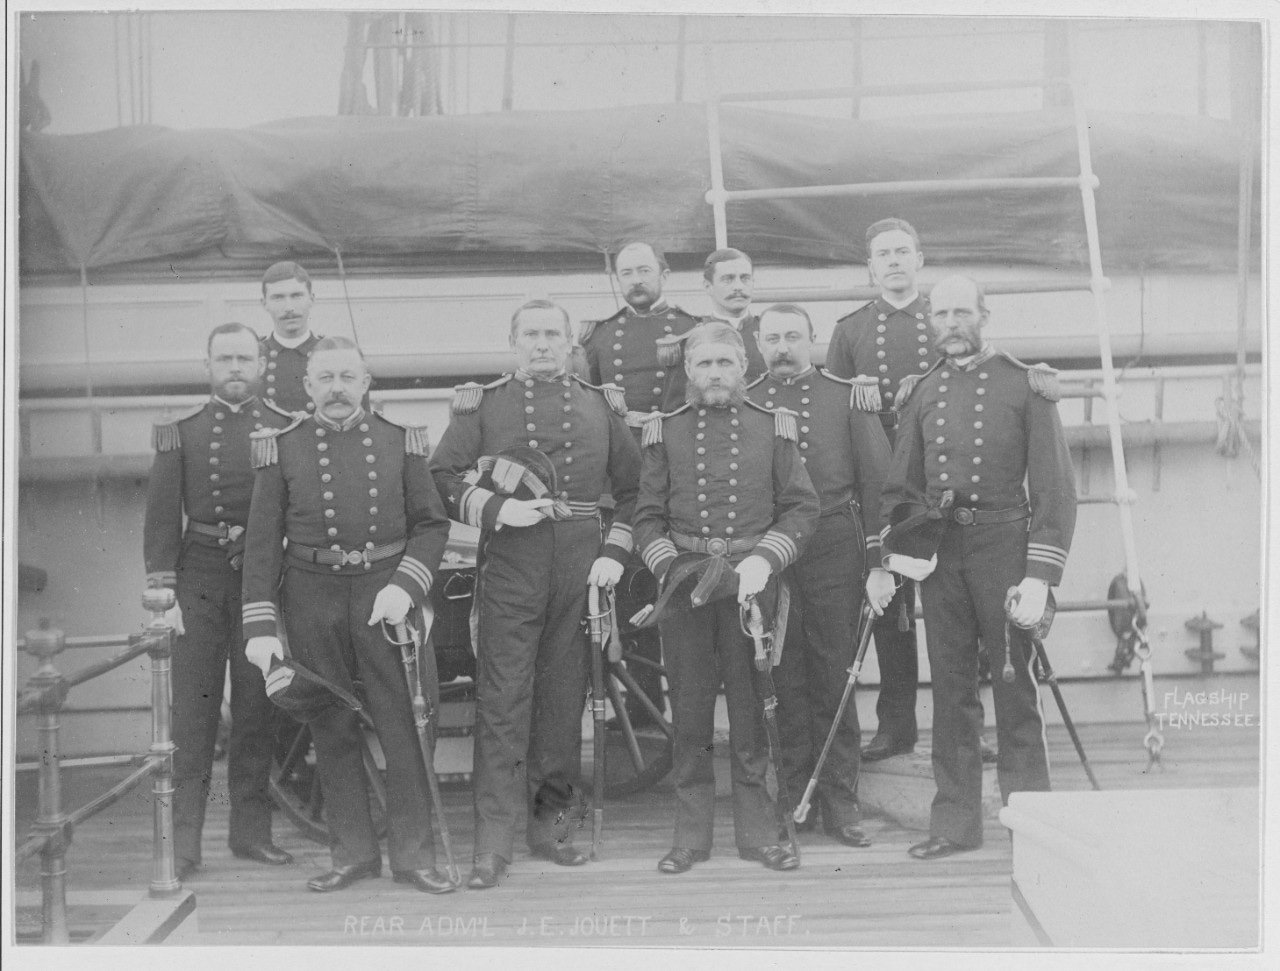
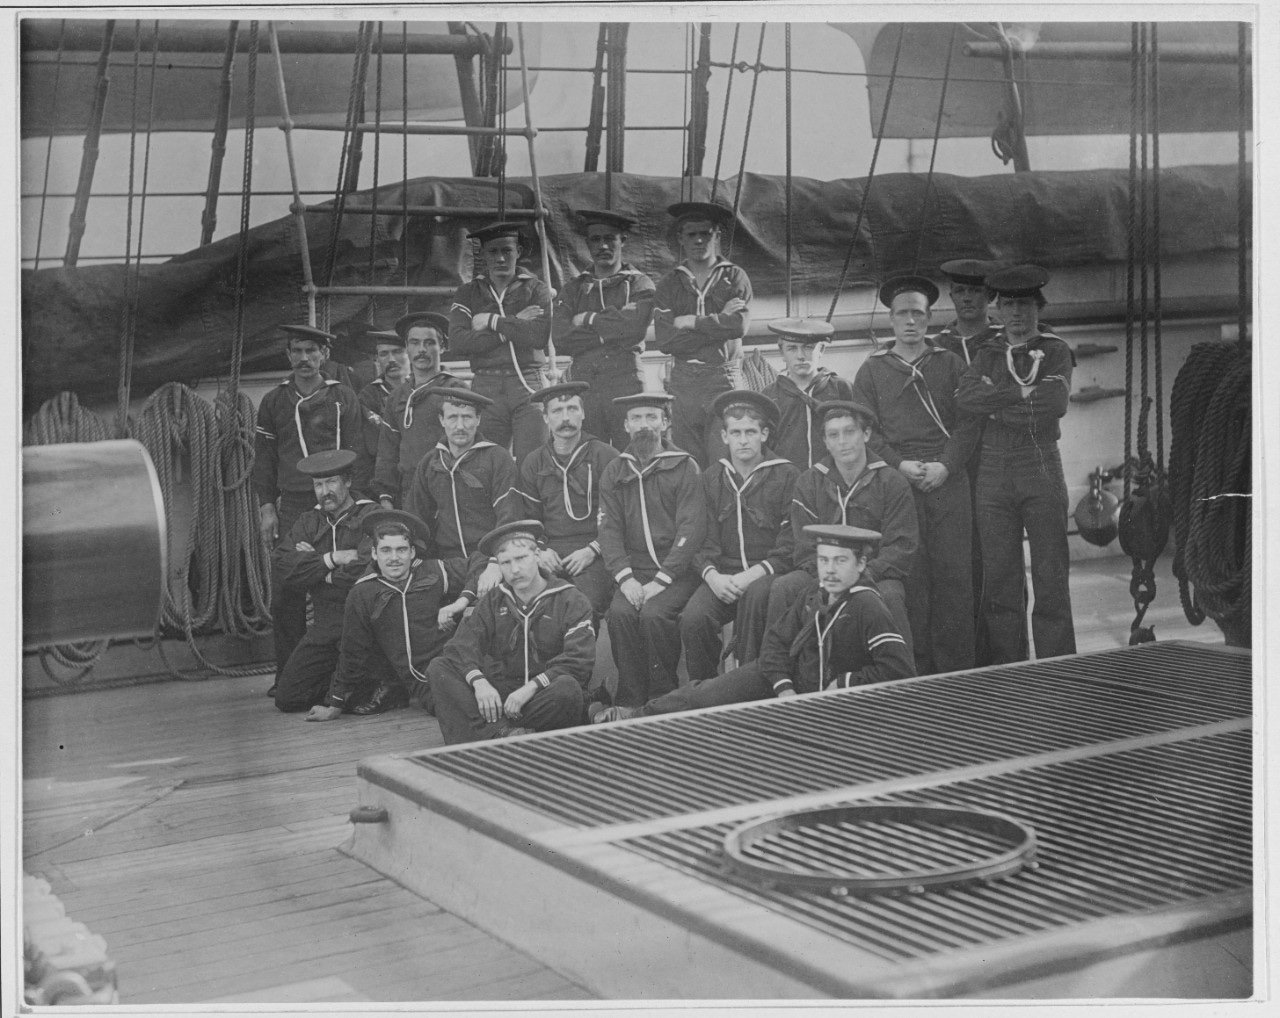
Brian, in a way I feel guilty having this many photos of the Tennessee. You sit there starving for visual information and here I sit drowning in it though the forward part of the Tennessee remains cloaked in mystery. It's such a shame that so much of the past went visually unrecorded when the means was there. I consider these photos a legacy. Wouldn't it be great if MSW had a vessel photo and or drawing library/data base? What a leg up that would be for modelers, particularly for members new to the hobby.
-
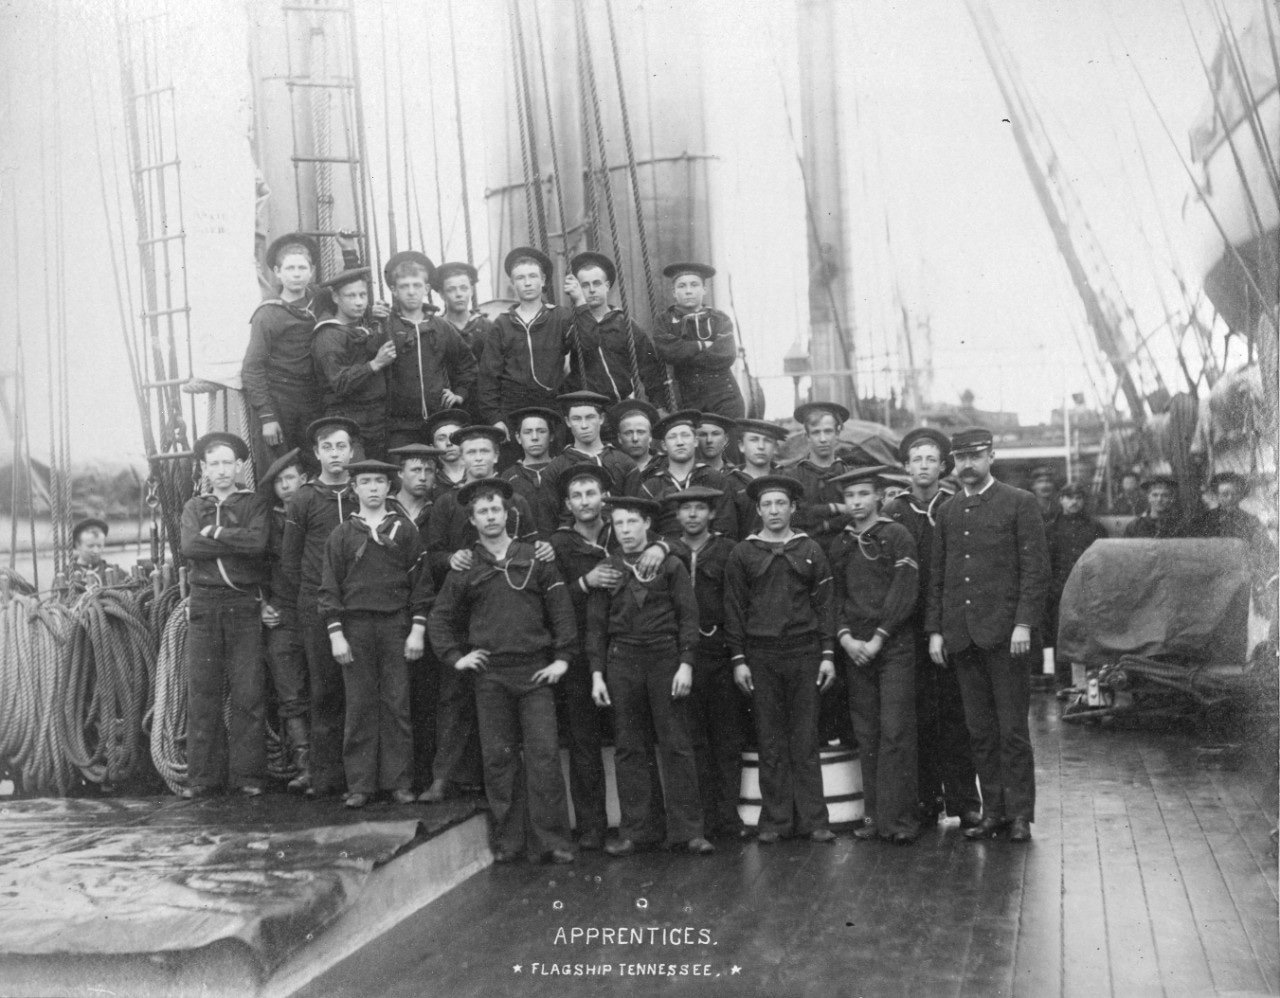
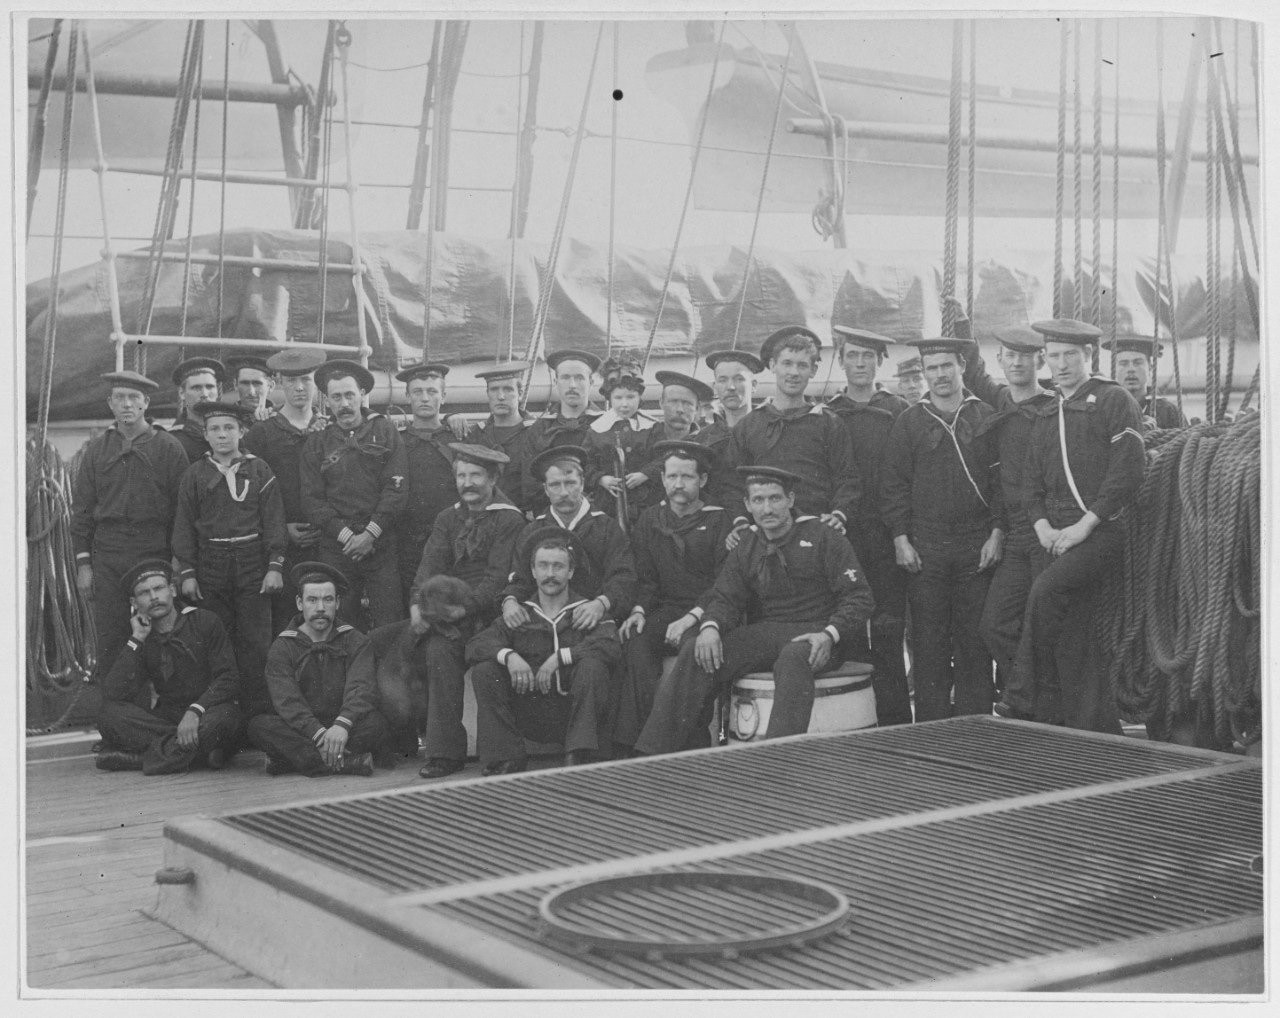
Eberhard, I have to disagree. If it was an apprentice he'd (if a boy) have a regulation hat on (see last photo in 'center views' of the apprentices) not that child's hat it's wearing. I'm not sure if it's a boy or girl but they're cute. I thought about the Setter being a ship's dog but of all the photos the dog only appears in this one photo. Plus, I wonder what US Navy regs were regarding animals aboard ship?
-
Lynn, 1/4 inch is the smallest size available to my knowledge. Below looks like better good prices. https://www.ptreeusa.com/drilling_forstner_bits.html
-
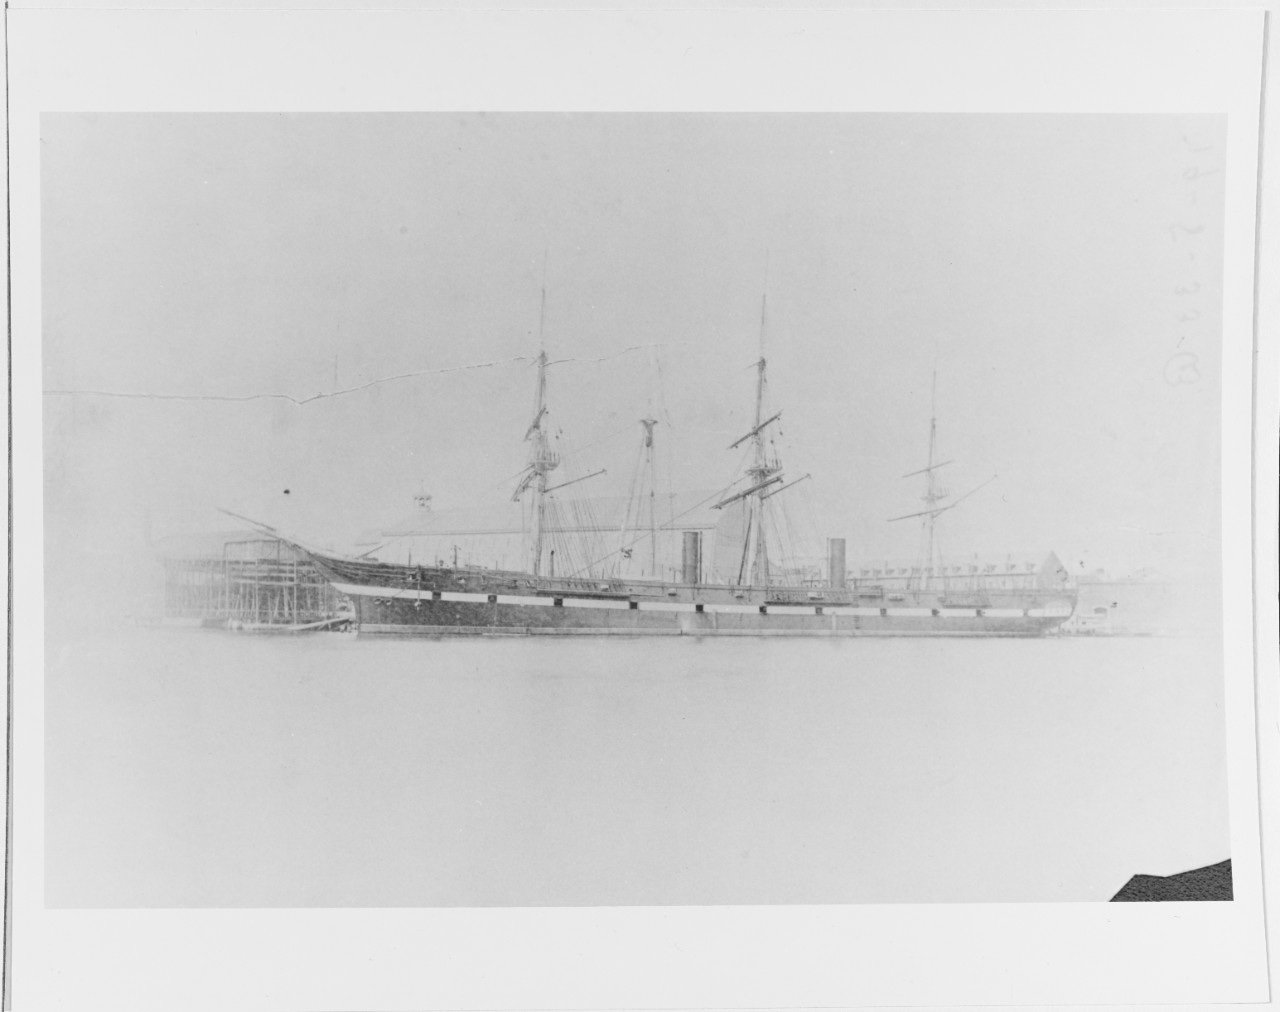
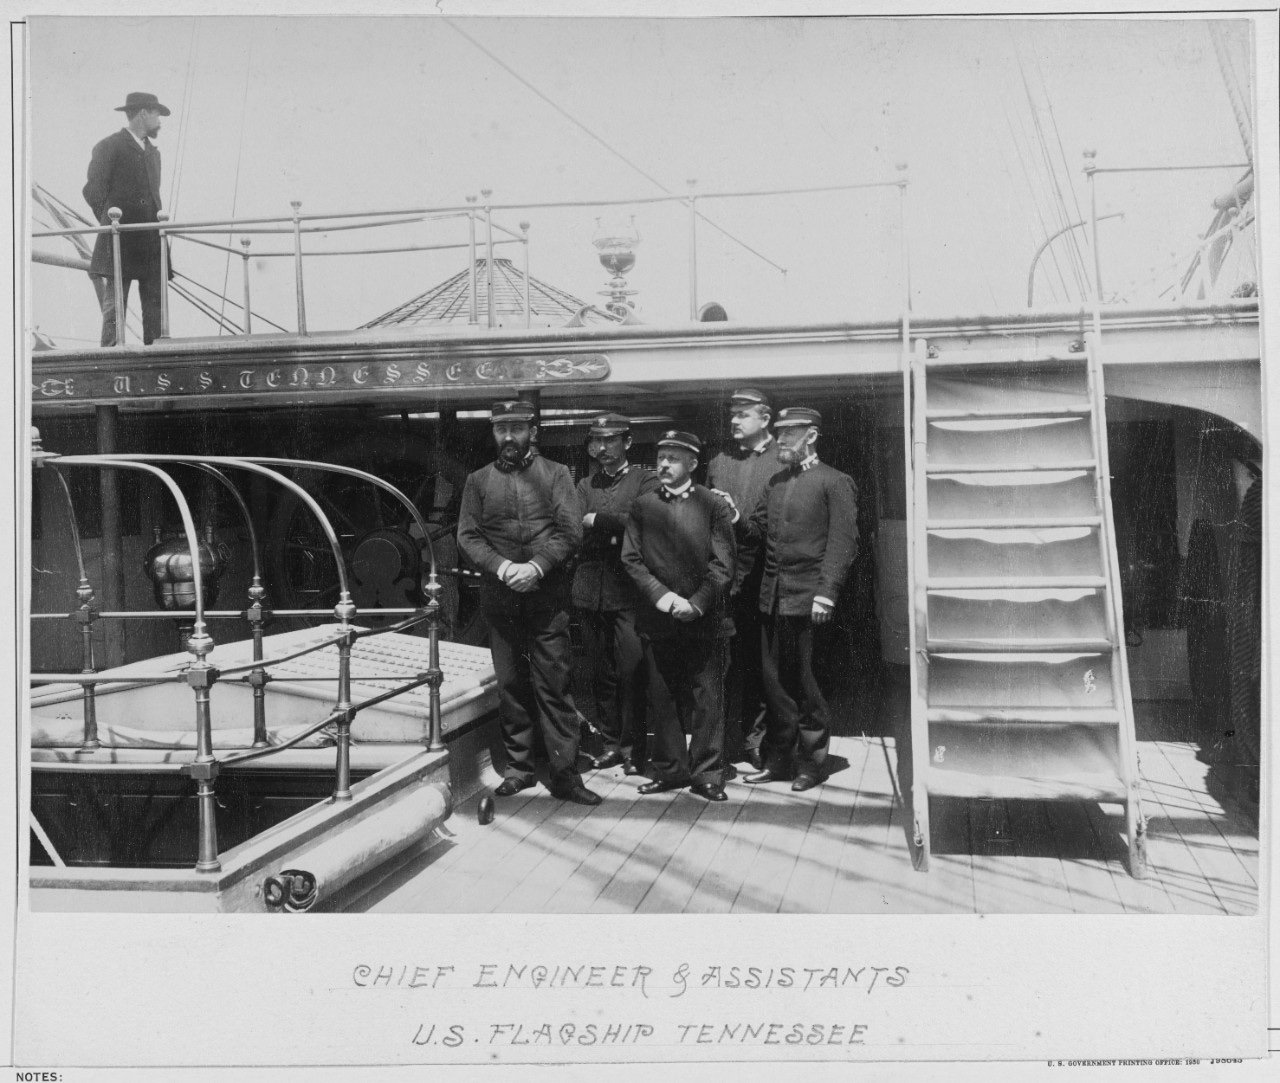
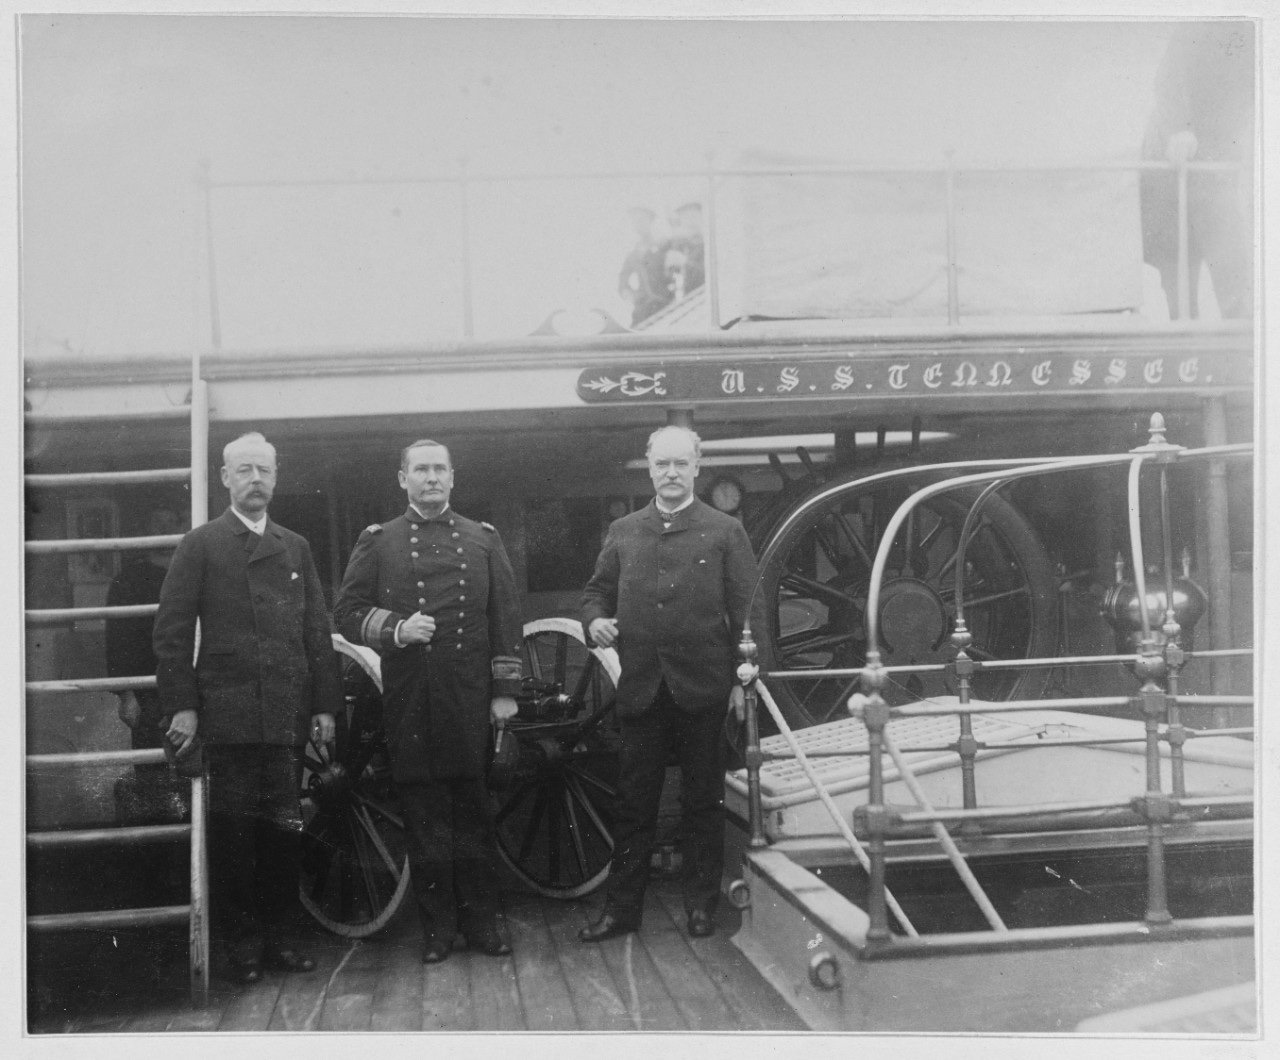
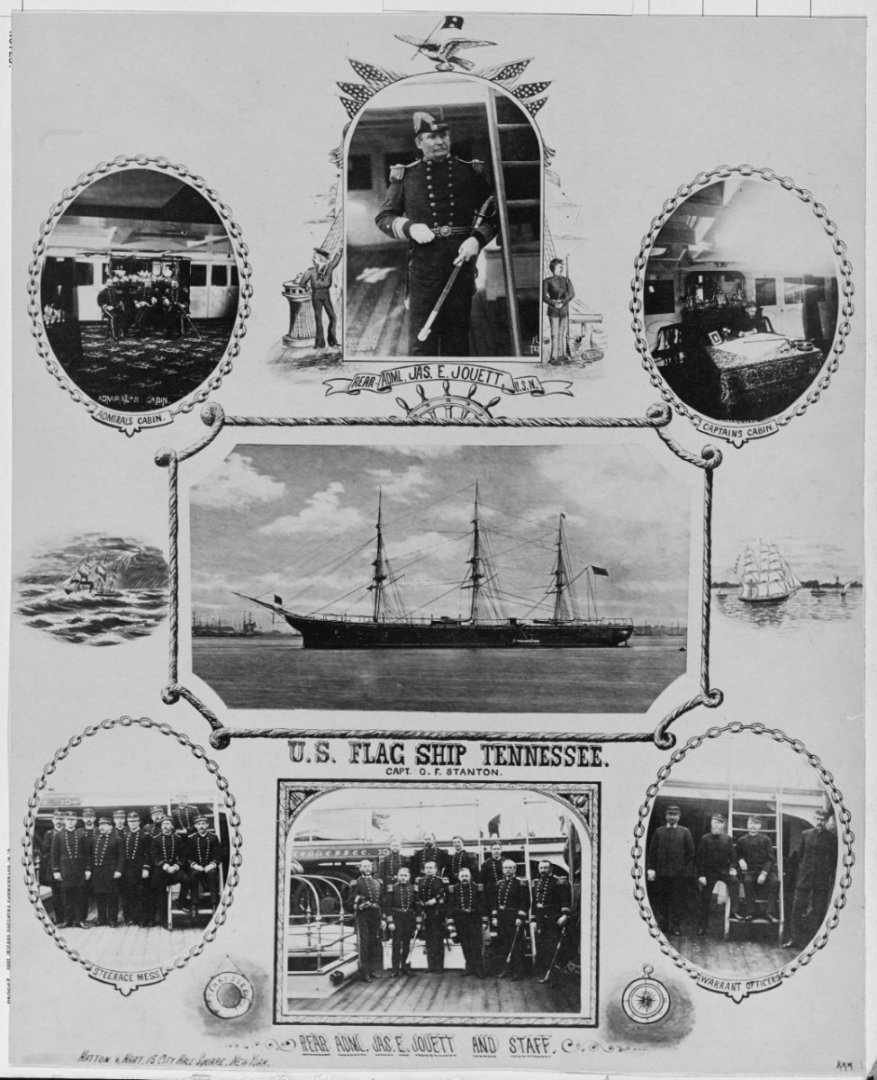
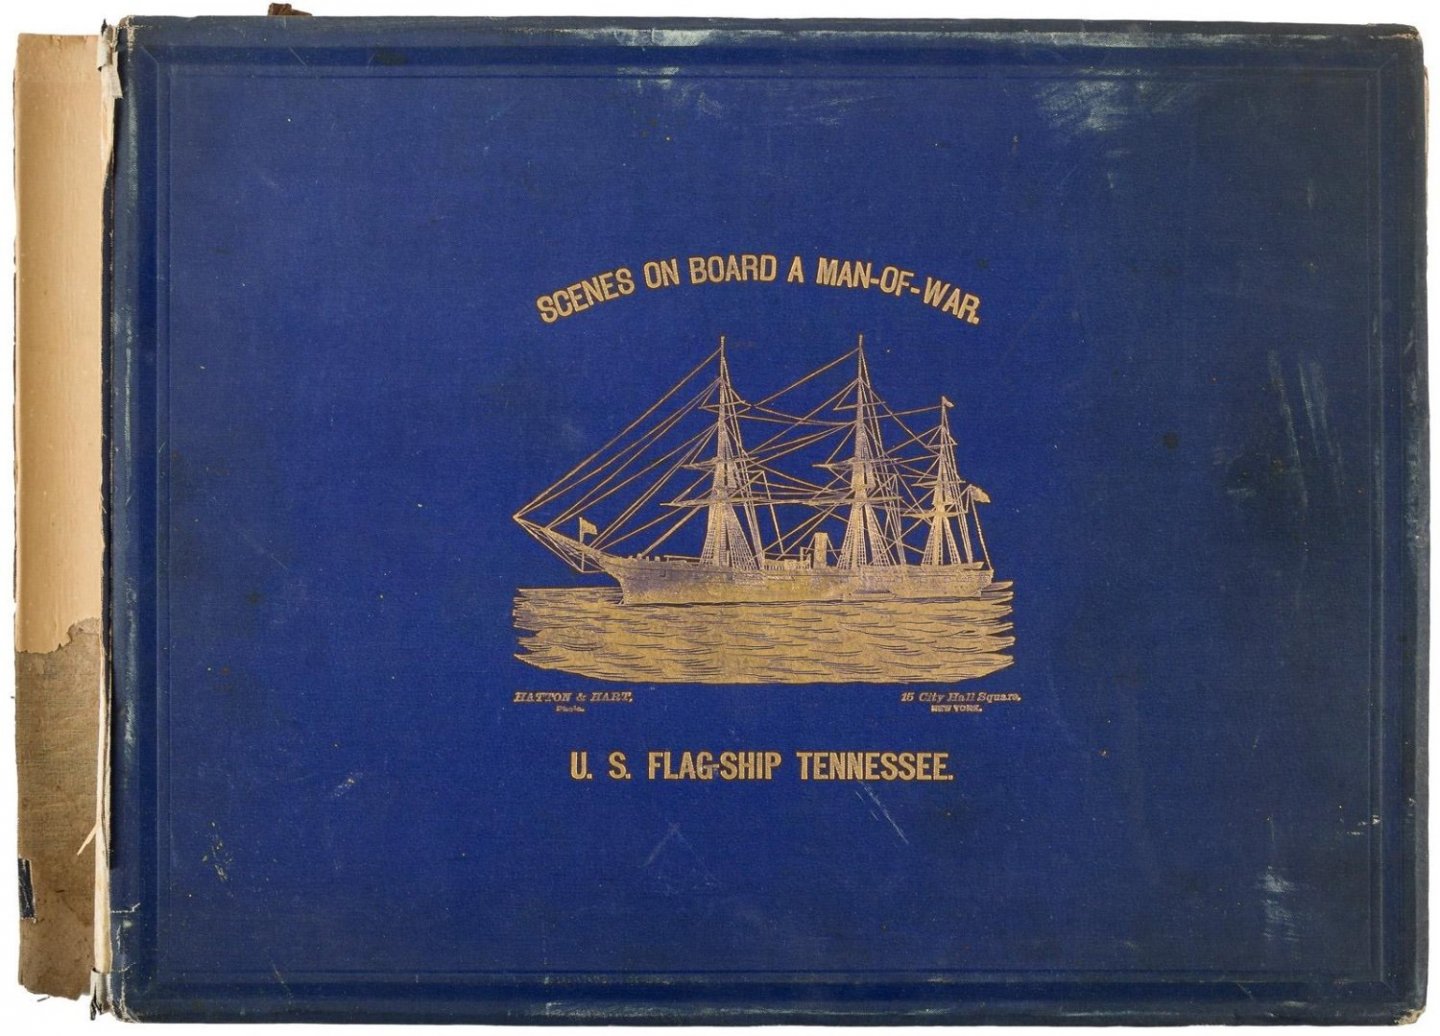
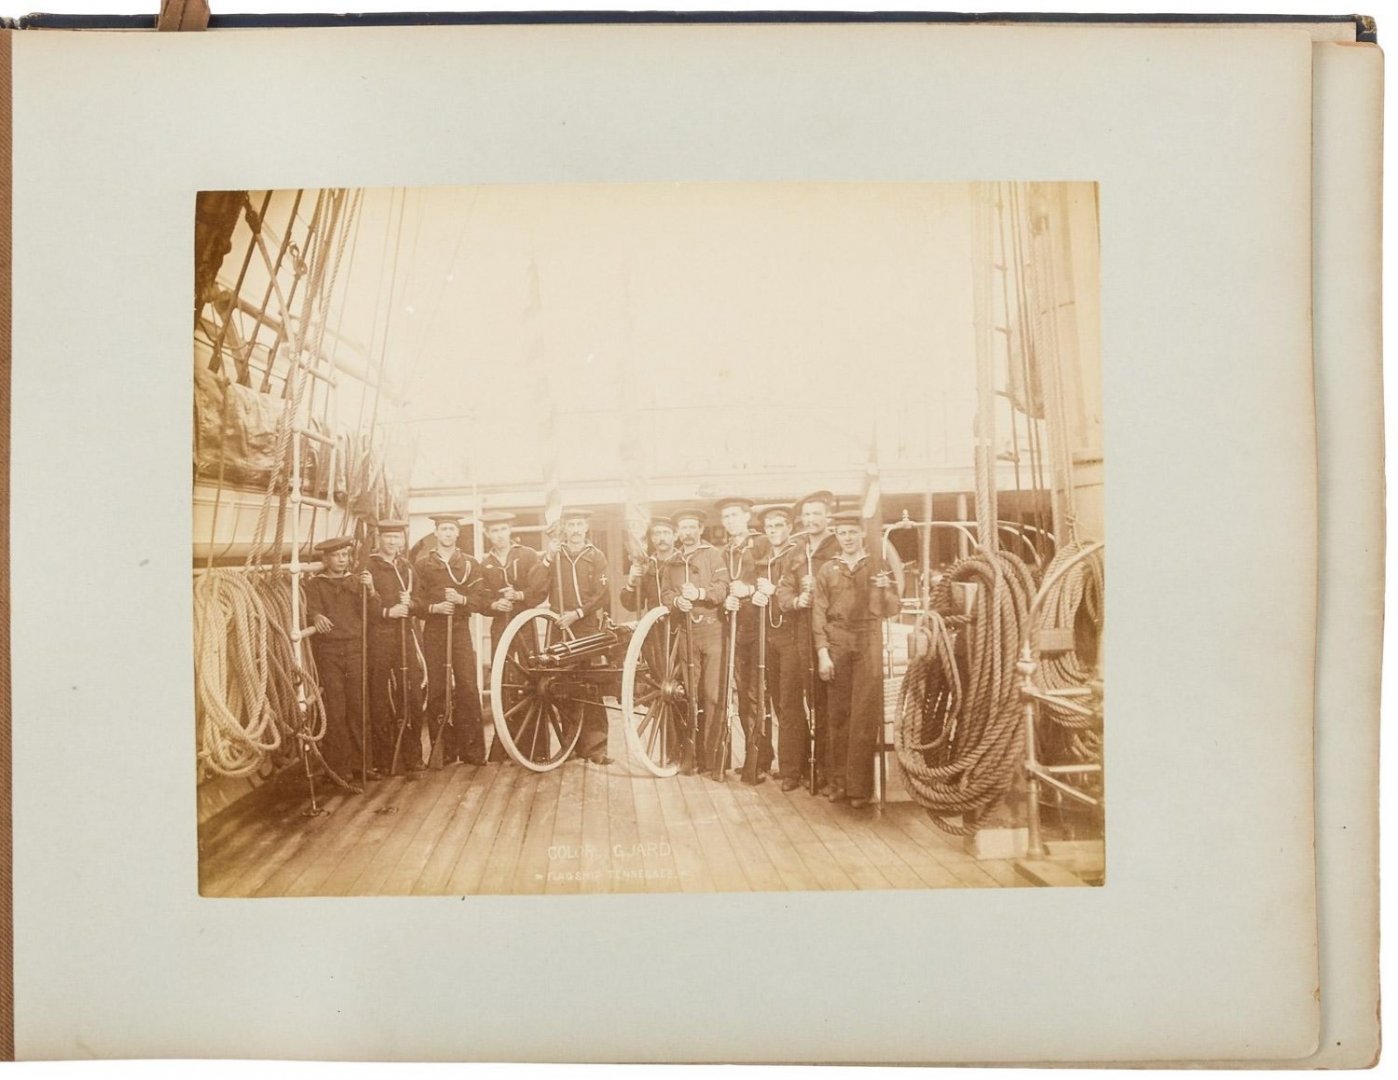
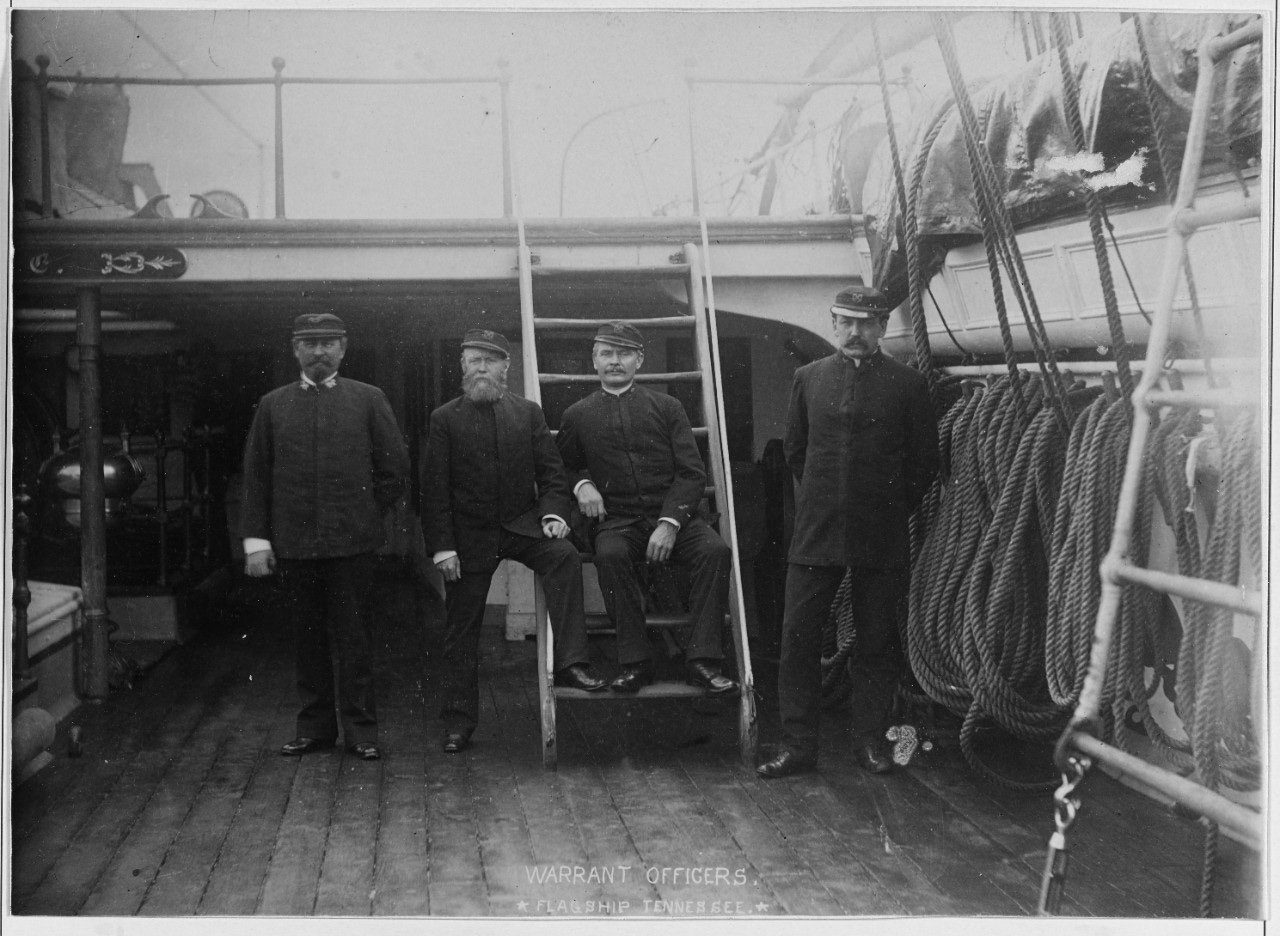
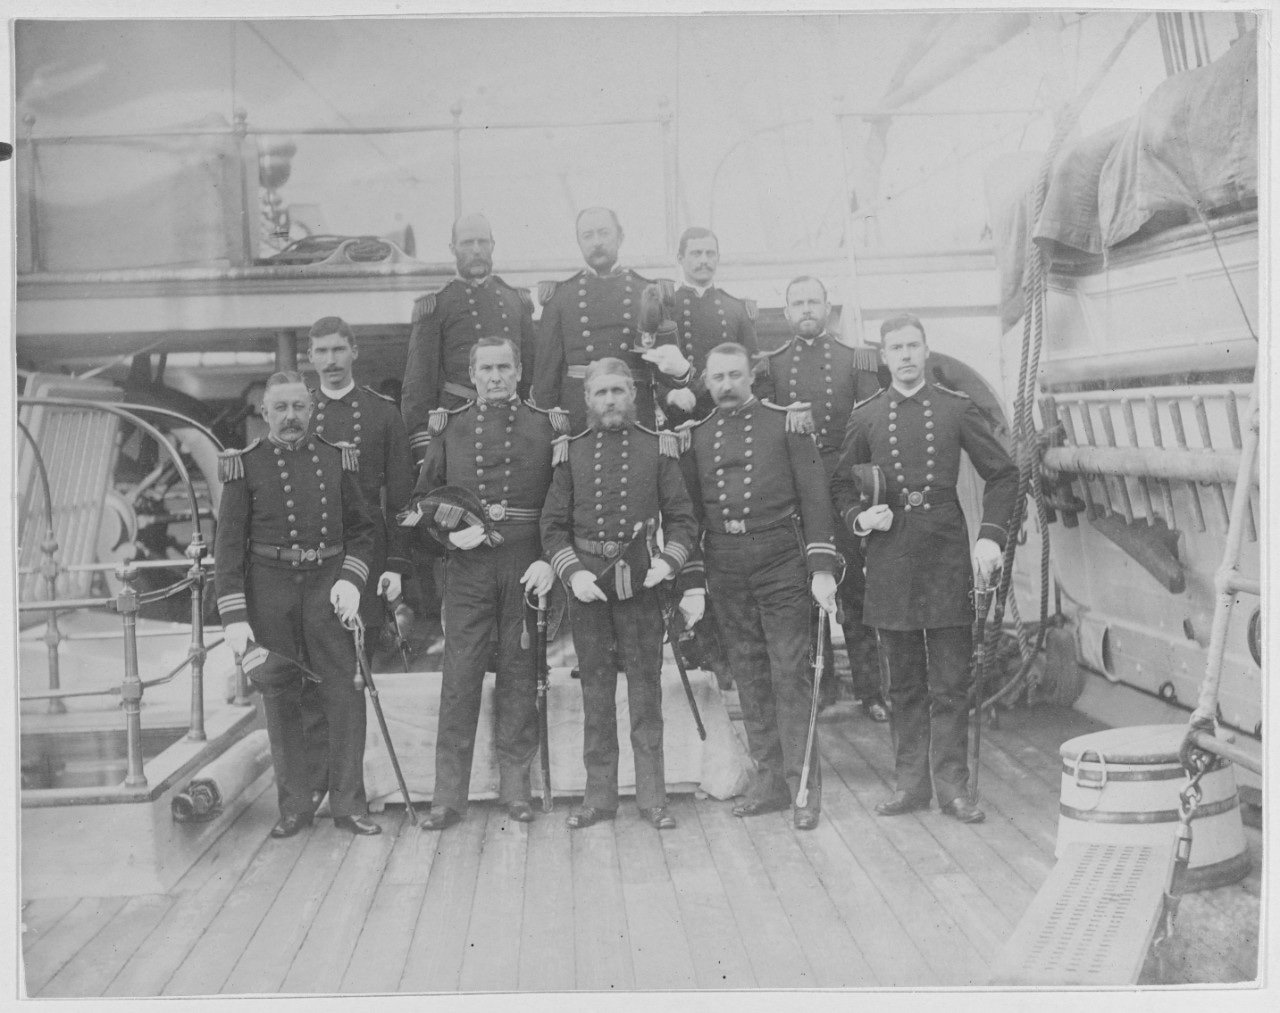
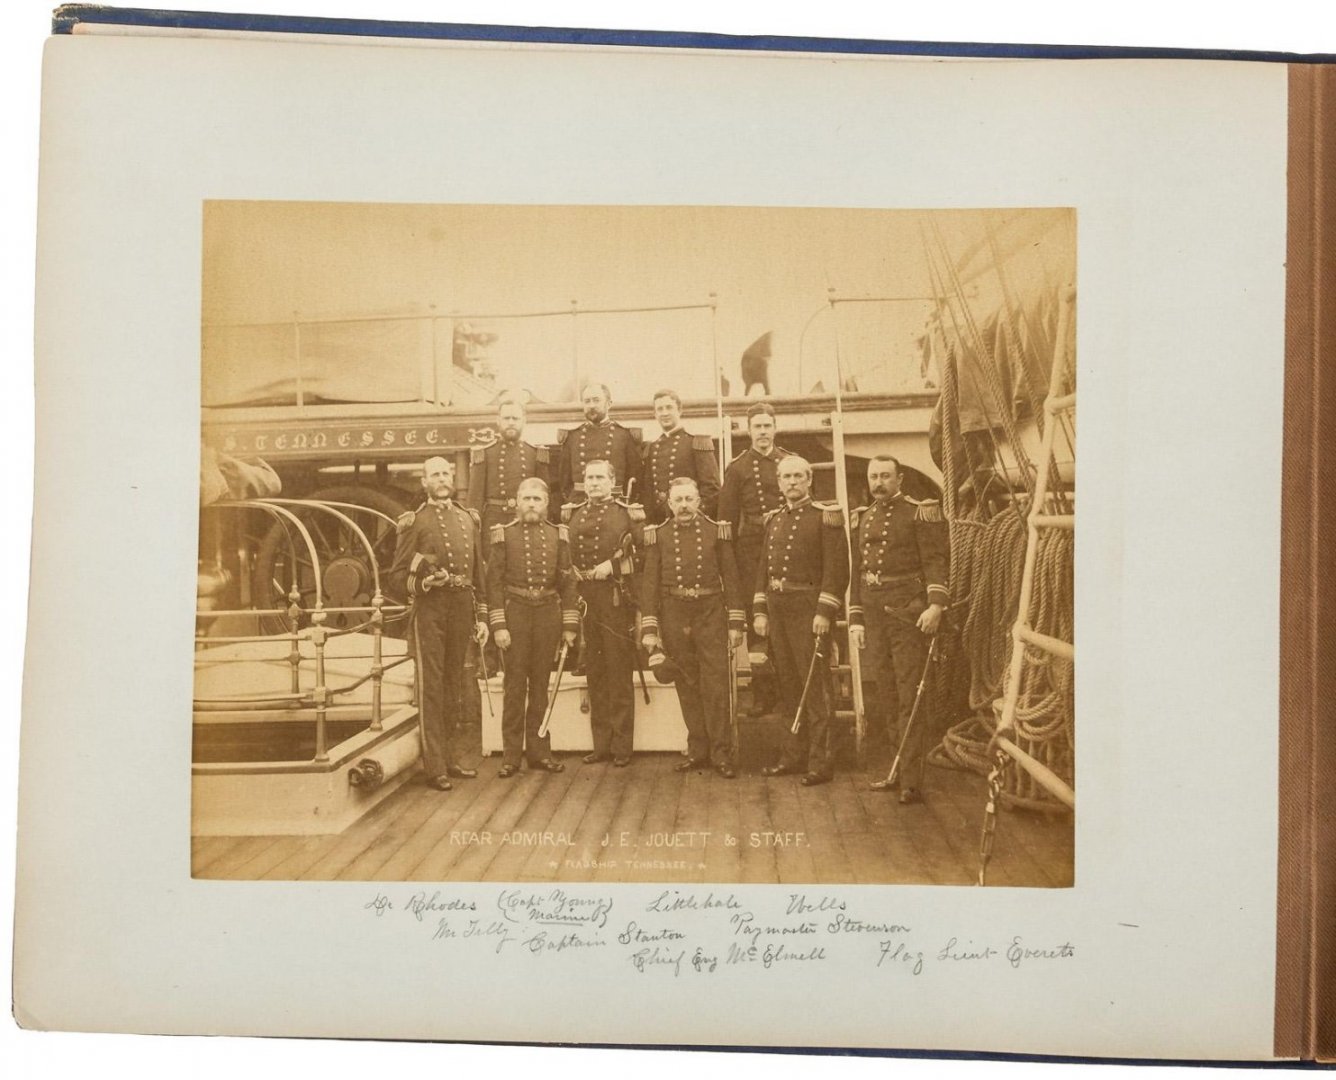
Odds and ends. The first photo is interesting as it provides views of the Admiral and Captain's quarters. The next two photos were not taken by Hatton and Hart. The last photo is the album cover by Hatton and Hart of the Tennessee, there are only two known to exist. I think most if not all of photos of the Tennessee in that album are included in these four post.
-
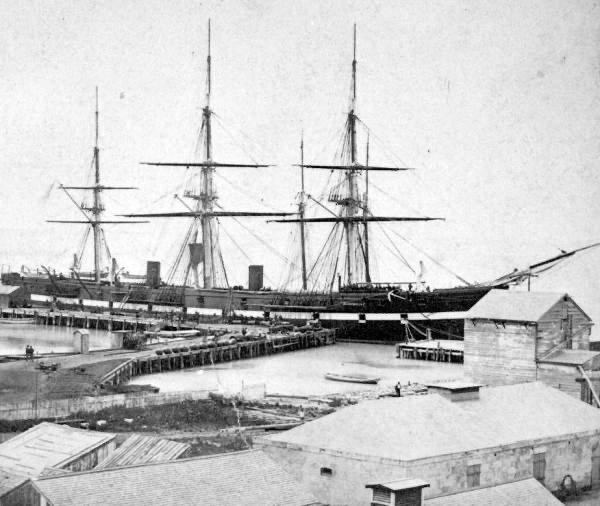
Starboard side views. Dup The last photo was provided by Pat Banyan. It's the earliest deck photo of the Tennessee that I know of. Photographer unknown.
-
Port side views. I find this photo interesting as it shows someone's child and someone's dog I find the last photo interesting as it shows someone's child and someone's dog.
-
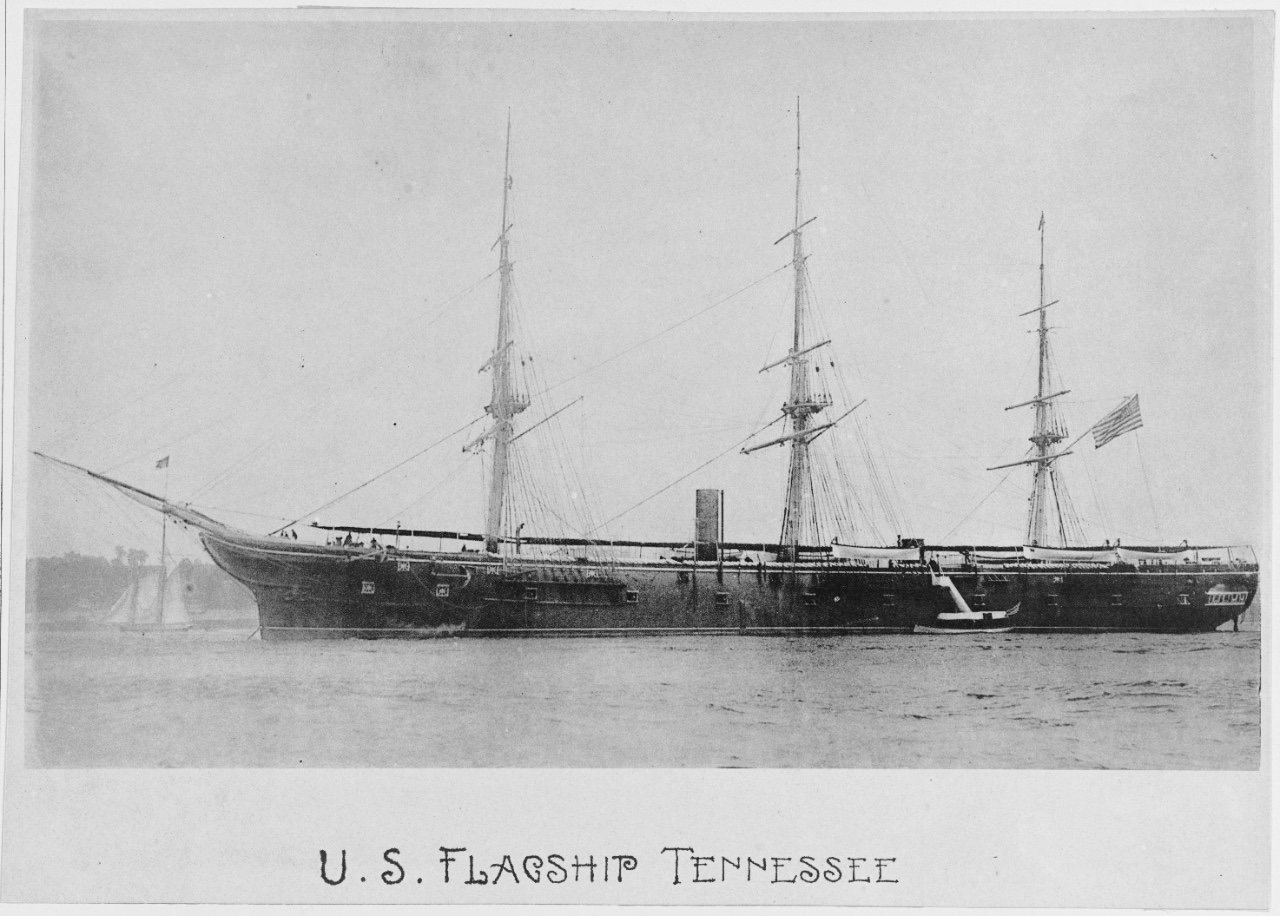
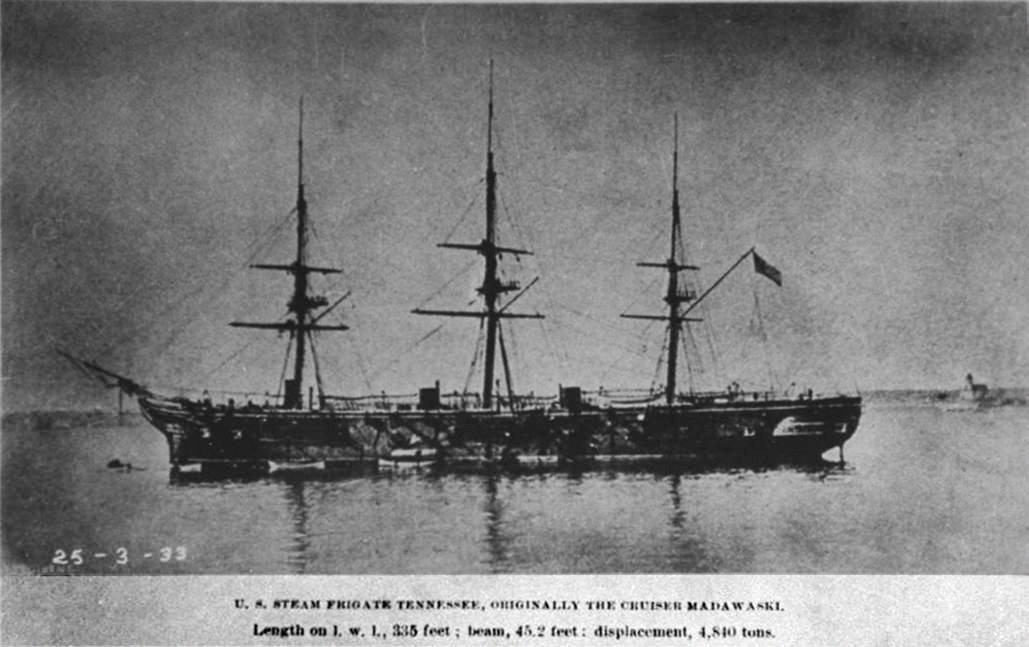
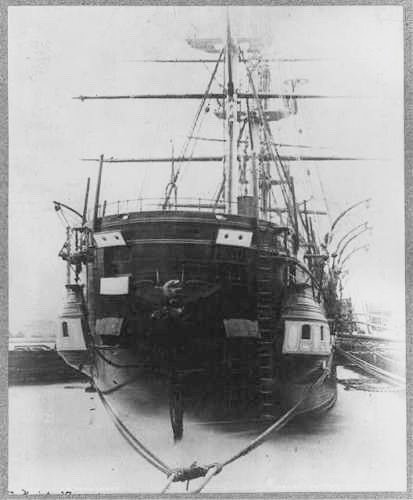
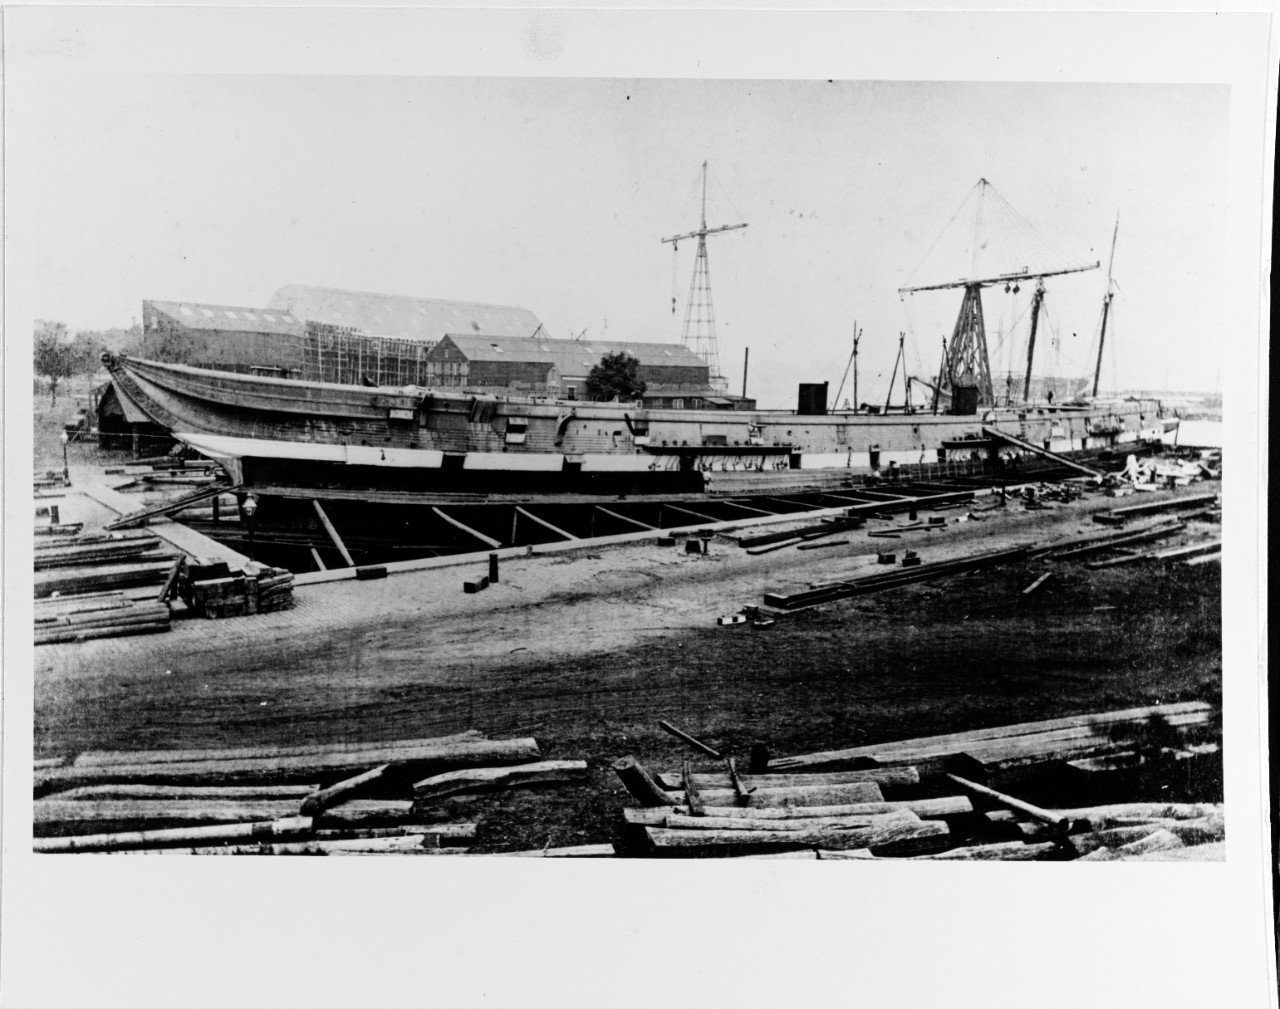
These are all the photos and two drawings I have of the Tennessee. Hopefully they provide interest and insight. I'll make four entries; profiles, port side view, starboard side view, center view, and odds and ends. Unfortunately there are no photos taken from the main mast forward, most all were taken around the mizzen area. Profiles This photo is either of the USS Madawaska (later renamed USS Tennessee in 1869) being laid down or the USS Tennessee being broken up?