Keith Black
-
Posts
6,684 -
Joined
-
Last visited
Content Type
Profiles
Forums
Gallery
Events
Everything posted by Keith Black
-
 Thank you, Ian. Sorry to hear about Ginger. Funny that he has a fav ice cream. Our cat Emma likes any ice cream as long as I share with her........goofy cats.
- 732 replies
-
- 4
-

-
- Lula
- sternwheeler
- (and 1 more)
-
I think I should have been here from the start! Sorry for being late to the party, Chris. Beautiful rigging work on the deadeyes, the whole project looks fantastic.
- 38 replies
-
- 1
-

-
- Alert
- Vanguard Models
- (and 1 more)
-
Wow, Siggi. What gorgeous workmanship.
-
Thank you, Roel. Tom, it's in my DNA to harshly judge of my own work. Funny you say that, Eric. The top rail is also referred to as the drink rail. Thank you, Glen. Thank you, Jonathan. You got here just in time to join the wrap party for this project. The light from the end of the tunnel is blinding.
- 732 replies
-
- 4
-
-
- Lula
- sternwheeler
- (and 1 more)
-
I love all the crisp details, mcb. At 1:160 that's dang hard to do.
-
Now that you mention it I think I remember seeing him. I try to remember all of us that have cat friends.
- 732 replies
-
- 4
-
-
- Lula
- sternwheeler
- (and 1 more)
-
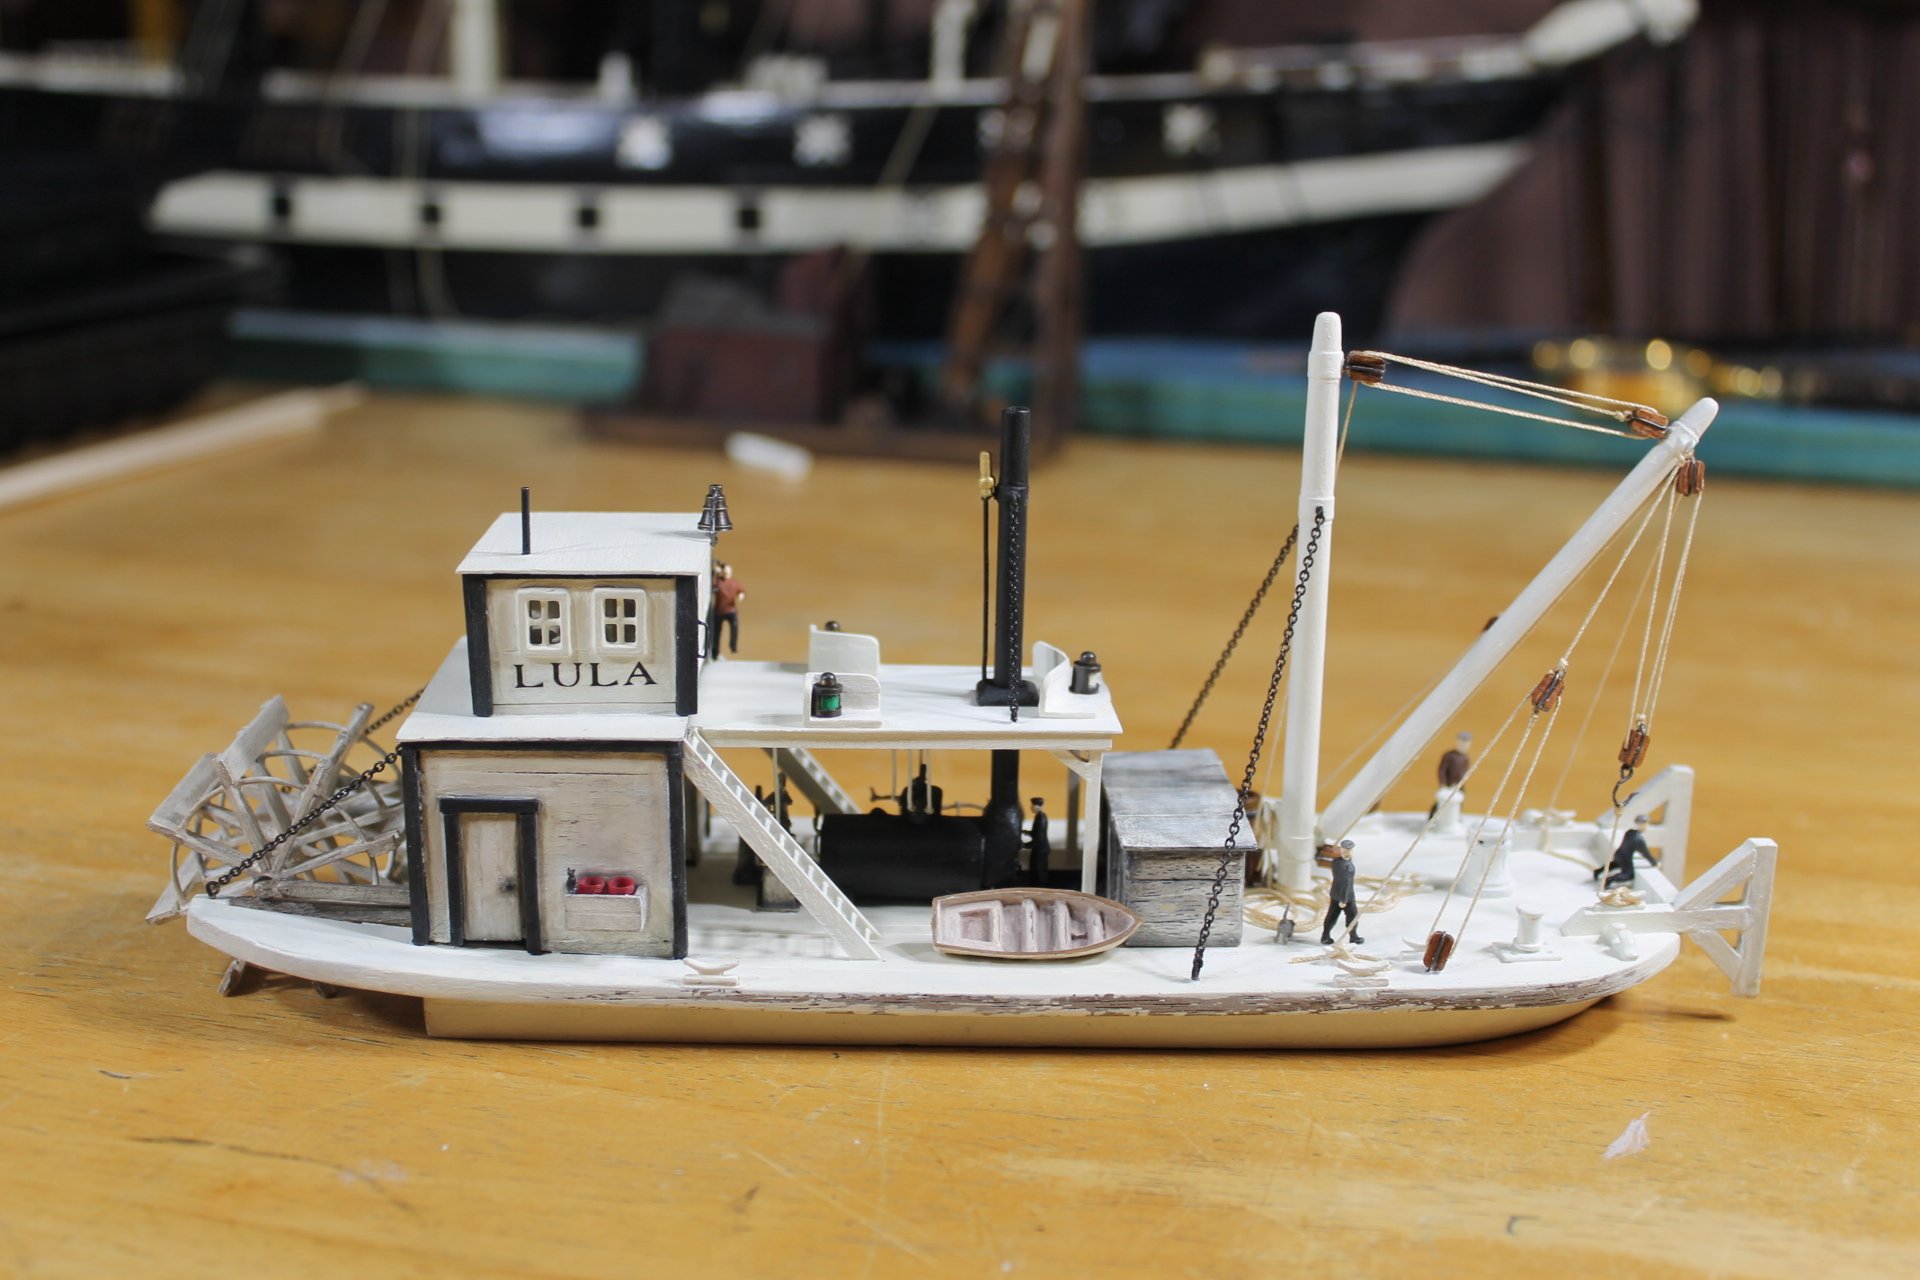
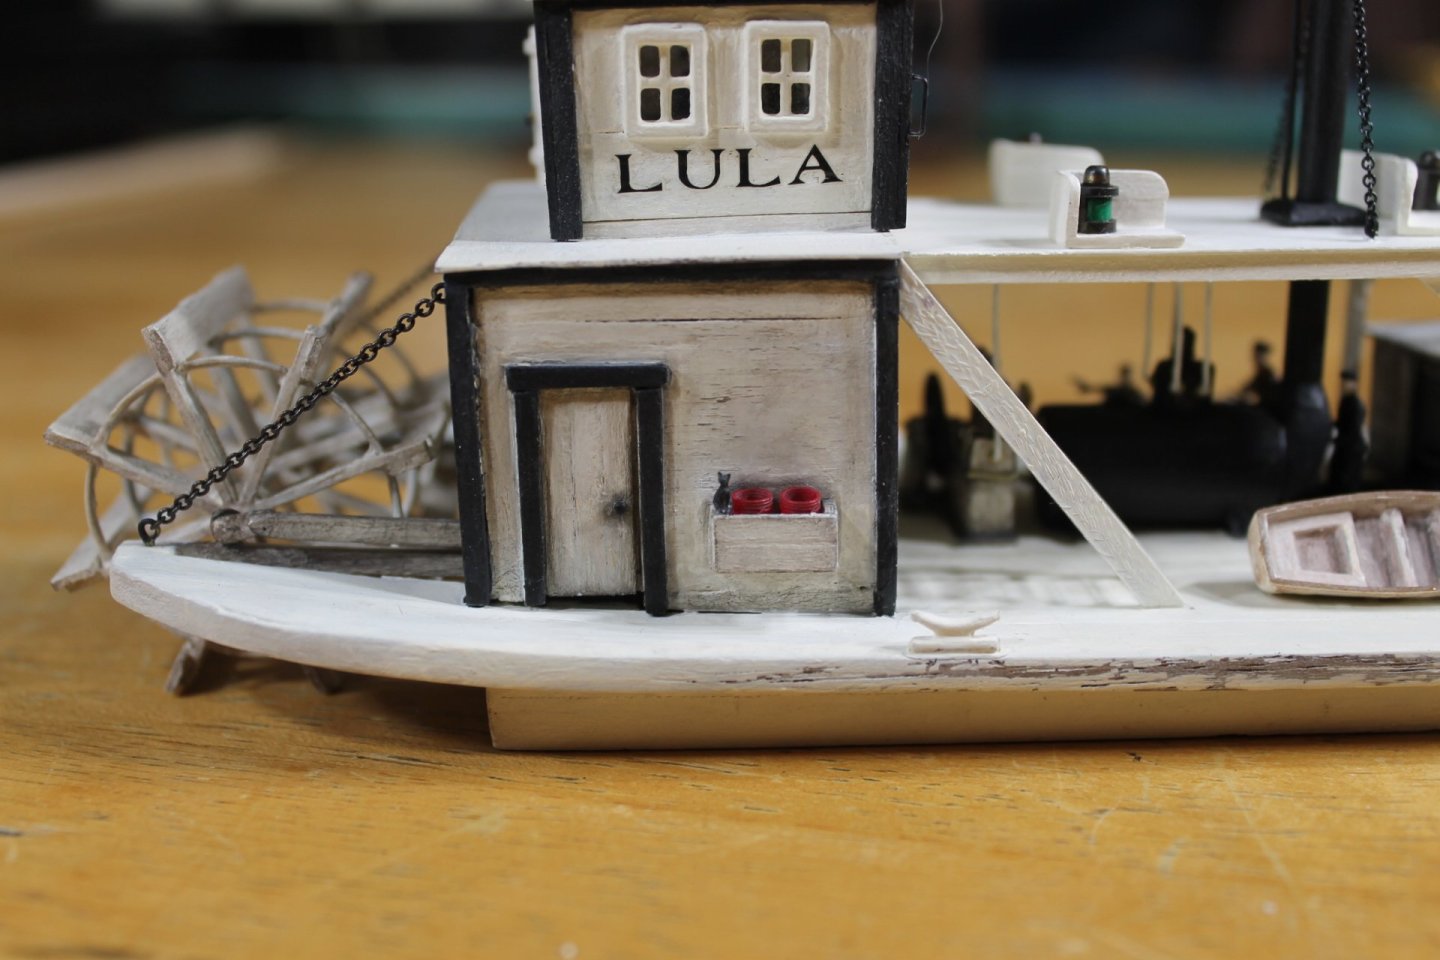
Thank you to everyone for the kind comments and for the likes. I got the railing around the pilothouse installed. The balusters are 0.03125 (1/32) inches and the top rail is 0.9375 (3/32) inches. I drilled 0.031 holes in the top rail for the balusters. The top rail is about twice the width it should be but I needed the extra width for drilling the holes because the wood has a tendency to split if too narrow. The railing is pretty robust now that everything is glued together so I may try sanding the top rail width a tad narrower but I don't want to mess it up and have a redo. I still need to add stairway handrails, some railing (very little) on the boiler deck, and make a mount for the stern lantern and hang it and that's it for construction. Thank you to all for your support and for following along. Keith


- 732 replies
-
- 26
-
-
- Lula
- sternwheeler
- (and 1 more)
-
No, Paco, I've never had the pleasure of meeting you but when you joined yesterday I found and read some of your Sprite restoration log, link below. Once upon a time I restored cars, mainly old British iron but now, unfortunately, I'm too old to turn wrenches anymore. http://ahsprite-mk3-restoration.blogspot.com
-
You are more than welcome. Do you still have your Healey Sprite?
-
Beautiful, Siggi.
-
Paco, welcome to MSW. Glad to have you aboard.
-
I've lived with a cat/cats in our homes continuously for over 45 years. Of my 78 years I dare say I've spent at least 60 of those years living with a cat. Some have been so so, others have been totally awesome animals but I've shed bitter tears for each when they made their final journey. At this point nothing a cat does surprises me and the laughter and love they provide is one of the treasured moments of my life......... stupid cats.
- 732 replies
-
- 9
-
-

-
- Lula
- sternwheeler
- (and 1 more)
-
It's good to see you back in your workshop, Bob. Another one almost done already, you are a marvel.
- 46 replies
-
- 2
-
-
-
- Golden Hind
- airfix
- (and 2 more)
-
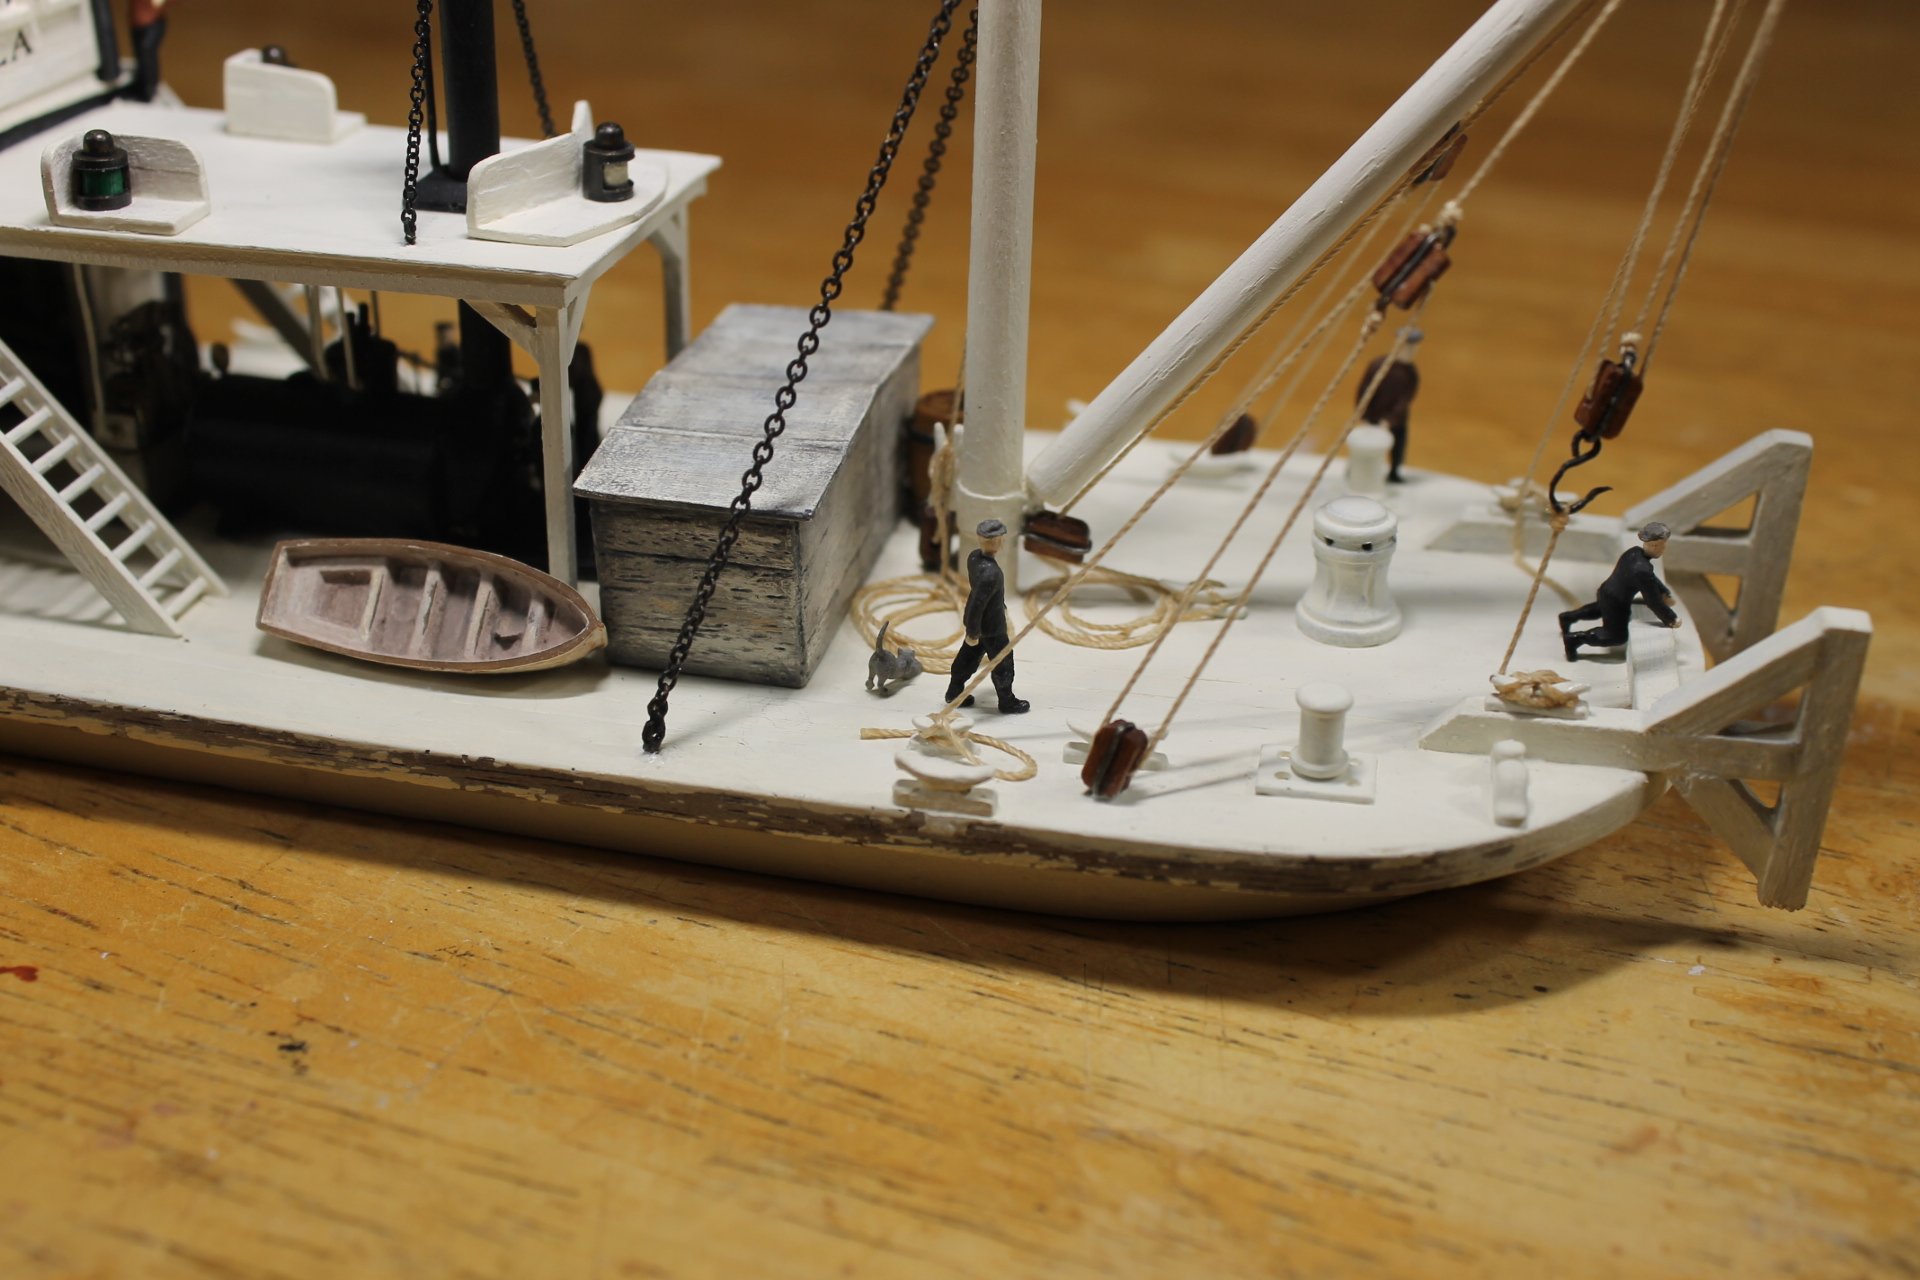
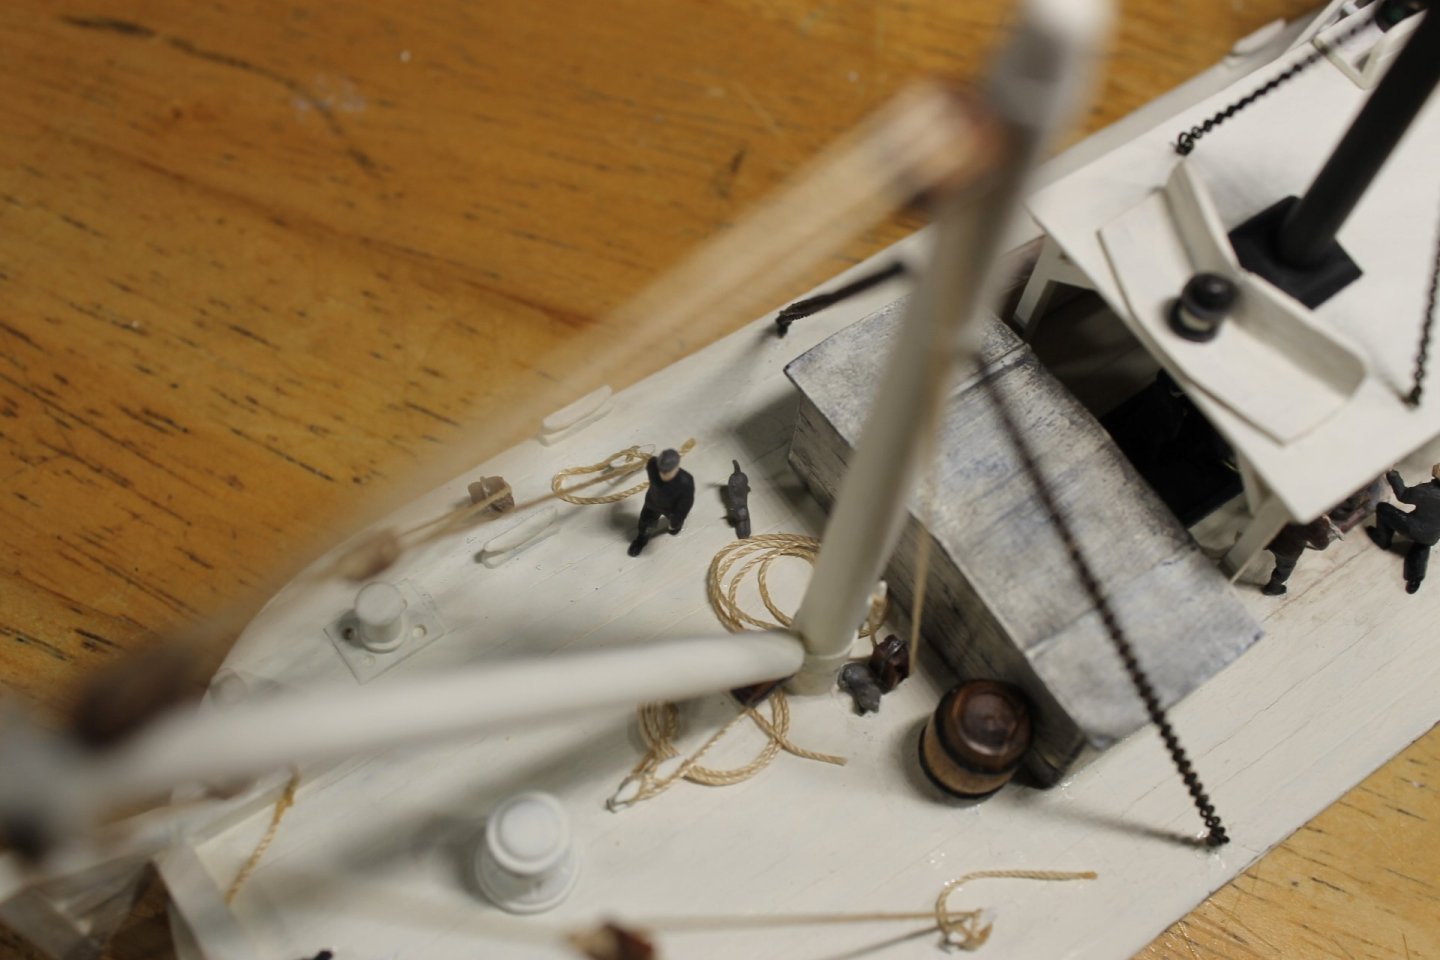
Thank you to everyone for the kind comments and for the likes. I got the dinghy weathered and glued down, I still need to add a coil of rope around that sprue. You can barley see that sprue in normal viewing. I used a brown pastel to weather the inside of the dinghy but it's got a pinkish tint to it. I know not why and I'm not sure how to fix it other use a little black? I received a box of three cats today from an Etsy supplier. They're supposed to be HO scale but they seem smaller which is okay. The one sitting on the fire bucket box is 0.115 inches high. To see any detail it must be viewed under magnification. It snuck aboard and I'm really not in favor of it sticking around as I think it's bad luck to have a black cat onboard. I've temporally named the cat, D1. This cat sharpening it's claws on topping lift line I named Stump Grinder. It's more or less the lead deckhand's cat. It's a little bigger than D1. I couldn't get a good in focus photo of the cat laying on its belly beside the Derrick crane mast. This cat doesn't have a name yet. It's larger in girth than Stump Grinder. I may name it D8. If you think I'm procrastinating doing the handrails you are correct. Thank you to everyone for the support and for following along. Keith


- 732 replies
-
- 24
-
-
- Lula
- sternwheeler
- (and 1 more)
-
Kurt and Eric, I am honored that both of you have taken the time to offer sage advise and answer my many beginner's questions. Your willingness to do so time and again is humbling and I am forever grateful.
- 732 replies
-
- 5
-
-
- Lula
- sternwheeler
- (and 1 more)
-
Kamil, welcome to MSW. Glad to have you aboard.
-
Eric, thank you for taking the time to teach me. I can't tell how much I truly appreciate it. I was seeing sternwheelers without full hull length support not knowing or understanding the why of it. Now that I'm more educated I can view and appreciate what I'm seeing when observing sternwheeler images. For that, I again, thank you. Thank you, Gary. I hope I'm allowed the opportunity to work on that sternwheeler from the Hard Coal Navy days. She is truly an ugly duck.
- 732 replies
-
- 4
-
-
- Lula
- sternwheeler
- (and 1 more)
-
Beautiful work, Bruce. The best to ya on the knee replacement, enjoy the fishing and your trip to France.