

.jpg.01e54eff8de6be562e7bc1146f40d40a.jpg)
Matt D
-
Posts
606 -
Joined
-
Last visited
Content Type
Profiles
Forums
Gallery
Events
Posts posted by Matt D
-
-
That’s a beautiful display, Jim. Congratulations on your wonderful model!
-
5 hours ago, Strelok said:
As Dr. Google couldn't help me in this regard: can somebody point me to a chart or list (or tell it plainly), for how to change this imperial scale (3/32") into a metric scale (1/x th)?
The relationship is 3/32 inch per foot. To covert to unit-less scale, divide by 12. 3/32” per ft. divided by 12”/ ft simplifies to 1/128 and the units cancel.
-
1 hour ago, CaptnBirdseye said:
Would 'Laser Grade Poplar lite plywood' be recommended? Sorry, but never bought my own before so all new to me
They also supply 'Ceiba' and Birch.
I think this would work fine, Gary. As Gregory noted above, the slots are the area that is most affected by the thickness. Once you have the bulkheads cut accurately, the thickness isn't very critical. Be sure to transfer the marks for the gun port sills to the plywood as accurately as possible. This is a fantastic project and we'd love to have you join us in building your own Winnie.
One last thing to consider: are you buying the laser cut chapter sets from Syren and having them shipped to you? If so, then the incremental cost of adding the laser cut bulkhead set may be worth considering. I don't know your experience level with a scroll saw. I thought I did a really good job and then found out down the road that I would have been much better off buying Chuck's. Unless you're scratch-building the whole thing, it might be worth shelling out the dough for the laser cut set. Please don't take this as discouragement if that's what you really want to do, because I understand that as well. I really wanted to cut out my own bulkheads.
- Gregory, glbarlow, CaptnBirdseye and 1 other
-
 4
4
-
-
Hi Gary. I can't answer your question about the 6mm lite ply. But regarding the false keel: it's designed in 3 pieces and shouldn't be built as one piece. The main reason is that it will tend to warp if it's not broken up. In fact, the middle piece is also reversed to negate the effects of any warping that might occur.
One word of warning I will offer is to make sure your printout is done a 100% scale, not "fit to page". I have a second Winchelsea bulkhead set that's about 96% scale from learning that lesson the hard way.
- Chuck, glbarlow, Ryland Craze and 3 others
-
6
-
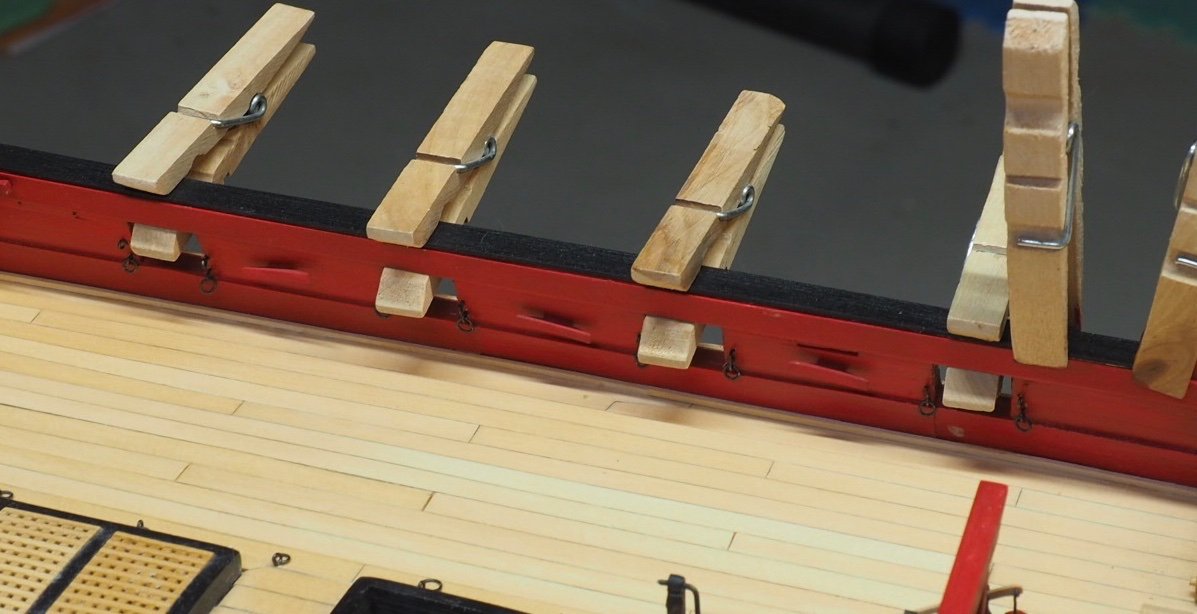
Thank you guys for looking at this. That seems like the most sensible way to fix it. I'll get to work carefully cutting the clamps back. I probably won't have anything to post for a couple of weeks. Between my two kids, we've got 3 lacrosse games and a track meet this week. I'm also hoping to go walleye fishing on Saturday. And I have to travel for work next week. April and May are going to kick my butt.
- James G, FrankWouts, glbarlow and 3 others
-
6
-
That looks beautiful, Dusan!
- FrankWouts, westwood and Saburo
-
3
-
On 4/8/2023 at 8:30 AM, Chuck said:
Lovely!!!
Thanks for saying that, Chuck! And thank you for making this project happen. It means a lot to me that you put in the amazing work to bring this to us.
On 4/8/2023 at 9:13 AM, Rustyj said:The wow keeps coming. Very nice matt!
Thanks, Rusty! I’ve been lucky to get some time to work on her lately. With spring sports starting, it’s going to get tougher soon.
On 4/8/2023 at 9:46 AM, James G said:Agree with JJ. That black really makes everything pop!
Thanks, Jim! I agree with you and JJ, too.
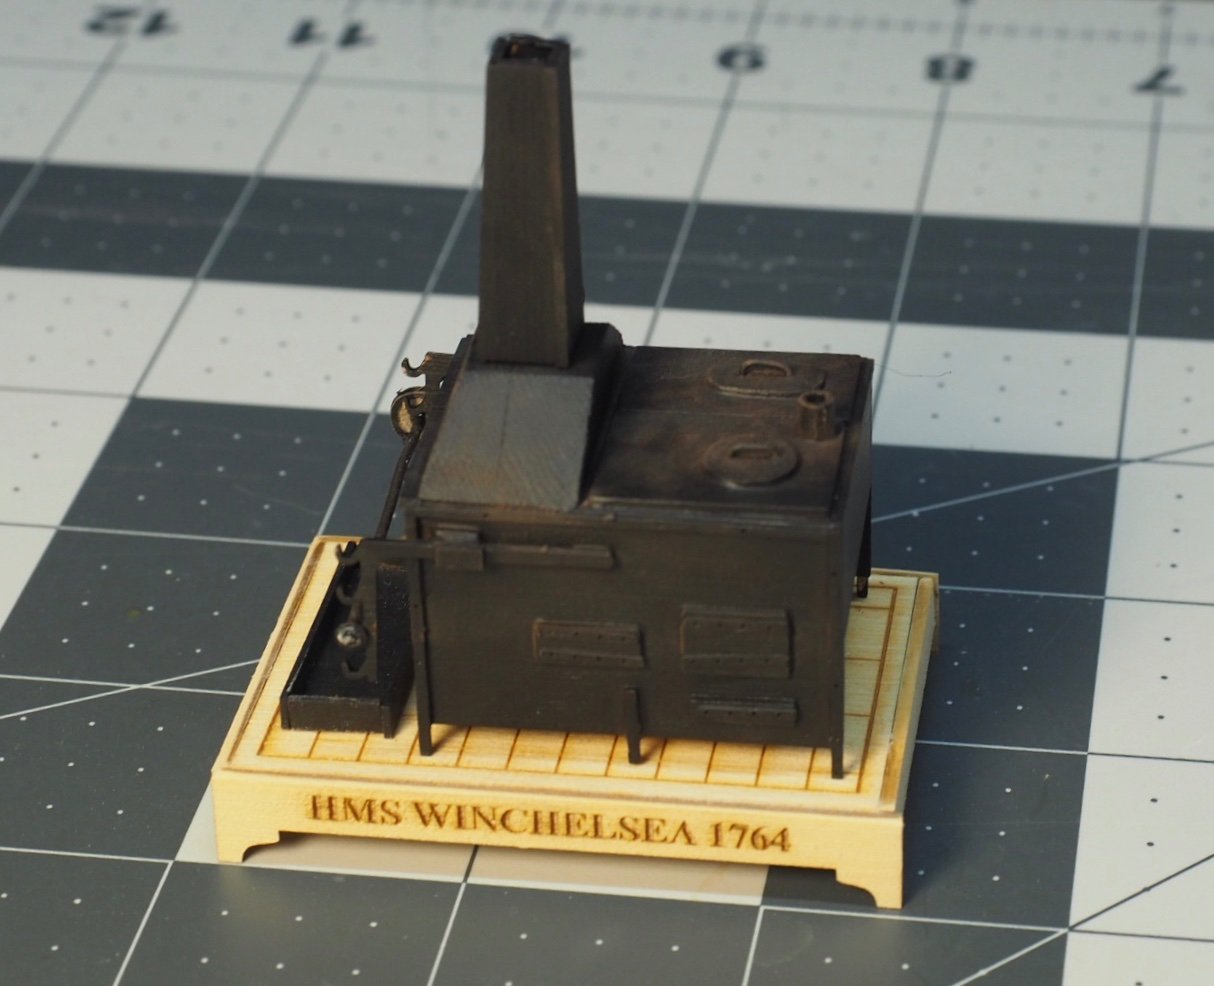
4 hours ago, westwood said:Beautiful work Matt and btw I like the simulation of the iron on the stove.
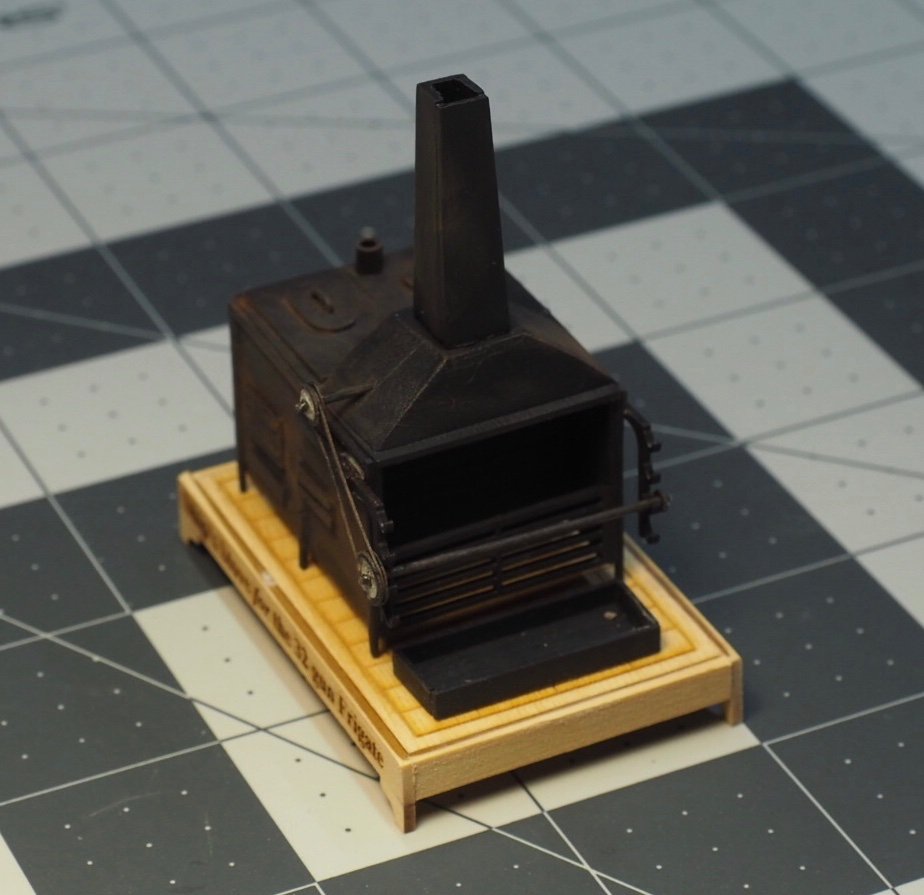
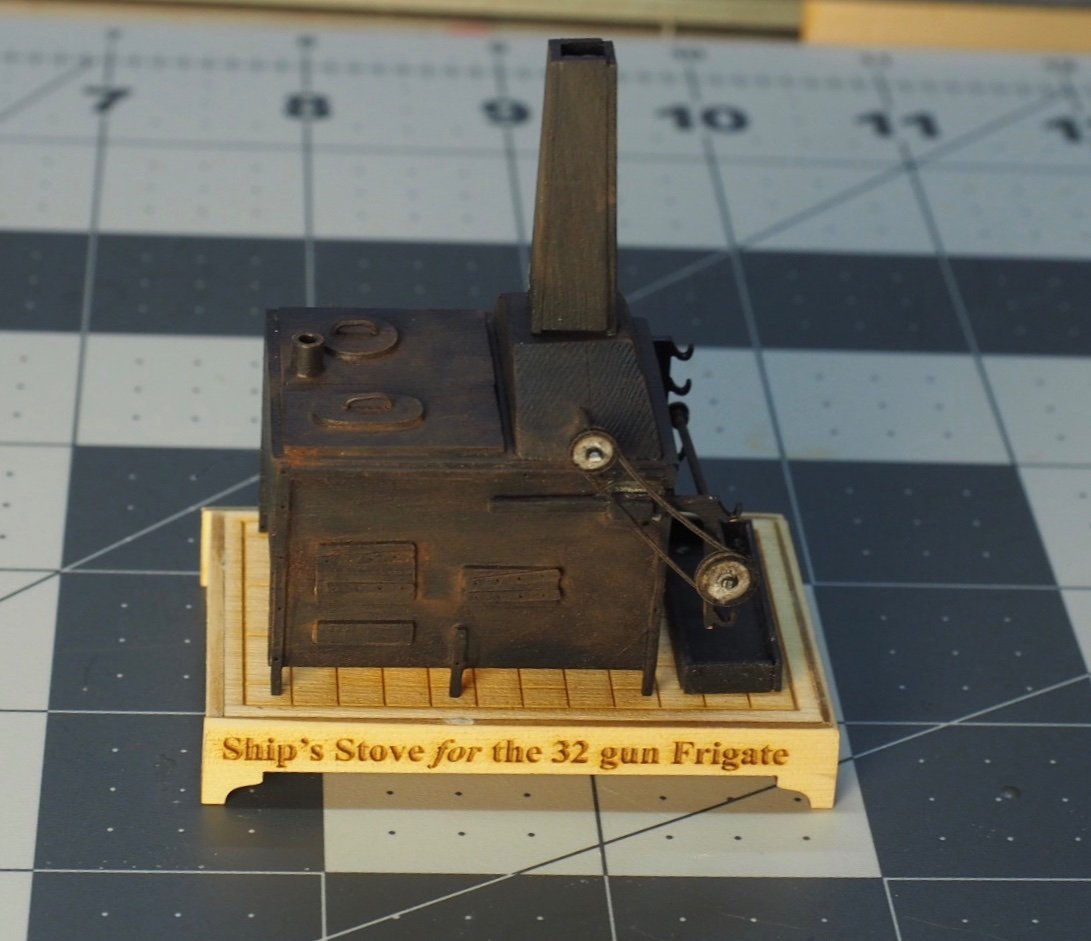
Thanks, Dusan. This is the first time I’ve ever tried weathering. I used pastels because I as able to get a lot of colors. I mixed some dark grey with a deep rust red. To use the pastels, I scraped them with a blade into a dish. Then I applied them with a brush.
On 4/8/2023 at 9:18 AM, scrubbyj427 said:Once I got the caprails on it felt like I rounded the corner for the finish line for sure, not only did It give the appearance of an “almost” finished model but the black added a much needed contrast to all the red and bare wood that needed to be covered. Looks good Matt, you’re closing in.
Thanks, JJ. And thank you to everyone who liked my previous post.
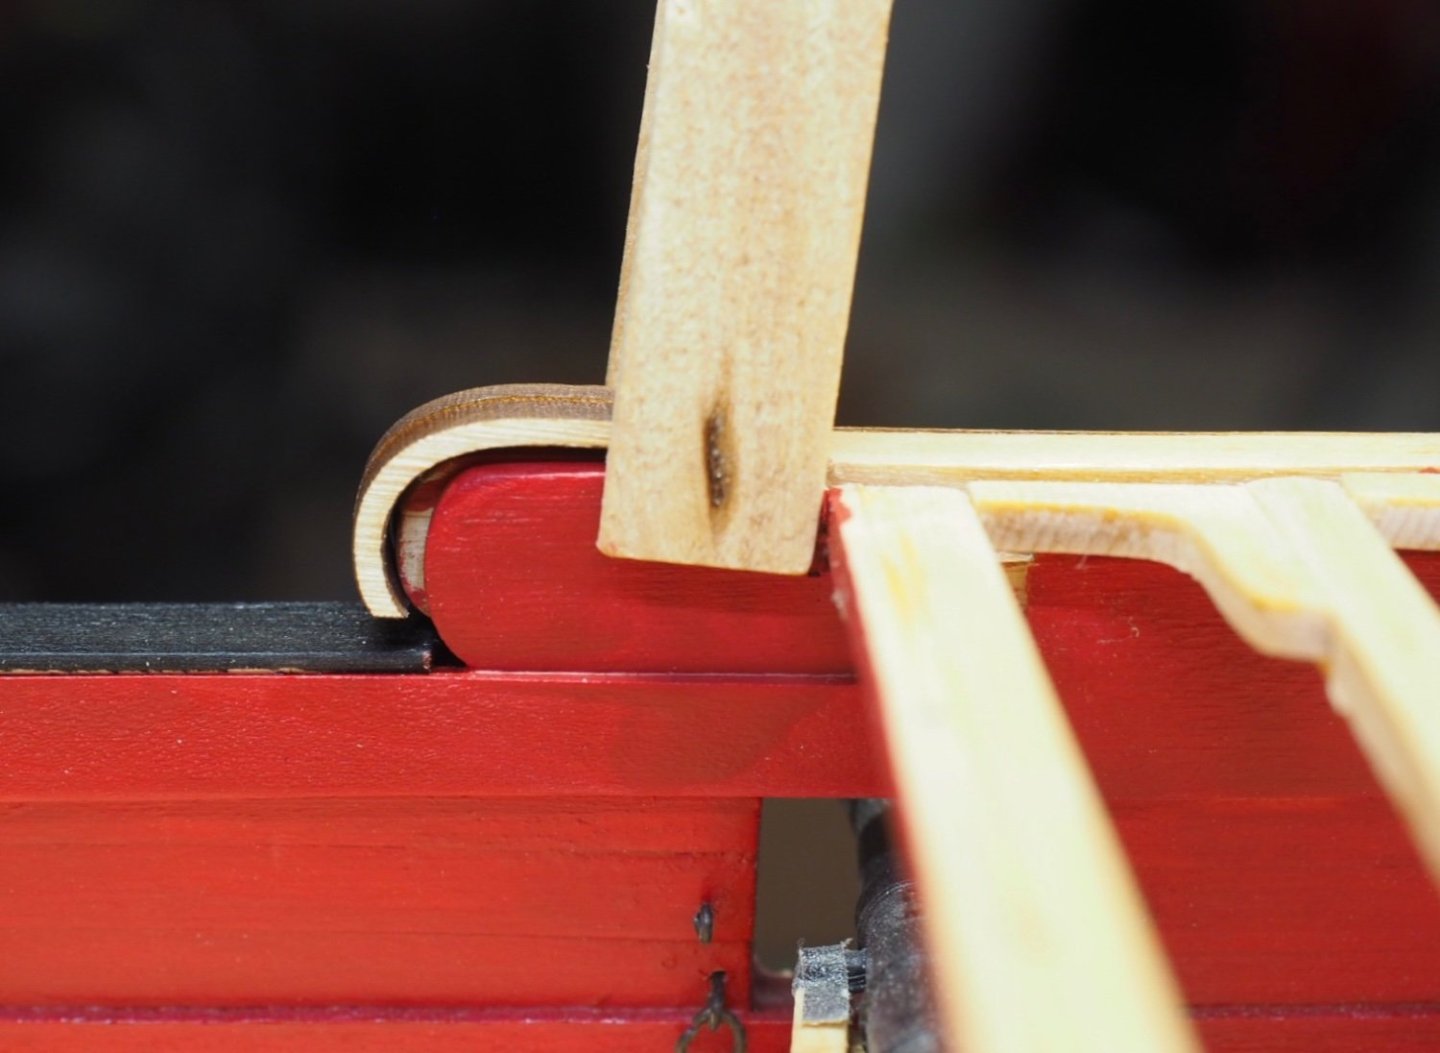
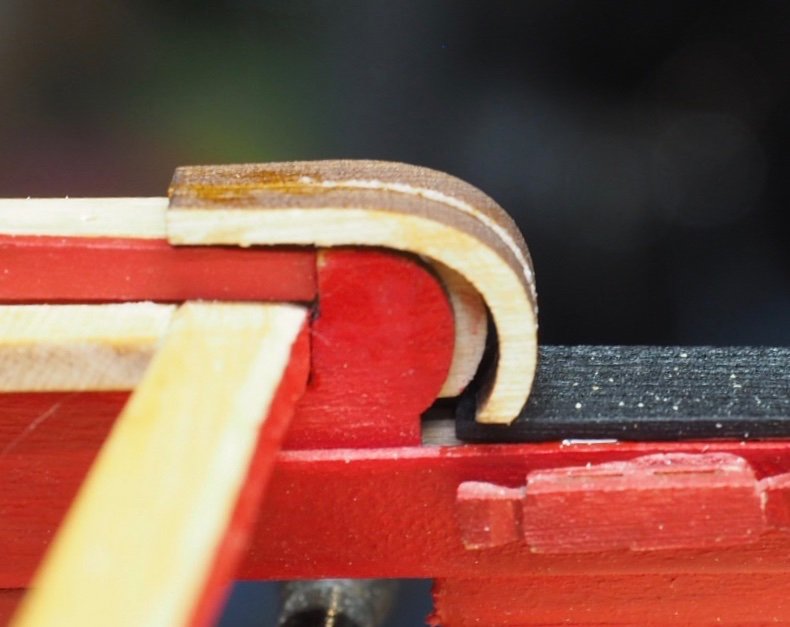
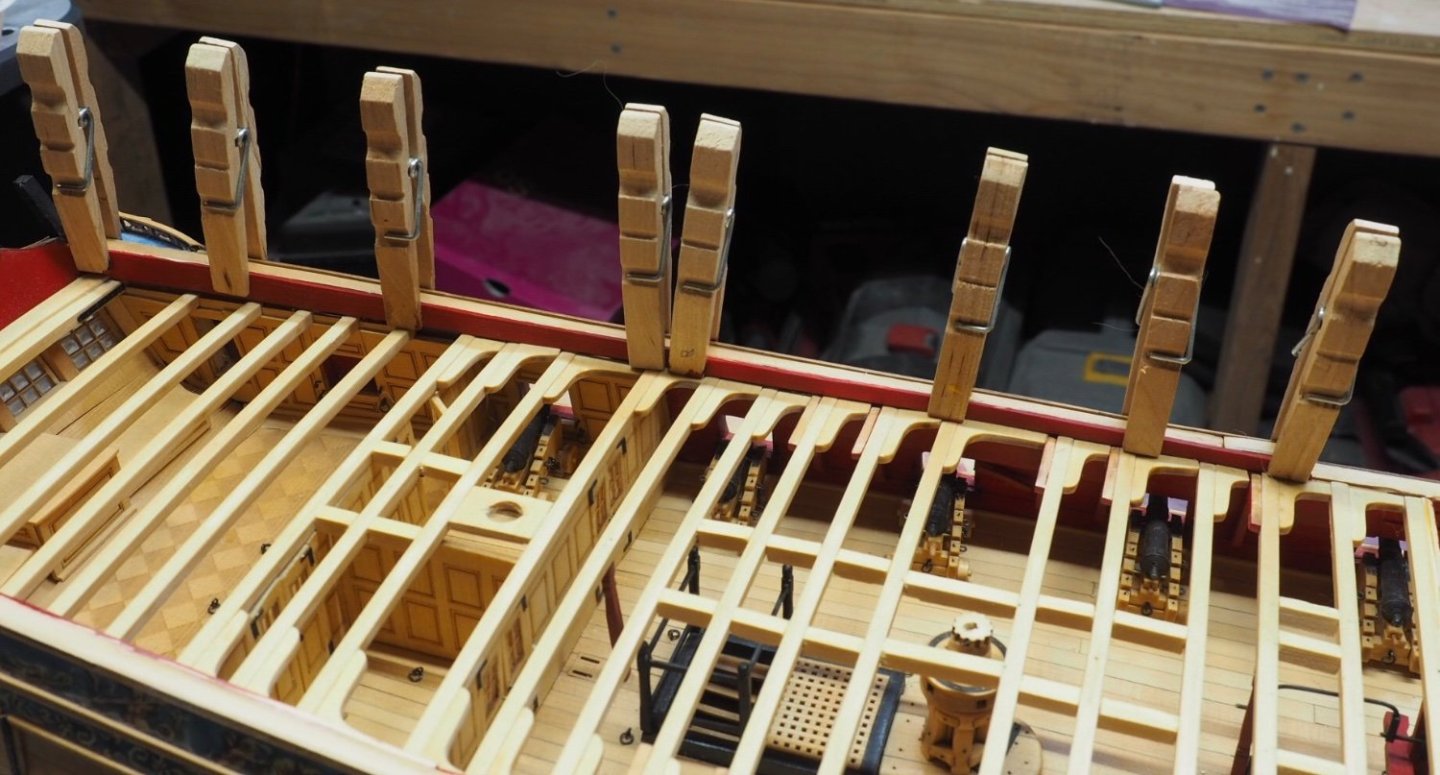
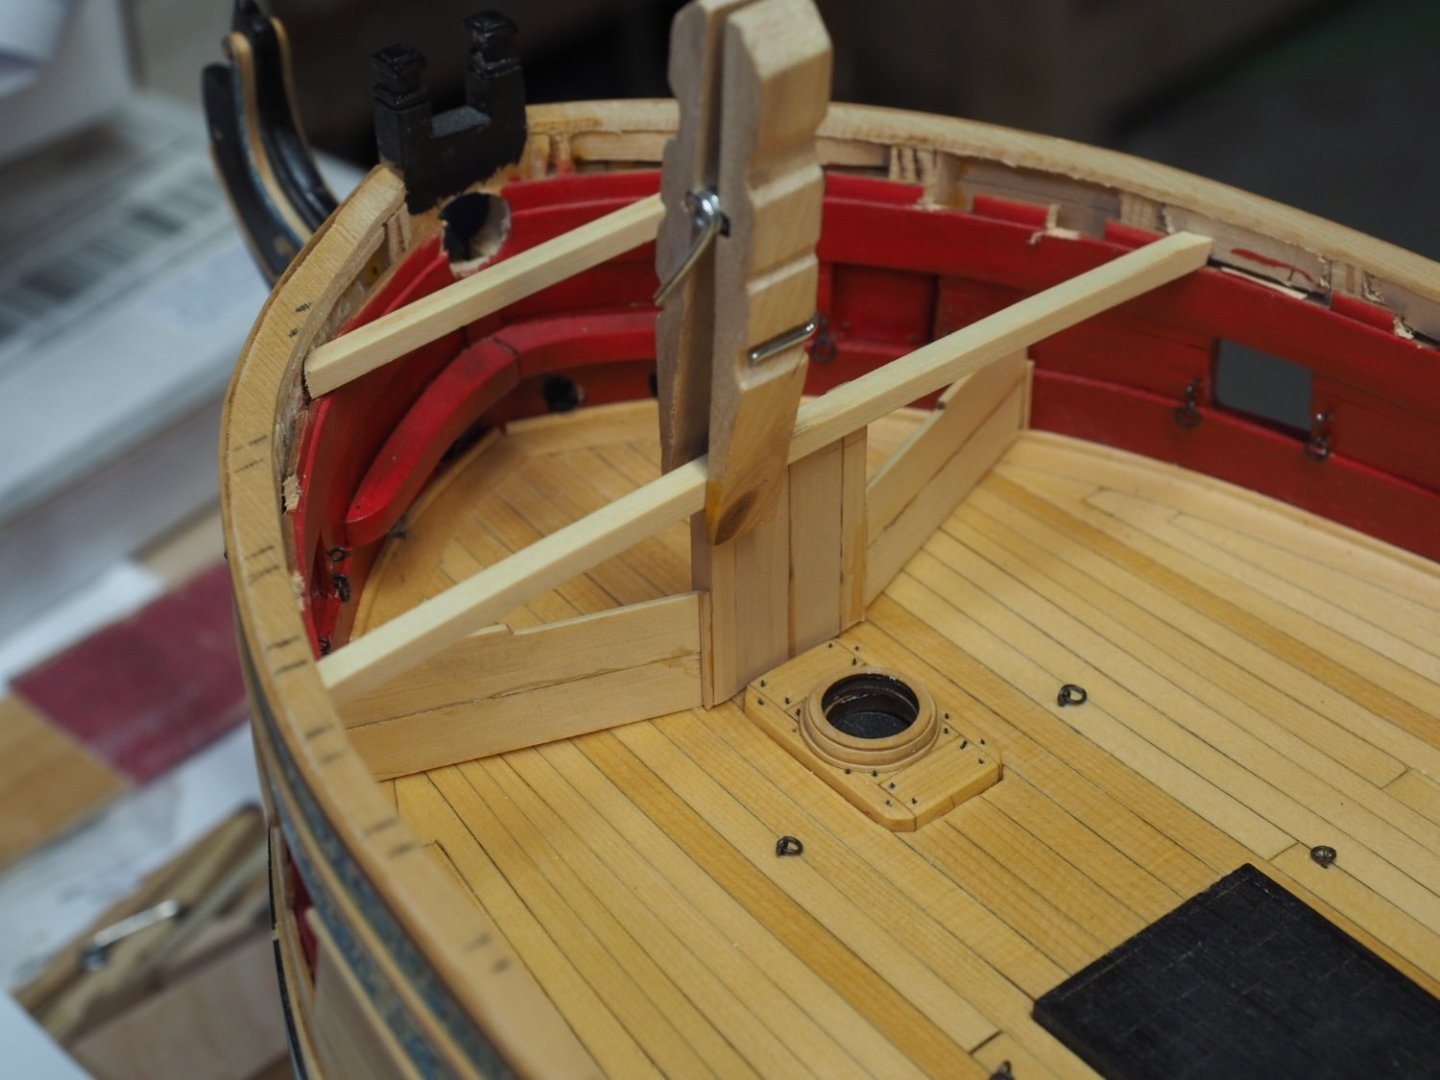
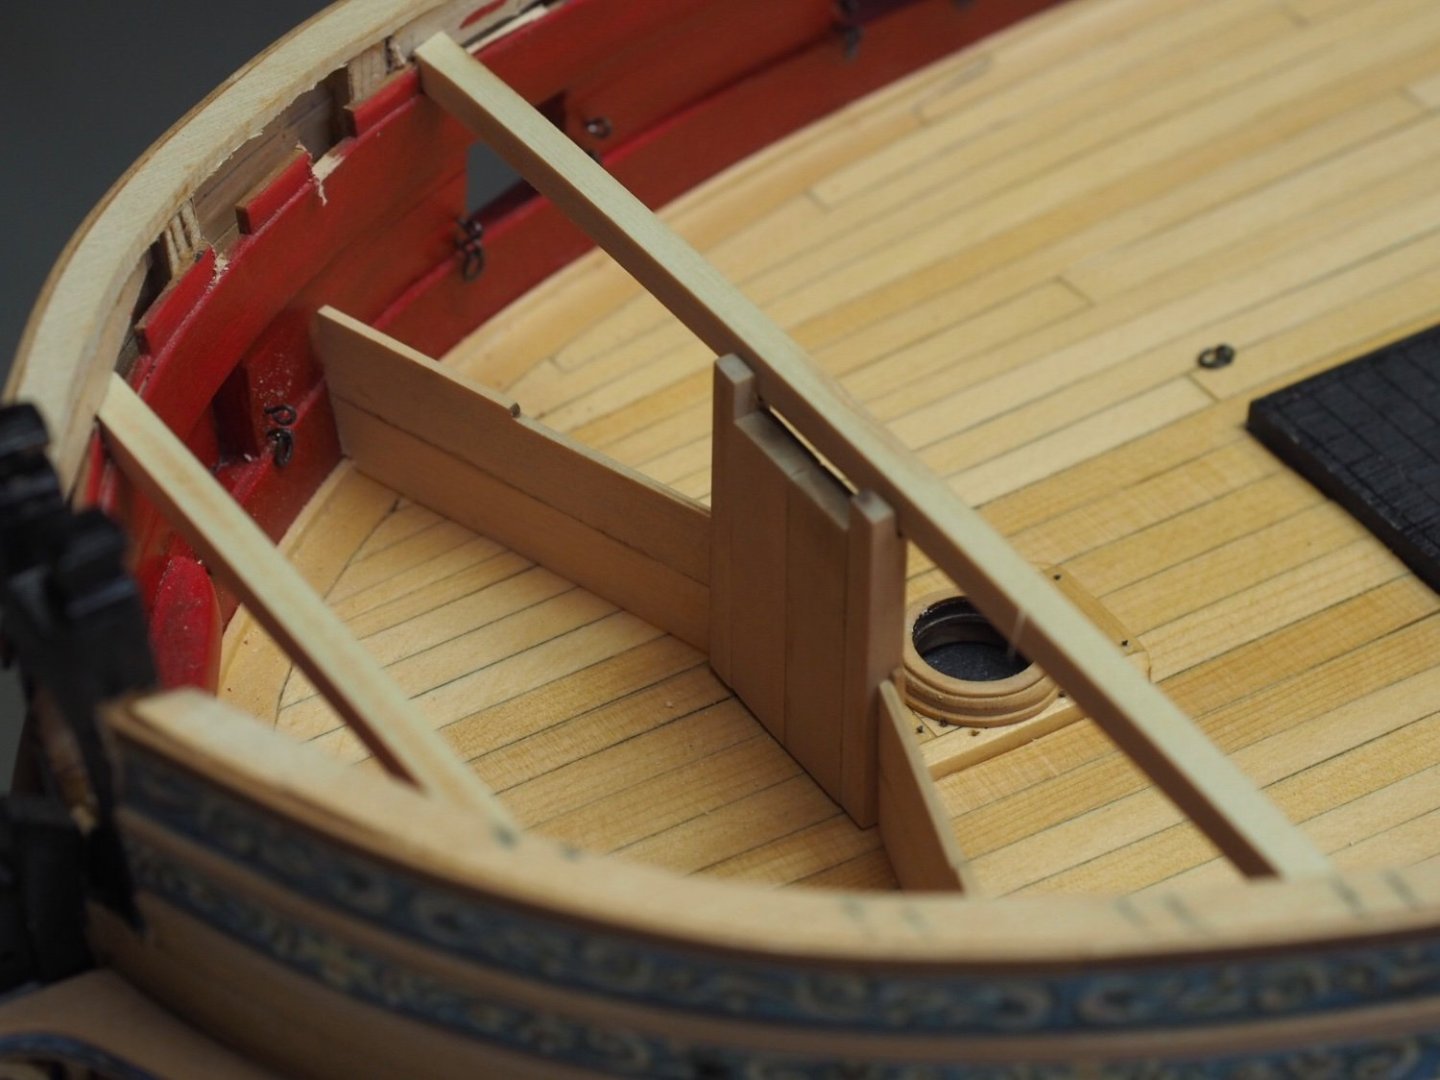
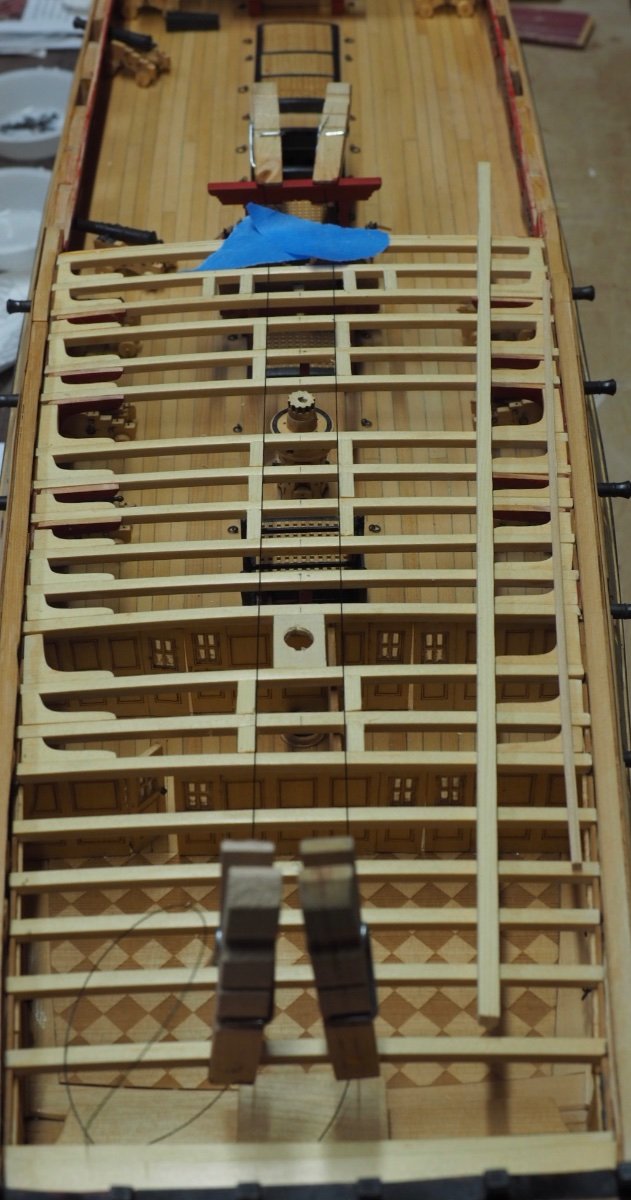
About those cap rails: I have a problem and need advice. You can see in the pictures that I have a gap between the beam clamp pieces and the curved cap pieces. This will look awful if I don’t fill that in. I think the best course of action is to cut the beam clamp back to the beam and then make a new piece out of 3/64 stock. Does that sound like a good idea, or is there a better option?
-
Beautiful work, Rusty! Those head rails look really fun to build.
- FrankWouts and Rustyj
-
2
-
That’s no small feat, JJ! Especially since you rigged them all. They look perfect! Also, the cherry was an excellent choice. Seeing yours, I wish I had done that, too.
- FrankWouts and scrubbyj427
-
2
-
Thank you, Rusty, JJ, Chuck, Glenn, and Jim, for your comments. JJ, you’re right about the fun stuff! Chapter nine is full of really neat stuff. I’ve planked the bulwarks on the quarterdeck and made the cap rail on one side of the waist. These two things make a huge difference. Having finished surfaces in those areas is a world of difference.
-
-
Beautiful work, JJ! Your photos are really well done, too. The close ups really show off the detail of your work. Your wheel and binnacle look so good! I also really like the mating of the cap rails to the fancy moldings in the bottom photo of your post.
- scrubbyj427 and FrankWouts
-
1
-
 1
1
-
Thanks, Jim, JJ, and Rusty. It was fun to build it. I'm working on the forecastle beams and knees and it's almost time to glue the stove in place permanently.
- scrubbyj427, Rustyj, James G and 1 other
-
4
-
-
All of the masters look beautiful, Chuck. As an owner of a set of Winchelsea castings, I am confident that the Speedwell set will be gorgeous.
- scrubbyj427, mtaylor and Ryland Craze
-
3
-
Caption on a photo about halfway down the article: “The Petrel was pictured in an neighbouring berth in January, before being moved into the dry dock.”
So she has only been in dry dock a short while.
- thibaultron, Keith Black, Canute and 2 others
-
5
-
35 minutes ago, dvm27 said:
Greg is unhappy with you for turning an extremely difficult area of the model into a "fun" diversion. A lot of innocent boxwood pieces sacrificed their lives in order for me to successfully frame that area. And then there was the errant elbow strike elbow...
LOL! I've been waiting all day for this comment!
-
That looks great, JJ! That was a good idea, using a batten to check the catheads. They look perfectly aligned to me.
-
I think it looks great, Bob. I’m amazed that you can put so much detail in such a tiny boat.
-
Thanks, Jim. I’ve been enjoying your Winnie build, too. And thanks to all the “likes”. My wife is nearly back to 100%. Luckily, it didn’t interrupt anything important - just work.
- FrankWouts and James G
-
2
-
Beautiful work, Rusty! Those gangways are so cool. Thanks for sharing this with us.
-
Thanks, JJ, Frank, and Glenn. I just started the Syren stove kit. It’s so perfect and easy to build. I’ll have pictures soon.
- James G, scrubbyj427, Chuck and 3 others
-
6
-
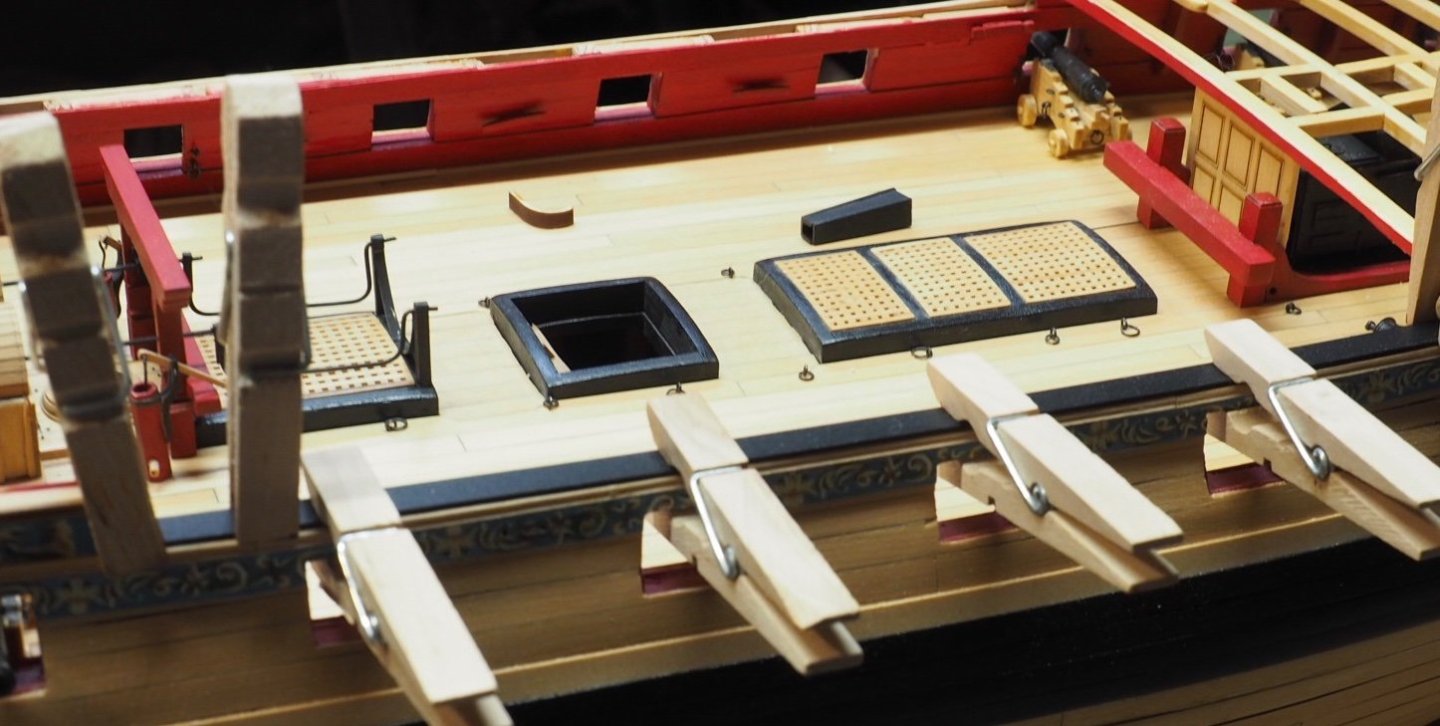
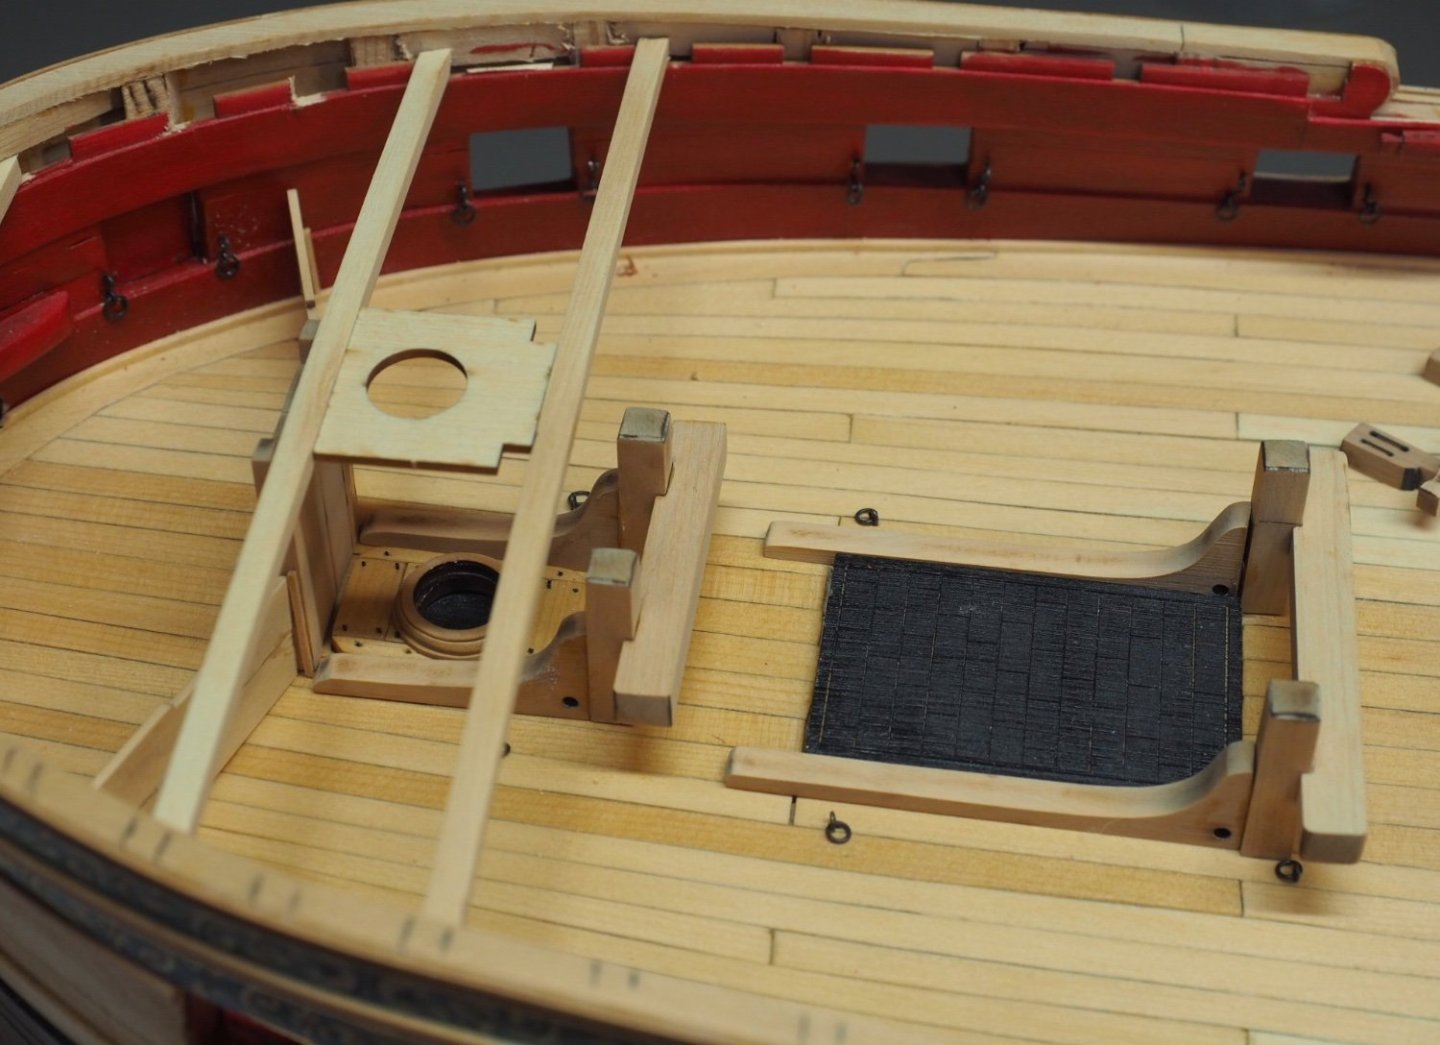
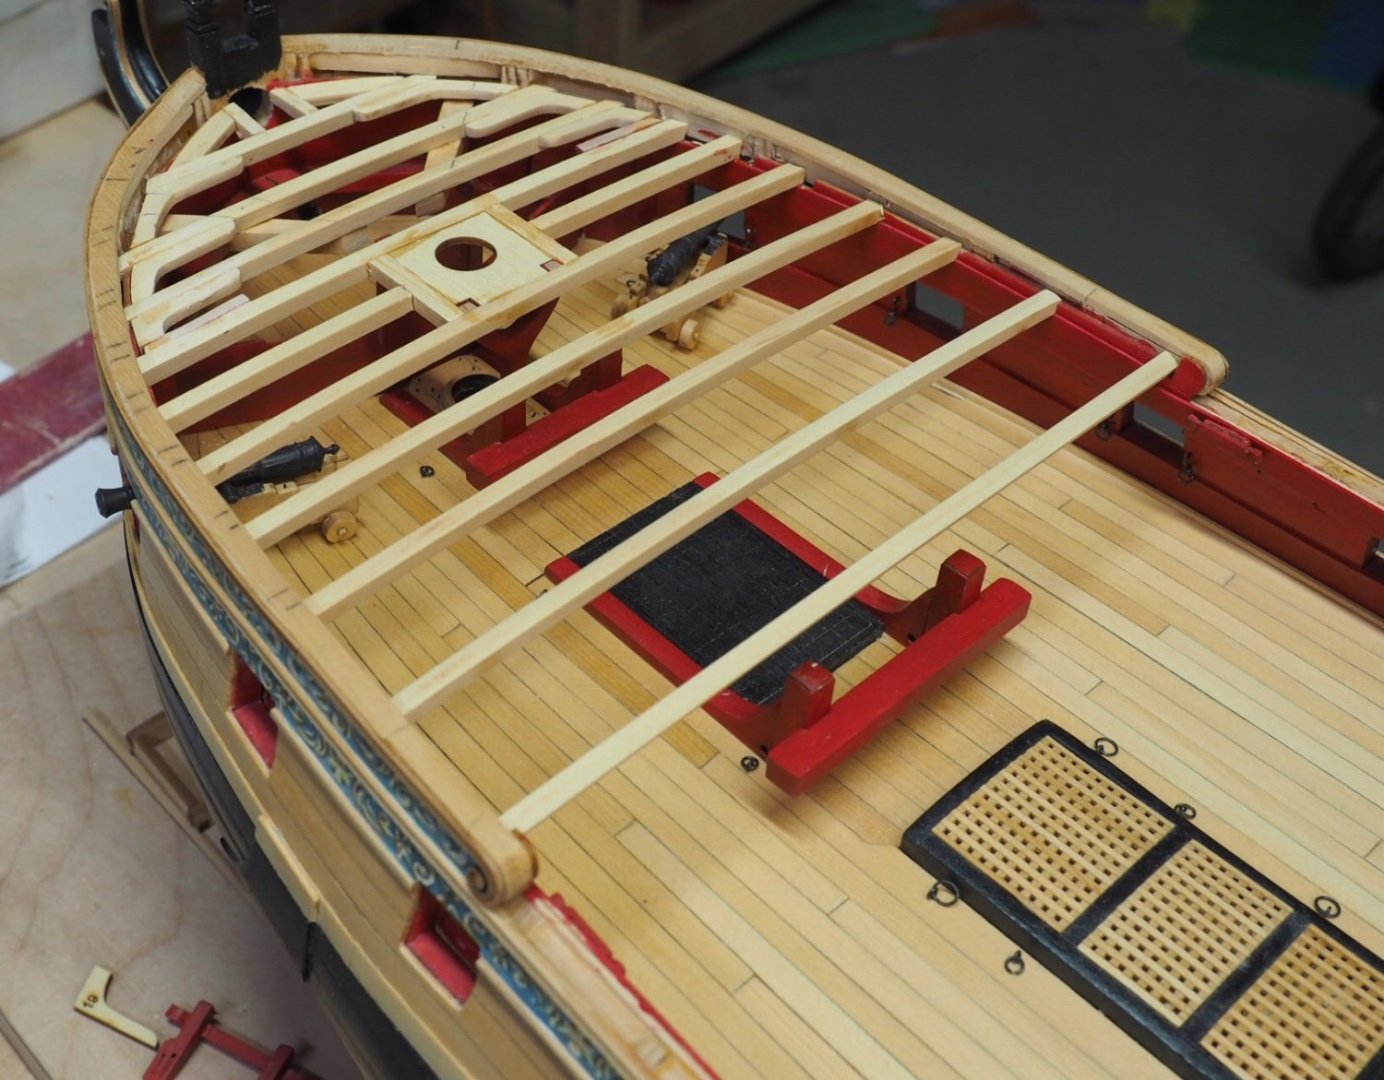
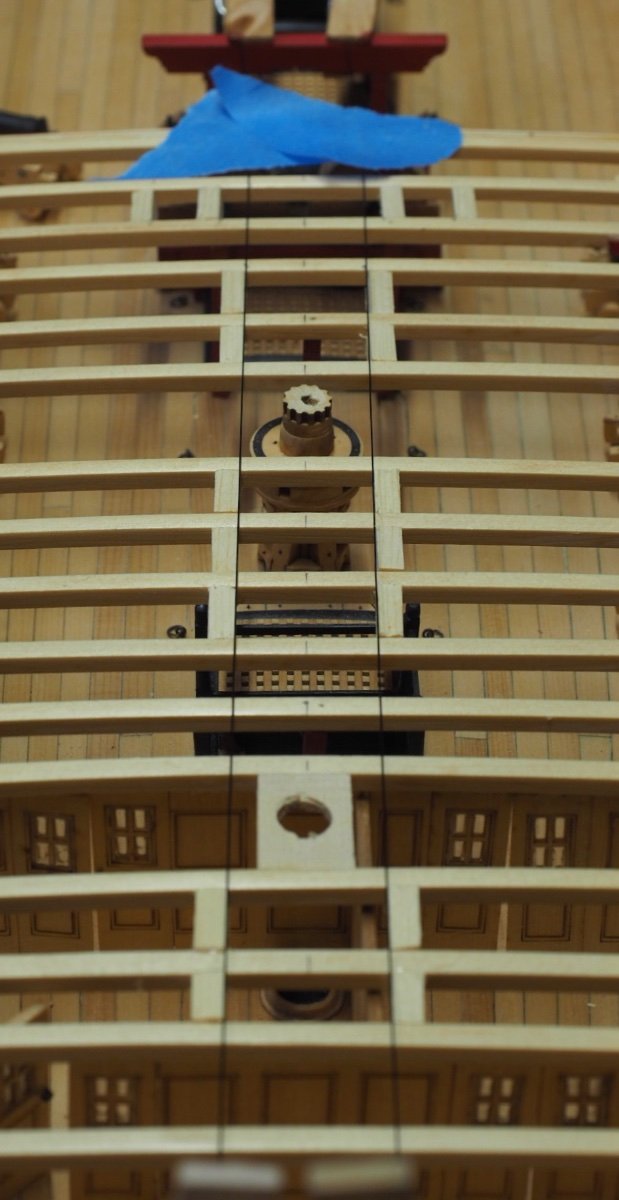
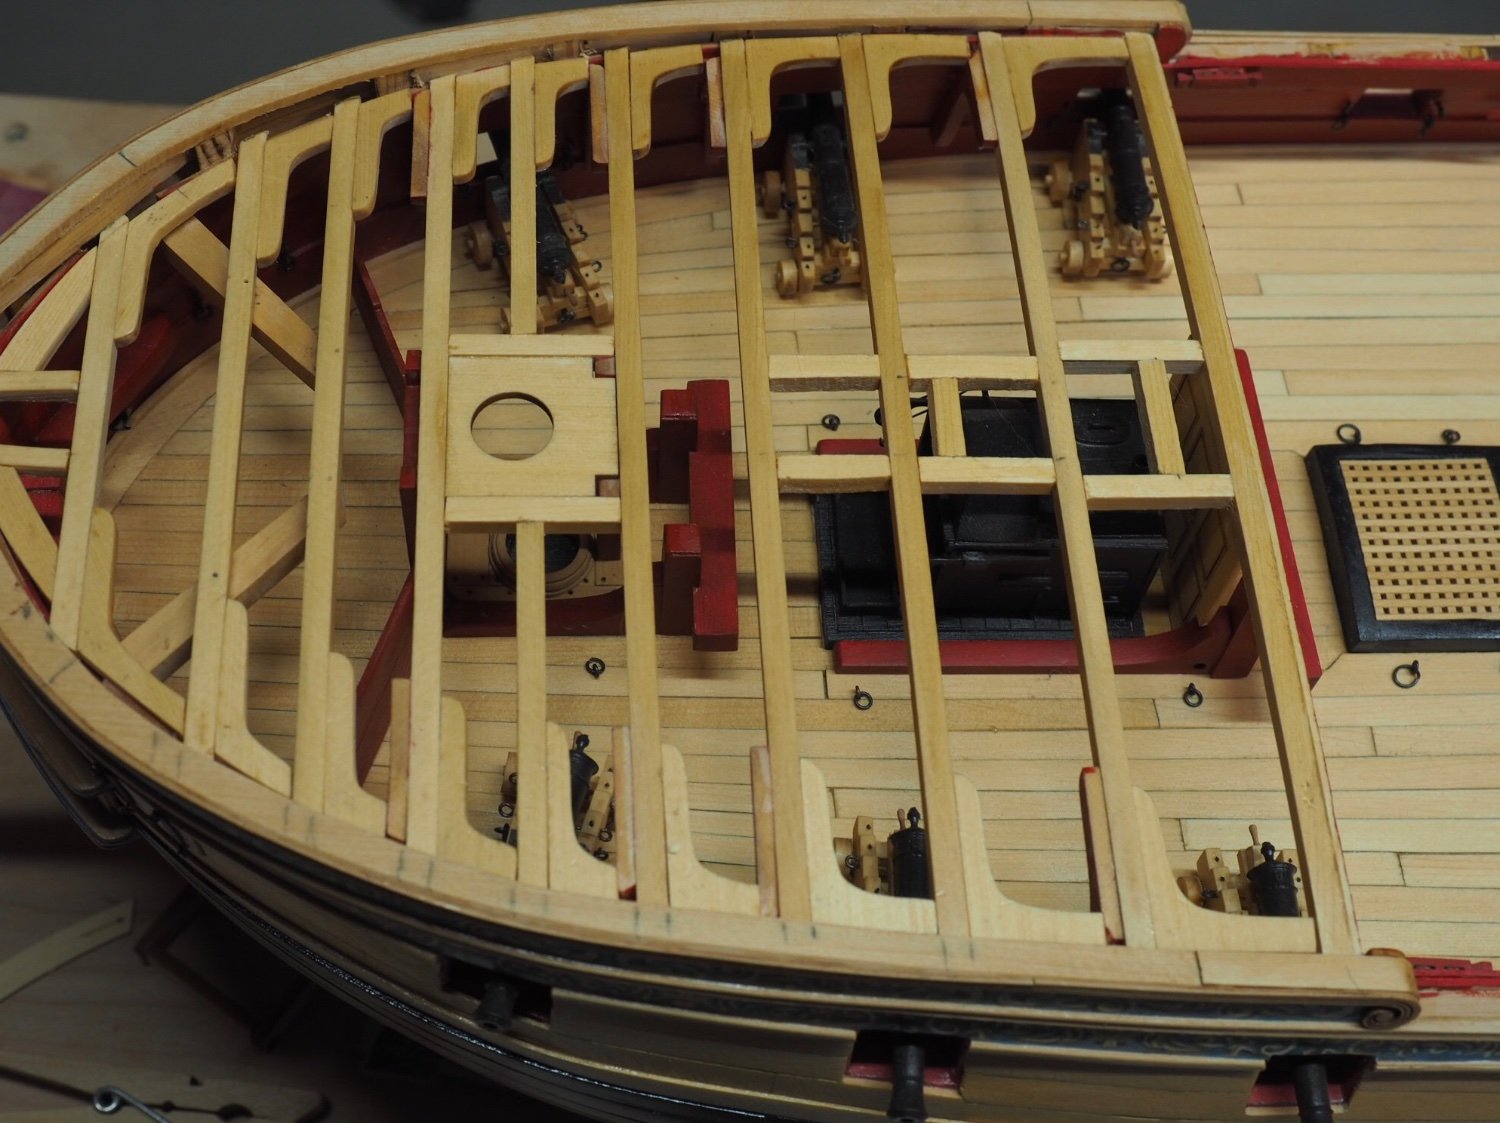
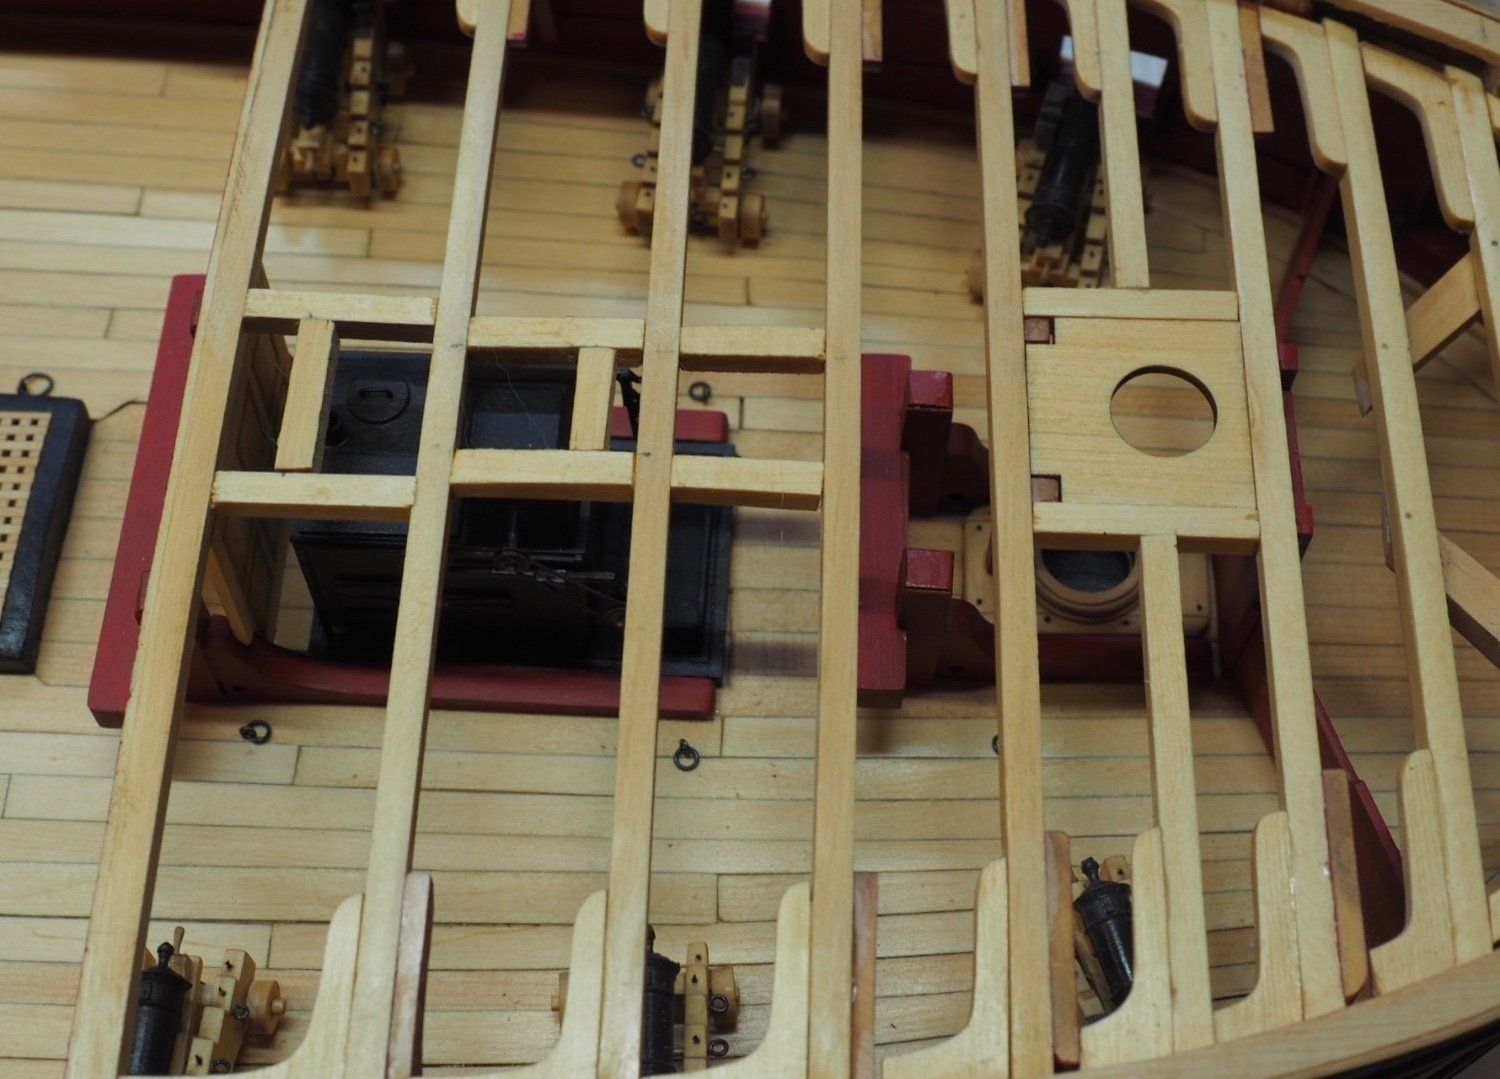
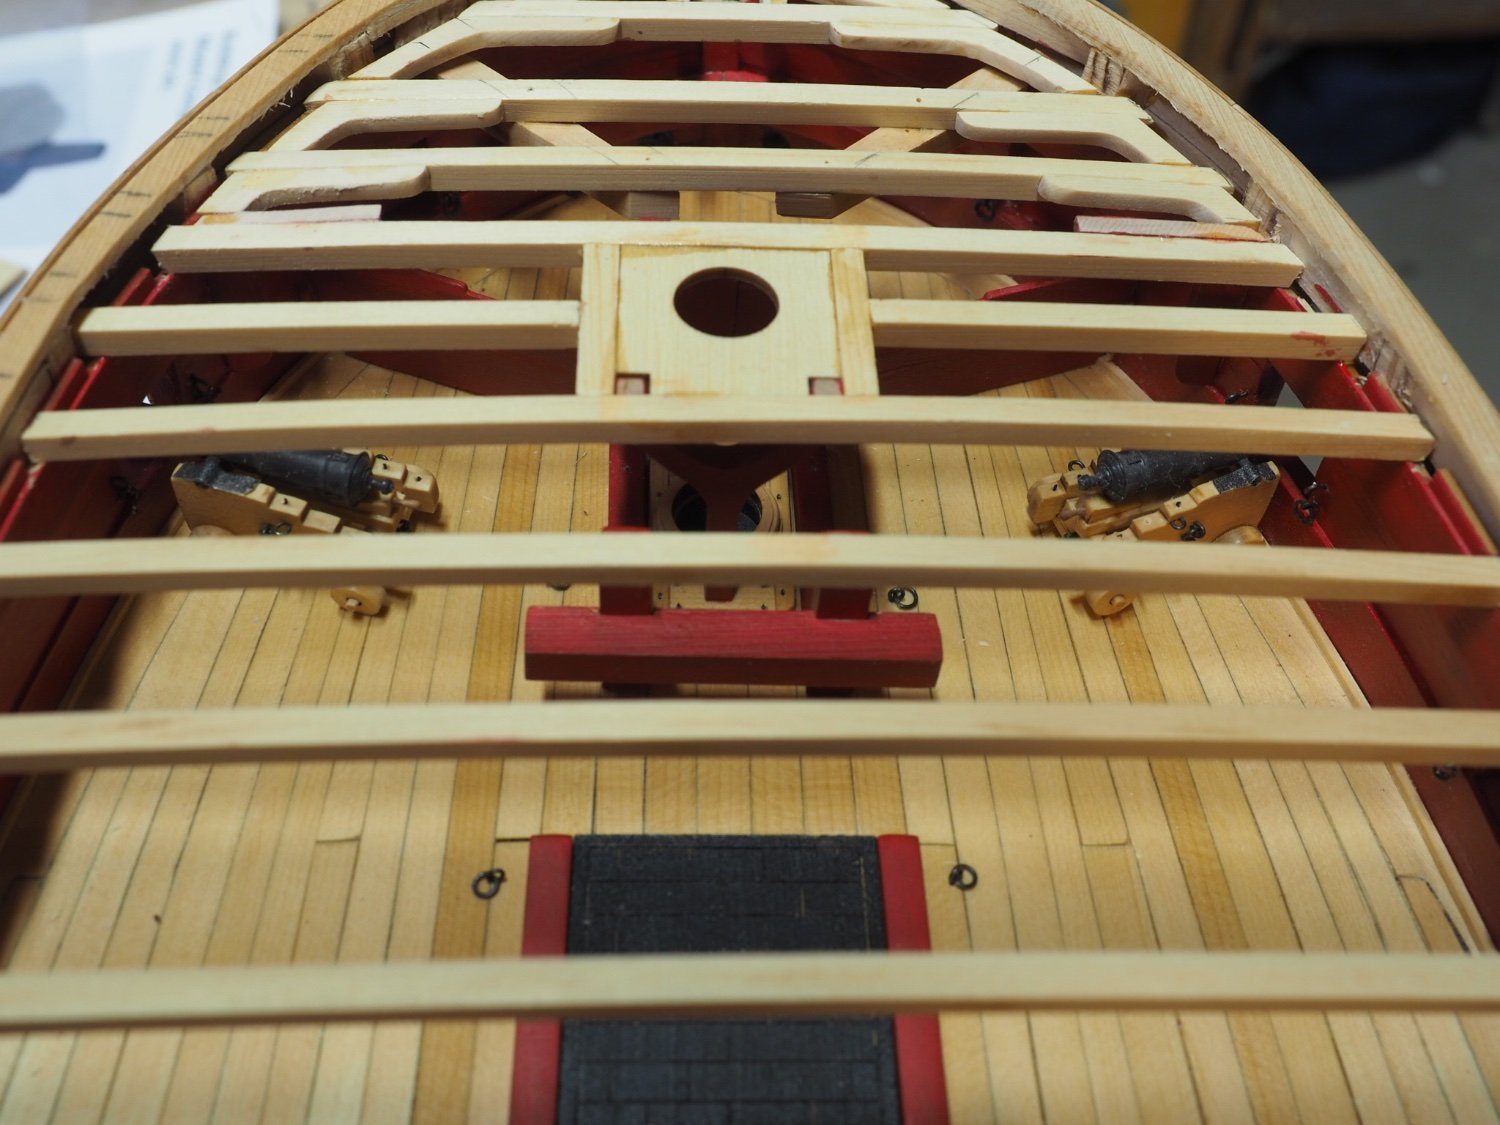
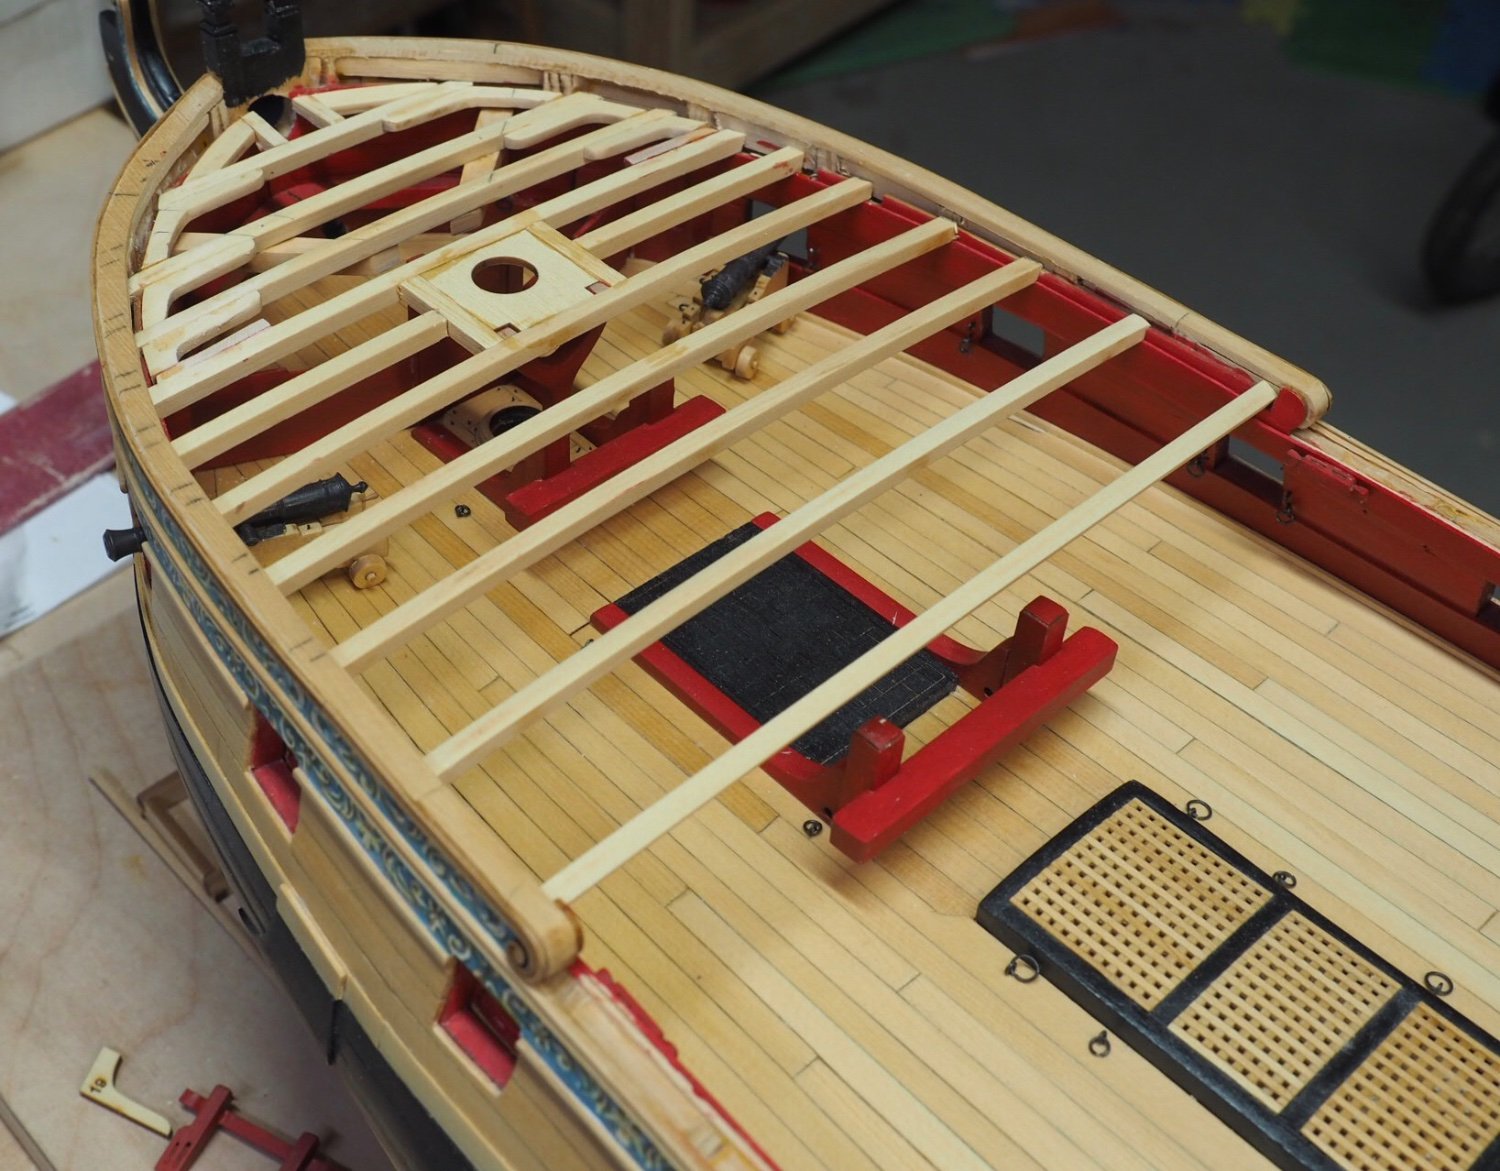
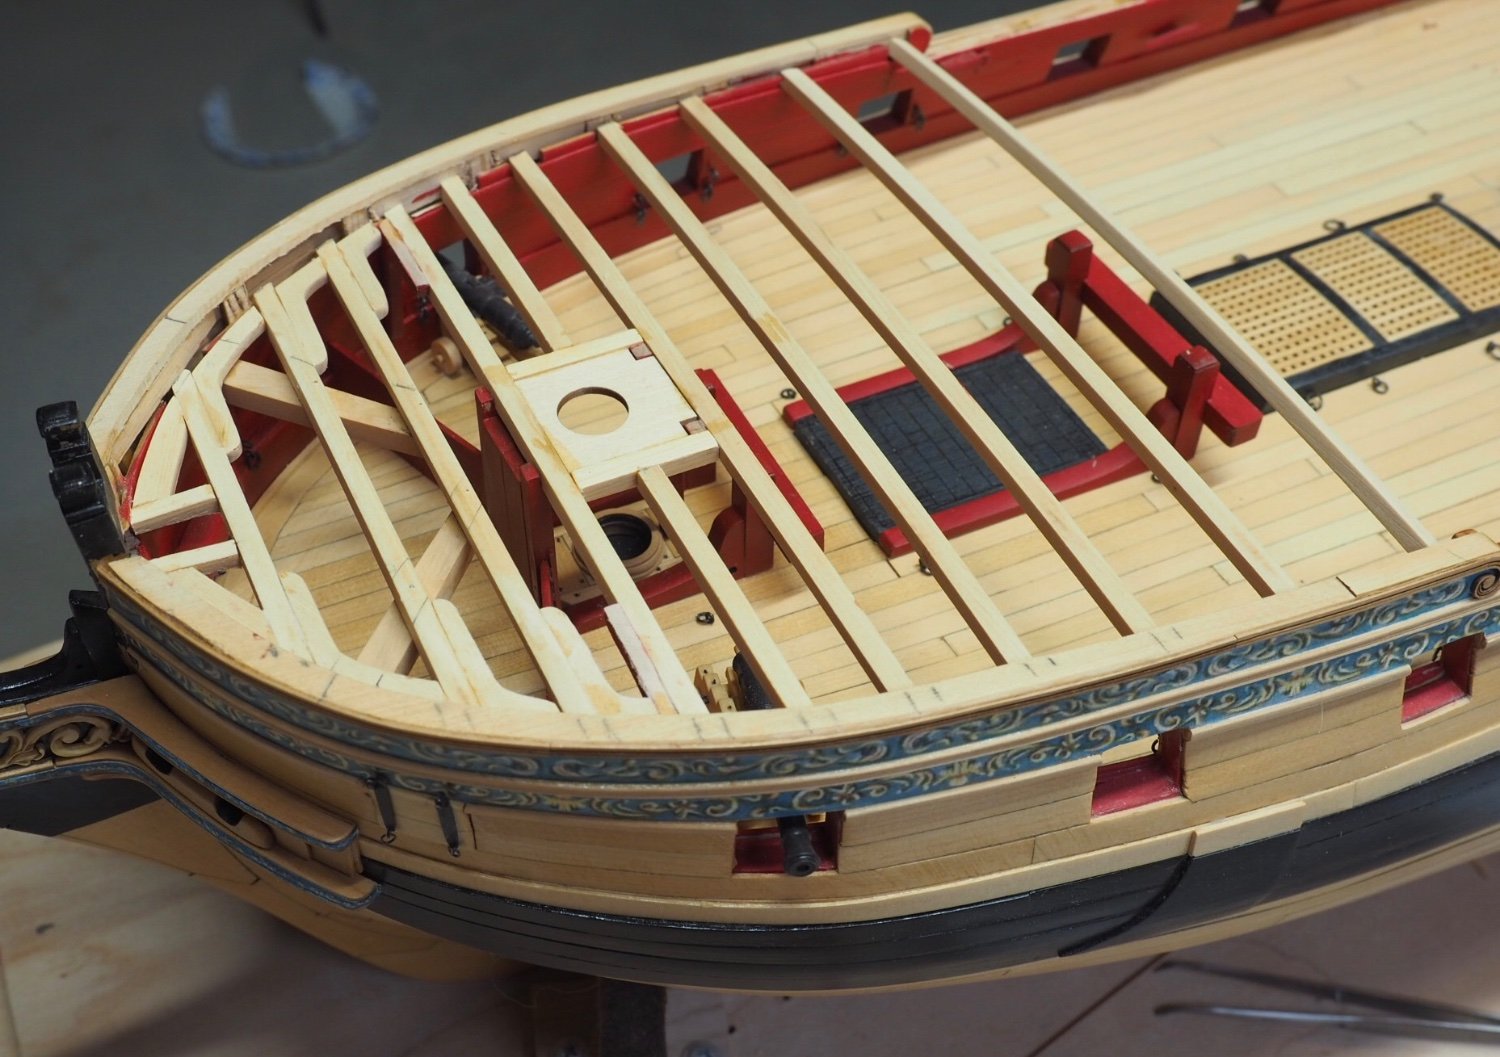
The Admiral is recovering from Covid, so I had lots of time to work on chapter 8 this weekend while she was isolating from everyone. She had a mild case and is well on the mend. Here are some pictures of my progress. I’m going to need to order chapter nine soon.


- JpR62, scrubbyj427, bobandlucy and 11 others
-
14


Syren Ship Model Company News, Updates and Info.....(part 2)
in Traders, Dealers, Buying or Selling anything? - Discuss New Products and Ship Model Goodies here as well!!
Posted
Hi Chuck. Now that it seems you have recovered, I will say that I really like the new material and would love to use them instead of wood. If I understand you, they are easier to use and can be made to look really amazing. Please add my vote to the Syrenite column.