

.jpg.01e54eff8de6be562e7bc1146f40d40a.jpg)
Matt D
-
Posts
627 -
Joined
-
Last visited
Content Type
Profiles
Forums
Gallery
Events
Posts posted by Matt D
-
-
-
Bob was an amazing member of this community and one of my favorite people here. I’m so sorry he’s gone. Rest In Peace, Bob.
- Ryland Craze, hamilton and FrankWouts
-
 3
3
-
On 11/23/2022 at 8:19 PM, leclaire said:
Any bets on how that will turn out?
Stay strong, Bob. They’ll keep making them if they’re worth buying. That’s what I tell myself.
- Ryland Craze, mtaylor, thibaultron and 1 other
-
4
-
Chuck, I’m so excited to see you start on the Speedwell! Thanks for bringing another amazing project to life and sharing with us. I love what you bring to this hobby.
- Seventynet, Chuck, shiprookie and 8 others
-
11
-
Gorgeous, Glenn! I love how the stern looks with those beautiful carvings and the quarter galleries. It's just terrific.
- glbarlow, Dave_E and FrankWouts
-
3
-
Beautiful, Rusty! Have a wonderful vacation!
- Vladimir_Wairoa, Rustyj and FrankWouts
-
3
-
Bob, I hope your surgery goes well and you have a speedy recovery.
-
Congratulations, Chuck! It has been a joy to watch your Winnie come together. I'm very thankful to be able to follow you on this project. The completed model looks like it belongs with the contemporary frigate models.
- FrankWouts, Jack12477, Ryland Craze and 2 others
-
5
-
-
Beautiful rigging work, Ron!
- mtaylor and hollowneck
-
2
-
That sounds like a great trip, Chuck. I love Newport. My grandparents met there in 1942, when my grandpa was stationed there in the navy. They were married in Trinity Church. I took my family there in 2009. Did you go to the museum at Navy War College? It’s got some excellent paintings and at least a few models. Have fun painting happy clouds!
- FrankWouts, KentM, Chuck and 2 others
-
5
-
That looks great, Edward! So far, Chapter 3 has been my favorite part of this build. Those quarter galleries and the transom decorations are so much fun to build.
- FrankWouts and Edwardkenway
-
1
-
 1
1
-
This looks like a fantastic project, Popeye! Just last weekend, my son spent a night on the New Jersey with his boy scout troop.

-
-
Thanks, Mldixon and JJ. And thanks to the likes, too. I’m going to be away from the shipyard for the next three weeks because of travel. I’m going to Montana next week and then Germany for two weeks.
- Rustyj, scrubbyj427 and FrankWouts
-
3
-
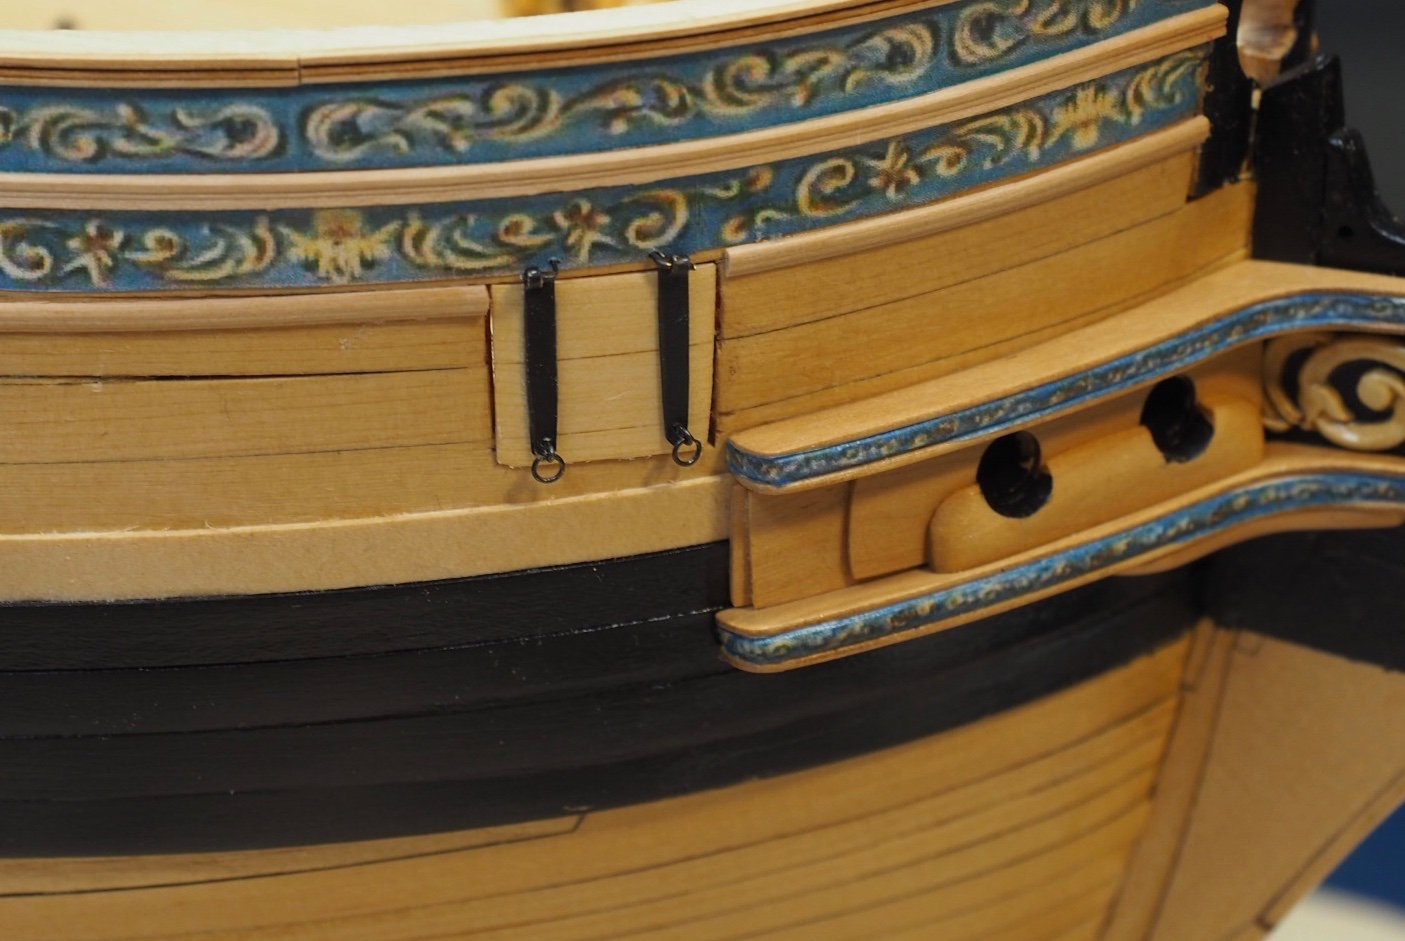
Here is a one picture update of my first completed gun port lid. I’ve made all of the hinges. The eyebolts and split rings are tiny and made from 28 gauge wire. I was worried about making the hinges too short, so they ended up on the long side. I have several mistakes on the starboard side and some are definitely visible in this shot.
- Edwardkenway, rafine, Wacom and 5 others
-
8
-
Congratulations on your new business, Mike! I’m looking forward to being a customer.
-
Your hull paint and finish looks beautiful. This seems like a really nice kit.
- Dave_E, Obormotov and Thukydides
-
2
-
1
-
Welcome to Model Ship World, John! If I can add a little more advice: I recommend reading a lot of build logs before you buy. You will find amazing build logs for most of the kits that are on the market today. Reading in advance will help you make a good choice based on what it takes to finish the build. I have not followed the advice of starting with a small kit and from where I am now, I will tell you that you should start with a small kit. David Antscherl's series from Model Shipways is a good place to start. This is advice I didn't follow, but wish I had. One perspective I couldn't wrap my head around when I started was that if you start with something little like a Dory and it's too small or too easy or anything else, it will also not take too long to finish and then try something bigger and more difficult.
-
Thanks, Jorge!
- Jorge Diaz O and FrankWouts
-
2
-
Thanks, Chuck. That sounds like a much better way for me. I’ll give that a try.
Thanks, Glenn. I broke a toothpick in half and chucked it in my Dremel. It was easy to push the wheel onto the toothpick and sand off the char using 320 grit sandpaper. You have to be careful not to burn them with too much speed or pressure.
-
Thank you, Justin.
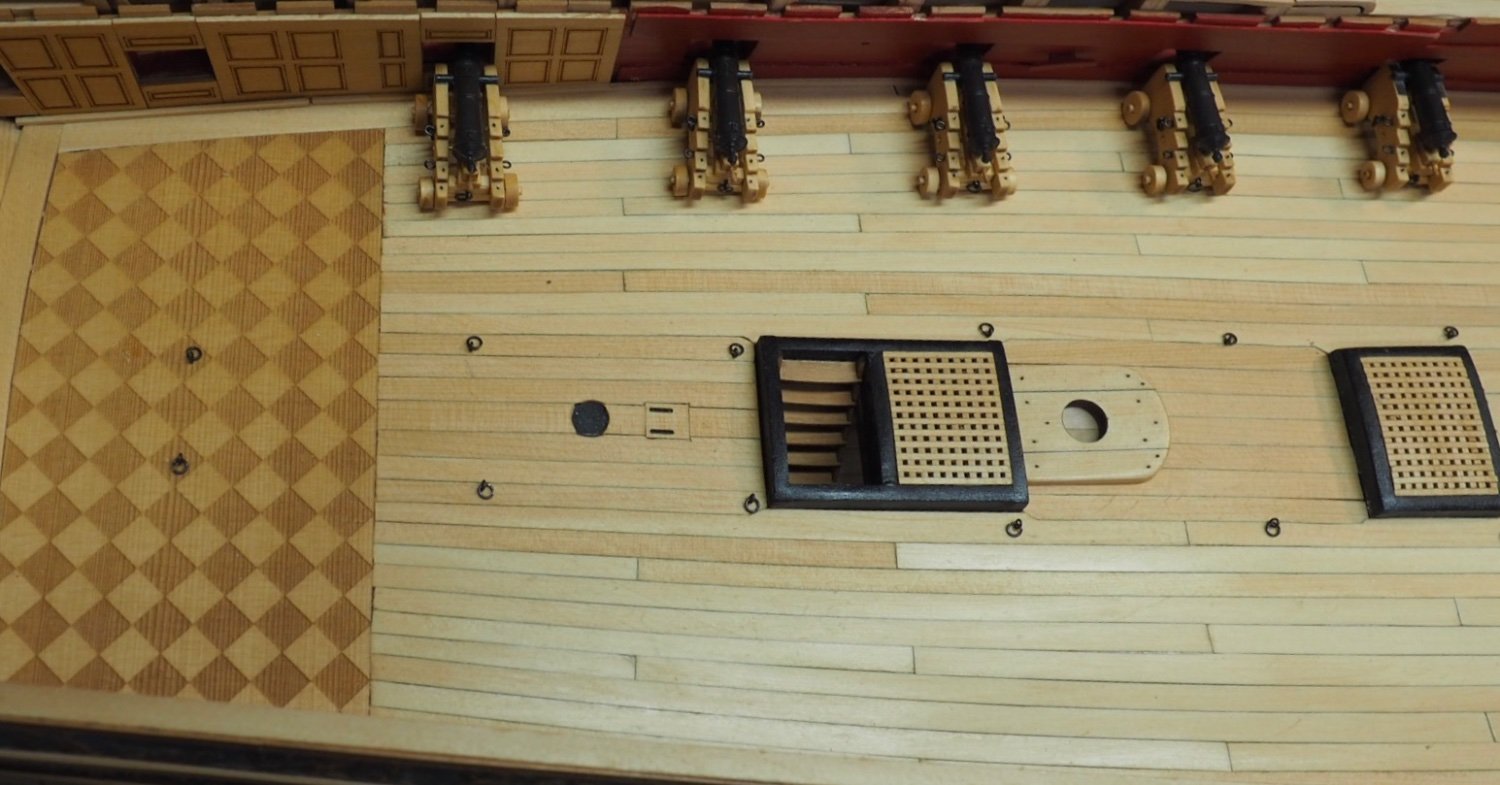
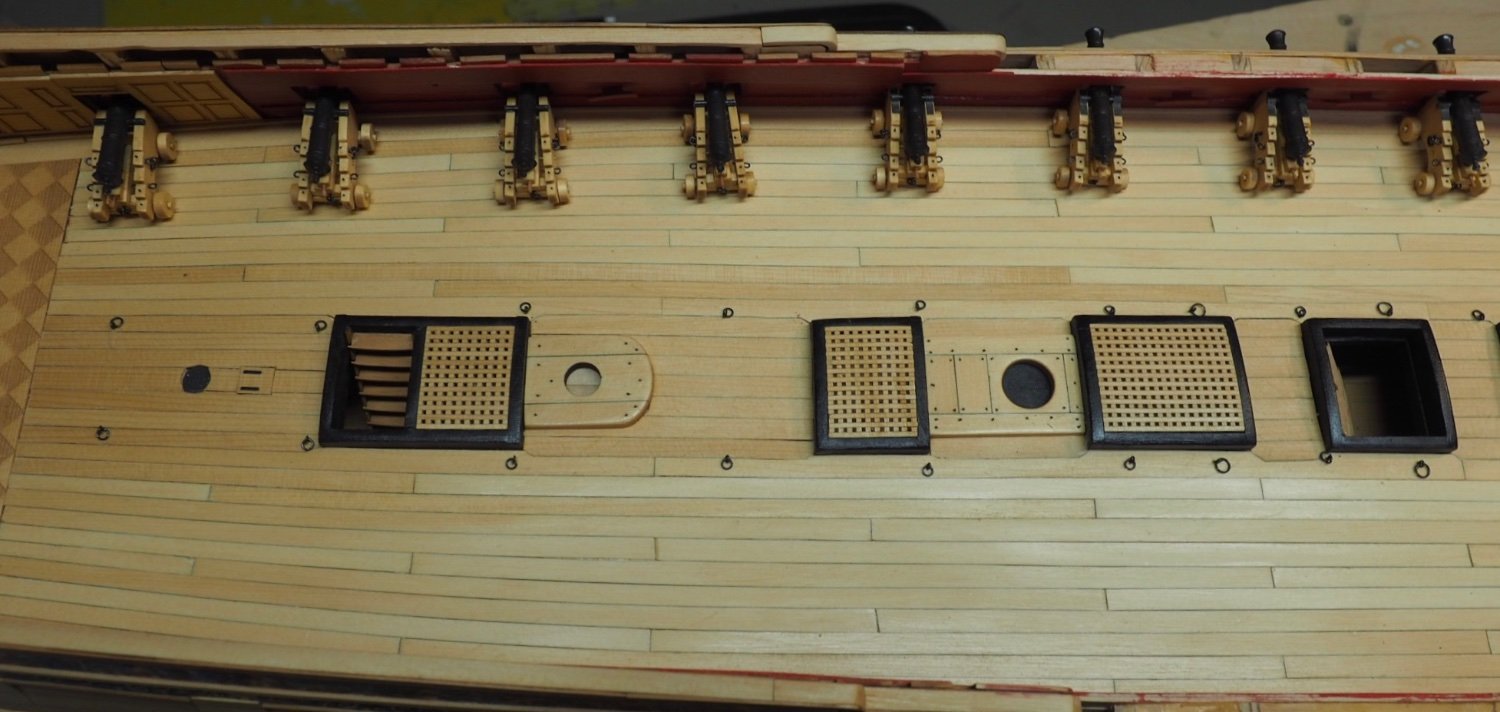
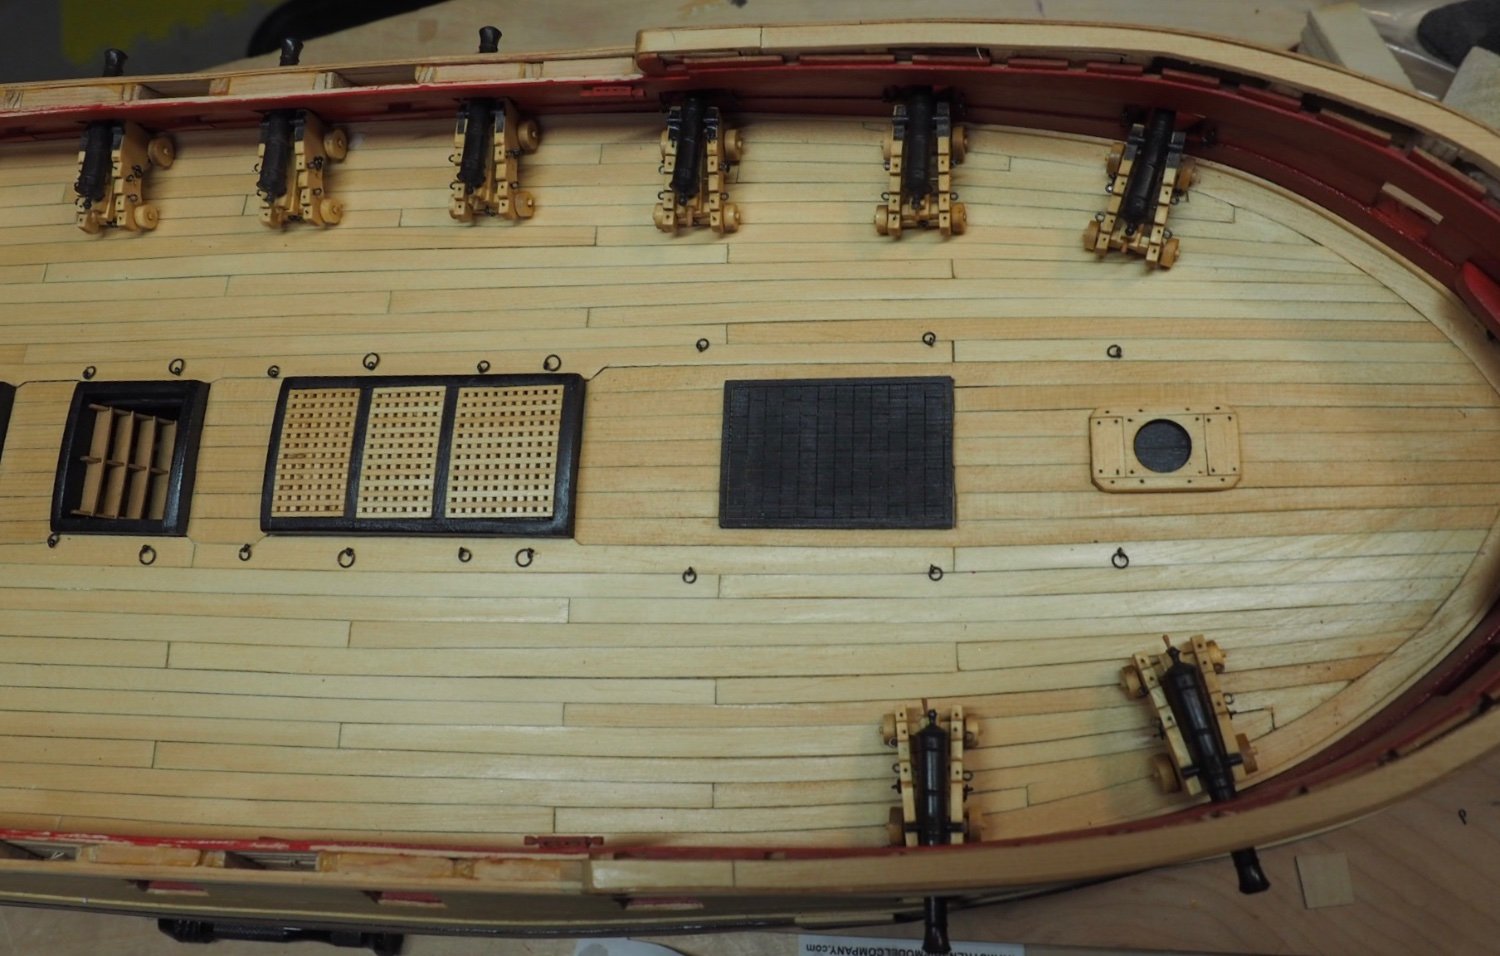
I’ve made 14 cannon, with a few still short a couple of items. I’ve got 8 more still untouched in their packages and two carriages ruined by my inexperience. I’ll be ordering another package of carriages the next time I buy parts from Syren. I’ve been making my eyebolts and split rings in batches when I’m ready to install them. The ones on the gun deck make a huge impact on its appearance.


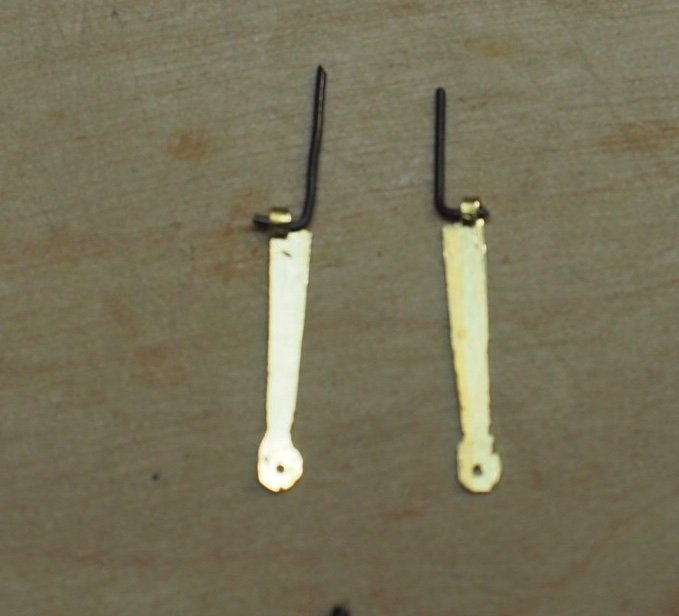
’ve been pondering the gun port lids and have decided that they need to be done before I move on to chapters 7 and 8. I think I will need to get my hands on the inboard side to position them right, so the quarterdeck and forecastle would be in my way and make it impossible to install the hinges and covers. So I’m trying to make some hinges with limited success. Here is my first attempt at the whole thing. They’re far from perfect, but I have enough brass to make about 30 of them. My main tool is a Craftsman fine bastard file. I think I mainly need more practice and a better way to make the round ends more consistent. Does anyone have any tips on this? Also, what do you recommend for blackening? Thanks for any help you can offer.
- FrankWouts, Vladimir_Wairoa, Saburo and 2 others
-
5
-
-
Nice work, Edward! That’s a fantastic milestone.
- Edwardkenway and FrankWouts
-
1
-
1

HMS Winchelsea 1764 by Rustyj - FINISHED - 1:48
in Member Build logs for the HMS Winchelsea
Posted
That looks excellent, Rusty! I thought about you earlier today when I was making more eye bolts for my Winnie. Thanks again for your instructions.