

.jpeg.7d7eba14c97a2e1d9f79cd2c97f6424a.jpeg)
EricWilliamMarshall
-
Posts
985 -
Joined
-
Last visited
Content Type
Profiles
Forums
Gallery
Events
Posts posted by EricWilliamMarshall
-
-
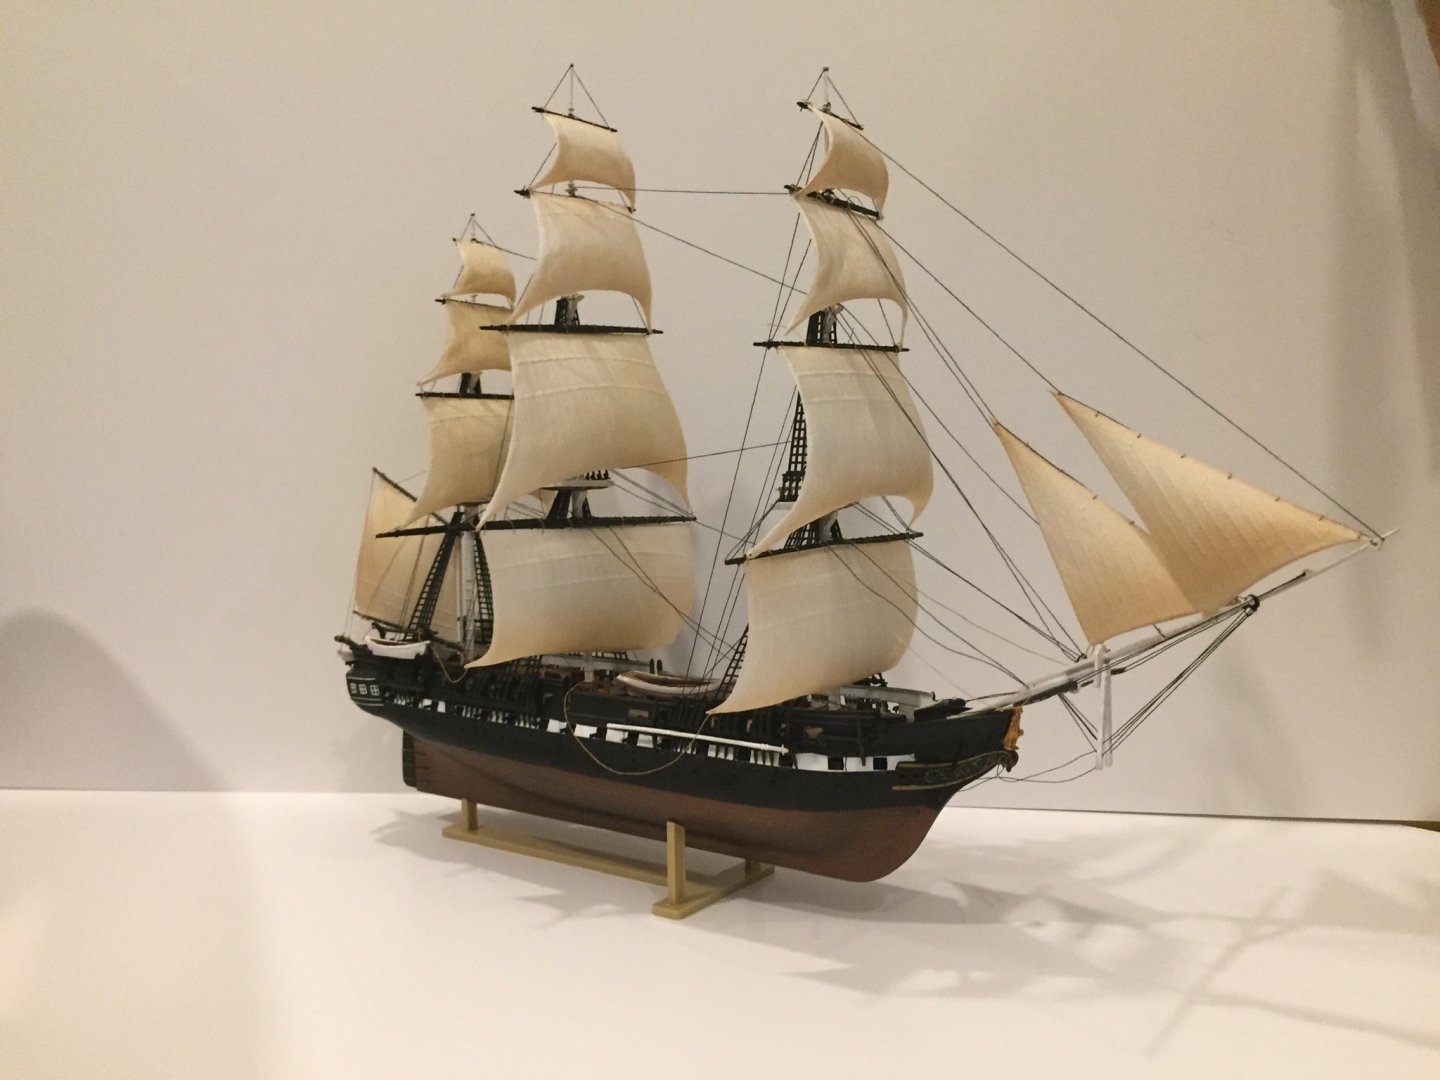
My first effort - near finished. Thanks for your time, wisdom and warm welcome!
-
-
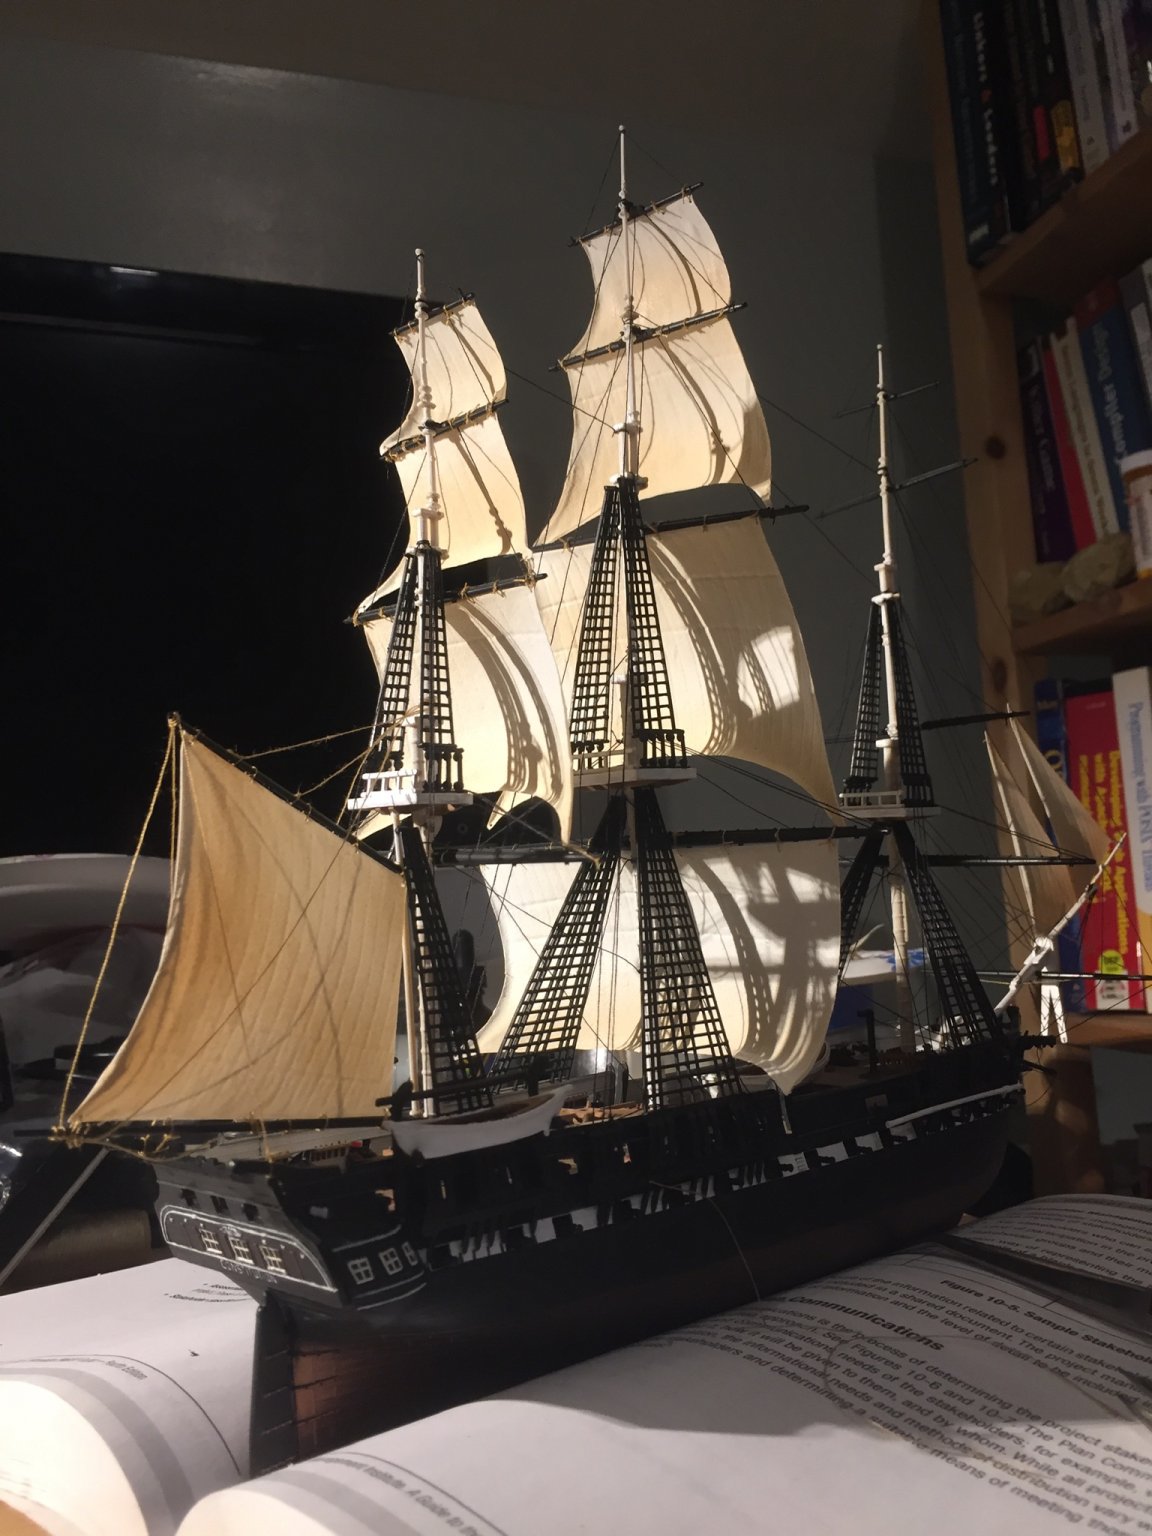
Despite my wandering and rework, I have made some progress! So thanks yet again for everyone’s support and insights! I have just fore mast sails, a ship’s boat and clean up left!

- GrandpaPhil and mtaylor
-
 2
2
-
On 12/1/2019 at 5:03 AM, wefalck said:
I would recommend that you get hold of a modern book on tying knots for yachtsmen, which explaines the basics that would be valid for at least the past 200 to 300 years.
I’ve ordered a book by Toss and a few on ship modeling. I appreciate everyone’s forbearance. The kit is very “light” on the use of knots. In fact, it is skipped entirely.
")
-
Making progress with the sails!

- GrandpaPhil, ccoyle and Edwardkenway
-
3
-
-
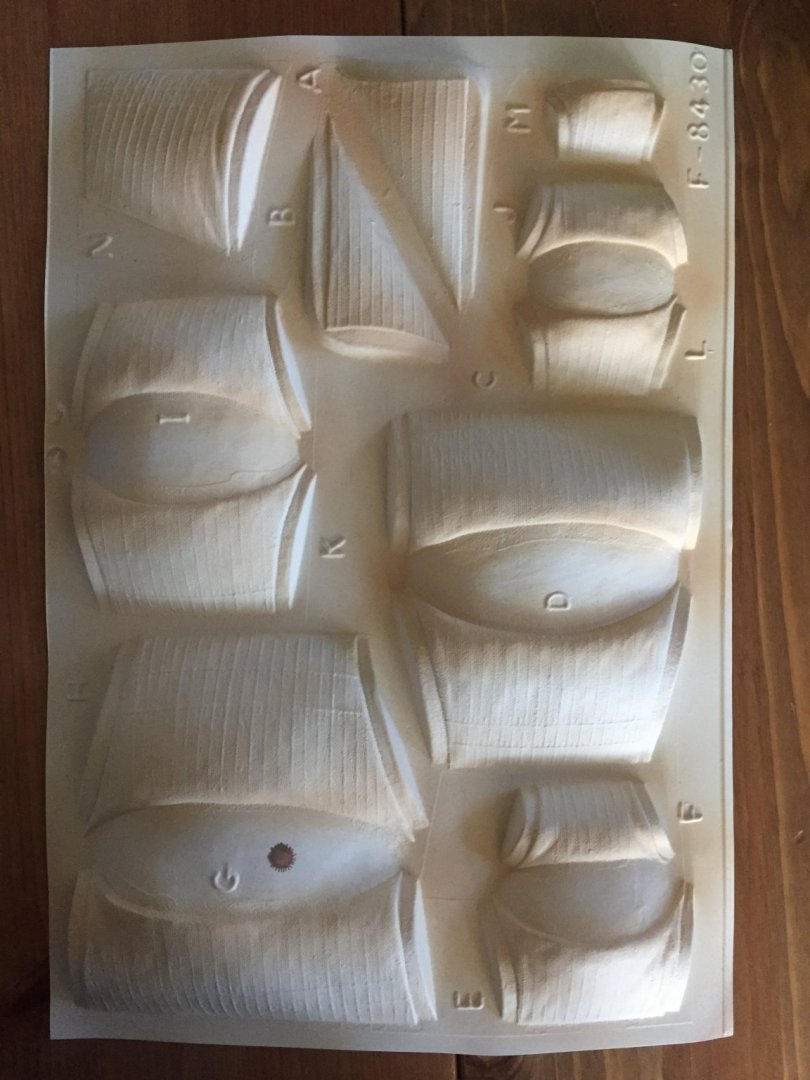
Beginning the painting of the vacu-form sails!
- SigEp Ziggy and GrandpaPhil
-
2
-
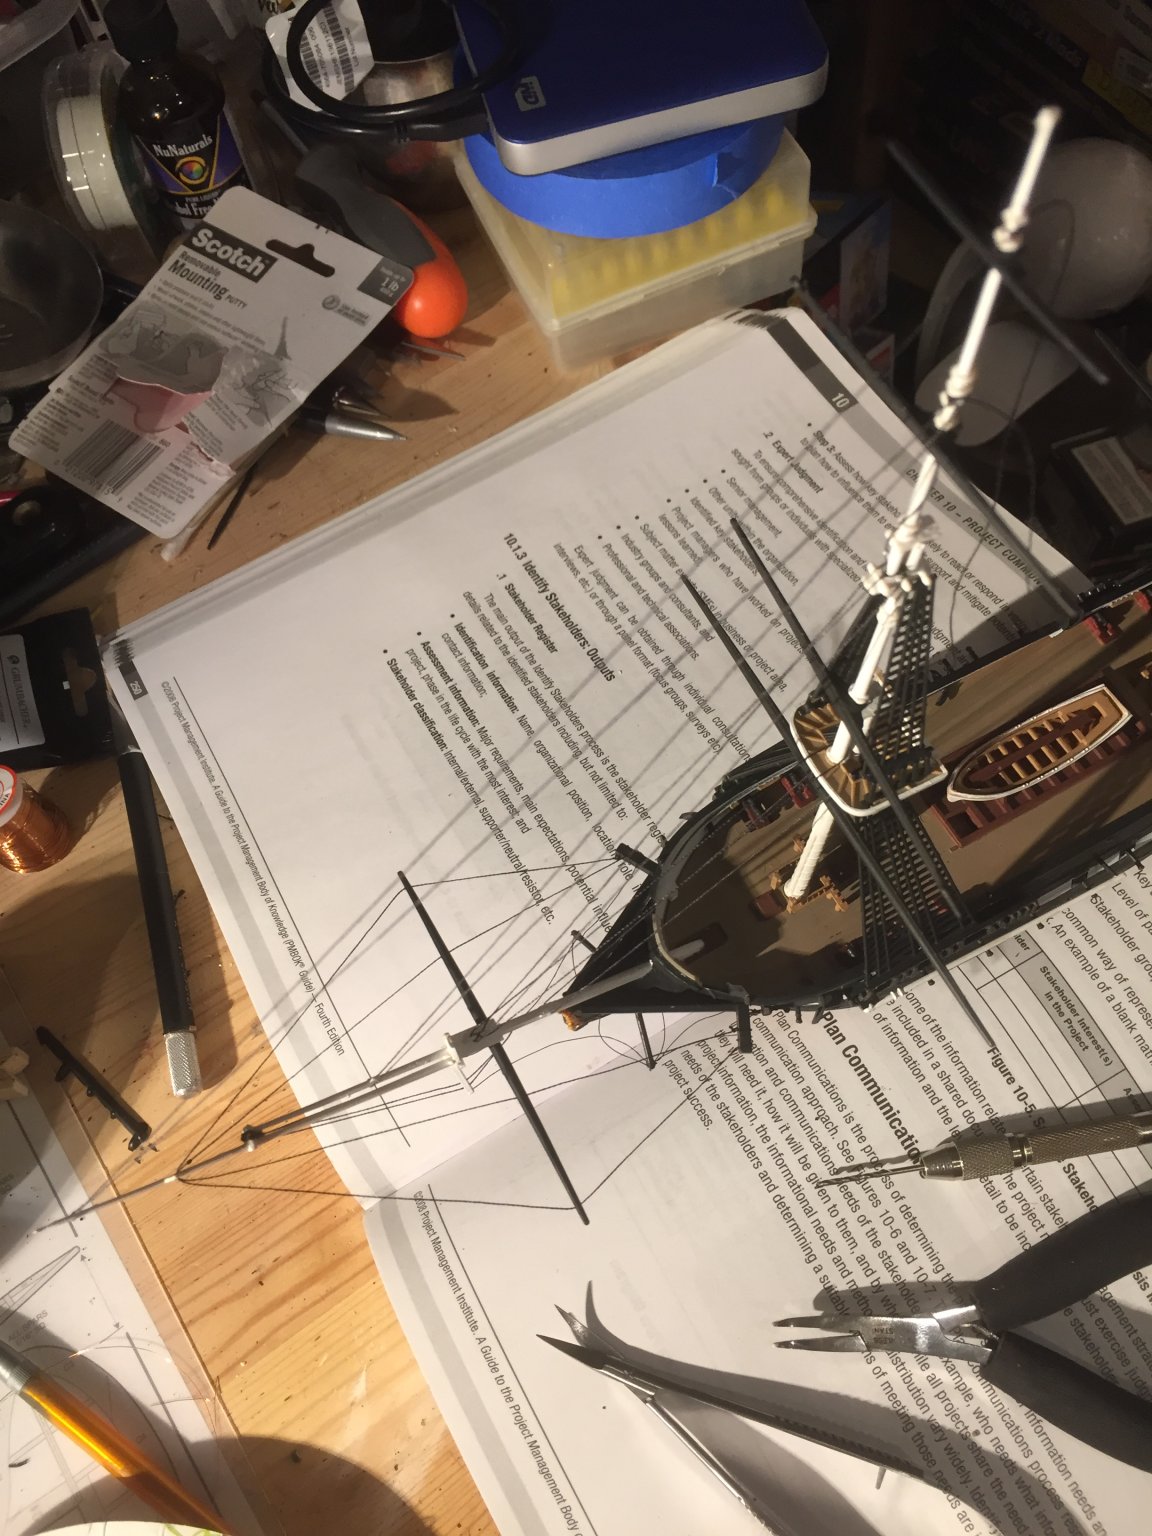
Yet more questions:
how do folk keep tension on the strings while tying the knot?
And the obvious follow up:
how do you tighten a slack string?
-
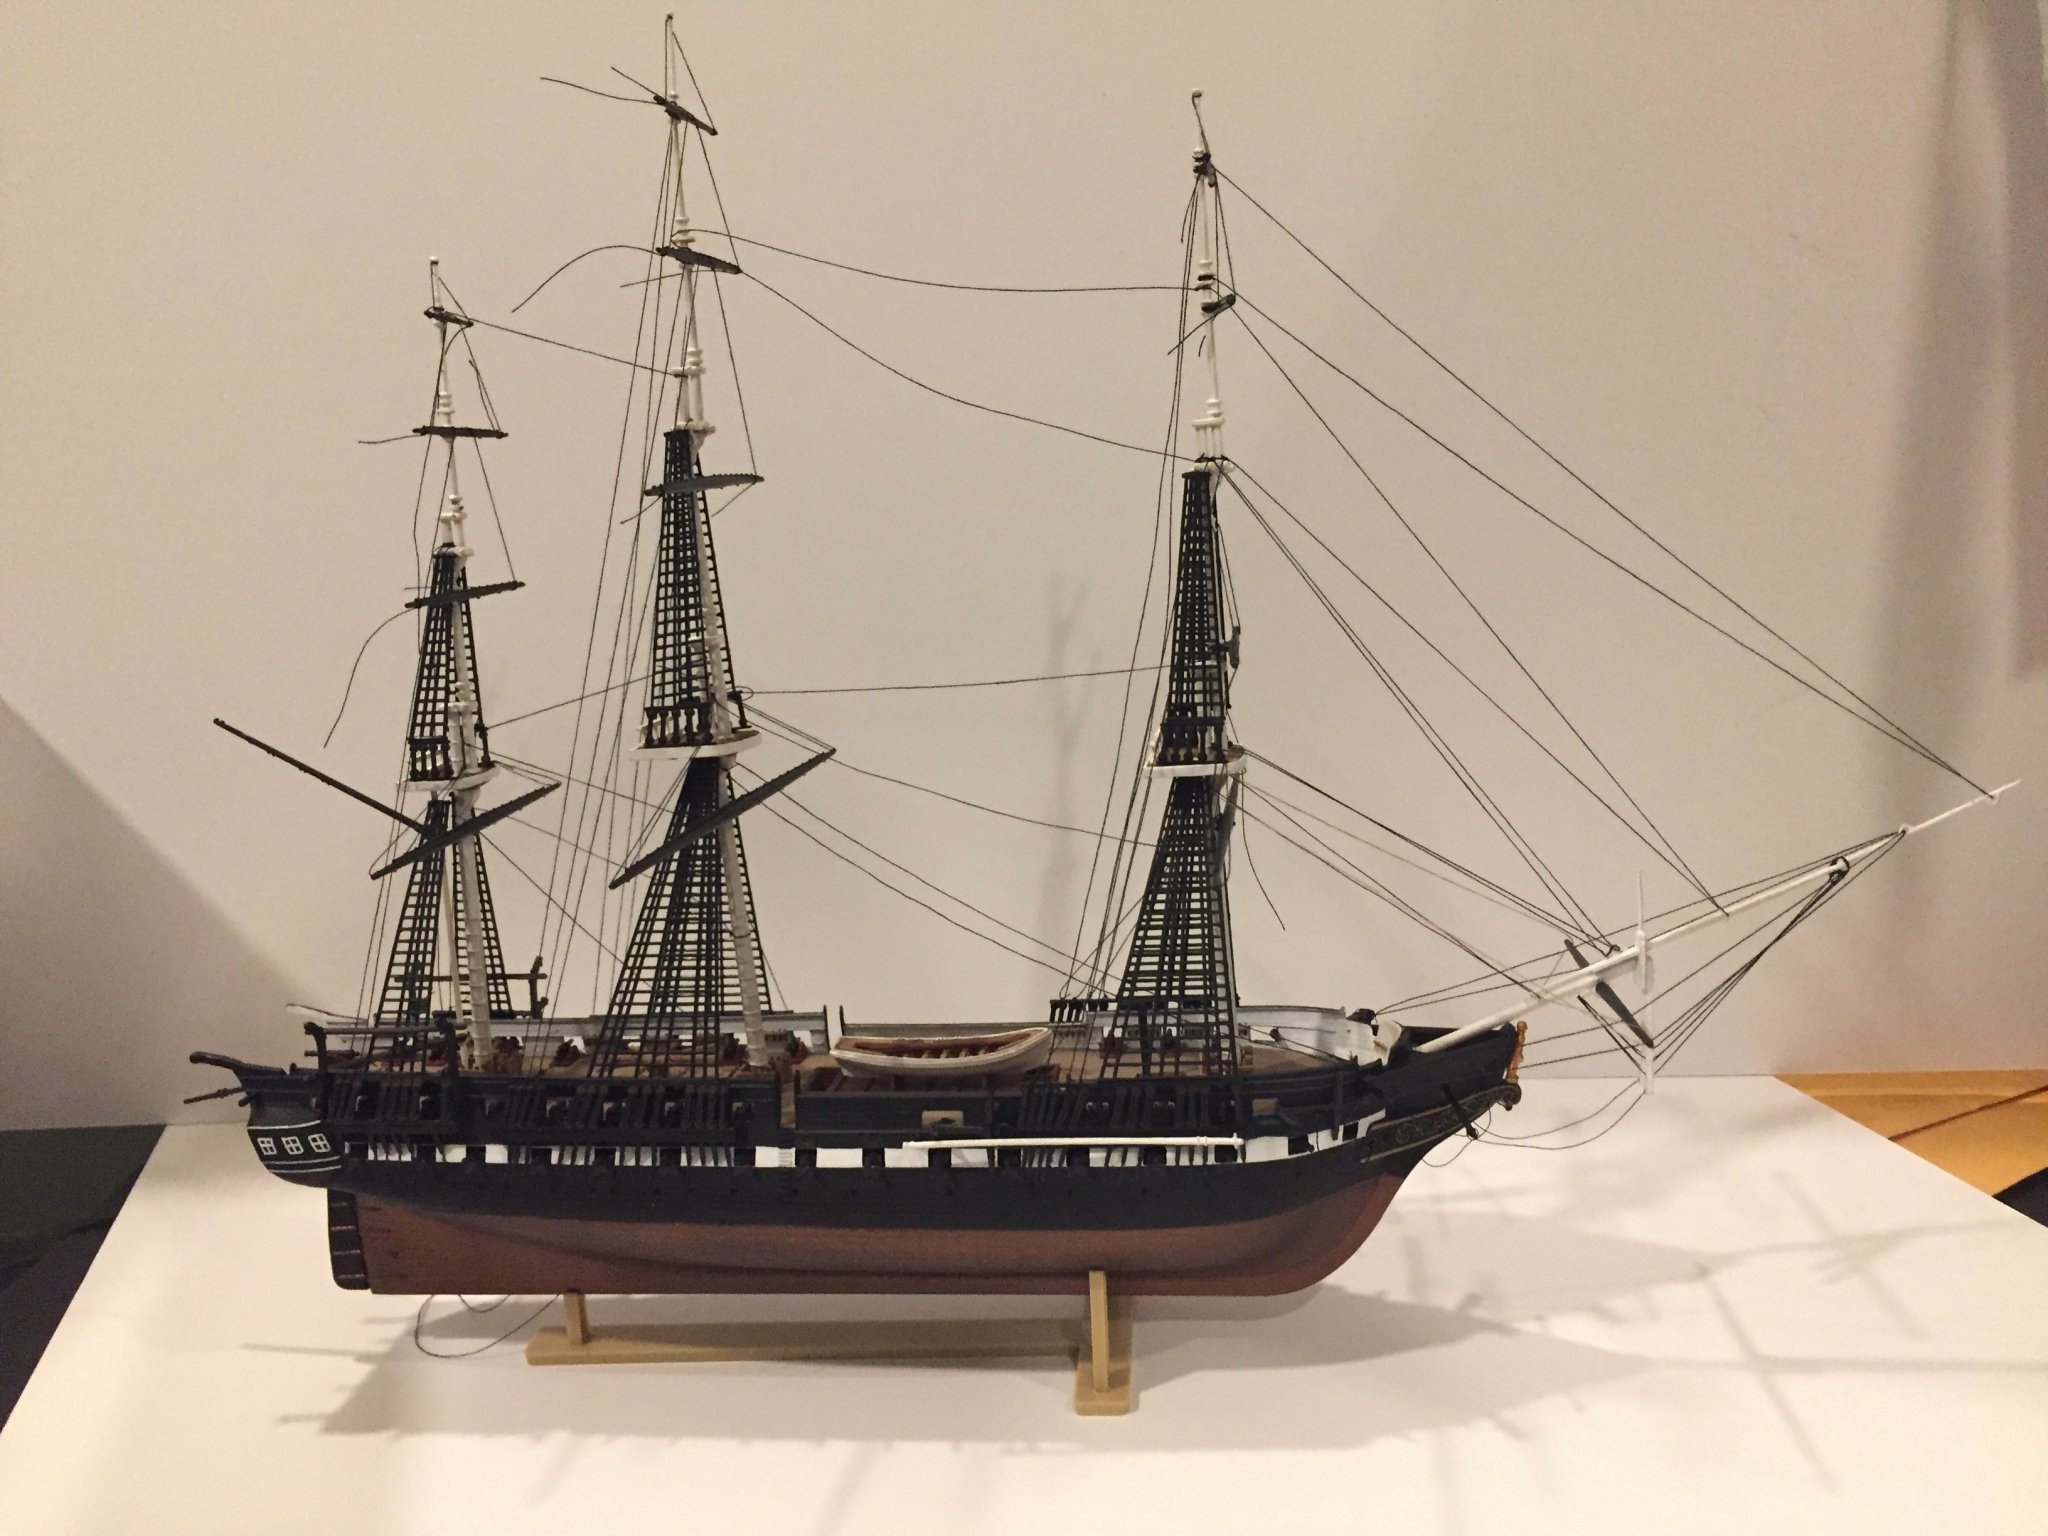
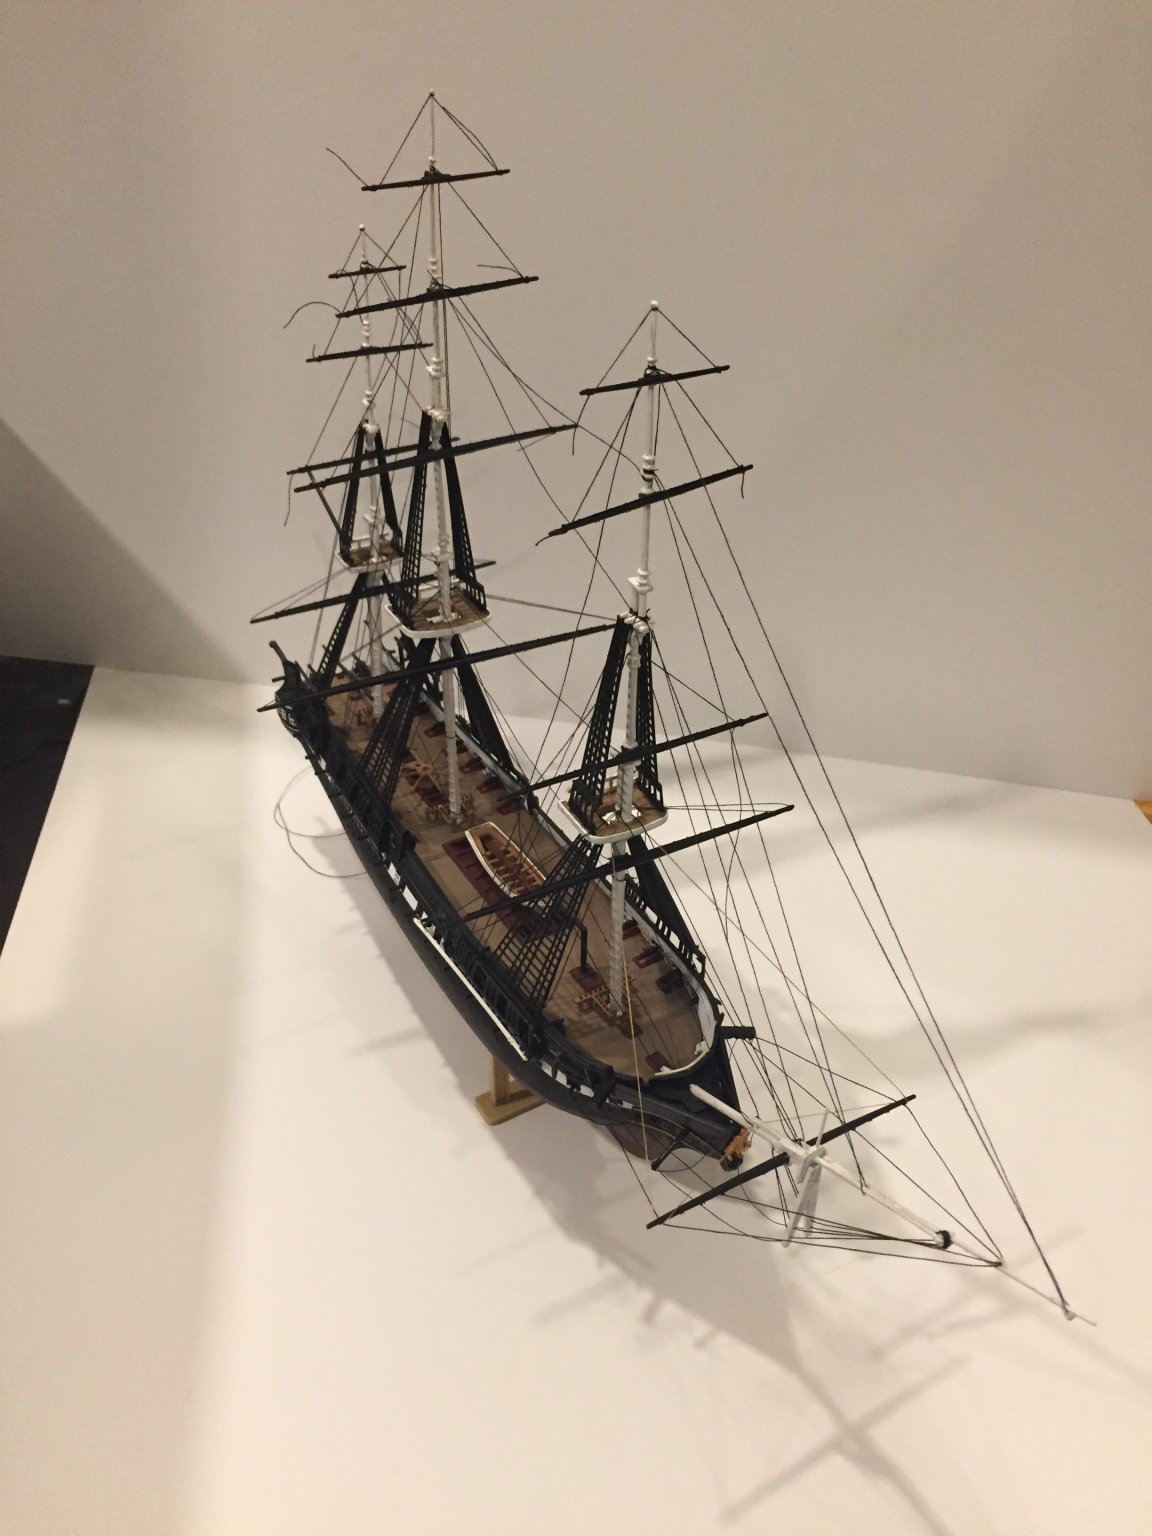
The standing rigging is complete!

- SigEp Ziggy, GrandpaPhil, ccoyle and 1 other
-
4
-
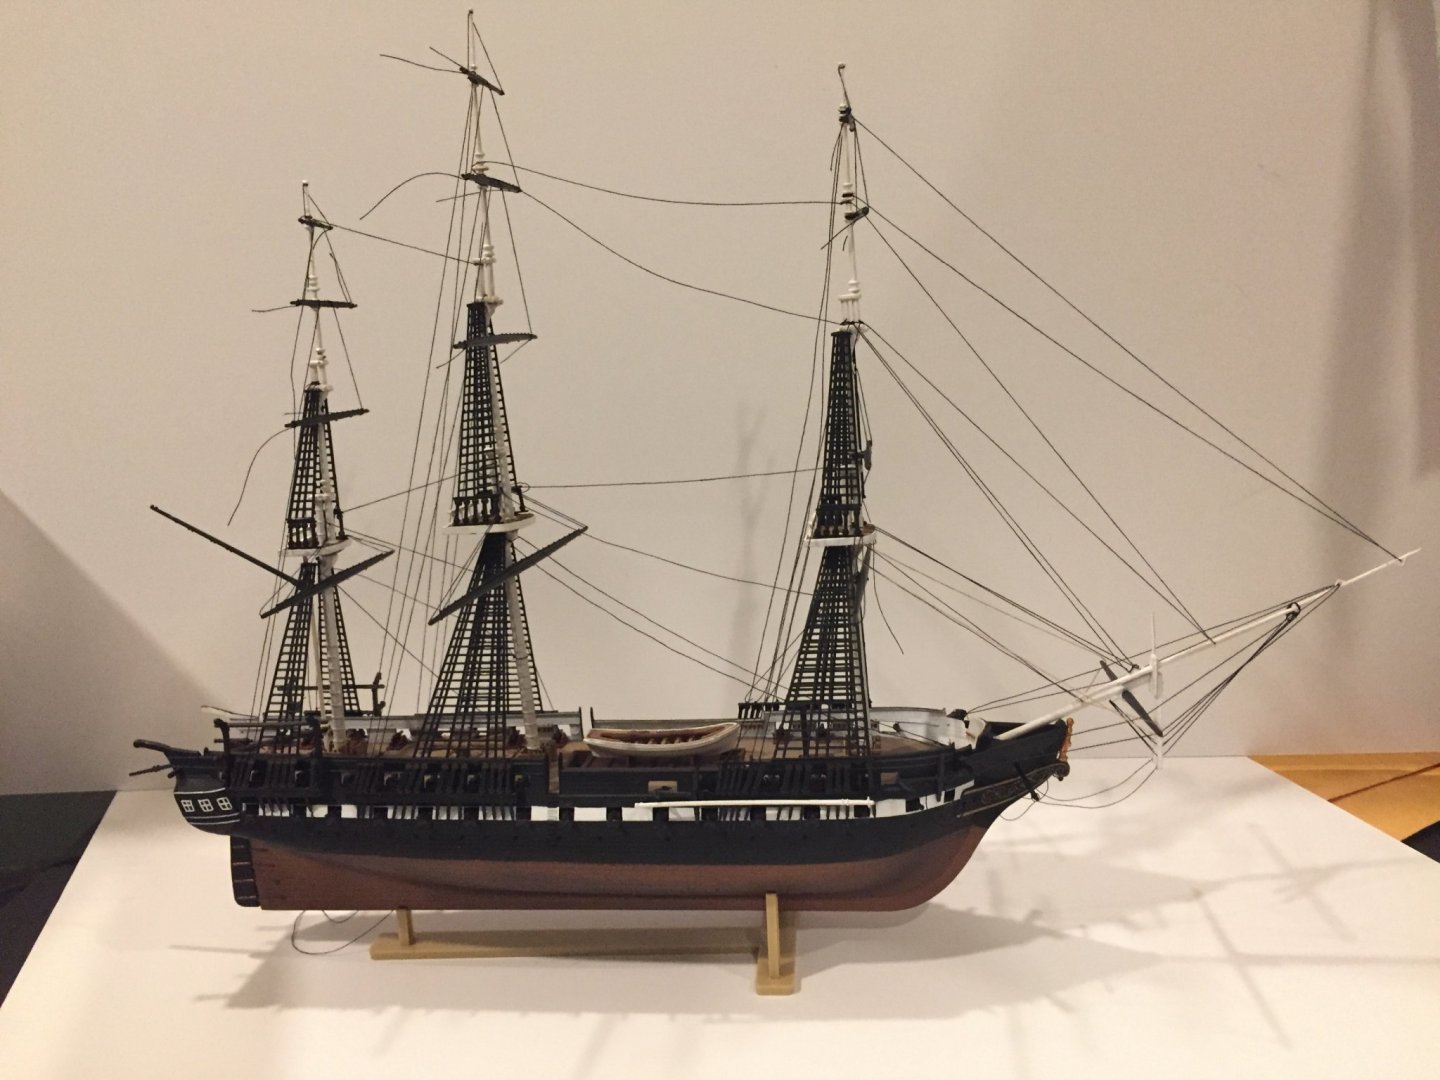
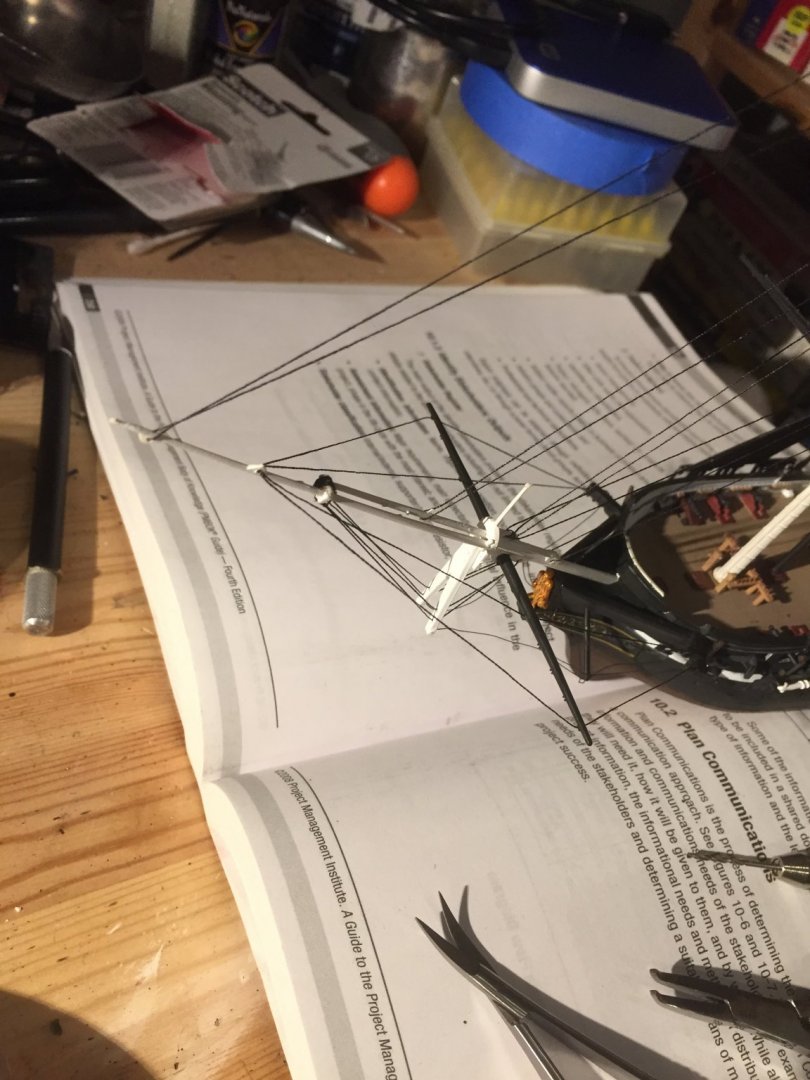
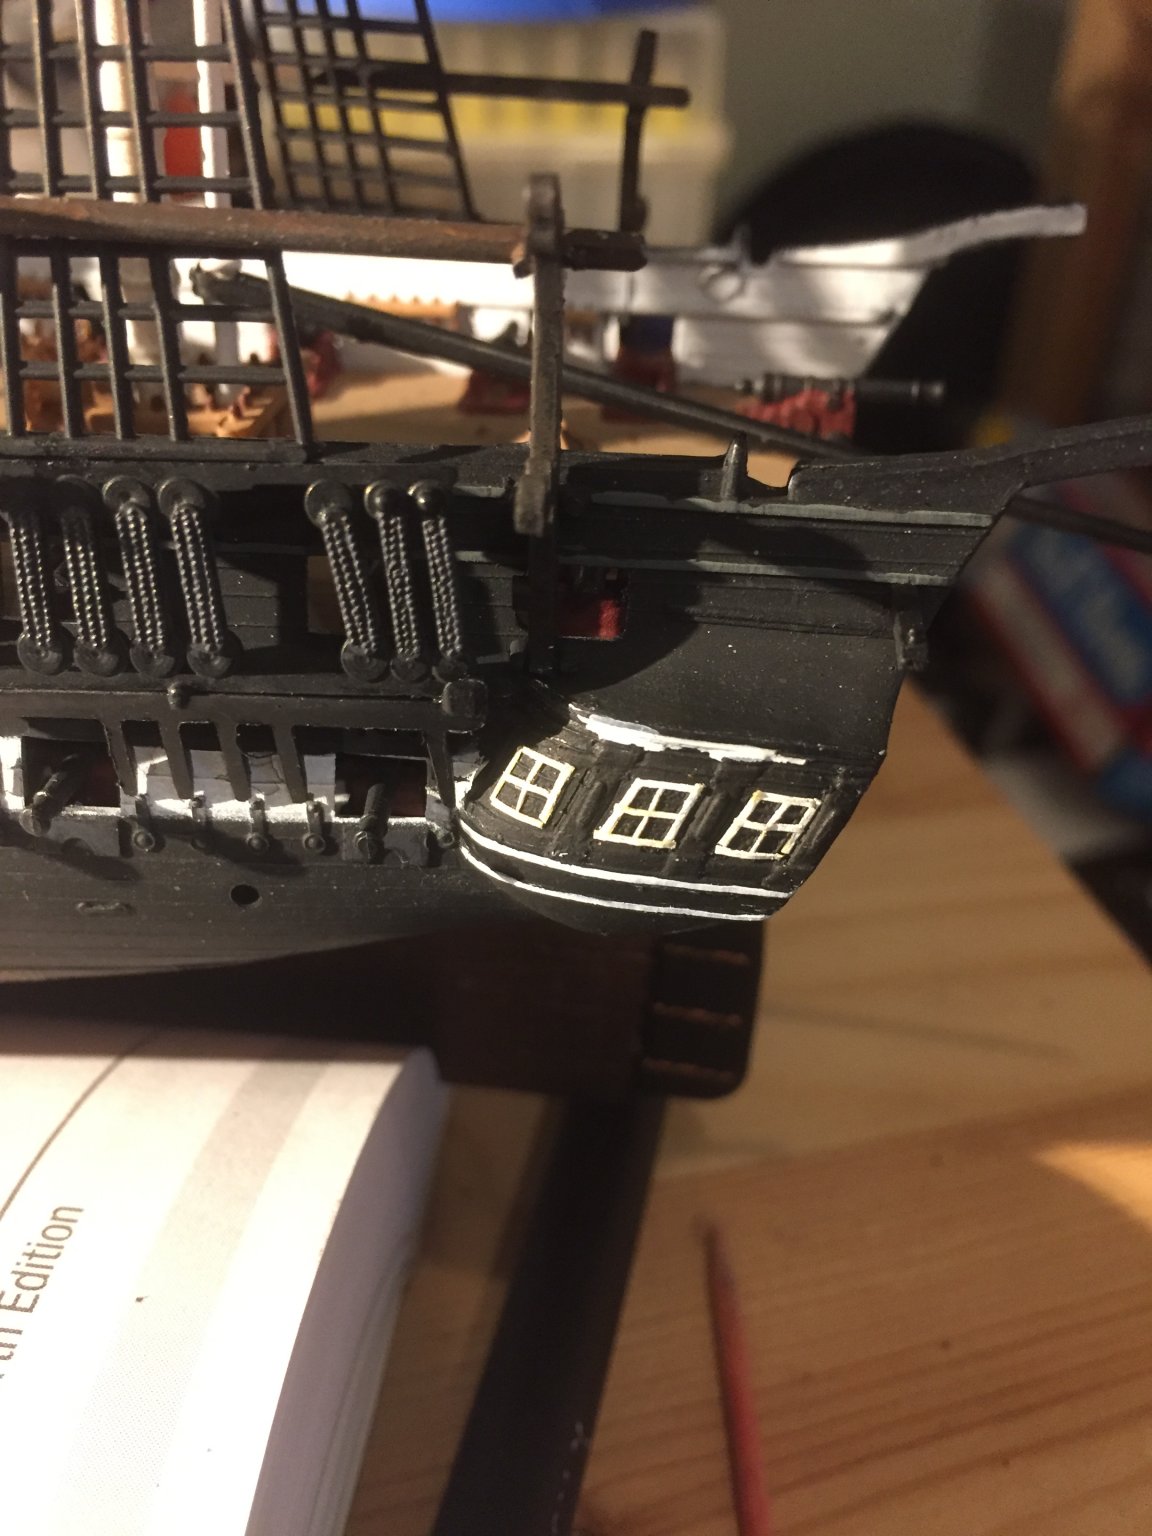
I did suffer a few set backs. Two steps forward and one step back...
-
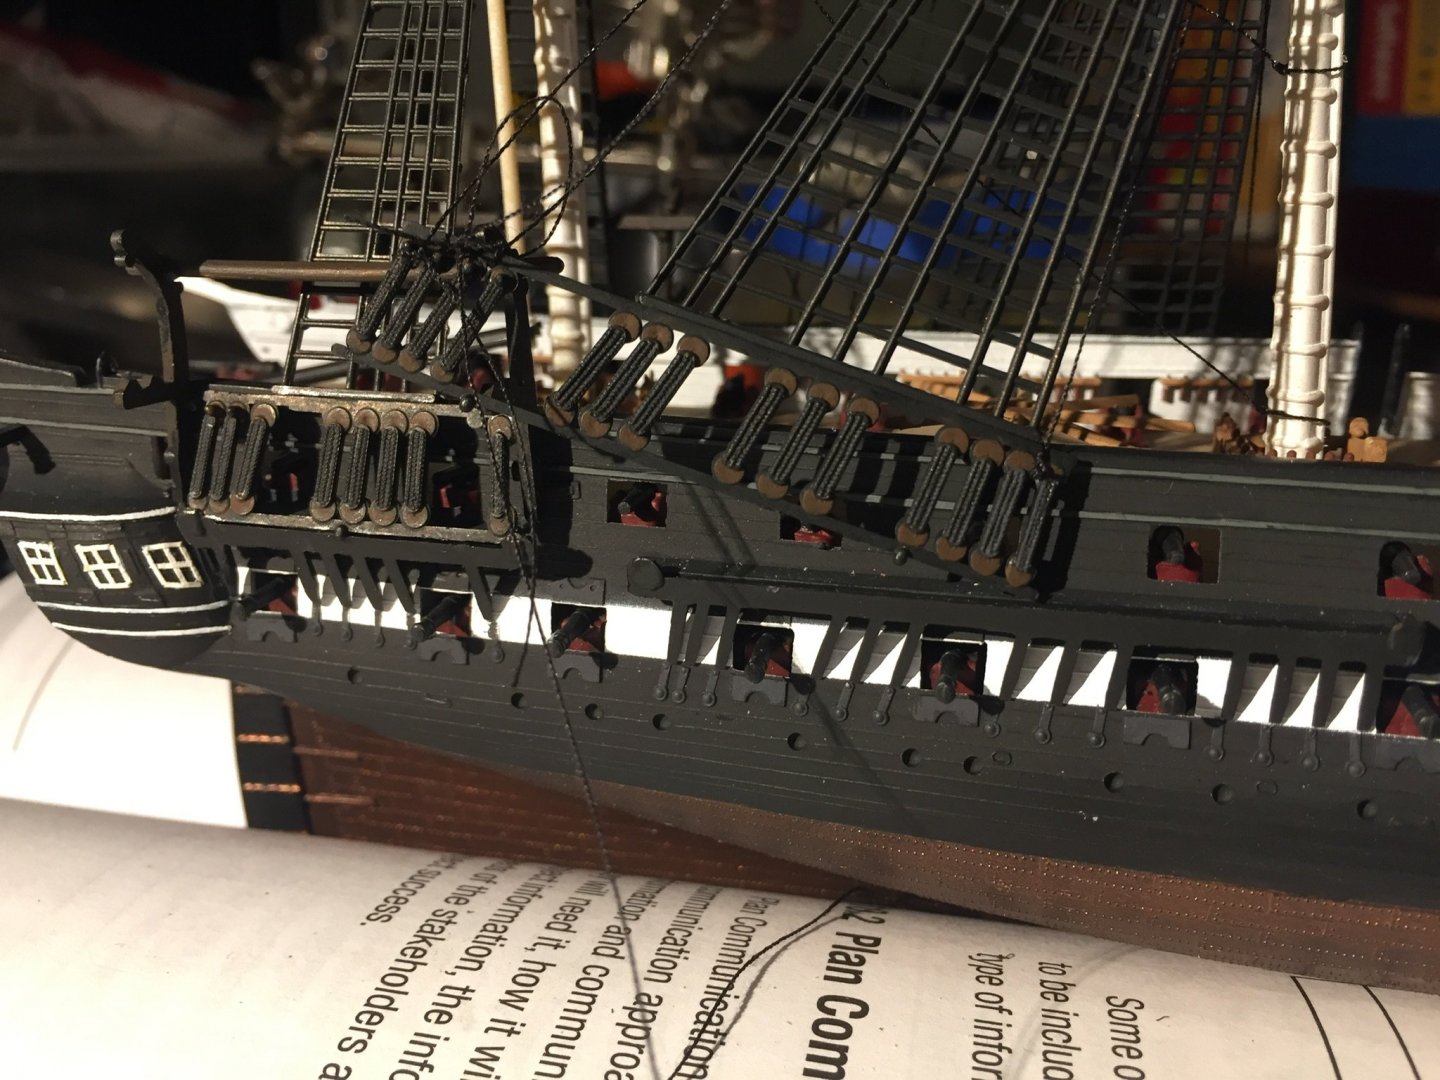
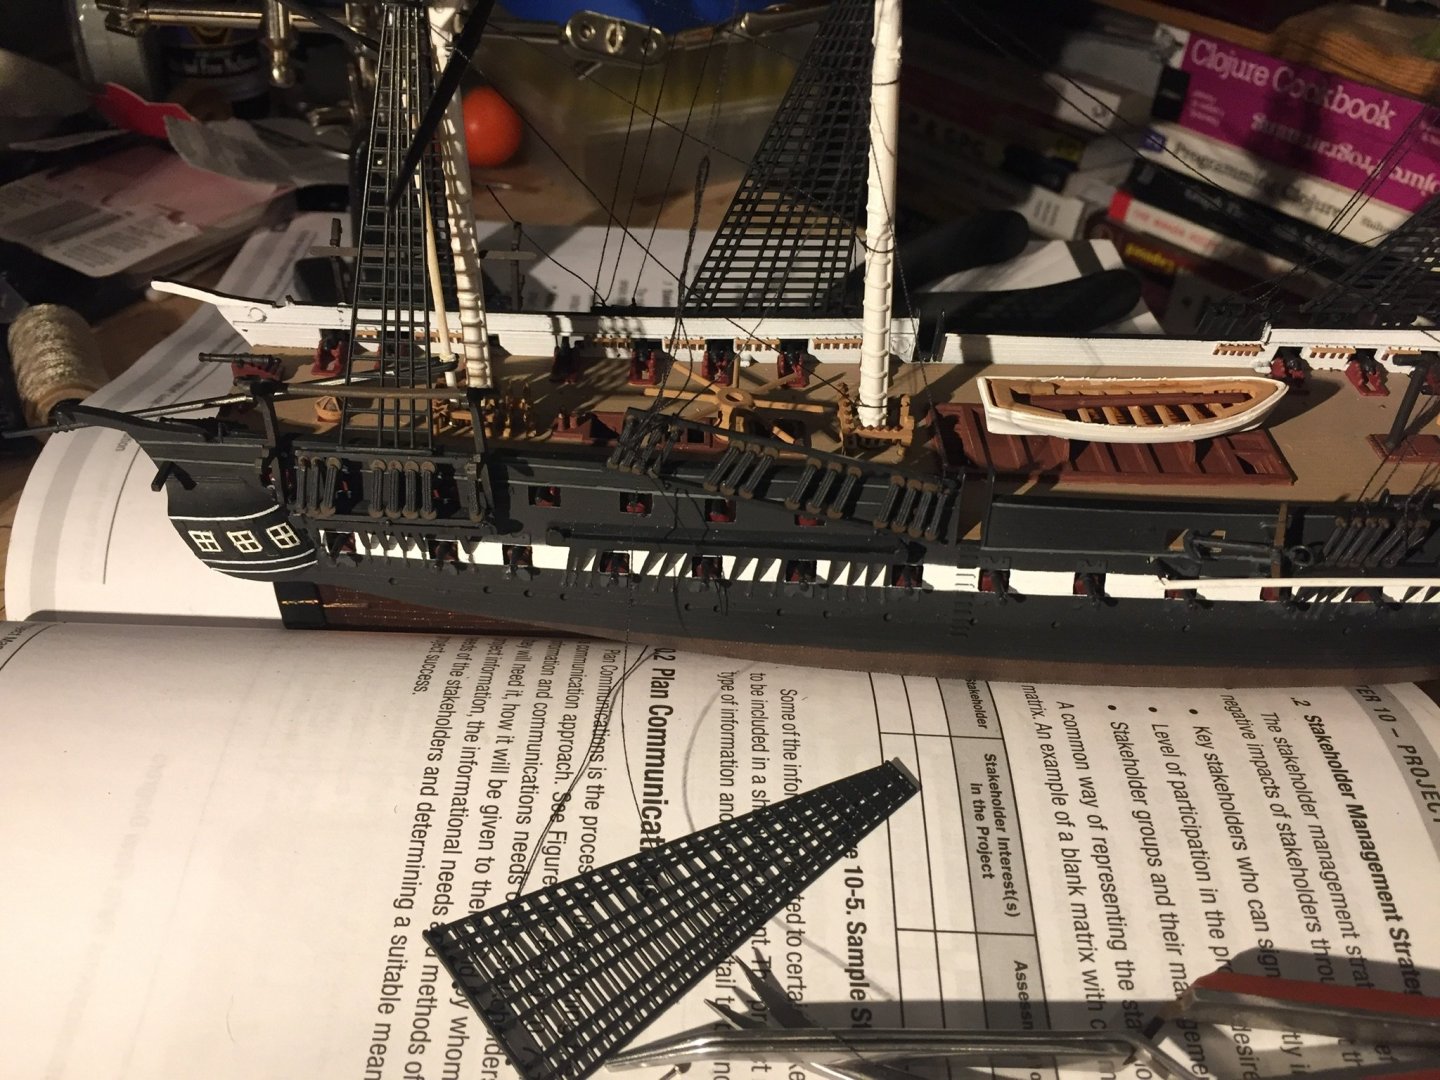
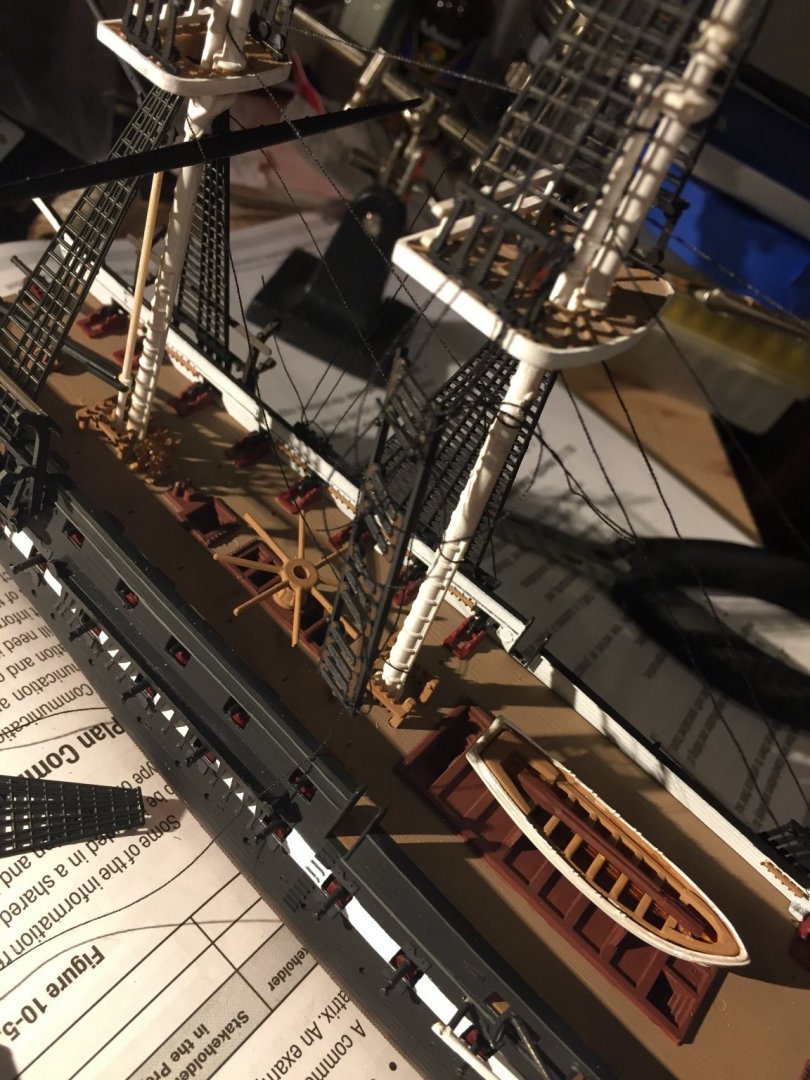
A couple thoughts about the kit for those who might work on this kit:
1) secure the guns on the lower deck - I left the transom off, to put guns in back in.
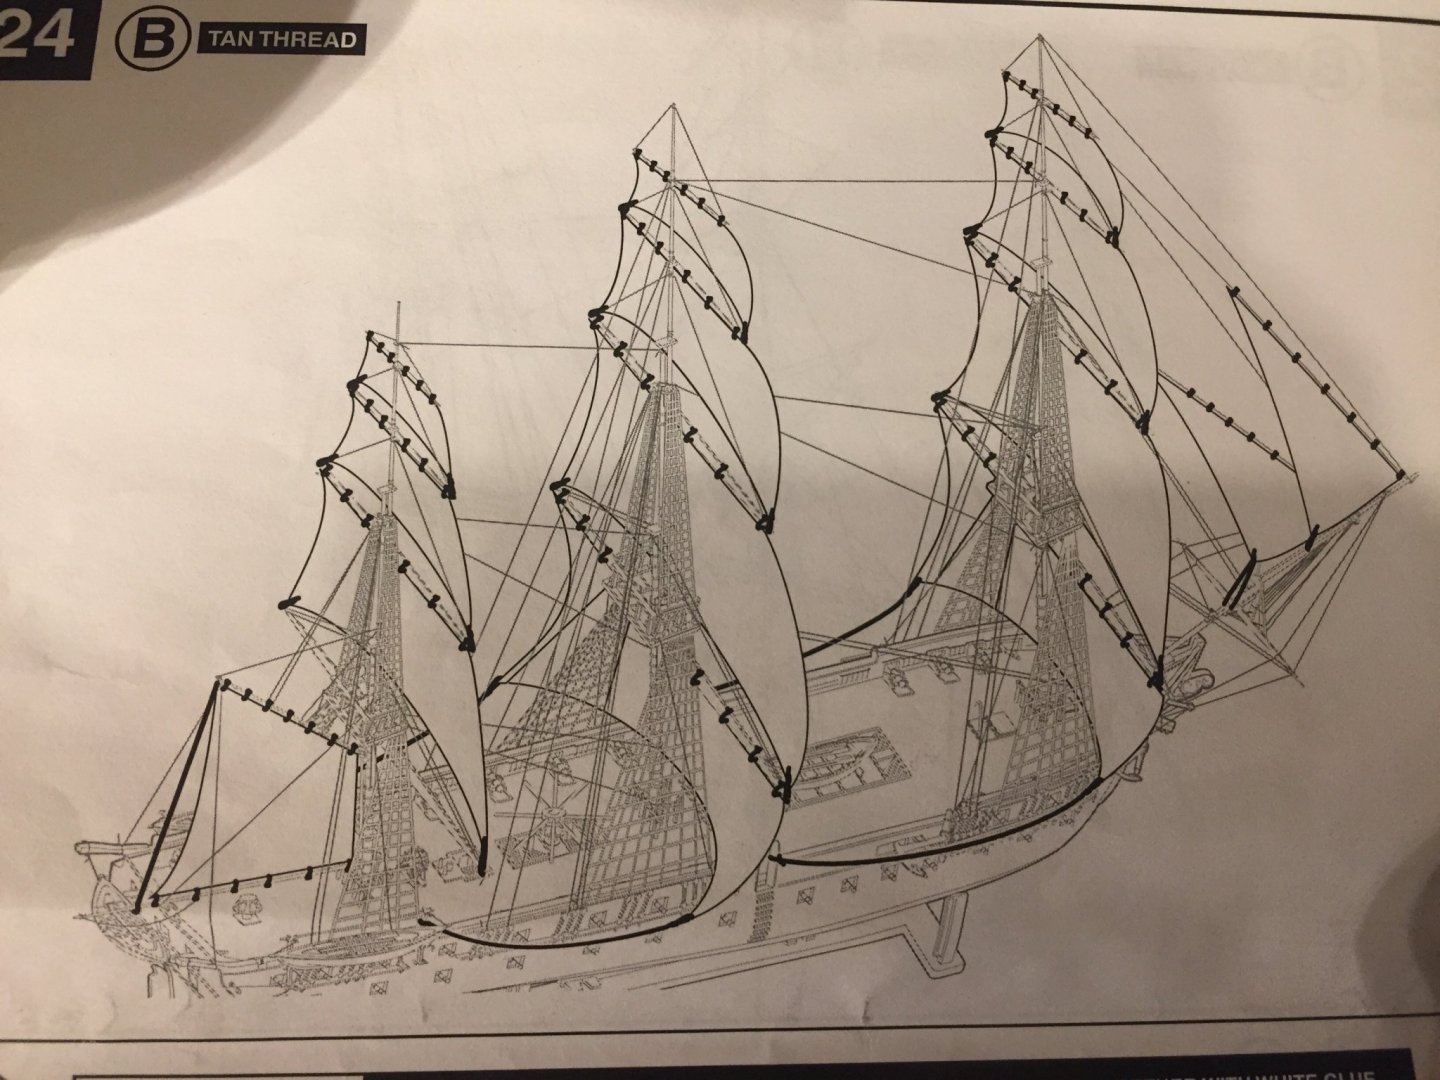
2) the pieces labeled deadeyes and channels (parts 75 and 76 for example) have pins which are about as big as the ejector flash; it is easy to clip off the wrong bit. The channels/ deadeyes assembles need to stand proud of the hull otherwise knots can’t be tied later the assembly. It is a bit counter-intuitive since this is a bit finicky and flimsy. They only attach at the bottom and via the pins. The need to be fairly secure since the rigging will tied to them to the top of them.
3) the ratlines need to be aligned with the deadeyes. The ratlines are slightly problematic. Look at the instructions regarding the riggings starting at step 19 to see how the alignment of the ratlines and deadeyes interact with rigging. There is a lot flash and two little tabs at the bottom of ratlines. The tabs align the ratlines on the deadeyes- the whole setup is very flimsy and easy to pop apart.
4) I found the thread in the box hard to work with and suggest replacing it with any other thread!
5) the yards don’t need to be attached until step 21 instead step 10 as in the instructions. The are easy to pop off in handling the model when rigging.
6) the top of the ratlines don’t align well with the masts. But they don’t have to as long as the bottoms are secure.
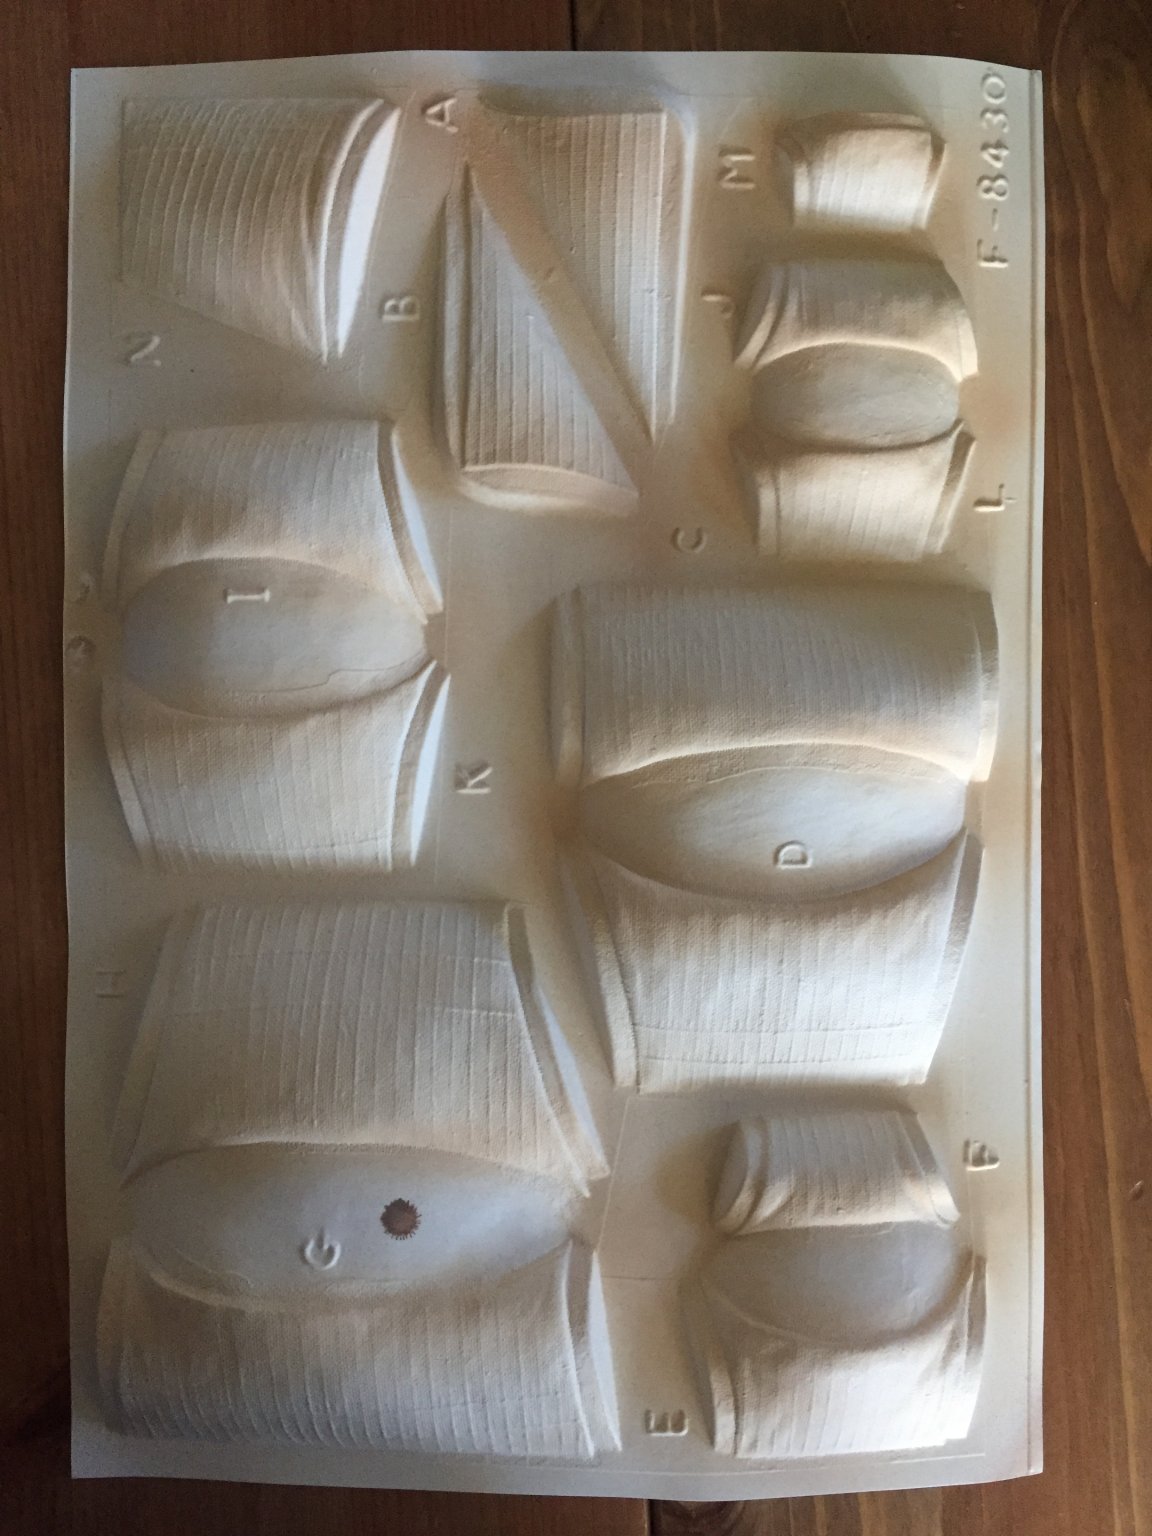
7) the box top image does not match the model, nor do the photographs on the box match the instructions’ paint scheme or rigging.
8 ) there is rigging illustrated in the instructions that is not described, just shows up in the background of other steps, suggesting a missing step or two.
9) the simple rigging instructions is the only place where the sails are identified by part number (or letter, in this case); this may be a bit of surprise when you get to the installation of the sails in the advanced instructions and there is simply one image of all the sails attached!
-
https://www.thenrg.org/modeling-clubs.php list a few clubs in the UK (at the bottom) and https://www.ukmodelshops.co.uk/clubs/A/General lists some others. A phone call to https://www.dockyard-model-shop.co.uk might be the fastest way to track down a lead. Good luck with your hunt. My heart goes out to you; dementia is a tough.
-
The entire http://mswshipkits.ampitcher.com/KitDetails.html?kit=10252 is missing an image. Who should I contact?
-
19 hours ago, wefalck said:
Unfortunately, the path is not so straight.
The real world tends to intrude rudely. I'm merely following along and I'm not in a rush - this is your leisure time! Again, thanks for sharing!
Regarding your machine tools, I love there is a domain in machining/metal work where no one complains about the small size of their equipment.
I believe you mentioned being drawn to the challenge of small-scale modelling (and the ease of storage/display).
I'm curious: what drew you to machining in such a small scale? Have you always worked at such small scale? -
Besides the beautiful and skilled work, I want to thank you for the clear descriptions and clear photos! It makes it a pleasure to follow your work. May all your attempts succeed on the first try!
- mtaylor and FriedClams
-
2
-
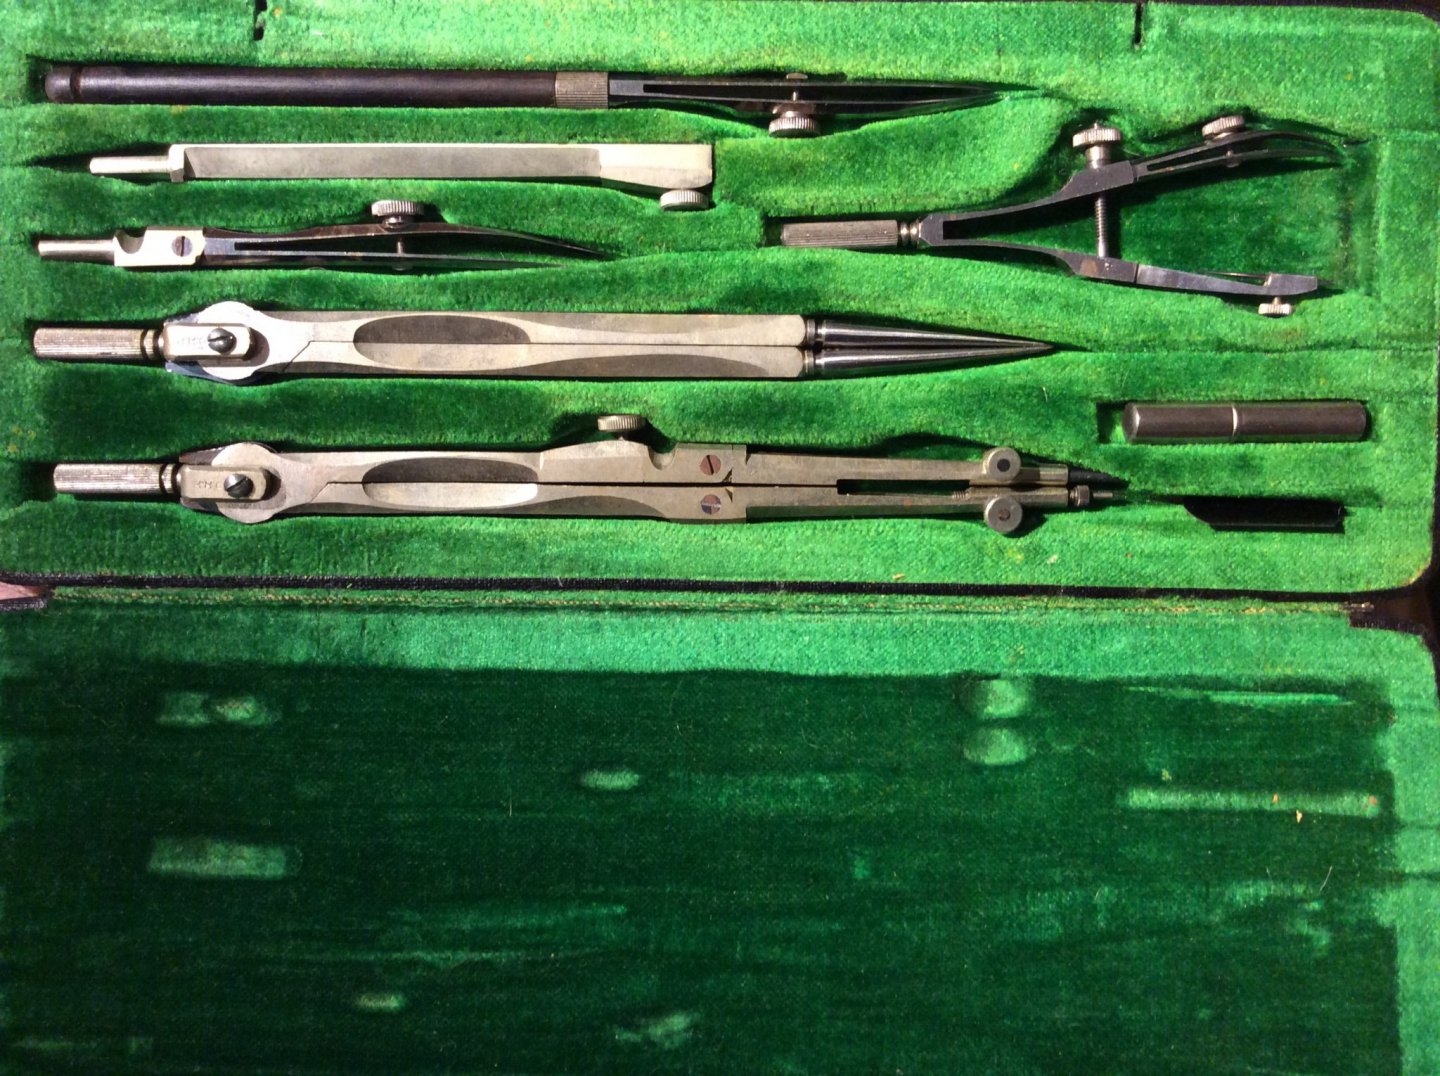
Bob, thanks for sharing! That is a window into a world I had never given much thought to (and have just spent several hours online wandering through parts of that world). The pen I used is from an old set my parents had.
There is such a wealth of technology that hidden or near lost, once a new technology comes along. I have a set of molding planes, which is what was used before routers came to wood working. They are more adaptable and safe enough that my little kids could make moldings for our porch rails, when I fixed our porch.
I noticed there here are some folks using these drafting tools on model trains as well. I had to just stop myself from looking at ever more items on eBay! I’m a sucker for beautifully made old things.
Thanks for widening my world!
-
-
To ccoyle’s original intent (as I understand it); I came across a quote from Ira Glass (NPR radio):
Nobody tells this to people who are beginners, and I really wish somebody had told this to me.
All of us who do creative work, we get into it because we have good taste. But it's like there is this gap. For the first couple years that you're making stuff, what you're making isn't so good. It’s not that great. It’s trying to be good, it has ambition to be good, but it’s not that good.
But your taste, the thing that got you into the game, is still killer. And your taste is good enough that you can tell that what you're making is kind of a disappointment to you. A lot of people never get past that phase. They quit.
Everybody I know who does interesting, creative work they went through years where they had really good taste and they could tell that what they were making wasn't as good as they wanted it to be. They knew it fell short. Everybody goes through that.
And if you are just starting out or if you are still in this phase, you gotta know its normal and the most important thing you can do is do a lot of work. Do a huge volume of work. Put yourself on a deadline so that every week or every month you know you're going to finish one story. It is only by going through a volume of work that you're going to catch up and close that gap. And the work you're making will be as good as your ambitions.
I took longer to figure out how to do this than anyone I’ve ever met. It takes awhile. It’s gonna take you a while. It’s normal to take a while. You just have to fight your way through that.
—Ira Glass
He is speaking of writers, but the same applies across many disciplines and, certainly, here, I believe. More detail can be found here: https://jamesclear.com/ira-glass-failure
- jeff watts, RichardG, GrandpaPhil and 6 others
-
9
-
On 11/17/2019 at 12:55 PM, VTHokiEE said:
What wood kits were you gifted?
Kits gifted in the last century:
Billings - Oseberg Viking ship (model 518 from the ‘90s),
Authentic Model - Opium Smuggler (also from the ‘90s),
And I was gifted or found at garage sales, this century:
Mantua Models - Black Falcon (‘Brigantino Cosario del 18” Secolo’, from the 70s?),
Heller - Le Glorieux (plastic, missing the sails, age unknown),
Heller - HMS Victory (plastic, missing sails and slightly started by the previous owner, age unknown),
Constructo - Union (the newest of collection - purchased ten years ago),
Sterling - Sovereign of the Sea (clipper, a kit from the ‘70s?)
So you can see I love the idea of ships models but I have been unsure how to jump in for a while.
My set of models is very light on instructions and techniques. I received the Viking ship first and couldn’t for the life of me understand how the planking in the box was supposed to match the picture the planking on the box! Every couple of years I would bump into the box in the attic and open it and wonder!
So you can see why I’m just delighted to find this community!!
- GrandpaPhil and mtaylor
-
2
-
Folks may also be interested to know about resources behind the website mtaylor suggested: https://www.animatedknots.com/references.
It lists two:
- The Ashley Book of Knots
by Clifford W. Ashley was published in 1944 by Doubleday (New York), and
- Bushby’s Manuscripts - Between 1902 and 1926 Henry North Grant Bushby created “Notes on Knots” – seven manuscript volumes plus an index volume. These are now available on-line thanks to the Mariner’s Museum.
-
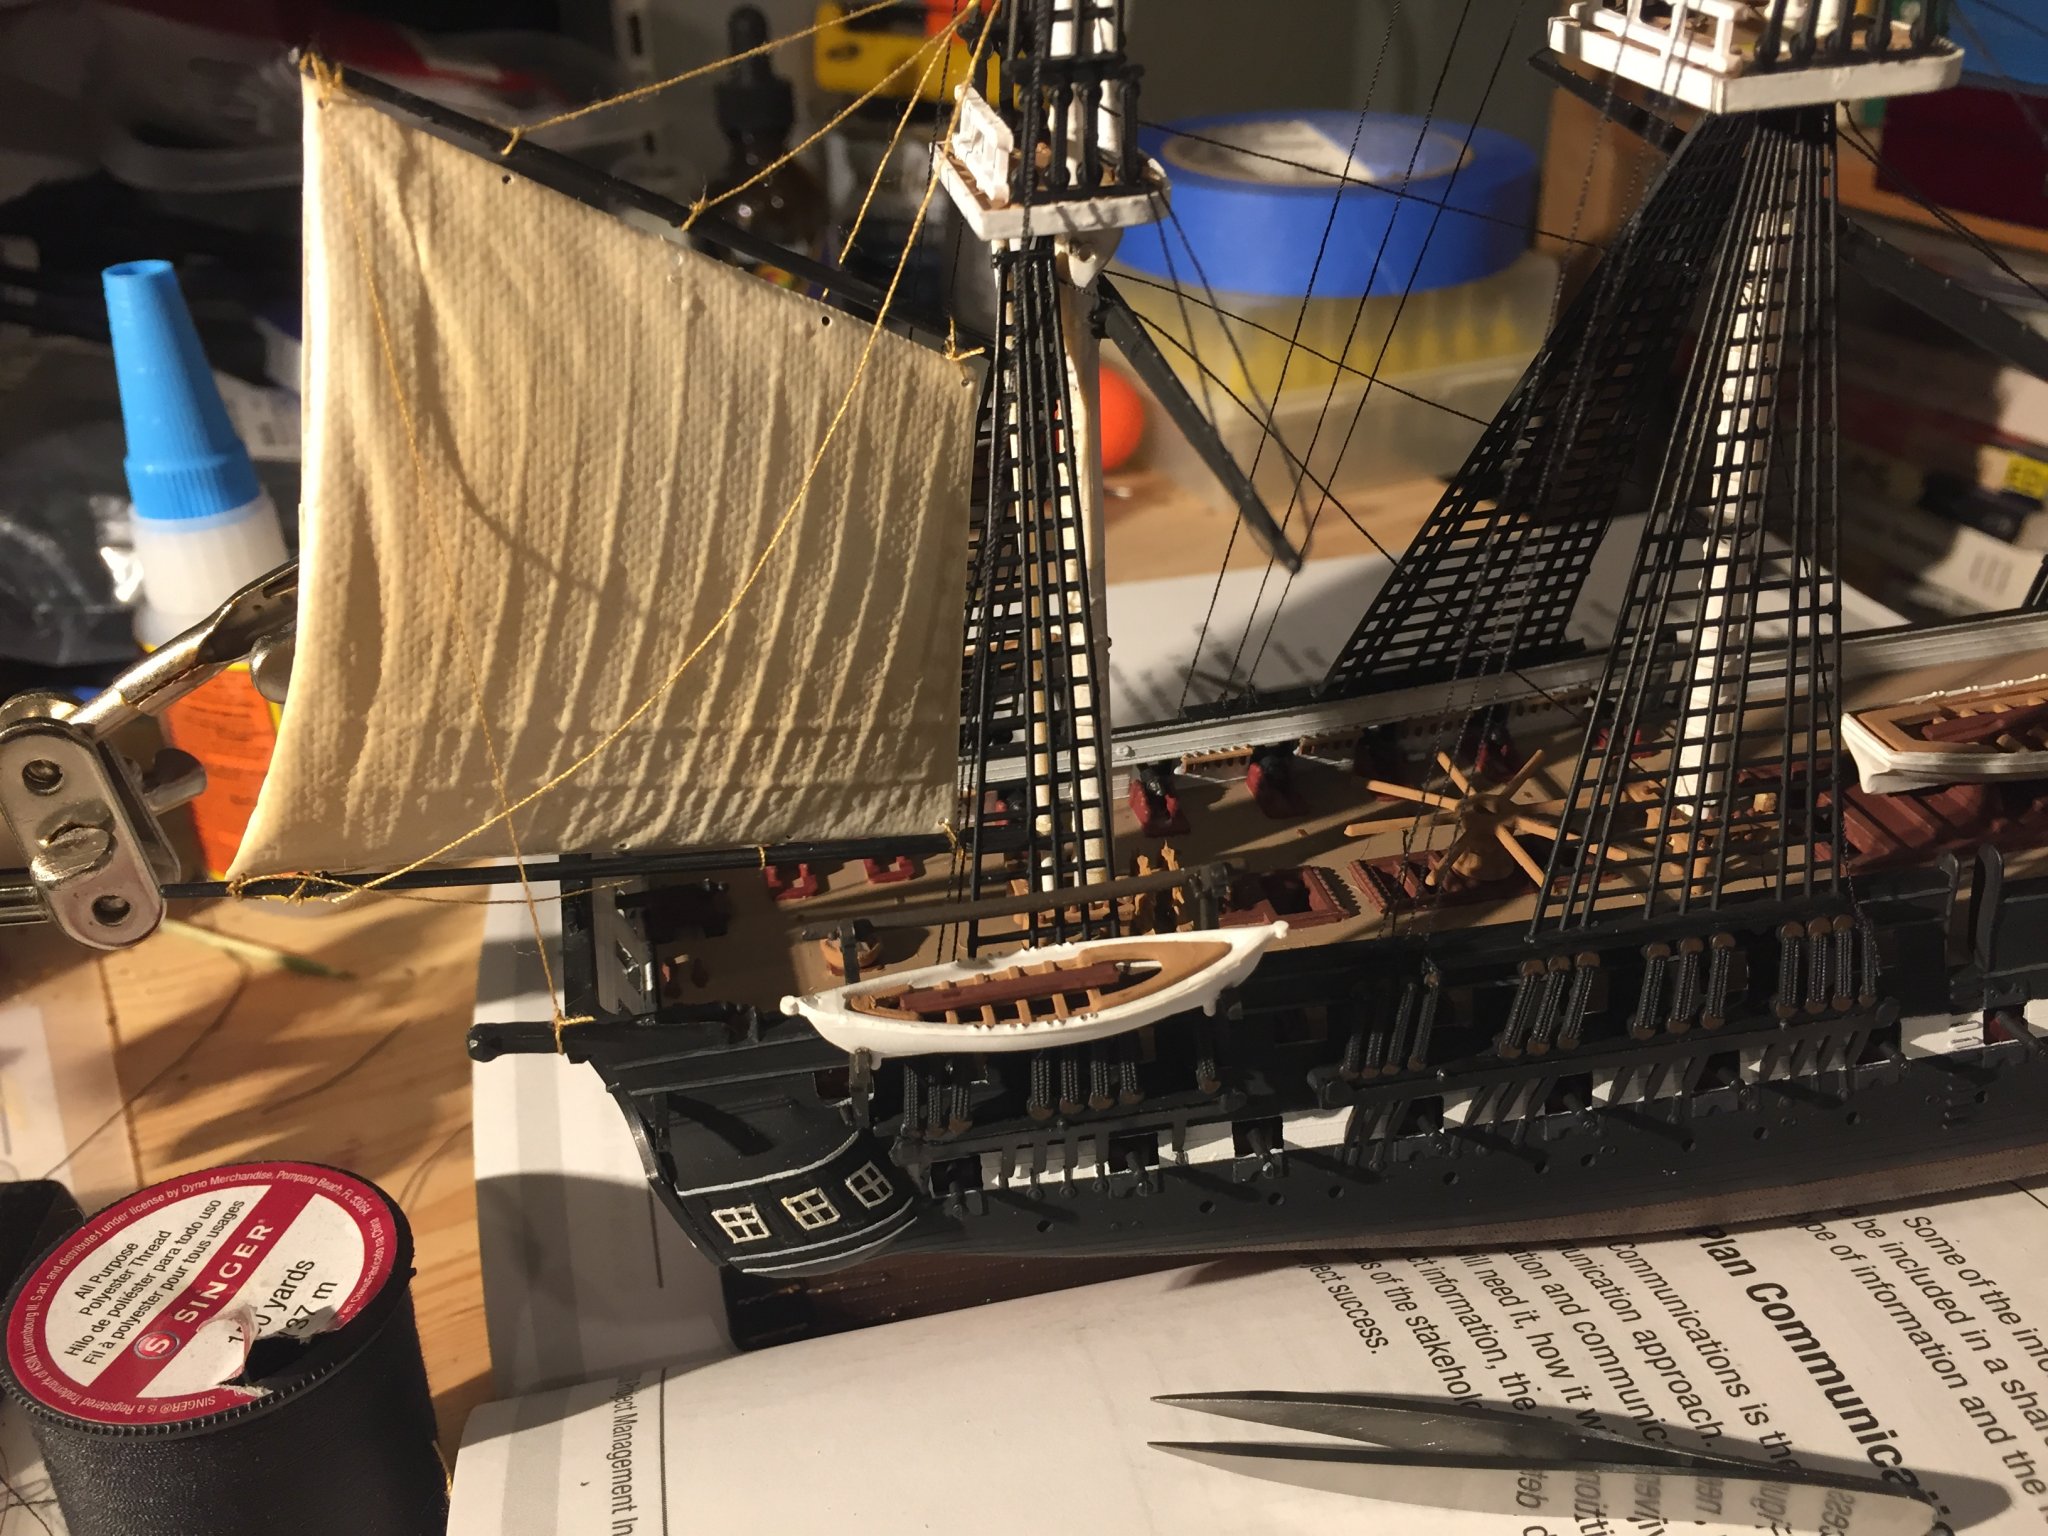
After a bit of experimenting and suffering, I ditched the kit’s very slippery string for some regular polyester black thread. The string provided with the kit would untie itself if the masts were slightly nudged, even if glued. Bleck!
The regular thread is also less ‘fiddlely’ and less hard to work with. So I was able I was able to get more done than I expected in my last session - always a pleasant surprise.

- GrandpaPhil, J11, Edwardkenway and 2 others
-
5
-
After bit of experimenting, it turns out the string provided by the kit is unusually slick and that was the chief difficultly. I tried rosin and wax, and I tried white glue and super glue and still the knots would come a part. Yick.
i switched to regular polyester thread, and my progress was much swifter! While bracingly grueling, the previously difficulties probably probably helped develop my fledgling skills. Oddly enough, the regular thread is less ‘fiddlely’ when trying to manipulate it and easier to maintain the tension I wish. So the new thread is markedly faster to work with!
I also discovered the doctor’s knot (https://en.m.wikipedia.org/wiki/Surgeon's_knot) as a side-effect of following Bob Cleek’s suggestion about examining surgical knots. It makes for a slightly larger knot but it hold it’s tension better when compared to a ‘regular’ overhand knot.
Again my thanks to everyone for their help and advice!


- mtaylor, Moab and Duanelaker
-
3
-
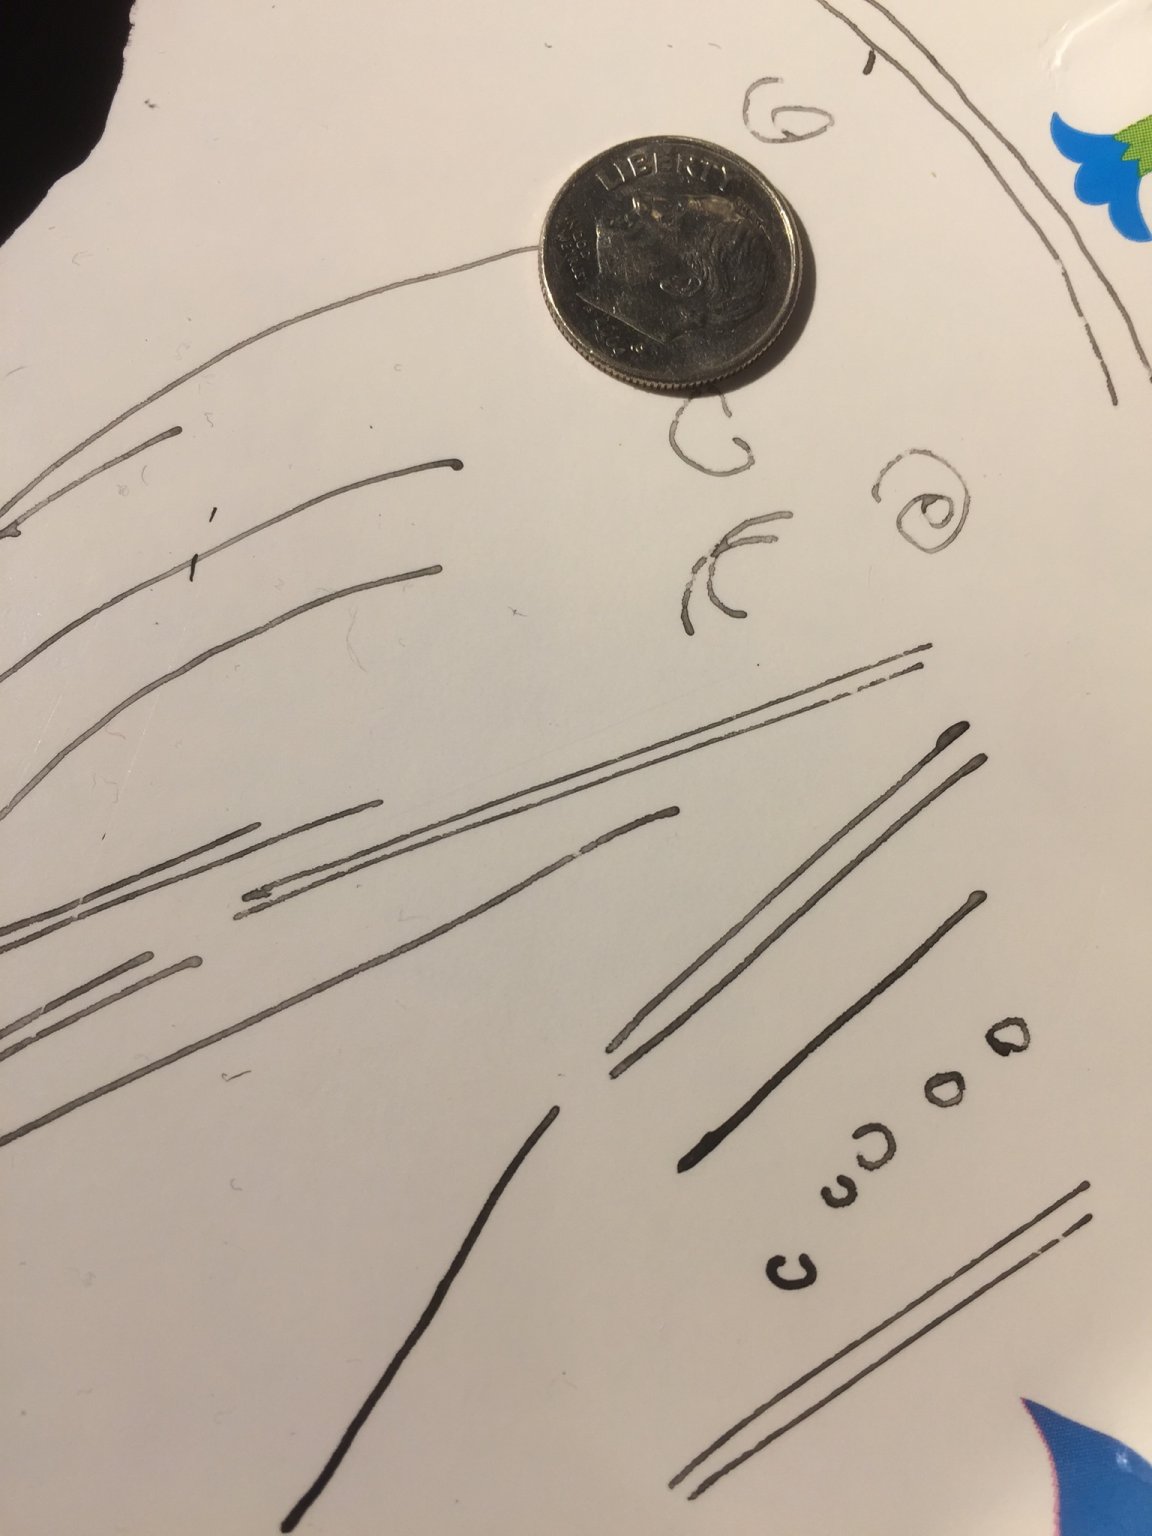
As per druxey’s suggestion, I found a bow pen and gave it a shot. After a bit of prep, I experimented with the pen. It gives beautiful straight lens with almost no effort on a flat surface.
I played with the thickness of the paint (again as per druxey’s suggestion). I tried the thickest paint that would flow from the pen that would flow on a paper plate (being my rather fancy paint pallet) and then on the model. It bled horribly.
So my take away is back to Chuck’s comment about surface prep and, for.me, practice. There is great potential in the bow pen.


- thibaultron, Canute, paulsutcliffe and 2 others
-
5
-
On 9/13/2019 at 5:10 PM, Jaager said:
Model Building with Brass Hardcover – March 27, 2012
by Kenneth C. ForanOn 9/13/2019 at 5:52 PM, kurtvd19 said:Ken Foran's Model Building with Brass - I learned a lot from it that I never heard or saw elsewhere
Ken Foran is a member here! https://modelshipworld.com/profile/18498-xken/


USS Constitution by EricWilliamMarshall - FINISHED - Revell - 1:196 - PLASTIC
in - Kit build logs for subjects built from 1751 - 1800
Posted
I’m calling it done! It was was finished but it fell while trying photograph (ouch) and when I’m back to the ‘workshop’, I’ll fix the damage and create a better base. Again my thanks to everyone who stopped by and peeked in or shared sometime and wisdom. The next stop will be something wooden but small and simple.