realworkingsailor
-
Posts
3,271 -
Joined
-
Last visited
Content Type
Profiles
Forums
Gallery
Events
Everything posted by realworkingsailor
-
 That largely depends on a couple of factors. I know I have some fine mesh screening I purchased a few years ago, if I can find wherever it was I put it (a very safe place I can only assume). Otherwise it will come down to material thicknesses. The scribed siding is only available in 0.030” thickness (at this scale), so if, in conjunction with the mesh, the thickness of the insert is too much for the clerestory, the mesh might have to be omitted. Bethlehem Car Works does supply PE screens for clerestory vents, but ordering from them is a bit iffy (not unreliable, as far as I know, but they don’t have an actual online storefront). Andy
 -
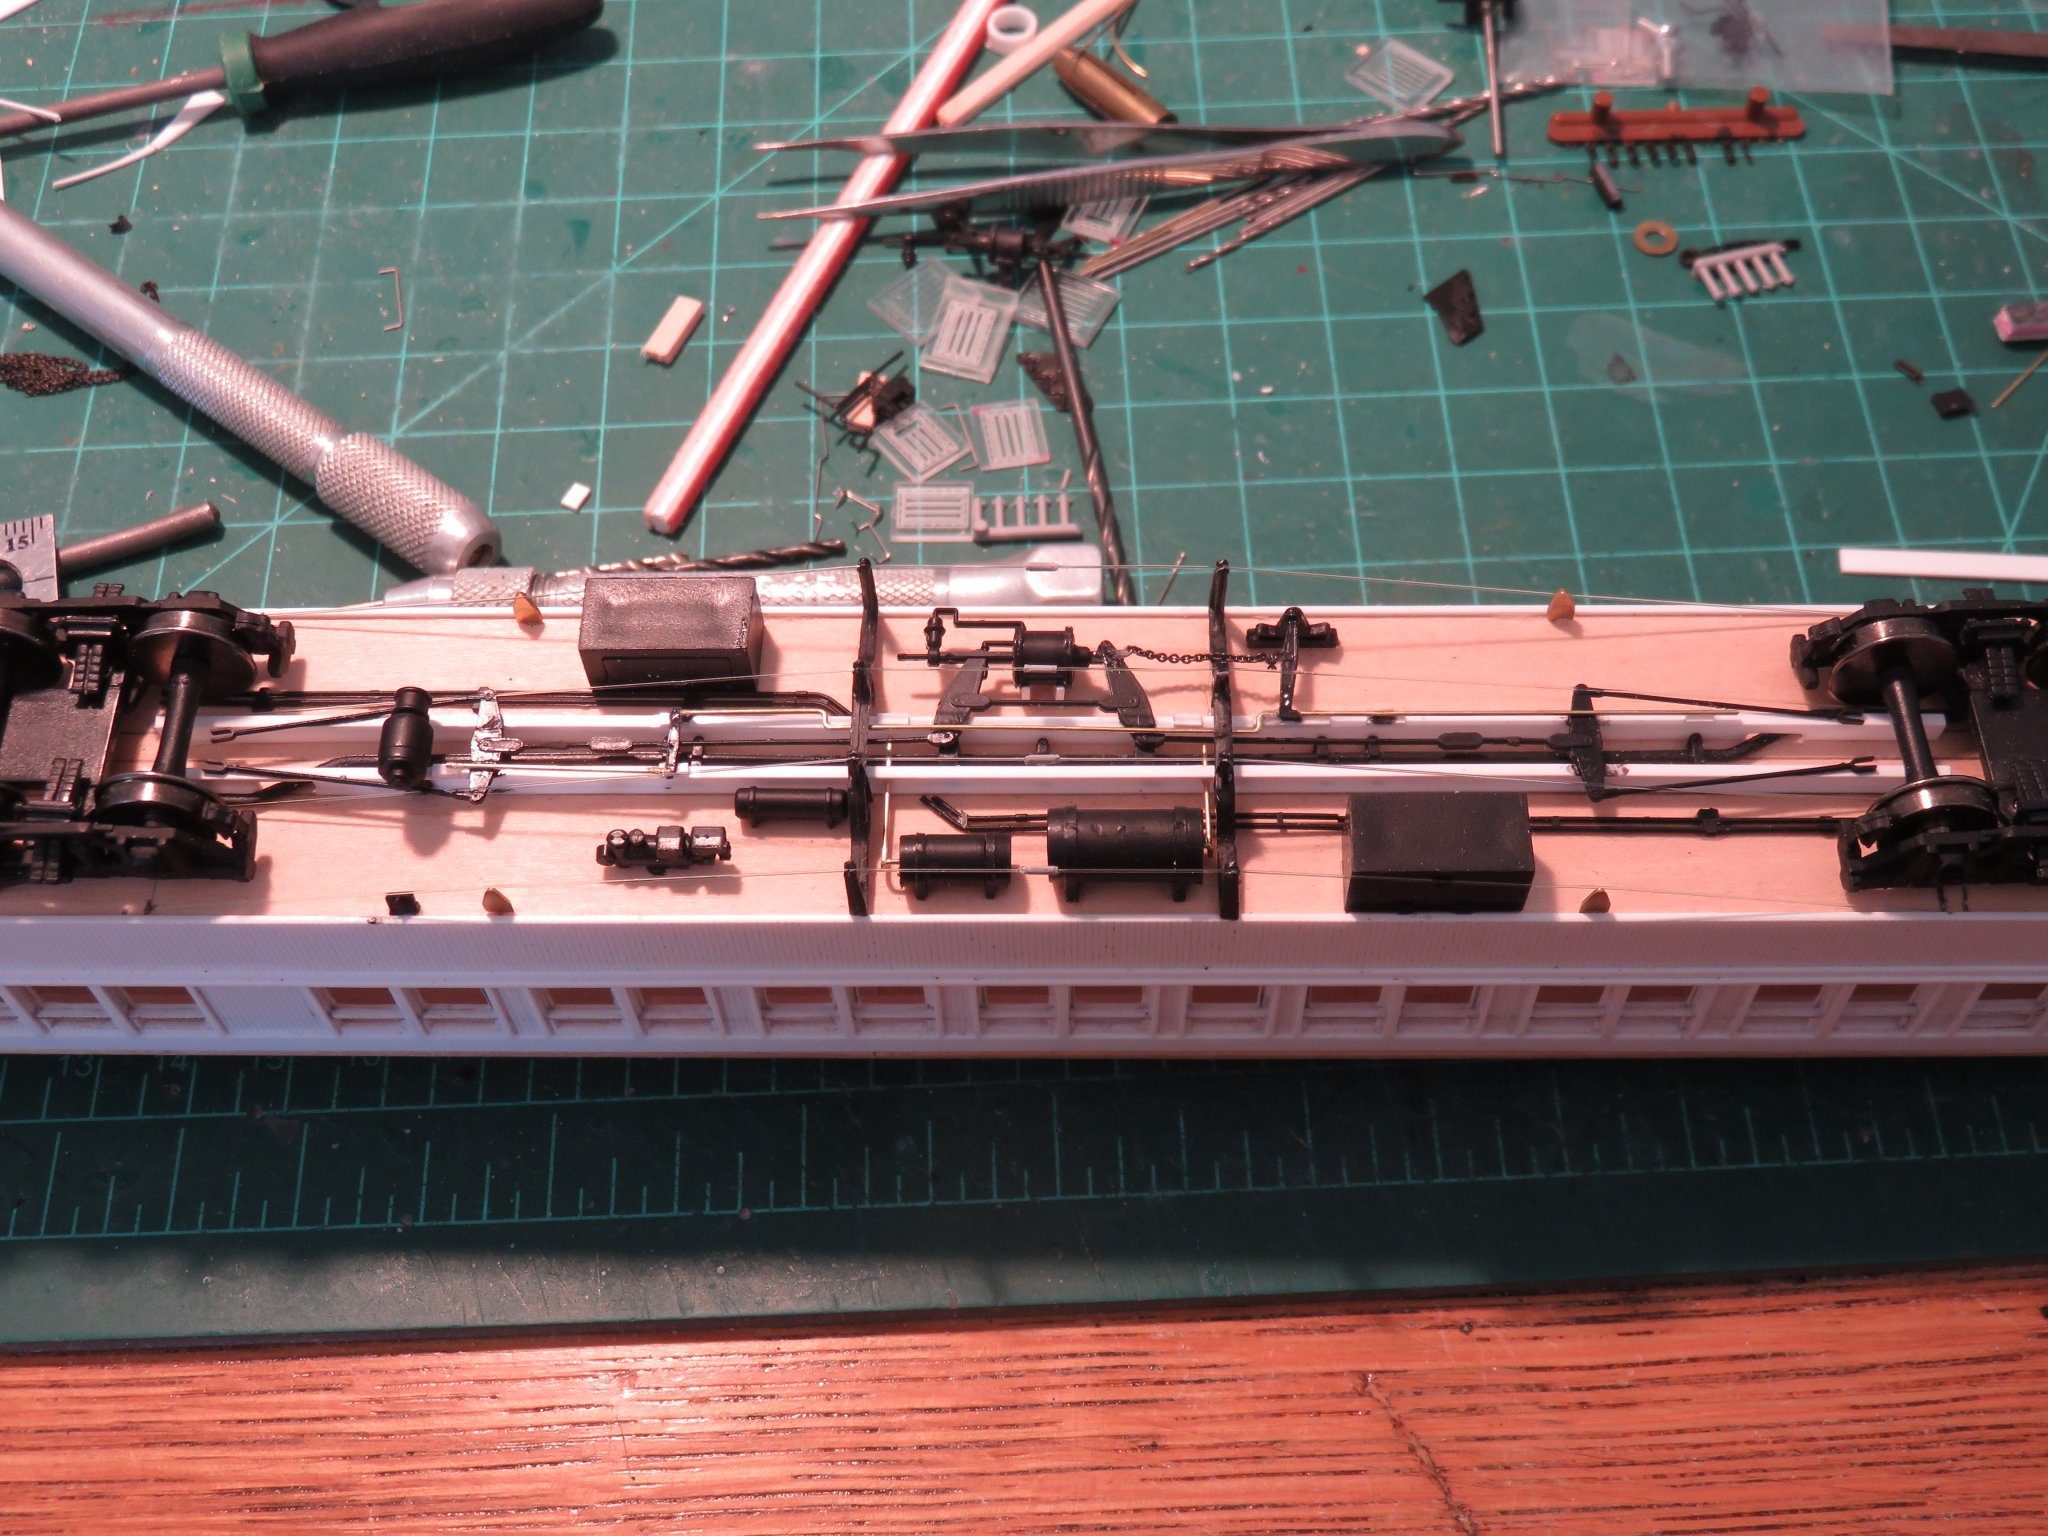
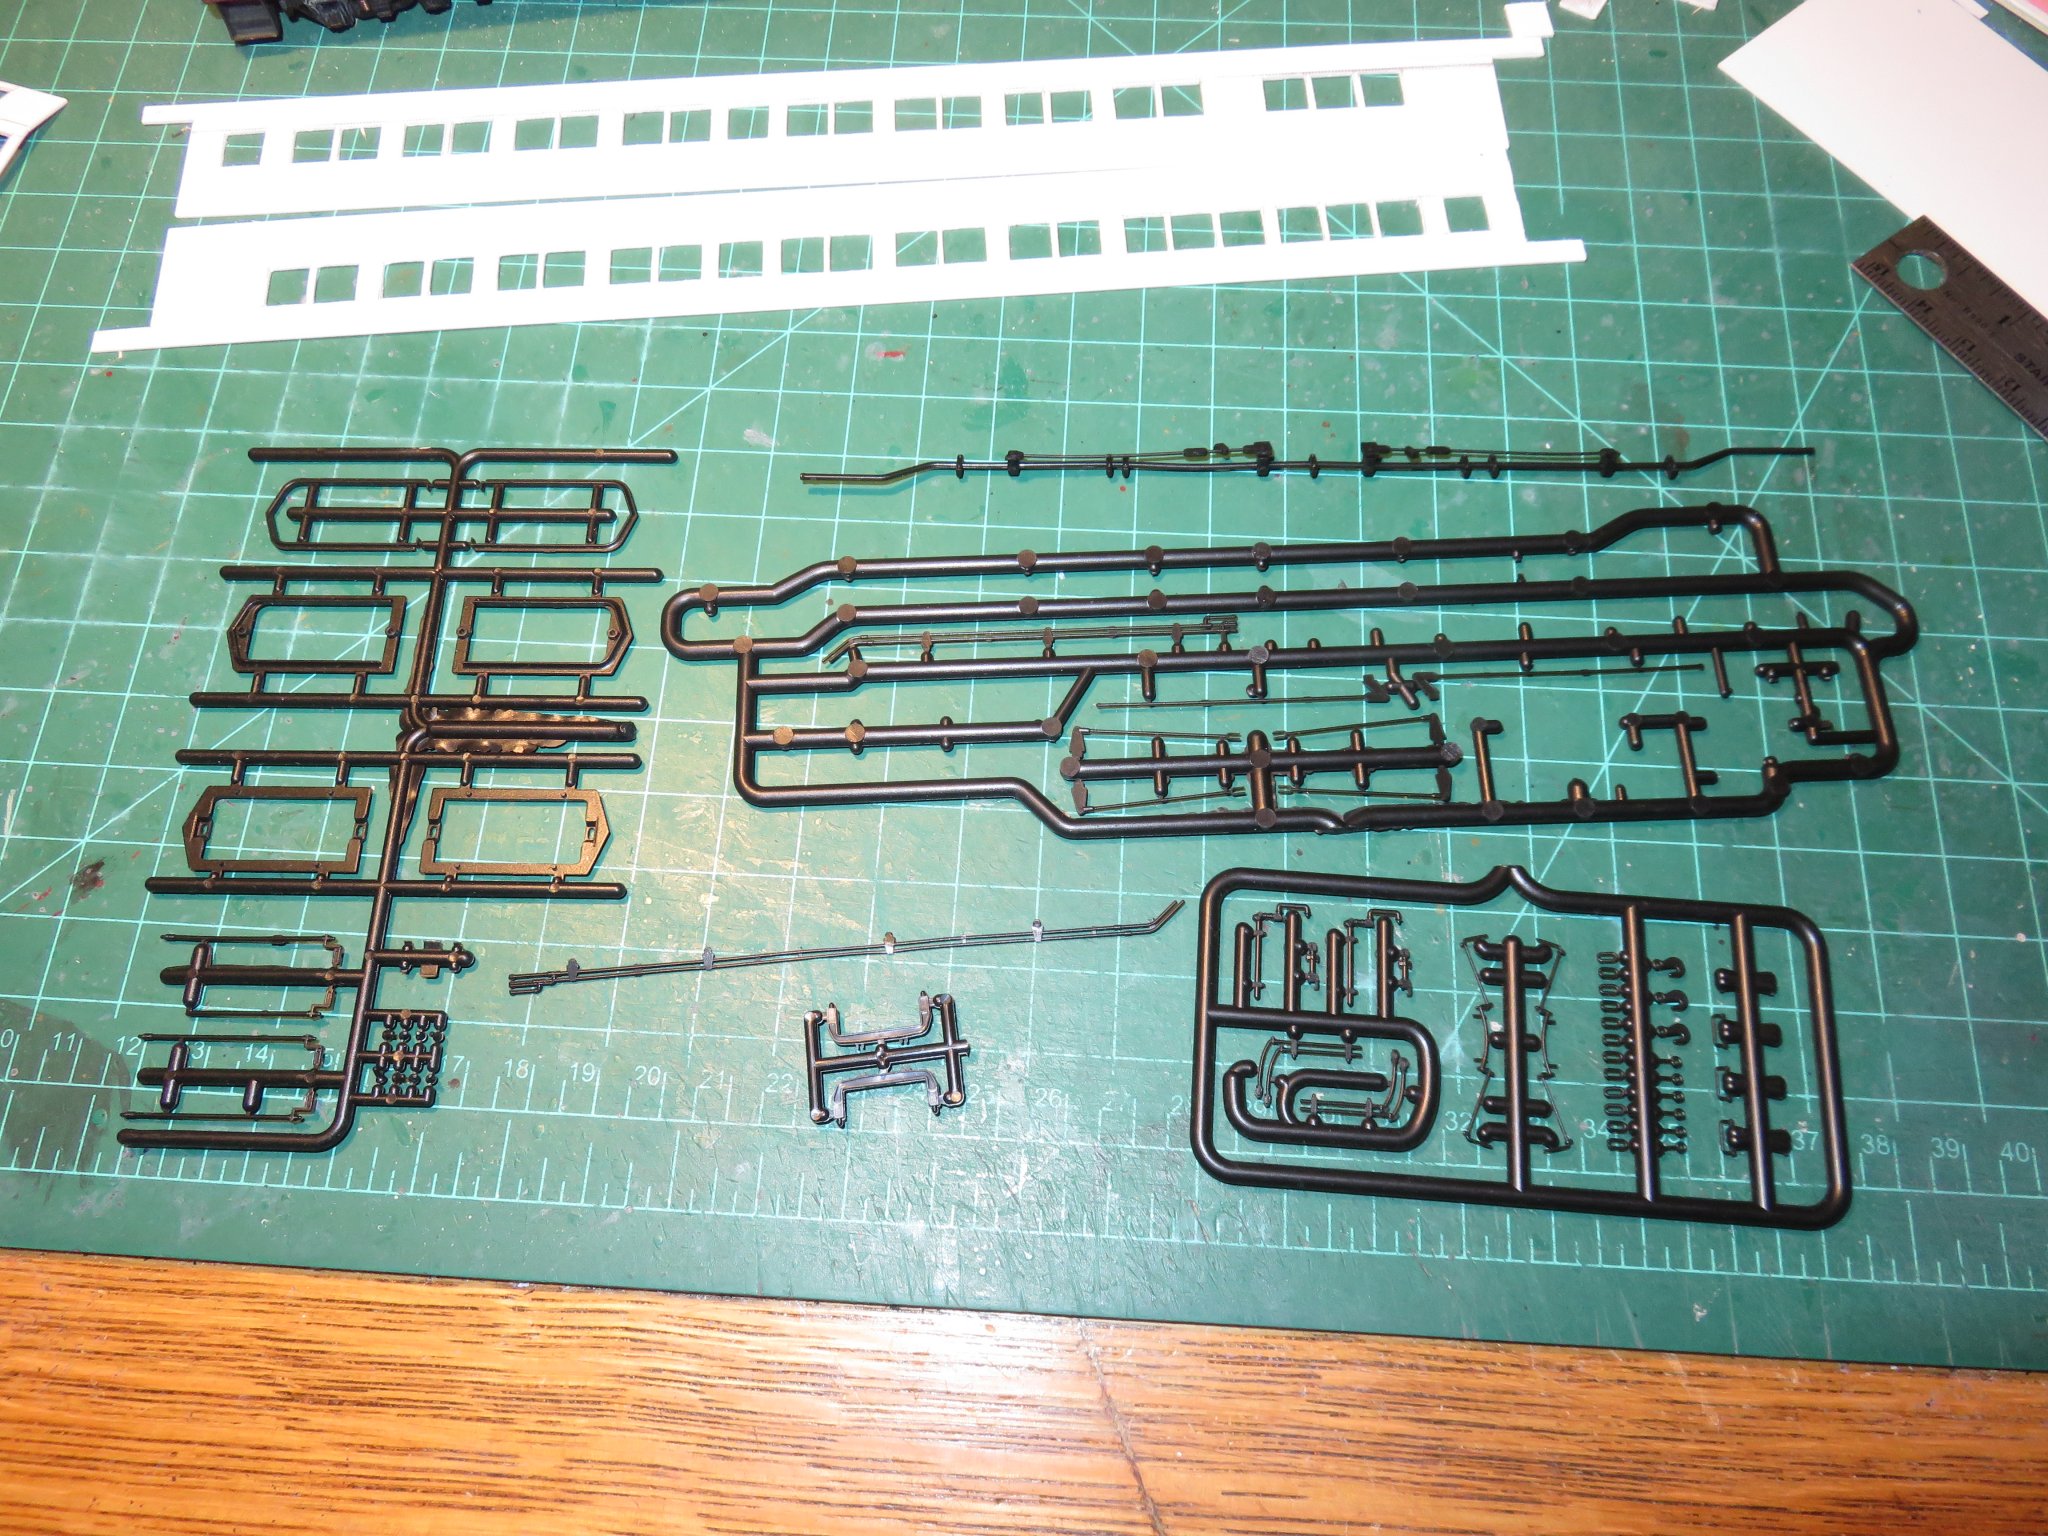
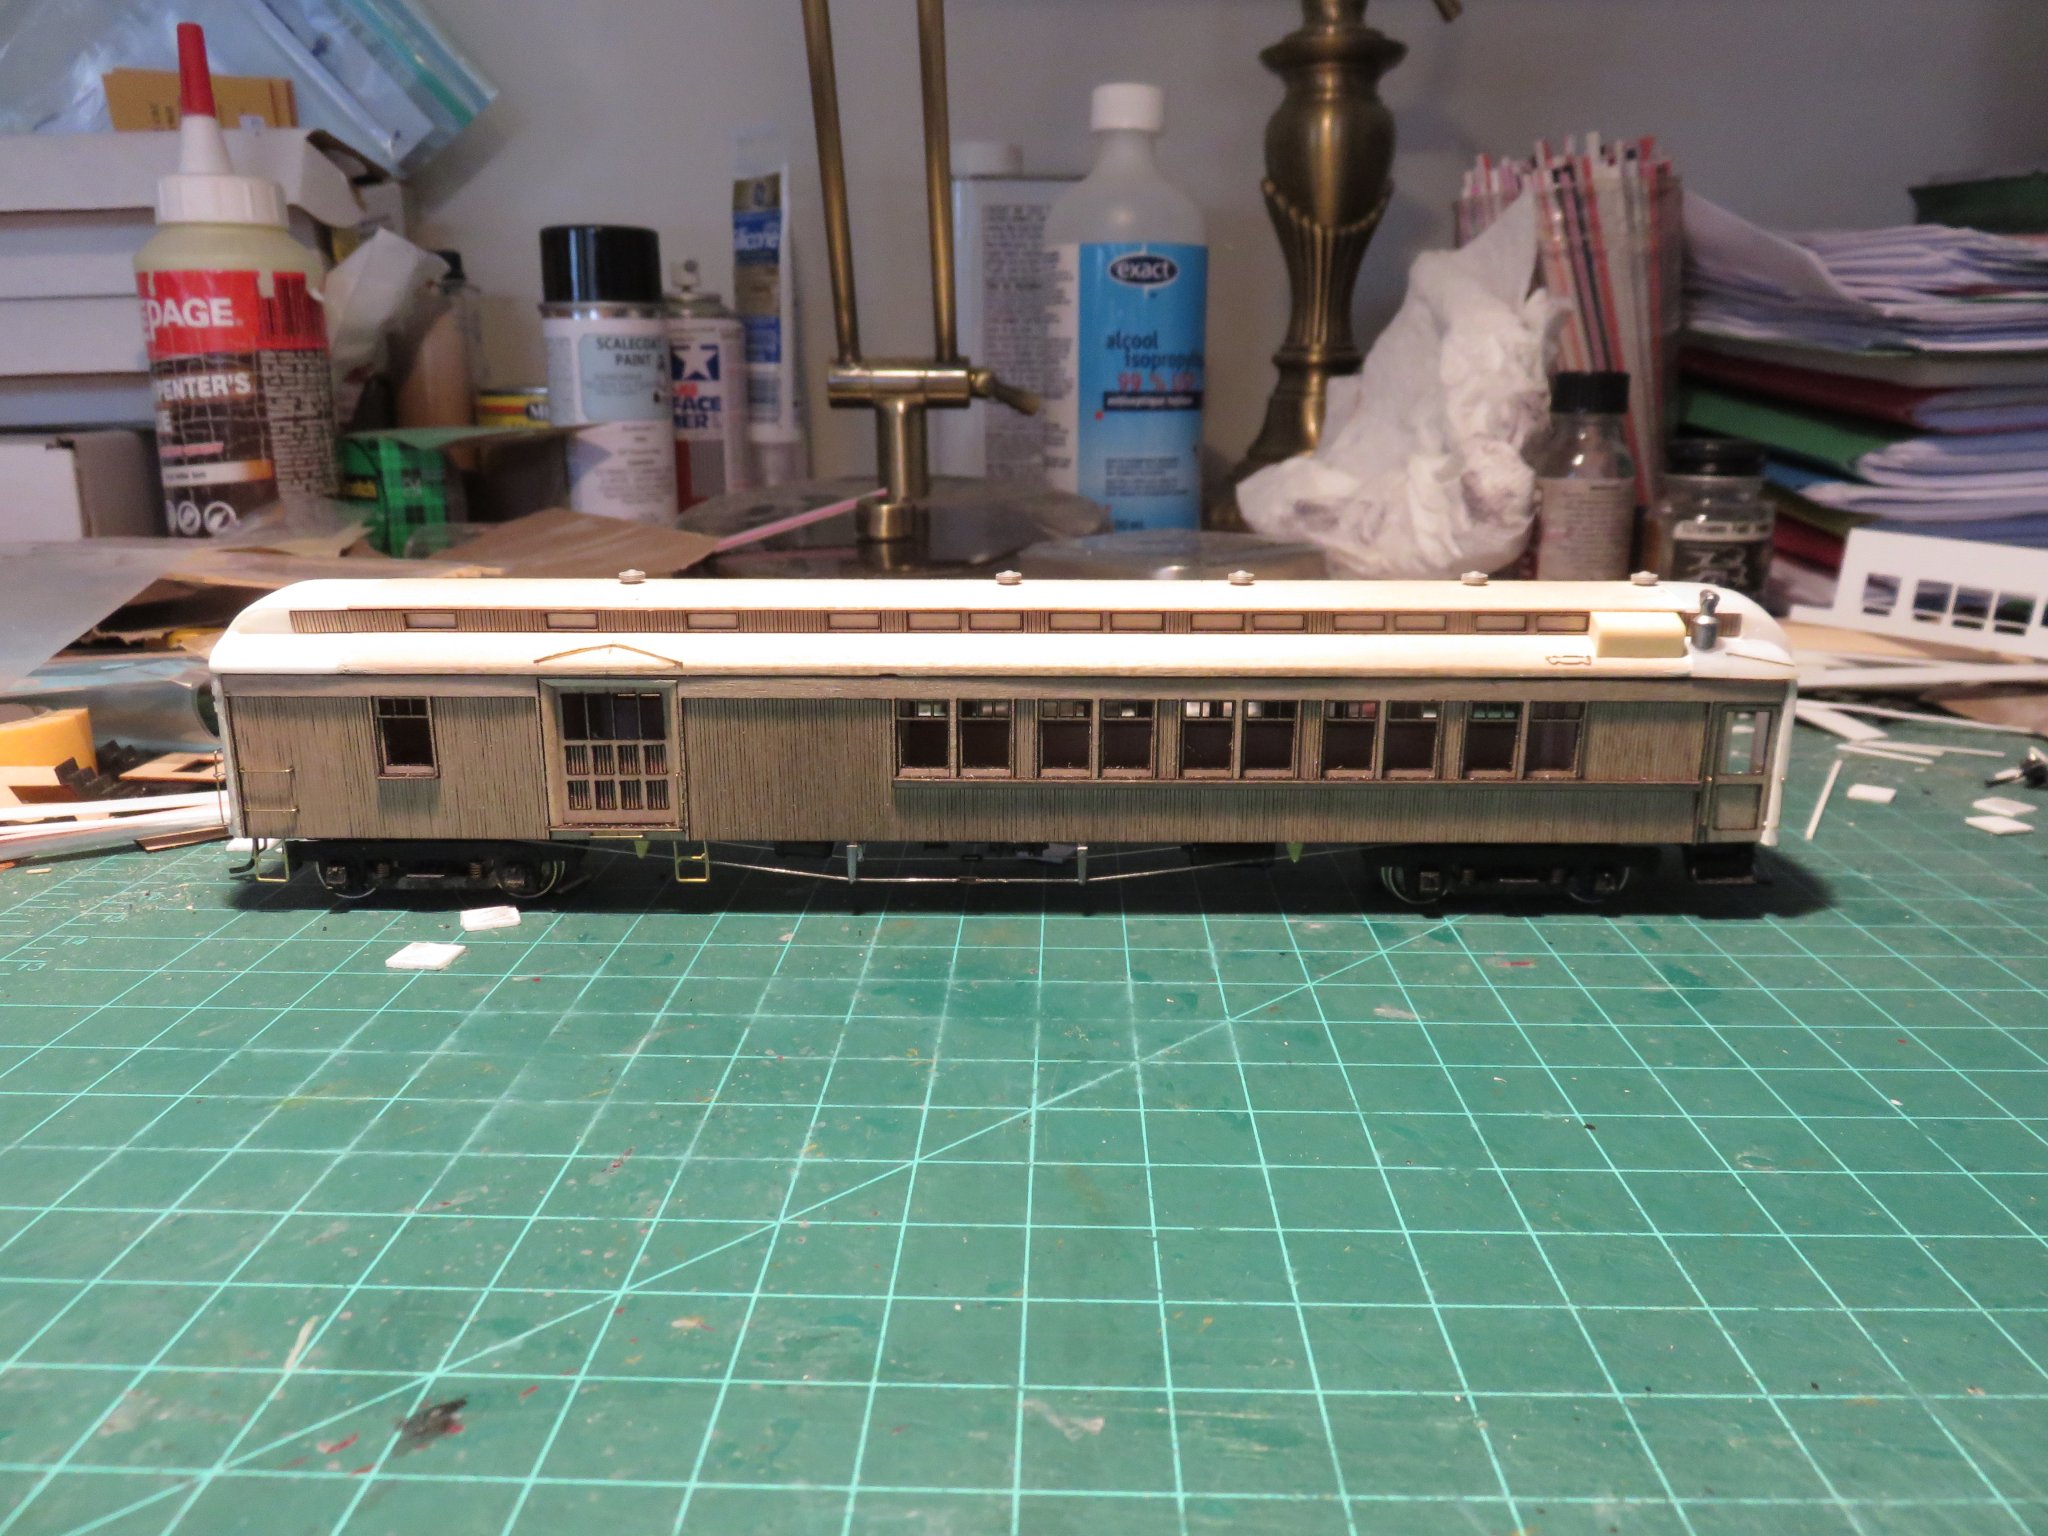
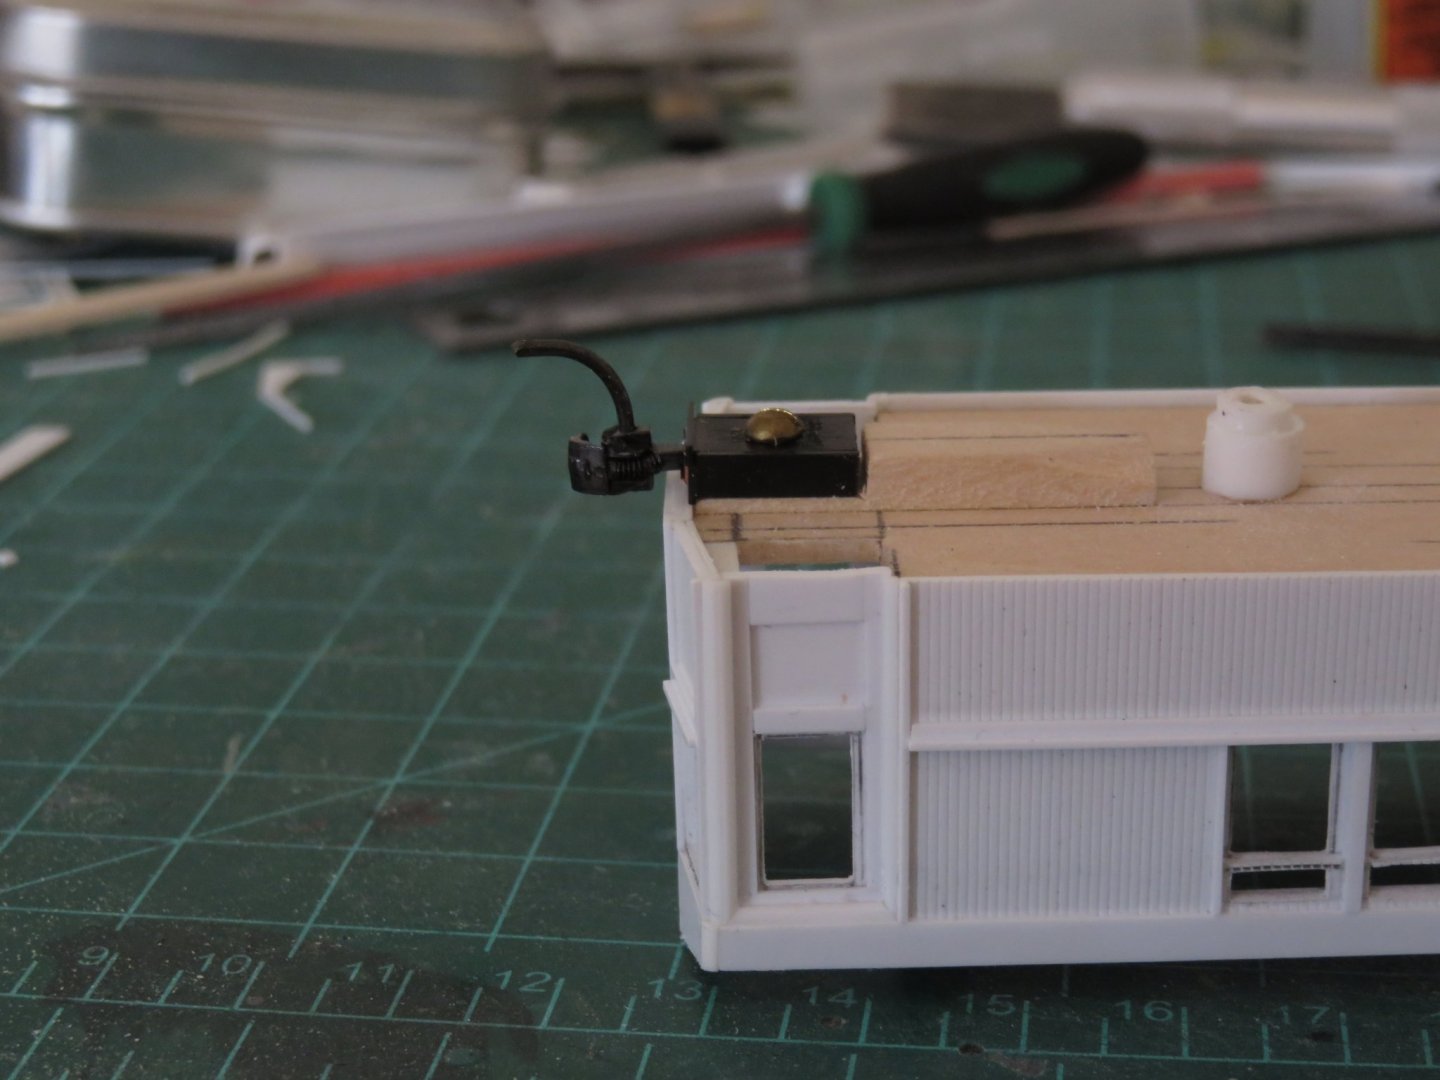
As always, thanks everyone for the comments and likes! Work on the main underbody details has largely been finished. I have decided to omit some of the "plumbing", mostly because it would serve only to add clutter to an already tight space, which is also the other reason as it has become increasingly difficult to do things neatly, without mucking up some of the already completed items (I've had to dust off a spiderweb of fine strands of CA glue). The main queenposts are a white metal casting from Bethlehem Car Works I had laying about. The truss rods are made from monofilament fishing line. I prefer using fishing line as it is fairly easy to get tight and somewhat resilient to incidental contact. Wire is much harder to get to the proper tension (without destroying the car in the process), and would tend to show every impact. For those who are interested, here's an annotated version showing the various major components: The vast majority of the detail parts came from leftover Branchline kits and other bits and pieces in my parts bins. It should be mentioned that although the locations of the major components is somewhat reflective of prototype practice (and supported by partial photographic evidence), it is still only my general interpretation, and is not necessarily a 100% accurate. The corner steps have also been added. I've left off some of the final details such as the coupler cut levers and the connections for the steam, air and signal lines. These will be added later when I'm adding the grabirons and other final details. The time has now come to return my attention to finishing the roof. Some sanding and filling is necessary to smooth our the joints, and an insert will have to be made for the clerestory. Andy


- 154 replies
-
- 17
-

-
Thanks Canute! Based on photographs I've seen (looking closely at the hose connections at the ends), it's possible some cars would have been equipped with both steam heat and a Baker heater (given our colder climate up here). Either way, there could have been a pass-through steam line to allow heating other cars in a consist. If I had known 11 years ago that I would be neck deep in this project, I'm sure I would have taken many more photos of the preserved car at the museum in Delson! Andy
-
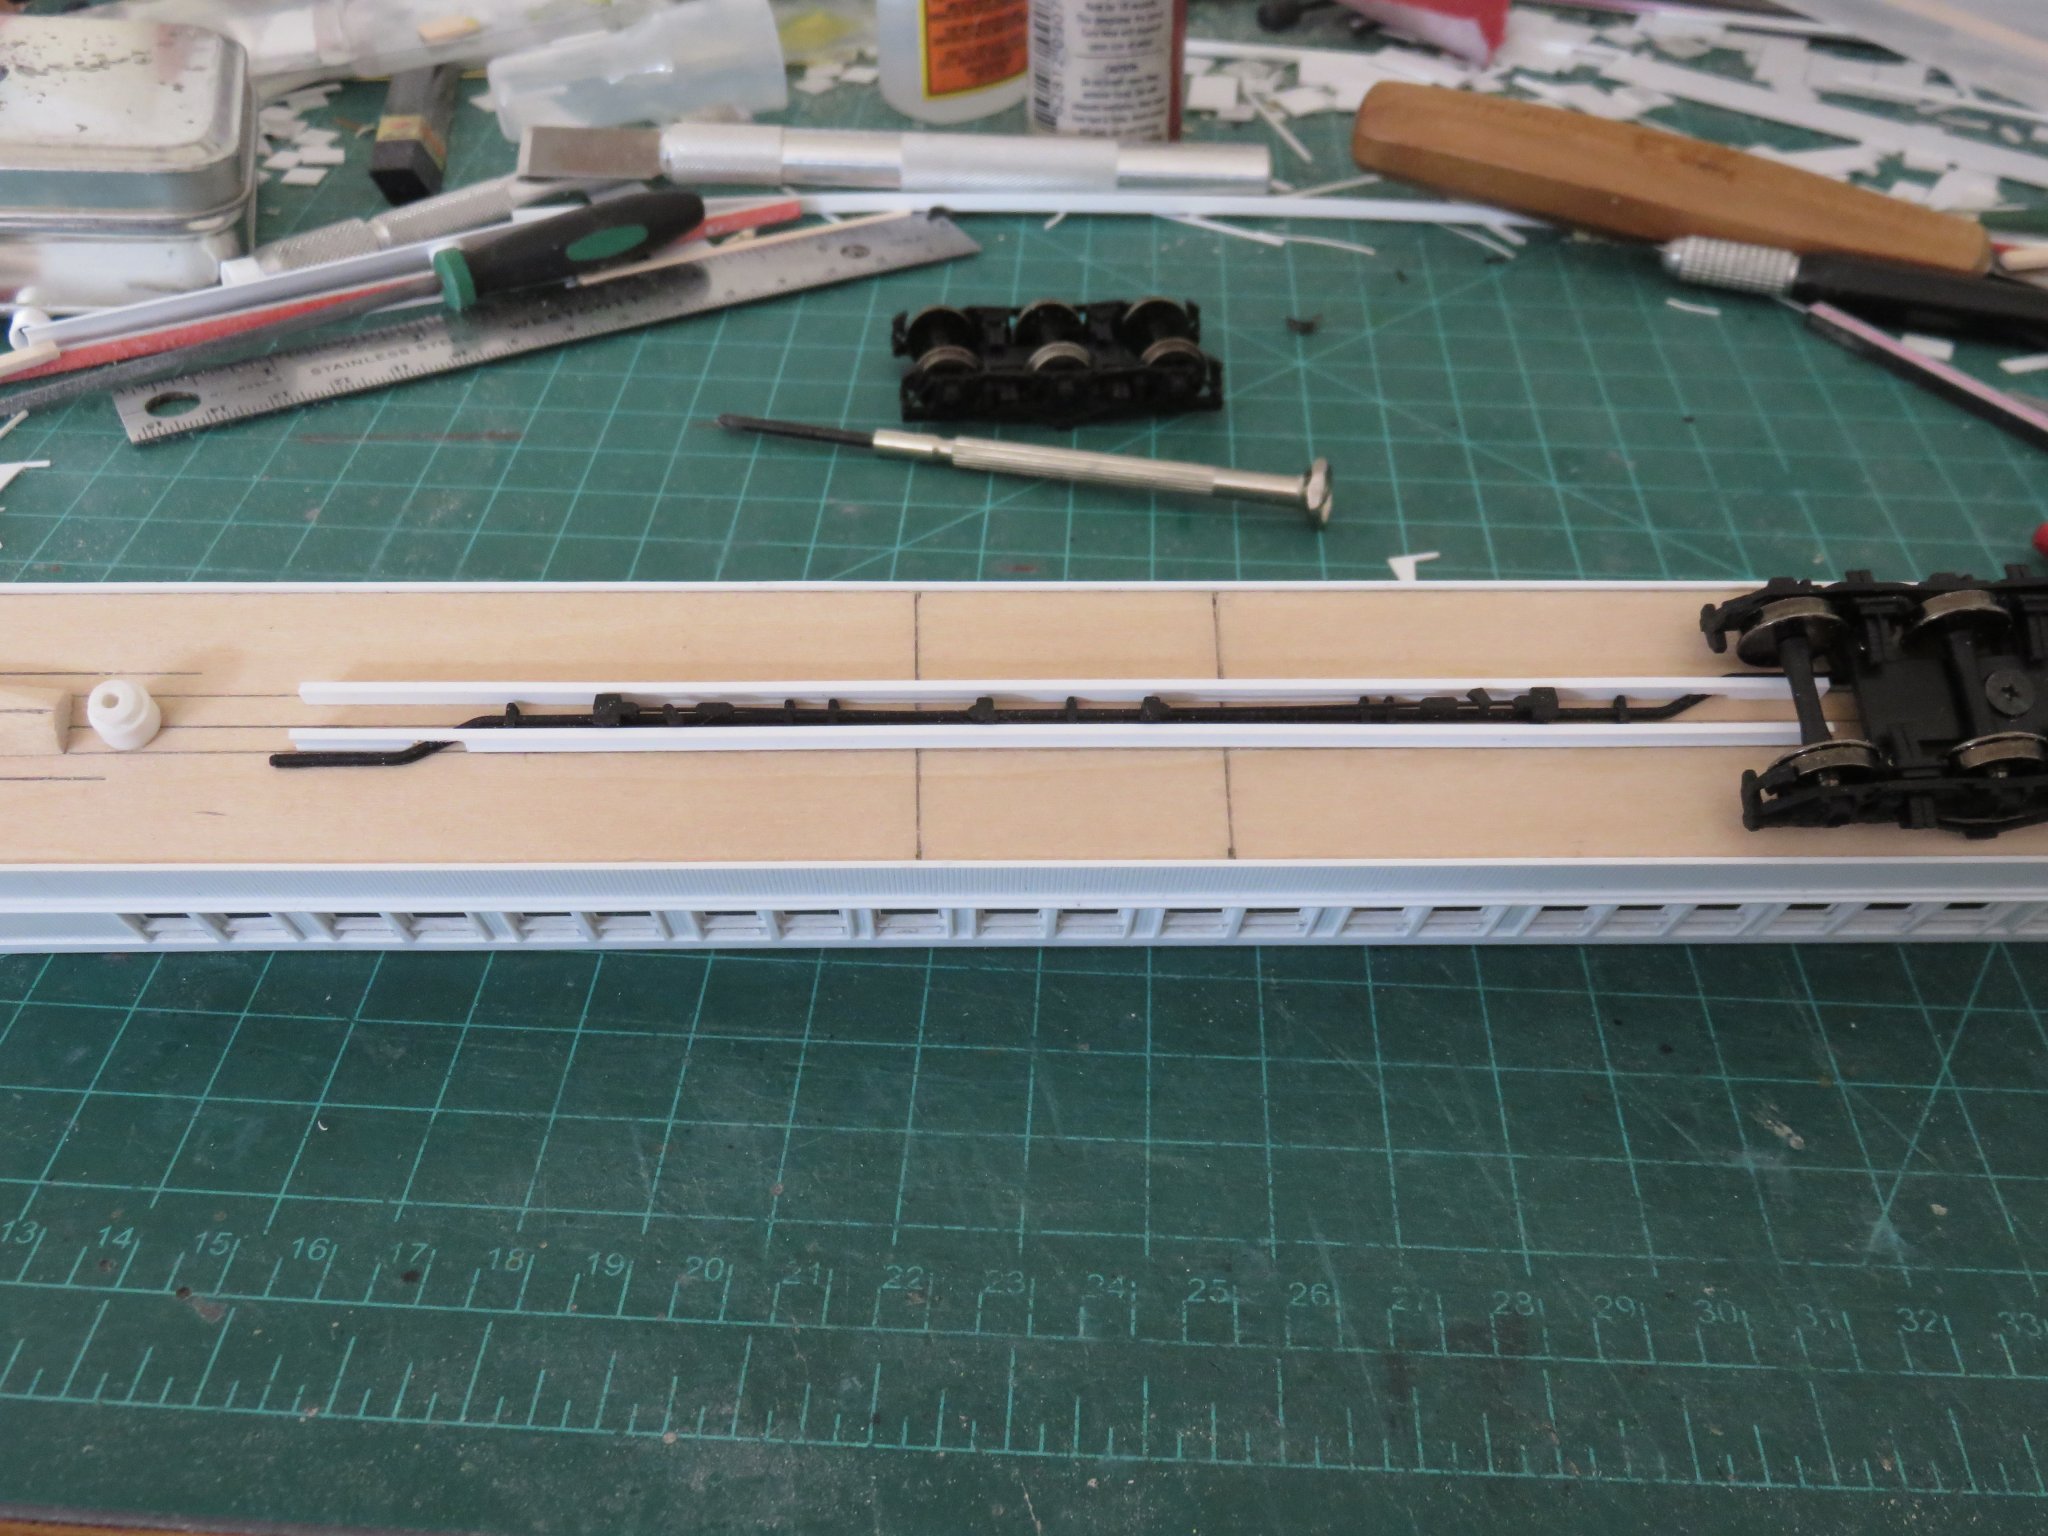
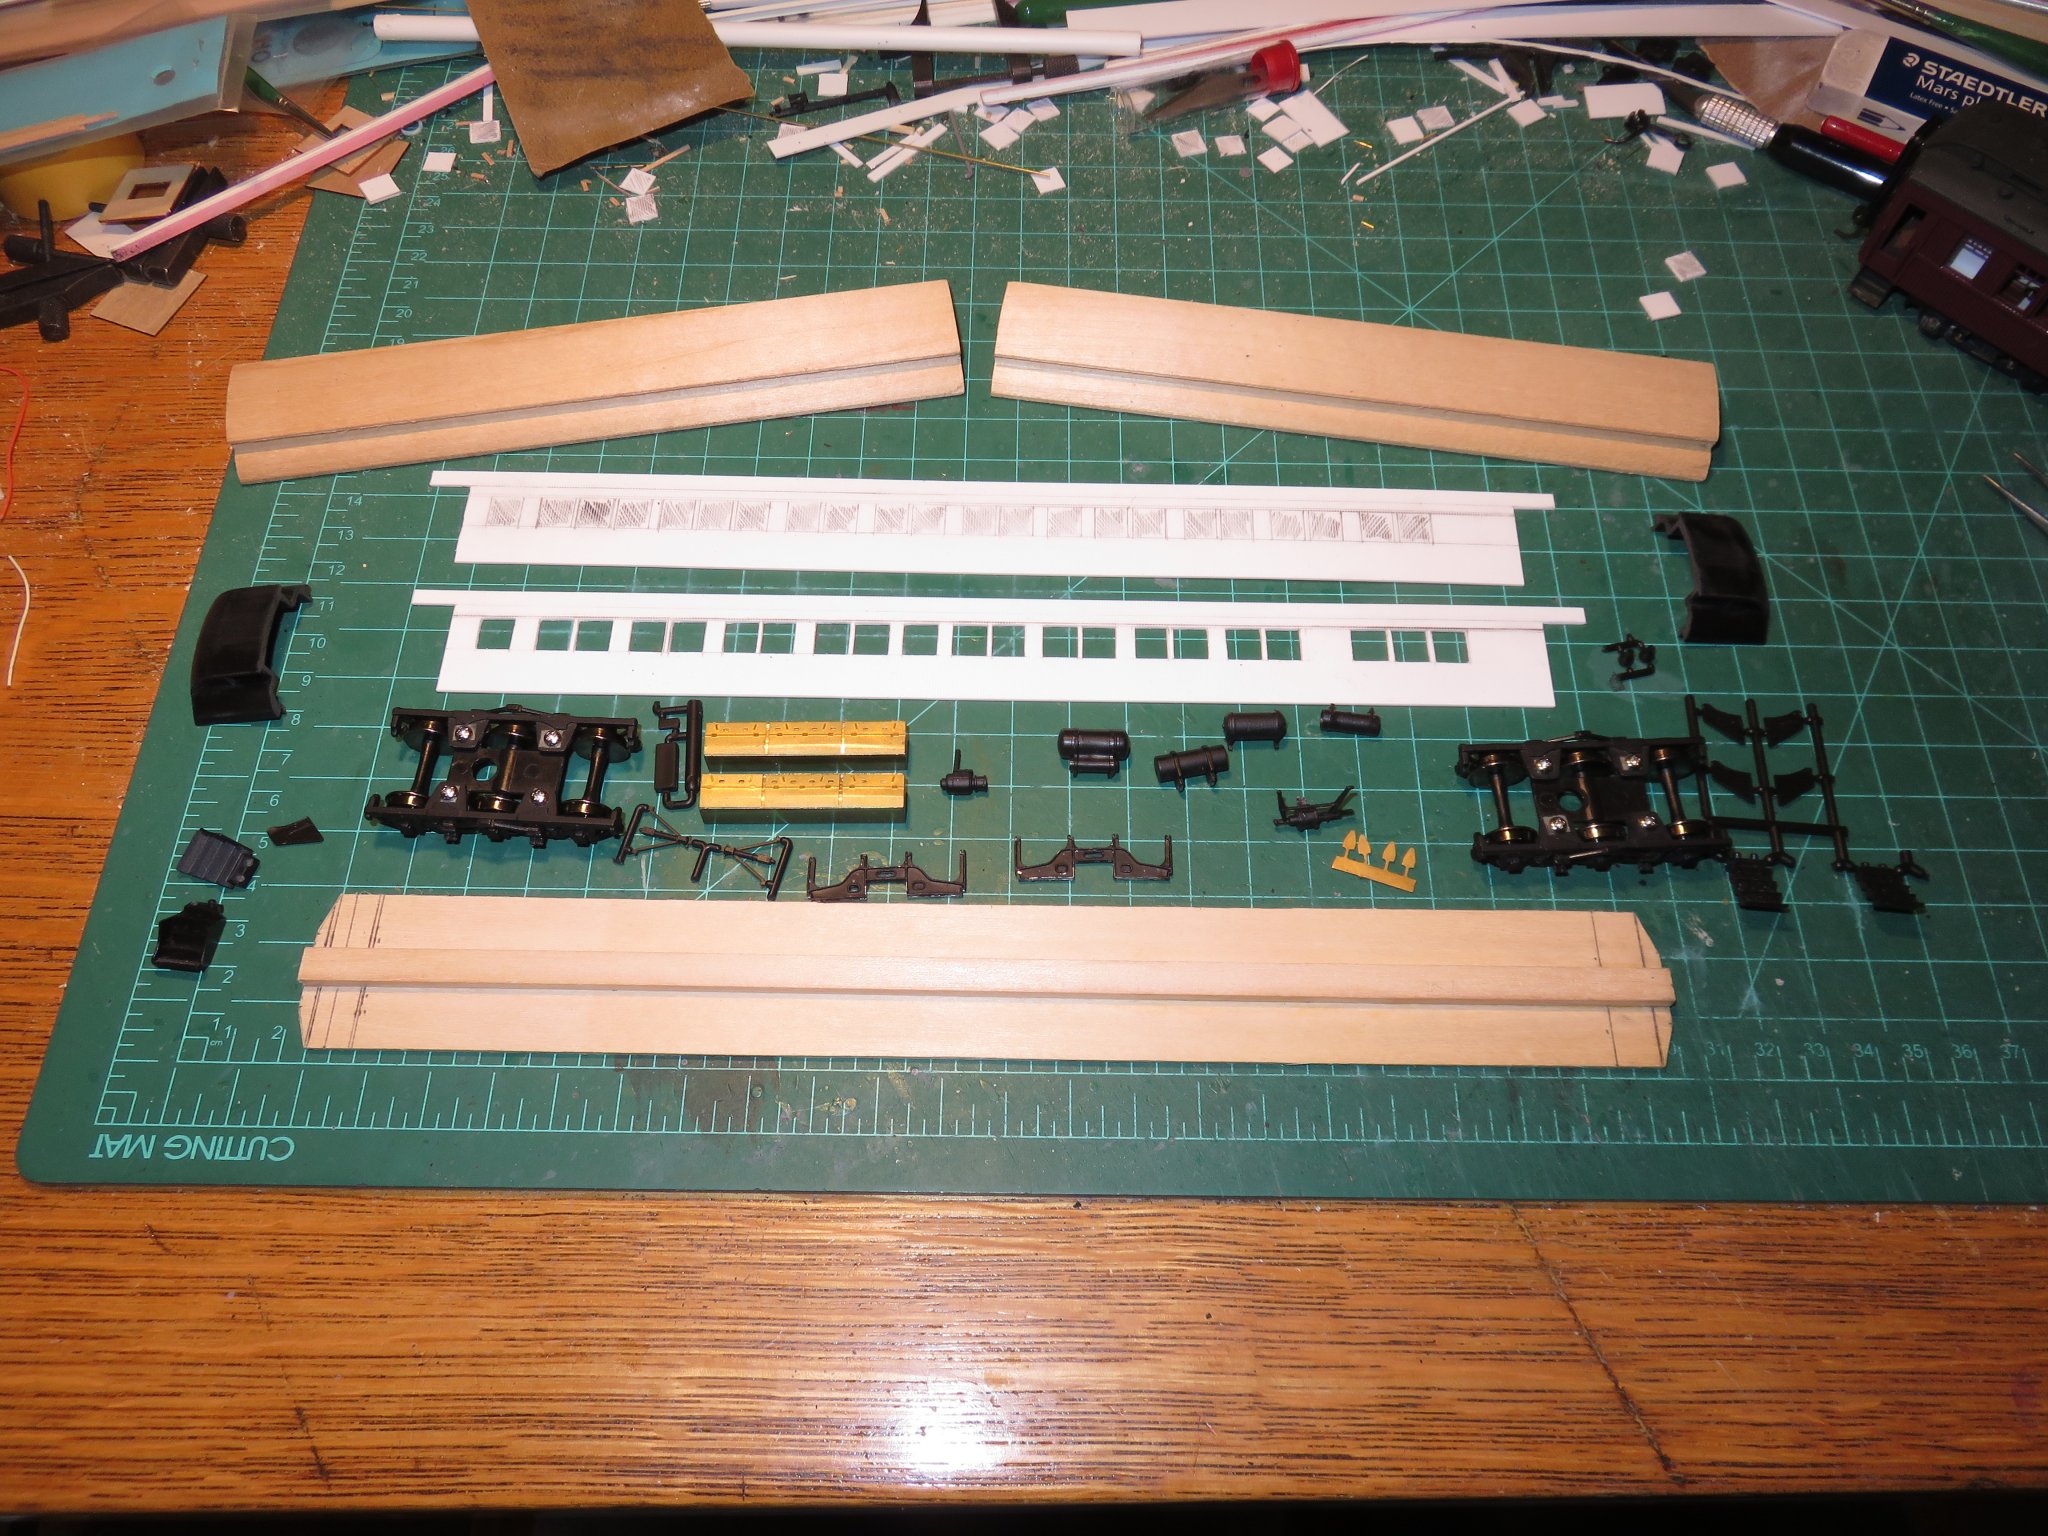
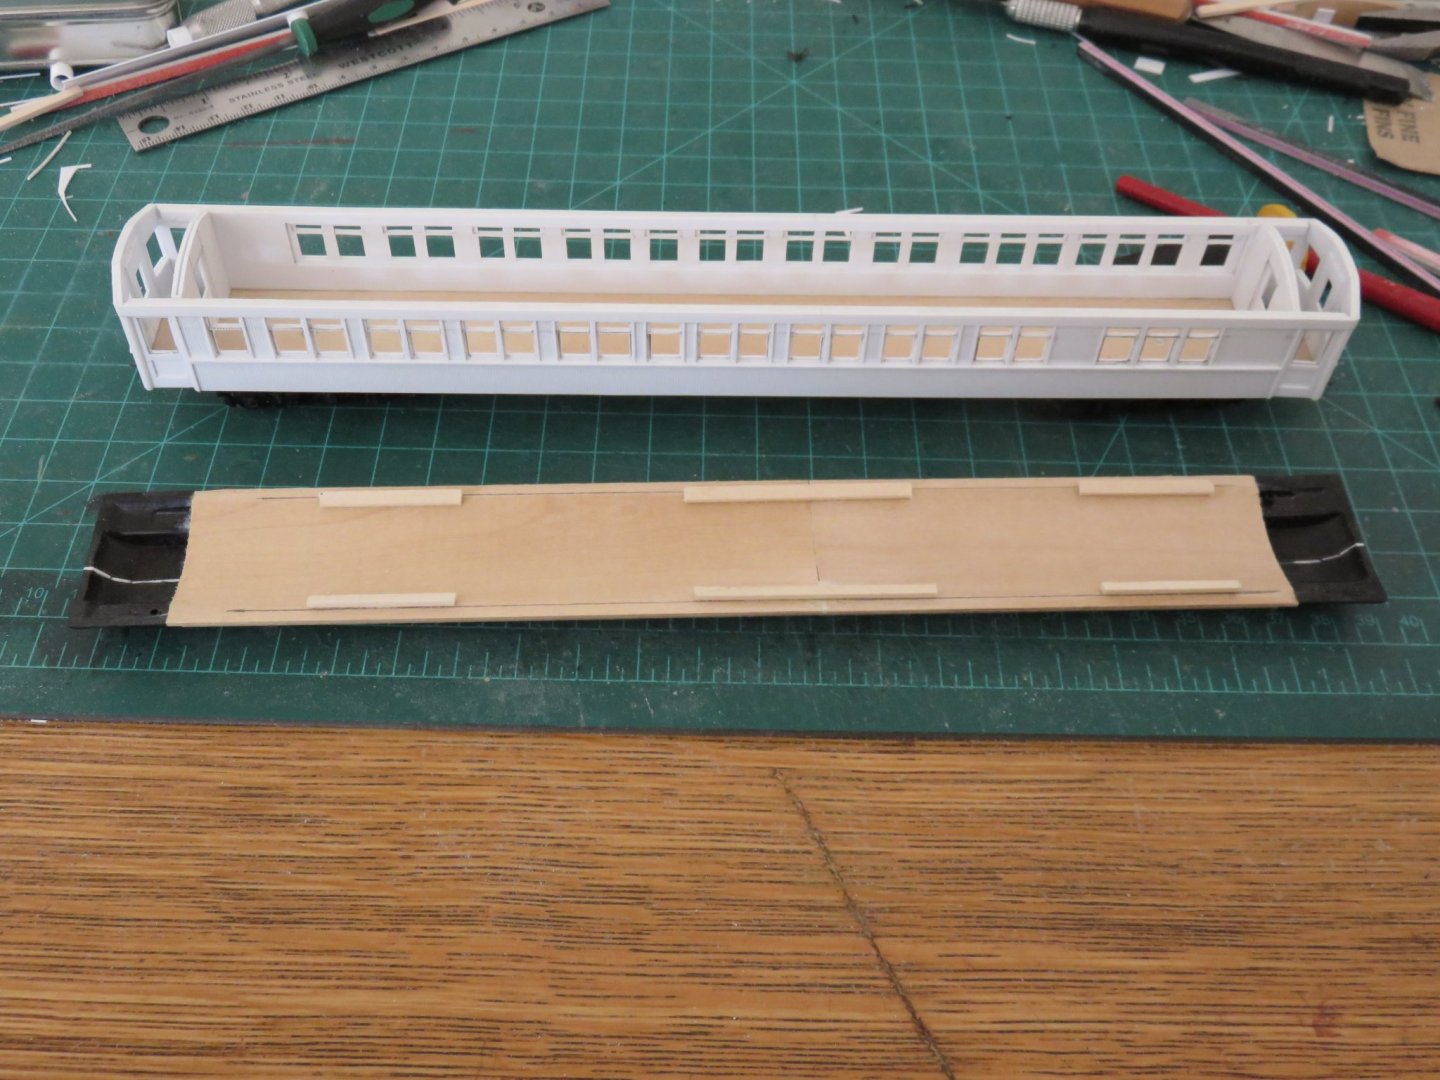
Thanks, everyone, for the comments and likes! A busy weekend in the car shops. Both car ends were installed and the side entry doors have been made and fitted. Prior to fitting the doors, the doorways were trimmed with 0.030" styrene 1/4 round to match the prototype... almost. If you take a quick look back at my first post, you can see the 1/4 round moulding and the nicely coved corners. If this was at a larger scale I might have attempted it, however at this scale, a simple mitre joint will suffice. It was now time to turn to trucks and couplers. For some reason most "craftsman" style kits leave this step off until the end but I prefer to get this step out of the way now as this can sometimes involve some "heavy" work that may risk damaging any detail work that has been installed. You can see clearly my king post and bolster arrangement for the trucks. The end sill is a scale 12" x 24" piece of basswood strip glued to the underside of the floor. Once the car height was set by adjusting the height of the bolster and comparing my car with other models in my collection, the couplers were installed and adjusted with a Kadee height gauge. The couplers are Kadee #58 semi-scale knuckle couplers, which give a nicer appearance than the standard (oversized) #5. This model will ultimately be an operating model, some some compromises (like the large 2-56 screw) are necessary to ensure reliability (it really won't bee seen after the steps and end details are added). Following this bit of rough work, it was time to tackle the roof (or at least the basic construction). Shown here upside down, the roof is made up of a couple of pre-made clerestory sections with end pieces cut from a leftover Branchline kit coach roof. The roof ends needed to be widened to better match the width of the milled clerestory sections. Some basswood strip provides for a nice friction fit in the carbody. Some final tweaking, sanding, filling etc will be required, but otherwise the heavy work is now completed. I can now move on to the fun detail work. Which has already begun on the underside of the car. The centre sills were made using 1/8" styrene "C" channel. The black steam pipe was also salvaged from a Branchline kit. I'm not sure if the prototype cars were also equipped with steam heating (as it is, the cars had a Baker car heater), but it adds a nice detail. Next up comes the rest of the underbody detail, including the queen posts and truss rods, air tanks, brake and electrical equipment. Andy


- 154 replies
-
- 16
-
-
There are many bottomless rabbit holes in model railroading just waiting to suck in another unwitting victim! Andy
-
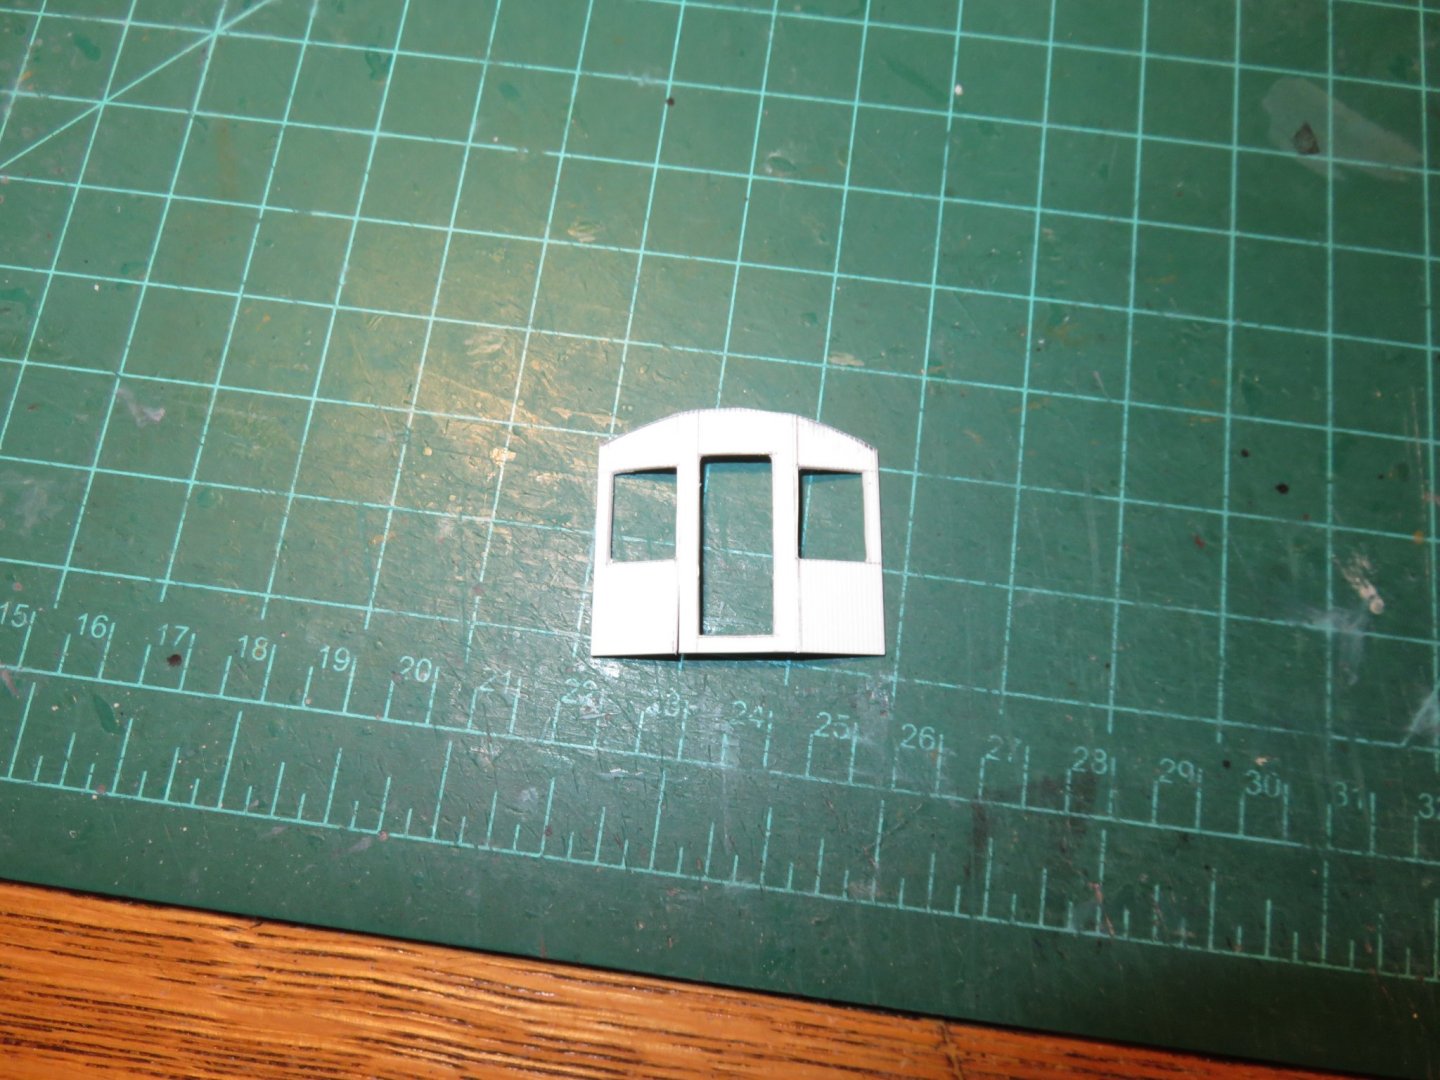
And thank you too, EG! I apologize for the quality of the photos, but the scribed siding (bead board) forms the outer layer, so it’s on already. It’s a bit hard to see (white on white). I’m not a professional photographer, but I know I can (and should) do better... time to lose the little point-and-shoot and haul out my SLR. Andy
-
I am definitely planning on a basic interior (bulkheads/partitions and seats). I hadn’t given much thought on how far I really might take this.... now you’ve gone and given me something to think about! Andy
-
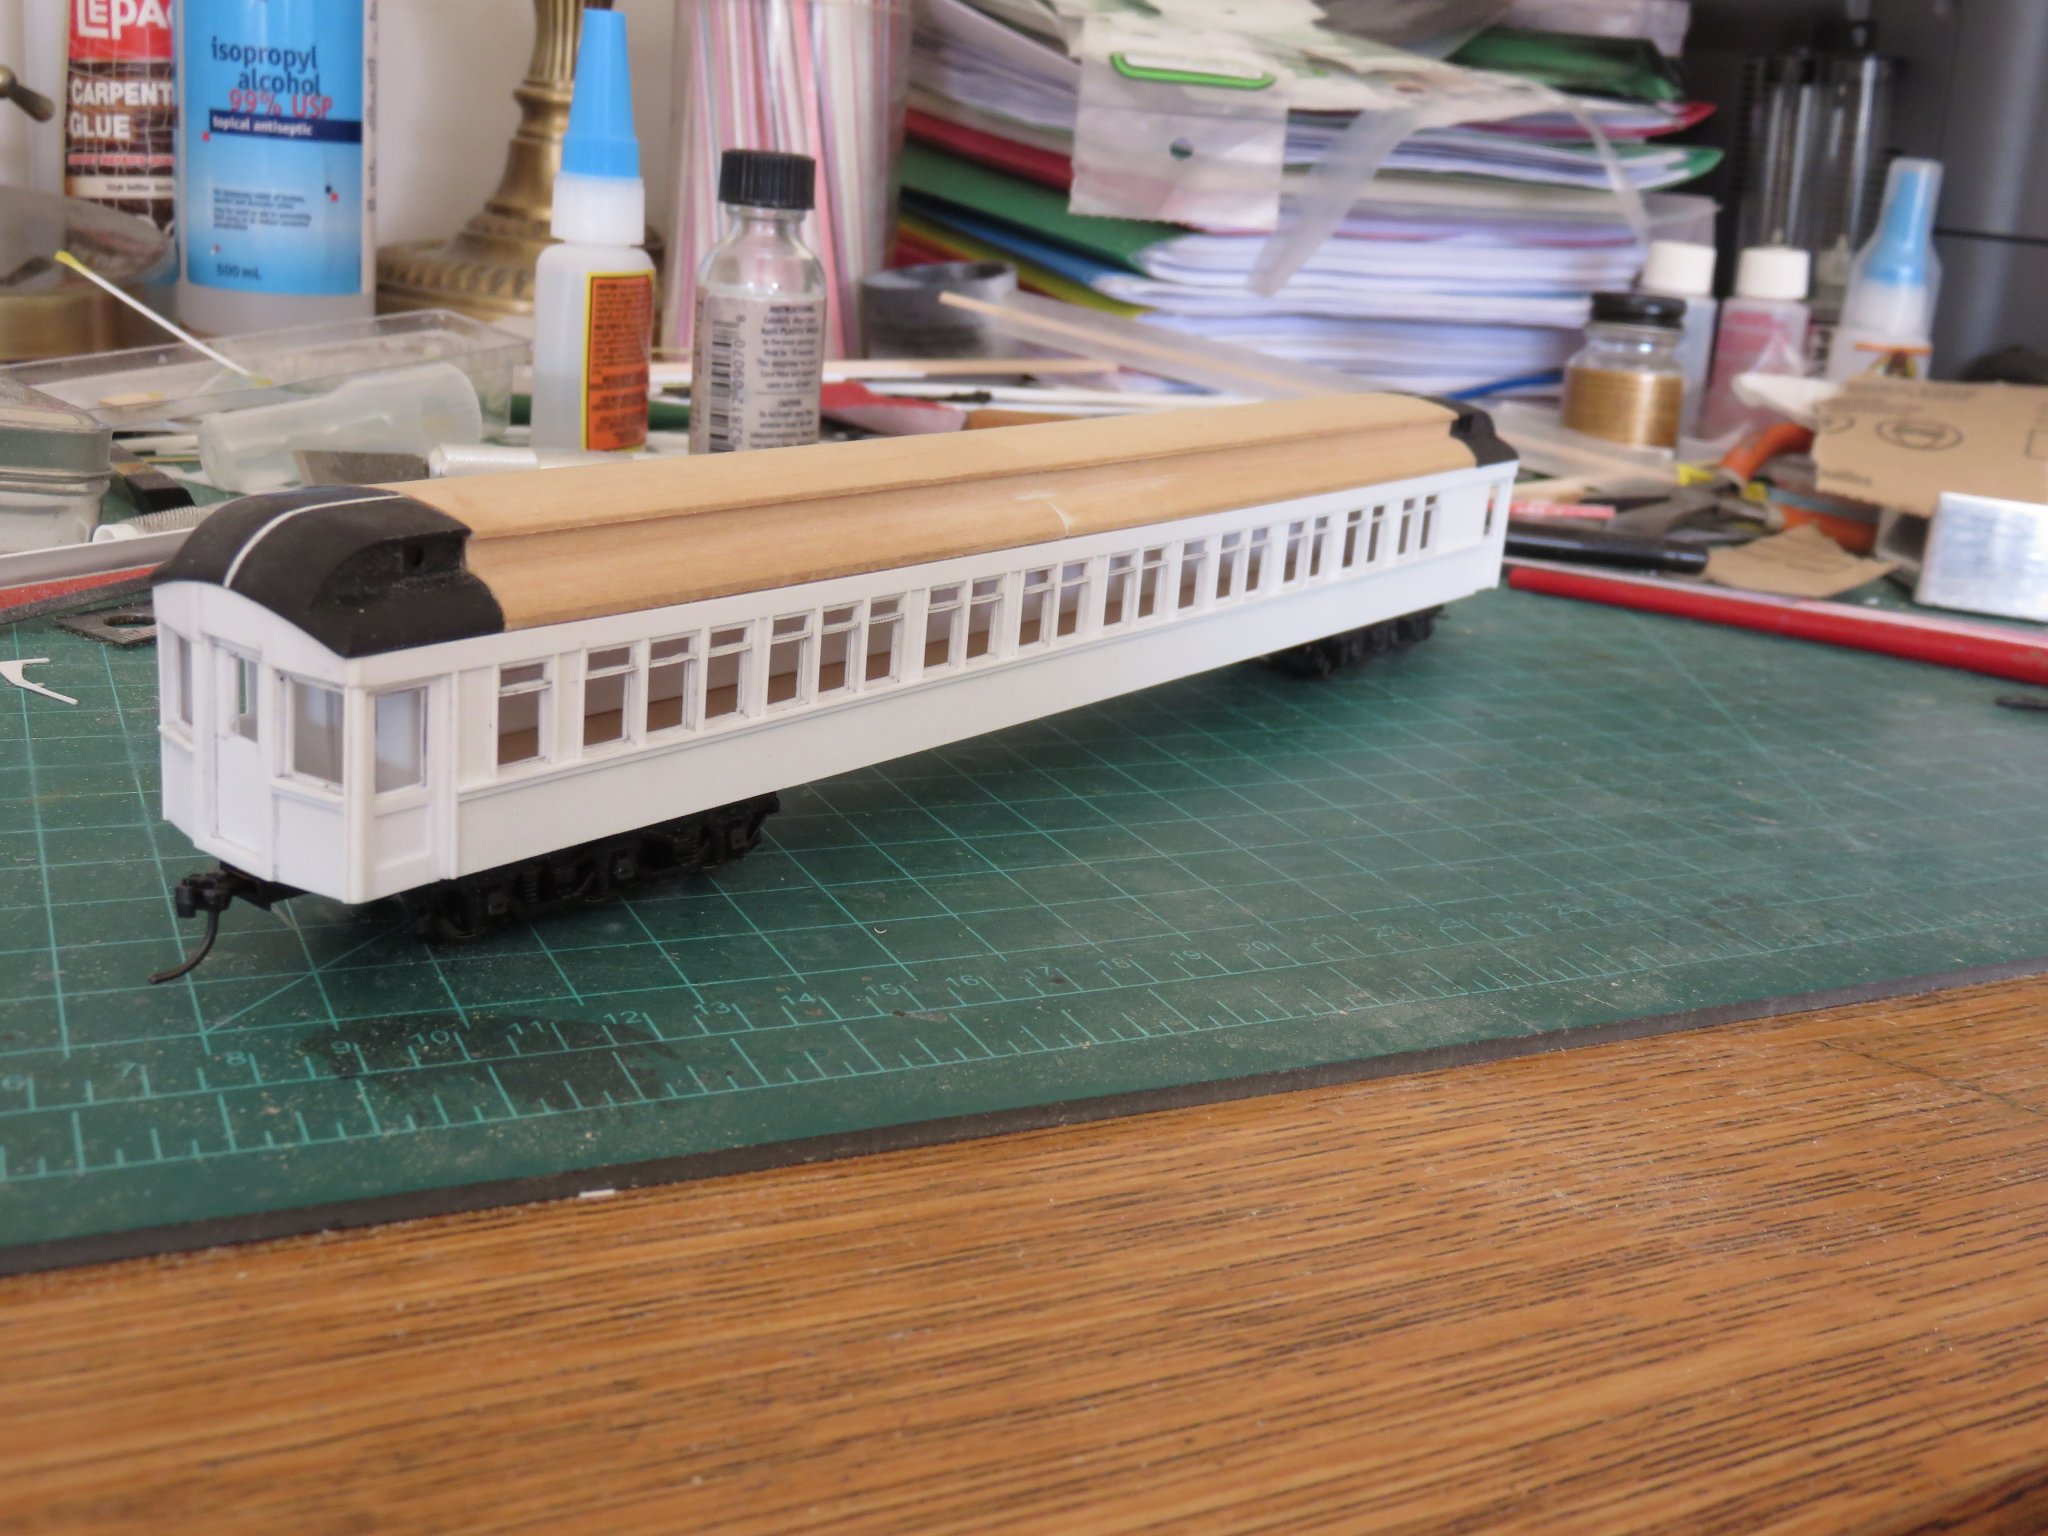
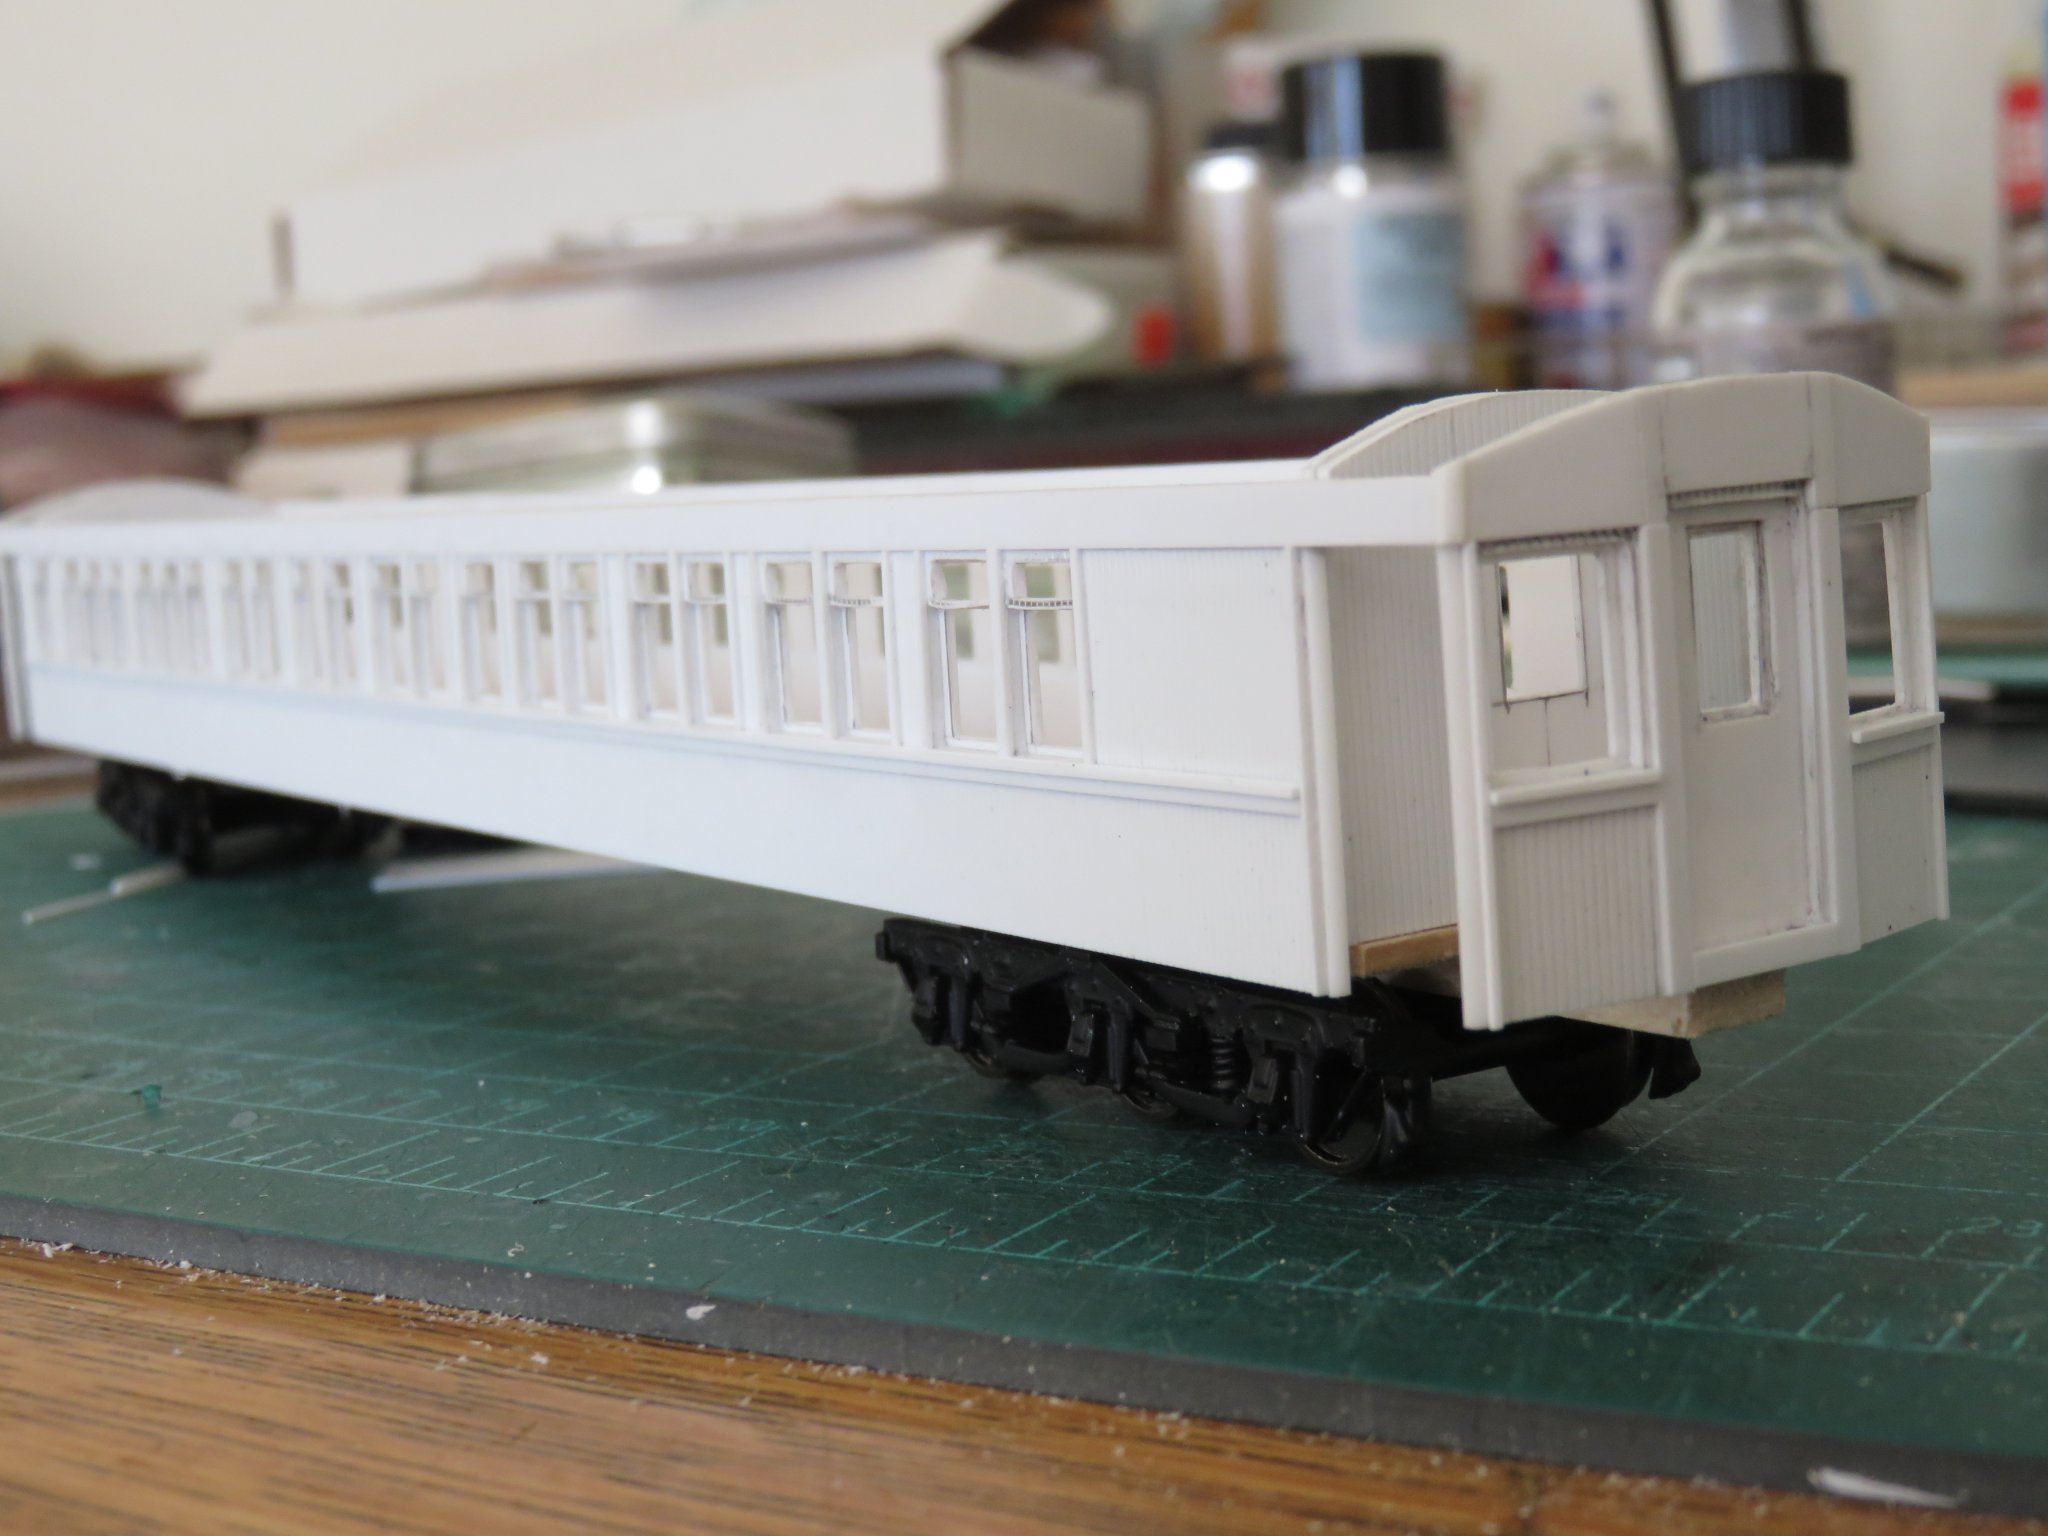
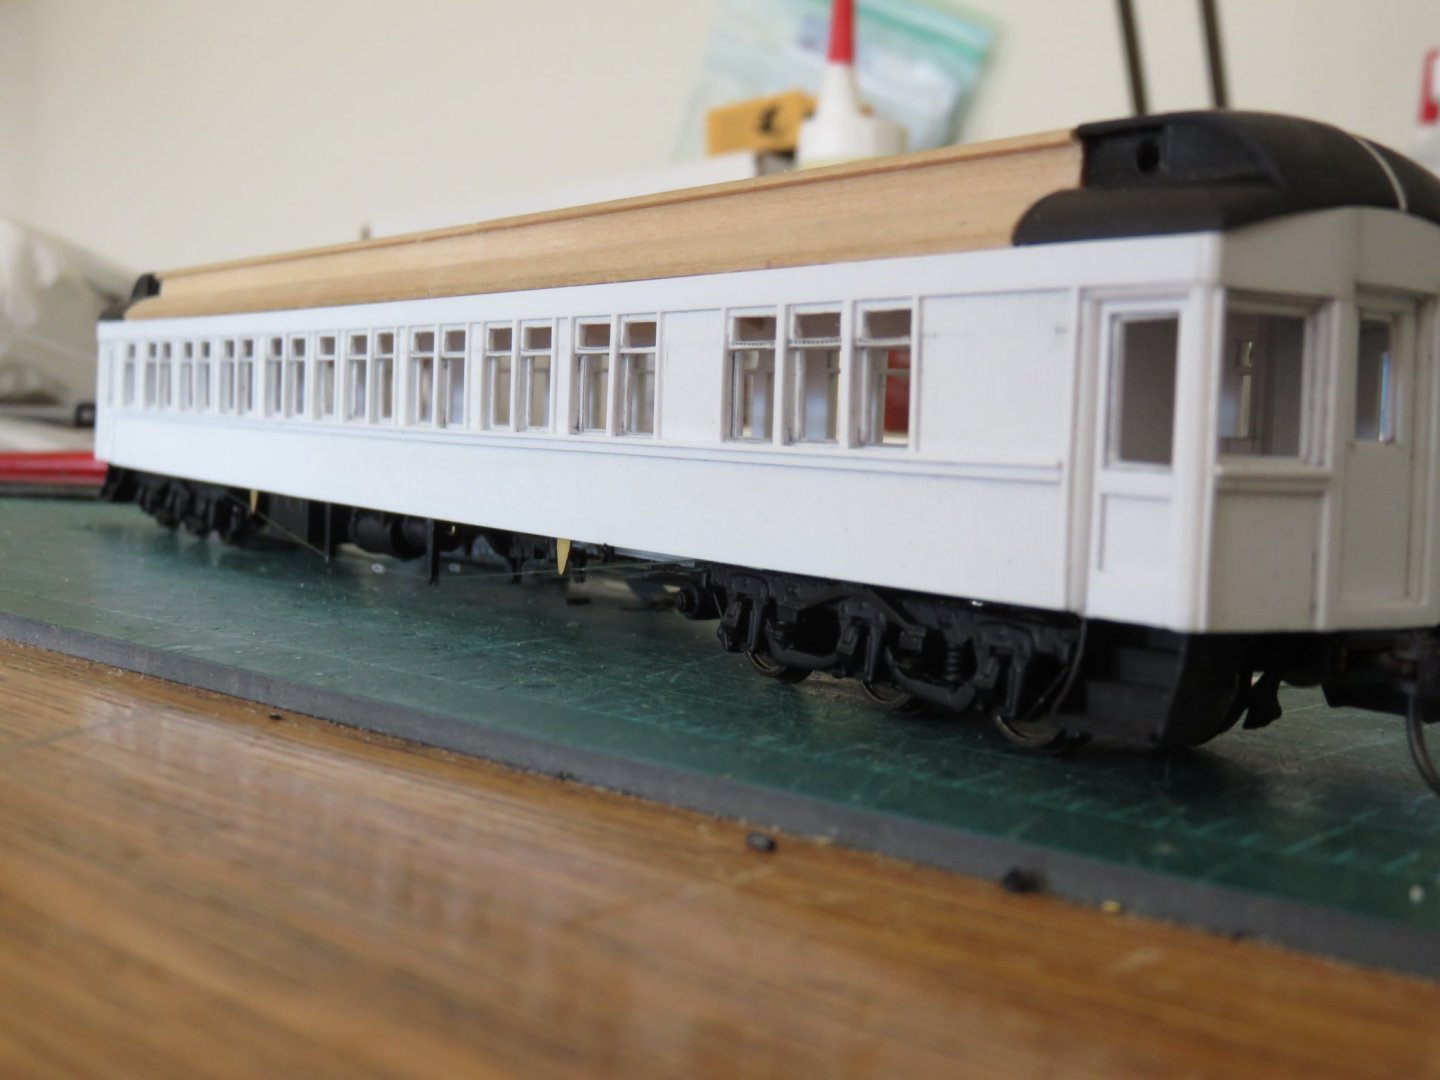
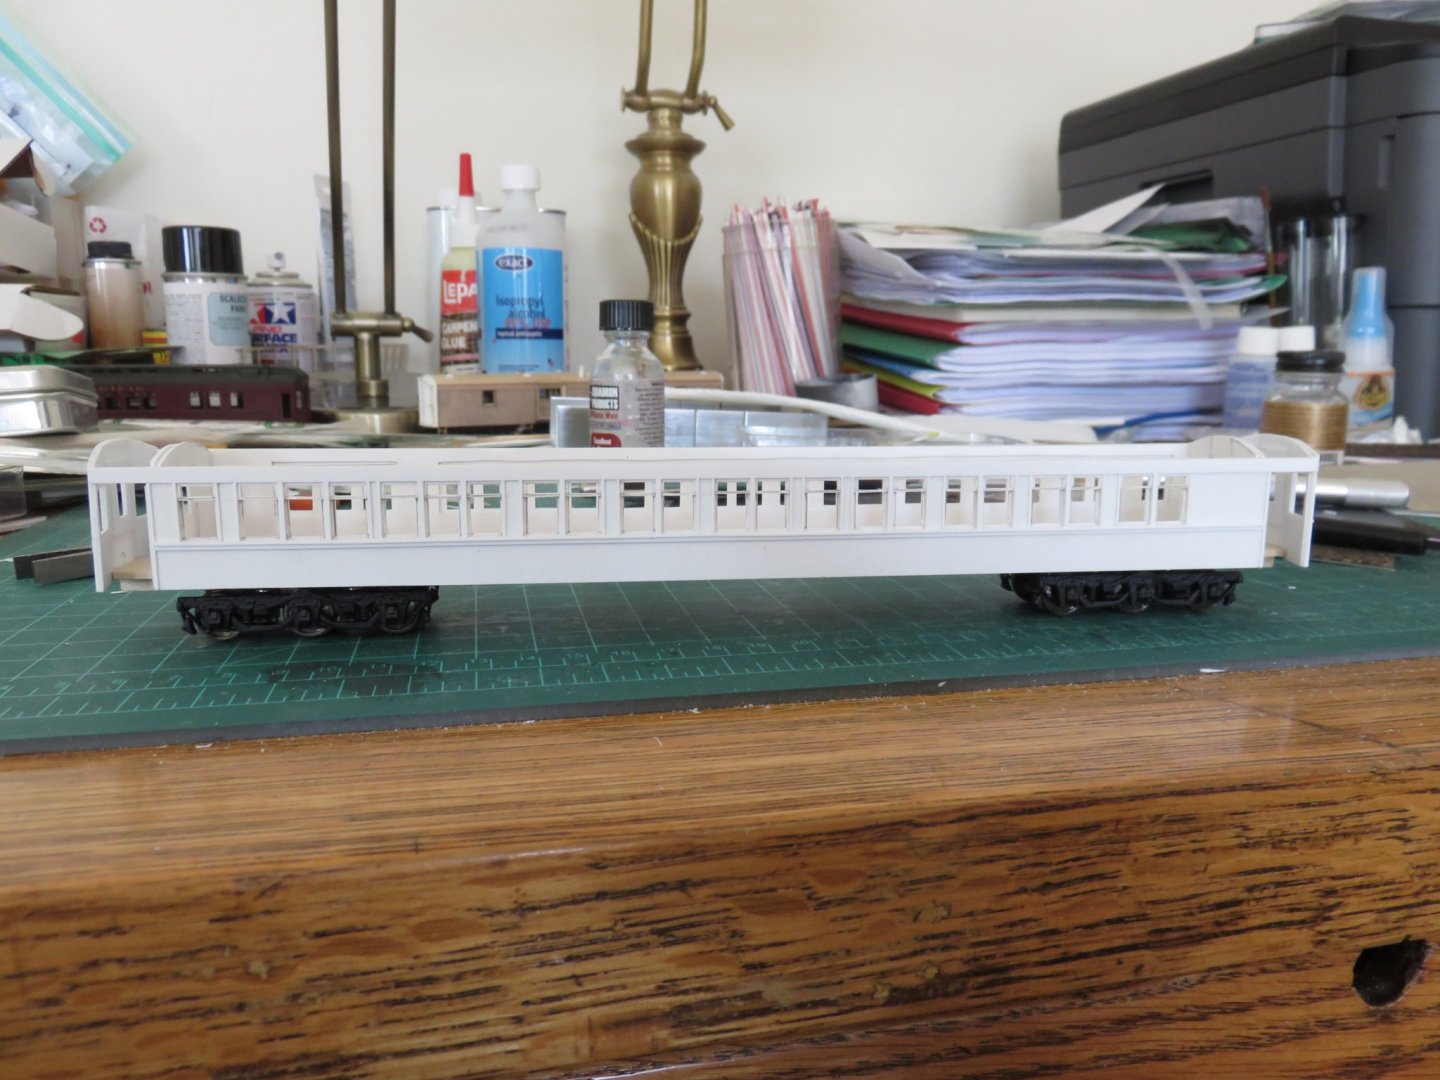
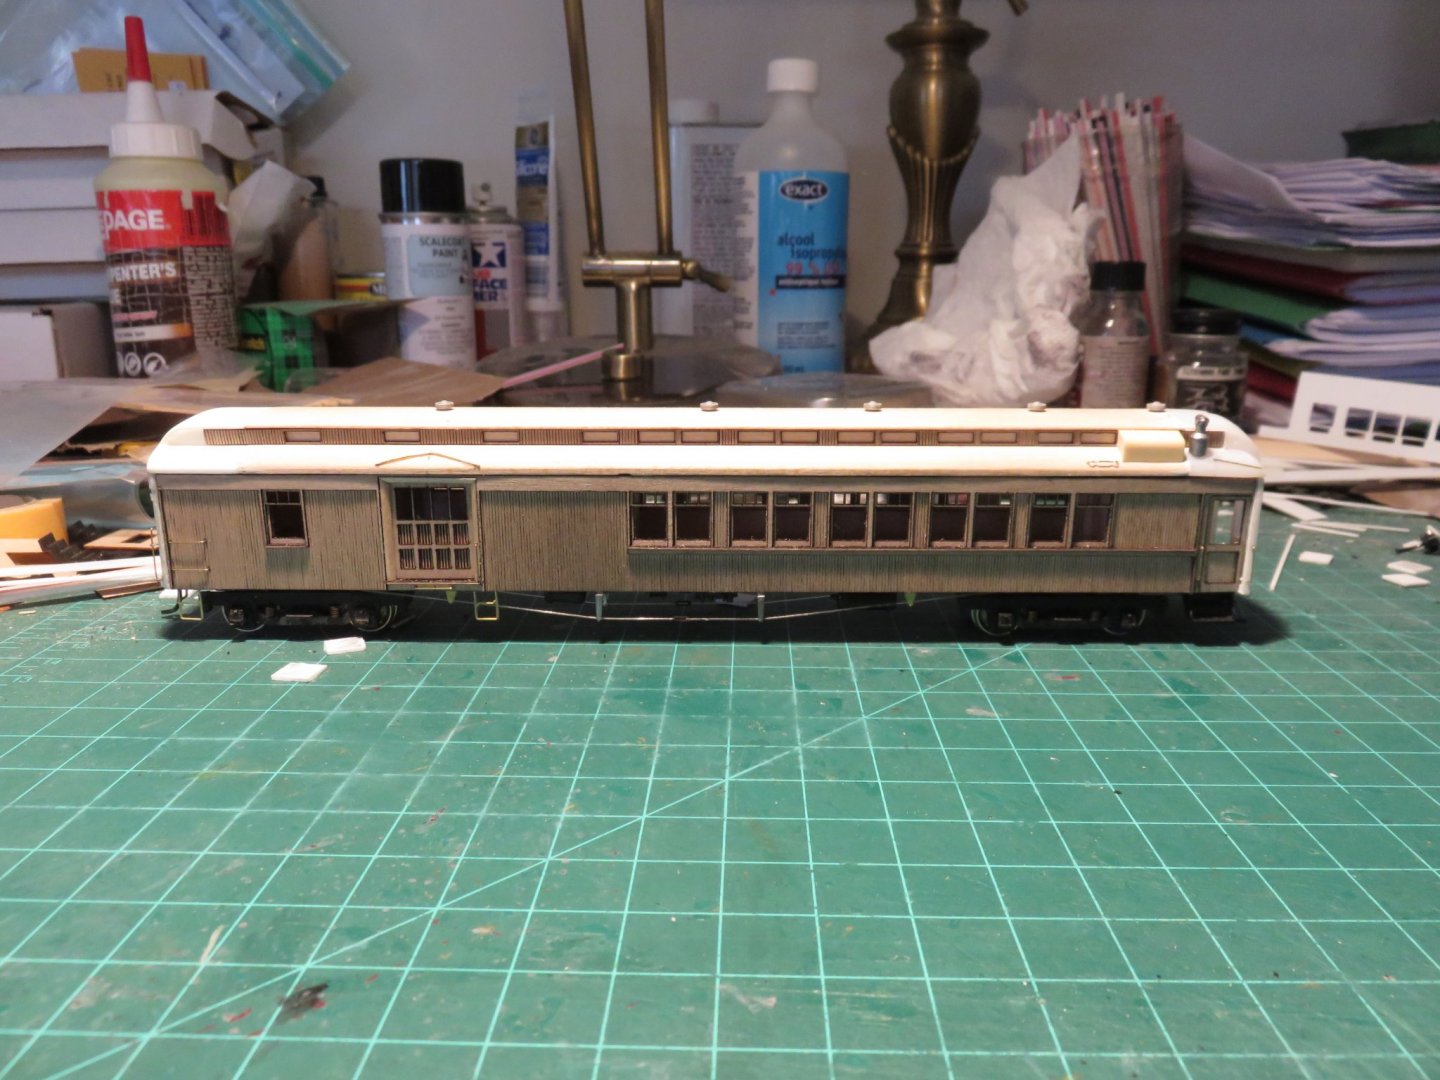
Thanks everyone for the comments and likes! EG, that's some brilliant work with that diagram! Time for a big update! Window cutting has been completed on the smoking room side of the car (YAY!) The core layer was made and subsequently glued in place, and the trim pieces put on I did a bit of a rework on the floor of the car, mostly because I found a few more detail parts. The holes have been drilled to accommodate the truck king-posts, which I fabricated using some different sized pieces of styrene tube. The truck is supported by a bolster made of a larger piece of tube that slips around the king post,. I've used this method before, to good effect, with Walthers passenger car trucks. Apparently, the particular version I'm using are discontinued... lucky I bought them when I did... (however many years ago that was...). The corners of the floor have been notched out to accommodate the entry steps, which will be added later in the build. Also in the photo are the vestibule bulkheads. These will be relatively unseen after construction, so they only need to be family simple in construction. Finally, some assembly! The car sides and vestibule bulkheads have been assembled to the floor. Things went together fairly quickly, and for the most part, everything lined up nicely (and squarely too!) The car is sitting temporarily on it's wheels so I can get a preliminary look at how things are proportioned. Also this is the time to begin verifying and correcting the car height (by adjusting the truck bolsters), and eventually the coupler height as well. There's no diagram for this, it all has to be done by measurement and comparison with other model passenger cars, as well as a couple height gauge (more on that part later). I've also been busy working on the ends of the car, and getting them finished, trimmed and attached. One down, one more to go. And just for those keeping track at home, Sticking a scale ruler against the car as it stands, it comes to 79' 9", once I add the diaphragms (the bellows that go around the end doors that allow passengers to pass between cars in a train), it should be pretty close to the prototype 80' 3".... not bad for having no diagram to work from! Andy


- 154 replies
-
- 16
-
-
Thank you so much for the offer, but you don’t need to go to all that trouble. From what my friend told me, a shop employee stumbled across a dumpster full of old drawings and documents, he saved as much as he could. Andy
-
I've seen that in my searches. I think that's part of a mechanical department drawing, and is crazy full of details and references (and very cluttered to be honest). At the scale I'm building, it's the folio drawings that are more useful (basic dimensions and the like). Although if there was a mechanical department drawing of the layout of the undersides (brake lines and reservoirs, steam and signal pipes, battery boxes and other electrical components) that part could prove useful. I fear many of these drawings have been lost in the dustbin of history. Based on reports from a friend of mine who had a chance to visit part of the CPR operations out west, certain recent corporate overlords at CP couldn't see any "cost benefit" of maintaining these old archives and a large portion has been lost wholesale. Andy
-
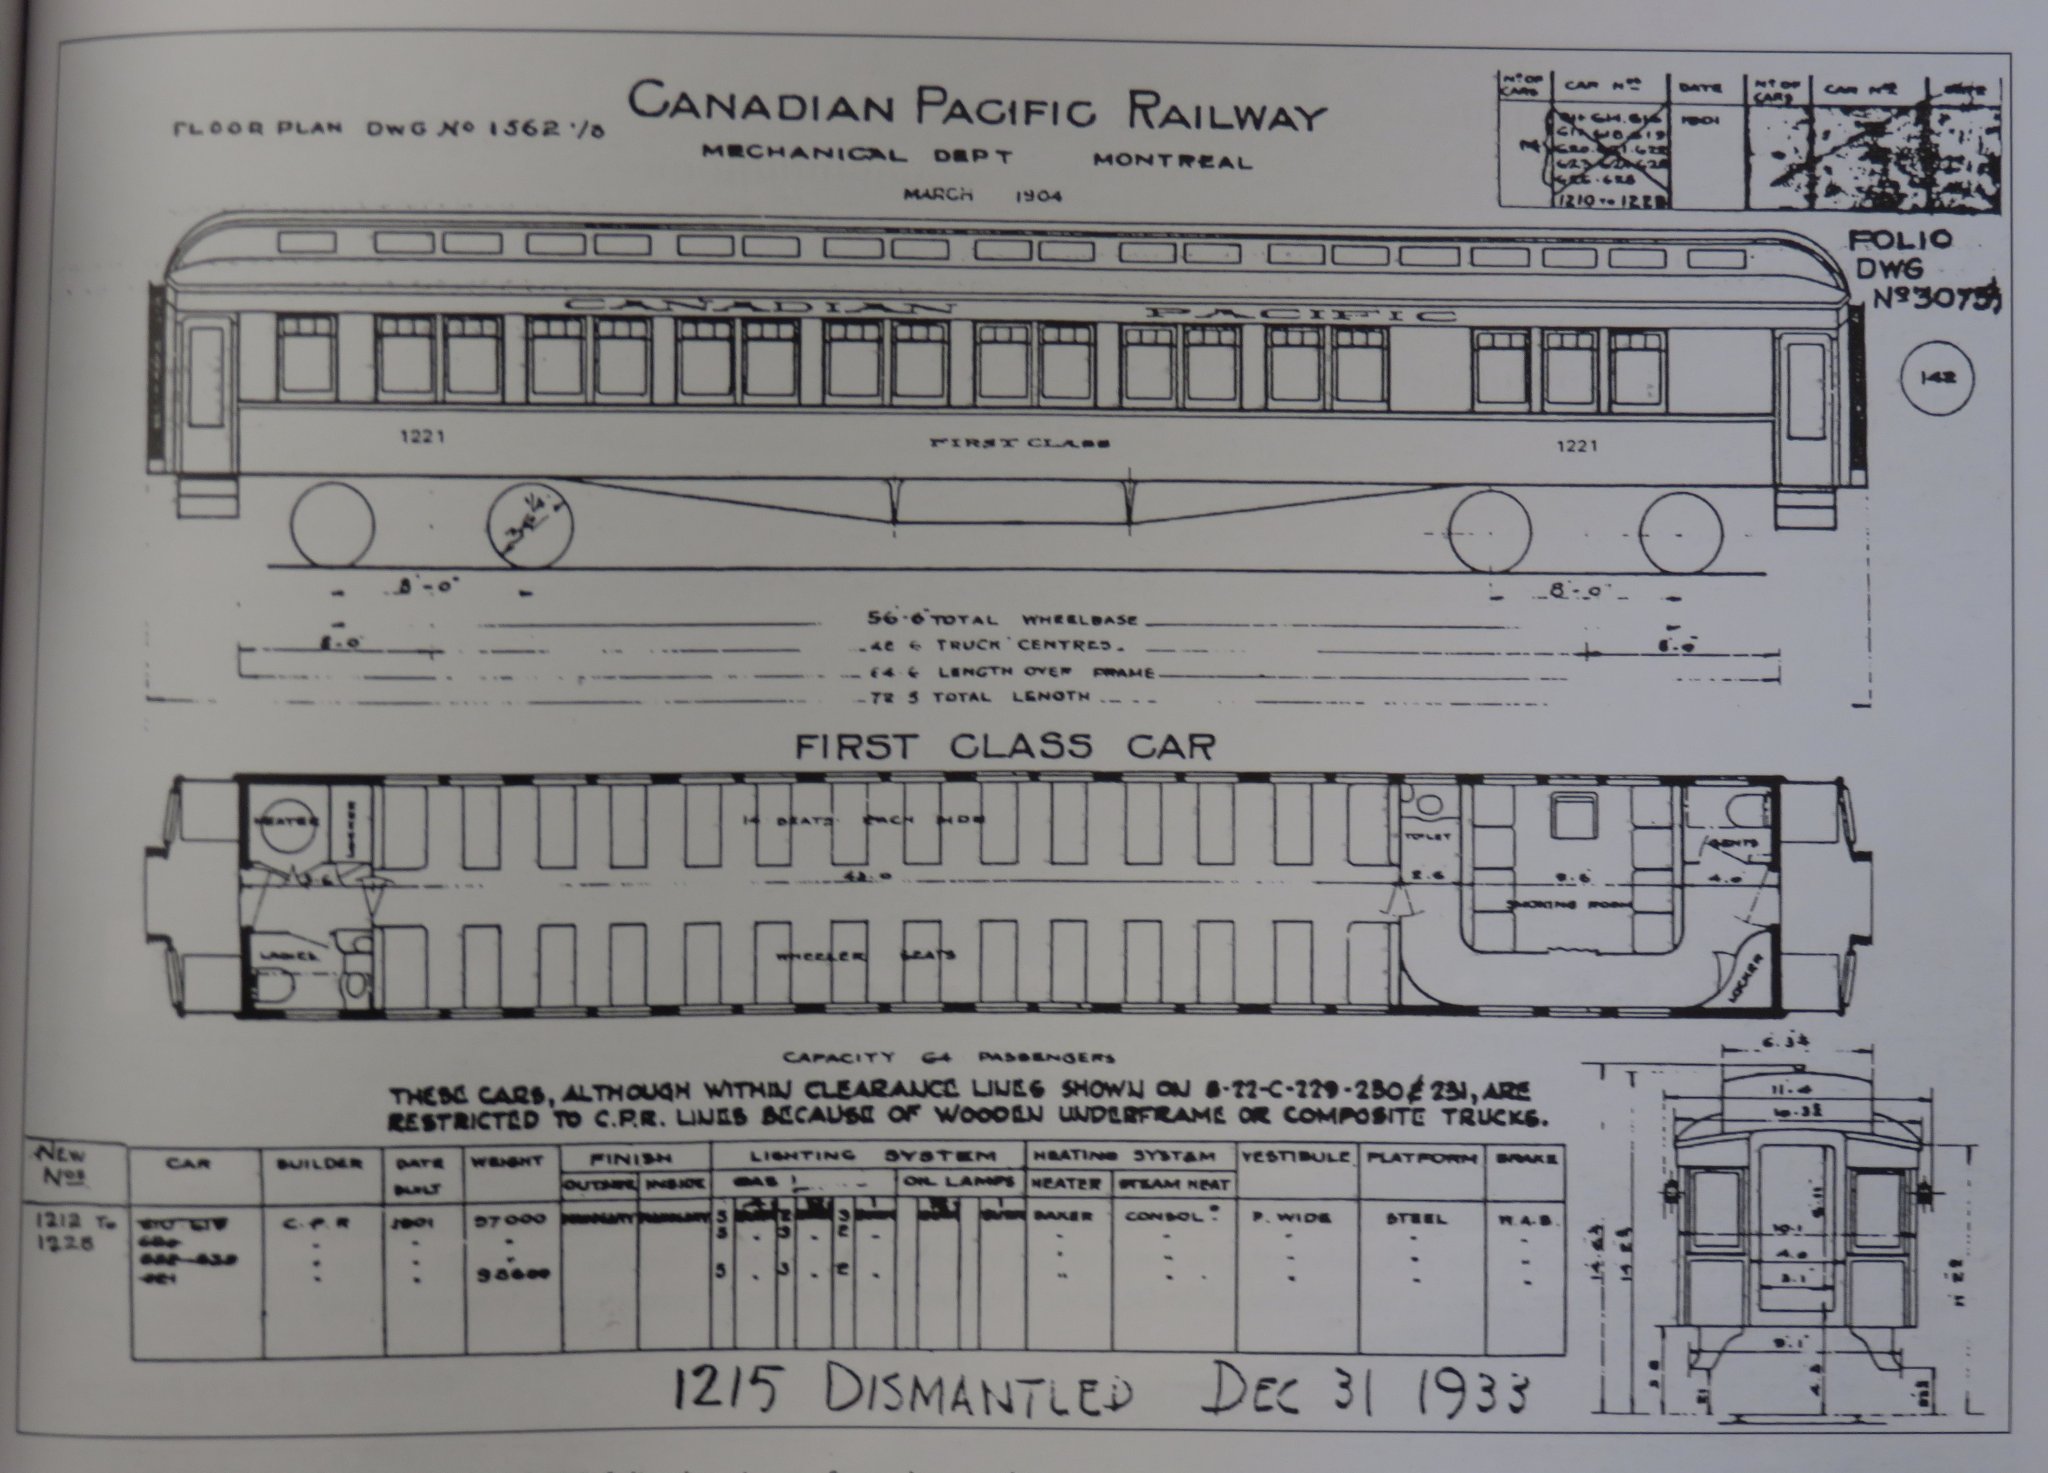
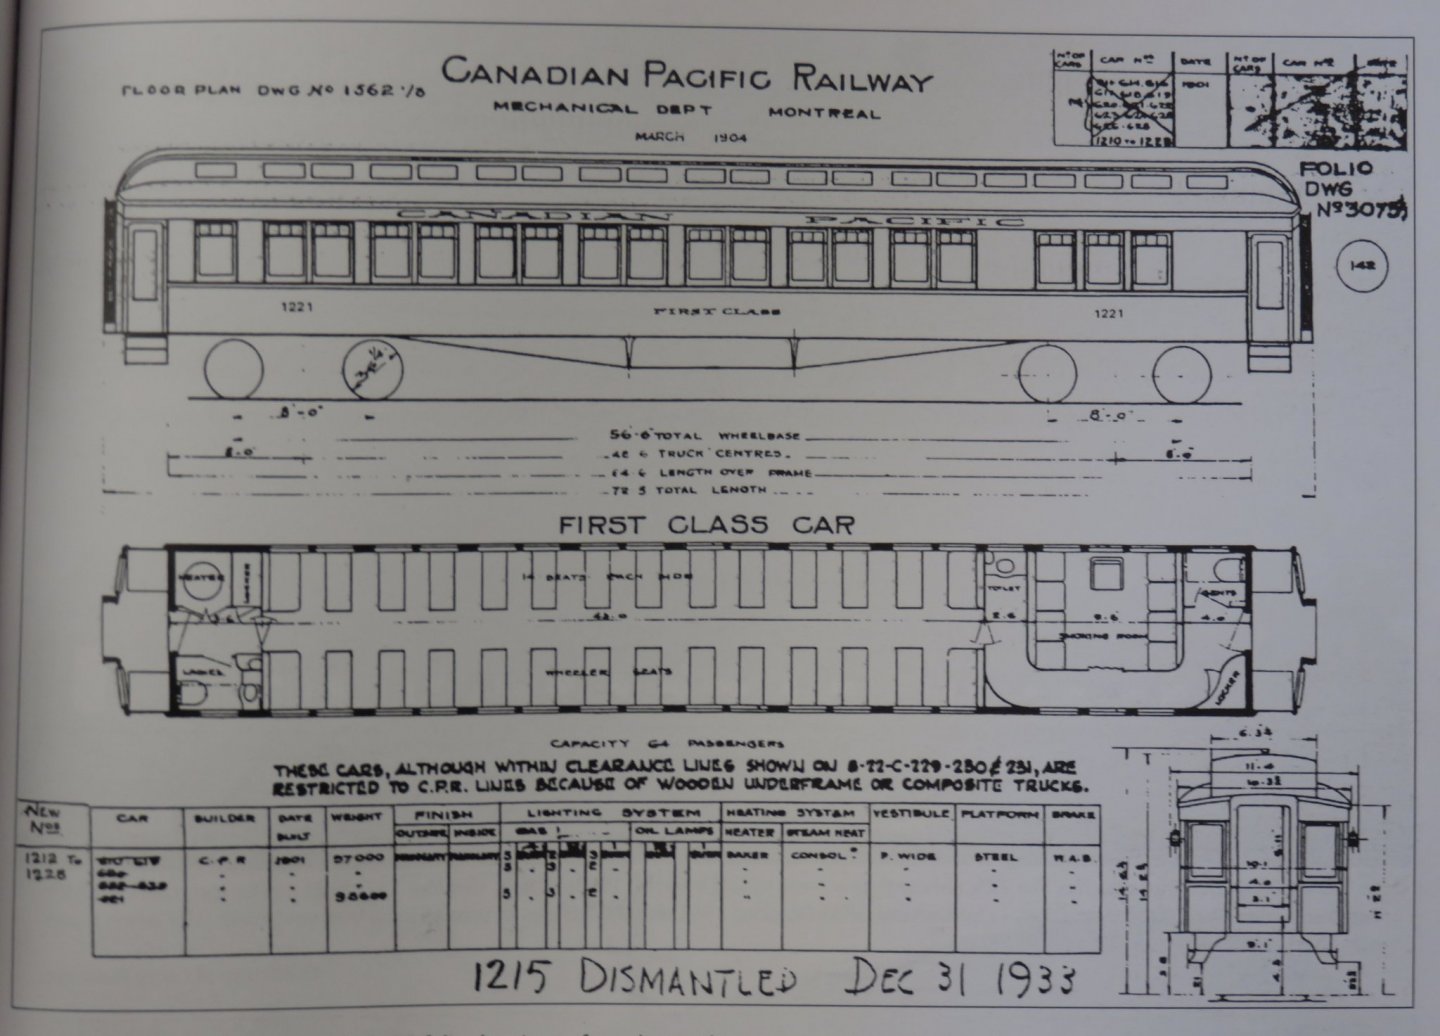
Hello all, thanks for the comments and likes. Time for another small update. As mentioned in a previous post, I have largely been unable to locate a proper drawing for this particular car, but I do have a drawing of the smaller version in a book: This was just a quick photograph of the folio drawing. The book, "From Abbey to Zorra via Bagdad" by Dale Wilson, is a based on a copy of the 1955 CPR passenger timetable, and includes many images of some of the passenger rolling stock used by the CPR, as well as copies of the 1949 and 1960 passenger equipment registers. Although the above drawing is of the smaller car, the interior layout is generally the same as the car I am attempting to build. Moving along with the build, I've finished the trim on the corridor side of the car, there is only a few remaining pieces of 1/4 round that will frame the doors (that will have to wait until the car sides and ends are assembled), as well as the mullions for the transom windows. I've also begun work on the smoking room side of the car, cutting out the windows on the sub-side layer. This tedious task has now been completed (thankfully) The two layers have now been glued up. After the glue has had a chance to set, the next step will involve cutting out the transoms on the outer layer, as was done on the corridor side. Although tedious and repetitive, things are still moving forward at a fairly steady pace, assembly is starting to look like a looming possibility. Andy


- 154 replies
-
- 12
-
-
Thanks OC! Painting that roof must have been a “fun” job! It definitely gives a good appreciation of what the railroads had to do to keep their “varnish” in top condition for the clientele. Andy
-
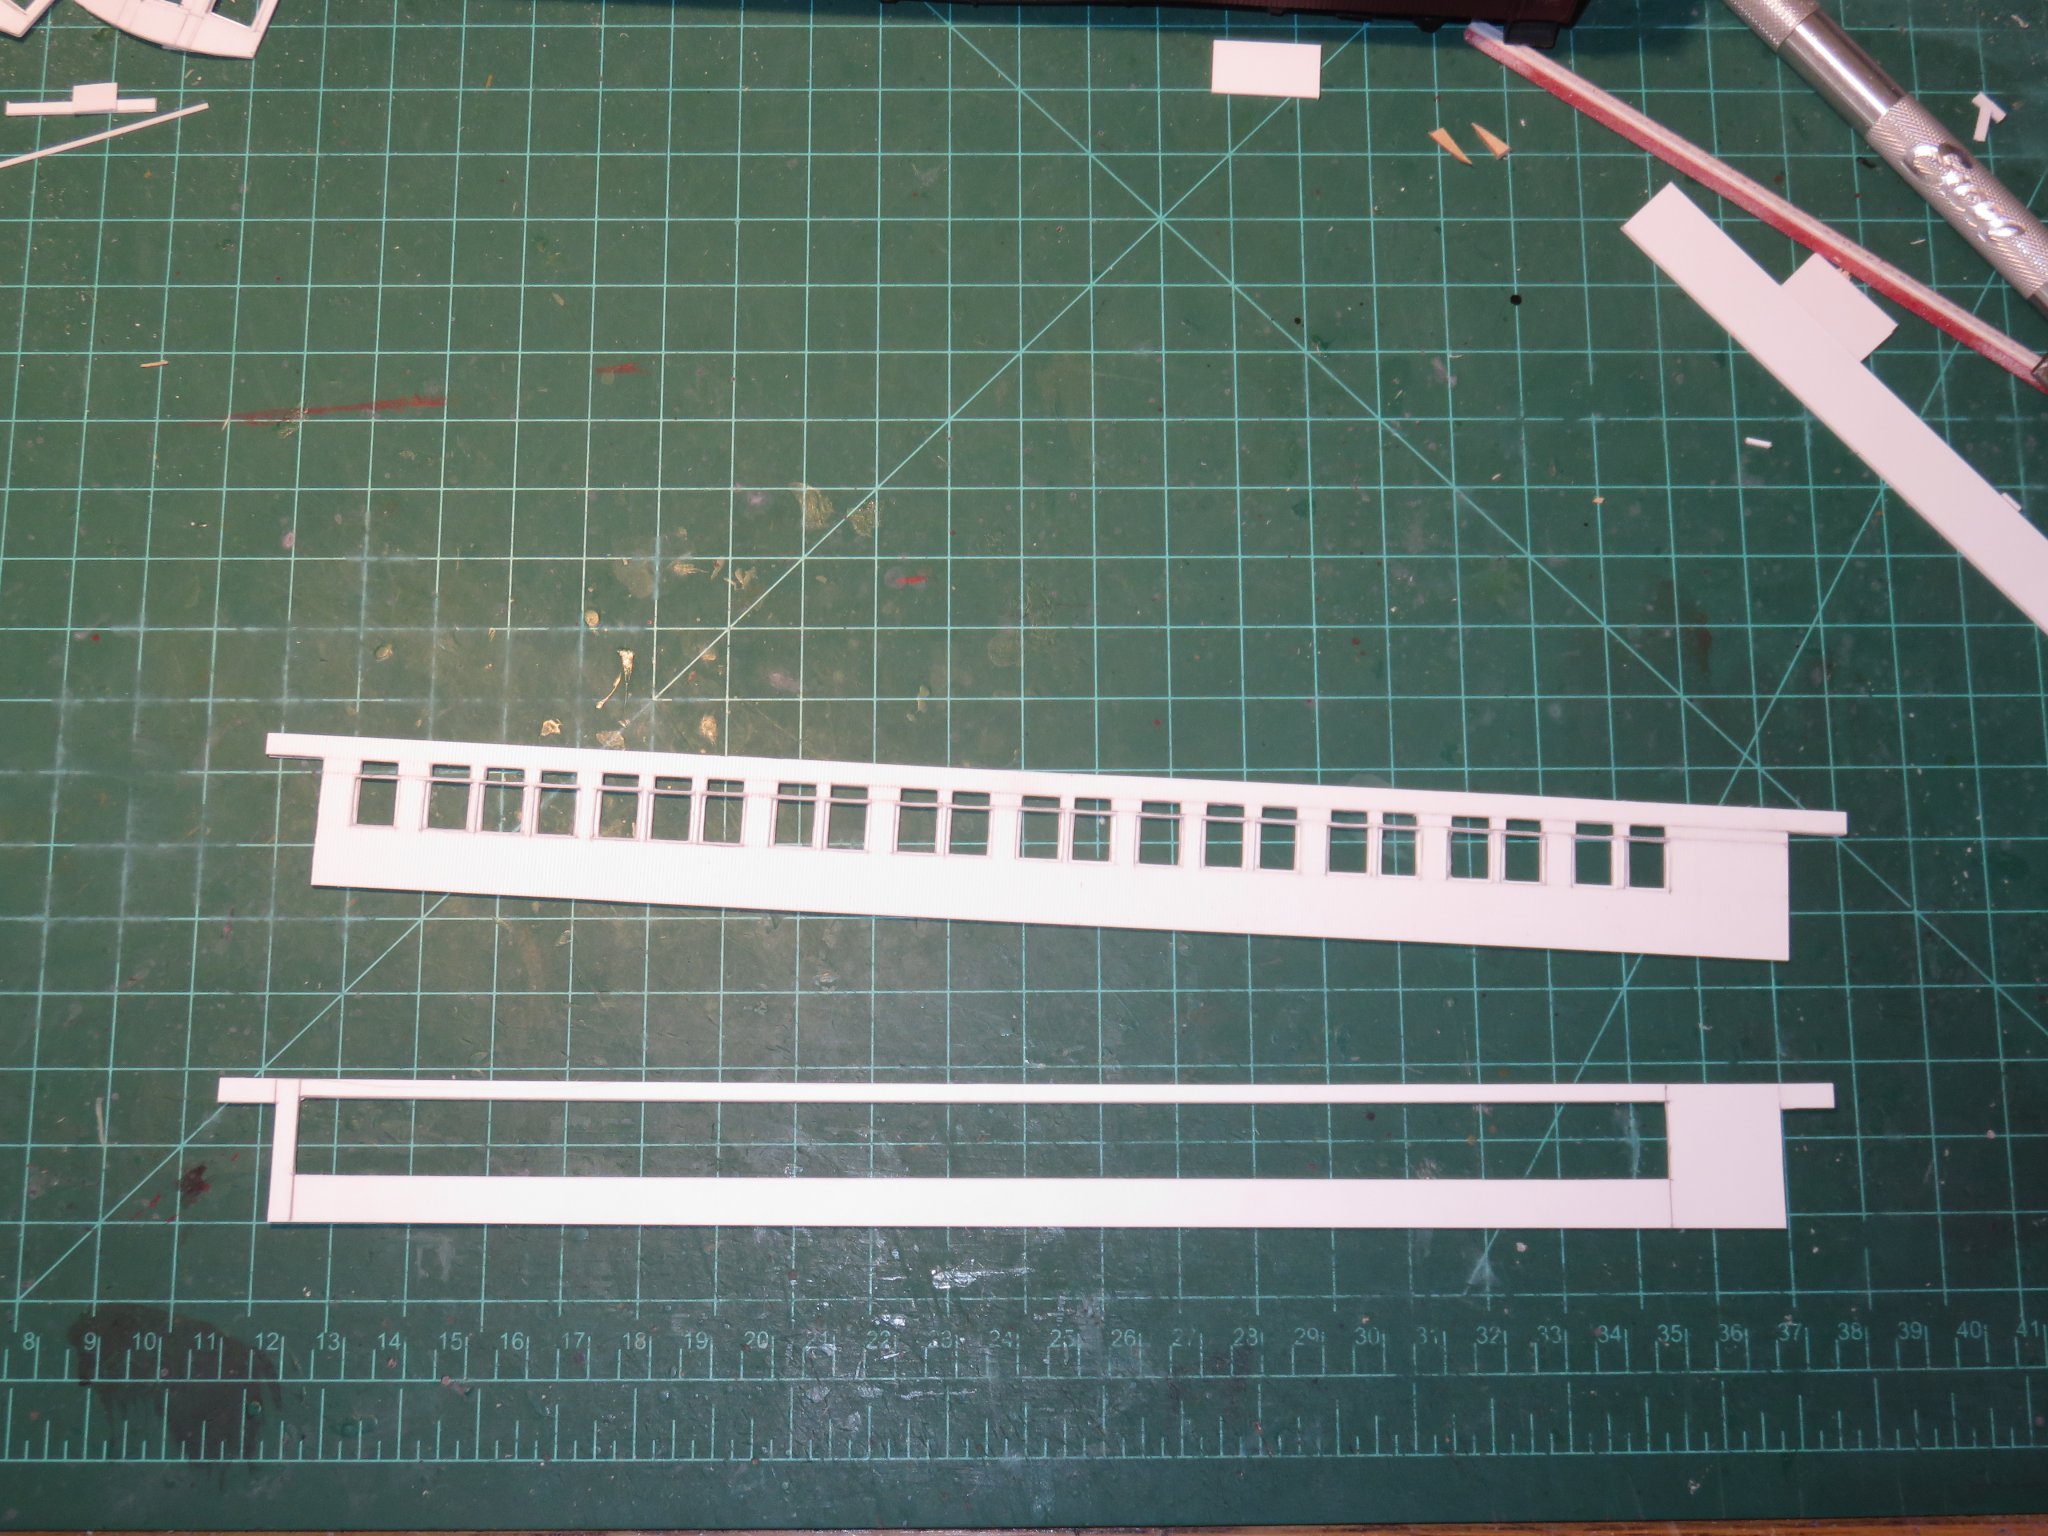
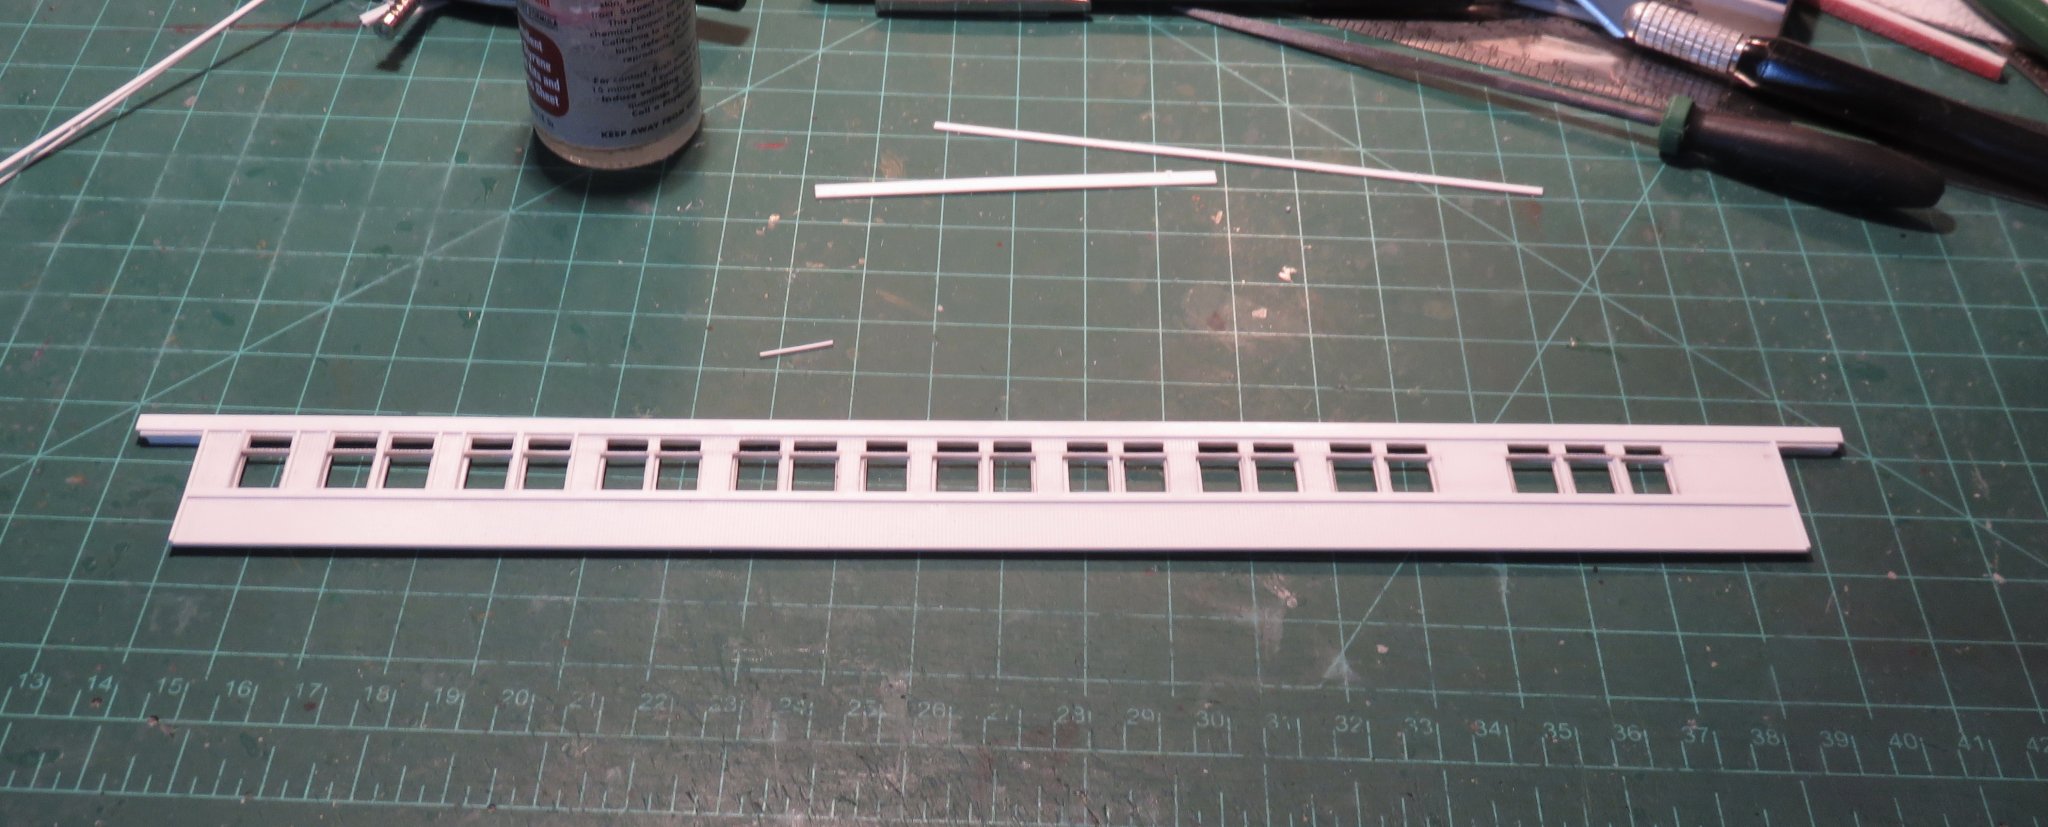
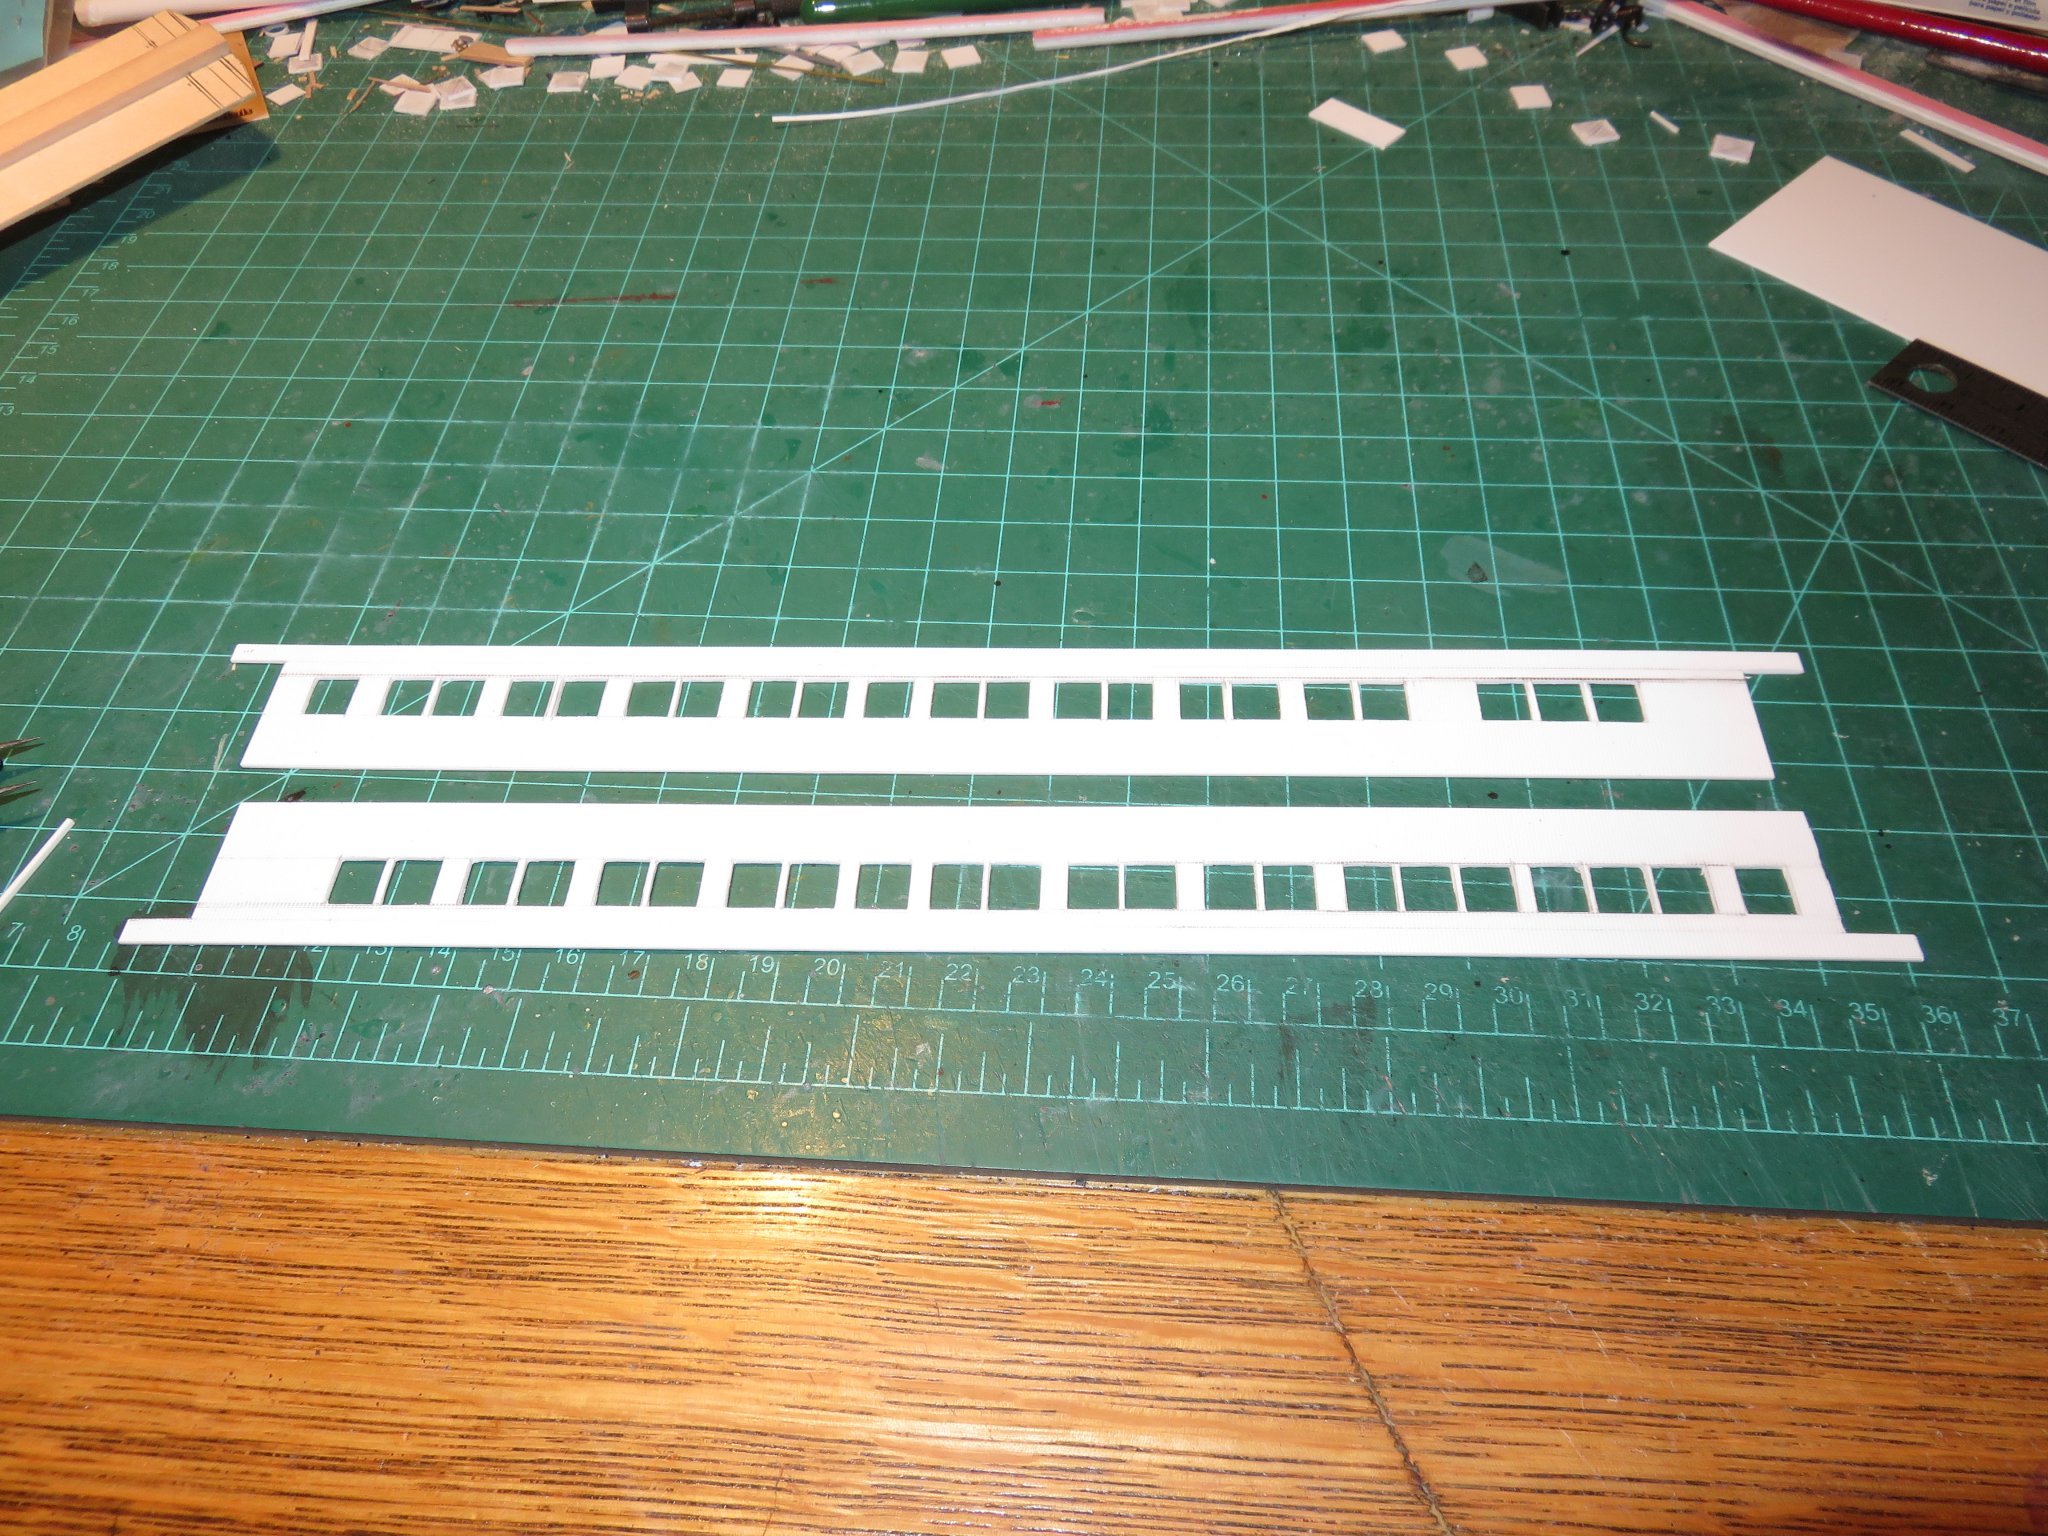
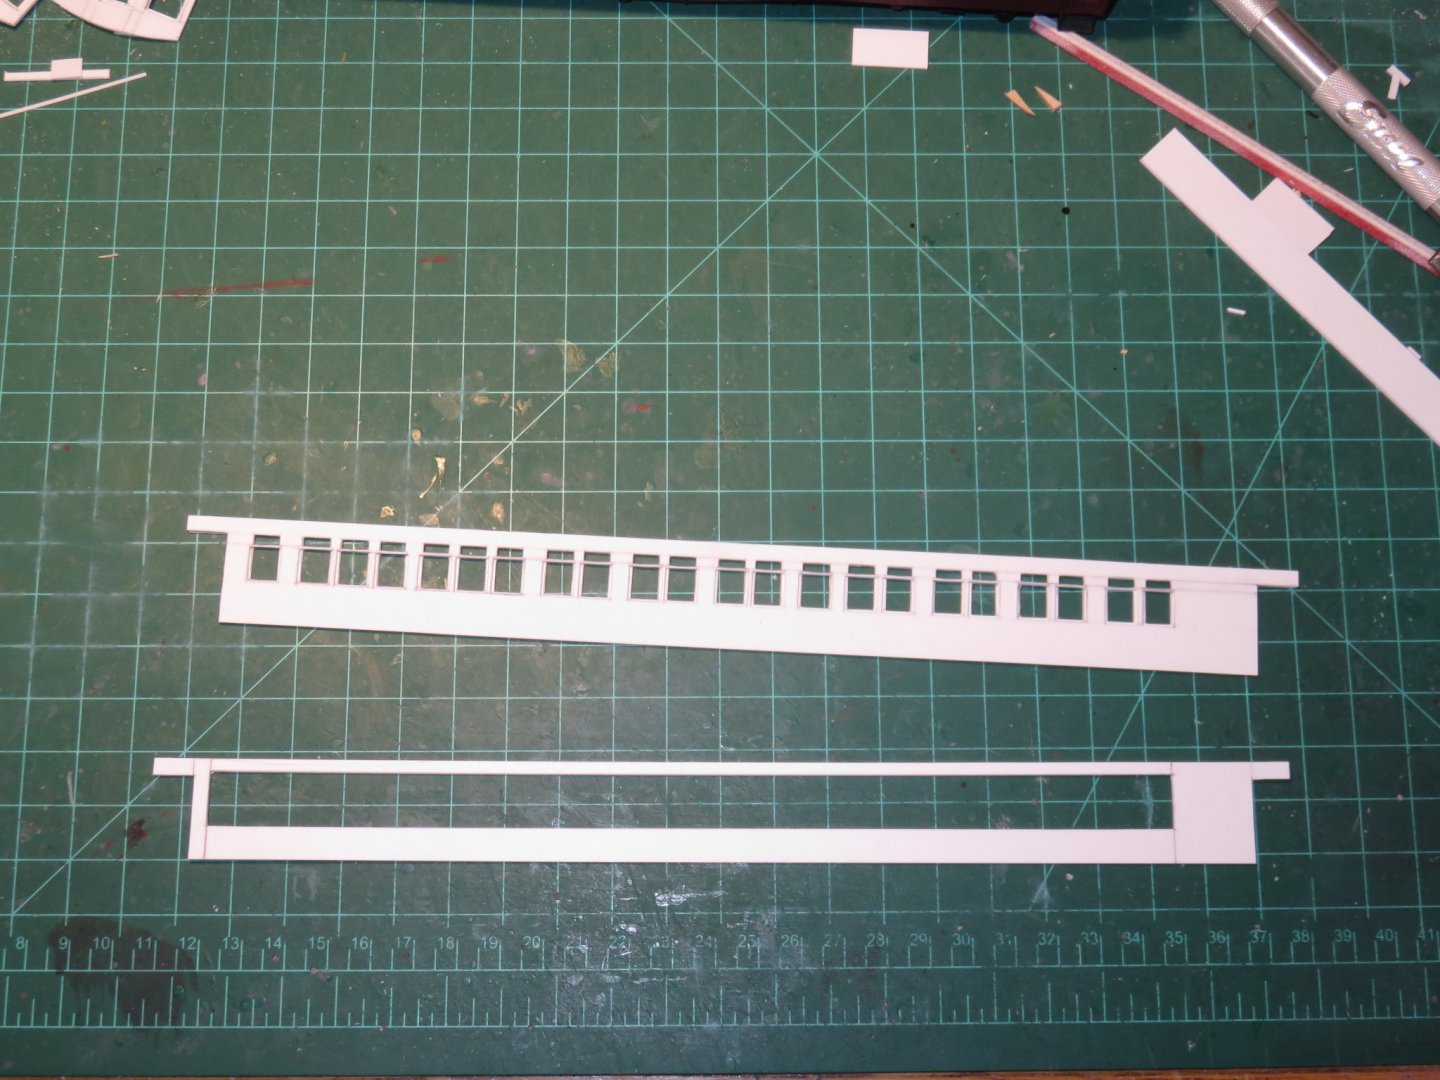
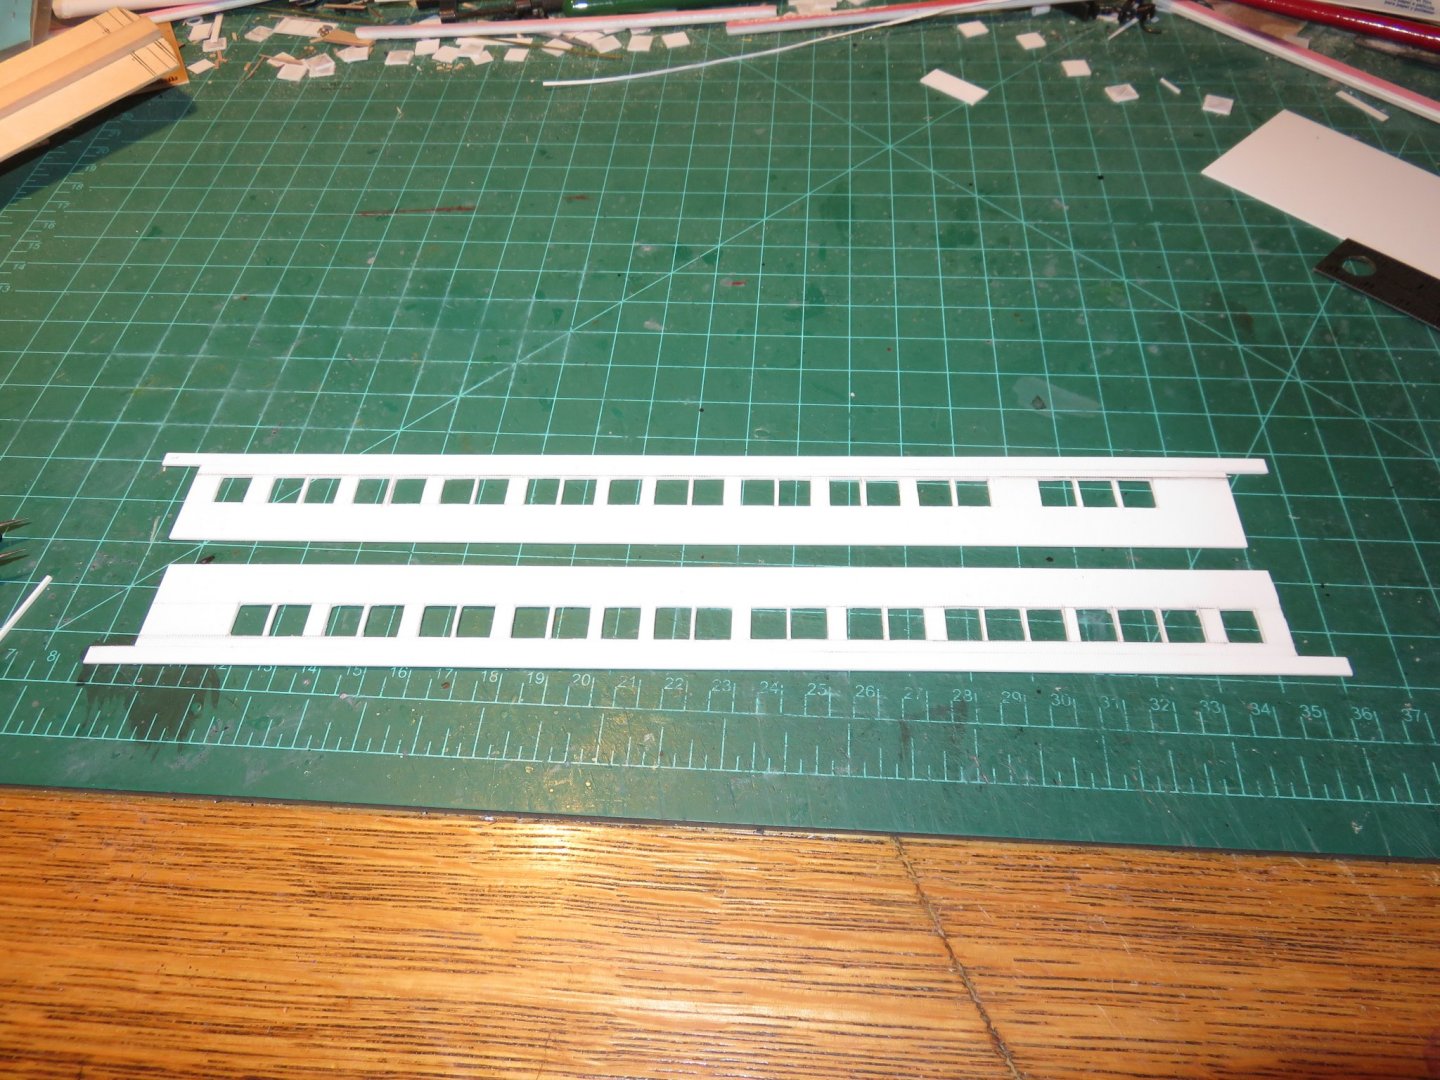
Time for another "small" update. Work has progressed on the corridor side of the car. The sub-side layer has been completed. A tedious process of measuring, marking, remeasuring, checking, remarking, remeasuring, rechecking and finally cutting out each window one at a time. I was pleased with the results, so I've now started to finally glue things together. After the sub-side layer was glued to the scribed outer side layer, the transom windows were then cut out. This process went rather faster than I anticipated (a small mercy). After then windows were cut out, the core layer was also cut and added on. Both the sub-side and core layers are shorter than the outer side layer by almost a scale 12", this now provides a substantial, inverted "L" shaped glueing surface when the time comes to start assembling the car. I've now begun adding the trim layers. Above the windows, the letterboard has been added and below the windows, the belt rail as been started (this will be finished with a final trim piece later). Starting from the left hand side of the car side, I've also now begun adding the vertical trim. After trimming the windows, the mullions will be added to the transom windows and that should just about finish this car side. Andy

- 154 replies
-
- 14
-
-
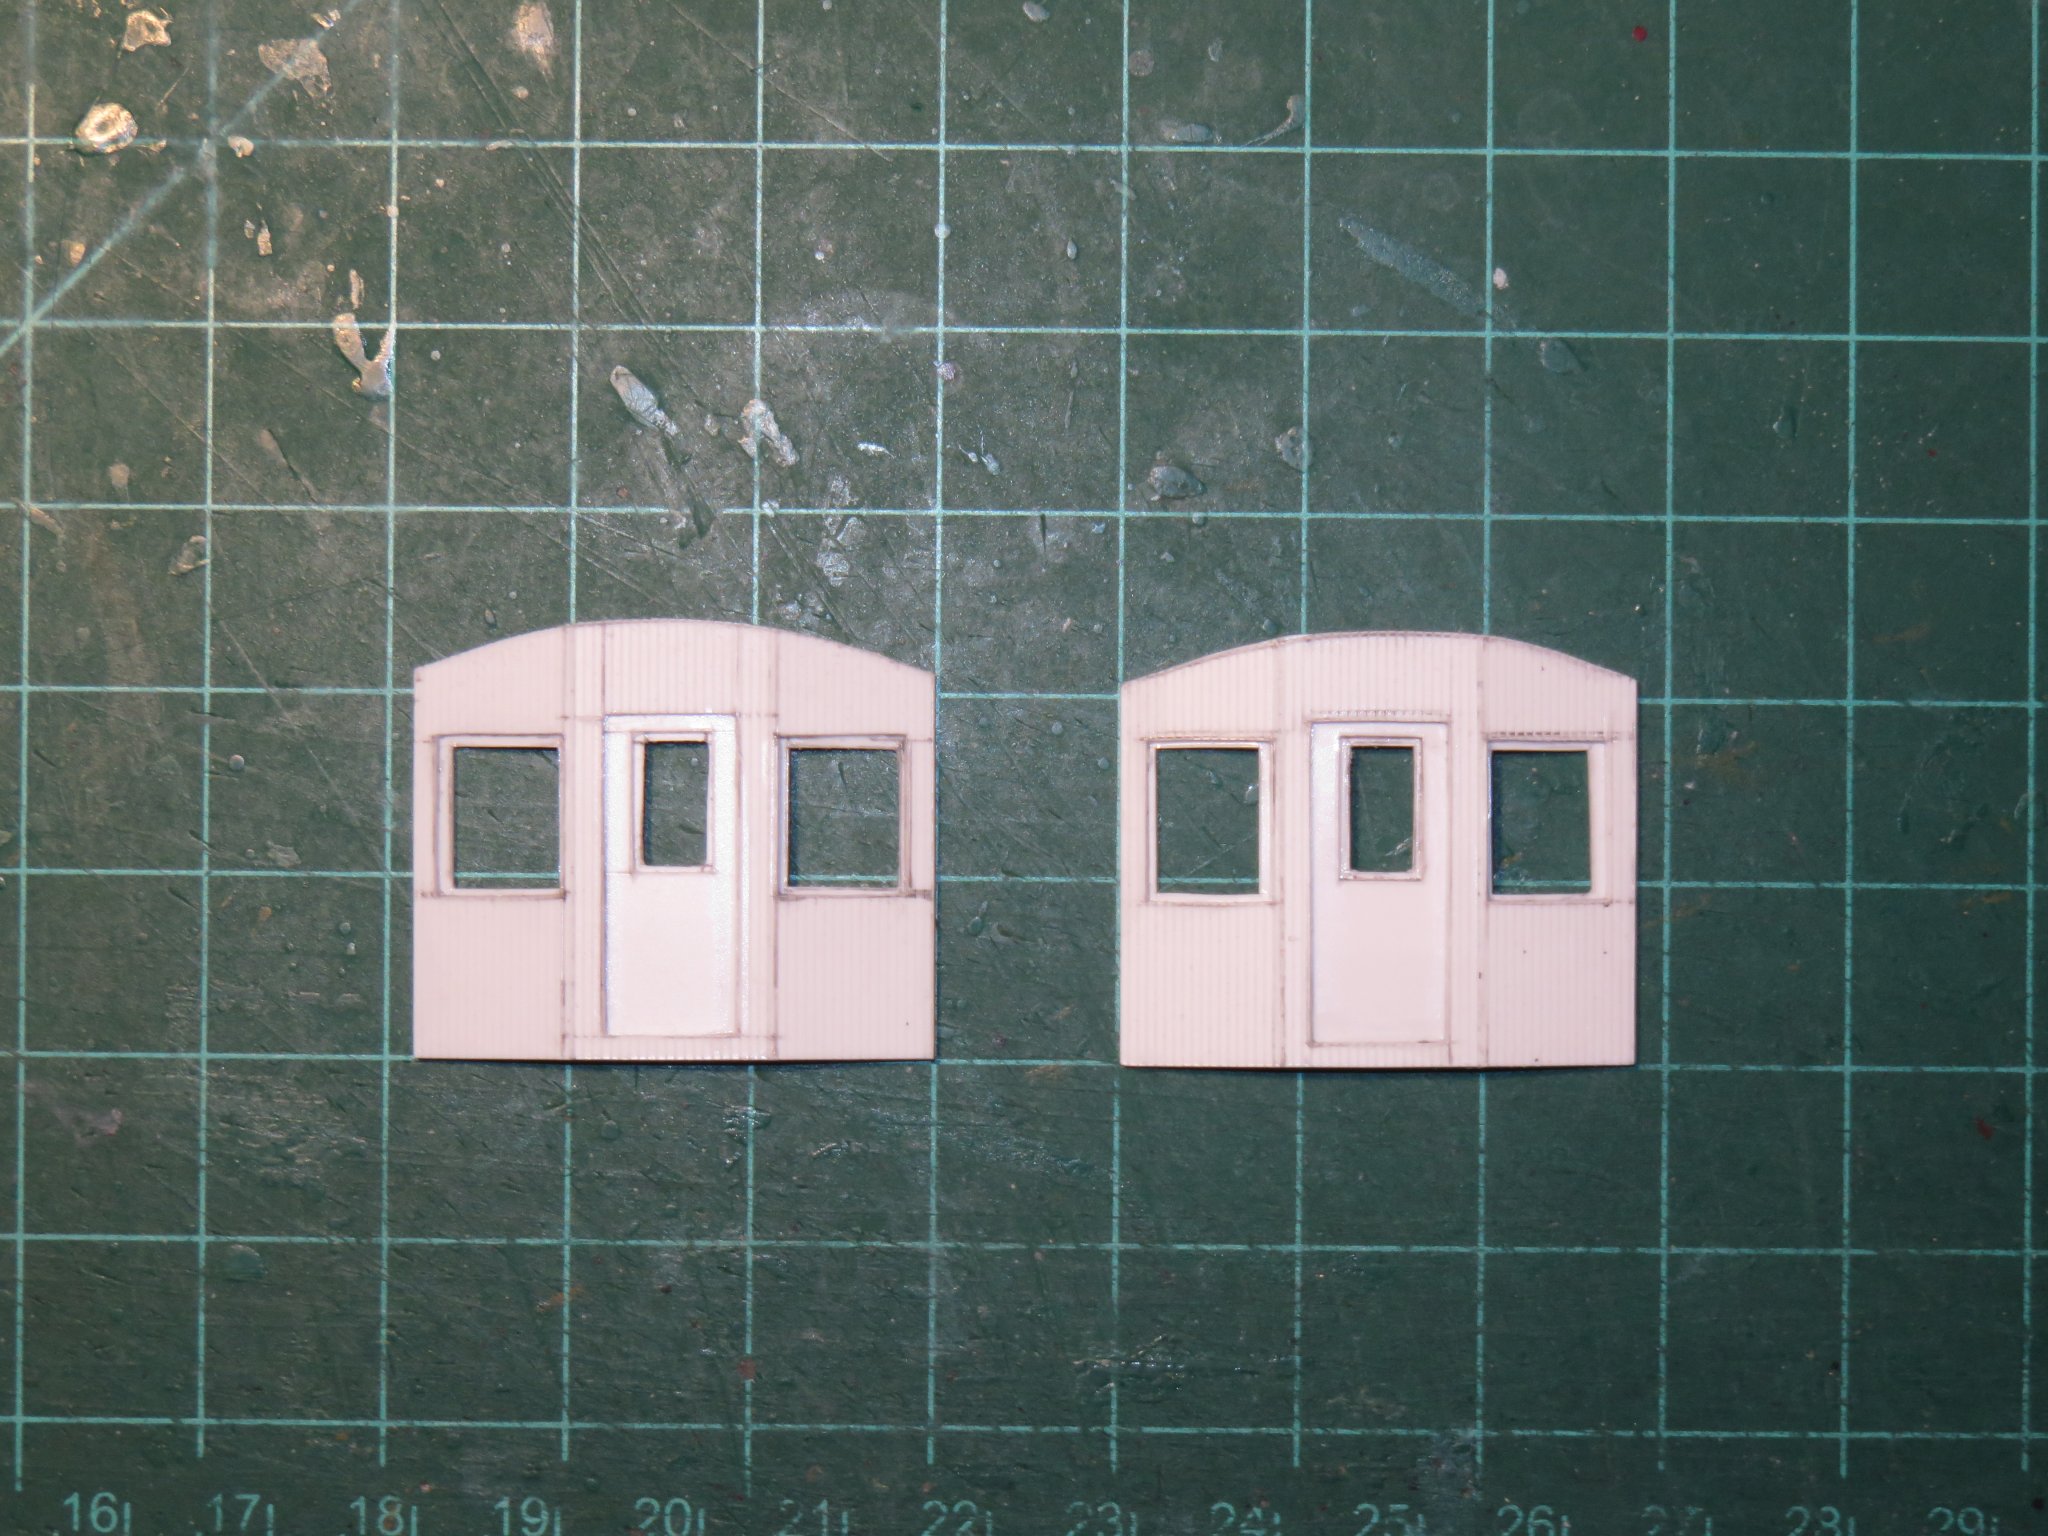
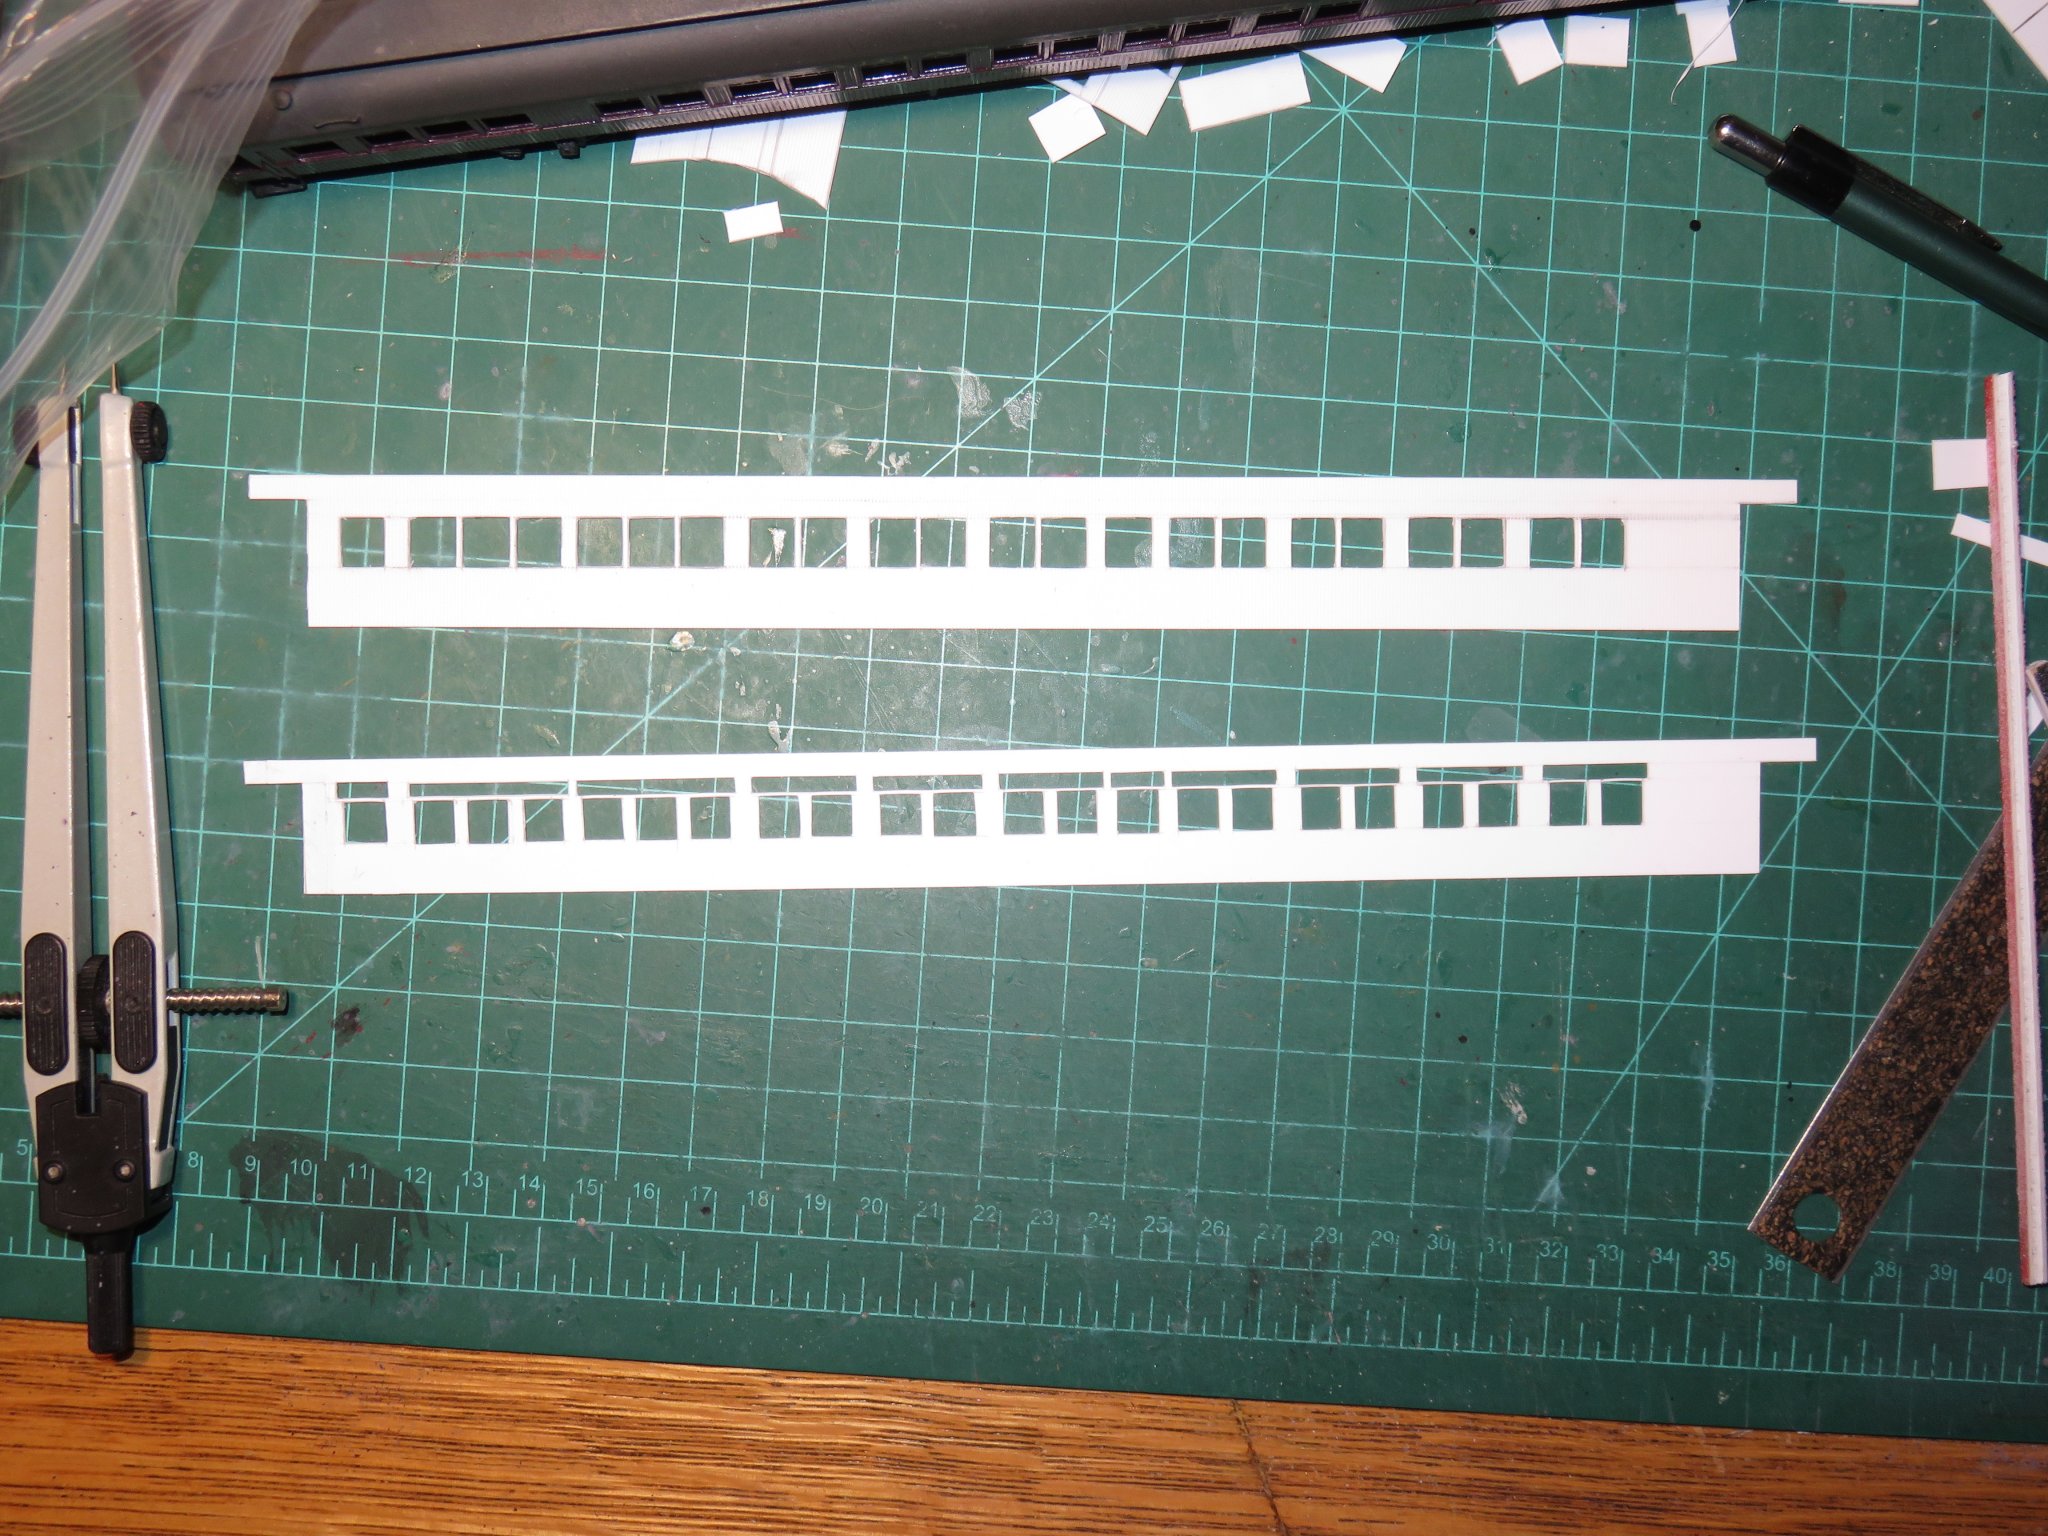
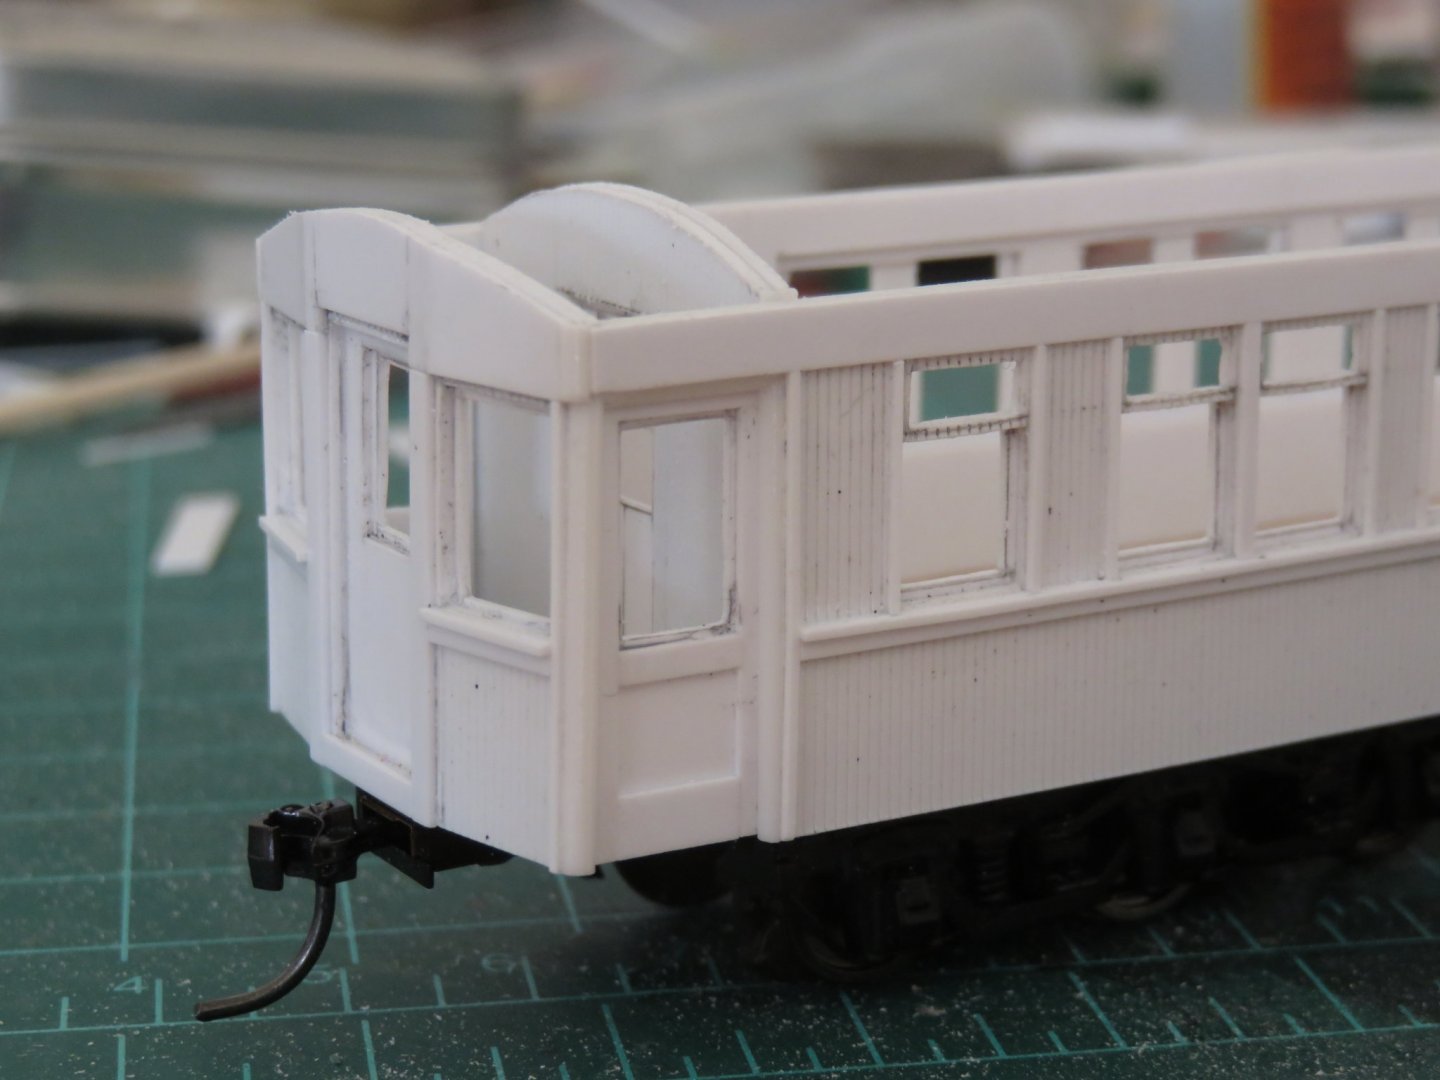
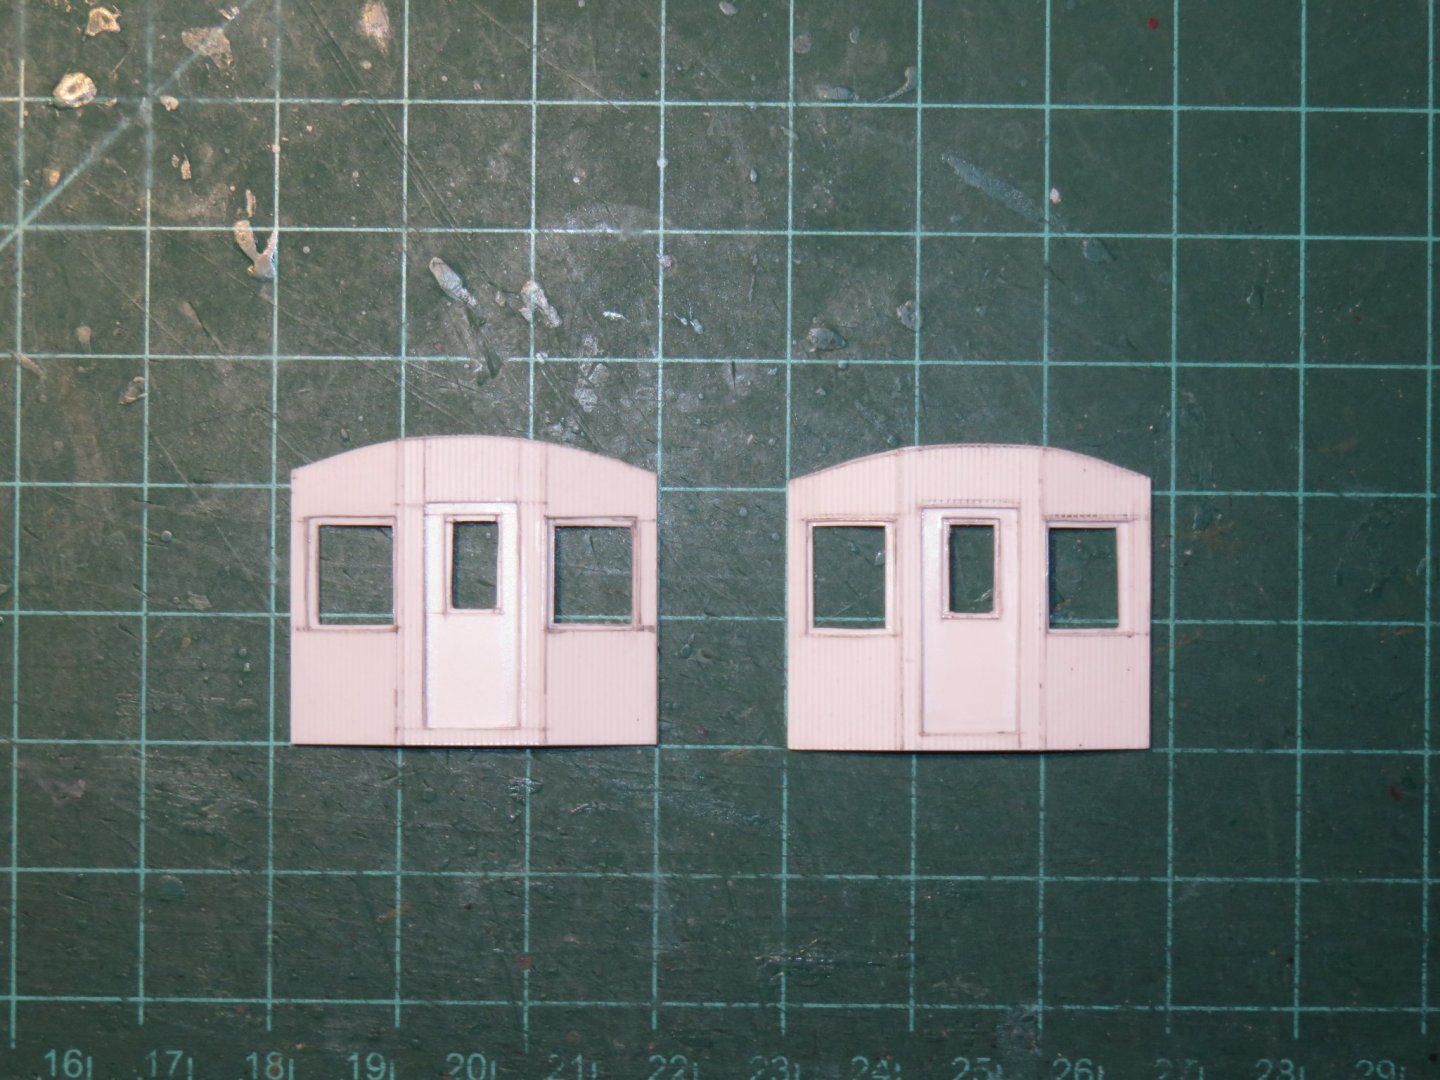
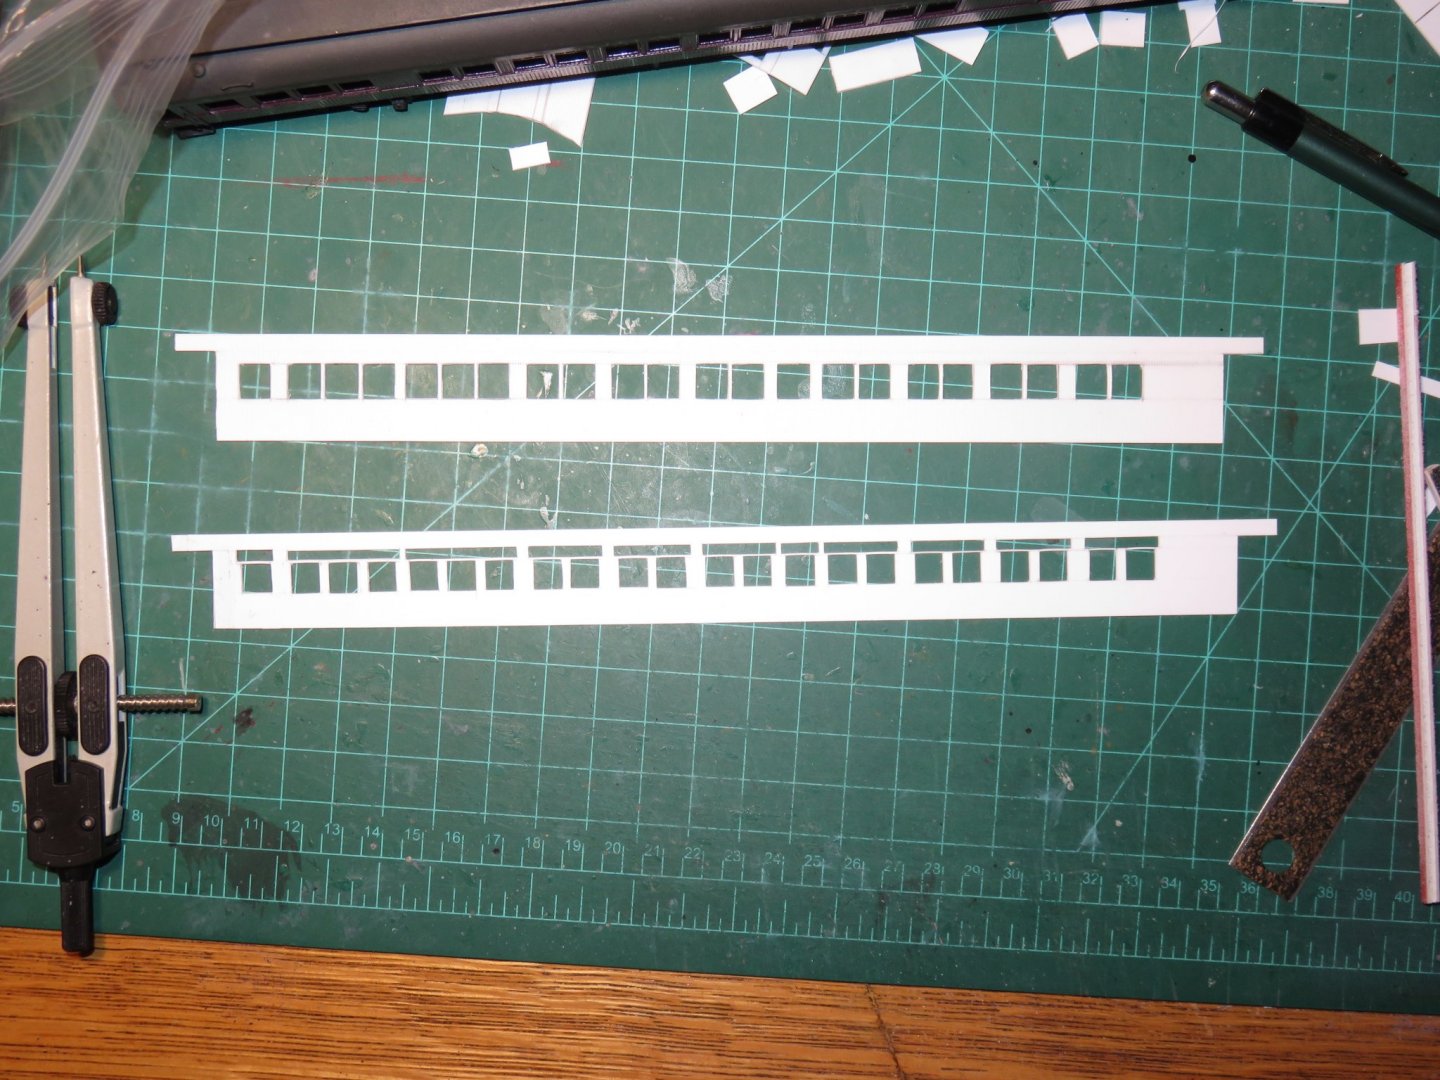
A small update. Work has progressed on the ends of the car, and I now have two that are a reasonable match. There's a bit of a preview as to what is to come with the sides, as I went ahead and added the window frames, as well as the doors (and the door window frames as well. One of the tricky bits was getting the top curve to match the curve of the roof end pieces. It's not quite correct, but I've left myself a decent margin for error there, so when the time comes for assembling the car, the arch can be sanded to fit nicely. There's still another layer to be added above the windows, but there again, that will have to wait until assembly. The ends are slightly over width as well, but again, that can easily be corrected at a later point in time. As I mentioned earlier, the ends provide a nice preview of things to come. Next up will be the creation of the sub-side layers. Above is an earlier attempt that is destined only for the scrap pile, but it does nicely illustrate all the cutting that lies ahead. For the sub-side, the transom window openings are a bit more generalized, and the exact openings are still yet to be cut out on the outer side layers. The trick is that the transom windows need to be the same width as the frames of the windows, as cut out on the sub side, so in order to be as accurate as possible, they cannot be cut out until the subside layers have been made and glued in place (fingers crossed that all foes well). Andy
- 154 replies
-
- 17
-
-
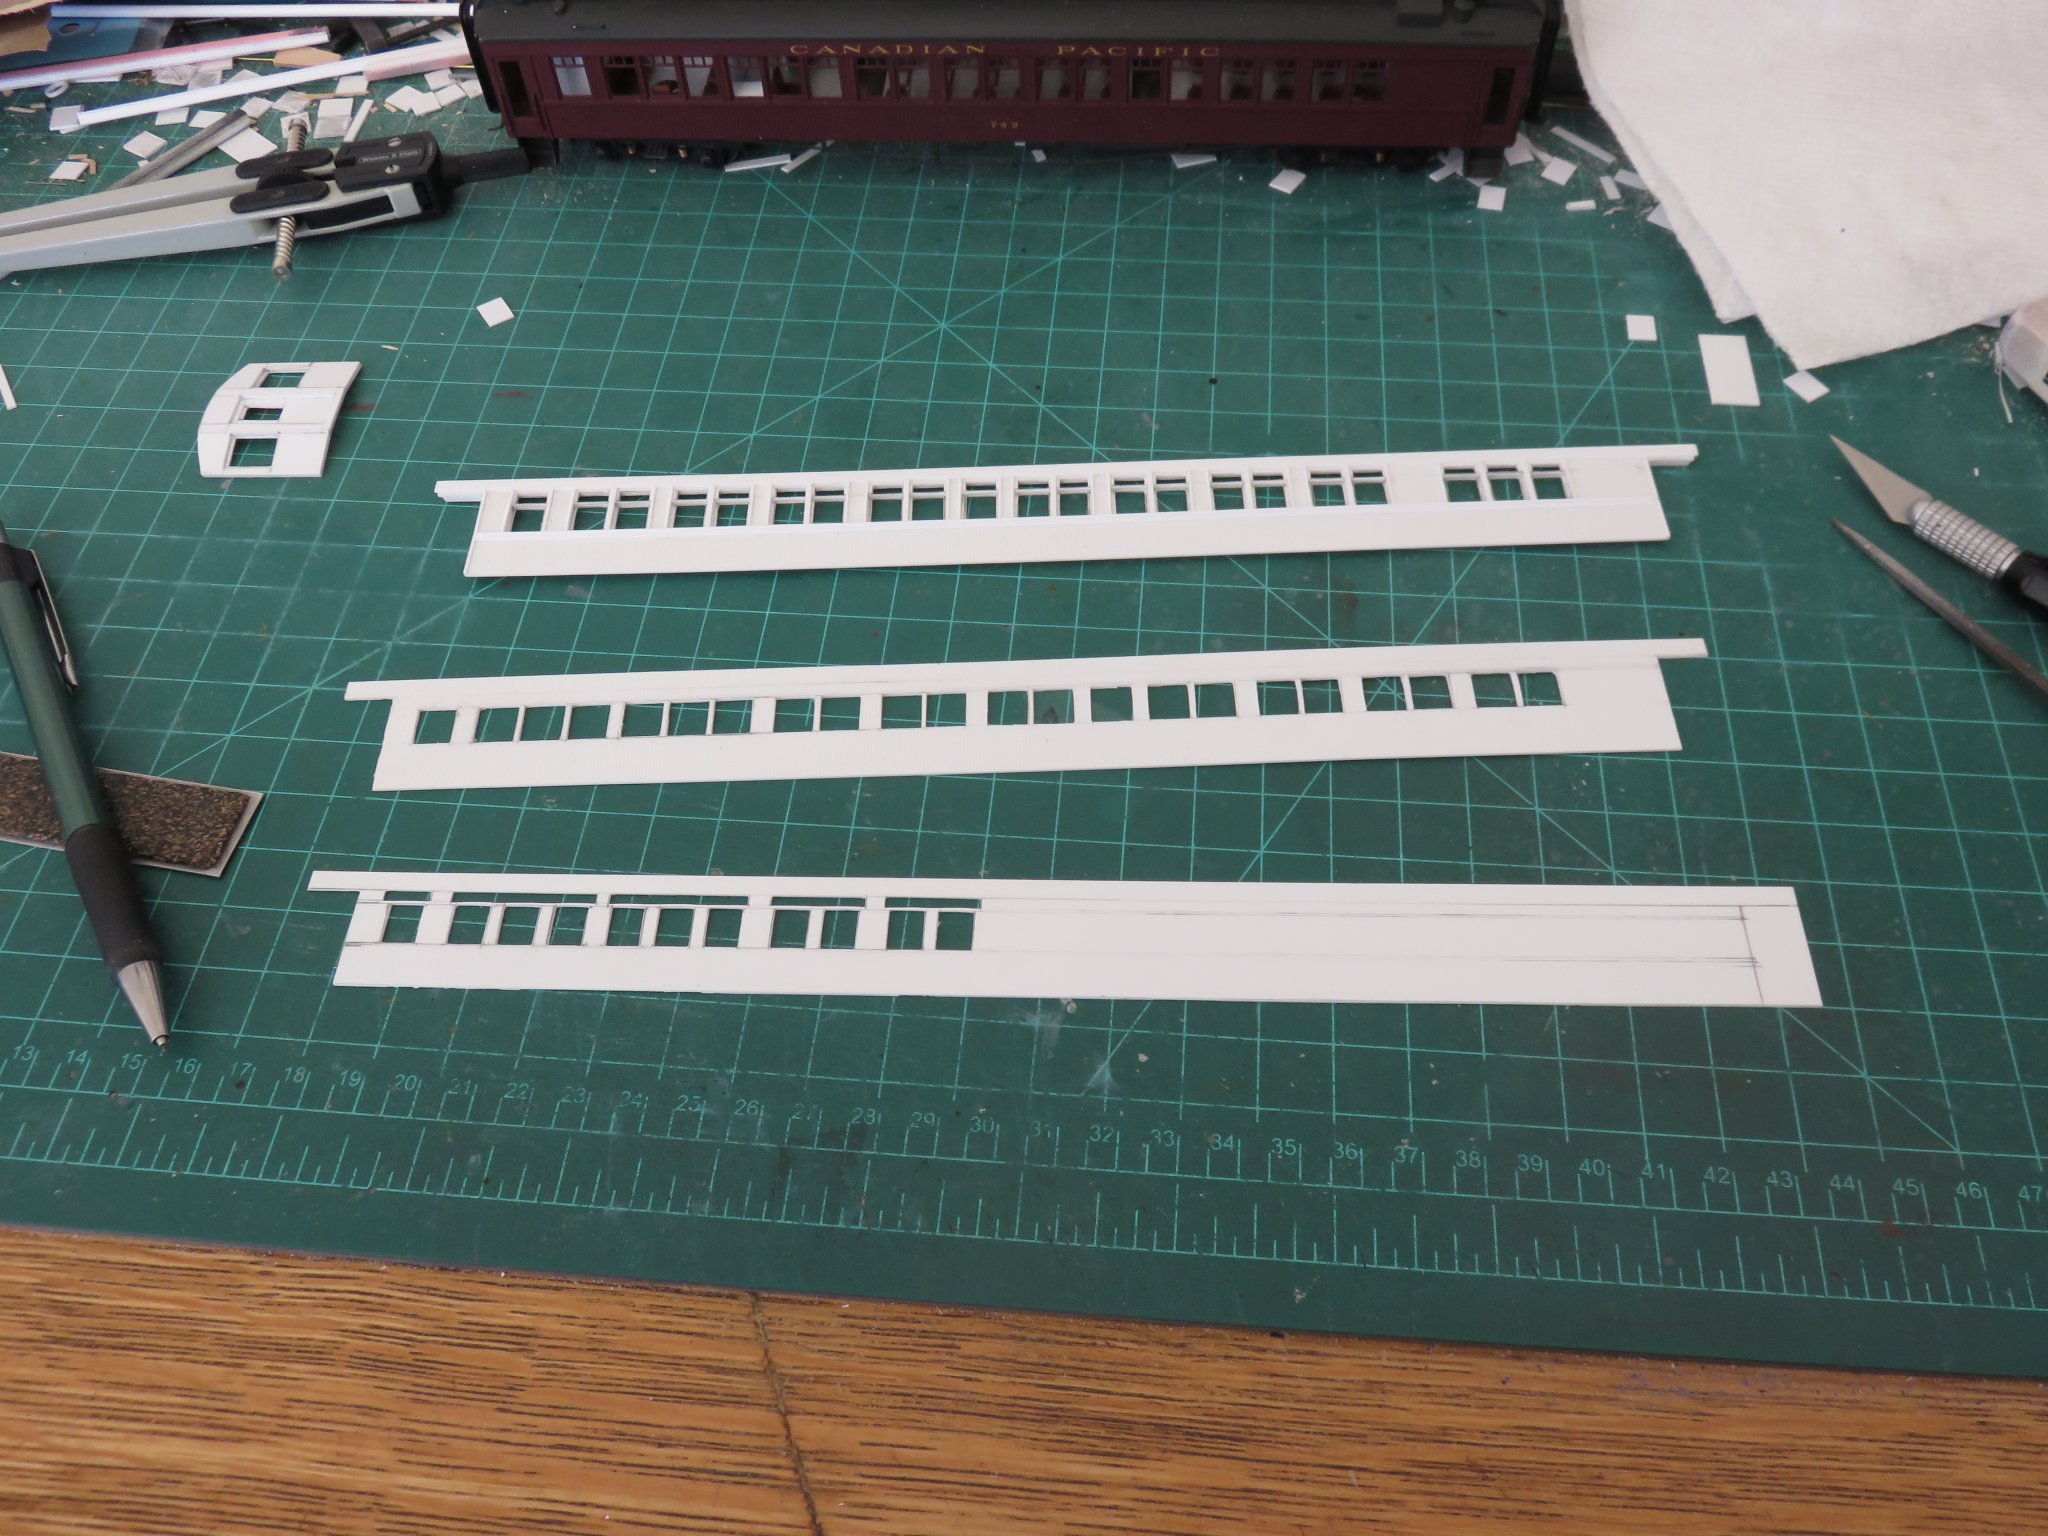
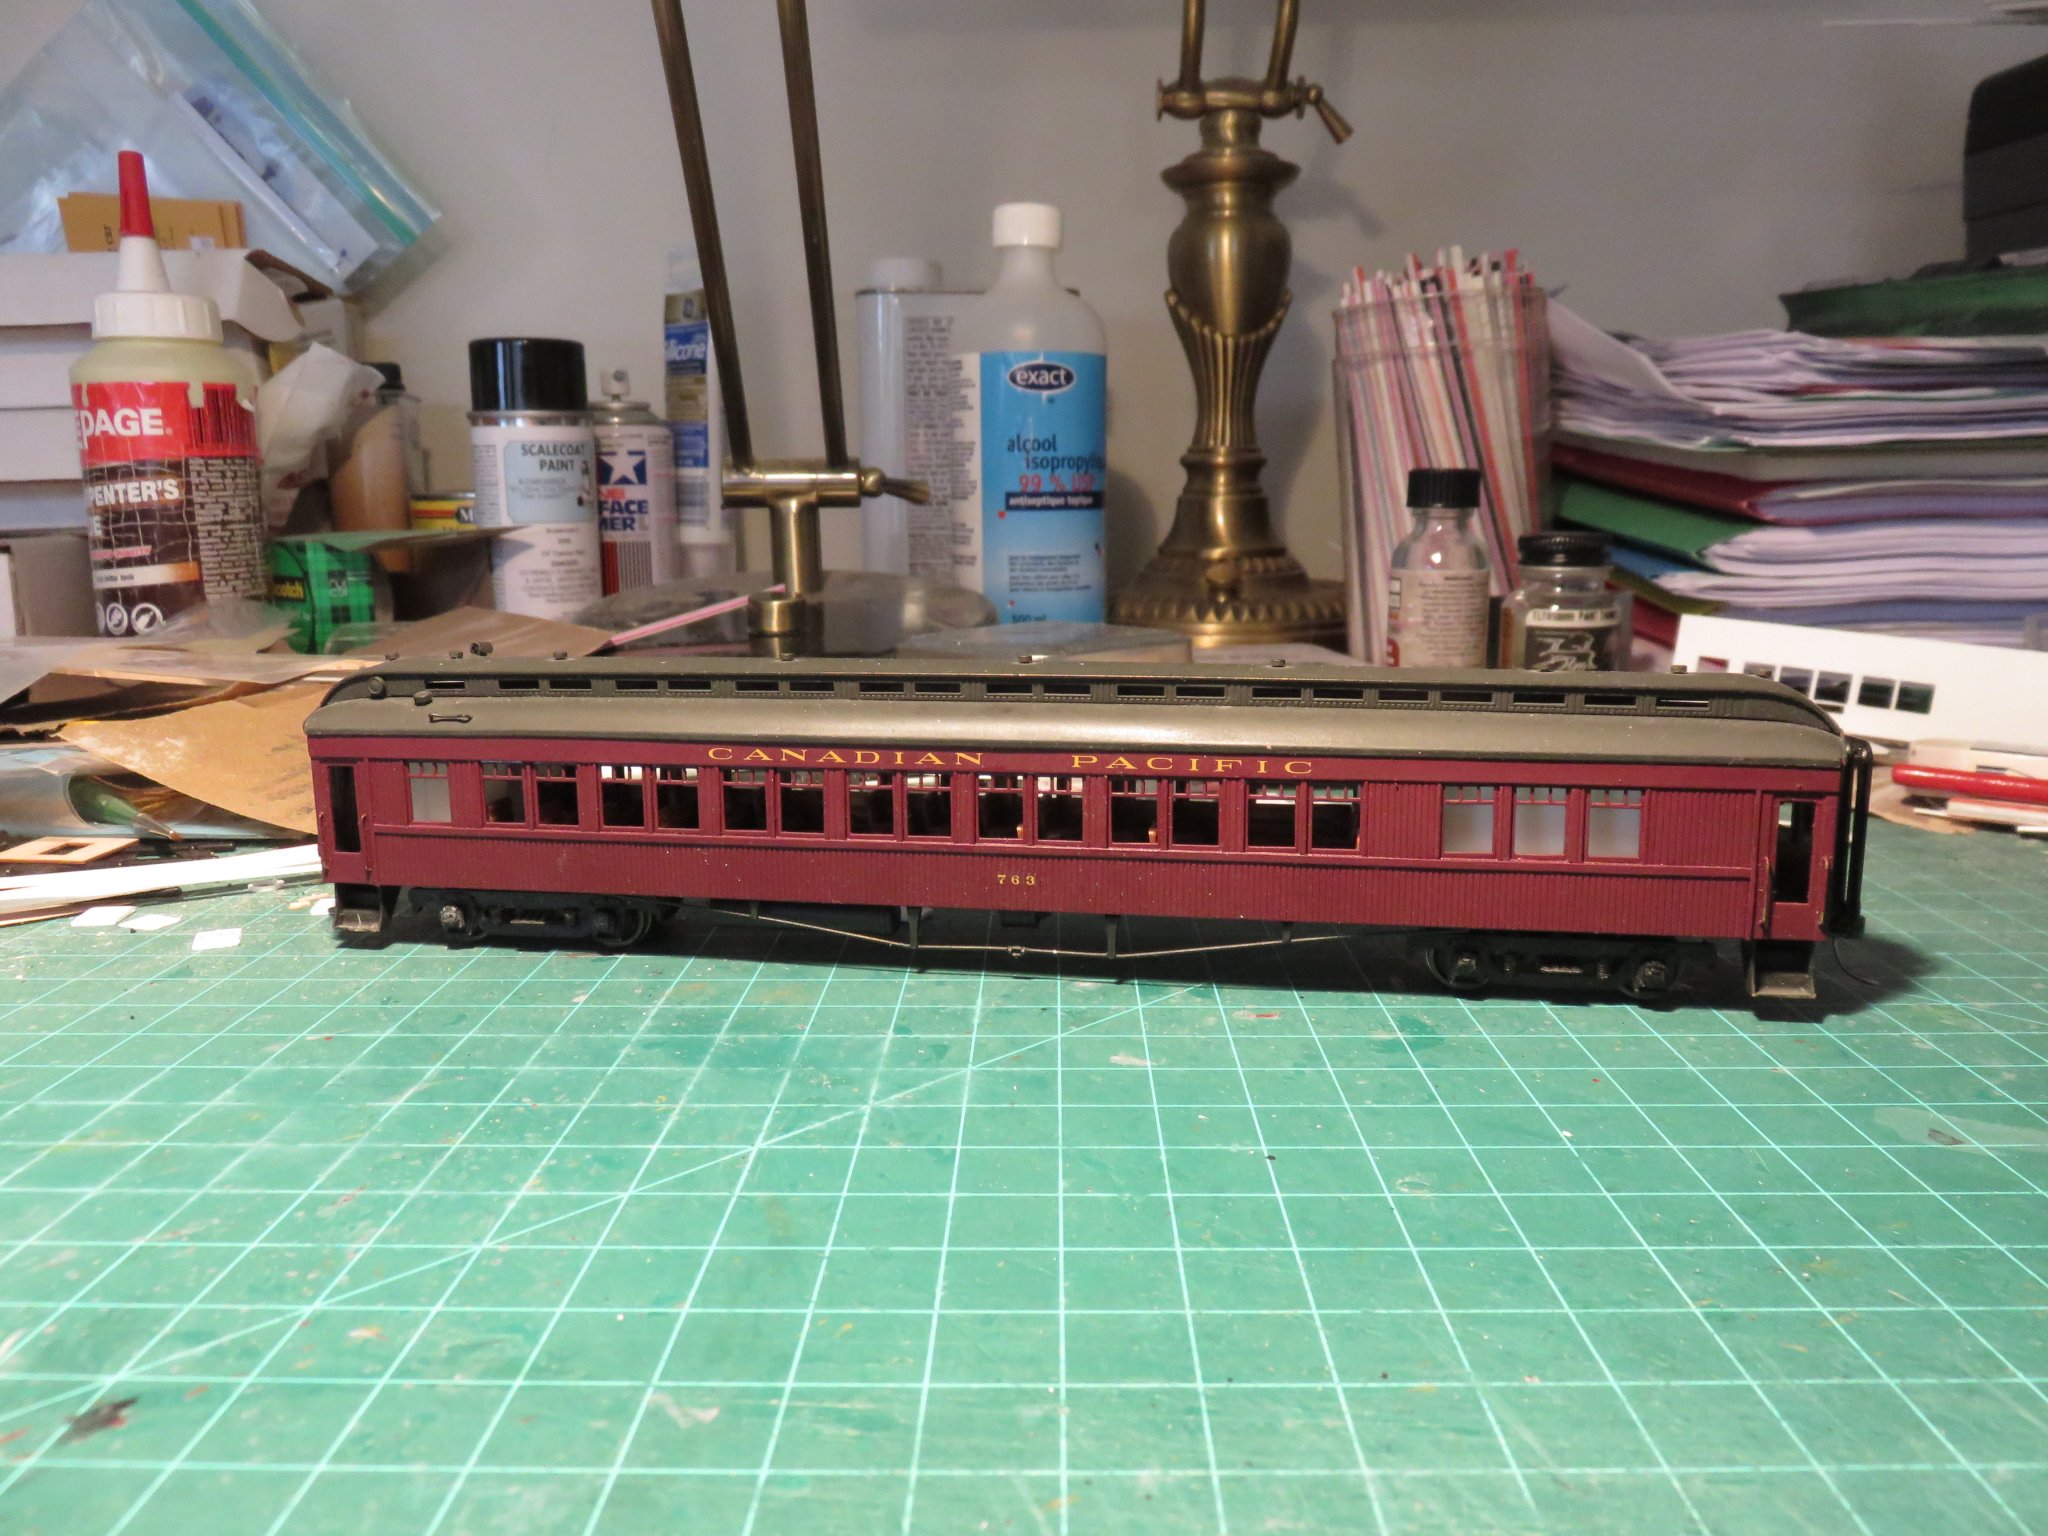
I've been slowly working my way through the various hurdles that come with trying to make a halfway accurate model while working without useable diagrams. A big help has been my brass model collection, of which I have a couple of "wooden" coaches, albeit the smaller variant of the car I'm attempting to build: I painted and lettered the car many many years ago, and numbered the car in the 700 series, but I'm not entirely sure that's correct car number. It's possible that this particular model was based on a couple of different prototypes. The window arrangement seems to indicate it should be one of the 1200 series cars (for which I have found a diagram in a book), but the mechanical equipment arrangement seems to follow some of the cars in the 600-700 series. More importantly for my current project, the window arrangement with respect to the smoking section (at the right end of the car in the above picture) is identical to the arrangement found in the larger car that I am building. Speaking of windows, I have finished cutting out the windows on the outer side layers (with only minimal bloodshed!). There's a very slight height discrepancy that can be corrected later on (a little fudging here and there) but overall I'm satisfied with the results. I've now moved on to making the outside ends of the car. Unlike the majority of later steel cars, the ends of these wooden cars also included large windows. My first attempt didn't quite work out (somewhere a cutting and/or measuring error snuck in, and one side of the arched top is a bit lower than the other, where is meets the vertical side), but my concept seems to be sound, so onwards with another attempt! Finally, I've had more success raiding my spare parts collection, namely I've scored a load of underbody details like the air and steam lines, and other assorted brake equipment details, as well as some end diaphragms. These parts are all leftover from some old(dish) Branchline car kits. After I get the ends figured out, I should be moving on to making the sub-sides. Andy


- 154 replies
-
- 16
-
-
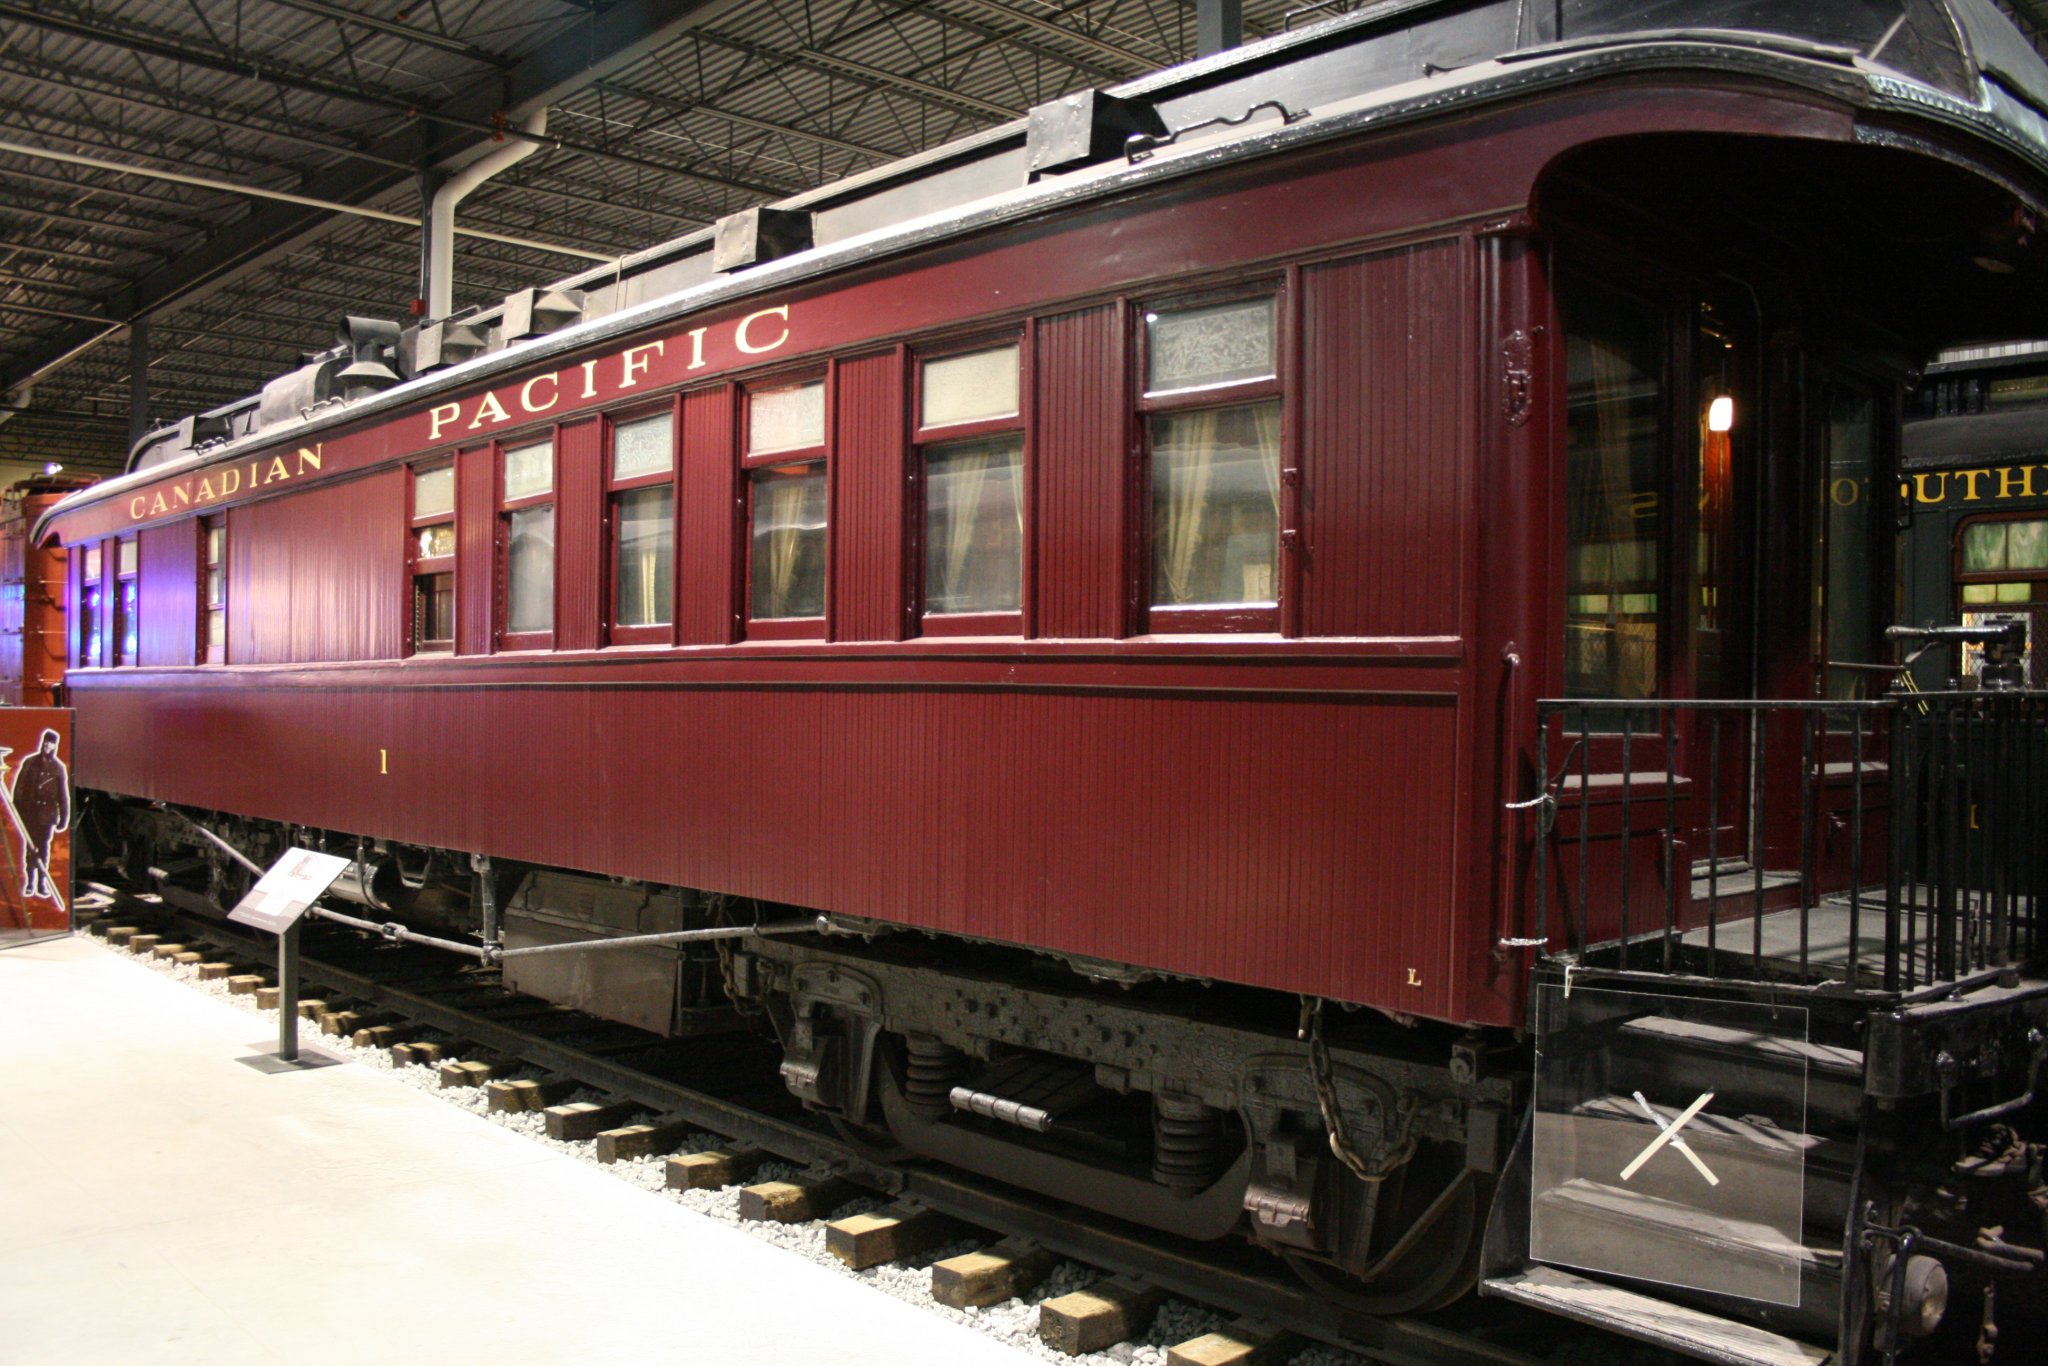
Westwood... yeah that’s going back a few years! From photos, CPR kept the transom windows until the cars were scrapped, it’s likely, though, that the fancy etched glass was replaced. At Delson there’s also a restored official car that has its etched glass in place: Andy

- 154 replies
-
- 13
-
-
It’s been a while, that’s for sure! Yes, the windows will be the most tedious (and repetitive) part of this build. if you notice in the prototype photo, each window has a series of three transom windows above it too. I haven’t yet started cutting (or even marking them out) yet, that will happen after I have the sub-sides sorted, so that they line up properly with the window sashes. For the record I plan on only cutting out the full transom window and re-inserting the mullions (made from styrene strip) afterwards. I foresee going through a good number of #11 x-acto blades on this one (I hate dull blades!). Andy
-
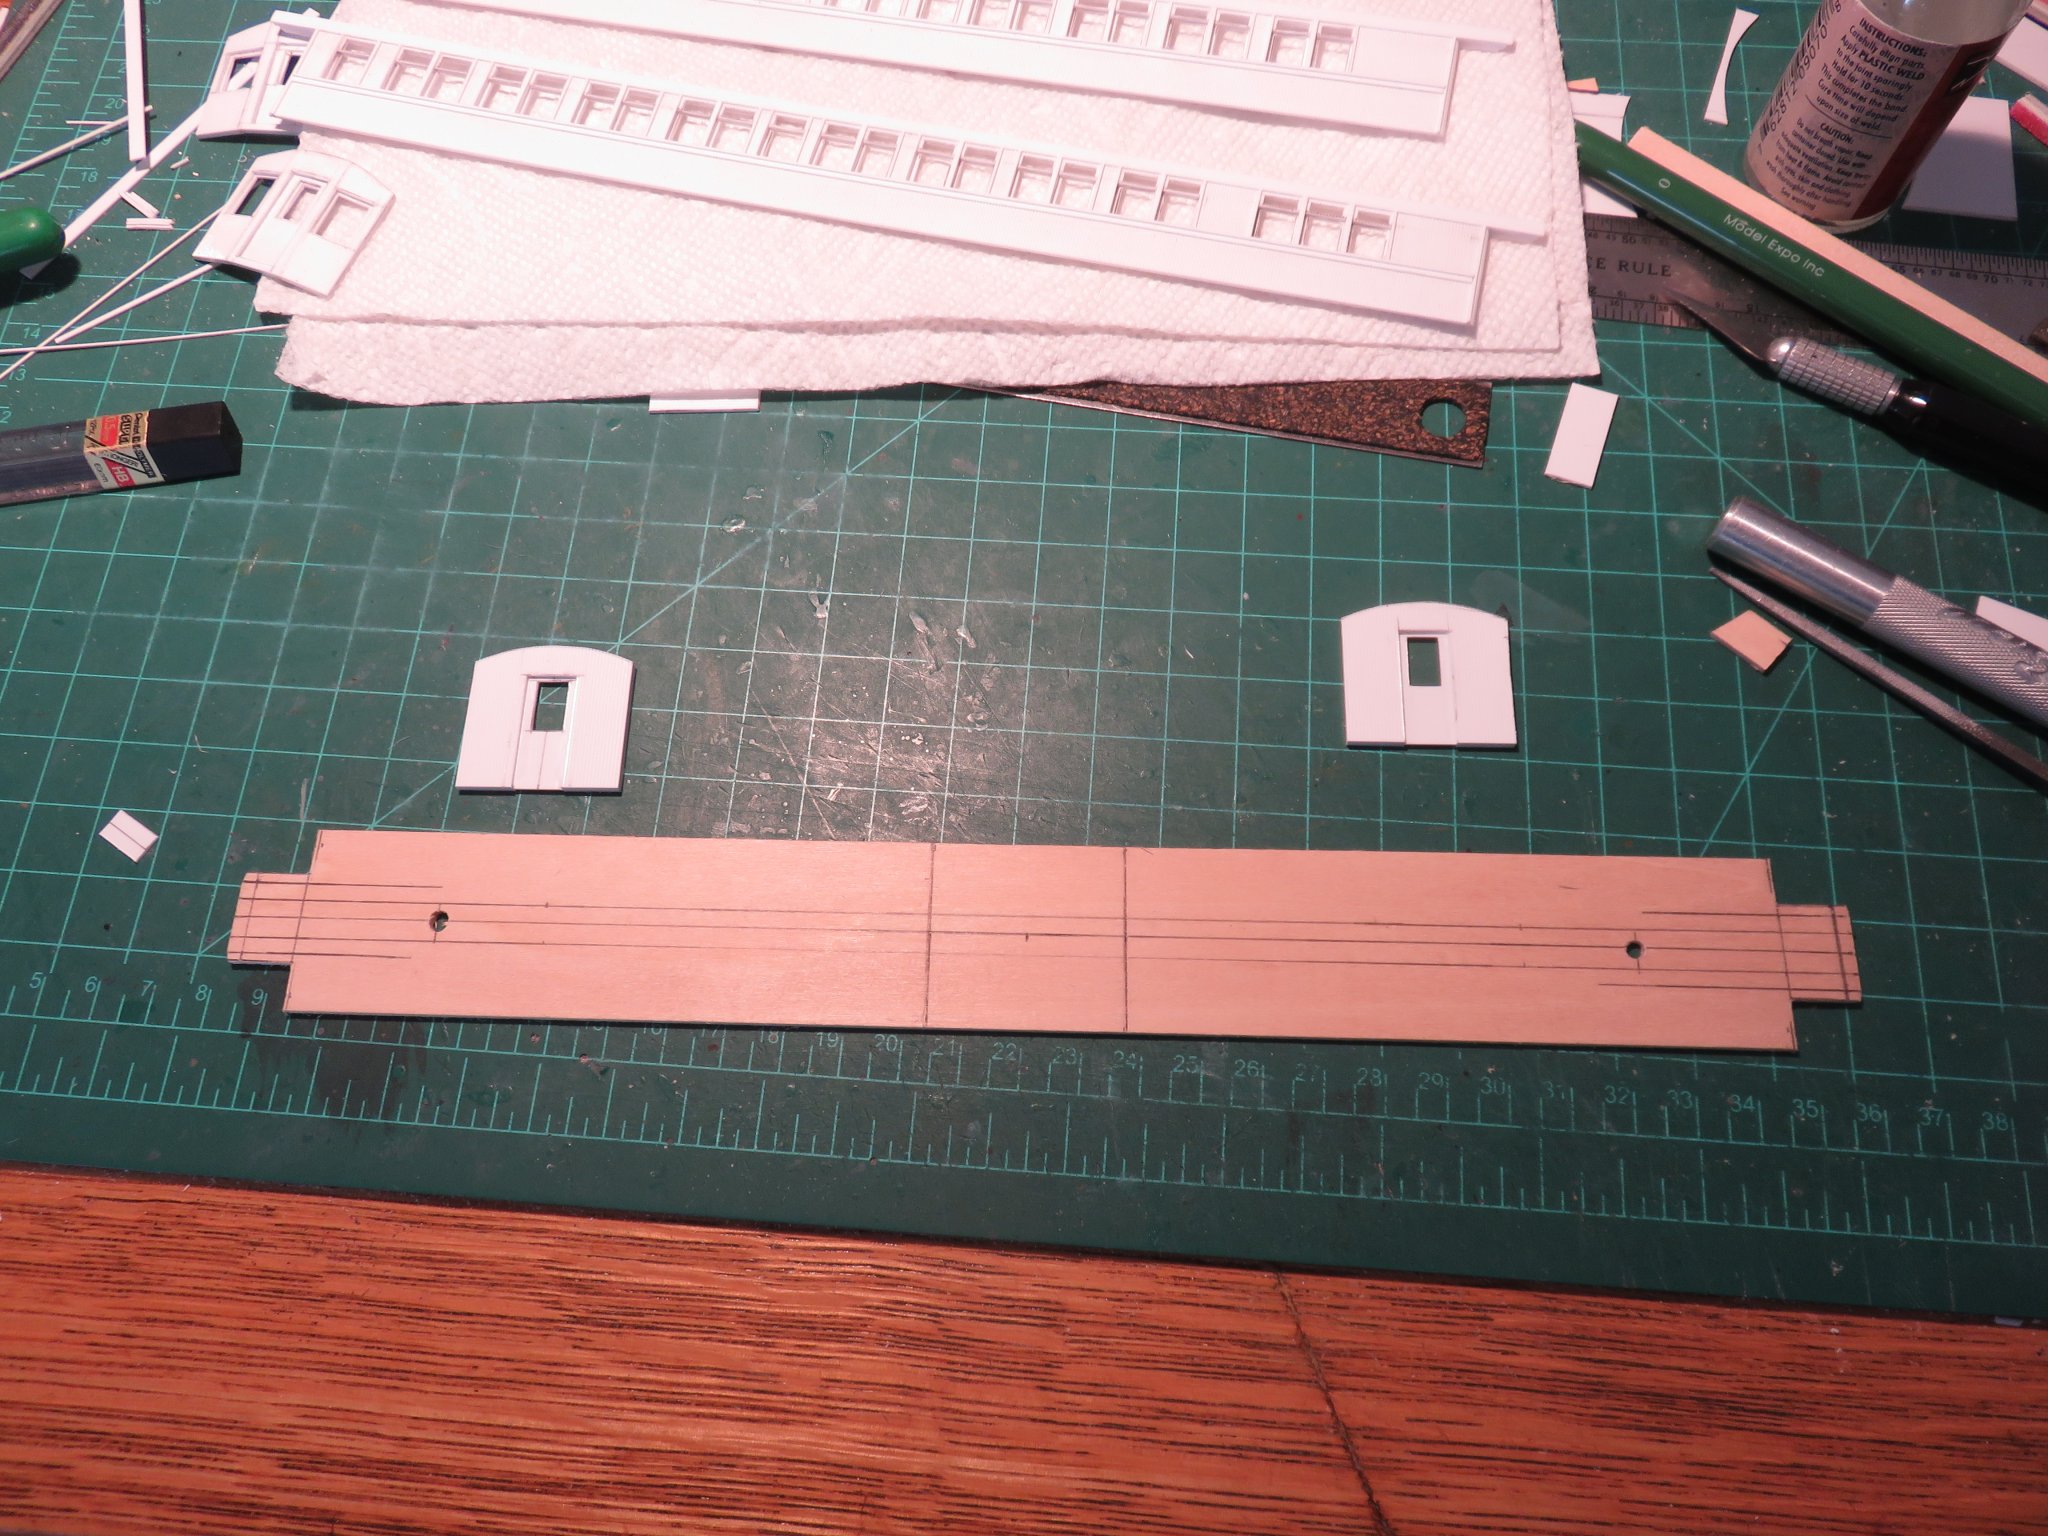
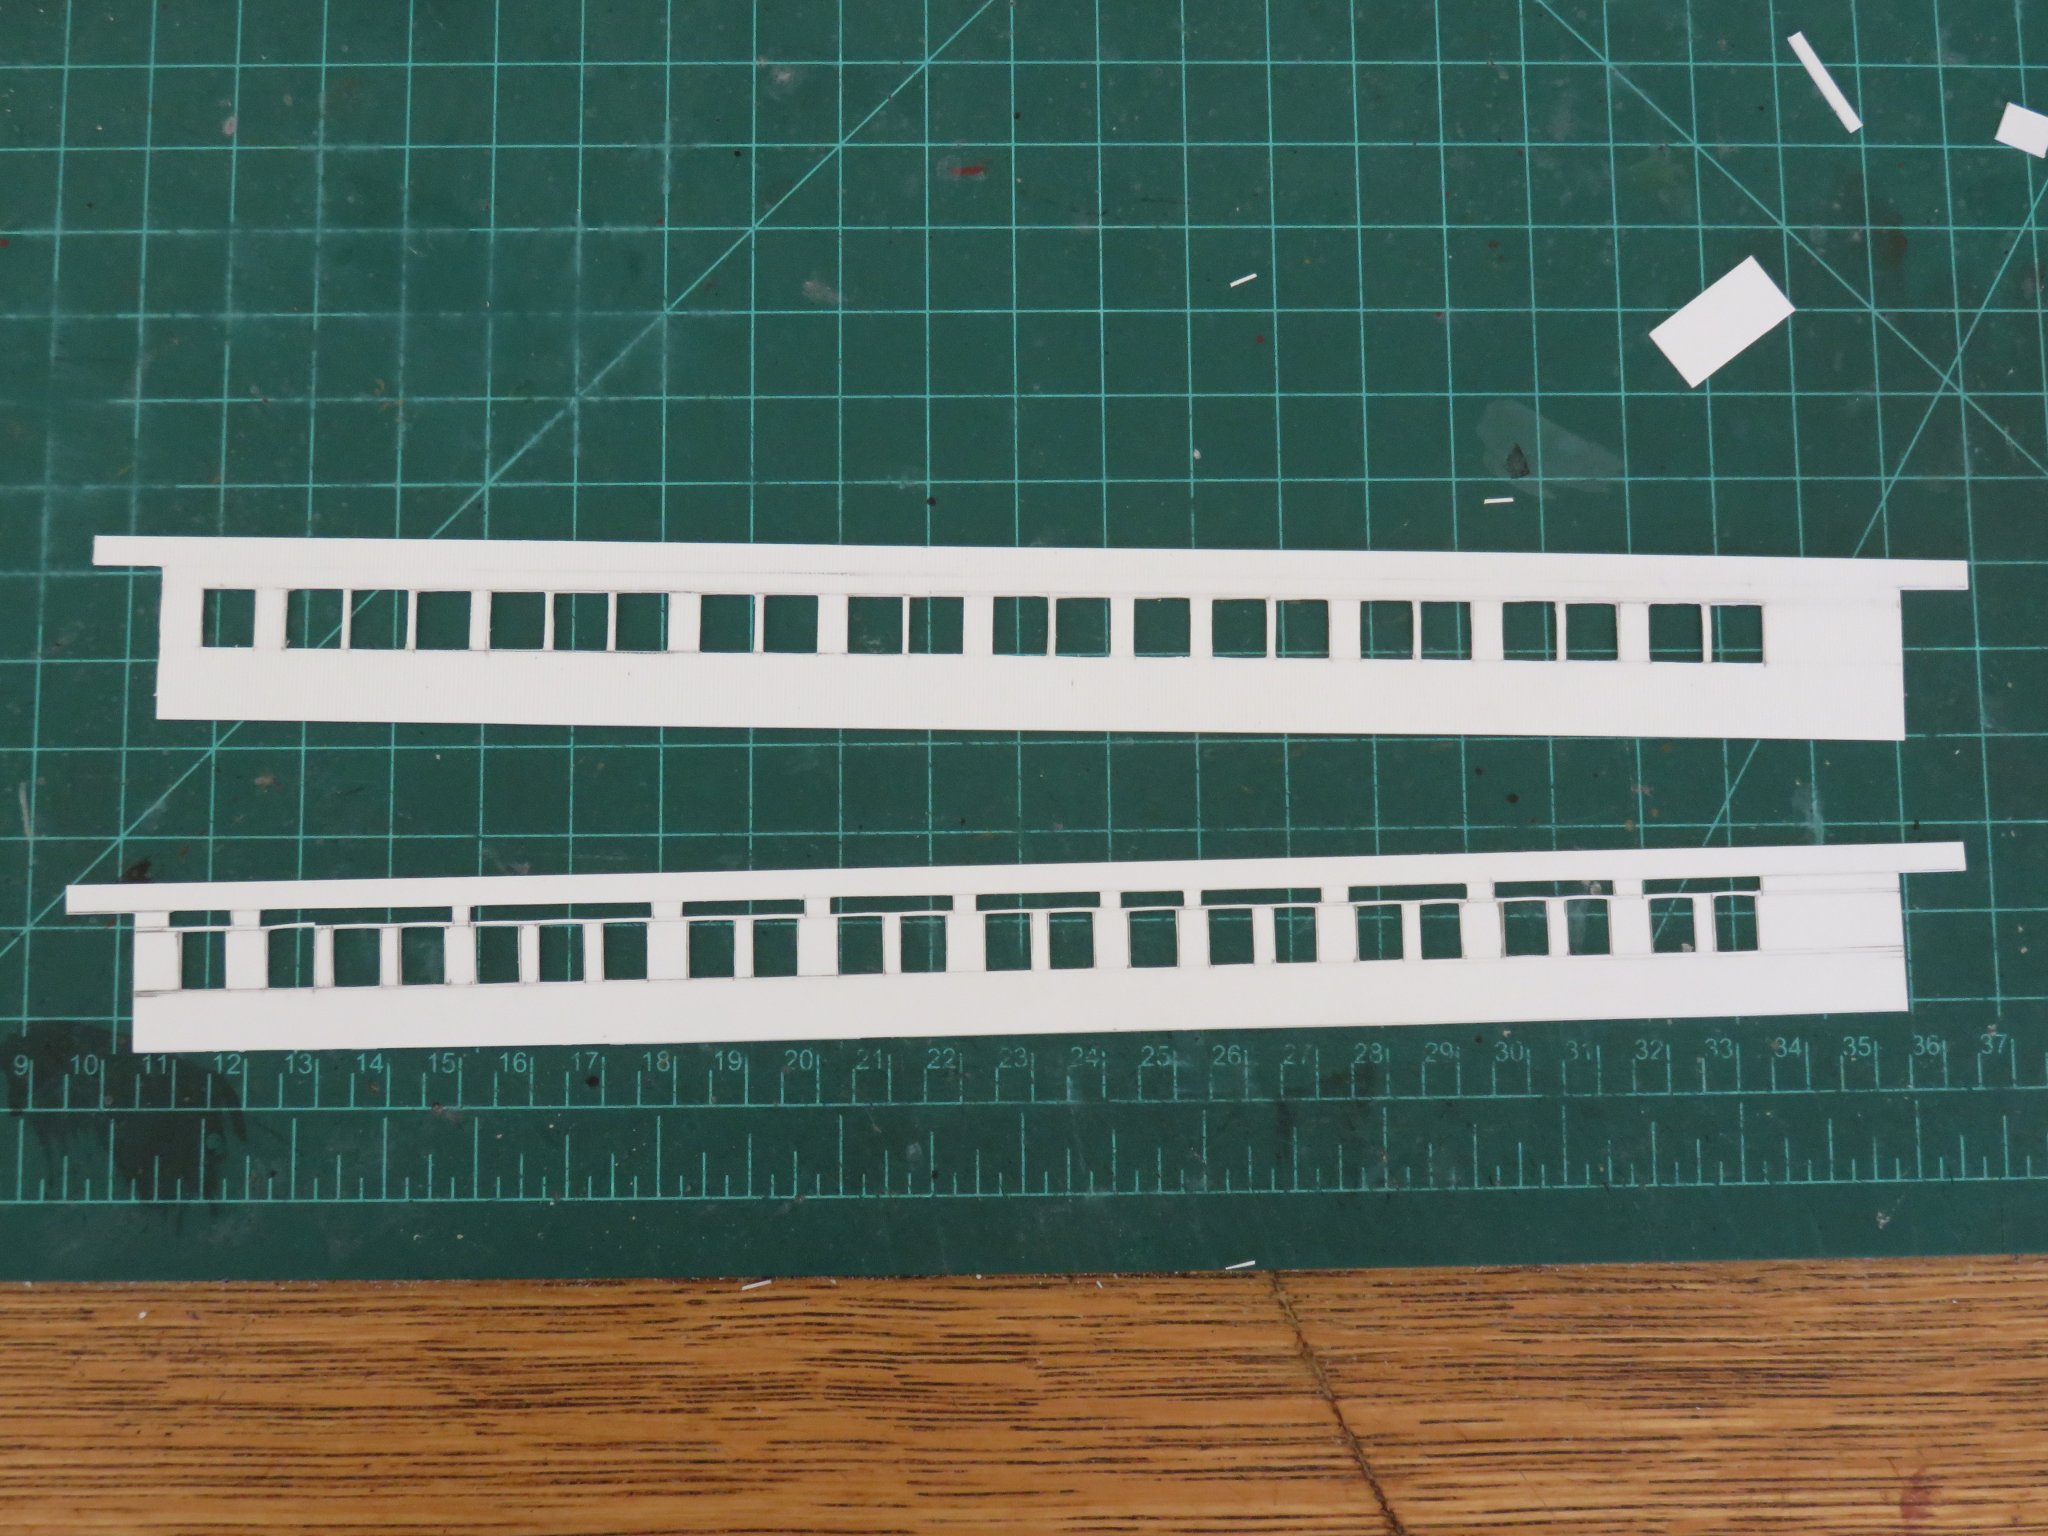
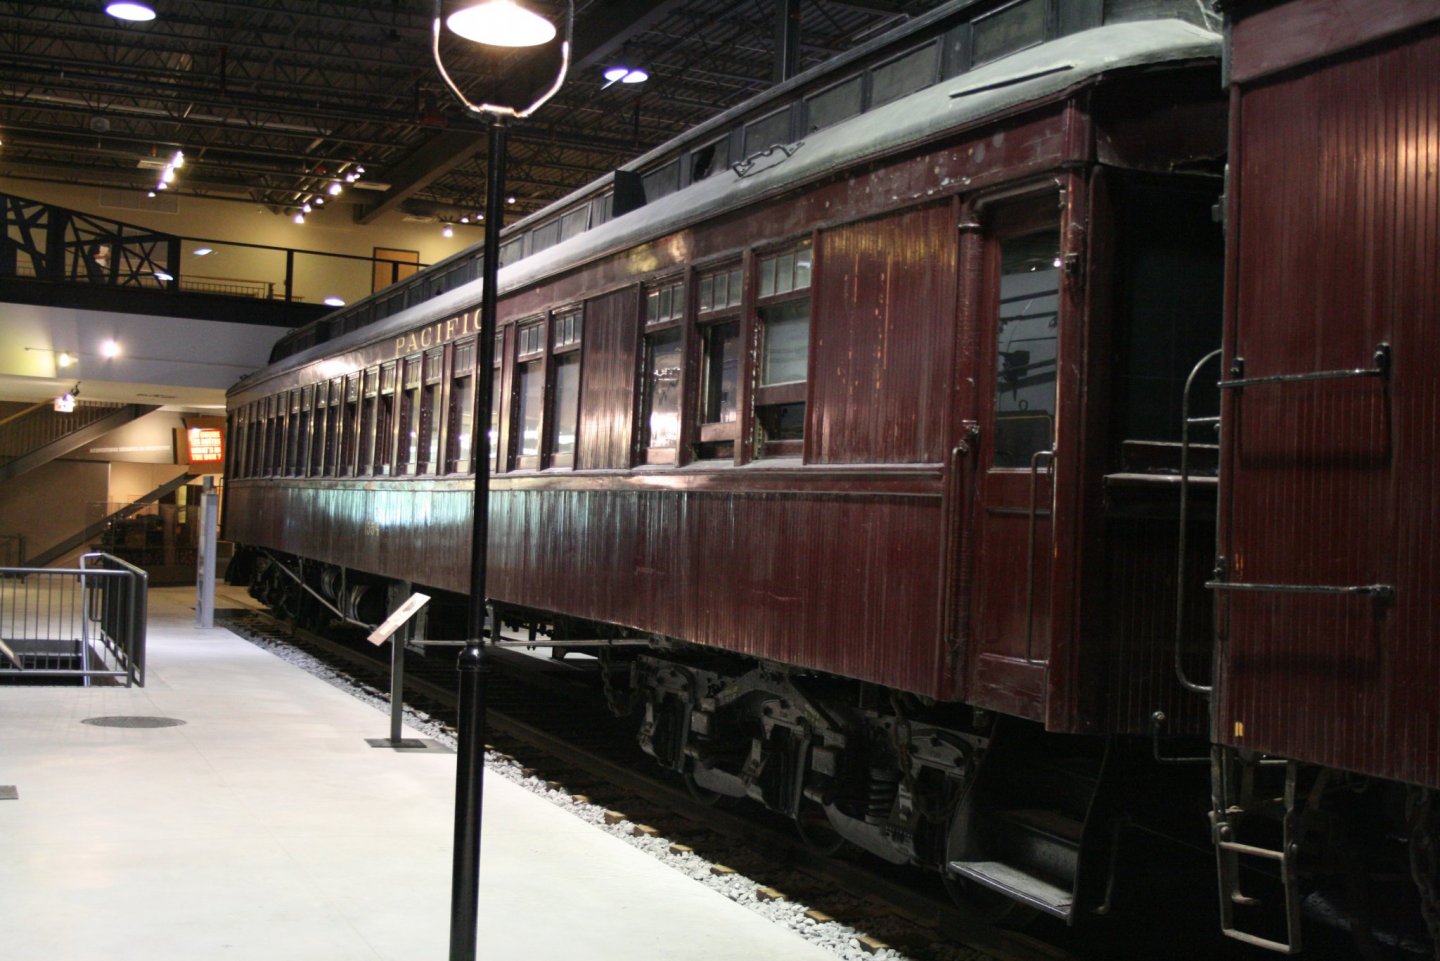
The CPR 1500 series wooden first class passenger cars were originally built in 1912. The car was 80' long over the buffers and had a seating capacity of 76. It also included a smoking area. A surviving example can be found at the railway museum in Delson, Quebec. I had the opportunity to visit there back in 2009. The main hall is fairly dimly lit (as far as photography is concerned). These cars lasted in service almost 50 years. Although in their later careers they were relegated to secondary and branchline service, that represents a significant lifespan, especially for wooden equipment. At some point, the cars had even been converted to electric lighting. Many other types retained the original Pintsch gas lighting. The primary source of inspiration for me was this CPR combine kit I recently completed. One of the primary stumbling blocks for building wooden type cars is the complexity of the windows. For anyone wanting to build a model of a steel car, there are many suppliers of almost every different type of window. For wooden cars, there is considerable scratch building required. The combine I built showed me a viable technique that builds up the car side in multiple layers. An inner core layer to serve as a base. A second sub-side layer which will be seen only as the window sash, a third layer that has the wooden siding, and finally am outer layer consisting of the trim. In my case, these side layers are all being built using styrene of varying thicknesses. The core layer will be cut from 0.040" thick styrene sheet, and the sub-sides will be cut from 0.020" plain sheet. I have already begun work on the third layer using the siding sheet.I had already made a few attempts starting with the sub-side layer, but I was running in to difficulties getting things to line up (between both opposing sides of the car as well as the subsequent layers. I have since decided to start with the siding layer in order to accurately establish the window pattern for each side, and then cut the thinner sub-side layer to fit. The floor of the car is basswood. The clerestory roof pieces are leftover from a couple of other kits that I've built and modified. Most of the remaining bits and pieces come from a healthy stockpile of bits and pieces I've built up over the years (despite what anyone else says, it does come in handy). Andy

- 154 replies
-
- 19
-
-
A brief history of the ship here: https://en.m.wikipedia.org/wiki/HMS_Ontario_(1780) At the bottom of this page is some video footage of the wreck: http://www.shipwreckworld.com/articles/shipwreck-explorers-discover-1780-british-warship-in-lake-ontario For more detail, check out this book: https://www.amazon.ca/Legend-Lake-22-Gun-Brig-Sloop-Ontario/dp/1550821865 Andy
-
You have my attention. Can’t wait to read your review. Andy
-
The roofs on these cars are typically galvanized metal. They are often not painted. Quite commonly, when the sides of the car were painted, the crews didn’t mask off the roof, so there is usually considerable overspray. I would definitely follow the recommendation to seal the wood before painting. It doesn’t really matter what sealer you use as long as it’s compatible with whatever paint you decide to use. Scalecoat paints are still available from Minuteman Scale Models, in either bottles or rattle cans. Most craftsman kits like this didn’t come with trucks or couplers (most still don’t). From the looks of it, you’ll need a pair of 70ton roller bearing trucks. And you’ll also need weights if the car is planned to be used. As for your decals, given the age of the kit, you may wish to dig around and see about replacing them all together. Microscale may have what you need. For weathering, look for Pan Pastel. They have weathering pastels that you apply with an applicator sponge and seal with dullcote. Have fun, these types of kits can be challenging, but at least you don’t have to bend any wood into weird curves. Andy
-
Unfortunately I have yet to stumble upon a definitive work on the subject. Most of what I’ve learned comes from various tidbits from a diverse assortment of sources, and a deep and undivided fascination with all things steam. Short of being able to dig up an old railway shop manual on the subject. Maybe if I was a bit more literarily inclined..... Andy
-
It has a lot to do with the history and development of the various types of valve motions (valve gear). Early forms of Stephenson’s valve gear (the predecessor of Allan’s straight link) were directly connected in line with the valve stem (no articulated linkage). This required the valves to be placed horizontally in line with the pistons. If the steam chests (the mechanical structure that contains the valve and piston) were to be turned outwards, the locomotive would be made considerably wider than necessary. Even later versions of Stephenson’s gear (on locomotives with vertical oriented steam chests) still kept the rigid valve stem, although the action was transferred laterally through a series of cranks and cams. The real limitation of inside valve gear is the size of the locomotive. Smaller locomotives generally had lighter, more open frames (with more space between). The advent of external type valve gear such as Walschearts, allowed for increases in size of locomotives by permitting heavier frames. Andy
-
The diagram makes sense. It’s basically a derivative Stephenson’s valve gear, but by moving the radius rod at the same time (and opposite direction) as the link, the same valve action is effected in something like half the space. Andy
-
Very nice machine work! What manner of valve gear did the locomotive use? Given your valve location between the frames, I’m guessing Stephenson’s? Andy