


mikegr
-
Posts
589 -
Joined
-
Last visited
Content Type
Profiles
Forums
Gallery
Events
Posts posted by mikegr
-
-
Keeping working following strictly the 2;1,5 rule.
The mail deck woodwork is done. I added a second layer of aluminum to eliminate bumps and gaps. Just to let you know aluminum has gone 30% up, not only gas. The lower section between middle and stern need more strength to repair the sagging effect. You can see the gap in the previous post, now looks much better. Lots of filling, sanding , priming etc.
The worst was fitting the bilge keels. I scratched them using 2.5 mm balsa then layered with wood hardener so won't brake during working process.
Several attempts made to glue them. A strong silicone based glue was used to stick the 1mm rod across the hull. But was hard to clean up the leftovers without a diluter.
I managed to glue the bilge keels with CA but only step by step piece by piece. I run over titebond glue to fill gaps and strengthen them. Sand and prime. Tomorrow will look for micro works to be done.
- yvesvidal, mtaylor, GrandpaPhil and 1 other
-
 4
4
-
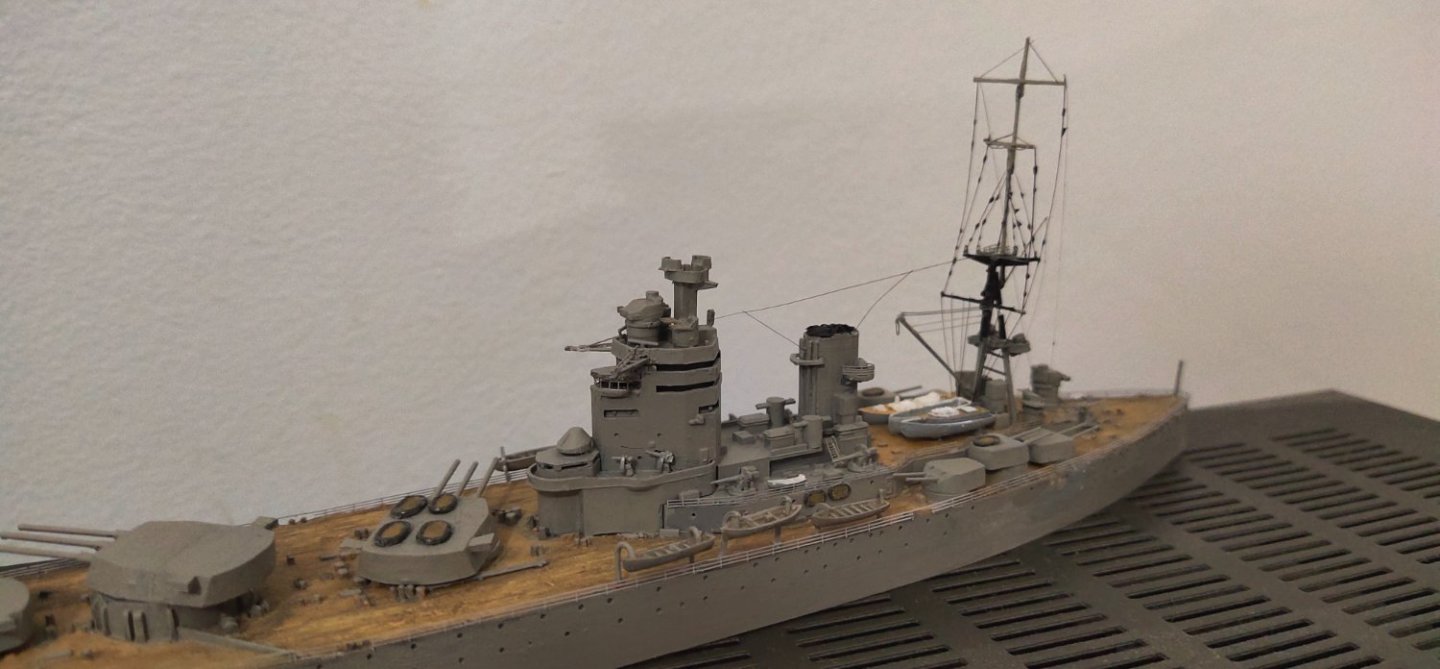
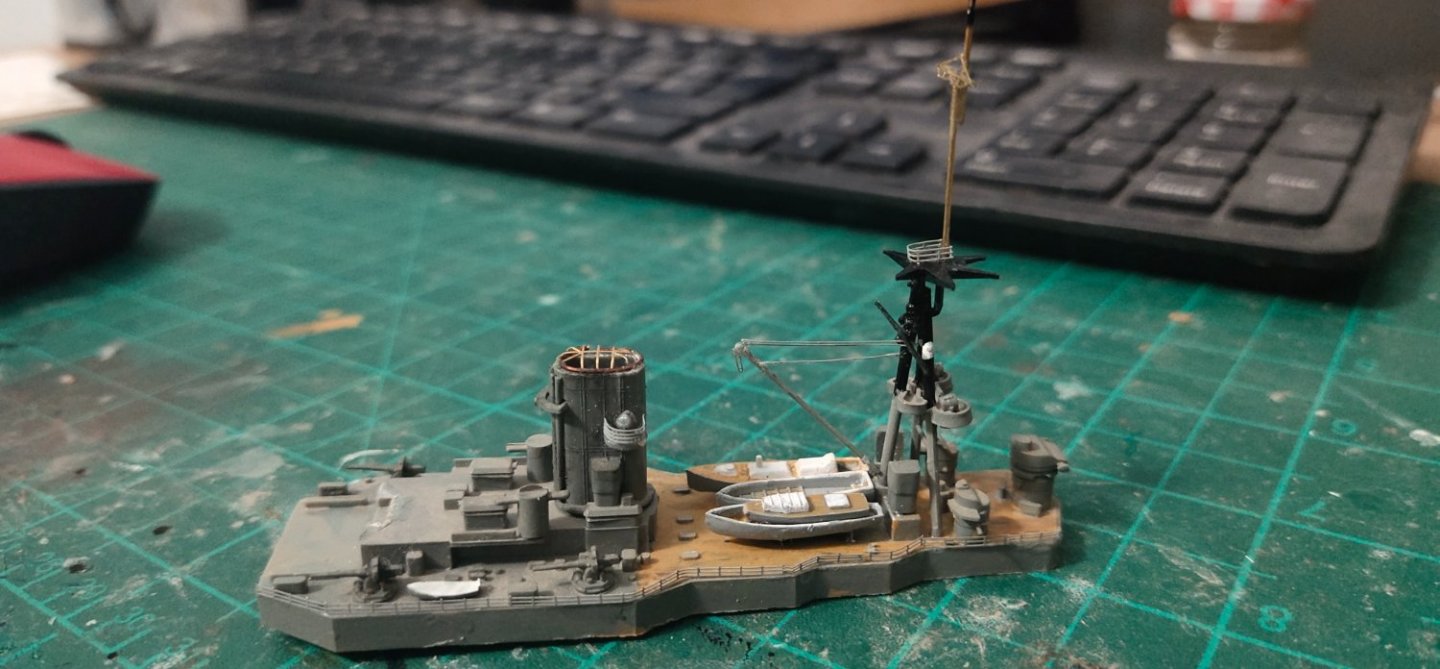
I have finished the rigging job
It is not extended much apart the rear mast but its kinda complicated and concentrated. In the real ship its even more complicated.
-
At last a day pic even with cloudy sky.
Main deck rails, weathering and rigging need to be added.
Using a small sand paper I made parallel (almost) lines of worn on weathered deck. Looks convincing I think

- mtaylor, yvesvidal, BLACK VIKING and 5 others
-
8
-
I couldn't imagine that a sail boat model could be so fascinated to build until I saw this.
- Retired guy, FriedClams, KeithAug and 2 others
-
5
-
I have added some details. Ladders, drilled holes,doors, remake the crane wirring. Also from my newly refreshed stash I put some extra life rafts with good detail. Paint them was tricky I hold them with one pin in place while paint them with a single brush hair.
Finally I may need some extra hull for my heavy seas display so I made one from polystyrene. It is not perfect but its more than enough as most of it will remain hidden

-
5 hours ago, BarrettM82 said:
Super helpful mikegr, thank you. Needles are good shout too as I have a batch for car paintwork repair. With brass, can you flare it at all with heat? or will it crack? The bofors also seem to have recoil springs, so could just use a bit of milliput to replicate them.

For something more flexible only brass or copper wire will do.
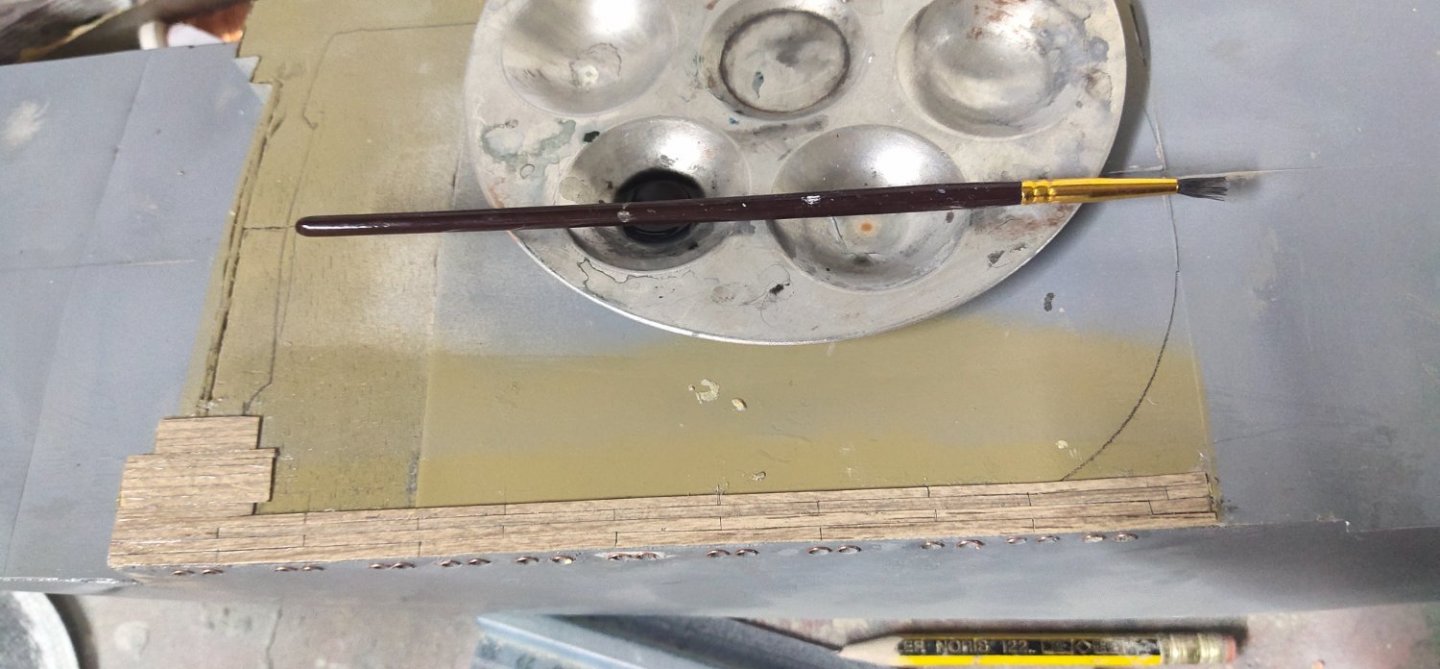
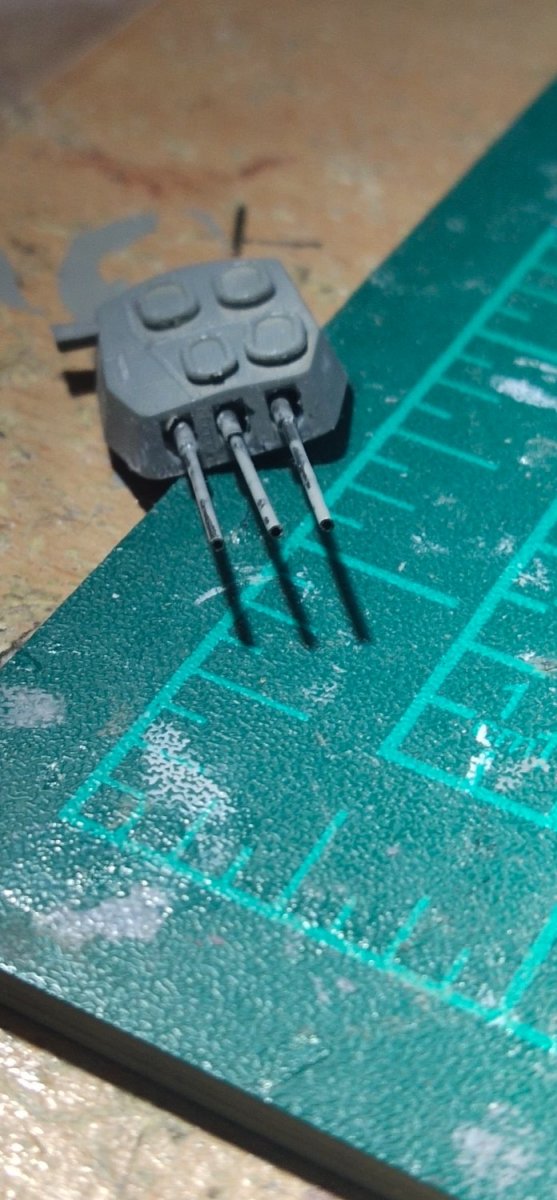
The recoil is a bit of fantasy thing. In 1/700 maybe can be omitted but in 1/535 you need to scratch it or think of it something ready available. Here's a recent work of how I use needles to make barrels. They are coated with humbrol oil based
 primer
-
12 minutes ago, BarrettM82 said:
True Mikegr but if I go that route I might just be tempted to drop the revell build completely! and 1/700 just a bit small for the space I'm looking to fill.
Never used brass rod, would a normal metal saw be enough to cut it, also would need super small sub 1mm diameter right? Finally, can you flare brass without cracking it at those dimensions ? The Bofors have flared ends on their barrels. I'm looking around for 1/700 custom barrels but no joy so far.
I still have a mad thought of trying to use a resin option , has anyone used resin castings from a silicone scratch build mould to custom build ship parts?
for barrel improvement i use brass. I think 0.4-0.6mm would be ok in your case. Also sterile needles are good as they come in even smaller diameter. I cut them with a rotary tool with a disk cutter. Then sand a bit the edges.
- mtaylor, BarrettM82, Canute and 1 other
-
4
-
7 hours ago, king derelict said:
Thats quite a challenge but from my limited experience I think its mostly doable and the rest can be worked around to make a great model. It you have it in a case no-one can get their noses and micrometers right on the detail.
The Bofors are nasty but could you replace the barrels with brass rod or use brass barrels from a bigger 1/700 scale calibre?
Good Luck
Alan
An average Trumpeter kit in 1/700 would give more detailed AA guns not to mention high end brands
- Canute, Bill Morrison, mtaylor and 1 other
-
4
-
On 2/19/2022 at 3:12 AM, king derelict said:
A serious day of folding and building the starboard catwalks. Its slow work waiting for the lower catwalks to set in place before adding the upper ones. However the starboard side is complete apart from a couple of bracing pieces that go under the forward platforms
.jpg.1b7eaeb61b25d3390245b10361c977cd.jpg)
It looks like the back of the upper catwalk has lifted since it was placed. A job for tomorrow
.jpg.eda0f5ba99388e6634d55544ed362a4e.jpg)
.jpg.e065d53ecd3f95faefc74b000c9cf376.jpg)
.jpg.ca0982fa1c3652870b305306cc54b1b5.jpg)
.jpg.07de7277940dae2a9746c34960532da3.jpg)
Thanks for looking in and thanks for the kind feedback. This is turning out to be the biggest project I have attempted
Have a great weekend everyone
Alan
Definitely worth the effort
-
I keep working following the rule for scratch build rookies. Two steps forward, 1,5 steps behind.
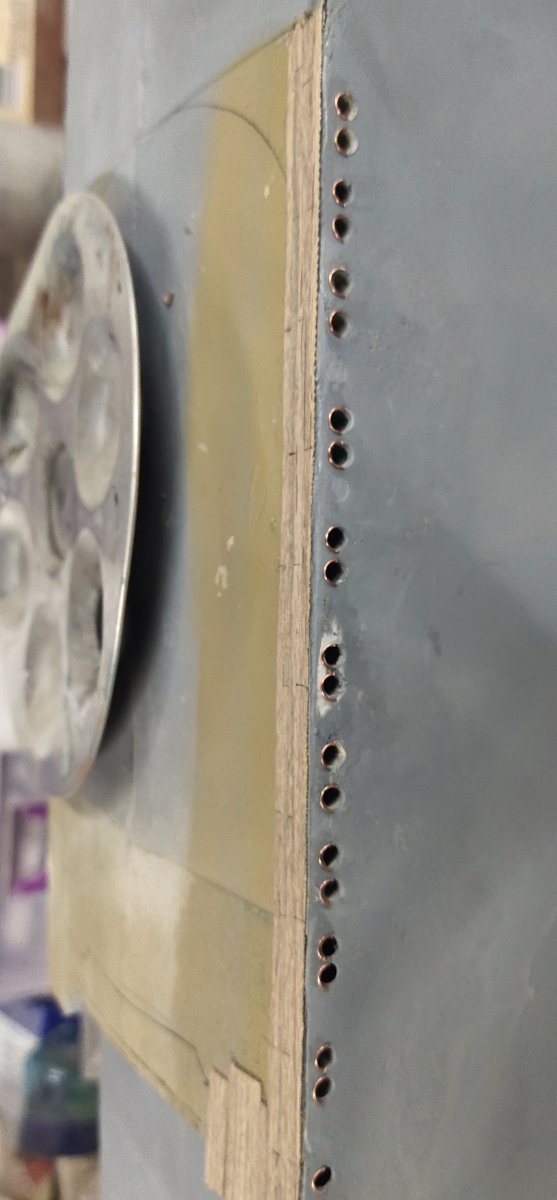
Even I used a mask, It took me several attempts to open portholes in correct alignment. Then I installed the frames over them.
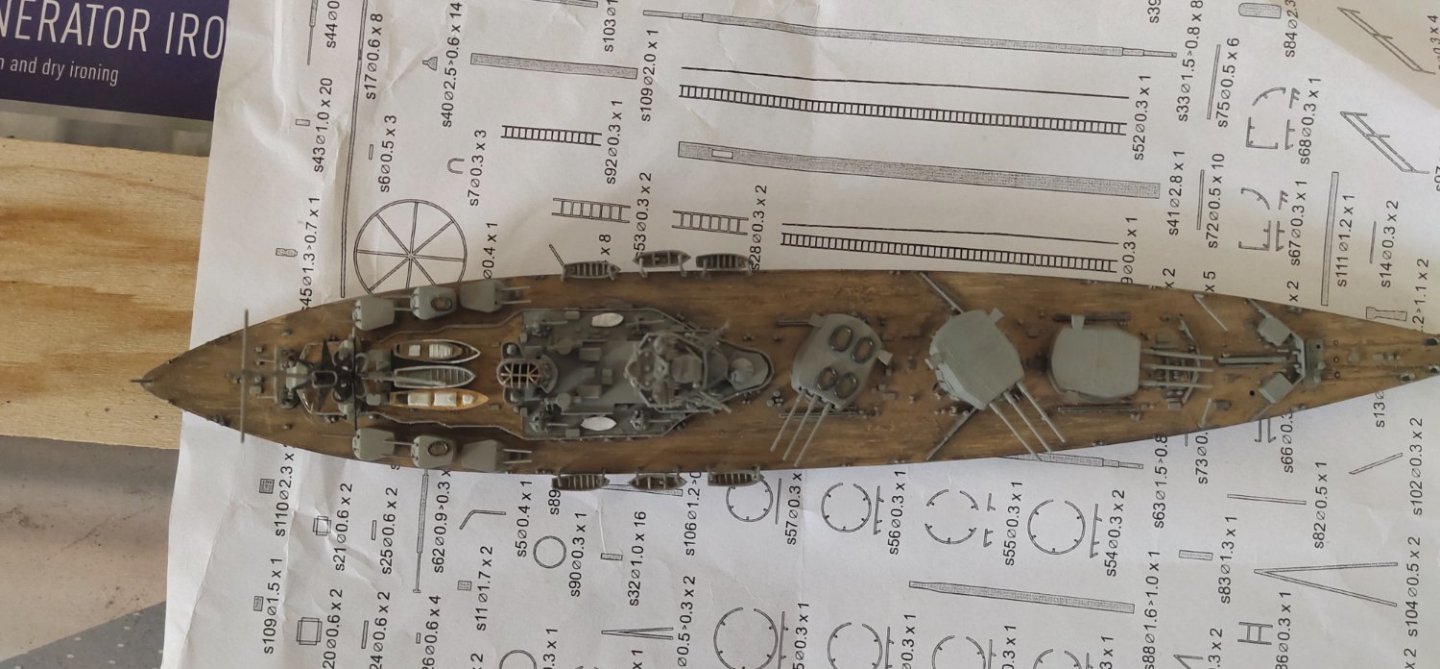
For deck planking I found an easier way. I cut a long stripe veneer and glued. Then cut it vertically every one inch. I repeat the process. Finally I used black wash to emphasize cuts and cleaned the excess wash.
Sorry for the wrong shoot but itseems I have a problem with pic rotation

- KeithAug, ccoyle, GrandpaPhil and 1 other
-
4
-
On 2/14/2022 at 6:41 PM, CDW said:
It must be a tricky proposition removing the glued on superstructure pieces from the decks after all these years. Nice work!
Don't see this class of ship modeled too often.
Indeed not much building info about it online, even its an old but decent for the price, kit.
I have finished the replacement of barrels. I drilled anchor chain holes and replaced davits, some from my stash, some scratch built by copper wire

- lmagna, Old Collingwood, mtaylor and 3 others
-
6
-
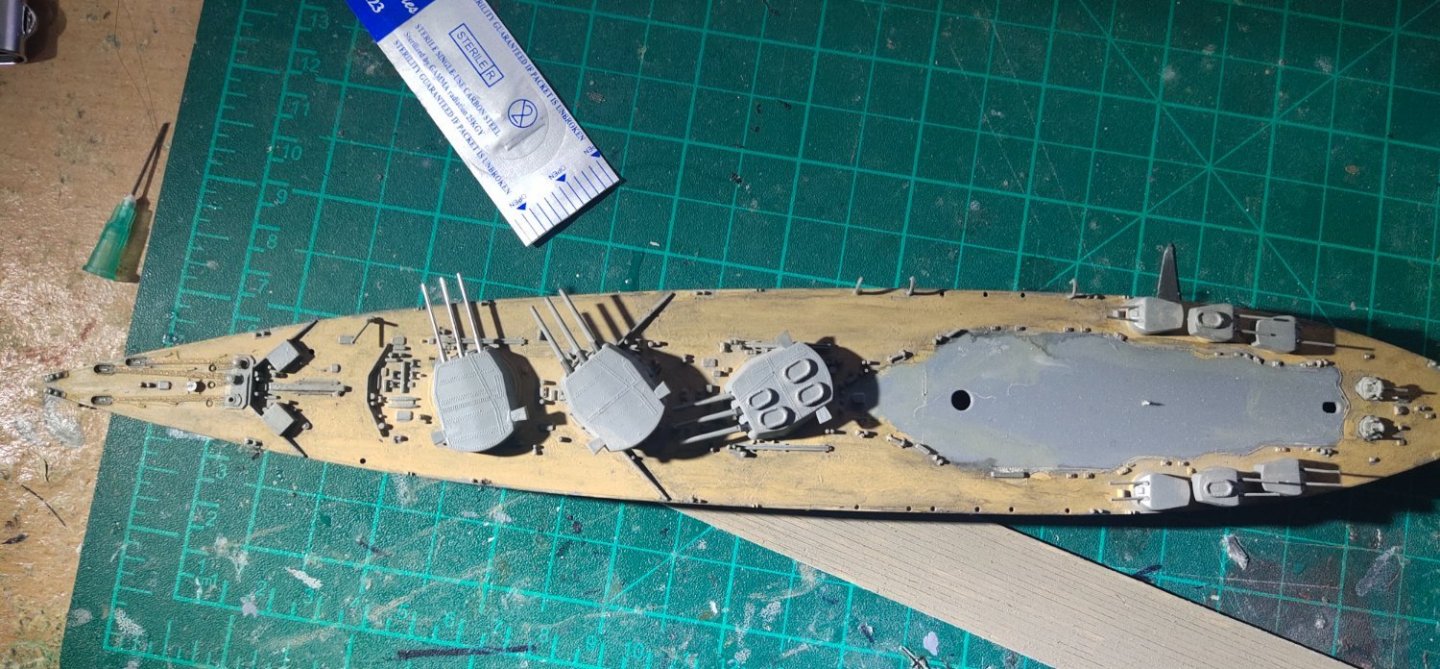
Done weathering the deck and scratch building metal barrels.
A dedicated sticker for this class would be good because the engraved deck lines are very thin and are invisible after the initial thick brushed paint.
- CDW, lmagna, Old Collingwood and 5 others
-
8
-
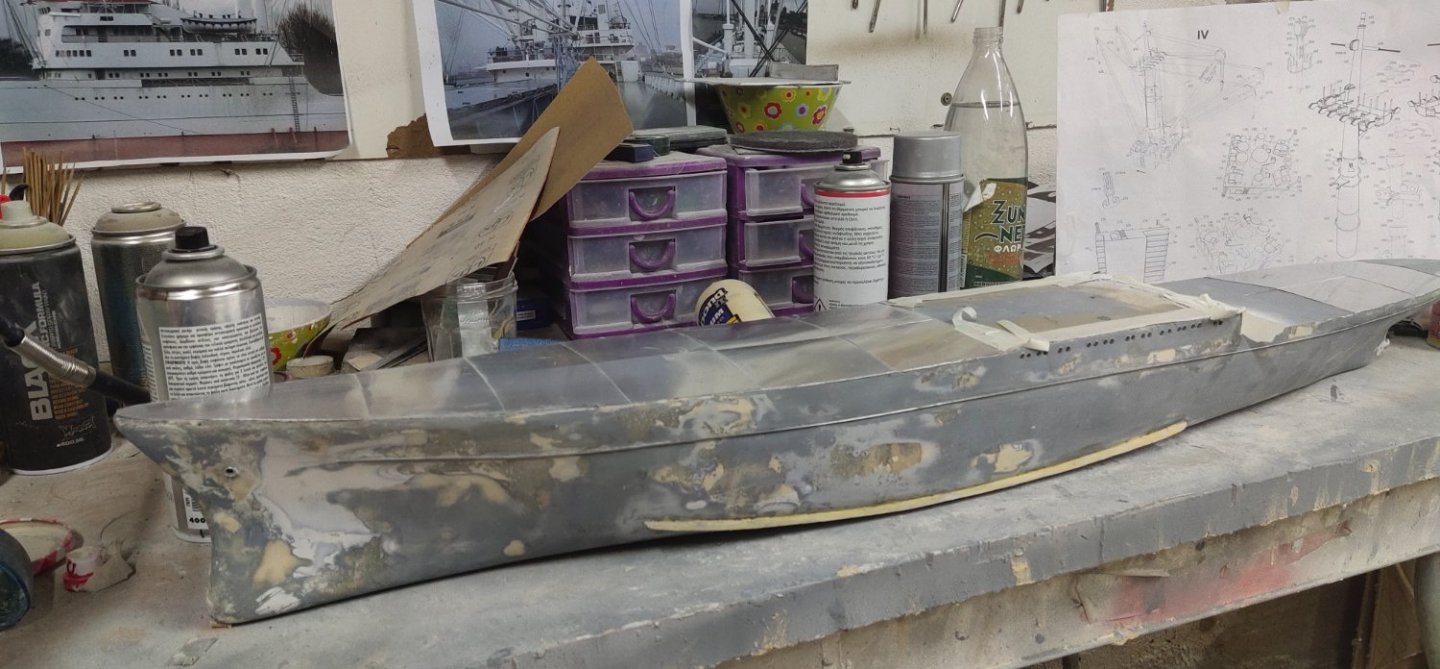
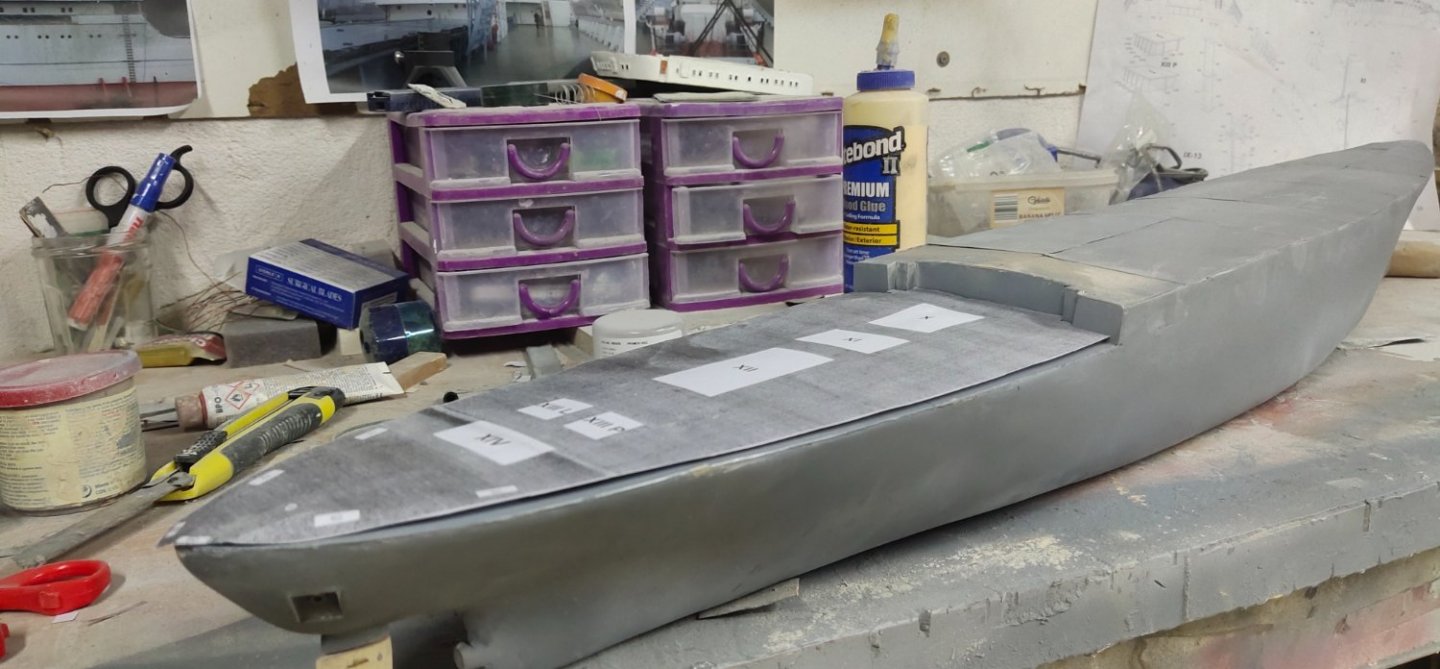
I finished the decks, have them covered them with aluminum sheet 0.10mm thick. several pieces were being used. I will fill in some putty and try to simulate the soldering effect between deck pieces. If not feel happy after paint then I will an extra one piece layer. I just need to find a few long ones somehow, about 50 cm each.
Some work on hull has need done also especially at deck-hull join line.

- GrandpaPhil, KeithAug, yvesvidal and 1 other
-
4
-
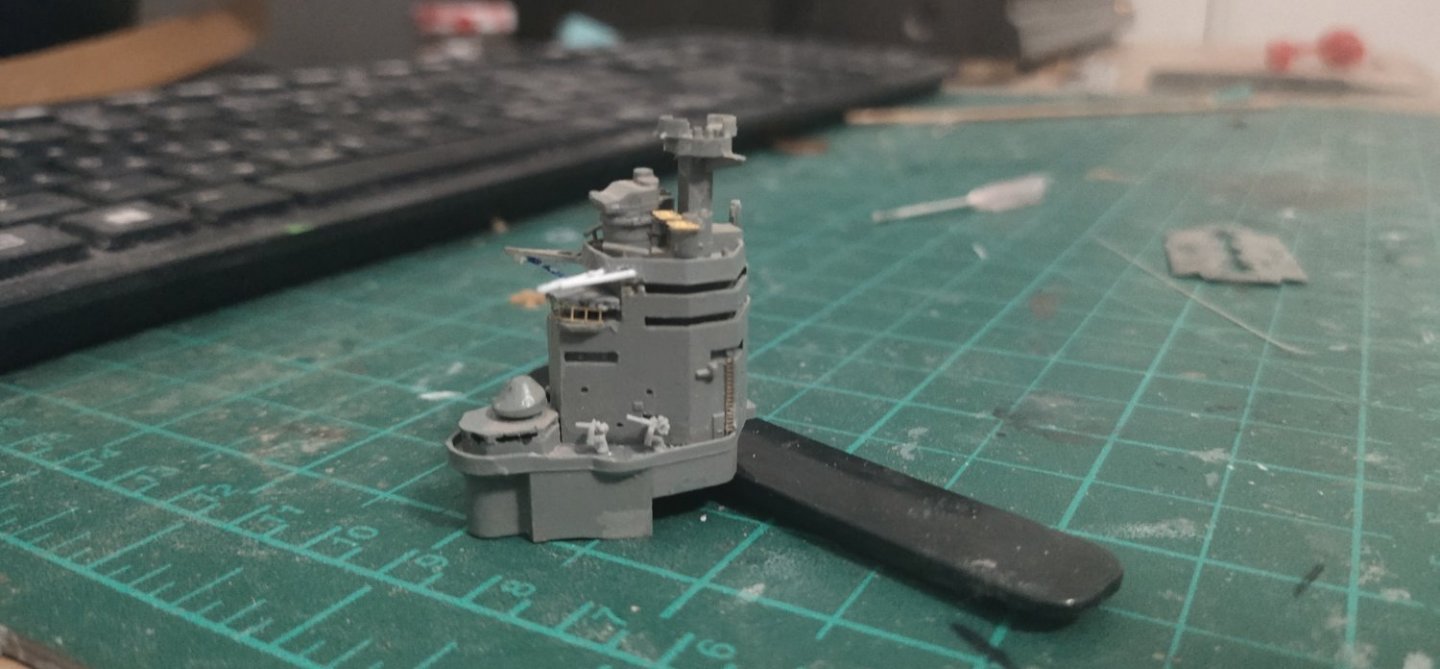
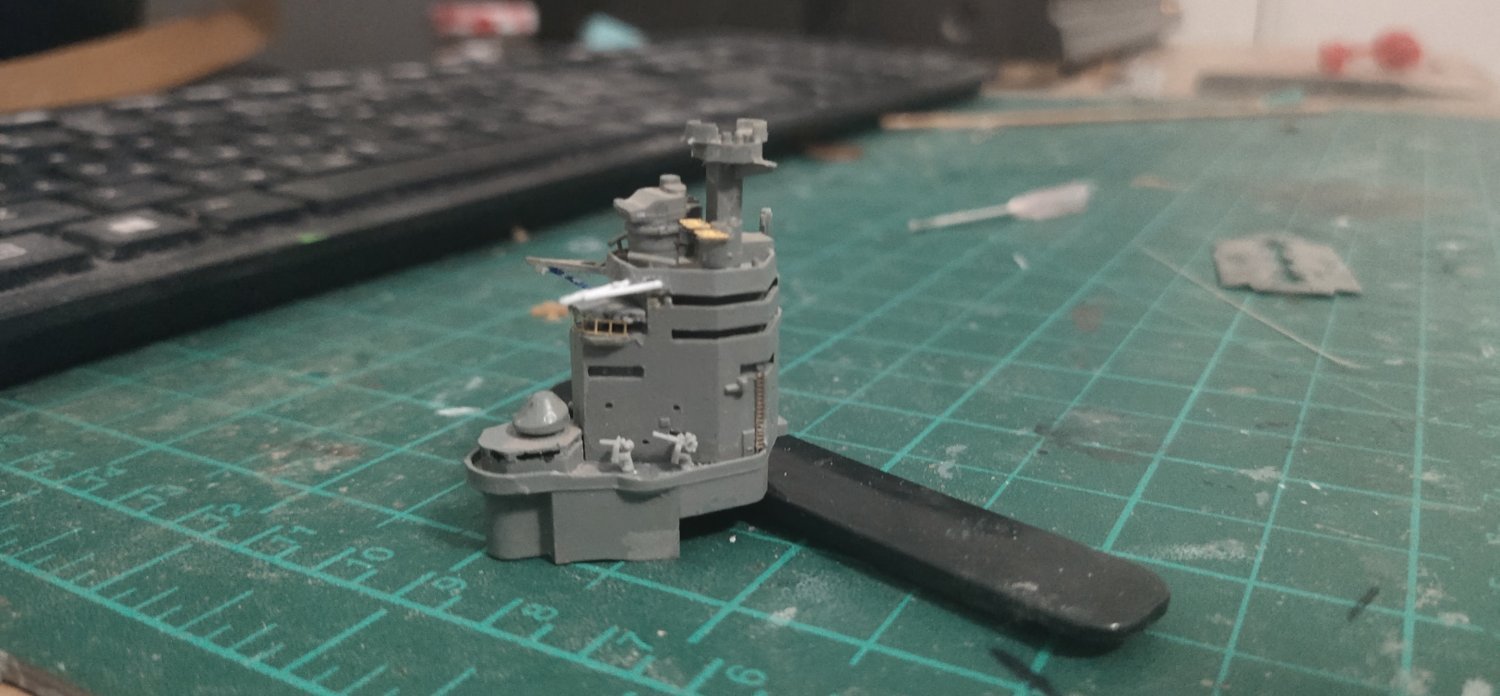
I have started upgrading the bridge. Did some scratch built, added PE and replaced some moulded aa guns with separate ones. I lost two rangefinder antennas during process so no PE set for the rear ones. I think I will start assembly my next model on the floor.
I found an easier way of bending PE precisely. I draw the lines of the piece on a paper then I bent the part according to the line. Wherever this is applicable though.
- lmagna, mtaylor, thibaultron and 3 others
-
6
-
11 hours ago, lmagna said:
At least you didn't have to deal with the real price tag. I read today that they cost over $35K an hour just to fly. I have no idea if this is true or how they come up with the number but it was a little shocking. Most of the other newer "specialty" aircraft were up there as well. I think the older almost indestructible Warthog was only something like $9-$10K.
Its absolute real. F22 is more expensive and B2 is 100-150k per hour.
Just before collapse of the Soviet Union, US had invested on such multibillion projects. Another one was the Seawolf class. The use of computer took the project design in a different level but then it wasn't extended until today. This along with large production numbers for export can drop the price of the F35 below 90 million dollars. A forth generation Eurofighter cost no less than 100. Japan's planned stealth fighter, 170+ millions.
-
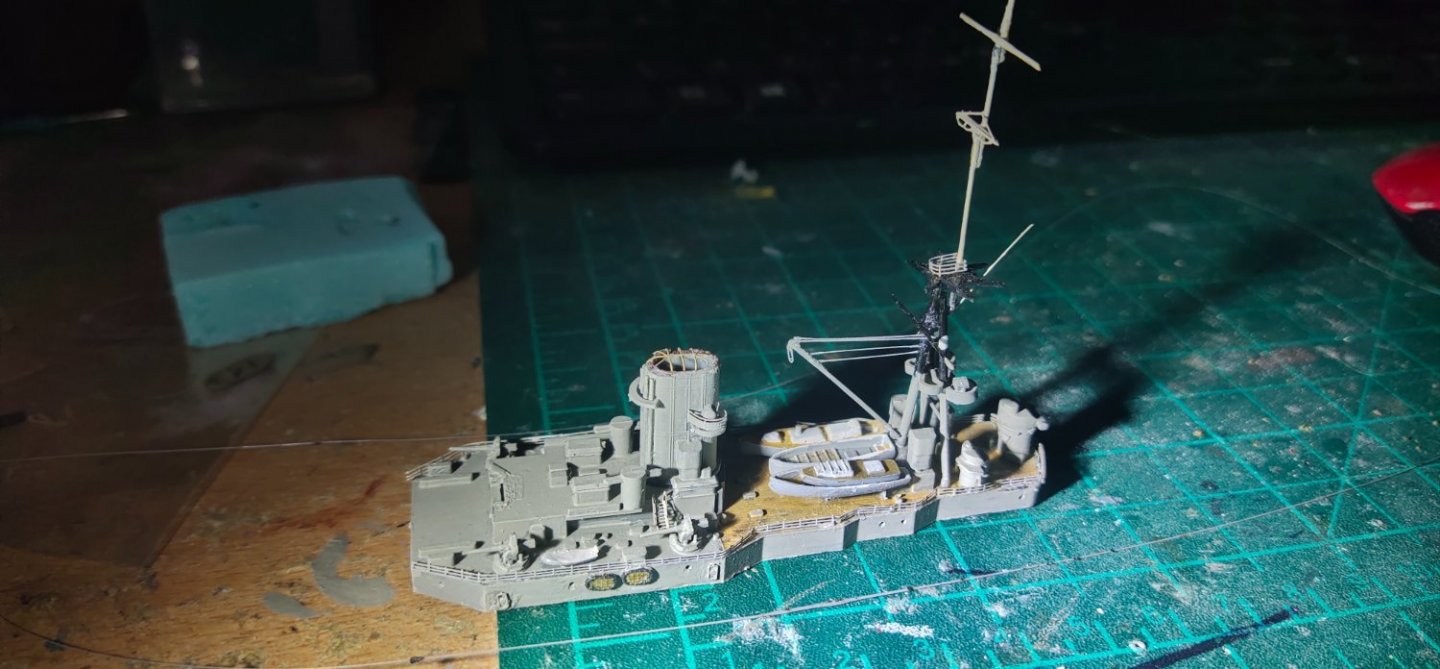
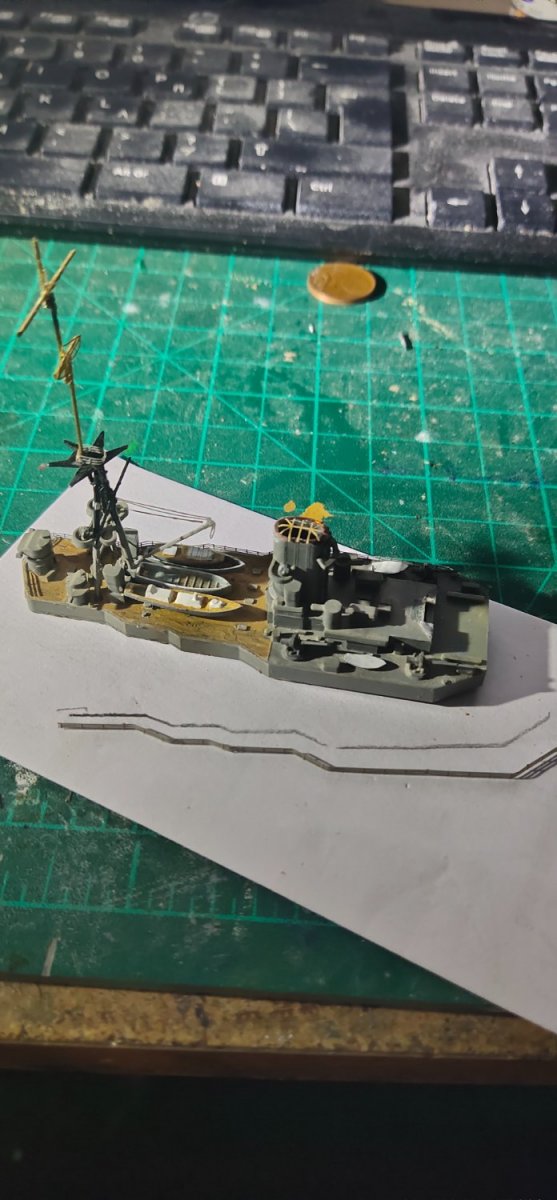
I did some work on the upper deck. Weathering,boat upgrade,
 rails and added the rear mast-crane set.
- mtaylor, yvesvidal, Old Collingwood and 2 others
-
5
-
-
do you have decals for F35?
- mtaylor, Canute and Old Collingwood
-
3
-
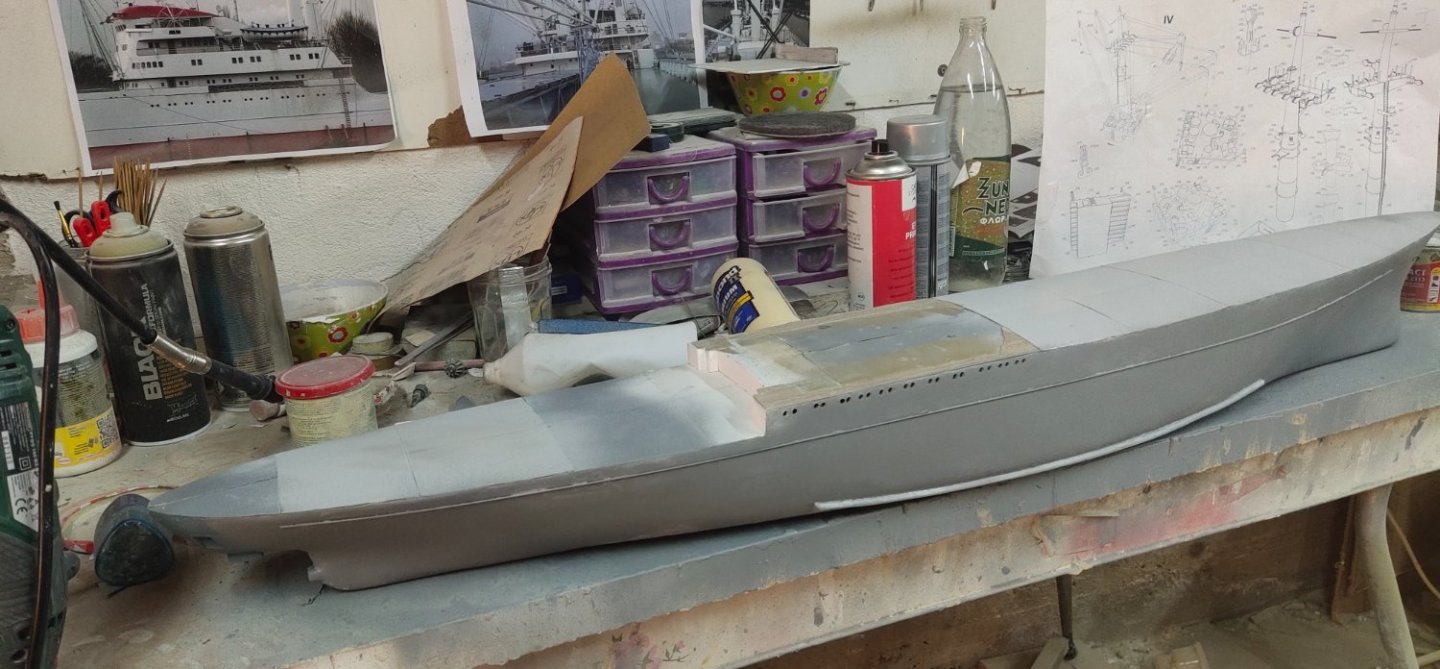
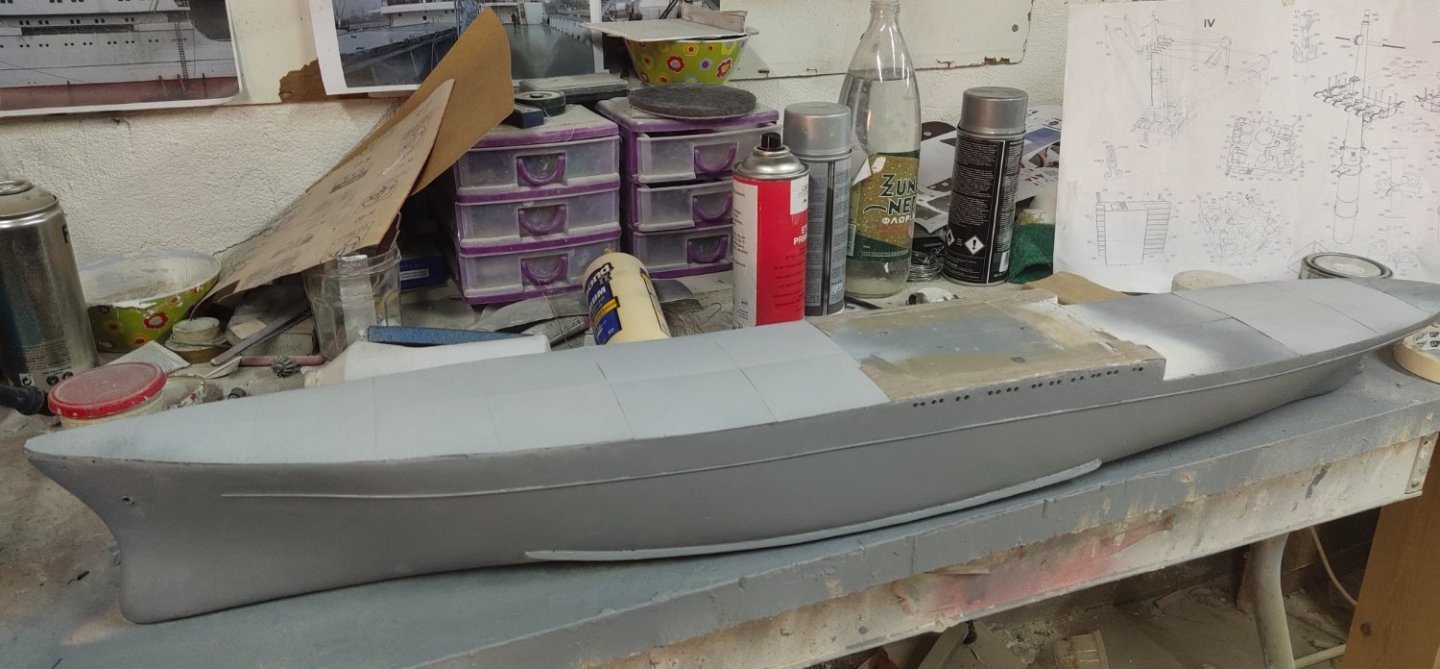
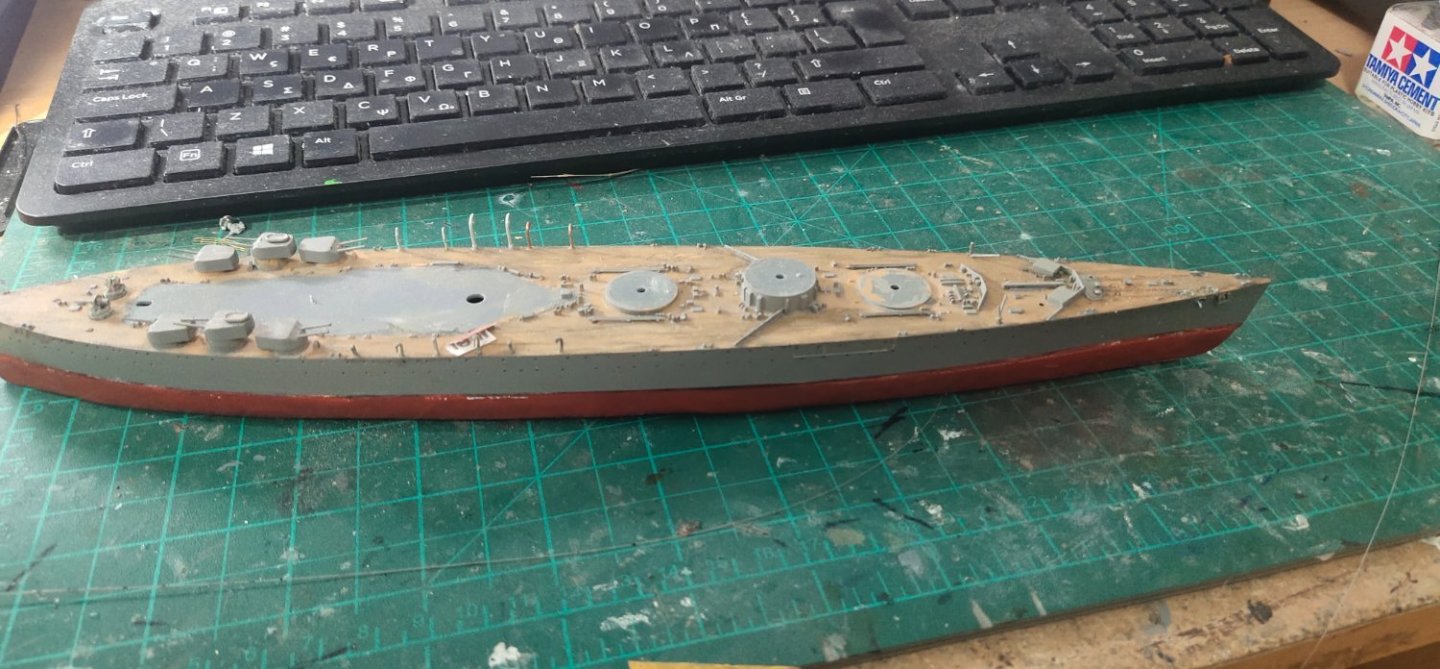
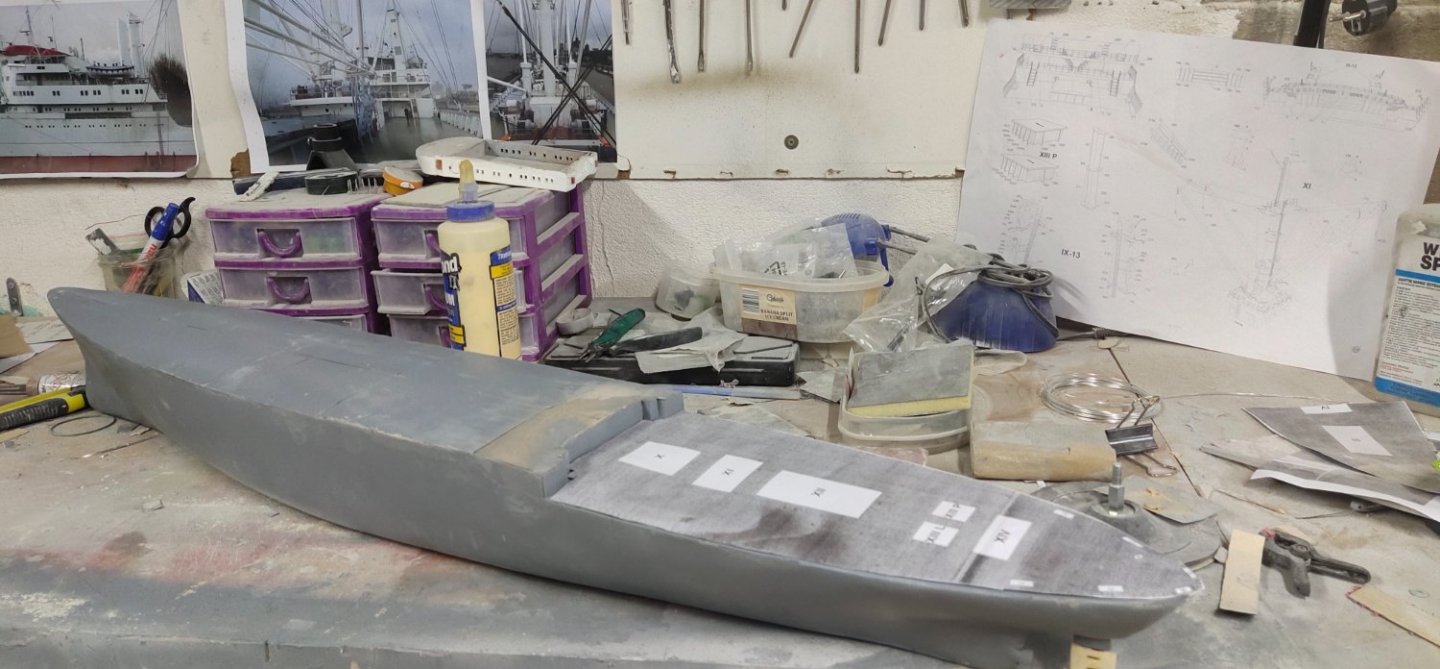
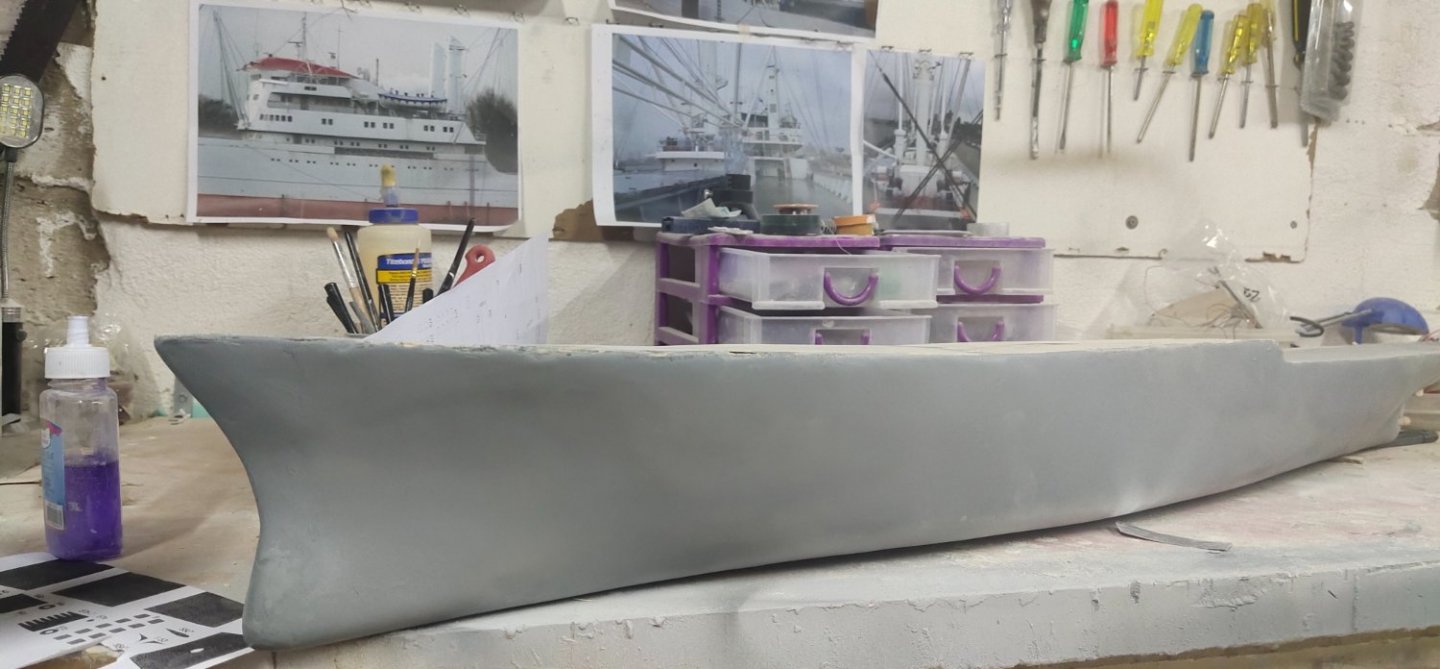
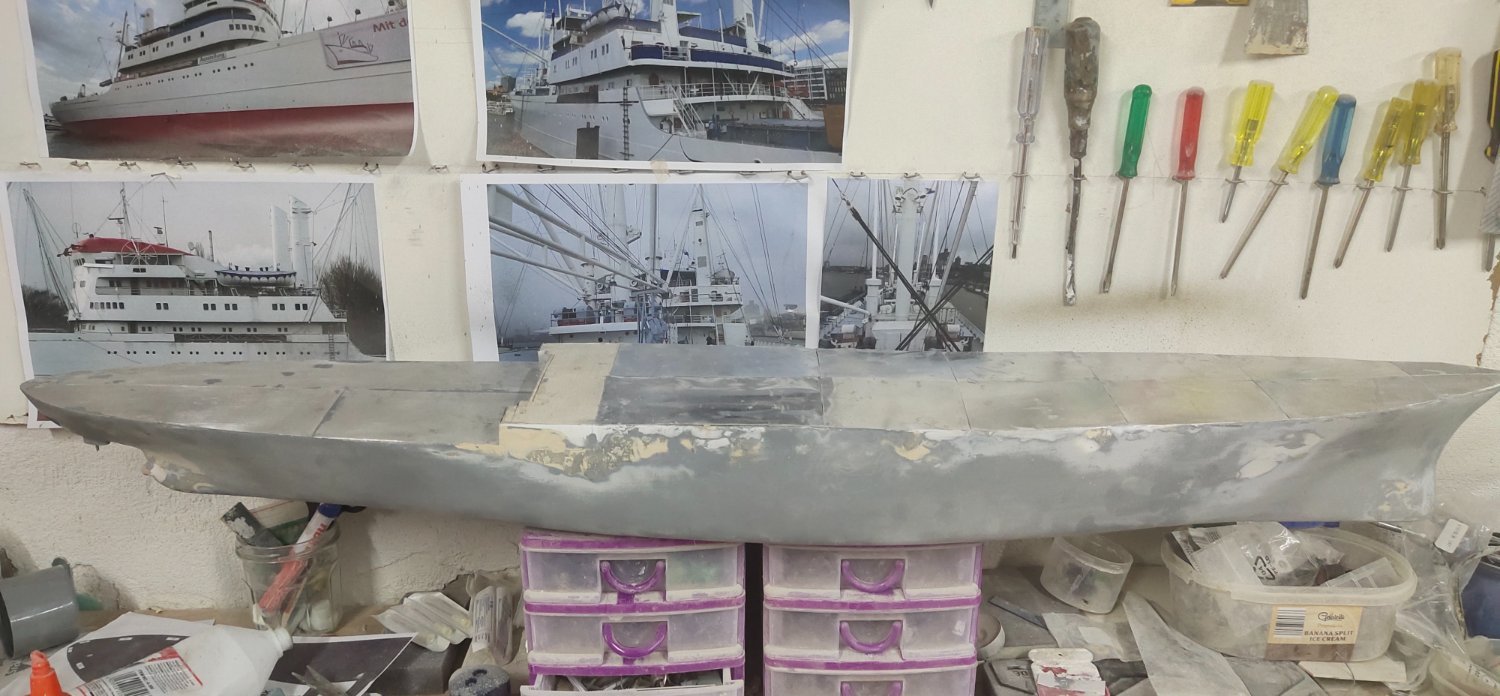
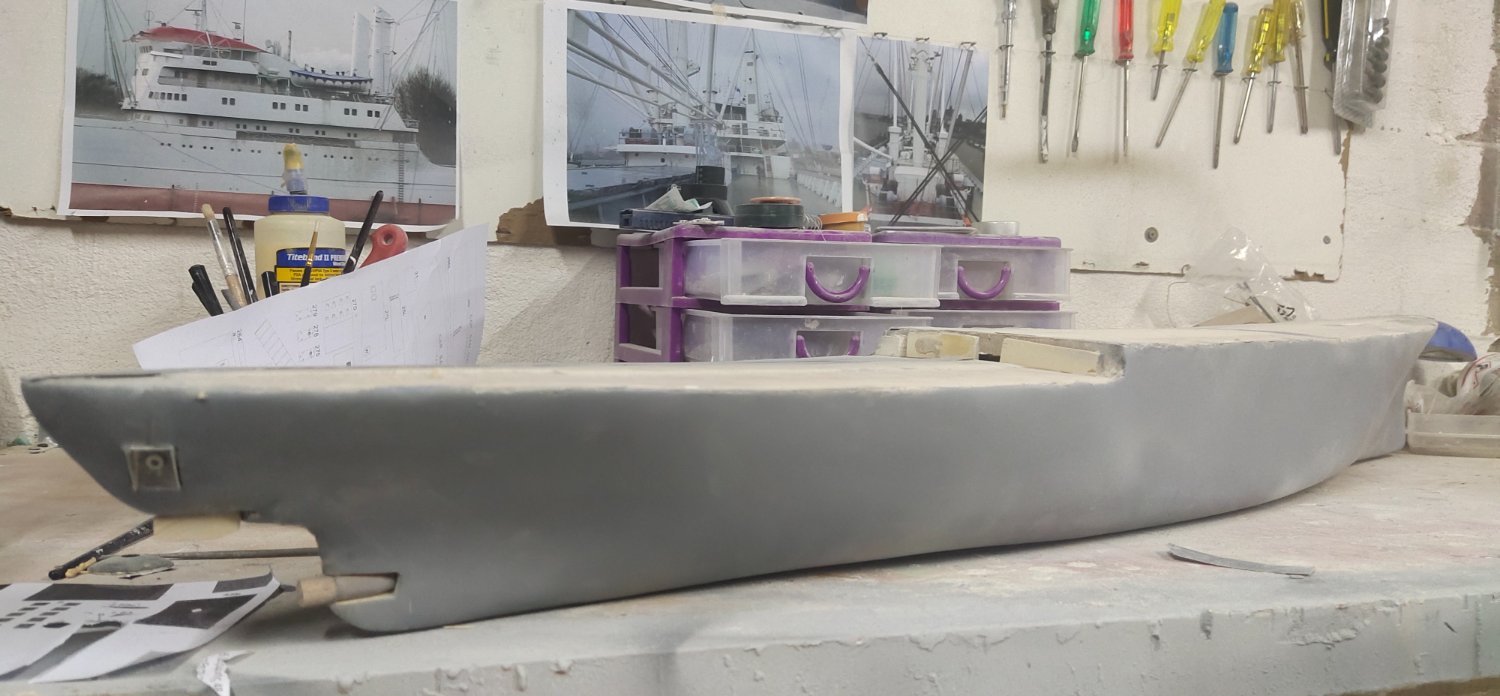
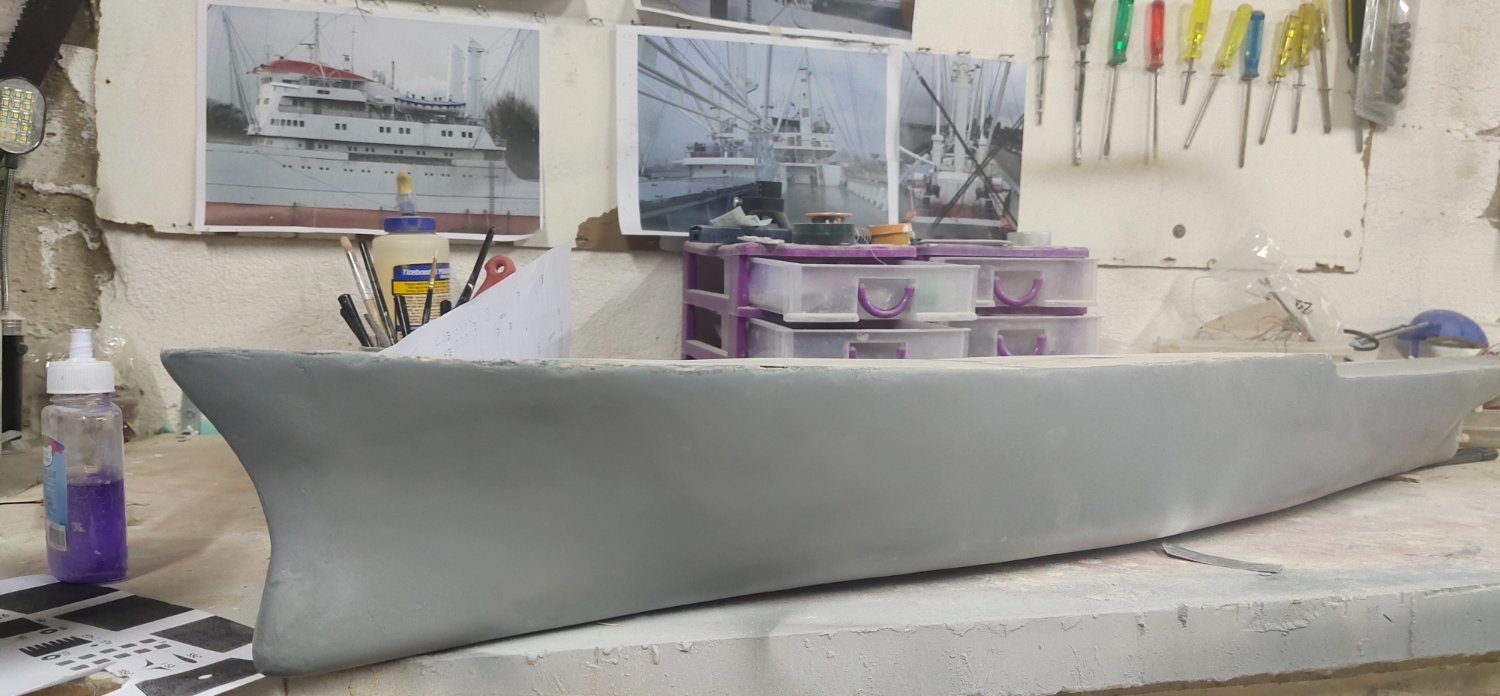
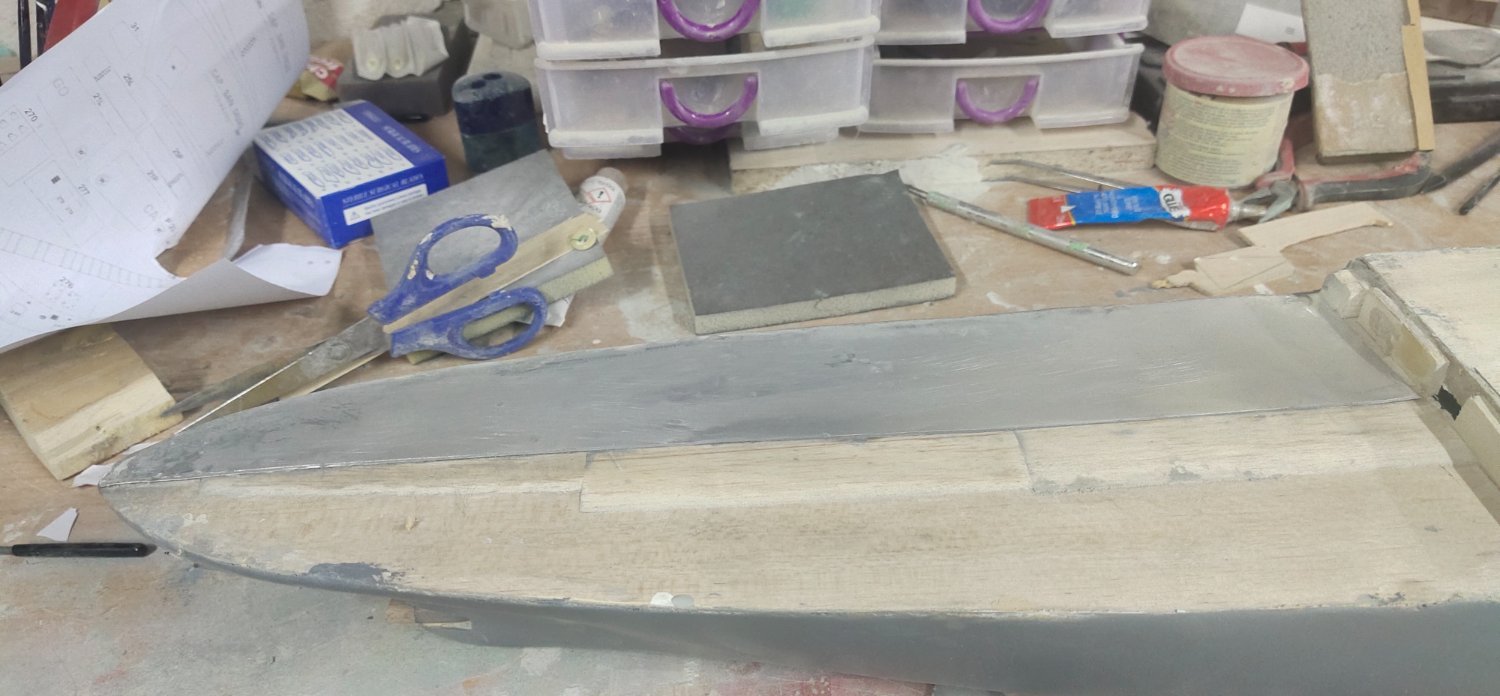
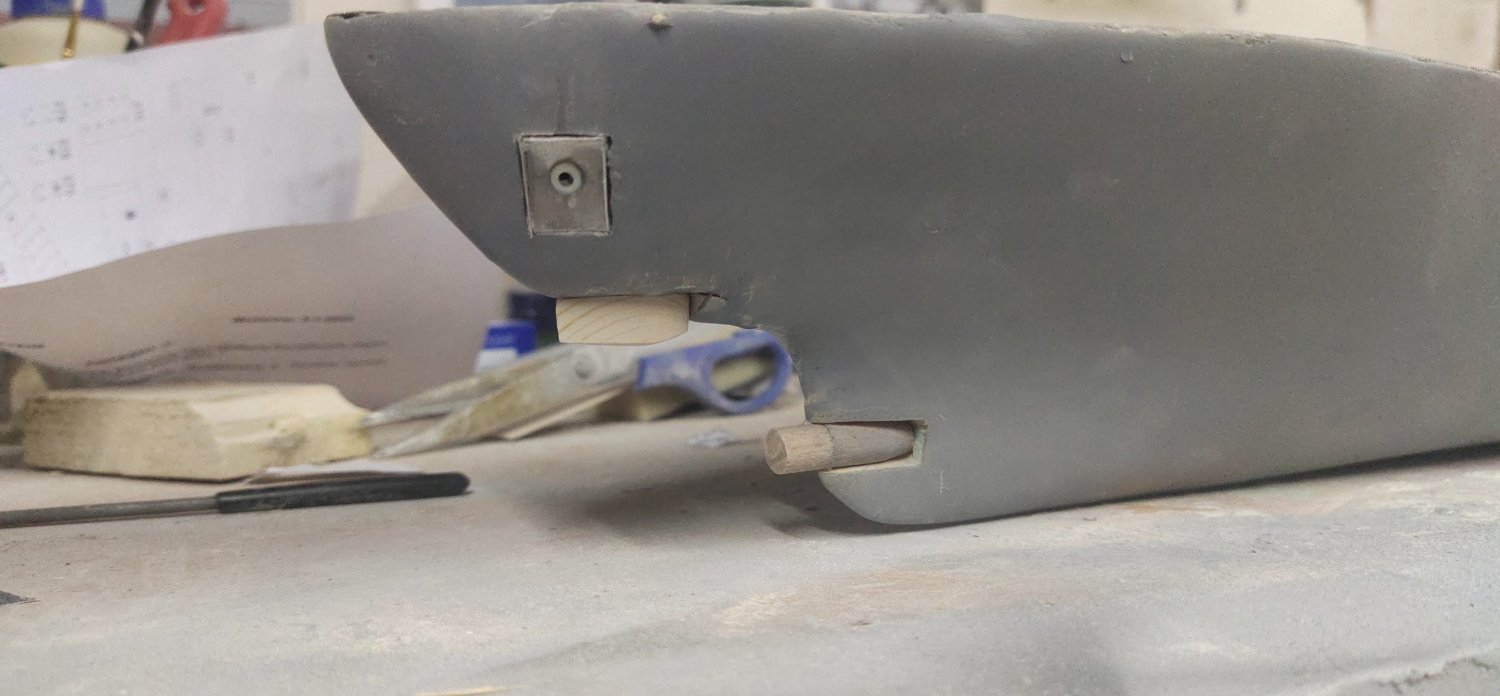
So after some weeks of struggling with the hull I managed to take it to the desired level. I will polish it with 600 grit paper tomorrow. There's work to be done on the joint with the deck but I also have to add the deck frame with supporters there so I will deal with it later. I did though some -off hull- work after long time. I added the propeler base , rudder base and test fitted the box in the bow which I don't know what it stands for, maybe for a third anchor. It wasn't great progress but it was pleased that I switched back to creation for a while.
Last thing, I need to strengthen the deck by adding aluminum sheets. To give also the desired pitch I put underneath some balsa pieces. At the deck centerline they are 1mm thick trimmed down to sharp edges towards ship's sides. Hope you got my point.


- mtaylor, GrandpaPhil, yvesvidal and 2 others
-
5
-
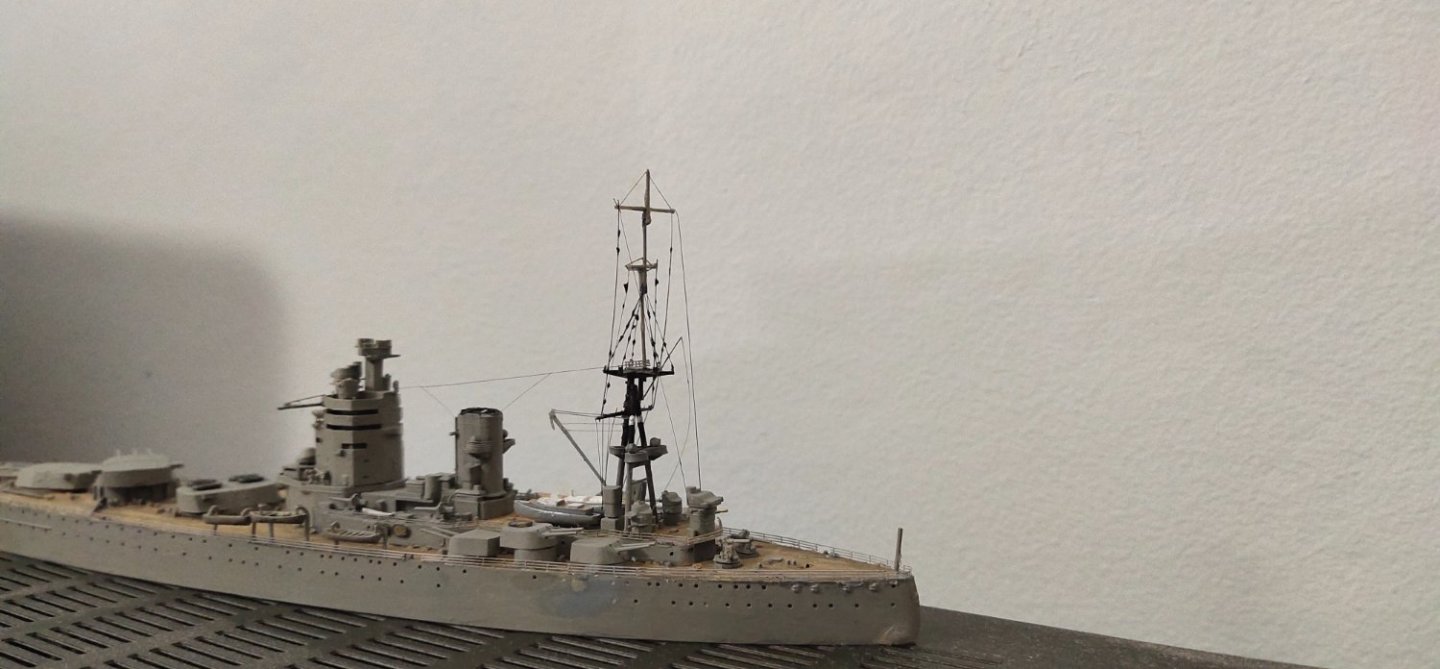
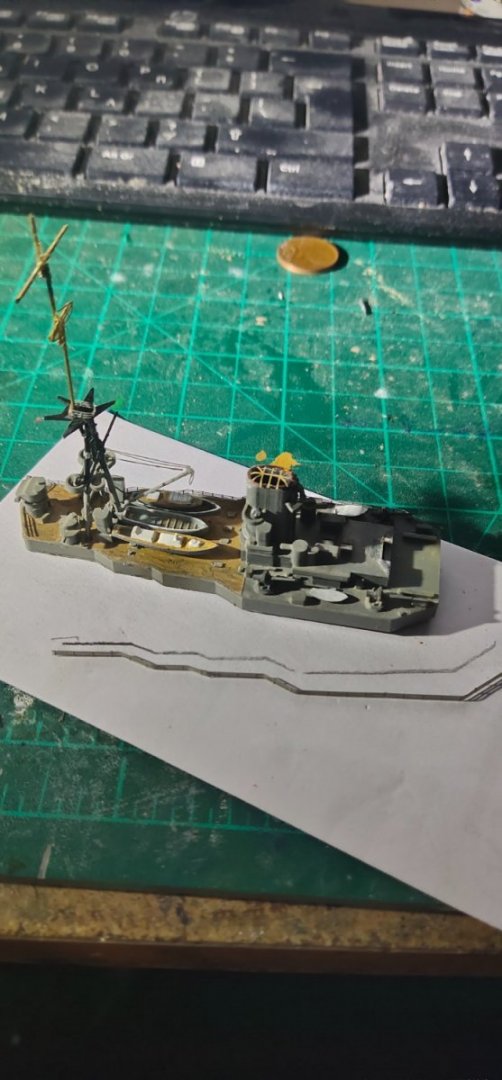
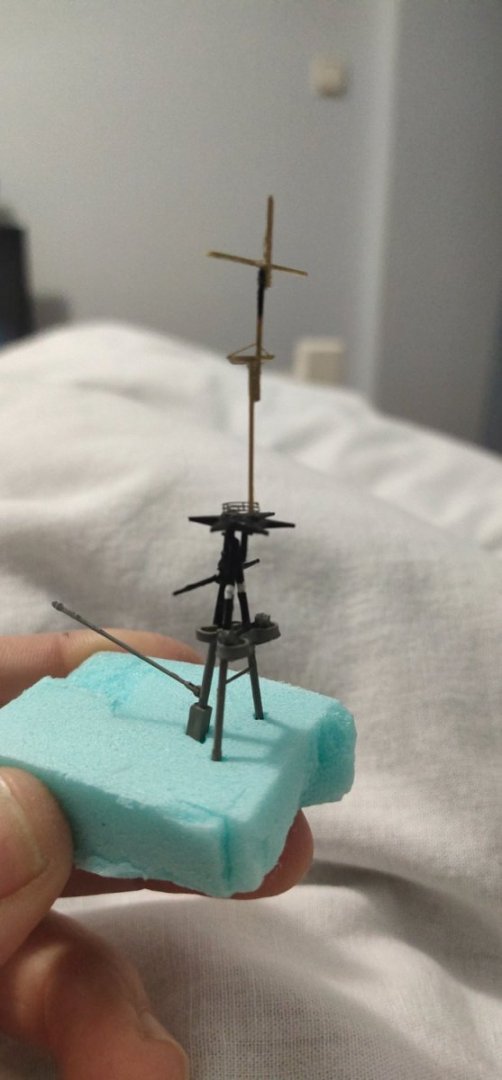
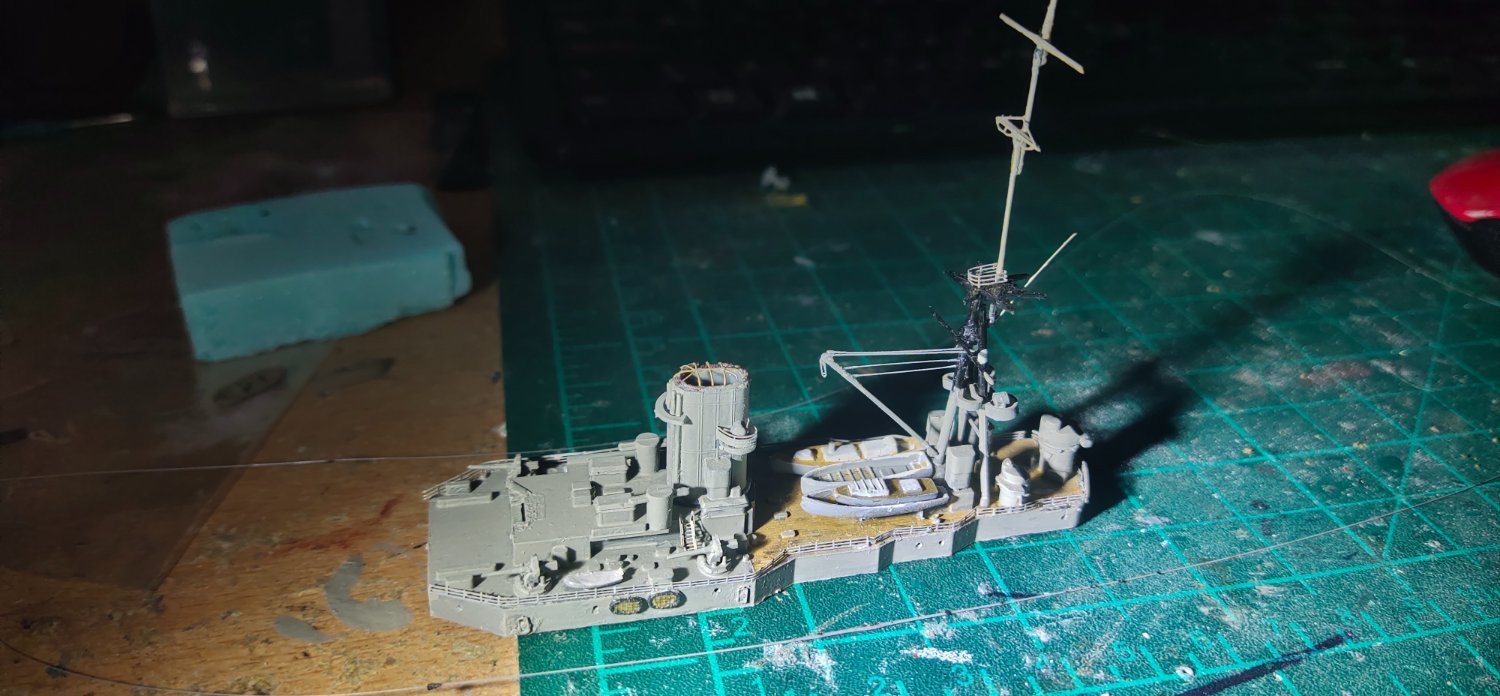
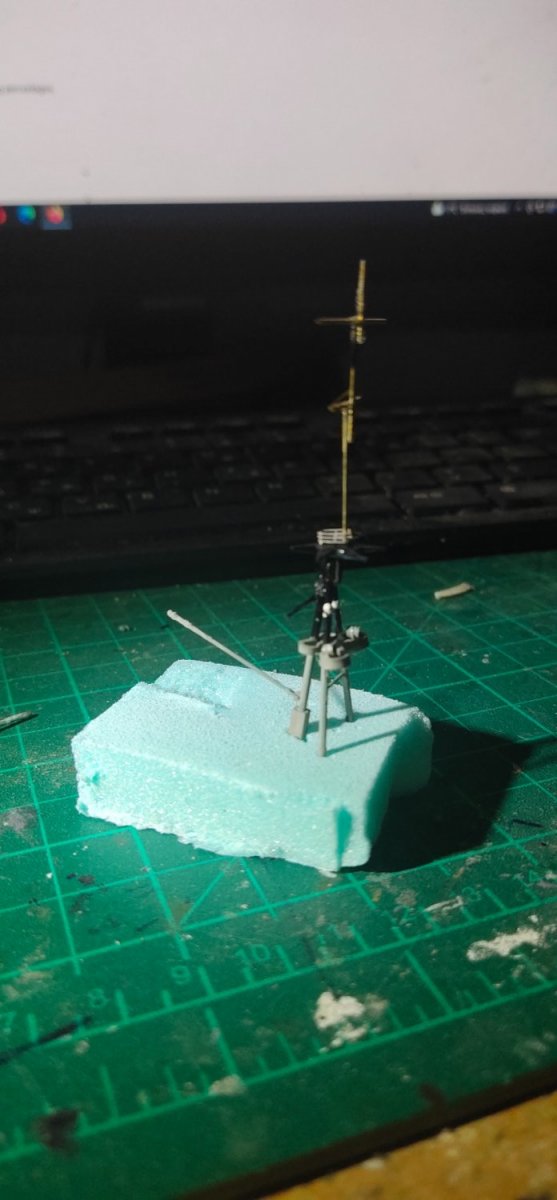
Ι scratch built the upper part of the rear mast. Since I don't have soldering skills yet I made it in 3 parts. At the 2 joints, the vertical masts are glued. This, will offer some extra strength required for the rigging tension. As extra precaution I will use stretched sprue instead of elastic thread.

- Old Collingwood, mtaylor, lmagna and 5 others
-
8
-
22 minutes ago, hof00 said:
Thanks Chap.
Yup, the alignment is an issue on some of the Rails, agreed.
I was not happy, the more I thought about it....
I looked at Rod's, (rvchima), Bismarck build also for confirmation of my thoughts. (Thanks Rod 🙂)
So, I have "Pushed" the Rails in on the Starboard side using a 1.0mm strip of Walnut as a spacer between Rail and Hull, it looks much better and much more in scale....
I think that a "Prime" will hide any other misdemeanors.
Amazing what a millimeter will do!! 🙂
Live and learn I guess.
Anyway, something to start my day off tomorrow!!
Please feel free to comment, it's really helpful!!
Cheers....HOF.
I see some pencil lines of first set from left. That would be ideal for vertical alignment.
I guess a final check would be by checking the hulk from the stern to make sure they put in the correct depth. So basically we are talking for a 3 dimension check. Definitely bit more complicated task that bend and glue as it seems initially.
Not to mention that after some sets (or models) you will be able to put them by hand without the need of any tools.
- mtaylor, Old Collingwood and Canute
-
3
-
Close photos suggest some alignment but once painted they may look ok.
You can use a spacer while installing them let's say a toothpick for example to make sure they are put evenly.
- mtaylor, Canute and Old Collingwood
-
3
-
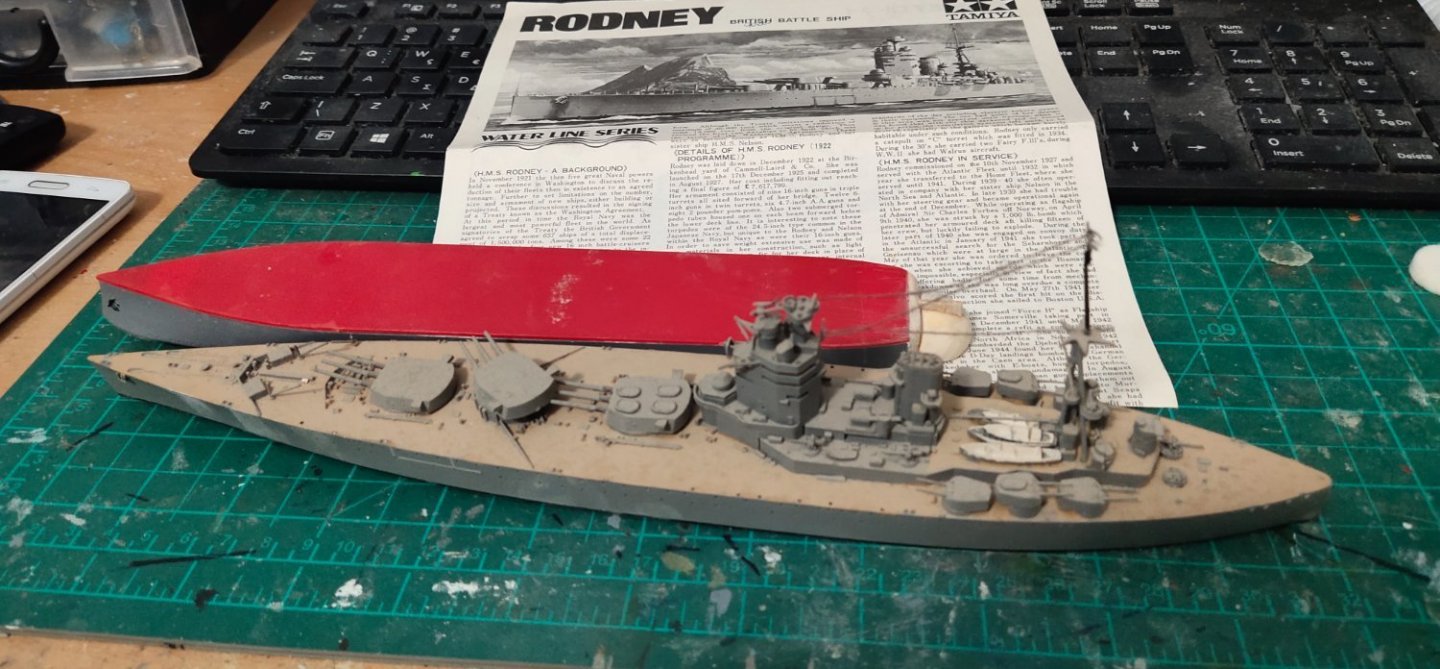
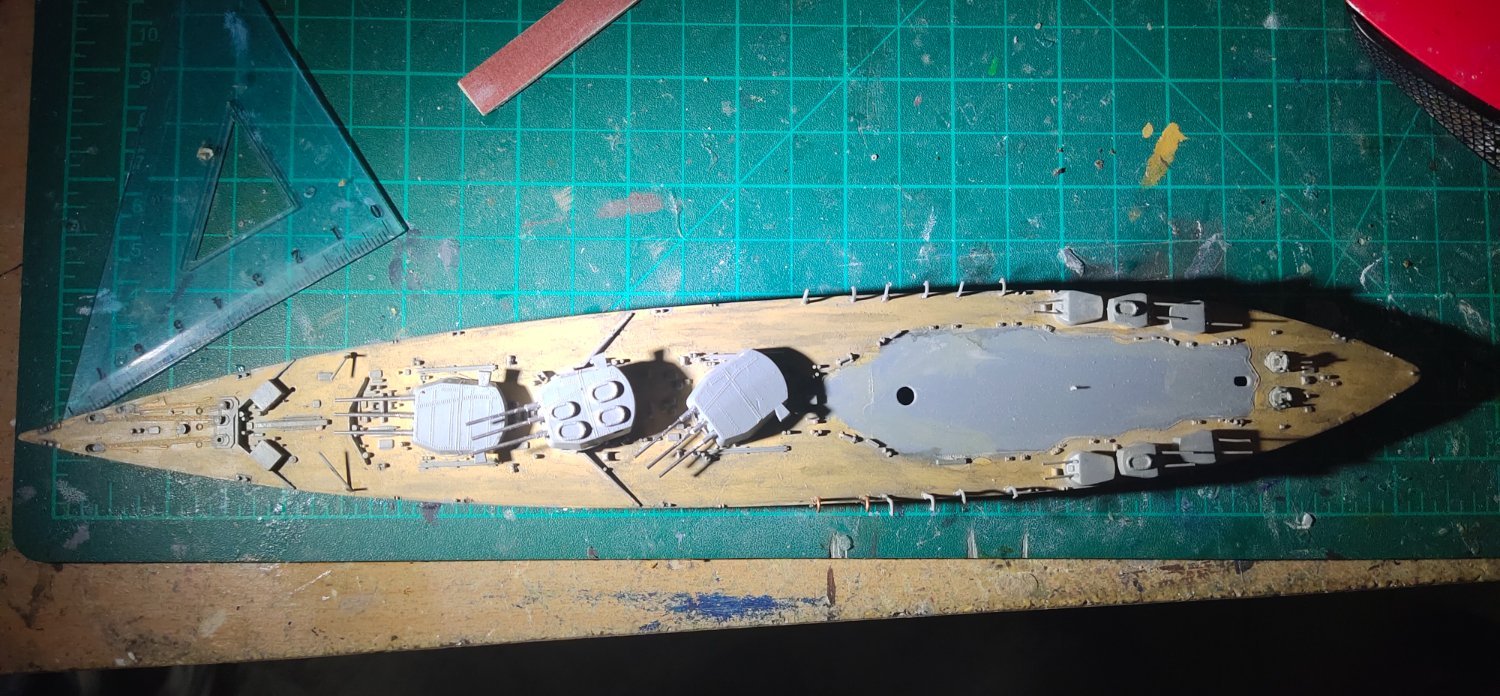
I was thinking that this is one of the least damaged models while an accidentall fall caused some breaks.
The paint is in great condition the challenge would be to match the color with the added parts so I skip repaint.
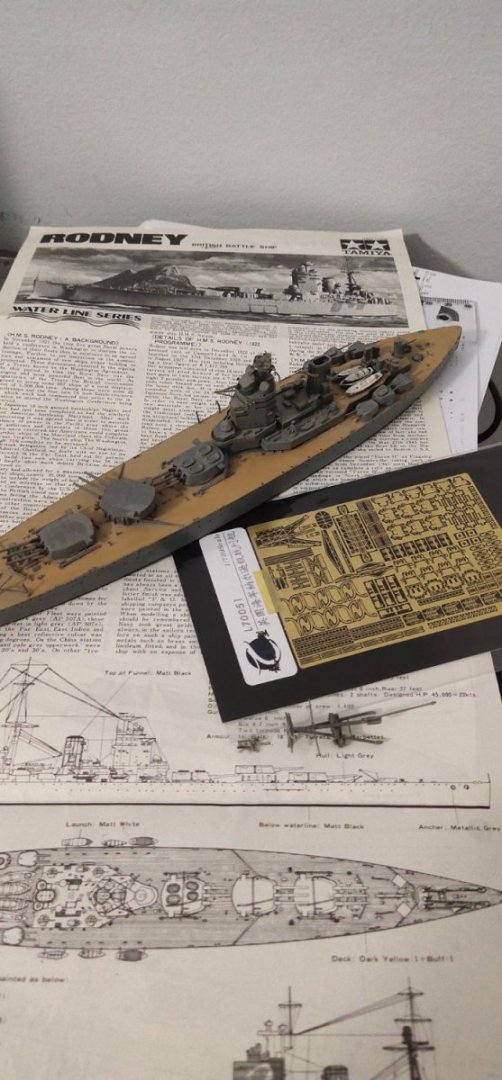
The PE parts are for the "Nelson Class" which means they include 40mm aa guns which Rodney never received. J will use some of them, railings and whatever I could find on my spare parts stash.
-
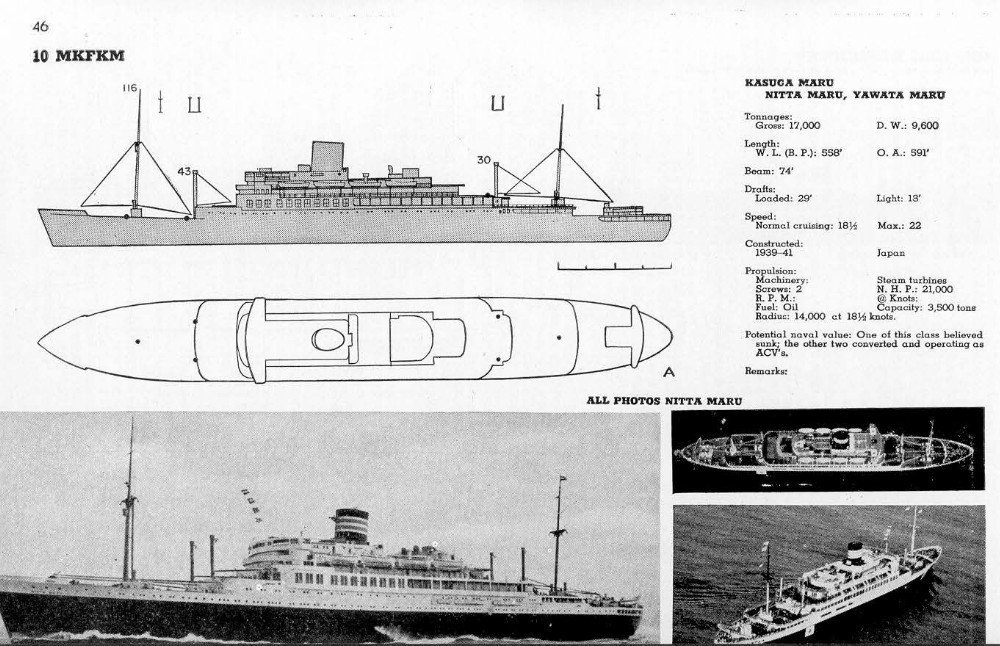
As I was searching some plans I noticed the bow was quite different than it should be. I considered it as a model fault so I cut it and tried to make a new one shaping some wood. Then while a friend called and ask some info on painting a Fletcher, I researched my instruction sheets which I have kept for years. To my surprise I found out that the kit was not Hikawa Maru but Yawata Maru by Aoshima, a cargo liner converted to Unyo, the sister ship of previous built, Taiyo.
Under these circumstances a conversion would be out of question. I put it aside for experimental purposes and proceed with a more classic built, HMS Rodney by Tamiya.


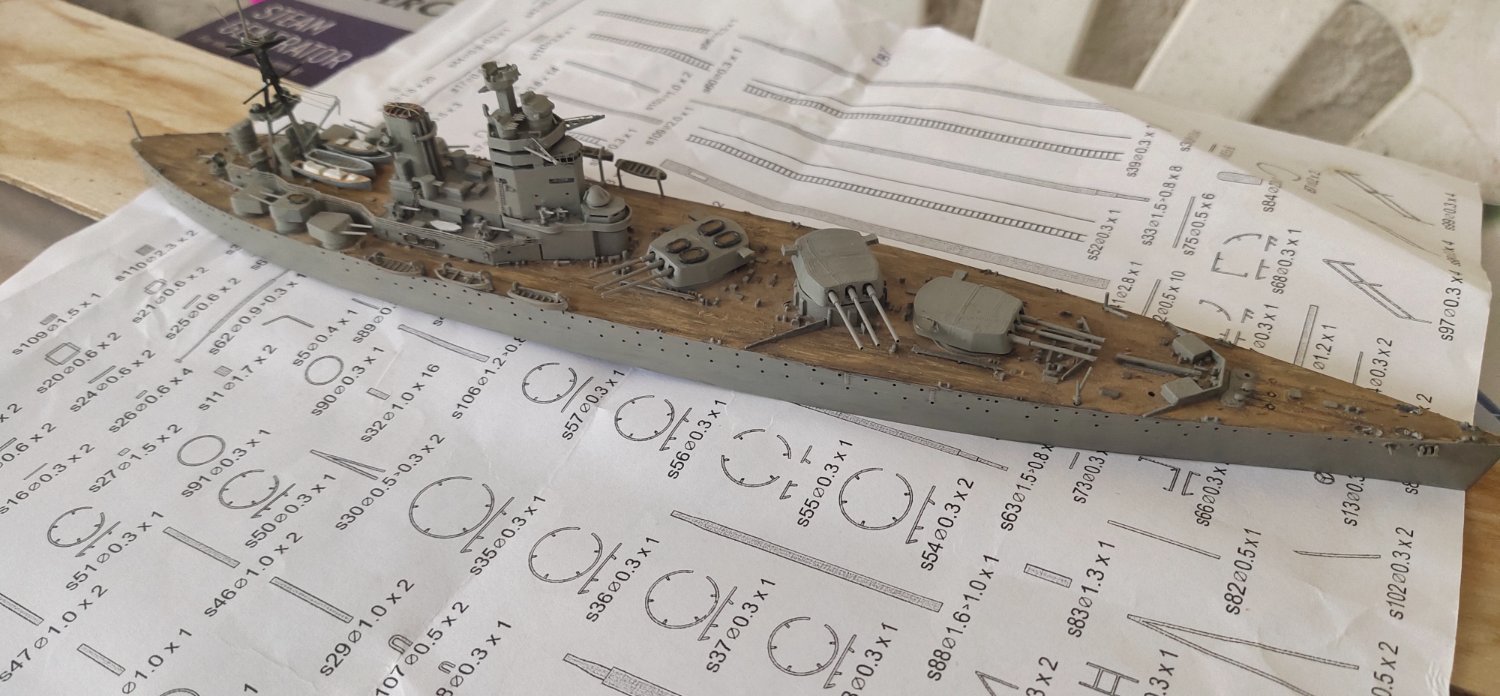


Rebuilding the fleet by mikegr - 1/700 - restoring old plastic models
in - Kit build logs for subjects built from 1901 - Present Day
Posted
The finished model with light to medium weathering plus light chipping. The A turret has a paint peel off on the roof. This caused by accidentally using a nitro based thinner. I left it as it is, I kinda like it. Next base will be the sea base