


mikegr
-
Posts
741 -
Joined
-
Last visited
Content Type
Profiles
Forums
Gallery
Events
Posts posted by mikegr
-
-
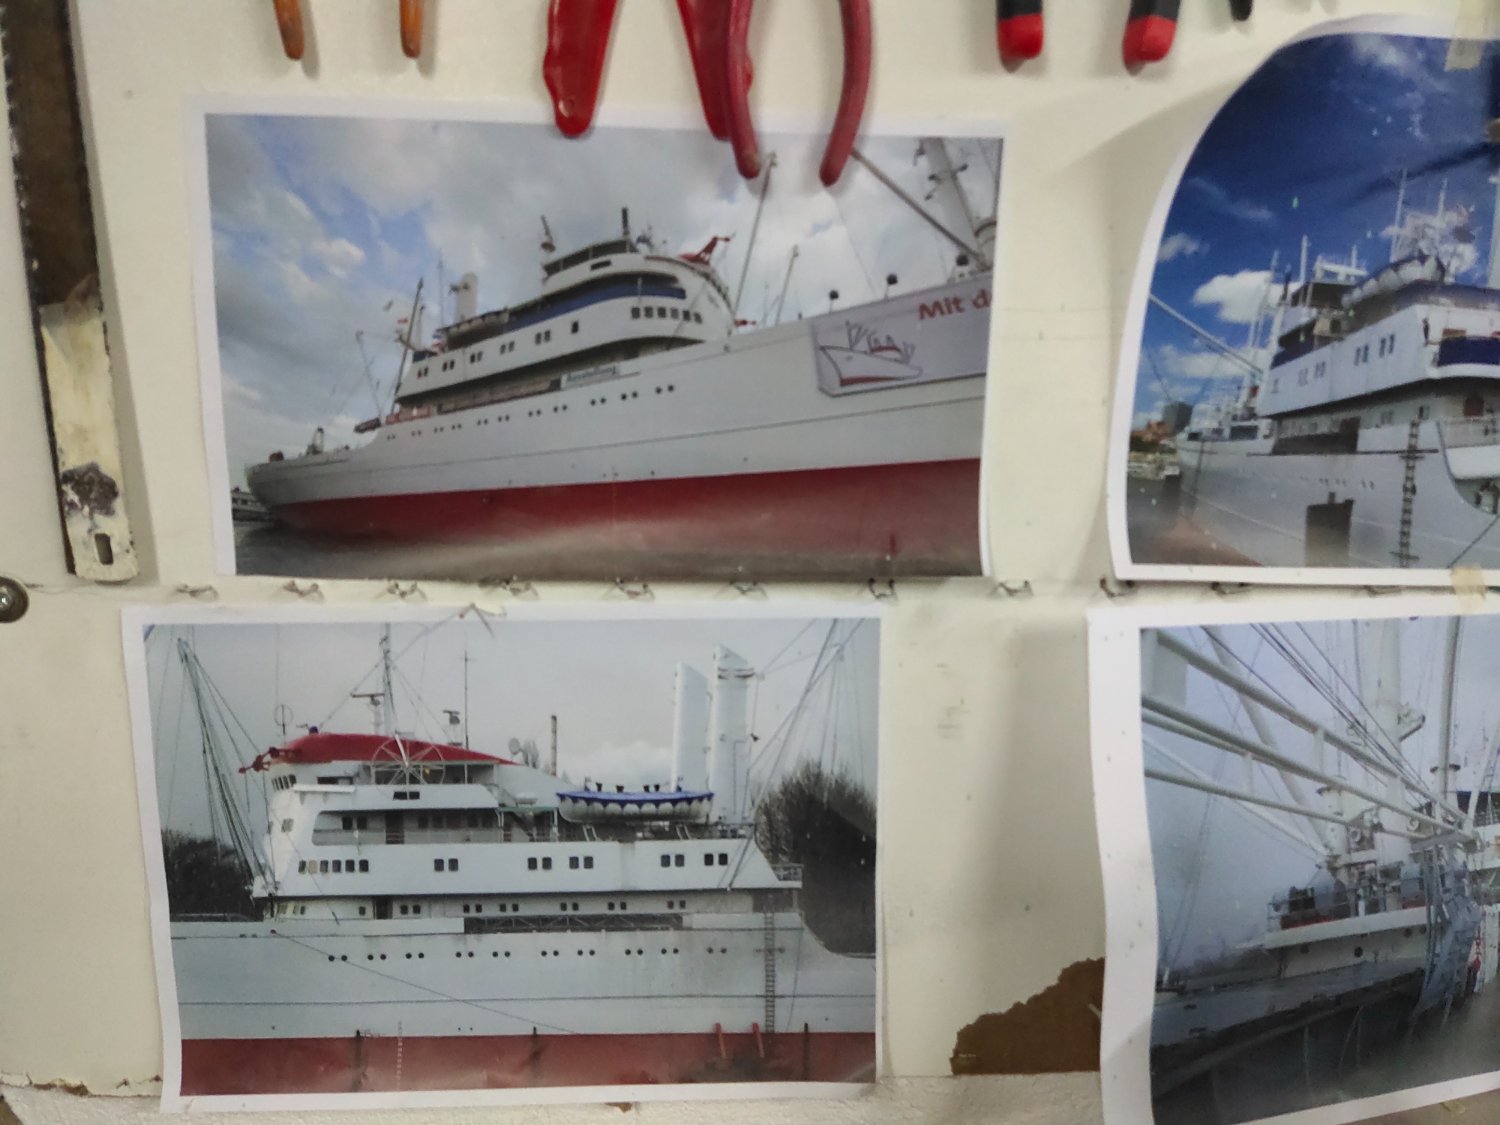
No update for 3 weeks depsite 3 weeks of daily work from half an hour to whole evening.
Typhoon was a different story. First I had to fit extra bulges around the tower area like in the real sub
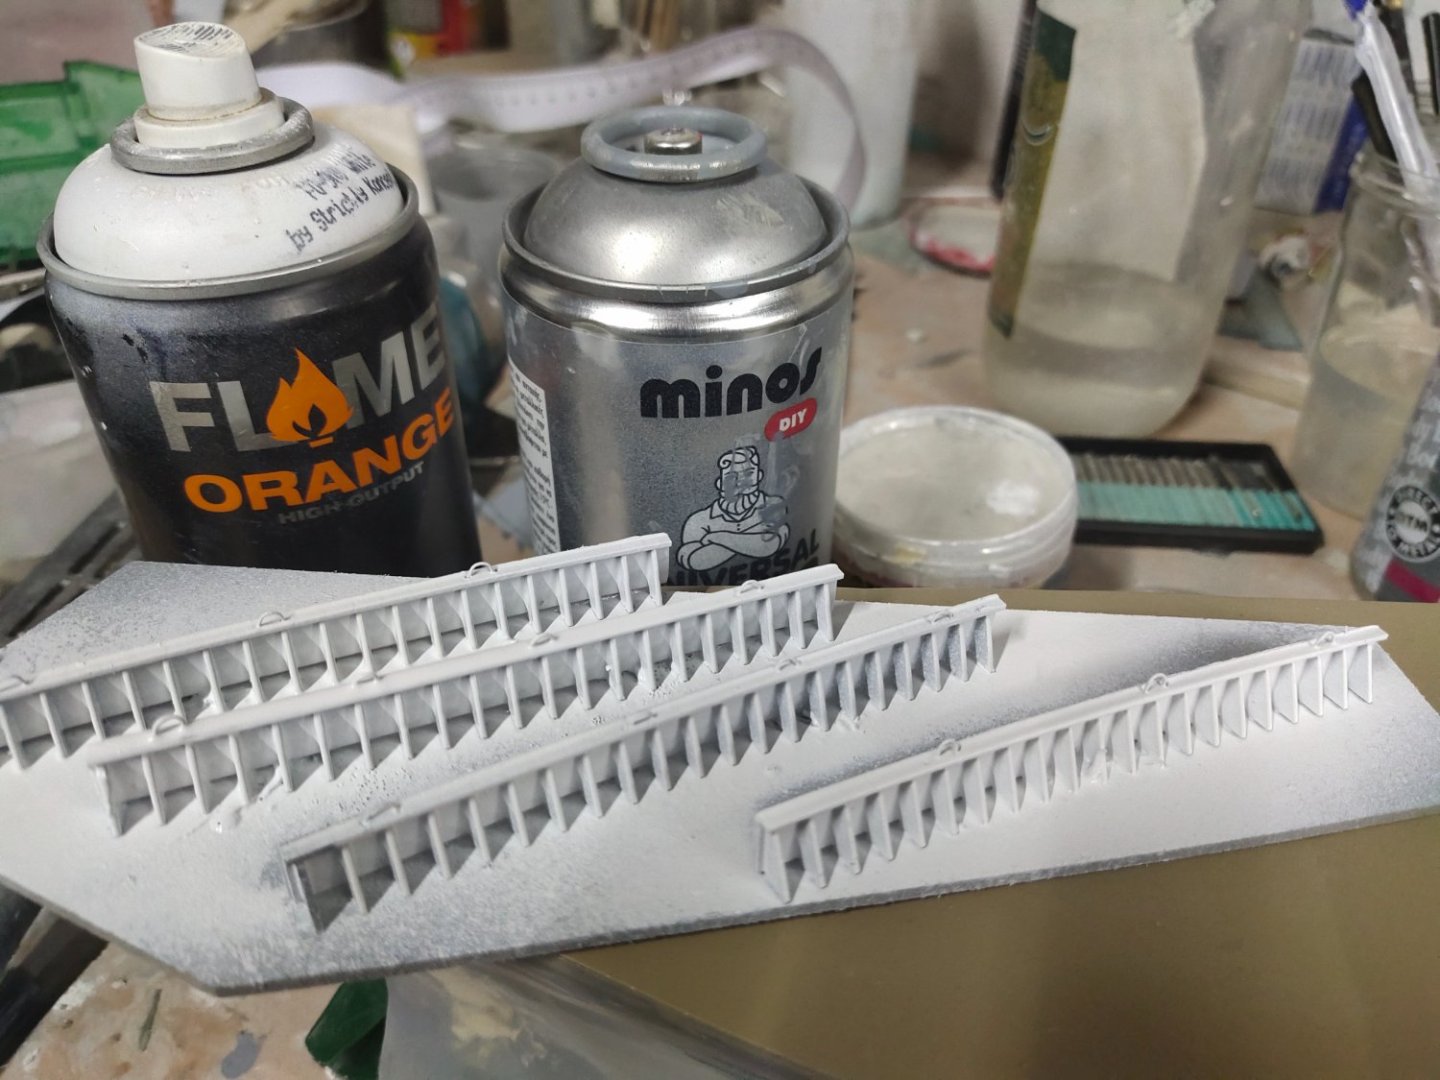
Then I tried for a snow effect. But those large areas actually gives the optical illusion of a larger scale so more detailed job should be considered. For my bad luck I didn't want to give an easy flat snow finish, something more challenging caught my attention
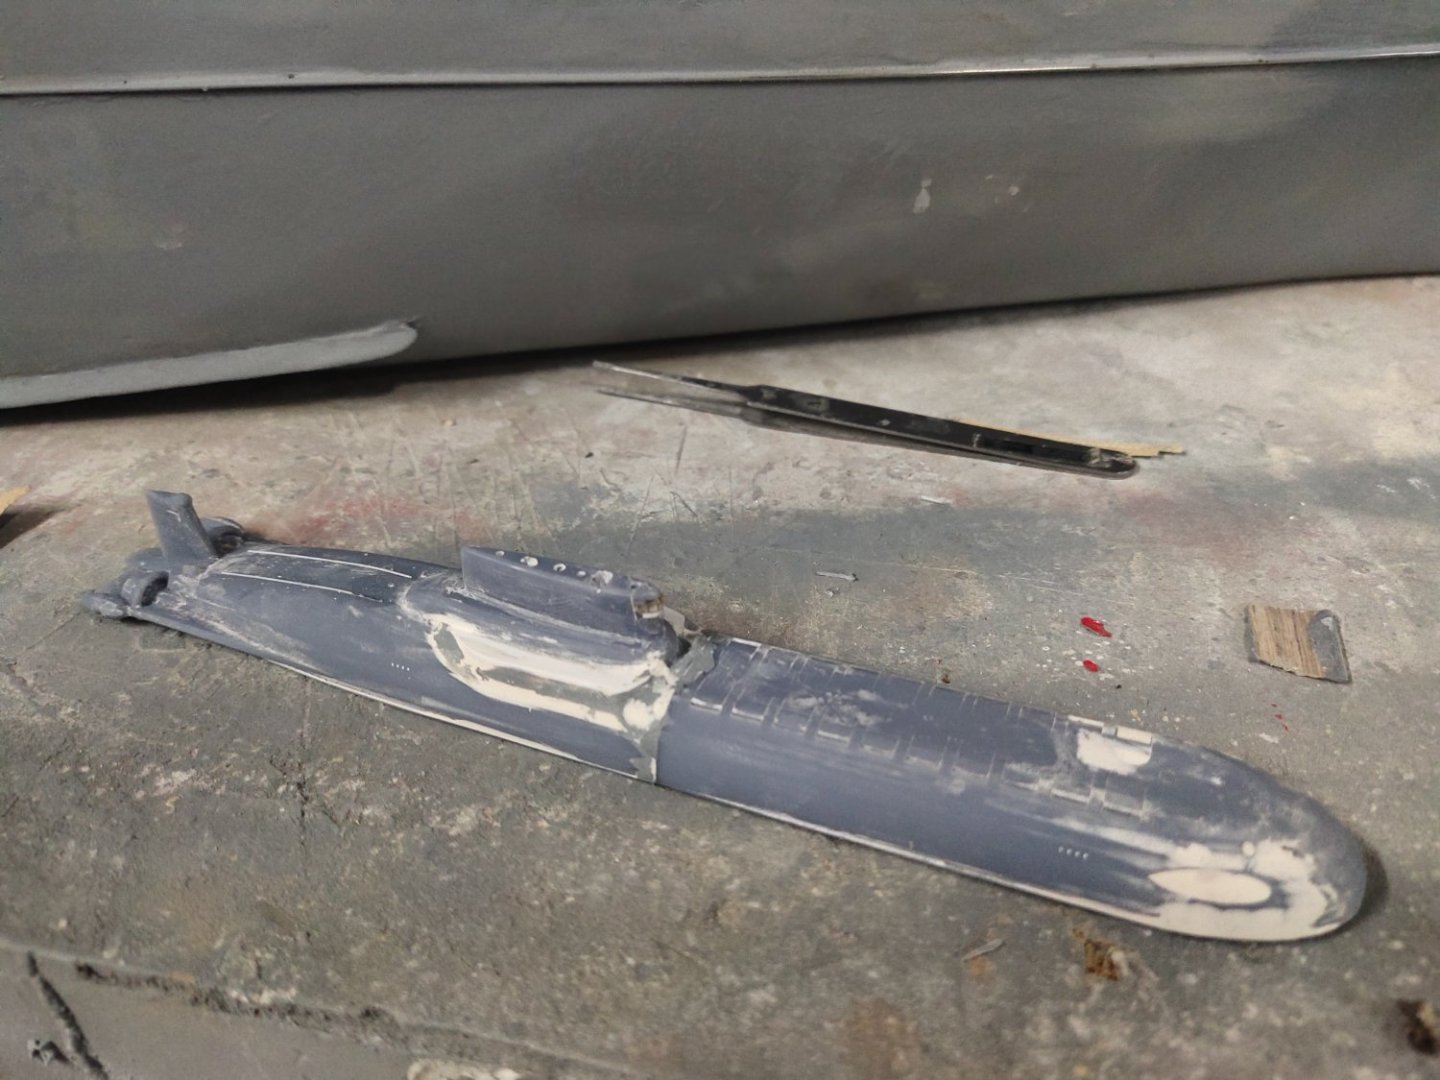
After few failed attempts I noticed that engraved details, particularly the cover of missile silos have gone. It was time to not only reprint the front hull part but to interfere in the file and make the lines more clean. With the right modification this was successful.

Painting failures went on for several evenings. Finding the right thickness on white paint to spray over large black area was a disaster. From, say 30 hours of work, 29,5 was spend on paint testing and airbrush cleaning. I even suffered a break down but thanks to online information airbrush was repaired quick without need of wasting time ordering spare parts online.
The missile silo hatch missing is due to a file problem. After a not so good scratch built attempt and new paint failures it was time for a re print. And as usual, further design modifications were necessary. This time were also more extended. New tactics were used, a home made snow paste was used and some chalk powder. After several tests I scored a result that prompts me at least to proceed to the next stage

Perhaps the hull leftovers can be modified to shelters or bunkers😁
- ccoyle, Old Collingwood, Coyote_6 and 4 others
-
 7
7
-
Small update
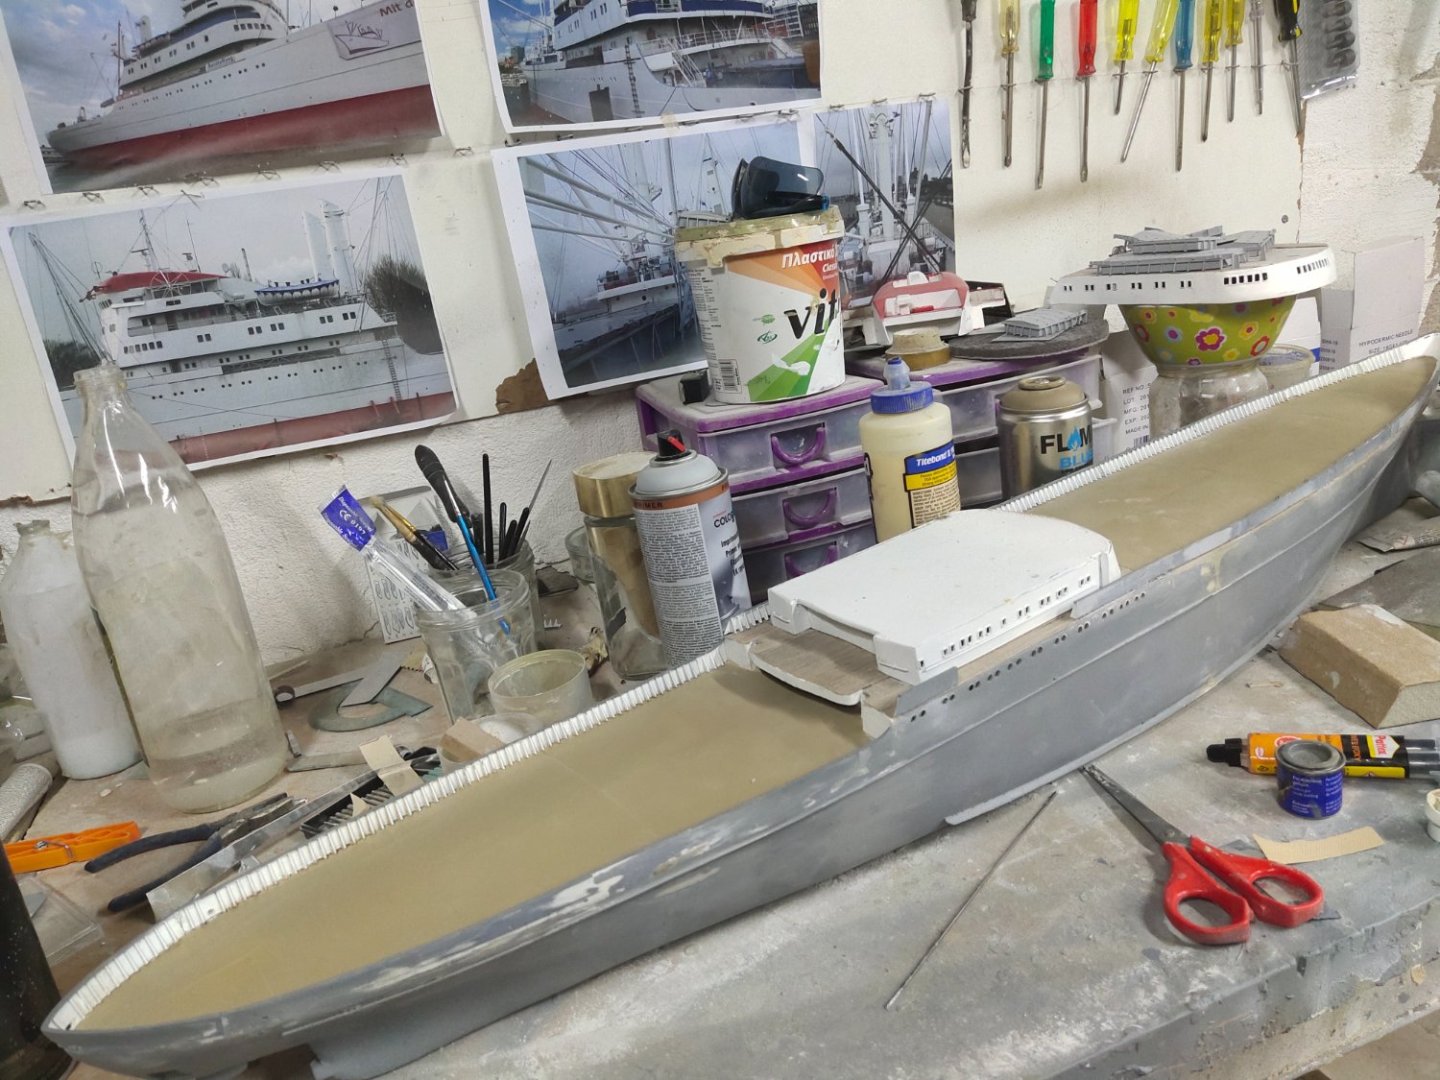
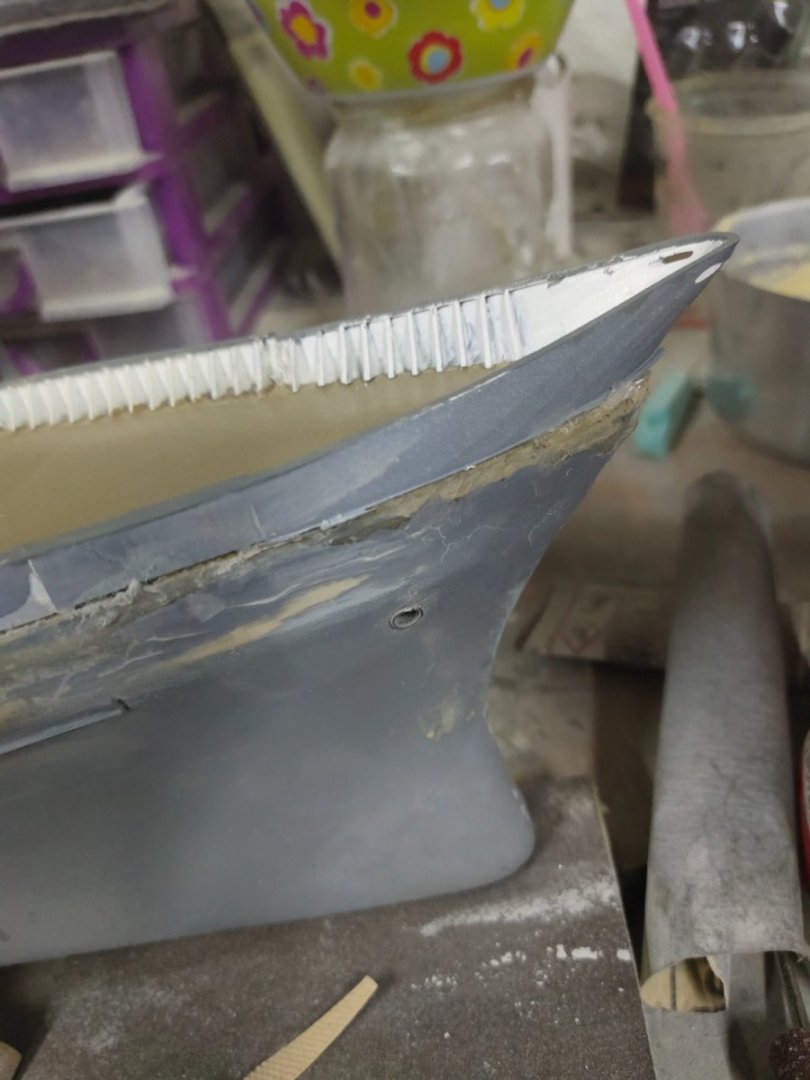
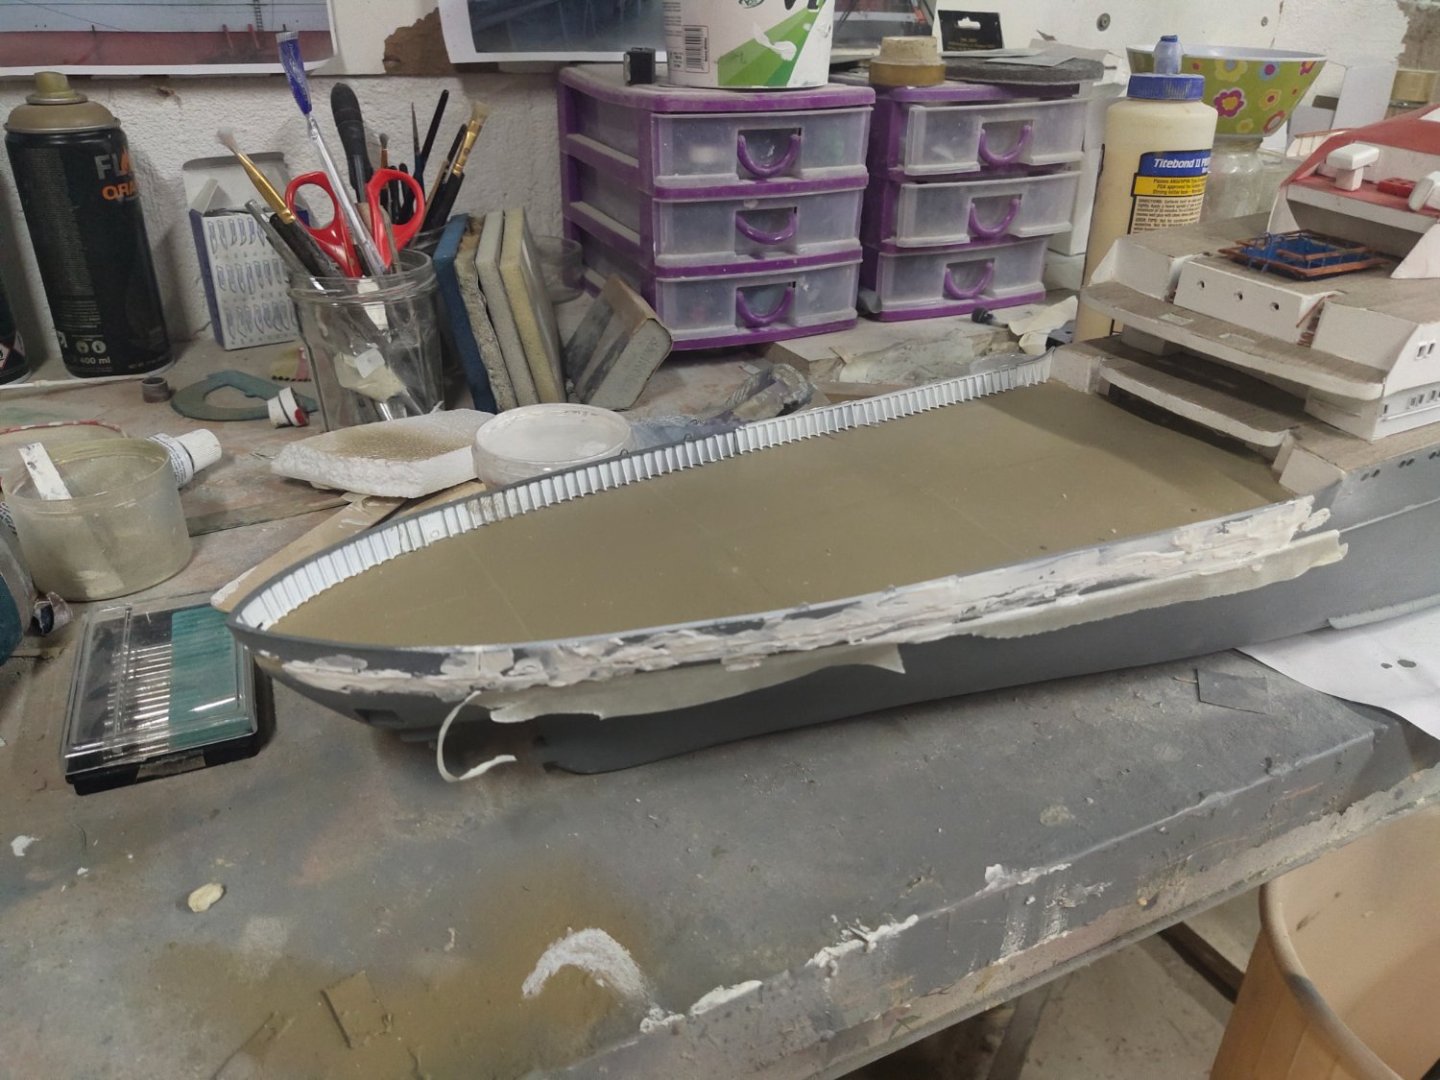
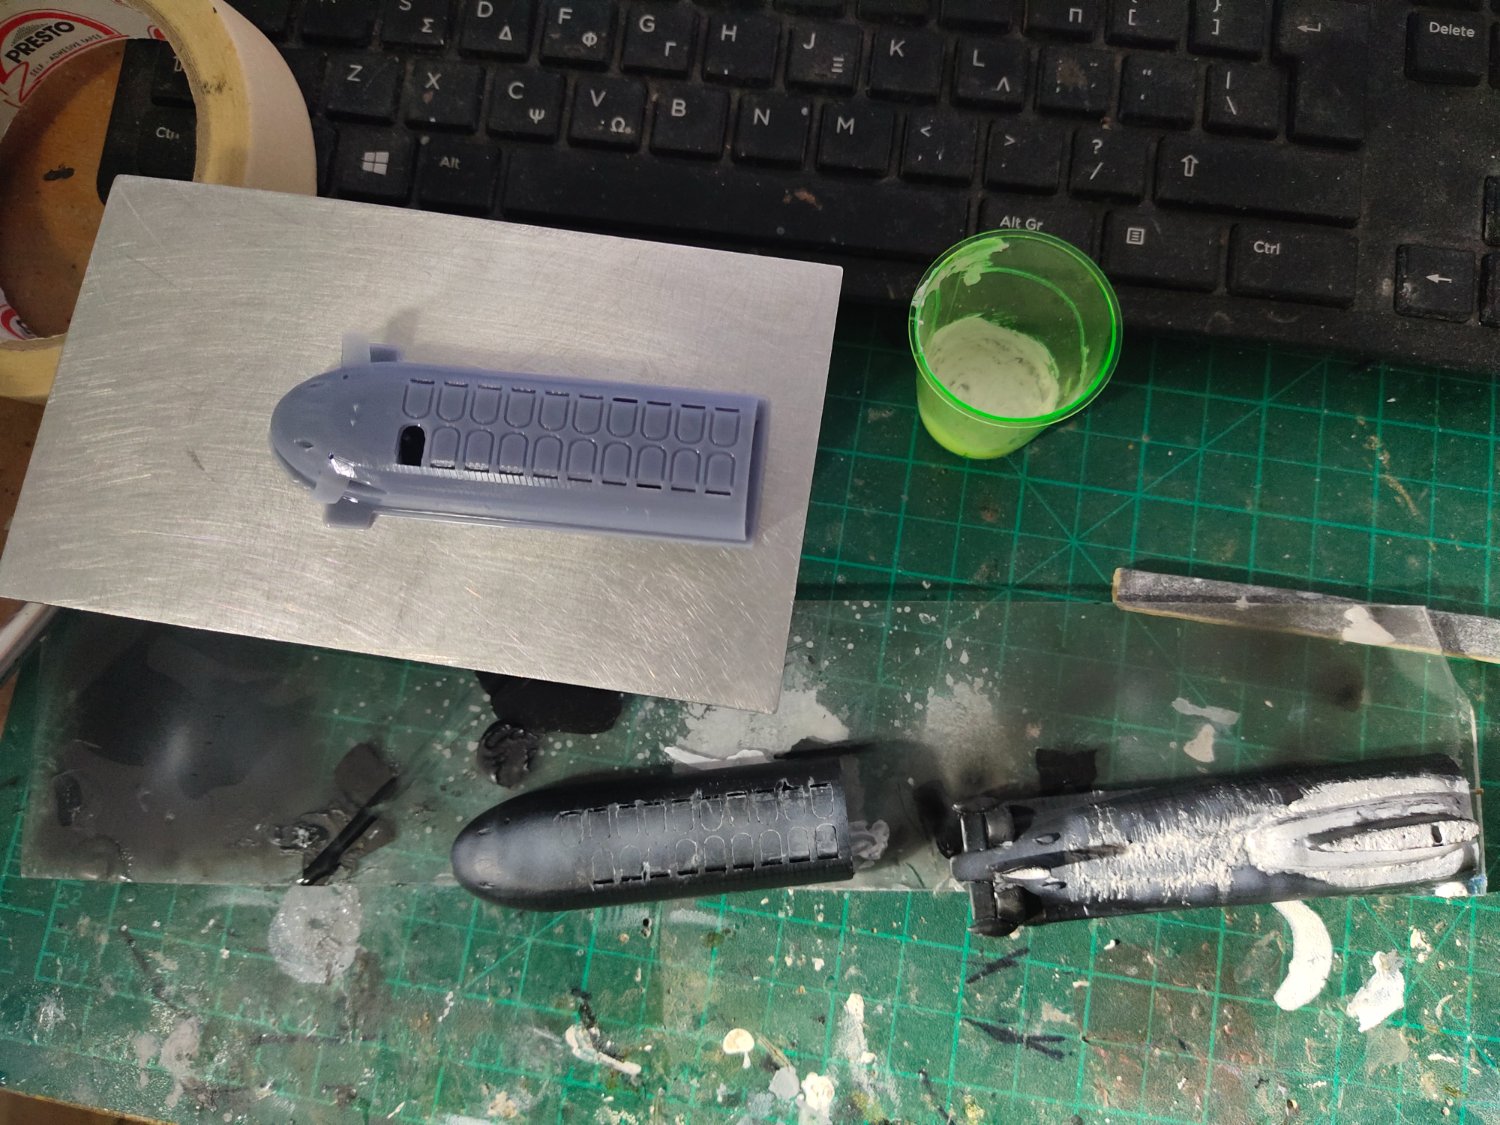
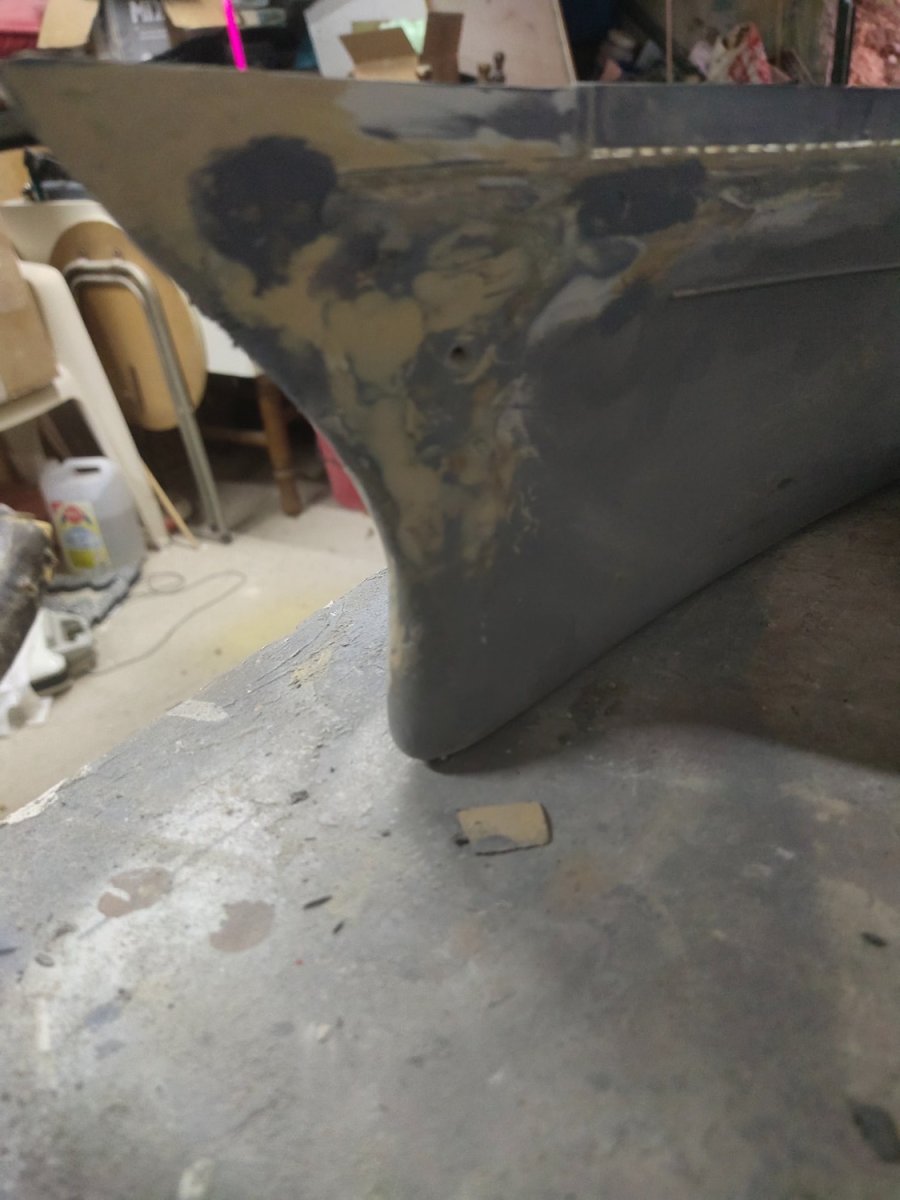
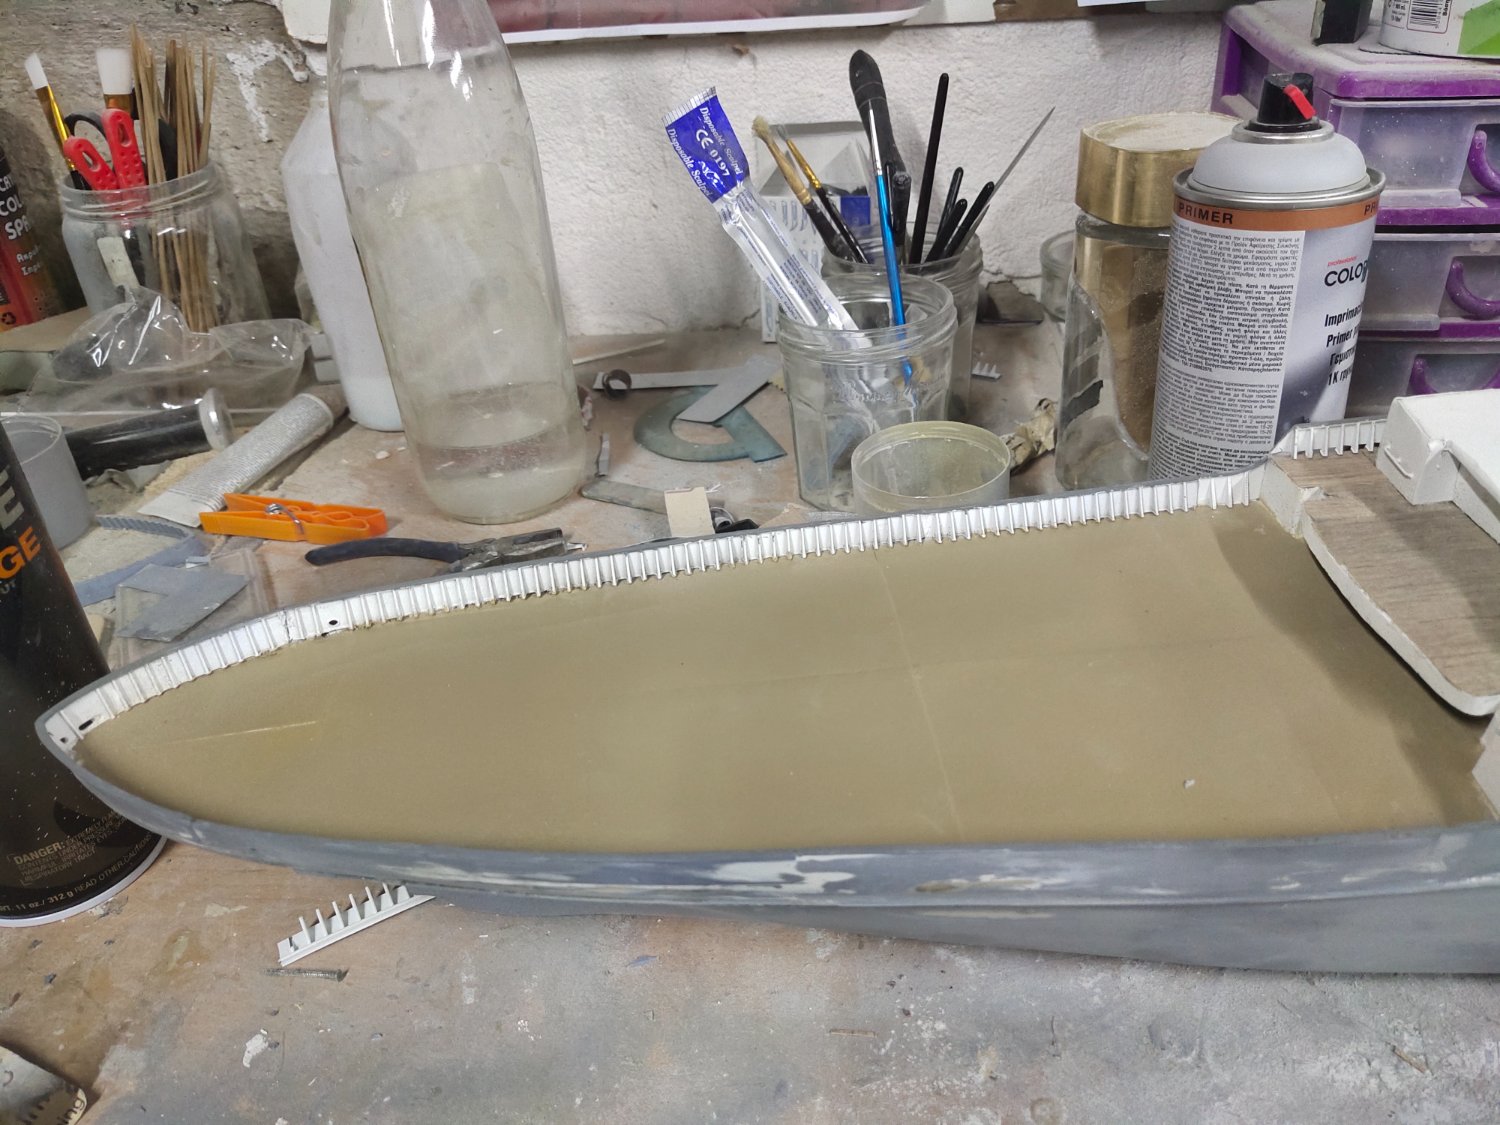
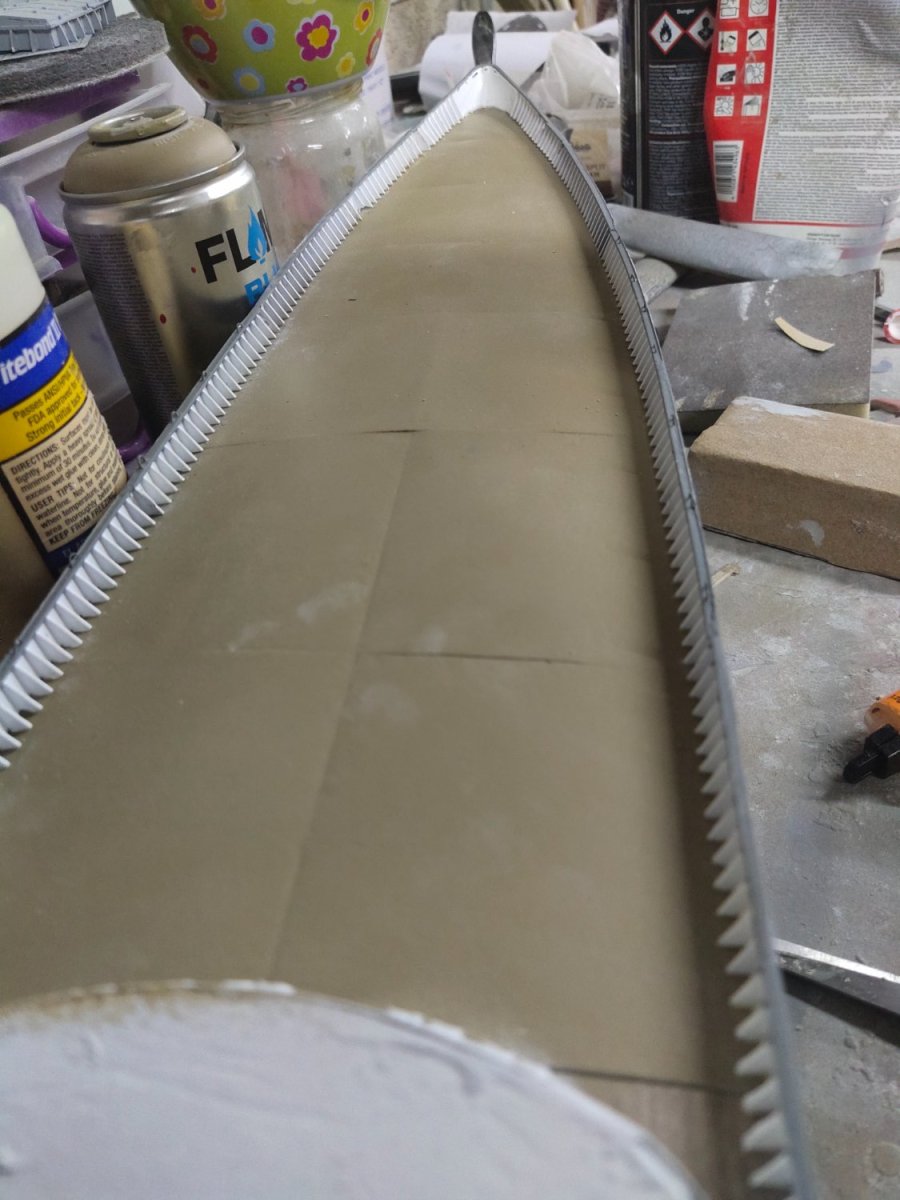
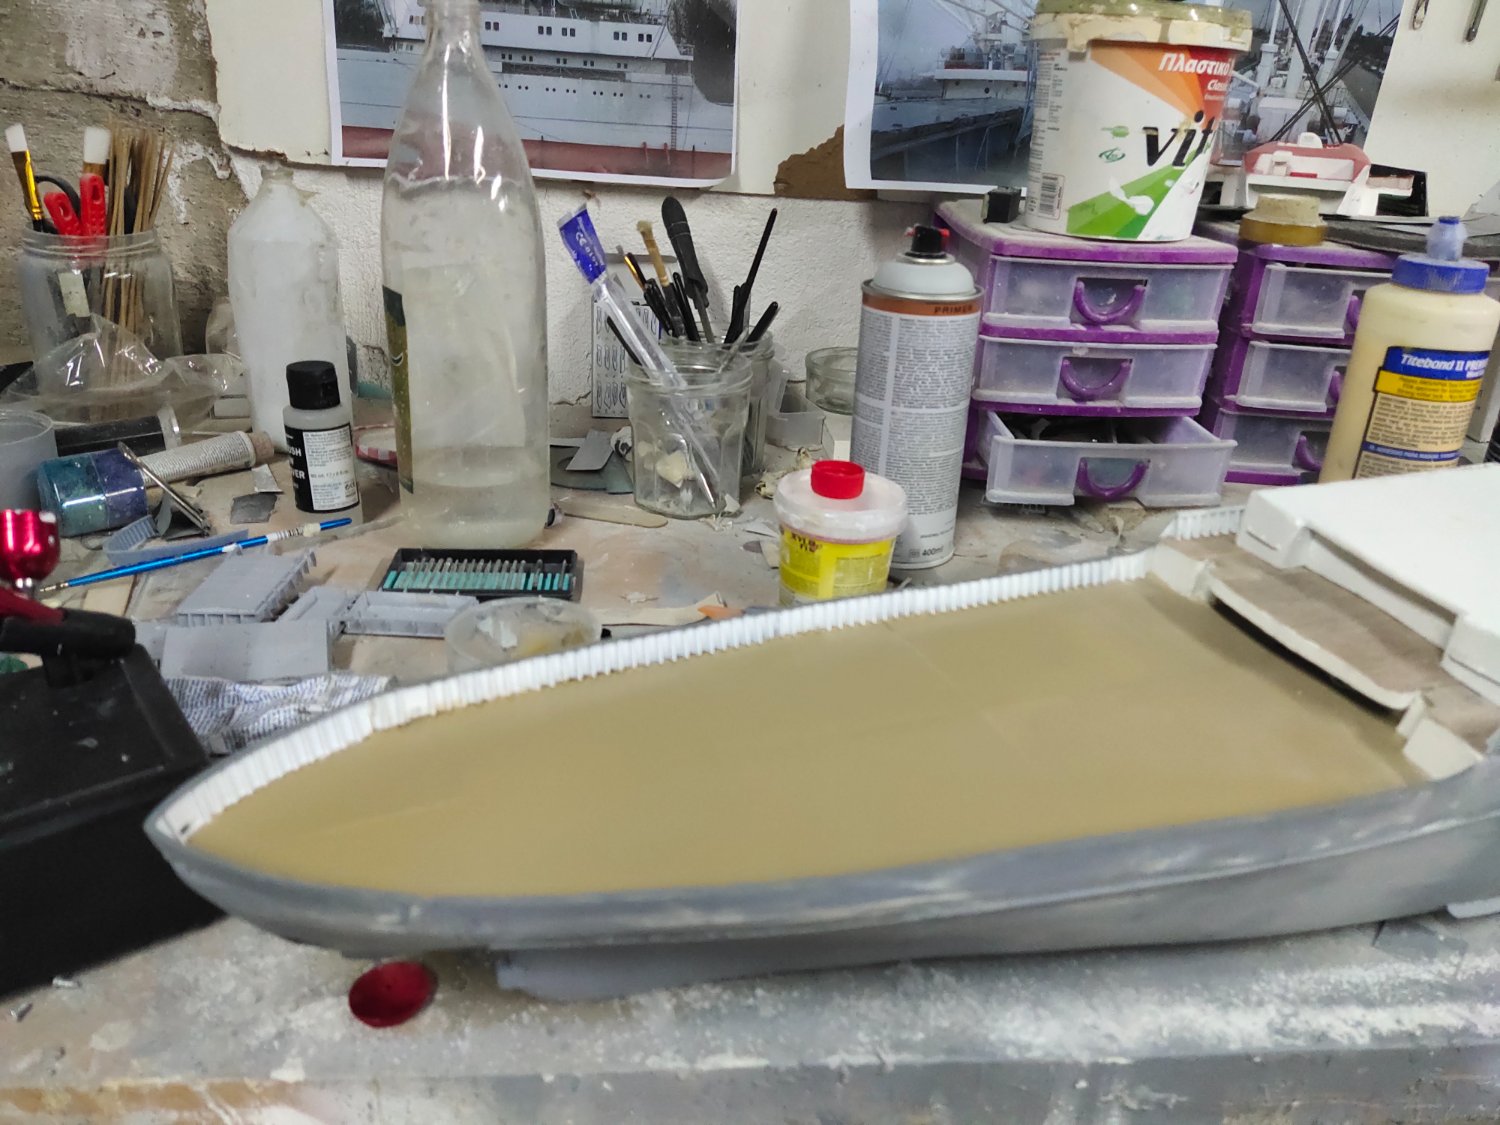
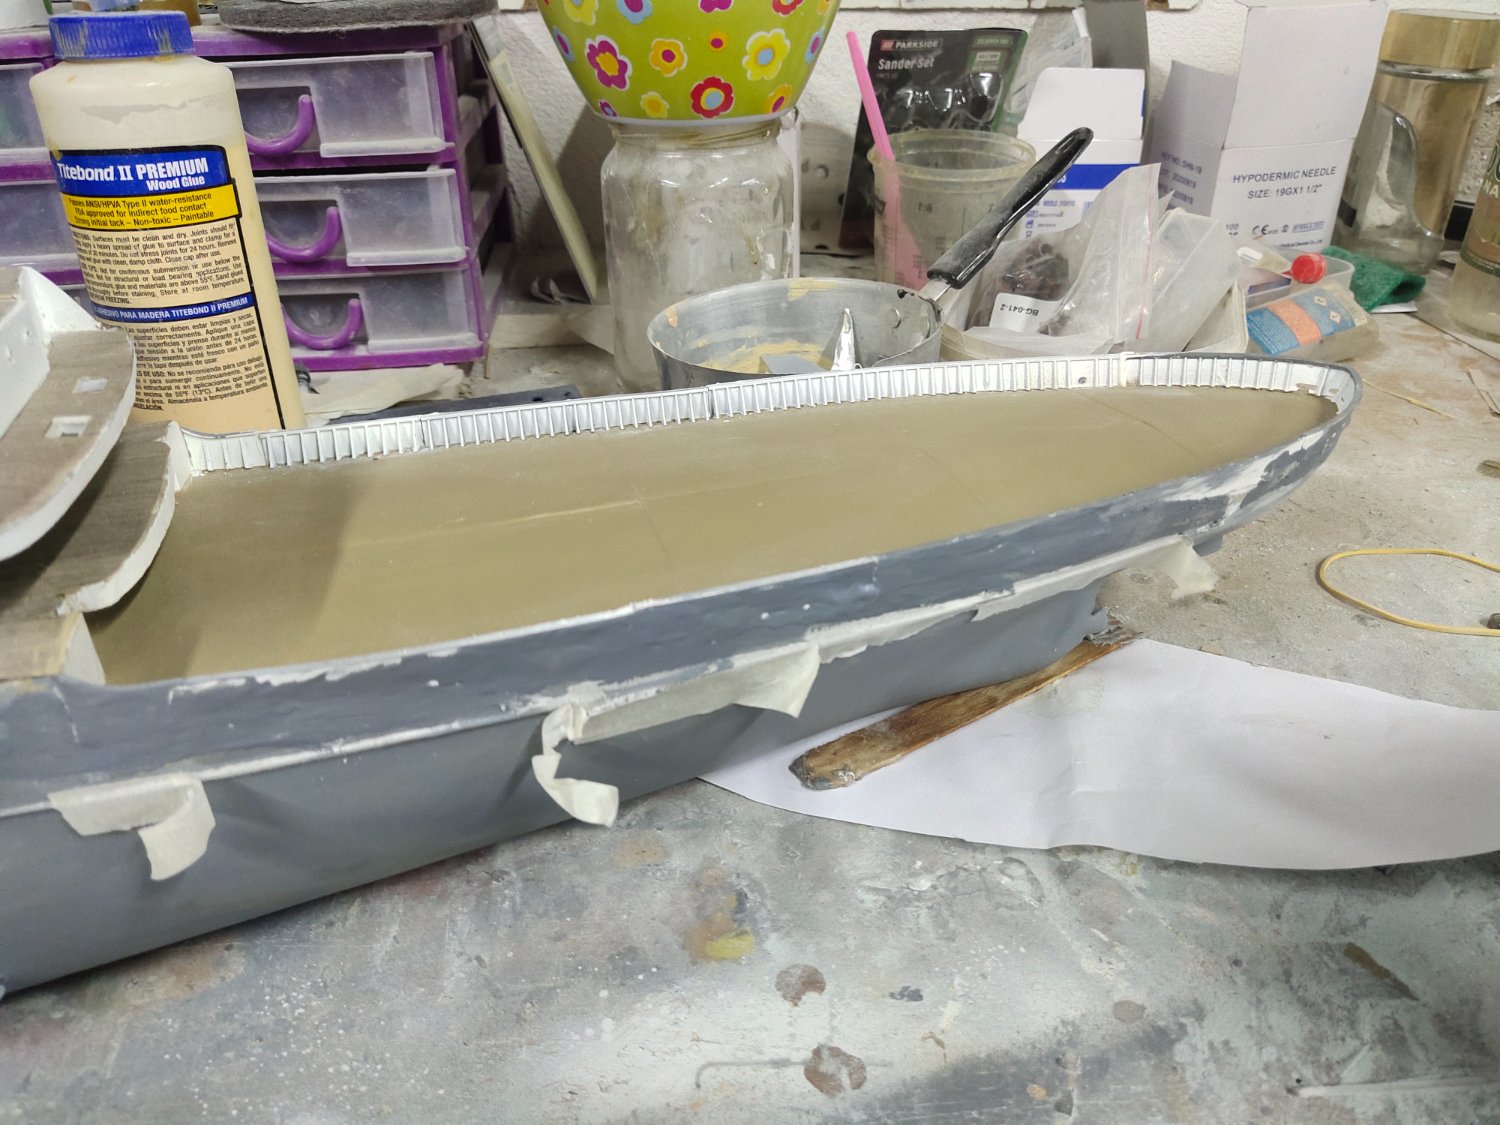
I have been working on the bow. I used some epoxy putty to shape the bow. Very easy to shape but hard to sand. Smaller gaps filled with body car filler. Some hull imperfections were covered with glaze putty as well as epoxy in order to make a smooth surface.
After bow shaping I will concentrate on eliminating last minor hull bumps and gaps. Nexts pictures won't look much difference but there definitely some work to be done


-
After slow progress and piece by piece assembly all sections are into place. I painted white the internal part and grey the upper side. Externally putty was applied at joints then sanded but not primed yet. I need to do some work on the bow. The deck at the anchor area is a bit "fat" and it should be trimmed somehow to meet the slim frame. The bow is also quite sharper on the upper end like the real ship and needs to be aligned with the rest of it. Finally there are some design lines that must be deleted so frame will have a smooth finish like the rest pieces.


-
-
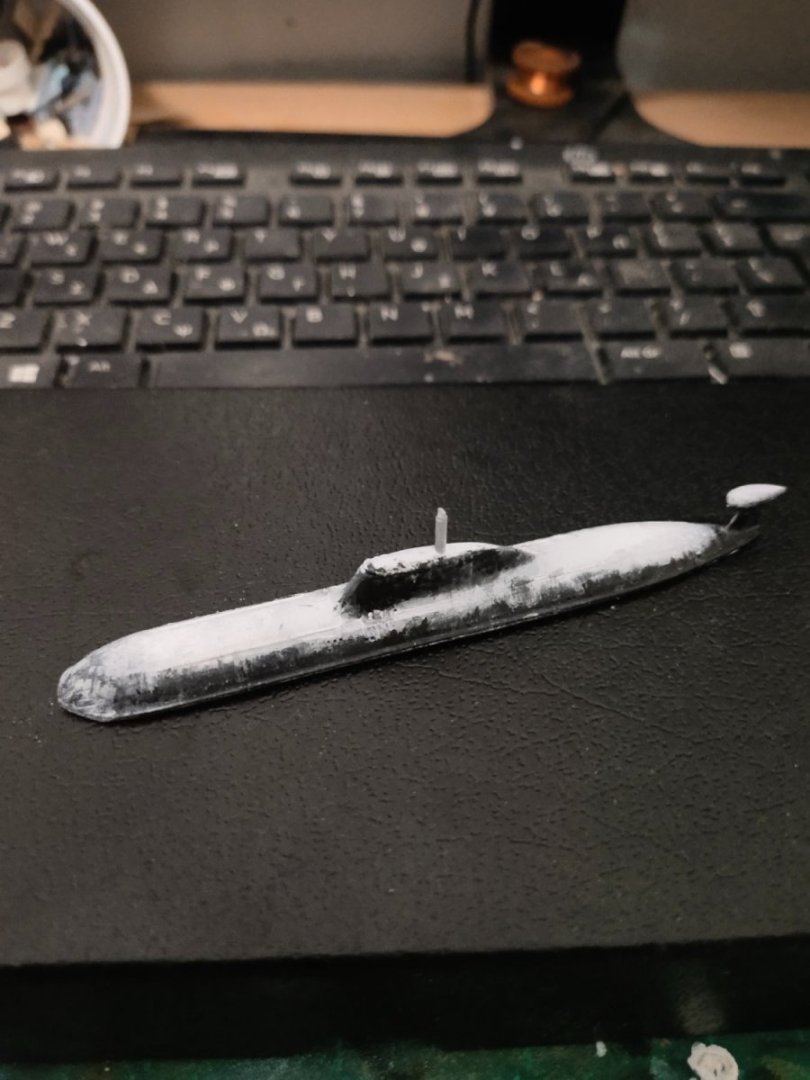
Spend quite a lot of time on the 2nd sub. Gray black color sprayed, then I added some lighter shades. Using cotton swab a fade effect was achieved
However it will be of little importance. I sprayed white but airbrush was spitting paint creating a mess. Had to experiment with color thickness, cleaning the nidle many times and testing paints specialized for airbrush.
So after many layers, chipping and brush weathering I managed to get a decent result. Or perhaps I felt convenient with it because I got tired.
Tomorrow a closer look may change my mind.
A comparison photo with both model subs and two test models
-
just noticed that this is another submarine project.
Those drills are really fragile especially the thinner ones, i'm only left with a couple of these
- Old Collingwood, mtaylor and Canute
-
3
-
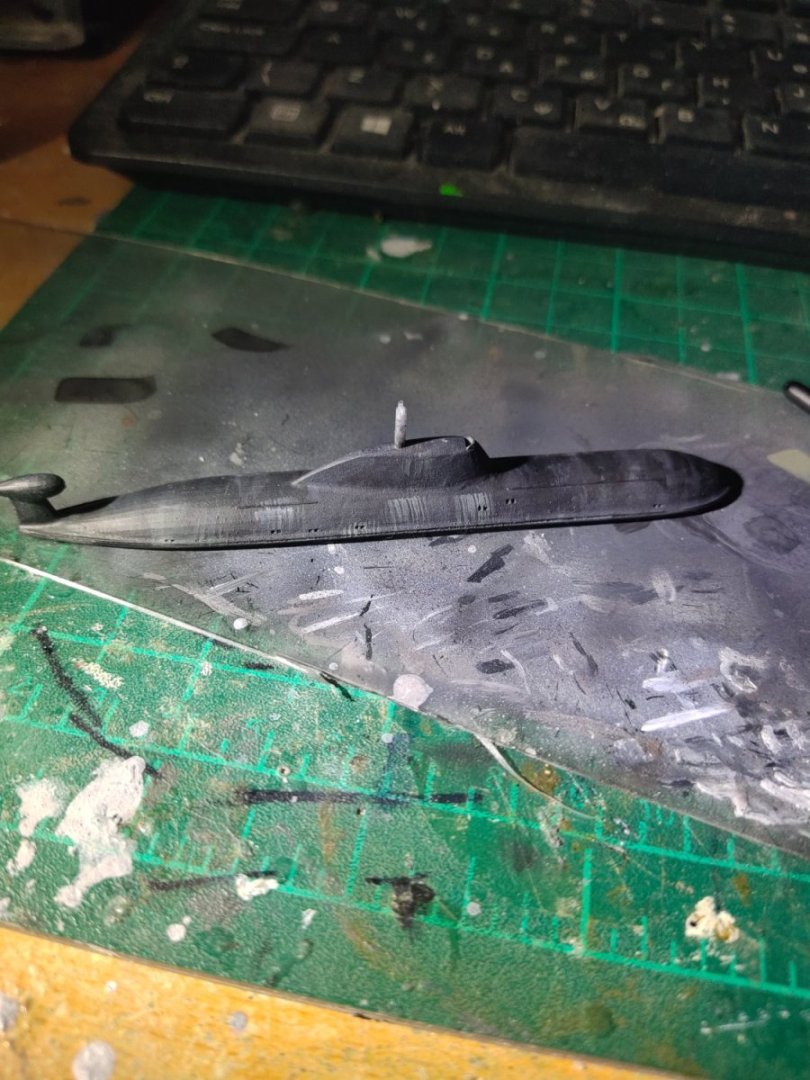
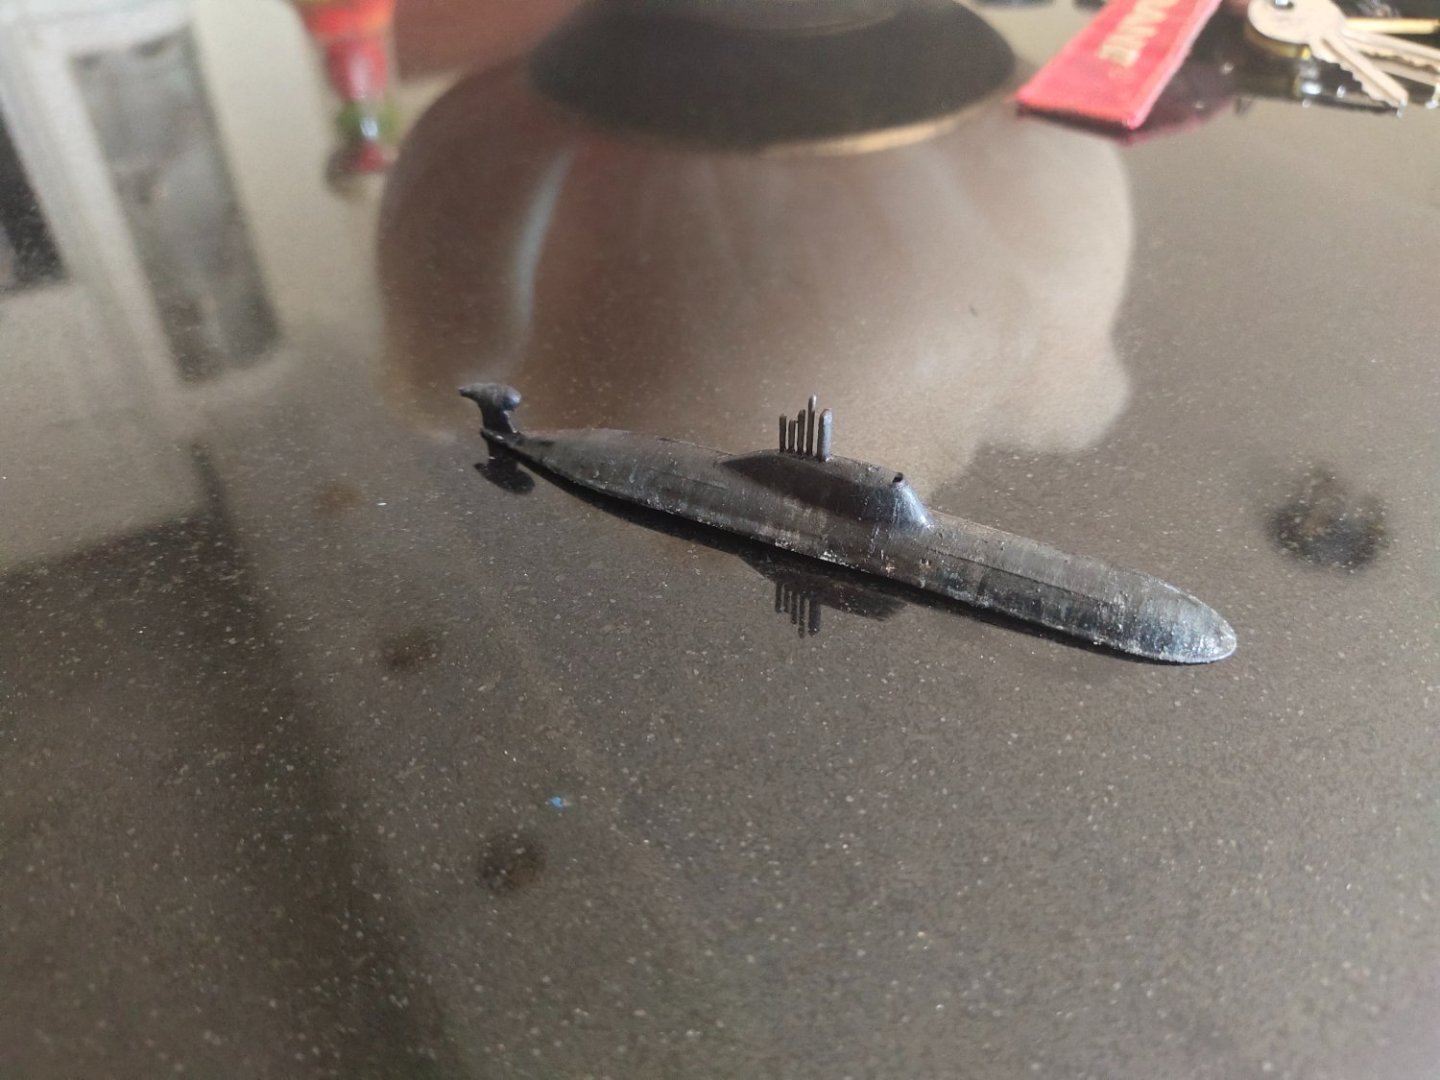
I did some research and found that most model companies recommend a dark grey/flat black color for Russian subs. Wasn't sure what to do so I gave it an airbrush paint with black and dark grey in 1:1 proportion to both test and proper model
 then I added some heavy weathering with tiny brush with more concentration this time. For wet areas I used Tamiya glue, quick drying and very glossy effect as I like


The one with the raised antennas is the freshly arrived on harbor, so there will be no snow effect on it. I will proceed to the other Akula , the stationed one with less weathering and in icy condition
- RGL, king derelict, Canute and 4 others
-
7
-
Recovered from the covid isolation, not much trouble and found time to do some other activities
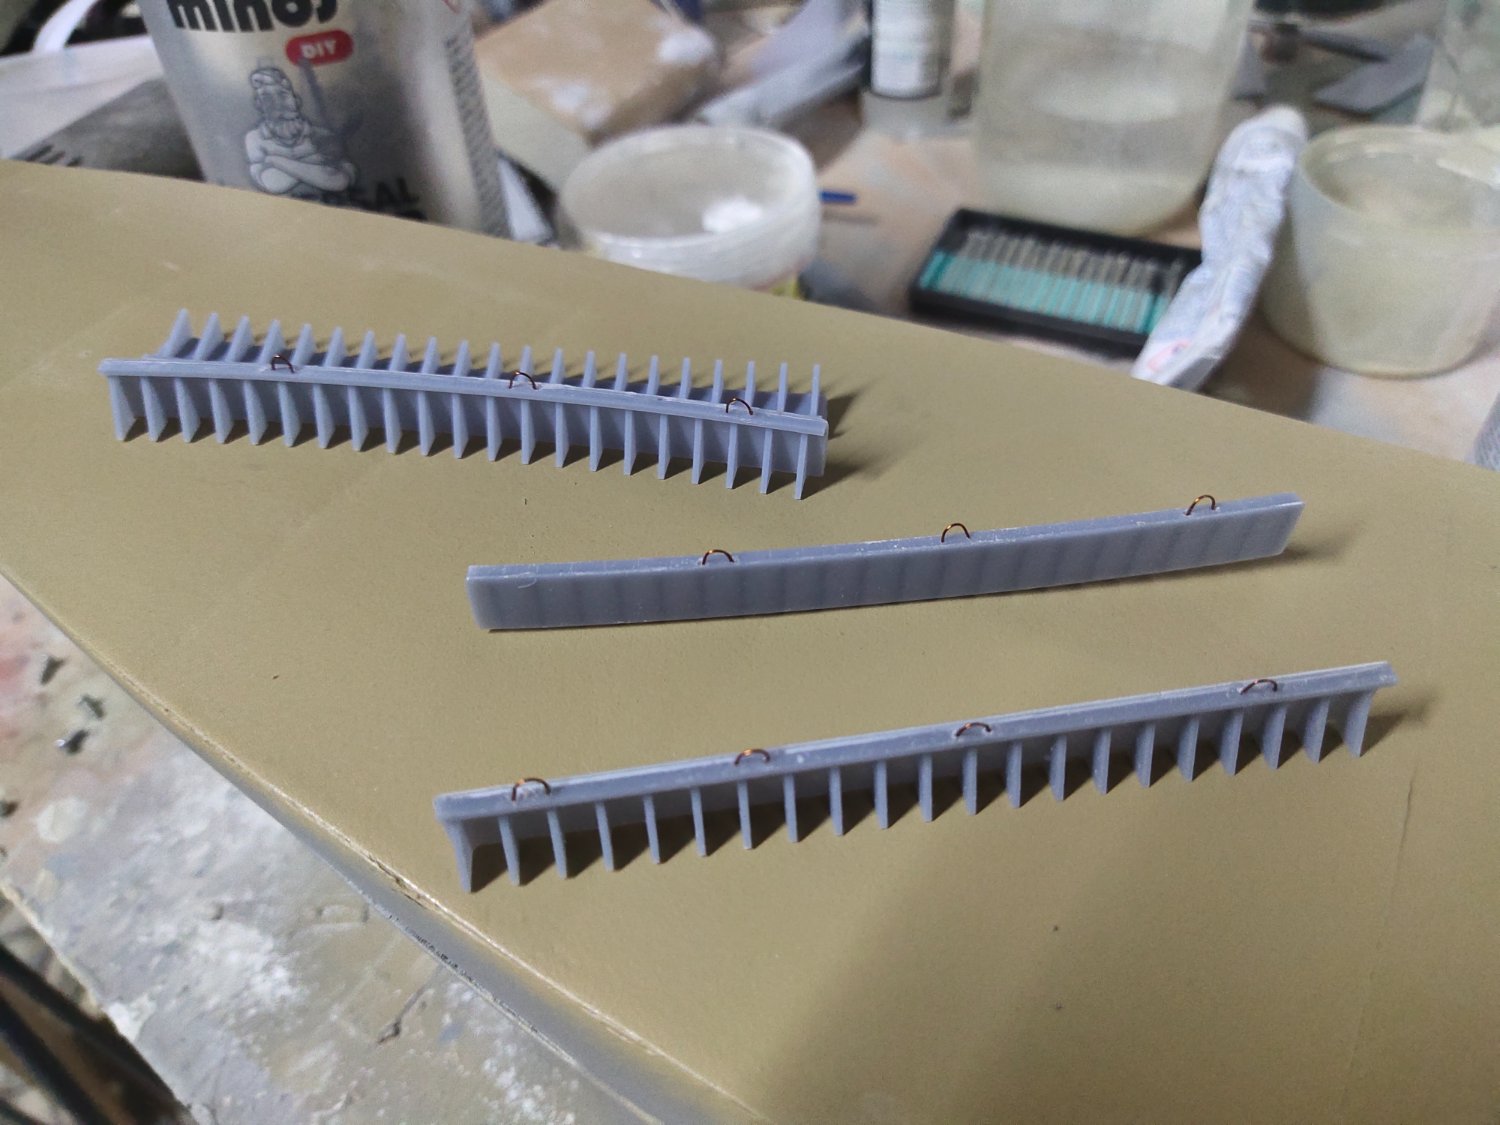
Back to the project I am working on the middle and forward sections. I design them myself as these are straight pieces. Besides with some heat applied resin can be curved without the risk of distortion like plastic. I forget to add buckles for rigging so added some with brass wire. Etch primer were used then white color for the internal section

-
Probably surpass in quality every model kit in the market
- Retired guy, mbp521, Keith Black and 3 others
-
6
-
A warped model is used as a test bed for weathering experiment. Used some initial airbrush spray but in this scale I found that extra brush details should be added. With thin brushes I worked making vertical stripes with different shades of grey, then black then again grey sometimes before the previous paint gets dry, making an interested result. Added very few drips or rust, some chipwork on bow and gave a wet effect applying one ingredient resin, locally. I need to work harder to form the vertical stripes with thinner brushes and of course on color consistency.
- Old Collingwood, mtaylor, yvesvidal and 2 others
-
5
-
2 minutes ago, ccoyle said:
So, are lionfish good eating? I know they are considered invasive in the Western Atlantic/Caribbean.
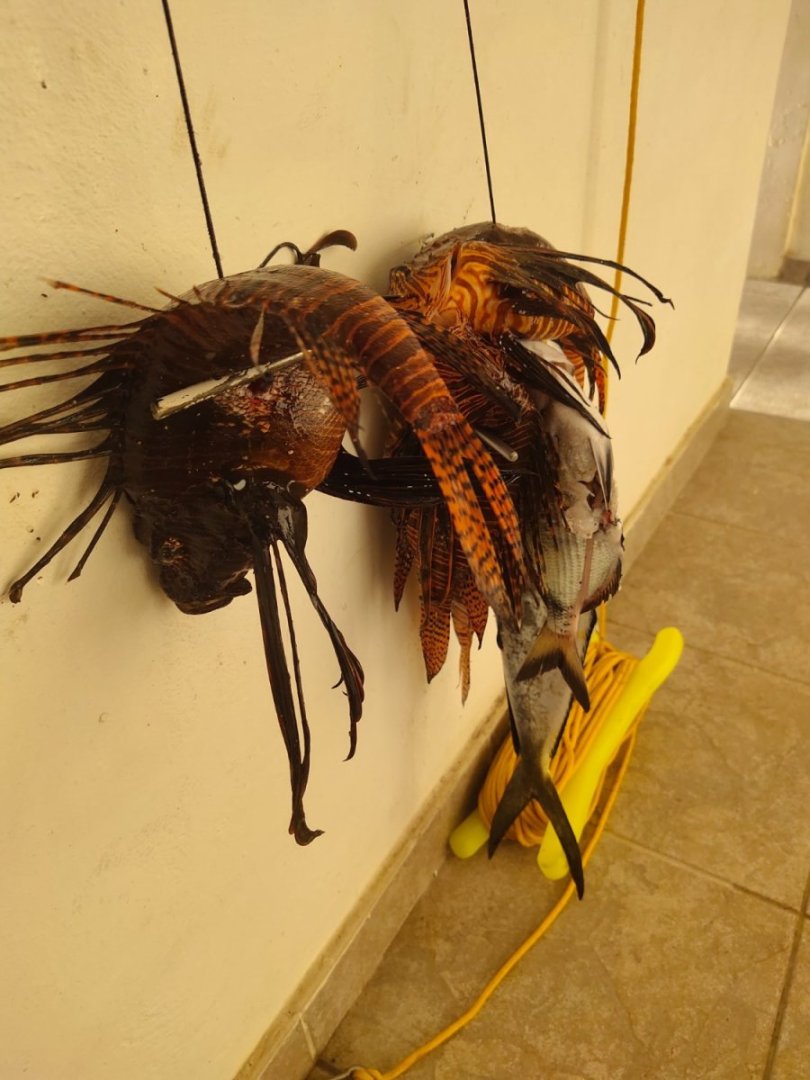
Yes they are quite tender, I like them fried
They are invaded Mediterranean cause of warmer waters and it is said that occupy areas quite fast.
My favorite fish is Mediterranean white grouper by far. It was also served when Obama visited Athens.

- mtaylor, Old Collingwood, Canute and 2 others
-
5
-
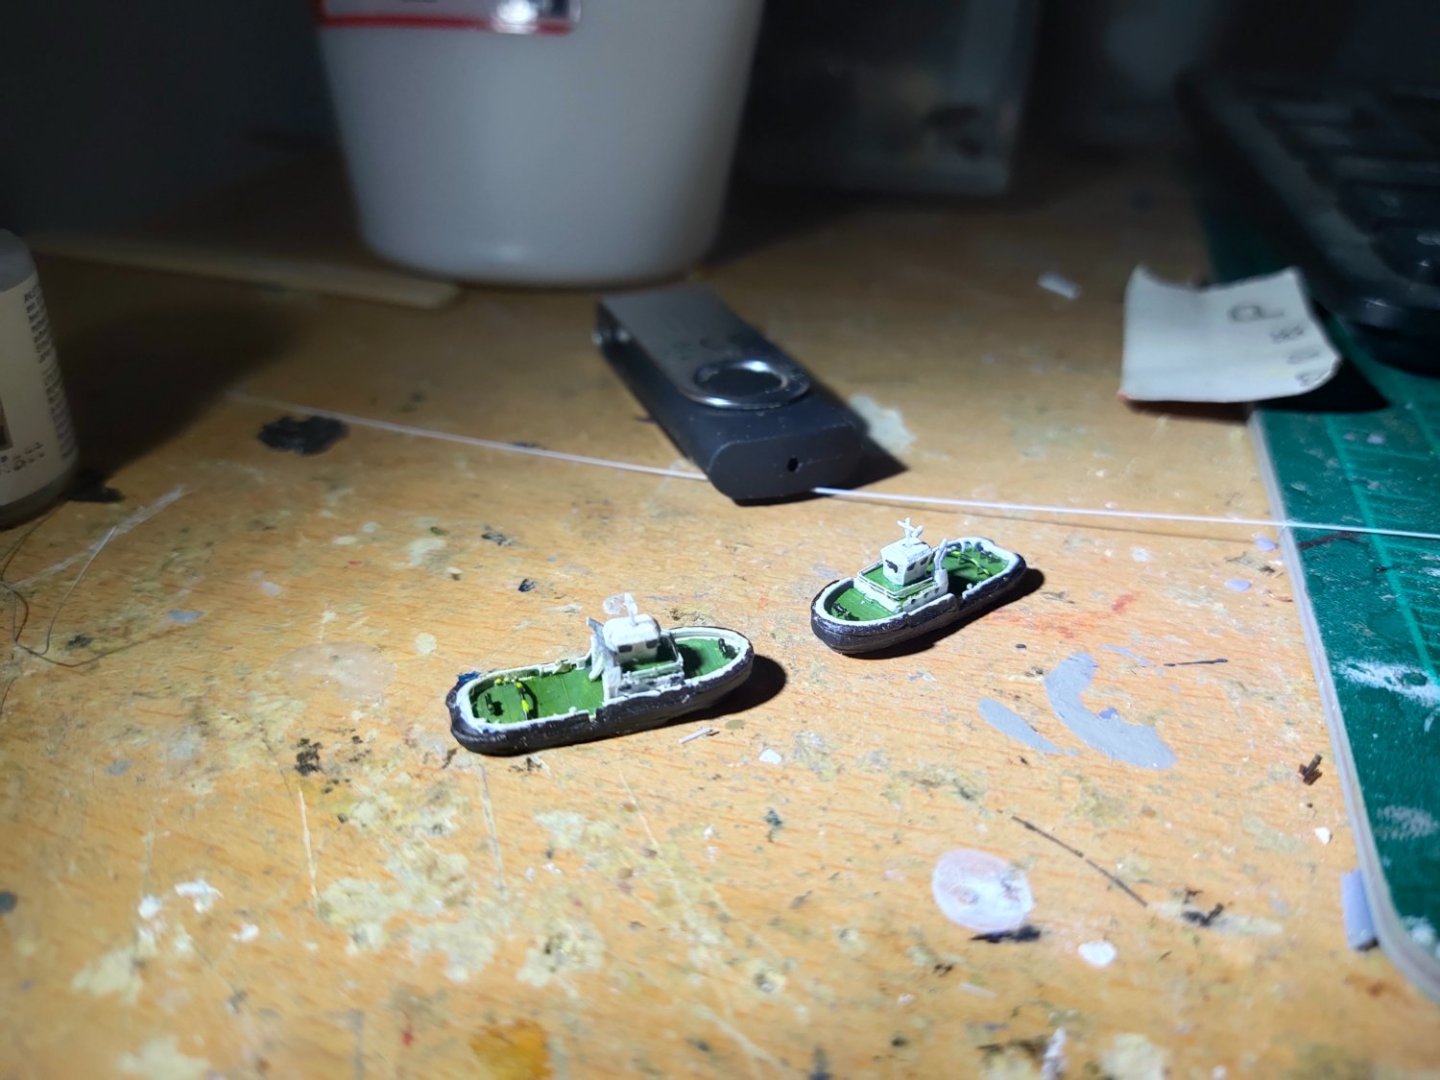
Just recovered from a covid isolation in my house at a nearby island. Not much of an issue time to do some other activities, spearfishing, mountain walk etc.
I finish painting the two tugboats. Used 5/0 and 10/0 brushes.

I then managed to put some extra details, a mini mast and bit or railing
- Old Collingwood, yvesvidal, mtaylor and 3 others
-
6
-
-
Just now, mikegr said:
Rear section done. I started working on the main deck. There's a gap where bulwarks meet the deck as shown on pics.That means less work for me.
There is some detail paint job to be done but can be done later. I wanted to update here. Time is running out. Tomorrow early morning I will travel to my other place in a nearby island for some self isolation as covid got me and its wise to avoid contacts for a while. Hopefully I will continue next week


- yvesvidal, GrandpaPhil, mtaylor and 2 others
-
5
-
Rear section done. I started working on the main deck. There's a gap where bulwarks meet the deck as shown on pics.That means less work for me.
There is some detail paint job to be done but can be done later. I wanted to update here. Time is running out. Tomorrow early morning I will travel to my other place in a nearby island for some self isolation as covid got me and its wise to avoid contacts for a while. Hopefully I will continue next week
-
On 9/21/2022 at 8:02 PM, Roger Pellett said:
I believe that the difficulties building the Ohios had more to do with commercial problems that existed between the US Navy and General Dynamics Electric Boat shipyard than with actual construction of the submarines.
I am in the process of rereading October Fury by Peter A. Huchthausen. The title refers to the events at sea during the Cuban Missile Crisis. This is a great book about Cold War Russian Submarine operations. Huchthausen was a very junior officer aboard one of the destroyers enforcing the blockade. He later was a Naval Attache’ in Moscow and came to know several of the Russian Submarine officers involved.
Roger
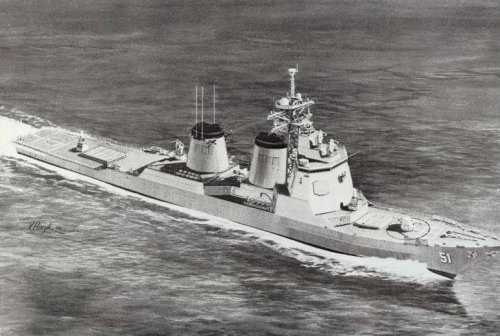
According to "Warships of the US Navy" published in 1983, one of the problems was the welding quality. 33% of Ohio had to be rewelded from the start. At the time the book was published Navy was seriously considering to terminate the program and look for alternative, like a lengthened 688 version.
In this book also there is a report for the upcoming DDG 51. The plans were looked like this
Thanks the members for the comments so far and their opinions.
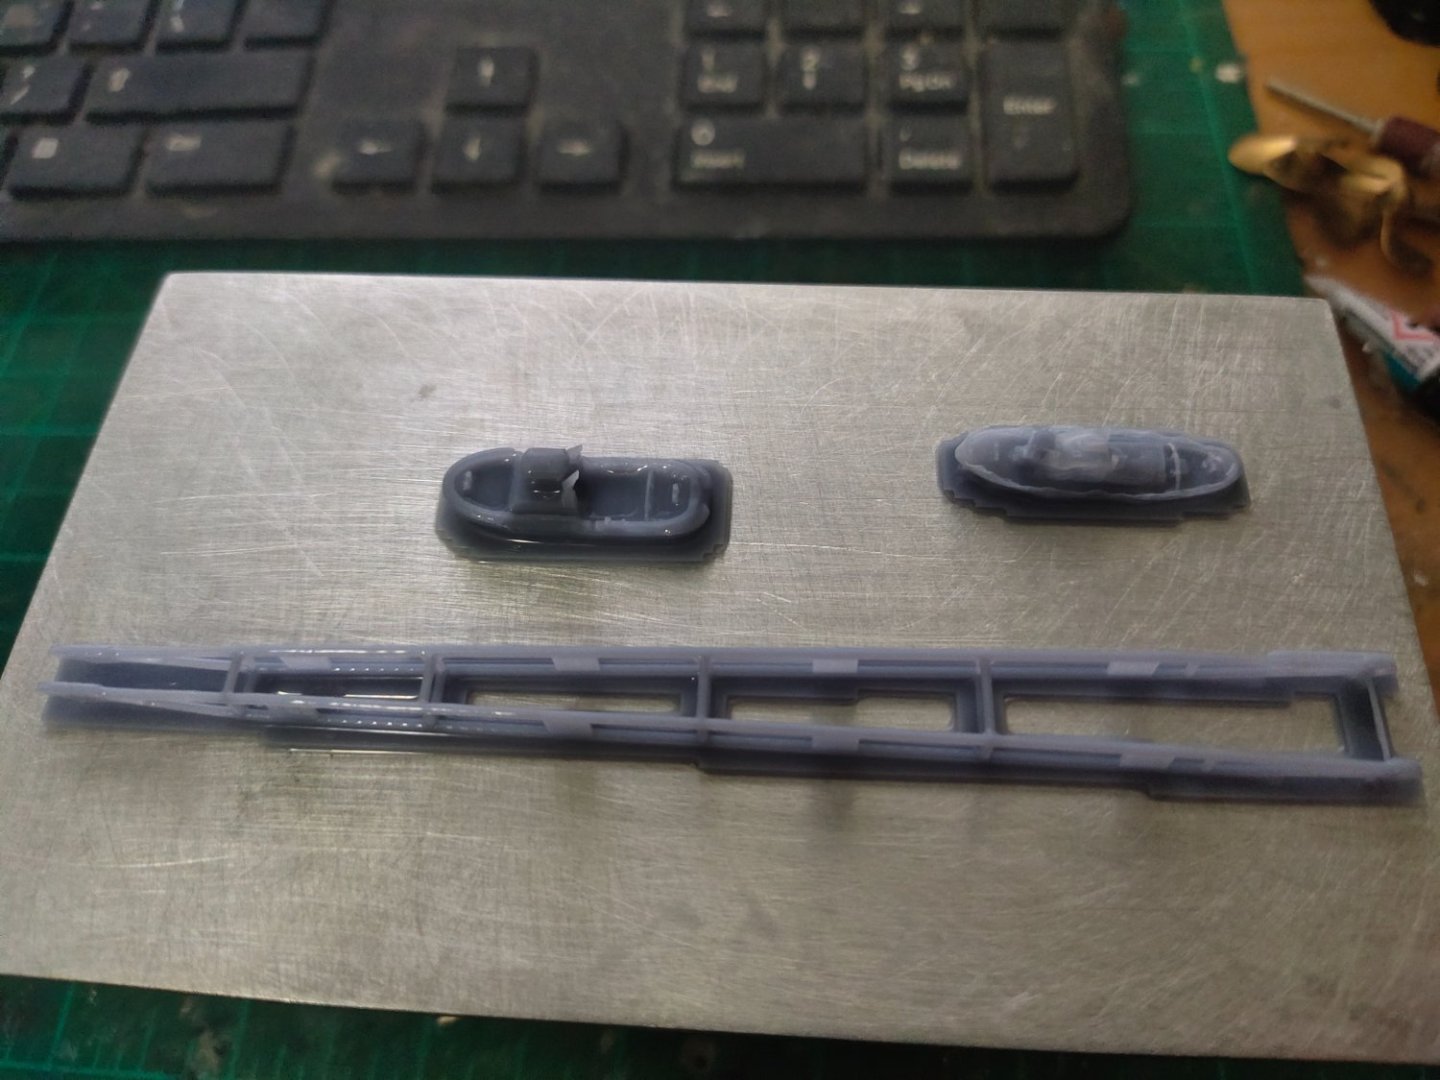
I printed the last ship, its a tug boat. I actually printed two designs, the one proved too fragile, the other looked ok, most probably can be used in 1/700 scale with some enlargement.
I considering also a crane although in this scale it could bring my printer to its limits with its delicate construction. It took 4 prints to get the tugboat but didnt took long 1-1,30 hour each try
- mtaylor, Canute, Old Collingwood and 2 others
-
5
-
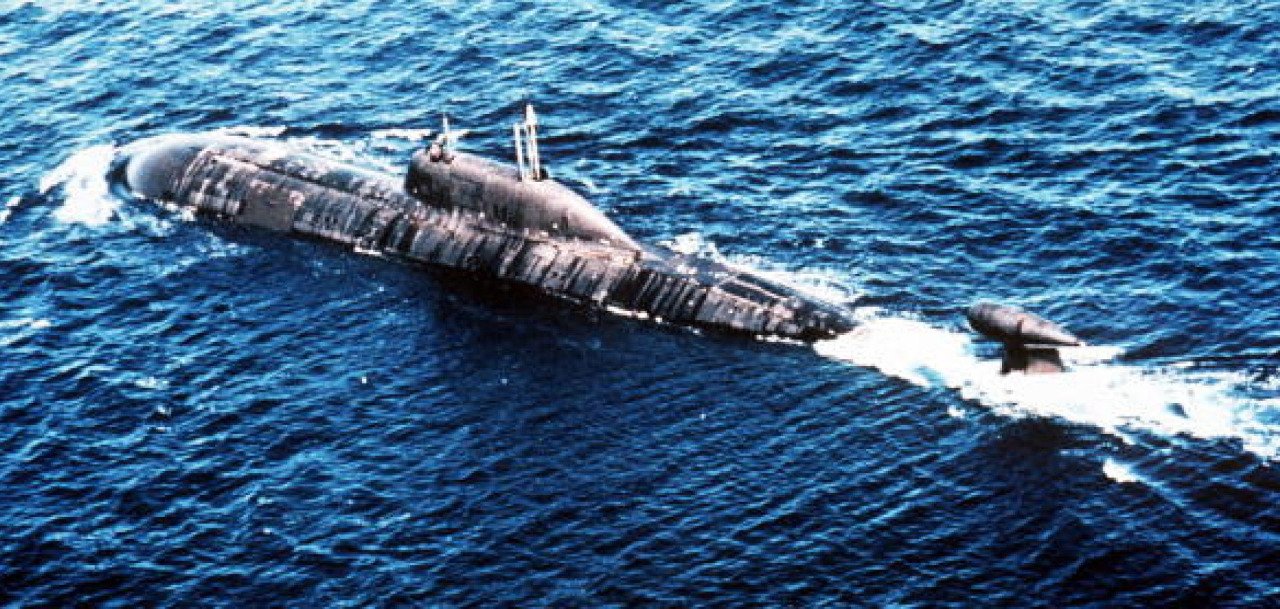
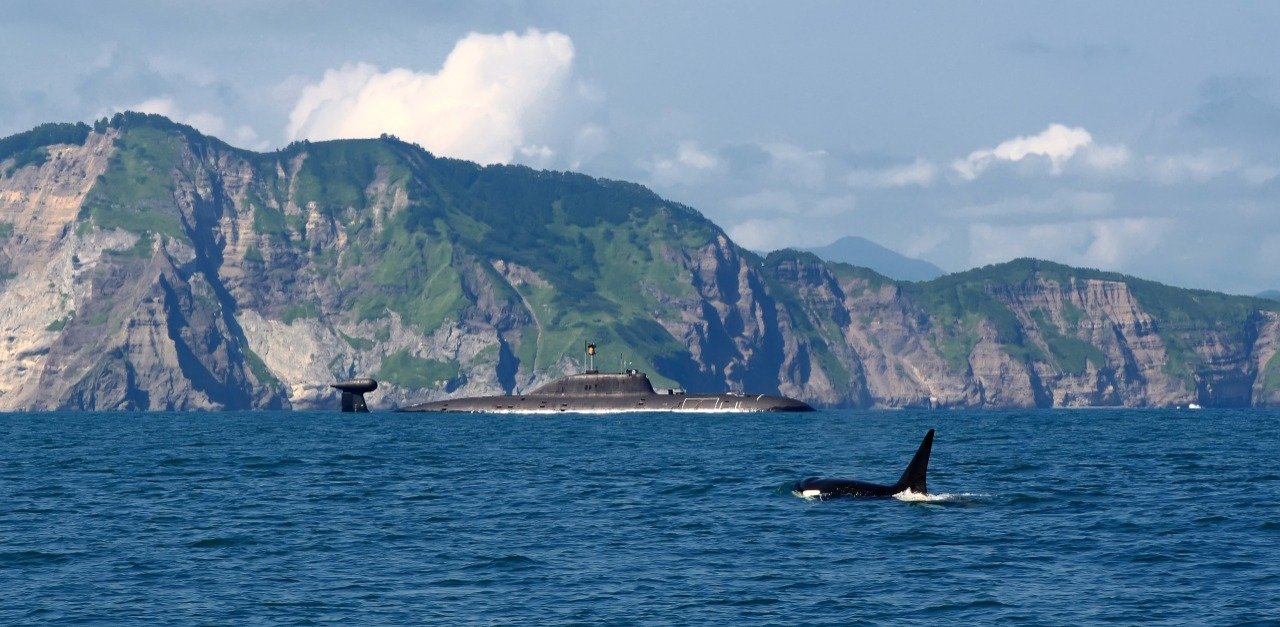
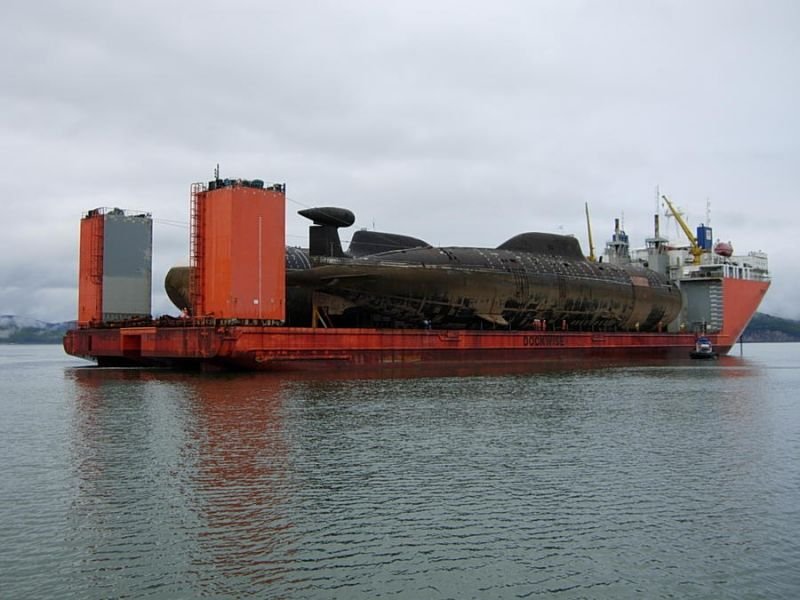
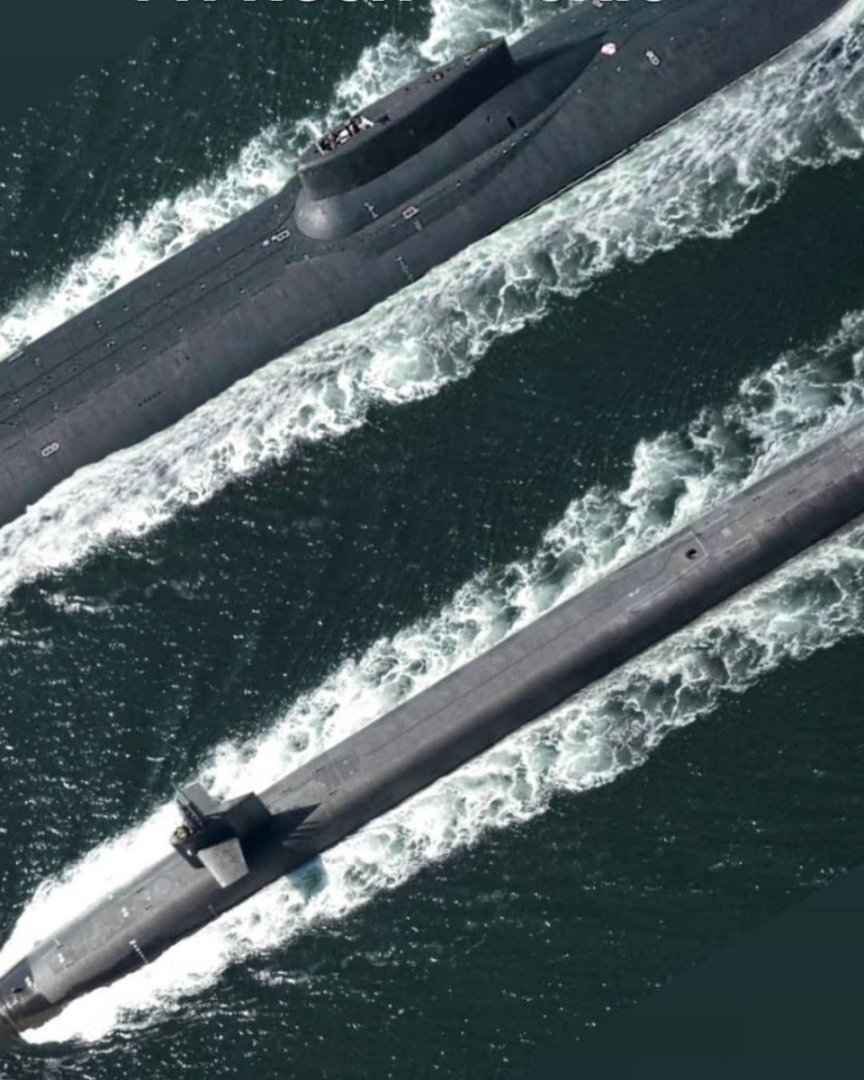
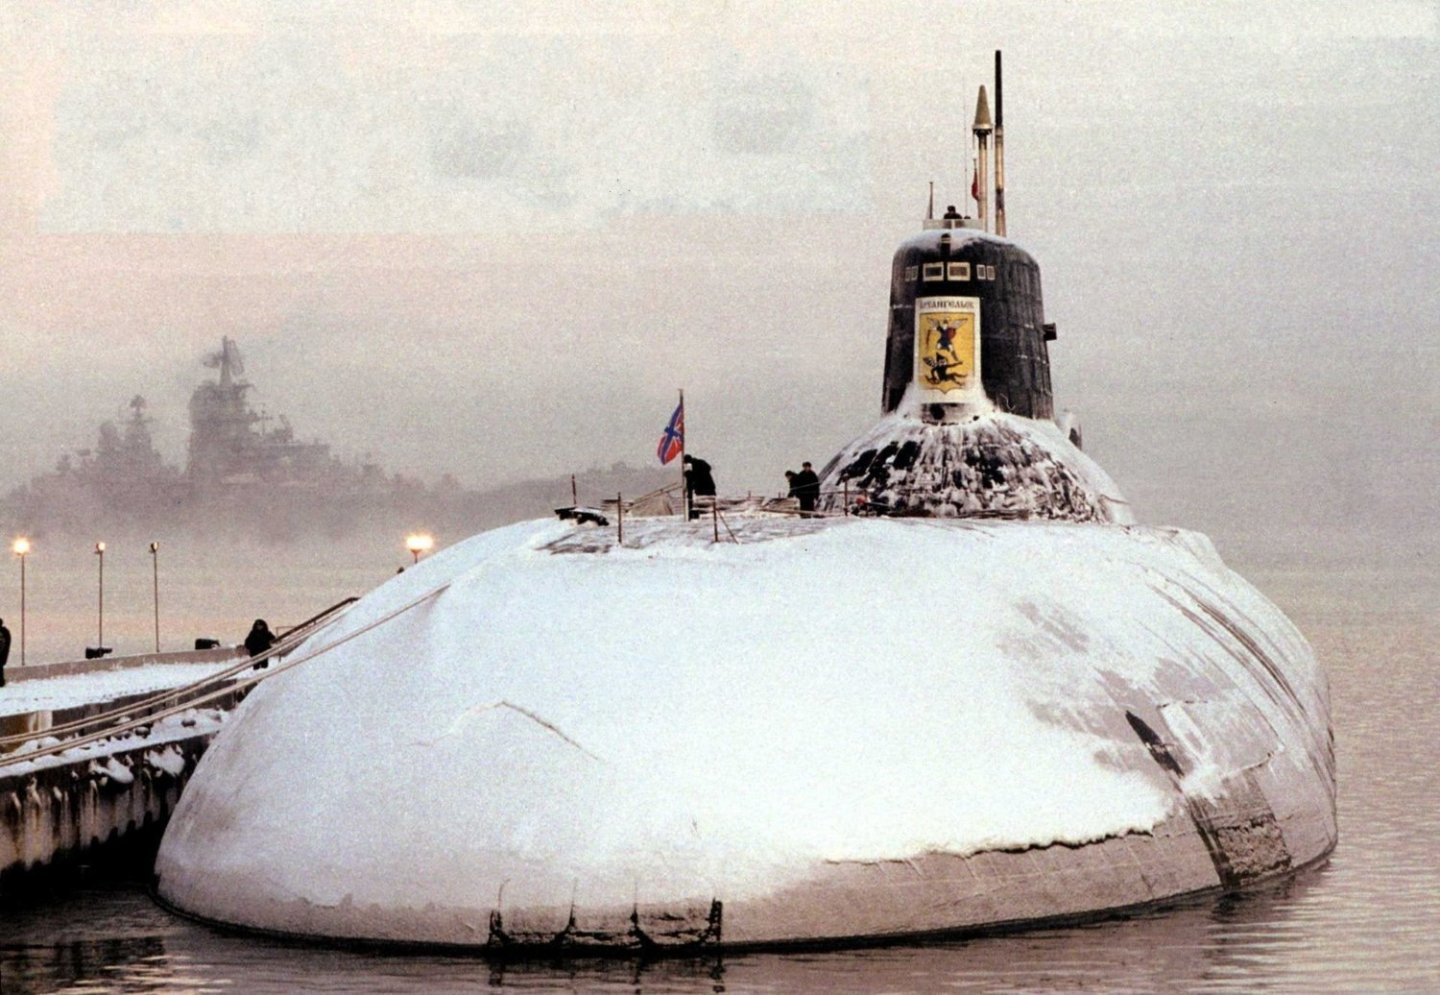
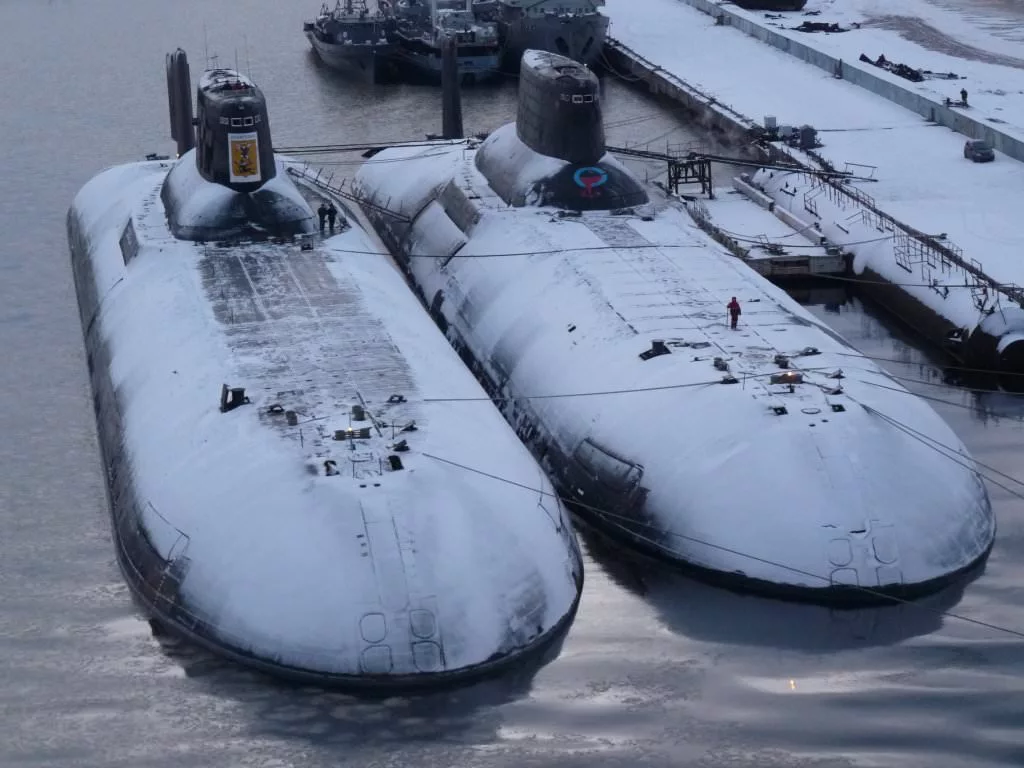
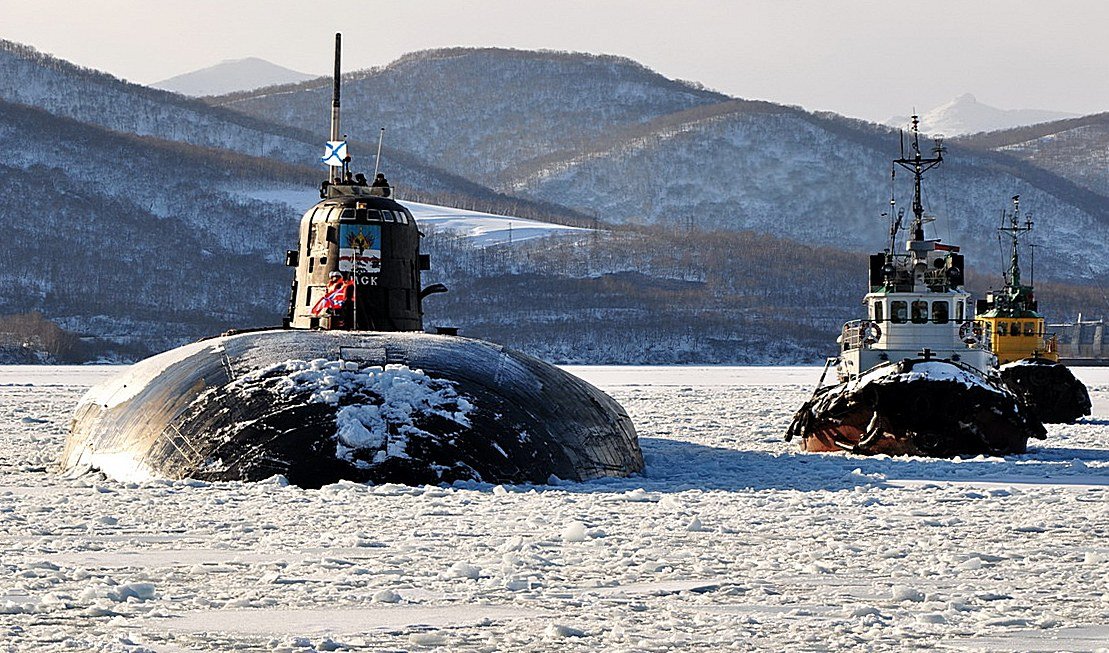
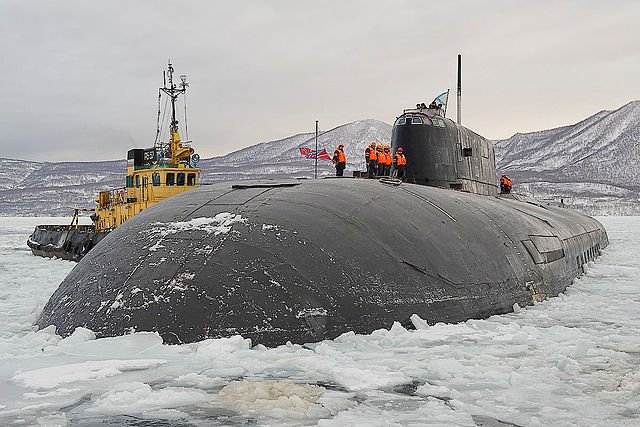
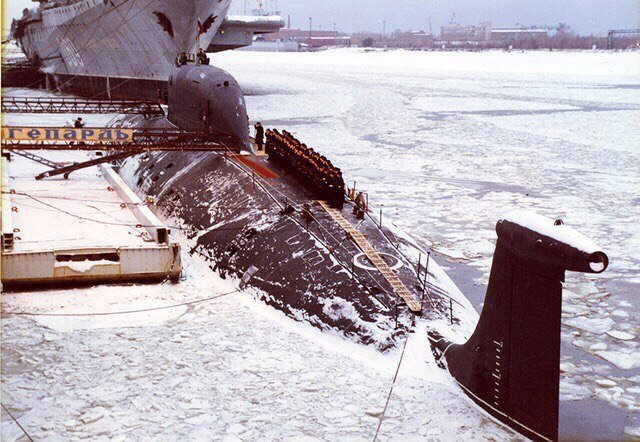
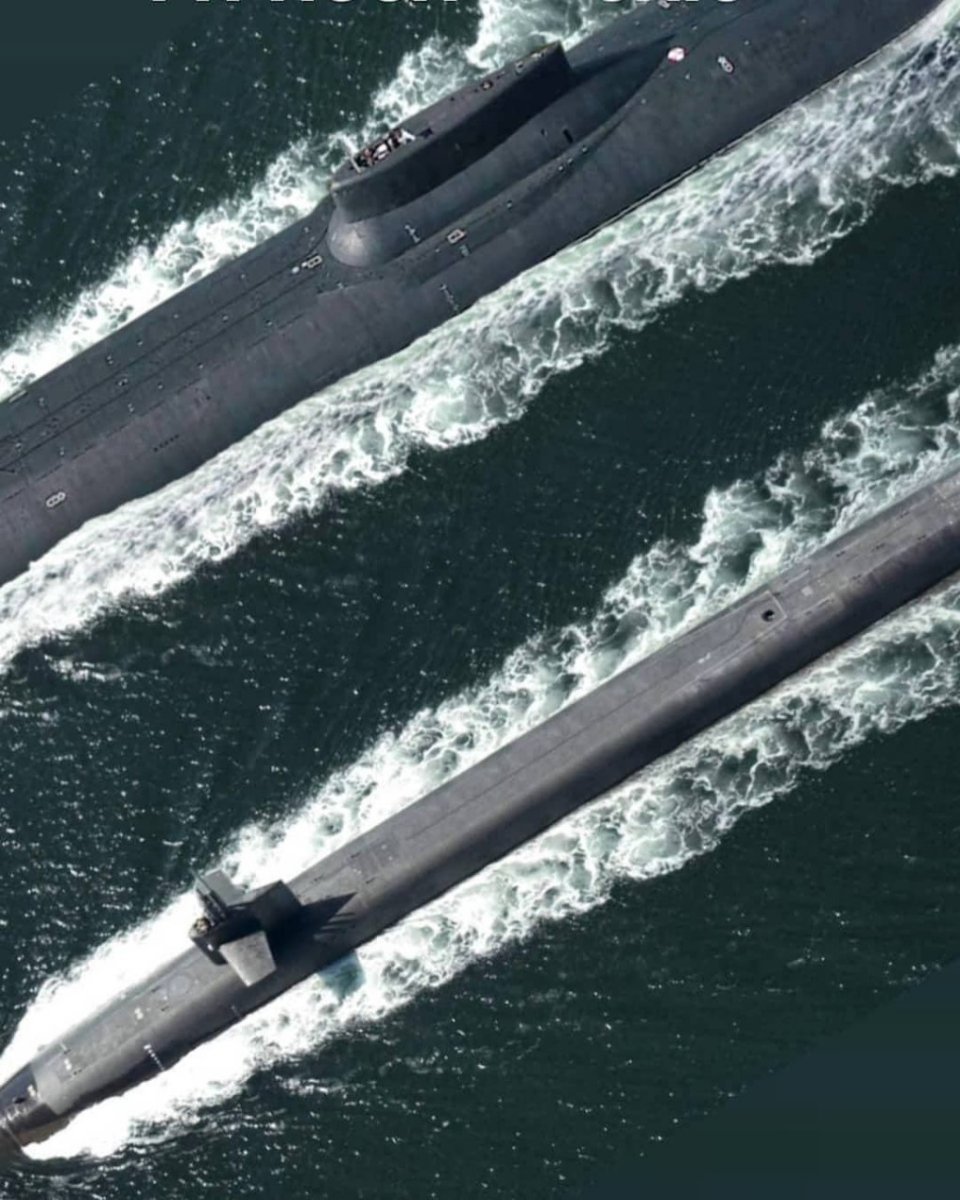
A few last nice pics i found online
two hunters met on cold waters
A nice idea for a next diorama
So,
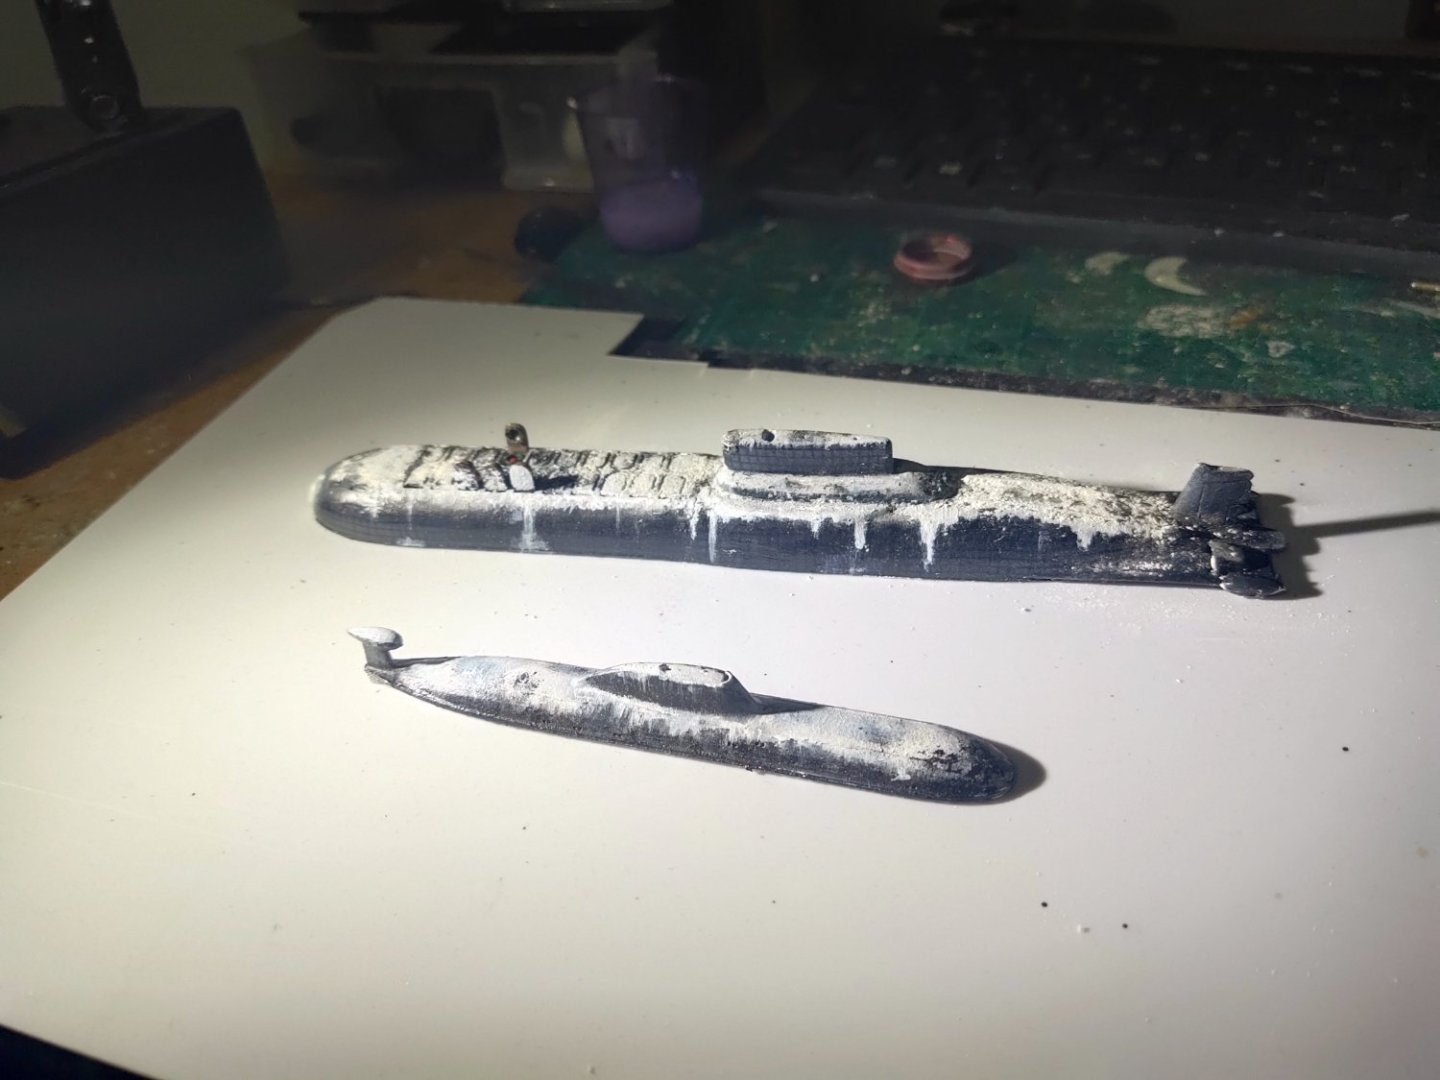
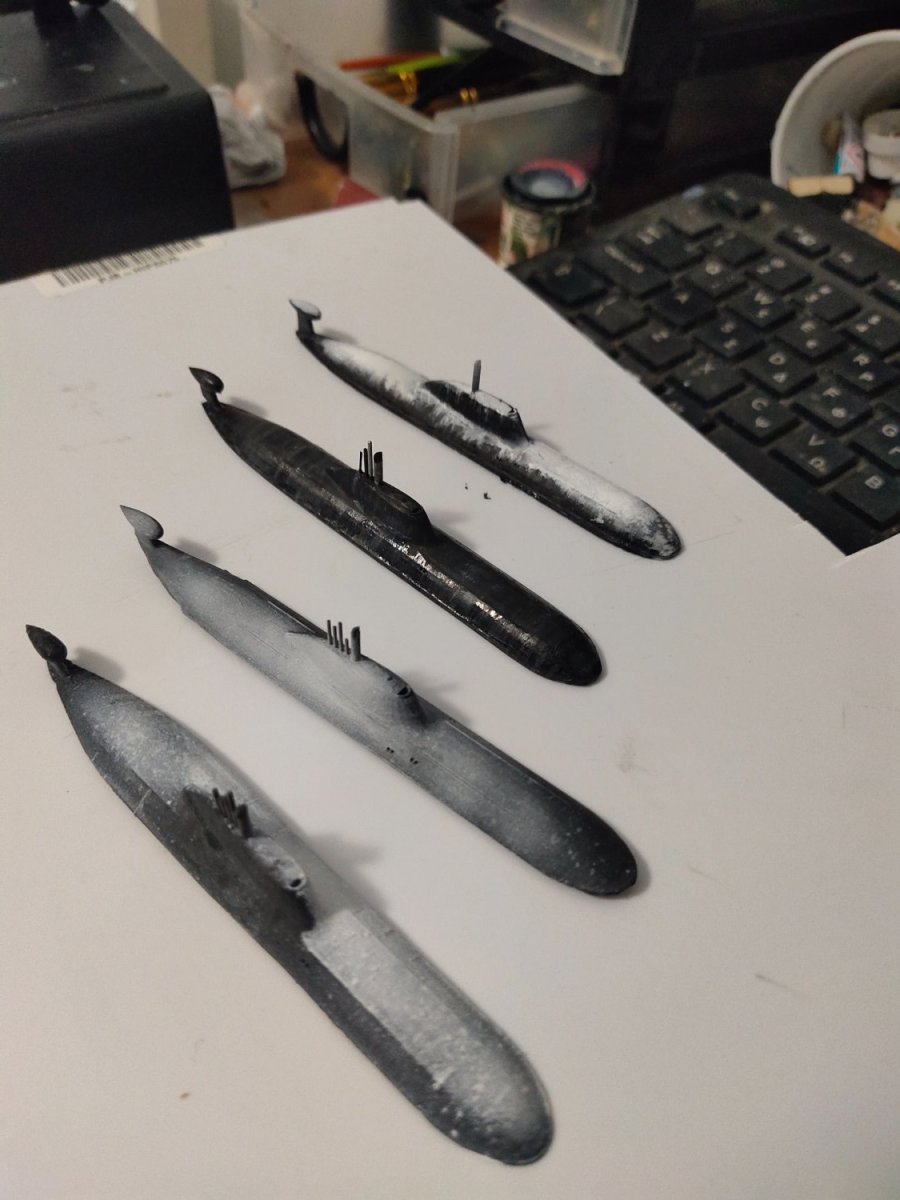
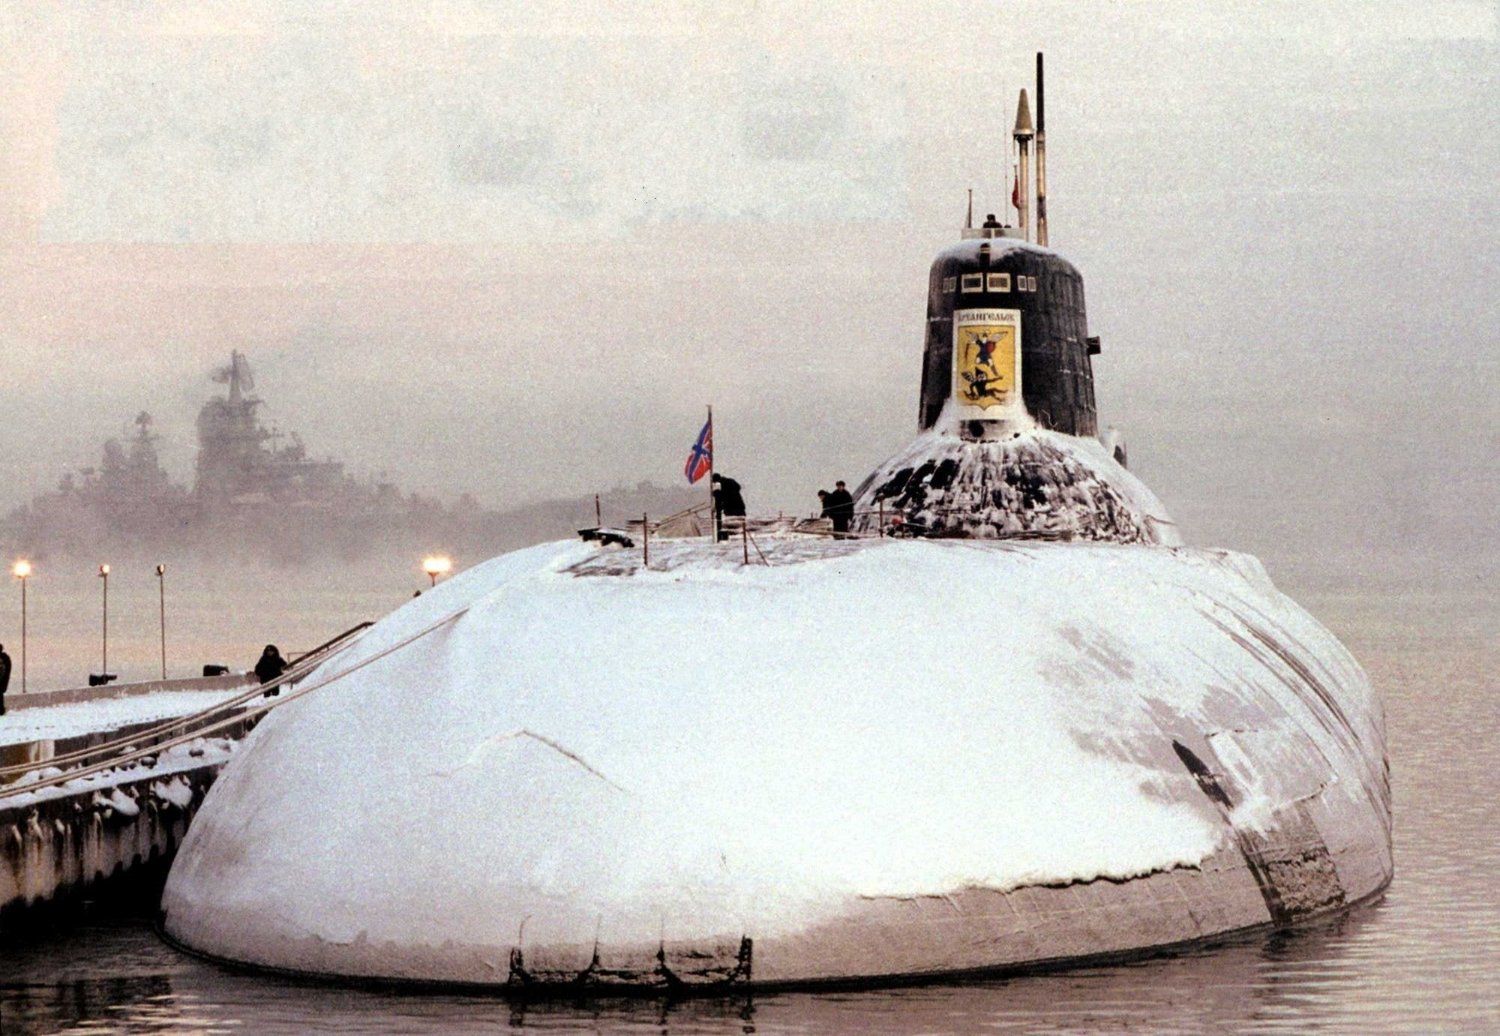
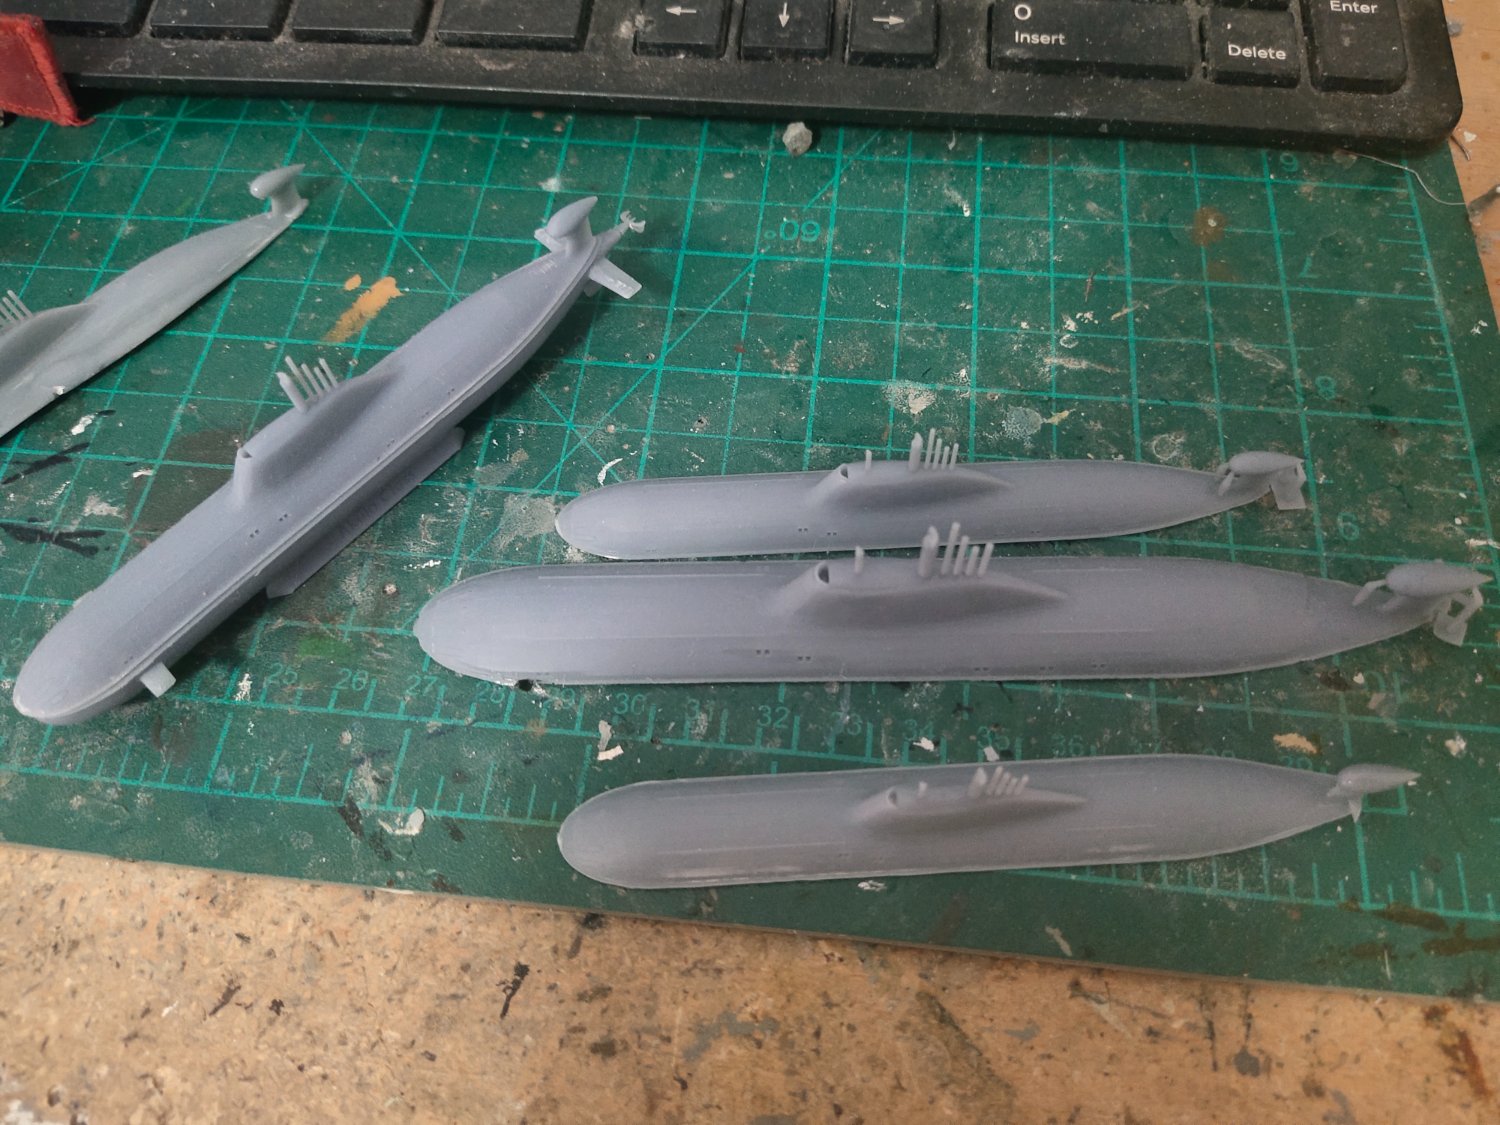
I printed the other model for display a Typhoon class submarine. The size of this giant is impressive. It was printed in 2 pieces thanks to the smaller scale, in 1/700 i would need to divide it in 3. Here is a comparison to the Akula in both 1/950 and 1/700 scale
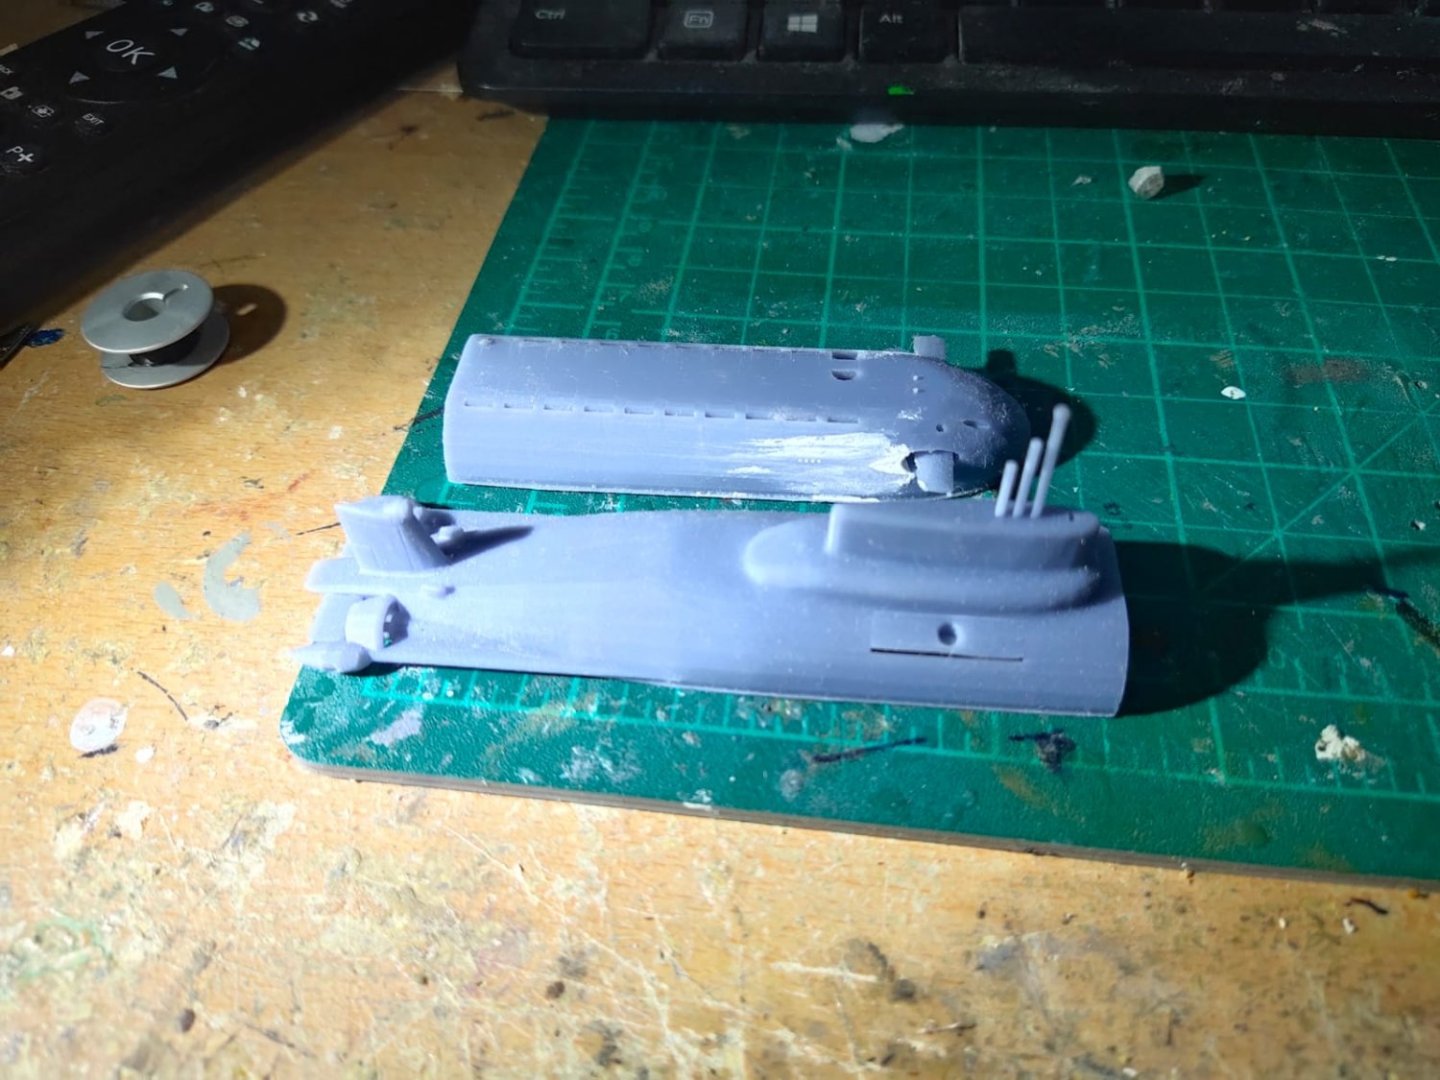
.thumb.jpeg.8db7465094aef63d6b30933df4507d88.jpeg) This model has a 2mm margin as it will sink to the resin a bit while other's dont. So i need to modify them accordingly as well as other modifications. The missile silos doors have extremely wide gaps, these should be filled and covered by snow anyway.
This model has a 2mm margin as it will sink to the resin a bit while other's dont. So i need to modify them accordingly as well as other modifications. The missile silos doors have extremely wide gaps, these should be filled and covered by snow anyway.
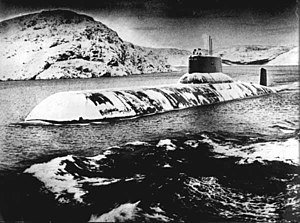
The Typhoons although were very impressive they were never the most modern submarines of their time. Their most distinctive feauture was their two hull construction side by side giving them that huge space and increased survivability in a torpedo hit.
A side by side comparison to an Ohio Class is revealing
The Typhoons were among the most comfort subs ever sailed even having a swimming pool and sauna. In comparison Ohios are quite crampy. But they still can carry up to 24 ICBMs instead for 20 in Typhoons. Ohios were quite problematic and expensive to be built but they have a great life expectancy, estimated to serve the fleet beyond 2030.
- Baker, Old Collingwood, BLACK VIKING and 5 others
-
7
-
 1
1
-
Britannic is just a few miles away from my second house in Kea. The depth is 125 meters. There is also another wreck in 70 meters a French liner converted to military transport the SS Burdigala.
Every year Britannic was inspected by a group of Belgian divers. One of them died cause of wrong gas mixture used during dive.
-
3 hours ago, RGL said:
I’m really keen to see how you do the ice.
That depends on the scenery. I'm more worried about the ground effect, rocks etc
- mtaylor, Old Collingwood and Canute
-
3
-
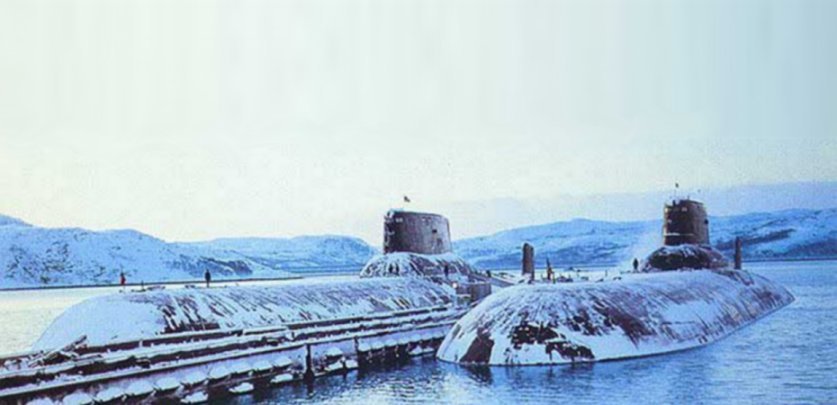
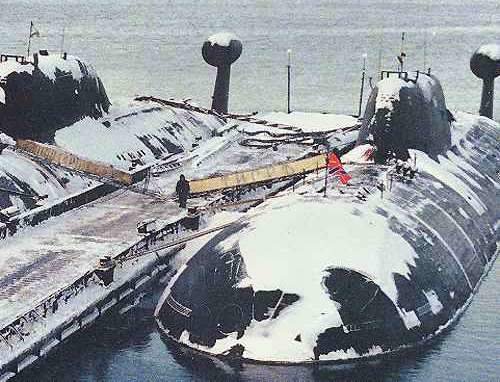
Looking at the pictures i noticed that there are many building options available.
No ice on subs, full ice on sea
Lots of ice on sea, no ice on subs
moderate amount on ice/snow on both objects
- Canute, mtaylor, BLACK VIKING and 6 others
-
9
-
Back to hand work. I used some wood putty to fill some gaps around the joining area of bulwark and deck. I sanded and used glaze putty for a smoother finish. A couple evenings of work is required but big deal. Been here done that. After this, i will use airbrush to repair paintwork.

-
1 hour ago, king derelict said:
Great idea, Mike. It will be spectacular. The sun prints look very nice too
Alan
Thanks Alan.
By the time you get your resin printer there will be a lot of material that will take your 1/700 and 1/350 to another level.
Your filament printer also has paid off very well on your giga project.
- Canute and Old Collingwood
-
2
-
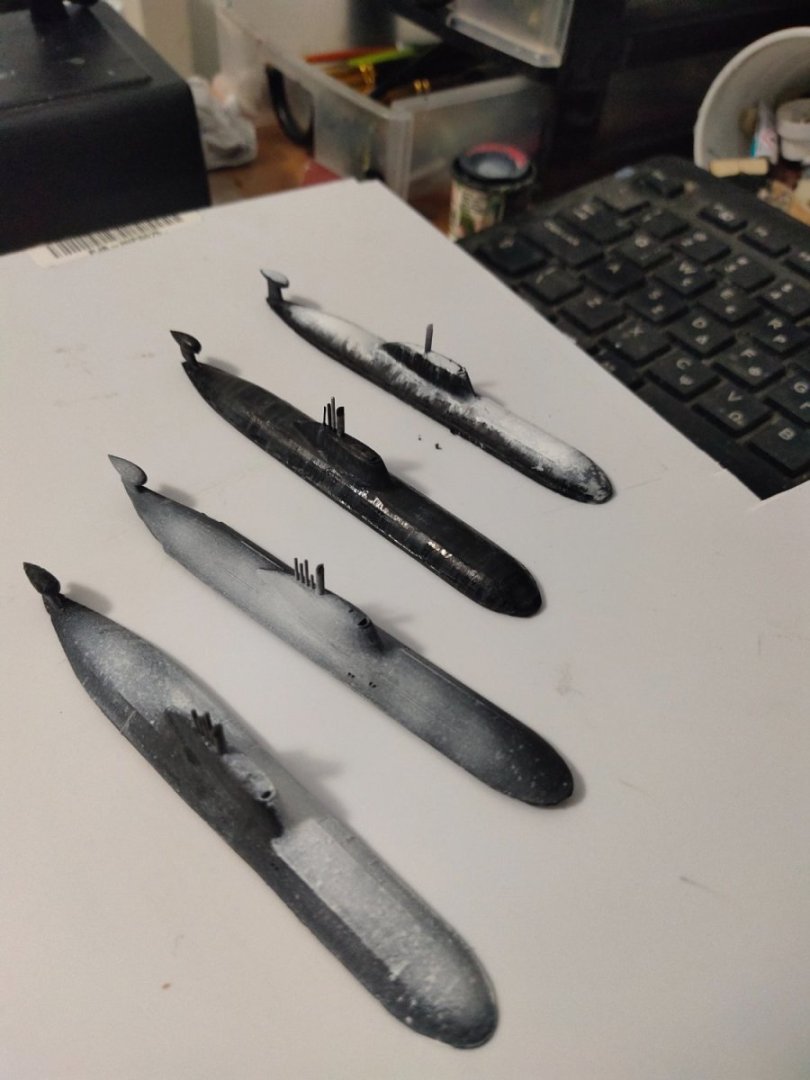
Why in 1/950? I will explain.
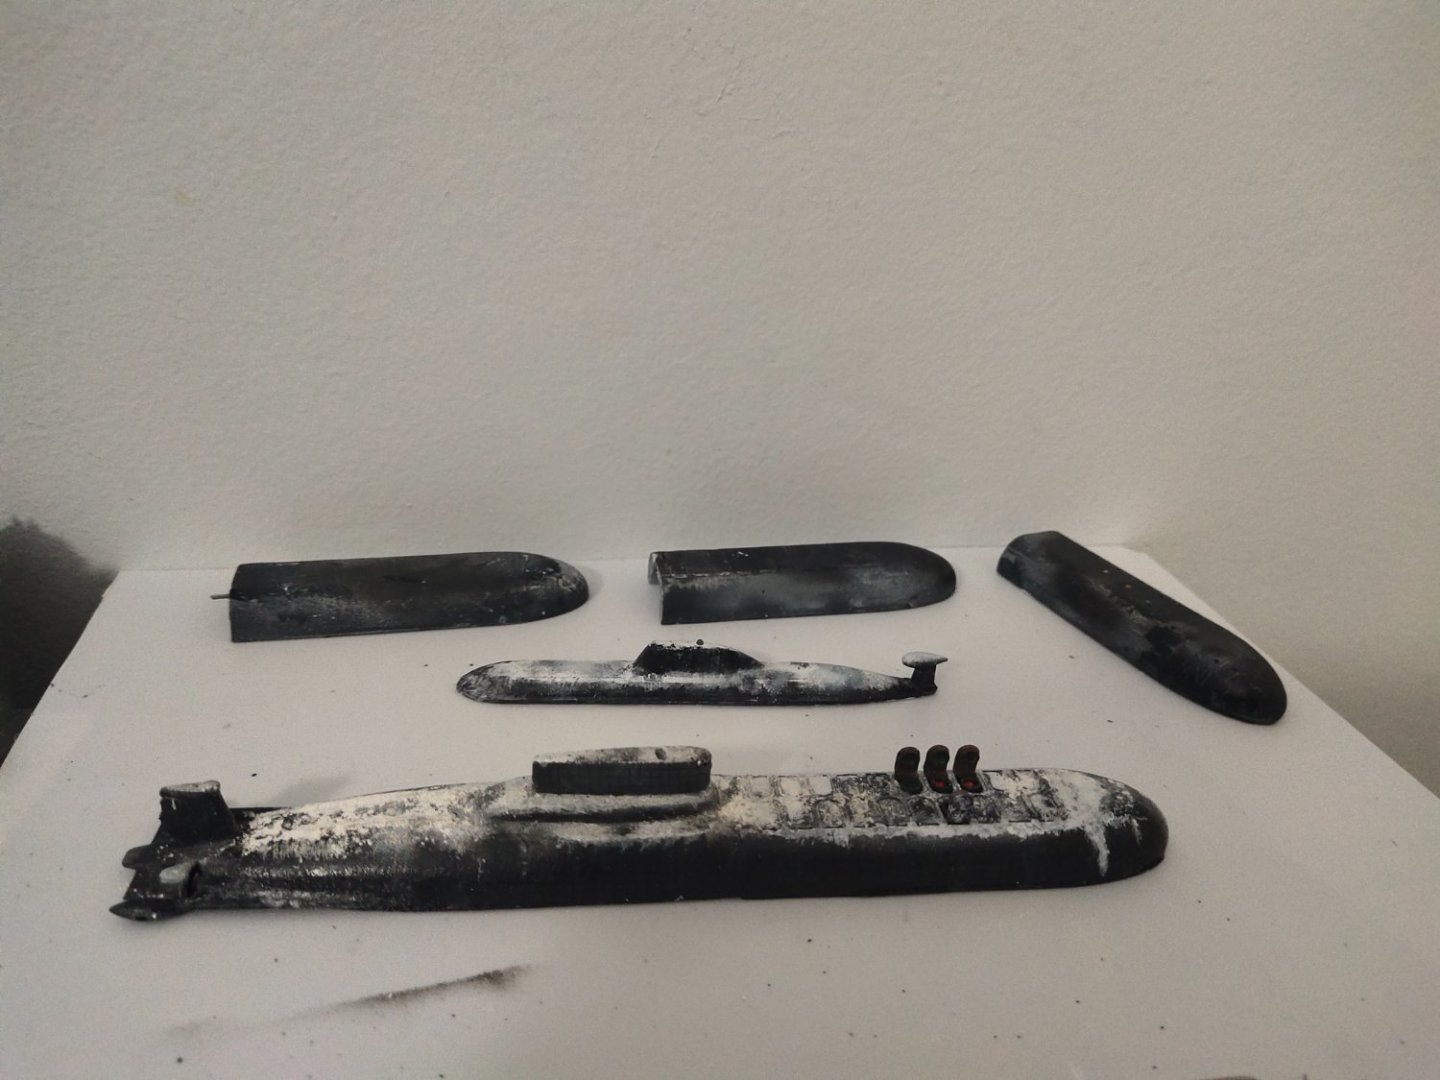
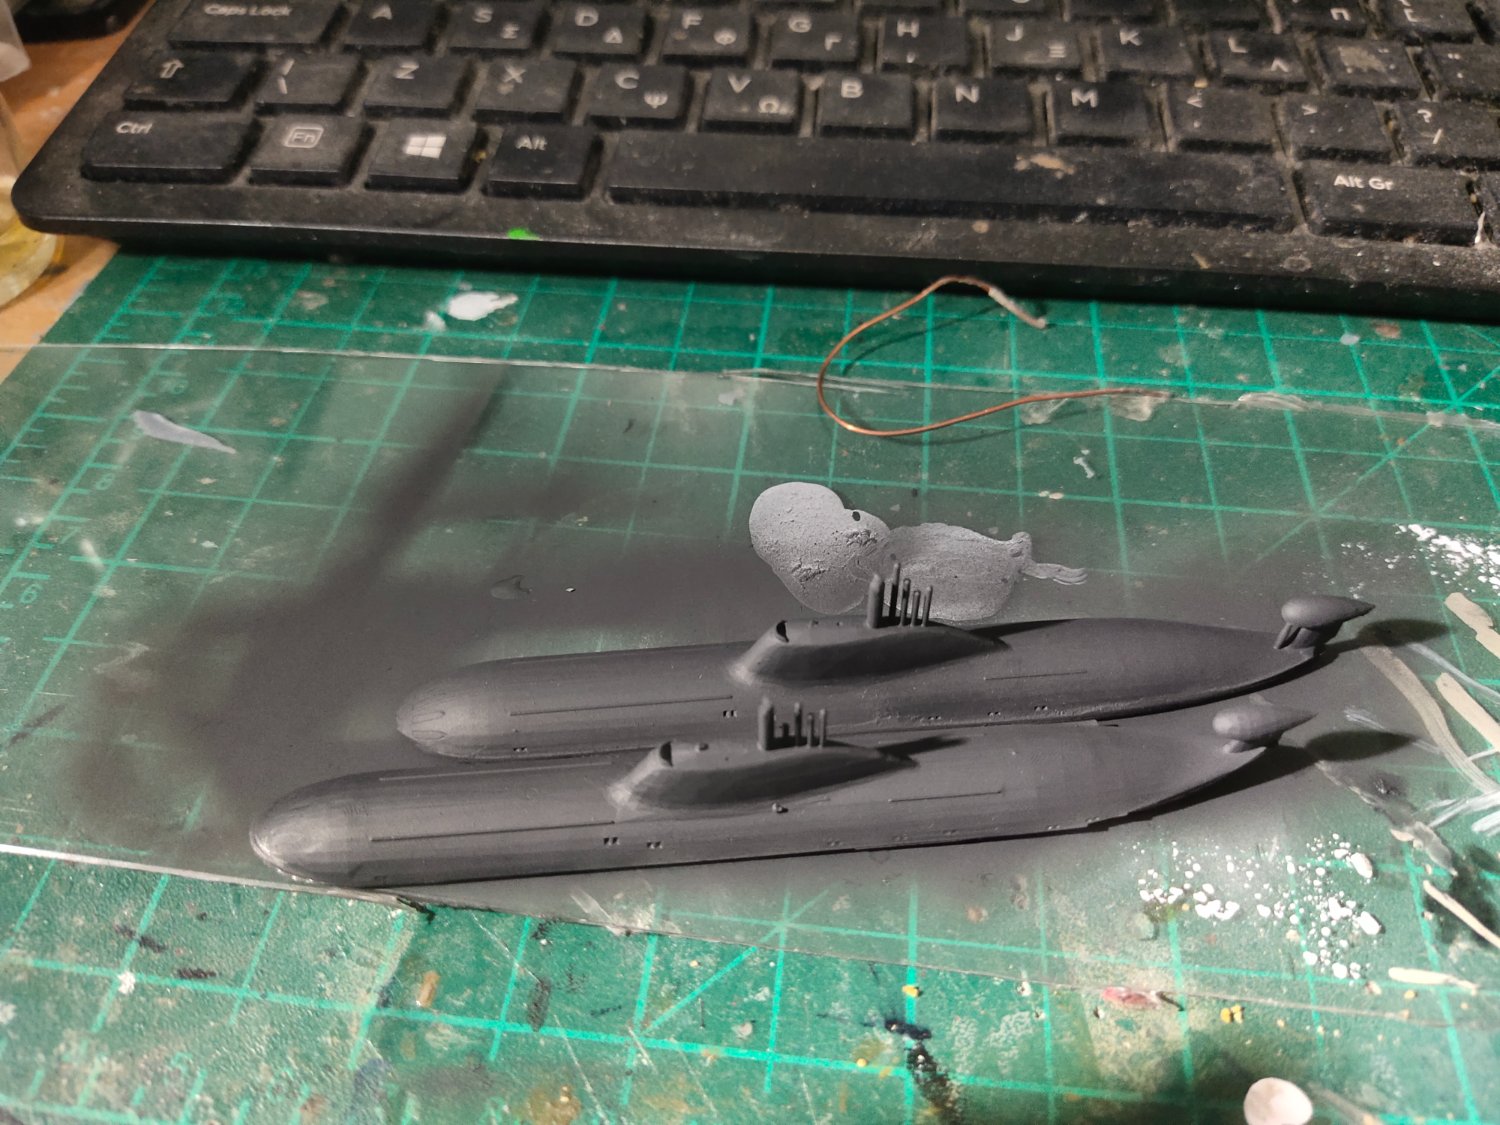
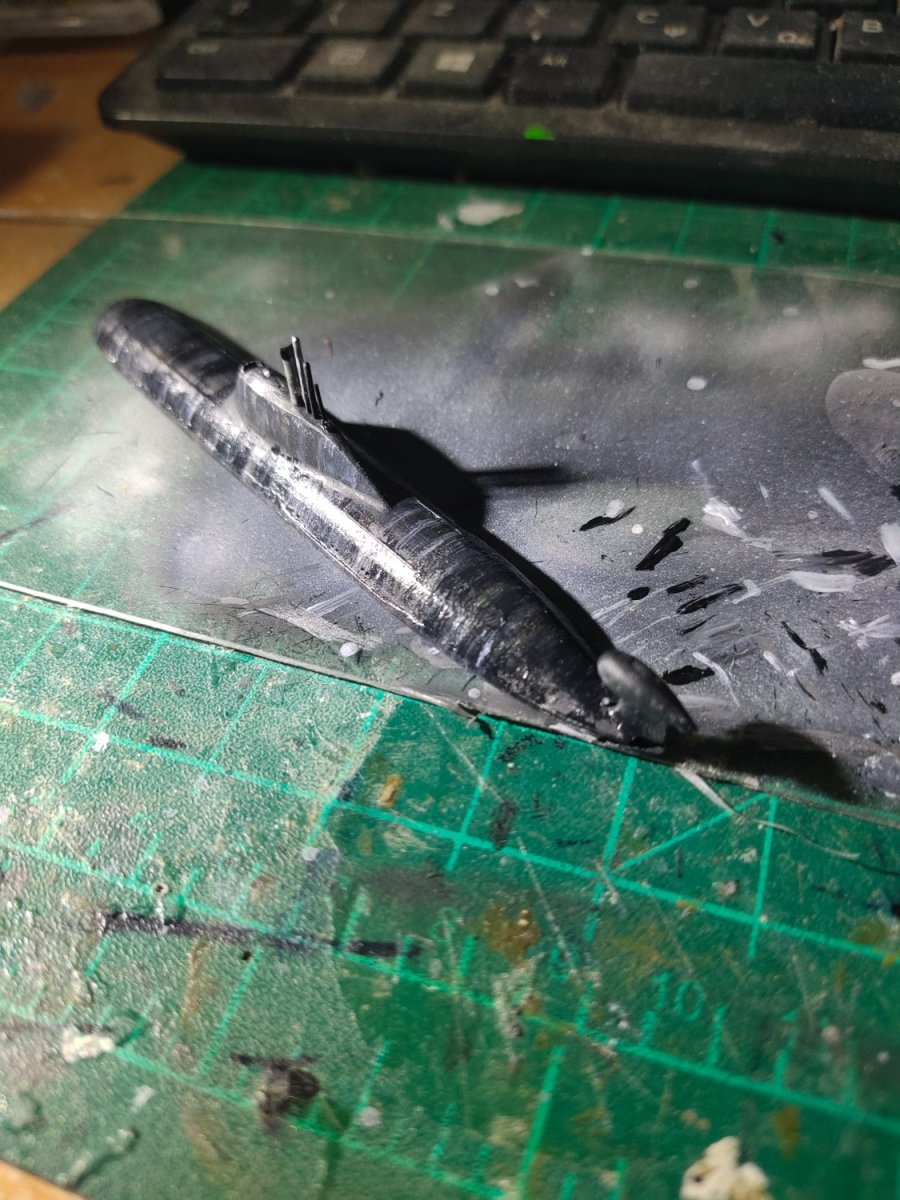
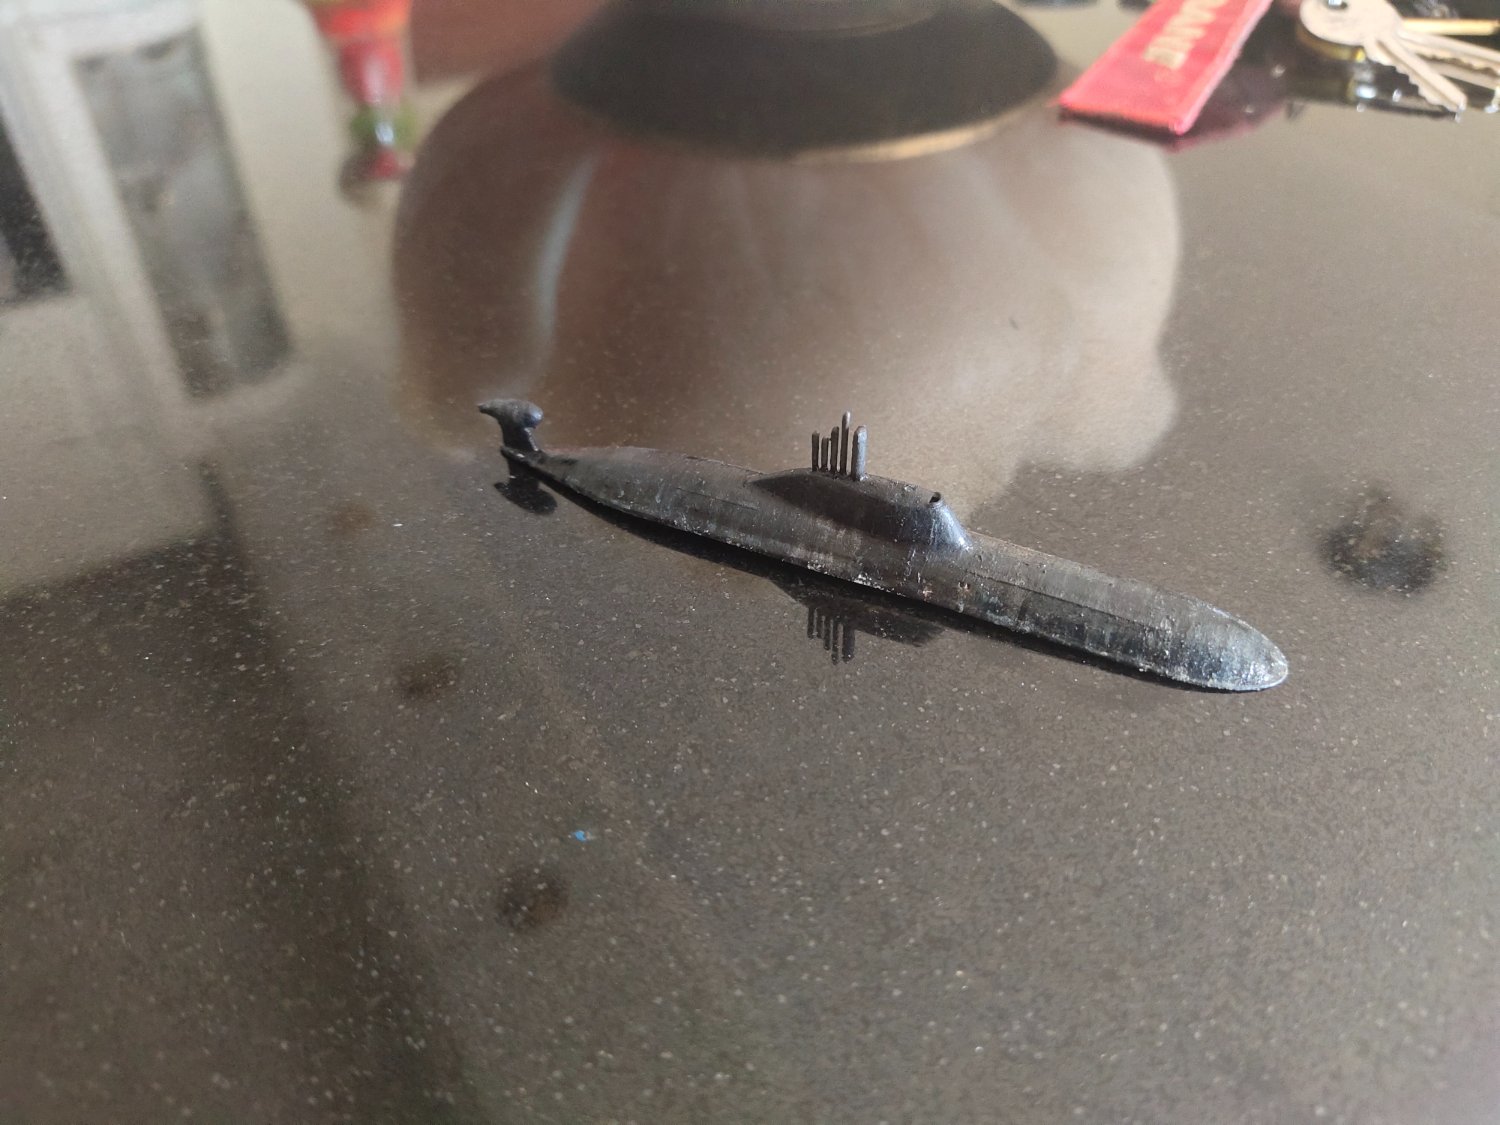
During my first research for 3d printable models and parts I came up with some submarines. Among many I download and printed a freeware file of Akula Class sub. It was the first ship to be printed so some experimentanion would be needed.
After testing several pieces were complete in good detail in 1/700
scale. Or I thought so. While testing and calculating scales my mind was at Alfa Class a sub significantly smaller than Akulas. After doing some maths It was obvious that I was left with a bunch of Akulas in 1/950 scale. You can see the difference of the size in 1/700 and 1/950 in the photo

Not sure what to do with them I decide to built a diorama using at least two of them and maybe another class. The scenery would be icy. It will be my first diorama including sea and terain scape. A combo of 3d print and hand work.
- NavyShooter, reklein, GrandpaPhil and 8 others
-
11
-
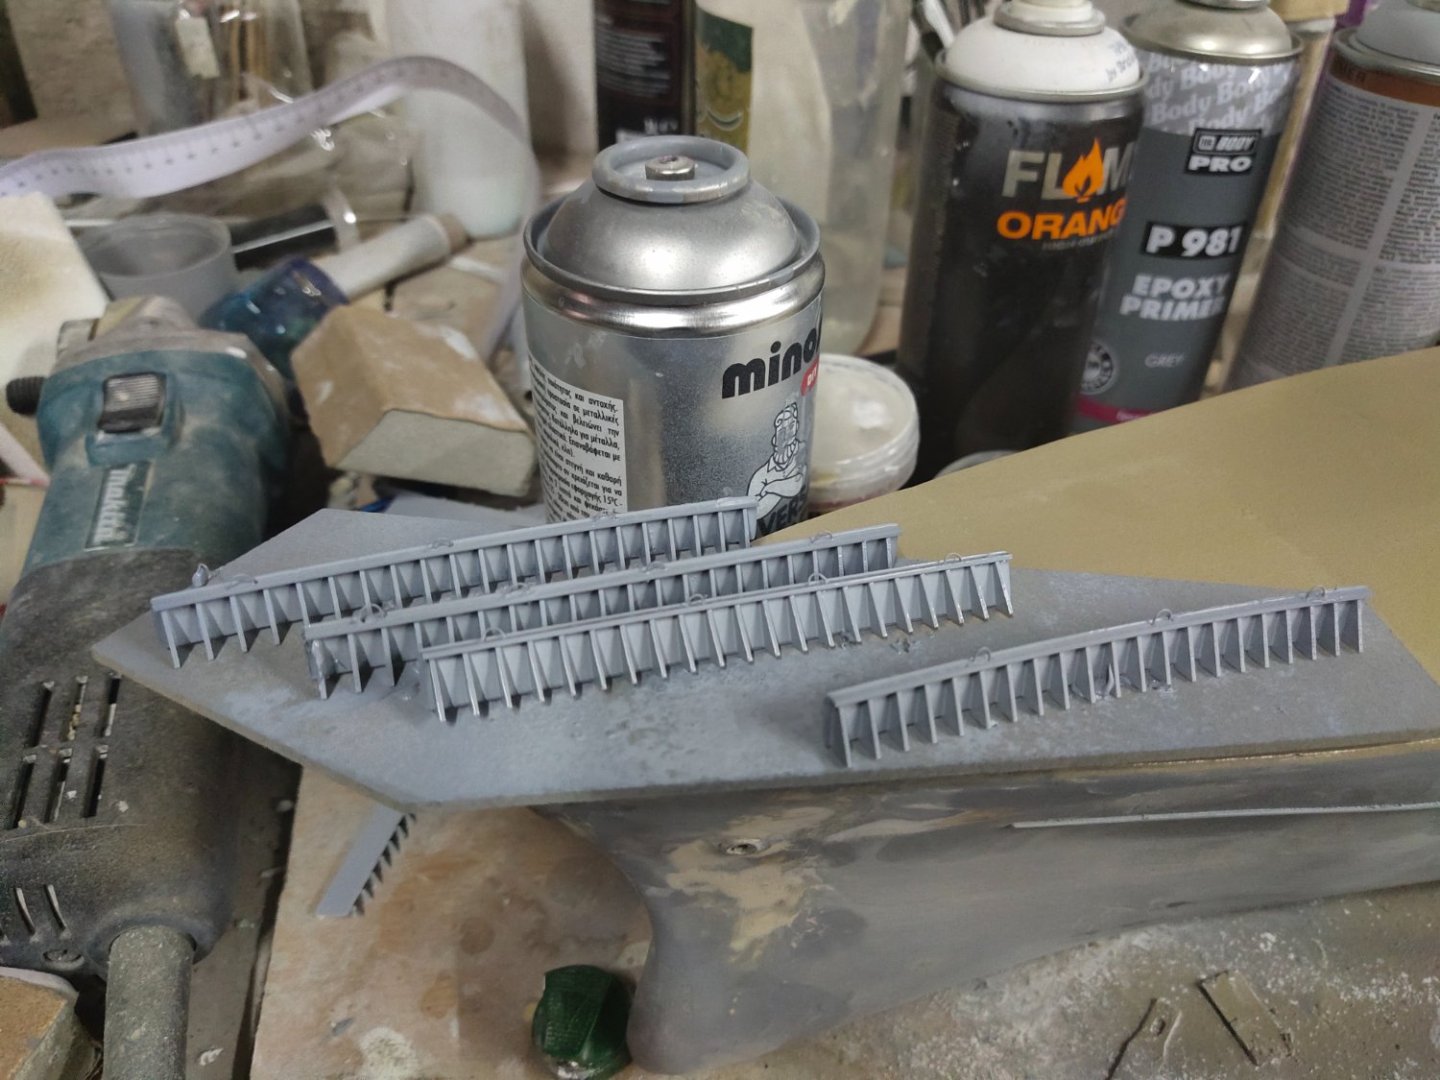
I made a plexi case not perfect but good enought to keep the dust away.
A label also was 3d printed. Not sure what the Japanese letters means, just found the printable file for these online.
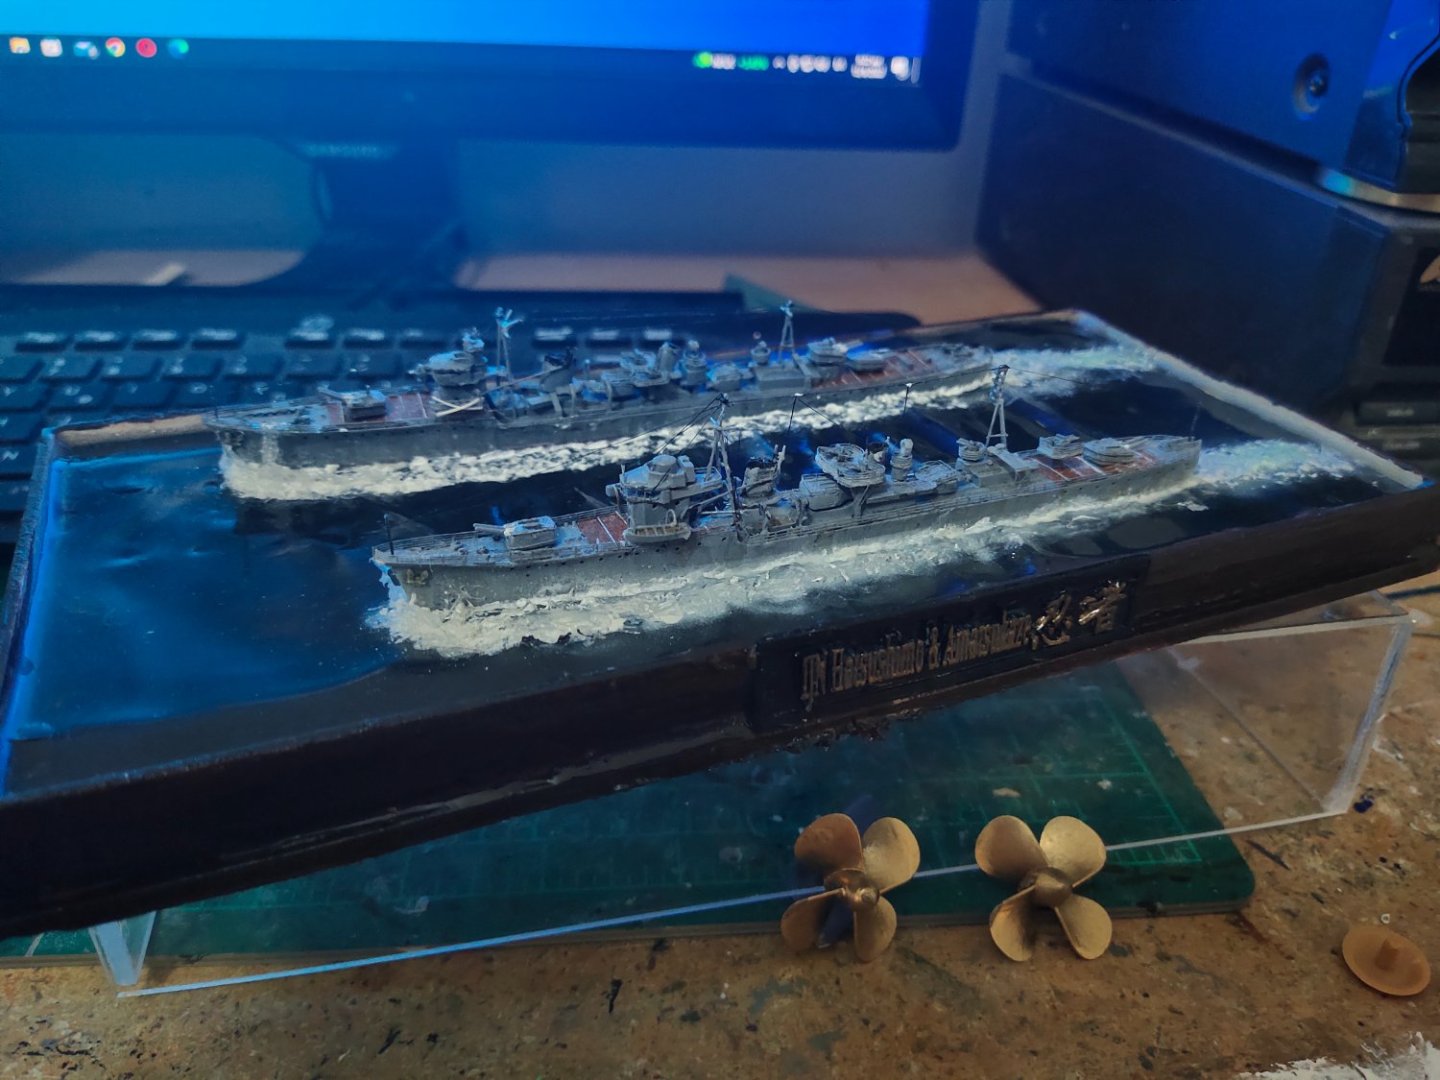
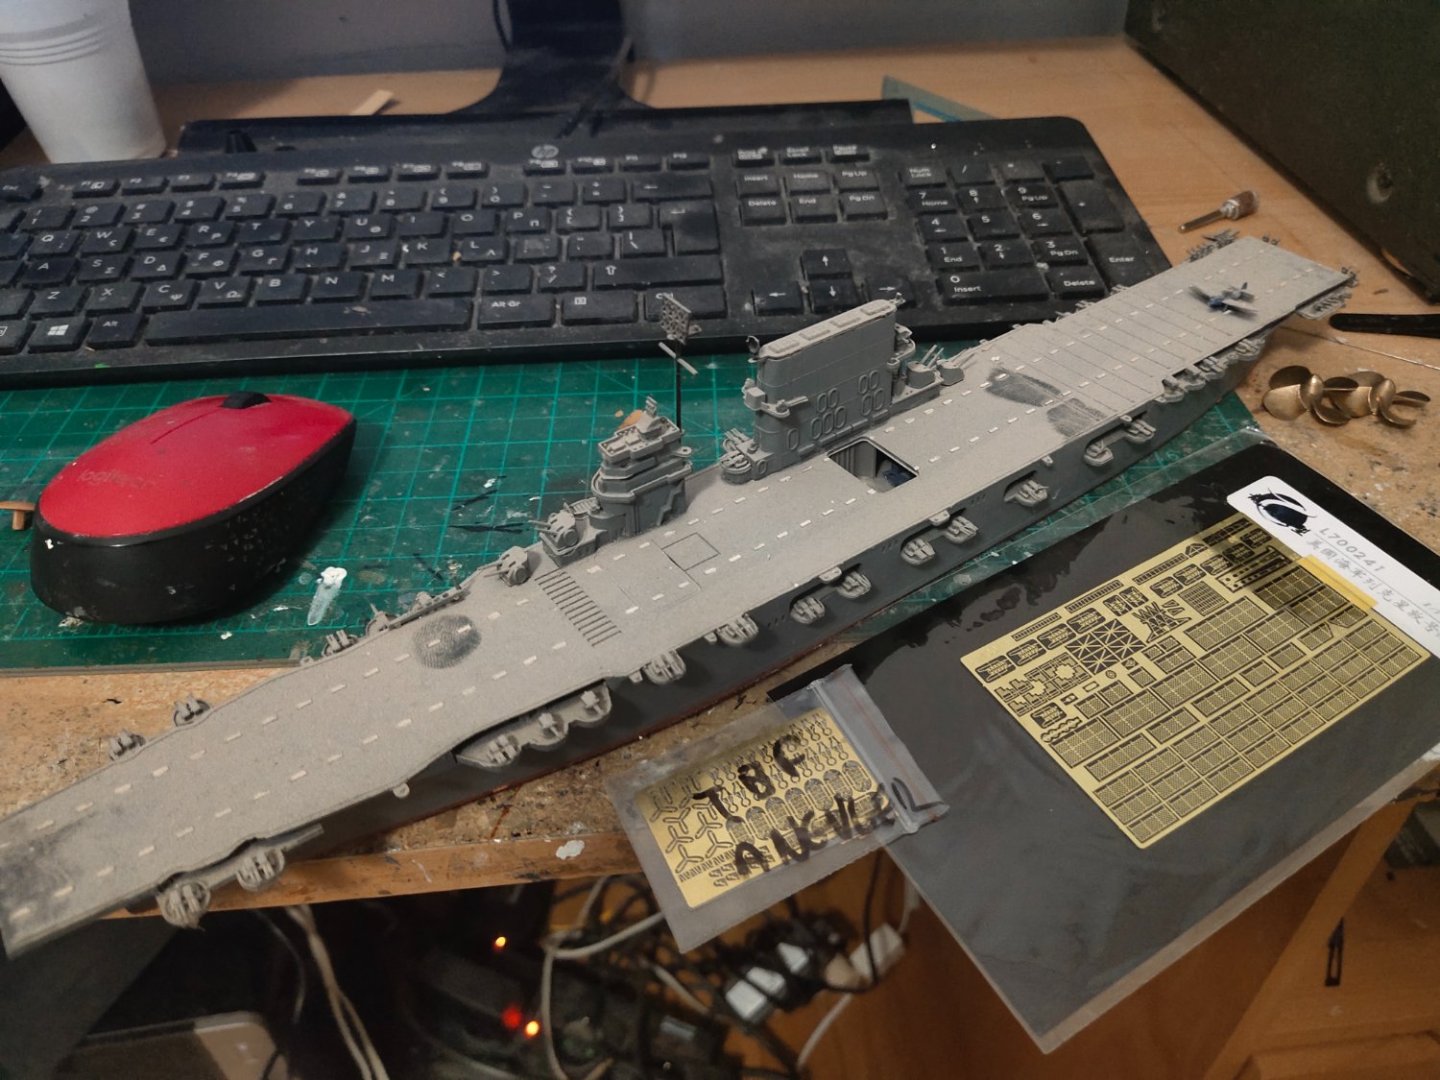
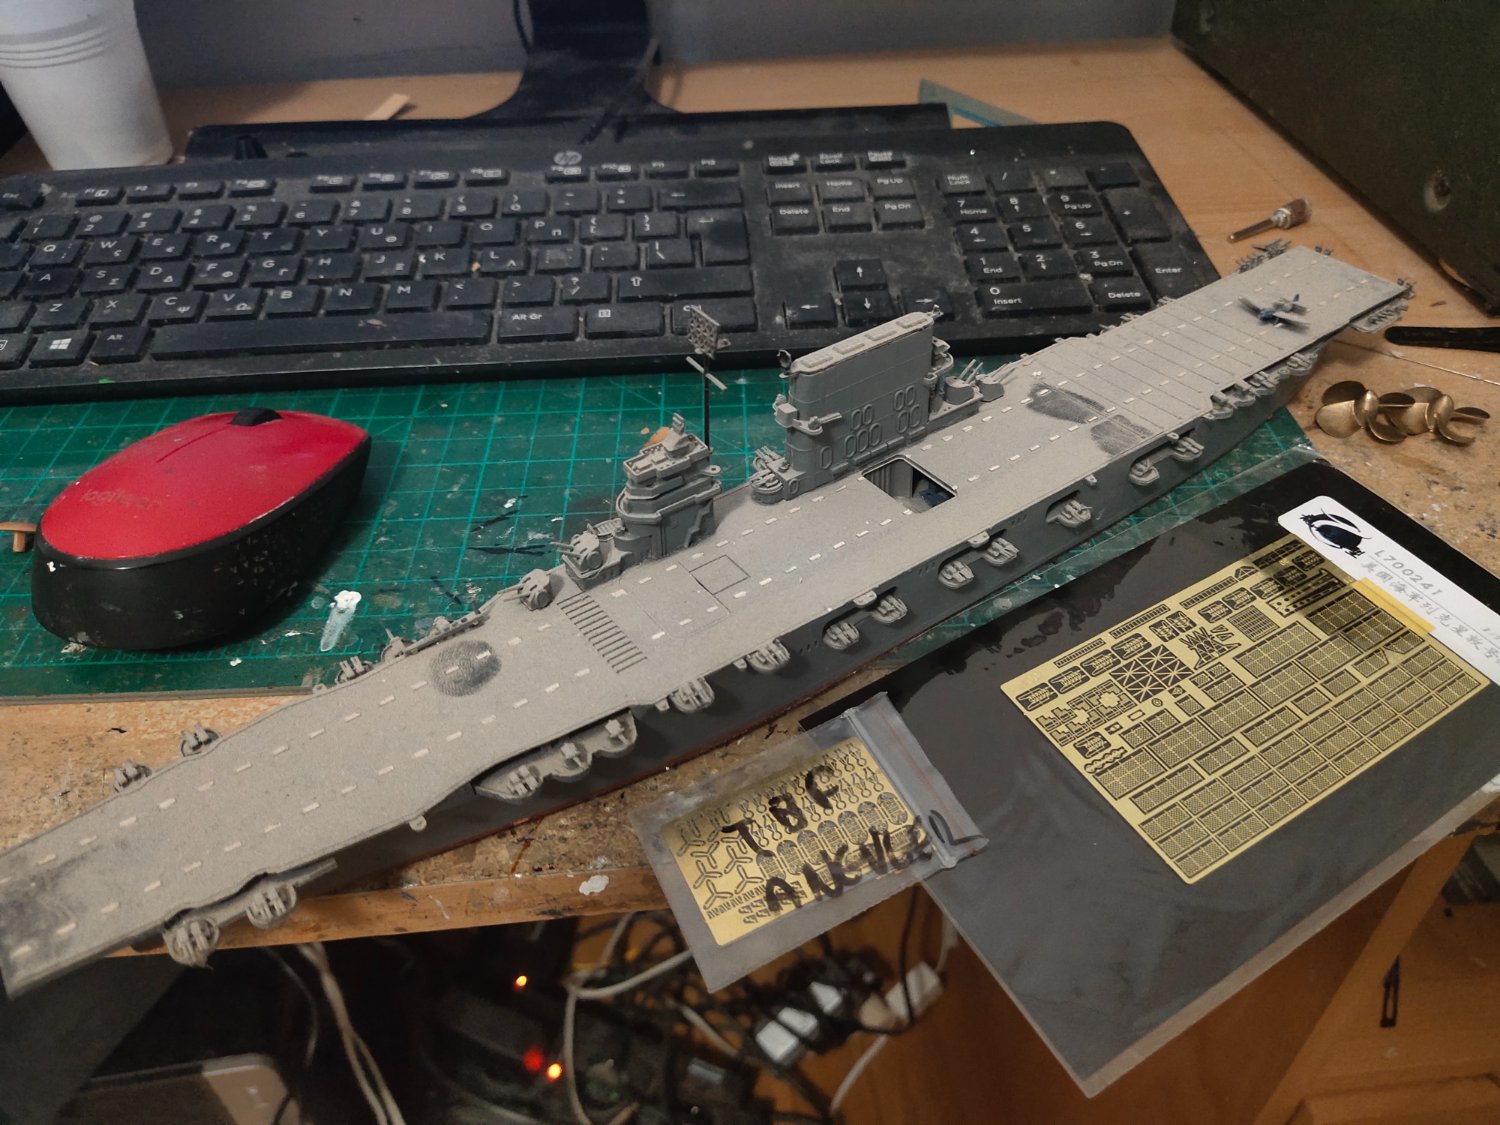
Next project USS Saratonga with PE set, the longest 1/700 model according to a 2015 Fine Scale Modeller Magazine.
This is going to take a while as I'm going to take a break and start another project to post in this section.
- yvesvidal, thibaultron, Baker and 5 others
-
8


.jpeg.de6b68861ae61809b7b87d15ec4c15ef.jpeg)


Varyag 1901 by Valeriy V - FINISHED - scale 1:75 - Russian Cruiser
in - Build logs for subjects built 1901 - Present Day
Posted
Literally ready to fire!