


mikegr
-
Posts
833 -
Joined
-
Last visited
Content Type
Profiles
Forums
Gallery
Events
Posts posted by mikegr
-
-
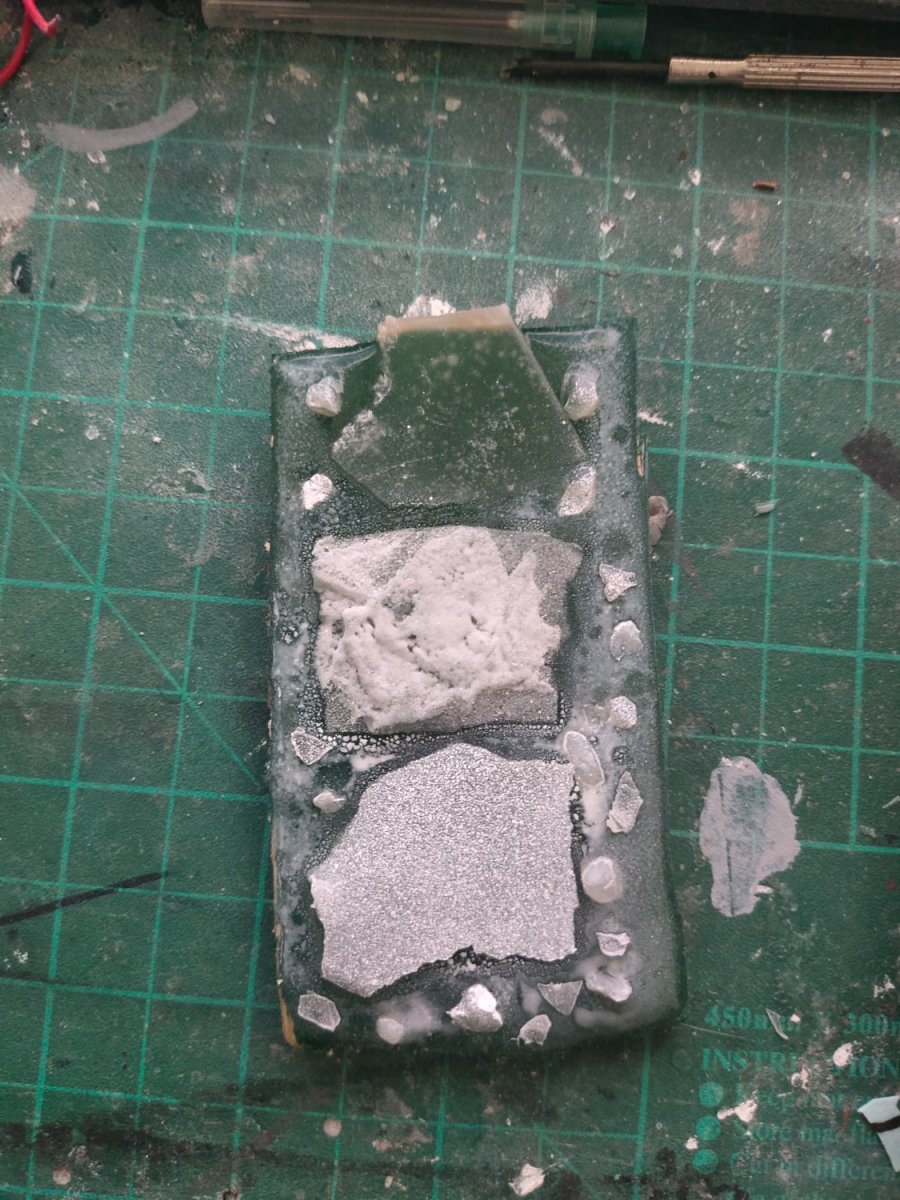
While resin is 99% done I did some experiment.

From top to bottom
Paraffin
Paraffin with PVA and microballoons
Paraffin with white spray paint.
What do you think? I think microballoons won again. The of them applied the more ice turn into snow
- ccoyle, Keith Black, yvesvidal and 4 others
-
 7
7
-
1 hour ago, ccoyle said:
Looks just like murky bay water.
This can be fixed later. I can brighten it up. Almost to a drinkable state😁
- Canute, robert952, Keith Black and 4 others
-
7
-
Thanks all the members for likes and comments.
I came now to the point of no return. Once resin poured in there won't be much space for corrections.
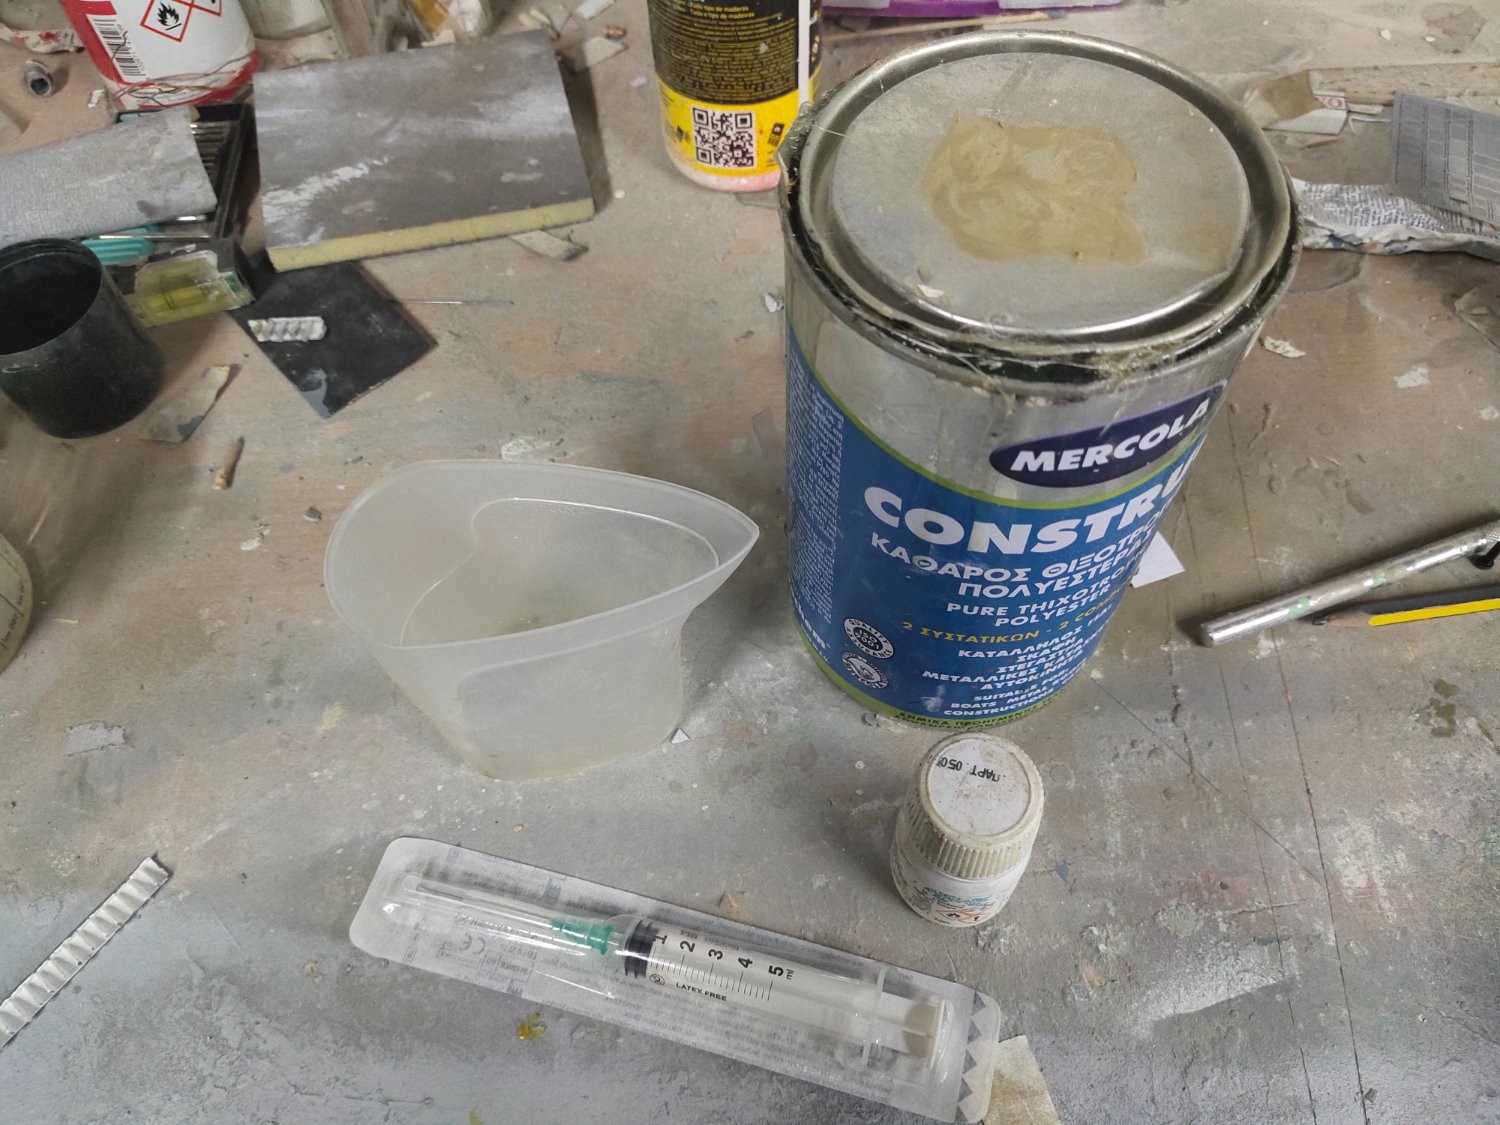
Paraffin has a melting point 45 to 65 degrees. To reduce the possibility of accident I will use polyester instead of fast curing resin with 2% catalyst. The greenish color of it will also match the seabed. There will be two layers , a basic one, then ice block formation, then the top layer, hopefully to create an -ice sinking effect-.

After leveling the surface I put it on wood blocks to avoid sticking with the workbench due to excess resin leftovers. I calculate the amount of catalyst and wrote it down on the upper right of the base. Only Typhoon and dock will be glued now cause of higher depth, others before the Fina layer

Right after the process i covered the whole thing with a pan to protect it from dust.
After 5 hours I removed to see the result
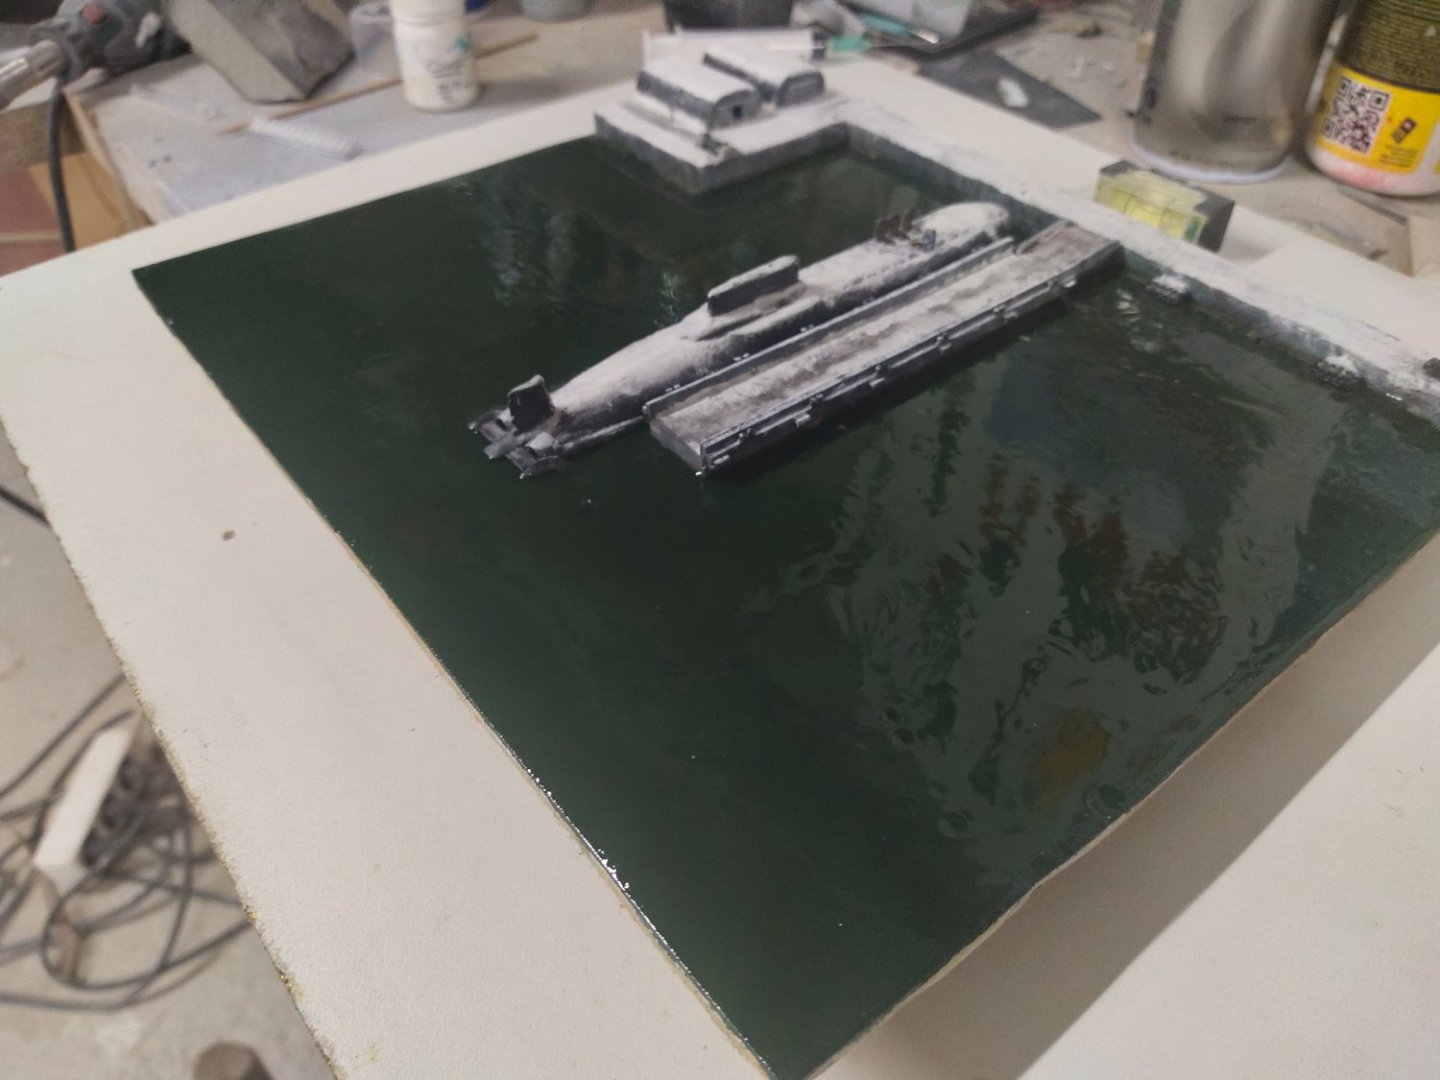
Low temperature and reduced catalyst didn't allow resin to cure completely.
I will cover it again and let it rest overnight. If its still soft in the morning I will have to increase catalyst amount in the next final stage.
- Prowler901, king derelict, robert952 and 8 others
-
9
-
 2
2
-
On 1/3/2023 at 2:23 AM, king derelict said:
Its starting to come together really nicely
Alan
Thanks for supporting this project Alan.
-
On 1/1/2023 at 5:53 PM, Wintergreen said:
Happy new years mike!
Just scrolled through your log and even if it is not my cup of tea, so to speak, the build is still very impressive!
Amazing in all its littleness 😄
Happy new year to you and your family as well.
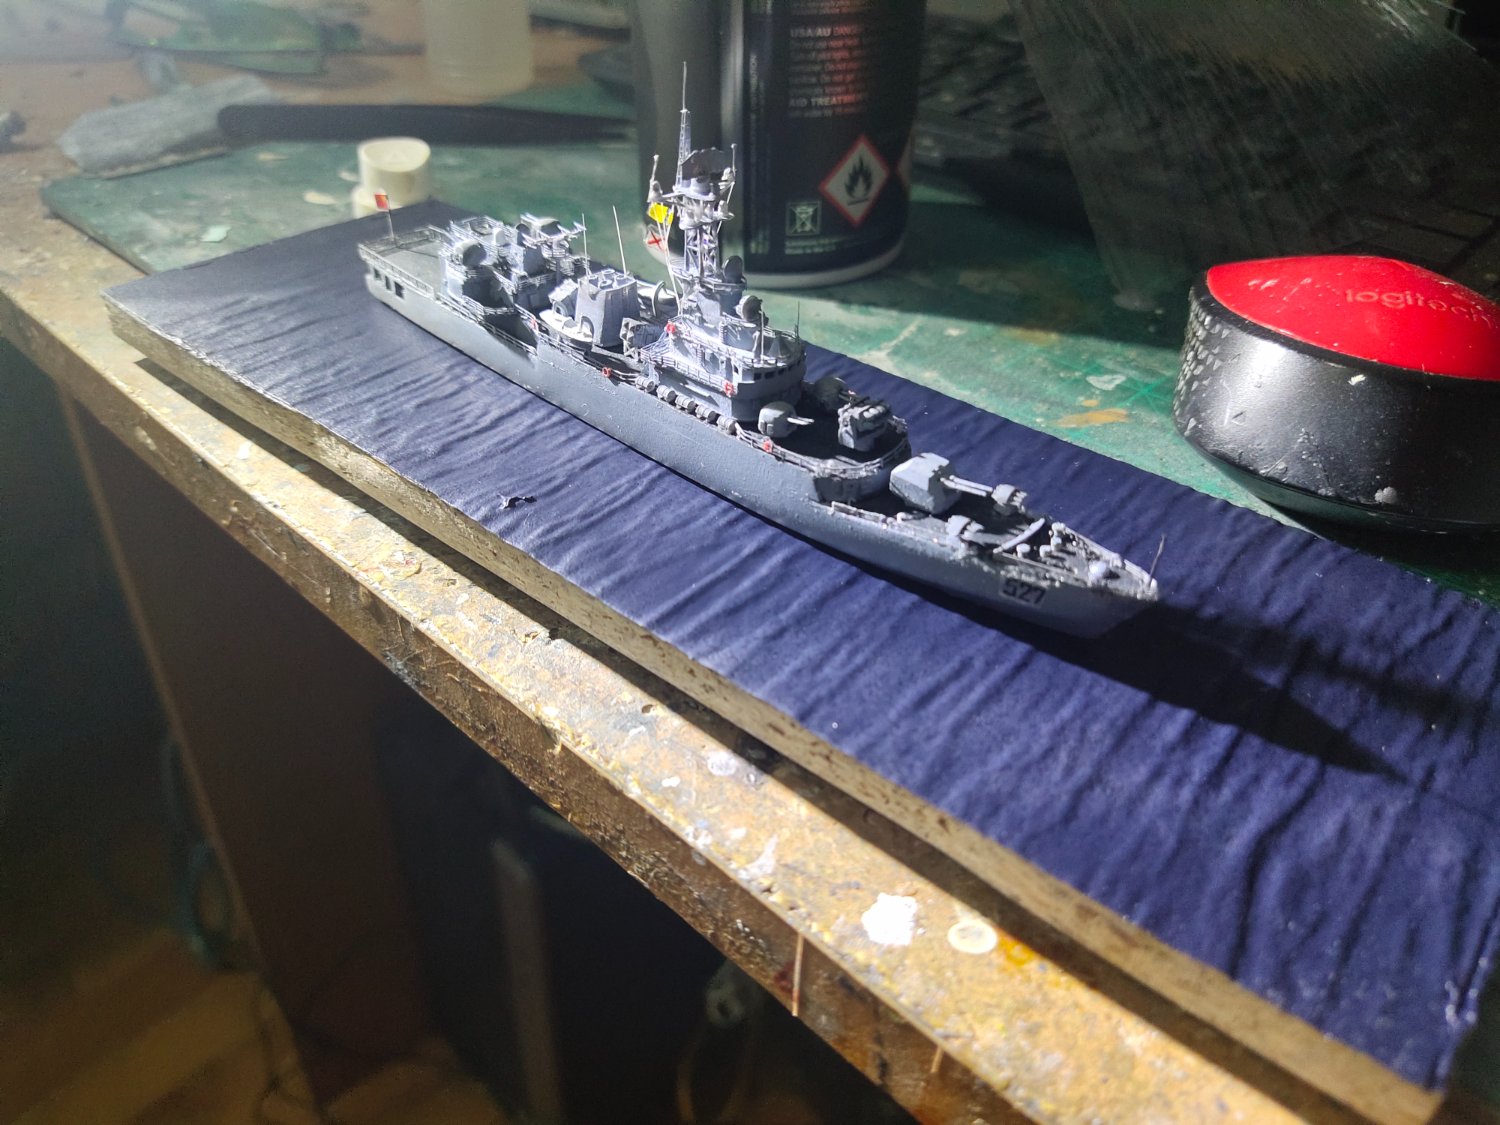
This is the first project of a 1/700 building series, a bit unusual scale for scratch built which can't be compared to the amazing builts presented in this section, but still has its beauty.
Anyway added some final details, rigging, flags etc.
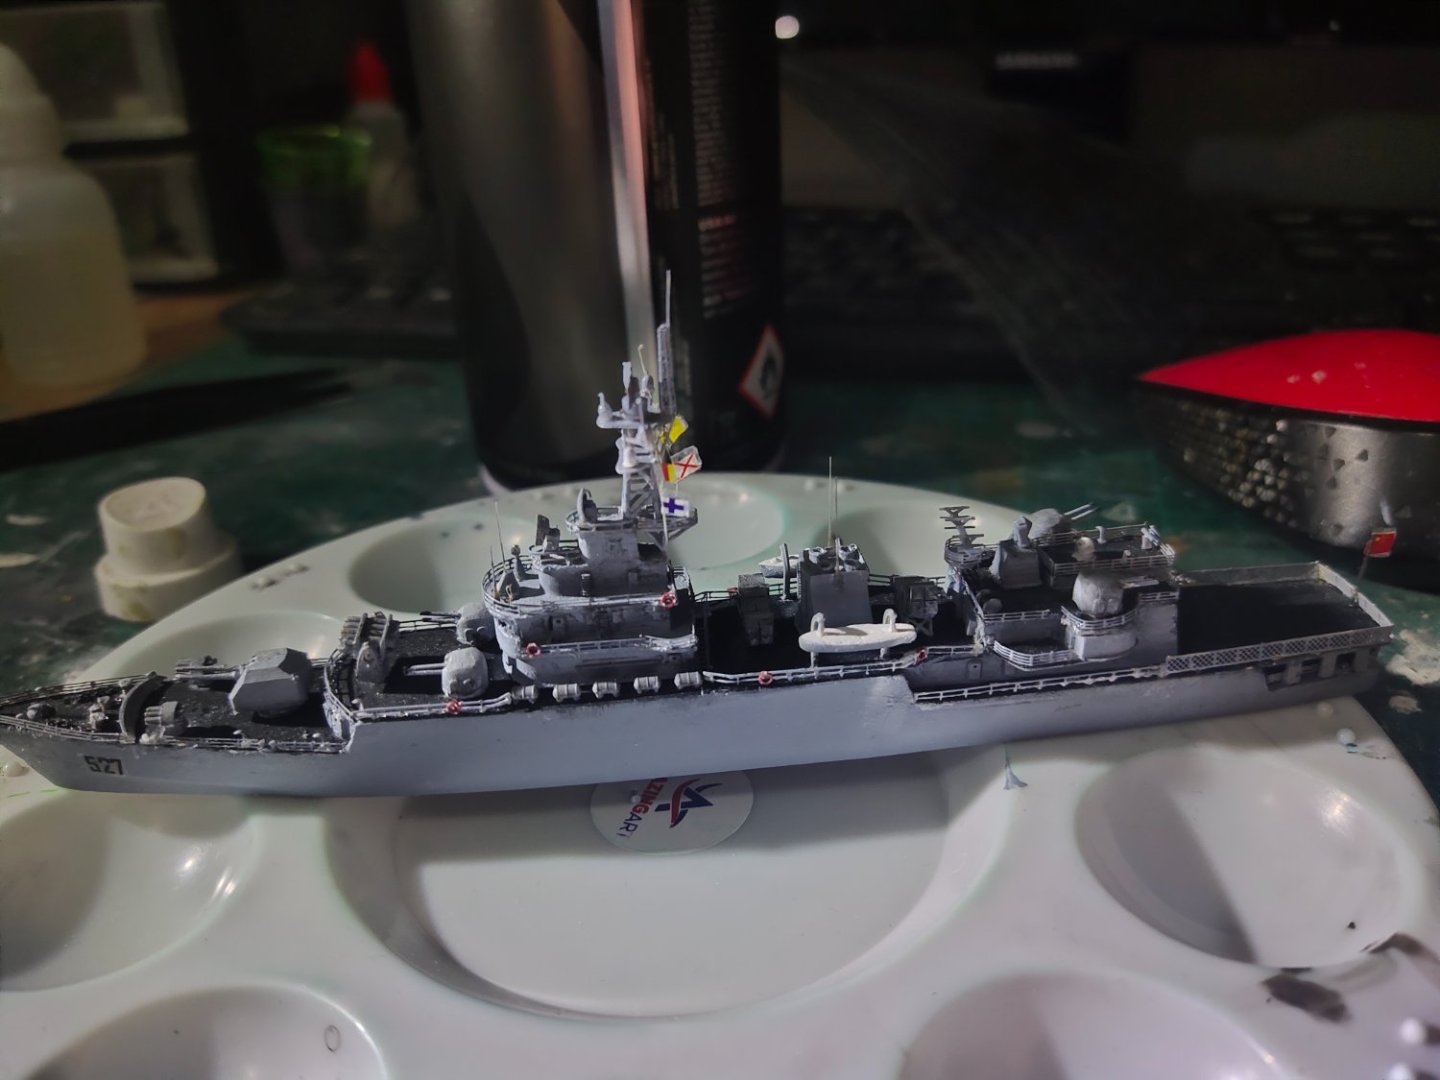
The 527 number is also homemade, if you want to know how just watch this kind lady at 2:40
Now let's see if a simple sea base can look as good as a more complicated one
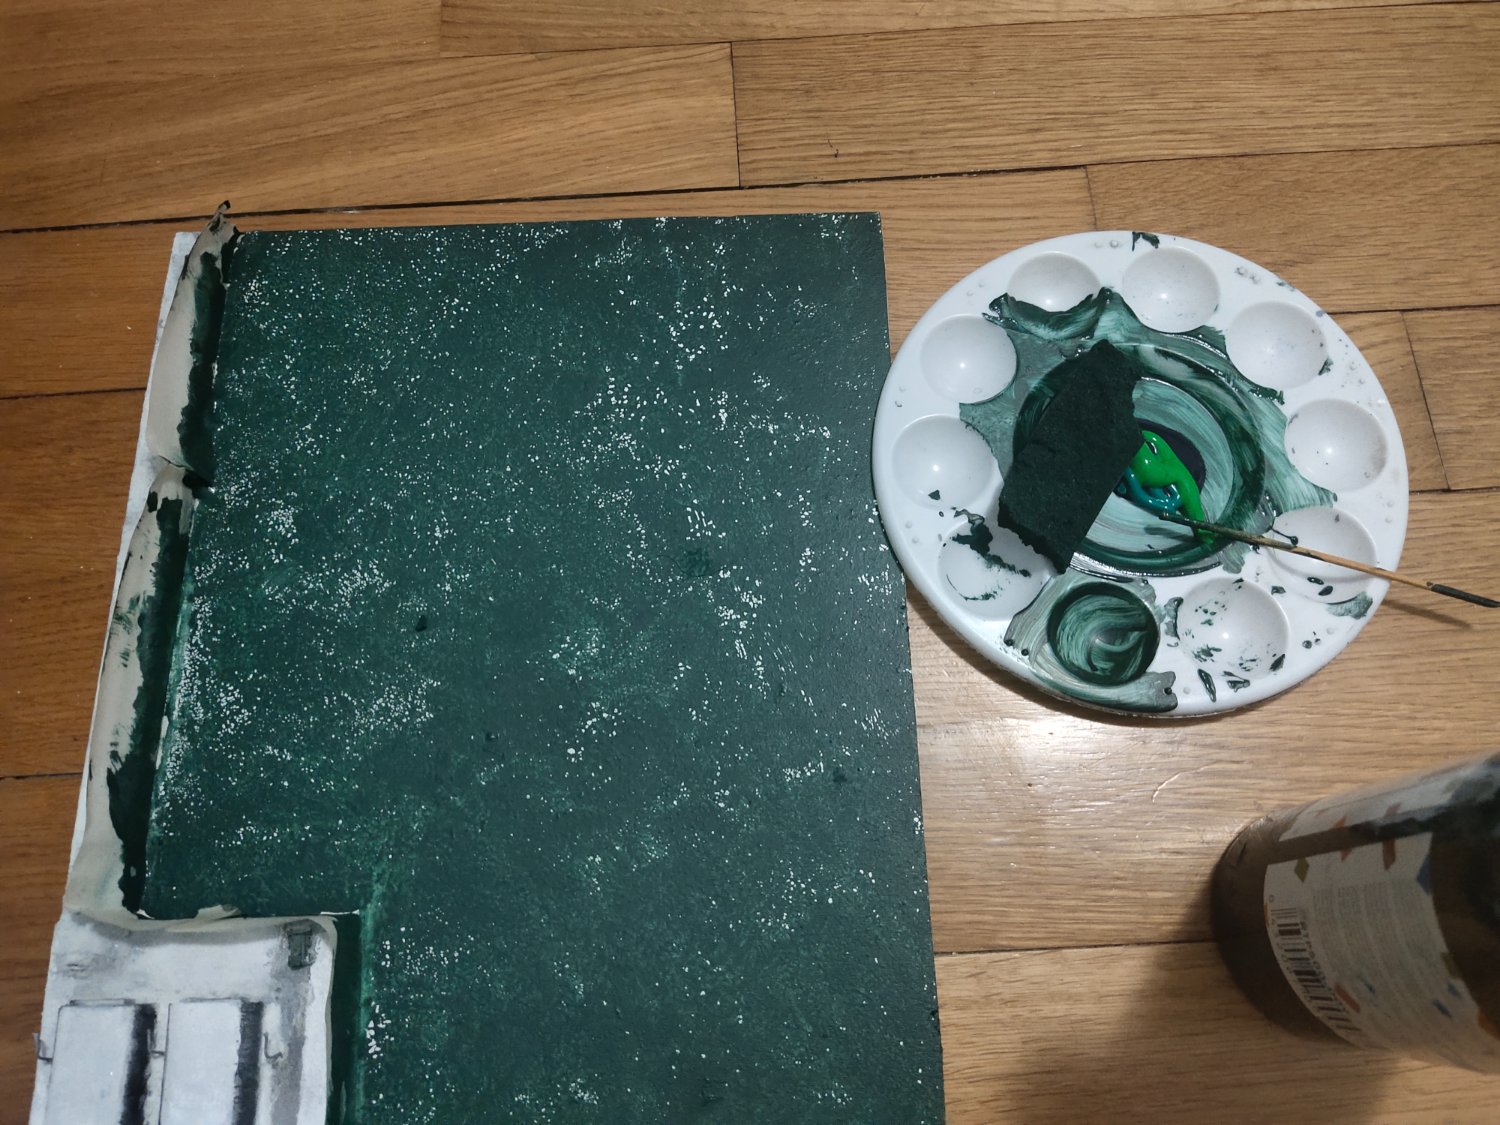
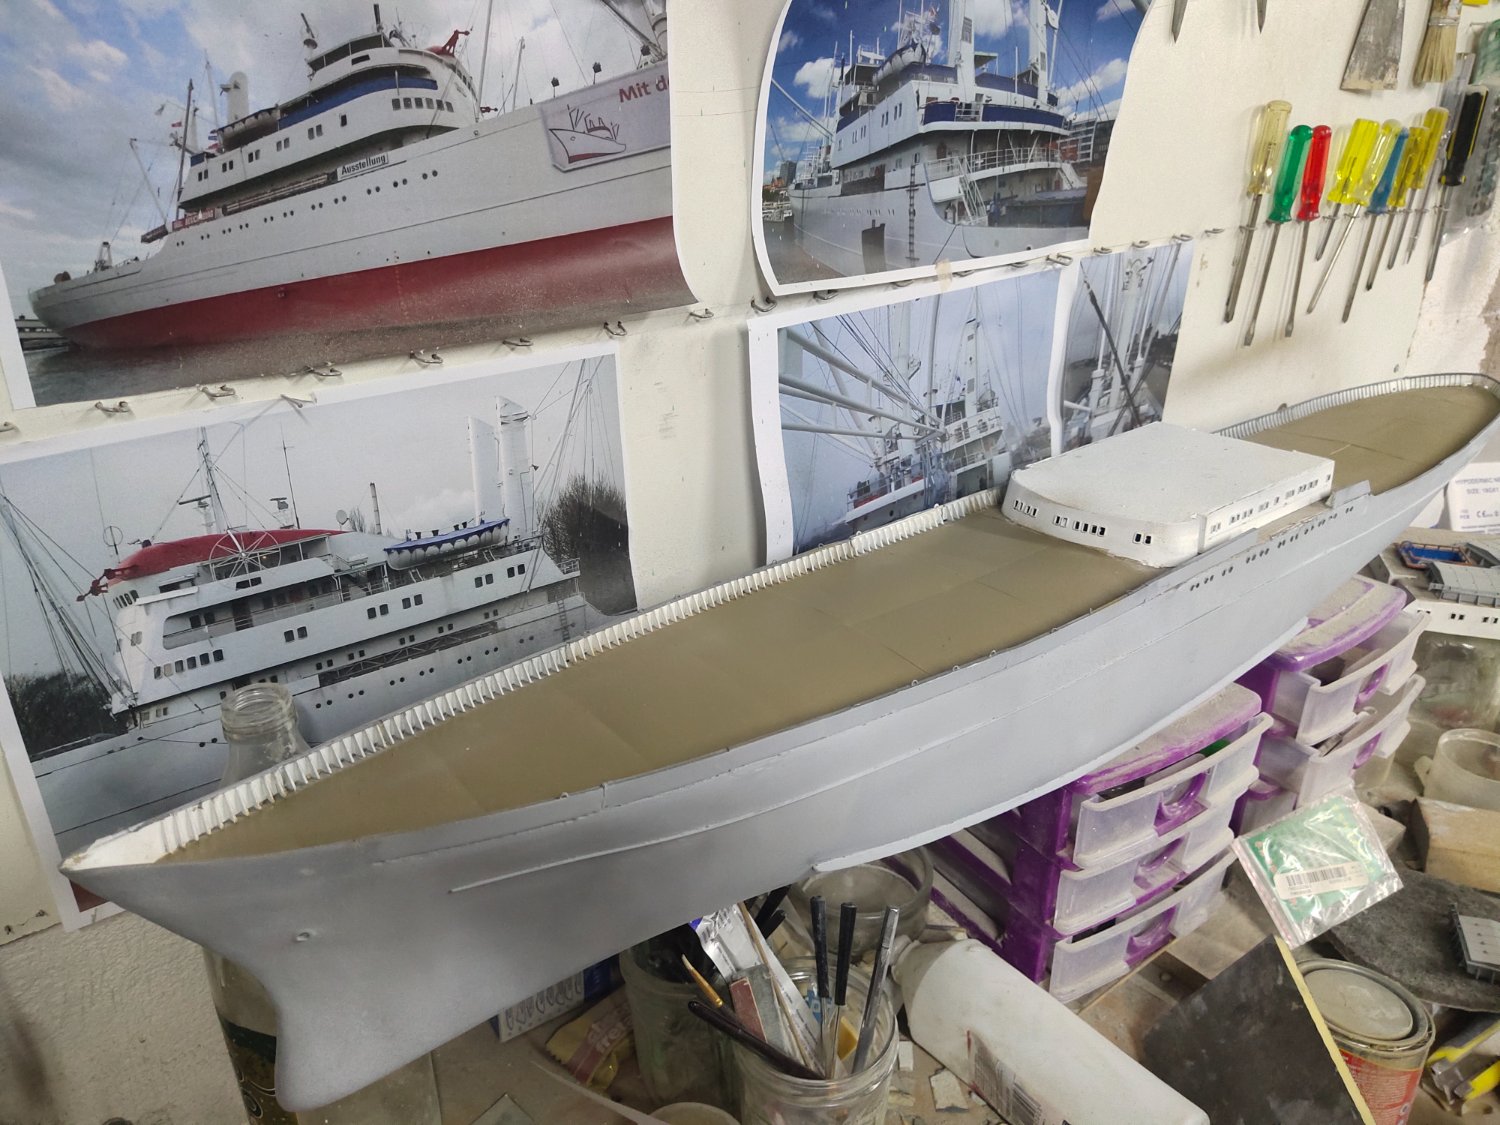
I took a piece of water ripples transparent sheet and glued to a wood base. The first attempt with Titebond failed then I used adhesive glue and worked
After priming the naylon surface I sprayed it with dark ocean blue

- Canute, Wintergreen, mtaylor and 1 other
-
4
-
Next phase was the painting of the sea bed. Boring to deal with airbrush I mixed dark ocean blue with green at 1 to 1.5 ratio. Took a piece of sponge, dipped in, then used it to paint the base. Sencond attempt with reversed paint ratio. Finally some brush work to fill in white gaps. Since most area would be covered by ice such a procedure is too much but I was in the need to experiment as always and see how it looks.

For the ice formation I got i some other materials except those in hand.
A block of paraffin. With icy semitransparentcolor plus some white paint may give a realistic look.
Ice flakes. Not sure if I use them, will see.

Finally while its Christmas and stores are loaded I accidentally found this on a nearby toy store: ice rocks. For a 1,5 euros a pound it was an easy choice.

Perhaps I may have stacked up materials for all my icy dioramas in the future. Perhaps not.
-
A last 2021 update.
I finish the main mast while added the rear radar. Added antennas, handrails and few other. Tomorrow will finish and start rigging. Happy new year to all
- robdurant, KeithAug, GrandpaPhil and 2 others
-
5
-
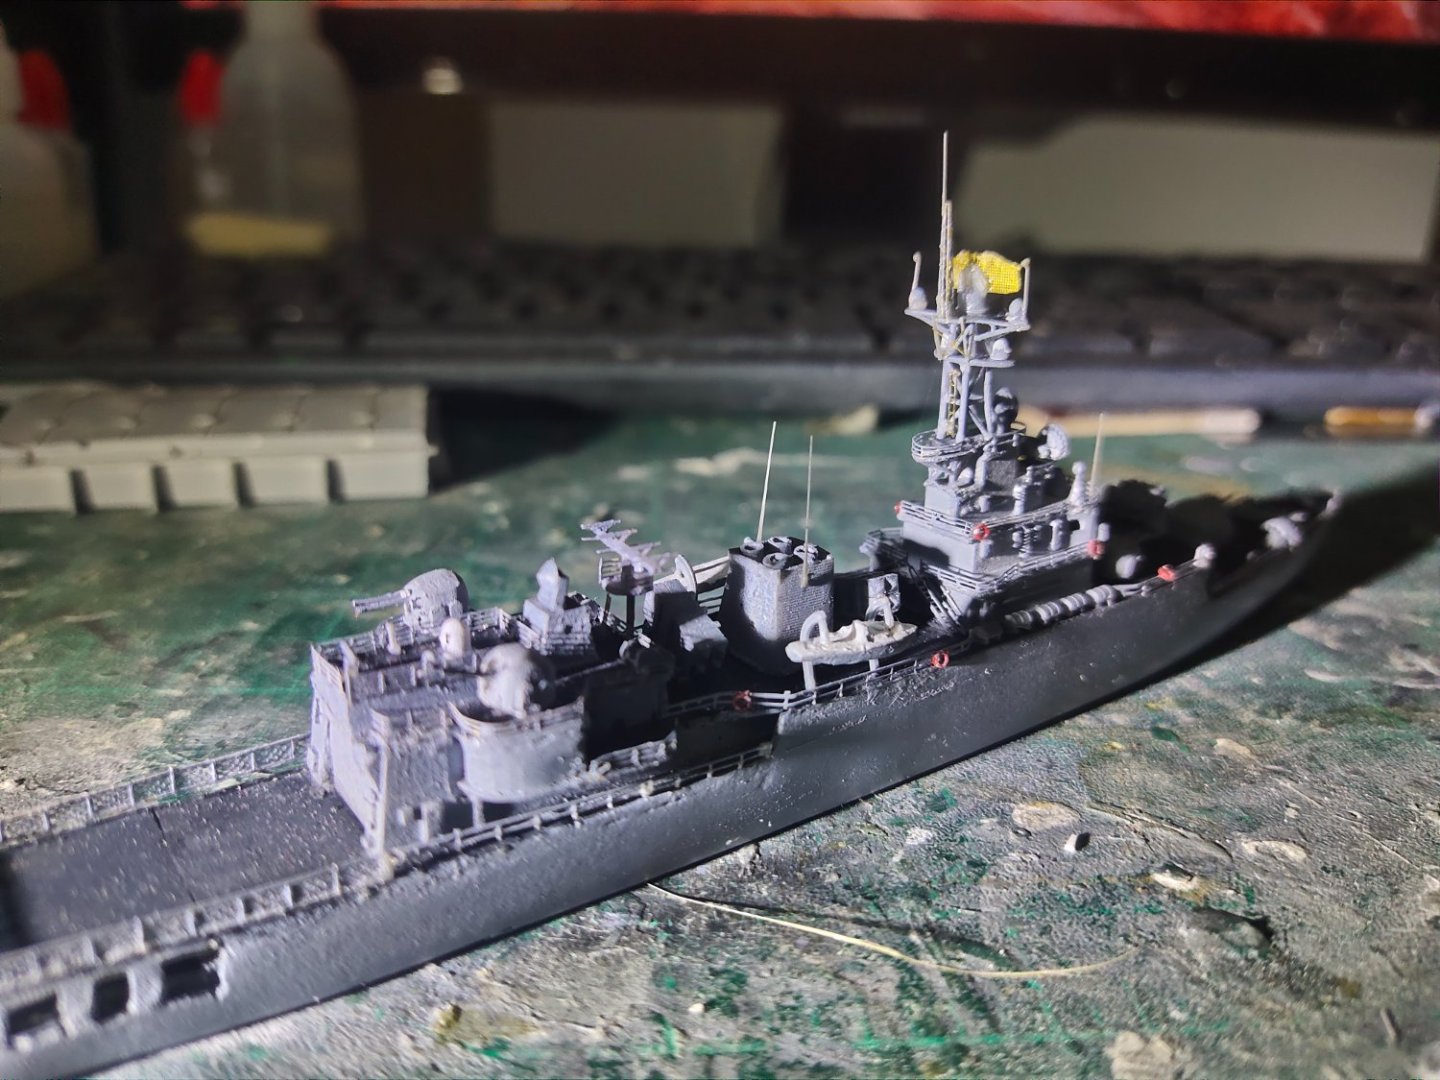
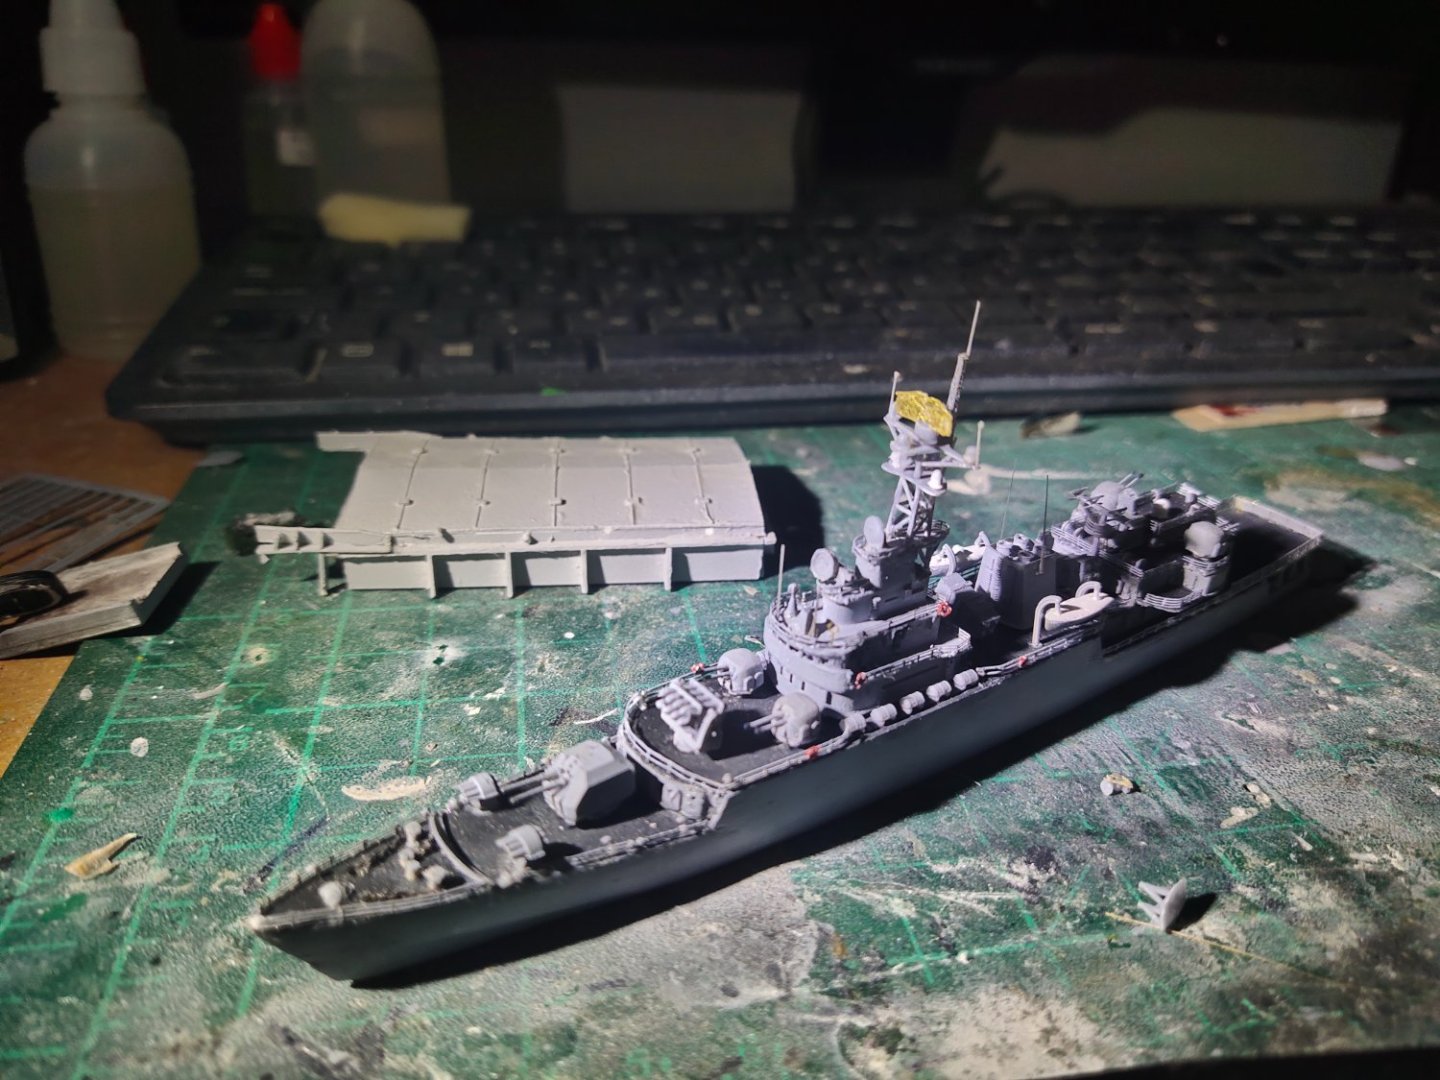
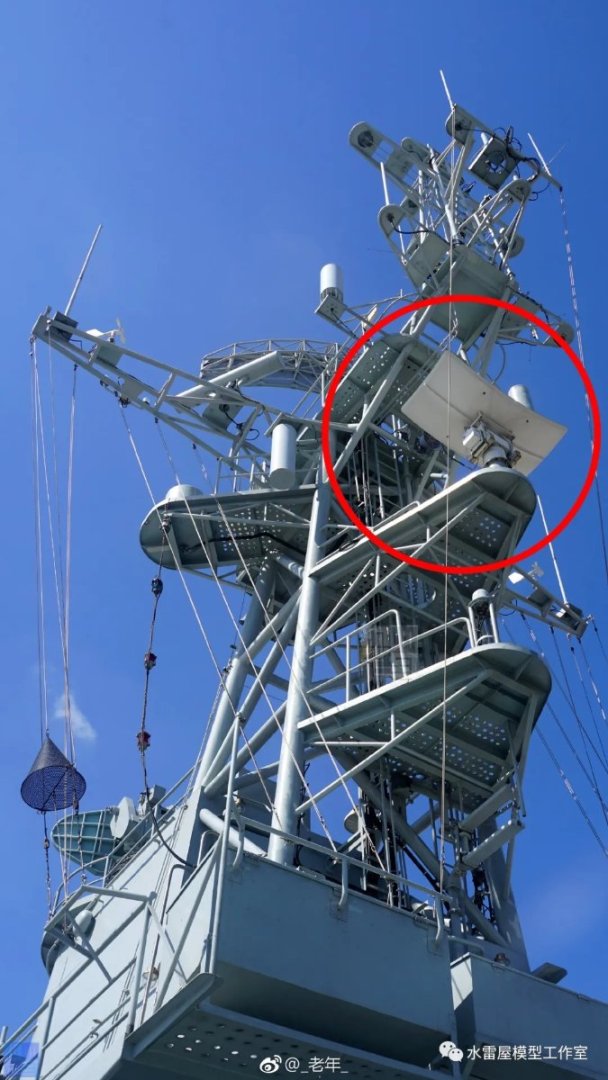
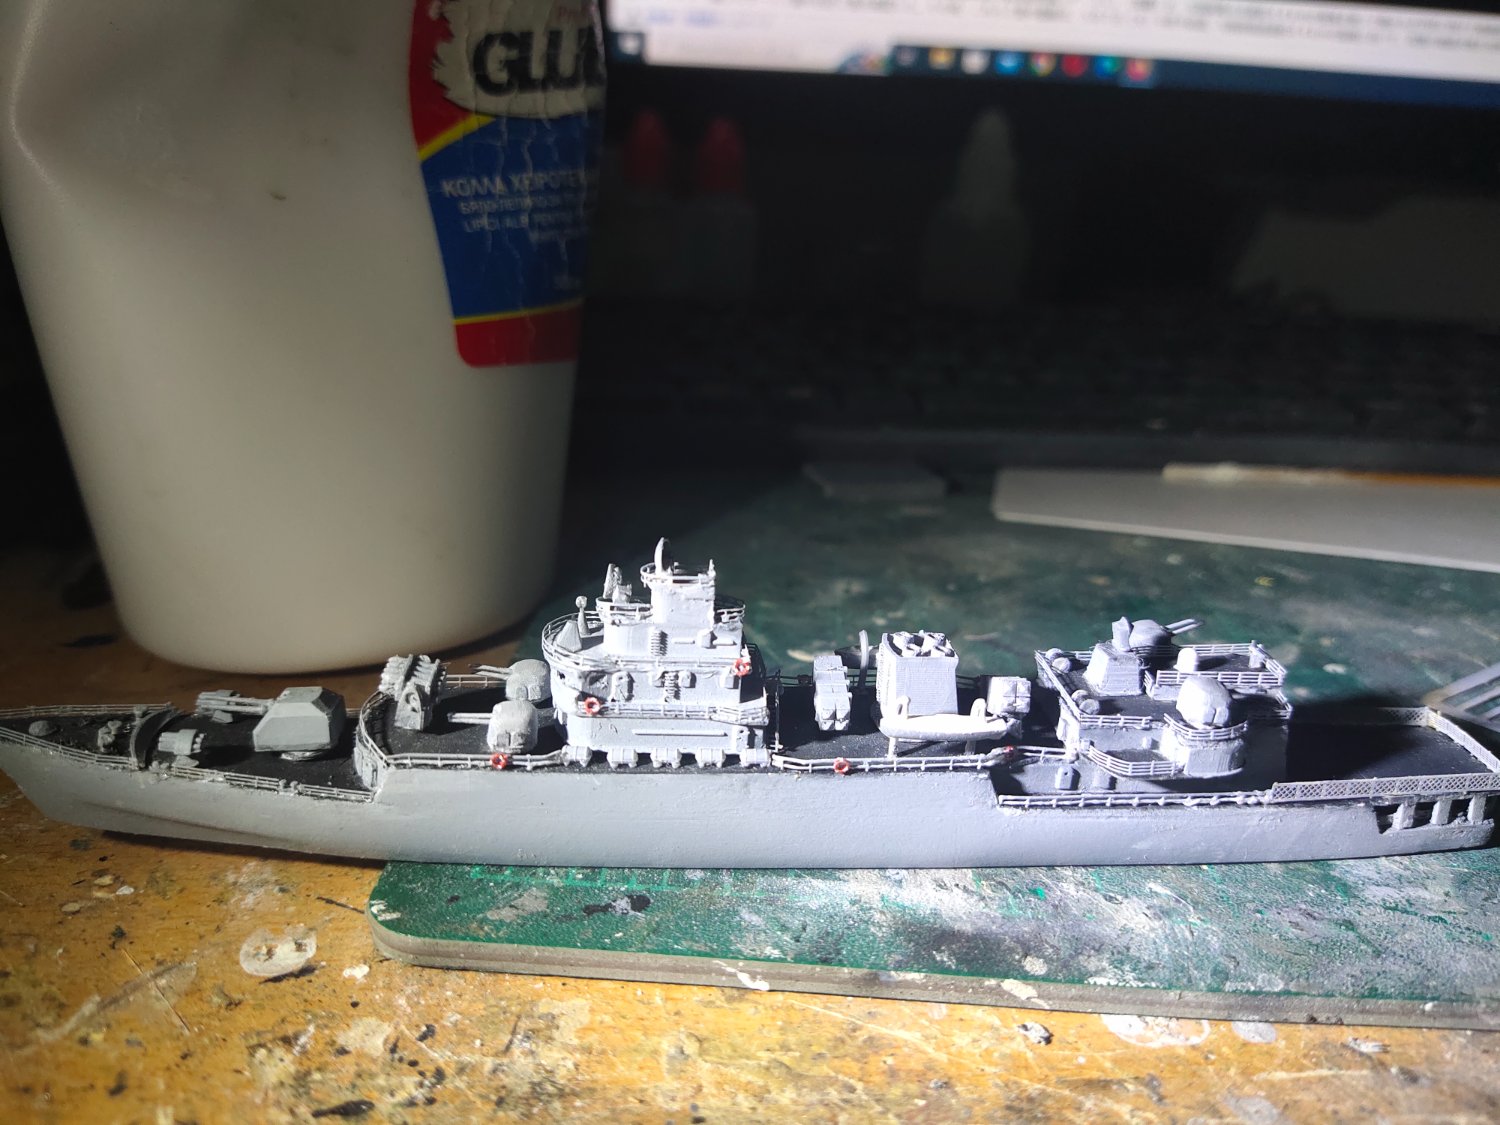
Α small update on the main mast as the last part was added. In a larger scale it could be a model its self with such complexity. In 1/700 is much simpler. I need to add the main radar. The most similar item in my stash is the SPS 40 but proved too big to fit on the platform. So I look for alternative.

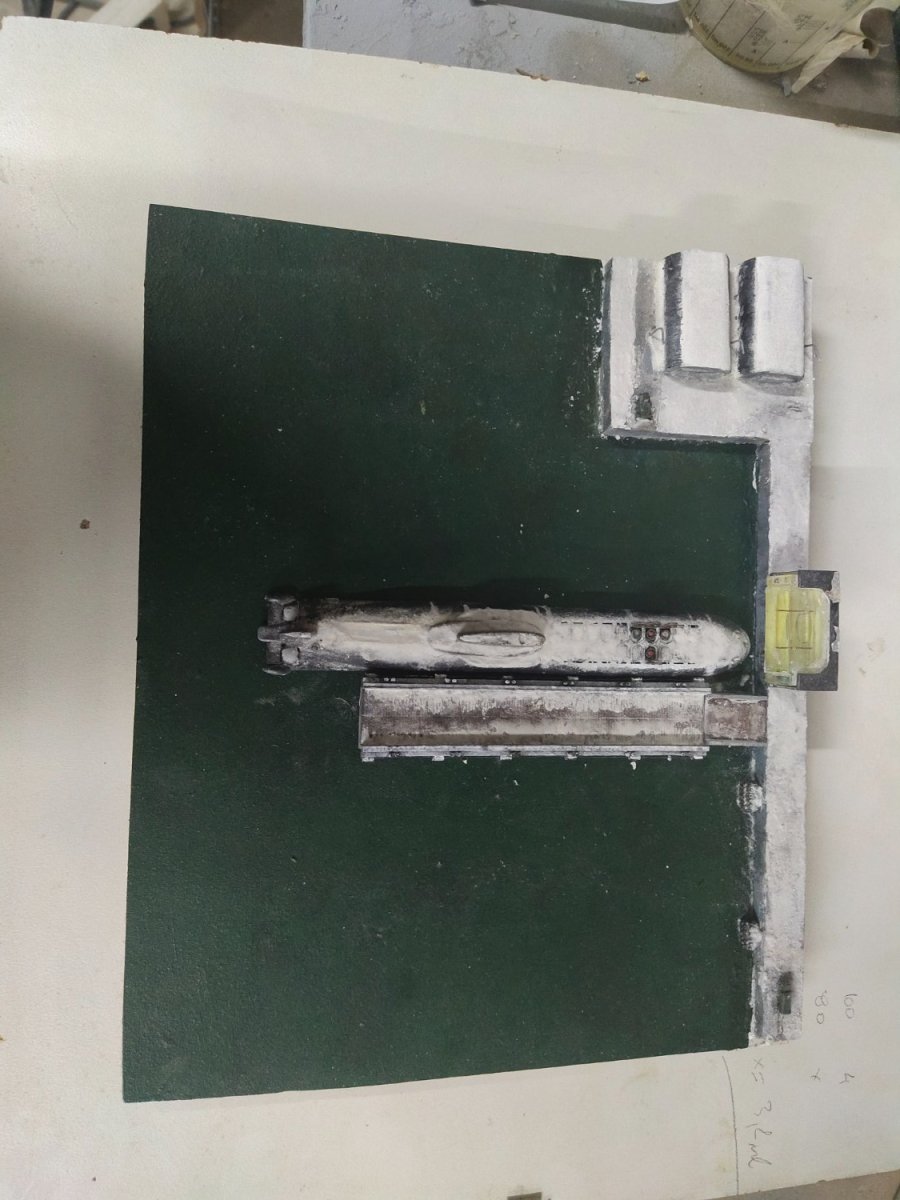
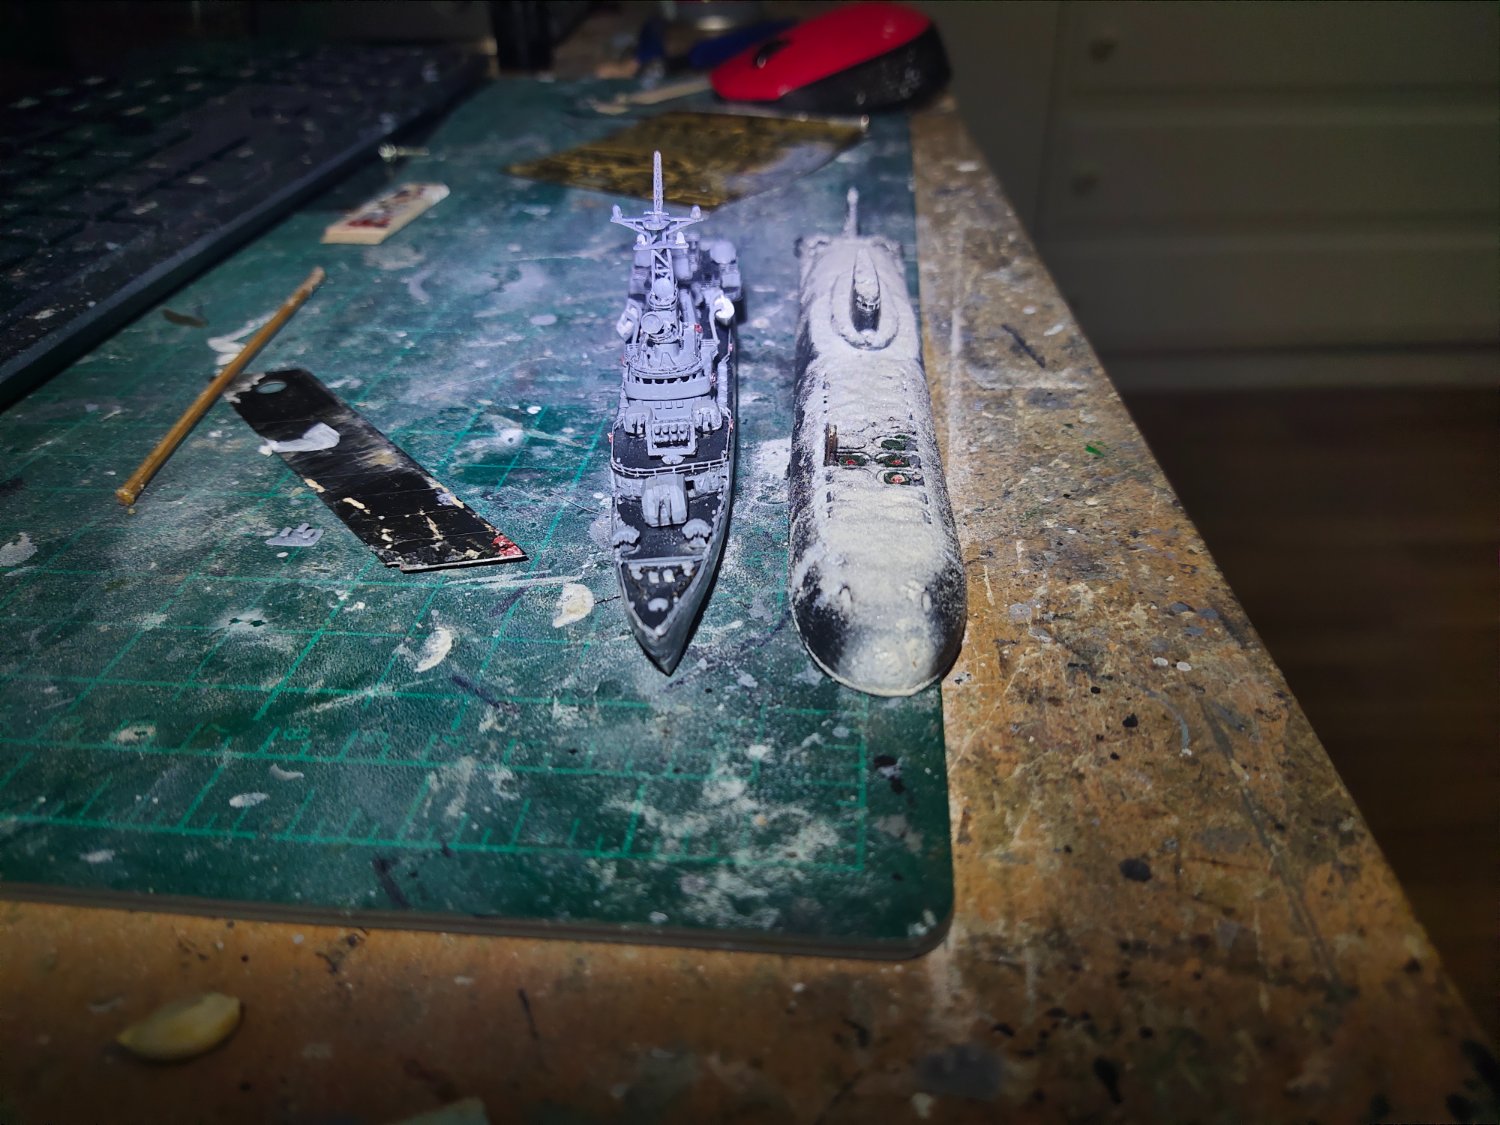
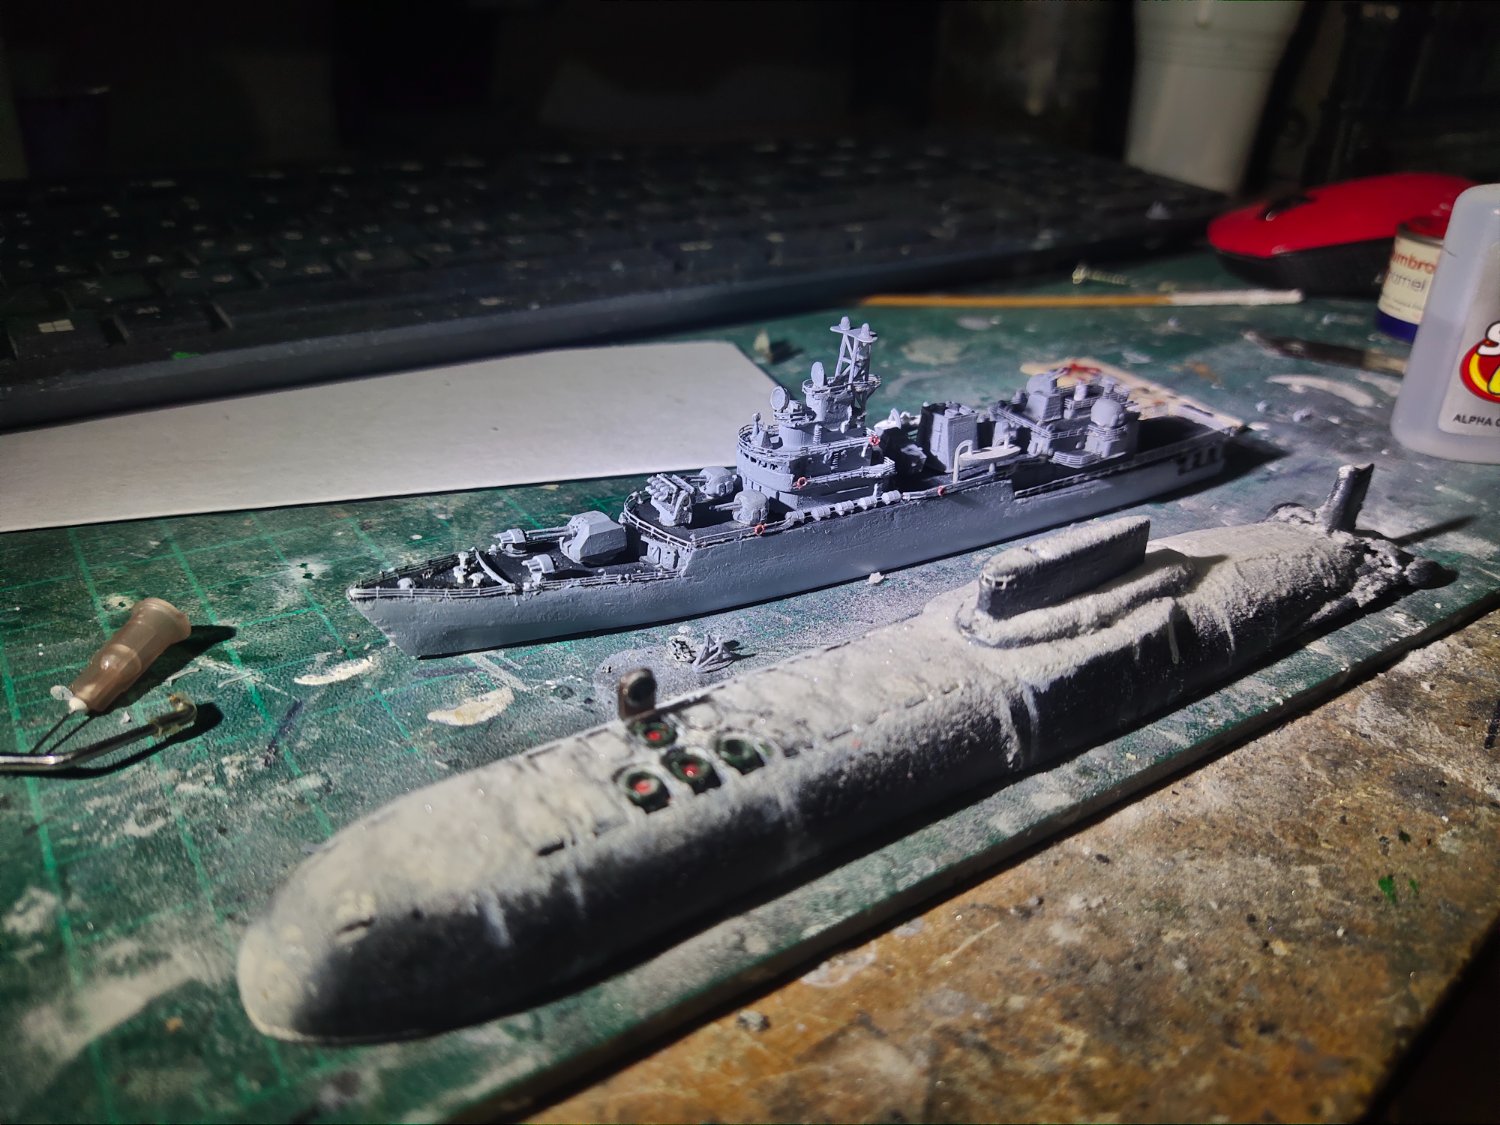
A shot with a Typhoon class sub. This is in 1/950

Once again thanks for the support on this tiny unfamous project.
-
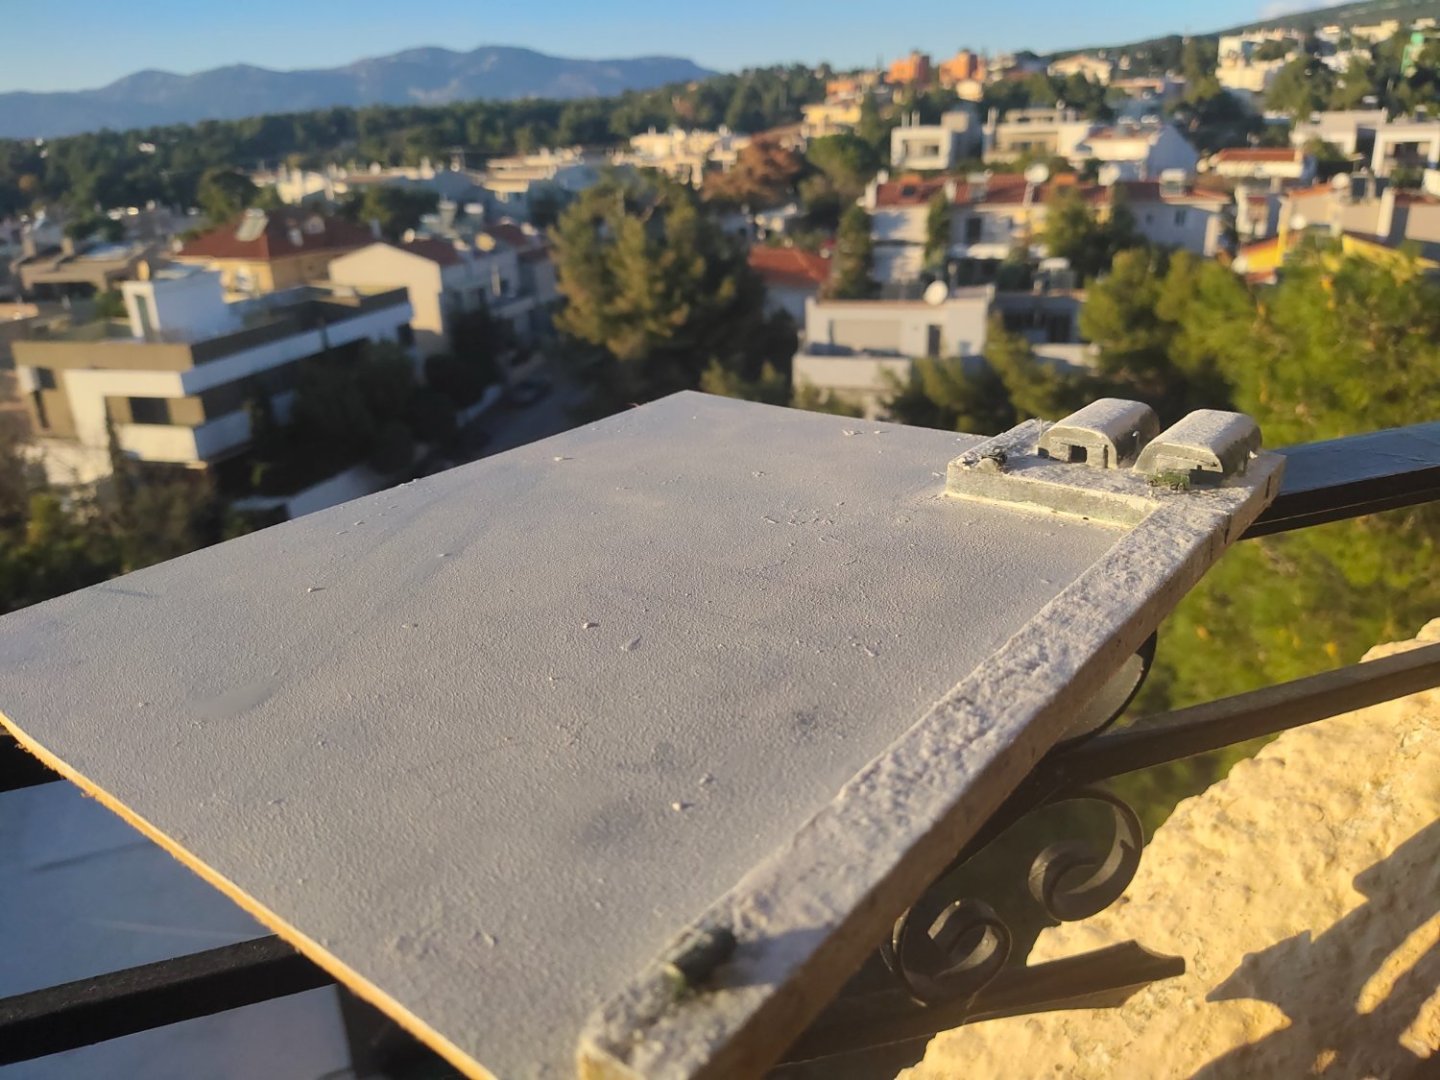
1 hour ago, ccoyle said:
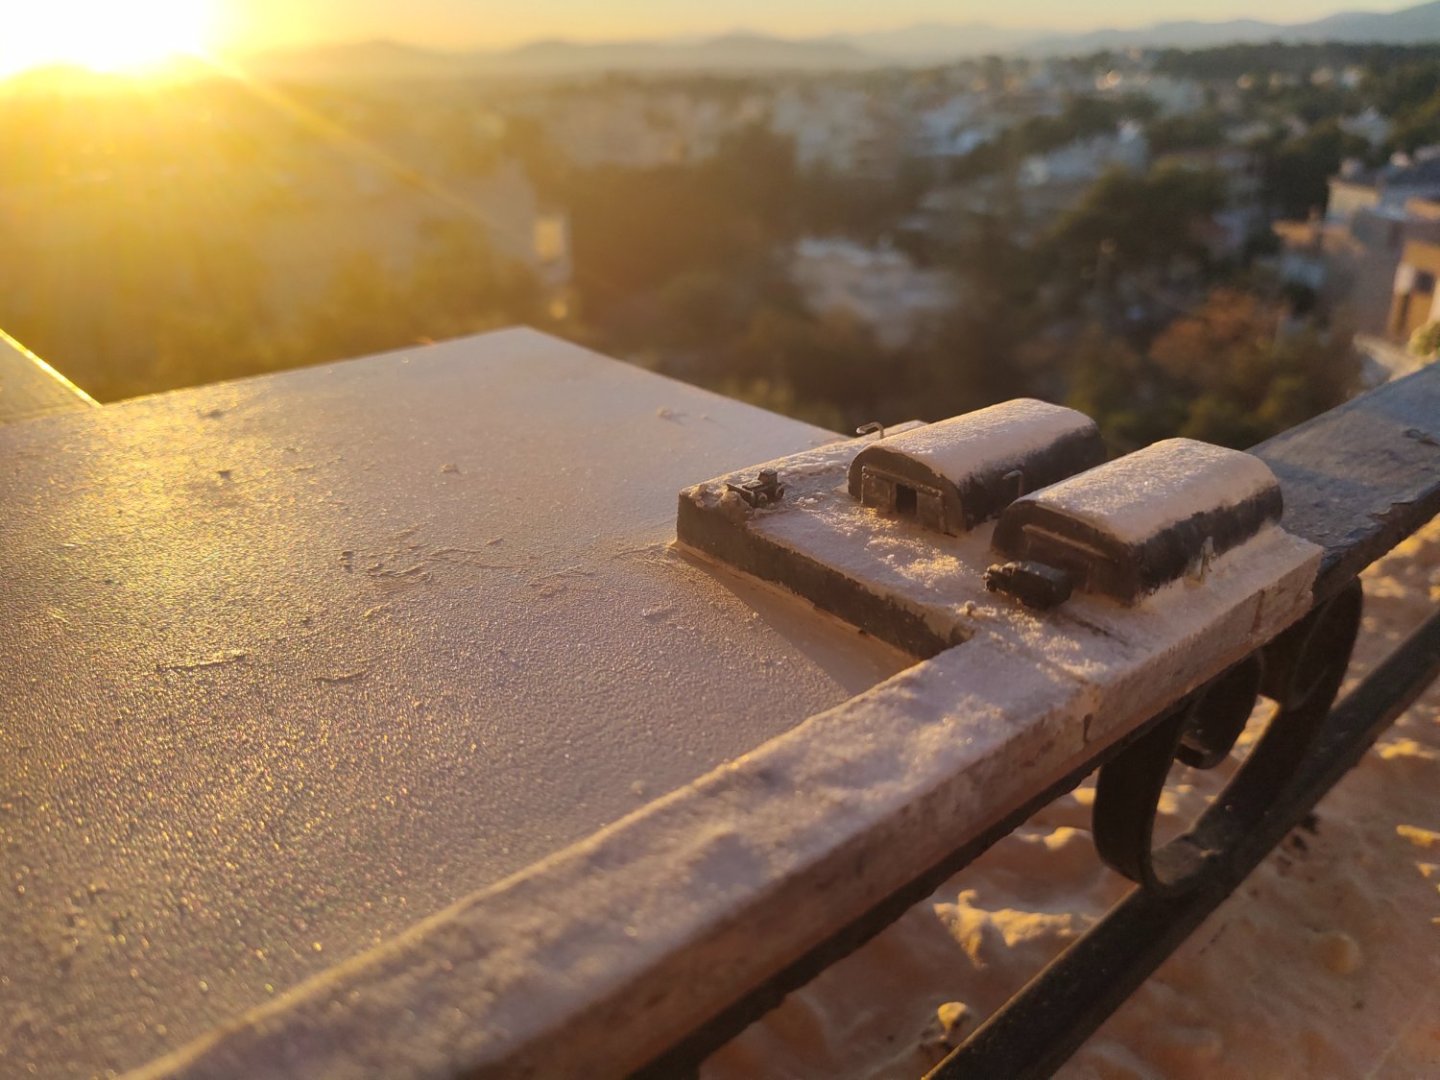
Such an interesting contrast seeing your snowy diorama out on your sunny balcony!
Thankfully It didn't melt.
-
-
-
-
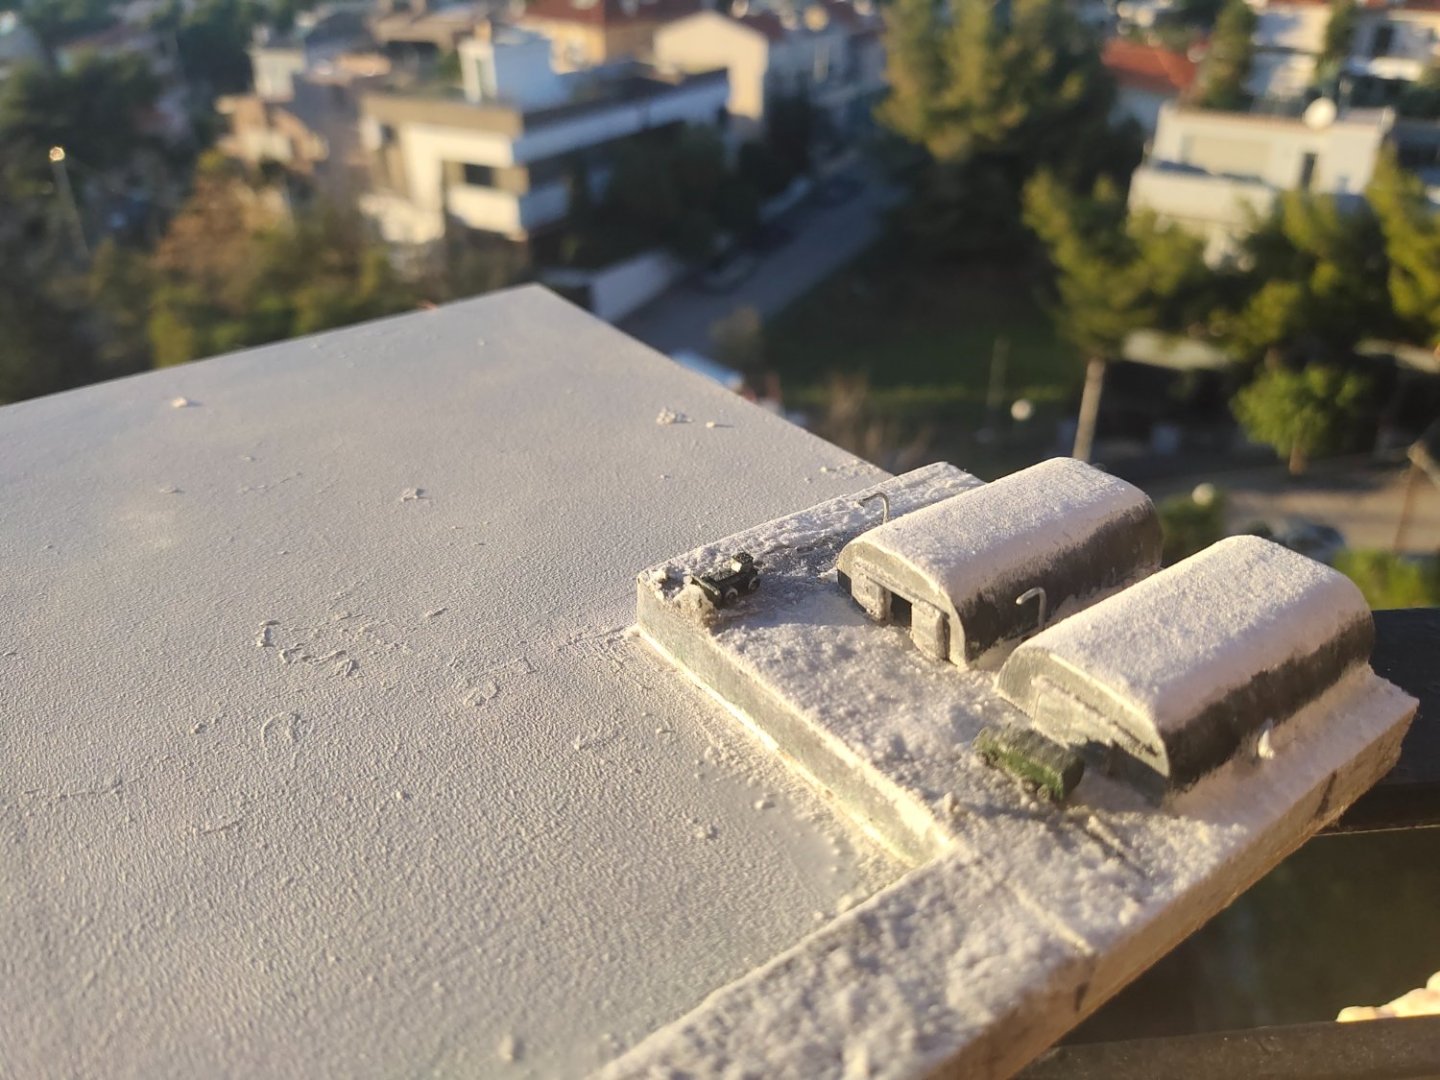
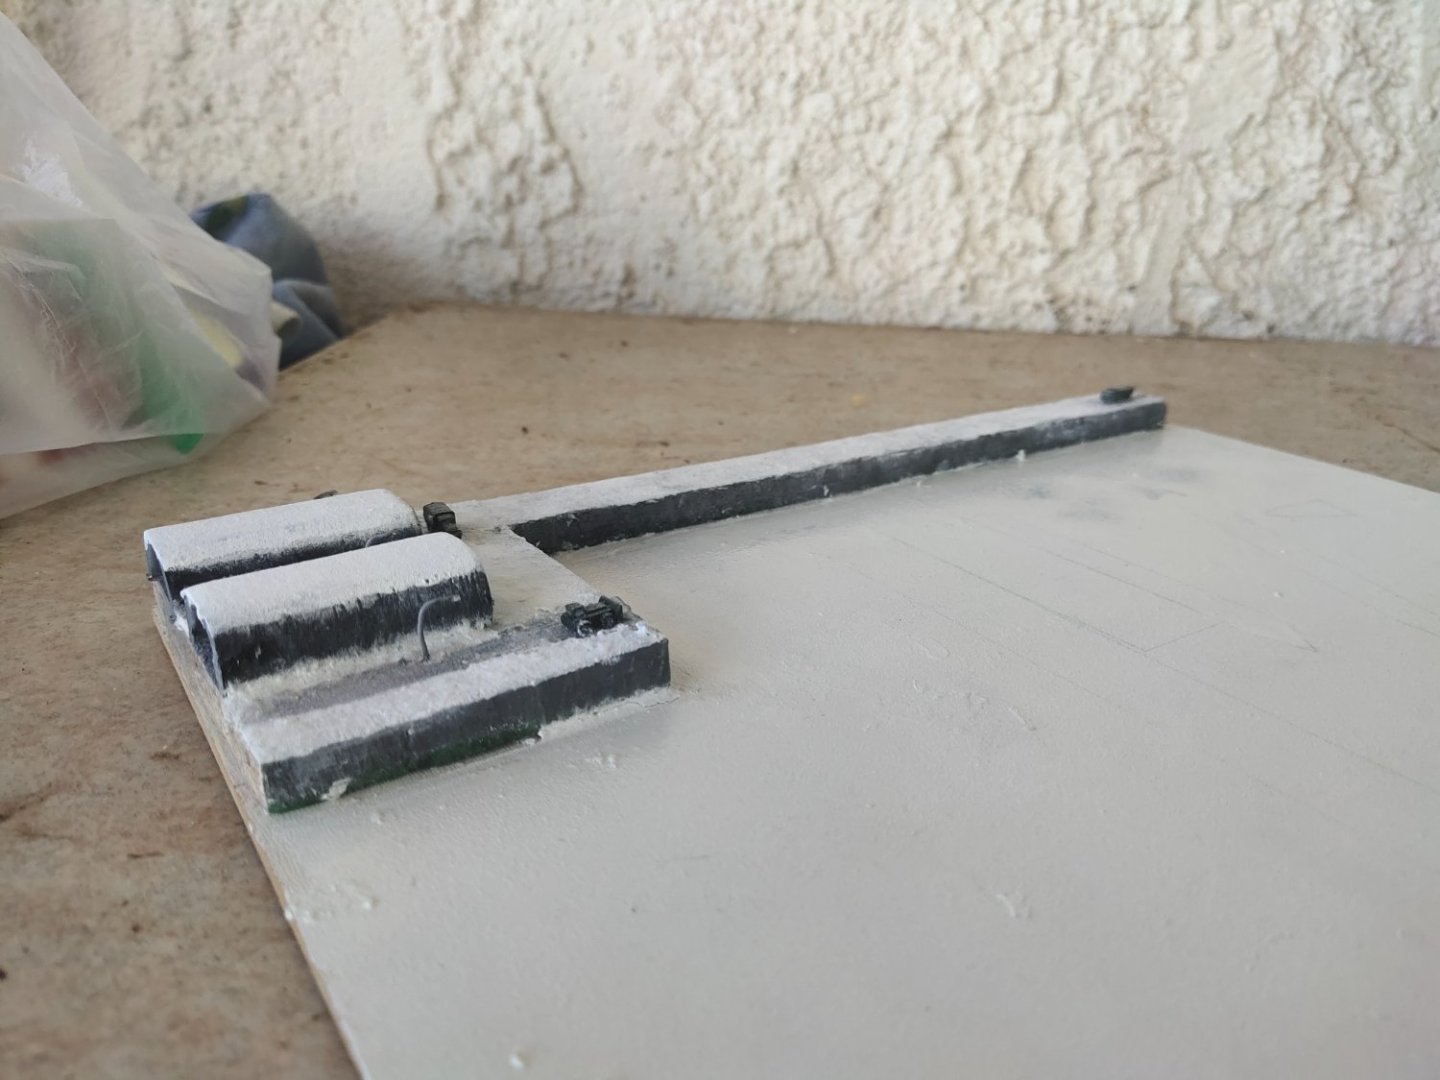
I thank all members for the encouraging comments and likes. Therefore I decided to step up with the details.


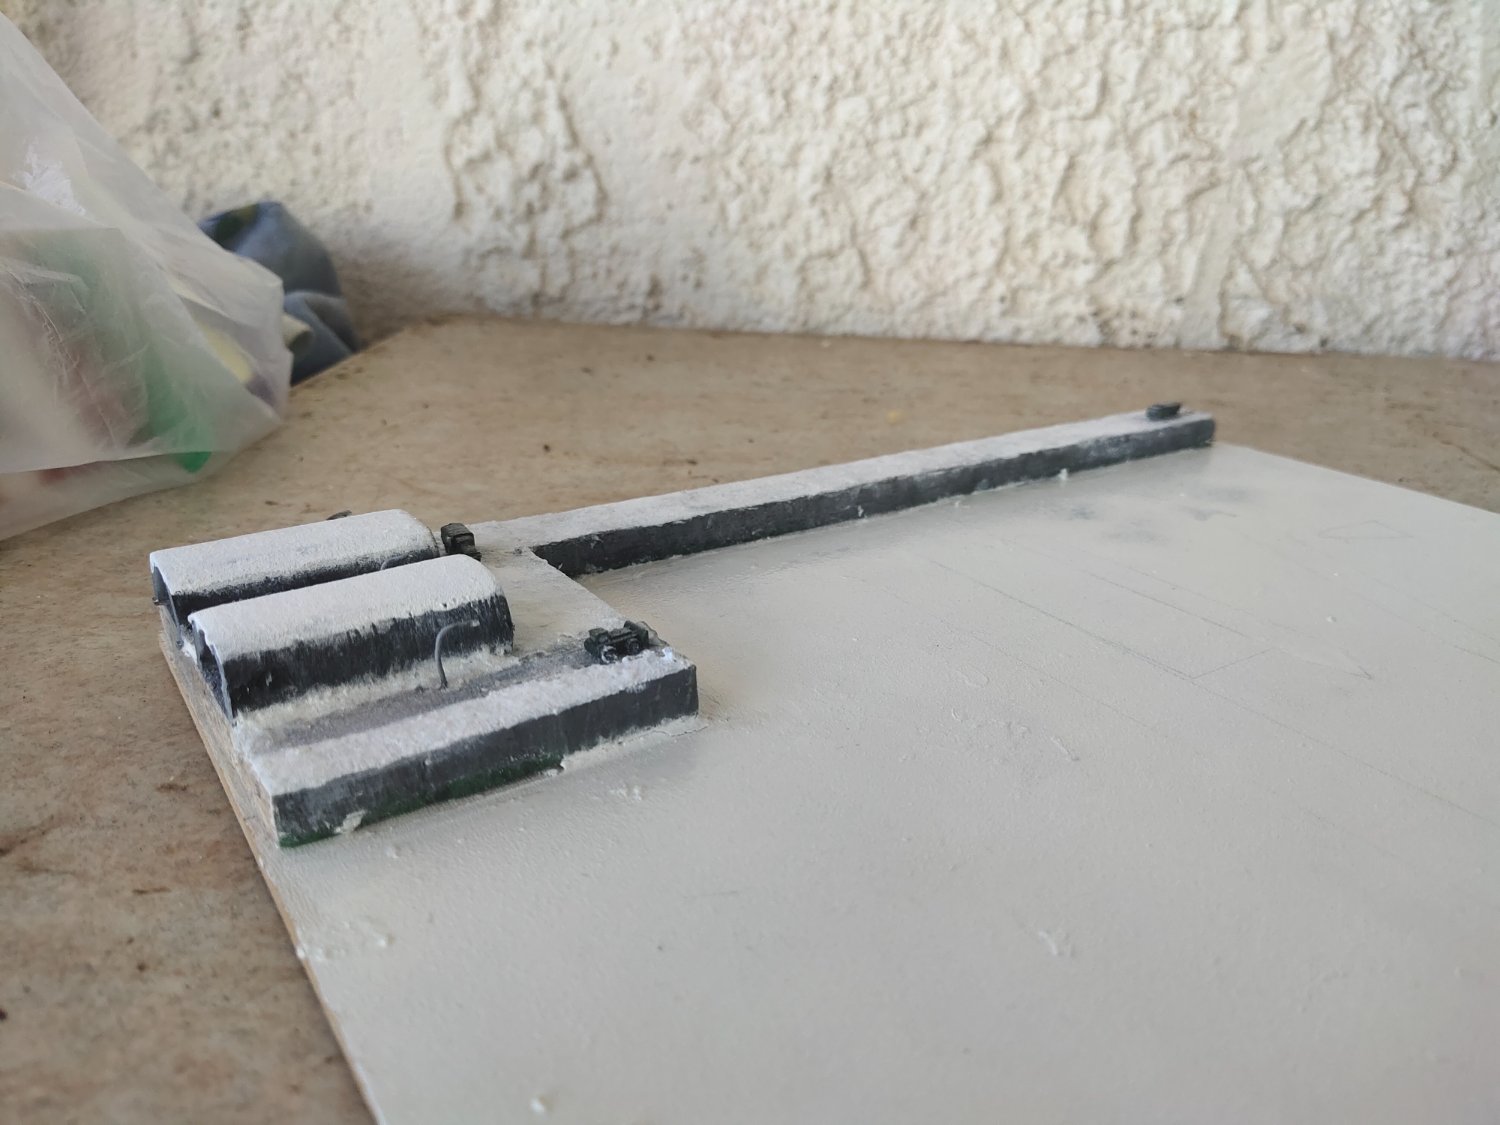
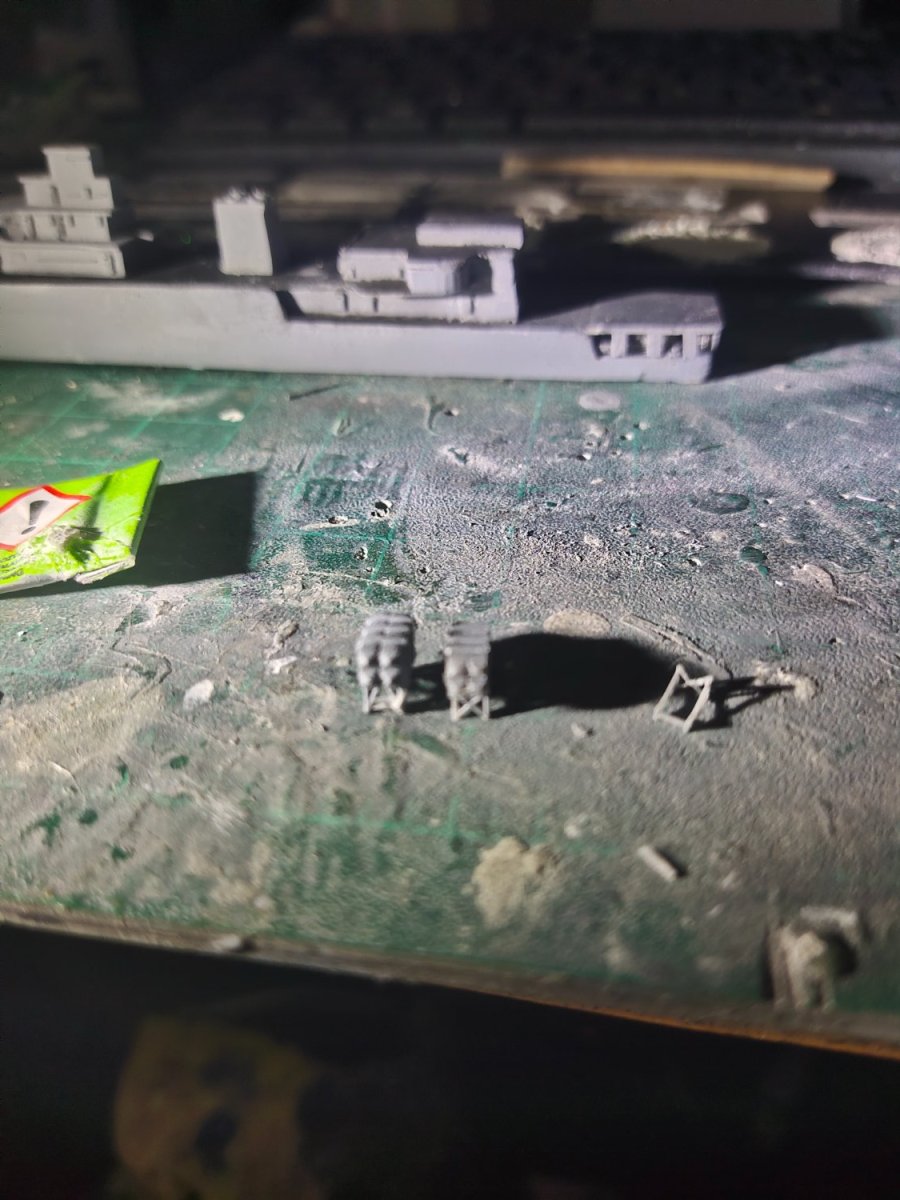
Radar base and mast is not the only addition. I also printed and fitted some air vents especially at the bow. 2mm in height each, you can see at the building plate along with radar parts and some test print life rings in 1/350.
- GrandpaPhil, Prowler901, robdurant and 2 others
-
5
-
-
-
I put some white paint in most areas then PVA glue then microballoon sprinkle. There should be a machine that could spread it evenly like the one they use to coat with grass, train layouts.
Today its a shiny Christmas day with 18 celcius so i took some pics on the balcony on shadow and on sunlight

-
-
Thanks for the encouraging comments and likes. I need to experiment a lot because it is the same materials that will be used for making sea waves.
I decided to add some motion but figures at that scale is out of question. So I added some vehicles. A light coat of gel was given, then microballoons sprinkled over , thicker in some places, less in other. A bit of white glitters added, I like the shinny effect on light.
Some putty on the base to fill a gap.
Gel is not dried yet but I couldn't wait for tomorrow pics were taken today.

-
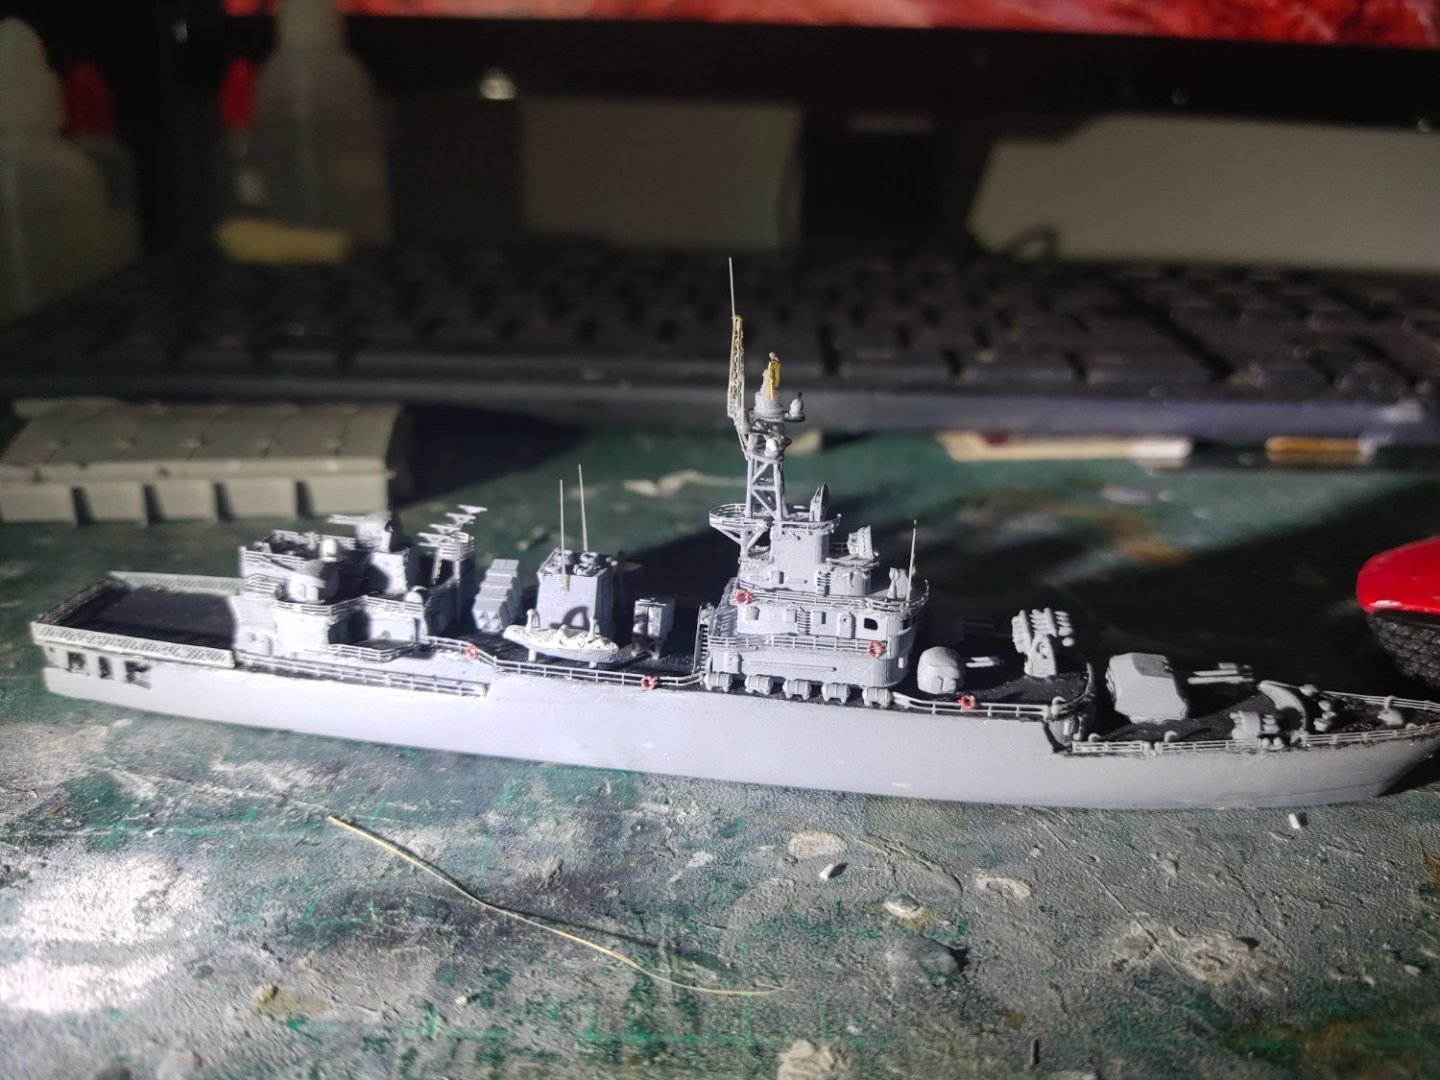
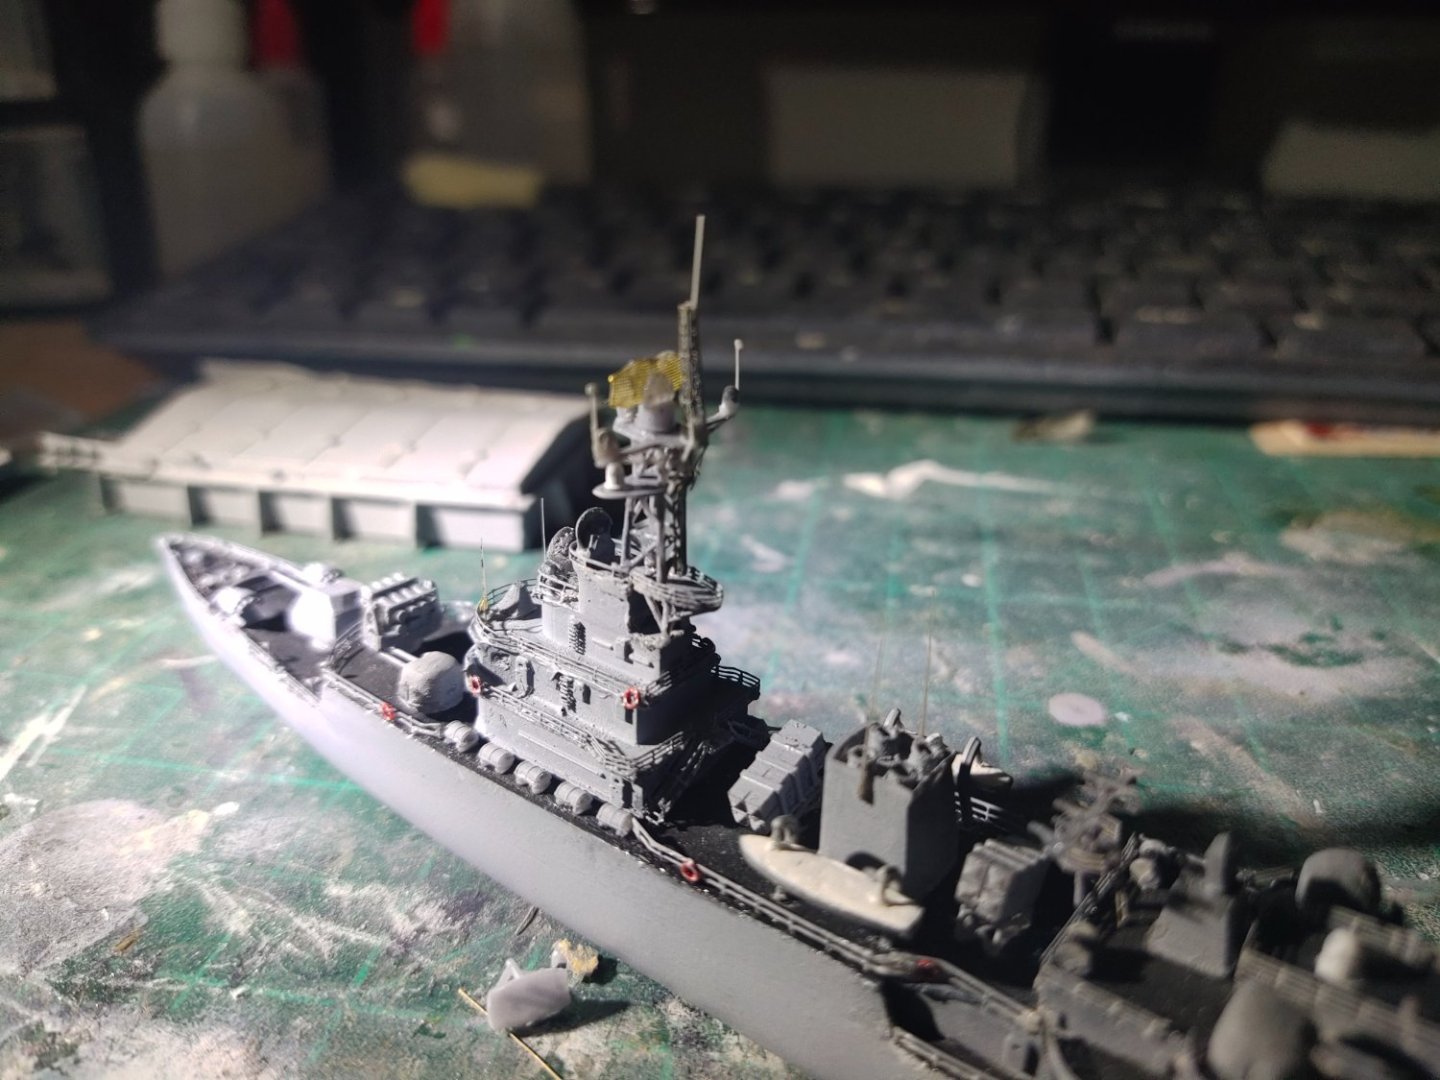
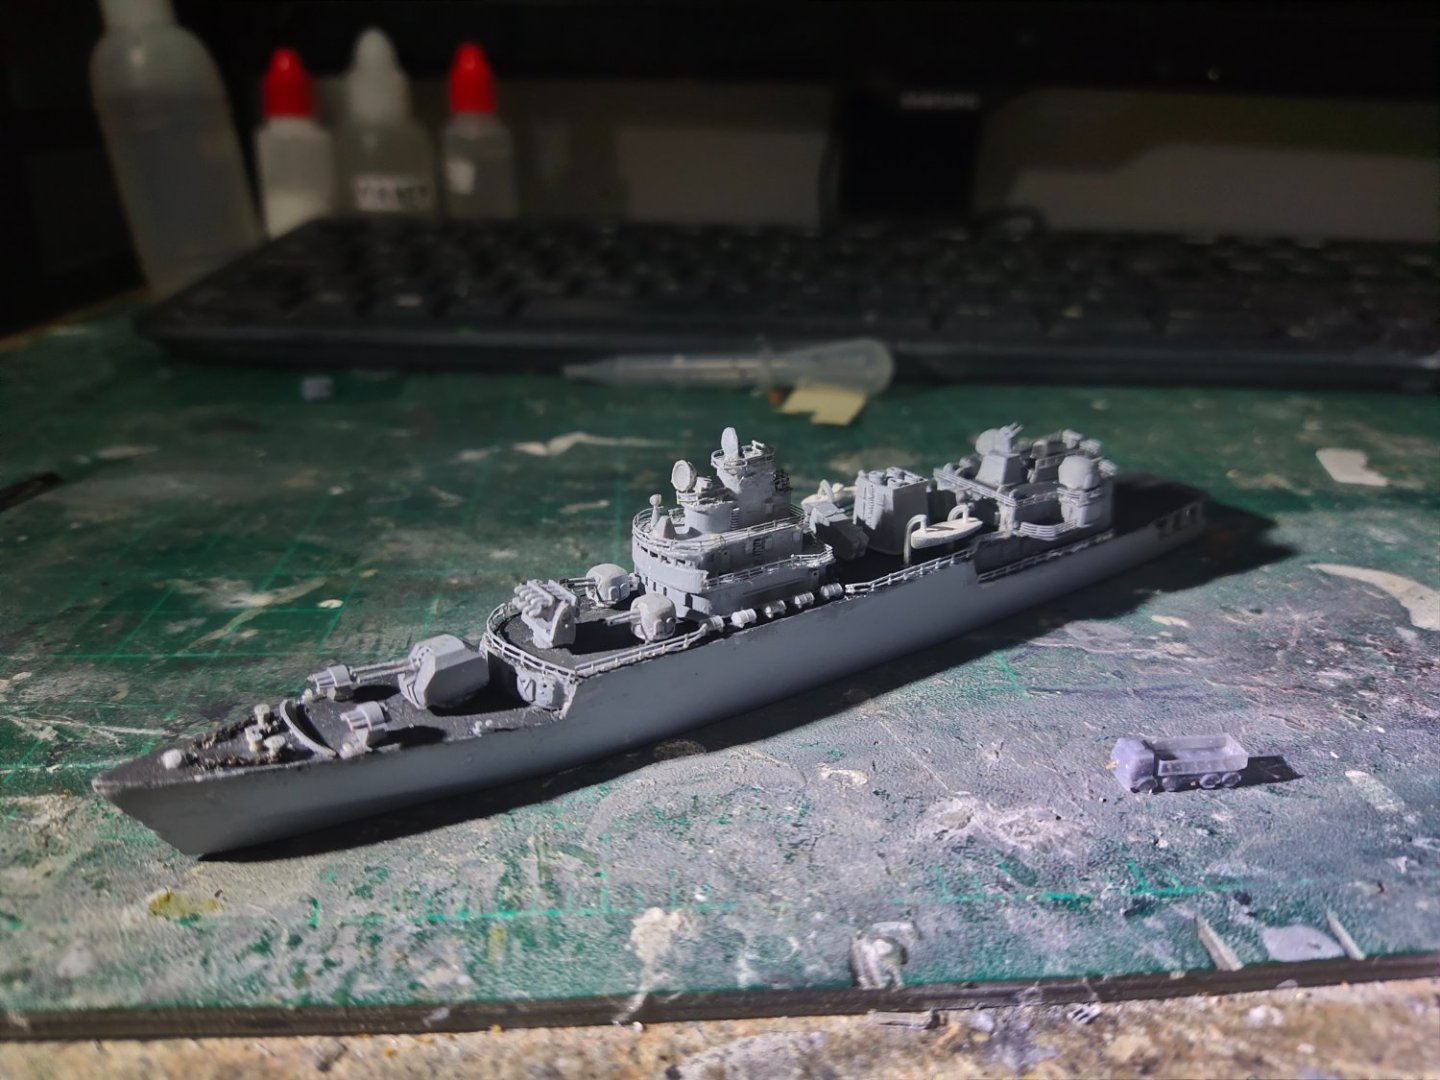
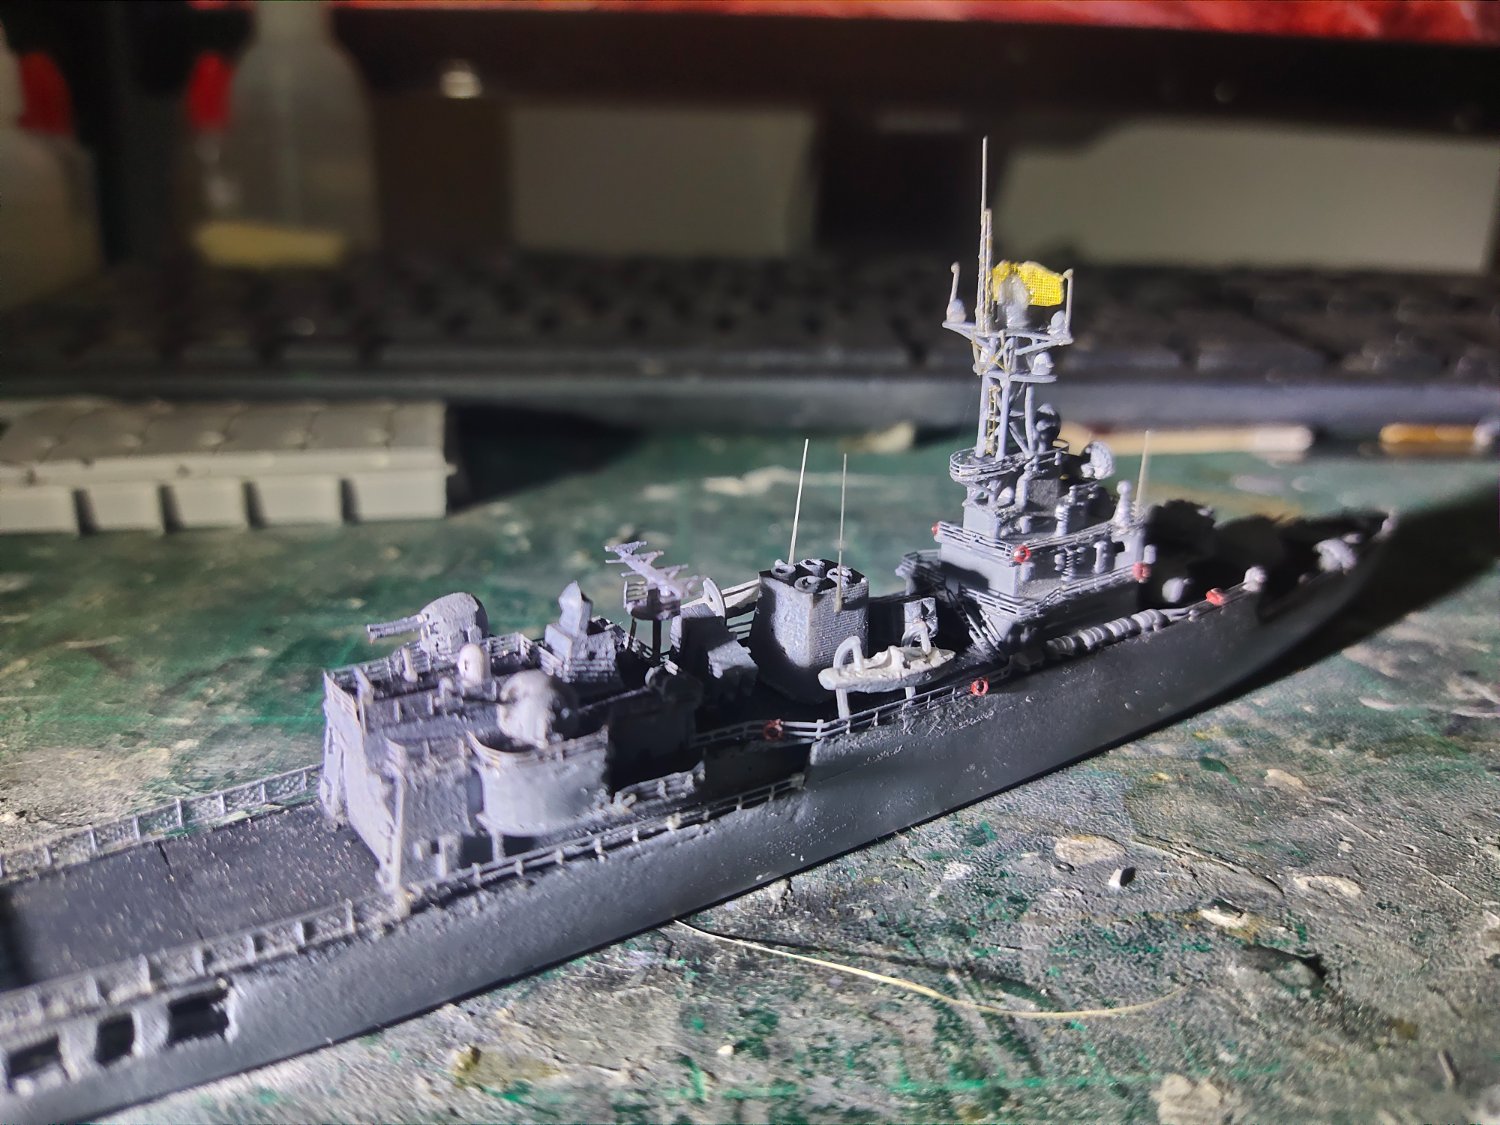
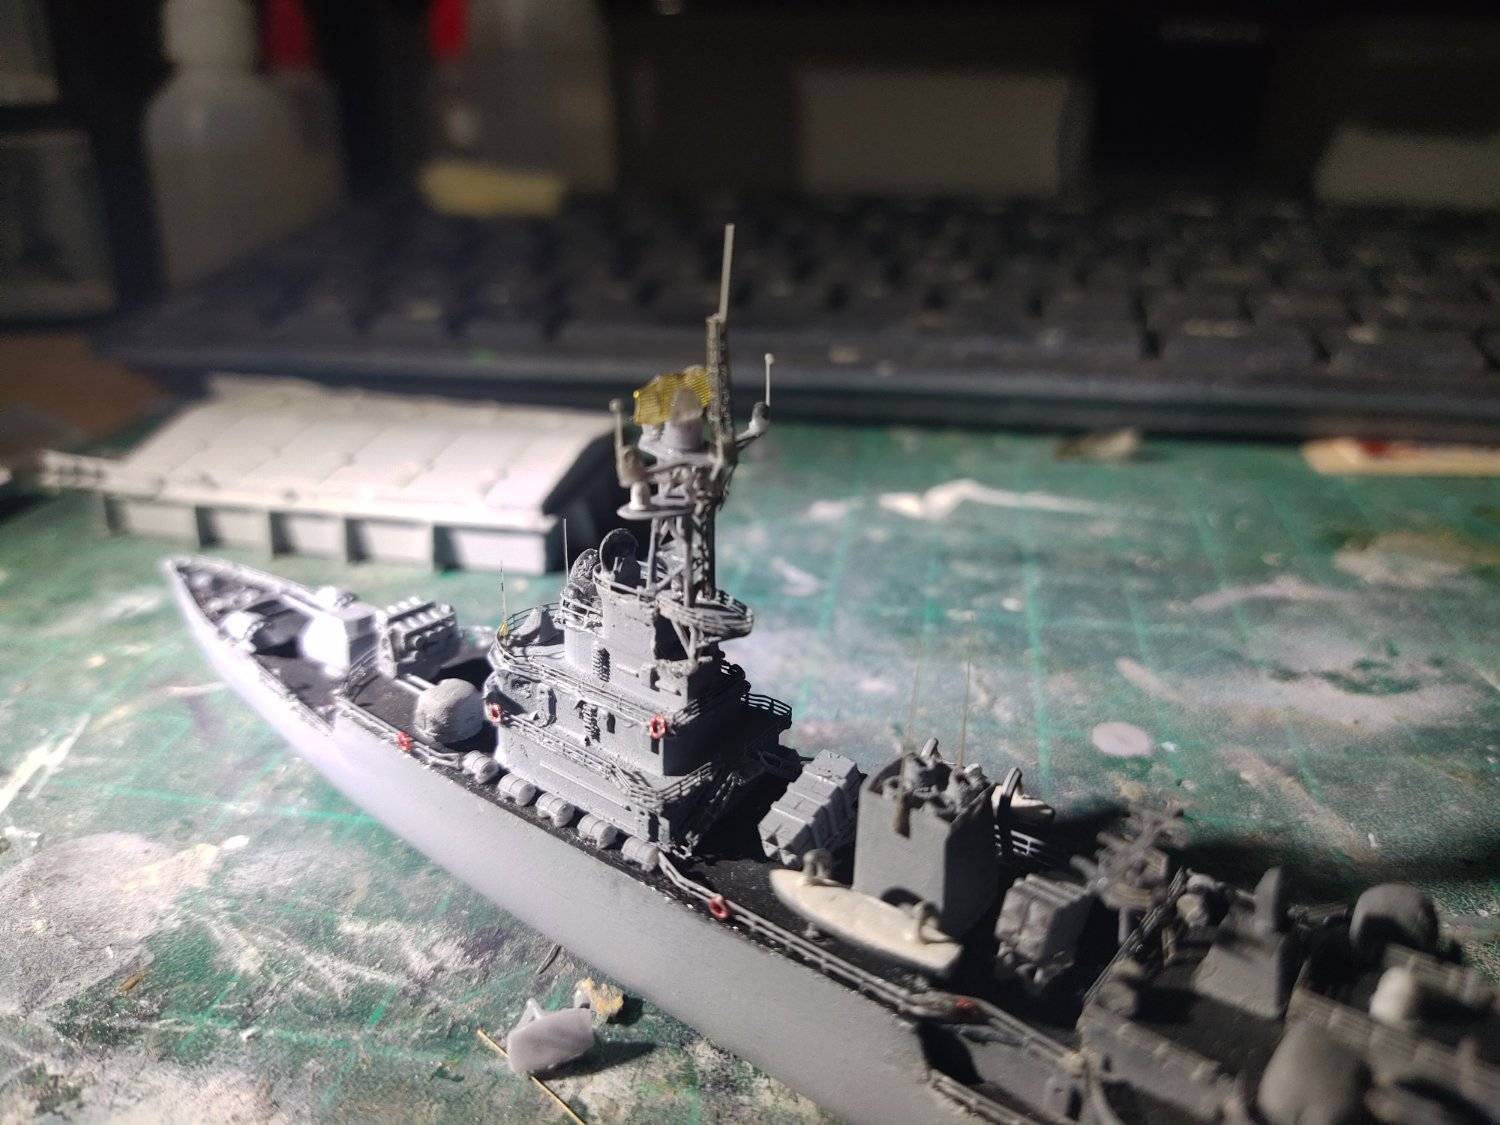
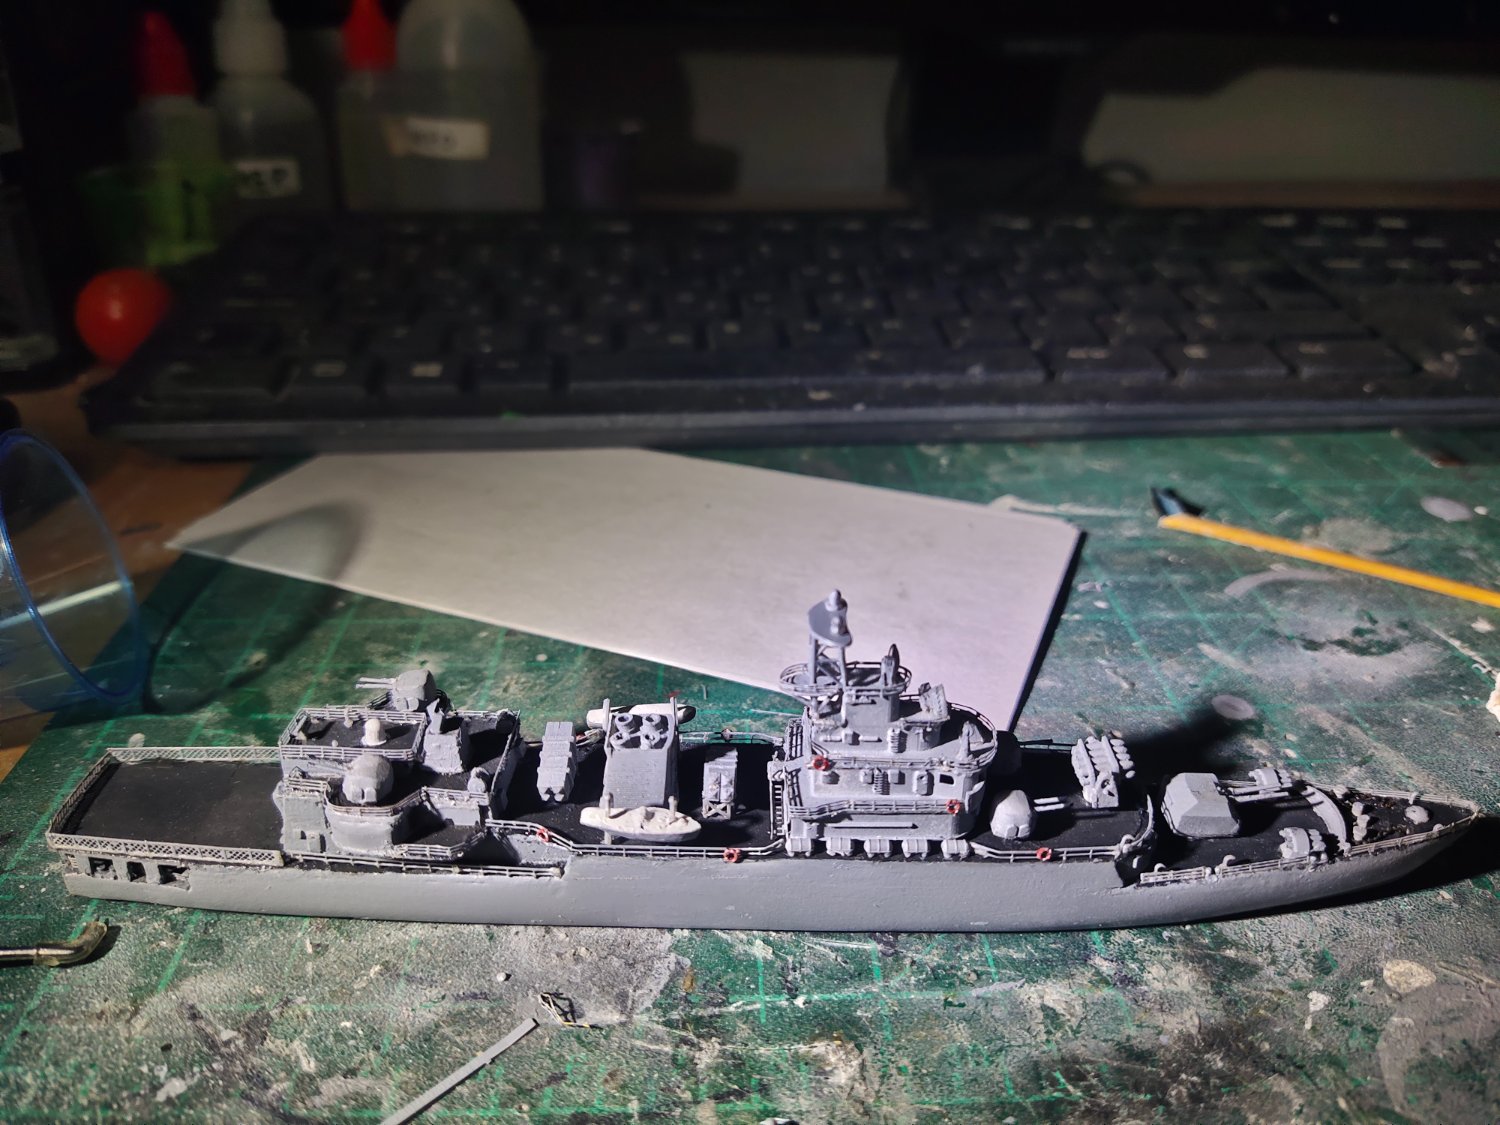
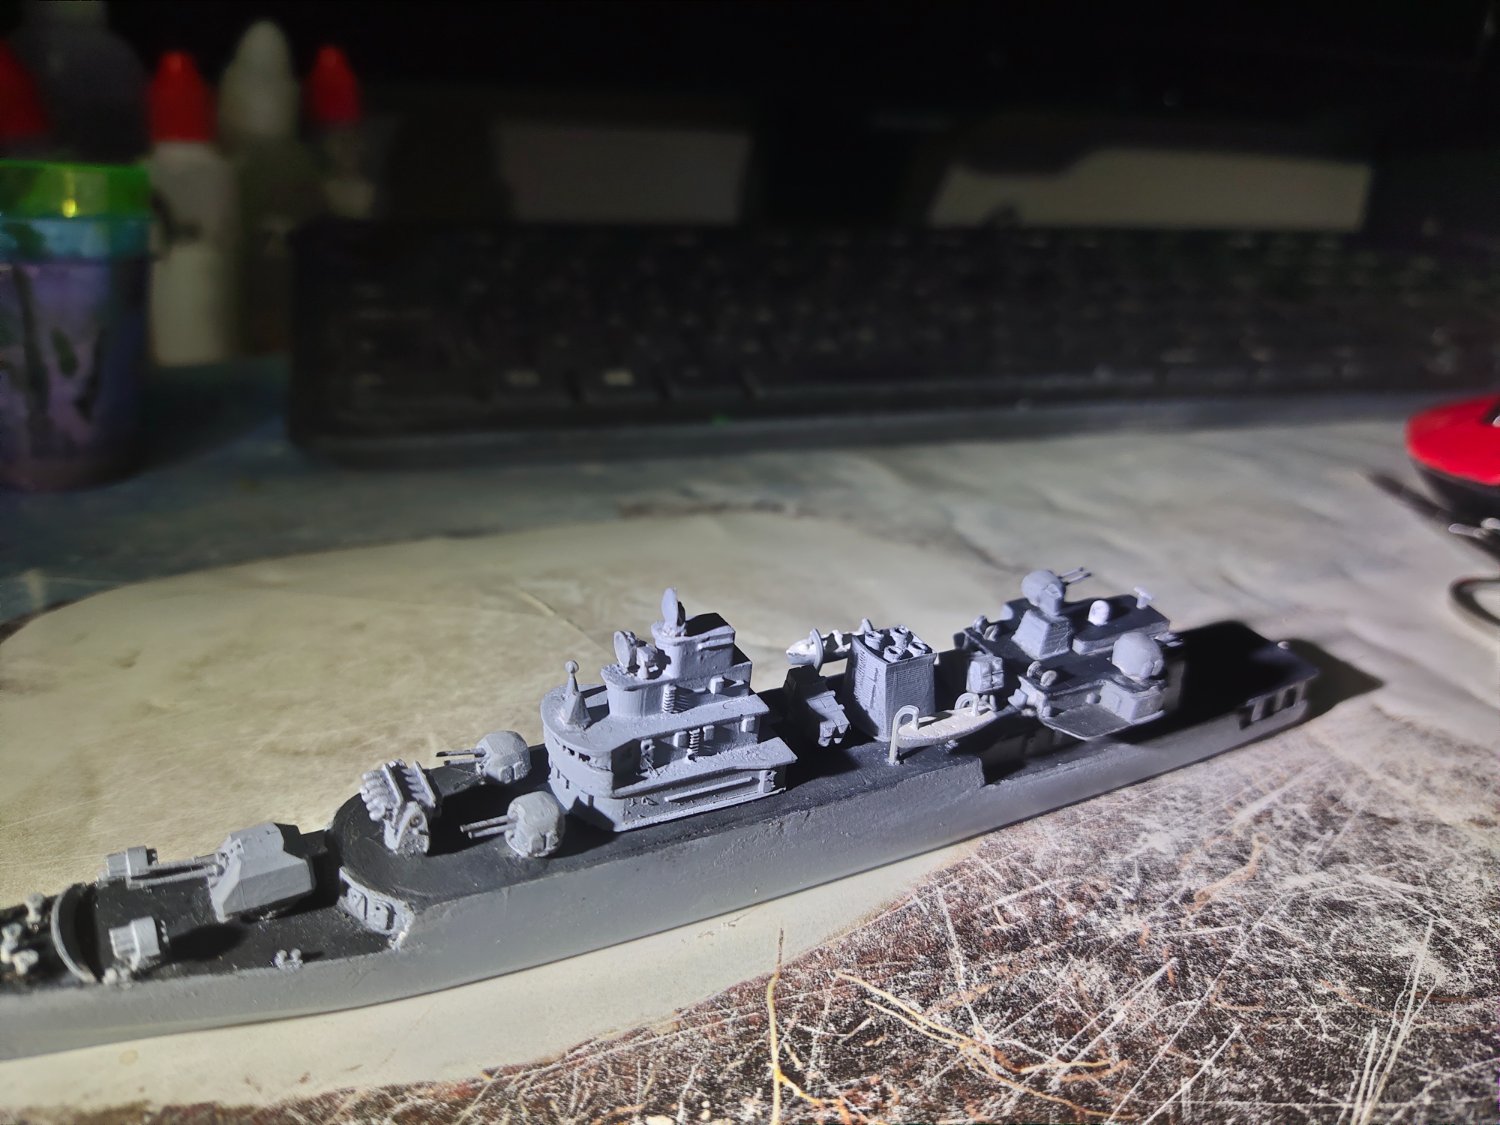
I almost done railings today. More work than I estimated. Fortunately there won't be any in my next project. After installing them I had to check carefully for shiny brass spots and repaint them over with tiny brush.
I also printed the rear type 517 radar but it will be placed upon completion since it looks quite fragile.


- GrandpaPhil, Canute, Prowler901 and 3 others
-
6
-
Apart from some minor paint improvement with 000 brush the progress of the day was the addition of barrel liferafts and the stairs behind the superstructure.

- GrandpaPhil, Canute, yvesvidal and 3 others
-
6
-
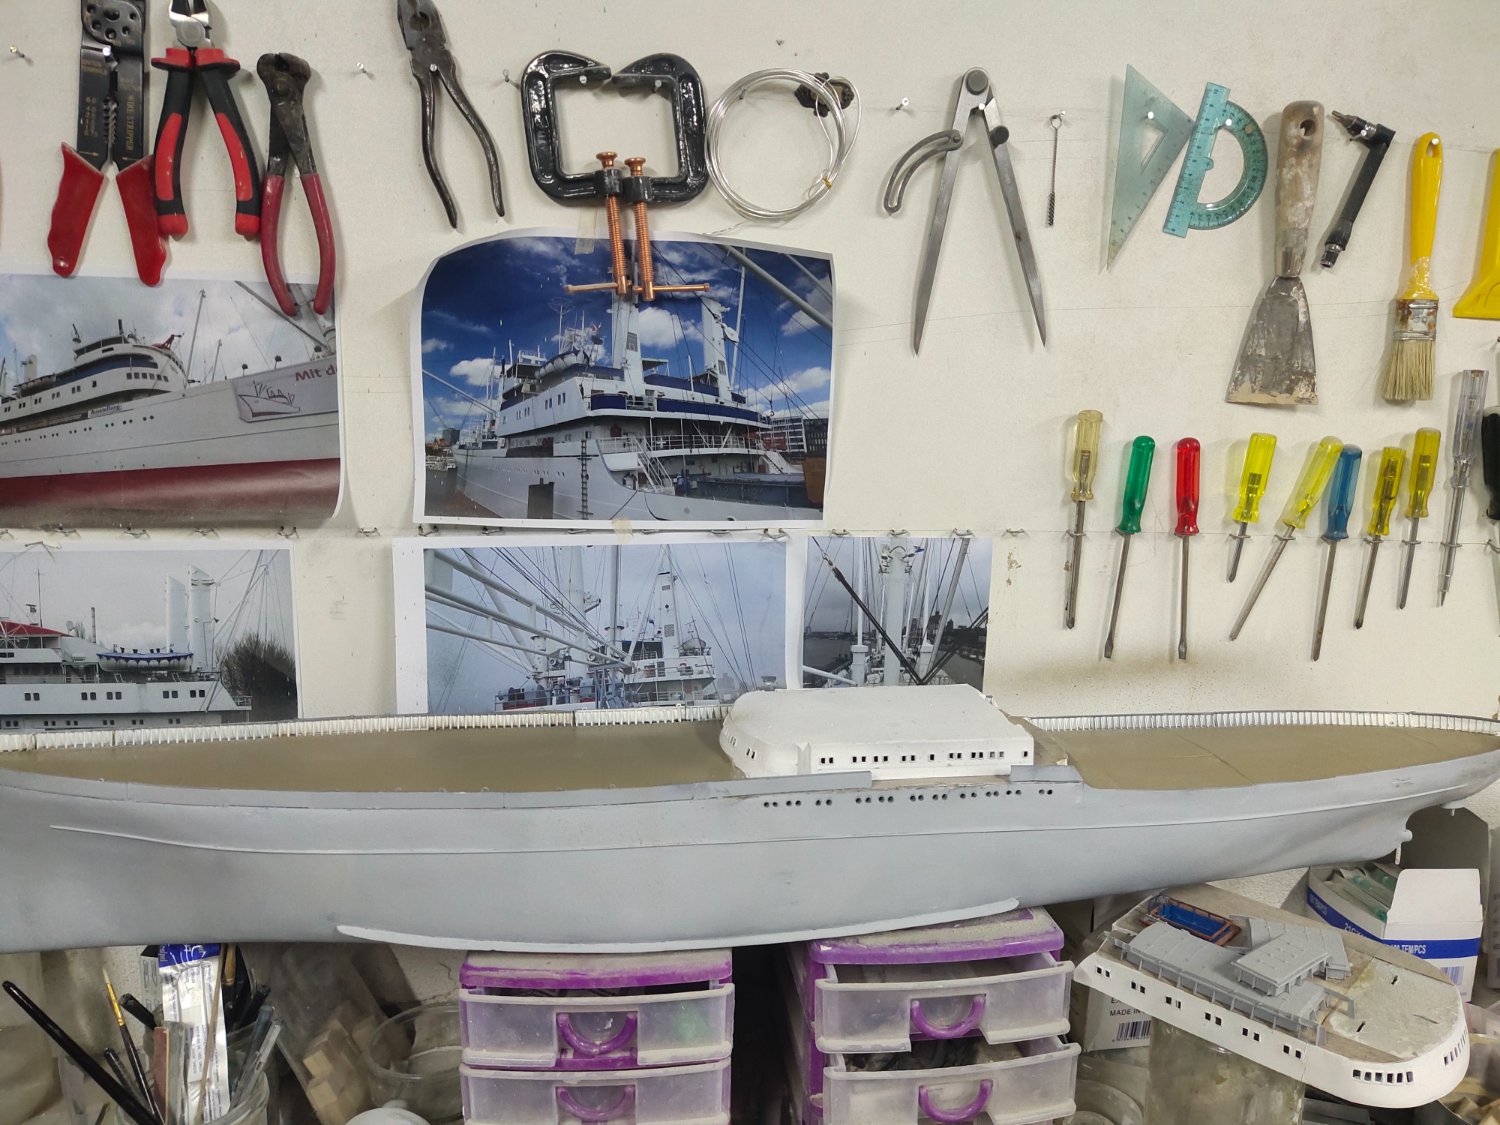
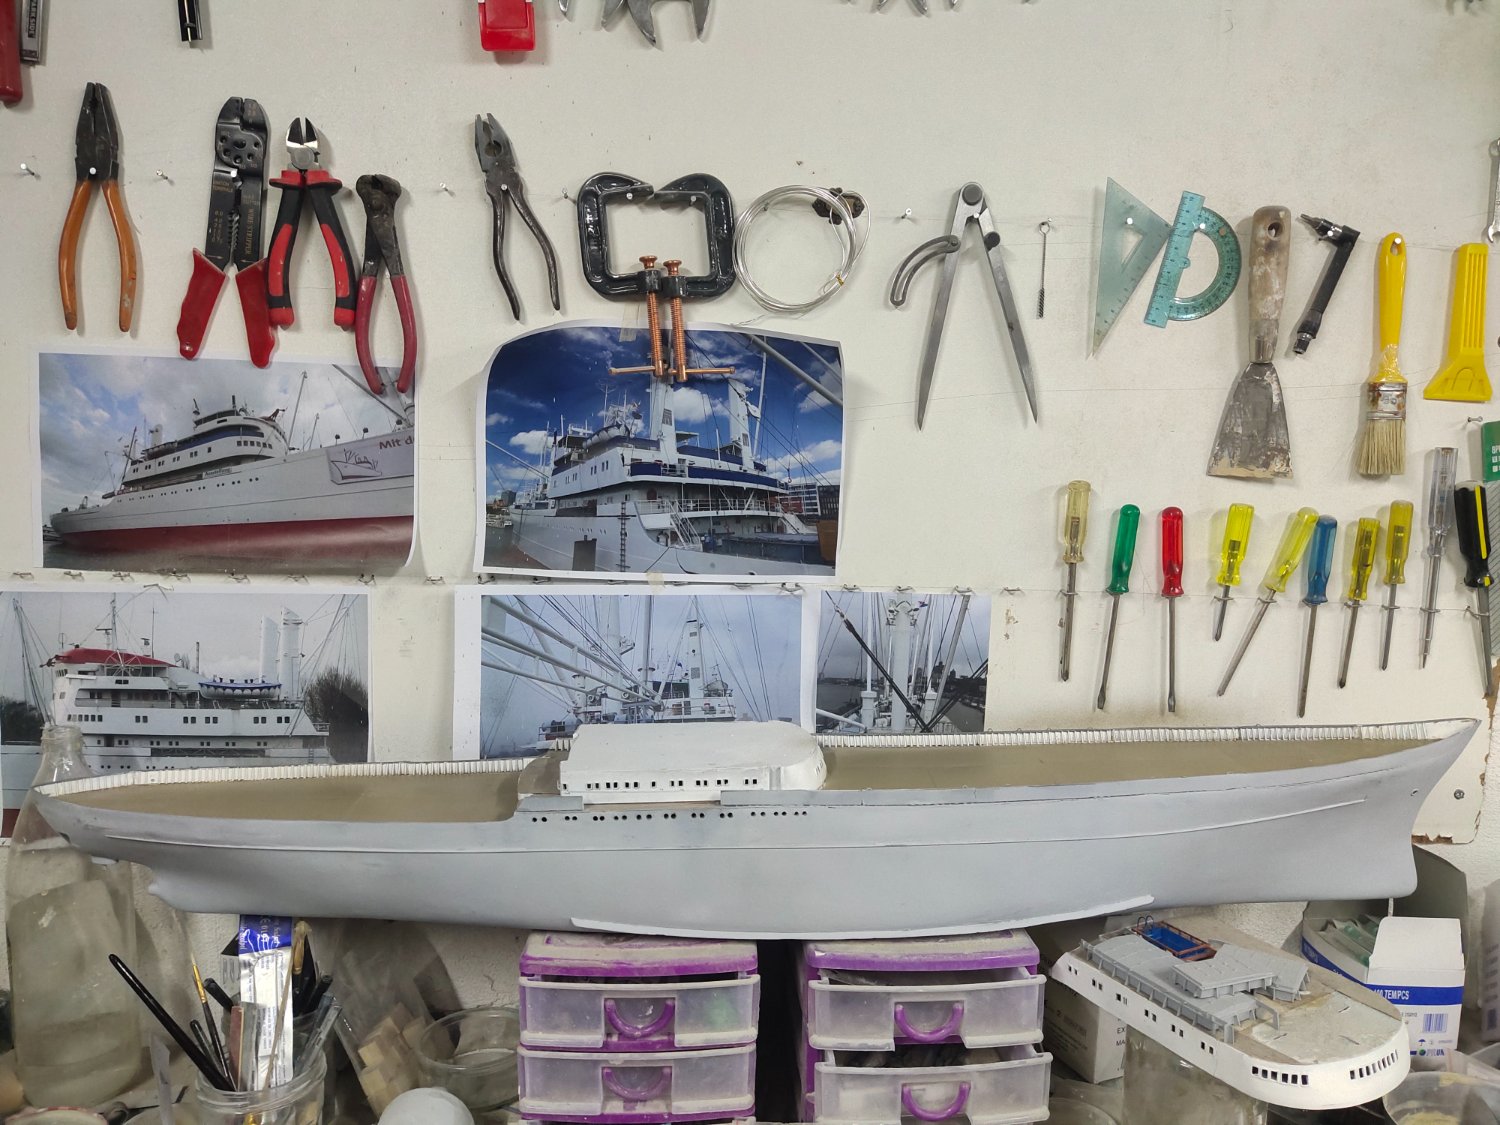
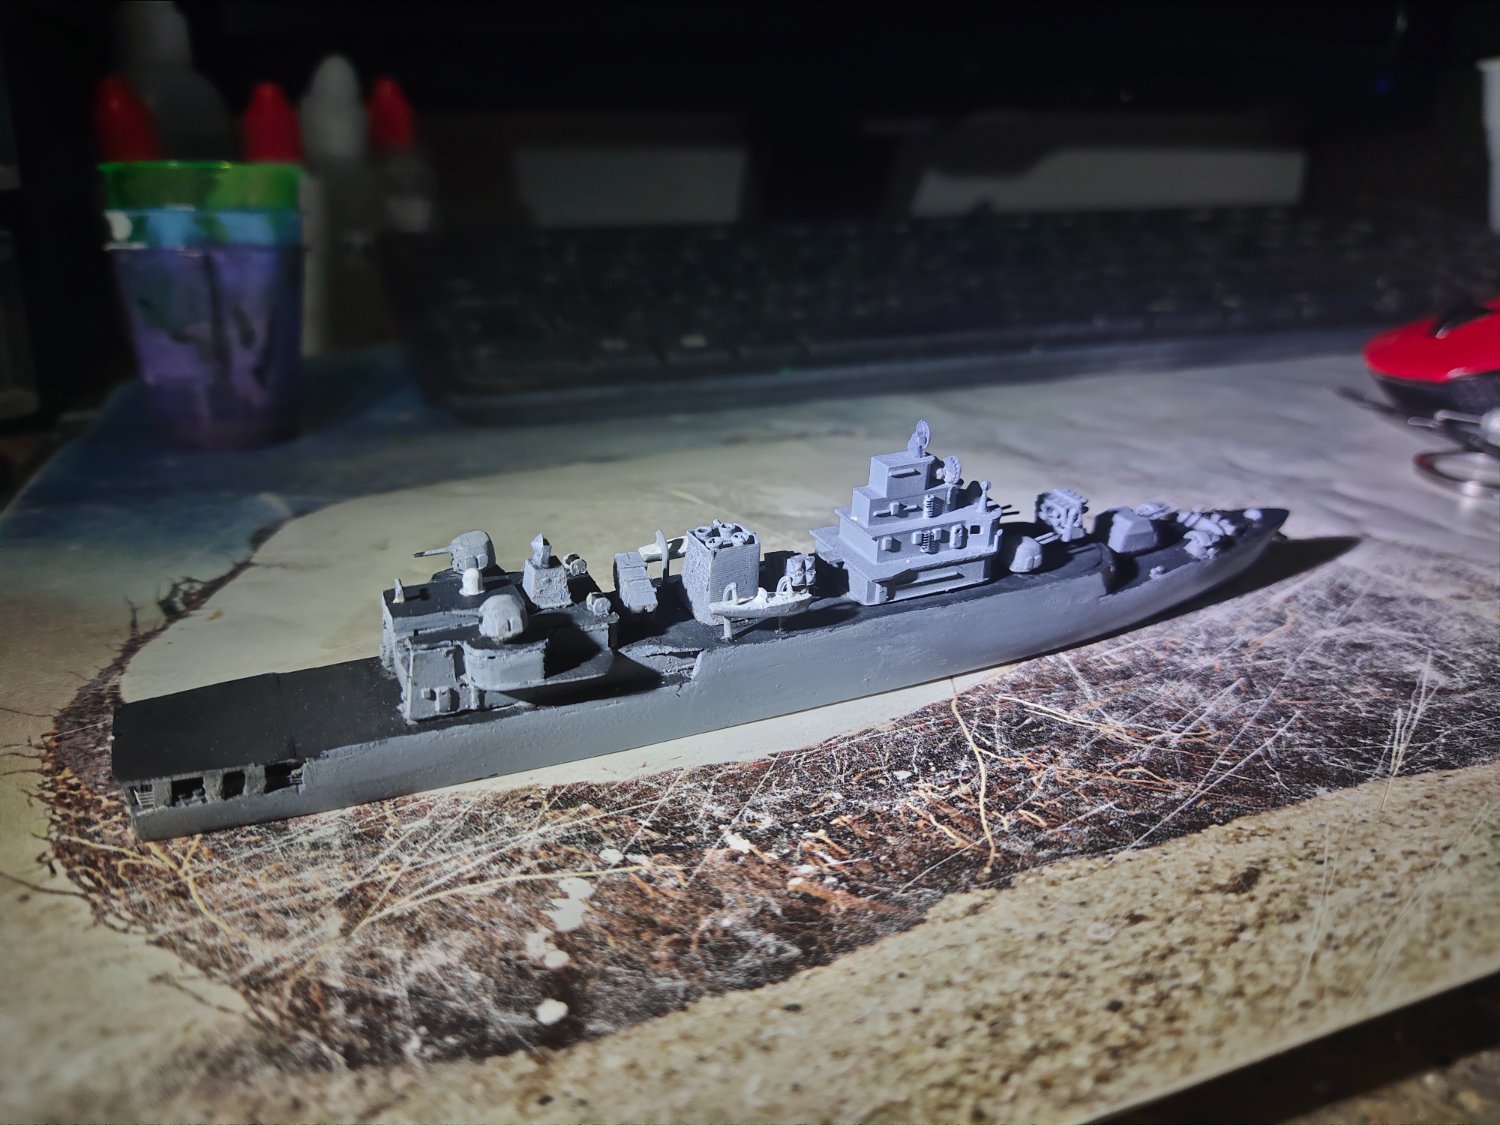
Because I work with resin therefore o use CA this makes a mess on painted decks. This gives me an idea of how special resin kits must be treated.
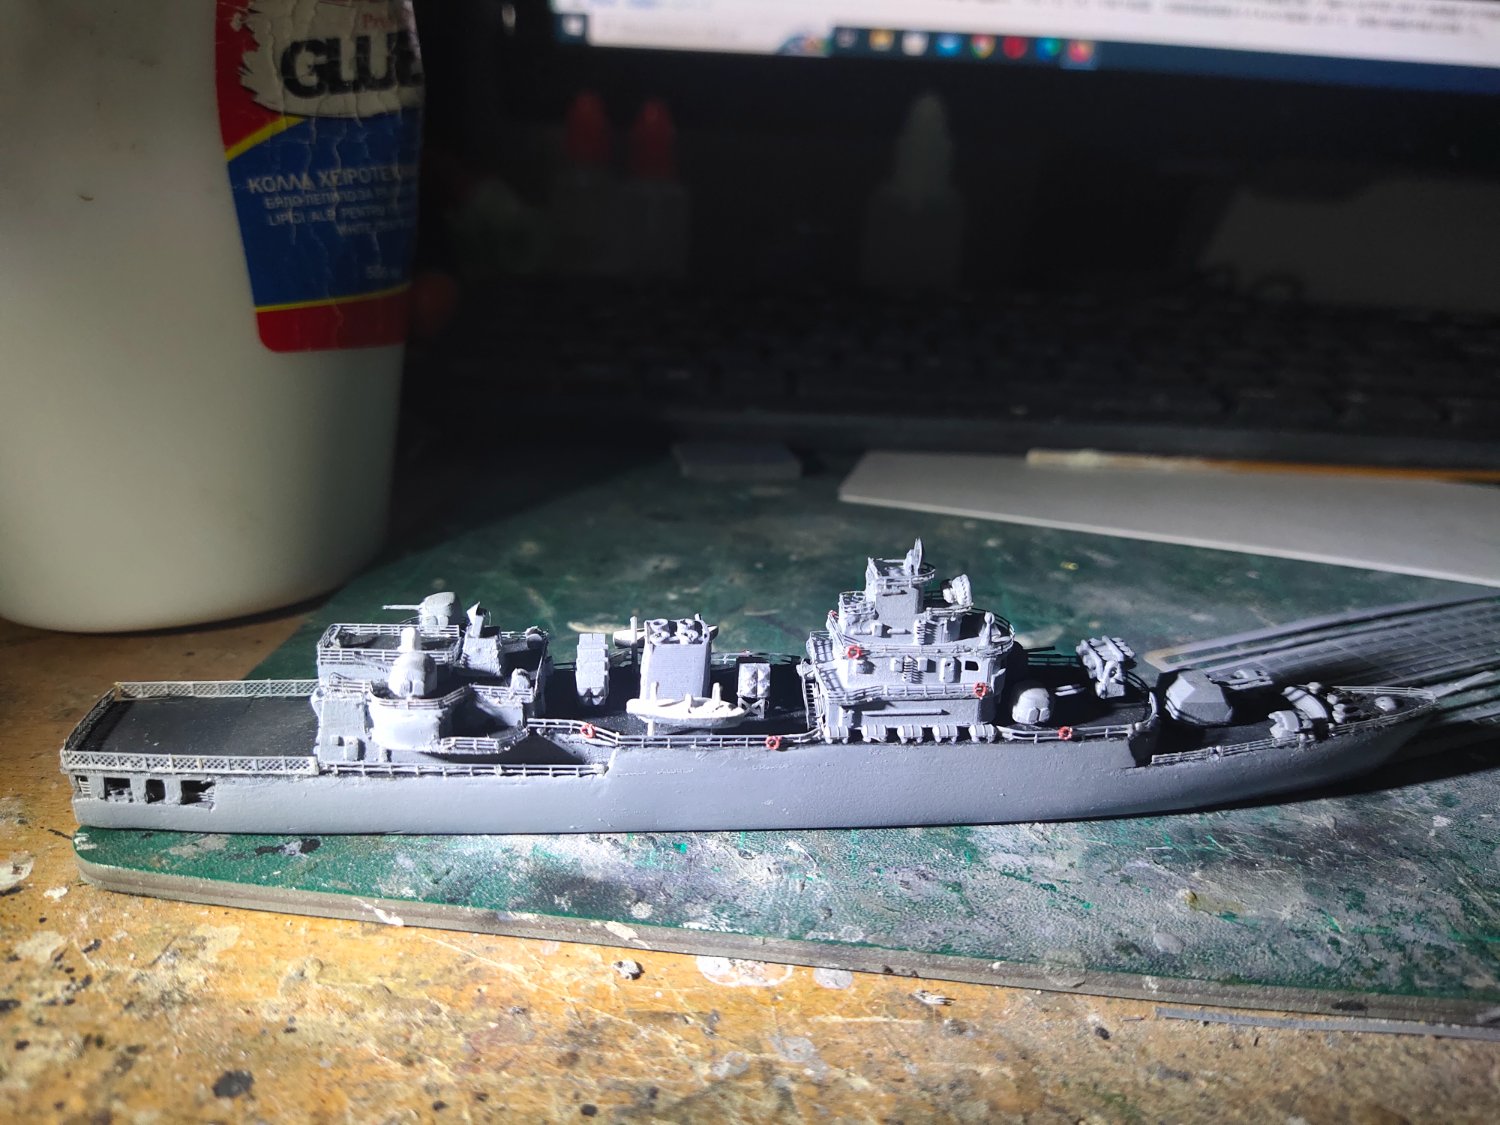
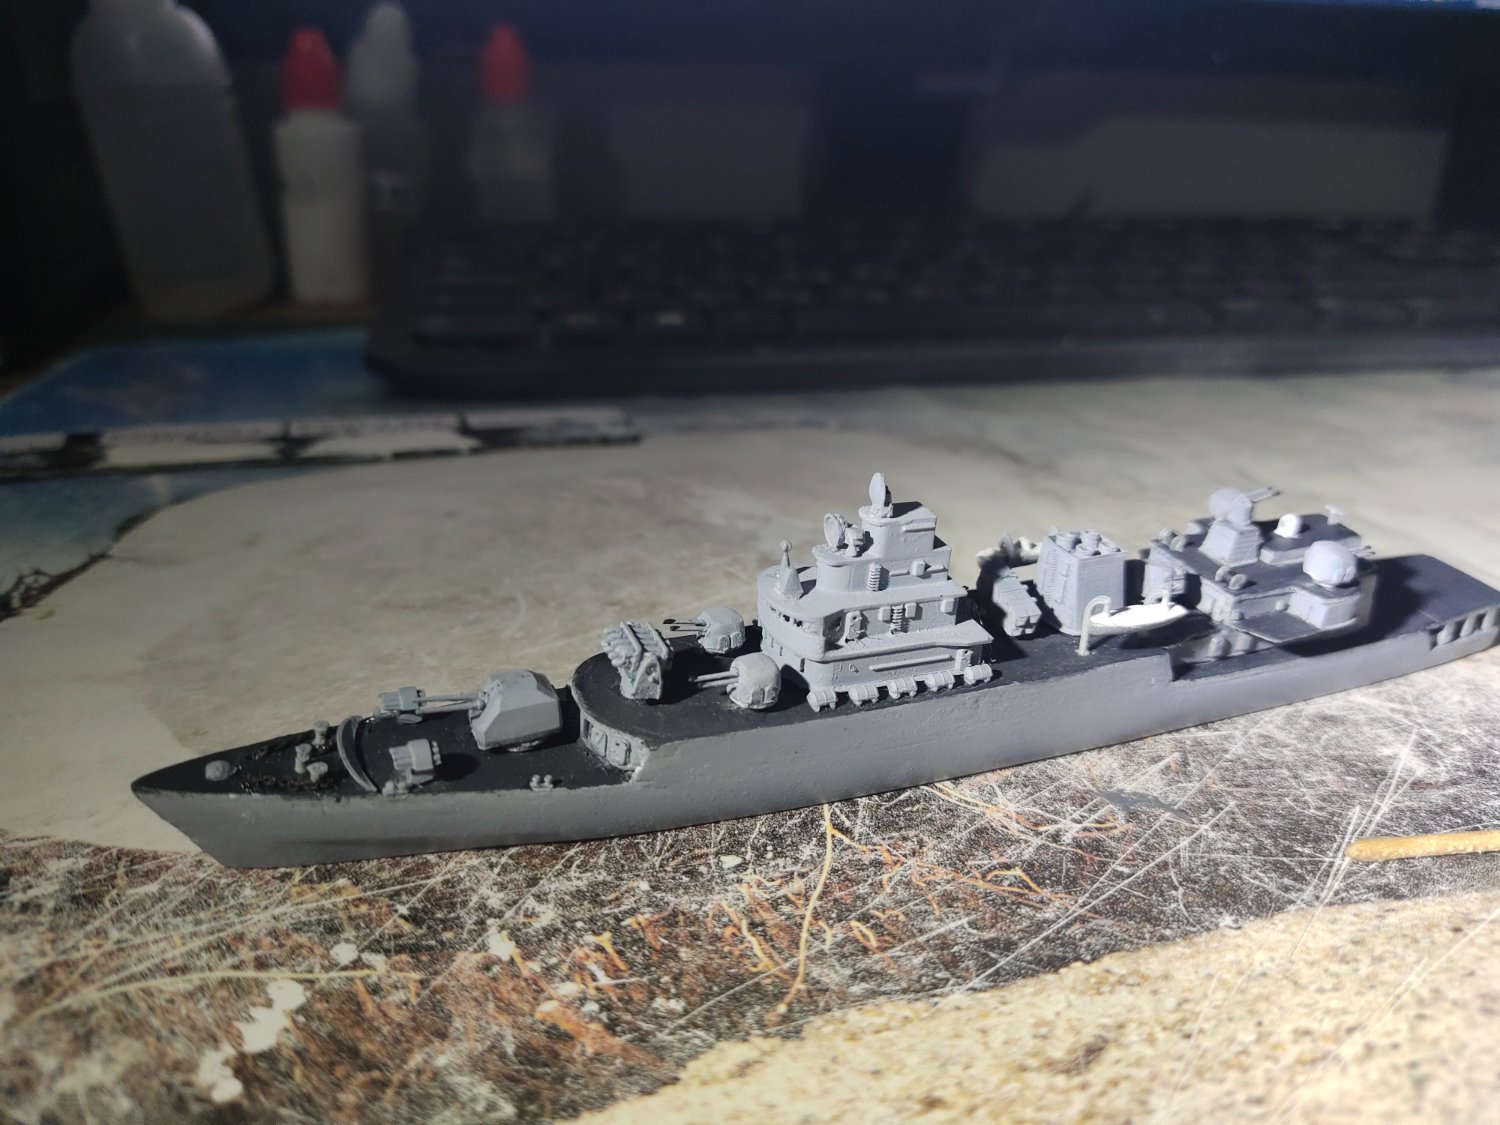
After making some paint corrections with brush I added more details, like bollards, anchor chain and machinery as well as secondary antennas over hangar. What left is 4 ladders and railings. Then I have to deal of how to make the main radar mast as well as the unusual shape of rear type 517 radar


- Canute, KeithAug, Roger Pellett and 4 others
-
7
-
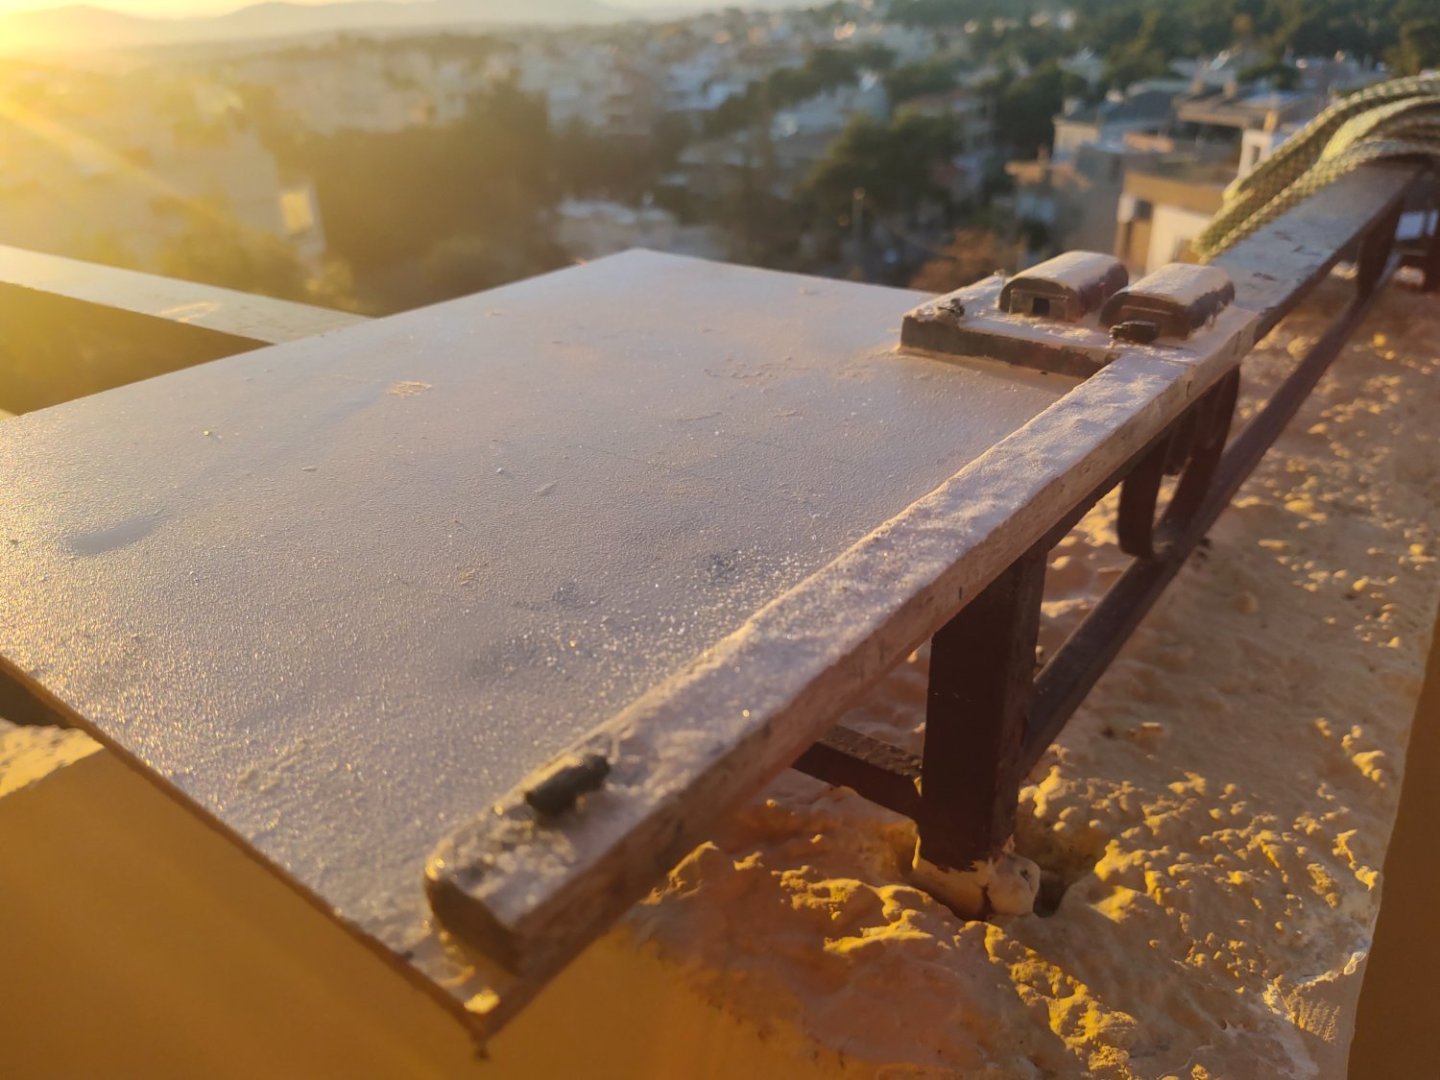
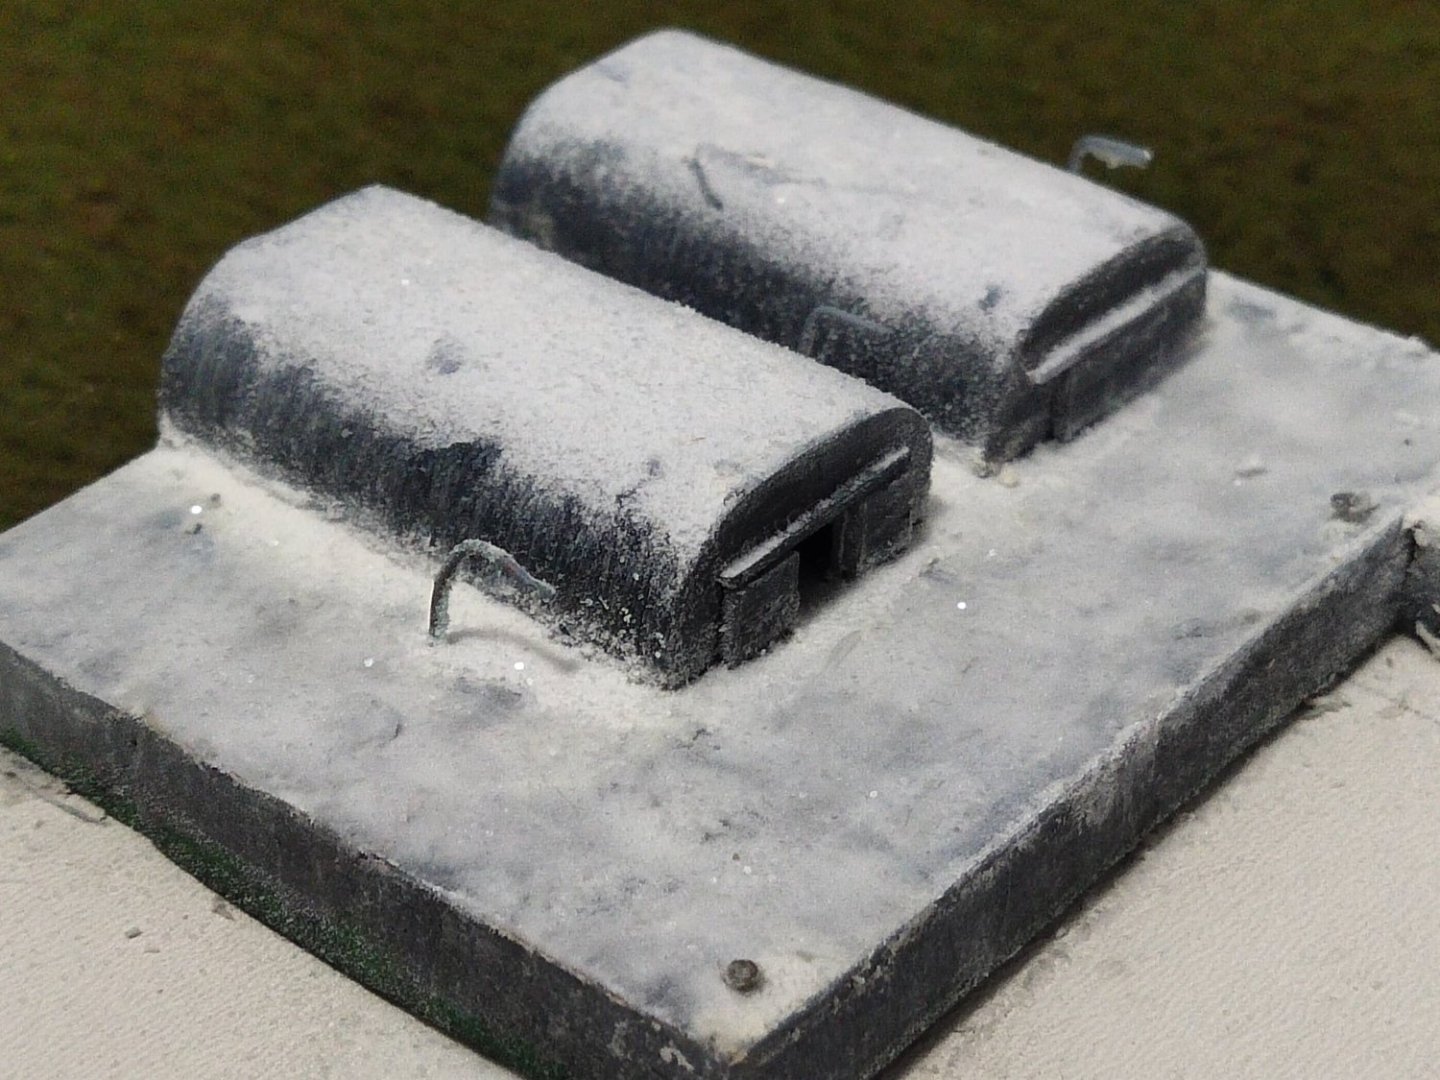
Some pics on daylight.
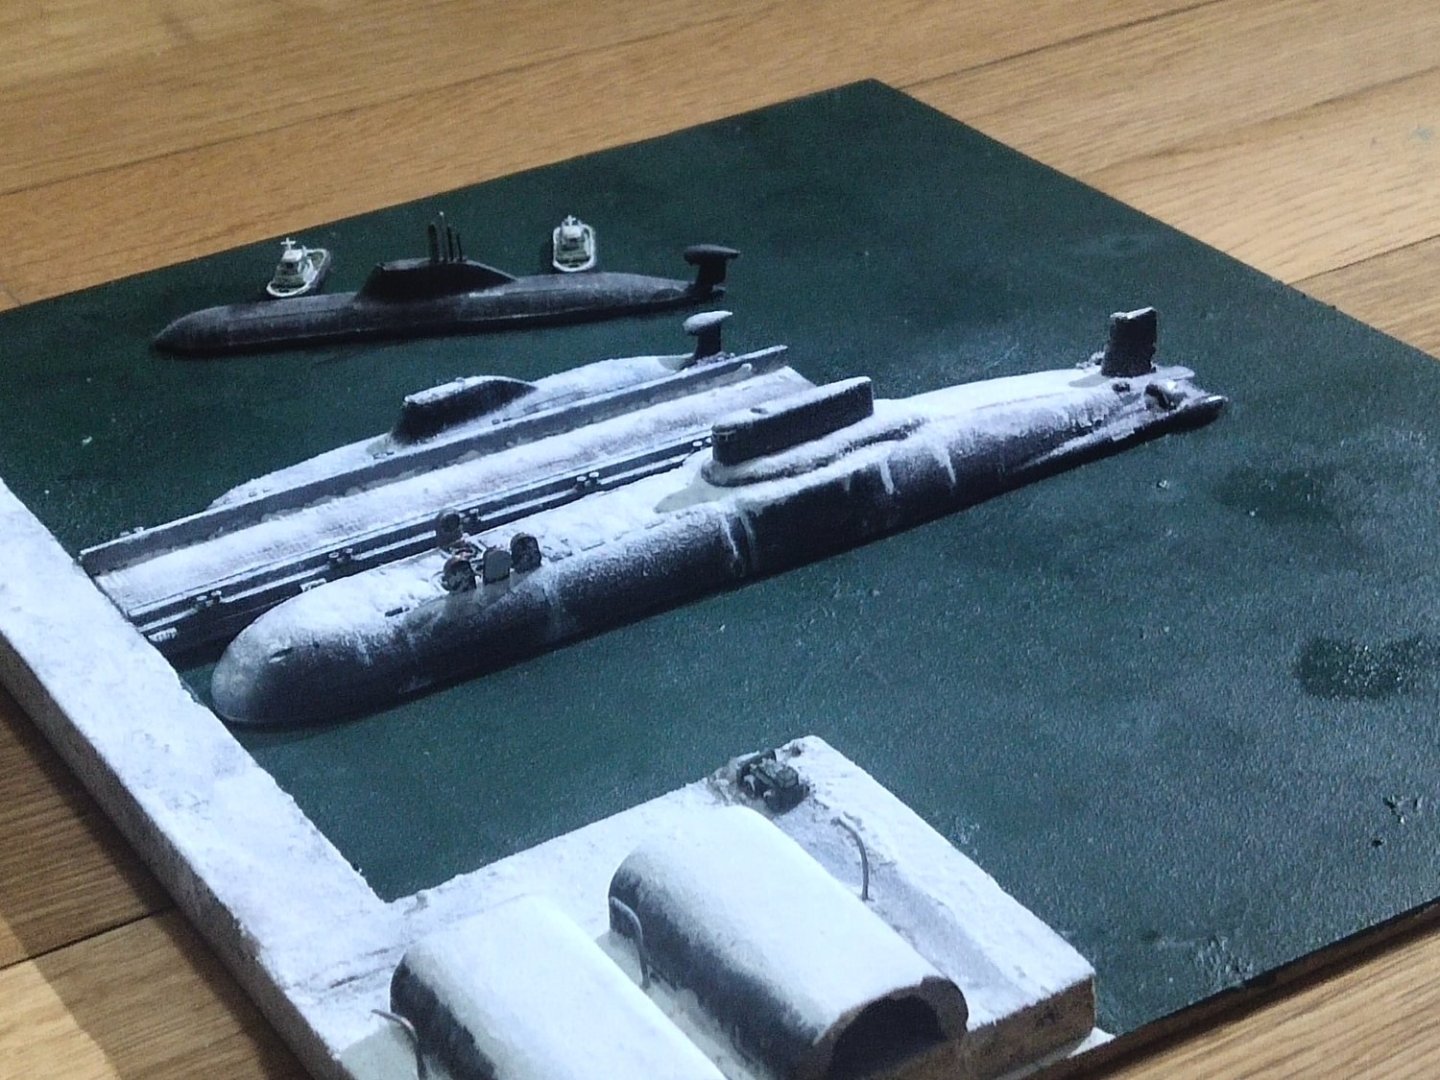
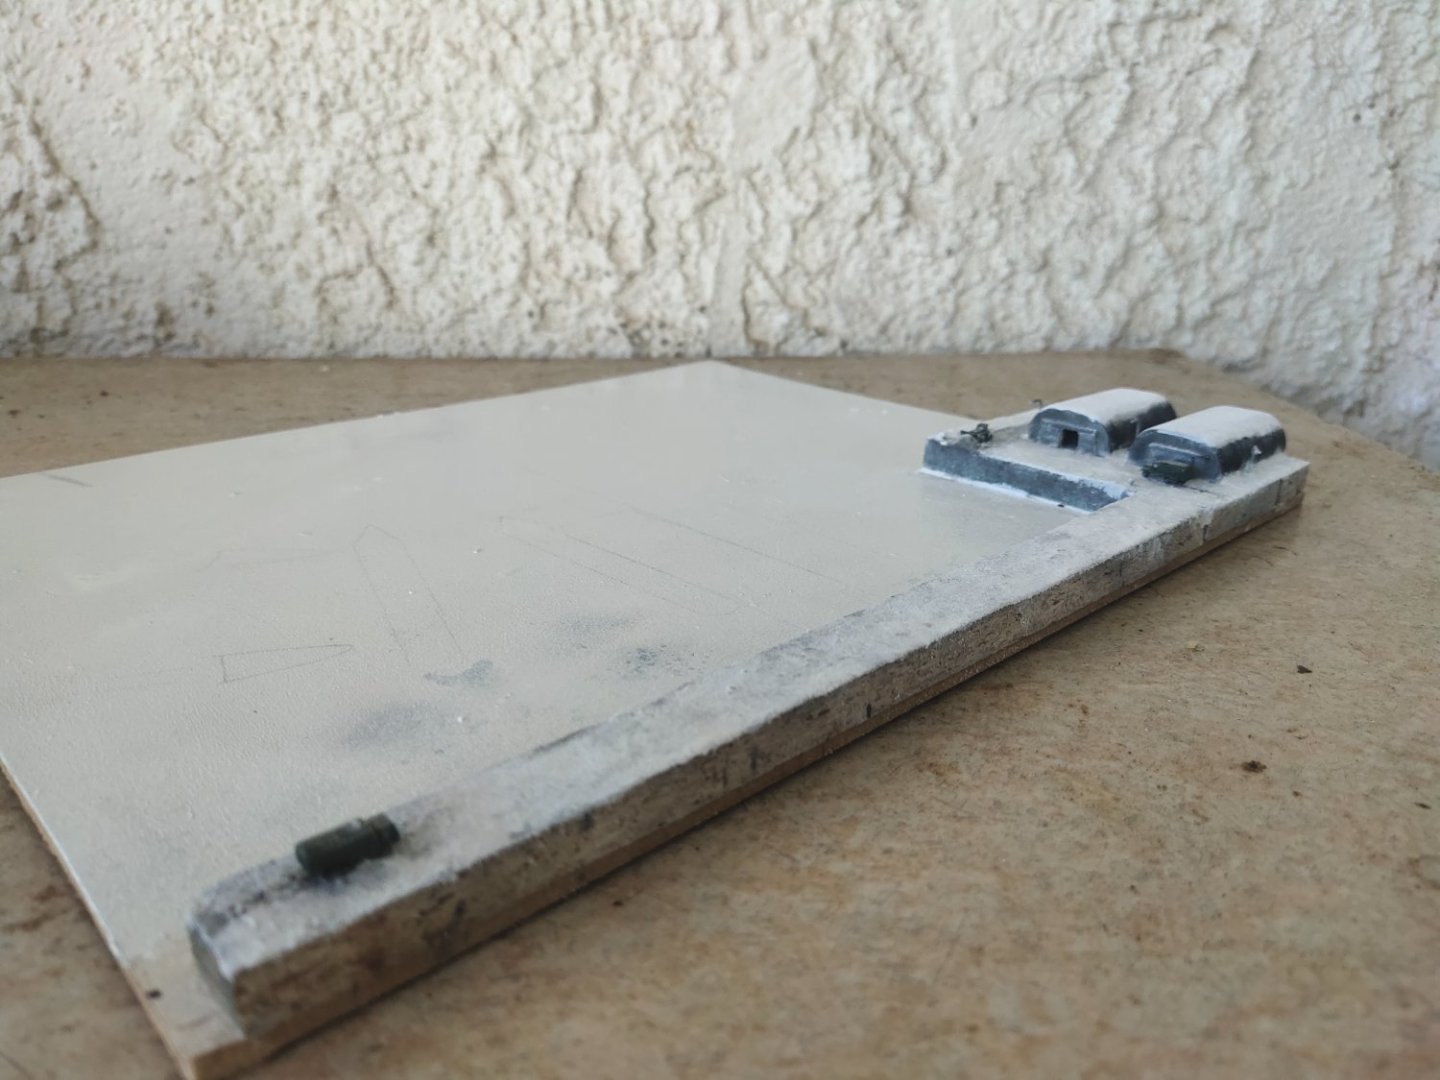
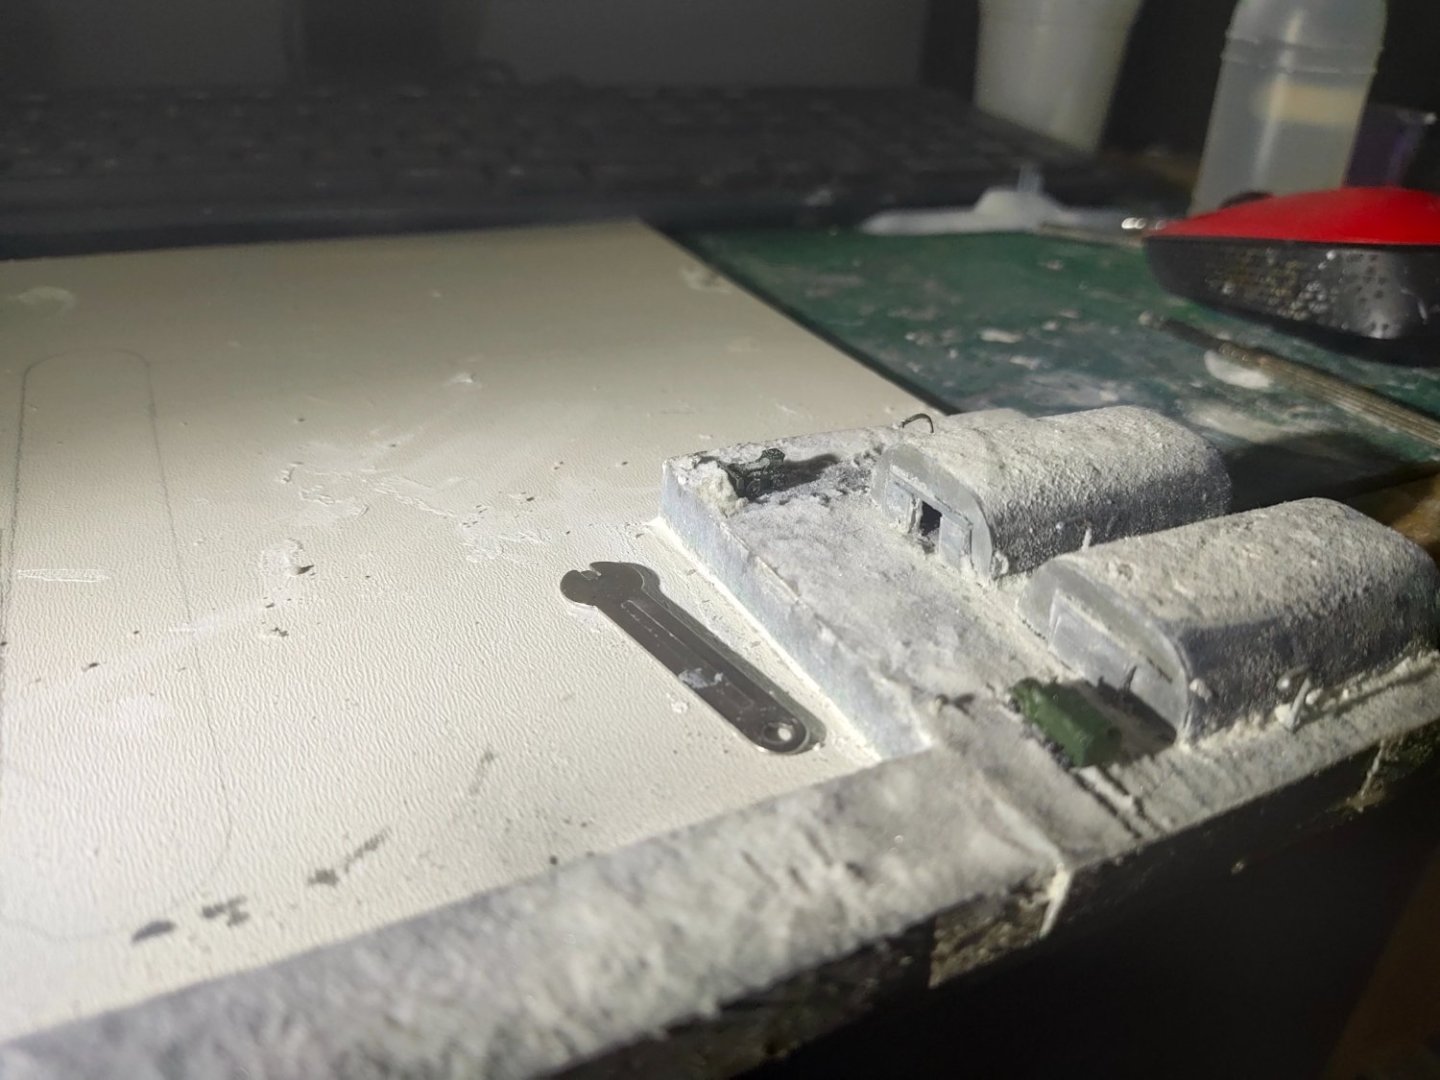
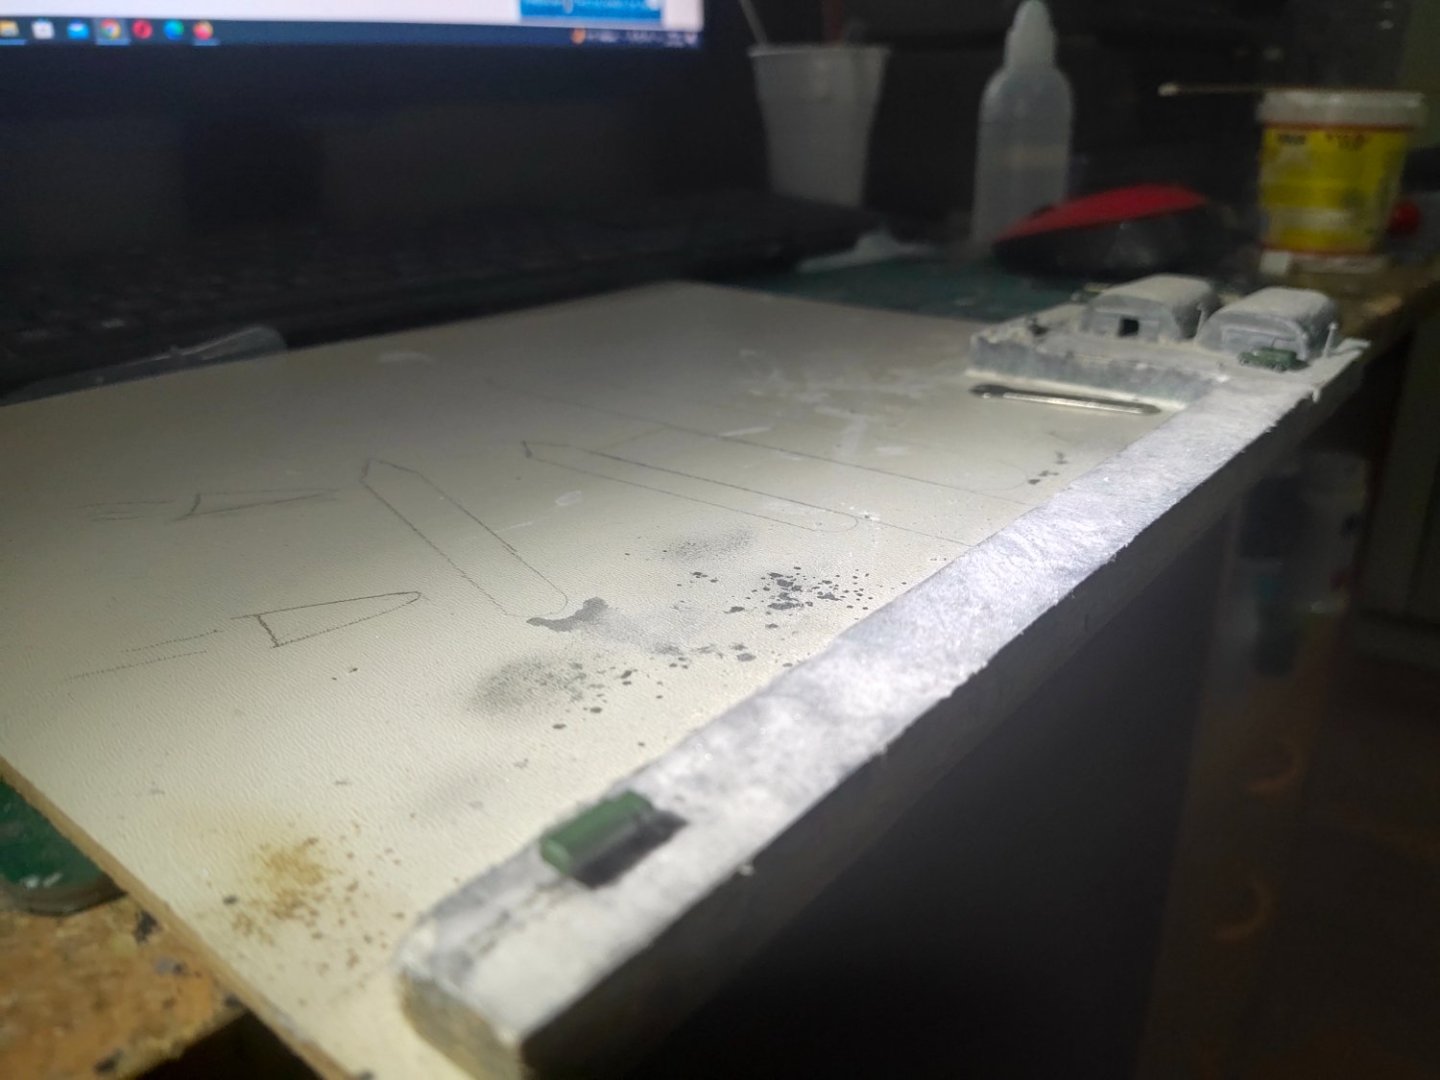
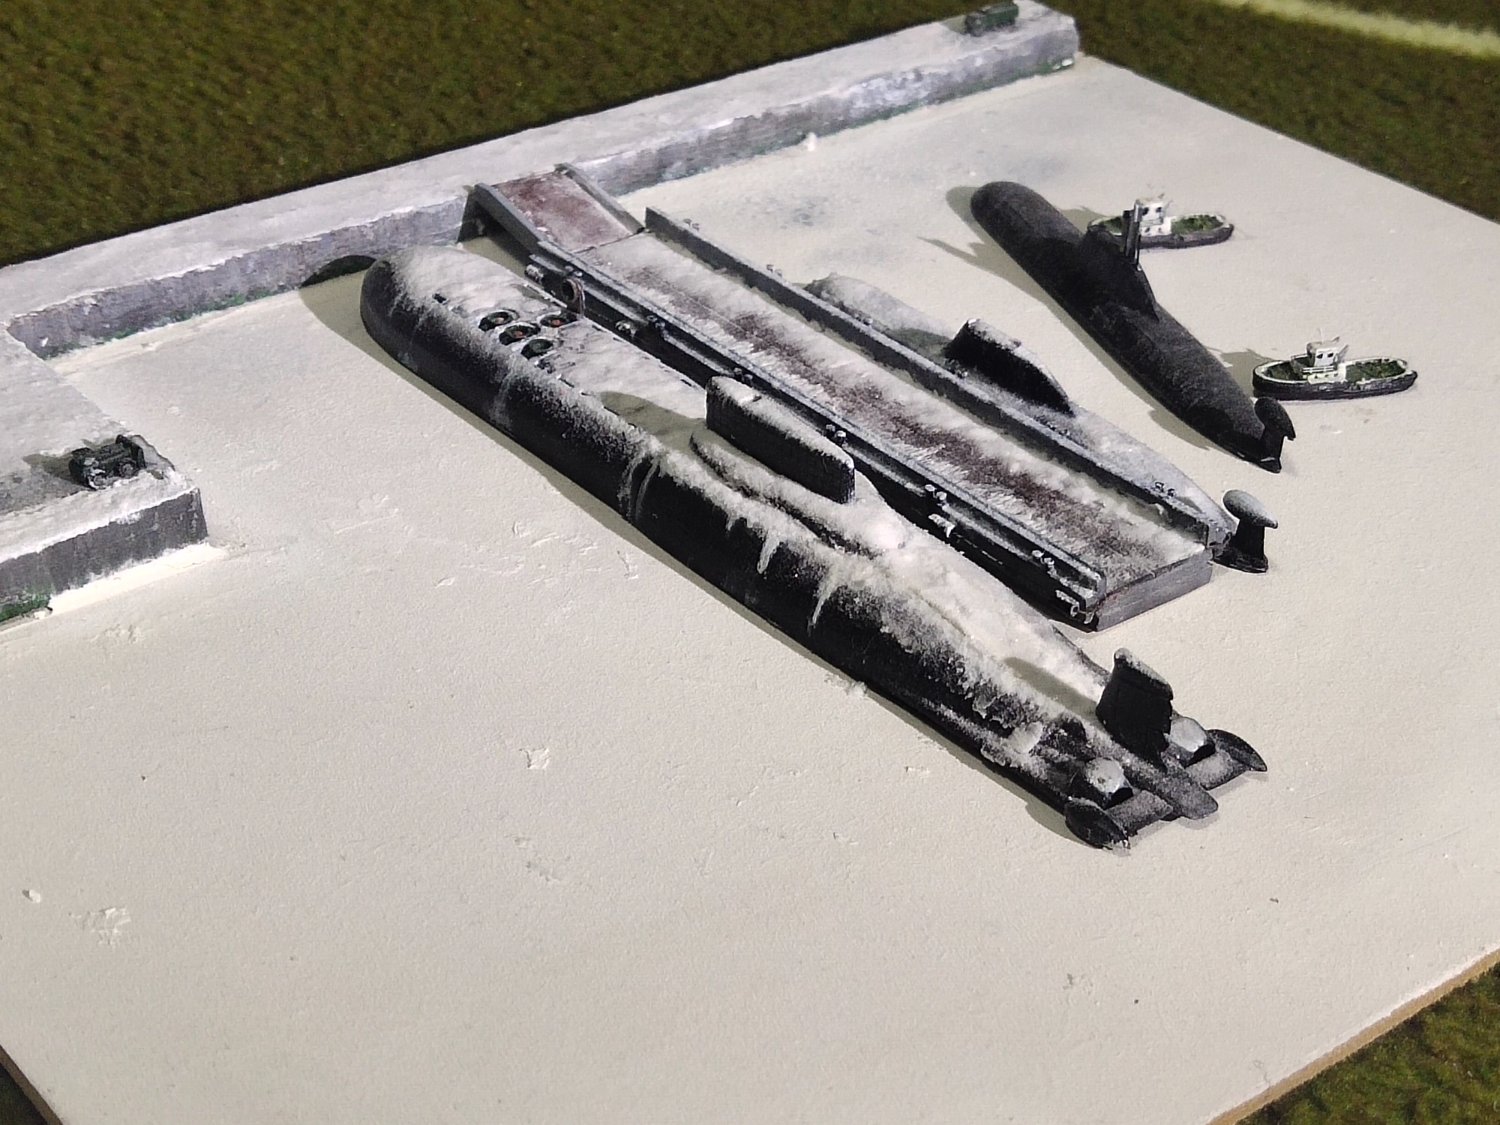
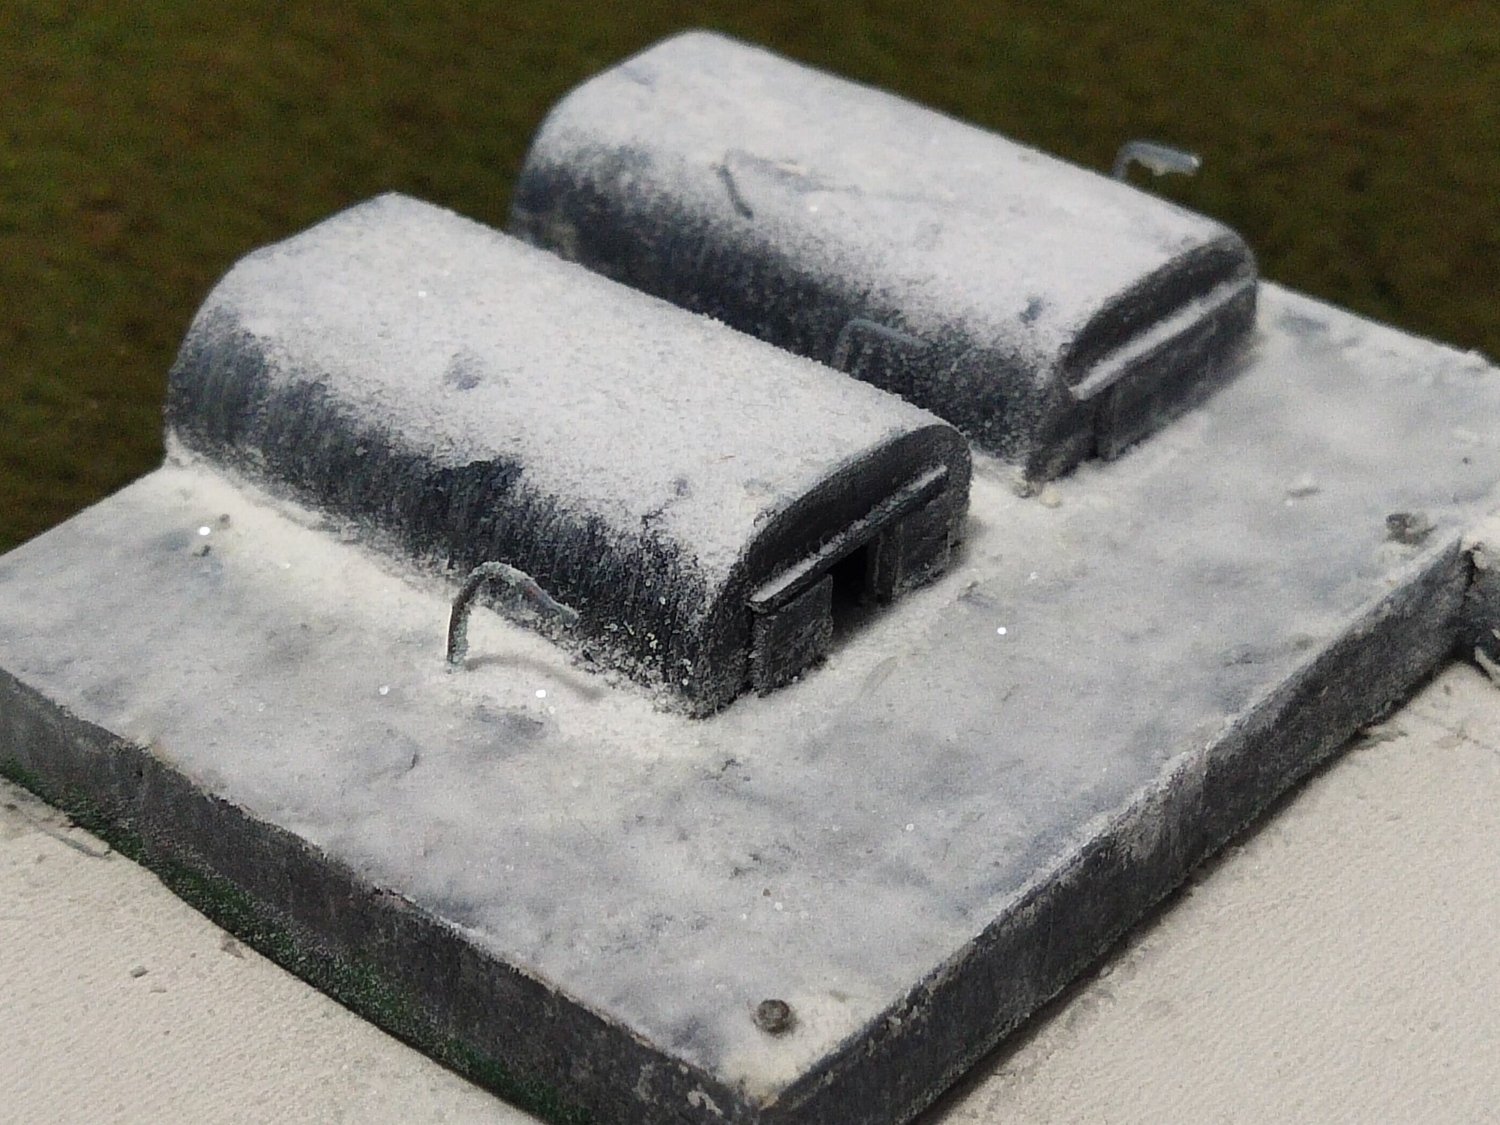
I added some gel and microballoons at the middle of the dockyard to create an ice effect. At the edges I poured microballoons over paste to represent snow accumulation. A small amount of white glitters added for extra shine effect. Extra snow added on Akula as well.
For the roof top microballoons plus few glitters over paint did the job.
I will restart the base, with less snow and more icy surfaces. Typhoon needs to be re worked also.
Note on Akula, resin has warped already.
-
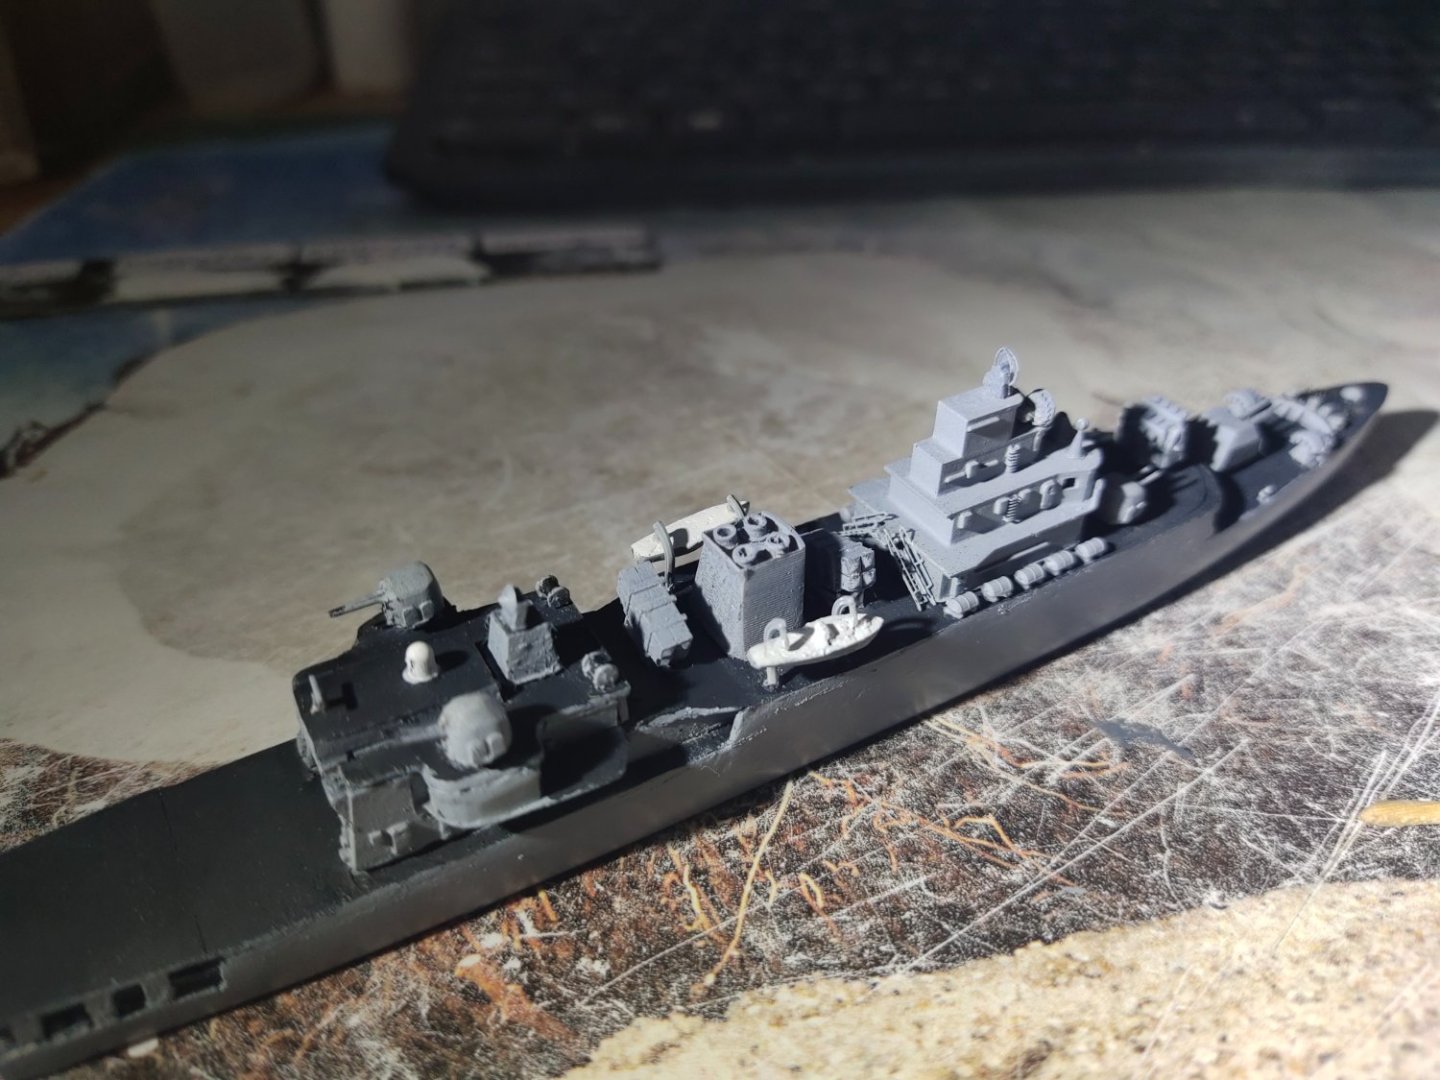
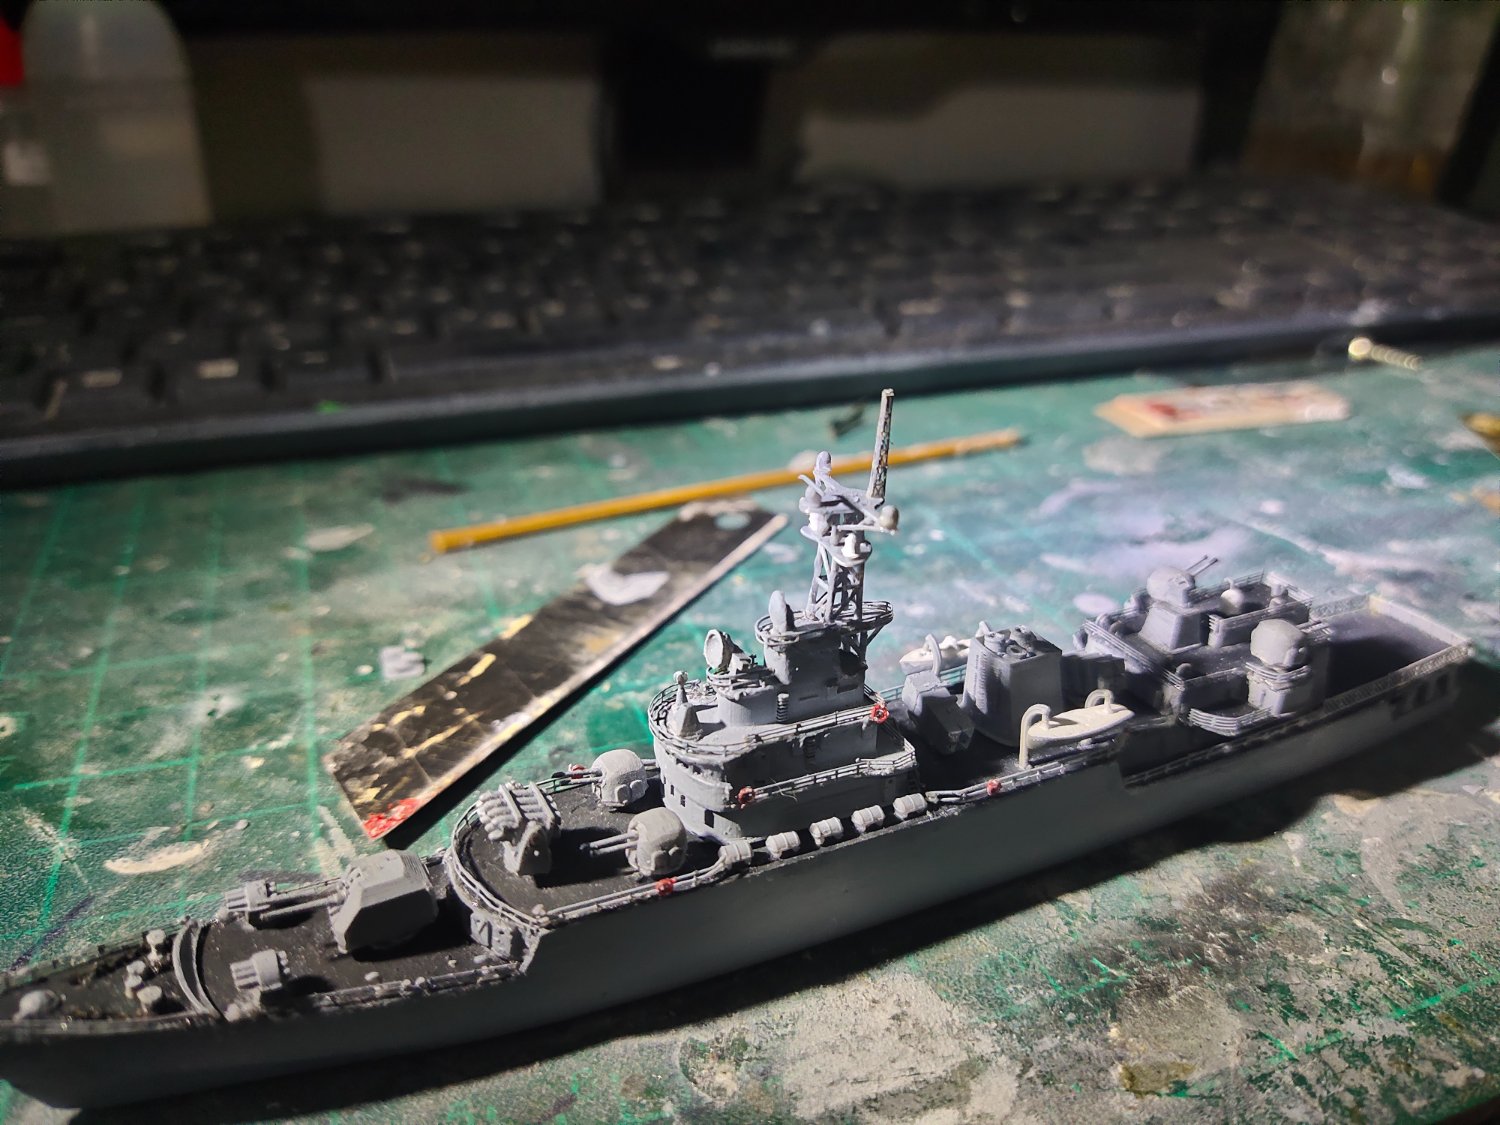
Fitting doesn't lie. Hangar proved too long thus space between this and funnel wasn't enough for the SSMs to be fitted. I had to shorten it by whole 5mm. Funnel had to be repositioned as well. Not easy process when deal with CA glue and resin. Plastic deck broke and had to be repaired. Funnel was re printed with added details, hand ladder and grills. Also SSM boxes were reprinted 1mm narrower. The base is a separate piece very delicate, almost transparent. Its shorter, to give a correct lower firing angle. Also secondary AA was given a haircut by one mm. Finally their type 345 radar was fitted as well as the 347G radar for the main gun, at the very top of the superstructure.


- Prowler901, KeithAug, GrandpaPhil and 3 others
-
6
-
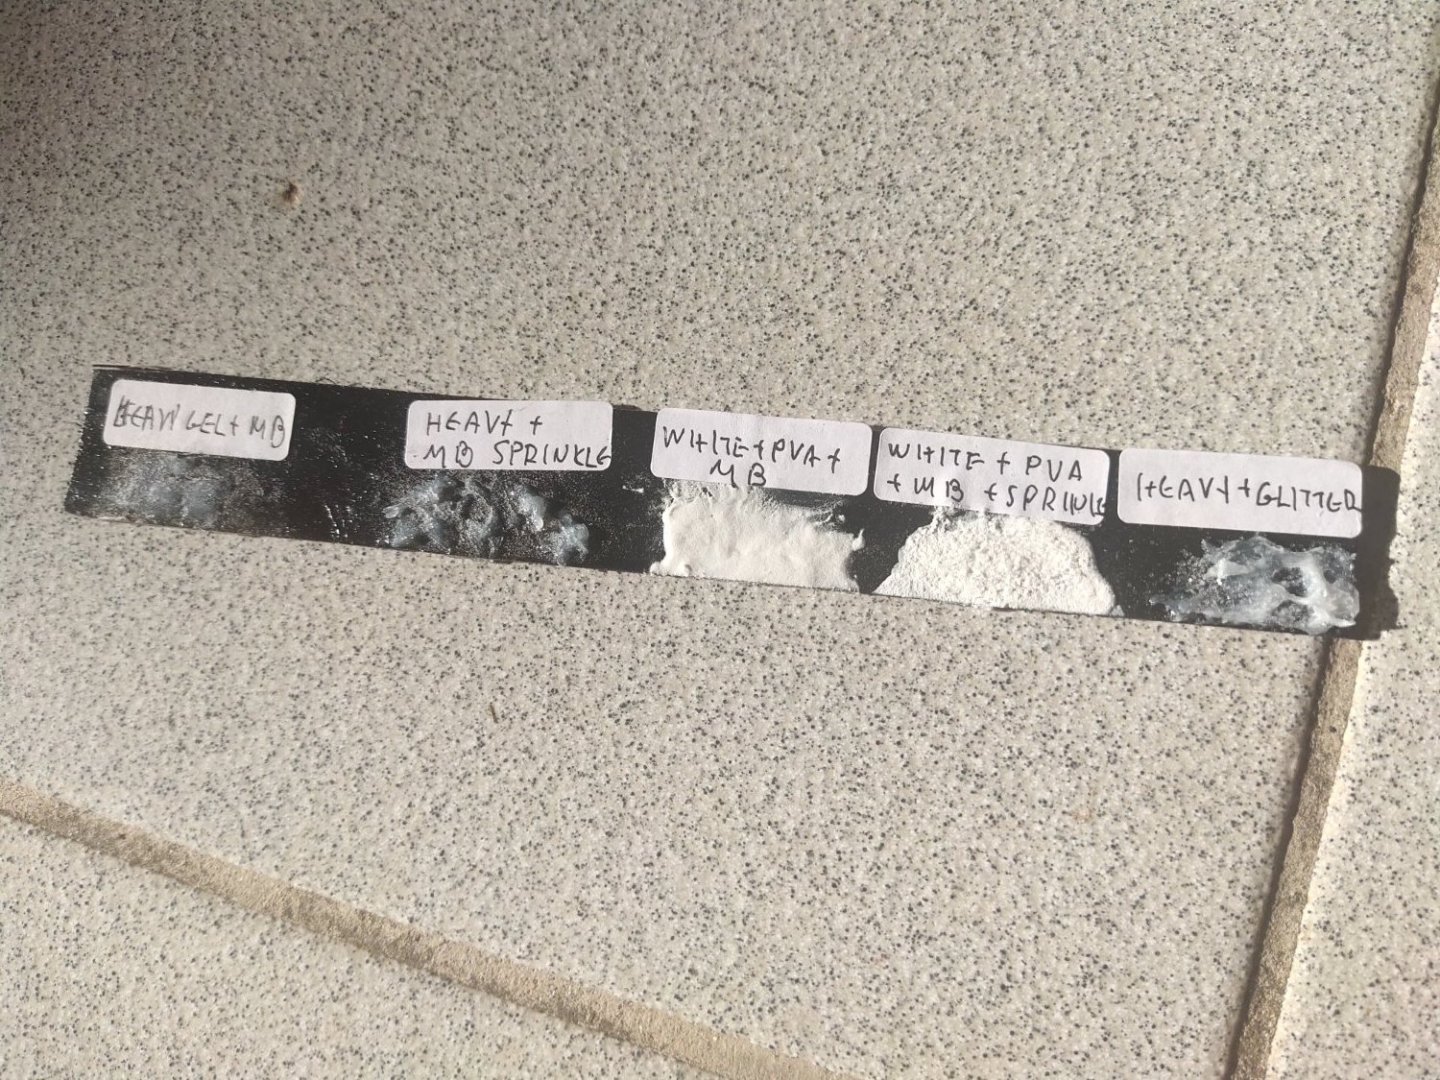
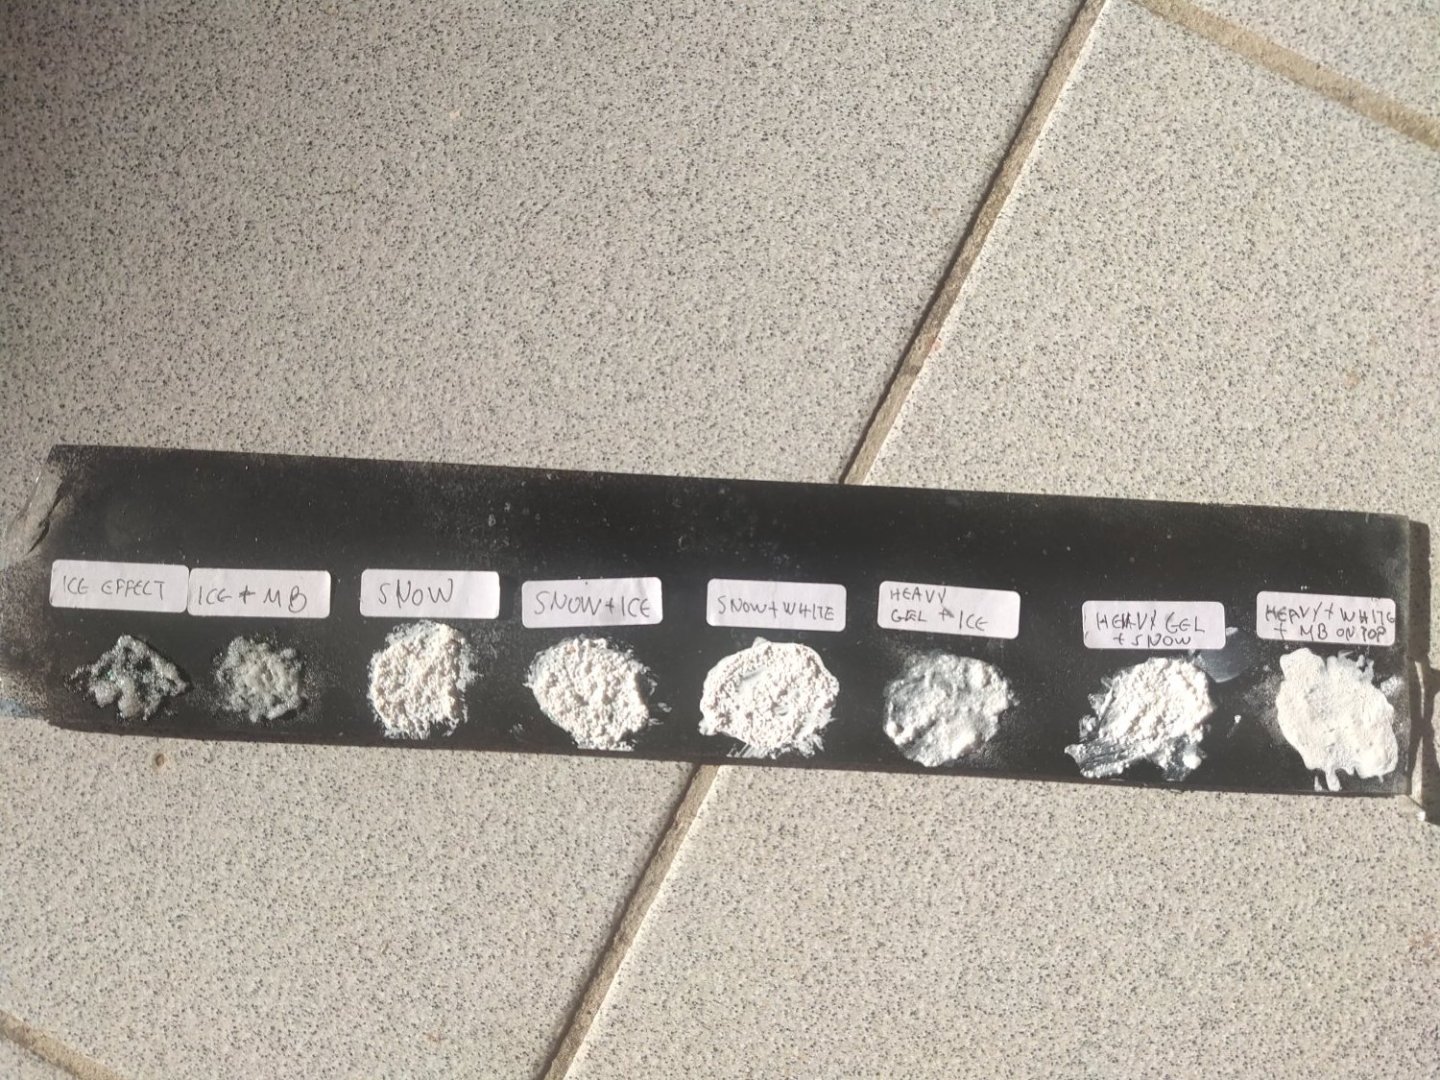
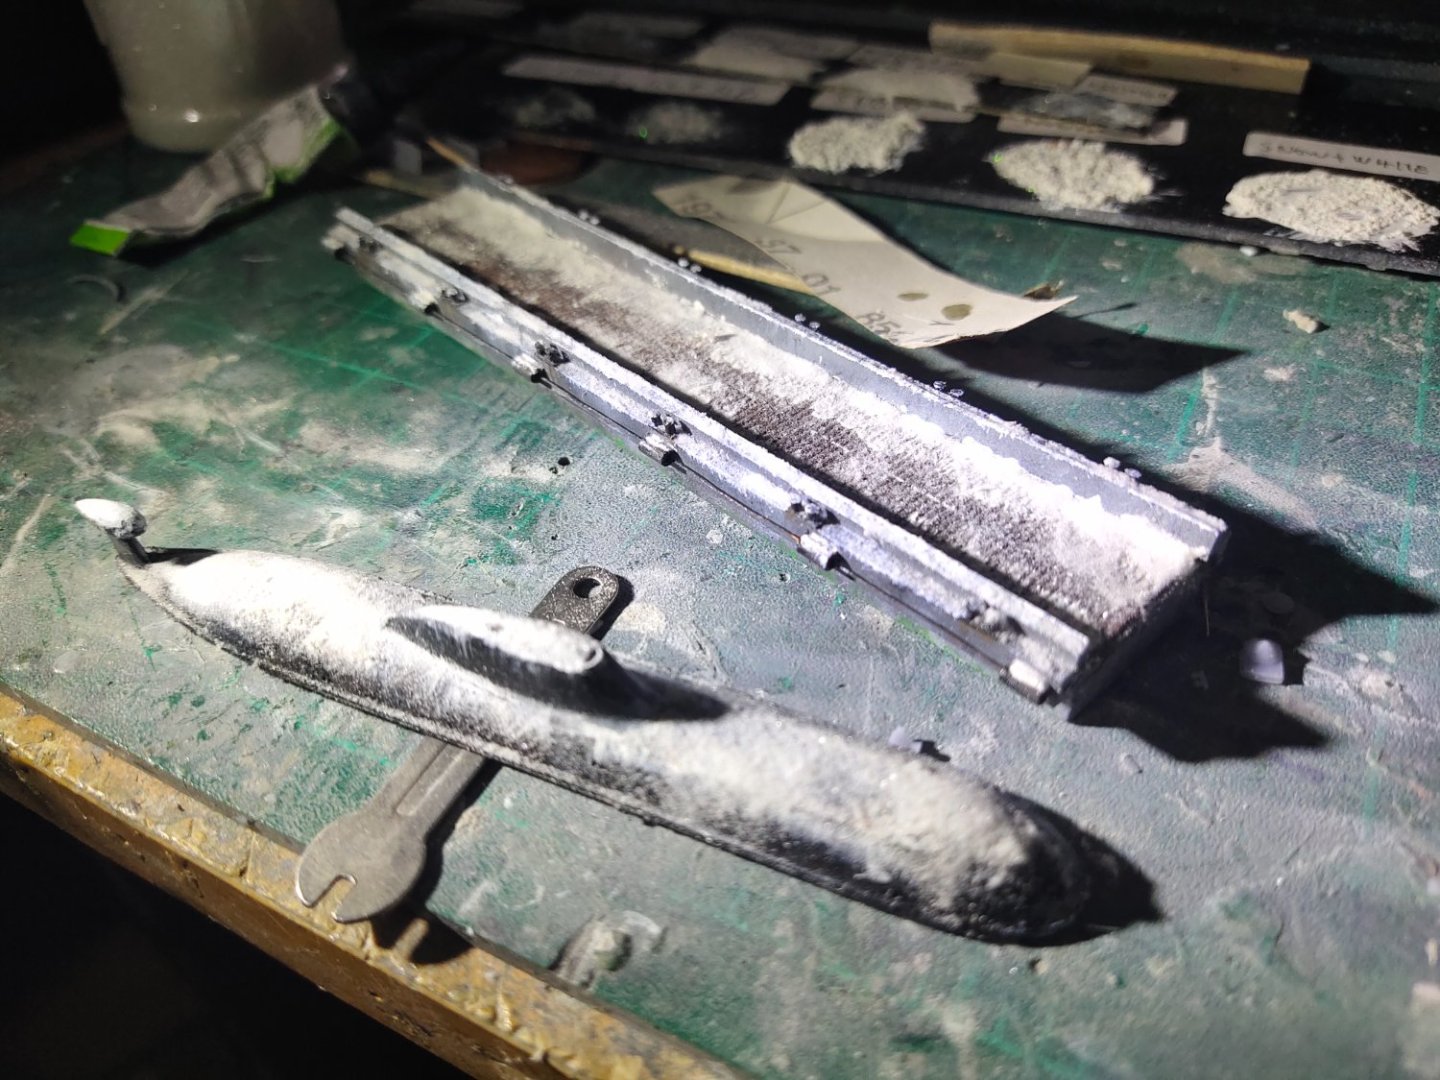
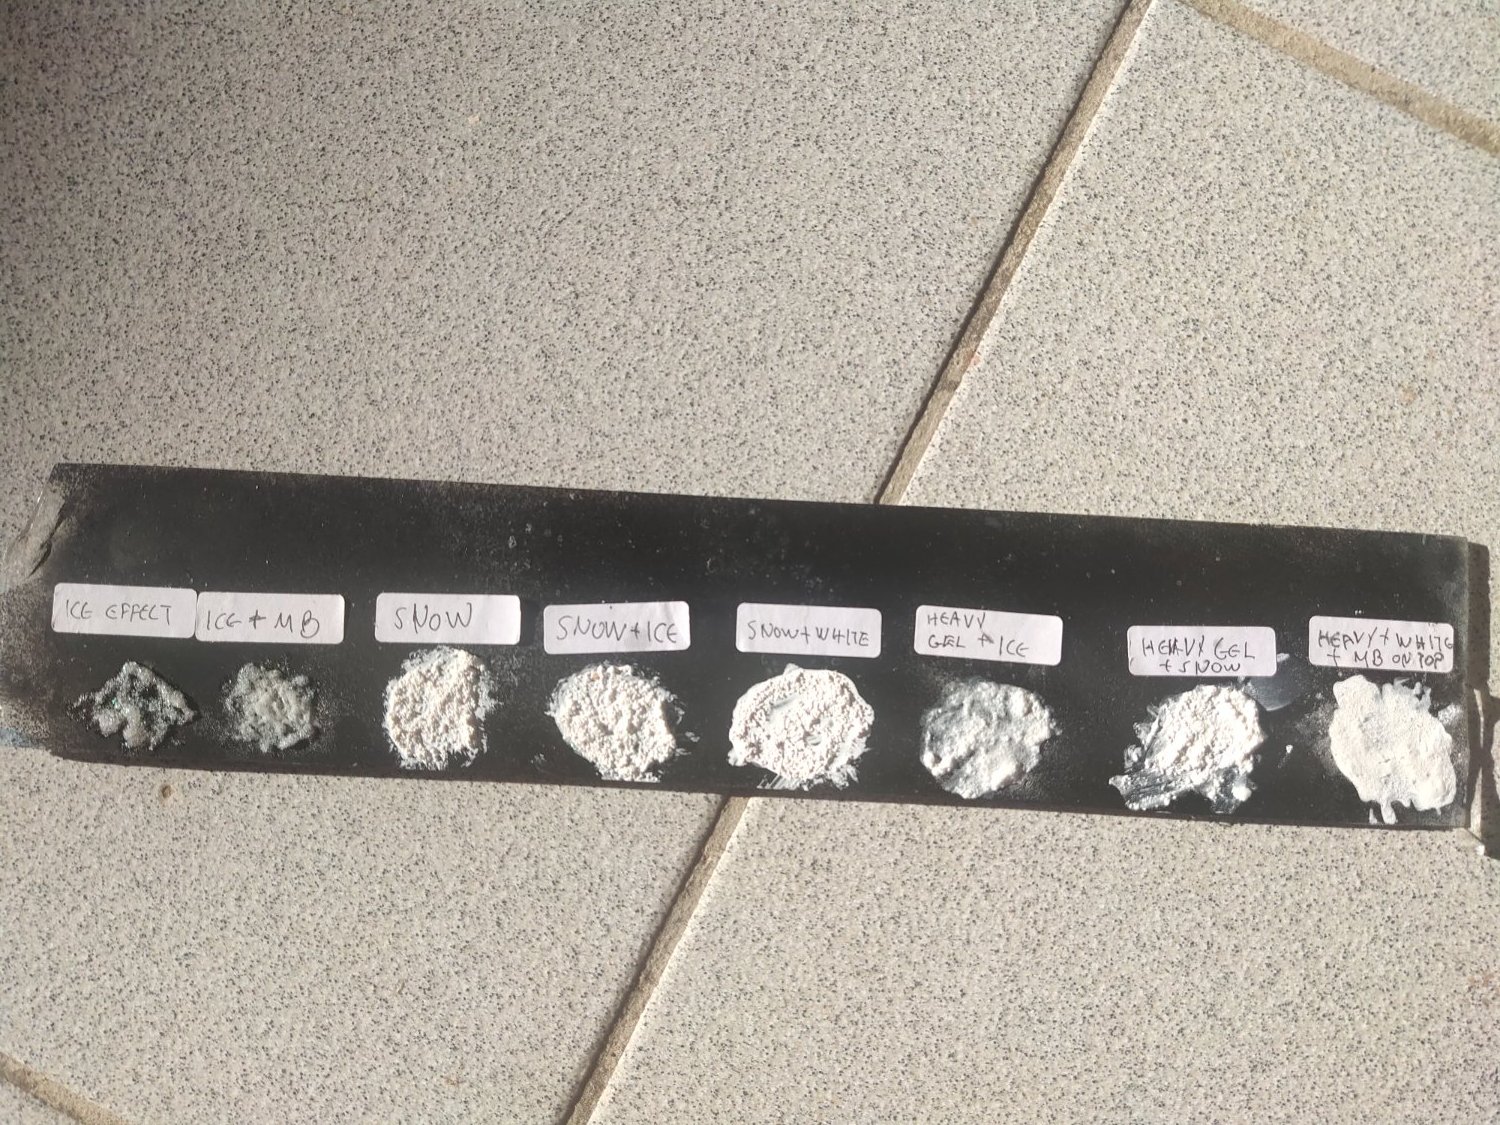
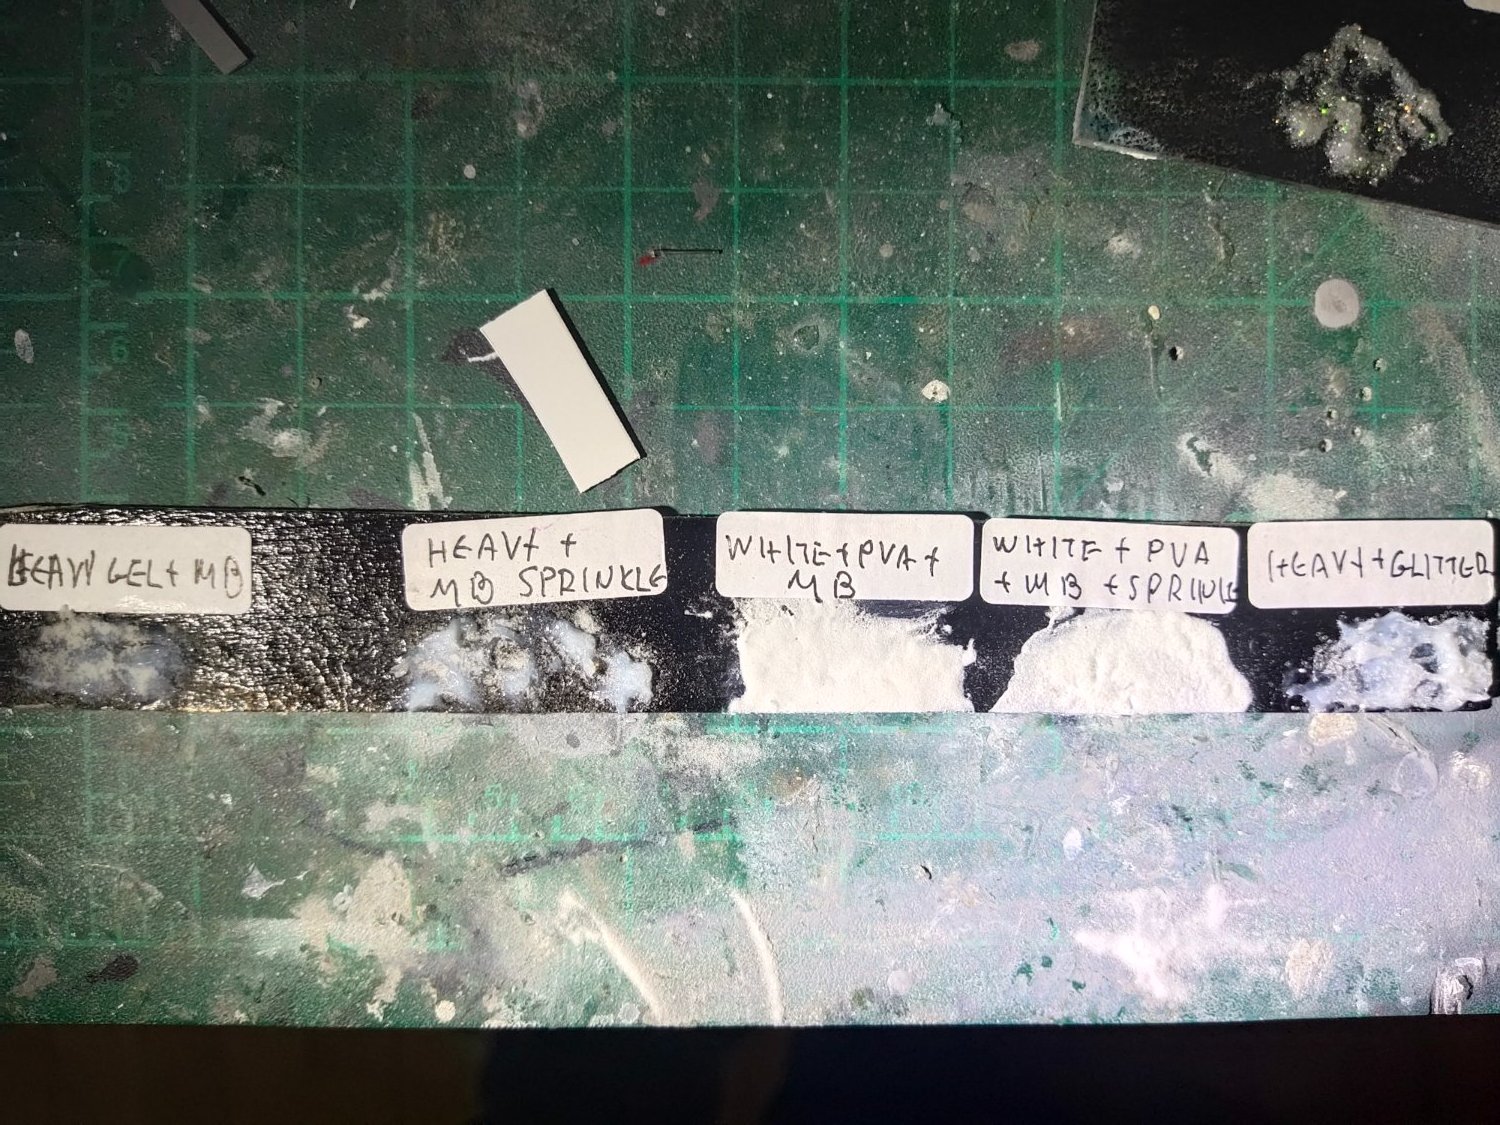
Progress has paused because I decided to have some education about ice and snow. At large surfaces even in that small scale I find that it takes more that paint job, no matter how perfect will be.
I got some extra materials on hand. Ready made snow paste, ice paste and micro balloons. I added some more usual staff like heavy gel, PVA and paint.
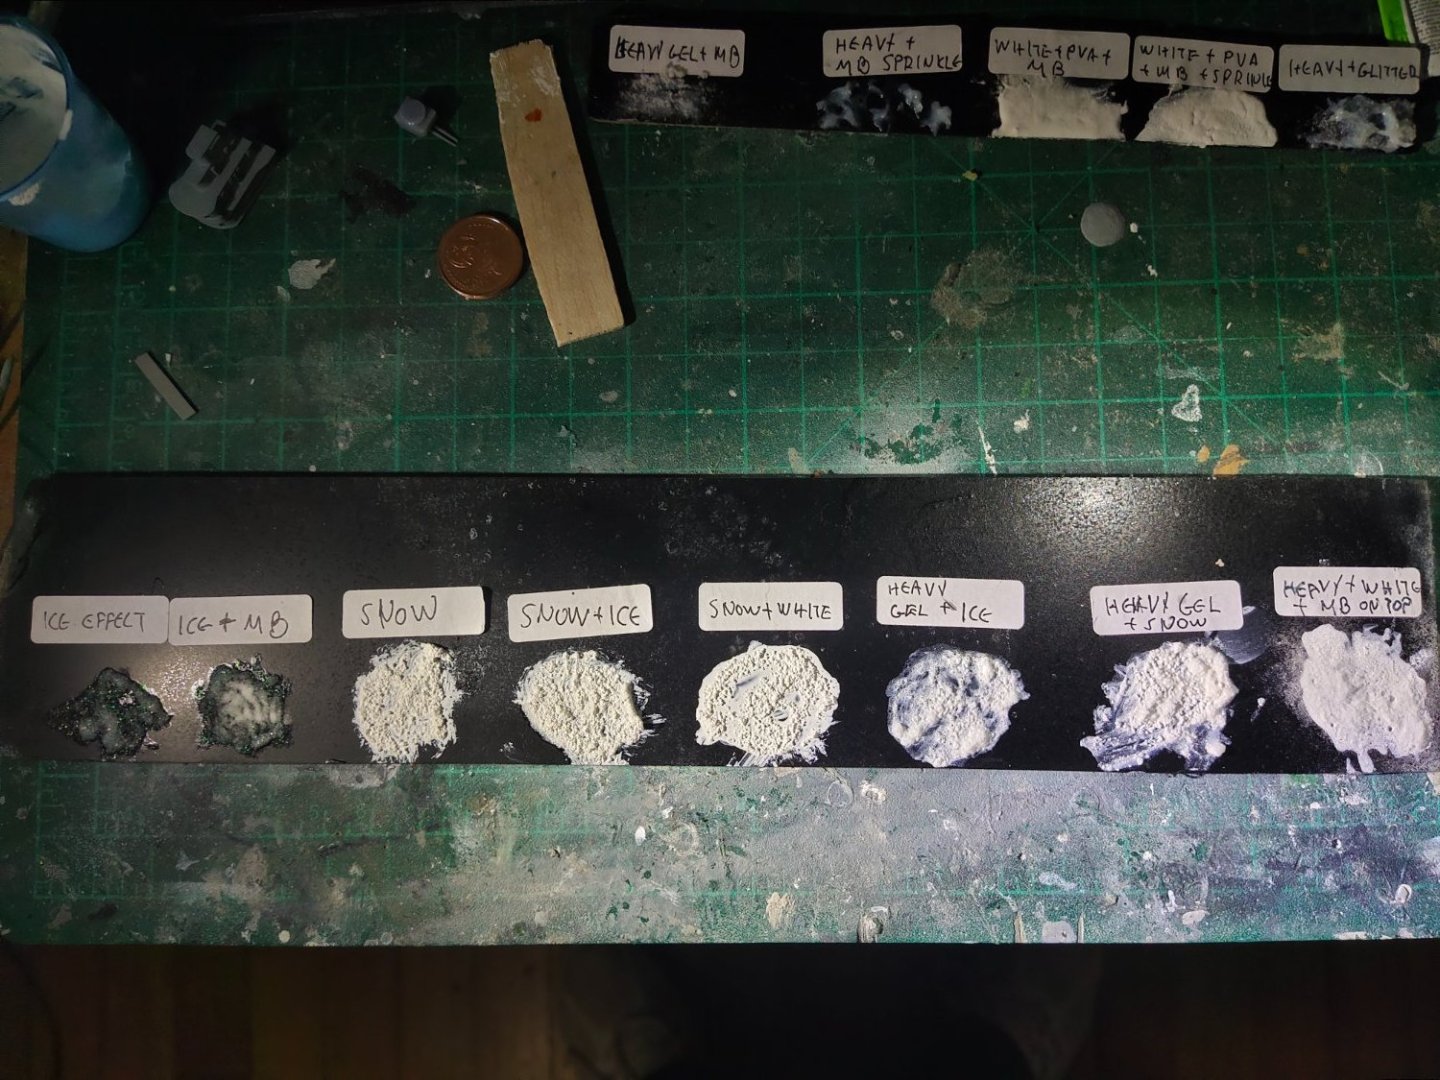
From left to right
-Ice paste
-Ice paste with microballoons
-snow paste
-snow and ice paste
-heavy gel and ice paste
-heavy gel and snow paste
-heavy gel, paint and microballoons sprinkle on top

-Heavy gel and microballoons
-heavy gel and microballoons sprinkle
-paint, PVA and microballoons
--paint, PVA and microballoons sprinkle
-heavy gel and white glitters.
Ice paste gives a good shiny transparency but big colorful glitters reduce realism. This is an artcraft paste not a modeling one.
Microballoons proved a fantastic material. White and shiny like crystal because its actually crystal powder. Gives a nice effect when sprinkled on other pastes but even if added alone.
Tomorrow I will post more pics on day light.
- Canute, mtaylor, king derelict and 2 others
-
5


Type 53H3 Jiangwei-II by mikegr - FINISHED - 1/700 - PLAN frigate
in - Build logs for subjects built 1901 - Present Day
Posted
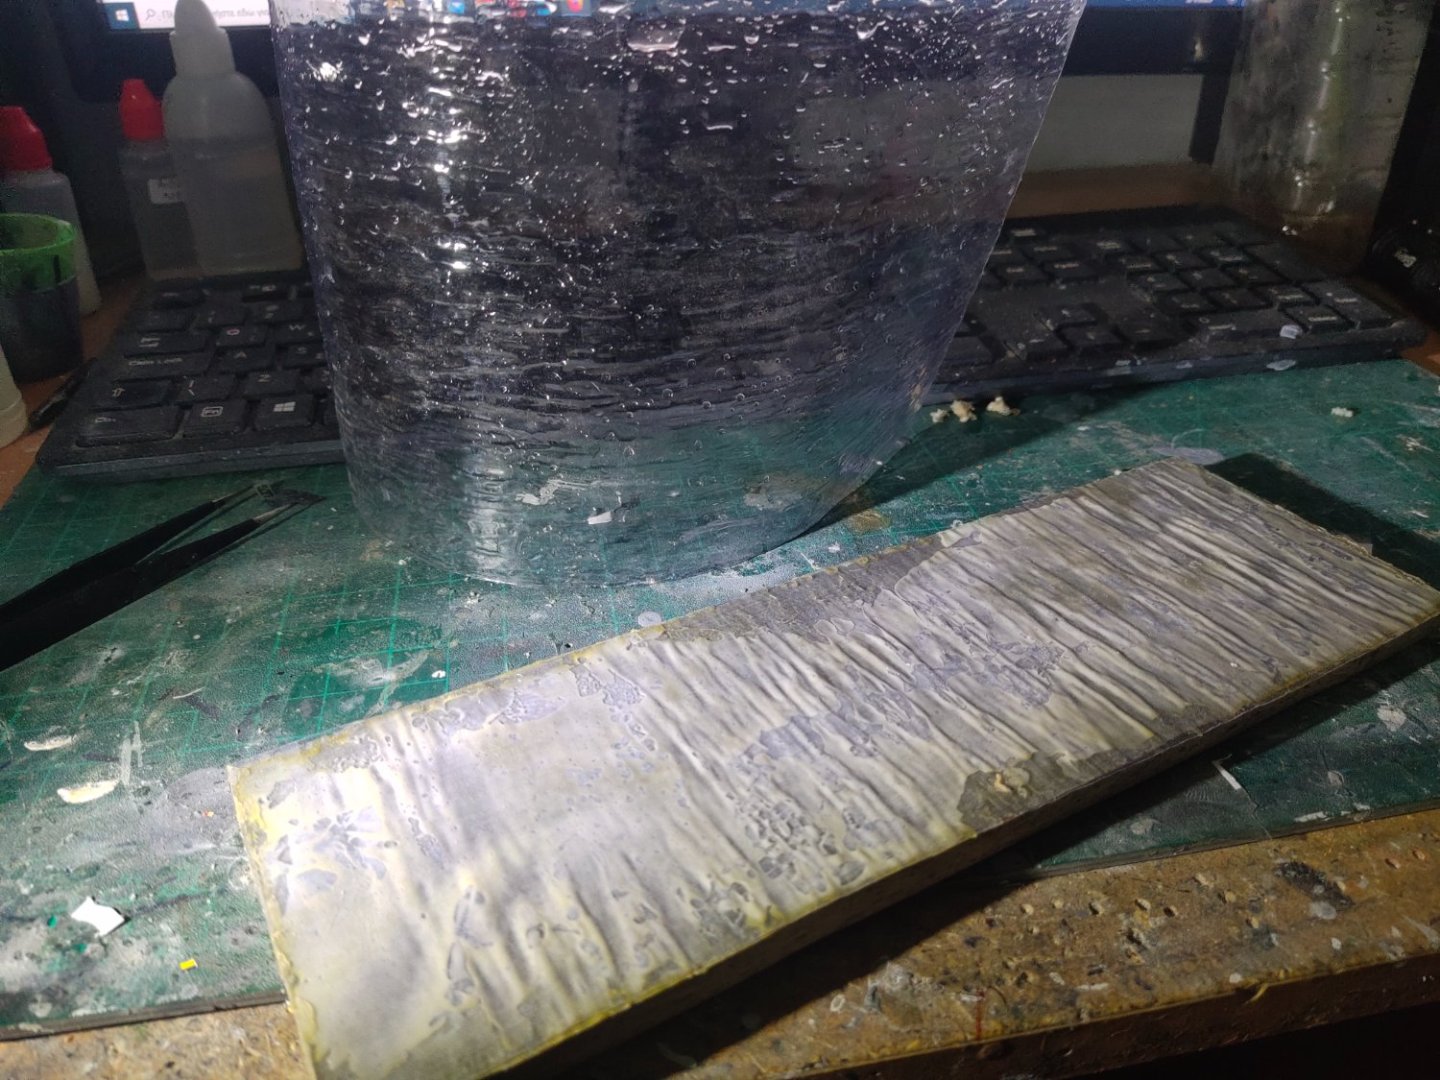
I worked on rear wakes with airbrush, then added white paste near the bow and gel paste right after. Then glazed over with transparent silicone.
Waves were made with snow paste sculptured with toothpick. Waterline gaps filled with cotton soaked in PVA. Sea was covered with gel medium. Once dried it will get transparent and glossy.