


mikegr
-
Posts
589 -
Joined
-
Last visited
Content Type
Profiles
Forums
Gallery
Events
Posts posted by mikegr
-
-
-
6 hours ago, Old Collingwood said:
Wonder if anyone can 3D print these railings to match the PE ones?
OC.
I have seen printed 3d parts including rails. The detail was amazing
- mtaylor, Old Collingwood and Canute
-
 3
3
-
47 minutes ago, Old Collingwood said:
Thank you kindly @RogerF @mikegr I will have to have a think, I think the PE might be too delicate and thin to sand, another option would be hand paint just the rails I need to add for the boat deck, as the Vallejo Surface Primer is so good at going on even with a brush - its shrinks down when it dries, and the AP507A is the Lifecolour range and thin for airbrush work, then the top coat is very good.
OC.
Traditional Humbrol enamel (01)has worked fine for me. I used it with brush only, no thinner. I have no experience with airbrush
- mtaylor, Canute and Old Collingwood
-
3
-
8 hours ago, Old Collingwood said:
Fighting an internal battle with myself - prime / paint / flat top coat the PE frets, or un treat attach and prime / paint by brush? my worry is that handling the rails on the top boat deck sections (some need bends) after cutting then away will lead to peeling away / scuffing etc from holding them while I twist them to shape and glue them in place.
Any ideas folks?
OC.
I have sold this problem by using high quality autobody epoxy primer. But I use it on spray and even it has flow regulator needs careful handling and proper spraying distance as it may flood the tiny parts. Also it may cover the parts numbers on sprues.
-
You may consider using gel CA for rapid PE gluing wherever this needed like masts etc...
- Canute, mtaylor and Spooky spoon
-
3
-
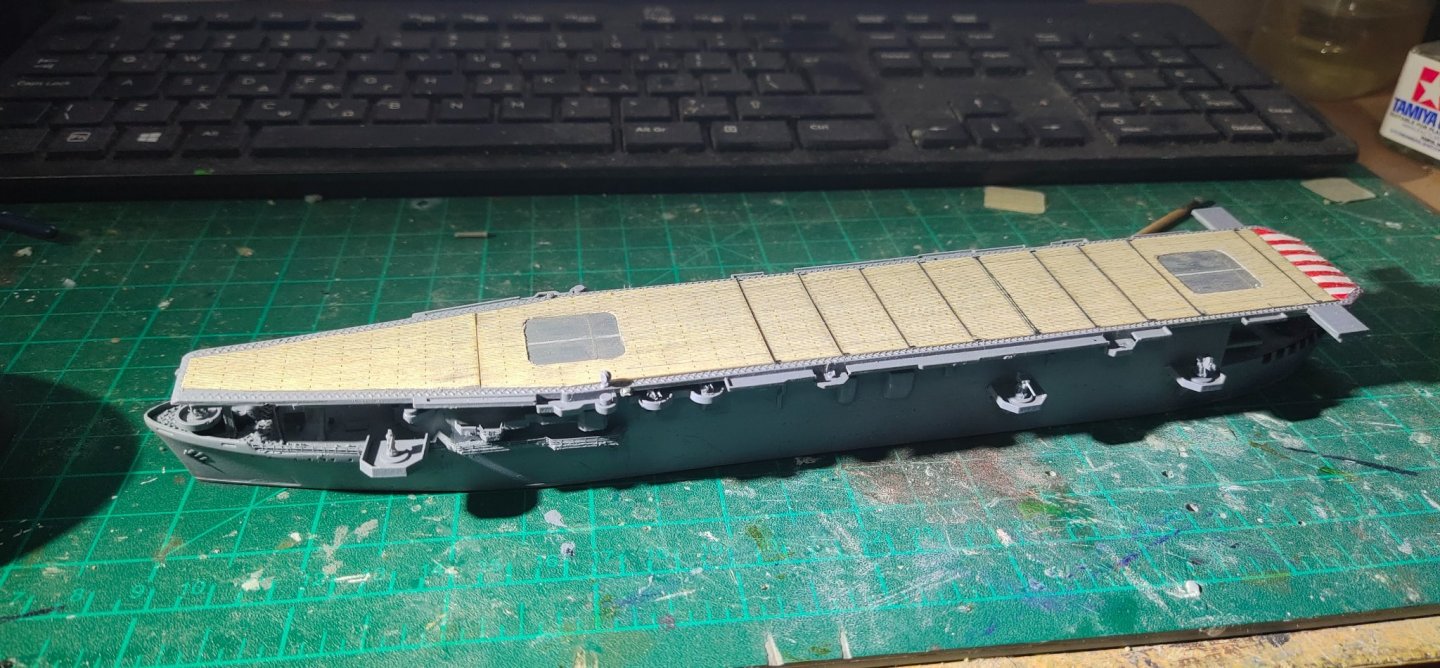
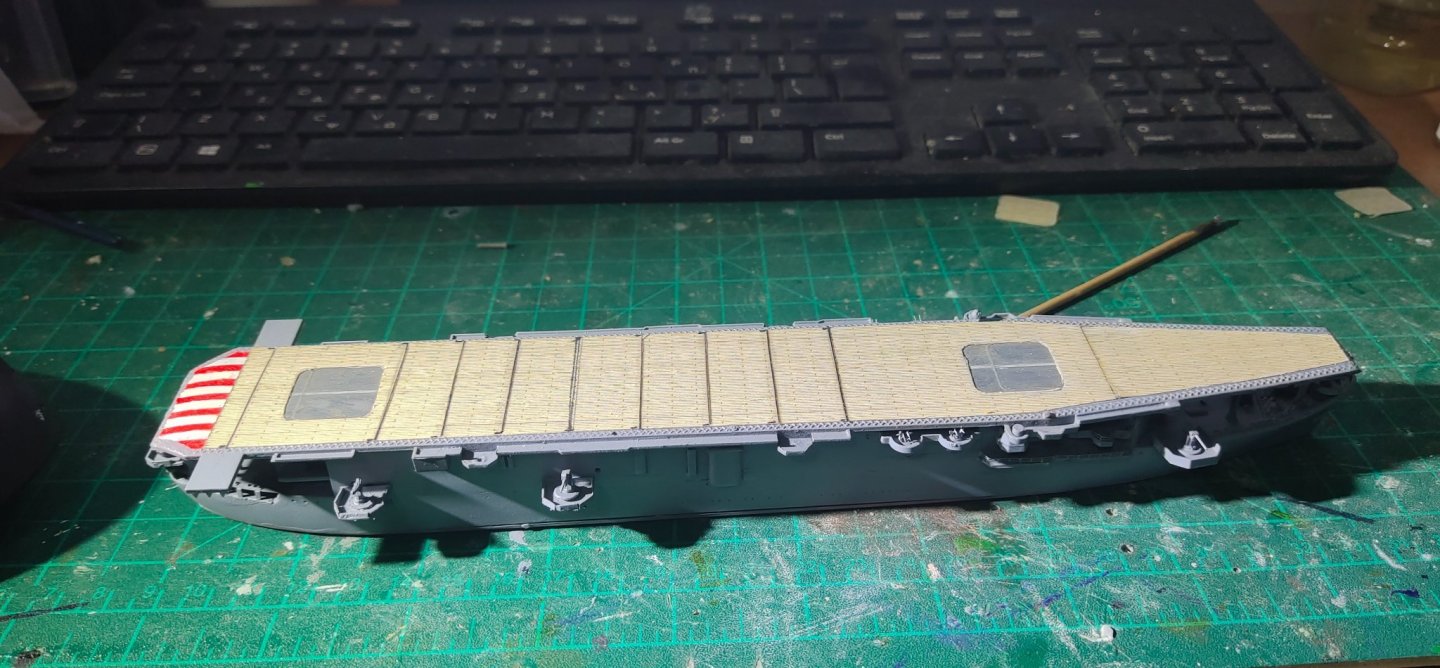
I painted the ship, first airbrush attempt. Test fitted the deck.
- Canute, Old Collingwood, yvesvidal and 2 others
-
5
-
So many stuff for a tiny model.
Good luck. Size doesn't matter. Can be impressive as much as its bigger cousins.
-
6 hours ago, el cid said:
A guy with the handle “Sargentx” used to post on the other site and created a series of very helpful tutorials on color theory, atmosphere, seascapes, etc. I think he’s a professional artist and made some breathtaking models. His seascape series is here:
http://www.shipmodels.info/mws_forum/viewtopic.php?f=4&t=155661
HTH,Keith
This is Chris Flodberg indeed a full time artist. Along with Katseas my favorite sea base builders in 1/700 and 1/350.
https://www.chrisflodberg.com/maritime.
There is also a concentration of methods by builder on this forum
http://www.shipmodels.info/mws_forum/viewtopic.php?f=4&t=37923
-
Merry Christmas to all.
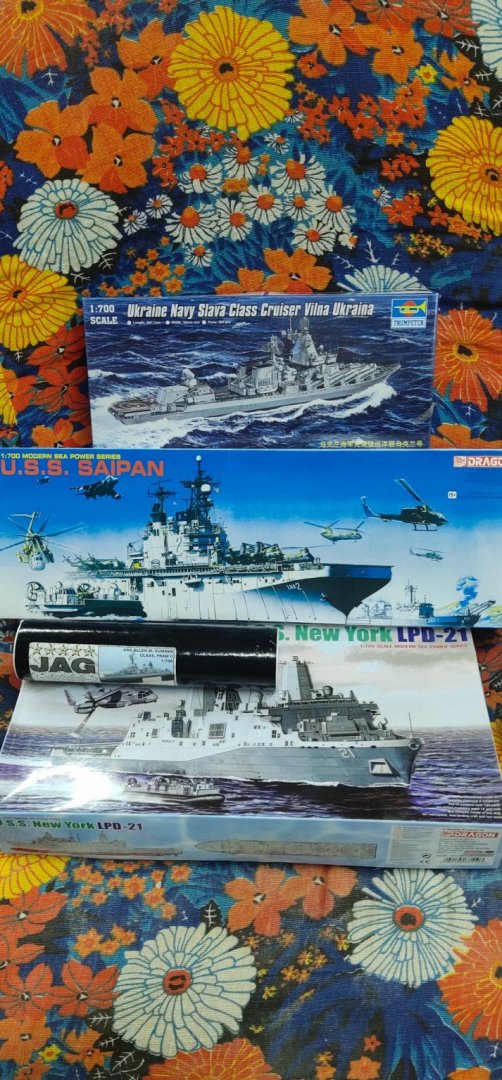
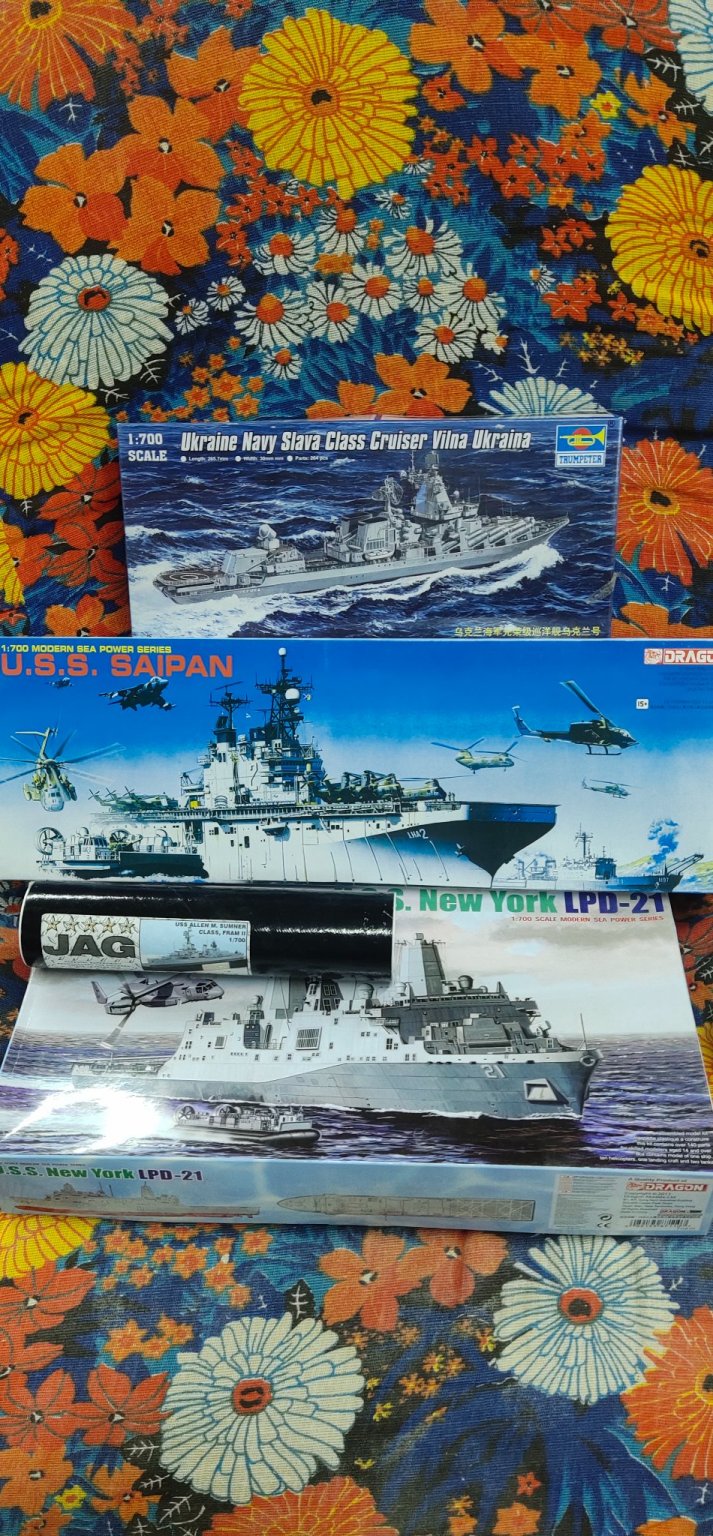
Santa came on time as usual. I think I will make a long kit review thread for the models of my stash so potential buyers can have a look.
- lmagna, mtaylor, Old Collingwood and 3 others
-
6
-
-
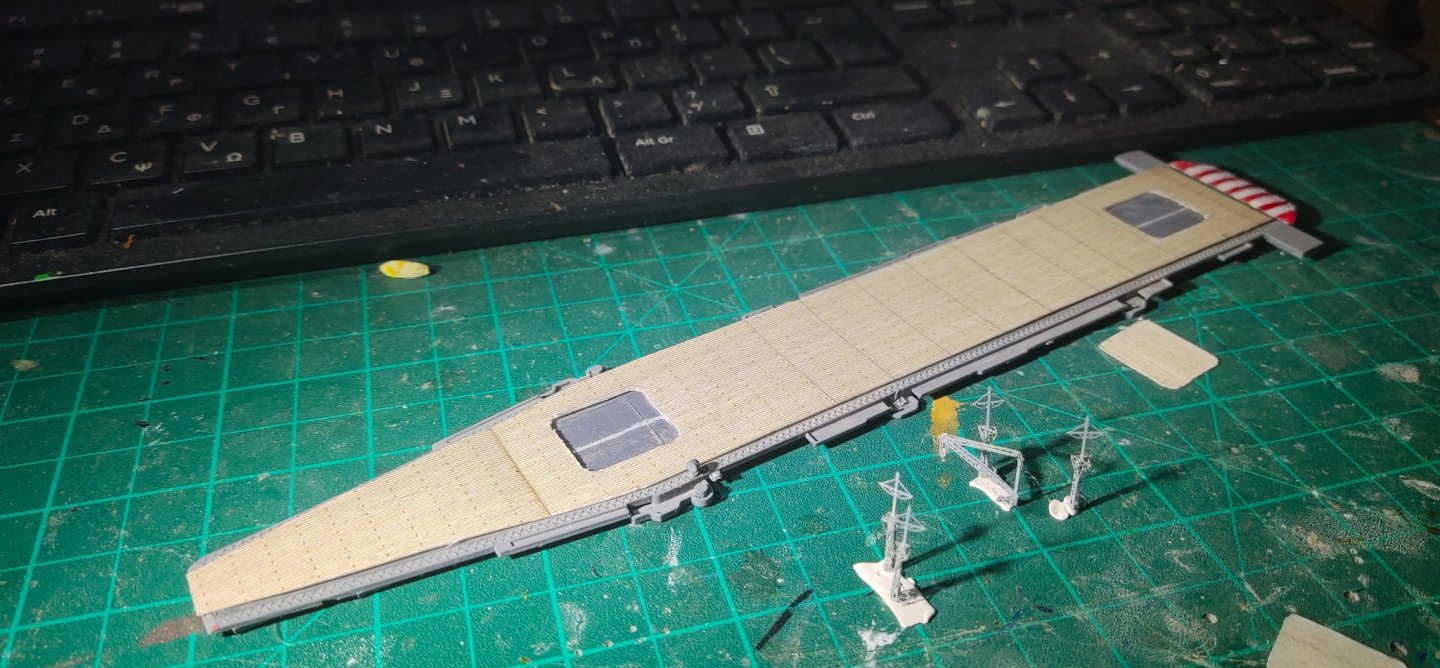
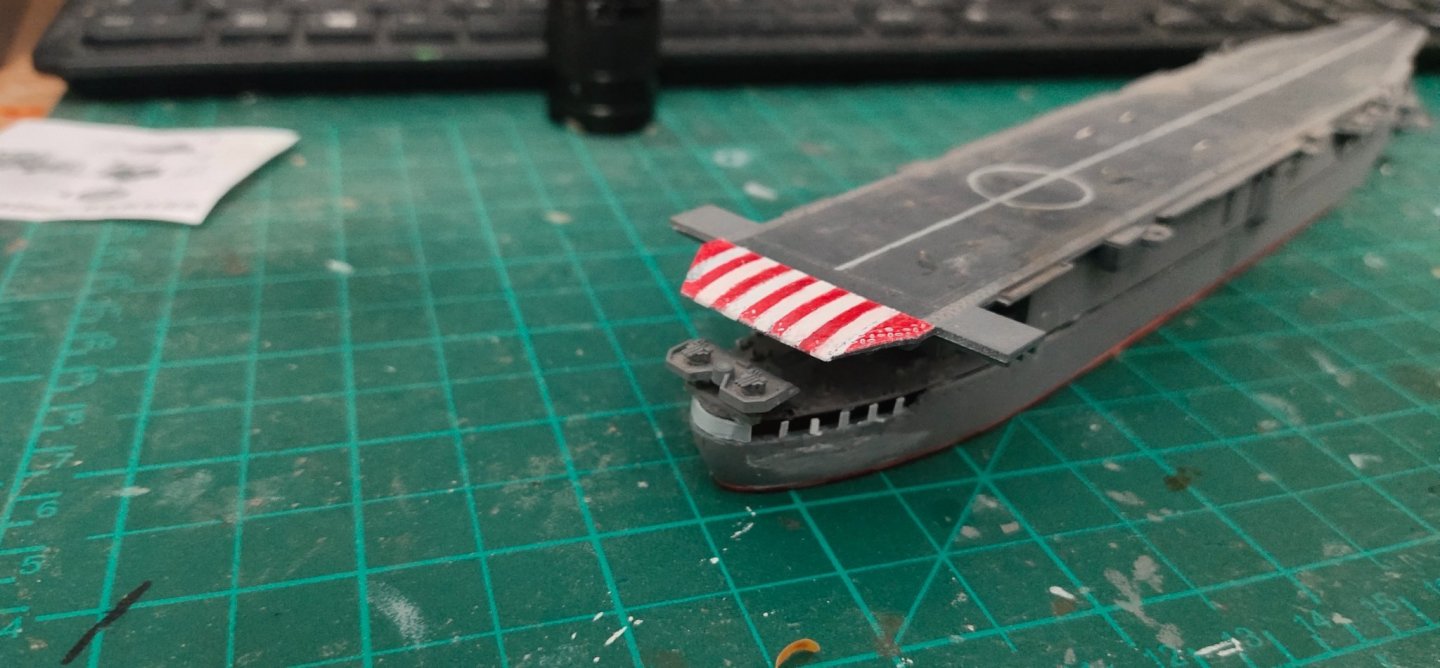
Not much progress I just feel the need to update.
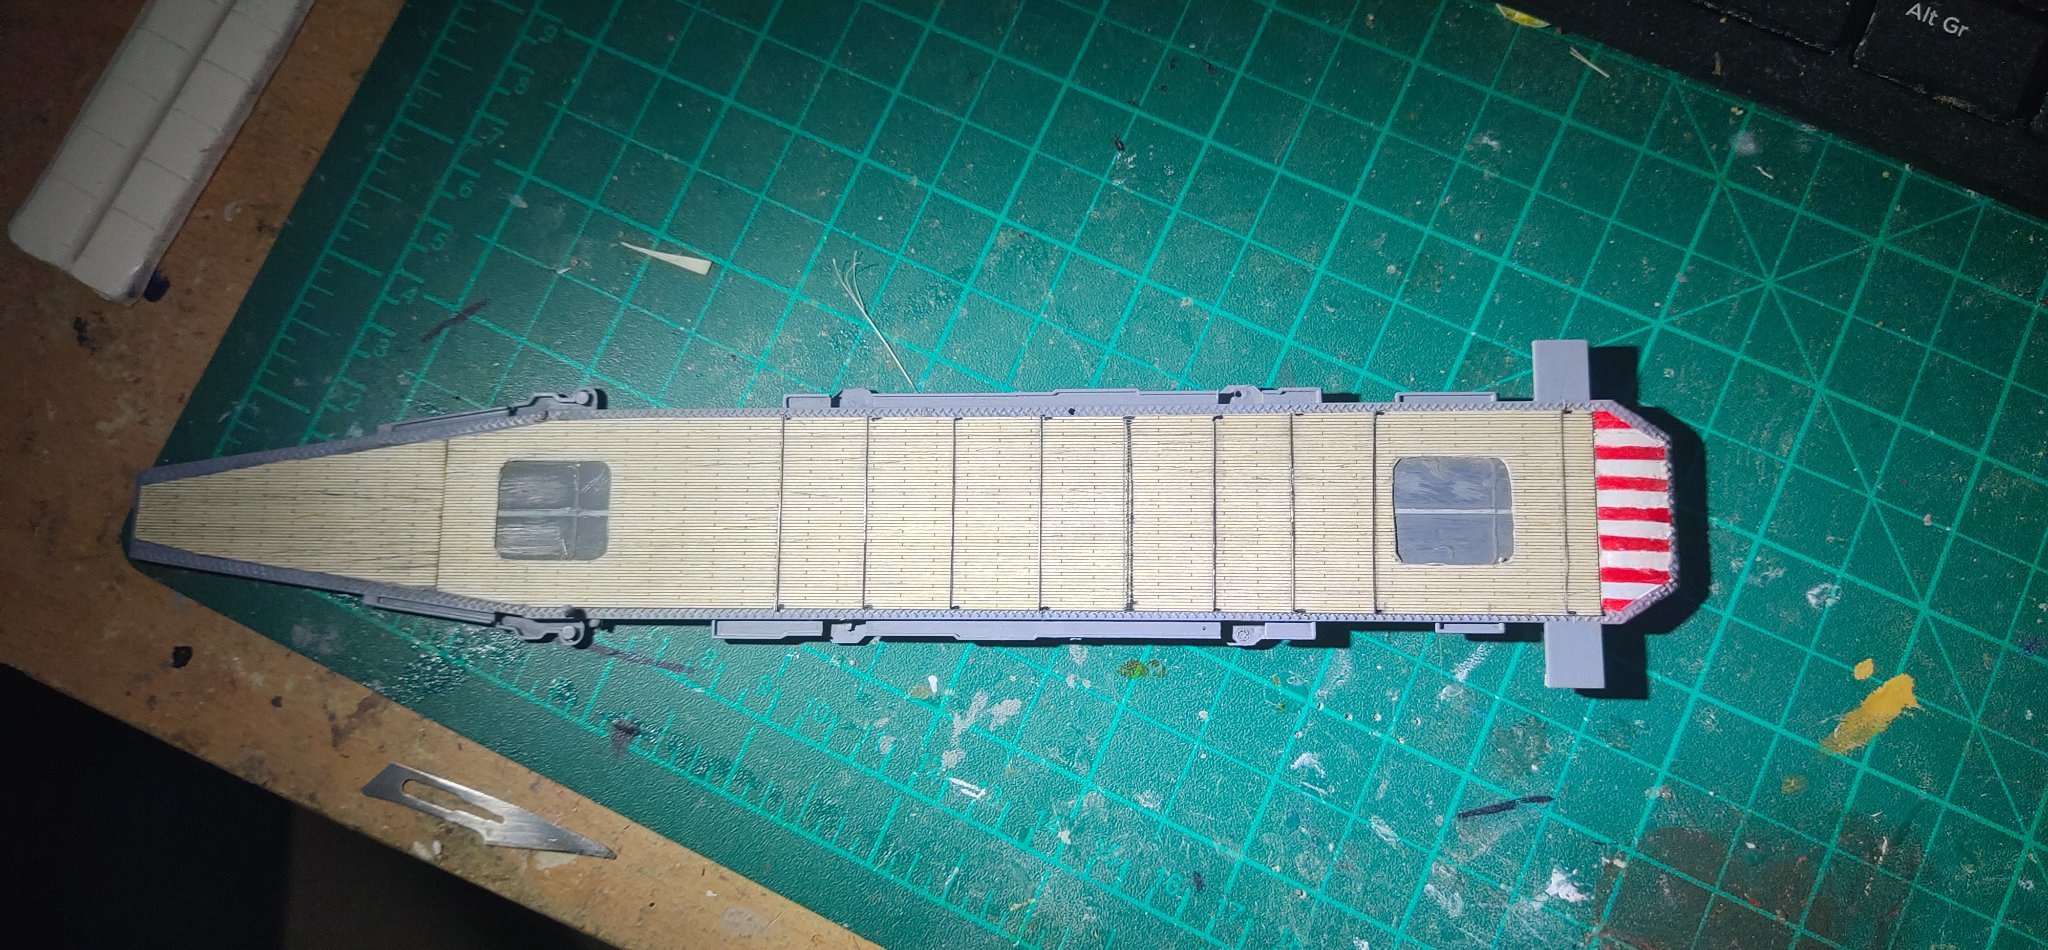
Deck sticker added. I marked the arresting gears. First I used marker and ruler. Attempt was disastrous because the surface wasn't smooth as it looked. I hope parking a couple of aircrafts would cover it somehow.
For the rest, I used paintbrush hair painted with black marker.

-
I finish the masts and deck crane. I cut the deck sticker. Front elevator mismatched about 4mm. Correct measuring needs skills...
-
-
What is more important is the rigidity of the material. I used Aber PE from Poland. They were the worst. Could be bent by just paint brushing them. Then used many from Chinese manufacturers but not Flyhawk. They were better but still soft, while good in detail. Same for White Esign and Russian Micromask.
Japanese PE are the crispiest by far. They can be cut easily with worn blade or on a soft surface while still being durable and forgiving . Can even hear the cracking sound sometimes. Something like the Japanese knives i suppose.
Metal hardness can be achieved by proper treatment perhaps by high temperature. And obviously this has an cost and impact on quality of those material.
Ofourse being solid hard is not the case here as this would create folding problems. There is a magic balance that has to been found to make our lives easier.
- Canute, Old Collingwood and mtaylor
-
3
-
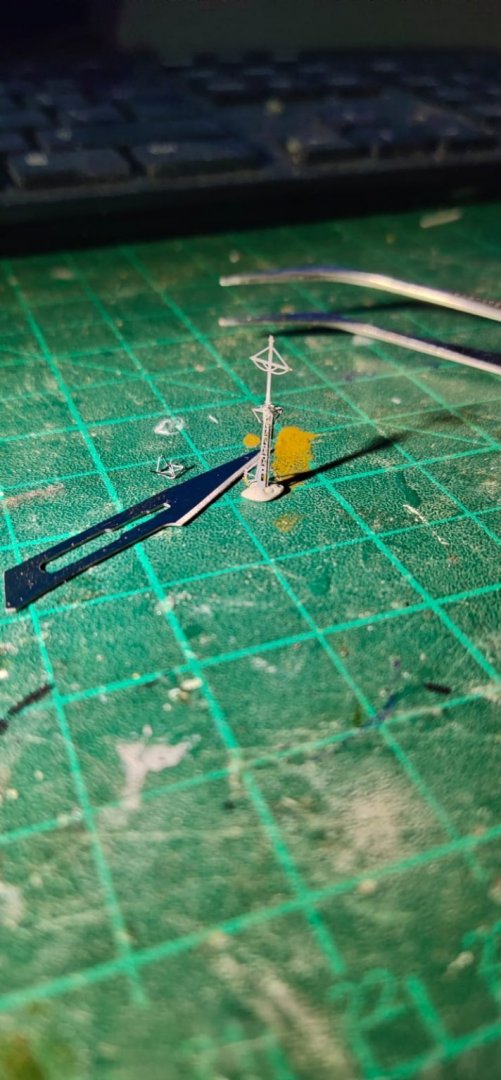
Benting this piece in 4 seemed impossible. However it took me few minutes. Fujimi PE are the best ever worked with.
I use my knife and another blade usually to curve these pieces. I have more 3 to make. Note the tiny part close to the blade. I lost it but found it again
.thumb.jpeg.b0b7c3f1b2fe142f7ad9652e8ff4b8c7.jpeg)
- Veszett Roka, rvchima, Old Collingwood and 5 others
-
7
-
 1
1
-
-
4 minutes ago, Veszett Roka said:
Ah, it makes sense. I understand your concerns here, i would need properly thinned paints too. Especially because the old models have several layers of paint plus lacquer. Still don't know yet how to remove (or overpaint) the old colors. Also the fine pigmentation is important, i think Humbrol enamels is one of the best in this manner (disadvantage is their tendency to sedimentation, and you cannot know how long a paint bucket kept on the self).
Thank you!I used humbrol enamel on all these models. No primer no finish varnish. The color deterioration is minimum after 25 years. Removing these old paints chemically is risky I think without damaging the plastic.
- Canute, lmagna, Old Collingwood and 2 others
-
5
-
1 hour ago, Veszett Roka said:
Why it was tricky? This seems quite simple for me using masking tape and brush, so i'd like to learn some technique for the future. Check out my Titanic here, it was entirely hand-painted by brushes. Also i'd like to restore and bash a lot my childhood models (Russian battleship Potemkin and ice breaker Lenin), both 1:400 and i think your tips will be needed there.
Because enamel paint should be perfectly thinned in order to work easily with it without the risk of microdrips getting under the tape. An airbrush could help but still need experience about matching color thickness, spraying distance etc. A white thinned paint over dark paint would require several layers. A primer would have helped here.
-
On 12/13/2021 at 10:48 PM, JKC27 said:
Love the way this is coming along. I am paying particular attention to the way you constructed the superstructure as it is similar to one of the ships I want to build in the future once I am done with my current. In fact the next one I want to do is actually in my avatar. The way you made the windows is a concept I very well may experiment with myself. It's so hard to make the windows, especially at the front on the nav deck as they are so small and close together that making the pillars is very daunting.
Curious how you are going to approach all the cranes.
Keep up the awesome work!
The windows are made with office staples cut in L shape and glued together so they can display the frame as seen on pic.
I experiment in many surfaces:
Aluminum 0.20 mm thick.
Strong and durable while also easy bending. Opening precise window holes was hard.
Balsa. I used it on the face of the bridge deck. Very easy to form window holes but fragile. I had to create 3 faces. Also need to be smoothened to avoid the wood texture.
Styrene. Easy to work with, no need for smoothing. Kinda inferior material though. I used hair dryer to dry paint on it faster and it curved in no time.
For cranes the nightmare is the rigging. I have dozens of photos but still need to collect details. I bought some single and double pulleys. Amati has also triple as well as other useful parts for modern ships. I will need approx 60-65 In total.
I also need to practice with soldering to make some parts like this cage after the rear crane
- Ian_Grant, KeithAug, GrandpaPhil and 2 others
-
5
-
I did some paintwork on the rear deck. I used brush. It was trickier than I thought. I also modified the bow making an "open" frame.
- Canute, king derelict, thibaultron and 5 others
-
8
-
gotta love those life rafts and paravanes. Most manufacturers can't produce this even in 1/350.
-
-
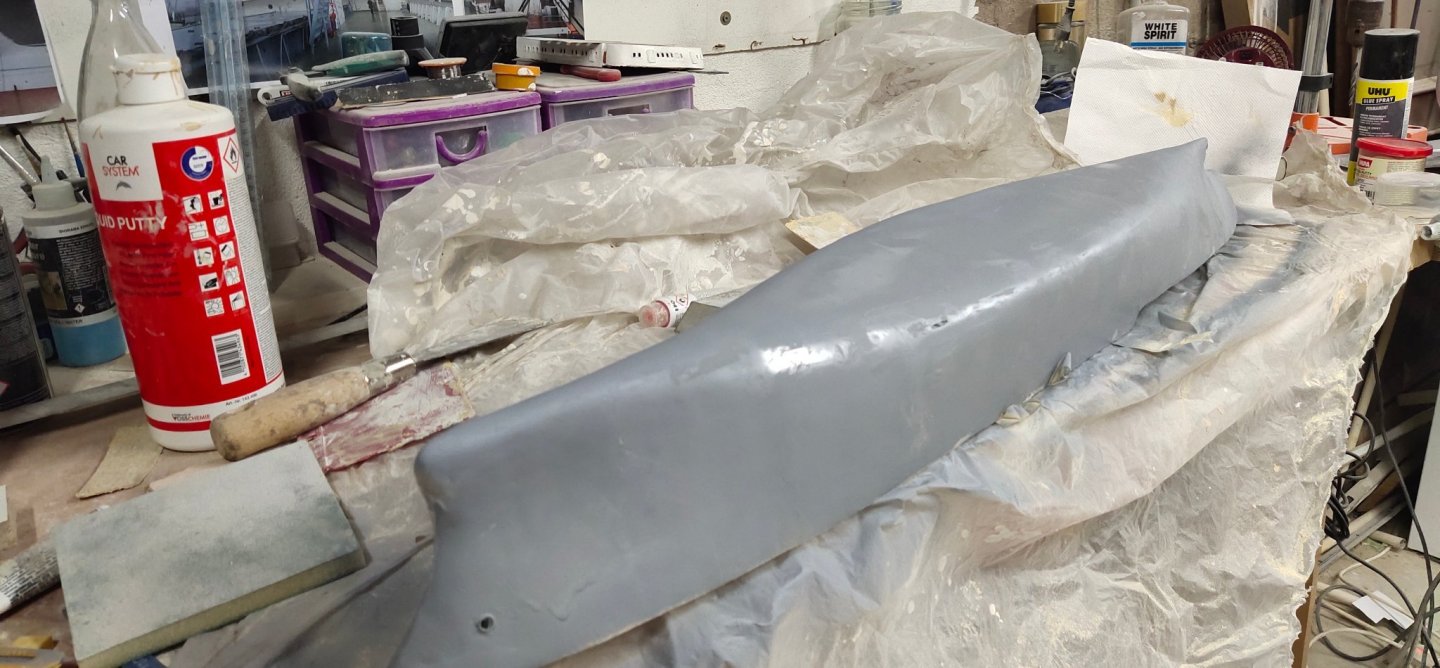
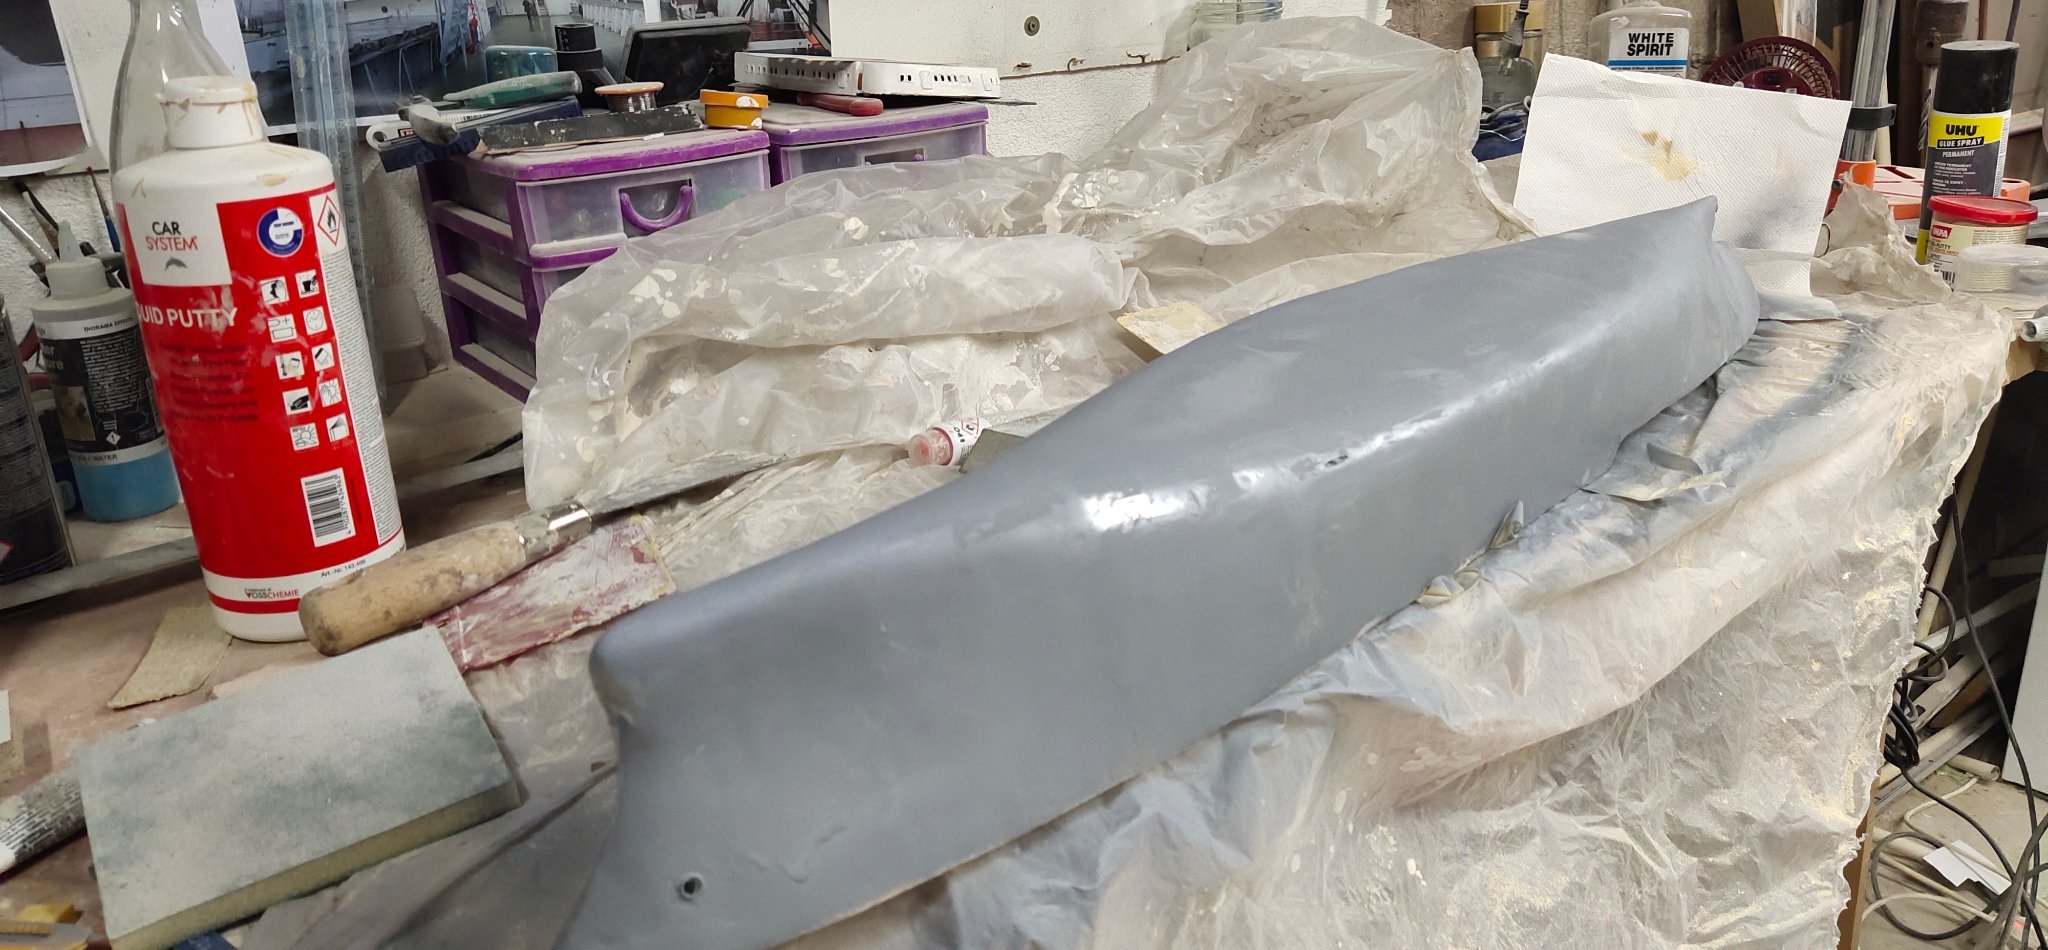
this is the hull after several layers of filler and primer

- GrandpaPhil, mtaylor, Roger Pellett and 3 others
-
6
-
when comes to hull painting i "reverse" the hull. For example to paint the freeboard area, i put the hull upside down to make sure paint overflow wont go underneath the tape. For under the waterline, hull is sitting properly. In both cases spray can in pointing downwards
- Old Collingwood, ted99, hof00 and 2 others
-
5


.jpeg.0299434ba9d51147aefebcbdffb8ca86.jpeg)


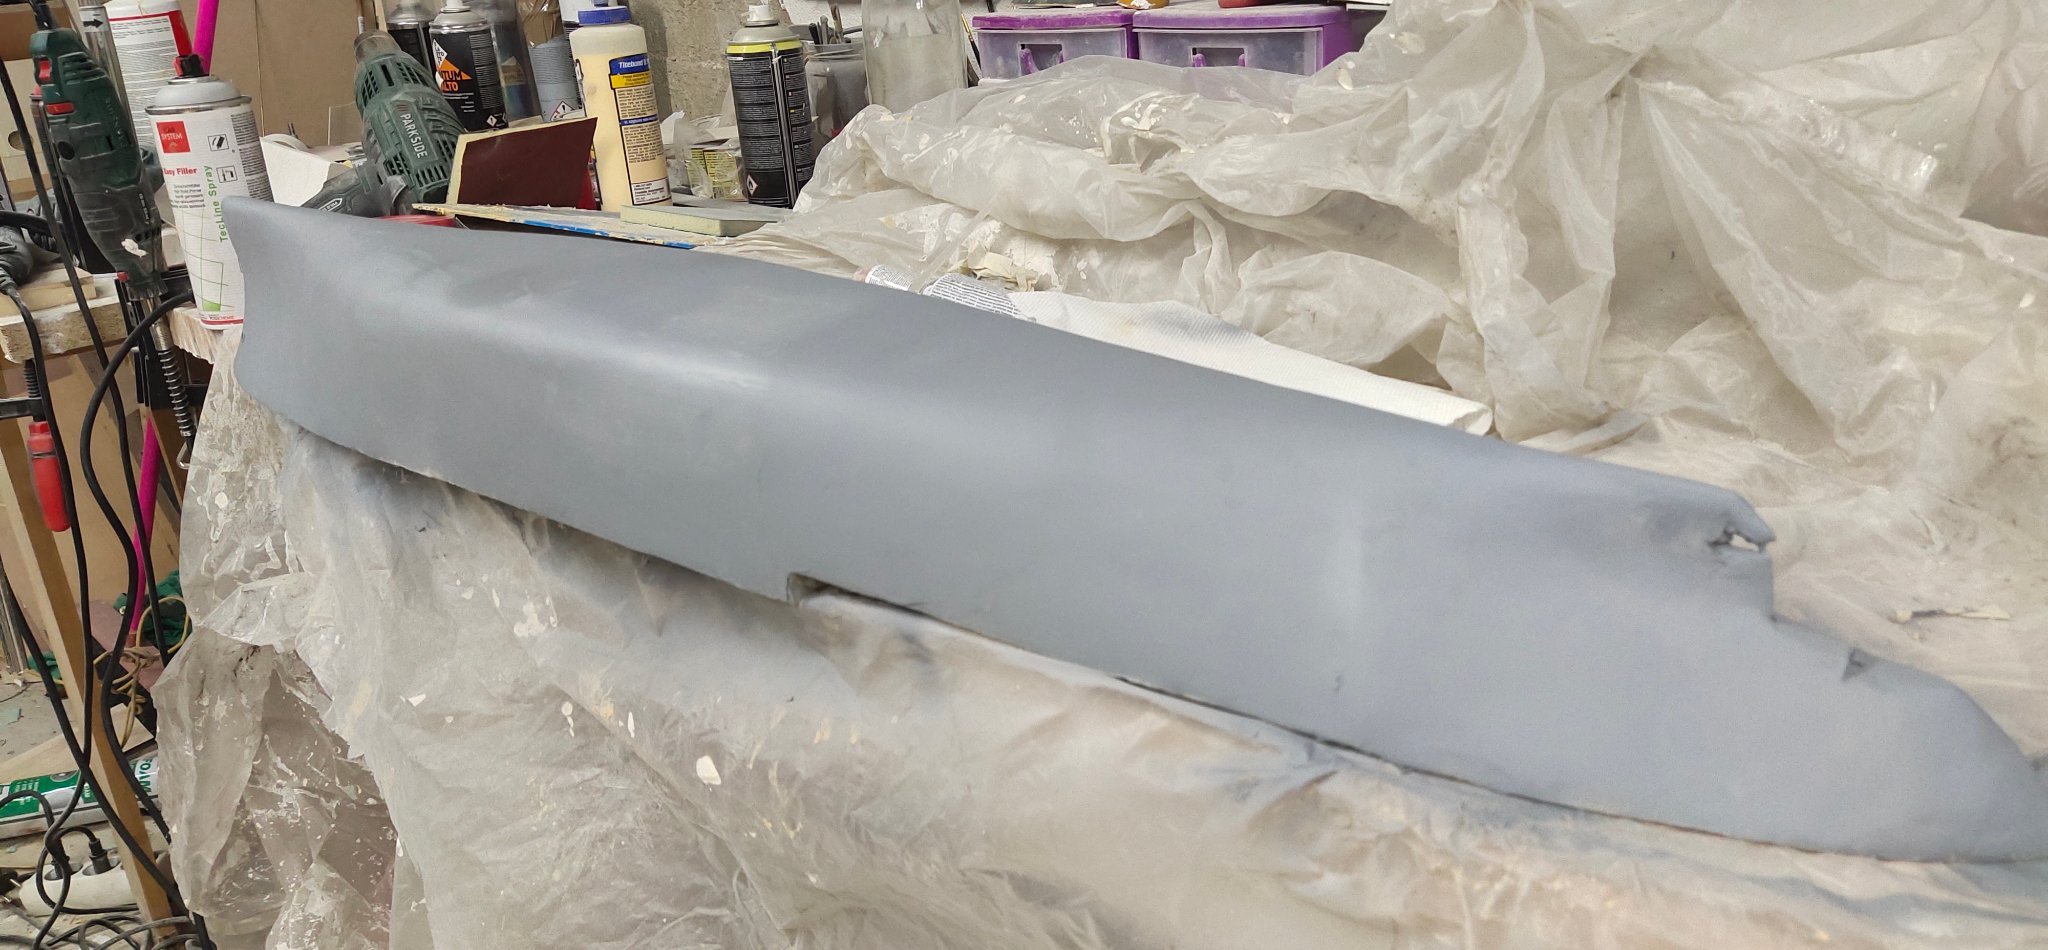
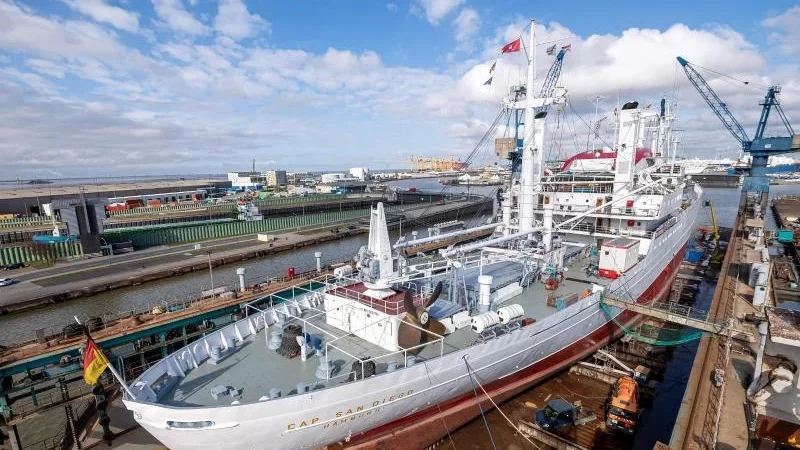
Cap San Diego by mikegr - 1/160
in - Build logs for subjects built 1901 - Present Day
Posted
I have finished the hull to the polishing point. However during hard sanding I noticed vertical surface cracks at the point where main deck lowers and meet the aft deck. Even I had fortified this joint that wasn't enough to make up for the absense of a unified deck and planking. Also some filler peel off appeared in some areas. Another lesson learned. Under these circumstances, laid up of a 3rd hull seemed inevitable.
After consideration and online study I decided to to risk and try a new for me technique. Wrapping the hull in fiberglass.
To make it a bit more rigid and avoid another two week season of sanding I chose an extra light fiber mat, 30gr per sqm heavy. I gave it 3 layers. 5 would be better but I was afraid of extra resin causing problems with foam again. I will probably do the rest work after at least 24 to 48 hours.