-
Posts
7,407 -
Joined
-
Last visited
Content Type
Profiles
Forums
Gallery
Events
Everything posted by Mirabell61
-
Hi Johann. wellcome to the build log and many thanks for your Kind appreciation. What happens next ?....., I`ll have to do the "waist cutouts" and the waist-decks planking fore and aft in order to get all the decks on in correct Position with the sides, and then all the upper hull rails. When that is done. there will be a sequence of filler smoothening, and fairing the aft hull portions and shafthousings. The metal-plating will first begin when the forestanding sequences are done Nils
- 2,625 replies
-
- kaiser wilhelm der grosse
- passenger steamer
-
(and 1 more)
Tagged with:
-
Hi Dan, good decision, the dash-dotted lines shown in the deck plans usualy indicate position (width and length on outer skin) of the outer portholes to the corresponding deck, so that the booking passengers can see if their cabins have 1 or two portholes. I had a look at the Andrea Doria deckplans on the web and only for the "Upper Deck" it shows thin lines next to the porthole positions. My interpetion of these lines is, that it`s the birds view on the bilge keels in this case. Regards, nils
- 108 replies
-
- andrea doria
- ocean liner
-
(and 1 more)
Tagged with:
-
Hi Jeff, that bow looks looks great !.... Super job on the copper plating and that capline.... Nils
-
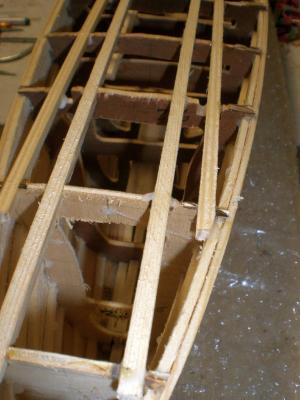
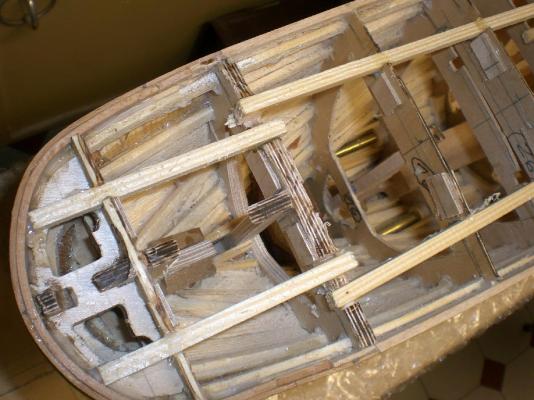
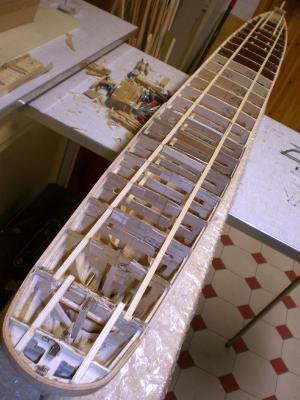
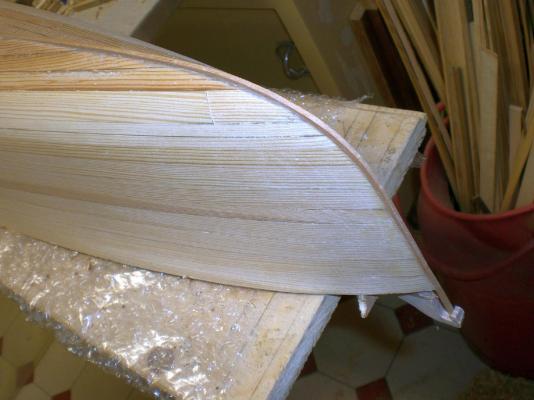
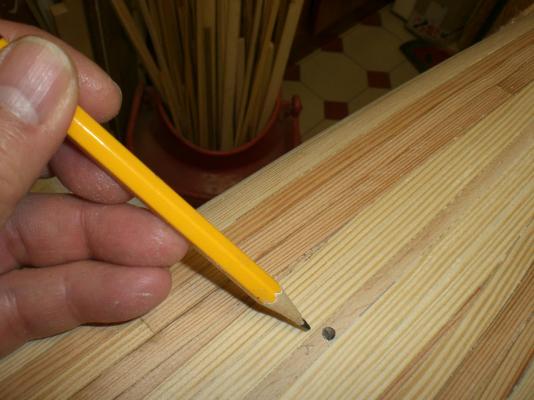
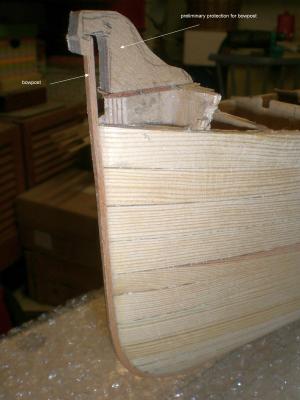
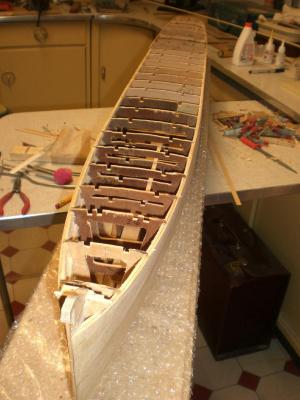
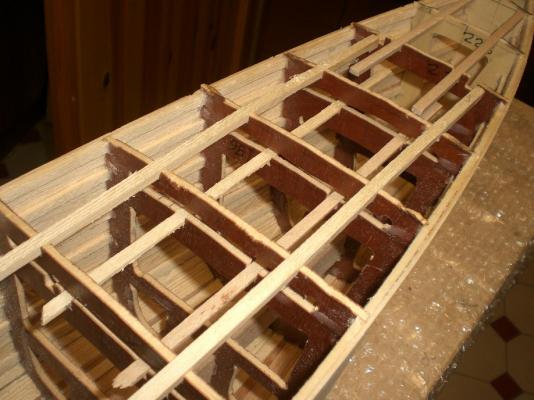
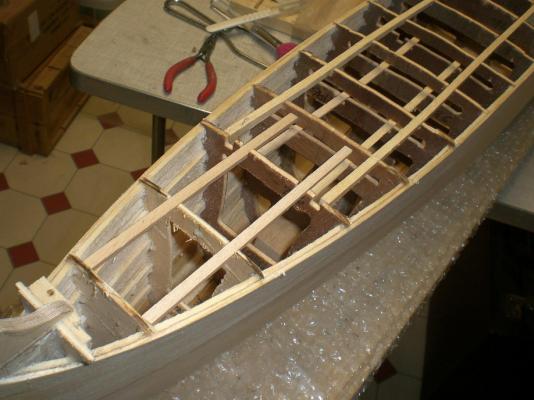
update, deckstringers glued in... will have to adjust the sheerline a bit bothsides before cutting the "waists" fore and aft, where portiones of "one deck lower" will be installed. These deckportions in the sides outcuts area will be pre-planked before mounting.... The forecastle deck outer area will be remarkably rounded downwards to the sides sheerline, which is characteristic for this liner Nils all the wooden beams that are under the deck later on will not be visible, therefore no need (exept for the hight related outcuts and slots) to have precision joint fittings here the upper sides of the deckbeams will be excactly faired to suit the deck curvatures, resp. rest on the side sheers I just weighed the hull at this stadium : 1550 Gramm the rather narrow bowpost (2mm) is blended out to transit into the keel (5 mm), flush with the planking the transition area (vertical planking to horizontal planking) will be further faired shortly before the plating takes place one of the three sleeve holes through the keel for the M4 galvanized steel pedestal spindels of the stand
- 2,625 replies
-
- kaiser wilhelm der grosse
- passenger steamer
-
(and 1 more)
Tagged with:
-
thanks Nigel, yes , you are right, viewing those pics my mind is revolving on that mode.... "how can at least part of those details be done, in order to reflect the charme of 1900", also the lovely cabin walls of the deck housings Just have a look at those toothwheel operated turning devices for the vent Hoods, fantastic !..... and that in scale 1:144 Nils
- 2,625 replies
-
- kaiser wilhelm der grosse
- passenger steamer
-
(and 1 more)
Tagged with:
-
Peter, thanks so much ! These photos are not only beautiful Detail shots of that that aera in technical shipbuilding ( eg: width of deck planking, vents on the boats deck, etc.) at the turn of the century, but also historical document of the passengers fashions Nils
- 2,625 replies
-
- kaiser wilhelm der grosse
- passenger steamer
-
(and 1 more)
Tagged with:
-
Hi Danny, those swivels look wonderful... I have a question: did you choose hard silver soldering for the benefit of chemical blackening behavior versa blackening soft solder joints ? Nils
-
Good work Denis, with all those line- and wire and antena Ends and funnel backstays, that must be safely secured from below the decks I can imagine that you are constantly thinking it through, what must go next, where shall I have no more access to later on.... Very nice work so far, well done Nils
-
Mick, thanks for your words,... the Aluminium foil I found on the web once, from a German based Company that produces thin metal foils and distributes those through wholesalers in large quantities. It took some persuding to ask for selling me a sample in exeption. I think the smallest quantity was 50 meters. The foil is 0,125 mm thick plus adhesive gluefilm and has a waxed paper protection foil on the backside. I did several Trials with different small samples from other suppliers with the self made Ponce Tools, but this 0,125 mm it worked out with best results, also with reference to the glue Quality. Unfortunately I do`nt really know where the foil is used for in industrial Engineering, I heared once that for example that steel plate traffic signboards along the road are coated with this foil after Offset printing those I do hope that the remaining rest will last for my KWdG Project as well Nils
- 113 replies
-
- heinrich kayser
- steamship
-
(and 1 more)
Tagged with:
-
Thanks Dan, I`m glad you like it, .... most of the sequences will be repeated, only mounting in a different hull shape with my new KWdG Project. The log of the "Heinrich Kayser" is quite extensive in showing the build sequences and I´ll be happy if you can adopt the one or other Thing for your Project. If i can help, please feel free to contact me Nils
- 113 replies
-
- heinrich kayser
- steamship
-
(and 1 more)
Tagged with:
-
Thank you ED, You are very wellcome to drop in to this log alltimes, and I`m very honored to receive these Kind comments from a master builder as you are. I just love the wonderful modeling craftmanship, knowledge and Performance skill, like you Show in your "Young America" extreme clipper Nils
- 2,625 replies
-
- kaiser wilhelm der grosse
- passenger steamer
-
(and 1 more)
Tagged with:
-
Thanks for your comment Peter, and so much for sharing These wonderful historic Photos. There is a book on the market author: Eberhard Mertens, "Deutsche Lloyd Schnelldampfer" which I did`nt invest in yet, due to my Budget, but I presume you may have it... Where did you find These pics ?, and mentioning there were even plenty more, Oh, you realy made me so curious now, would very much appreciate if you kindly would be able to drop some now and then, together with your visits to my log .... there are so many Details to be seen on those pics, like the outcuts for the anchor chains in the second forecastle wave-breaker, I was just wondering how I could / should do that Cheers Nils
- 2,625 replies
-
- kaiser wilhelm der grosse
- passenger steamer
-
(and 1 more)
Tagged with:
-
Congrats Dan, to completing "The Queen Anne`s Revenge", a very beautiful built ship with lovely Details, I do hope it reached it`s destinated Museum safe and Sound... Nils
- 241 replies
-
- queen annes revenge
- pirate
-
(and 2 more)
Tagged with:
-
Hi Dan, I just read your introduction to this ship, very interesting to get an Impression of your intensive research (well done !) on this ship and it`s last fatal journey. Trust this will be a very ambitious and by no means easy Task, but certainly you shall be keellaying this italian Beauty asap, Will stay tuned and watching to this interesting build log and wish you all the best with your ongoing research. BTW. I share your doubts for the Sub waterline hull shape, it`s a bit too much "Pear-shape" cross section in my opinion on that Frame plan, whereby the pic of the launching from the slip Shows a much more slender hull like it must have been for 1951 fashions Nils
- 108 replies
-
- andrea doria
- ocean liner
-
(and 1 more)
Tagged with:
-
Denis, thank you very much, your offer to help out with these hole-rivets is much appreciated, I`ll let you know if further requirement arrises.... Did I understand right, you`re planing the tallship "Danmark" up your sleeve, that will be great Nils
- 2,625 replies
-
- kaiser wilhelm der grosse
- passenger steamer
-
(and 1 more)
Tagged with:
-
thanks very much Patrick, Nils
- 2,625 replies
-
- kaiser wilhelm der grosse
- passenger steamer
-
(and 1 more)
Tagged with:
-
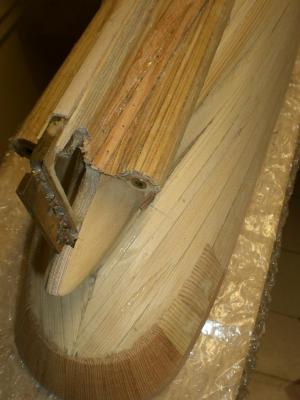
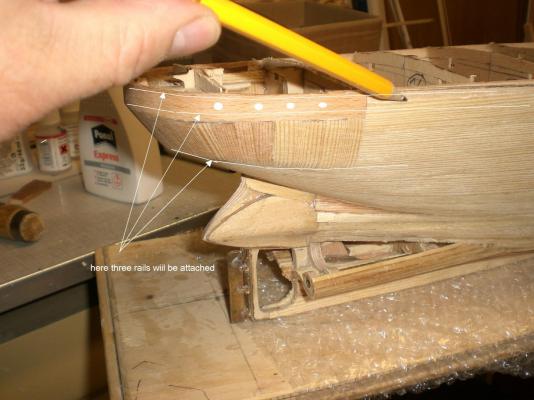
Build log part 11 some progress on building the hull.... Nils this is no convertion to a viking longboat, but temporary protection to the prolonged bowpost until the upper bow bulwark is ready for attaching my wife asks me this morning, if I`m sure the ship is not much too narrow... All the overstanding frame hights have been cut off between the second and the third rail (stern) I need enough place for attaching the decoration and the name, and homeport. For providing adequate space for the portholes around the poop and perhaps some "eyebrows" over the portholes, I had to increase the hight of this (round the stern) plank accordingly as well as a good transition of the sheer in foreward direction these are preliminary deck-stringers, for dry fit. There will be a pit right down to the lower deck, just behind the later forecastle bulwark
- 2,625 replies
-
- kaiser wilhelm der grosse
- passenger steamer
-
(and 1 more)
Tagged with:
-
Many thanks Mark, appreciate your tip for portholes Simulation, that is actualy the solution I`m going after by using hollow rivets DIN 7340 Form "B" I also found an in diameter suitable solid Nylon cable (like used for a rotating grass cutter) to slice / cut the glassing inlays from. Hope ist works well.... Nils
- 2,625 replies
-
- kaiser wilhelm der grosse
- passenger steamer
-
(and 1 more)
Tagged with:
-

Cutter Cheerful 1806 by rafine - FINISHED
Mirabell61 replied to rafine's topic in - Build logs for subjects built 1801 - 1850
Bob, your build sequences look clear, straight foreward and very well executed. You`ve got a real "gem" of a cutter on your slipway... Would it be worth a thought to do the hull below the wales in lapstrake planking ? (like Lee had Chosen for his cutter "Alert" ) Nils- 525 replies
-
- cheerful
- Syren Ship Model Company
-
(and 1 more)
Tagged with:
-
beautiful build Clarence, those metal paddle wheels look great Nils
- 39 replies
-
Hi Rod, thats a fine kit, especially those metal parts are eyecatchers,..... In your post #1, pic 6 it is showing etched, rivet-plates, is this including plates for the hull as well ? Your build Looks very well done to date... Nils
-
Hey Crackers !, I`m very much flattered with such fine comment of yours, stay tuned and enjoy.... Nils
- 2,625 replies
-
- kaiser wilhelm der grosse
- passenger steamer
-
(and 1 more)
Tagged with:
-
Thanks very much Denis, I`m just searching the web / Ebay in order to find suitable hollow rivets from which I intend to make the appr. 400 brass hull portholes from. Think I`ve just found something this afternoon, We`ll see.... Nils
- 2,625 replies
-
- kaiser wilhelm der grosse
- passenger steamer
-
(and 1 more)
Tagged with:
About us
Modelshipworld - Advancing Ship Modeling through Research
SSL Secured
Your security is important for us so this Website is SSL-Secured
NRG Mailing Address
Nautical Research Guild
237 South Lincoln Street
Westmont IL, 60559-1917
Model Ship World ® and the MSW logo are Registered Trademarks, and belong to the Nautical Research Guild (United States Patent and Trademark Office: No. 6,929,264 & No. 6,929,274, registered Dec. 20, 2022)
Helpful Links
About the NRG
If you enjoy building ship models that are historically accurate as well as beautiful, then The Nautical Research Guild (NRG) is just right for you.
The Guild is a non-profit educational organization whose mission is to “Advance Ship Modeling Through Research”. We provide support to our members in their efforts to raise the quality of their model ships.
The Nautical Research Guild has published our world-renowned quarterly magazine, The Nautical Research Journal, since 1955. The pages of the Journal are full of articles by accomplished ship modelers who show you how they create those exquisite details on their models, and by maritime historians who show you the correct details to build. The Journal is available in both print and digital editions. Go to the NRG web site (www.thenrg.org) to download a complimentary digital copy of the Journal. The NRG also publishes plan sets, books and compilations of back issues of the Journal and the former Ships in Scale and Model Ship Builder magazines.


