HOLIDAY DONATION DRIVE - SUPPORT MSW - DO YOUR PART TO KEEP THIS GREAT FORUM GOING! (Only 13 donations so far - C'mon guys!)
×


Mirabell61
-
Posts
7,407 -
Joined
-
Last visited
Content Type
Profiles
Forums
Gallery
Events
Everything posted by Mirabell61
-
 finest top modeling art Alex, very well done !! Nils
 -
John, I thank you for your word, perhaps if I would have Talent in sculptering there would have been made some partial blocks carved out with sculpturers hammer an chissel, to be fitted in Nils
- 2,625 replies
-
- 2
-

-
- kaiser wilhelm der grosse
- passenger steamer
- (and 1 more)
-
congrats to Dragon II building decision Bob, never learnt to know MSW 1, but had a look at your Gallery, ist a very nice boat. The actual Dragon-class calls for clinker planking, that will look great, hope you can put it on to your model. Wish you good success with Dragon II Nils
- 127 replies
-
- 3
-
-
- dragon class
- yacht
- (and 1 more)
-
Many thanks for your words Patrick and Mark,... and all the "likes" Patrick, Oh, and I nearly forgot to insert the stb. and port bilgekeels, (got some aluninium flat material for the keels), before the roundings are planked. They are going to be "sinked" radial a bit into the Frames in midship area for secure hold Mark, I knew that that area will cause some headaches, I`ve seen one or two models of this ship on the web, and the builders managed to do that beautifuly, thats quite tempting and encouraging Nils
- 2,625 replies
-
- 2
-
-
- kaiser wilhelm der grosse
- passenger steamer
- (and 1 more)
-
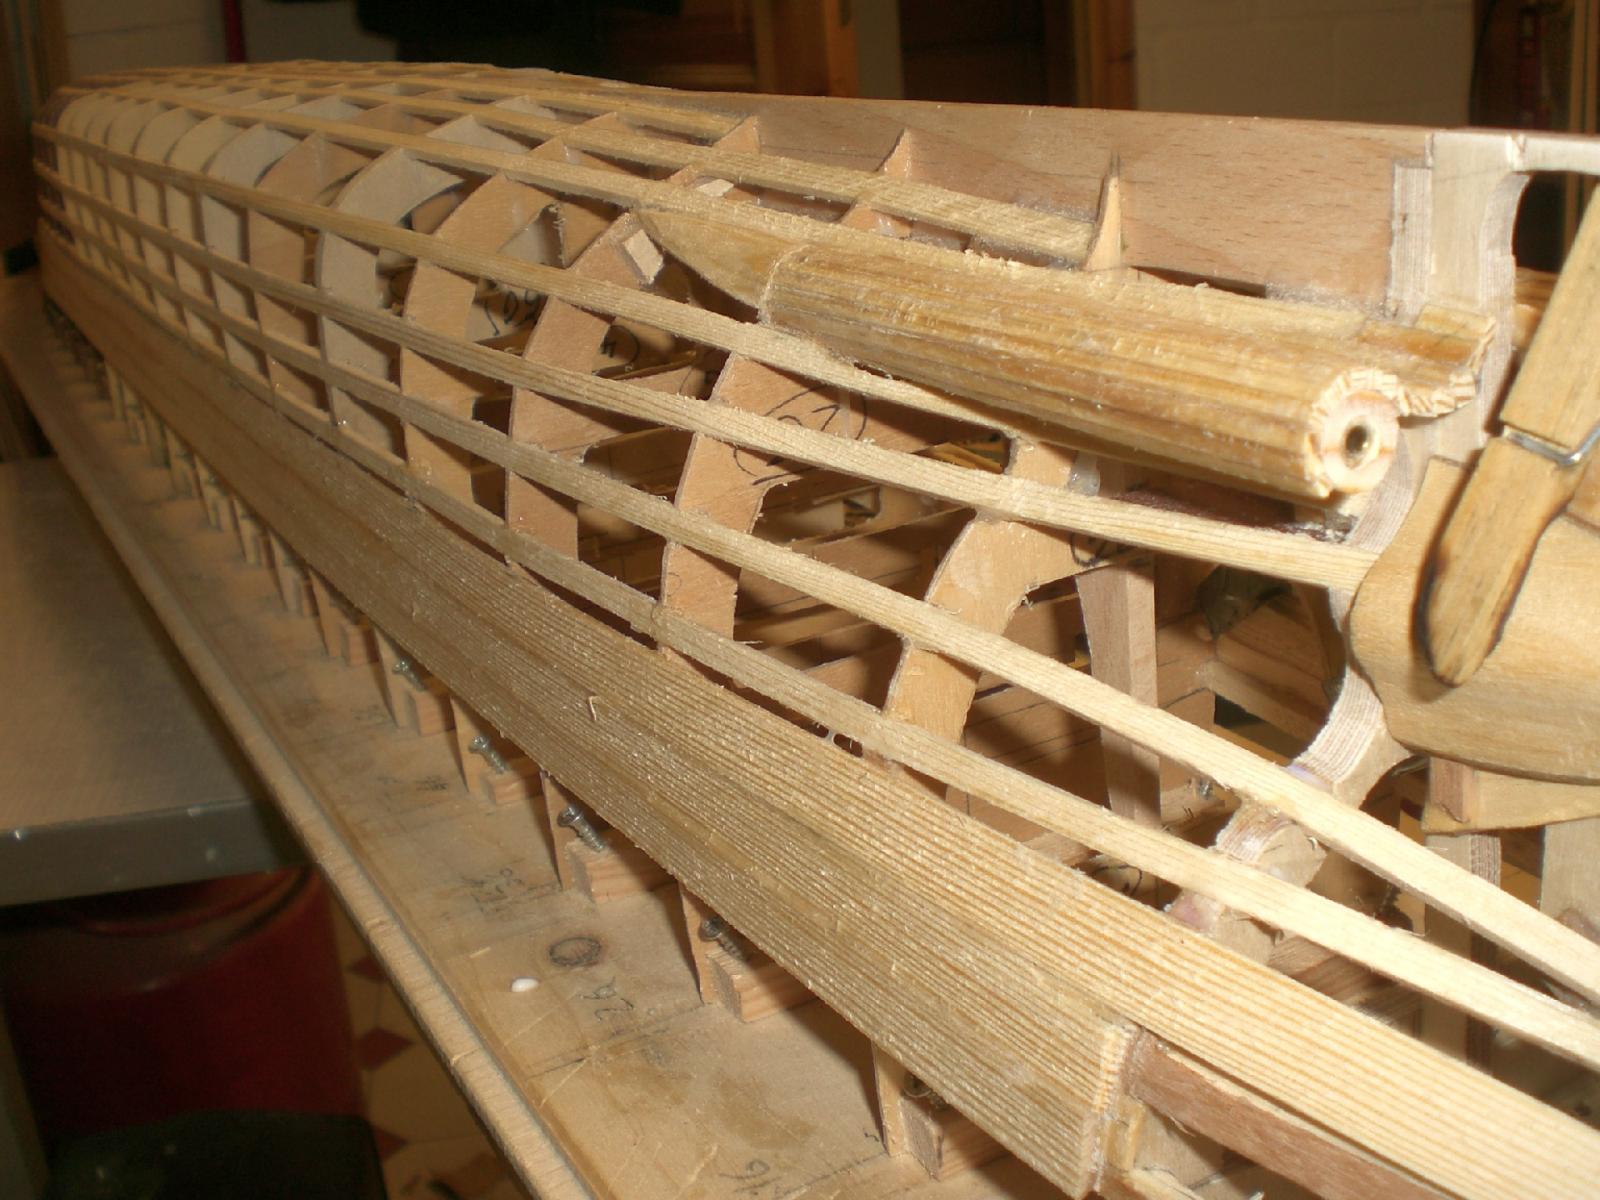
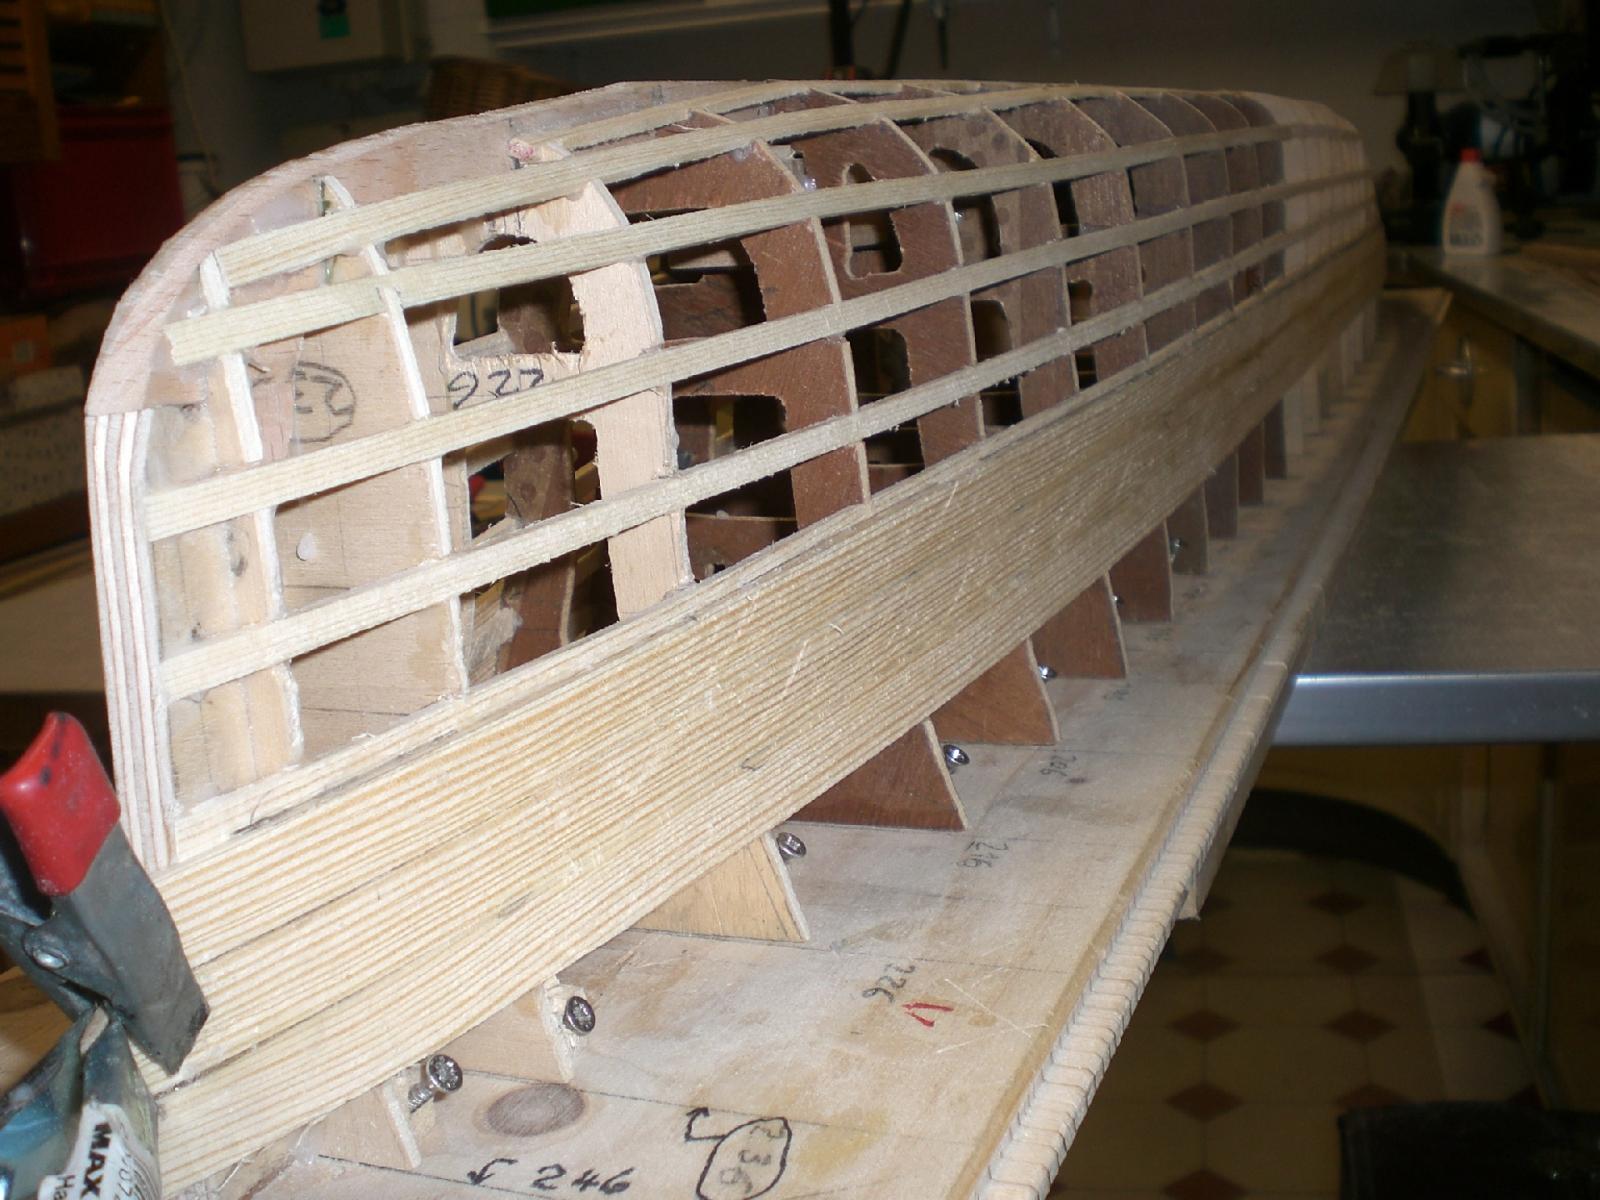
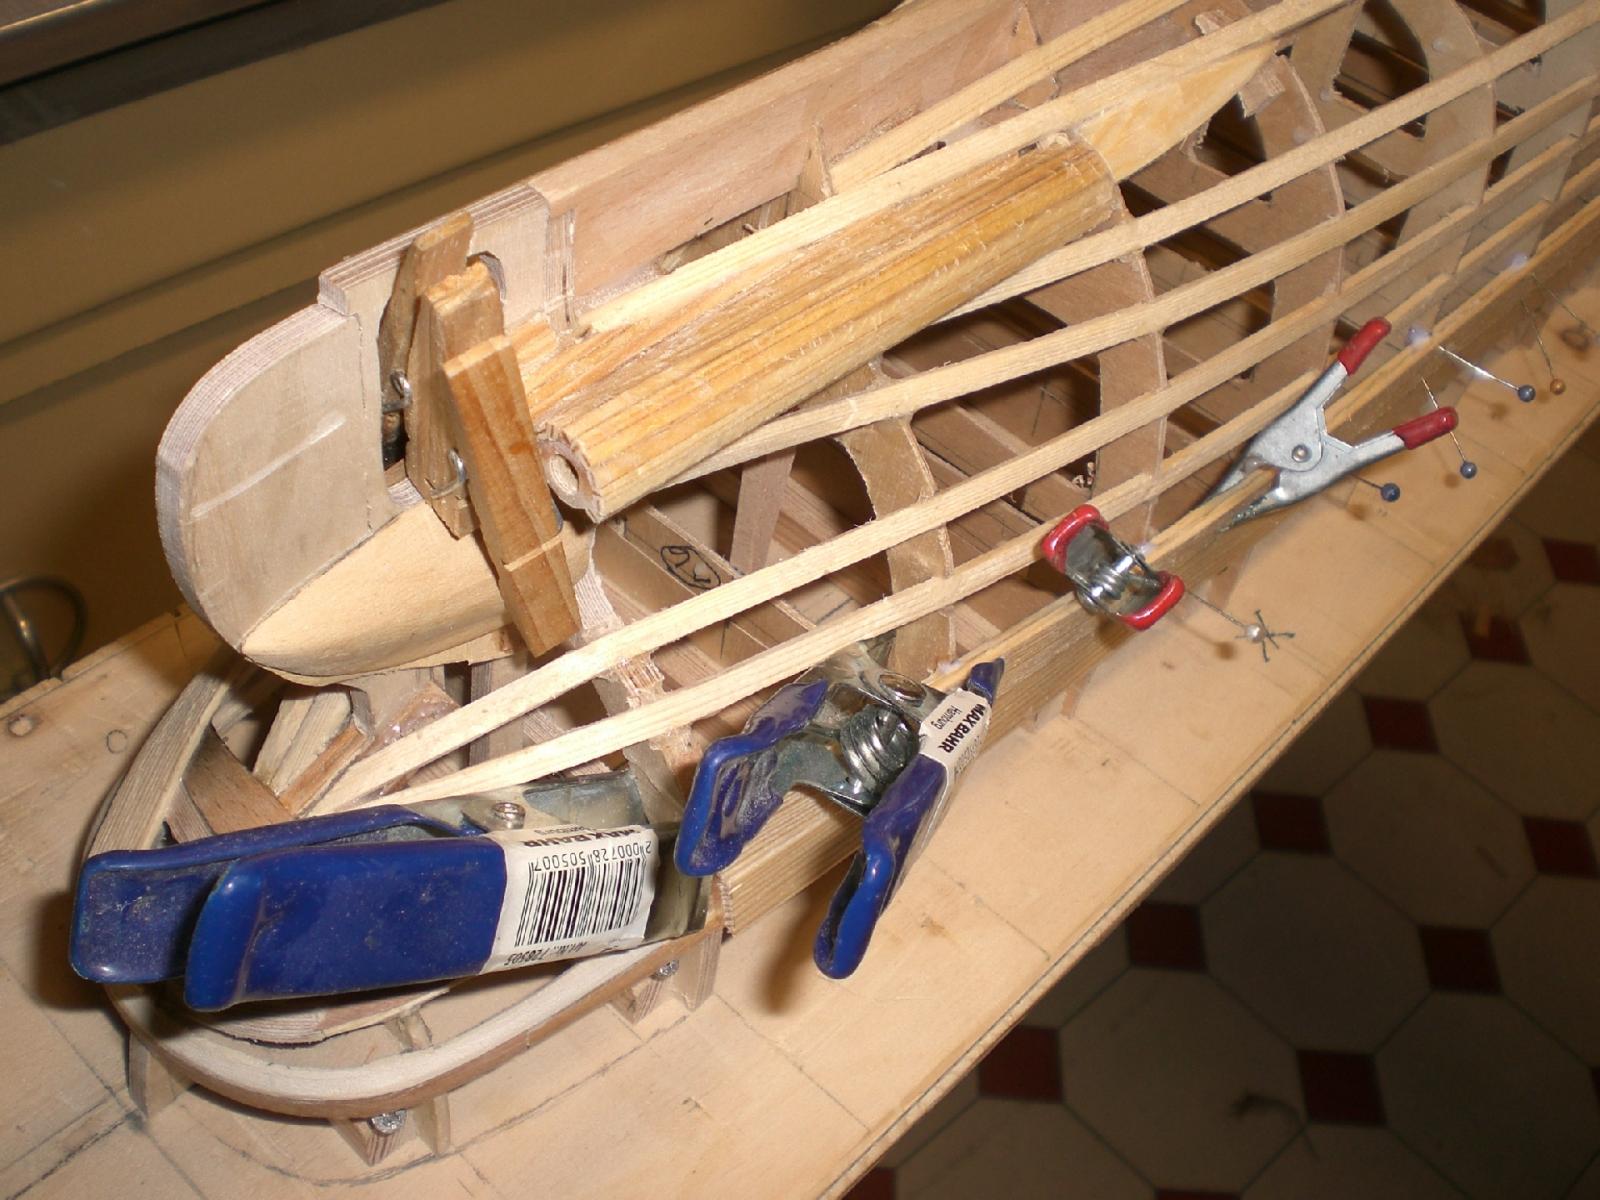
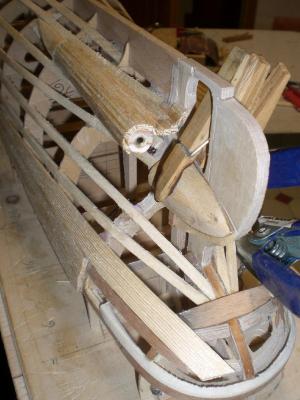
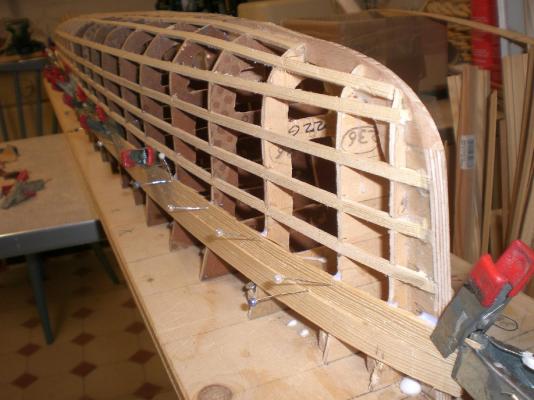
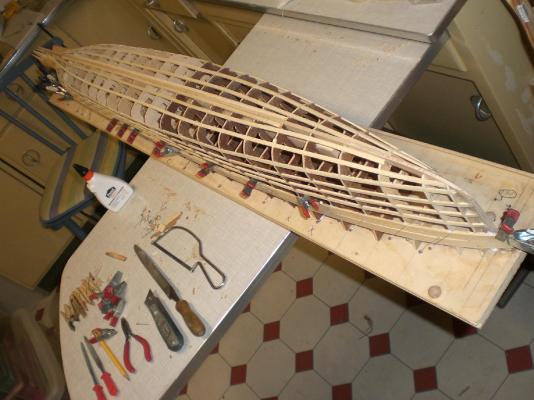
Build log part 7 today the hull-planking starts. For the long, rather straight planks from the sheer downwards I cut some 13mm wide planks (to get along a bit swifter). The delicate portion will be where the tail cone transits into the rear hull, just above the Propshaft housings, I`ll give a sigh of relief when that is done..... Nils rather sharp roundings are done with 2 x 2 strips, whilst the 2 x 13 planks realy get me somewhere the planking is single layer, 2 mm thick in pine. After sanding the surface later on, there should remain appr. 1,5 to 1,7 mm thickness here the stringers are of great advantage for clamping down the planks while the PA cures (I use "Ponal Express" glue) after fastening 3 planks the opposite side is done likewise, before I move on to the next plank group the yard slipway provides an absolutely twist / warp free hull I`ll have to do the ruddershaft sleeve and bearing mechanism, before the "cone "fillpieces" are attached permanently The rudder at this stage is just a "dummy spaceholder" and will be cut away and replaced by a structured metal made one later on


- 2,625 replies
-
- 31
-
-
- kaiser wilhelm der grosse
- passenger steamer
- (and 1 more)
-
Mark, your framework looks so good a base for planking up, must be real fun to see the run of plank to plank. Presume you will be single layer planking, that is fine, will be looking out for your next pics. I love the lines of "Licorne", looking very harmonic Nils
-
Hi Eric, thanks for your comment.. I`ve had a look around but unfortunately have neighther seen scale plans for AvH #1 nor the new AvH #2, but I`ll Keep in mind and come back to you if I come across anywhere. Nils
- 222 replies
-
- 1
-
-
- gorch fock
- barque
- (and 2 more)
-
Hi brunelrussel, thanks for dropping in and your interest in this model.... if you have the same sources I basicly used, you probably have the view of 6 decks and the side view (in section). To design a modeler`s plan you need to choose a scale, set a number of frames at preferbly equal spacings, and then pick the widths at the appropriate crosspoints Decks / Frames at hull outer Skin. I presume you have experience with this approach, so for a modelist with practice it`s quite a common task to draw your own hull lines-plan from that Information. It results in the Frames plan for determining and transfering the individual Frames to Wood. Certain decks will Need to have Access to in some Areas. I put stringers to all deck Levels, which are are not resembling the actual horizontal waterline Levels, but These stringers I would have put on anyhow for easing the planking Job and bringing in sufficiant strength and warp tightness to the rather Long hull For the scale I choose (1:144) the requirement was here 26 Frames at spacing (Center to Center Frame) of 5,35 cm on keel. Exception : the distance between last and second last bow Frame is only 2,67 cm Trust this will be what you were seeking for.... Cheers Nils
- 2,625 replies
-
- 6
-
-
- kaiser wilhelm der grosse
- passenger steamer
- (and 1 more)
-
Thanks Michael, stay tuned, trust by end of the week I`ll see if it works out, ( a Little Portion of planking) as already mentioned to Popeye Nils
-
Thank you Popeye, I`ll do a bit of planking in the next days. I`ve bought a 13mm thick plank that will be sliced to Planks appr. 1,5 to 2mm thickness, but then 13mm wide. Hope they won`nt be too stiff The Planks will go horizontal on from the sheer downwards until I need to Switch to less wider Planks in order to follow the roundings of the bilge keel area. For the rounding of the Stern I`ll probably do vertical planking, I have good experience with that Nils
- 2,625 replies
-
- 4
-
-
- kaiser wilhelm der grosse
- passenger steamer
- (and 1 more)
-
ROYAL CAROLINE 1749 by Doris - 1:40 - CARD
Mirabell61 replied to DORIS's topic in - Build logs for subjects built 1501 - 1750
It does real good to look at those fantastic results of your masterly work Doris, awsome modeling art all the way, love those figurines as well, and the pics with twiight illumination Nils- 883 replies
-
- 2
-
-
- royal caroline
- ship of the line
- (and 1 more)
-
Congratulations to completion of this beautiful Venetian Polacre Cristiano, very good built ship and rigging, I also like the full set sails and the Color giving which give the ship that heritage venetian Aura.... well done Nils
-
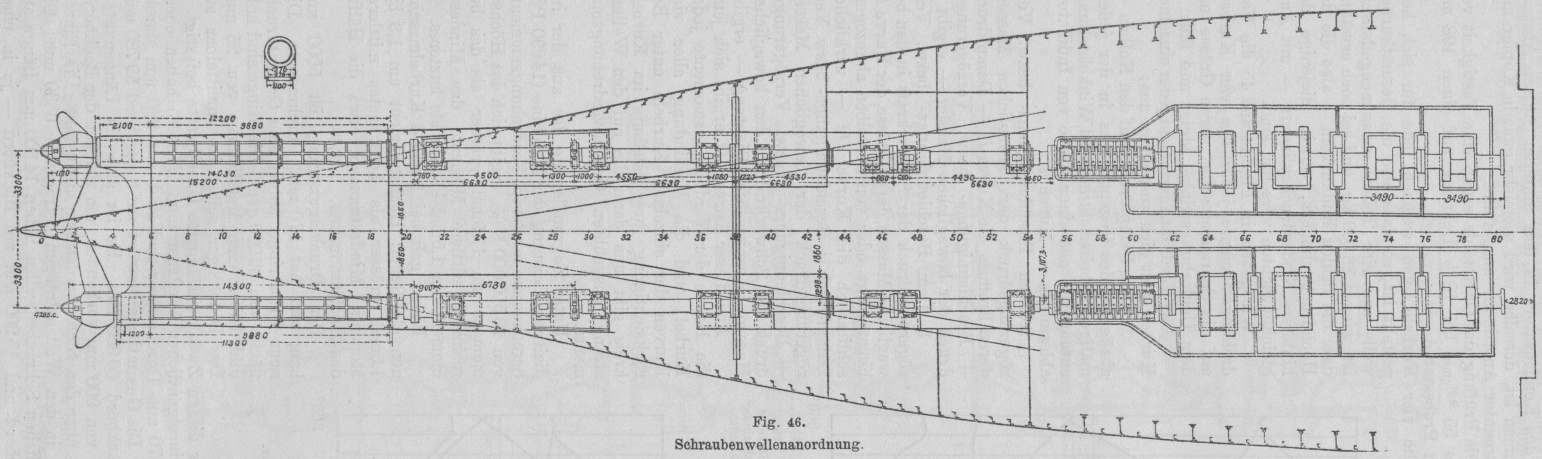
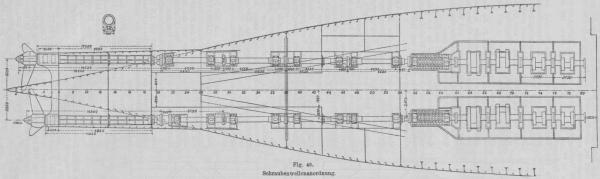
Good analysis Nigel, yep, I think that was the reason behind this interesting design. Also the actual props with each 6800 mm diam. run very close to the hull`s skin Nils
- 2,625 replies
-
- 3
-
-
- kaiser wilhelm der grosse
- passenger steamer
- (and 1 more)
-
Hi Nigel, many thanks for dropping in.... I was not familiar with this special twin prop arrangement either before studying this ship here an illustration why the outcut window,..... and how the overlapping outer prop circles prevent fouling each other, by stagering the shaft lengths Nils
- 2,625 replies
-
- 10
-
-
- kaiser wilhelm der grosse
- passenger steamer
- (and 1 more)
-
Cutter Cheerful 1806 by rafine - FINISHED
Mirabell61 replied to rafine's topic in - Build logs for subjects built 1801 - 1850
Hi Bob, wish you fun and much pleasure in building this beautiful cutter.... I`m sure you shall enjoy it, and congratulate you to the keellaying sequence on your model shipyard Nils- 525 replies
-
- 1
-
-
- cheerful
- Syren Ship Model Company
- (and 1 more)
-
Hi Lee, no Lee, trust we both have right, for my understanding it depends on what you call those series of plates at equalized spaces that provide the hull-shape. I call them Frames, therefore "plank on Frame", POF, and if you consider them bulkheads (resembling watertight single compartments, which they are not here) it would be POB In German we say Frames = Spanten, and Bulkheads = Schotten For example. the bulkheads (Schotten) in the damaged area of the Titanic were`nt high enough to prevent overflow of seawater from one department to the next, whereby the ship had hundreds of Frames to give the shape of hull to the outside Skin, regardless to the watertightness of compartments Fore the planking..... yes I will be planking, it is intended to plank with 2mm thick pine Planks 10 x 2, 8 x 2, and even 12 x 2 in the Long Areas with gentle curves, delicate areas like the propshaft housings are planked with strips 2 x 2 mm Nils
- 2,625 replies
-
- 4
-
-
- kaiser wilhelm der grosse
- passenger steamer
- (and 1 more)
-
many thanks to -Grant - Patrick - Jason-, and all the "likes" Grant, that a realy fine comment, much appreciated.... Patrick, a new "adjective" to my Approach with that "Magic", very Kind comment, well appriciated Jason, Thanks, I wanted to Keep them props shiny and sprayed clear varnish to them with the shafts revolving slowly in my Little hand-Drilling machine. Unfortunately I shook up the spray can too Long, so that there was too much air or gas trapped and transfered on the brass surface. some time later on I will have to take the varnish off again and apply new with a soft brush Nils
- 2,625 replies
-
- 3
-
-
- kaiser wilhelm der grosse
- passenger steamer
- (and 1 more)
-
Pete, thanks for your appreciation of the props... Nils
- 2,625 replies
-
- 2
-
-
- kaiser wilhelm der grosse
- passenger steamer
- (and 1 more)
-
Thank you Patrick, some things I just have to try out, in lack of a building instruction, but I`m lucky so far that all worked out well (no parts for the bin) Nils
- 2,625 replies
-
- 2
-
-
- kaiser wilhelm der grosse
- passenger steamer
- (and 1 more)
-
Thanks very much Nigel, The KWdG has been a very frequent guest at the NY NDL-piers long time ago..... Nils
- 2,625 replies
-
- 3
-
-
- kaiser wilhelm der grosse
- passenger steamer
- (and 1 more)
-
Panagiotis, thats a beautiful built ship, very well done ! Nils
- 116 replies
-
- 1
-
-
- kilkis
- mississippi
- (and 2 more)
-
Thank you very much - Patrick - Martin - Popeye, and all the "likes"...... Patrick, yes, its not far to go now, in the Moment ist hard to "let go" from the new Project, but I just have to sit down and care for Pegasus and groove myself in on it Martin, thanks for you appreciation, I`m quite proud of my sails, as they are all self-made, and I presume its the first scale 1:64 "Swan Class" under full set sails on MSW, as far as I know Popeye, nice comment, many thanks, glad you like it Nils