Mirabell61
-
Posts
7,417 -
Joined
-
Last visited
Content Type
Profiles
Forums
Gallery
Events
Everything posted by Mirabell61
-
 Hi Mike, thats a beautiful built hull of your "Stavanger", I very much like all the sequences of you log, and the Background Information for this Colin Archer typ, thanks for sharing this..... Trust I asked it sometime earlier already, but my question....How much Kilogram lead will the seperate attachable keel be in order to stabilze her on course ? Nils
 -
hello Vic, thats a a wonderful built model, beautiful to see, and yes I`m with Nigel, it would be a pitty to put paint on that lovely natural warm planking of rthe hull. BTW. how did your laying of golden CA (per injection needle) onto thr brass decor work out after complete curing, did it flake off or so, Did it still present a bit of volume (3D effect) to the plain brass.... ? Nils
-
A real little beauty Bob, interior, floor planking and new deck look great Nils
-
Papegojan 1627 by mati - FINISHED - 1/48
Mirabell61 replied to mati's topic in - Build logs for subjects built 1501 - 1750
Fantastic work Mati, I love that model, beautiful carvings, the lantern and that capstan are outstanding.... Nils -
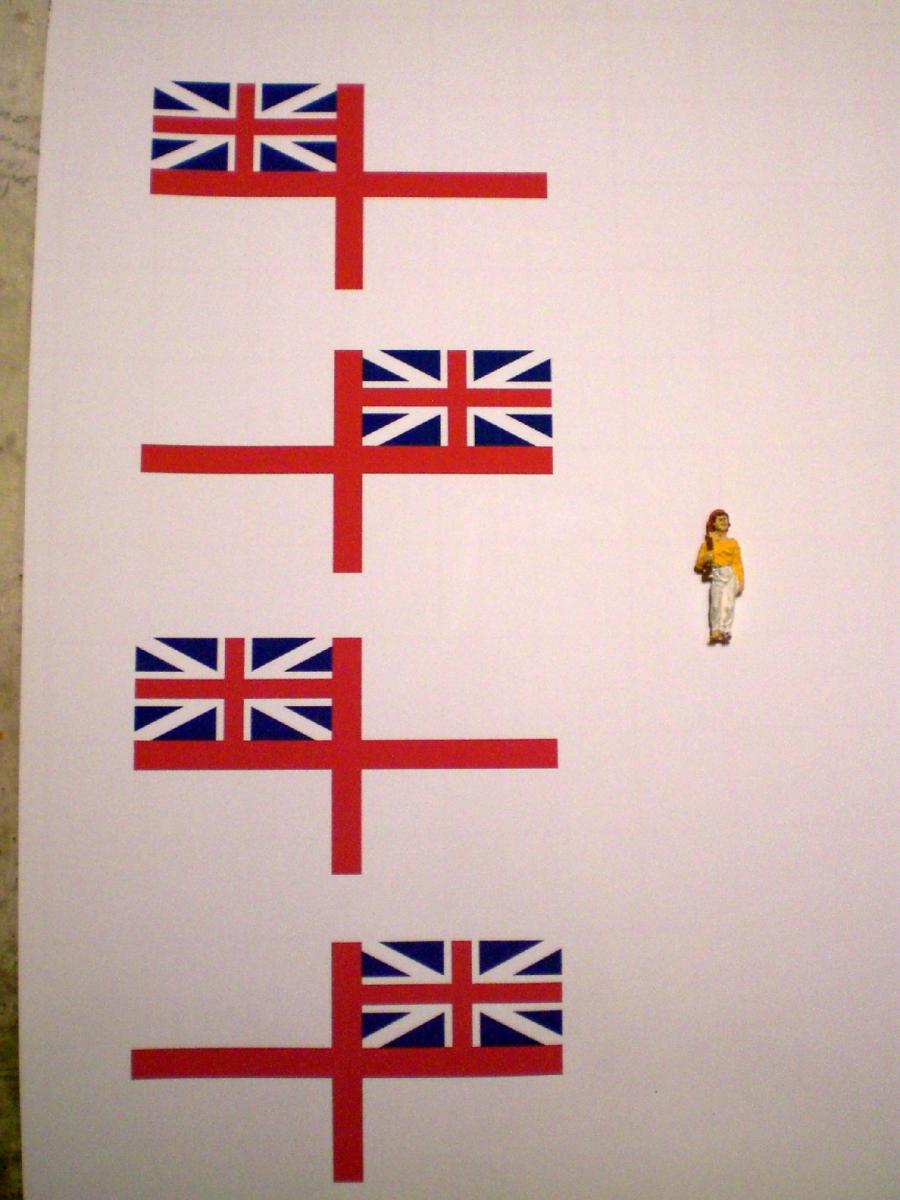
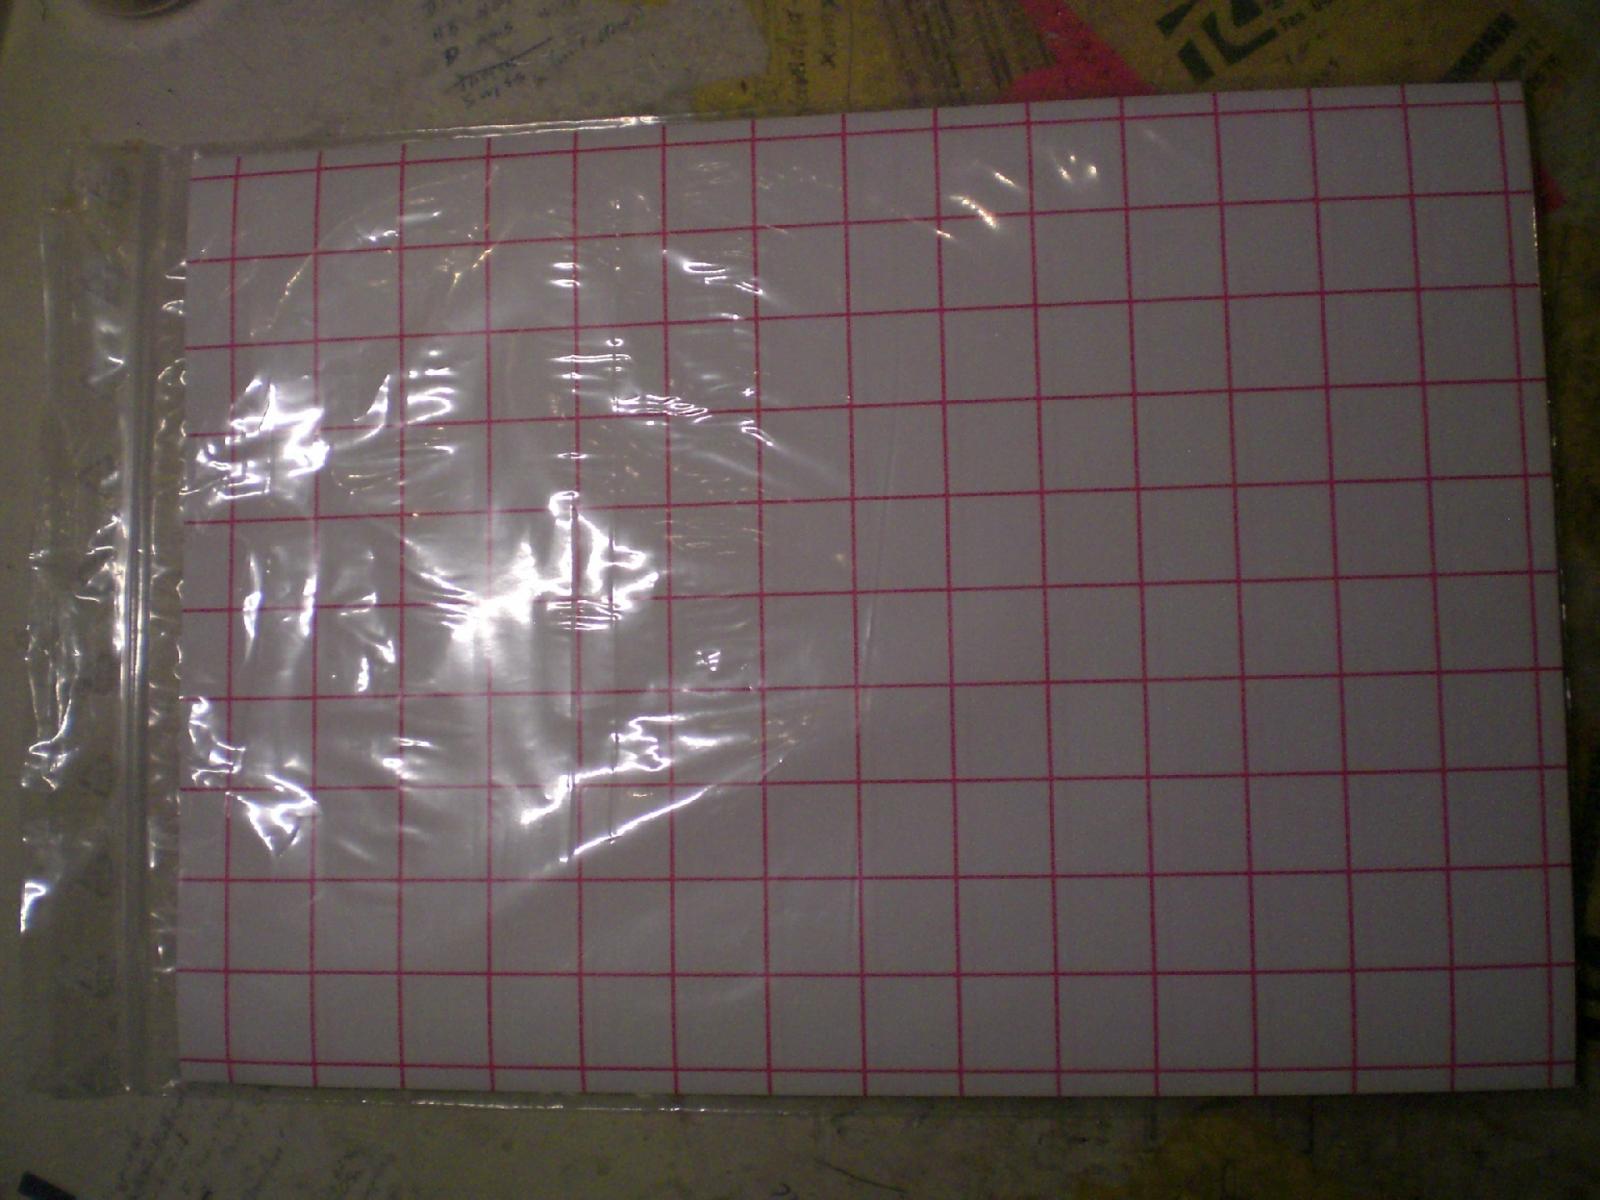
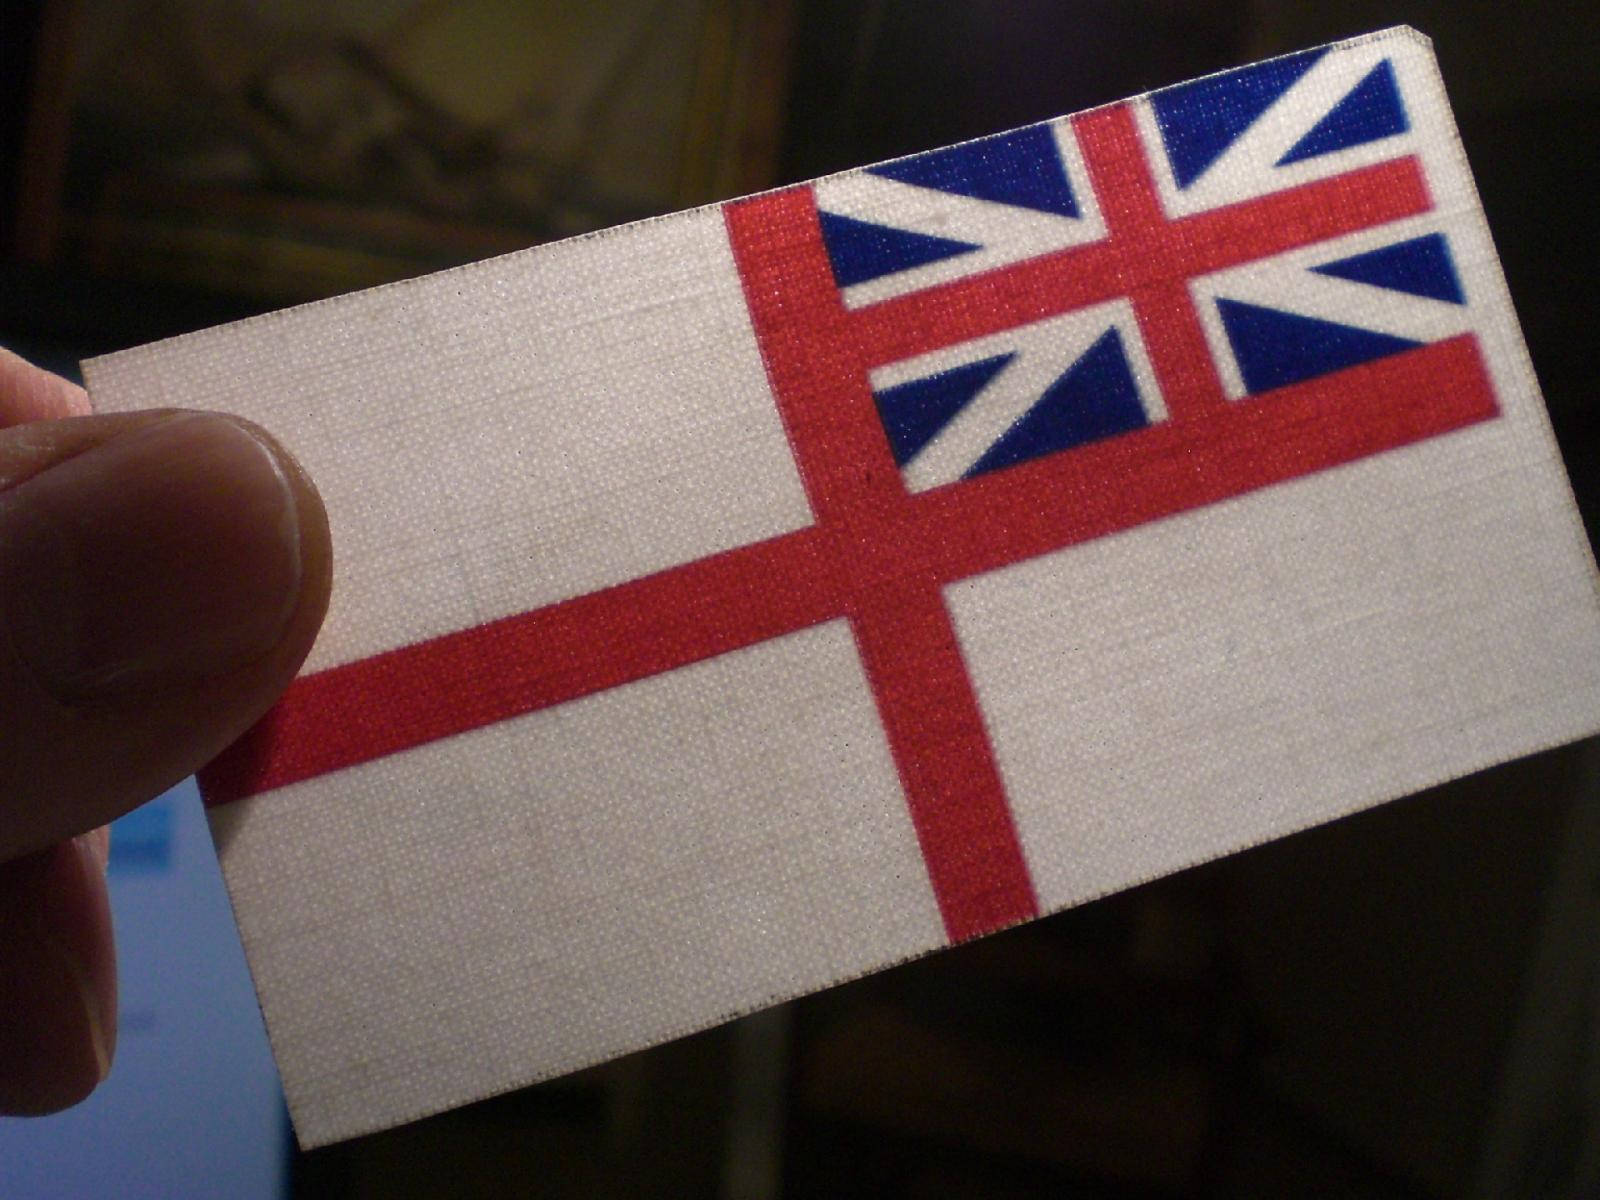
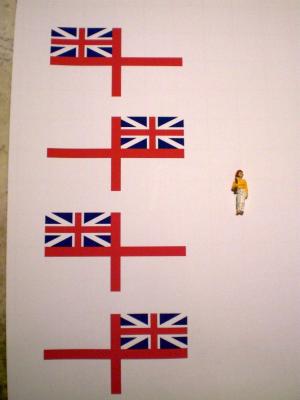
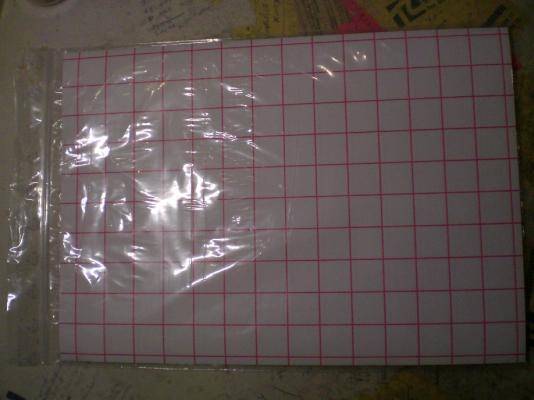
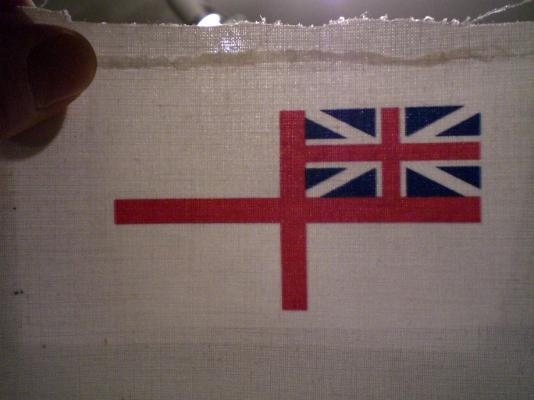
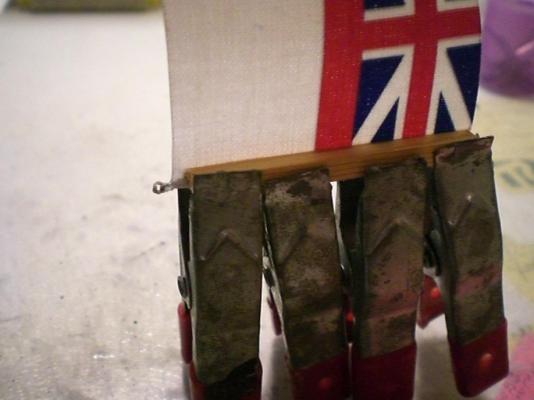
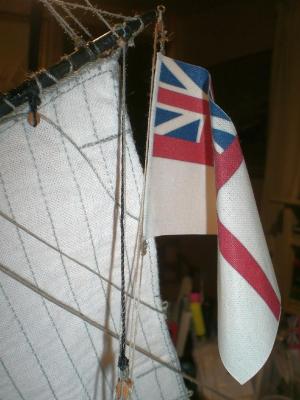
Hello Peter (Flyer) and Keith, as promised, I made a trial with the transfer paper and it worked out very well Both of you showed interest in this technique, so here I have some pics for you and for all who may be thinking of using this method.......... Now I remember where I became aware of this, it was a post by member Matija in the topic "how to print flags" Many thanks to Matija for sharing this input.... Nils first make an ordinary file for printing (scale the required size) on normal paper. Note that for the flag rear side you need a mirrored version these are 15 sheets of transfer paper (appr. 7.- Euros at Ebay) the sheets are well protected and come in a plastic bag with zip closer. The backside has these red squares printed on, as a help for shifting on the cloth, when doing the backside of the flag here the first side of the ensign has been ironed on, set medium cotton temp, and press the iron down on the rearside of the transfer paper. After gently pulling off the transfer paper, the picture will be completely removed and transfered on to the cloth now do same wih the mirrored side of the motive to the rear cloth side. Hold against light to adjust the right orientation, perhaps a little shift correction is required when both sides are done in this way it should look like this, a clean, neat print on the cloth. Cut out the outer ensign con tour an leave a little margin for the seam that will be glued or sen around the ensign line later two little pieces of wood span down the glued seam (fabric glue) until the glue is dry. new White-Ensign hoisted under the spanker gaff In all I am very pleased with the result so far. It may also be a good technique also for those who are intending to fix a chosen historic ; badge, etc,...motive on a square sail for example But please remember : Do`nt use this transfer paper with laser printers, the unit may be seriously damaged and become unrepairable Ammendment : another advantage of this method is that after cutting the outer edge of the flag, you wo`nt need to secure the cloth edges, here the tranfer medium fixes the cloth quite well


-
Keith, I had a look at the user instructions that came along with the transferpaper, and they extra Point out and Highlight it that the paper must never be used with a laser Printer, because the unit could suffer unrepairable damage. Perhaps one of your neighbours can help out with an ink-jet Nils
-
Mike, thats a real good decision you made, I`ll be looking foreward to your sail rigging attempt..... Nils
-
Peter, thanks very much for your appreciative words..... as far as the new ensign is concerned I think I read it here briefly at MSW somewhere (about the technique). Searched Ebay, found and bought 15 Sheets of so called "Transfer paper" DIN A4 Formate, to be put into the Magazine of an ink-Jet common copier I am using HP Officejet 4622. This must also be usable for T-Shirts and this sort of stuff with the Transfer paper...... Did`nt do it yet, but hope to do a Trial on the Weekend. I created a file with several ensign samples on my PC. If then the Transfer paper is inserted to the printer instead of the regular paper I get a mirrored pattern in full Color on the Transfer paper. The trasf. paper is then fixed with the meantime dryed ink, face down on the Cotton Cloth. Need an iron (not too hot) to Transfer the Motive onto the Cloth under gentle pressure. The horizontal mirrored Motive goes to the rear side of the flag. Press thumbs that it works, I`ll foreward a pic or two for the results, if I`m satisfied Nils
-
a very nice build Dan, I love the well sewn rigged sails, a beautiful ship to date. Also the Launch Looks has a very nice planking... Nils
-
Very nice build Eric, I like that cabin bulkhead it Looks great..... Nils
-
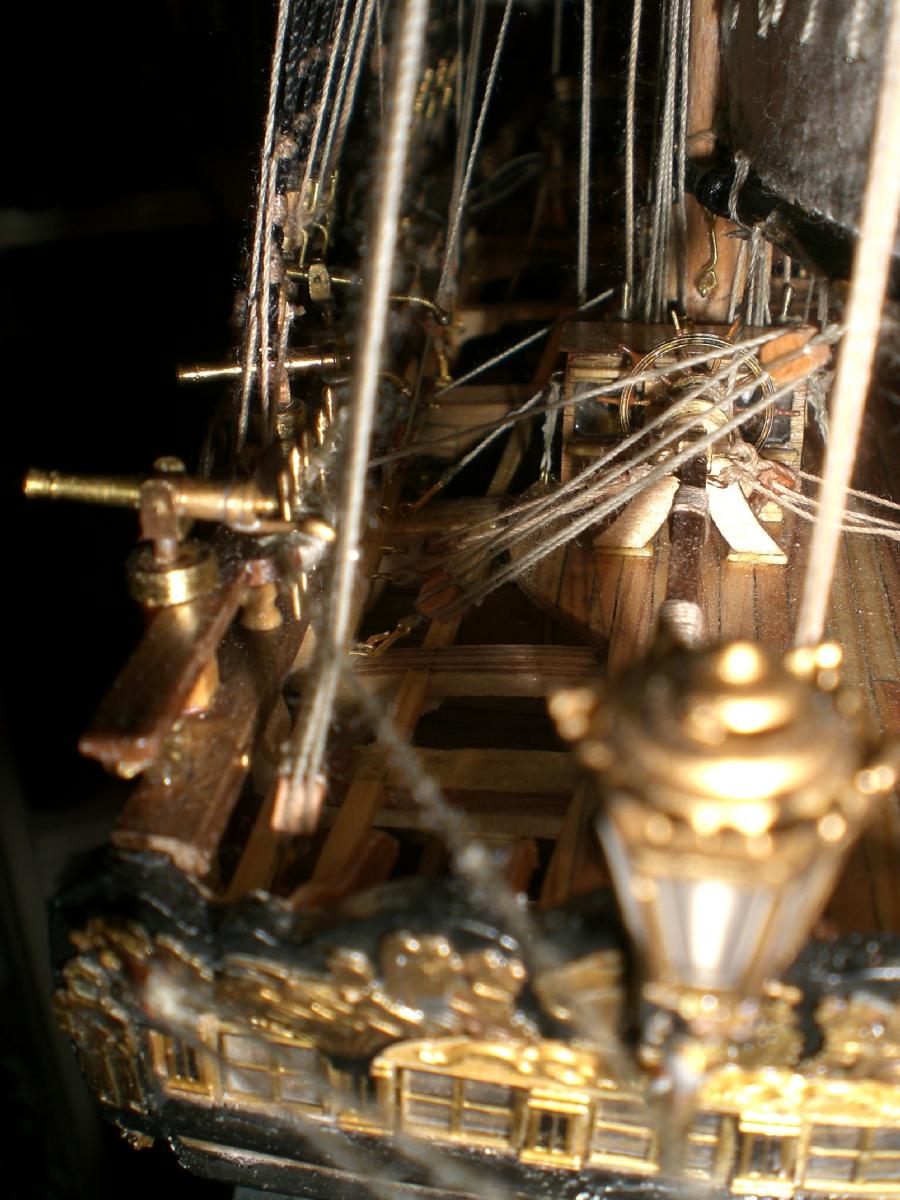
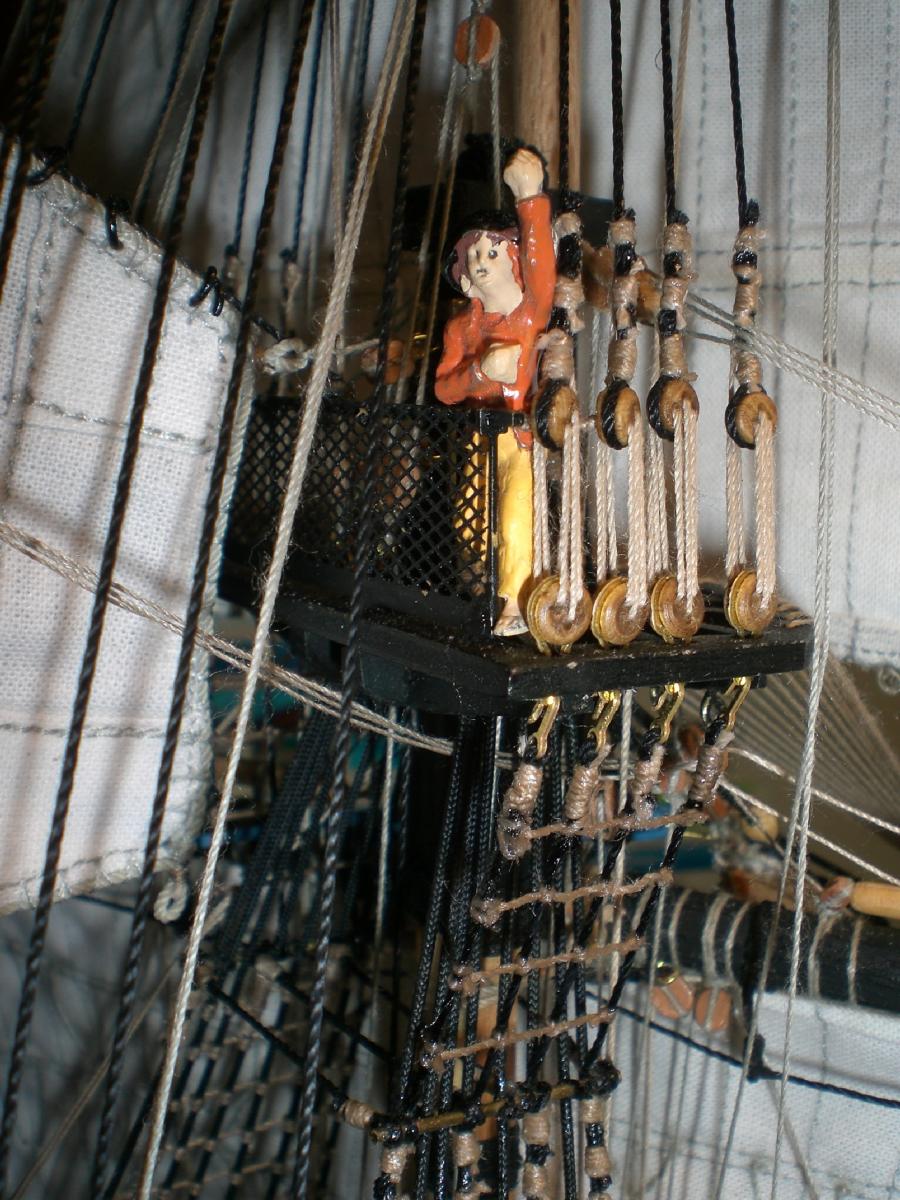
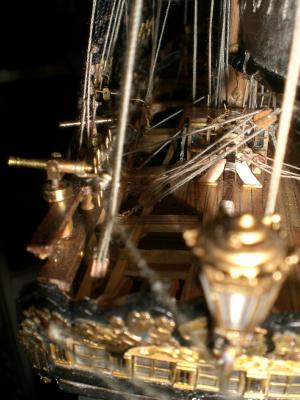
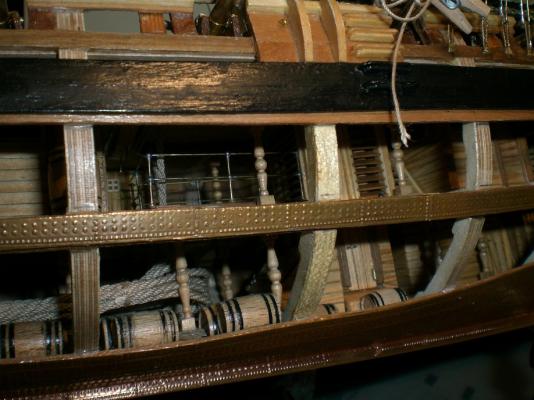
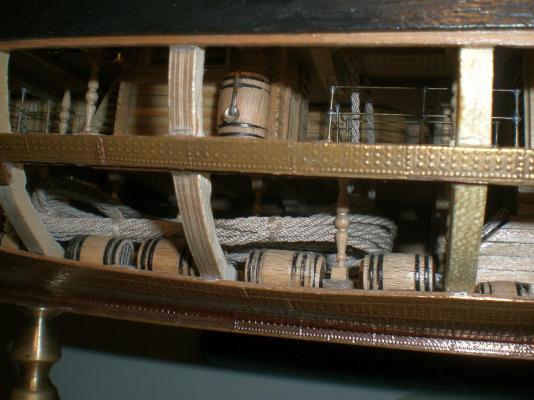
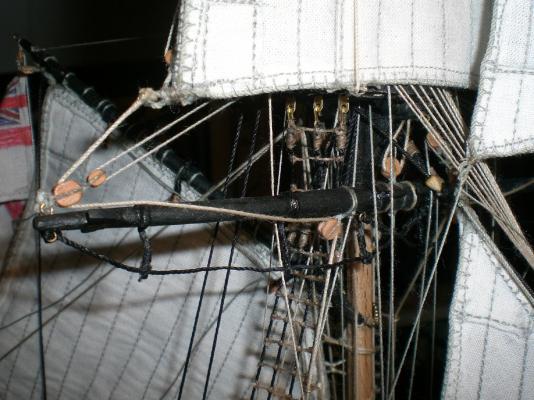
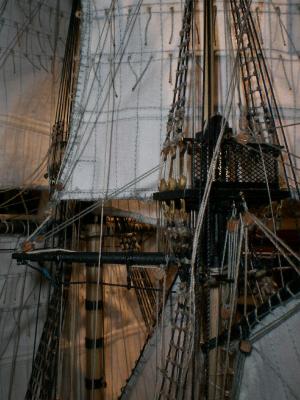
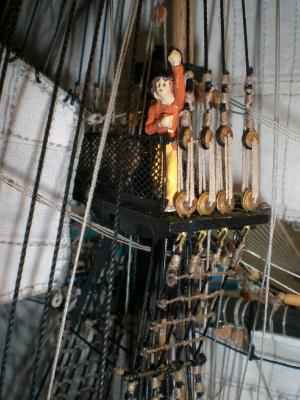
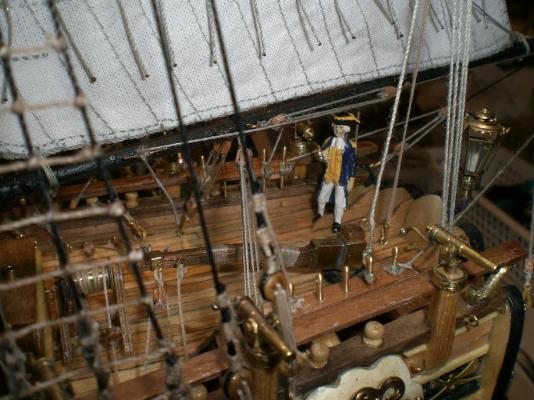
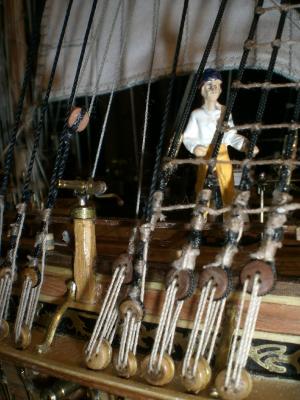
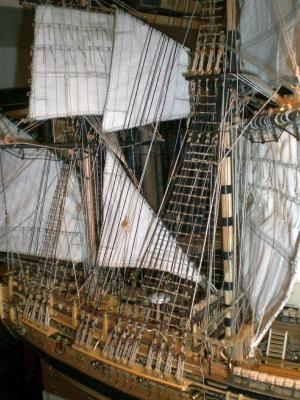
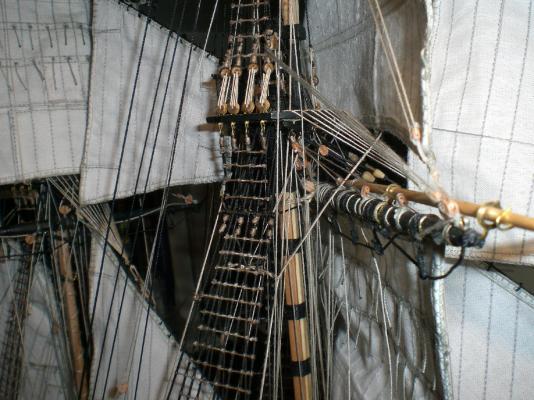
Status update..... as the complete rigging shall take some more weeks from now on, I have here some status impressions as intermediate pics for those who like to follow the build log. I noticed that due to the bracing yard positions some of the buntlines, leech- and reeflines have become a bit too taught, so they will have to become worked over again Nils Stern view on aft QD view to the decks, from keel to gun deck. Many supporting pillars are placed beneath the overhead deck beams bottom hold with storage area for anchor cables, all sorts of containment barrels. One elevation higher, intermediate deck here with fresh water drum and long spoon on port side of sail room Mizzen cross jack yard with Mizzen top sail, The white ensign shall be made new by using ink-printed transferpaper ironed on cotton cloth impression of mizzen mast main mast lower plattform captain is checking out the rigging progress of his new ship in command sailor standing on bulwark hand rail main course braced to opposite side for better access to attaching the upper ratlines (mainmast) some of the stay sail sheets attached to the foremost and aftmost shrouds, lines lead down through thimbles to the appropriate shroud cleats
-
Amazing work Ed, it its a fantastic built ship through and through... Nils
- 3,618 replies
-
- 3
-

-
- young america
- clipper
- (and 1 more)
-
beautiful work Wefalck, the gun and ist carriage looks very realistic.... Nils
-
well done Bob, it Looks great Nils
-
Beautiful model Pete, looking great, you sure know how to use those sharp chisseles..... Nils
-
Very nice work Kees, deck housings and all fiiting out details are beautifuly done, a super model Nils
- 205 replies
-
- 1
-
-
- kw49 antje
- trawler
- (and 1 more)
-
Nice work Hans, Nils
-
beautiful Fitting work Remco, Nils
-
HMS Alert 1777 by Jaekon Lee - 1/64
Mirabell61 replied to Jaekon Lee's topic in - Build logs for subjects built 1751 - 1800
Beautiful work Lee, ist a pleasure to watch your work at this scale (1:64 !), clean and tidy work, I love it Nils -
Wonderful work Patrick, it is amazing me every time I look at your Progress in this mini scale Nils
-
Hi Garry, sorry you`re having Trouble to enlarge the pics, do you face this with other members log pics as well ? As all pics are in JPG Formate, a single "left click" on the pic should open it to appr. screen filling Formate, it should work, at least I had no issues on this behalf from other fellow members Cheers, Nils
-
Thank you very much David Nils
-
Thank you very much Patrick, your kind words are well appreciated, although what I`m modeling is in my intension how I normaly do it, as long as it suits and pleases my obligational set planings for the individual project A fellow builder at MSW once wrote in a quote comment....... "While I admire others in this forum for their extremely clean and almost clinically precise builds I also like that just slightly handcrafted look your work still has"..... I like this comment and think this is reflecting quite well what I had in mind when building these models, rather than going for the attribute of "precision and order". With the Pegasus build it can for example be noted in many details, that there are quite a lot of deviations from the Amati plan, let alone the kit, that may perhaps cause some fellow builders to think that he`s not taking it so historicaly authentical, I just do it my way as long as I´m satisfied with the results and by receiving all these appreciating kind comments and "likes" Nils