

Keithbrad80
-
Posts
416 -
Joined
-
Last visited
Content Type
Profiles
Forums
Gallery
Events
Posts posted by Keithbrad80
-
-
Welcome to MSW Bob!
Im over in Santa Rosa but used to live in Paradise. I have family in Rockland as well so I know that area well. Make sure to start a build log for your Grand Banks Dory, it’s a great first model!
Bradley
- Ryland Craze, BobG and mtaylor
-
 3
3
-
Hello everyone,
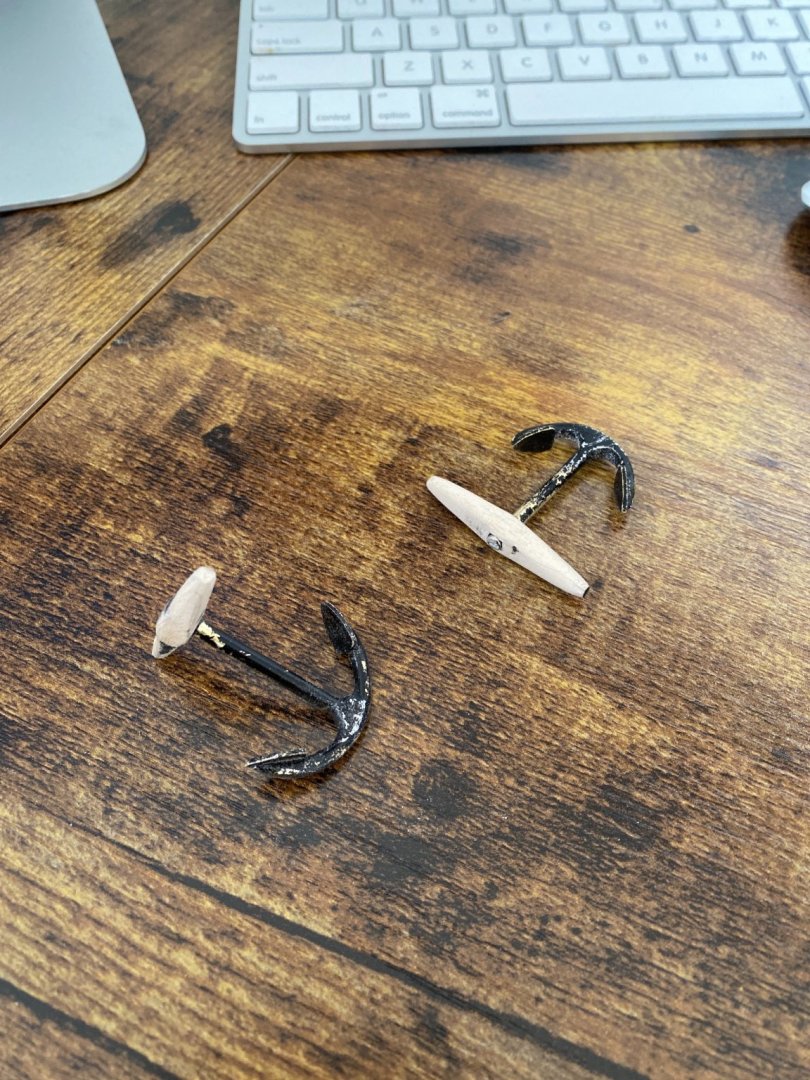
Very quick update, after taking another look at my anchors something felt off, and I realized the wood stock was way to big. So while sitting here during a zoom meeting I spent some time filing them down and I think they look much better. I will add some more epoxy, and get them painted later today hopefully. I’m almost done with the capstans as well so hopefully I can get started on the windlass soon which should be a challenge that I’m looking forward to. Thanks!
Bradley
-
1 hour ago, gak1965 said:
Hi Brad,
Those soldering on those anchors (and the symmetry of the flukes) is amazing. Just curious, my kit has the anchors cast in britannia metal, were your missing, or were you concerned about longevity, or how accurate they are to versions used in the time period? Like a lot of people, I wound up replacing the cast stocks on my Niagara with scratch built wooden versions modeled on the castings, and then used blackened brass to replicate the cast iron components. Will probably do the same for the fish. Like I said, they look great, just curious.
George
Hi George,
I actually only rebuilt them because I had the intention of making as many pieces from scratch as I could. I had almost no experience with metal working before starting this build so every thing is a learning experience for me. The cast pieces that came with the kit are not bad, some of them are probably better than I could make but I’m making my own anyway. I hope this is my last kit build and I can move onto fully scratch building!
Bradley
-
-
I’m sorry to hear about your accident Tom, Back issues are nothing to screw around with so I really hope you get better! IMO I would build the POB version, just so you don’t have to say good buy to the hobby! I hope your back gets better soon!
Bradley
- wyz and FrankWouts
-
2
-
Hello everyone,
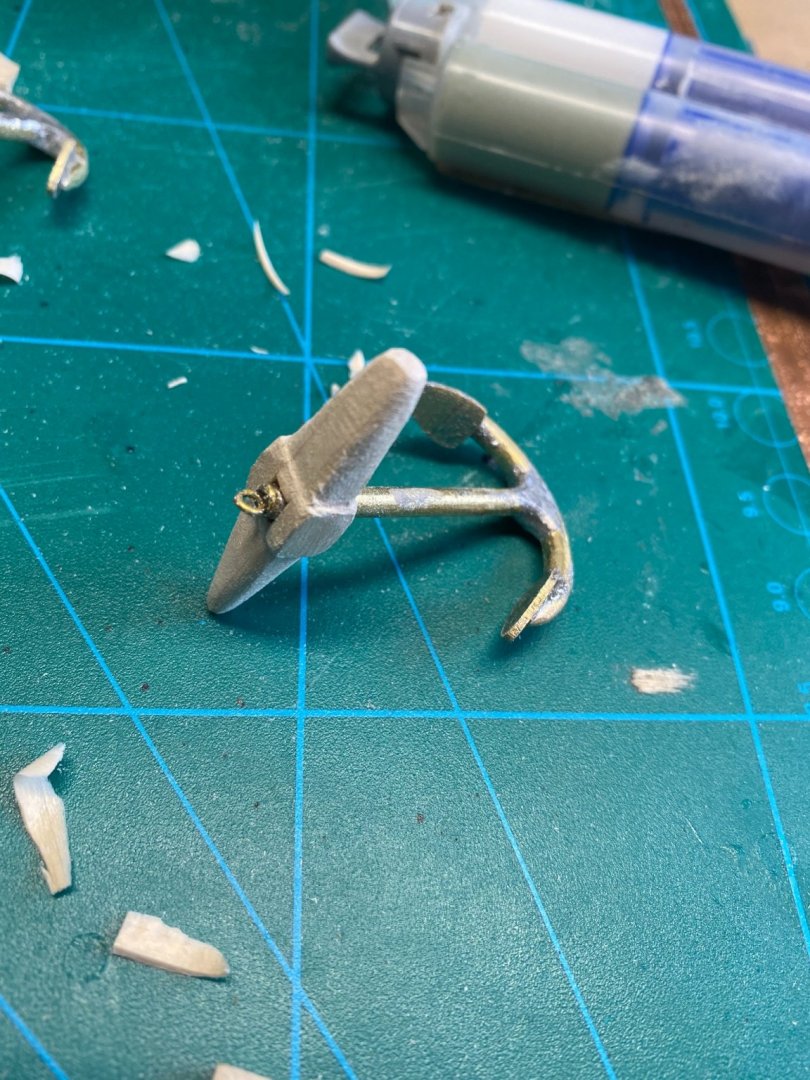
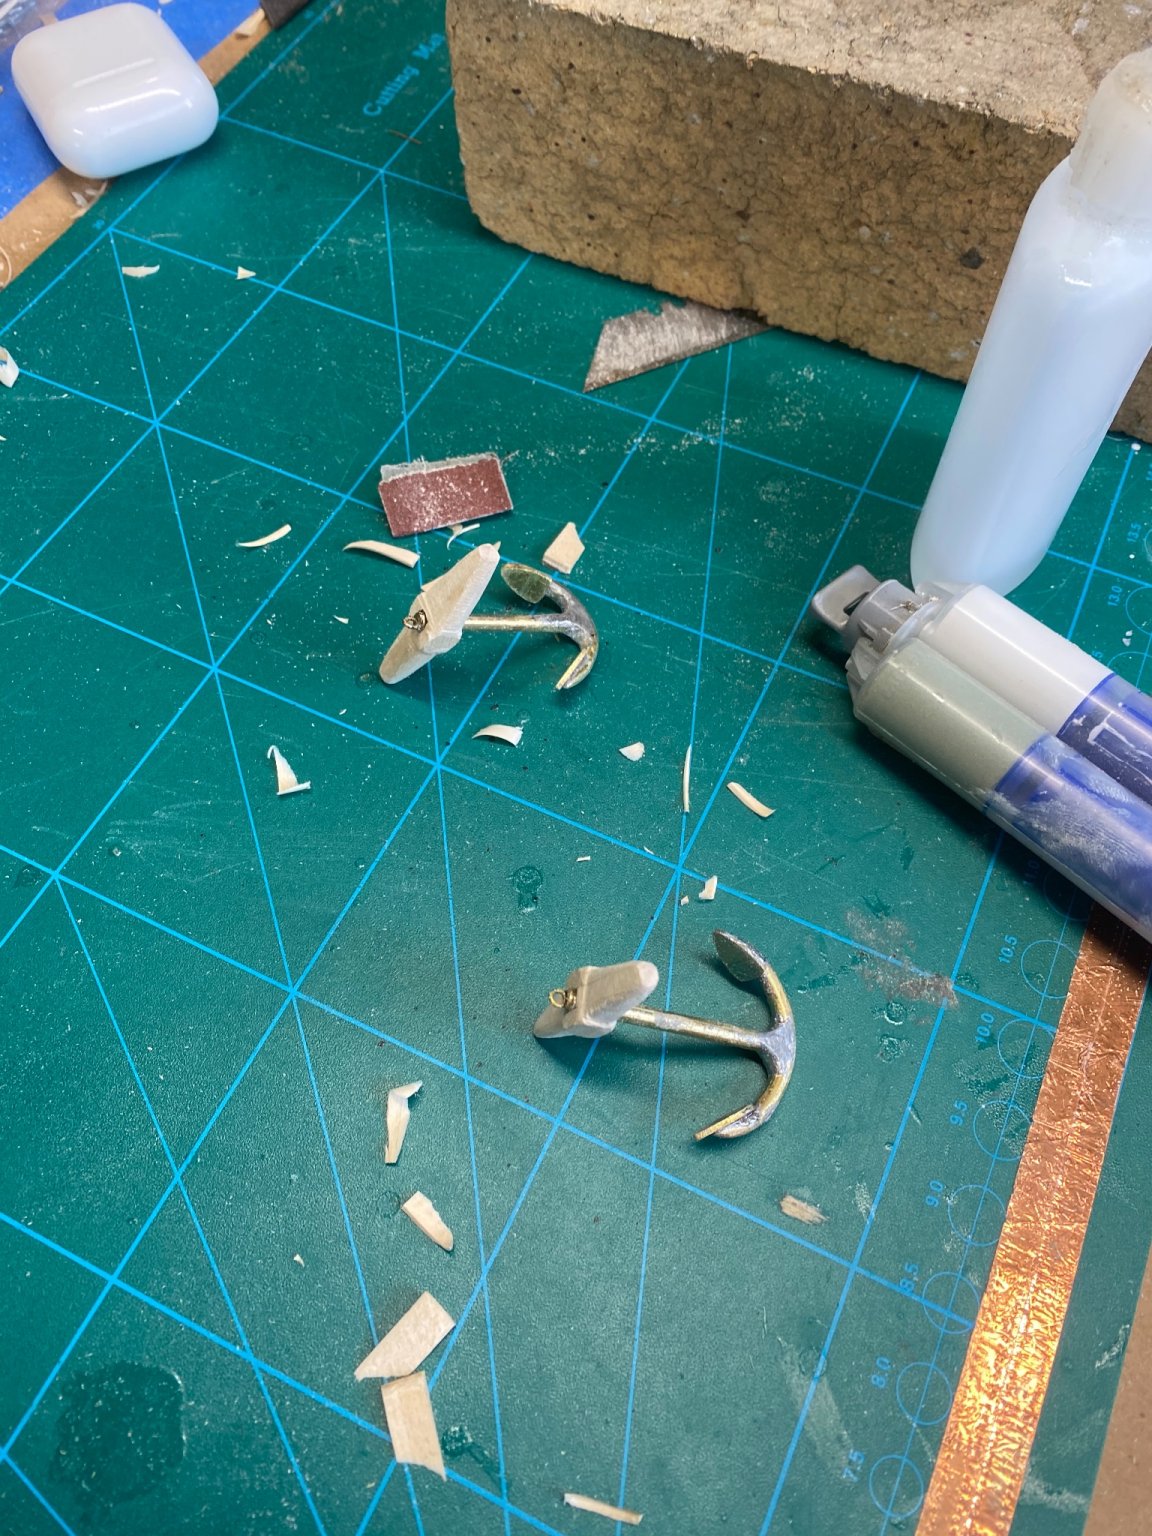
I got the anchors done today, or at least mostly done. I just need to paint them and I should be ready to start on the capstan which should be an interesting challenge. There are two of them on this model so ill make them both at the same time, I have an idea of how I will make them but I’m worried about scale. Something seems off, as I go it has gotten more and more exaggerated. I measure everything several times before I cut any wood, so I know my cuts are right and when held individually on the forecastle they look fine, but when installed everything feels too big.
I made the anchor from a thick brass rod, and some brass sheet that I silver soldered together. Before this build I had little to no experience with soldering so for my first real attempt I think I did pretty good. Thanks again!
Bradley

- WalrusGuy, Kathy Teel, ccoyle and 4 others
-
7
-
38 minutes ago, gak1965 said:
I also think I'm going to paint the waterway and planksheer before I put in the timberheads or the main hull planking.
This is a really good idea and something I wish I did on my own build. It should give you a much cleaner result!
Bradley
-
-
Another small update,
I finally got around to ordering some more needles for my air brush! So i got the cat heads, and the bell painted. The cat heads are painted the same color black as the rest of the hull and the inside is painted with a 90:10 mix of deck house cream and detail white, the deck house cream is from model expo and I do not recommend these paints, I had nothing but trouble trying to thin the paint, the detail white is a much better paint from createx colors. The bell was also painted black, this deck house cream color is going to end up being the color of most of the deck furniture. I then glued everything down and started working on the anchor, hopefully I can get those done tomorrow! Thanks again.
Bradley
- Kathy Teel, coxswain, gieb8688 and 1 other
-
4
-
Very nice! Your knight heads look great, it looks to me like your getting close to starting planking.
Bradley
-
Your planking looks great! IMO coppering is your choice, and it is your model so do what ever you think looks best. Making models that looks realistic and is true to scale is the motivation behind most ship modelers like my self, but in the end this is a hobby and you spent money on the kit, so build it how you would like!
If you do decide to put the copper plates on there, there are lots of resources available to you . I recently finished coppering the model I’m working on now with pretty nice results, after building a quick jig that made coppering easy. Nice work on the second layer of planking.
Bradley
-
-
3 hours ago, WalrusGuy said:
Very nice! Is the hawse hole drilled all the way?
Ya, and it was really tough getting the right angle. The other side doesn’t look as good, I filled it wood filler and will try again tomorrow.
Bradley
-
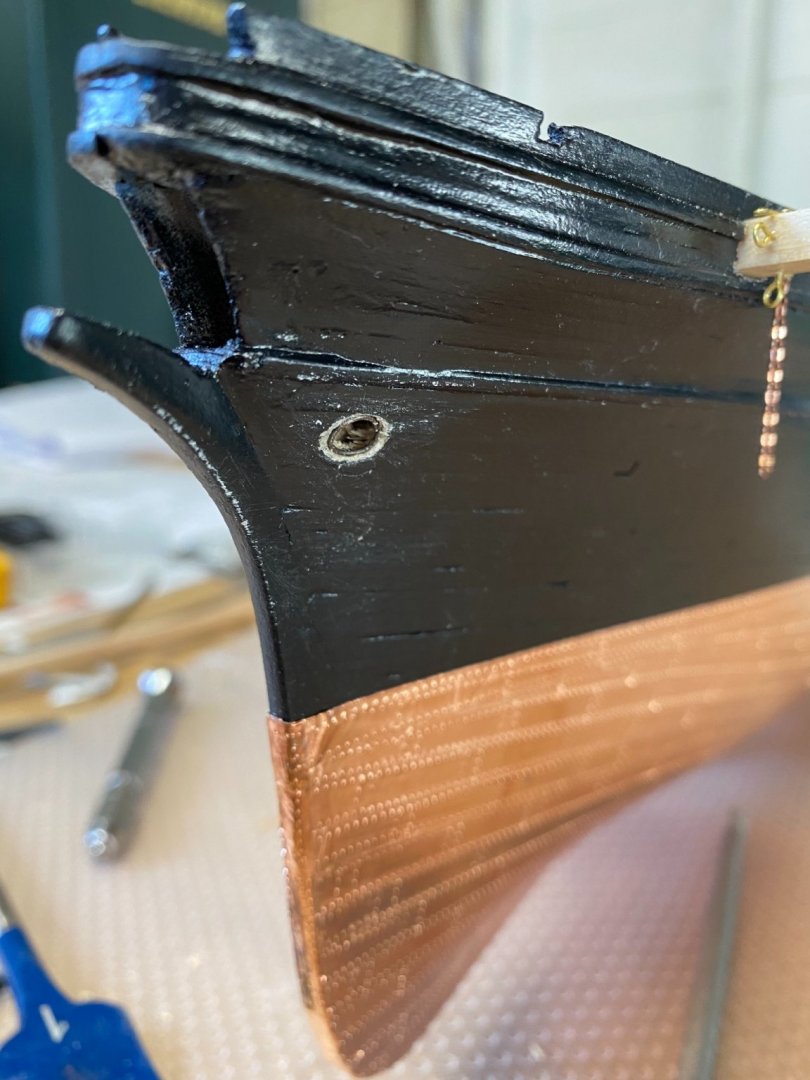
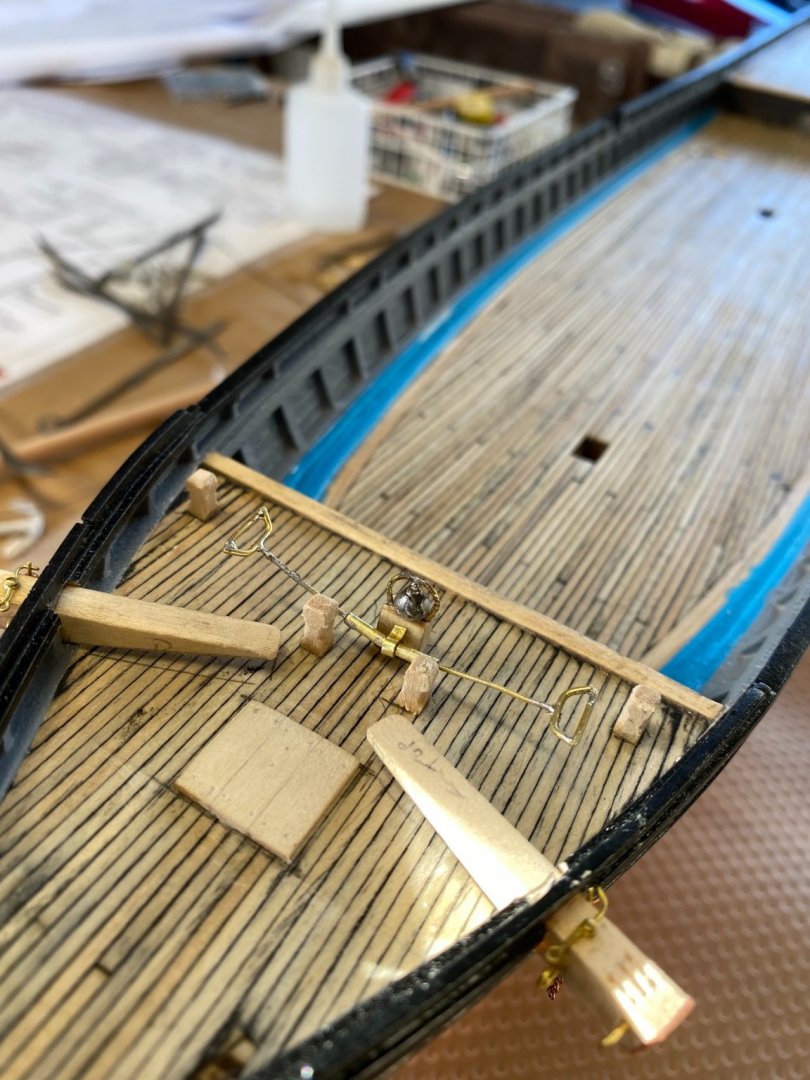
Hello everyone,
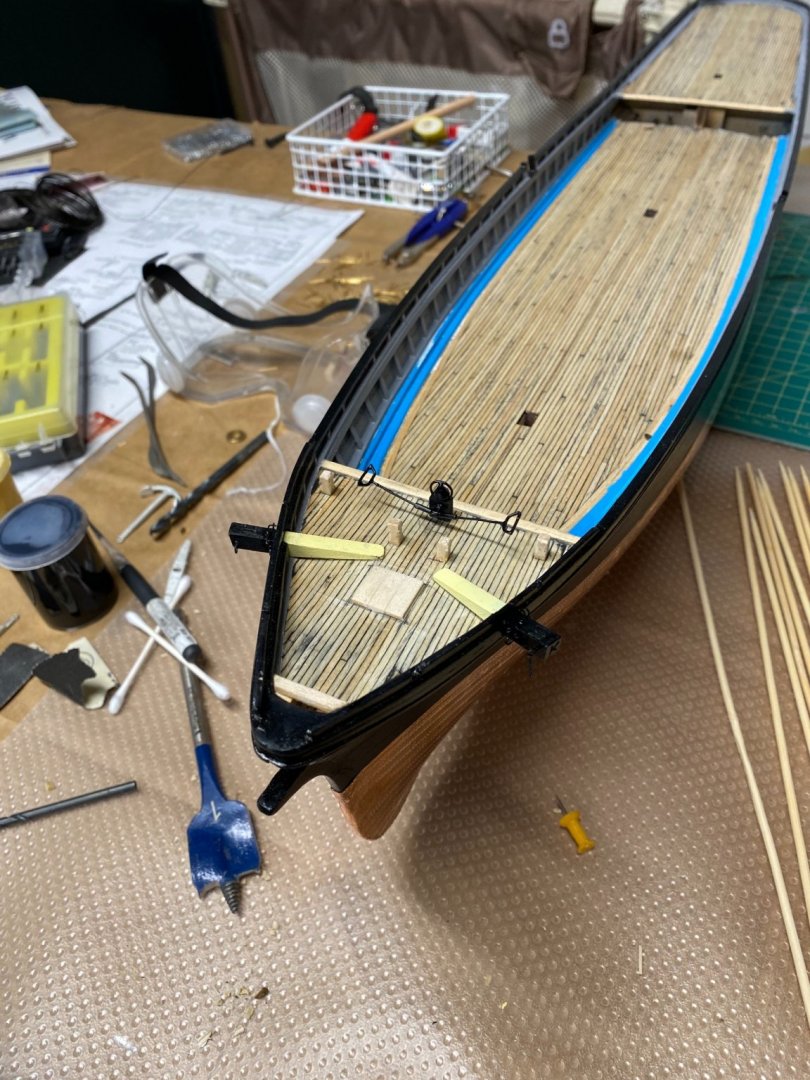
I got some more stuff done on the forecastle today, I think it looks pretty good!
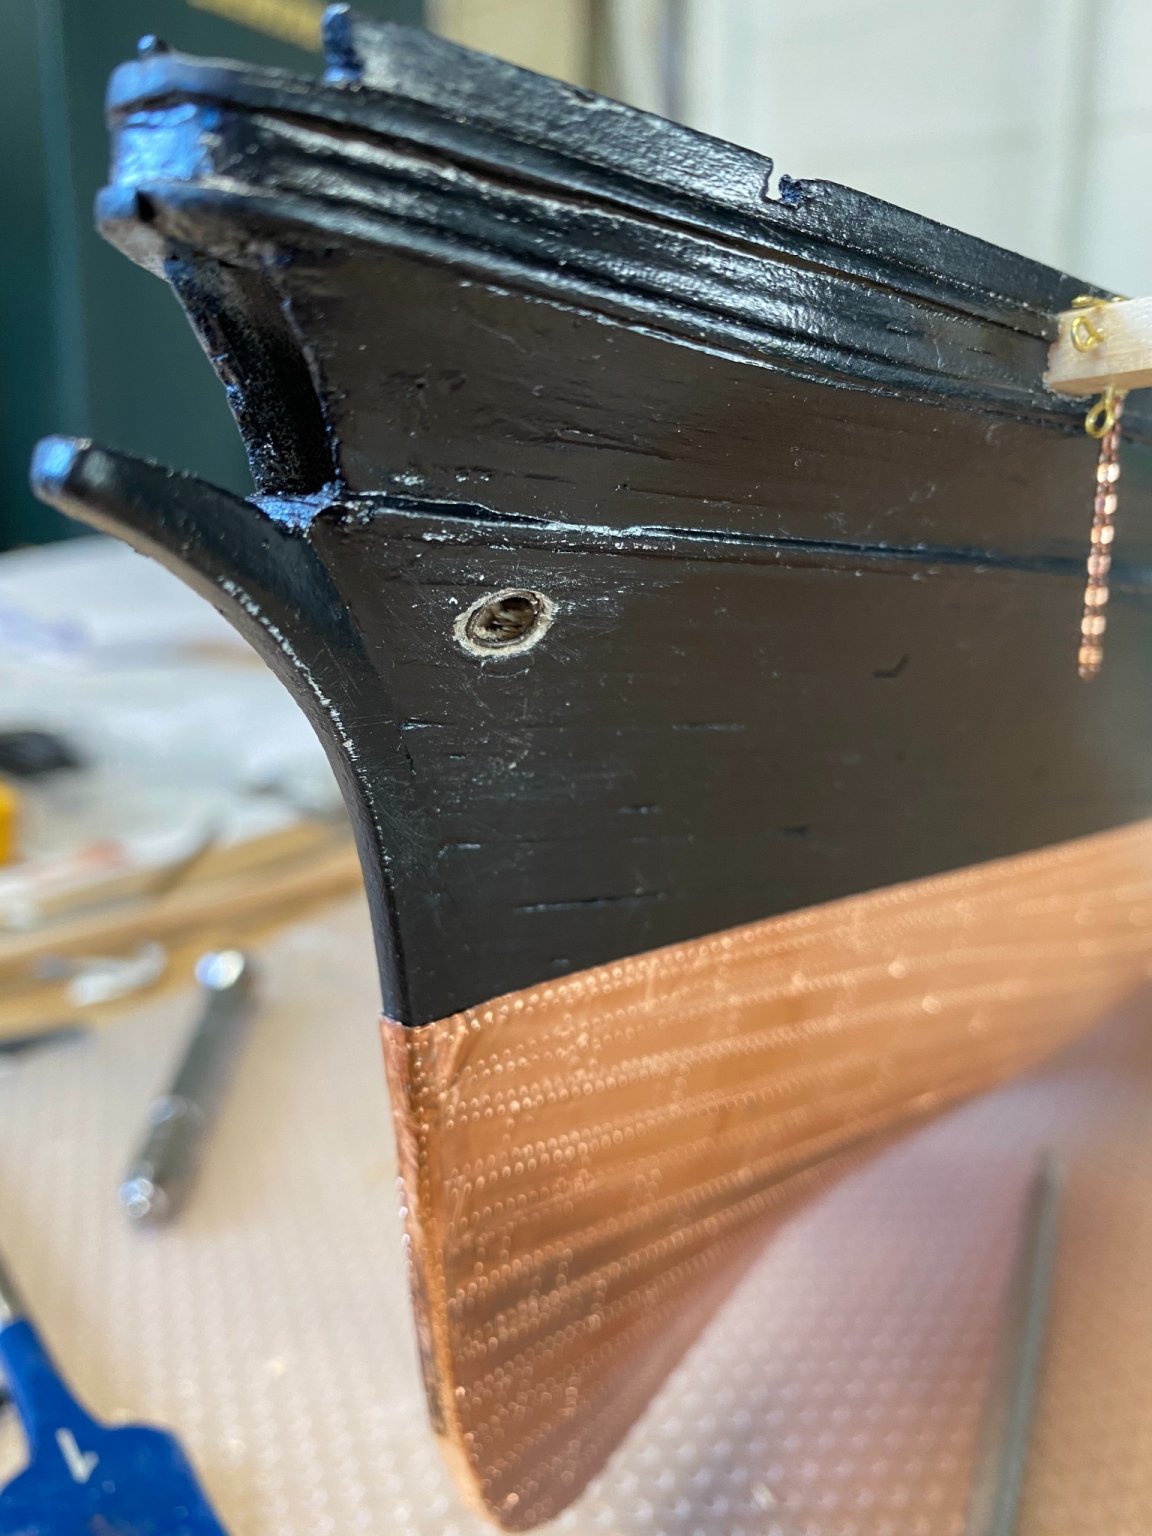
I got the hawse holes drilled, and put a blackened steel ring on the inside so hopefully once its painted it will look like the real thing. Here is a picture:
The next thing I got done was the top part of the windlass, I couldn’t figure out the name so thats what I’m calling it. I made it out of 1 mm brass tubing, .4mm brass wire and the bell is the cast bell that came with the kit, it didn’t look too bad so I decided to use it. Getting the bell in the right spot was really hard, but I got it done with the help of several small clamps. Sorry about the poor photo quality, I had to lean this part against the bits to get it stand upright, this is not the final placement of the piece.
Thanks again everyone.
Bradley
-
2 hours ago, Dziadeczek said:
I have the same as you.
Maybe its printed that way for a reason that I have yet to find out. Thanks!
Bradley
- Canute and thibaultron
-
2
-
Got my book! Does the order of the plans matter? Obviously they matter but when I bought the book they mentioned 8 sheet of plans, and while I did get 8 sheets, I got sheets 1, 3, 4, 5, 6, 7, 9, and 10. So I’m missing sheets 2, and 8 if they exist. The book is the 1:72 Young America 1853 book 1, if any one else has this book and plans and could check this is the correct number of plans that would be helpful!
Bradley
- mtaylor, thibaultron, Jorge Diaz O and 1 other
-
4
-
Hello everyone,
11 hours ago, BobMcM said:May I ask what you use to take pictures?
Bob, I have an iPhone 11 that I use to take my pictures, the picture quality is pretty good for a phone.
I spent some more time today on the forecastle, installing the bits and finishing both the cat heads. They haven’t been painted yet ill paint all components of the forecastle at the same time so ill show that later.
The other cat head came together much better, but I realized the pad I installed for the capstan in to narrow, ill add a thin strip to one side later to balance it out.

I also got the bits installed on the forecastle. I do have one slight issue, I must have measured something incorrectly because I no longer have room for the anchor pads. So instead of making them fit I’m just not going to install them and not lock my anchors to the deck. Here are the bits:

I also got the knight heads and pin rain installed at the bow but it was a minor detail that I added. Thanks again!
Bradley
- Kathy Teel, coxswain, EKE and 1 other
-
4
-
My only issue is I cant find any illustrations or plates that show where to tie off the pull cord. It’s not mentioned in any of the instructions or plans. I’m thinking about drilling a small hole in the spray rail and tying it off to a small eyelid on the back side? I’m not sure how that would look
Bradley
-
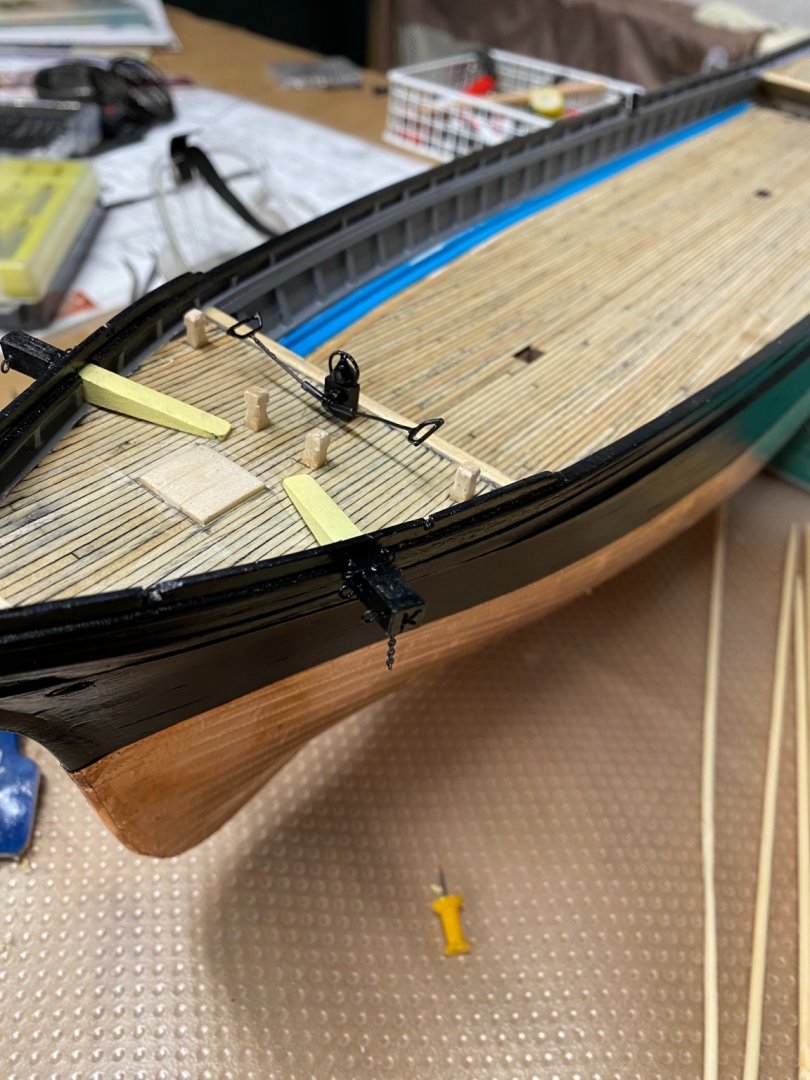
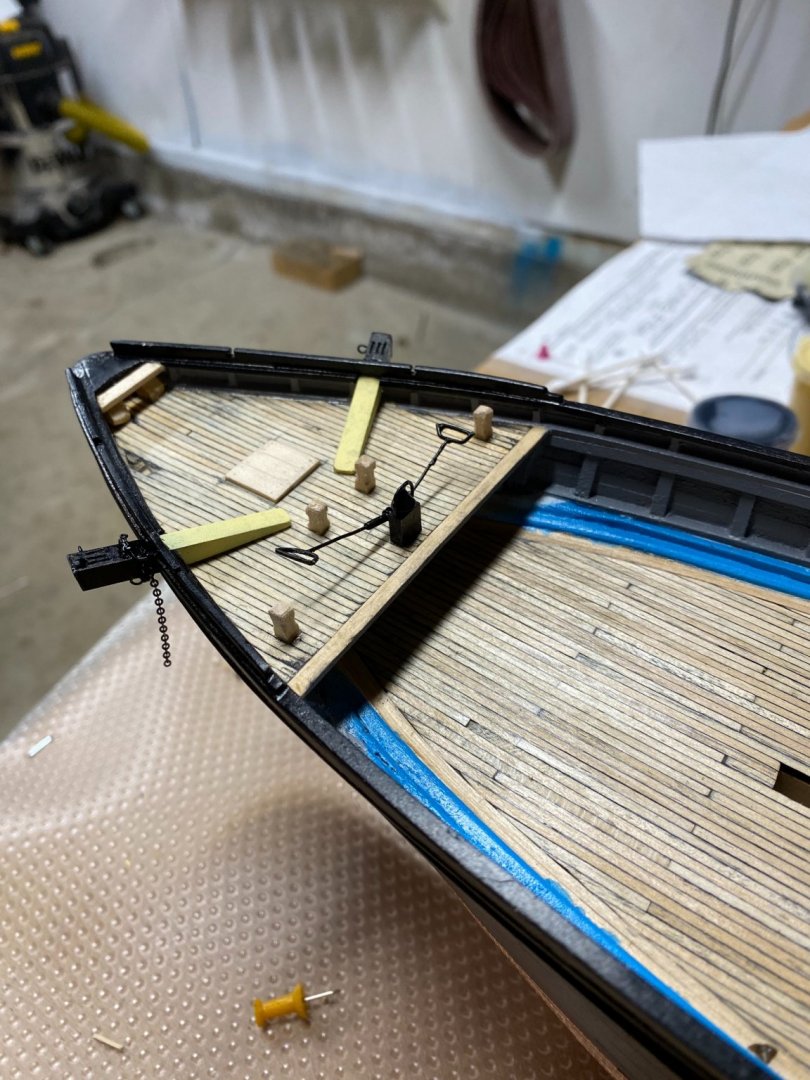
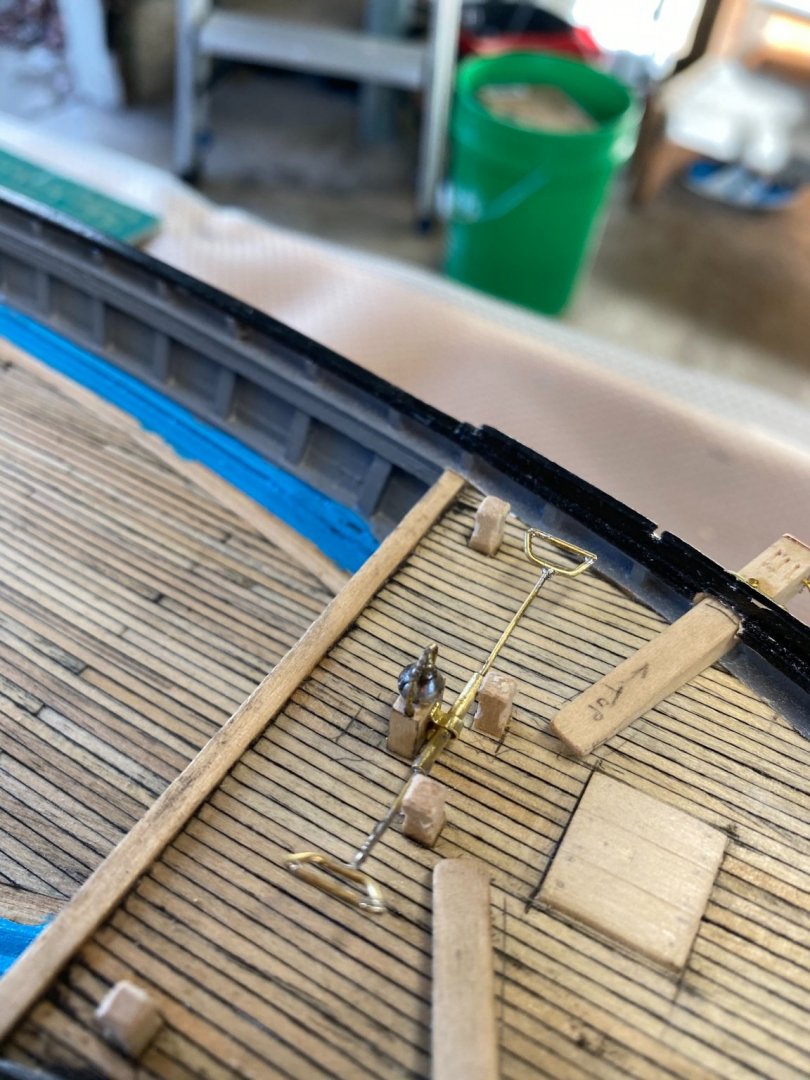
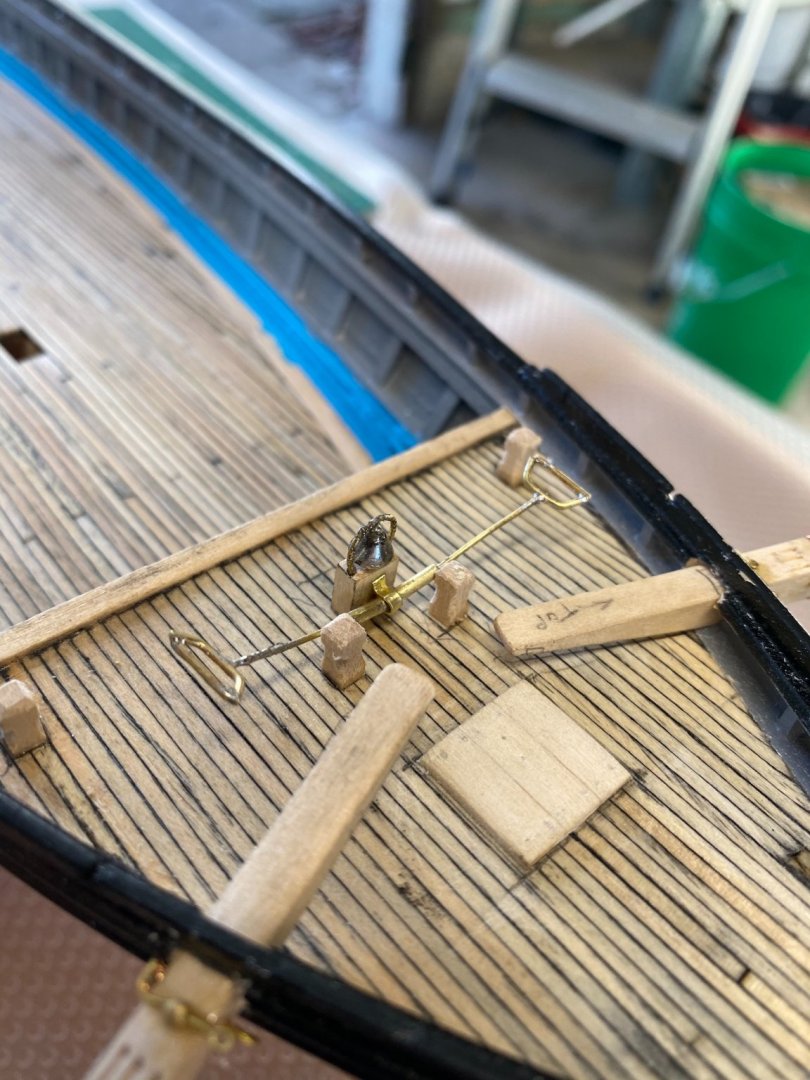
Hello once again everyone,
These last few days of doing not much other than working on the flying fish have been pretty nice! I have finished the first cathead, one more and I can get them painted.
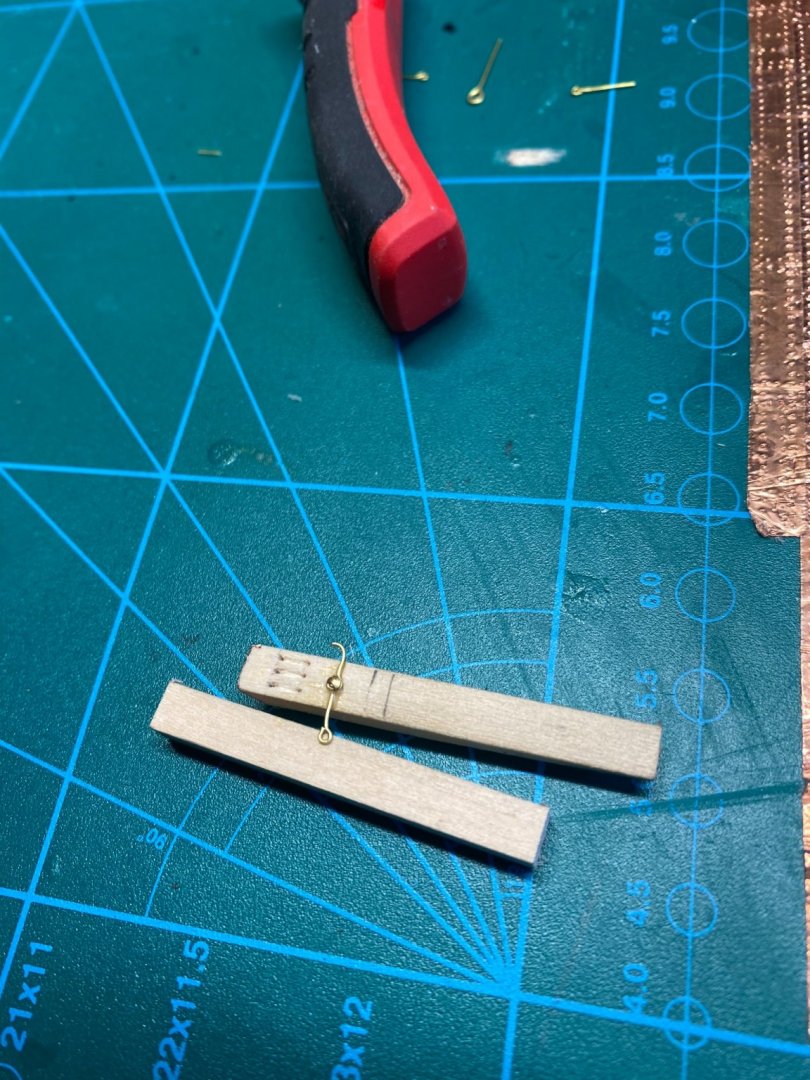
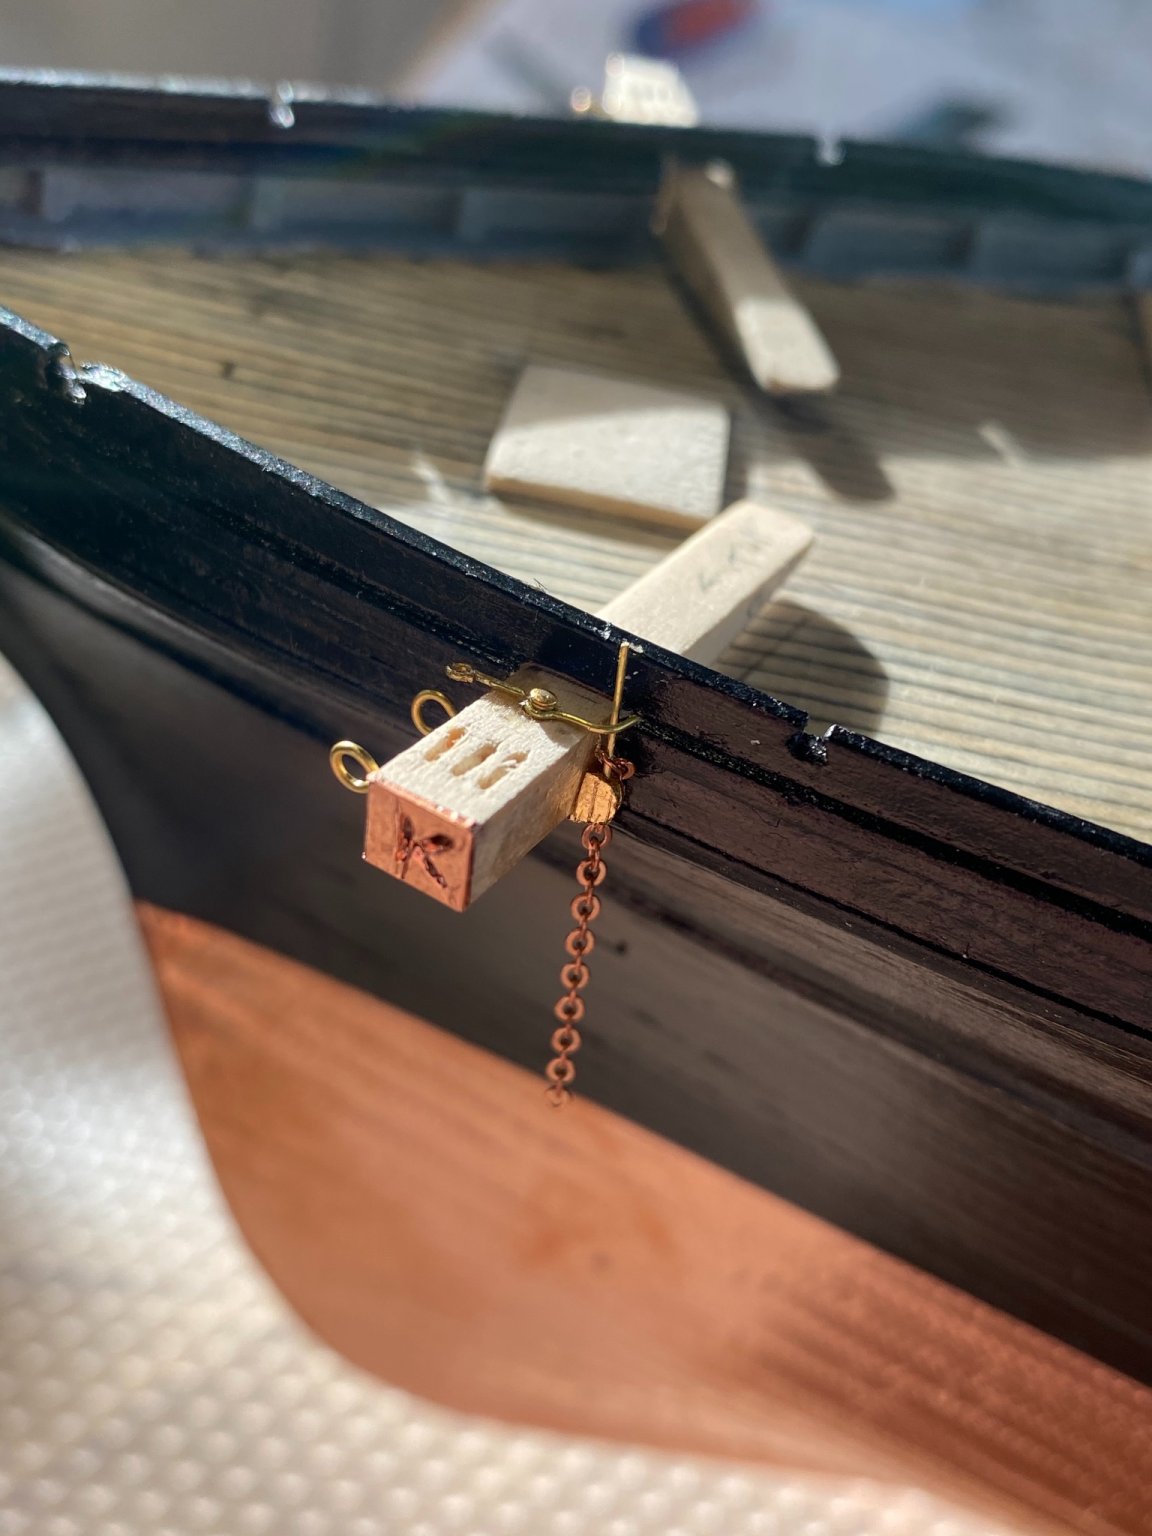
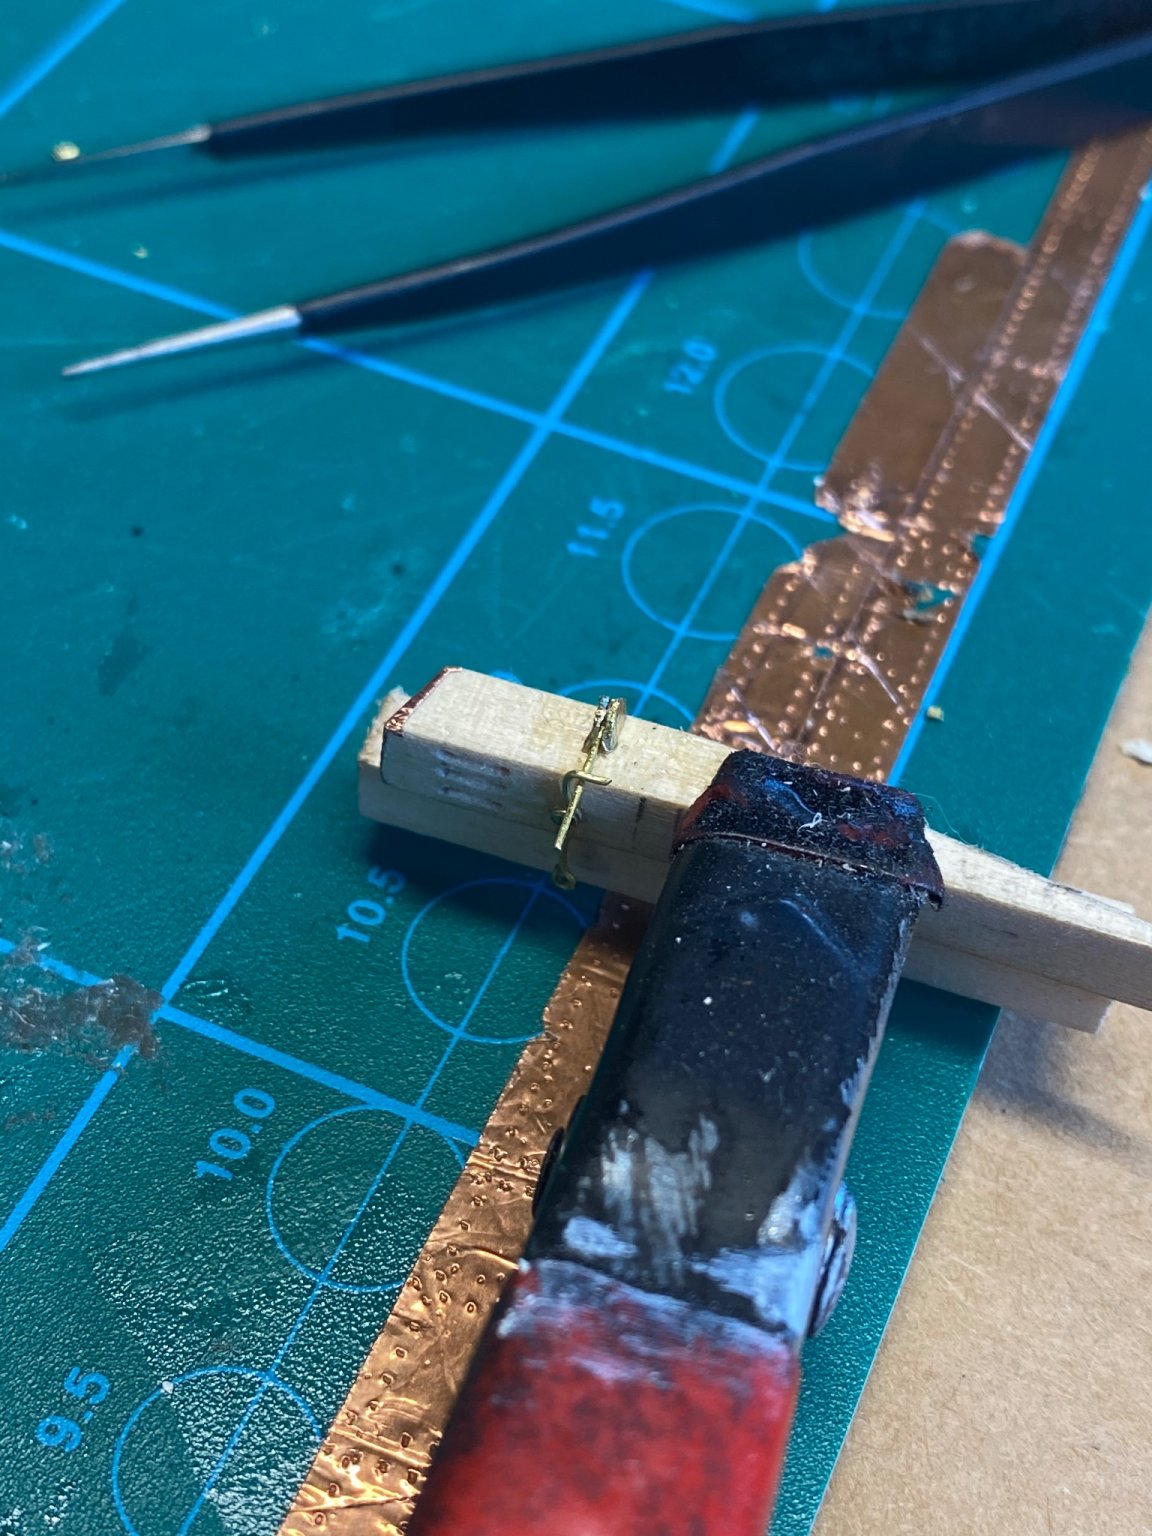
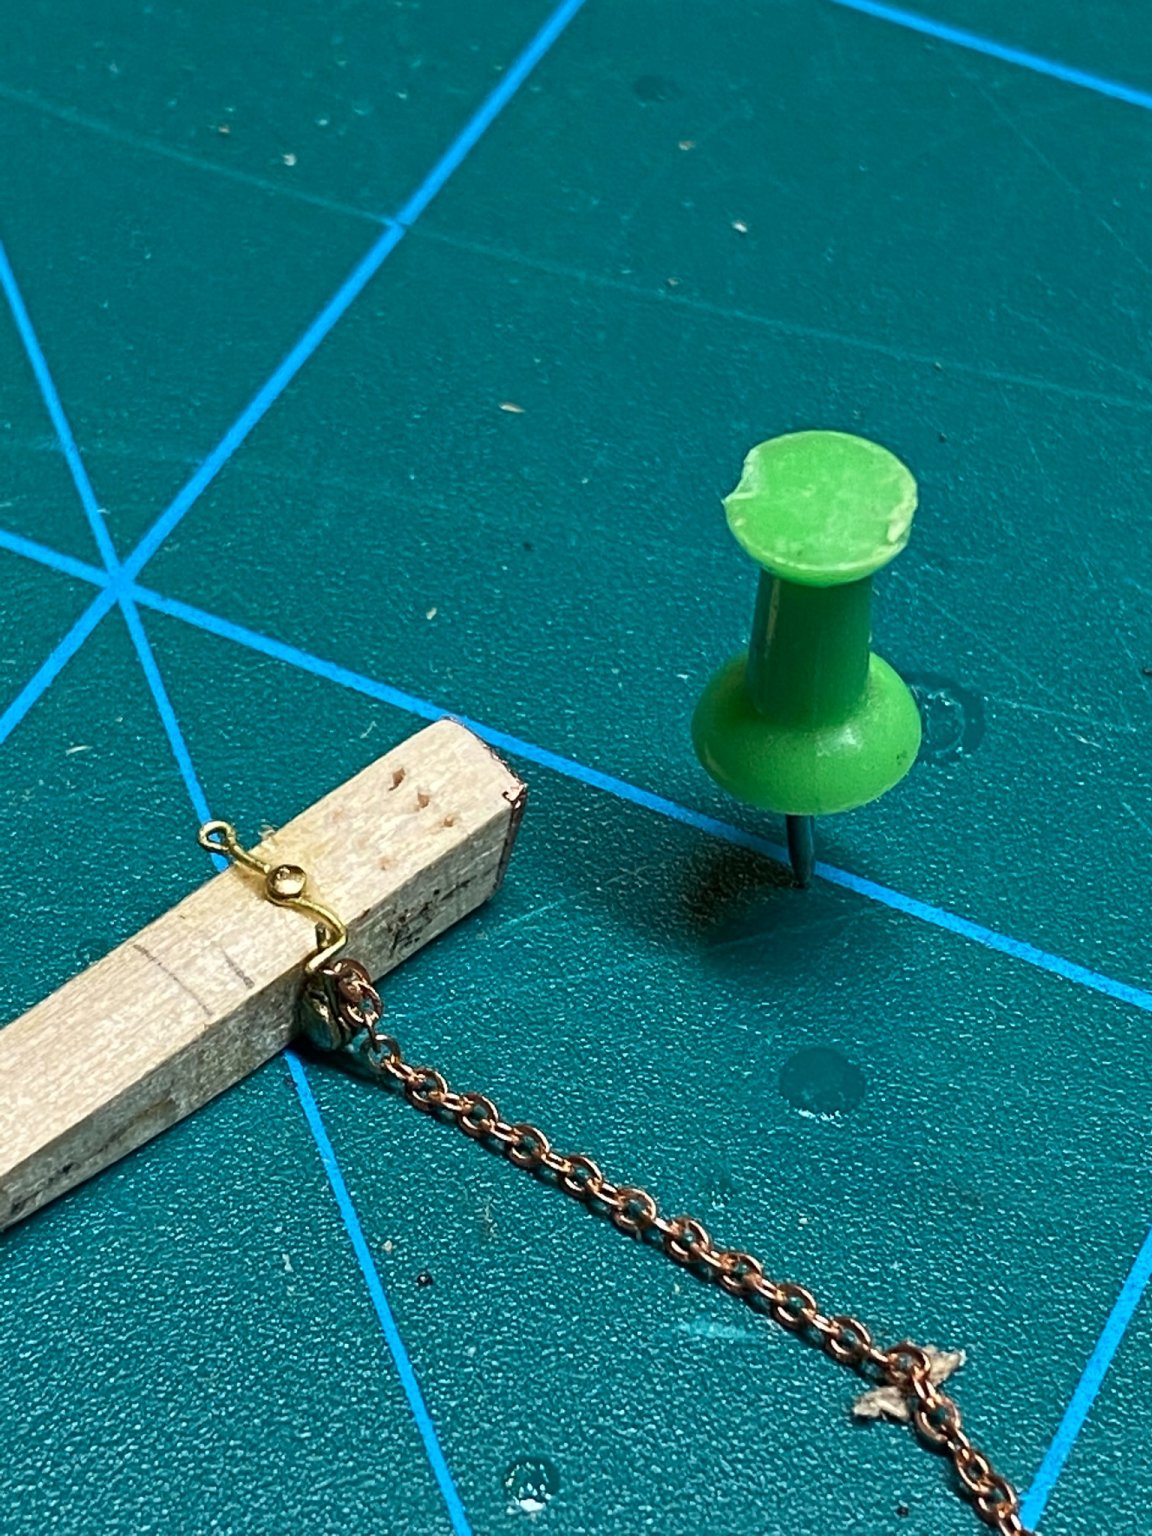
I had a bunch of really small brass eyelids sitting around and that is mainly what I used to create the anchor release, I haven’t checked in awhile but I think the diameter of the eyelid is .5mm and the shaft of the eyelid is .3mm.

Two eyelids were used on the release it hook with a .3mm brass nail in the center, I cut the shackle of sorts from a 3mm brass sheet by taking two flat pieces and clamping them in a pair of needle nose pliers and filed away all the excess, what was left was two half circle pieces of brass. I have another eyelid in the middle of those to act as the pin fall. Then I added the chain that will hold the anchor to this mechanism, and I will cut this to length later when the anchor is complete.

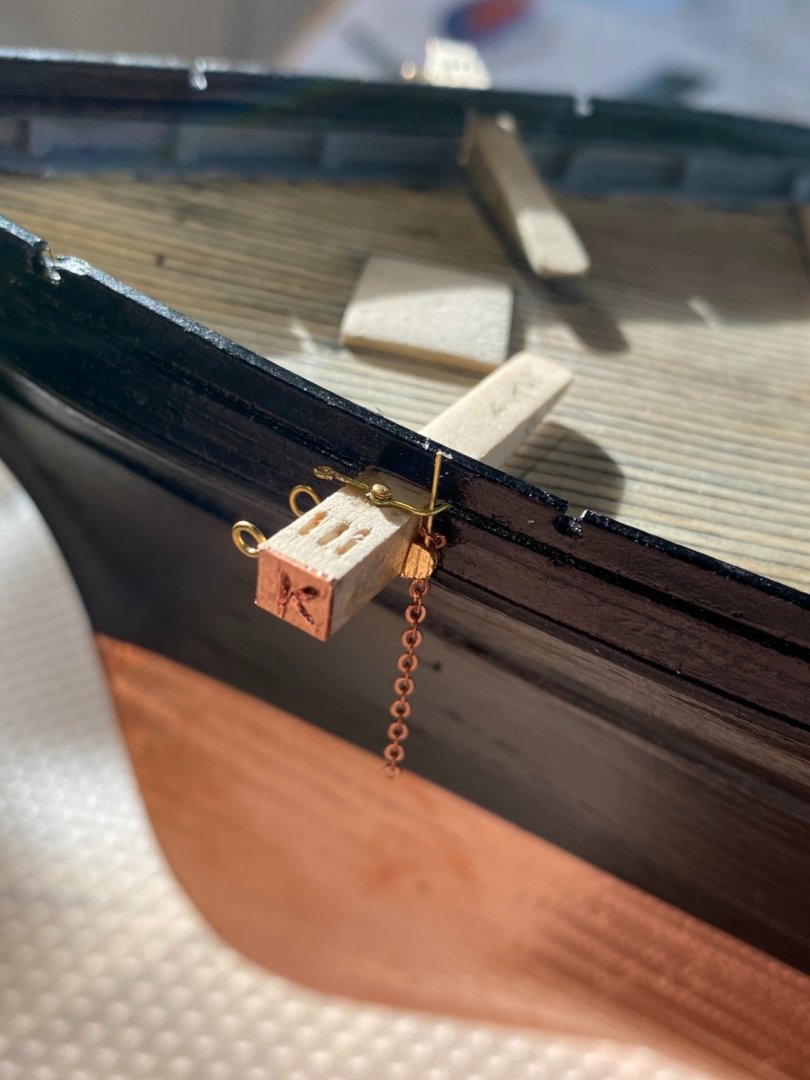
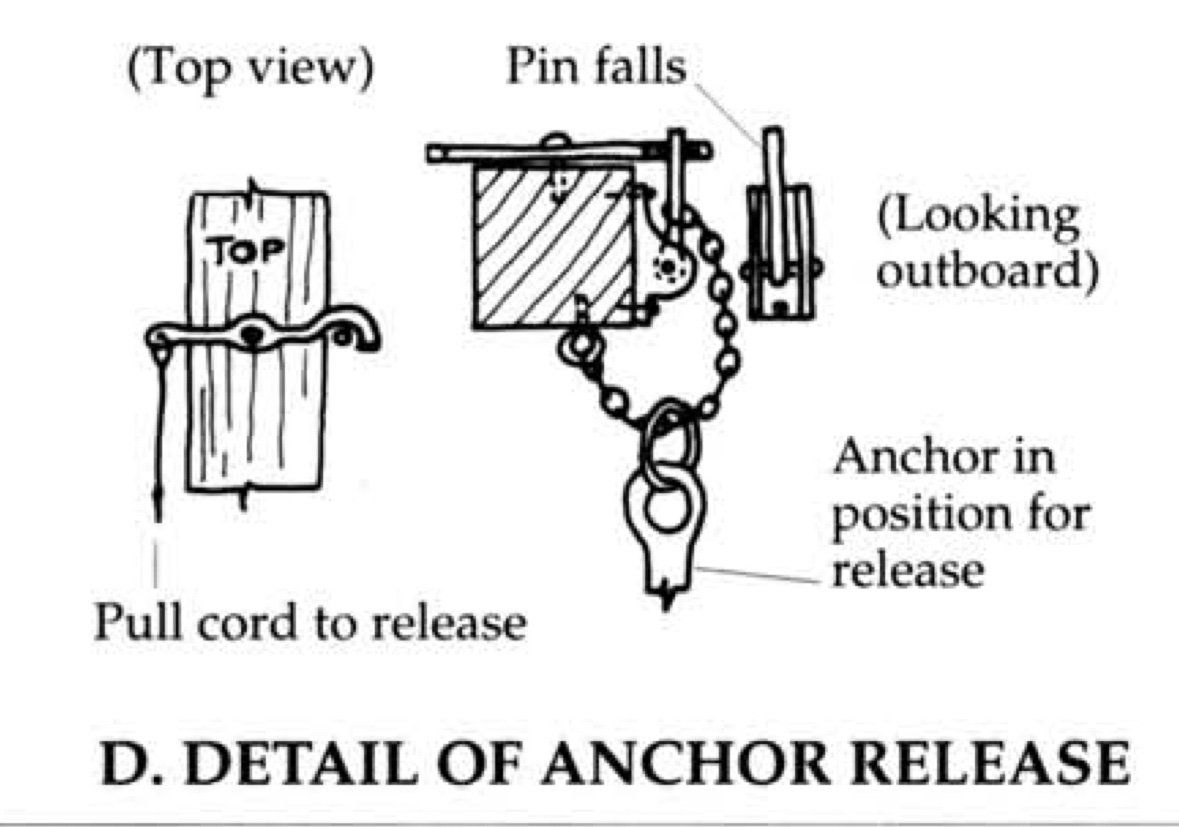
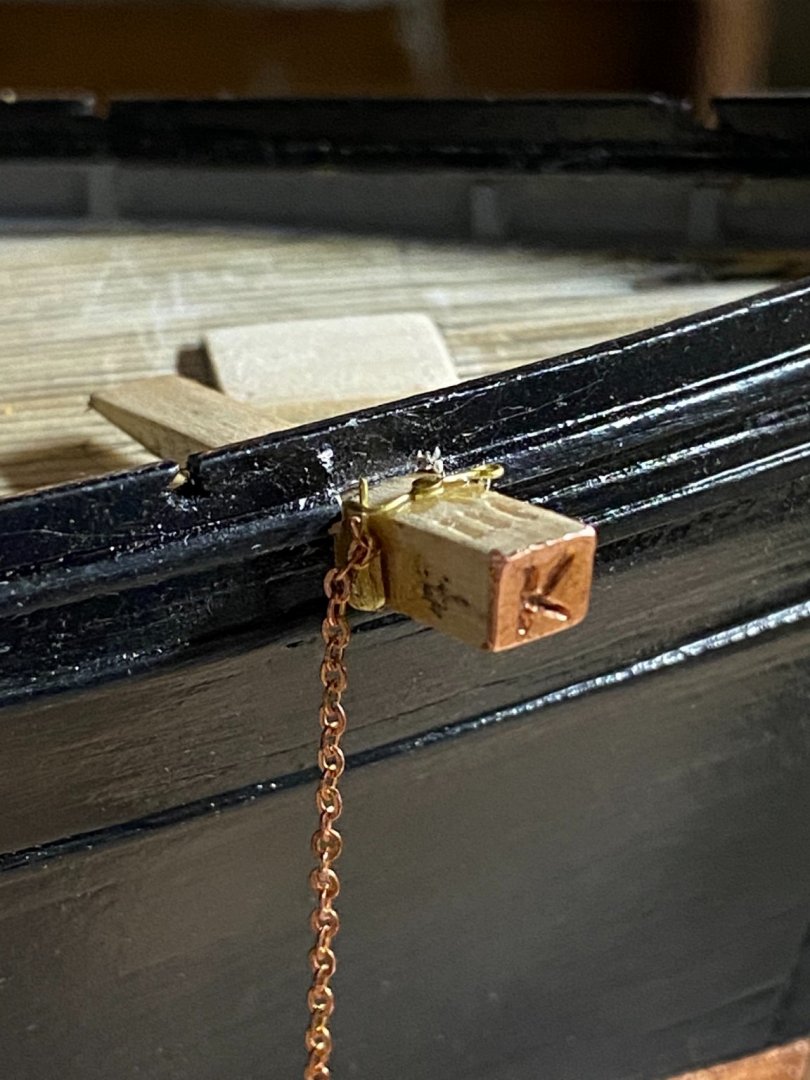
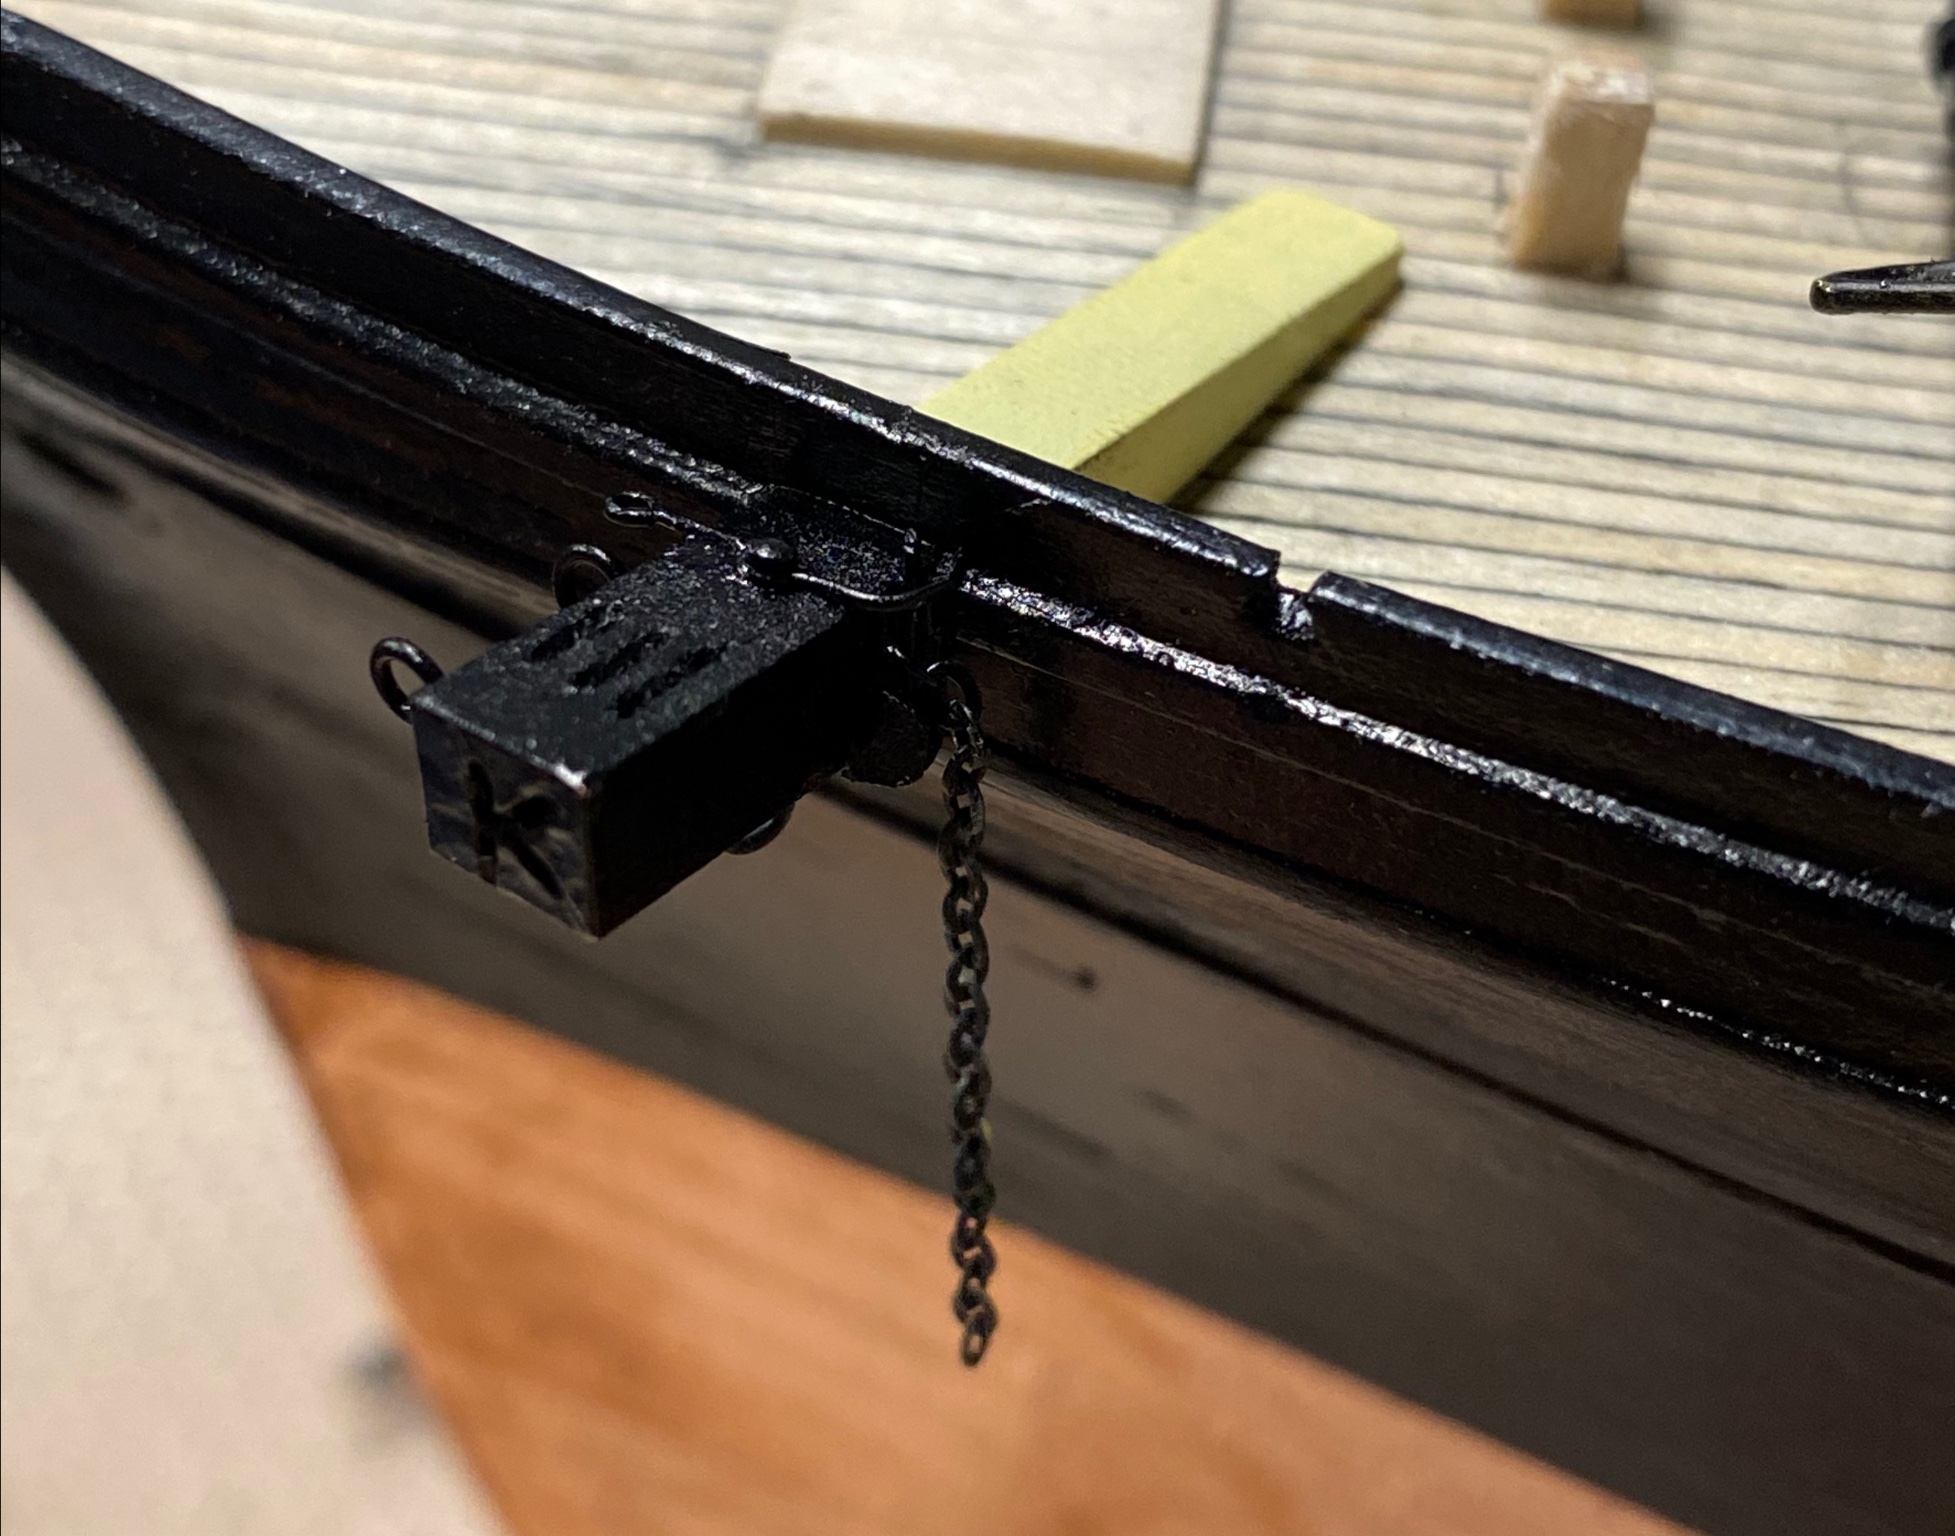
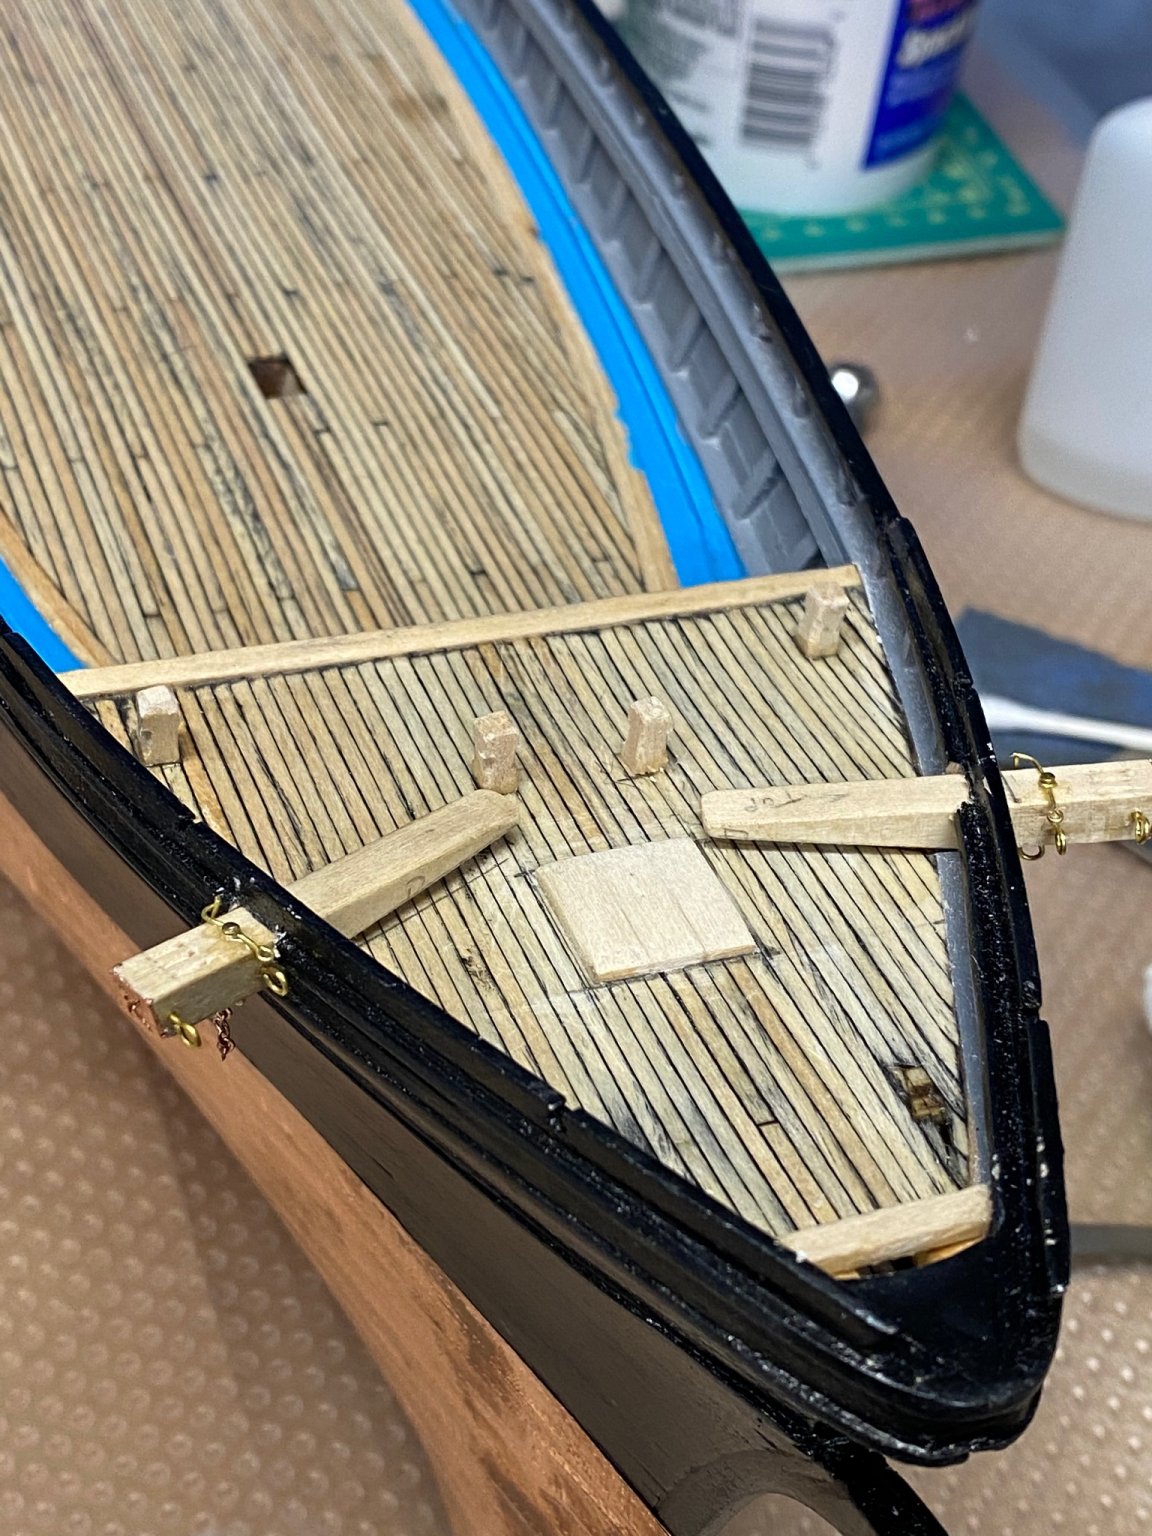
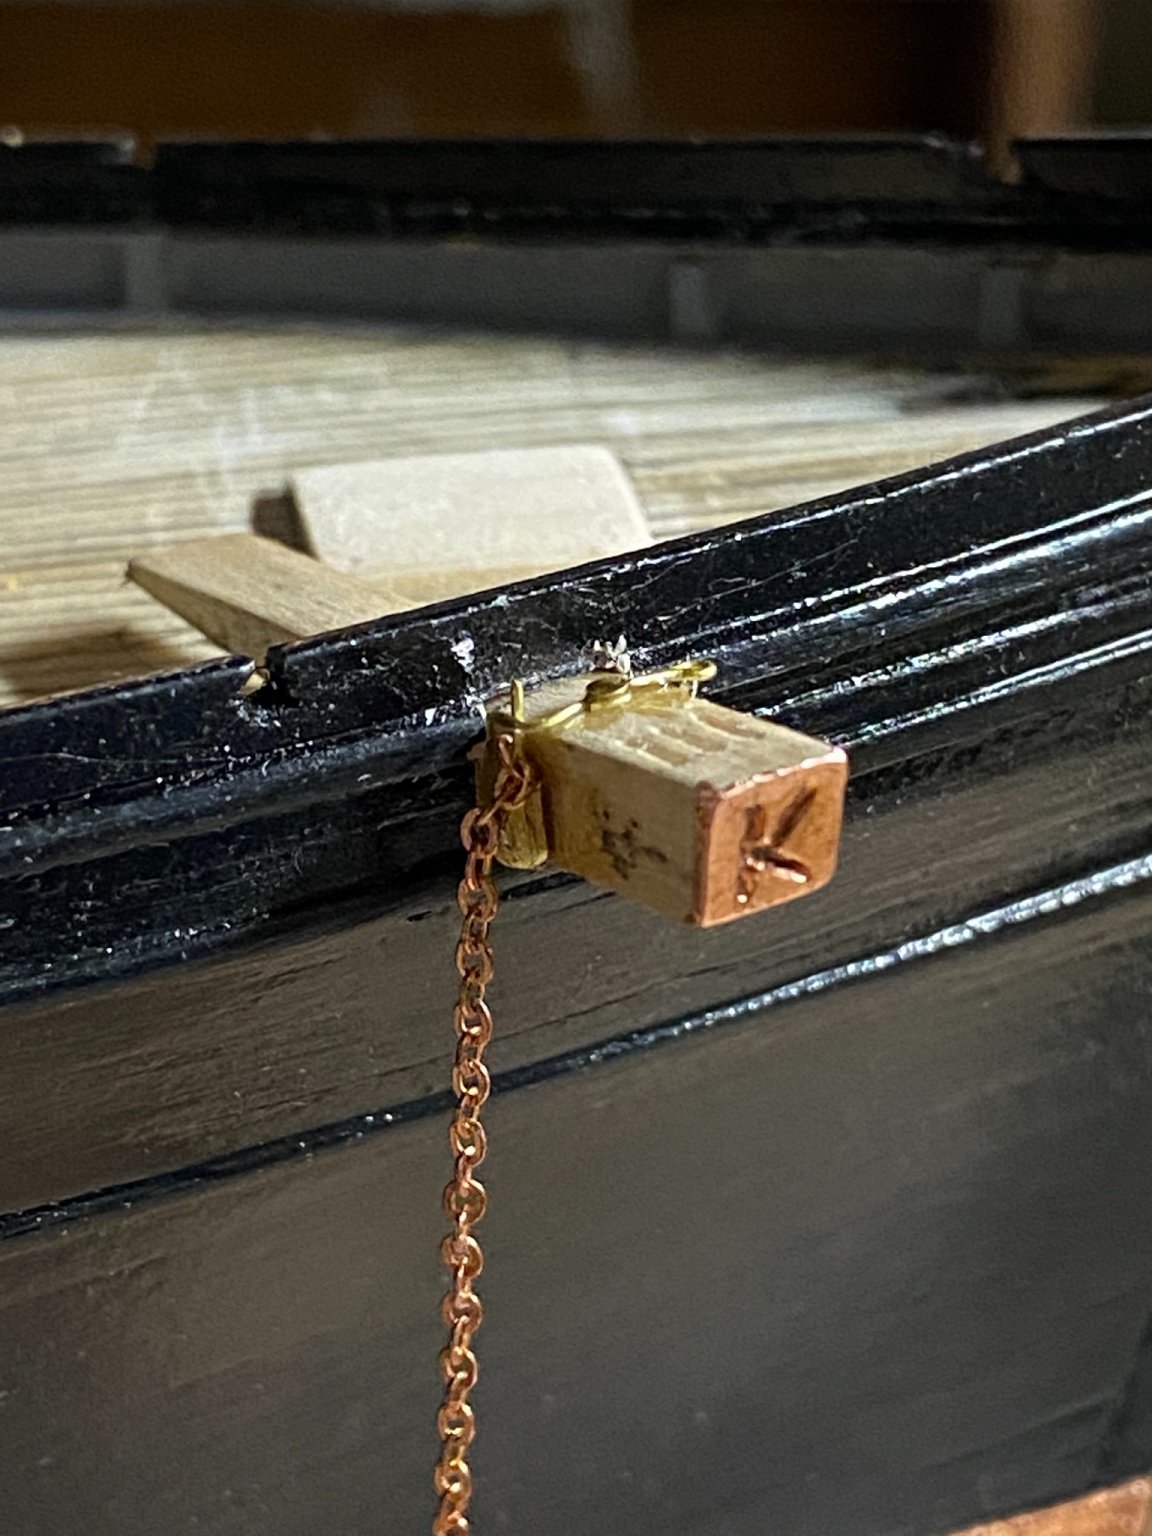
The idea is a small line is tied to the eyelid on the left, when pulled, the right side slides towards the end of the cat head, releasing the pin fall. Because the pin fall would be holding the anchor it would drop pretty quickly releasing the attached chain, and while the anchor is tied off by the main cable, this release mechanism acts as a way to lock the anchor the cat head, allowing it to be locked in placed on the forecastle deck if desired. Basically you pull the release cord and the anchor drops. Here is a photo that hopefully better demonstrates this point:
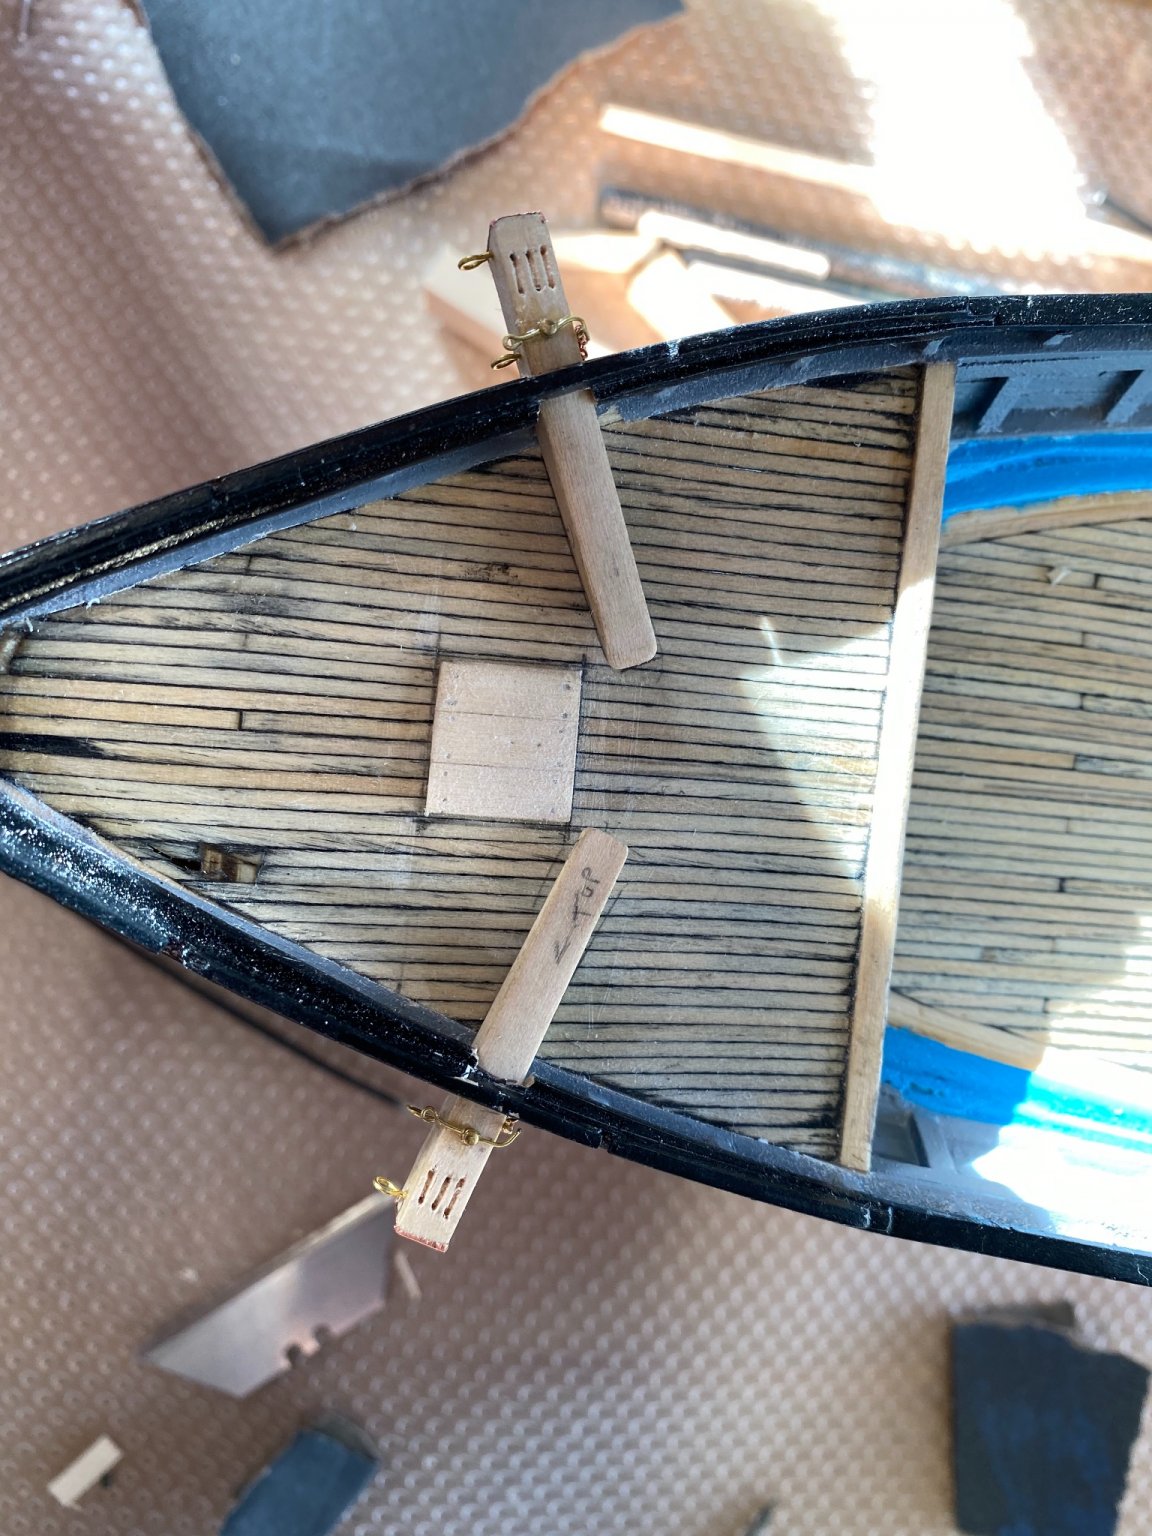
And finally here is what it looks like now when put in place, I haven’t glued any thing just making sure it all fits. Thanks again.
Bradley
-
-
Hello everyone,
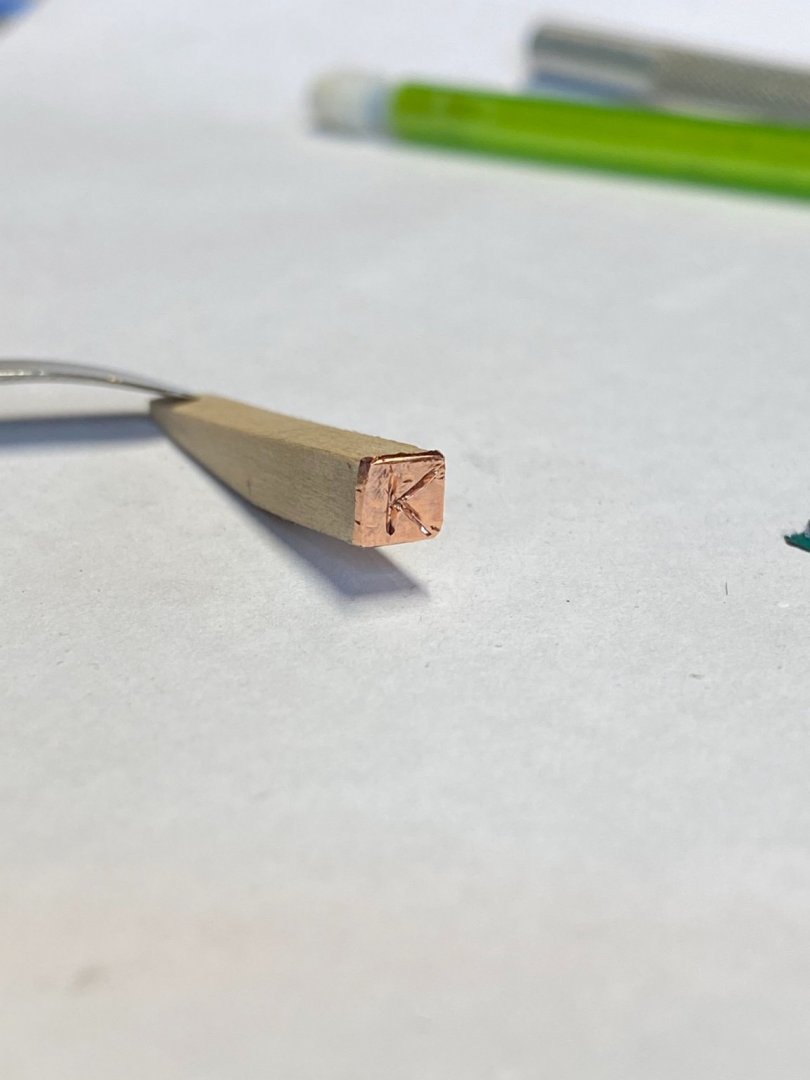
Today was more successful. I am almost finished with one of the cat heads, I shaped it on the disk sander according to the plans and carved the letter K into the face of the cat head. I didn’t figure this out until a little to late but I should have cut the sheaths before shaping the cat head, it would have made it less stressful.
Here it is:


I hand carved the sheaths this time, and reduced the hole that I drilled to .3mm. I think it turn out pretty nice! I started working on the anchor release, this took me awhile, I tried cutting the shape out of a brass sheet but its to small. So i had to use a tiny wire and epoxy it together at the center, I think it turned out pretty nice, the next step is to create the lever that holds this release.
Once the anchor release is finished I can paint. Also once the epoxy full cures I’m going to file down the nail I used to hold it all together. Thats it for today, thanks again!
Bradley
-
-
Hello everyone,
Well the Admiral went back to work a few days ago and takes our daughter with her and I don't go back to work until the 25th, so I have this week and next week to make some nice progress before most of my time is spent else where.
It’s always frustrating when you spend lots of time on something and it doesn’t work out, well that has happened to me over and over again lol. I worked on the rudder and the cat heads yesterday, at separate points I thought both looked excellent, and at separate times they both ended up in the trash. At least now I know what I can improve on and hopefully make a nicer product.
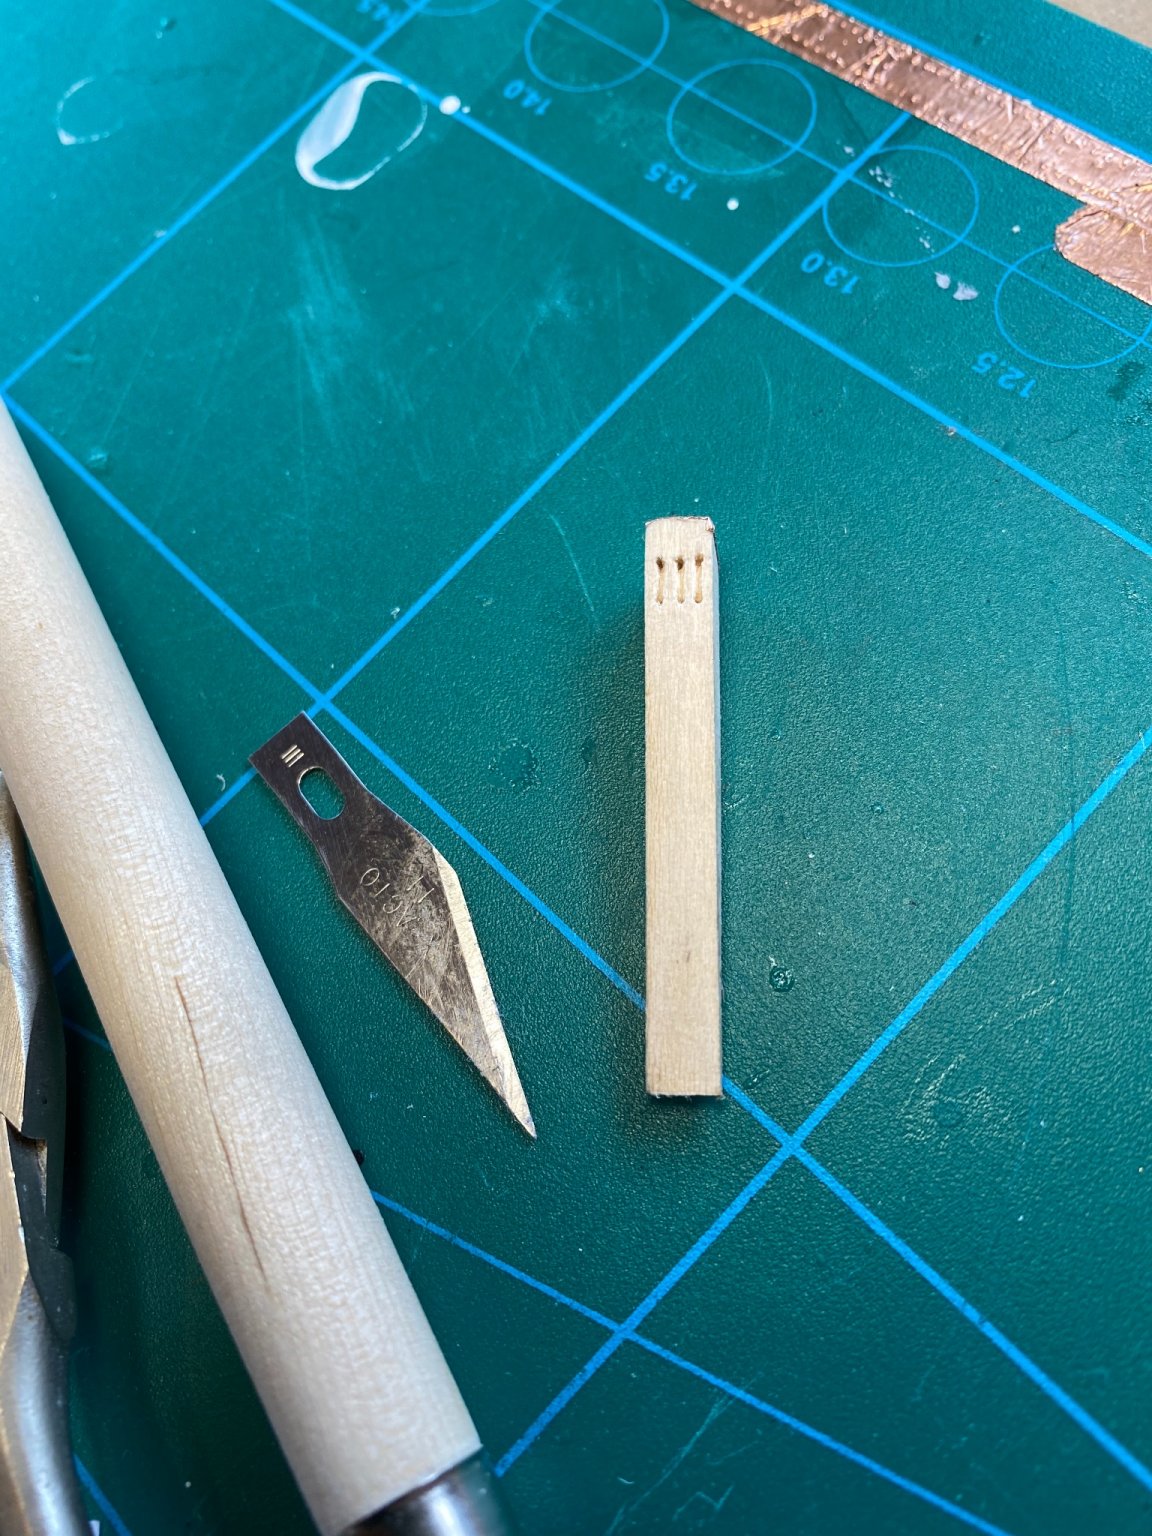
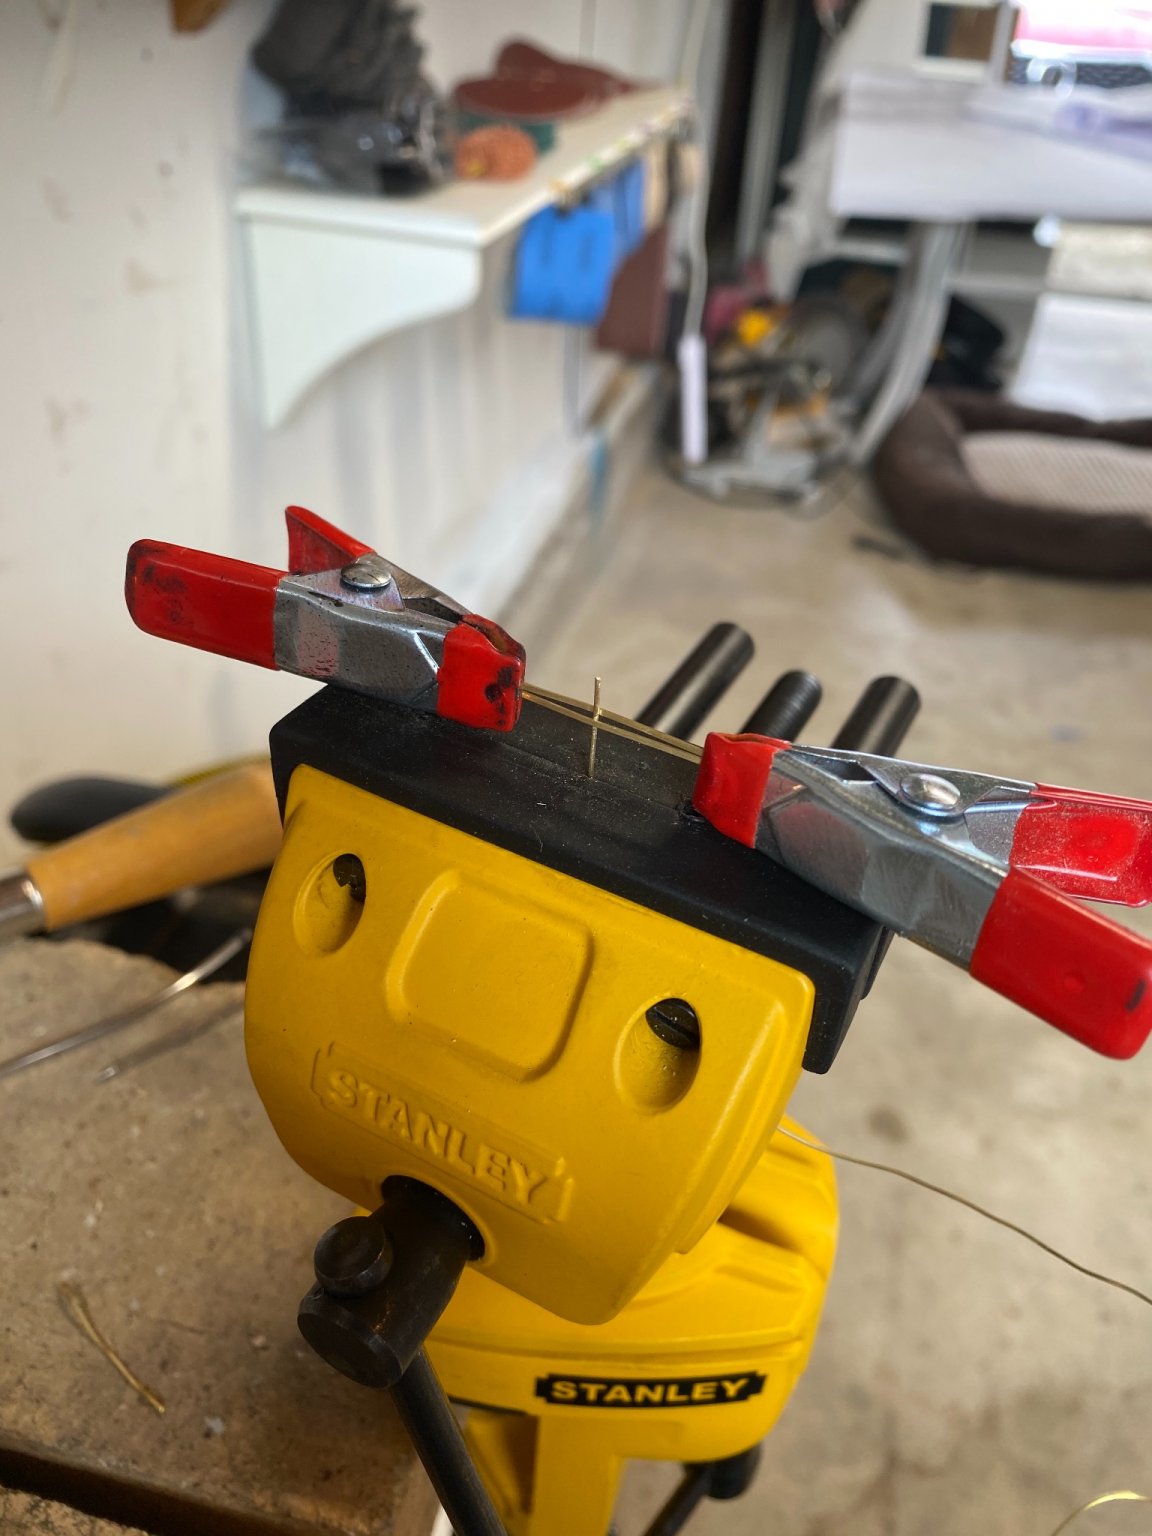
Starting with the rudder, I’m working on the pintle and gudgeon straps, I decided soldering the straps to the pintle will give me the most realist look. I figured out a pretty good method for my self that works well, I cut and clean the brass wire (24 gauge I think) that will be used as the pintle. I then took two equal lengths of 1/32” brass strip and clamped them next to each other and inserted the brass wire in between them, this way they are square to each other and stay there while I start my torch. Next time, a medium temp and low temp soldering paste would make this easier, I only had a medium temp soldering paste on hand so when I applied heat to one they both melted, if I had applied a lower temp paste to one and a medium temp paste to the other I could have worked on them separately which would have been helpful. My joints must not have been clean enough because every one of these broke as I was trying to shape the straps. Thankfully these didn’t take me long to make, but breaking 7 of them in a row was frustrating enough for me to move on to something else. Here is a picture of pintle and gudgeon straps:

After seeing poor results on this I decided to take a break from that and move onto the cat heads. Which I thought looked so clean before I drilled out the sheathes, thankfully I only did this on one, so its not a total loss. I think the drill bit i was using (.9mm) was to small for my drill press, because there was a lot of wobble that I didn’t notice right away. I started drilling and splintered the bottom of the cat head so thats too bad. Some good news about the cat heads though is I already have the opening on the model cut so all I need to do is make one more cat head and drill the sheathes by hand. The cat heads have a small gilded star or some other figure with a metal cap at the face of the cat head, my last name starts with a K so I put a K there. Thankfully I have another try at getting the K to look a little nicer. Here is a picture:
Last point here, I think I’m going to focus on one area at a time, with the size of this model it’s overwhelming to look at the deck plans and see how much has to be done. So ill start with the forecastle and when I’m happy with that ill move to the main deck than the poop deck. Thanks for comments and support everyone, it really helps!
Bradley
-


Hello from Northern California Foothills
in New member Introductions
Posted
Small world! I went to Montgomery and live in Bennett’s valley now.