


Keithbrad80
-
Posts
416 -
Joined
-
Last visited
Content Type
Profiles
Forums
Gallery
Events
Posts posted by Keithbrad80
-
-
Welcome to MSW Rachel, make sure you start a build log on your Albatros, plenty of people here are more than happy to help with any issue you run into!
If you get time take a look through some of the tutorials on the site, lots of information just sitting there!
Bradley
- mtaylor, Ryland Craze and Rach10199
-
 3
3
-
Out of the three tools you listed I would say a table saw would provide the most use. The Byrnes Table Saw would be an excellent purchase IMO, it would provide the most use long term. I have a table saw and a scroll saw but not a mill, it would be really nice to have but I don’t have one yet. The table saw might not provide a ton of immediate use but that gets my vote.
Bradley
- Canute, Slowhand, thibaultron and 2 others
-
5
-
1 hour ago, gak1965 said:
They were a real pain to cut, but he biggest problem was that I broke every single one of the bulkhead extensions for the forecastle at least once. They are all probably 10% CA glue now.
I had the same issue... I man handle the hull during the planking process and broke them all the time. I found it was way easier to cut them off, just the horizontal supports on the top, and replace them with a hand cut piece later. It will make planking the main deck and the forecastle ceiling planks a lot easier to install, afterwards cut a piece to fit the gap and plank on top of that for the forecastle deck. Hopefully that makes sense!
Your US Brig Niagara is very nice, I’m sure with a case it takes up a ton of space! This flying fish will probably do the same...
Bradley
-
Very nicely done! I had a really hard time with the water way under the forecastle, but yours looks great!
Bradley
-
2 hours ago, hof00 said:
Hi Chap,
That's an Awesome build!!
Cheers....HOF.
Thanks!
Bradley
-
2 hours ago, EKE said:
Isn’t it great to make models of ships like these, to capture a bit of their magic in the mind’s eye?
This is the reason I enjoy the clipper ships so much! I have never been aboard a clipper before but I could only imagine the view from the helm as she cut through the water. My next build is a fully framed 1:72 Young America, I ordered the books from seawatch books a week ago so hopefully I’ll start that in the summer, the hull is 42” long!
Bradley
-
8 hours ago, WalrusGuy said:
The planking looks so nice! It's breathtaking!!
Thank you!
59 minutes ago, EKE said:This looks wonderful, Bradley. Planking a hull of that size is quite a task, you must be pretty pleased with yourself!
This was certainty the largest planking job I have ever done. I would say between the decks and the hull I had to cut easily over 1000 planks, maybe more. I have been planking since like September so it feels great to finally be moving on!
-
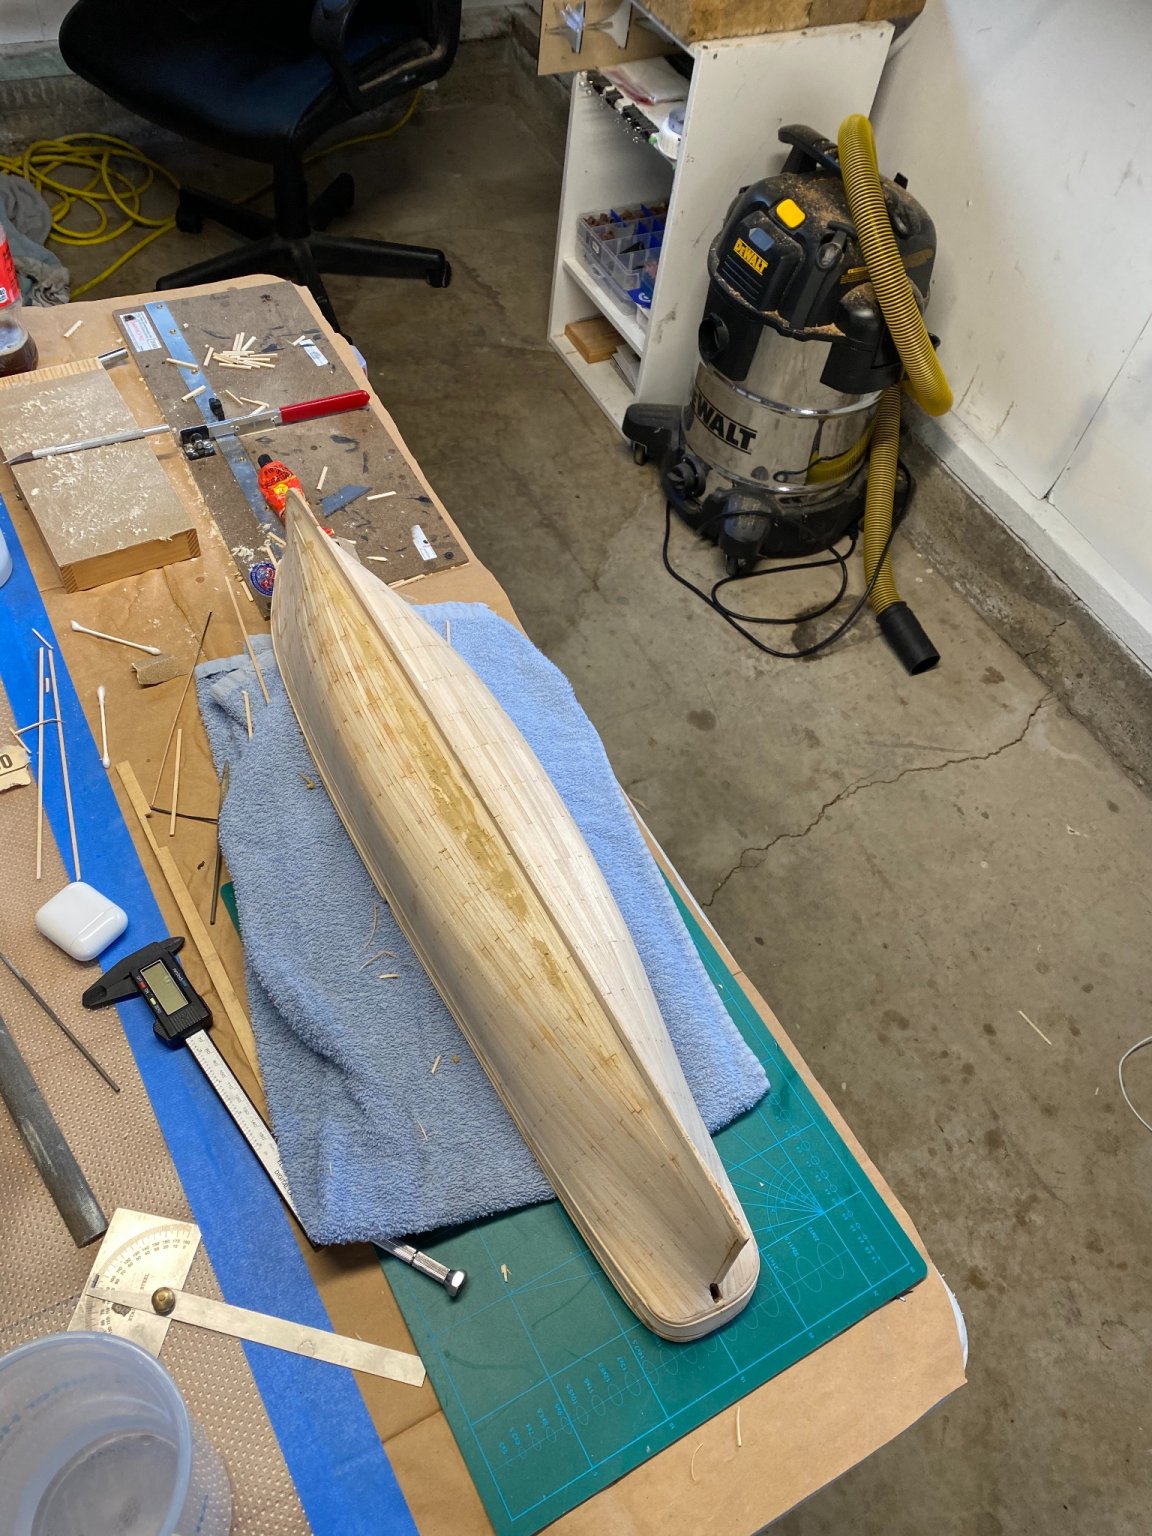
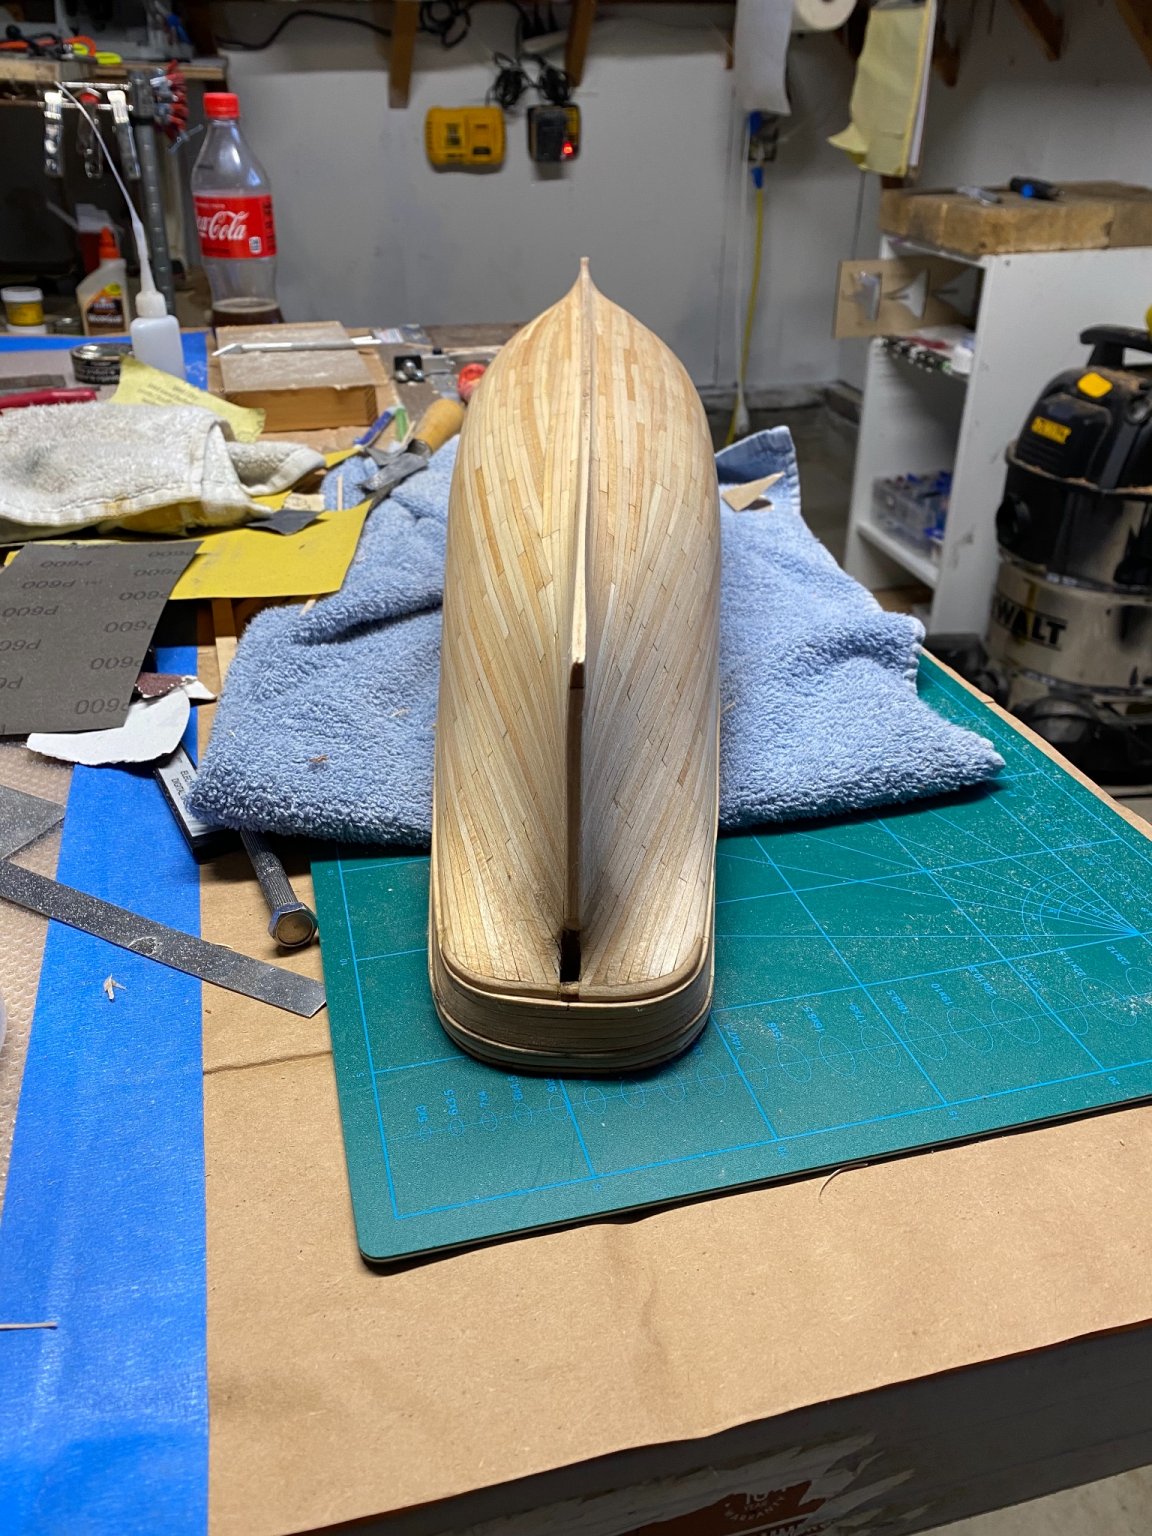
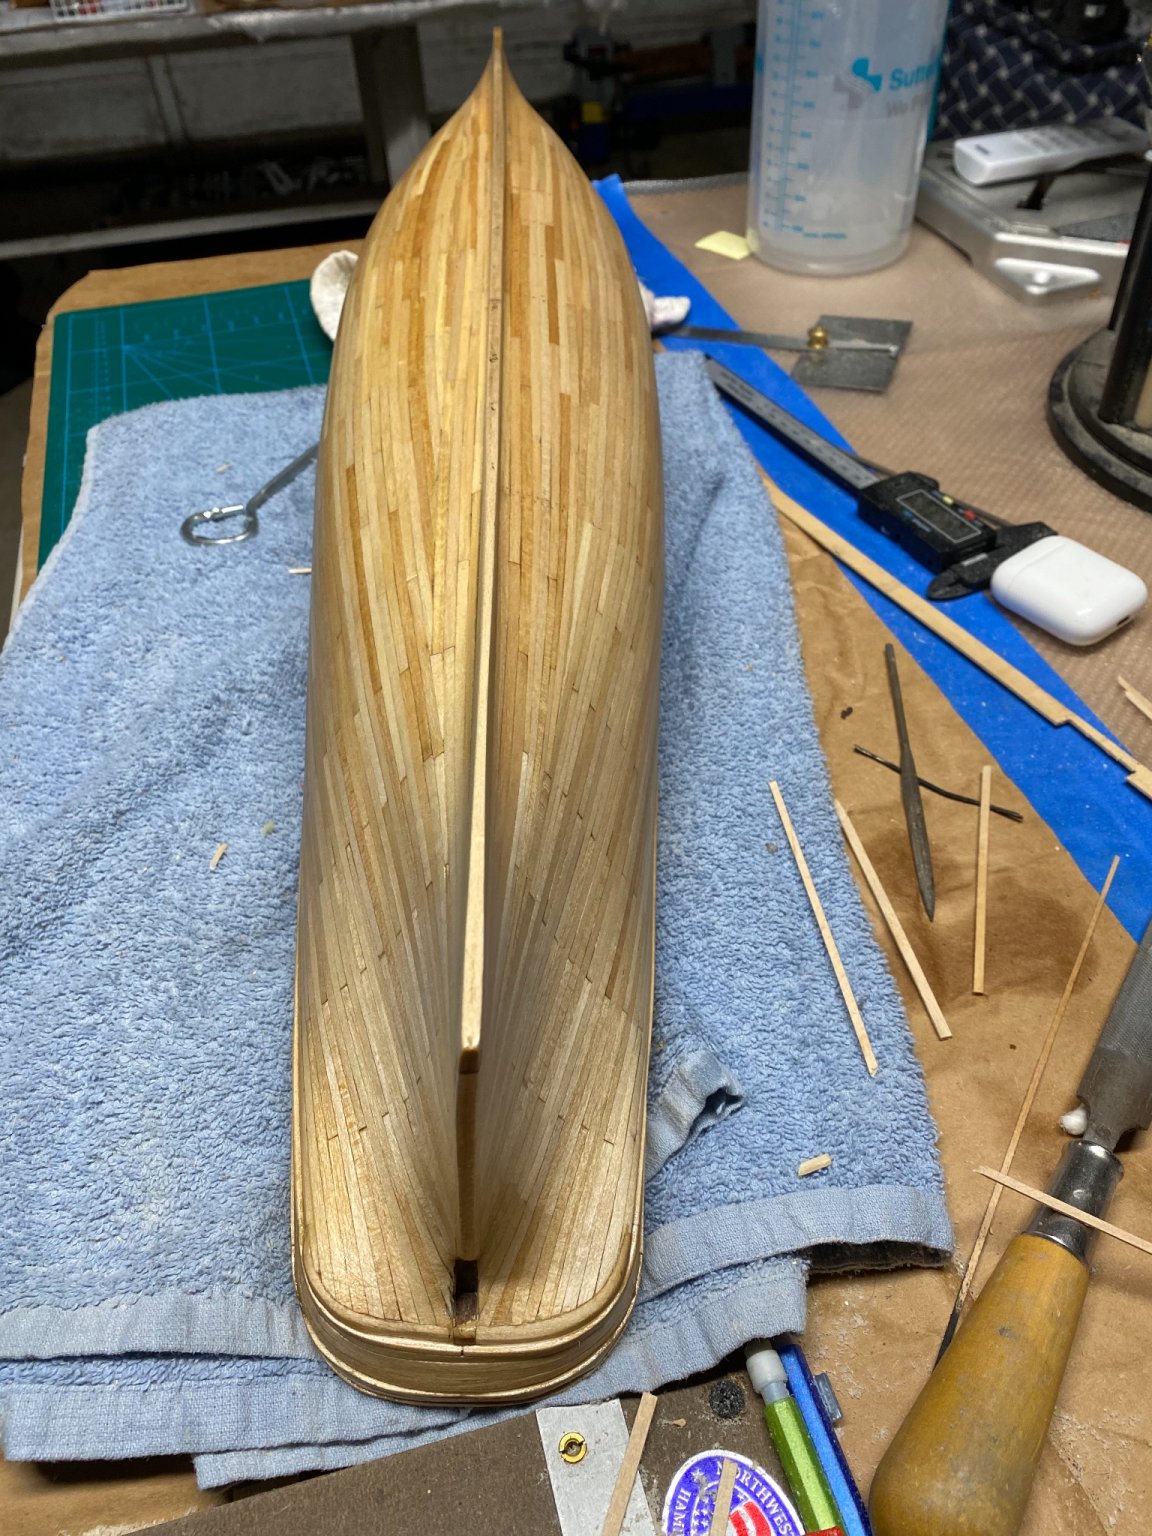
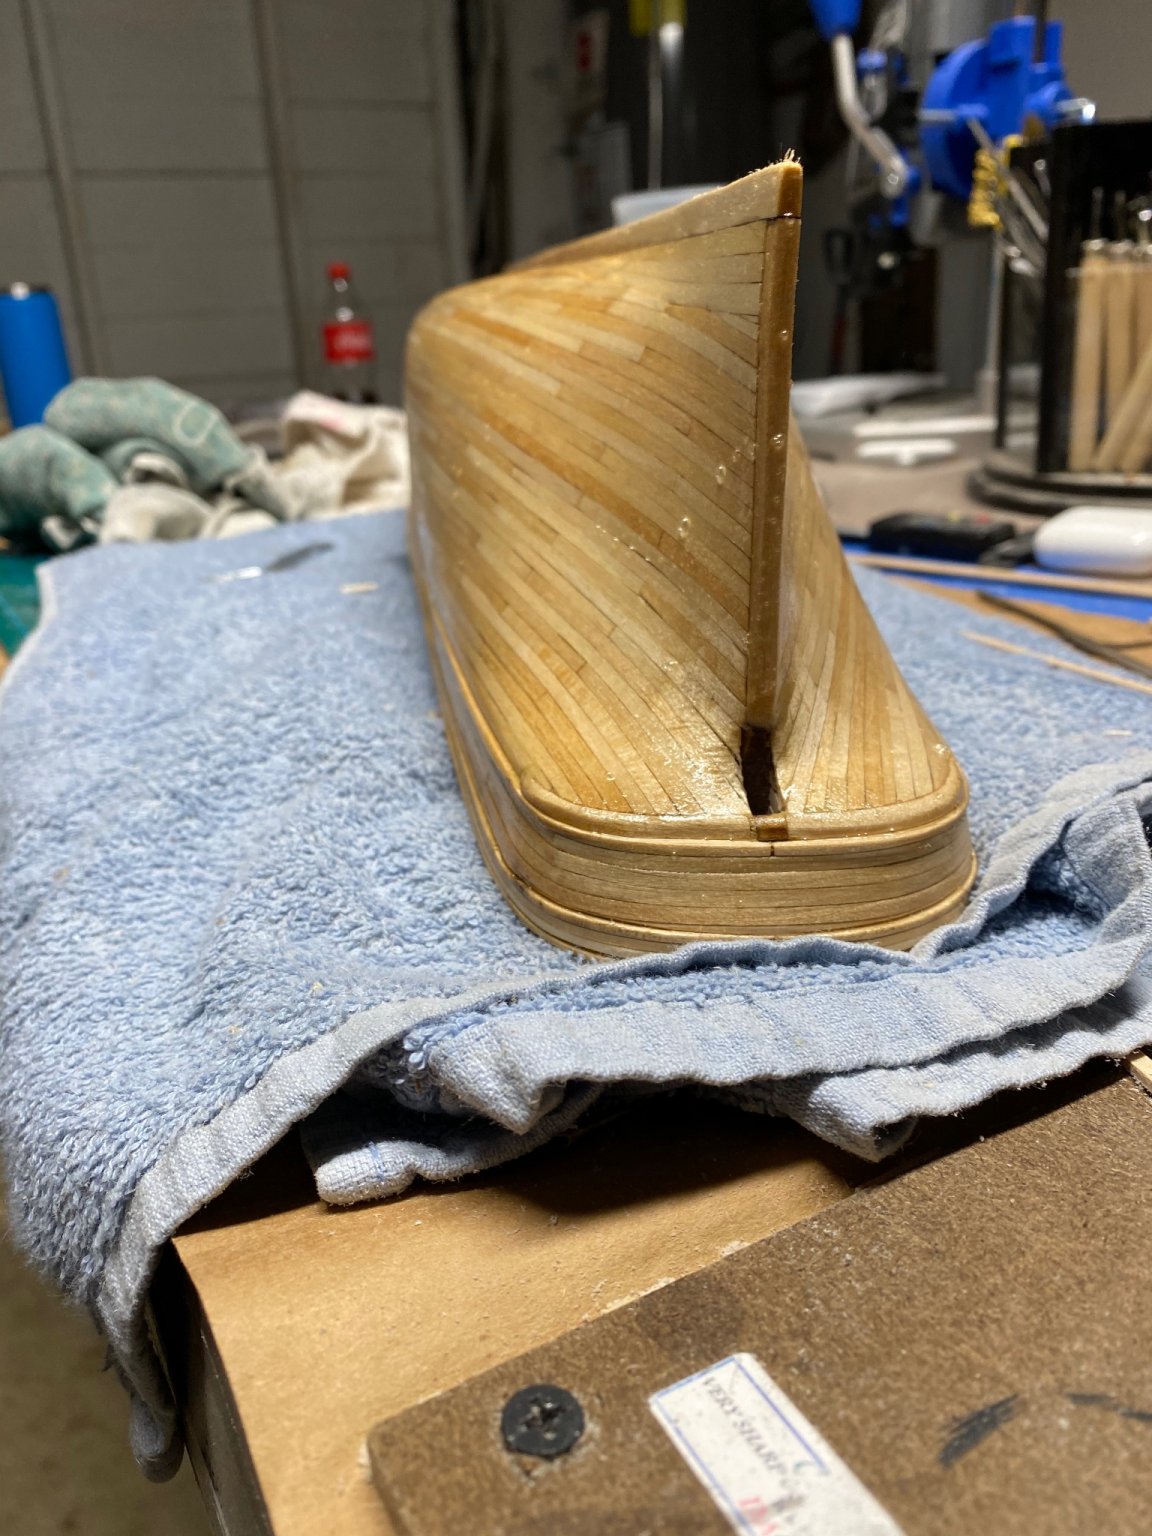
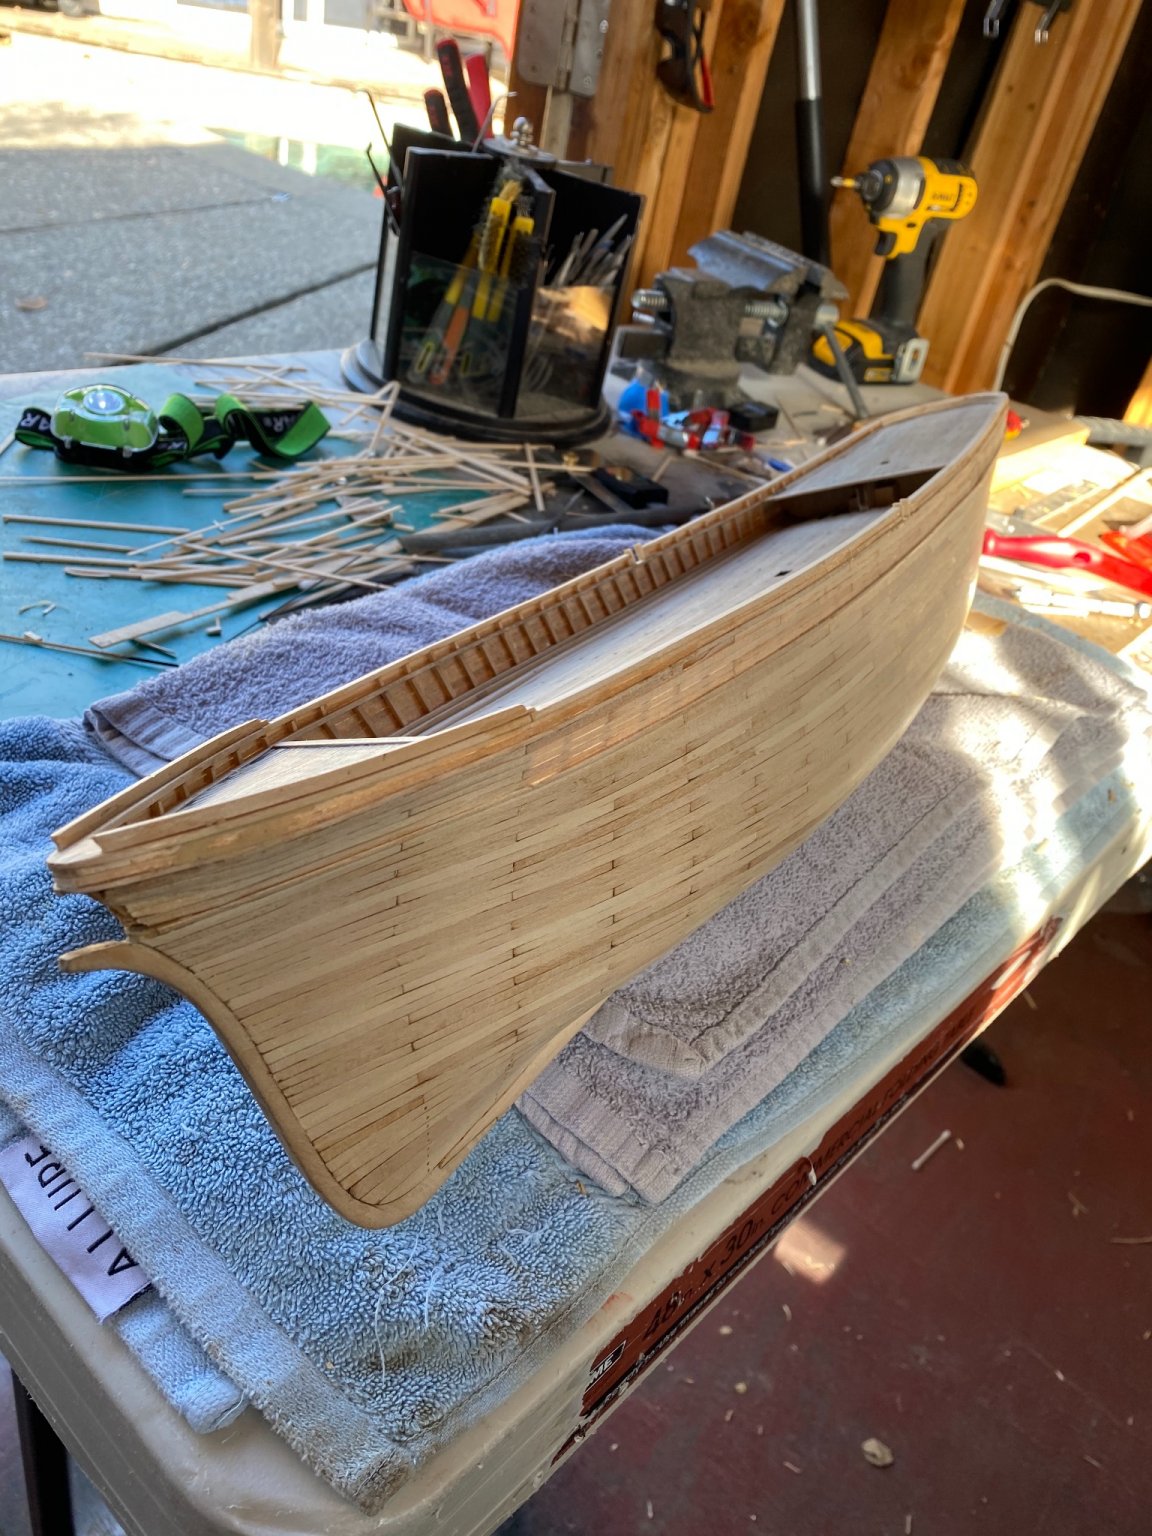
Hello everyone,
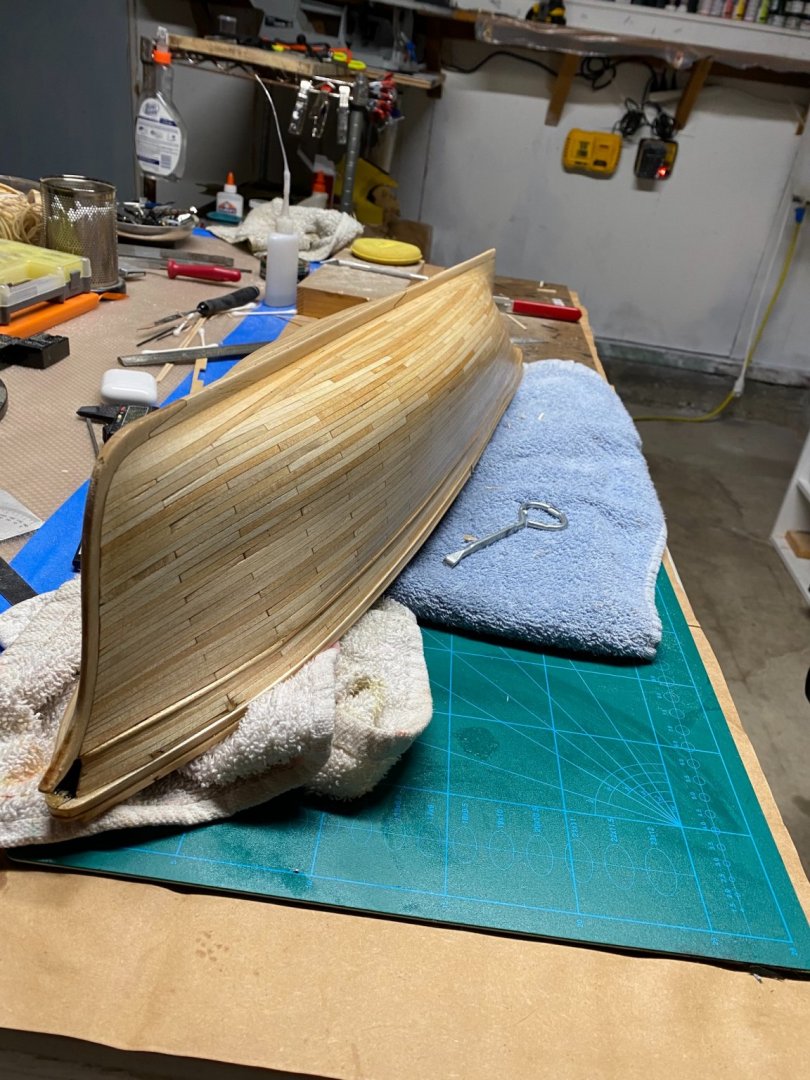
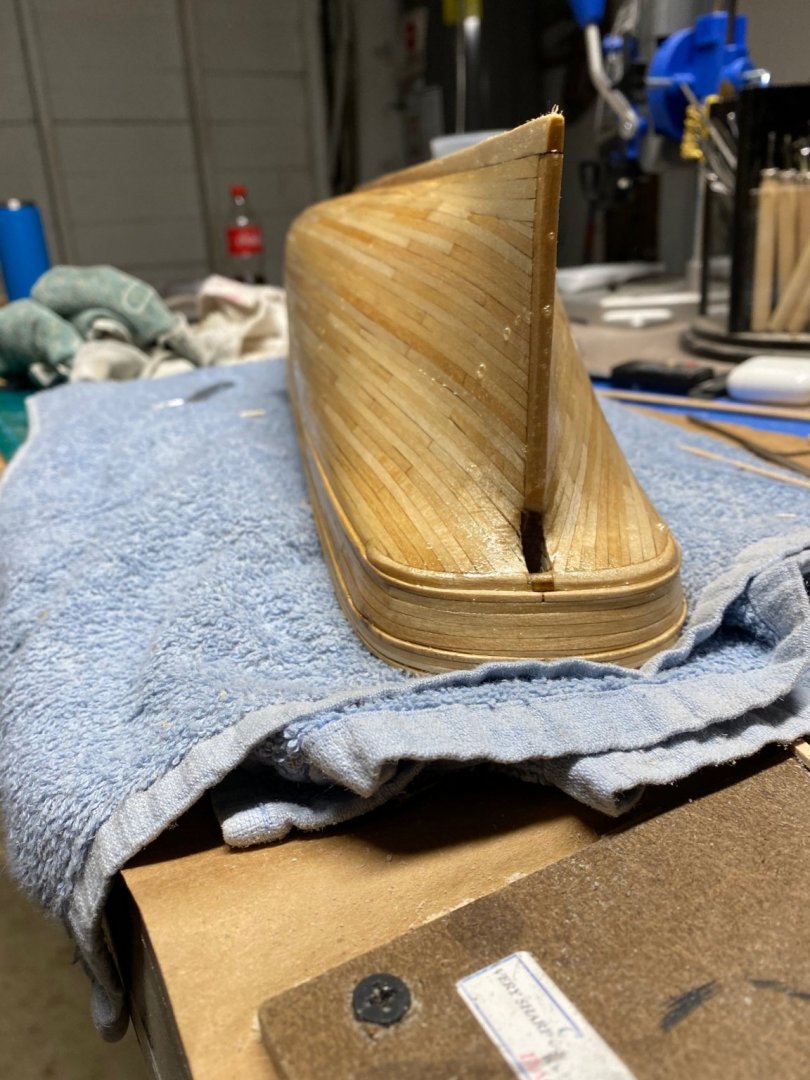
Another milestone for the Flying Fish! I finished planking and with that completes the basic structure of the hull, next up is primer and paint. For any who are interested I got my garage organized and almost everything is in the place i need it, and I will say it is nice having more space and knowing where everything is.
I finished planking today and am pretty happy with it, there are tons of things I will do differently in my next build, most of my mistakes shouldn’t be noticeable once it is painted. My goal at the start of this was to use as little wood filler as possible and still achieve a smooth finish, and surprisingly i did pretty well, I filled some spots and got everything nice and smooth.

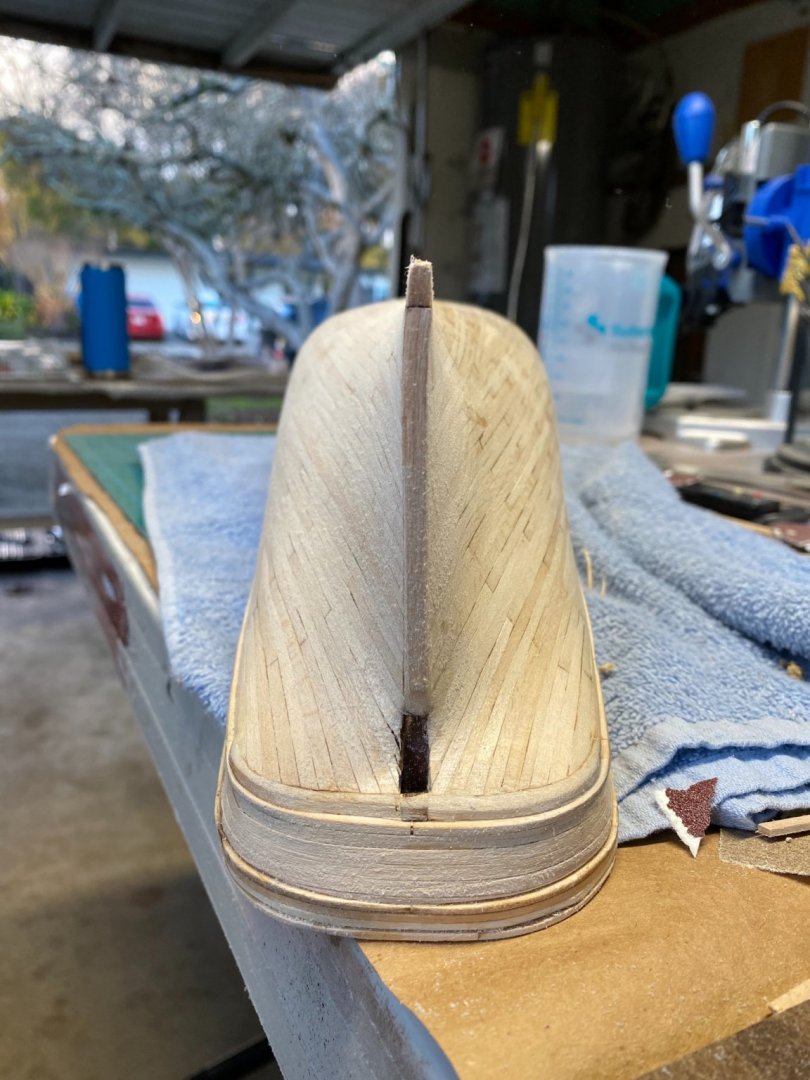
I sanded the hull with 80, 120, 220, and 300 grit paper to achieve a smooth finish and get rid of any fuzziness on the planks. I then followed it up with two coats of clear satin wipe on poly and a sanding with 220 in between, which gave my hull a very nice smooth finish. Ill paint sometime this week hopefully with a white primer followed by black with my airbrush. Unless anyone else has any recommendations...
This is the first coat of wipe on poly

Here it is after the second coat and how it sits now


Thanks again everyone for checking in!
Bradley
- Rudolf, DmitriyMarkov, gieb8688 and 9 others
-
12
-
4 hours ago, giampieroricci said:
I am not in a hurry, I have no problems waiting because I know it is worth it: I just wanted to know if at least the order had been received .....
Thanks for your answers!
This was my only concern as well, I just didn’t know if they got my order or not.
- thibaultron, mtaylor and Canute
-
3
-
Your skills and attention to detail is very impressive for a first build! Things are looking very sharp, nice work on the capstan your paint job is very clean!
Bradley
- BobG, EKE and chris watton
-
3
-
Very helpful video, thank you!
Bradley
- mtaylor and thibaultron
-
2
-
Welcome to MSW!
There are tons of planking resources available for you here on MSW and the NRG, there are also lots of books available to read. What you will find though, is though the results may be the same a lot of people have different methods for planking and lining the hull. You will get the hang of it eventually!
Personally I prefer Model Shipway kits, the instructions are usually very detailed and easy to follow and the quality of the kits is usually pretty good. I’m not sure how much shipping to Spain would be though, good luck and I’m looking forward to following your builds!
Bradley
-
I think it looks pretty good, as long as it is symmetrical it will look good.
In larger models the planks closes to the keel are called the garboard planks, they usually are thinner in the middle of the ship and flare upwards at the bow and stern. They are really important in larger models because they help keep the planks parallel and stops them from turning into a parabola. Well shaped garboard planks and an even taper will get you super crisp planks, if for some reason the garboard doesn’t shape the way you want it you can fix this by adjusting the taper at the bow and stern of your following planks. If done correctly it wont even be noticeable, honestly though for the size model you are doing this isn’t going to matter much. Just thought i would share some info on those planks and there importance, your model is going to look great as long as its symmetrical. Very nice work!
Bradley
-
-
Thanks again everyone for checking in! Happy new year to all hopefully it is better than last year...
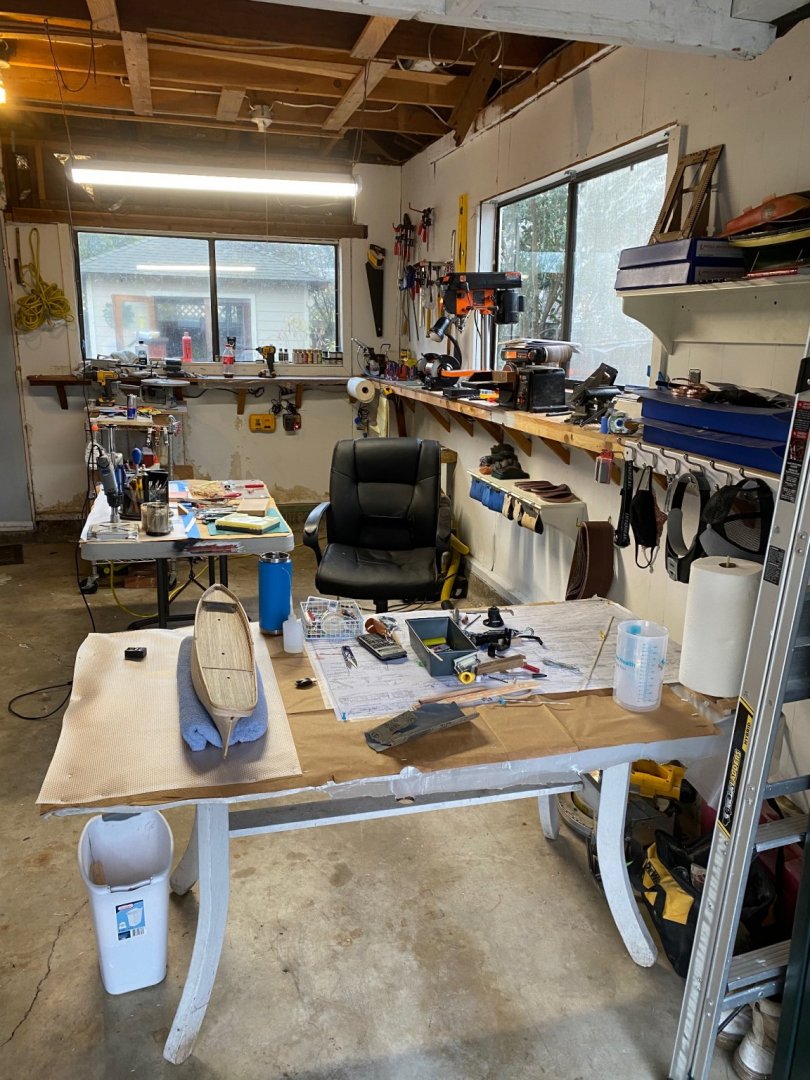
I only have a quick update about my shipyard for you today. Recently it started getting really cold here so I decided its time to move into the garage, after some cleaning and moving some stuff around I finally have a full blown workshop, although nothing has been organized yet, jut thrown on the tables for now. Before this i had two tables in a 100 sqft shed, so it will be nice to not be so cramped.
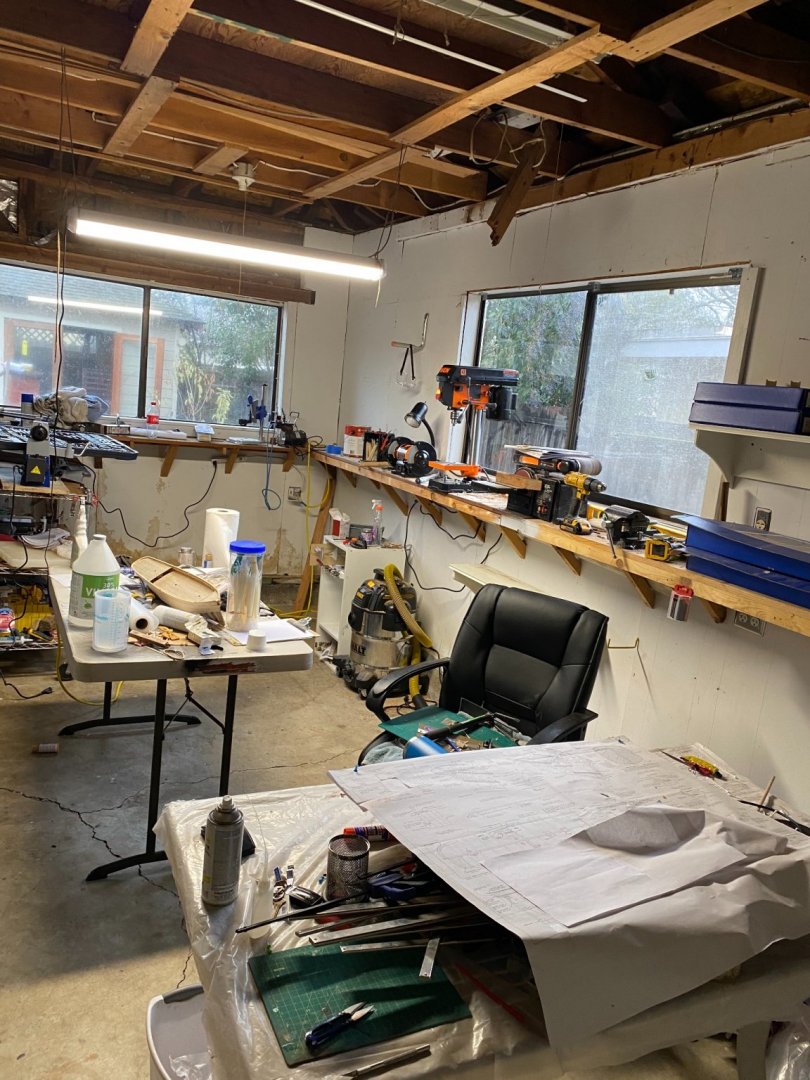
I have a ton of reorganizing and cleaning left to do and some more shelves to build until I’m satisfied but it’s nice to be inside! Hopefully Ill have an update soon on the flying fish, I have been trying to improve my air brush skills before I paint. Thanks
Bradley
-
Your angle is indeed kind of weird, but it’s not that bad. I think you have three options: 1) remove all the planking on the second layer of planking and taper them evenly for best results. 2) remove the top ten or so planks and have a steeper taper that evens them out, this probably won’t be noticeable once every thing else is added later. 3) leave them how they are. You will probably have a dramatic angle at the end of each plank, but with a nice sanding and a finish it should look nice. Remember to cut the second layer to fit the first as well. Nice work!
Bradley
-
Generally i plank the hull first. There have been times for me when i thought planking the decks first would have been helpful but it really depends on whether you have a laser cut deck or not. I have never used a laser cut deck but putting those in before hull planking seems to be the way to go, if you are planking the deck without a laser cut template then i recommend those last.
Bradley
-
As a geologist i have access to a few rock tumblers, some of them are massive. The medium is really what does the rounding as the rock moves around in the tumbler. The important thing here is that your medium needs to be harder than the material you are cutting, the harder the material the rougher the cut. For instance quartz is a hard mineral that makes up most sand in the world, using quartz will provide a quicker and rougher cut than something like aluminum oxide which will provide a polish of sorts on your rocks (or wood).
A rock tumbler is meant to reproduce the natural process of erosion, by knocking the wood or rock against the medium over and over and over. Because of this it takes a long time to see nice results. As I have never put wood in a rock tumbler I cant tell you what the effects might be but If you wanted to shape and rough up wood for blocks and dead eyes I would recommend a rough medium (silicon carbide) to cut away material for a few weeks, followed by a finer medium (aluminum oxide) to provide a pre polish of the wood. The down side of a tumbler is the only shape they can produce is spherical. what ever you leave in there will eventually become a sphere. Last point, remember to change your medium often, maybe once or twice a week but i would check your tumbler everyday to make sure nothing is coming loose.
In terms of model ship building there are probably much easier ways to make blocks and dead eyes than a rock tumbler, though it is a nice idea!
Bradley
-
15 minutes ago, DaveBaxt said:
In your experience would you also use the same glue on the deck planks?
IMO you can (almost) never go wrong with PVA wood glue. Most people don’t like using CA but sometimes it’s a necessity, I use it some times when planking the decks but most of the time a little bit of wood glue and maybe a minute of finger pressure on that plank should do it, just enough for the glue to start to set.
Bradley
-
Personally i would recommend a different method of planking.
First, contact adhesive is used for things like shoes, its really rubbery and dries basically instantly, its not very good stuff for ship modeling. Second, generally when planking the goal is to lay the planks horizontal so they all line up evenly across the hull. This gives the model strength and so the only way to make everything fit is to taper them. If you notice in the video you posted he lays down a bunch of planks and fills them in? The end result in this video looks nice, but a lighter wood is going to show these flaws, on top of that if you have space like that and try to fill them in with other pieces you will never get as tight a fit as if you had just tapered them. His model looks very nice, but the method of tapering planks is an important skill when planking the next model, so learning it now would provide better results on your next build.
What I would do, I would use PVA (white glue or wood glue) and hold the planks in place with my finger while they set, but first i would line the hull and get ready for planking the hull using tapered planks. I would figure out how much to taper them and place them one at a time until i am happy with the results.
There are tons of resources on this site and books in print that you can read through to get a good understanding of planking the second layer of planks, which can make a huge difference in the over all look of the model. Good luck!
Bradley
-
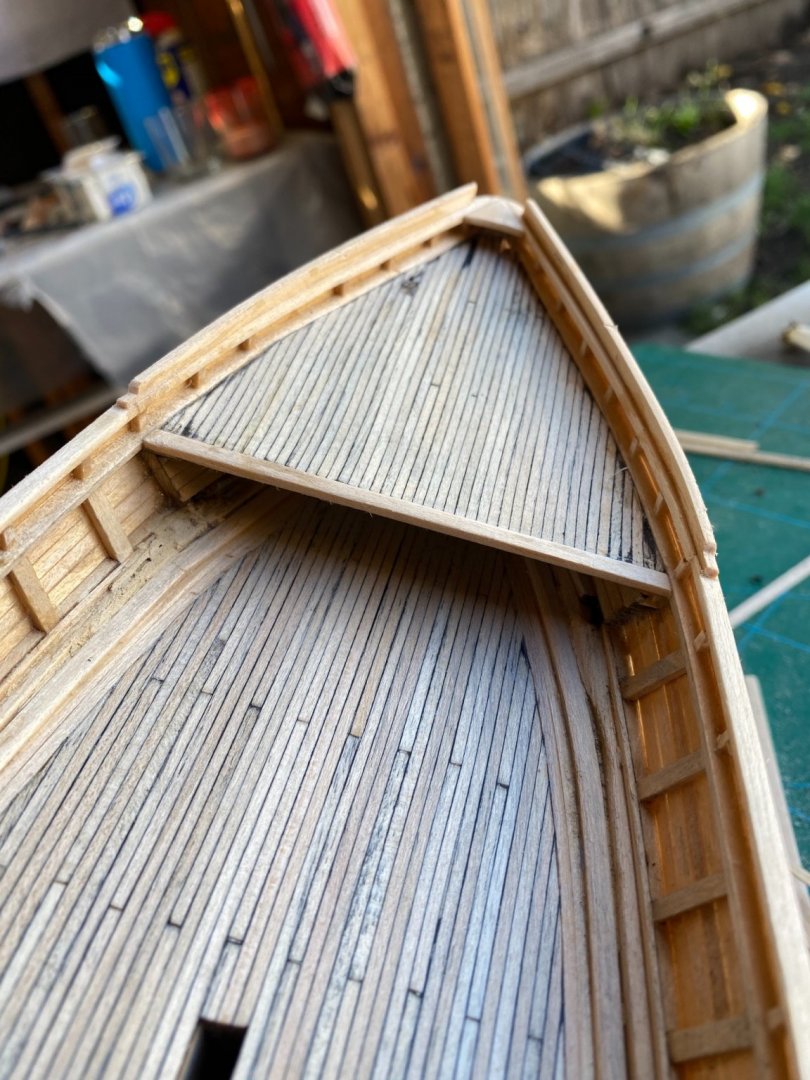
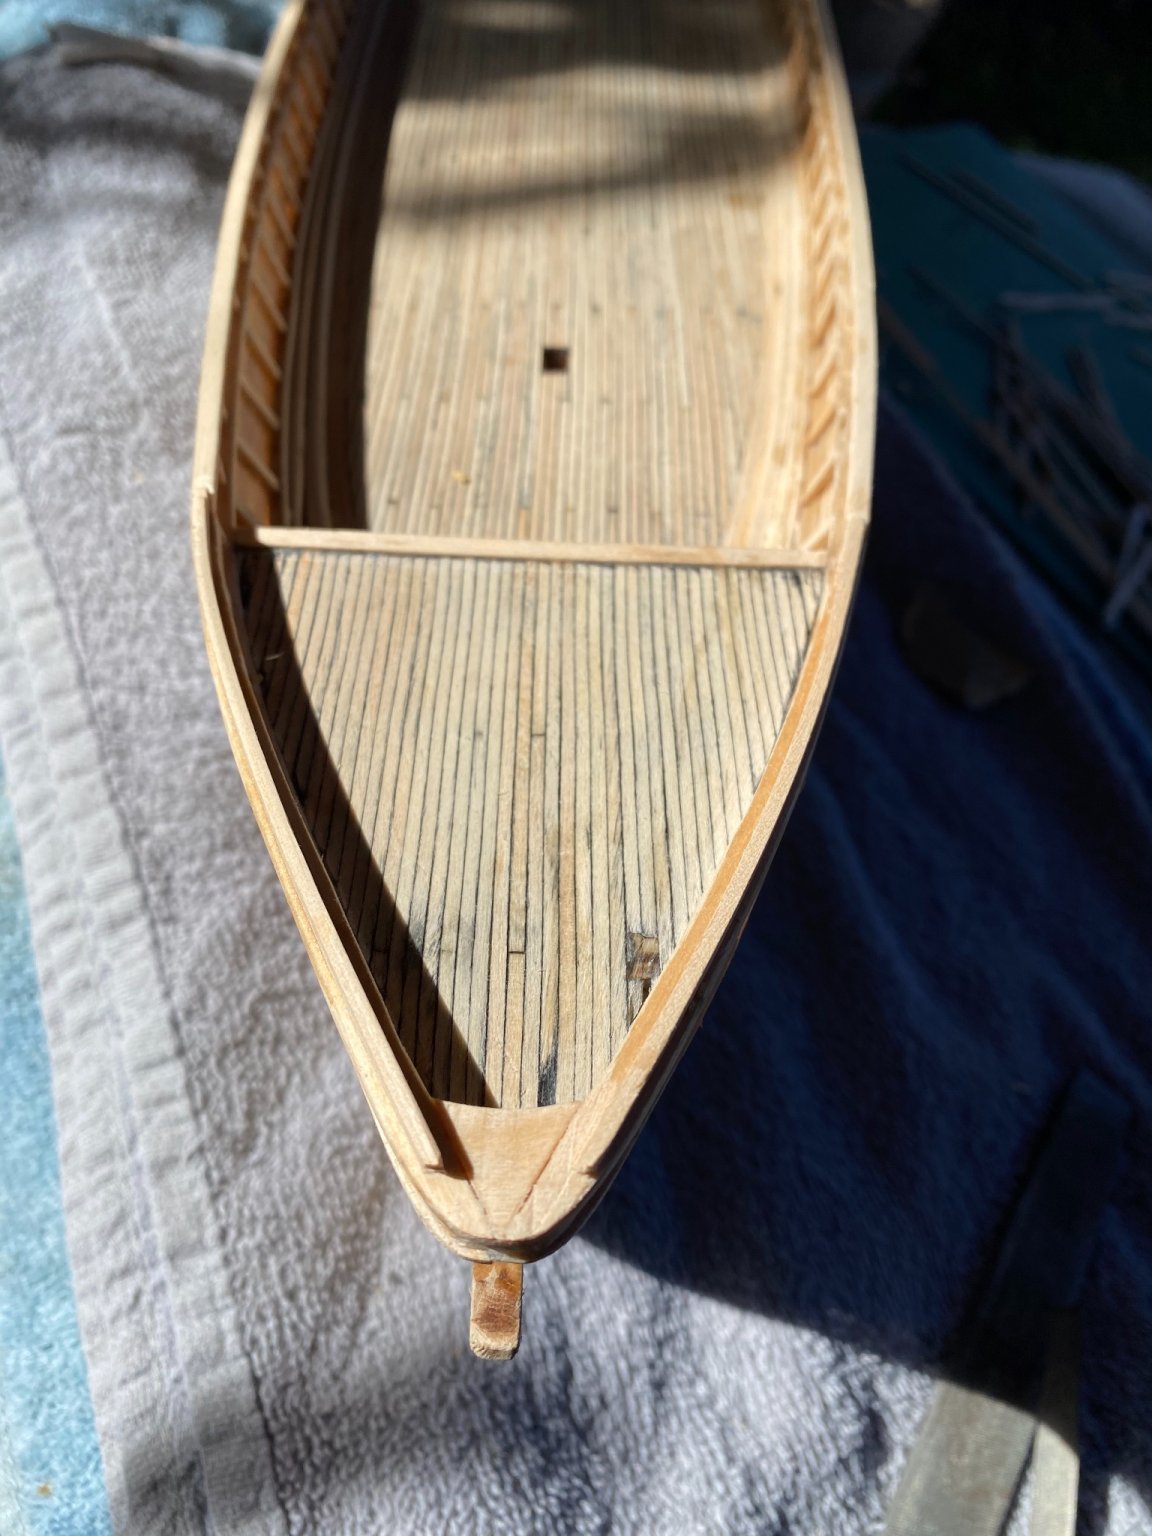
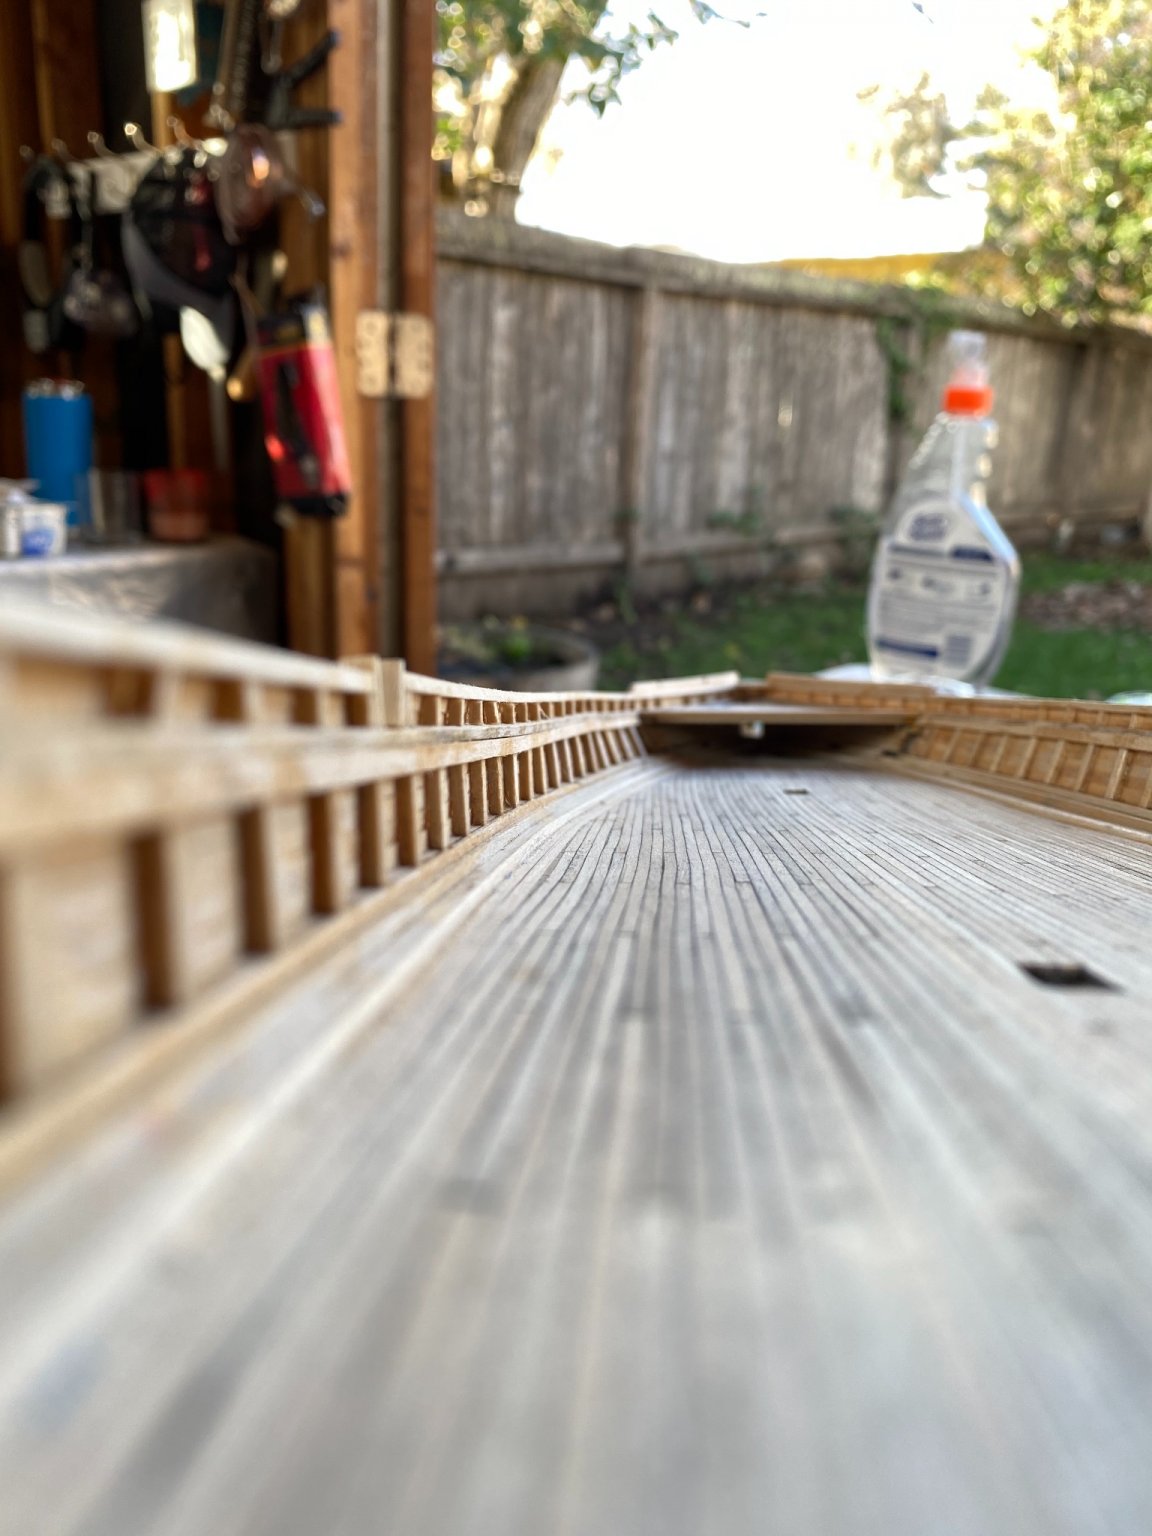
Hello everyone,
I was able to find some time over the last few days to work on getting the railing done. I’m pretty happy with my progress, I got the topgallant rail done, and the spray rail in. I also got the bow chocks carved on the spray rail, which wasn’t too bad, its easy to bend this rail in place without and steam or bending.
On the plans they give two options regarding the pin rail below the main rail, one with a clamp and one without. I chose to install the clamp because it should make the belay pins easier to install, according to the instructions, some of McKay’s ships had these clamps to make installation easier but some did not to make spar stowage easier on deck. Last thing I got done today was just some general clean up, i took several different files and make sure all my lines were clean and when painted should look very nice.
I have been slowly working towards finishing the hull planking, i still havnt done it... It’s the only thing left to do at this point so its the next step. Once that is done we will be almost ready for paint.
At this point everything above the water line on the hull is done, so now that i have the basic structure of the hull done I can start really thinking about paint and copper. Here is some picture of the build:

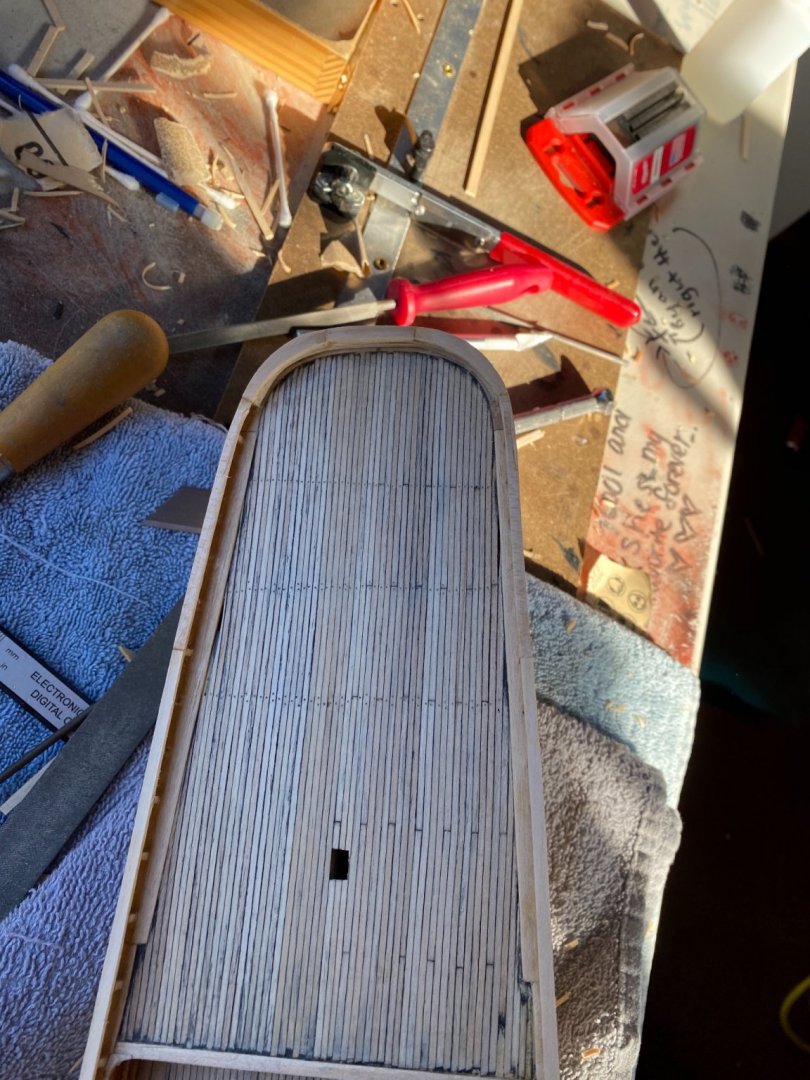
Topgallant rail in the above pictures looks a little messy, once its painted the pictures should be much more clear.
Installation of the spray rail

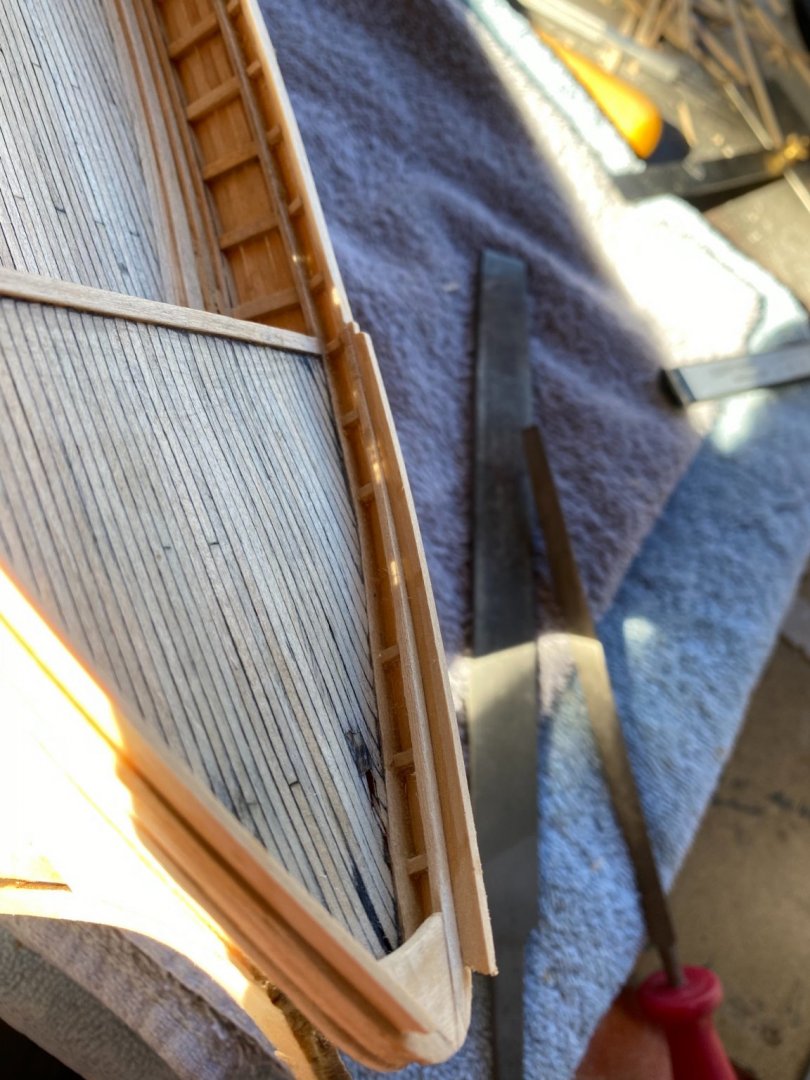

Final shape of the spray rails. And finally the spray rails with the bow chock
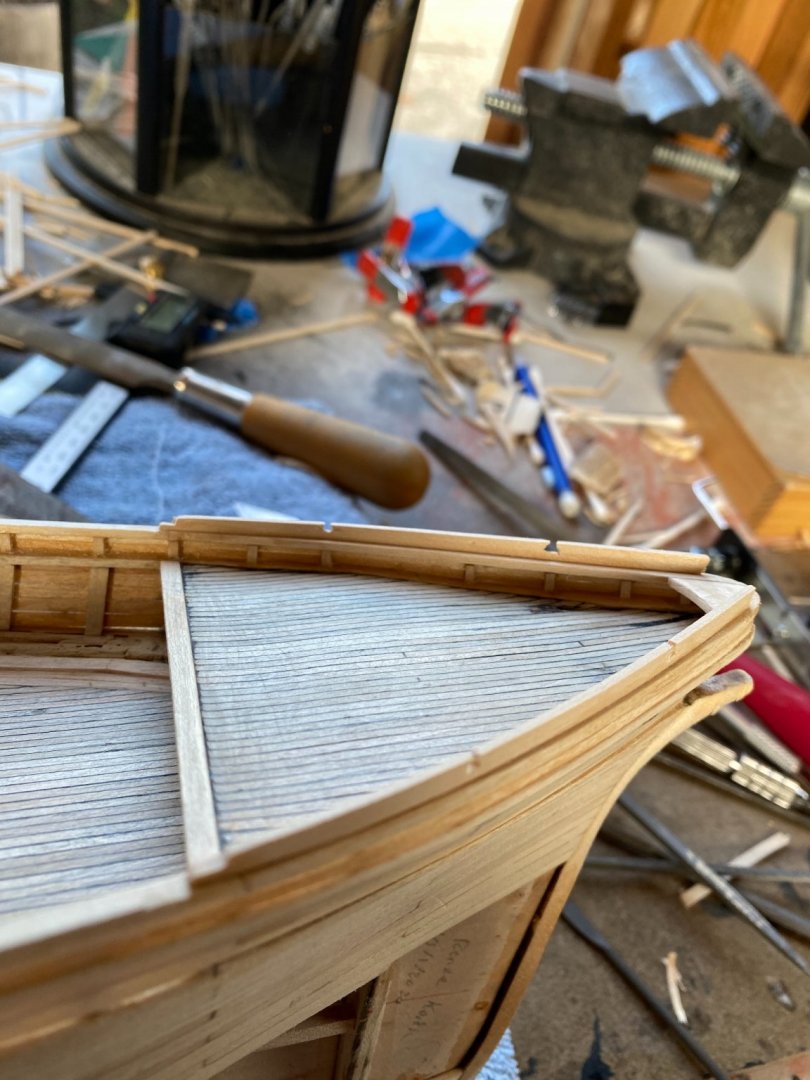
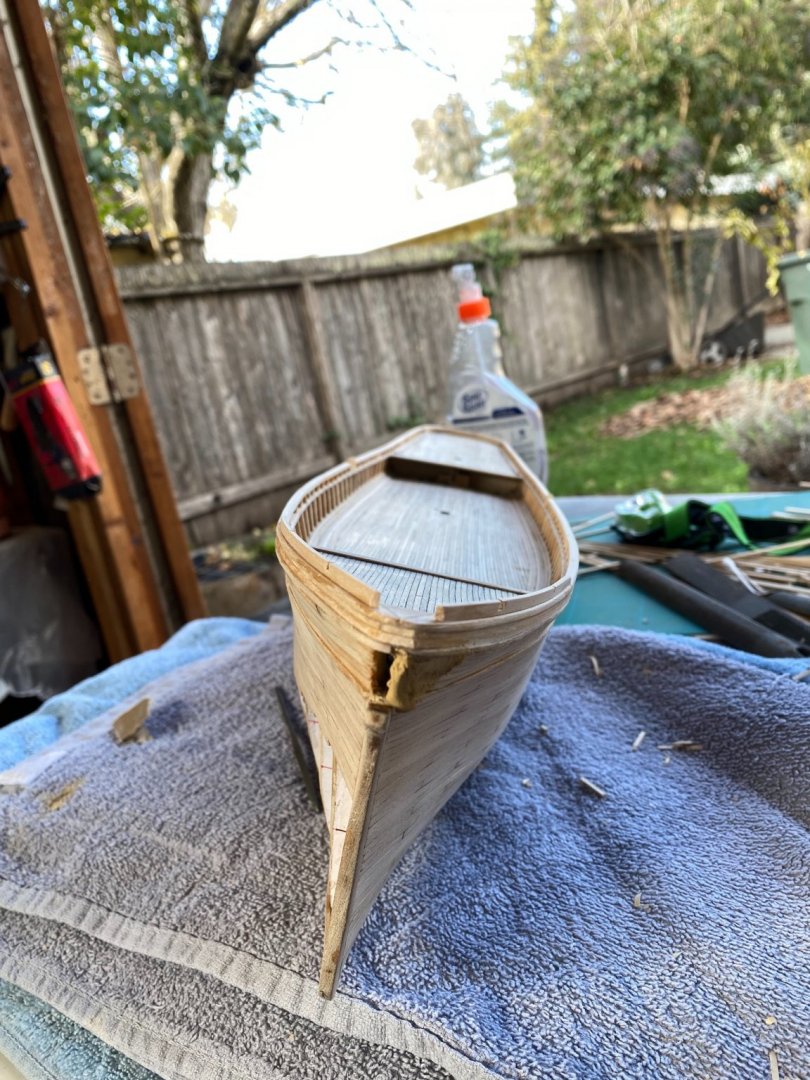
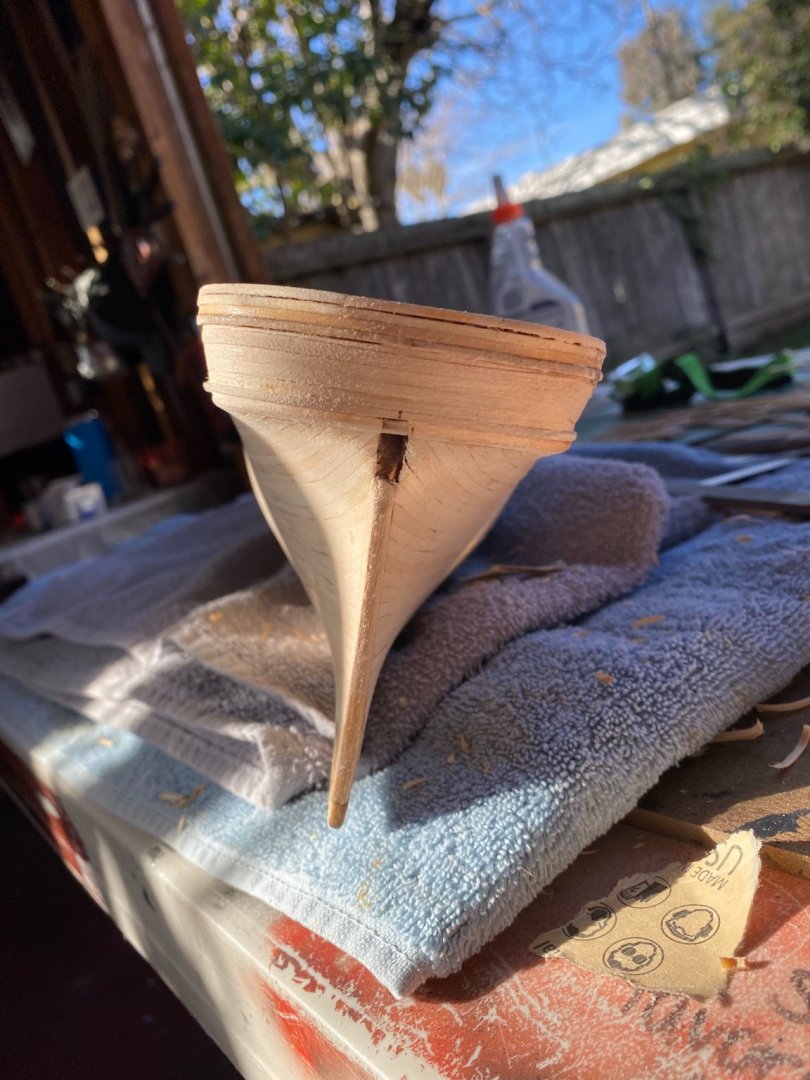
the bow has some heavy wood filler right now, i was waiting for it to dry so i can hand carve the shape of the bow at this part. For some reason it didn’t look how i wanted it so this is probably the easiest way.
It’s not a great picture but here is the clamp under the main rail:

So there is a lot clean up left but soon enough i will be painting and moving onto deck furniture. Thanks again for the comments and likes, they really keep me motivated. I got my last round of X-rays yesterday and confirmed the bone is no longer broken so back to modeling with two hands! Happy new year everyone, stay safe!
Bradley
-
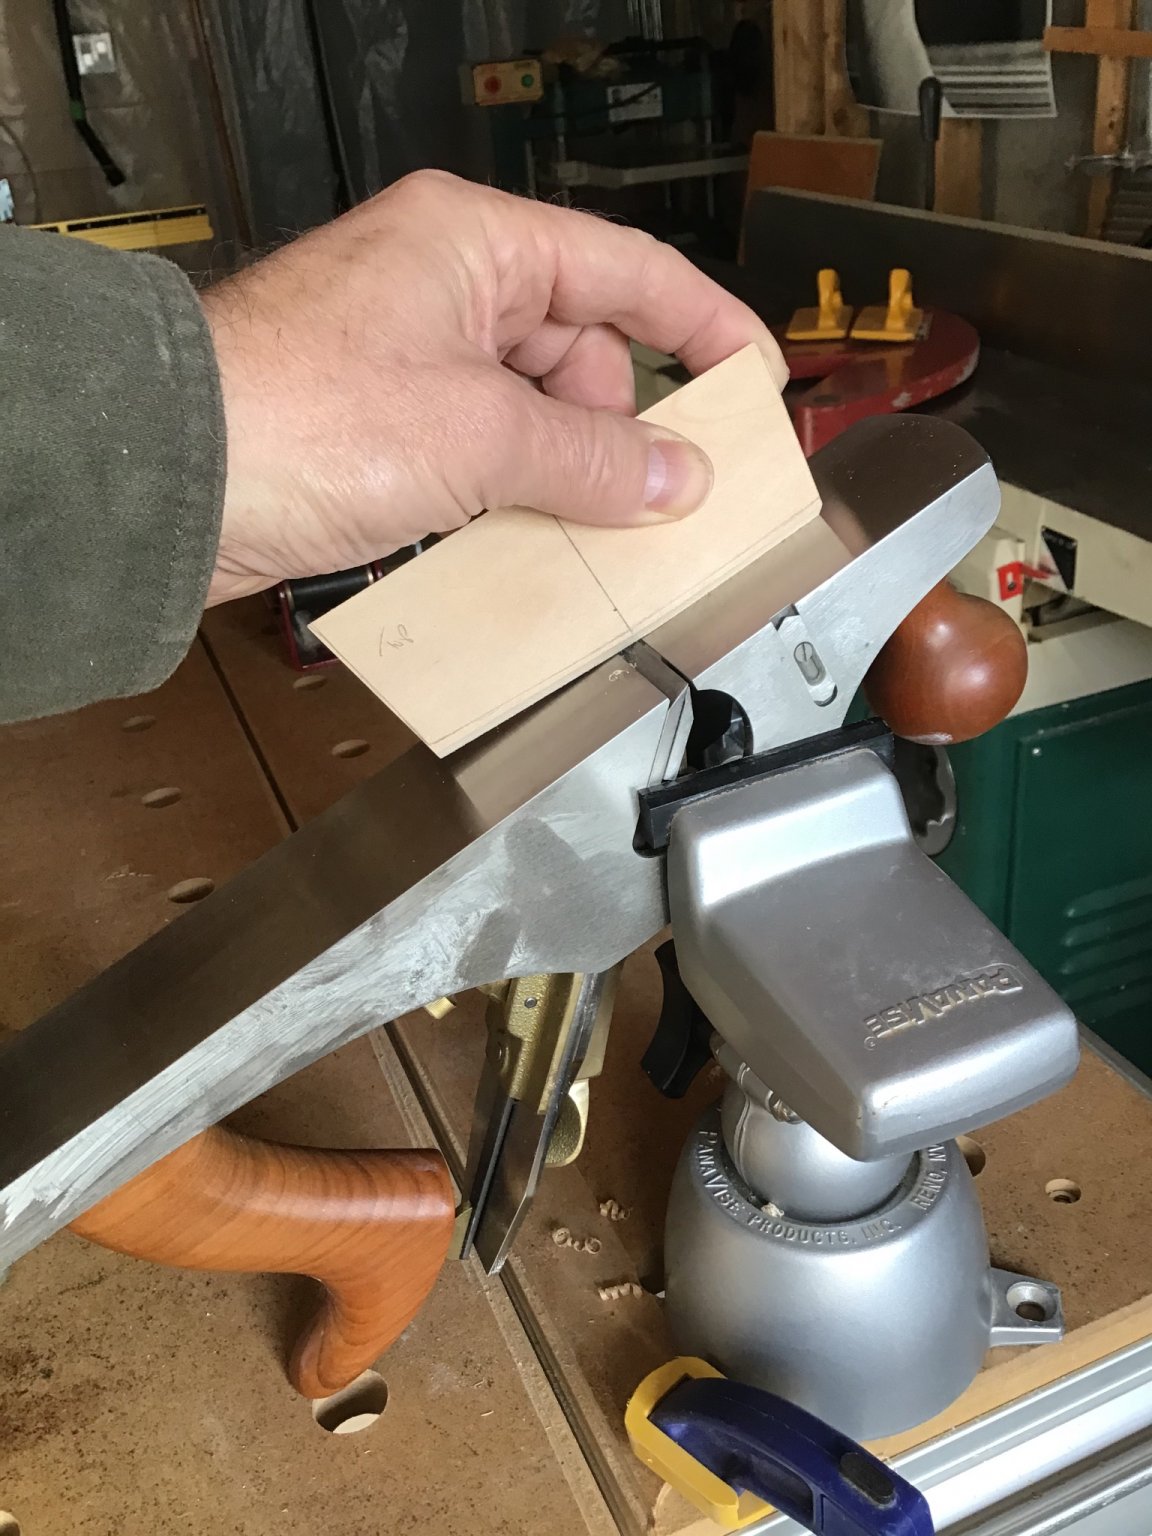
1 hour ago, ERS Rich said:
Hello,
Quite a bit of good work, thanks for posting and hope your hand is better soon. Having started out with the same craftsman combo belt/disk sander wanted to share two other ways to shape planks: hand plane and manually operated disk sander by Ultimation.
Happy New Year!
-Rich


Thanks for sharing Rich! I ended up doing something similar and cut almost all my planks using a small hand plane. I also need to build a better fence for my disk sander, there is a small gap between the fence and the sanding surface that I want to eliminate.
Bradley
-
Hello @Froggyman,
This section of the forum is only for new member introductions. You will have more success in finding an answer if you were to start a build log and post this question in the correct spot.
check out my build on the Flying Fish to see how I handled a really warped false keel.
-
2 hours ago, bobandlucy said:
Hi, Keith. Thanks for this build log. I'm starting this model with no experience. The very first step confuses me. The instructions say to glue the three bottom planks together, and then glue the cleats to the bottom planks. How might I clamp the three planks together? From your picture the only glue I see is along the cleats. . .
Thanks very much, Bob
Hi bob,
its been awhile since i have looked at this model, honestly I finished it and forgot to update this log. If I remember correctly the laser cut sheets offer two options, three laser cut planks to hold the cleats or one laser cut piece to hold the cleats. Both should be on the same sheet of laser cut parts, I’m pretty sure they offered both so the builder could determine their own level of difficulty. You can either cut the three planks out whic will probably provide a more realistic look, or you can use the one piece which is easier and faster. As @druxey mentioned finger pressure should be enough to hold everything together while the glue sets, as he also mentions white glue is a good option for this model. @kurtvd19 also mentioned that you should read through the entire instruction booklet to understand what’s next. This step is critical, if you fully understand each step it will make construction easier and result in a much nicer model. Good luck and have fun!


Hello from Cali
in New member Introductions
Posted
Here is a link to all the information needed to start one.
Bradley