


Keithbrad80
-
Posts
416 -
Joined
-
Last visited
Content Type
Profiles
Forums
Gallery
Events
Posts posted by Keithbrad80
-
-
Hello John,
wood working and model making is probably in my top five list of best things that ever happened to me. Talk about therapeutic!
Honestly I know very little about modeling clay, what temp does your specific clay need to reach before it cures? I imagine one of the benefits of working with clay is strength it adds to the model, and I suppose the weight won’t really matter once it’s complete. I’m really interested in this idea of working with clay so I’ll be watching carefully!
Bradley
-
Welcome to MSW John!
your story sounds very similar to mine, I’m younger than you but also suffer from PTSD... Especially after three deployments to the Middle East. Wood working initially is what I got into to help focus my attention on something else and some how moved onto model ships and love it! I’m sure as you read through build logs you will find others with a similar situation. It sounds to me like you really know what your doing, and I’m looking forward to following your build!
Just curious though, clay is an interesting choice of building material, what made you want to work with it? Wouldn’t it make the model really heavy? I’m sure you have done more research on this than I.Bradley
-
Your frames look great! I’m sure you have done this already, but taking a piece of scrap material and holding it to the frames you will see where the sanding has left pits and ridges. It looks to me like your ready For planking!
Bradley
-
-
Dead eyes seem to be one of those things where every person will have a different technique as to how to get them together. Depending on the scale I have seen shroud jigs that allow you to tie the shrouds right into the deadeye leaving them all level. I recommend looking up deadeye in the search bar of MSW, there are also several YouTube videos out there you could watch. It might be beneficial to practice a bunch before doing it for real on your model. Good luck!
Bradley
- Ryland Craze and mtaylor
-
 2
2
-
3 hours ago, Gr8teful Rick said:
but to buy them more as I need them
I wish this was something I learned when I first started, I guess it doesn’t matter much now but when I started building models, if I thought I would need a tool At any point I just bought it. Now I pretty much have any thing I need but at first I had several tools sitting around that never got touched. It’s a good idea to buy tools as you need them, I found that buying tools one at a time allows you to really learn that tool which makes using it really nice later. I will say that I ordered bits from model expo sometime last year and only had one or two discrepancies, not enough to have more sent to me. I’m sure your purchase will be fine!
-
6 hours ago, gak1965 said:
Very nice. I like the way that the deck color turned out. Are the tree nails. A toothpick end (let alone the body) at 1/96 is 3 scale inches. My guess is the only way to simulate at scale is going to rely on ink rather than wood.
So decided making actual tree nails was not worth my time. They would be tiny at this scale and probably not noticeable once the model is complete. Instead I have been trying to find the best technique for simulating them. Maybe pencil? Maybe if I drill the correct size hole then fill the holes with wood filler then sand flush? That might create the effect I’m after. I’ll have to do more research and practice until I get the desired effect.
-
Hello everyone,
Not a big update but some progress. I finished planking the forecastle but need to do some more sanding to get rid of the black paint. I decided its time to get the planking of the hull complete as well so next time I update ill have all the decks planked the hull planked and the Topgallant rail in. Thanks!
Bradley
- WalrusGuy, Duanelaker, gieb8688 and 2 others
-
5
-
Very nice looking, painting her green is an interesting idea that i think would look really good. As i get closer to finishing the hull of my flying fish I’m thinking more and more about paint. I’m looking for to seeing your progress.
Bradley
-
-
Welcome Harvey to MSW! Sounds like you really know what you are doing, make sure to start a build log so we can follow your progress.
Bradley
- mtaylor, Old Collingwood and JeffT
-
3
-
Hopefully this is still relevant to you but here is an article from the NRGs website that goes into great detail as to making masts from square stock without a lathe. The article is by Elia Gianopulos and does a really nice job describing the process of making masts and spars from square stock, with several nice pictures. Everyone else’s advise up above is great so if this method doesn’t work for you there should be plenty to work with here! Good luck!
https://thenrg.org/resources/Documents/articles/MakingAMastFromSquareStock.pdf
Bradley
-
I’m on board with everyone else here about the value of this model, I will say though that i think this model is kind of cool still, It has some historic value to your family.
On a different note, do people buy the things on this website? I saw a half hull of “a nautical vessel” for almost 7 grand, thats crazy money to spend on a half hull of a ship that doesn’t exist by someone who isn’t known? I found another of a Swedish model (a named ship but still) of a “luxury liner” that they want 18,500 USD for! Could i sell my models for that much lol
-
-
Look at that paint job! That black is awesome looking, I’m painting my flying fish soon and I’m thinking about ditching my paint for some of this chaos black. Very nice work!
Bradley
- EKE, BobG and chris watton
-
3
-
Excellent work on your long boat! Once the inside detail is put in you probably won’t notice that spot at the stern.
the flex shaft is something I have been looking at recently. I think I’ll wait for your review before I purchase my own lol. I do have the workstation and it has been really helpful. I used to have to a full size floor drill press, but lost that in a fire a while back, I think the only thing you may find trouble with on the workstation is routing, if you plan to use it for that. In most woods that I have tried routing, you get to much wandering and the line isn’t straight even if you take all day making the cut. Other than that it’s an excellent tool!
Wonderful job on the build so far, look forward to seeing more!
- Overworked724, WalrusGuy and Justin P.
-
3
-
Nazir,
So unless the drill bits are rusting or bent or dull they should be ok to use, but ill try to answer some of your questions!
So sites like amazon are great because you can get things for relatively cheap, and things like drill bits i buy on amazon because you can get a pack of 50 for just a few bucks, ill link in the set i bought for my self.
Metric or imperial is up to you i would say, I only have bits in mm because i can easily convert them from inches to mm and mm to inches. If you have used inches all your life you might feel more inclined to use that and same with mm.
If you have a need for regular drill bits you can get those too, most micro sets have sizes that will cover every application in ship modeling. Usually i would suggest buying tools as you need them but a micro set of drill bits will likely have most of the common sizes.
The kit i use came with a box that is categorized by size of drill bit. Plastic boxes should work fine, i have seen small vials you can keep them in but i have also seen wooden boxes, that part is up to you as most cases will be good enough quality.
Your current bits should be fine if they are free of rust not bent and have an edge still, i suppose the only way to tell is to use them. If you can drill through some scrap of what ever you are using then they should be just fine!
A good pair of calipers are critical for model making of any kind, personally i prefer digital calipers so there is no guess work. The set i use are made from a hard resin plastic and read inches and mm. Ill give you another link of a good set of calipers.
Hope that helps!!
Drill bits:
Pin vise for drill bits (in case you don’t have one):
Digital calipers:
Bradley
-
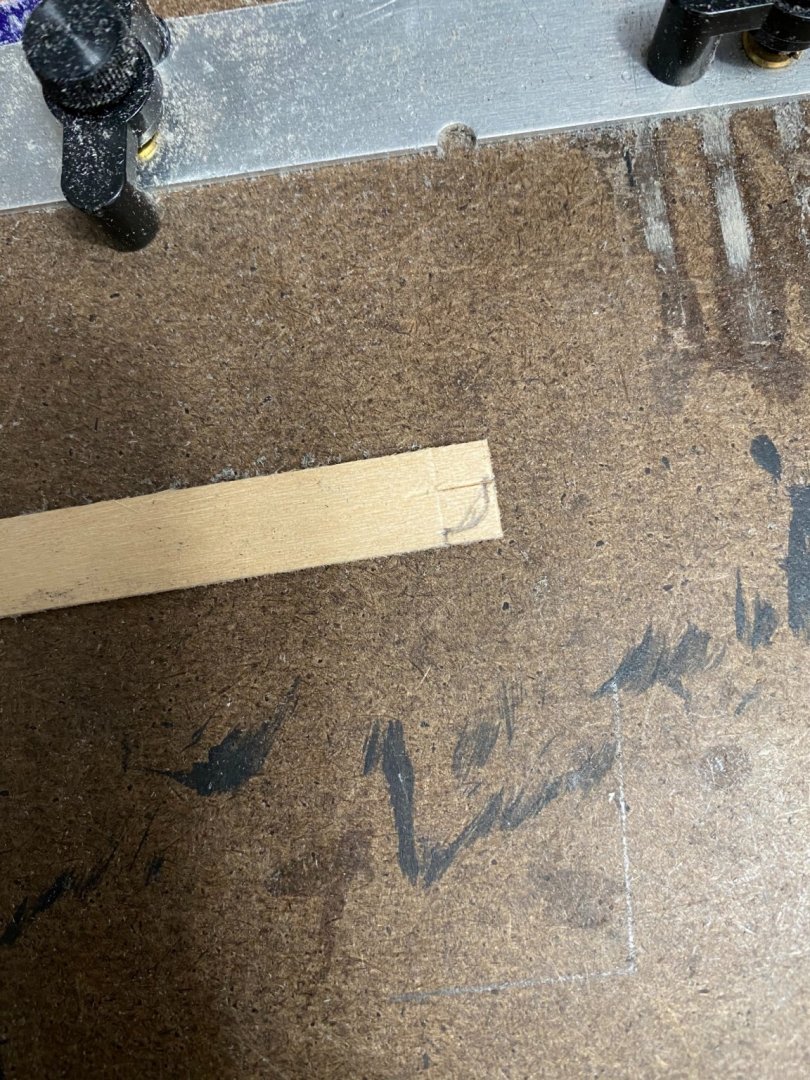
Also i have been thinking about tree nails in the deck planking, does any one have any experience at this scale? Would it be worth it or would the tree nails be too small to notice? Thanks again
Bradley
-
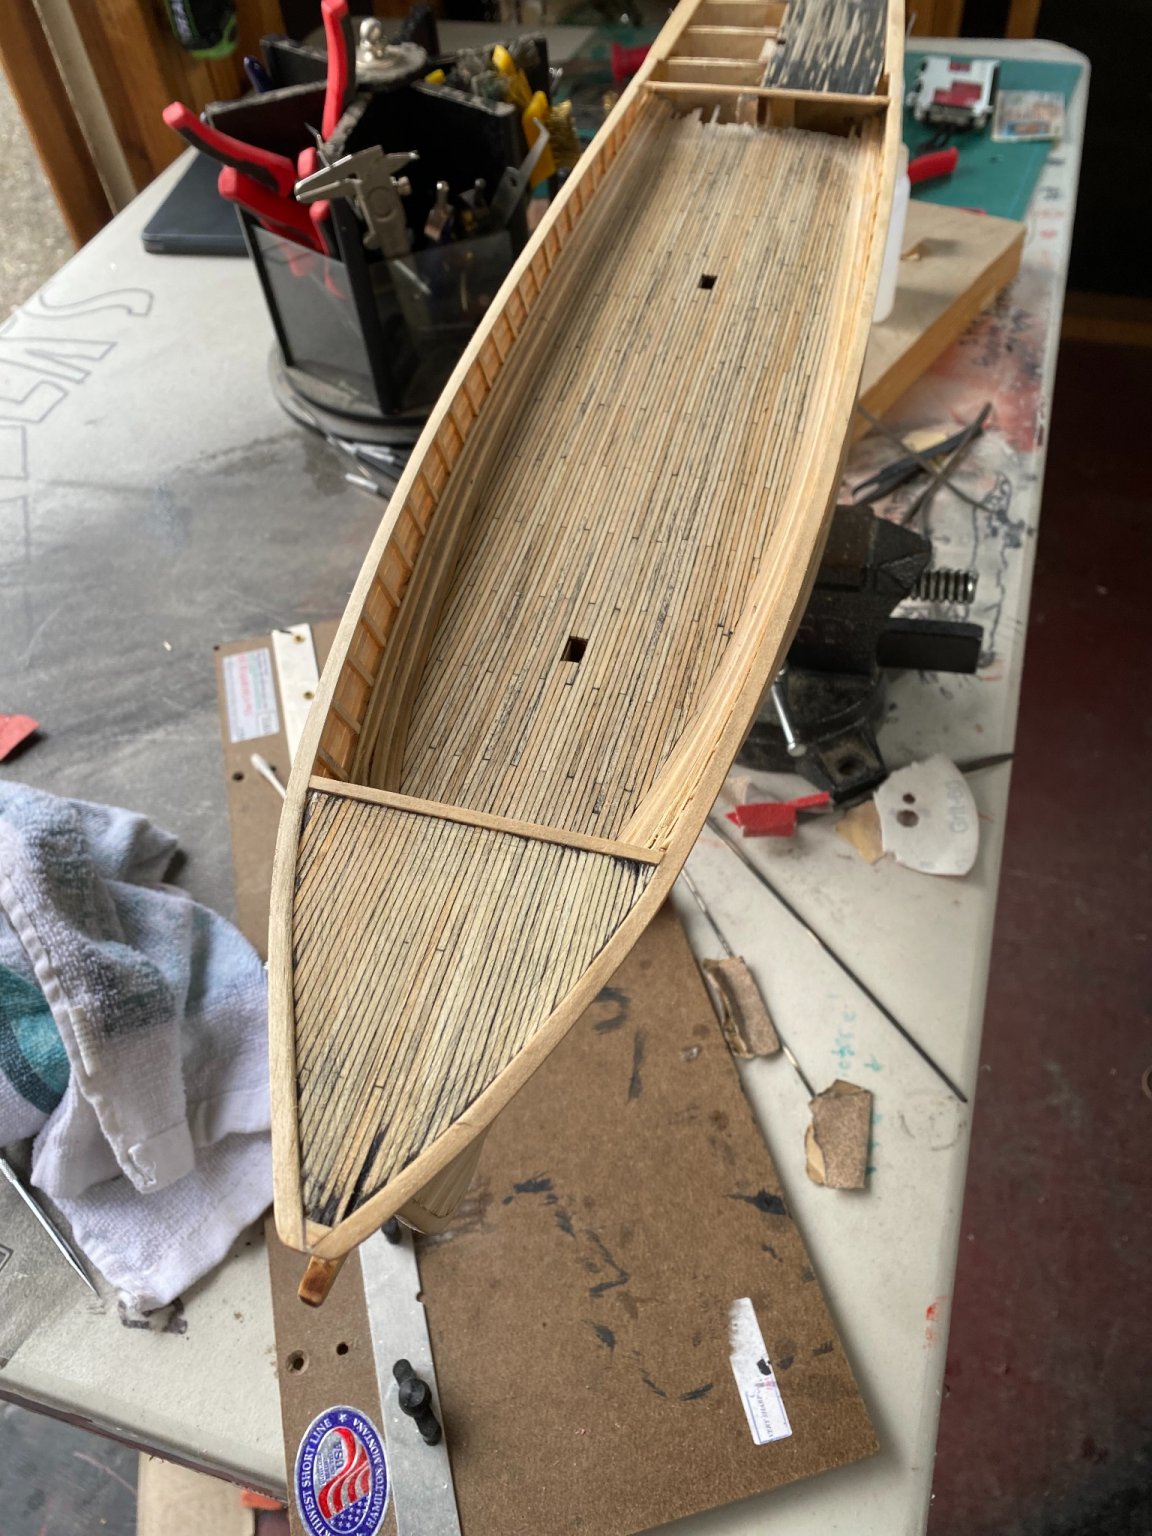
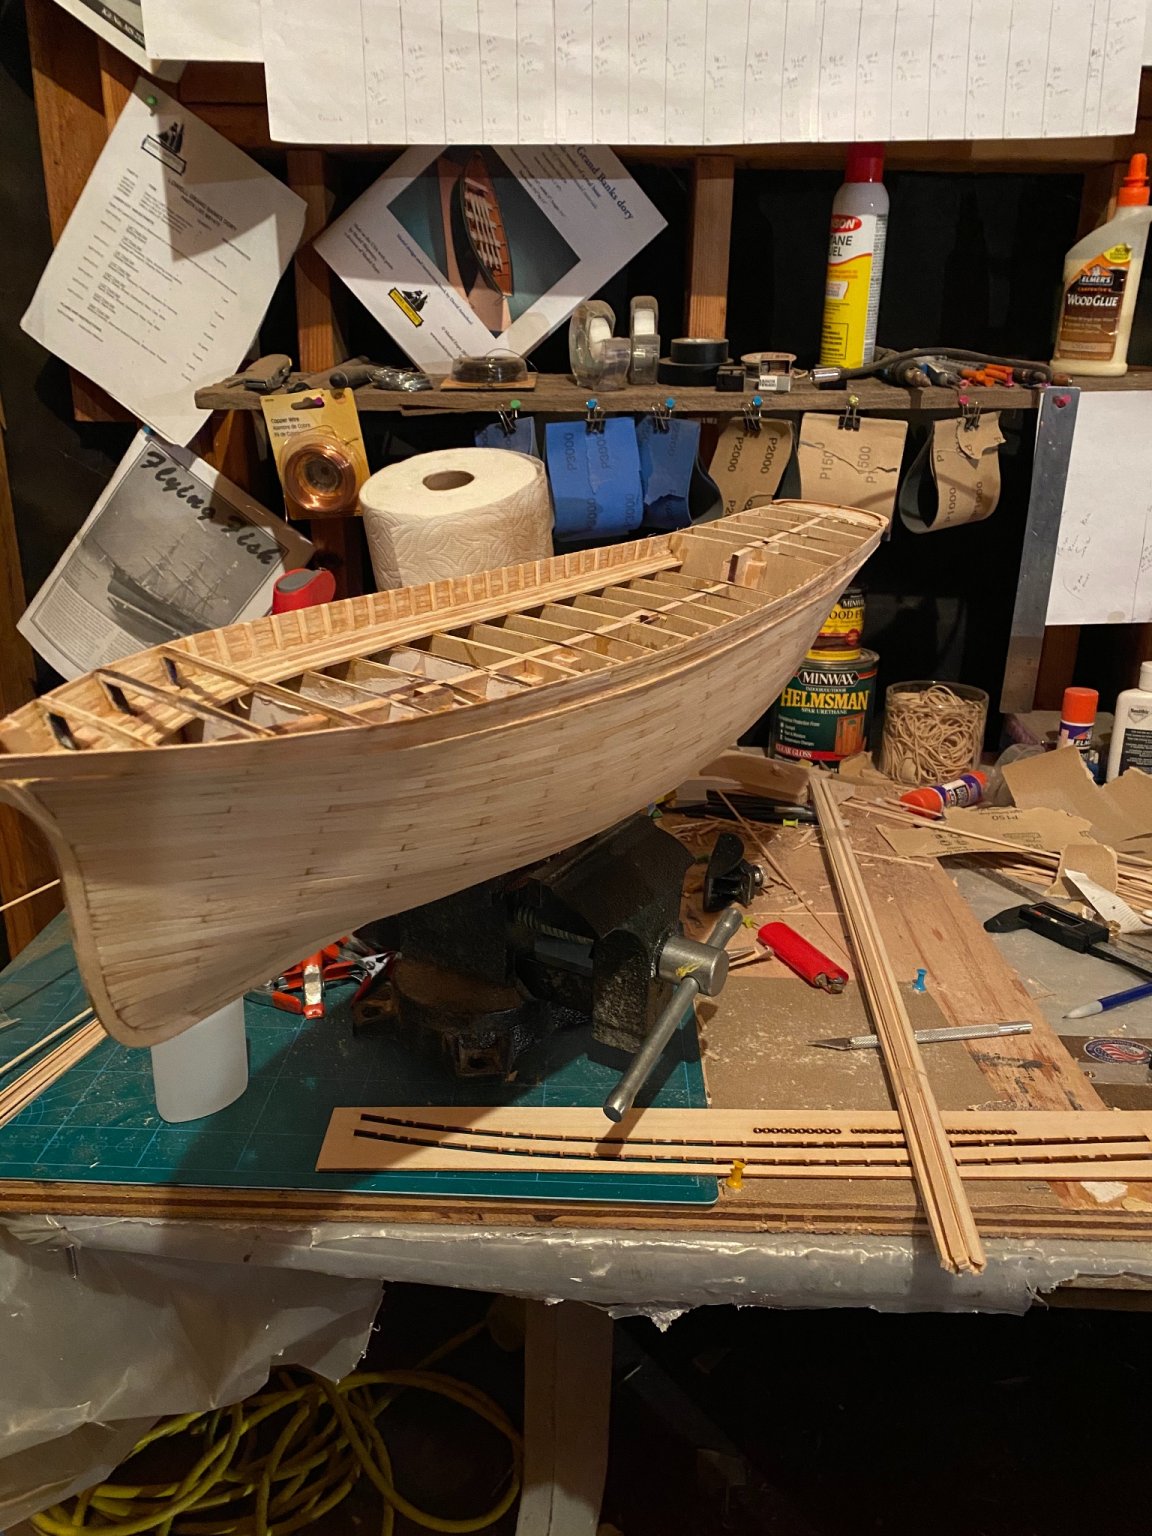
Hello everyone!
Big update on the flying fish, due to my hand i took a week off work so i had nothing but time to spend in the shipyard.
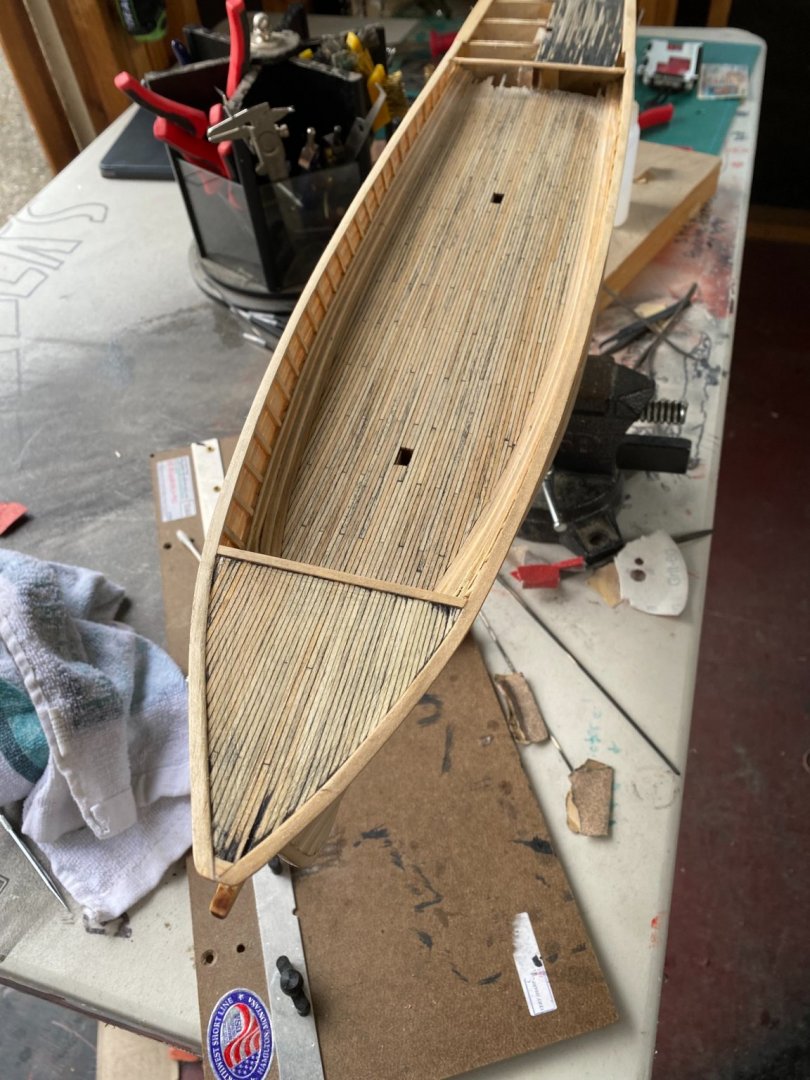
I finished planking the bulwarks and didn’t really have any problems, if you set your stanchions in the right spot you wont have any problems. Here is where we are at:
,


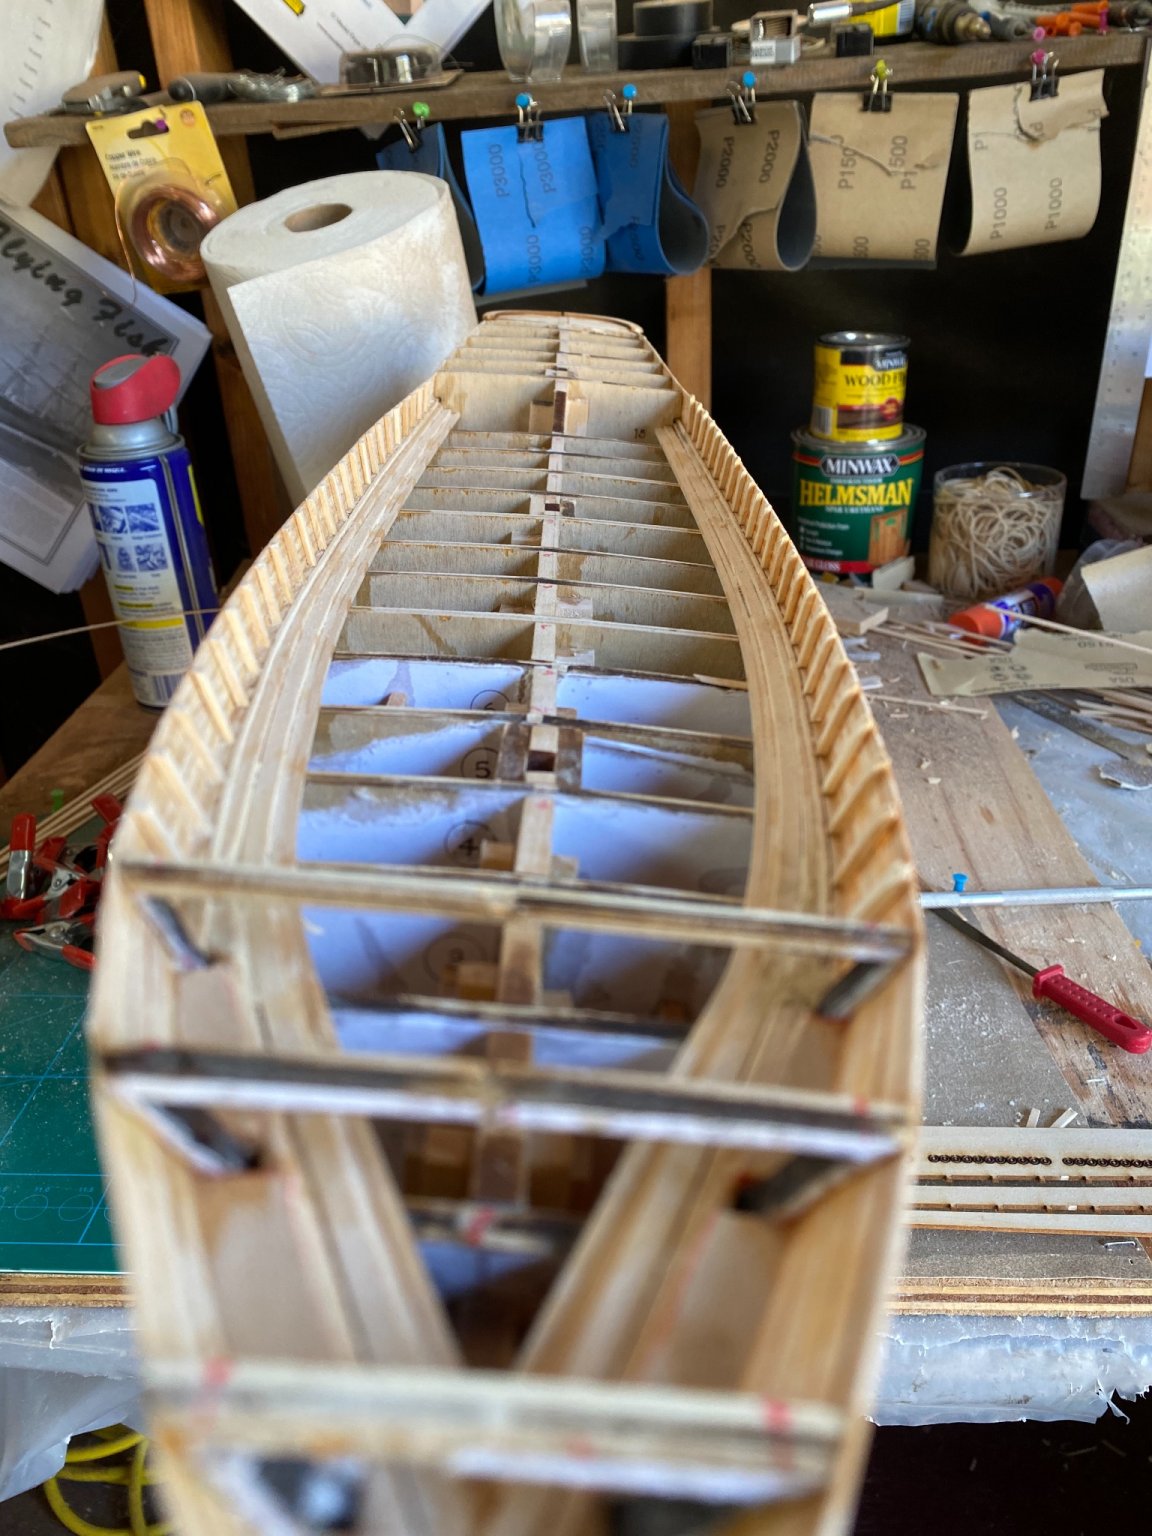
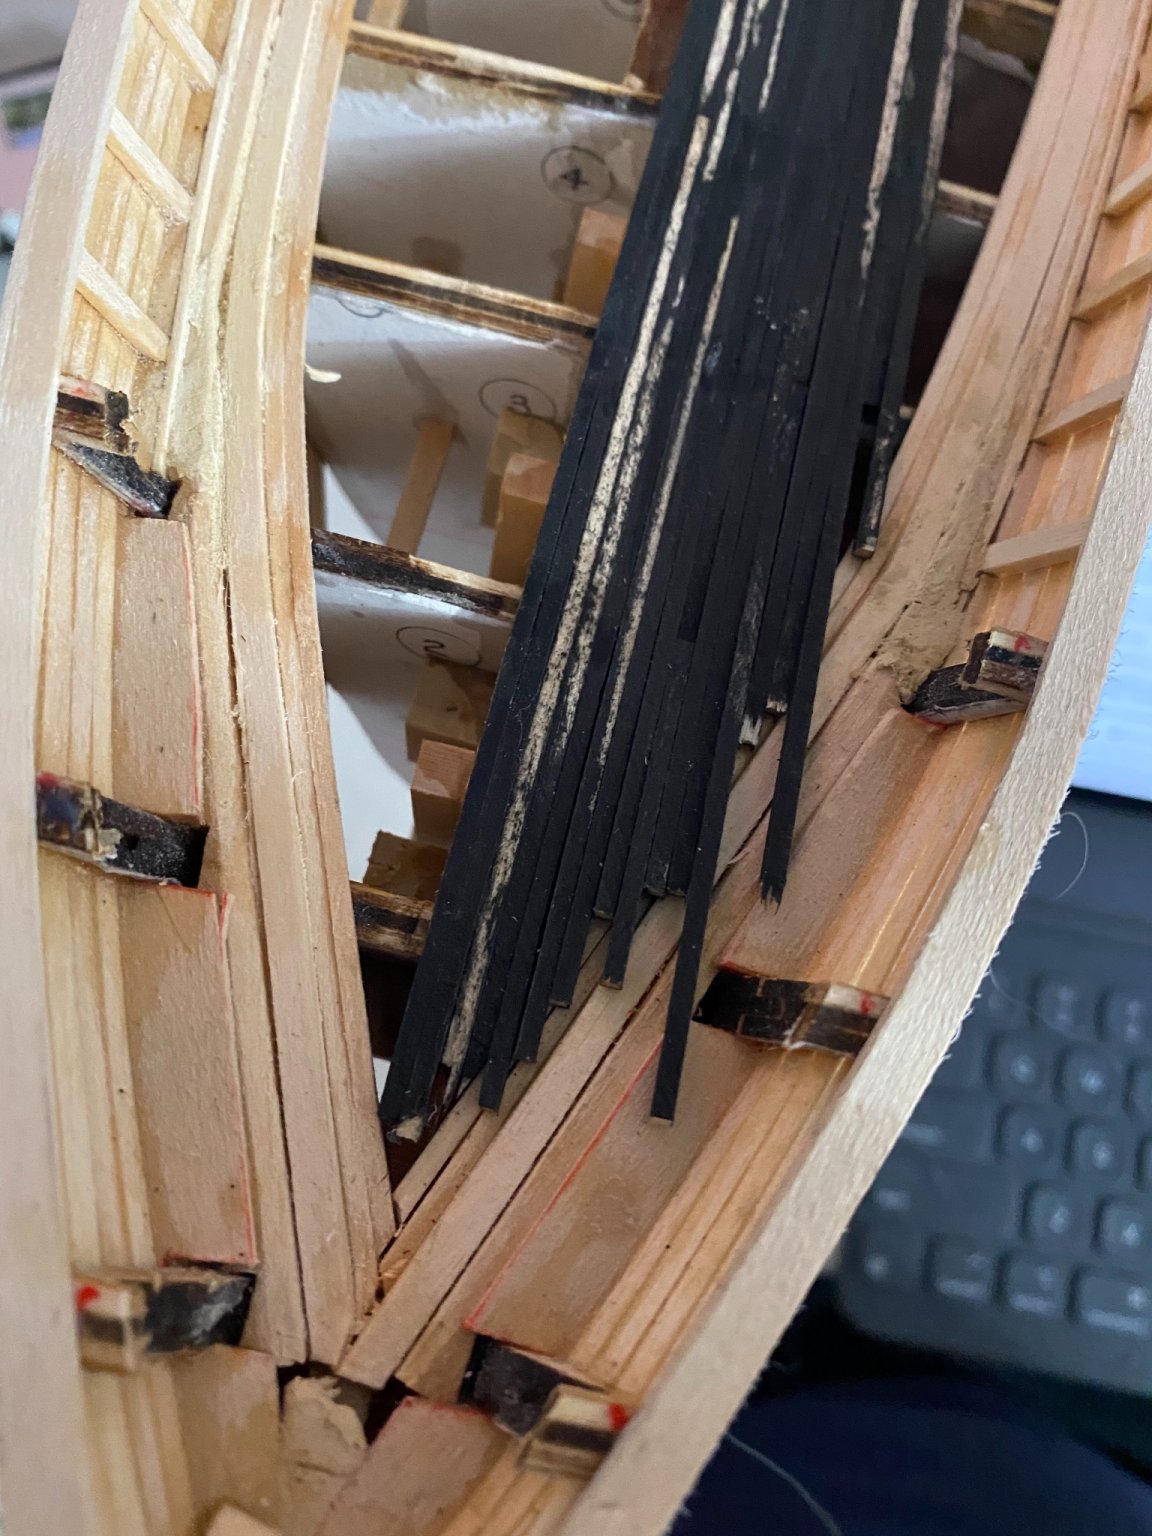
The main rail wasn’t very hard to put on, from bulkhead 15 aft the main rail is to be cut from a bass wood sheet. I didn’t realized that I cut this part of the main rail wrong until i started planking the poop deck. One more thing about the photo above, these first three bulk heads in the bow have a frame that allows you to plank the ceiling and acts as support for the forecastle deck above it. No where in the plans does it suggest cutting these frames off but i noticed in other build logs and videos i have watched and read they had cut them off, and i could not figure out why they were doing that. Well i wish i cut them off a while ago, with them on deck planking is pretty tough, but thats ok you still wont be able to see this but I know its there.
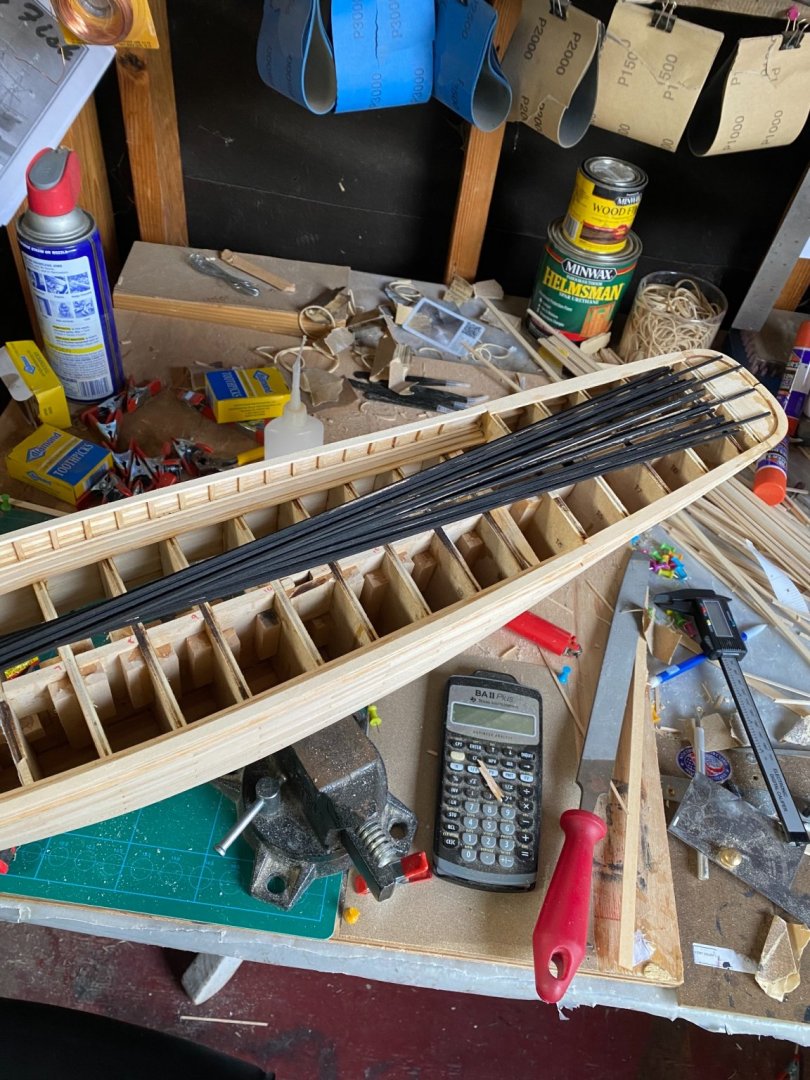
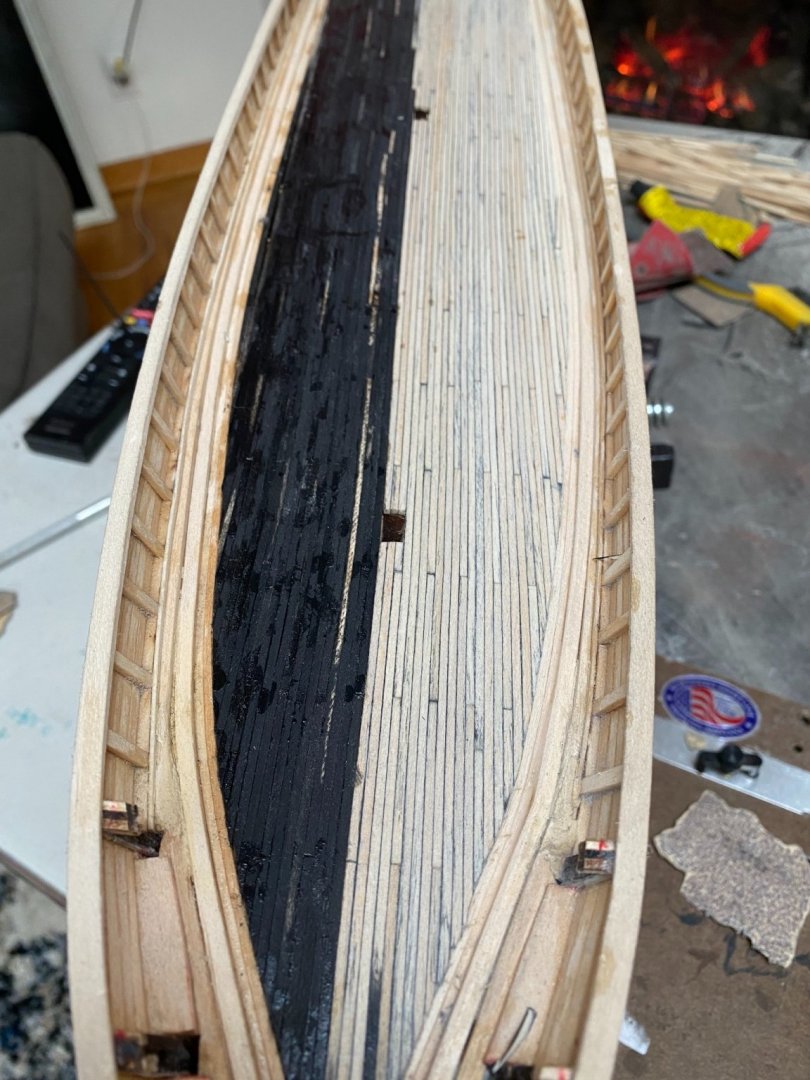
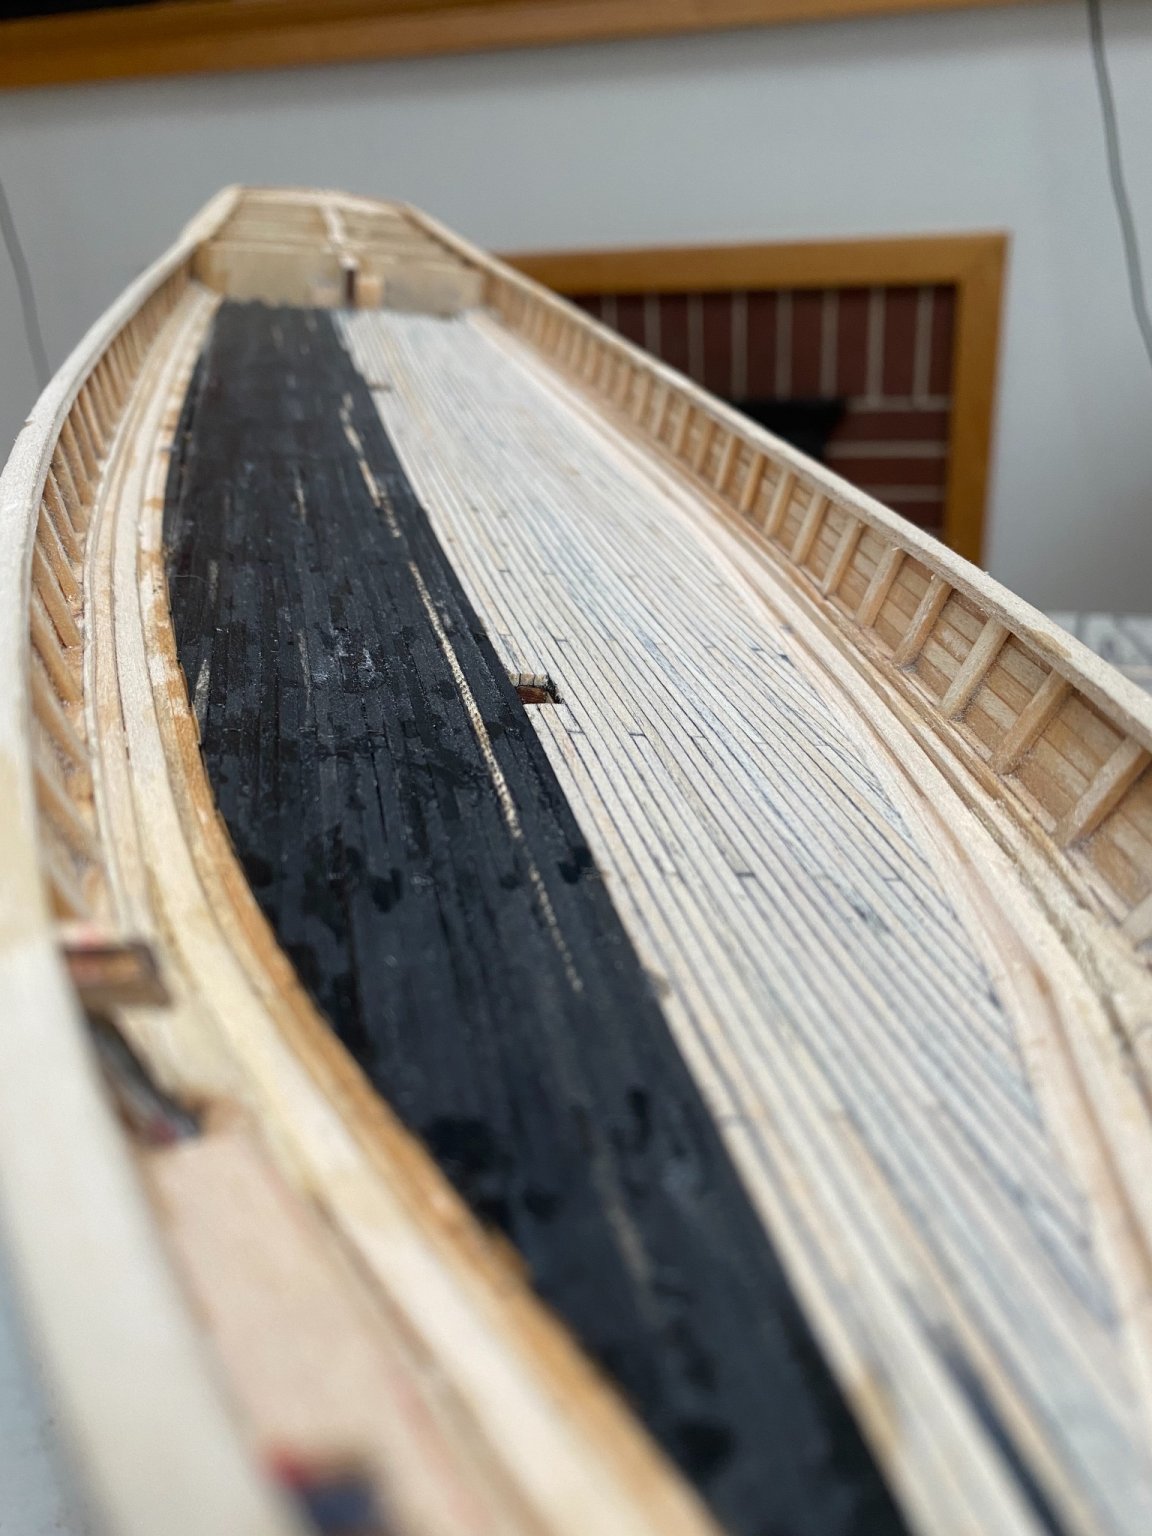
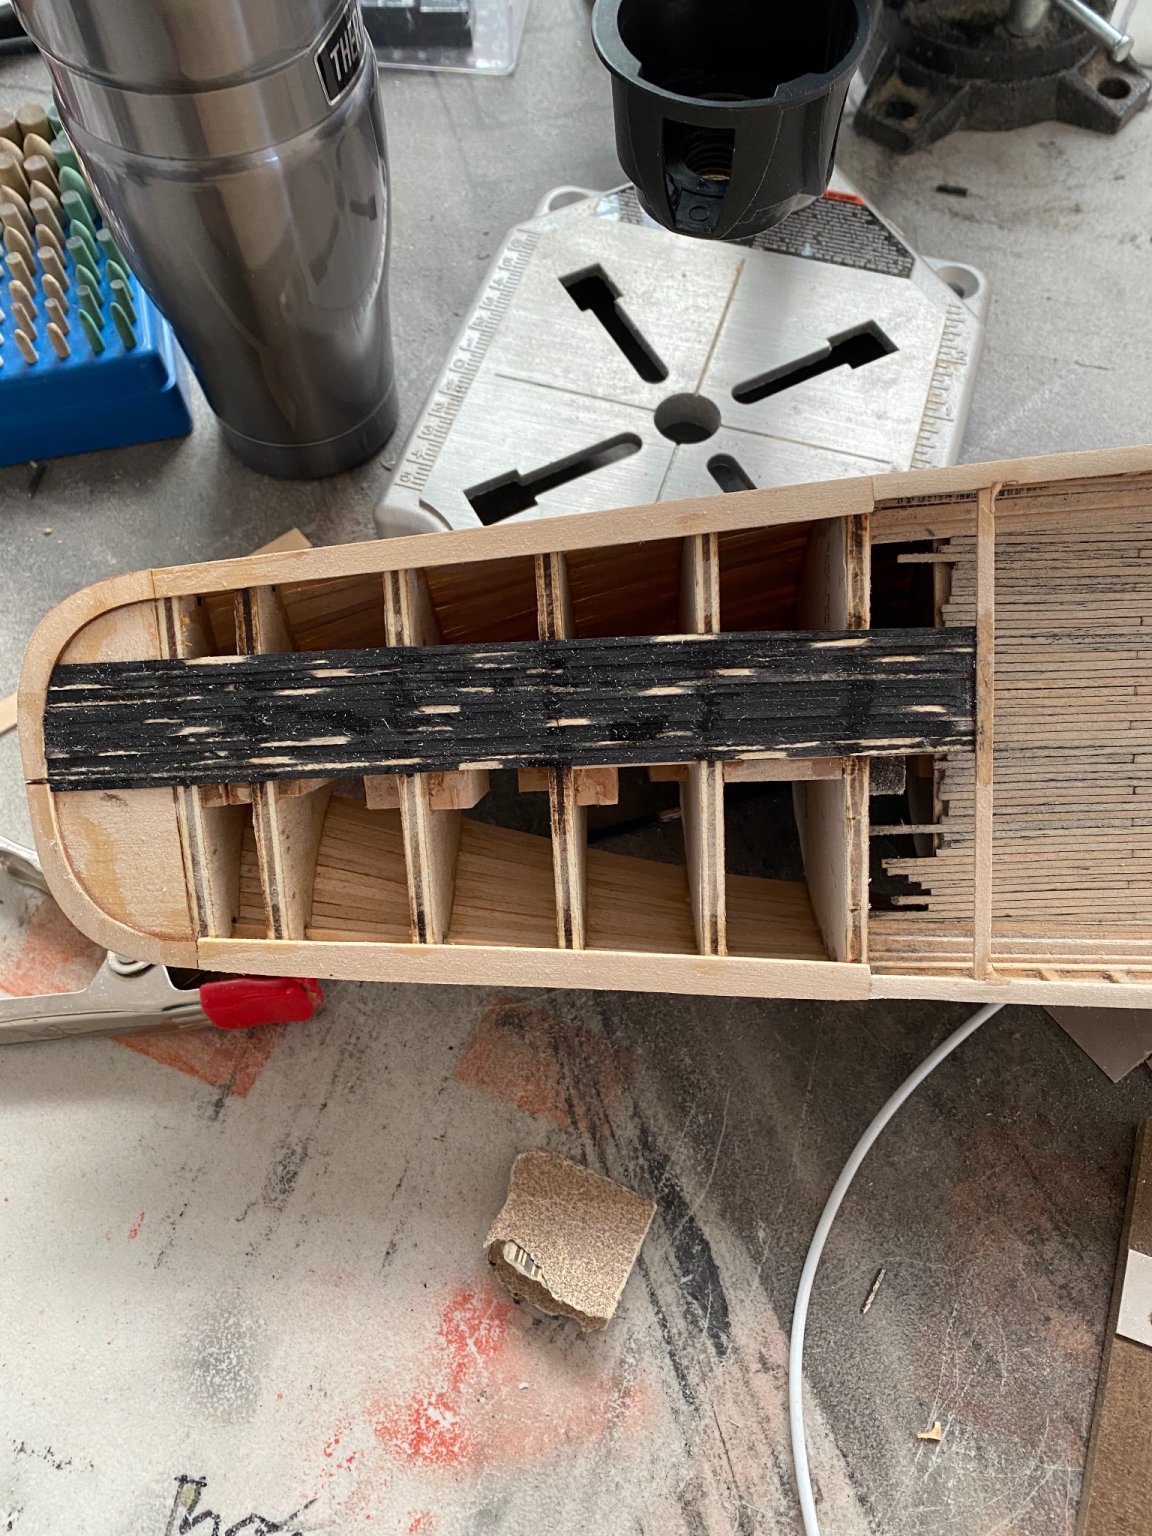
Ok so the next logical step was to begin planking the deck. I am really happy with how this turned out, especially doing it one handed! So i always start deck planking by painting my planks black. I will say i clamped my planks together and tried to only paint two sides but did a terrible job, the only real down side is some extra sanding, no big deal! Here is a picture of the planks after being painted black:
Afterwards i plank like i normally would and i went with a 3 butt shift on the deck planks. Nibbing has always made me nervous as i cannot figure out how to do it. I watched some videos i found, read through some build logs and reread a few books and still couldn’t get it right. I tried nibbing the first 5 or 6 strakes of deck planking under the forecastle but decided to just butt them up against the nibbing strake.
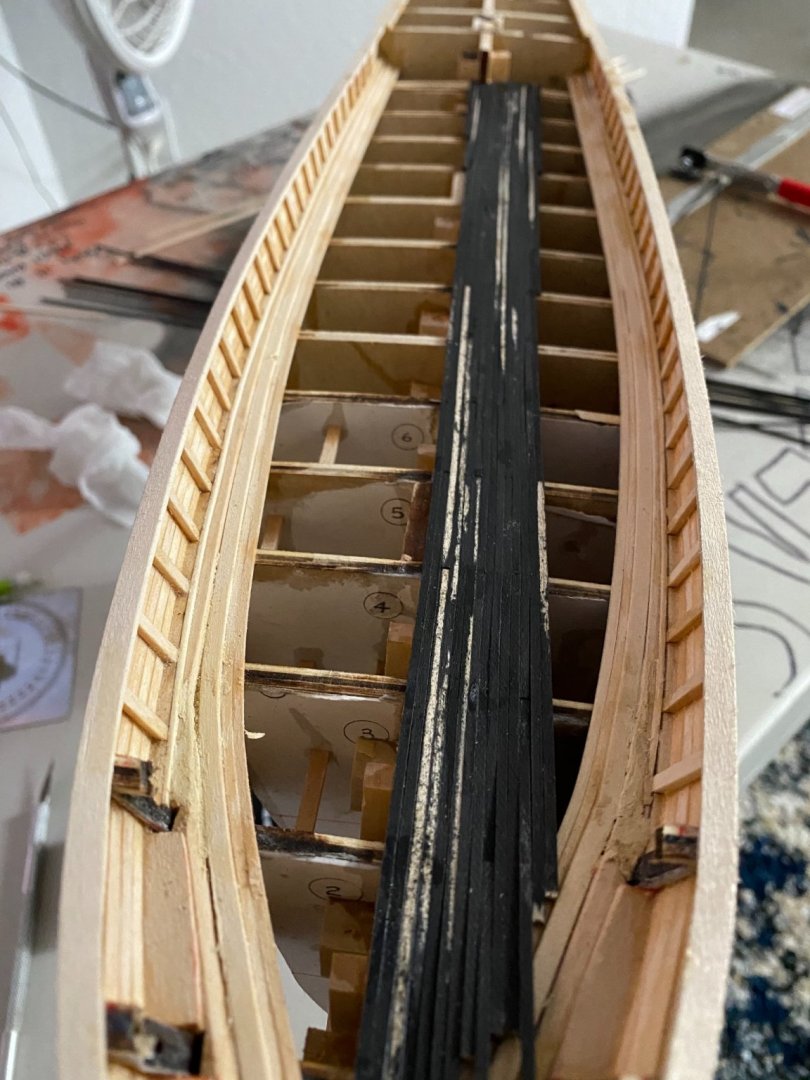
The only downside to my method of planking is the planks are not very attractive until your done lol. Here is a few pics of what the planks look like before and after sanding:

After i was done sanding up to 400 grit paper i wiped it down with some mineral oil and moved on to the poop deck.


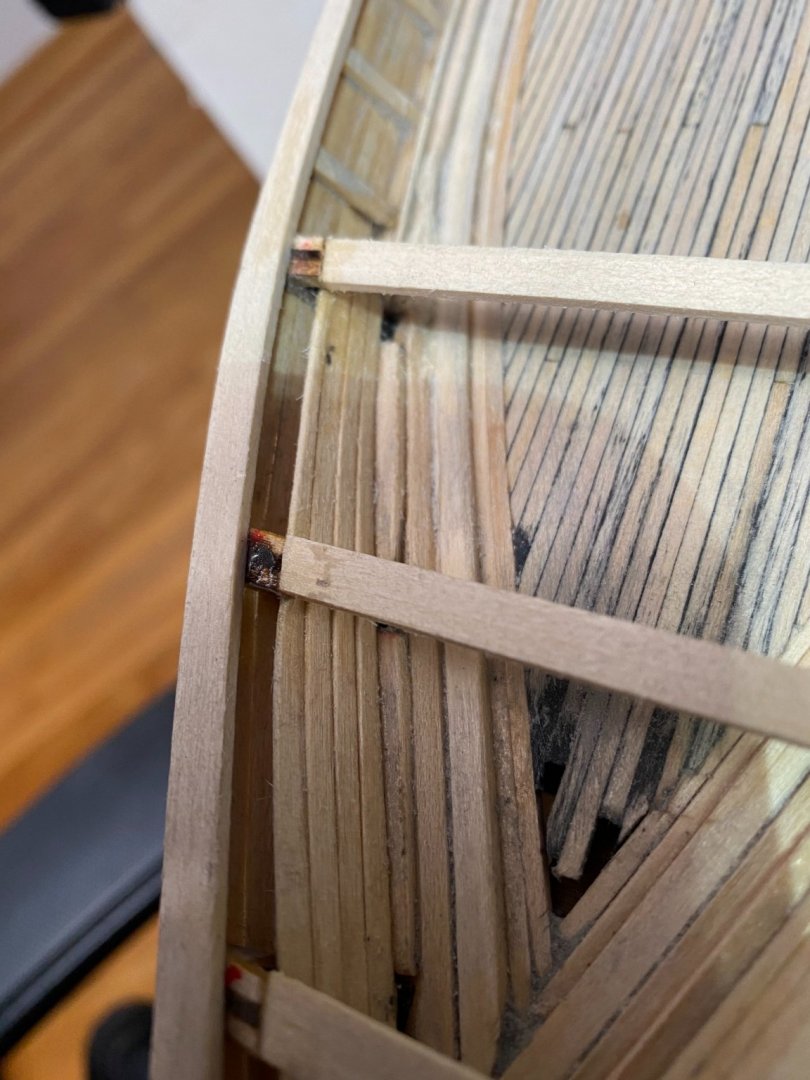
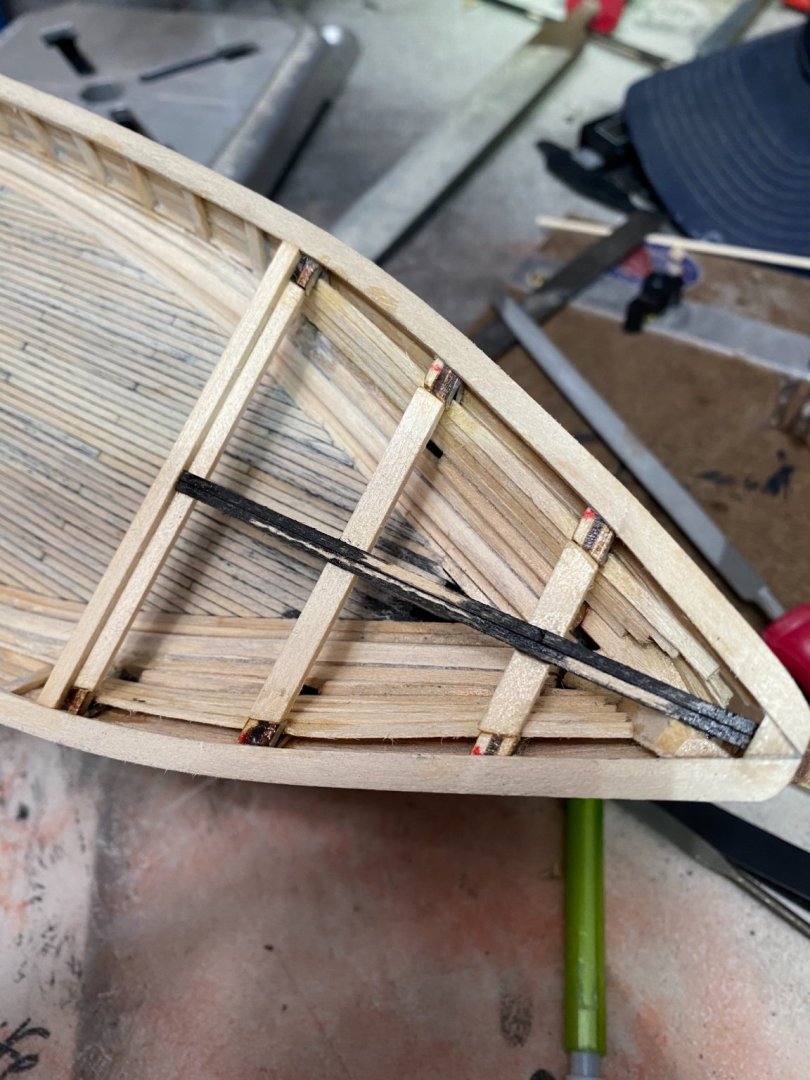
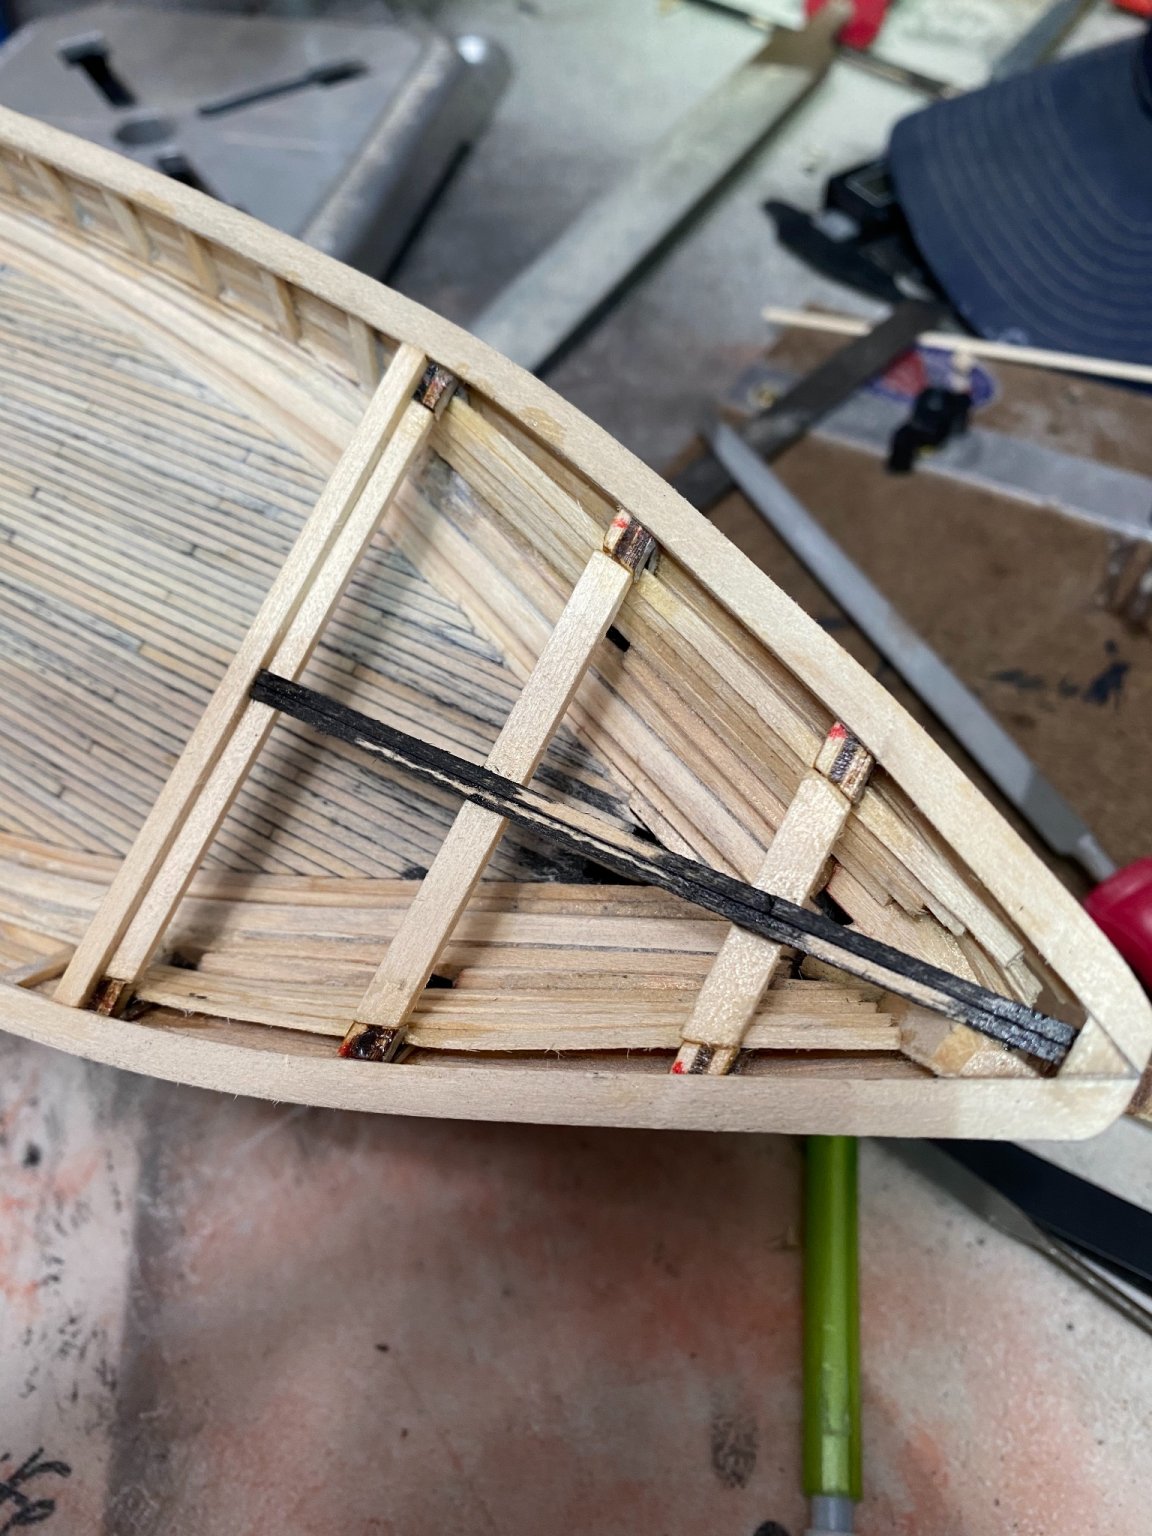
I had to make a total of 4 knees, I’ve never made them this small and the wood quality isn’t great so this was very frustrating. I probably made more than 10 knees for this and all of them broke or didn’t look very good, here’s the size i need and another failed attempt at the knees. This one is glued but i cut it out and am going to make more eventually:

So the next step was to plank the ceiling and rebuild the frames for the forecastle deck.
The final thing here is planking the poop deck.

So when ever I’m done planking the poop and forecastle, and have the topgallant rail on ill post another update. I’m getting close to finishing the basic structure of the hull, thanks for reading and sorry for the really long update.
Bradley
- BobG, Vladimir_Wairoa, etubino and 4 others
-
7
-
34 minutes ago, PA Ship Builder said:
Keith,
A great looking build. I'm starting on one in a few days and hope to post build logs. This will be my first wood ship build. Hope it works out as well as yours. Have a great / safe Thanksgiving.
Tony
Thanks Tony,
This was my 5th and 6th model ship in my life and while the kit is very well made and I’m sure you will do great, I wish I didn’t deviate from the original plans as it probably would have turned out a little better. Remember this all takes time, if you take your time I’m sure it will turn out great! I’m looking forward to following your build.
Bradley
-
-
I think it depends on what you want your model to look like, usually when doing the first layer of planking the butt shifts become important because they help define the shape of your hull. With the second layer, you typically do longer planks because they look a little better, I will say though making planks the full length of the hull is harder to taper in my opinion.
Personally i prefer the look of butt shifts when planking, but if you like the look of longer full length planks then go with that, beware of bending though with longer planks.
So this is a build by Allan Tyler shown in a booklet by him on planking techniques. If you notice his planking has a butt shift, and this is the look i prefer. It’s a very clean planking job with a very subtle butt shift in the planking, most people will never notice it, but for those that do it really makes all the difference.
So here is a model from the Admiralty Ship Models website, you can clearly see the full length planks they chose to use.
Typically i think people use full length planks when using a wood that i really nice when polished, i dont think its very historically accurate but it is up to! No matter what choice you go with just make sure to take your time and go slowly and it will look great!
Bradley
-
Monterey is a really beautiful place. My dad and I used to fish down there a lot as he was biologist for the aquarium when I was a kid, it’s a really interesting spot!
A couple years ago my wife and I lost our house in a wild fire and almost moved to Monterey! Hope you feel better and enjoy your vacation.
Bradley
-
I have never been a fan of stealers my self, I seem to have to do it three or four times before I get the results that I want. For a first build you are doing a great job!
Before you start planking the second layer of the hull I would look up and read about butt shifts. Basically when the hull was built back in the day that would offset planks by 3 or 4 bulk heads I assuming to increase the strength of the ships hull.Here is a link to another build of the HMS Victory by Michael101 asking about the butt shifts of the main deck. Comment #9 by John Garnish does a nice job of explaining how butt shifts work with the HMS Victory.
https://modelshipworld.com/topic/15399-hms-victory-middle-gun-deck-plank/
Bradley


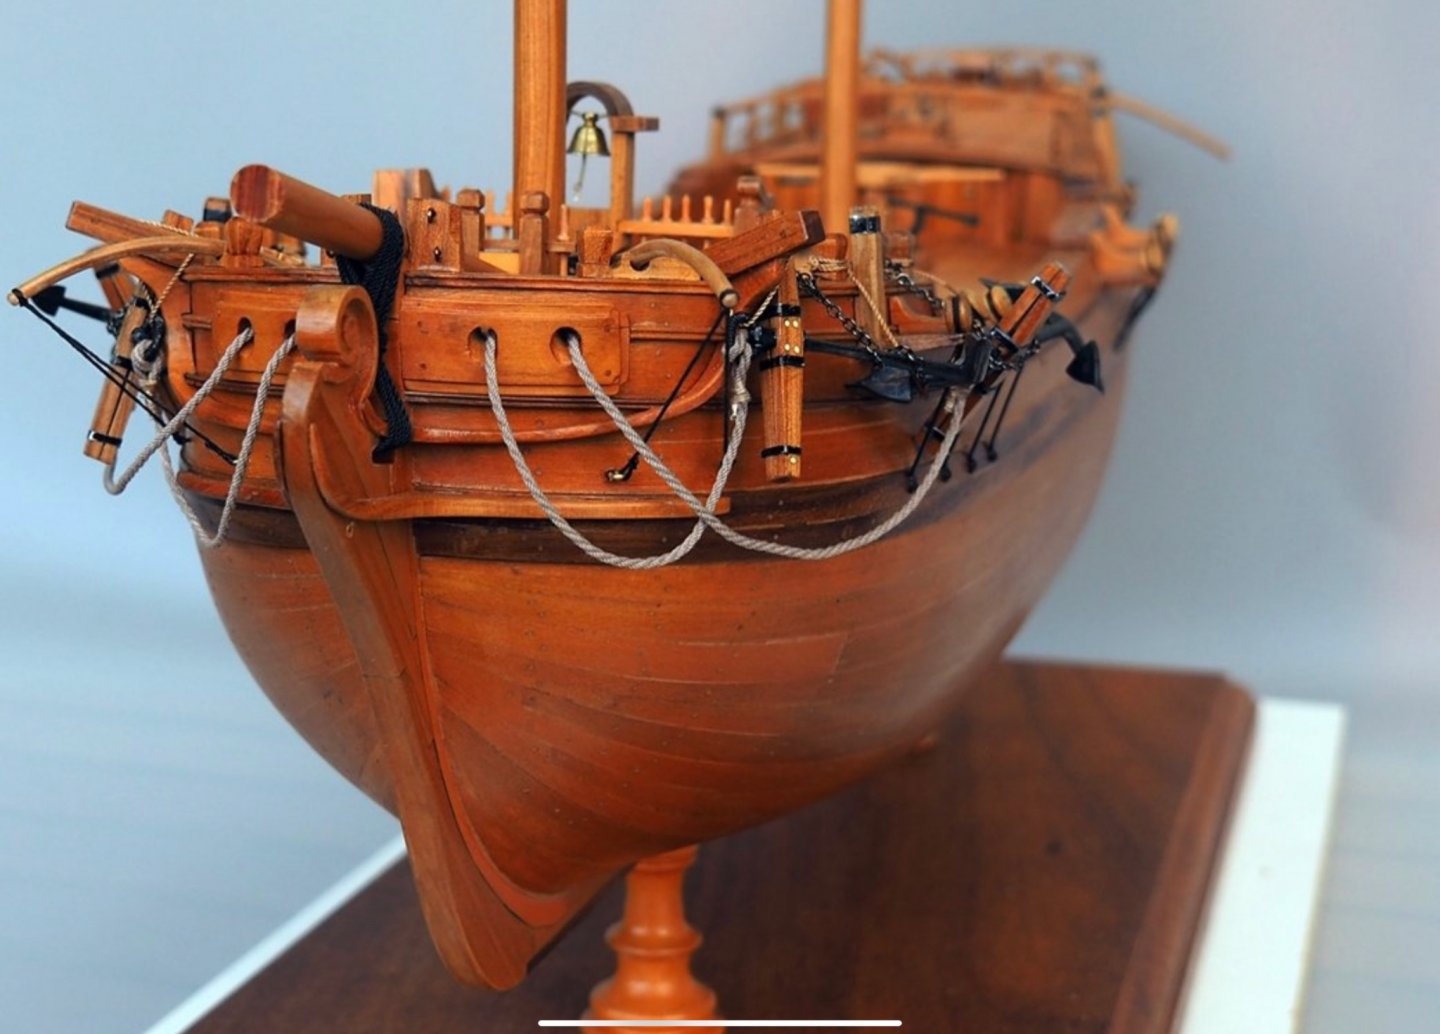
Flying Fish by Keithbrad80 - Model Shipways - 1:96
in - Kit build logs for subjects built from 1851 - 1900
Posted · Edited by Keithbrad80
Hello again everyone,
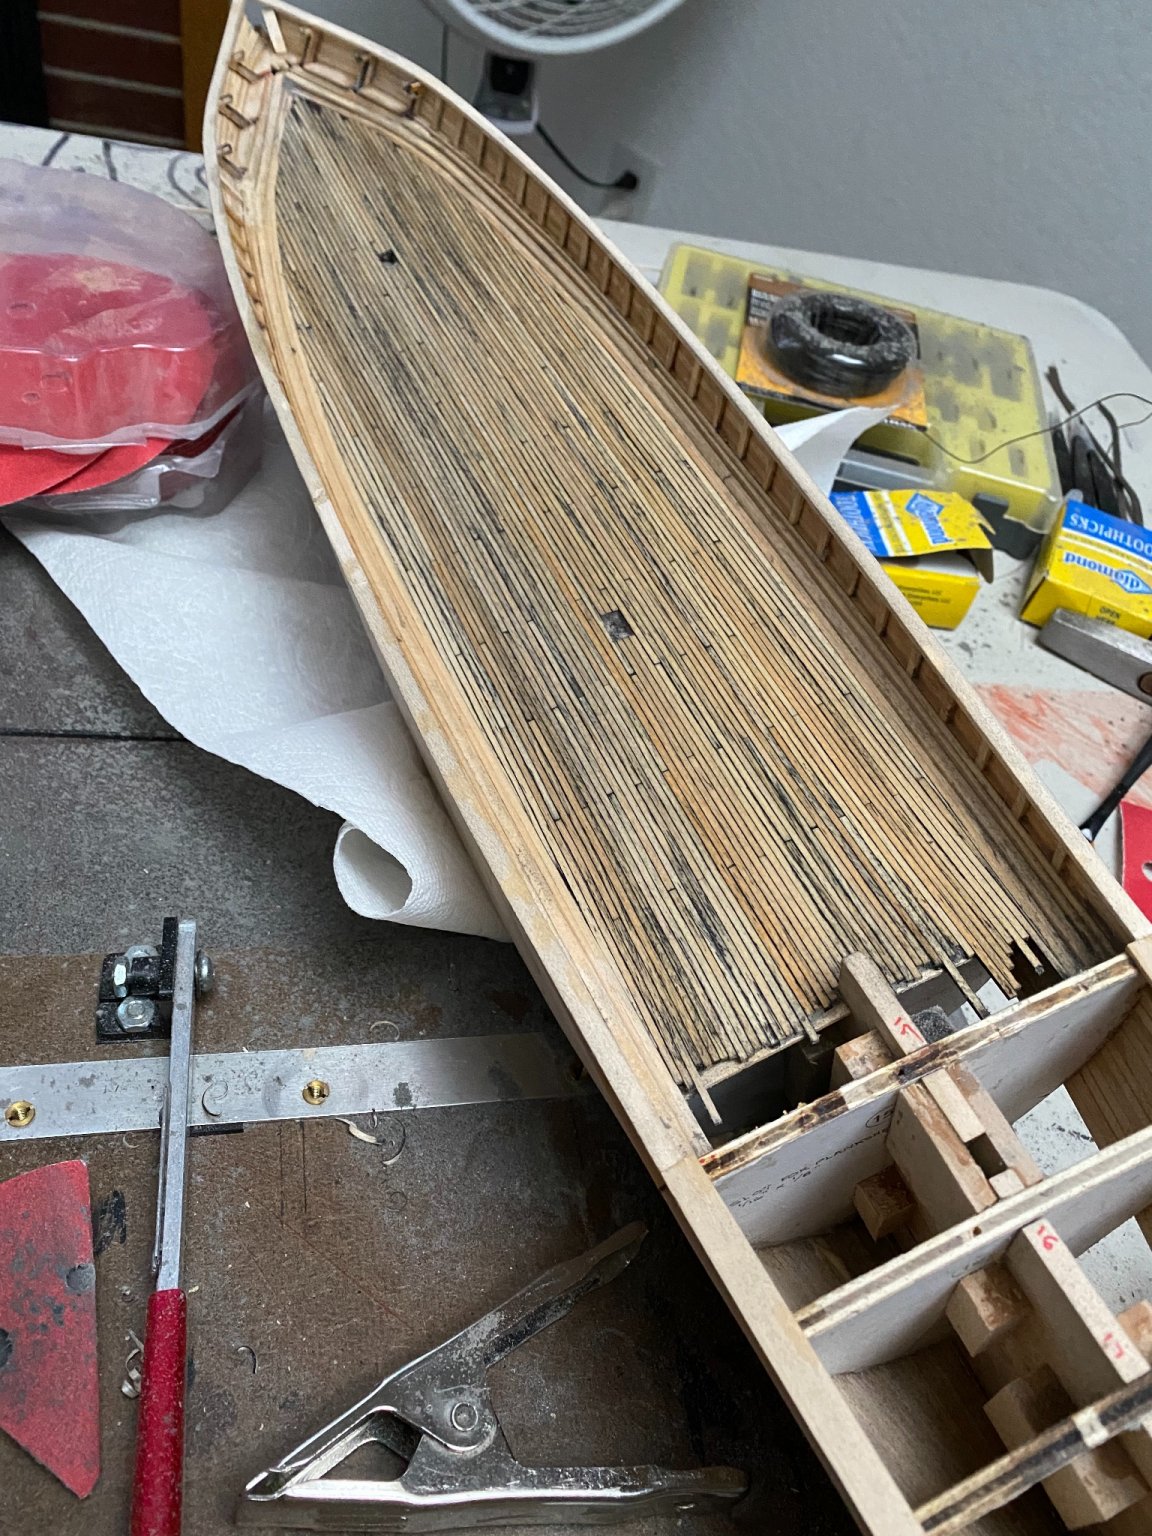
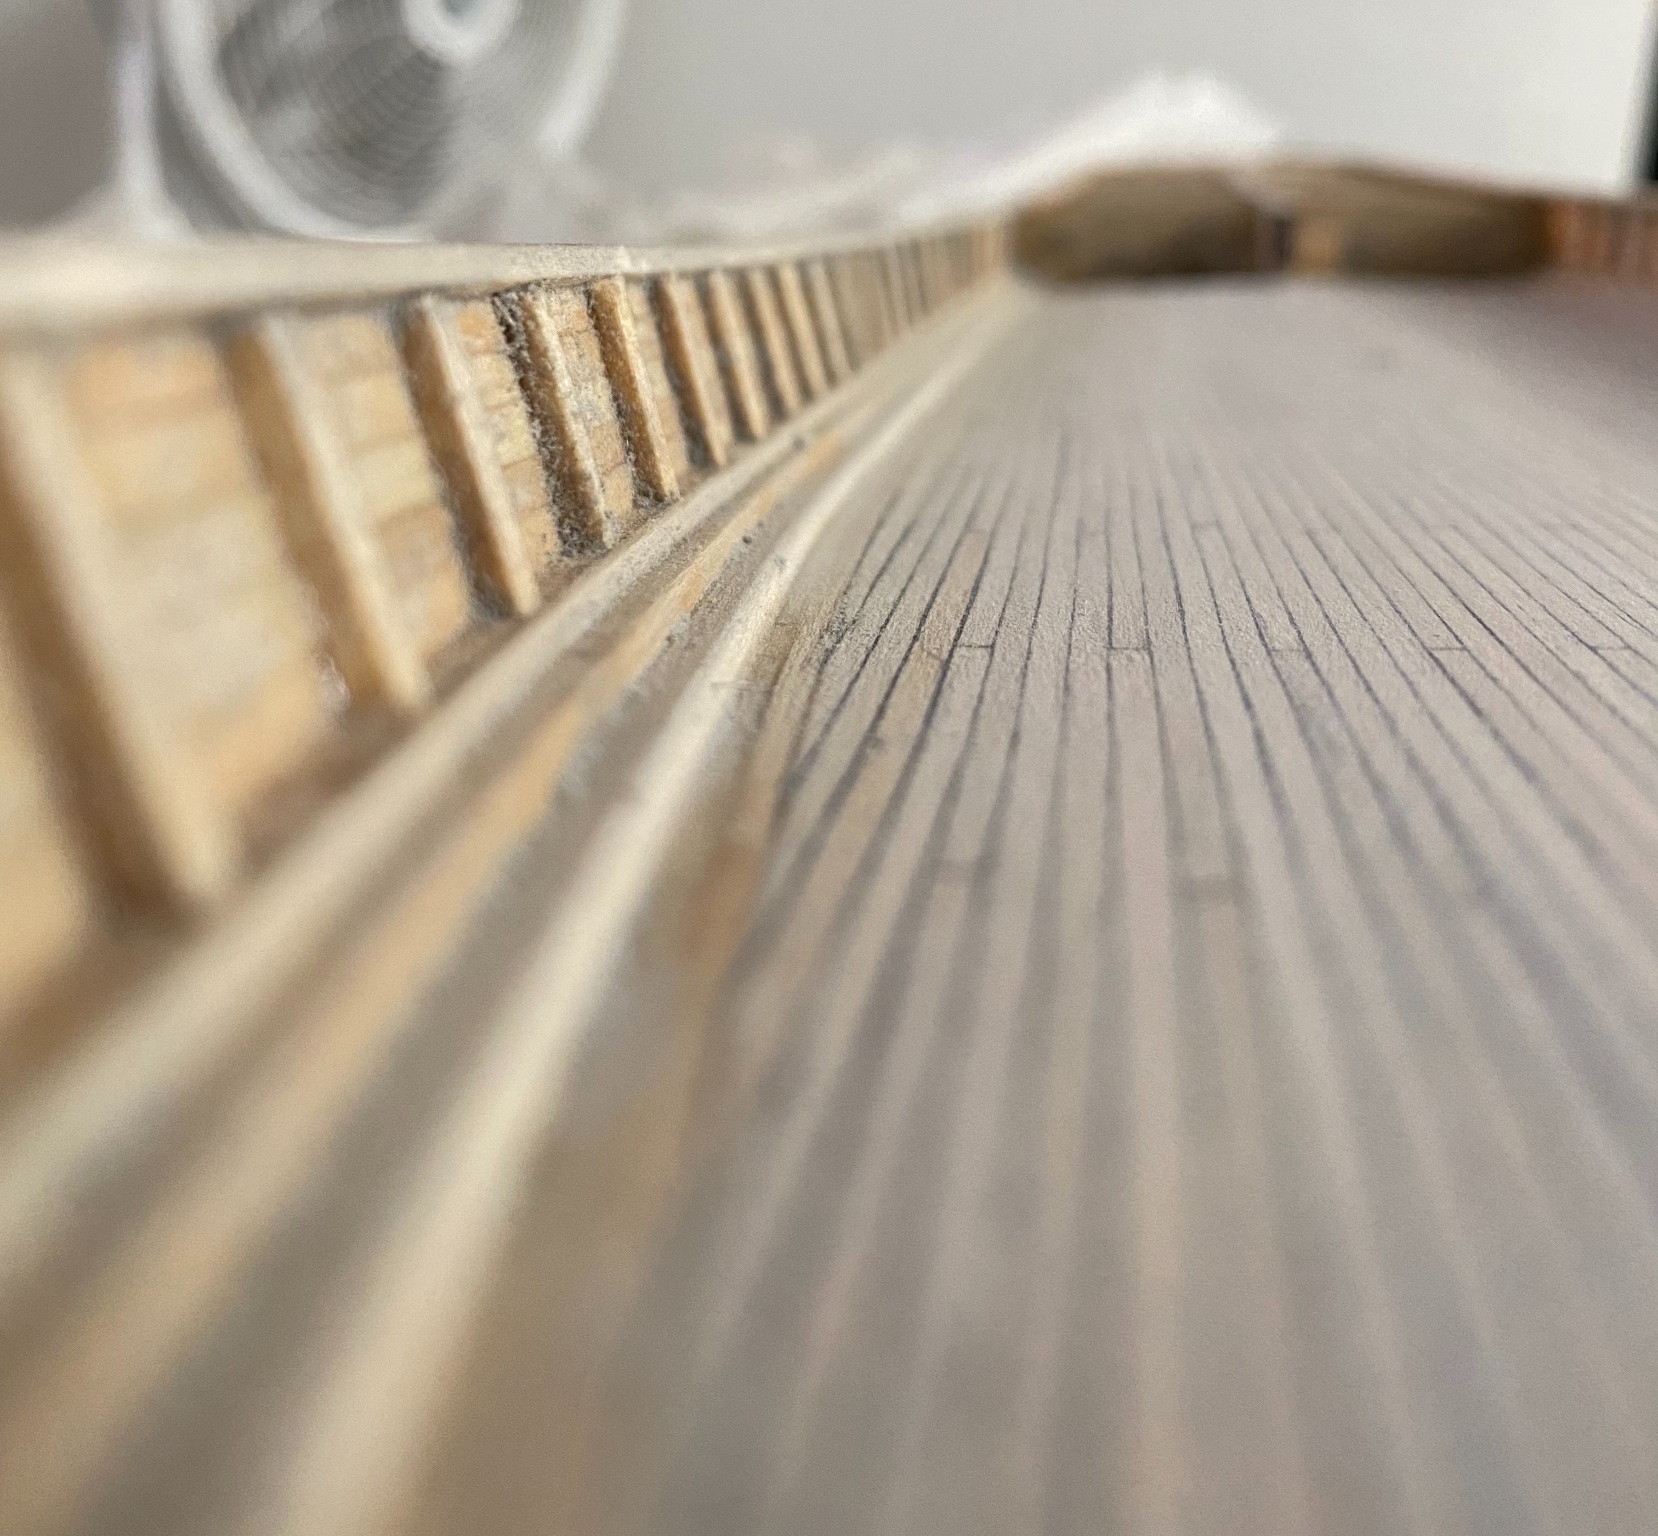
I finished deck planking! Well... I finished putting the planks in place and a good sanding with 60 grit paper. I still have tree nails to do, which will probably take me awhile but thats ok, its something I can work on for awhile when i have time. I experimented a bit with the tree nails and found the thing that looks best is just a .4 mm hole, and not filling them with any thing. Once sanded they should look pretty good, and from a feet away they will just look like tree nails. Now i did start this process on the poop deck with my Dremel but did a terrible job, so I’m switching back to drilling by hand which should produce a much much nicer look.
After I’m done with tree nails ill start sanding things to their final smoothness and only a few planks left on the hull and I’m pretty much done with the basic structure of the hull. I spent a long time today going back over every part of the ship and sanding things to the correct dimensions so when the top gallant rail is done I can paint and copper the hull. Here is a bunch of pics of my build so far:
I couldn’t leave the knees the way they were so i cut them out and made some new ones. Here is a pic:
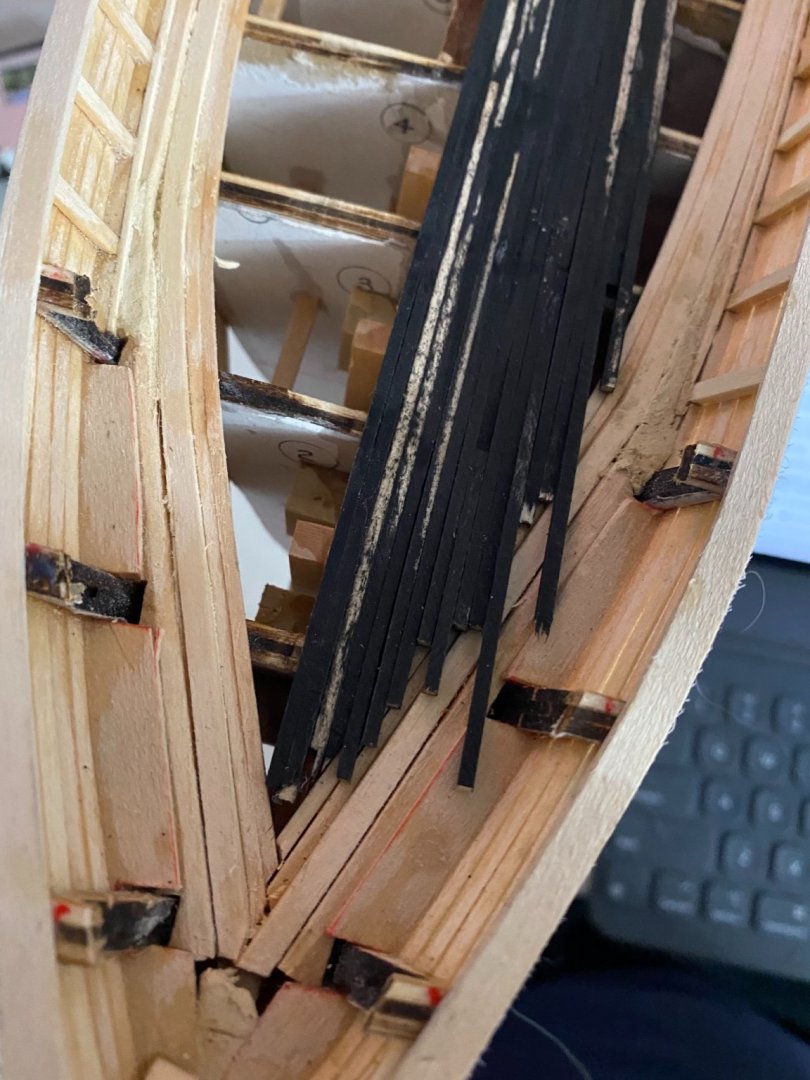
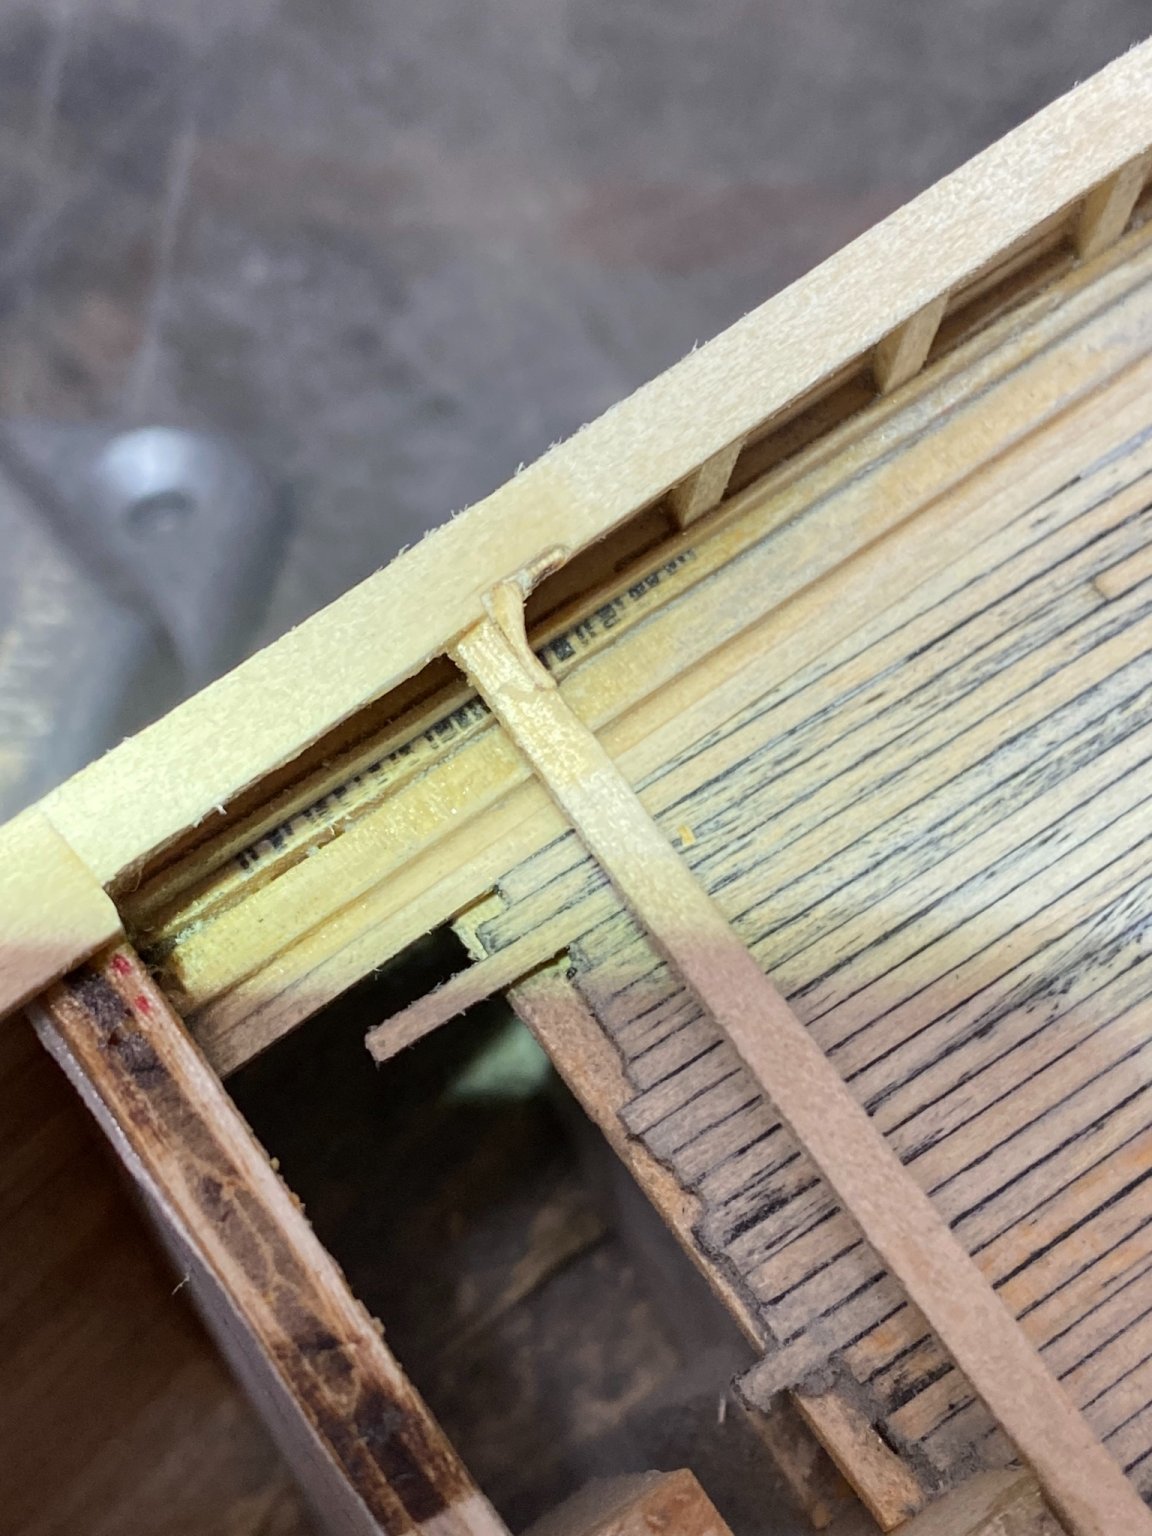
And then the one thing no ship modeler ever wants to happen, happened... I bumped my model off the table! As i was closing up for the day my jacket caught the corner of the table, just enough to roll the whole thing off the table. Thankfully the damage was kind of minor, I had started cutting the timber heads for the top gallant rail and getting them glued in place when it happened and of course knocked everyone of them off. It was frustrating but ok because i wanted to change a few things any way. Here is a pic of what i was doing before it fell:
Thanks again everyone for checking in!
Bradley