HOLIDAY DONATION DRIVE - SUPPORT MSW - DO YOUR PART TO KEEP THIS GREAT FORUM GOING! (Only 72 donations so far out of 49,000 members - Can we at least get 100? C'mon guys!)
×


BANYAN
-
Posts
5,946 -
Joined
-
Last visited
Content Type
Profiles
Forums
Gallery
Events
Everything posted by BANYAN
-

HMCSS Victoria 1855 by BANYAN - 1:72
BANYAN replied to BANYAN's topic in - Build logs for subjects built 1851 - 1900
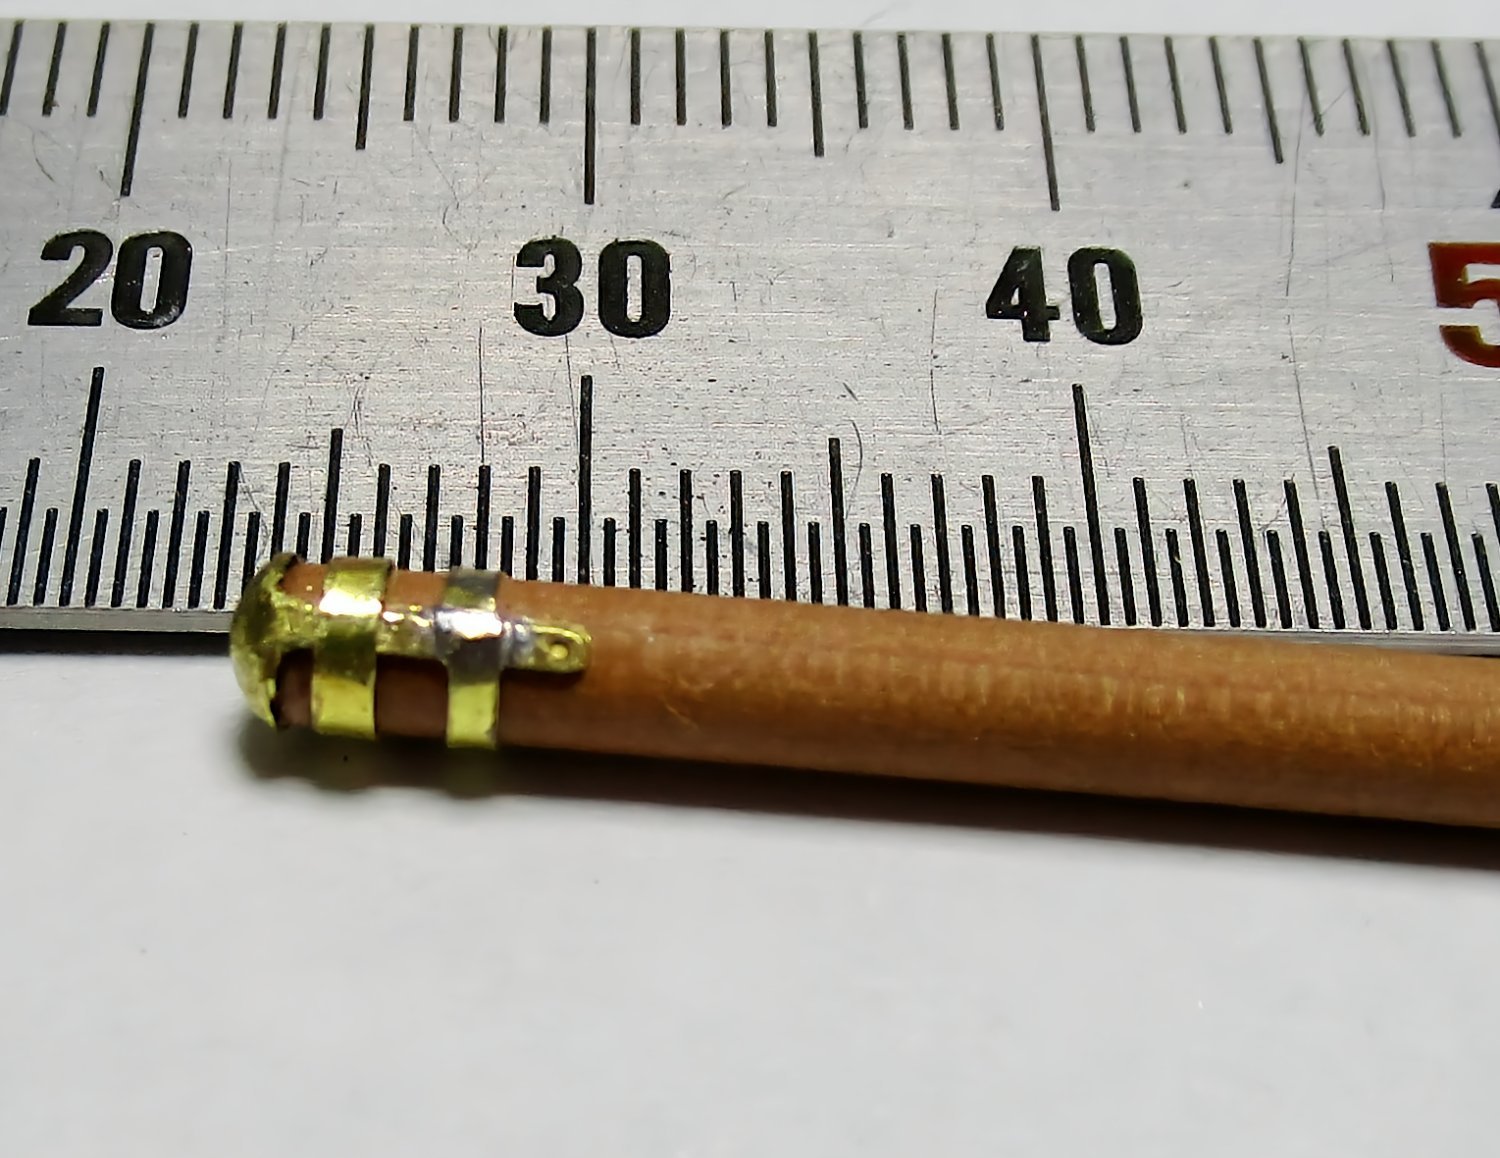
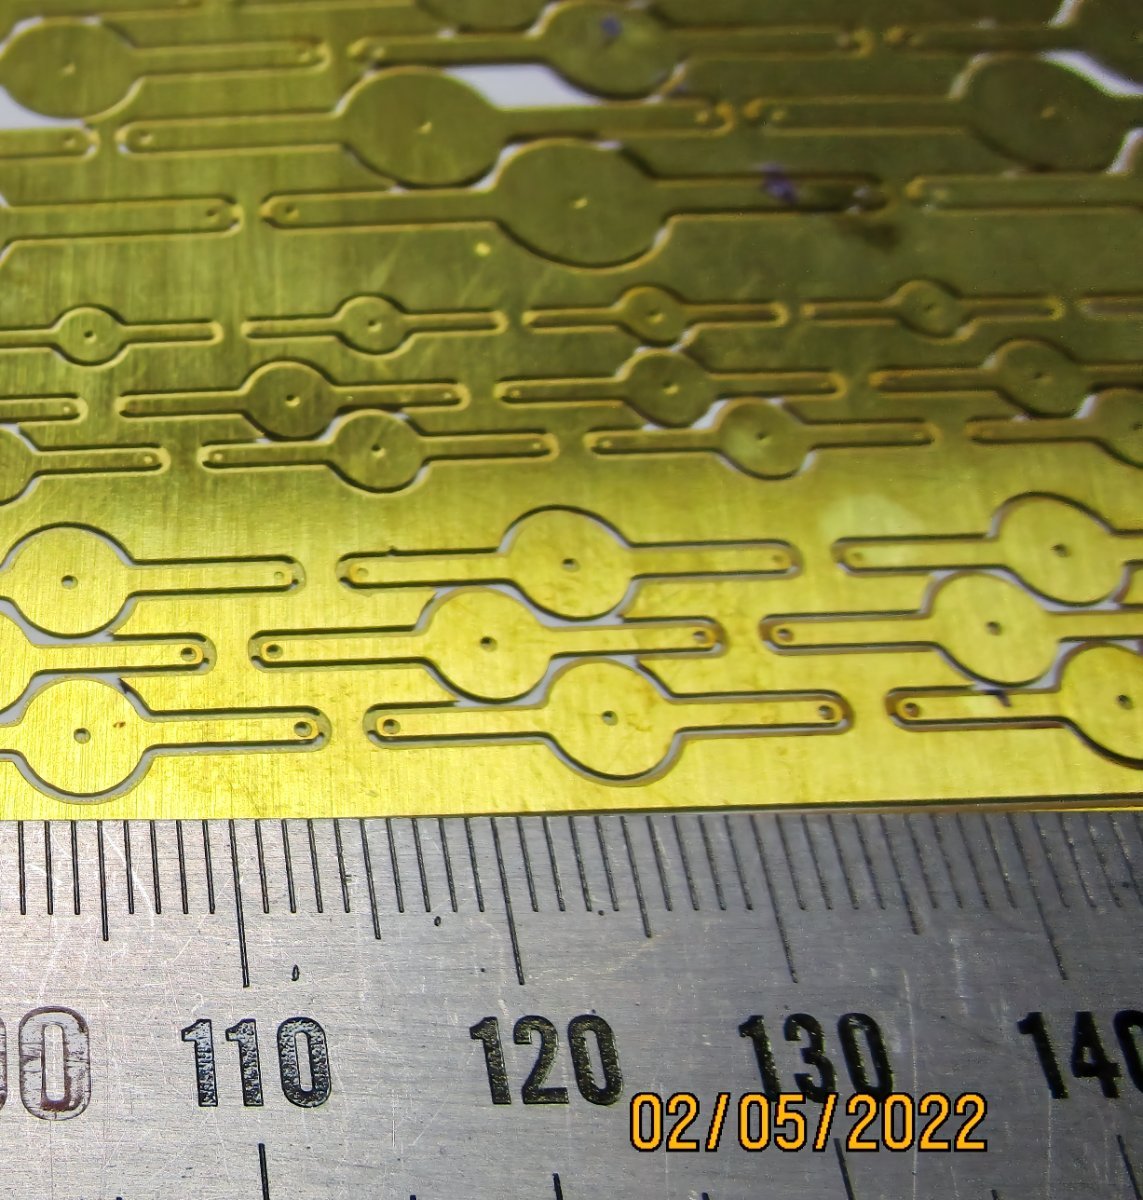
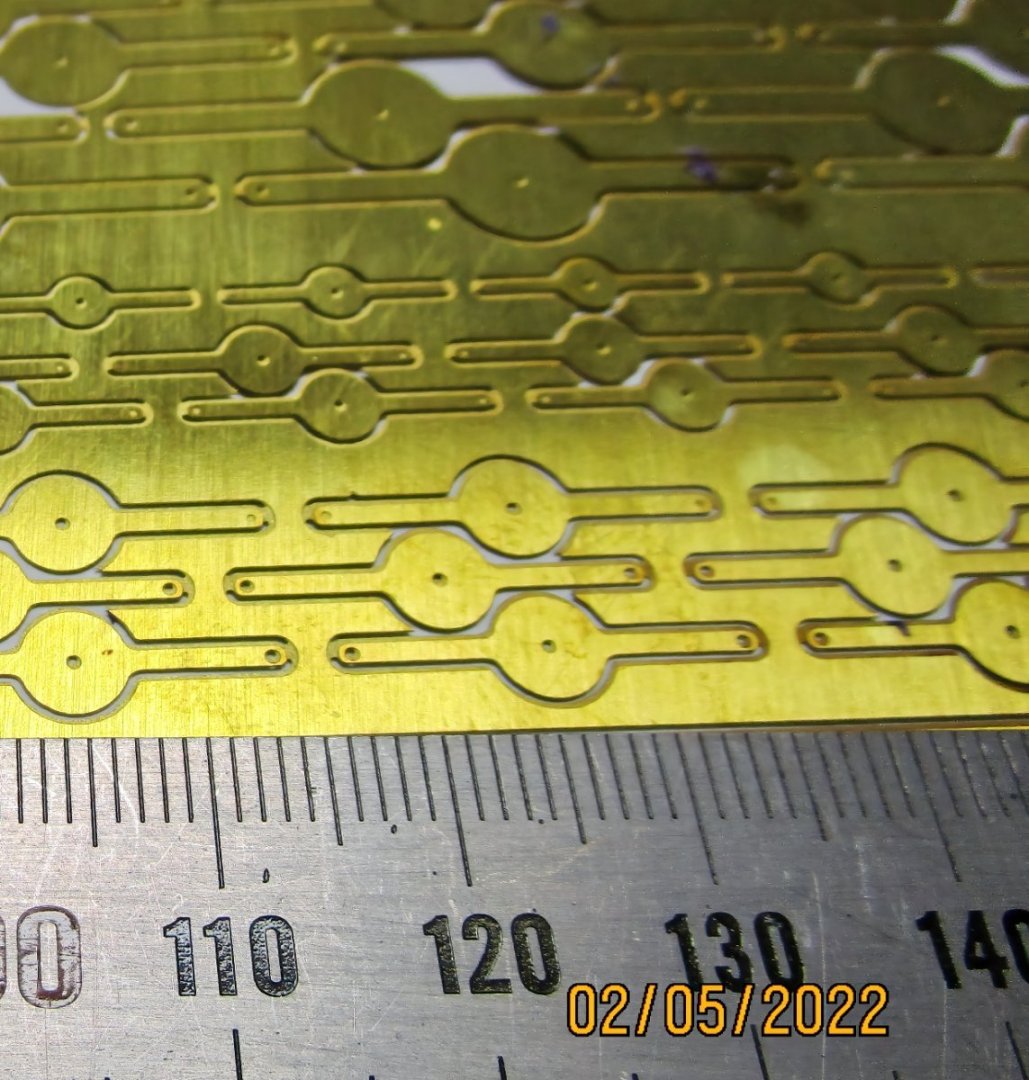
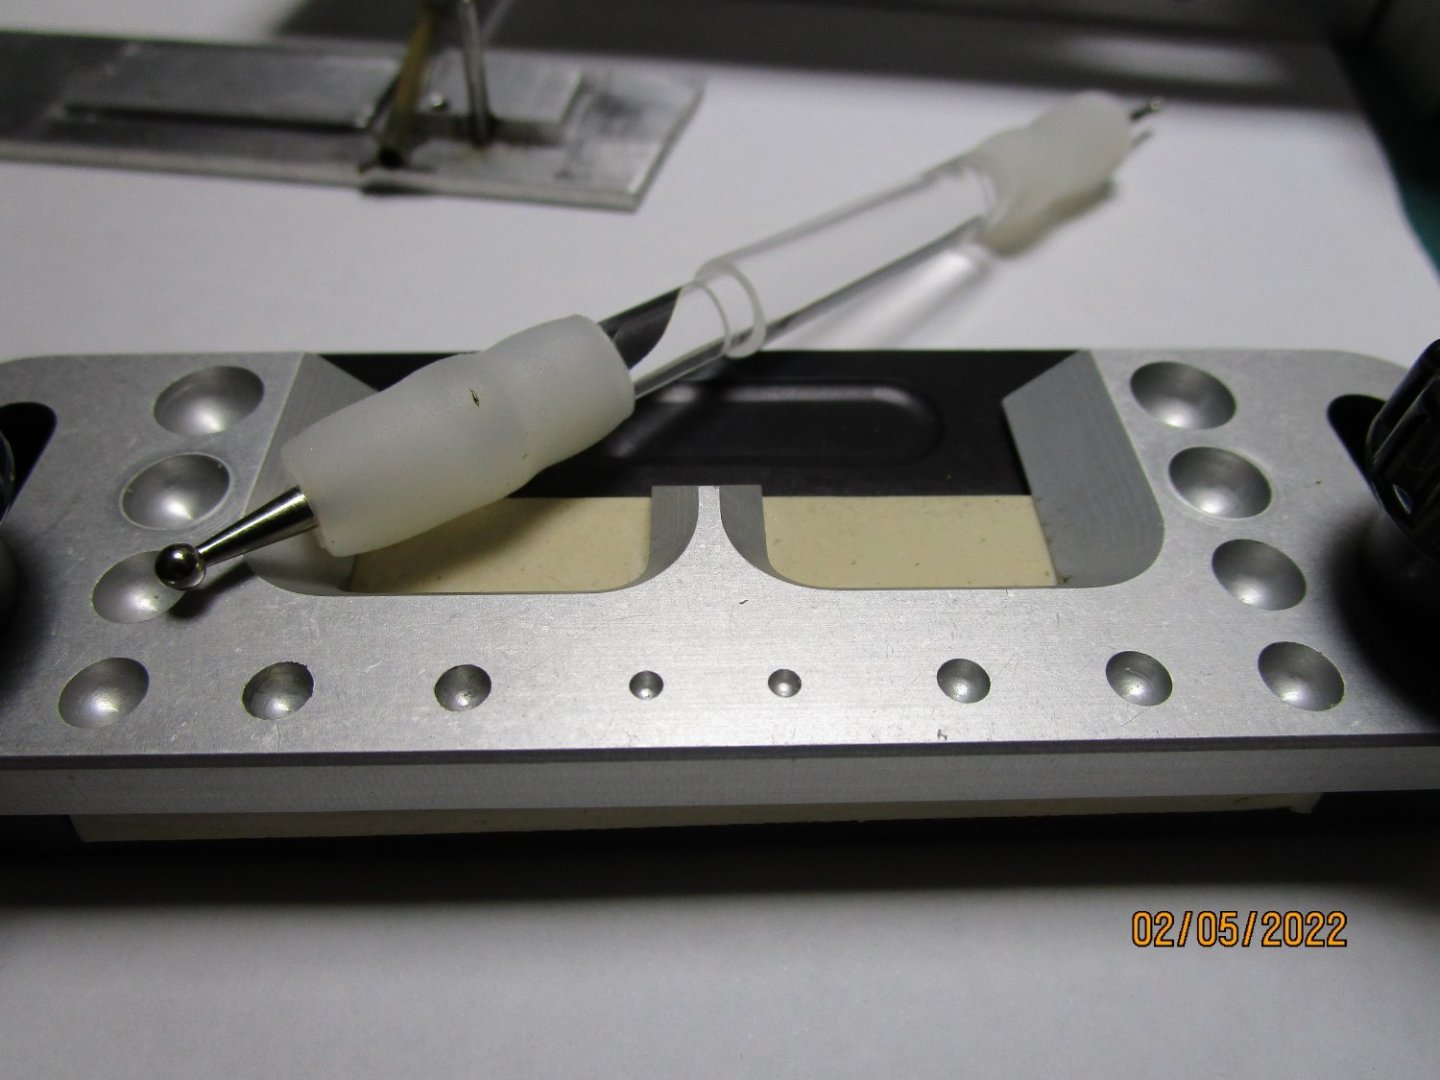
Well, I have finally got myself back into the workshop and started on some of the smaller fittings to be used in rigging the ship. The first are the fittings for the lower studdingsail/swing booms for which I need to make the ferule with gooseneck, and the spider bands. Noting the boom diameter is only a few millimetres in diameter, these are quite small. For the ferule I decided PE was the way to go, so drew up the basic stock parts. After experimenting I found I could not consistently 'round' a non-circular piece to form the concave end, so ended up going with a circular bit. I formed the concave shape by using a PE bending jig I have that has dimples inset for this purpose, then pressing the shape using a burnishing tool. I could not use tube for the bands as the diameters differ so I soldered a thin strip. The following are a couple of photos showing the end result of my first attempt where the alignment leaves a bit to desire, but overall, when viewed at eye distance, they look OK - not so great close up s they have not been cleaned up yet (the ruler is in mm). I will use some wire inserted in the end (through the preformed hole) as the start of the gooseneck. cheers Pat
- 1,013 replies
-
- 10
-

-
- gun dispatch vessel
- victoria
- (and 2 more)
-
What a beauty! Very nicely presented and a well constructed Model John. You should be proud of this one. cheers Pat
-
Simply wonderful work Eberhard; she/he is turning into a very eye-pleasing model. cheers Pat
-
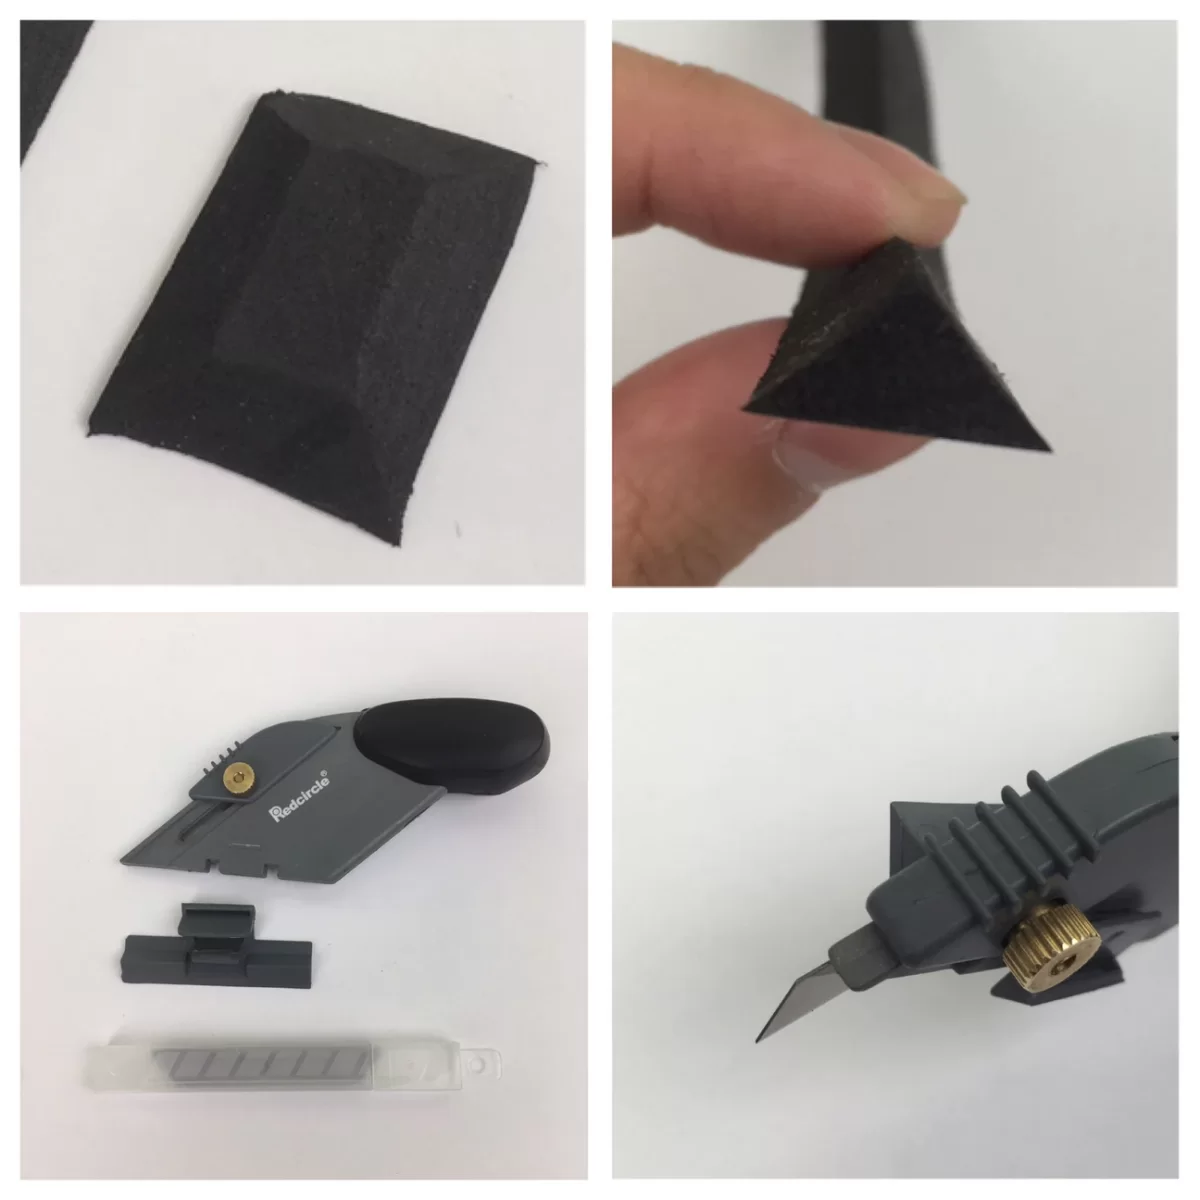
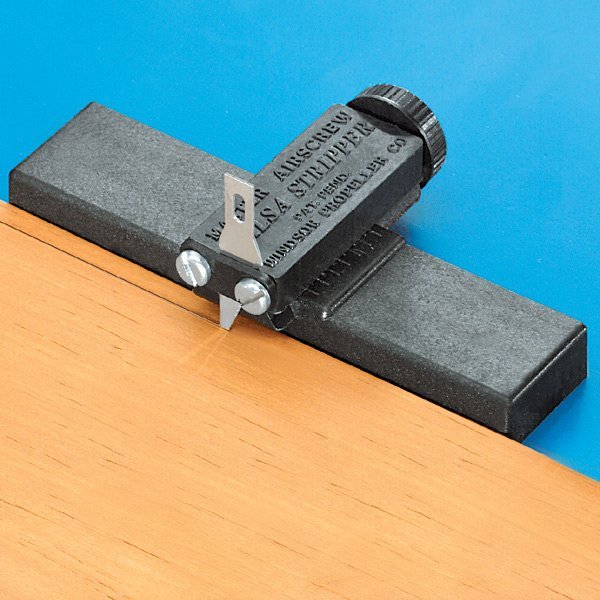
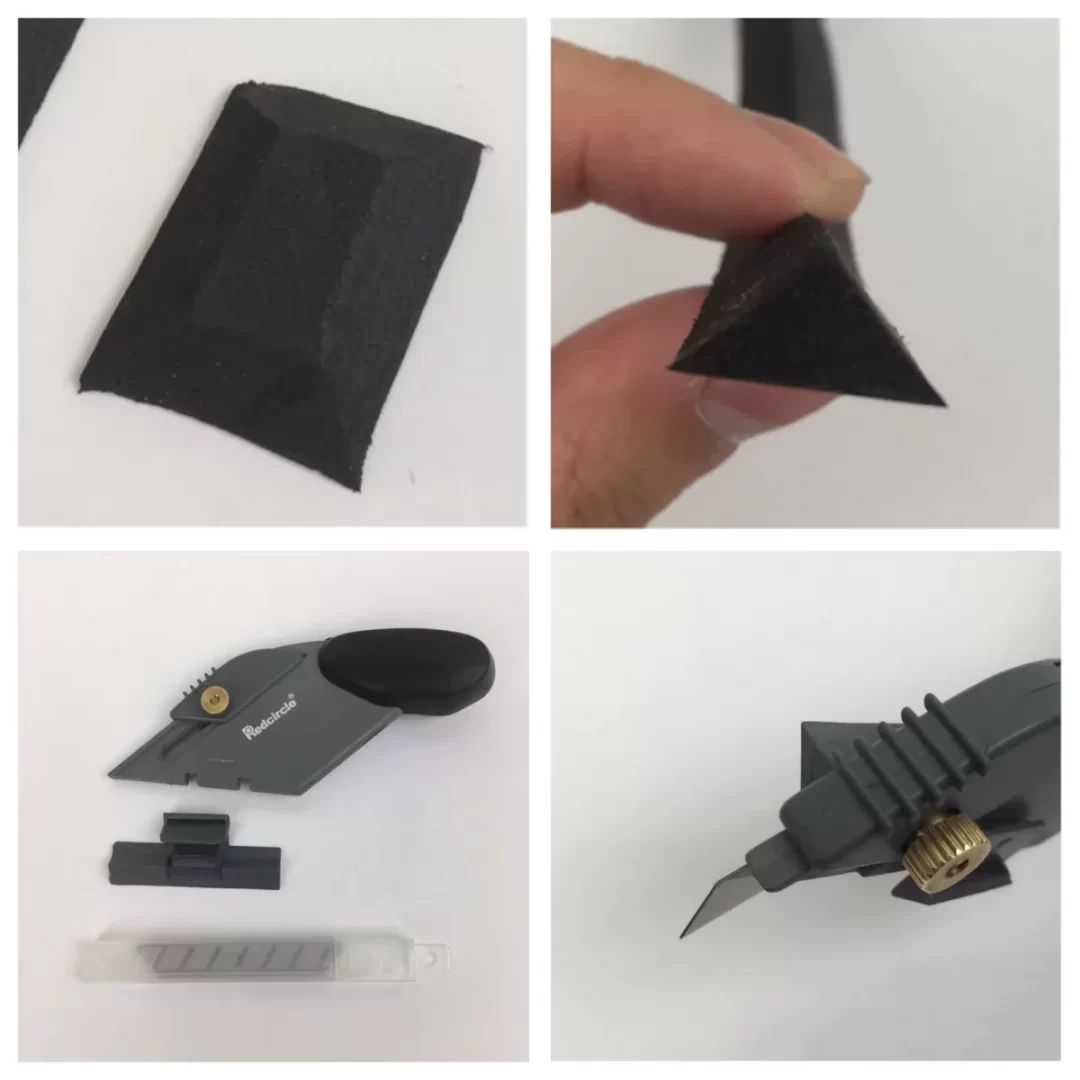
Allan, there are sure to be better solutions offered by the more experienced/talented builder but I used a 'splitter' tool generally employed by RC aircraft builders. I cut some very tight grained wood in thin strips to the required thickness to form the 'molded' dimension, then use this tool to take off thin strip to form the width of the stile etc. Below is a picture of the tool which I use with a jig clamped to a solid and straight edged cutting surface. I form a fence on the edge of the jig or table to guide the tool having clamped the strip to the surface (ensure it is square to cutting direction), and such that the cut strip between the tool and the stock ( I find that minimises the splitting sometimes experienced - a sharp blade is essential . Apart from the splitting, the other reason I have the cut piece restrained by the tool, is to stop it 'curling'. I hope that all makes some sense? There are various types out there, the first below is the style I used but I have also seriously thought of trying those card style cutters available from Office Supplies. The second image is a foam cutter that may also work? cheers Pat

-
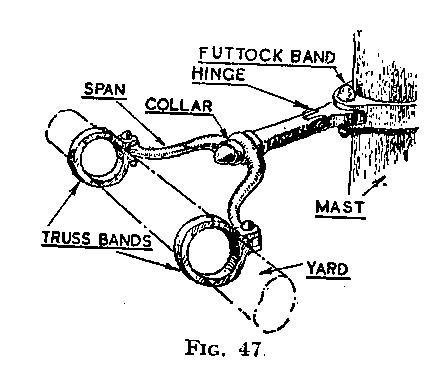
I think perhaps Barbara may be referring to the 'iron truss' that replaced parrels for the lower yards? Can you confirm please Barbara? See below which is an illustration by Harold Underhill in his Masting and Rigging Clippers and the Ocean Transport - Fig. 47. If so, there are some useful photos and illustrations available, but I have yet to find any useful guidance on the dimensions, especially the gap formed by the 'U' part - this gap allowed the upper masts to be struck through the resulting hole created when fitted to the yard. Some had a single joint/knuckle (hinge), others were double jointed to allow better clearance of the yard. when swung. As illustrated, they were usually incorporated as part of the lower futtock band. I do not know what type the 'Morgan' may have been fitted with? cheers Pat
-
NAIAD 1797 by Bitao - 1:60
BANYAN replied to Bitao's topic in - Build logs for subjects built 1751 - 1800
Very much up to your very high workmanship; a delight for the eyes. cheers Pat -
I think you may have started a new method for doing furled sails They look great, even up close. cheers Pat
-
I know that feeling only too well Keith. Very nice details to your launch, I particularly like that little engine/power derive. cheers Pat
-
Very nice work Brian; as Keith says, if you call this 'little progress' well .... Impressive detail. cheers Pat
-
John, many thanks for the explanation; I have learned something very interesting today. Appreciated. cheers Pat
-
hi John, ditto comments above - congrats to the team; the project is coming along very nicely and the additional detail in the photos is great to see. You have me somewhat confused though with the naming of the aux boiler. I am more familiar with that being the 'Donkey' boiler; not saying 'Doctor' is wrong, just wondering how you arrived at that name? Enquiring minds and all cheers Pat
-
Hi Peter, that's what I went with. Some ships crews may have painted the head part a little more ornately, but I just went for plain red ochre for the windlass stands and the heads. cheers Pat
-
Agree with Mark, the idea and construction of that mannequin is a very clever idea. Robotic or not, it is a great way to visualise the ergonomics and rowing techniques. cheers Pat
-
The heads may have been painted anyway Peter, that was my choice anyway :). You're making good progress and I like that 'brown stuff' bottom.. cheers Pat
-
As with many 'exercises in frustration' Steven, persistence provides a great result. Slowly but surely the refit proceeds. You must be pretty happy with these results? cheers Pat
- 740 replies
-
- 3
-
-
- Tudor
- restoration
- (and 4 more)
-
I love the simplicity of design for the display stand Greg; the stamp tops it off. cheers Pat
-
Michael, I think you may be a little tough on your efforts in saying you were not happy with the lay/fit of the garboards - I think you have done an exemplary job of it. cheers Pat
-
Very nice Rob, that rigging is looking great. I particularly like the effect you have generated with the furled and weathered sails. I also work from aft-to-fwd; for me that allows me to bring the appropriate amount of tension on the backstays, stays etc as I progress forward - but more importantly, I found that if I rigged the bowsprit/jibboom first that I was constantly knocking it . As Druxey says; each to their own and whatever works for you. cheers Pat
- 3,560 replies
-
- 1
-
-
- clipper
- hull model
- (and 2 more)
-
NAIAD 1797 by Bitao - 1:60
BANYAN replied to Bitao's topic in - Build logs for subjects built 1751 - 1800
Those blocks look great Bitao, very nice work. Love that ropewalk. cheers Pat -
Nice work Steven, those new deadeyes look good, and as you stated, the whole arrangement looks a lot neater. cheers Pat
- 740 replies
-
- 3
-
-
- Tudor
- restoration
- (and 4 more)
-
NAIAD 1797 by Bitao - 1:60
BANYAN replied to Bitao's topic in - Build logs for subjects built 1751 - 1800
You never fail to impress with your skills Bitao; lovely work as usual. cheers Pat