

Gregory
-
Posts
3,135 -
Joined
-
Last visited
Content Type
Profiles
Forums
Gallery
Events
Posts posted by Gregory
-
-
The Enterprise is still available, but I have had no offers.
Up Next is the Santa Maria from Artesania Latina.
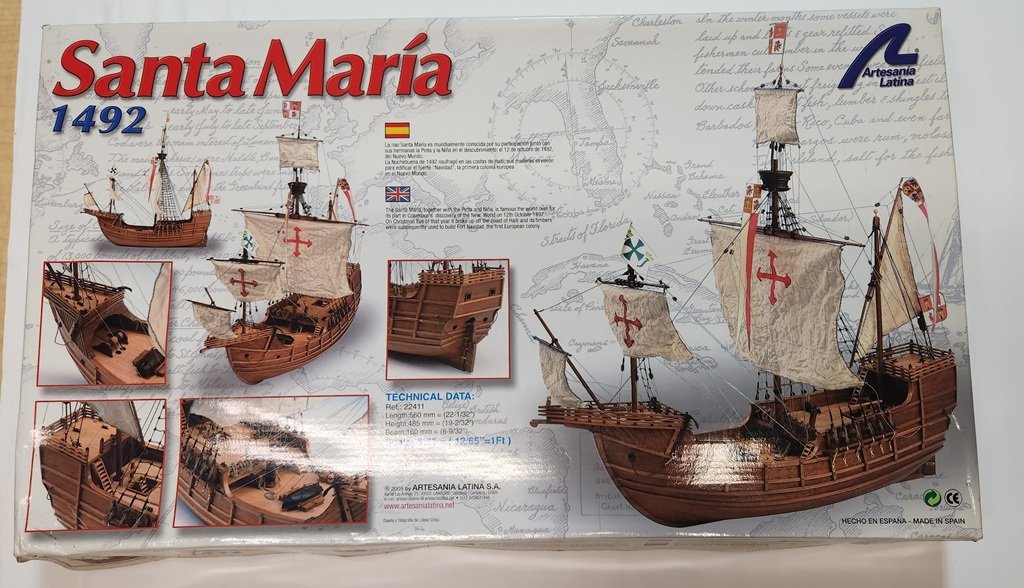
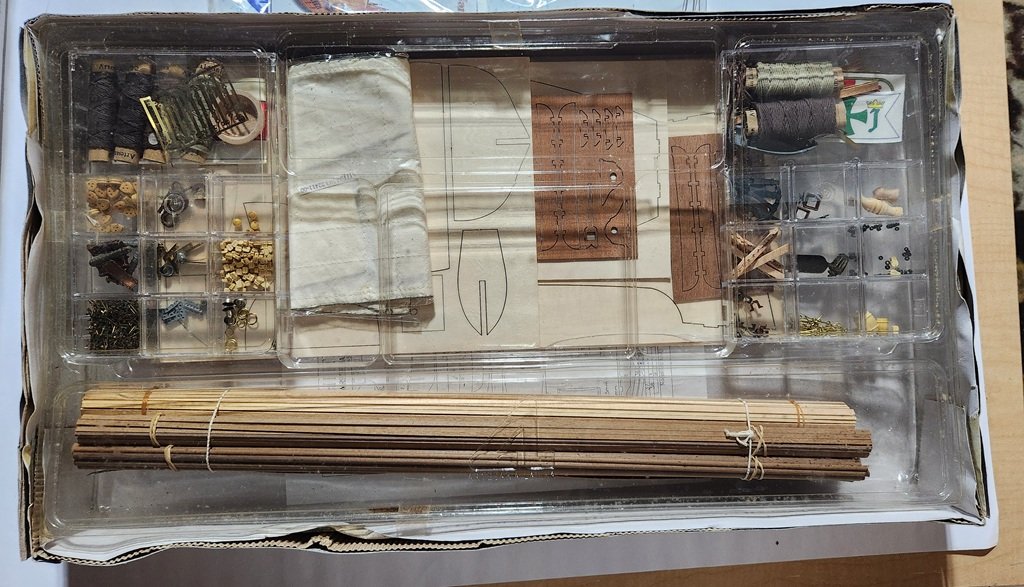
The box appears to have got wet at some point, but everything inside is in a plastic container, and I do not see any evidence of water inside the parts container.
This kit weighs a little over 5 pounds.
I am asking for $100 plus shipping.
For shipping I will be using what the US Post calls USPS Ground Advantage. It appears to be as fast as priority mail .
-
I have several kits that I will never get around to building, so I am looking to recover a little of my investment.
I can ship to US only.
I will list the kits one at a time, so PM me if you are interested. Let me know your location and I can give you a shipping cost.
I hope my pricing will work for those who need a new project but don't want to spend a lot.
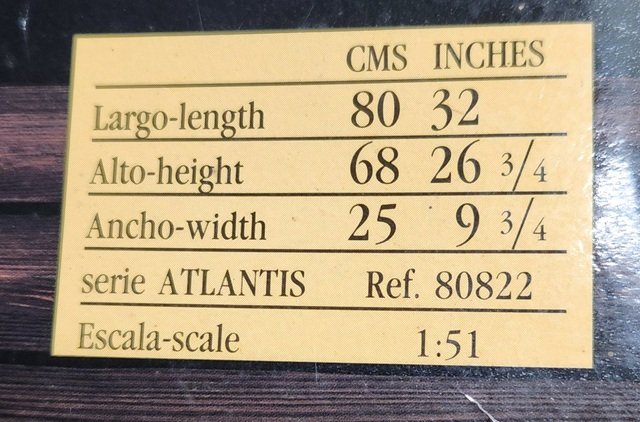
First up is the Constructo Enterprise .
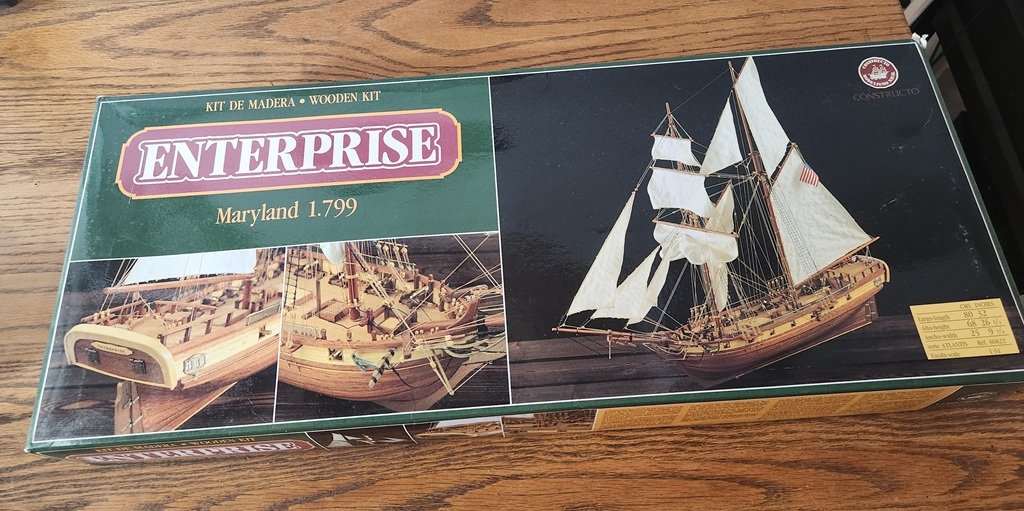
This is an older kit, and to the best of my knowledge is complete. If a buyer finds a problem, we can work something out to make it right..
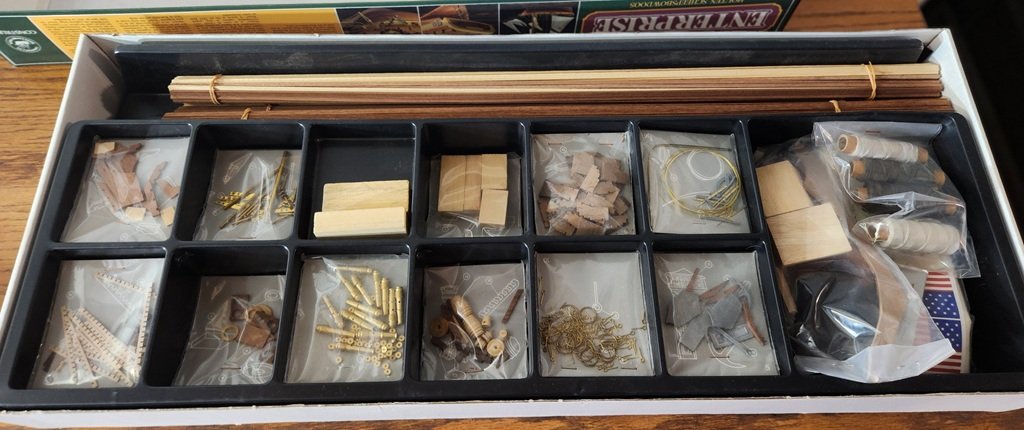
Typical fittings and wood stock for kits 30 years ago.
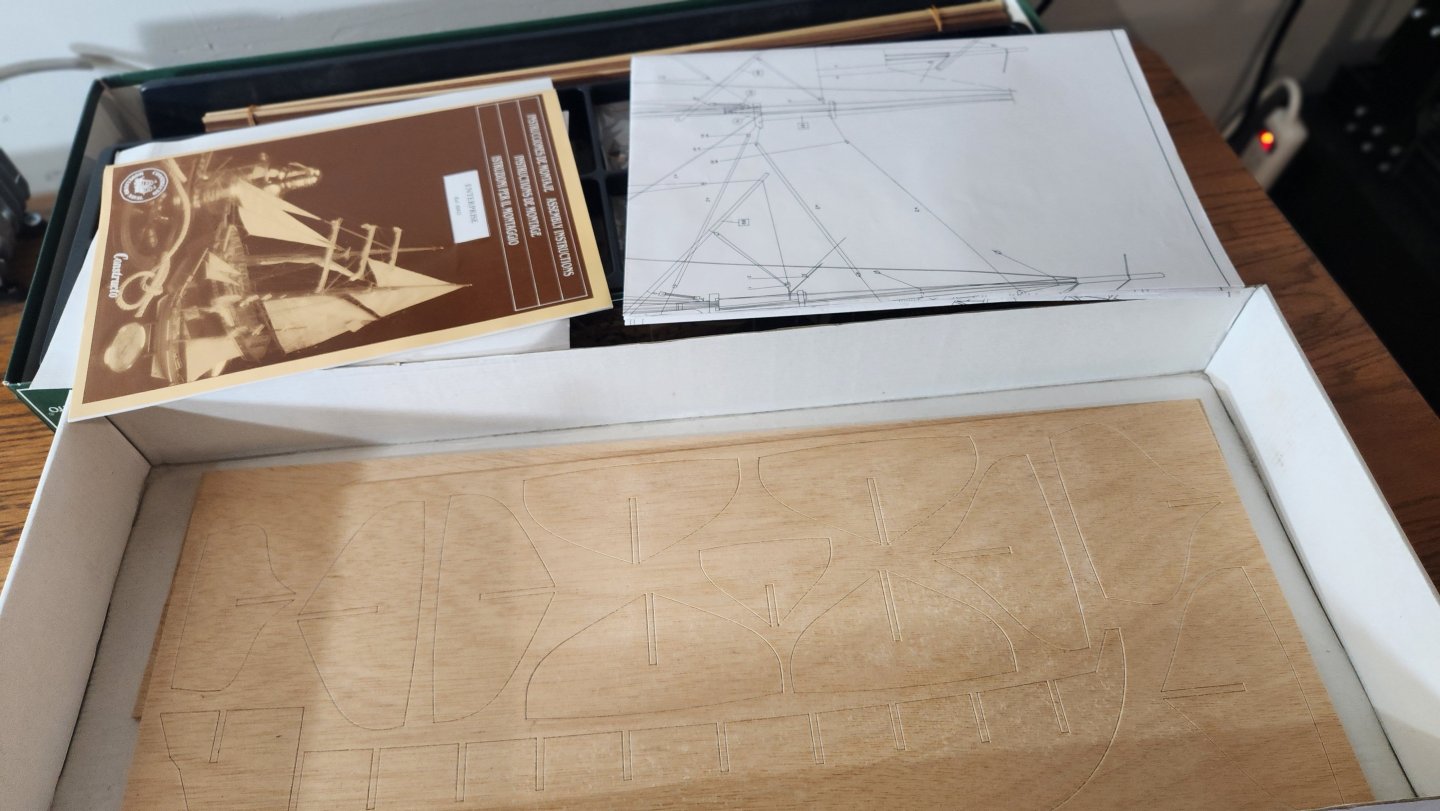
No laser cutting here. The back-bone and bulkheads look to be die cut. You can look at a couple of the build logs here to see what to expect.
For this kit I am asking $75 plus actual US Postal shipping cost . The kit weighs about 4 and 1/2 pounds.
I will list the next kit when this one sells, or if there is no interest in the next few days. I have 5 or 6 more I plan to offer.
- Ryland Craze, catopower and ccoyle
-
 3
3
-
Great work on the flag!
-
ModelExpo has a pretty good selection of basswood strips.
I see my local Ace has them.
Amazon has Midwest basswood also.
-
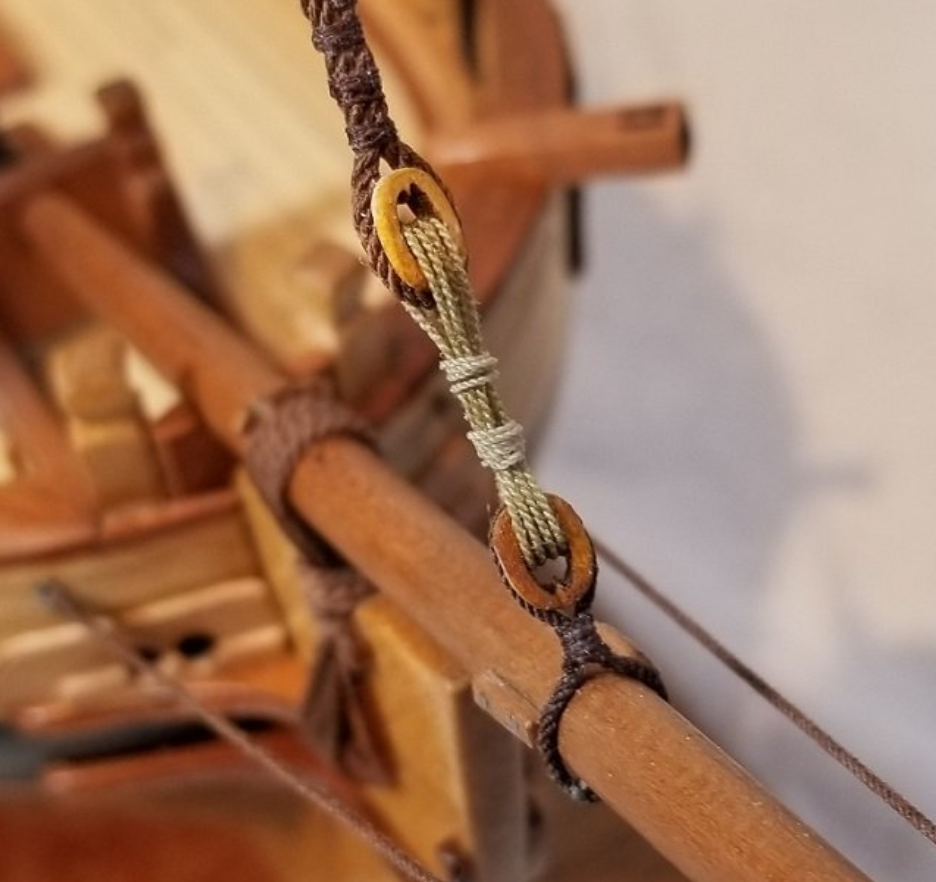
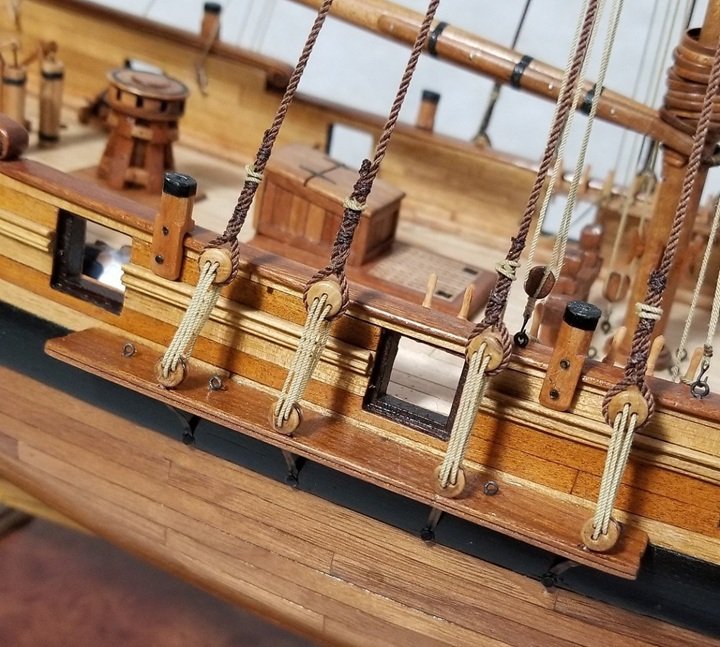
Here is how it looks on my Resolution. These are 'hearts' but the bulls eyes would be rigged similar as far as the lanyards go.
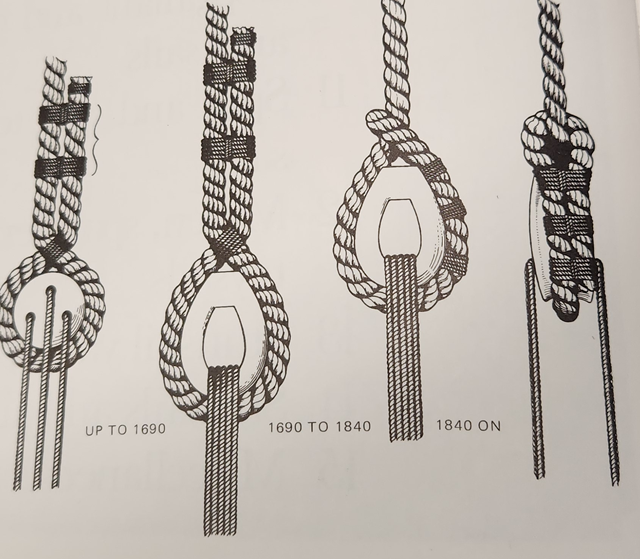
The last two pics are from Lees. Again, showing hearts.
I can't seem to find specific examples of rigged bulls eyes. Hopefully others will chime in.
The number of loops would be determined by the size of the line. I would think maybe 2 or 3 max on a bulls eye.
-
1 hour ago, Alex L said:
I tried using small amounts of CA glue in select places,
With practice, CA can be very effective.
If you have looked at Chucks planking videos , He uses CA almost exclusively.
I recommend a good medium formula such as 2P-10 Professional . Don't use the thin stuff. It spreads too thin and will soak into bass wood too fast.
You will also find, when you get the blanks bent correctly as shown in the planking videos, they lay almost flat and only require some finger pressure for 30 seconds or so for a good bond.
I rarely use regular PVA glue anymore except when I need lots of adjust time .
One of my favorite build logs for this kit is 18th Century Longboat by BobF. A lot of detail about how Bob built the kit.
Your first plank looks really good.
- Ryland Craze and Alex L
-
1
-
 1
1
-
3 hours ago, Snug Harbor Johnny said:
One difference is that the gathered strands at the tail stock were on a 'swivel' that could also counter spin as the rope was laid.
 ,
,
Assuming the 'tailstock" is what I call my 'traveler', There is also a swivel that I described above. This allows the rope to twist and lay up in it's effort to overcome the tension of the twisted strands.
I'll try to provide a video of it spinning later .
-
8 hours ago, Tumblehome said:
A complete tutorial would be more than helpful, please..
I appreciate the interest.
I'll try to make a more comprehensive video that I can post at YouTube. Might take a few days. ( or weeks )
I'll put together a new gearbox to show more about how it's made.
- Tumblehome, Ryland Craze and Ronald-V
-
1
-
2
-
Per my discussion with @Ronald-V over in Chuck's Syren Store topic, I will try to give a description of my rope maker and it's output.
First, here is my original rope maker. I realized the shortcoming of kit provided line when I built my first wood ship kit in 1994.
I found the basics of rope making in Ships of Scale Magazine, along with a few books that were my only source of information back then.
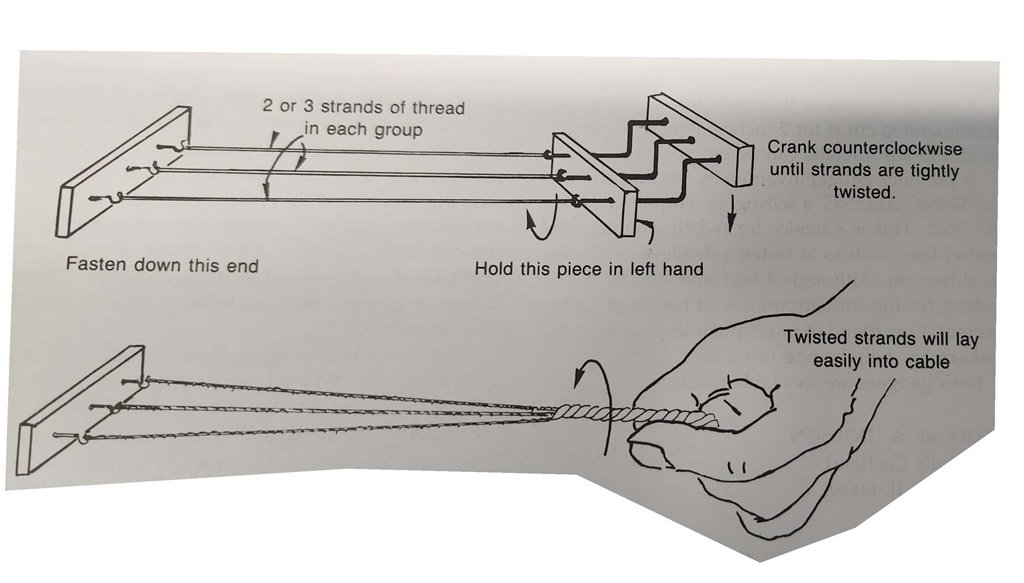
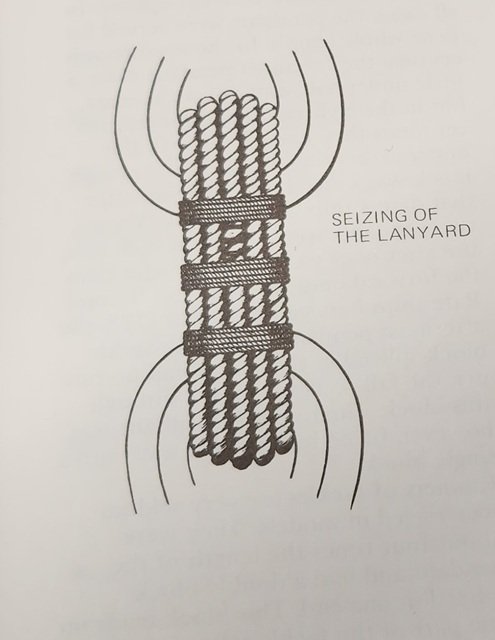
Just for fun, here is one of the the rope making ideas from a book - Ship Modeling From Stem to Stern by Milton Roth. One of my go-to's back then, but I have since found it had a lot of not so sound information, mixed in with the useful stuff.

Here is some of the " Not so sound " information from Roth. While the principle is OK up to a point, unless you were making rope out of rubber bands, this design would fail.
The upright on the right, which would be the ' looper ' on a working ropemaker, needs to be moveable, not fixed as shown here. As the strands are wound, and the rope begins to set up, it contracts, and becomes somewhat shorter than the original strands.
I wonder how many people built this, and experienced the snapping of the strands.

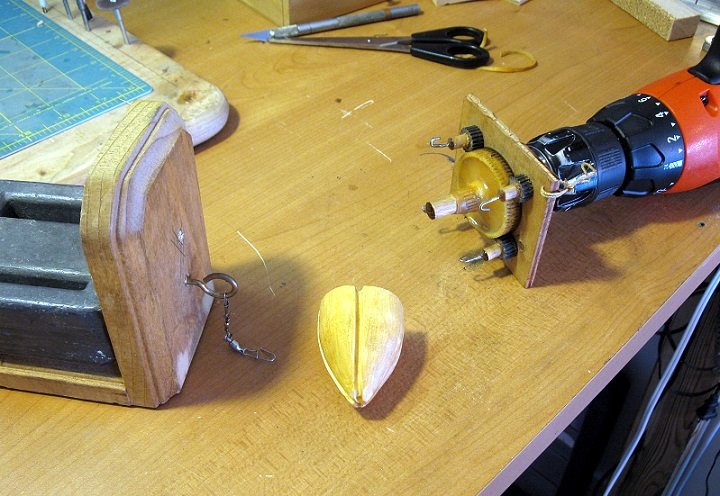
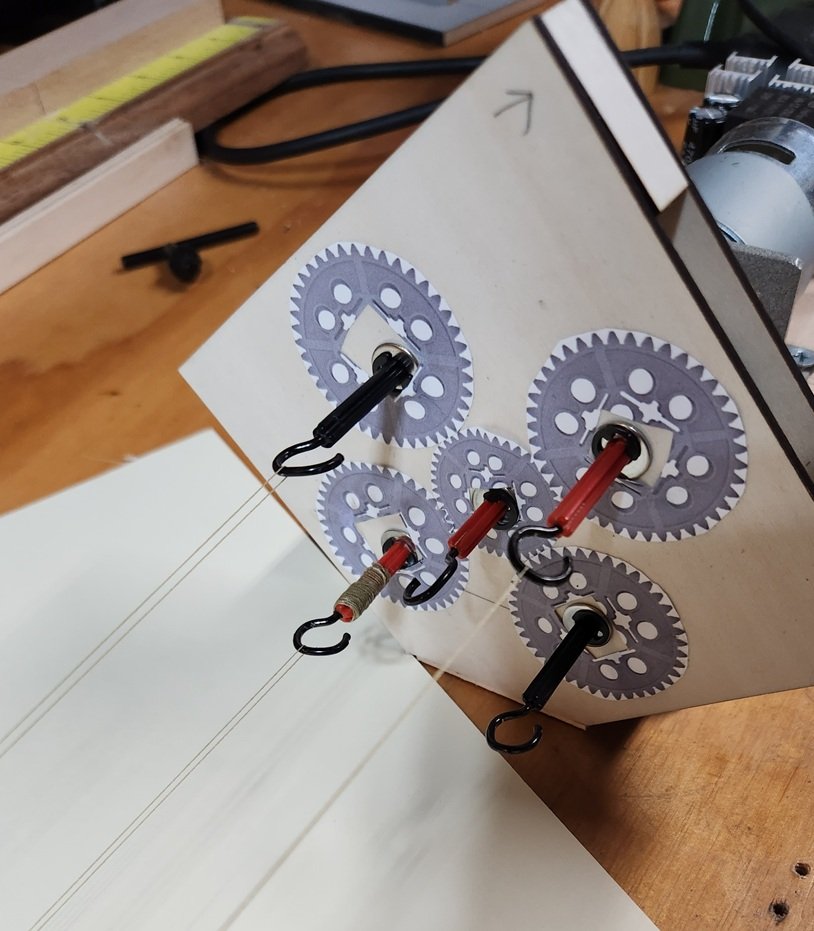
Here is the latest version of my Rope Maker. ( Rope walk ) I believe this is what is called the Frolic style, but I didn't know that when I made it.
I put images of the gears on the outside, because they are sandwiched inside the framework I made of plywood.
I will explain the named components, then show a little more detail about how it works.
1. The Whorls. The strands of thread are attached here. The whorls spin ( wind ) the strands to put a reverse tension on them. Then, when that tension is released, the strands will twist together and lay up into rope.
This is the basis for full size rope making. I believe the Rope Rocket has 3 whorls and of course makes great rope. I added a 4th, which I rarely use, but it gives some flexibility with recipes.
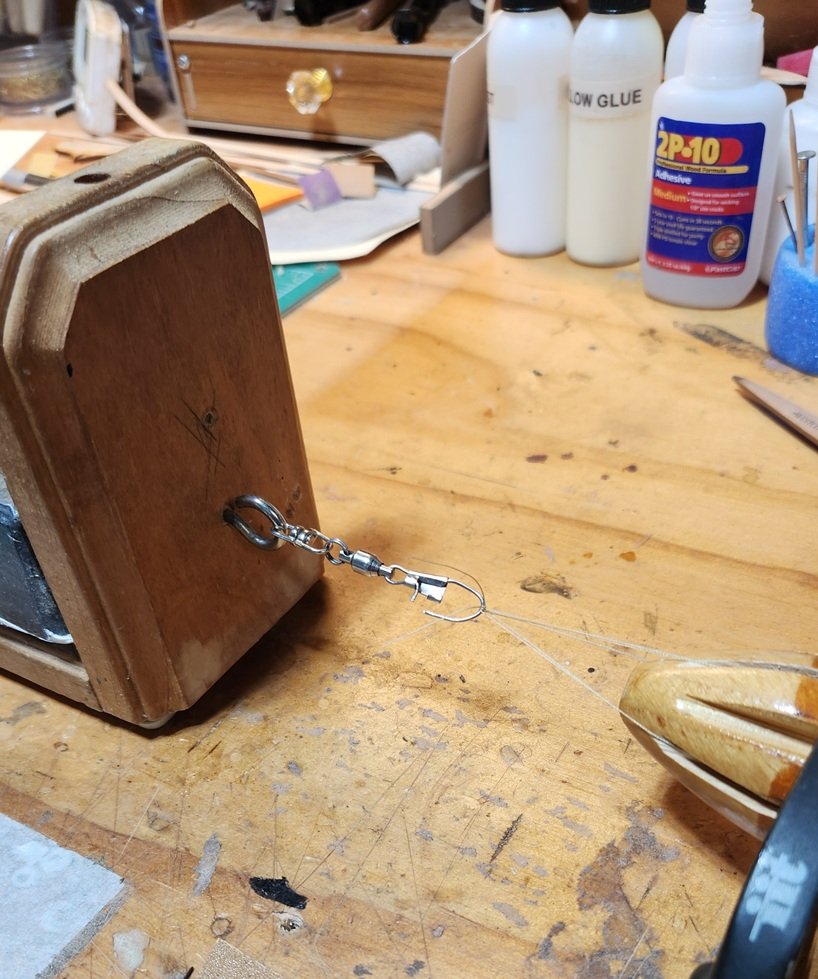
2. The Traveler. The traveler for my rope maker is essentially a sled, to which is attached the looper.
3. The Looper. The strands are all attached together on the looper. It will spin freely when the rope begins to lay up. I'm using a little Fishing Swivel Snap Ball Bearing.
4. The Topper. The topper keeps the strands separated while tension is put on the strands. Once the rope starts to lay up, it will slide toward the whorls, with the rope coming after it.

Here is the driver for the whorls. It is a DC motor with a 20V power supply. There is a variable speed, reversable regulator.
A good electric drill could be used, as with my original set-up, but I use this motor for other purposes.

My gearbox is made from Lego Technic gears. Those hooks (re-purposed eye screws ) have to be welded solid. If they move in the shaft you won't have even tension on the strands, which is essential for rope making.
I'm reluctant to provide detailed construction instructions or parts list, because I think other builders can come up with a more refined machine.
My goal is to show what can be done with simple parts, while achieving some very good rope.
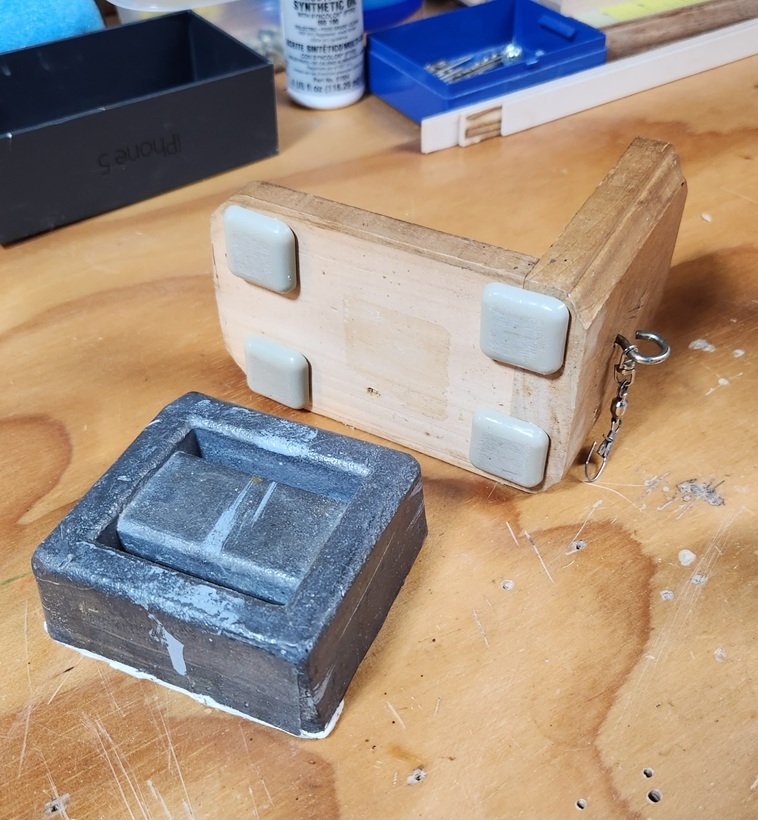
The traveler is on Teflon pads so that it slides easily. The diver's weight is necessary to keep it from sliding too easily. All to keep tension during the making.
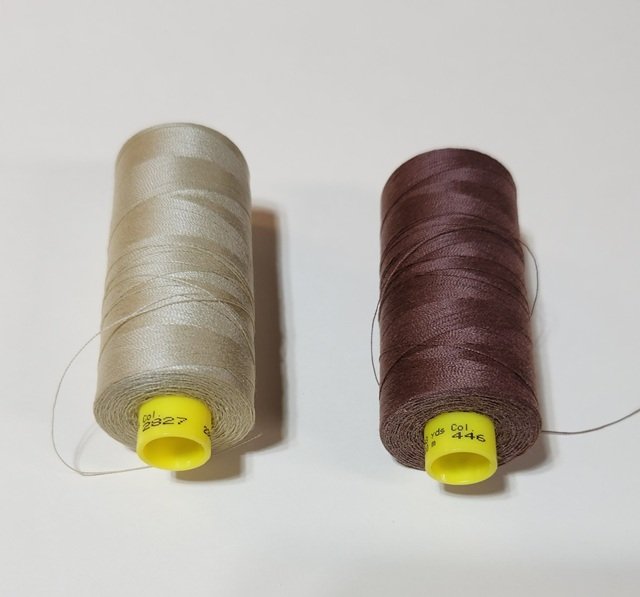
I use two colors of Gutermann polyester thread of various maras. For light colored rope I use 2827 and for dark 446.

Here are the various sizes ( Maras ) I have for making different size rope.
I use Chuck's rope size chart to help with my rope making.
I think there is also a recipe chart somewhere, but I have been making my own by hit and miss, because I may not use the same thread Chuck does.
To start making rope I tie my thread to the looper and run it to the whorls, looping back and forth.
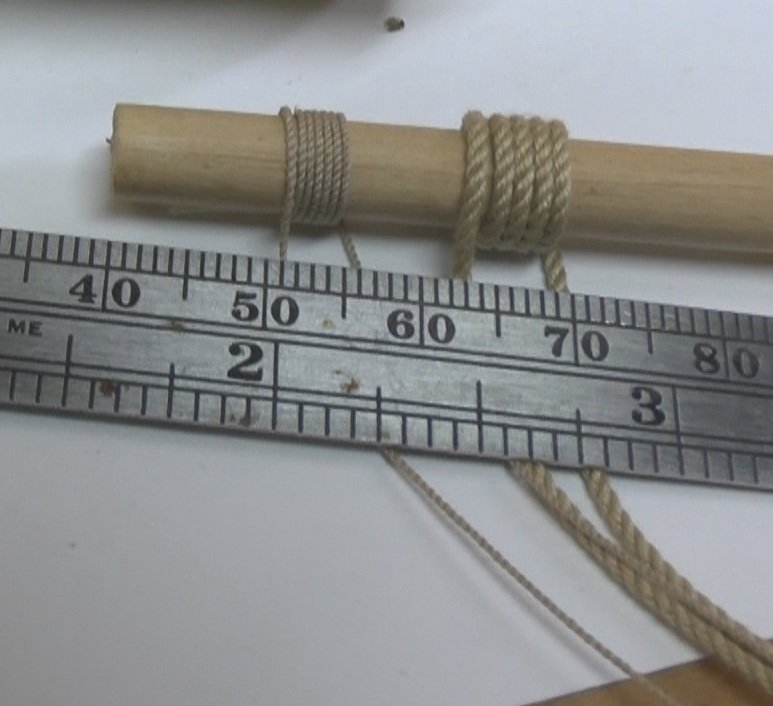
For this example I am using three doubled strands of Mara 100.
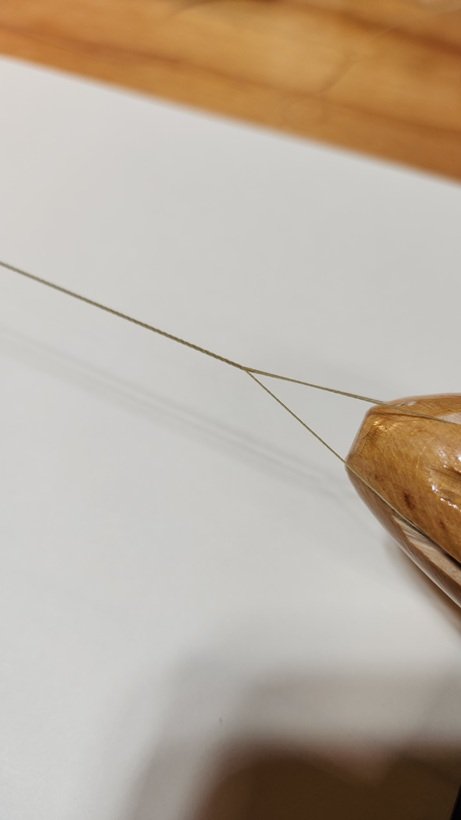
This is the looper end. The topper holding the strands apart prior to laying up.
Here is a little video to show the set-up before the making process. The strands are about 31 inches before the rope is made. The clamp keeps the topper from flipping over or falling out.
When you first start spinning the threads, you are spinning the opposite of the way the yarns in the thread are laid up. I have found this to be clockwise for the thread I am using.
This makes the threads sag a little, so you have to adjust the tension a little at this point by moving the traveler away from the whorls.
Again, this is something you have to experiment with early on as you learn to make rope with this type of rope maker.
A shot of the rope starting to lay up.

This is at the whorls after the topper has been removed. I cut the rope from the whorls, holding it to keep from unraveling, and wrap it round the center drive shaft eye.
I realize I could have provided more pics of the various stages. I'll try to respond to any special requests for more info.

Spinning the rope in the direction of the lay while keeping the looper from turning, 'hardens' the rope.
This is with the other end of the rope attached to the center eye, as mentioned above. The traveler will move toward the whorls at this point.
How much to spin it is trial and error until you get a feel for it. If you spin too much, the rope will start to gnarl up.

Here is the finished rope. Maybe a little over .5mm. The final length was about 21 inches, so about 2/3 the length of the strands I started with.
I don't know how this compares to the Rope Rocket, but I know Chuck makes 30 foot lengths of rope. For me that would mean starting with 45 foot strands.😄
I put this presentation together rather quickly, so I apologize if it is not that helpful. Please let me know if you feel I can add some detail or other information that would be helpful.
-
1 hour ago, Ronald-V said:
Don't you need quite a large room/table for using the ropewalk? That would be a problem for me...not yet at the point of needing the rope for the Sphinx, but something that i'm considering.
Ronald,
I make rope in 36-48 inch lengths. Any one line on a 1:48 is never longer than that. I don't have the Rope Rocket, but use a home made gadget that uses the principles of full size ropemaking.
This is my first machine I made when I built my first model in 1994. I have refined it a bit, but don't have any current photos.
Here is some of my rope. If you are interested in how it works, I can post some info over in the Rope Making section.
-
The Model Shipways Shipwright 3 Kit Combo Series with Tools, Glue and Paint might be a good place to start.
- Ryland Craze and robert952
-
2
-
This article by Chuck is invaluable for tapering your planks. Lining Off Your Hull Planking, Tutorial and Fan
It also talks about ' spiling ' to get the shape of the plank, but spilling requires you to have wider stock than uniform plank widths provided in most kits.
Spiling is not necessary if you use edge bending like @palmerit shows above. It is detailed in Chuck's videos.
This is an example from Glenn Barlow's Winchelsea. It was all done with edge bending. Glenn and Chuck use CA glue ; holding the planks in place with their fingers with no other clamping.
Like palmerit also said, each plank is it's own project.

Here is a picture Glenn posted of his scrap pile.
Here are Chuck's planking videos.
Another great resource is the Half Hull Planking Project.
-
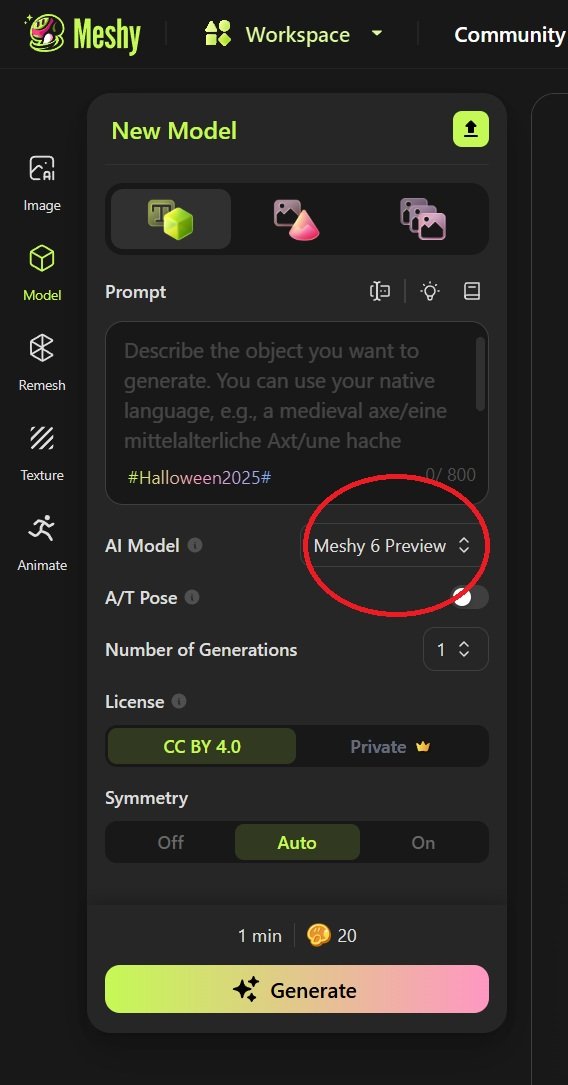
I too found it difficult to determine what you were getting and what it cost.

When you use Meshy 6, which is the highest quality you have to pay.
You can change the number to Meshy4 and get some free downloads, but you will see the quality is not as good.
Those who are into making this stuff can probably take the Meshy 4 stuff and improve it in another program.

This is the Meshy6 version.

This is the free Meshy4 version. It does some texturizing that may be useful in other applications. Depending on what you are making, you can probably get some useable stuff for free.
There is a limited amount of downloads. 10 Per month, I think.
I didn't find out what Meshy 5 does. It may be cheaper than Meshy 6.
-
-
-
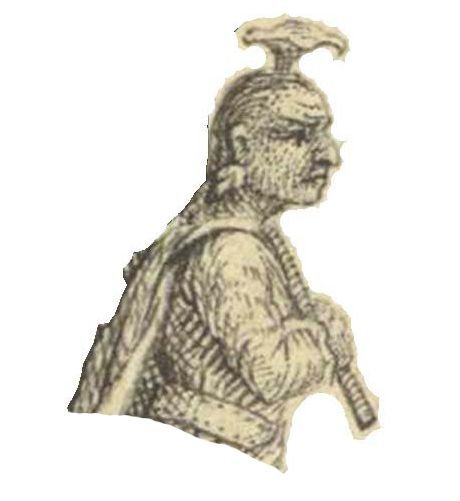
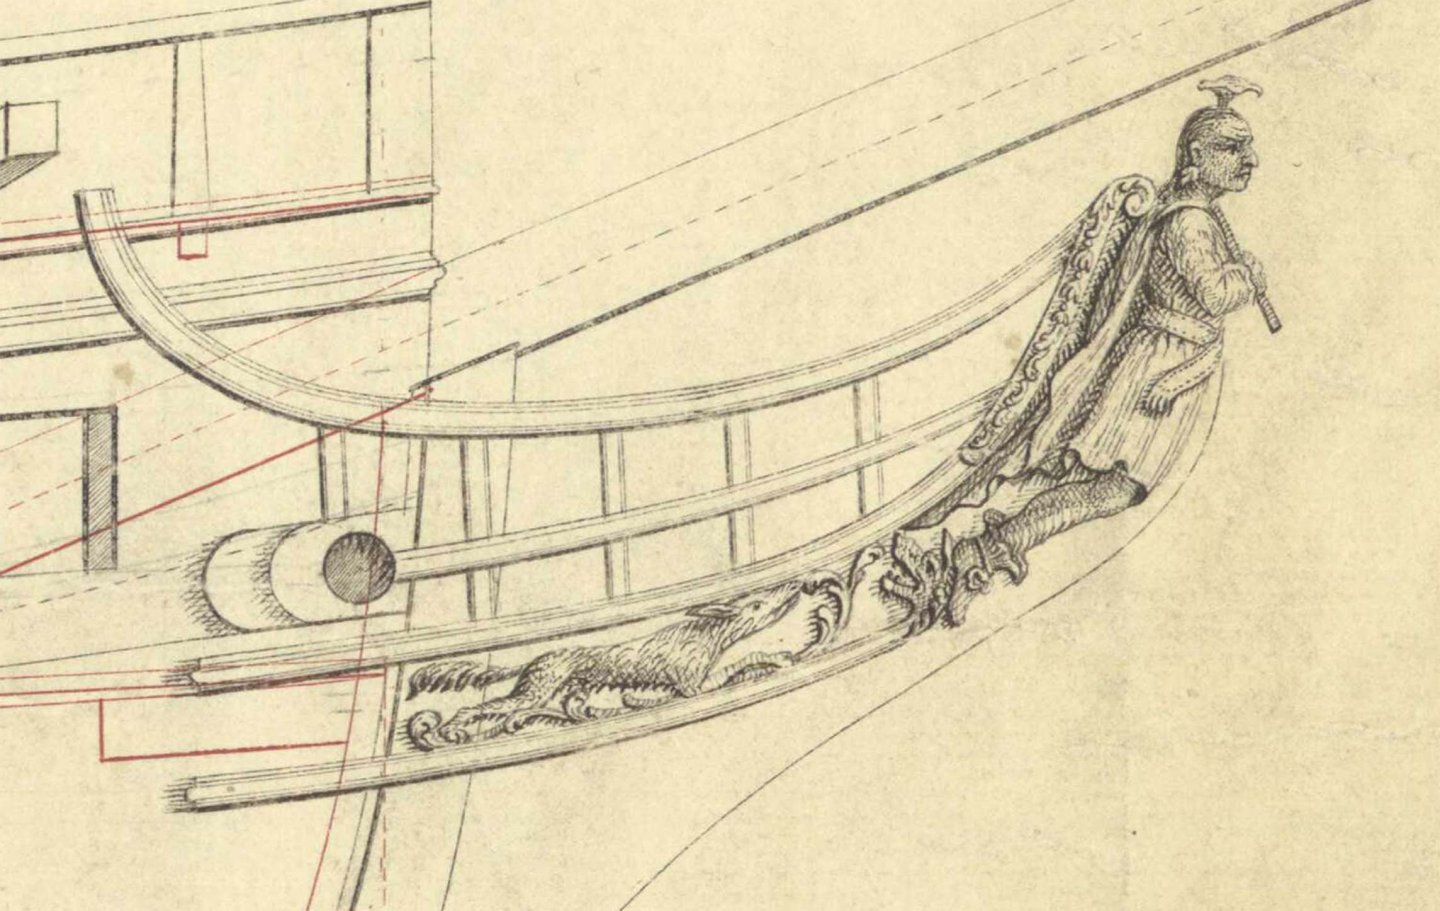
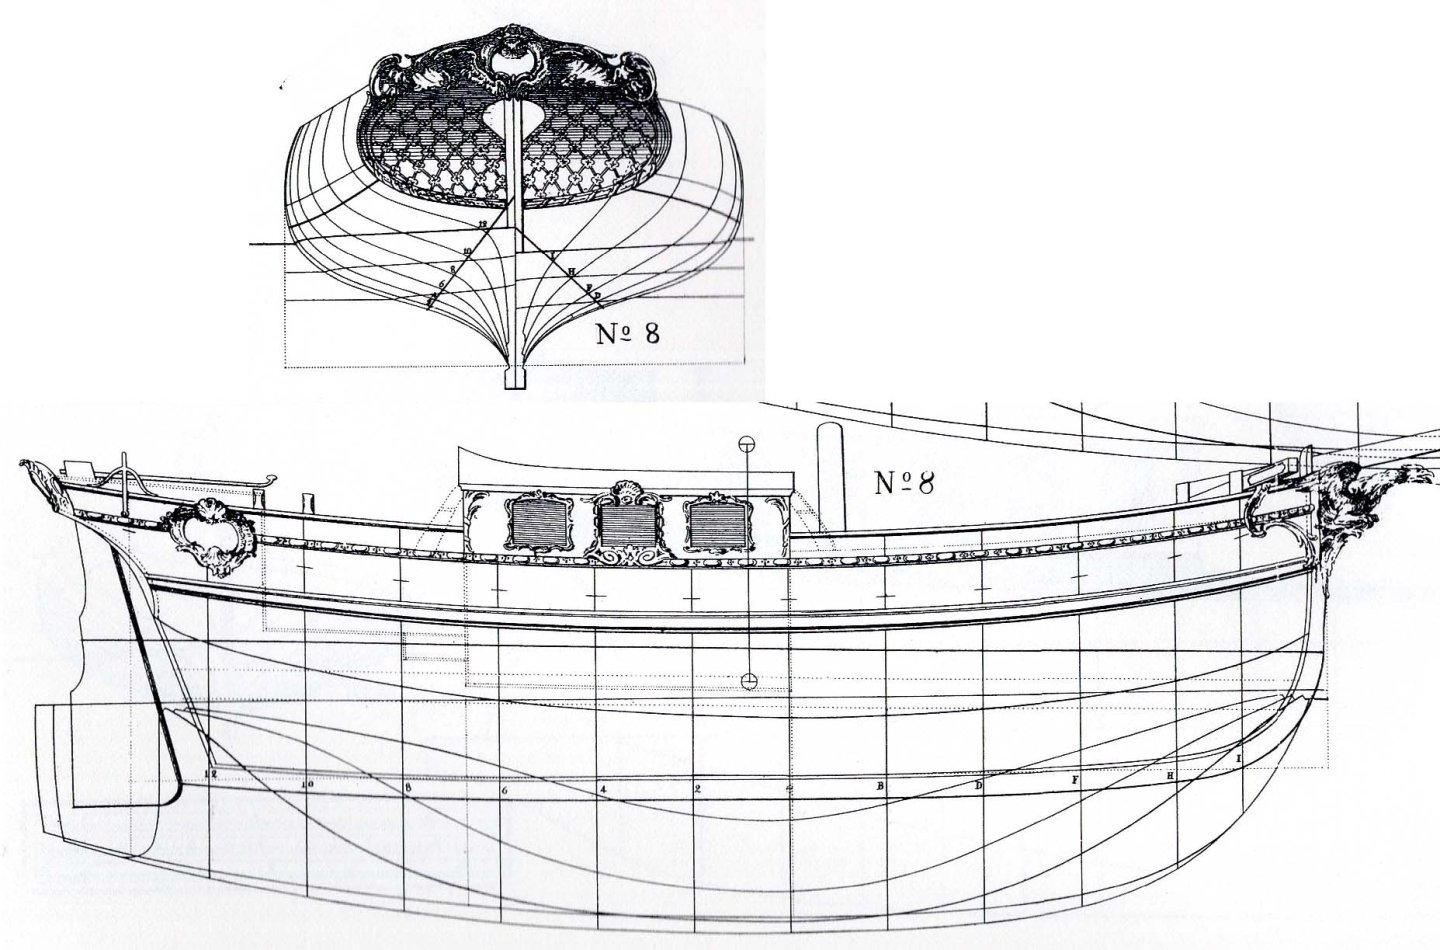
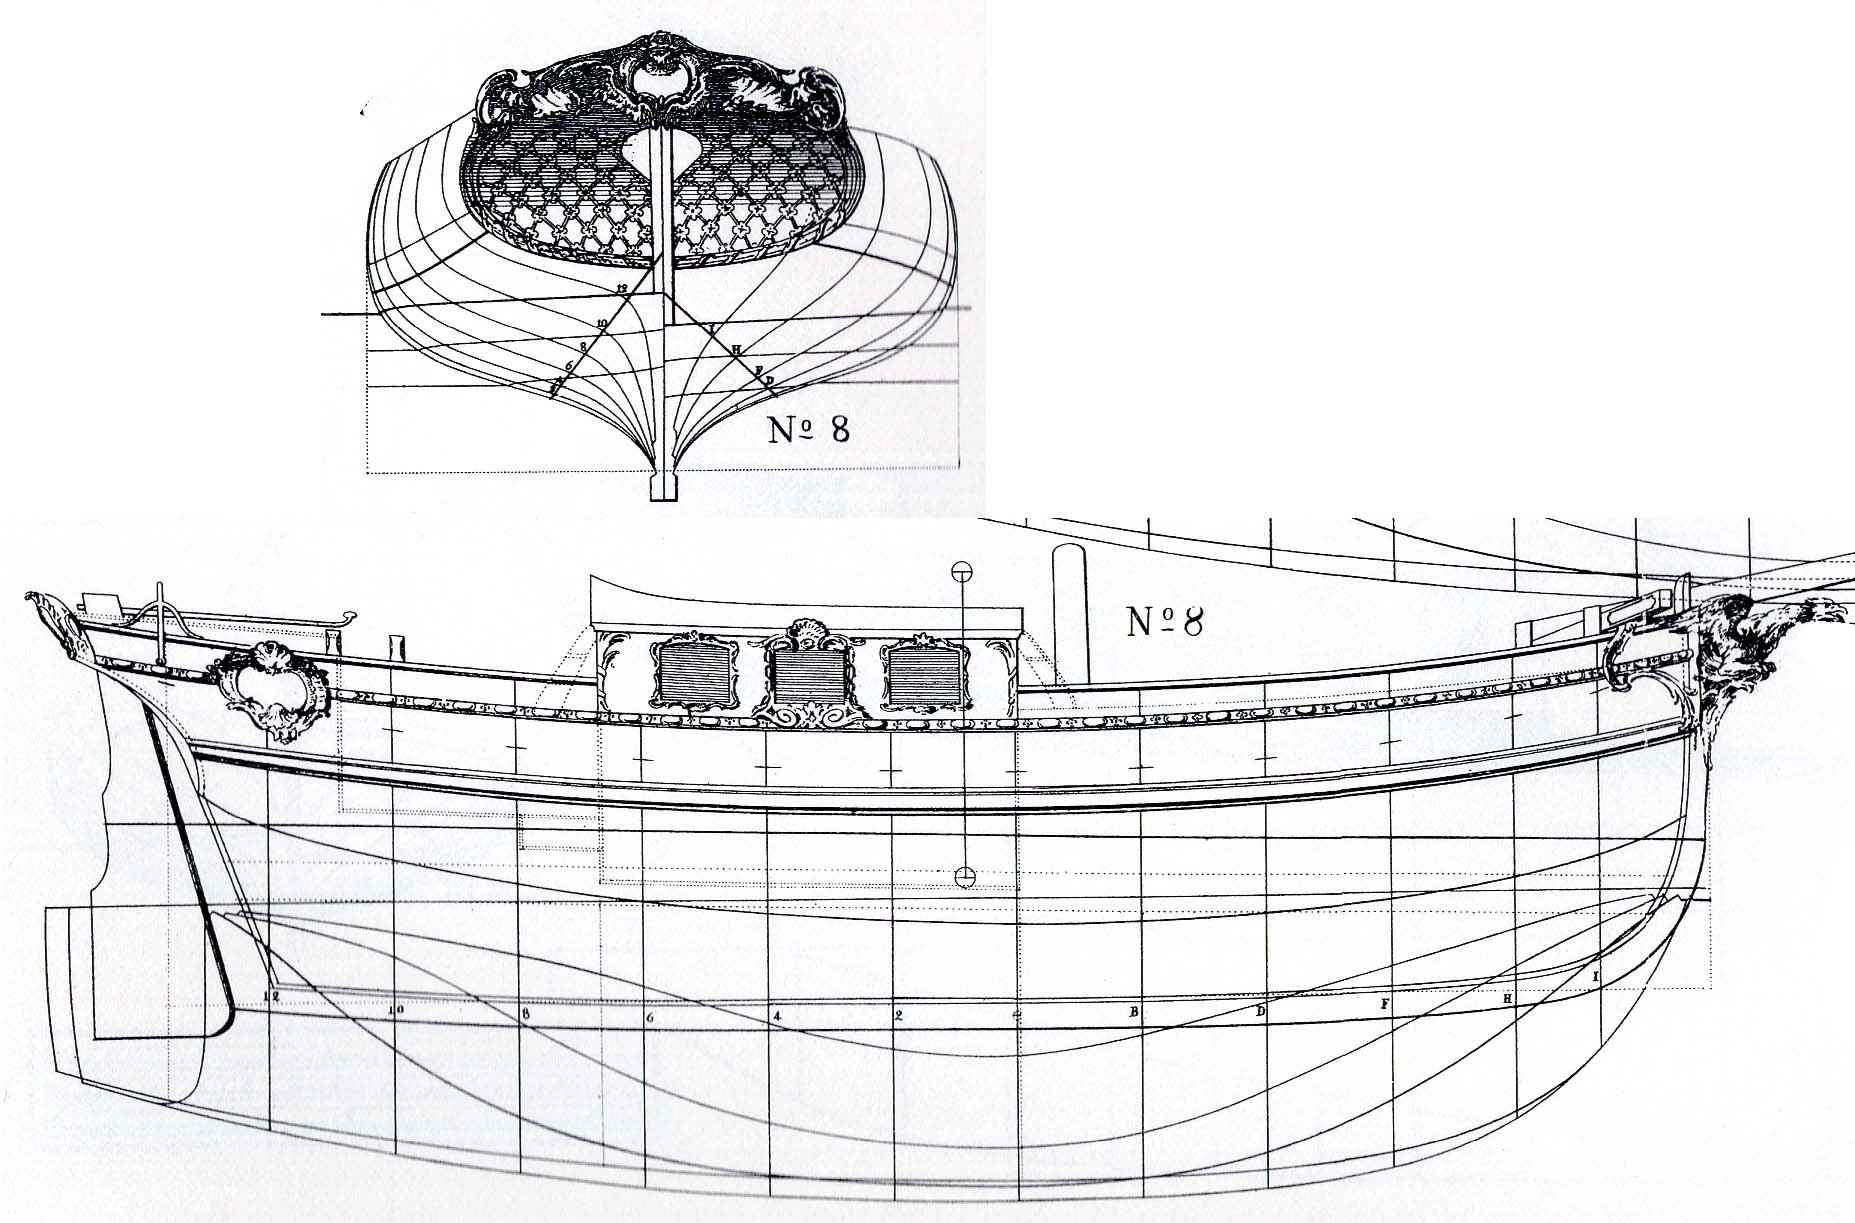
Here is my go at Meshy for a figurehead for Rattlesnake.
Here is the drawing from the lines at NMM
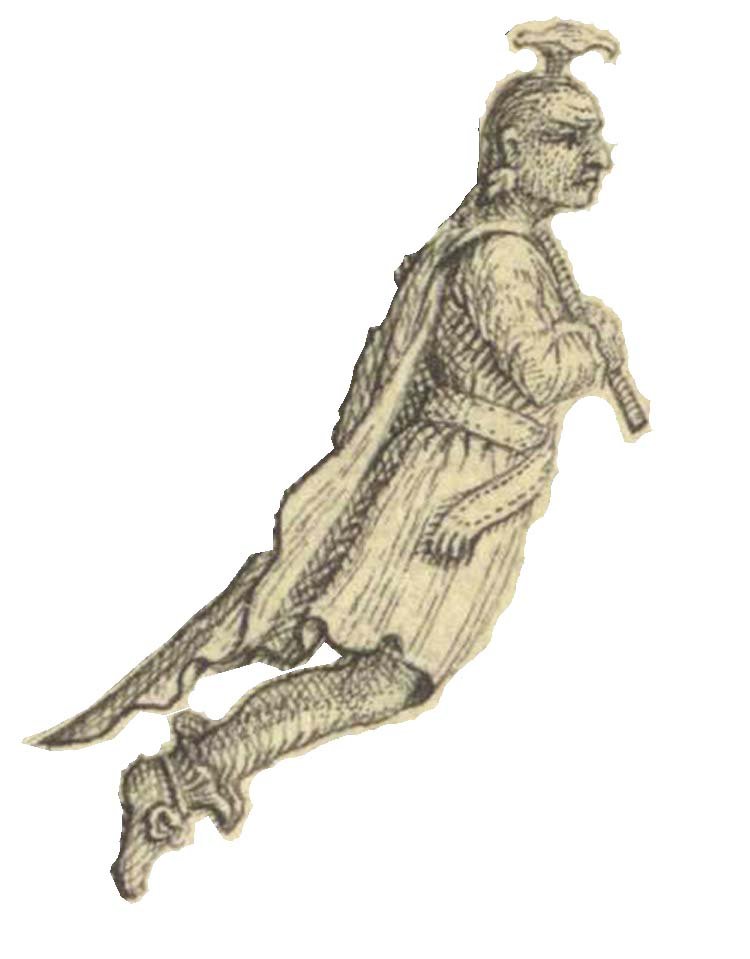
My trimmed up submission to Meshy.
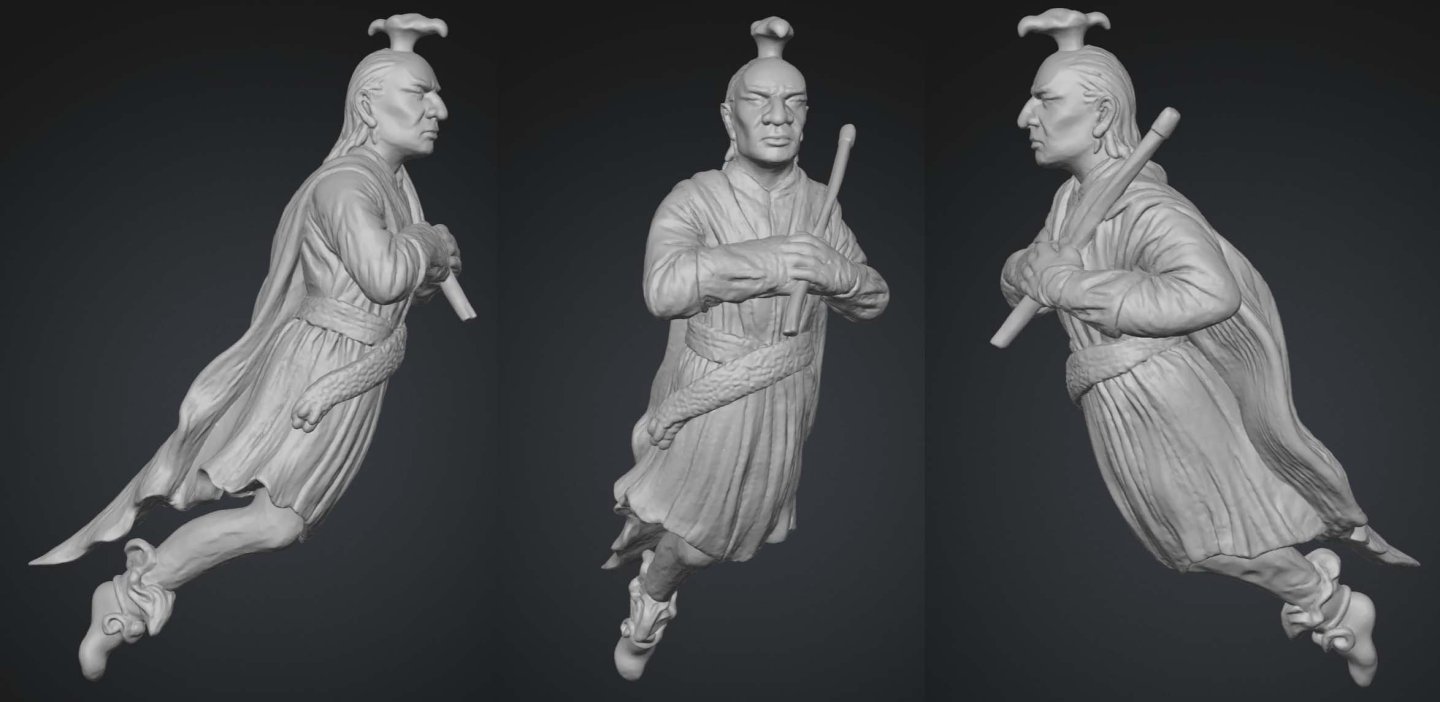
Here is the result from Meshy. Amazing how easy it is. ( Thanks Chuck! ) I can see how I can refine the original drawing to get some better results, like the end of the sash.
I only got one leg, but I see I left a "symmetry" option on auto, so maybe switching it to full "ON " would have given me another leg. But I also think this is something I can remedy in a CAD program.
My goal will be to do some CNC carving with a program like Meshcam, rather than 3D printing. But, I'm a long way from that.
If anyone building Rattlesnake from Model Shipways or Mamoli would be interested in a refined version of this for 3D printing, let me know and I will give it a shot.. Or feel free to use my line drawing above to make your own.
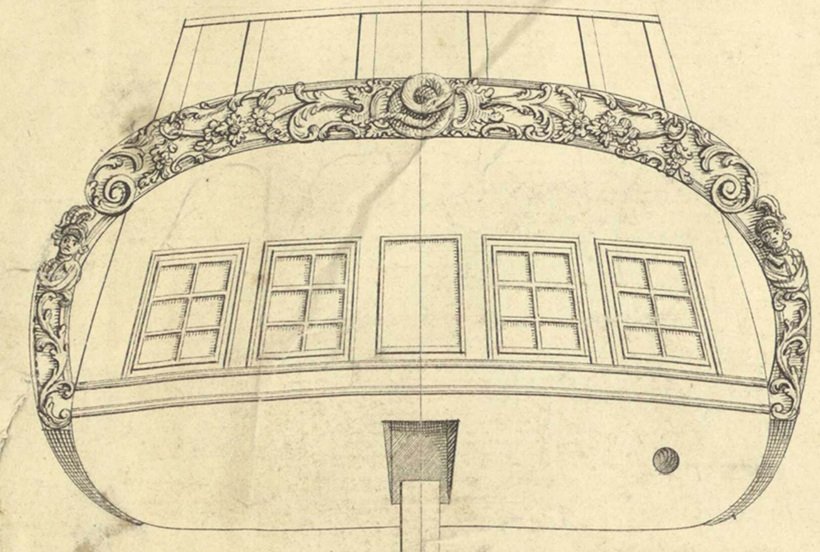
The trail boards and transom carvings will be another project and that will involve creating a base relief such as Chuck discussed above.
Again, this has been a great eye-opener and a priceless contribution from Chuck.
-
-
-
I have some padauk veneer as well as some dimensioned pieces. I really like the reddish orange color in my efforts to avoid paint.
Don't have anything to show for it yet.
I am using some bloodwood for the gunports on my rattlesnake.
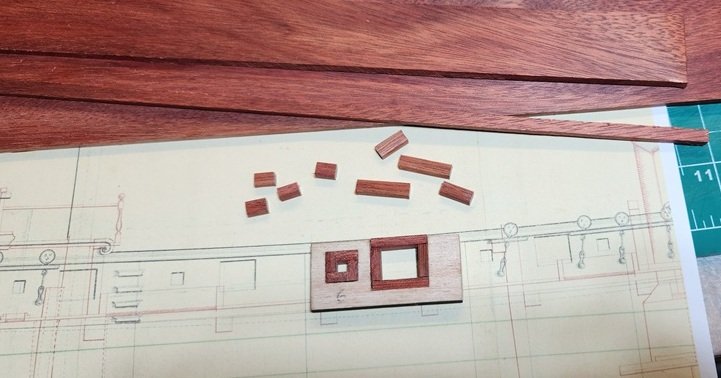
I don't find it particularly expensive in the quantities I might need for modeling.
-
21 hours ago, Olli Sukunimisson said:
Any hints or advice on carving this type of decor are greatly appreciated
There is a group project on carving that you may find useful.
The link is for tutorials and discussion, but you may find other useful info in the various logs within the group.
- Nirvana and Olli Sukunimisson
-
1
-
1
-
That looks pretty good.
Are you familiar with the Chapman drawings Gretel is based on?
There's a stern for you.
One little tip for that Mamoli casting. It's way too thick. It can be sanded way down without breaking into the carving.
My 2nd ( or maybe my 3rd ) Gretel is in the works, and your log is inspiring.
- Bryan Woods, GrandpaPhil, Baker and 2 others
-
4
-
1
-
40 minutes ago, glbarlow said:
Too bad Crafty Sailor went out of business, they had nice ones.
The ones from Crafty Sailor were from Falkonet. Don't know if they are still out there.
I agree they are the best I've seen.
- Canute, thibaultron and Ryland Craze
-
3
-
1 hour ago, chris watton said:
For future developments, I shall not be so quick to plaster it all on here. Once a development is near completion, ony then shall I announce it. I would rather not do this as I too get excited telling you guys, but it seems I have little choice.
How about:
" My next kit will be " HMS XXX " , with an image.
Six months later:
" HMS XXX is now available at Vanguard Models ! "
- Canute, BLACK VIKING, thibaultron and 1 other
-
4
-
30 minutes ago, BritByker said:
I'm interested in the tackle that were used to pull the cannon back inboard? They would be needed to initially load the cannon. They wouldn't need to be used after firing the cannon correct? The cannon recoil would take care of that? I'm wondering if the tackle was not usually attached, but only hooked up when needed?
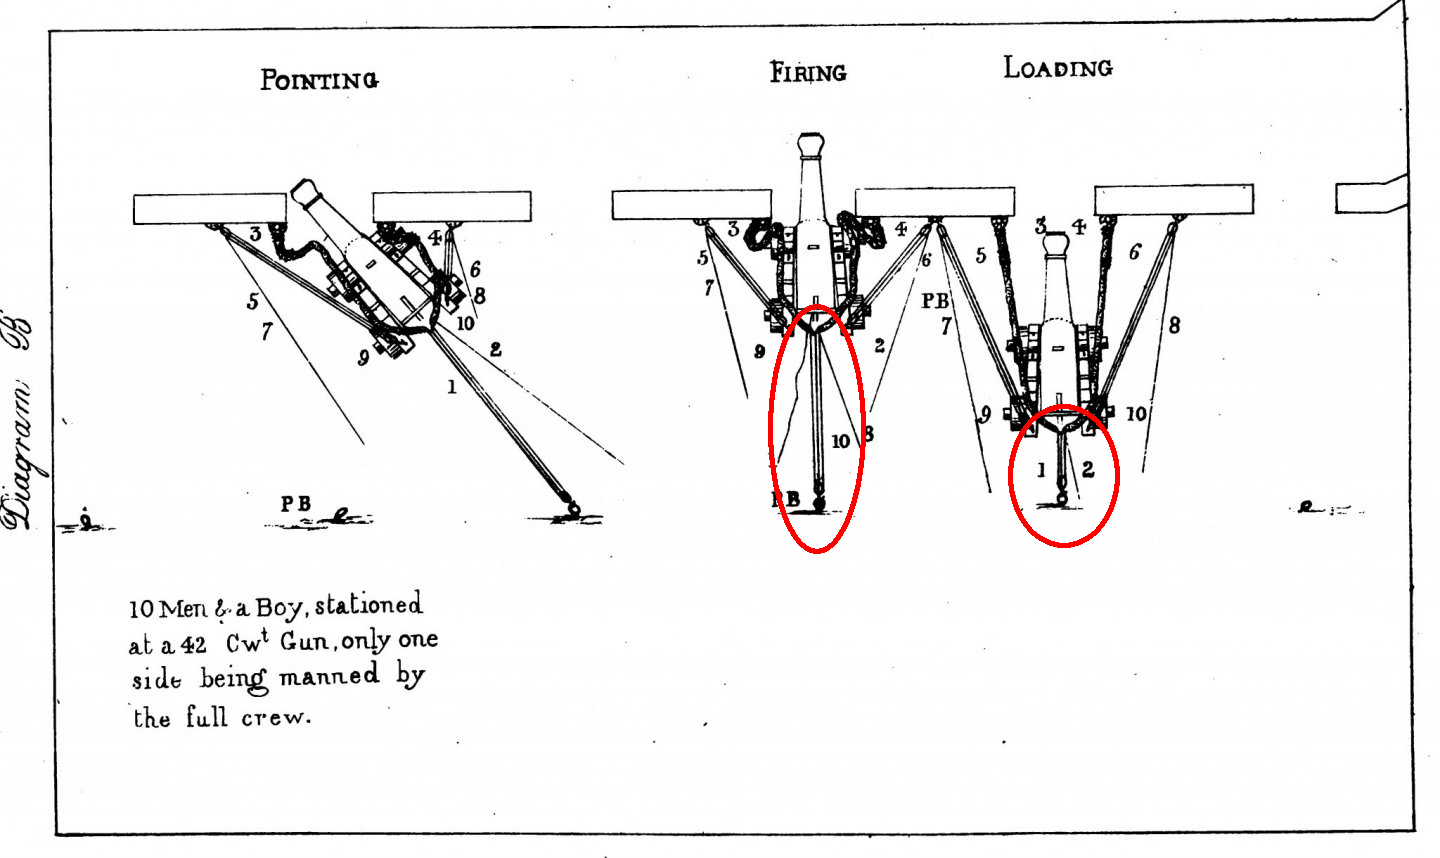
From DrPR's image above. The "out-haul" tackle is highlighted. It is not often shown on models , but you will see the ring bolt in the deck behind the cannon on a lot of models.
I would think it would be pulled taught after firing to keep the cannon from rolling on a rolling deck.
- thibaultron and cotrecerf
-
1
-
1


Wood Laser Cutting Service (Usa)
in Wood discussion...Where to use it? Where to get it? What types are best? How to Finish it?
Posted · Edited by Gregory
Where are you located?
Send me PM if you want to keep it private.