

Stevinne
-
Posts
296 -
Joined
-
Last visited
Content Type
Profiles
Forums
Gallery
Events
Posts posted by Stevinne
-
-
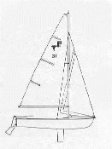
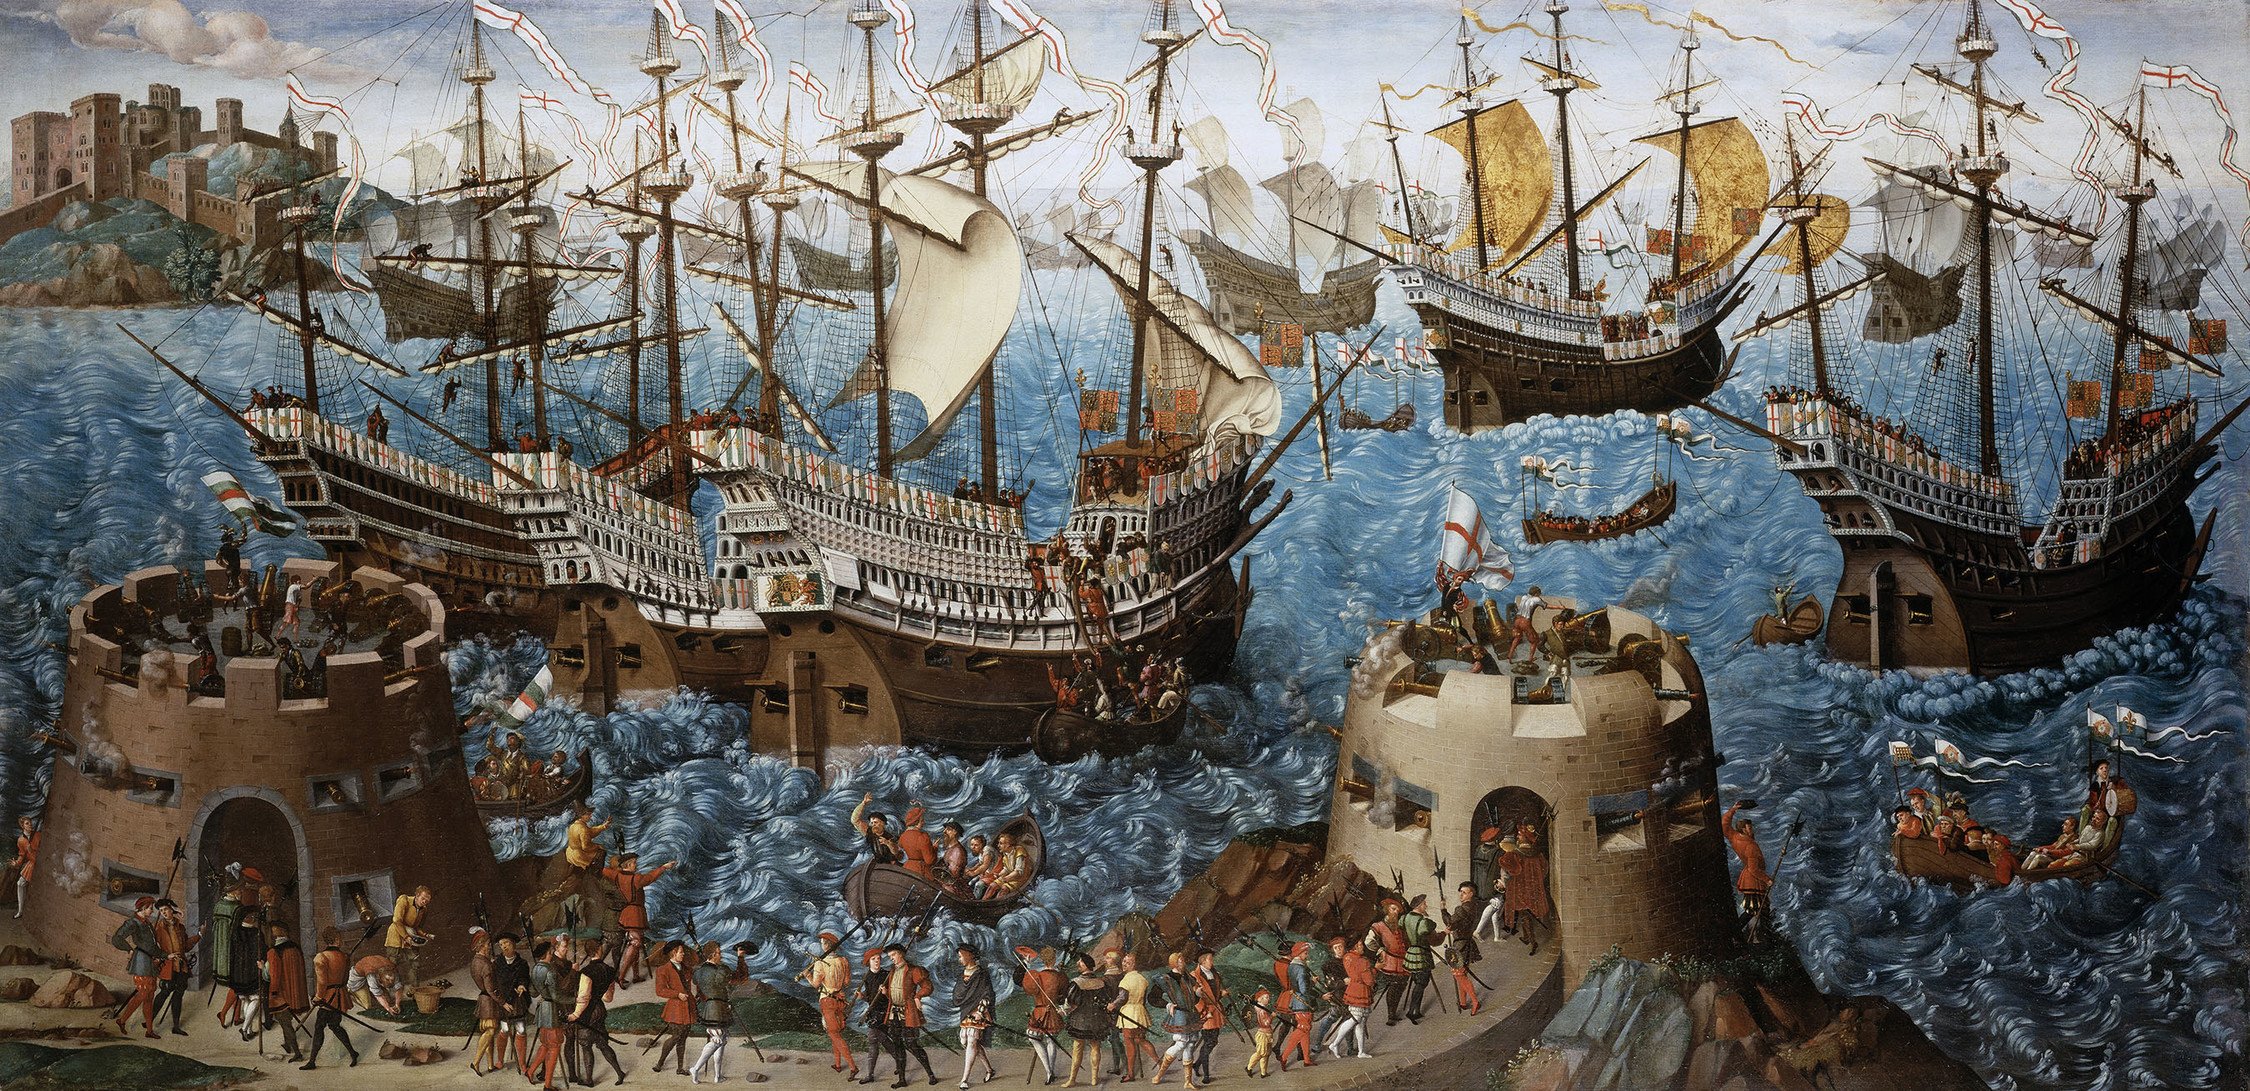
I'd think the forecastle guns were either swivels or what were known as hailshot pieces - light cannon almost like large guns that the shooter would hold while resting the front of the barrel on the rail. This would make sense since some hailshot pieces were found on the wreck. The Anthony Roll and this painting of Henry's court heading to France for the Field of Cloth of Gold show the ports on the focsle, but don't have any guns protruding from them.

- GrandpaPhil, mtaylor and Archi
-
 3
3
-
5 hours ago, Baker said:
I don't think I'll live long enough to experience an event like this 😇
I remember reading somewhere, maybe in response to questions on a Facebook post by the MR museum, that there are currently no plans to uncover and raise more of the remaining parts of the ship. I think the last thing they raised was what remained of the stem post, but that was decades ago. It is a shame, since it might settle the debates about what the ship looked like in the end once and for all.
-
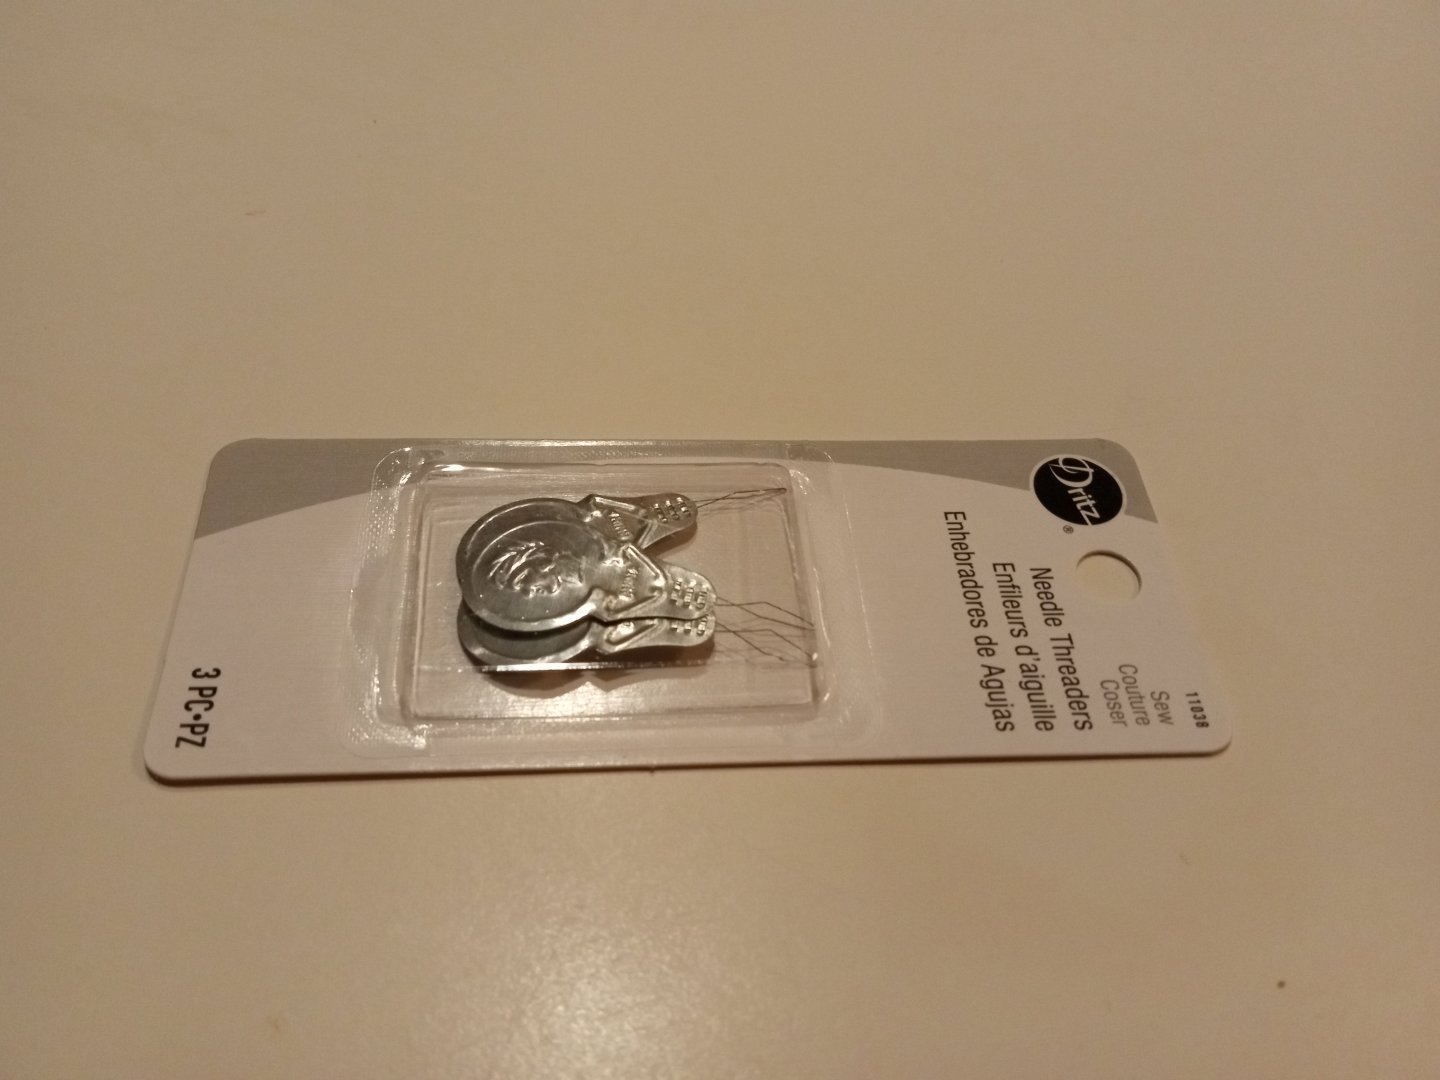
I've started adding fore and back stays, but early on into the process I ran into difficulty. I don't know how many needle threaders Sir Francis Drake took with him when he sailed the Golden Hind around the world, but at $1.50 per pack, for $10 today at Walmart I got enough of these bad boys to hopefully last me a decade or so.
- Baker and GrandpaPhil
-
2
-
23 minutes ago, tartane said:
What I yhink very curious is the enormous height of the fore castle. I can't imagine that a shipbuilder dared to go that high and indeed the ship seems to have tilted as a result.
It also catches a huge amount of wind.
Isn't the drawing that exists of it a very exaggerated representation of reality? That was often the custom at that time.
Wouldn't it be advisable to reconstruct the height to the human scale? So the deck heights do not exceed 170 cm, then with those three decks you get to a height of 510 cm plus the beam thicknesses that were still in between. Then it will be at most 60 cm higher. I would never go higher than 510 cm. But maybe that's also the height you calculated yourself because I don't know the scale exactly.
Constant
Back when MR was first constructed, that was the way warships were built. Cannon, being hard to aim and slow to load, the tactics were to fire a broadside, get close and board and generally, having the highest "castle" at the fore or stern helped you win. It wasn't until the Armada that the English pioneered fighting in lower and more maneuverable ships. That change came along with the change in tactics that called for fighting artillery duels instead of hand-to-hand combat. One of the debates about MR is whether or not they cut her down during the course of her career as they rebuilt her and increased her compliment of heavier guns.
-
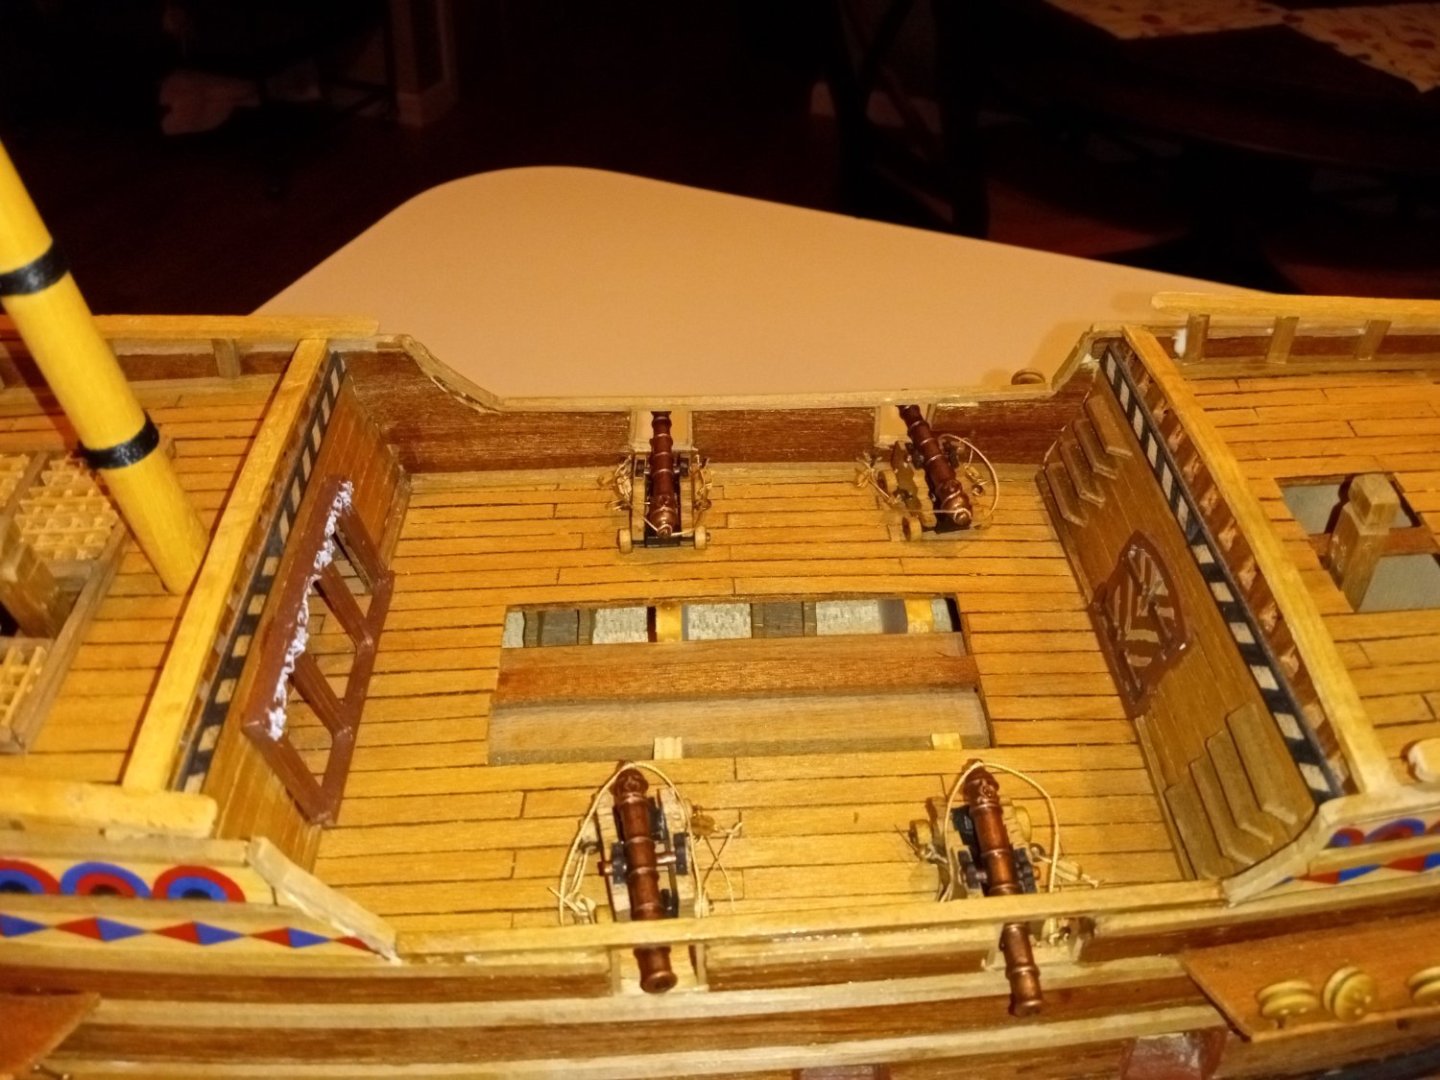
Been a while since I posted, but I've been slowly and steadily working. Got the sticks and deadeyes in her and rigged and installed the cannon. Those were a pain as I left too much wiggle room between the blocks and the brass pins that anchor them to the deck. Looking forward to getting the shrouds on her.
- JacquesCousteau, GrandpaPhil and Baker
-
3
-
2 hours ago, allanyed said:
The wood will shrink as it dries and could take away the tight fit against adjacent planks. Some species are worse than others, but this is can be a problem with most species. I have formed wet wood on the model in the past but let it dry before gluing. I stopped this for the most part as it needs to be clamped in place and clamps often leaves dents in the wet wood that remain even once dry. Have you studied the Chuck Passaro videos on marking out the bulkheads or frames and edge bending off the model? It is really easy to do and never a worry about needing clamps or pins as the finished piece of planking will have the right shape assuming it is properly tapered as well, especially near the bow. A well made pre-shaped plank can be held in place with finger pressure with the glue of your choice for less than a minute and is done.
Allan
I haven't watched any of his videos, but it sounds like I should. I haven't encountered any issues with shrinkage yet - at least with the second layer, but that could just be luck. I have had fit issues with my first run of planks, but I've always attributed that to my lack of skill with an Xacto knife and pencil. Maybe there was more to it than that. Thanks for the heads-up.
-
2 hours ago, allanyed said:
Hi Stevinne
Can you explain what this is and post a pic or two?
Many thanks
Allan
Unfortunately, I'm not planking anything right now. I usually soak my second layer wood before working with it, because I feel it makes it easier to cut and to also to bend. My plank shaper is basically a soldering iron with a big metal bulb in place of the soldering point. I got it on Model Expo many years ago. It came with a wooden jig for bending planks off the ship, but I usually don't use it. When placing the second plank I apply the glue while the wood is still wet and then run the heated bulb back and forth over it until everything dries. I find it forms a solid bond.
-
I usually use a combination of CA and carpenter's glue on the second planking. I use a small amount of ca at points to start the attachment, then a run of carpenter's glue. I run my plank shaper over the glued section once it's in place - it speeds up the drying process. Then I will use another dot of ca, some more carpenter's glue and continue the run. I find that for me, this works well, especially when I am trying to line up the planks along the curves of the bow and stern. One issue I find with CA and the second-layer is that if you get any spillover onto the exterior, it is very difficult to remove without staining the wood.
- mtaylor and Knocklouder
-
2
-
-
1 hour ago, Chuck said:
Stevinee...yes you are correct. But it got out of hand. We thought it would be used by members to showcase other hobbies....The gardening....maybe astronomy or photography among birthday greetings etc. Maybe a few fun topics. But as with all things a few bad apples even after being warned used the forum for their own personal facebook site. Posting bad jokes and memes and minions....by the thousands.
That is never what we ever thought it was going to turn into or become. A distraction. So no harm done. There may be a few members that are so put off by its removal that they leave....but remember they never posting anything else but that stuff. So no great loss. I hope this rebalances the site and maybe in the future we can bring it back. But I fear it would be impossible to police and moderate properly. There will always be somebody that says his love of funny traffic signs is his other hobby and just as important as someone's other hobby of gardening. And thus we will always end up with talking and dancing cats....bad jokes and quirky "doctors office moments" or "your funniest cooking mistake...the list is endless. That is called facebook.
Back to model building!!!
Chuck
Chuck, Thanks for the quick and reasoned response. I hadn't realized they had been asked to stop and kept doing it nonetheless. Makes a lot more sense now.
- mtaylor, ferretmary1, davyboy and 2 others
-
5
-
I never visited the shore leave section, but this is what the description was when it opened:
"If you haven't noticed, we've added a new topic area: Shore Leave.
From the pinned posts there about it:
This is the area that many wanted, and perhaps didn't even know it. If your topic is nothing to do with the world of ships or ship modelling, then here is the place to post it. General chat, Birthday announces etc.
No politics. No religion. No inflammatory topics.This area can be used for things like "visits to other members", non-nautical type vacations, basically anything anyone wants to share but with the caveat that it will be heavily monitored for taboo subjects.
Want to discuss cars? Airplanes? The great vacation? The wedding? No problem.
Lastly, we will periodically clean it out of old posts and topics.
This forum was created in order to cut down on the off-topic posting in our other areas of the site. Please post everything else here and in order to preserve the model resource for all of the build logs, techniques forums etc and make them easier to navigate and read through. Thanks Don't hesitate to share your experiences with all of the friends you have met through the site!!!"
While cat memes (how do you pronounce that?) weren't specifically banned, it sounds like the problem wasn't folks were posting stuff that was offensive or not what members were told the forum section would or would not accept. I also don't recall seeing any posts decrying the state of the forum. It seems just a case that what was posted was what didn't fit with someone's idea of what the forum should be. Now get those kids off my lawn!
- BobG and Keith Black
-
2
-
-
The Alan Lewrie series by the late Dewey Lambdin is fun, light reading with good naval battles thrown in. Not nearly as realistic as Patrick O'Brian but very enjoyable. If weight is an issue, I'd recommend checking out the Internet Archive, a free online library with loads of books, though I believe you must have an Internet connection to read, as they work as a regular library, with only one person allowed to check out a copy at a time.
-
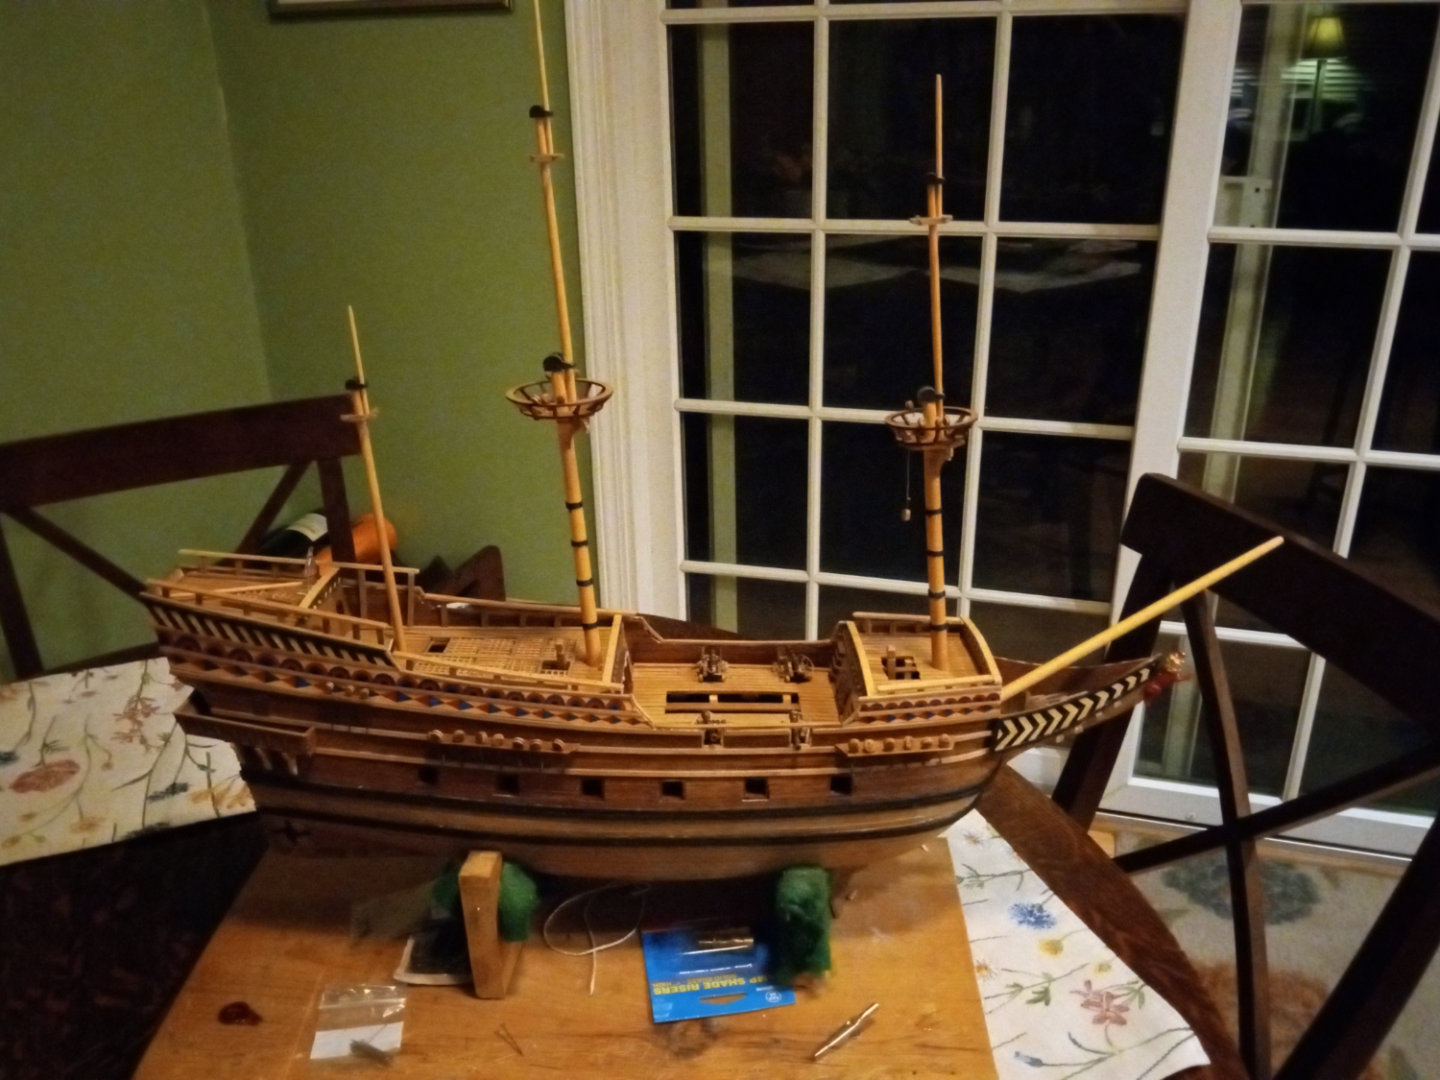
A bit more work on the masts. I used a technique I learned wrapping the guides on my bamboo fly rod to make the mast wraps. The crows nests went together easily, the support pieces were white metal that I painted brown. The masts were stained with pecan stain. Nothing is glued in place yet. I'm waiting on some backing links for the chainplates, since the plates that came with the kit are too short. I'm not sure if I'll use them and the backing links or just create my own to use with the backing links.
-
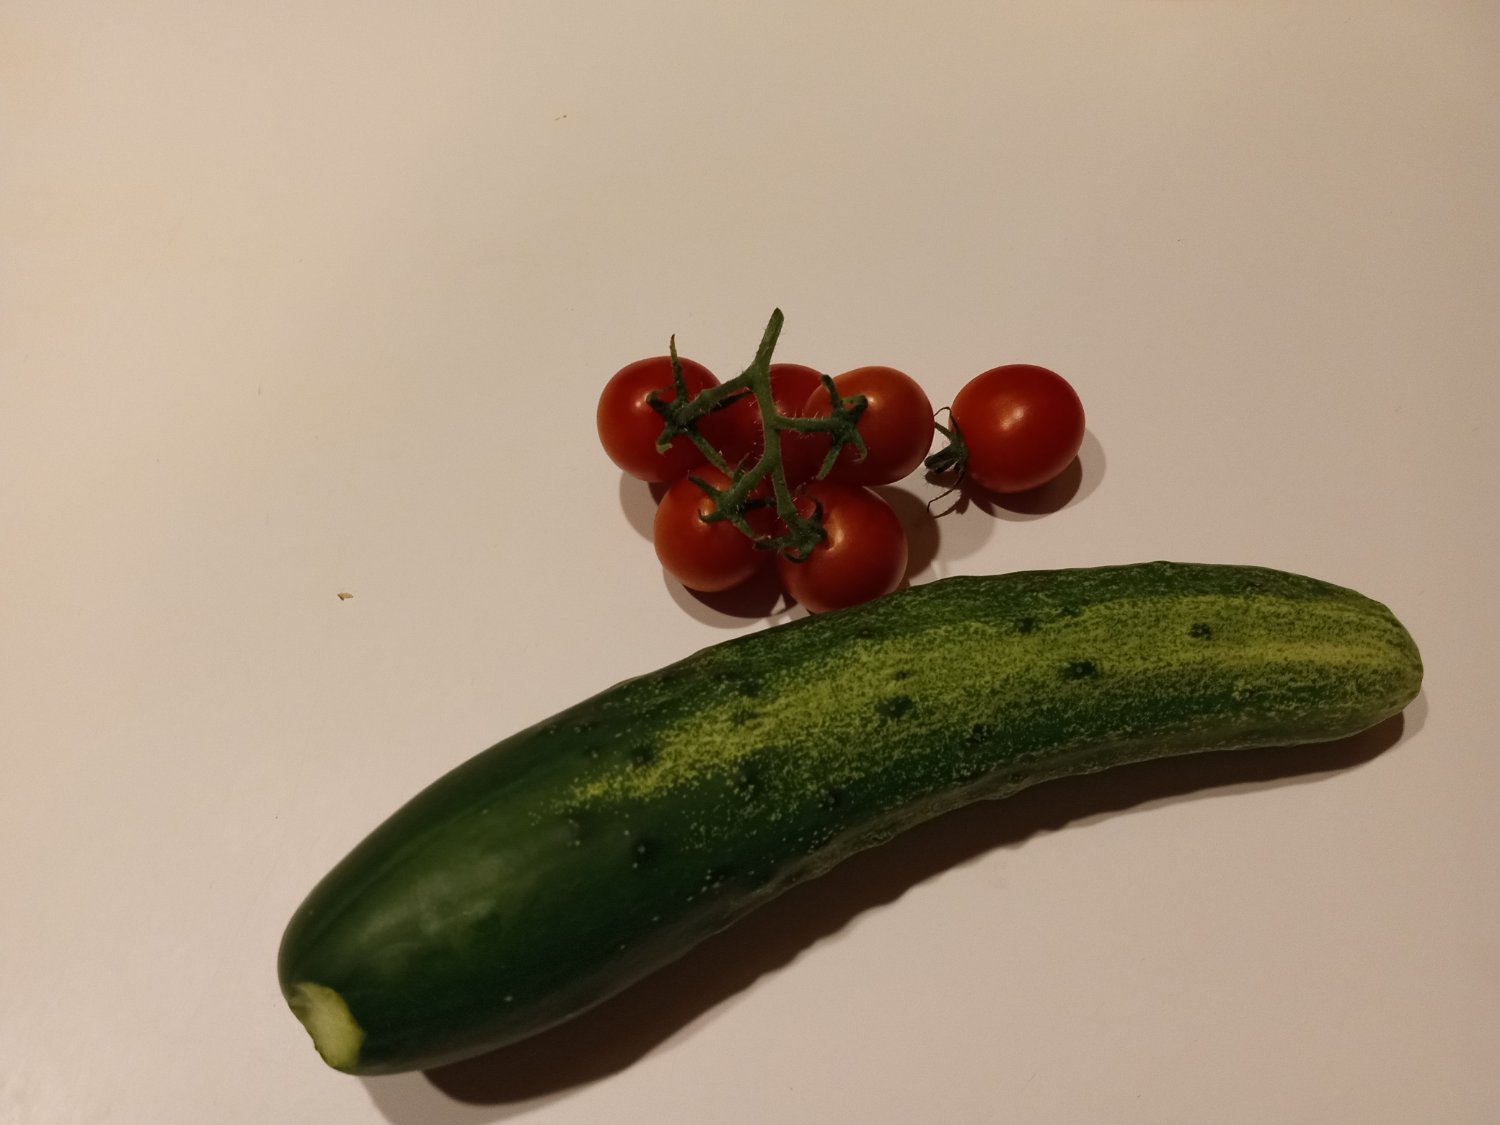
Tapering masts and yards is one of my least-favorite aspects of ship building. This time, however, I used a mini-plane that I purchased about a decade ago to get one of my Mom's doors to close when the wood swelled during summer. That really got the job done, with me then chucking the mast into my battery-powered drill and using some 100 grit sandpaper to smooth out the plane lines. The mast caps on this kit are cast metal, so there's little opportunity to widen the holes with a file. That's meant that the top masts are tapered at both the bottom to fit into the cap and at the top. I still need to work on the mizzen top before staining and adding some rope bindings. Tapering masts is so tedious, I took a break from my efforts to pick the first salad ingredients from this year's garden. Starting plants from seeds usually means my garden is running a little late each summer, but it gives me great satisfaction to grow my own. This is the first year I tried cherry tomatoes, but it looks like we are in for a bumper crop, so I'm pleased.

-
-
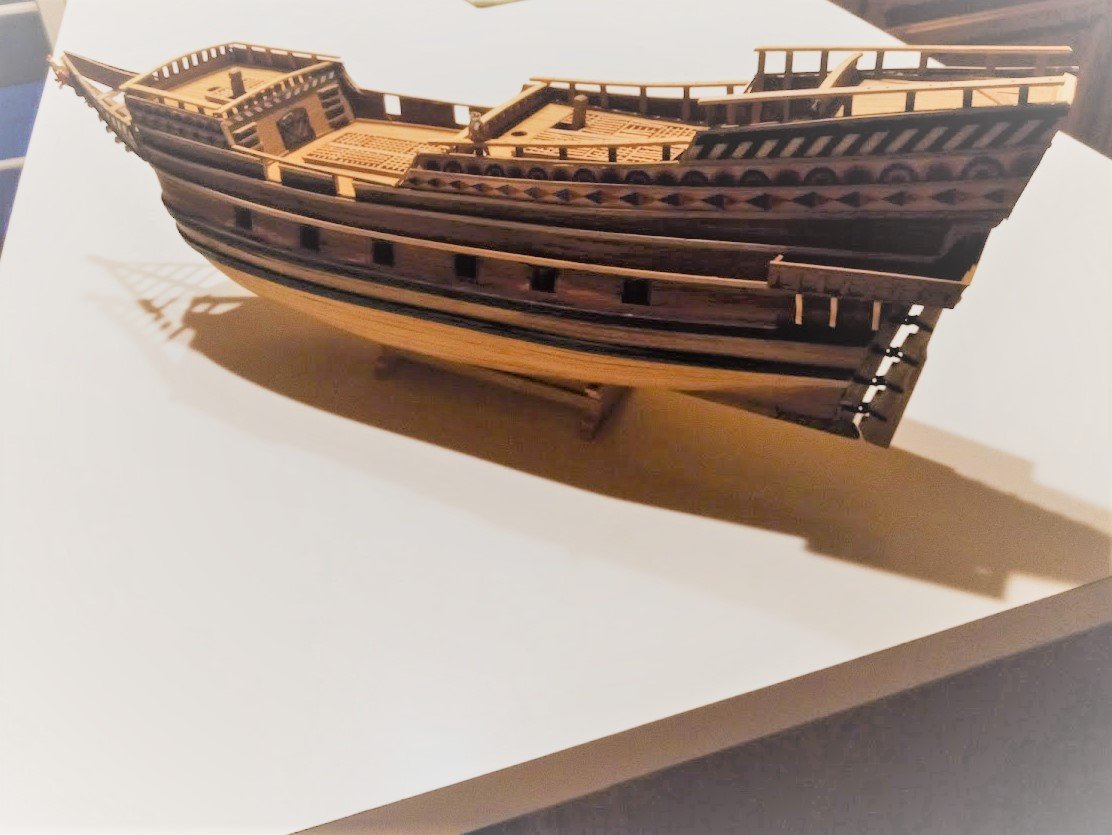
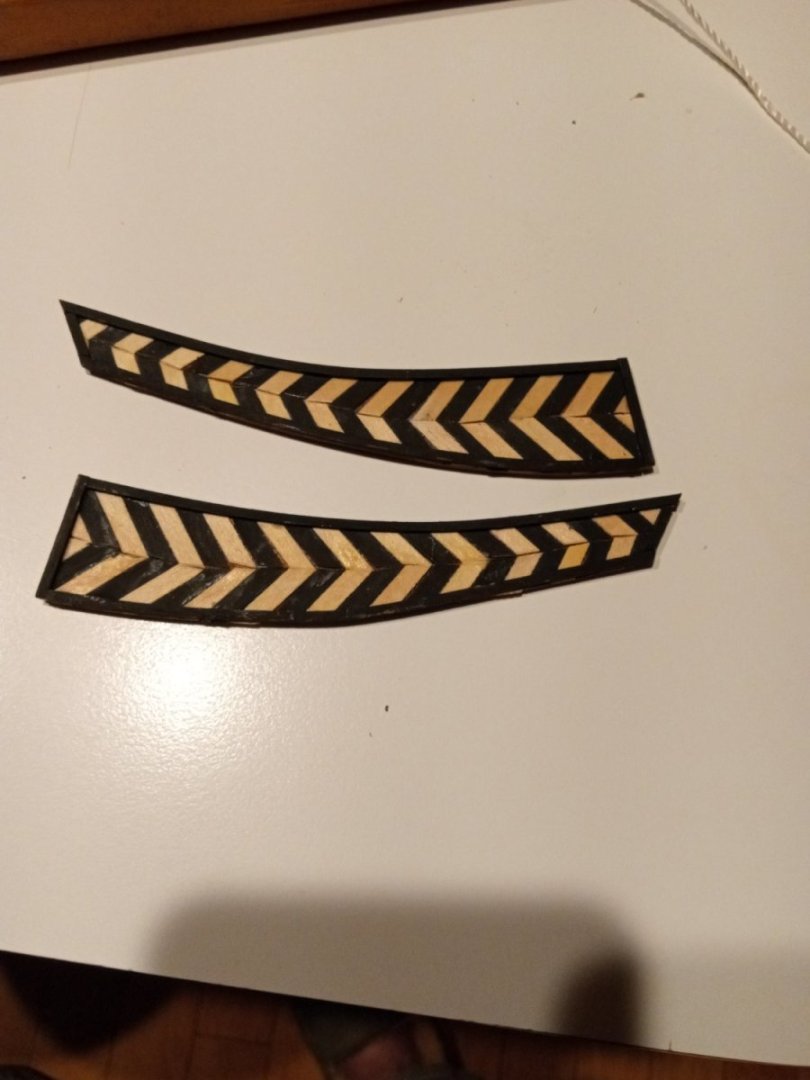
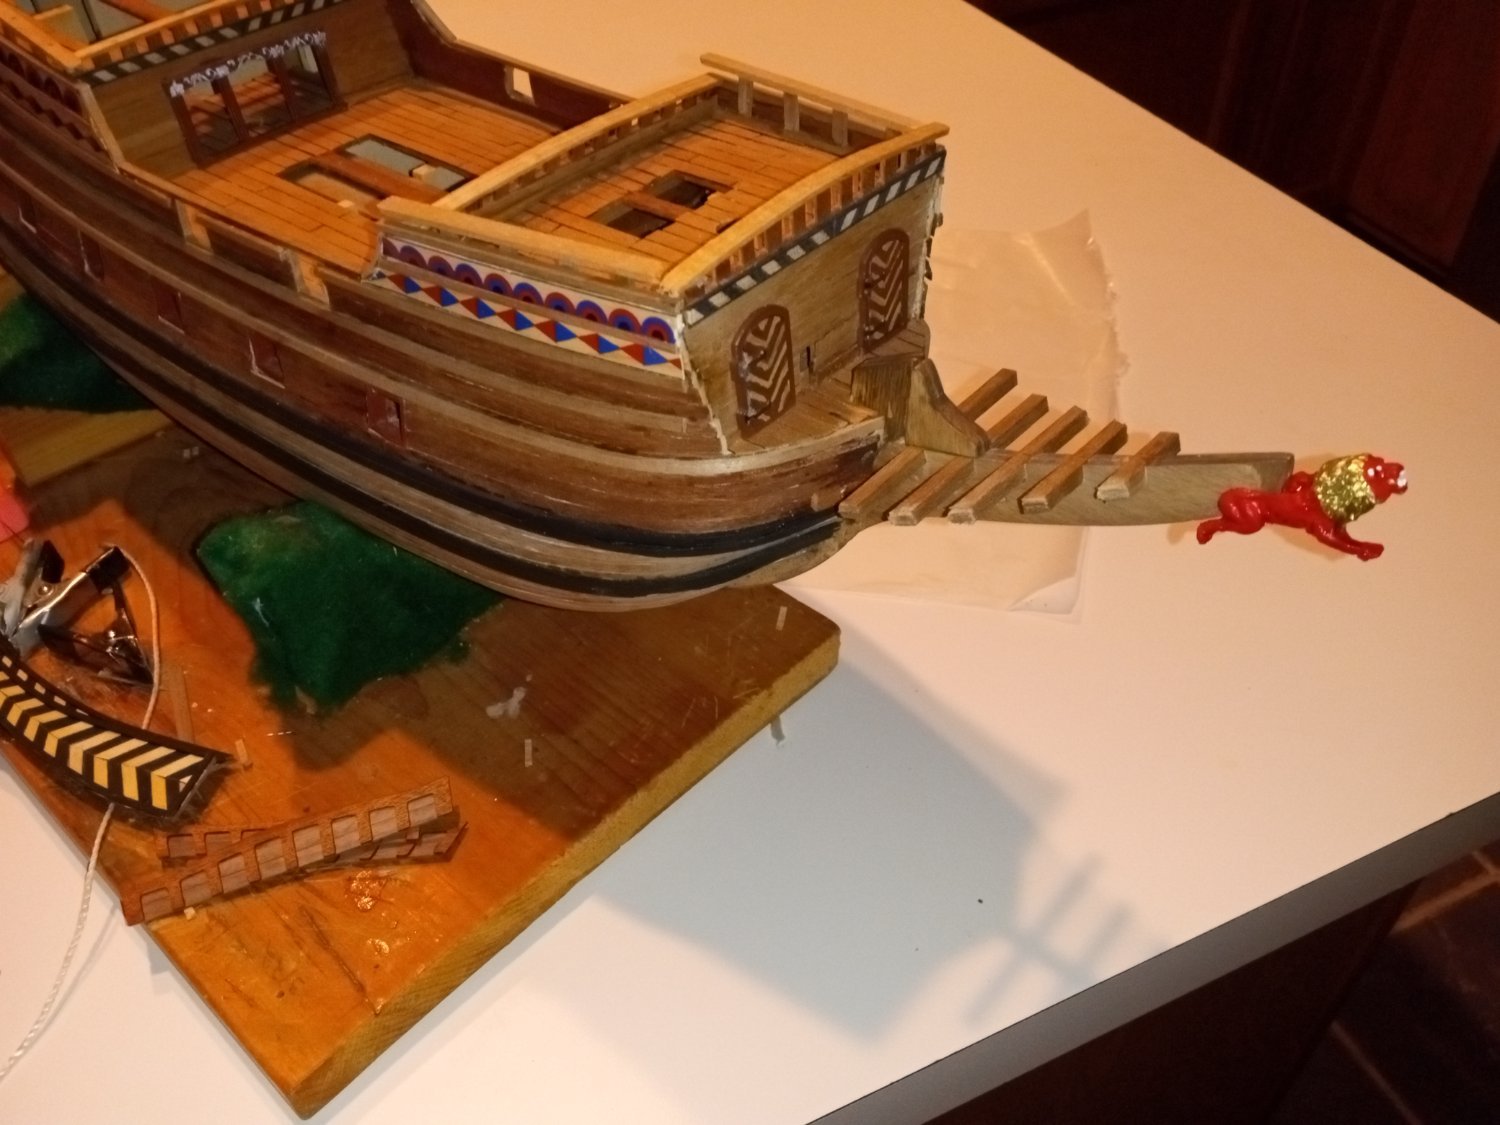
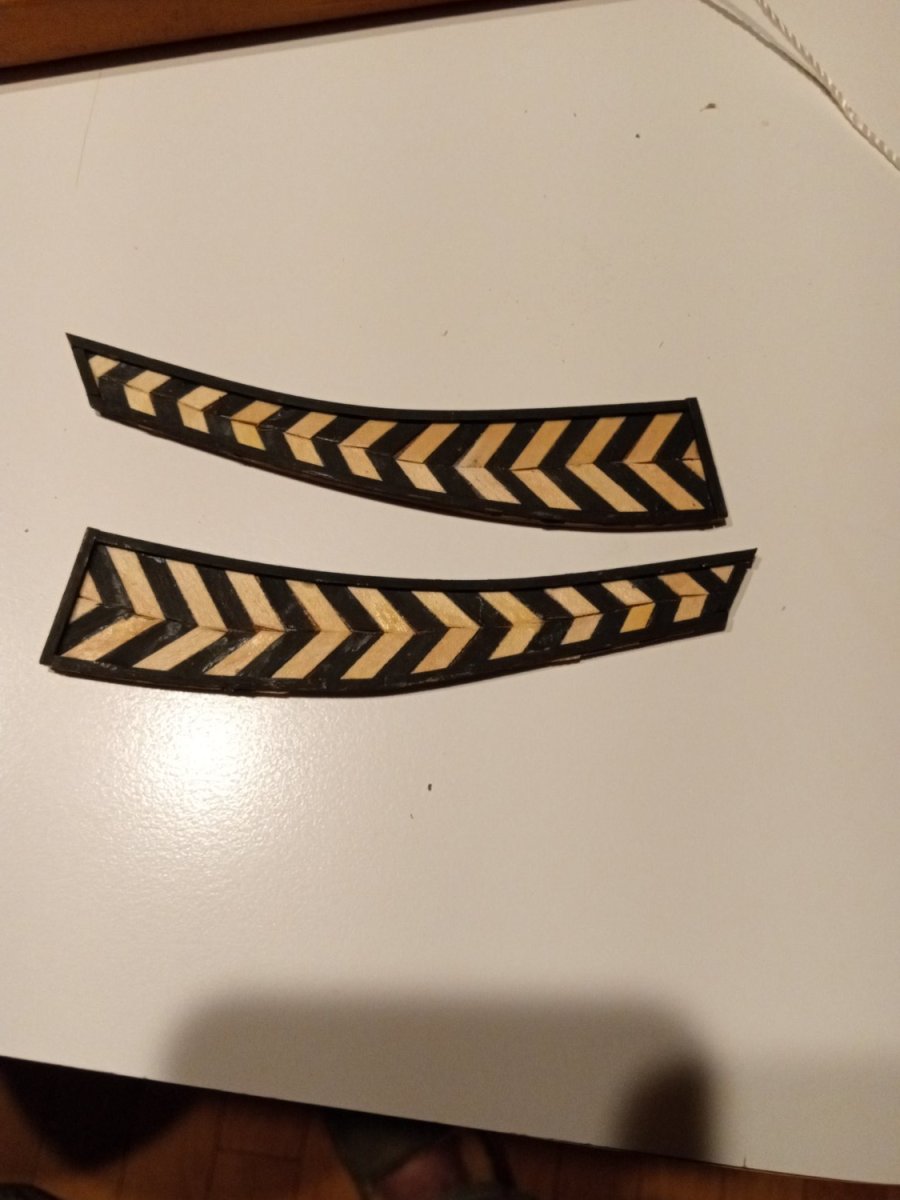
Added the stern galleries and the beakhead. I think the kit was missing some pieces, since they listed some parts for the back of the stern galleries that I simply didn't have, so I just backed the laser-cut forepiece with some walnut strips. The beakhead was made by covering a laser-cut piece with alternating strips of natural and black wood cut to give the diagonal effect. It took a little tweaking on my part while the glue was still wet to get them to sit right, and even then a stickler for perfection will note some problems. After having some health issues last August, I feel good that I'm at least at a point where if I were to keel over tomorrow, the kit is in a state where it can be displayed. Of course, that means that once I start adding shrouds - the likely next step - I'll need to complete the whole thing quickly so as to guard against the half-finished look if I can't complete things.
-
Been doing more work on the kit. Have the rudder mounted. Getting ready to install the stern gallery and beak head. Materials are still an issue as some pieces appear to be missing.

-
I was wondering if anyone had tips for mounting a rudder. I always find it difficult to get the pintle to slip into the gudgeons - there is usually little clearance between the two. I was thinking about positioning the gudgeons below where they need to be and them sliding them up before making them fast, but that seems more work than necessary. I'm sure someone must have an easier way.
-
An amazing restoration. Congratulations.
- Glen McGuire, Louie da fly, Baker and 2 others
-
4
-
 1
1
-
Lovely. A great build of an attractive ship.
-
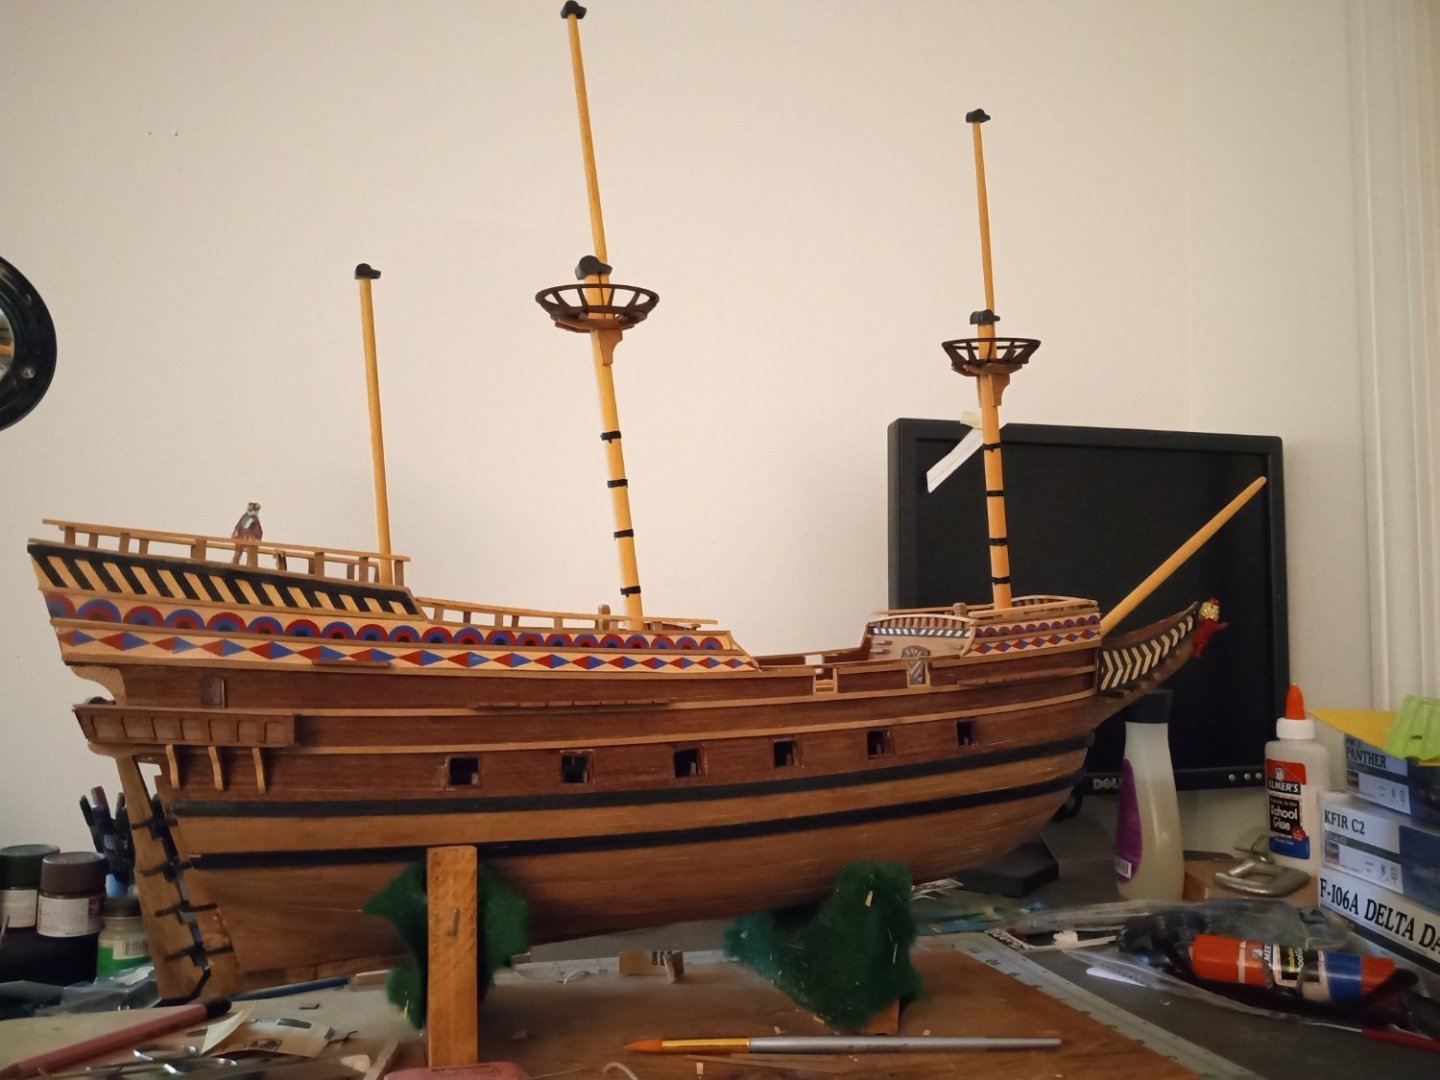
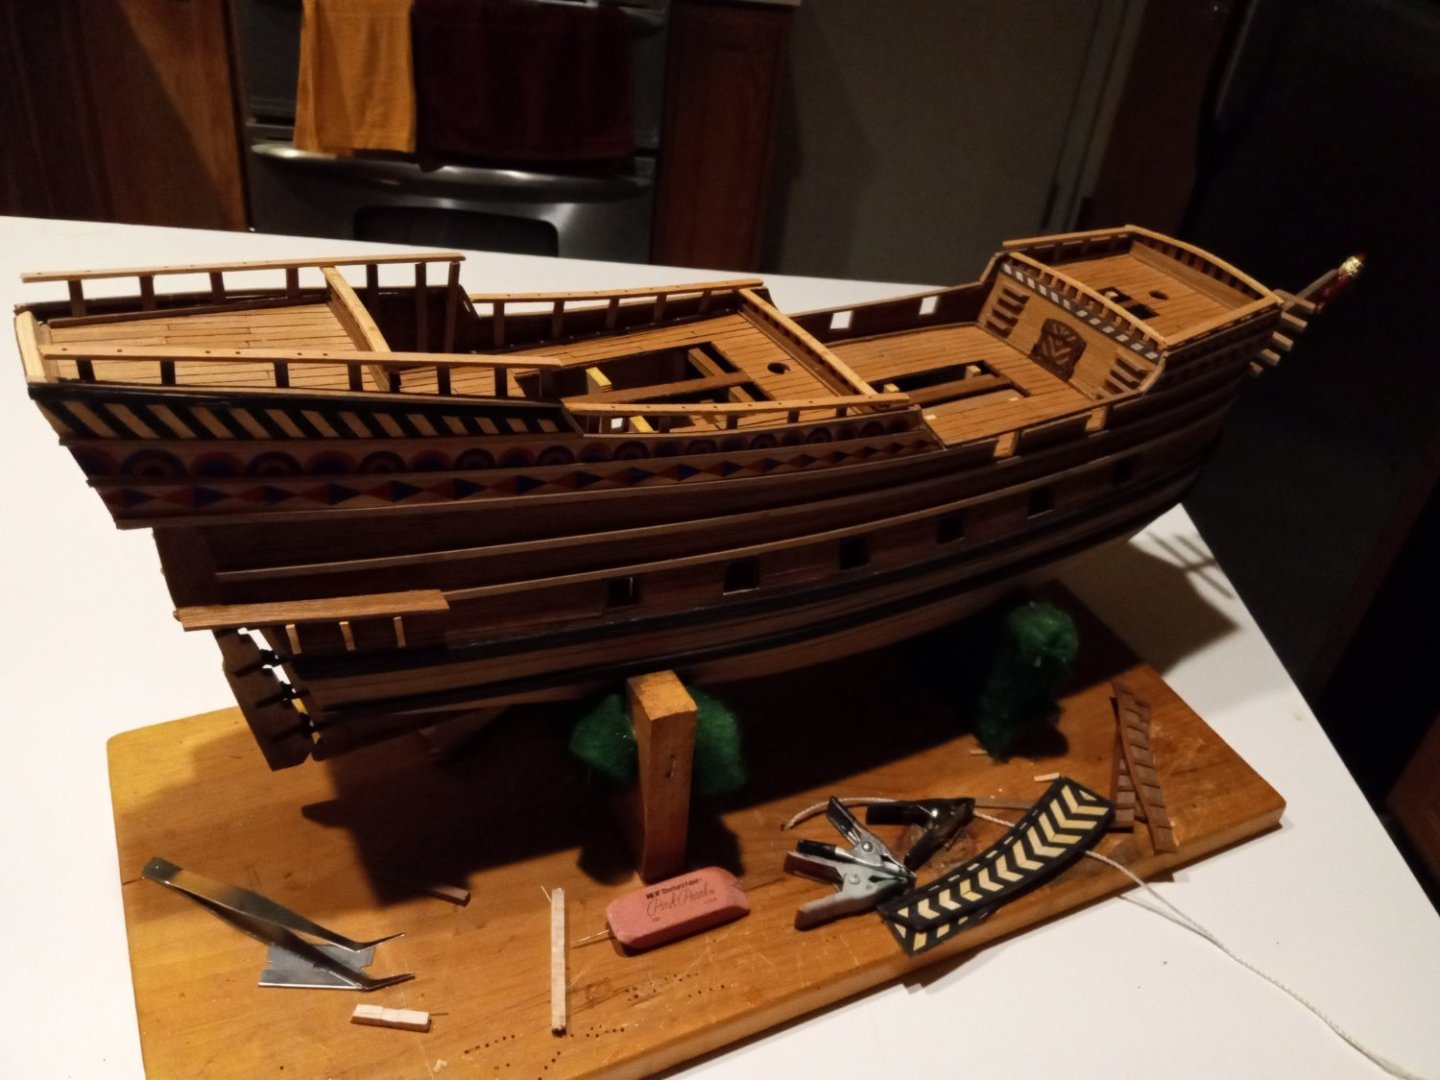
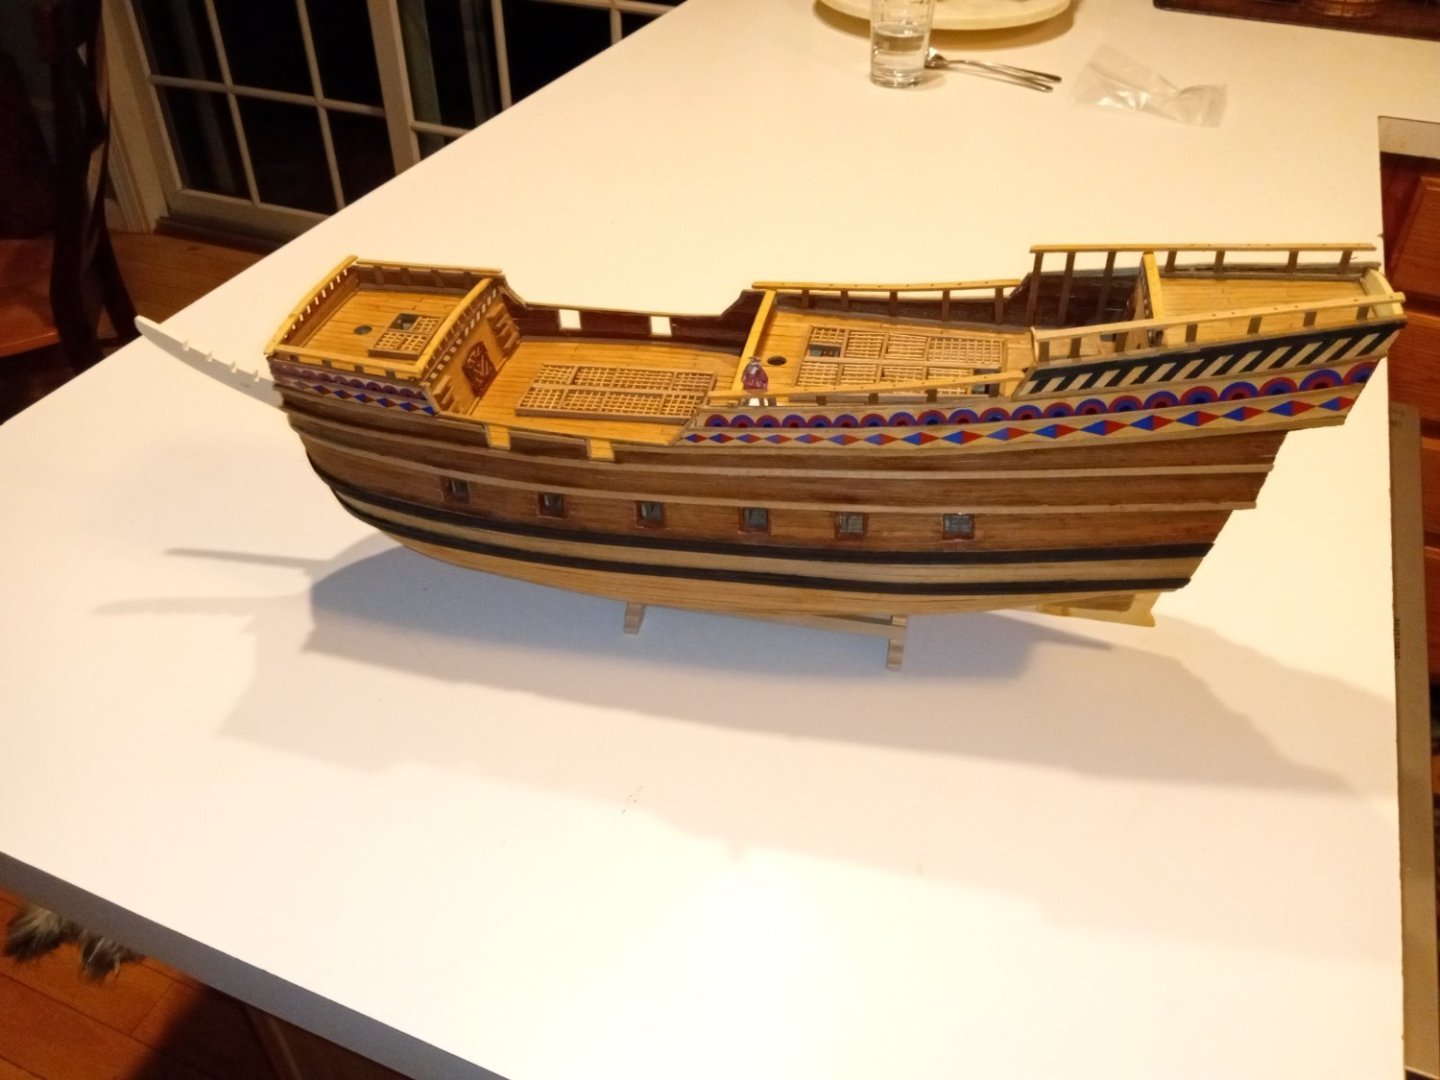
The railings are on, and I'm not displeased with how they turned out. I also put together the stand, which gave me a chance to give her a place to rest while I cleaned up the workspace. I also painted some wood to make the black stripes that will adorn the beakhead. I feel like I'm making progress.
- GrandpaPhil and ccoyle
-
2
-
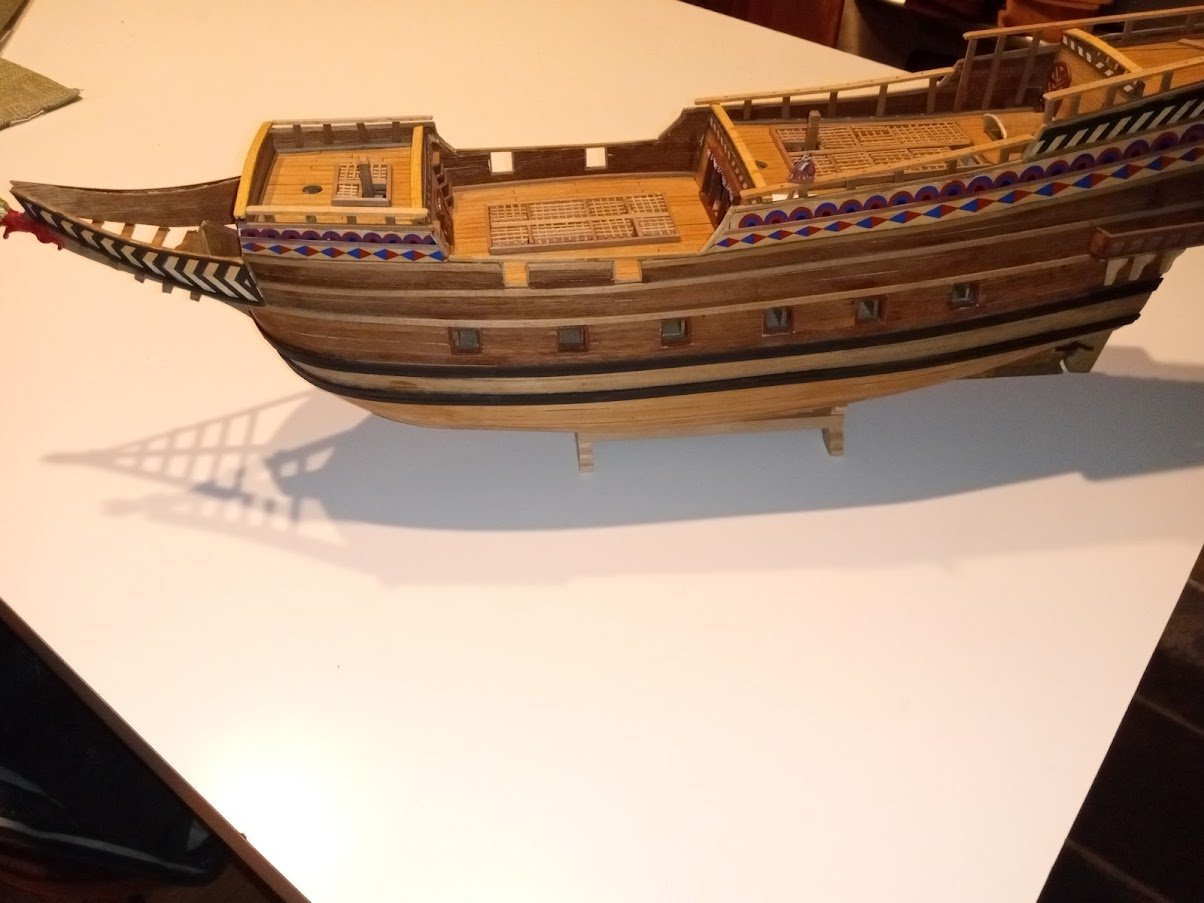
Been adding railings.
I'm happy with the height of the focsle railings.
I spent a lot of time trying to figure out what to do about the poop railings - whether I should end them at the end of the poop deck or extend them to the end of the outer planking. I decided to do the later, after viewing Ondras' amazing build log. He really has set the bar for me. Though I'm having trouble clearing it, he does supply inspiration and things to think about.
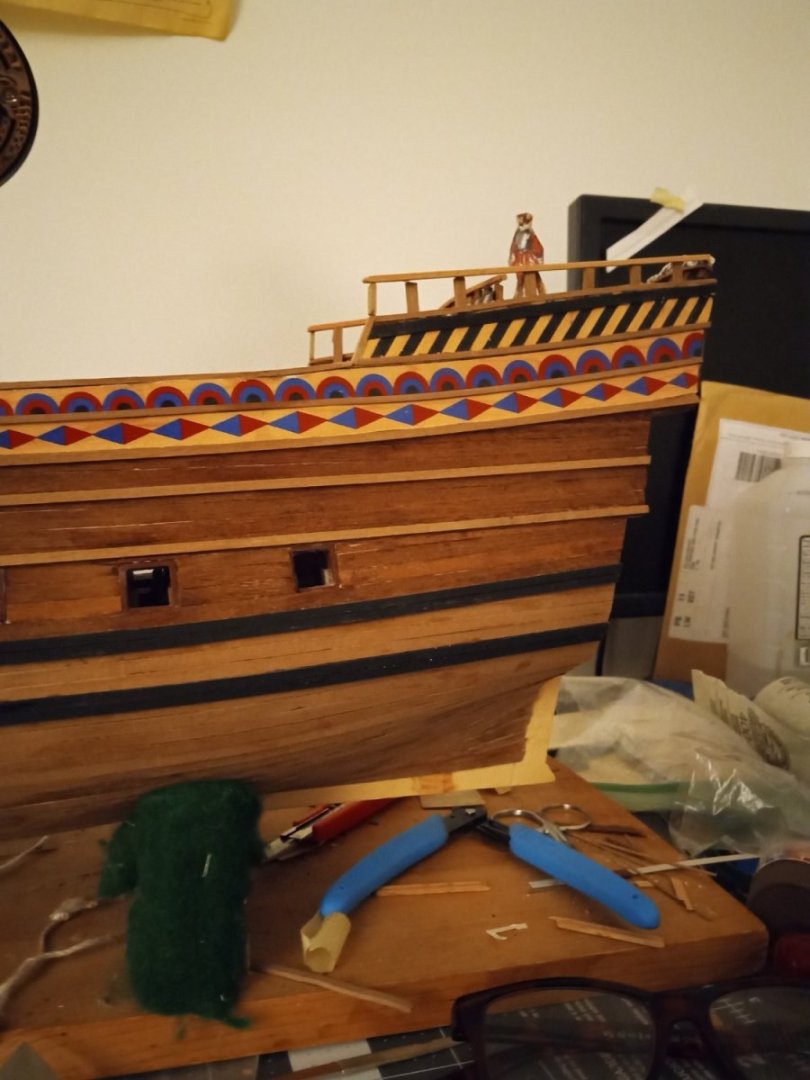
After installing the poop railing, I still feel it's about 1mm too high. I based the height on my little figure of Sir Francis Drake, who has been supervising construction. While the rail seems to fit Sir Francis just right, it looks a little too high for me. Also, the photo points out a gap to the support posts I hadn't noticed.
.thumb.jpg.424936a9e13c2b0bdb9014c04e130250.jpg)
.thumb.jpg.b46acbf59a7469a19bb3a7d46606ea80.jpg)
-
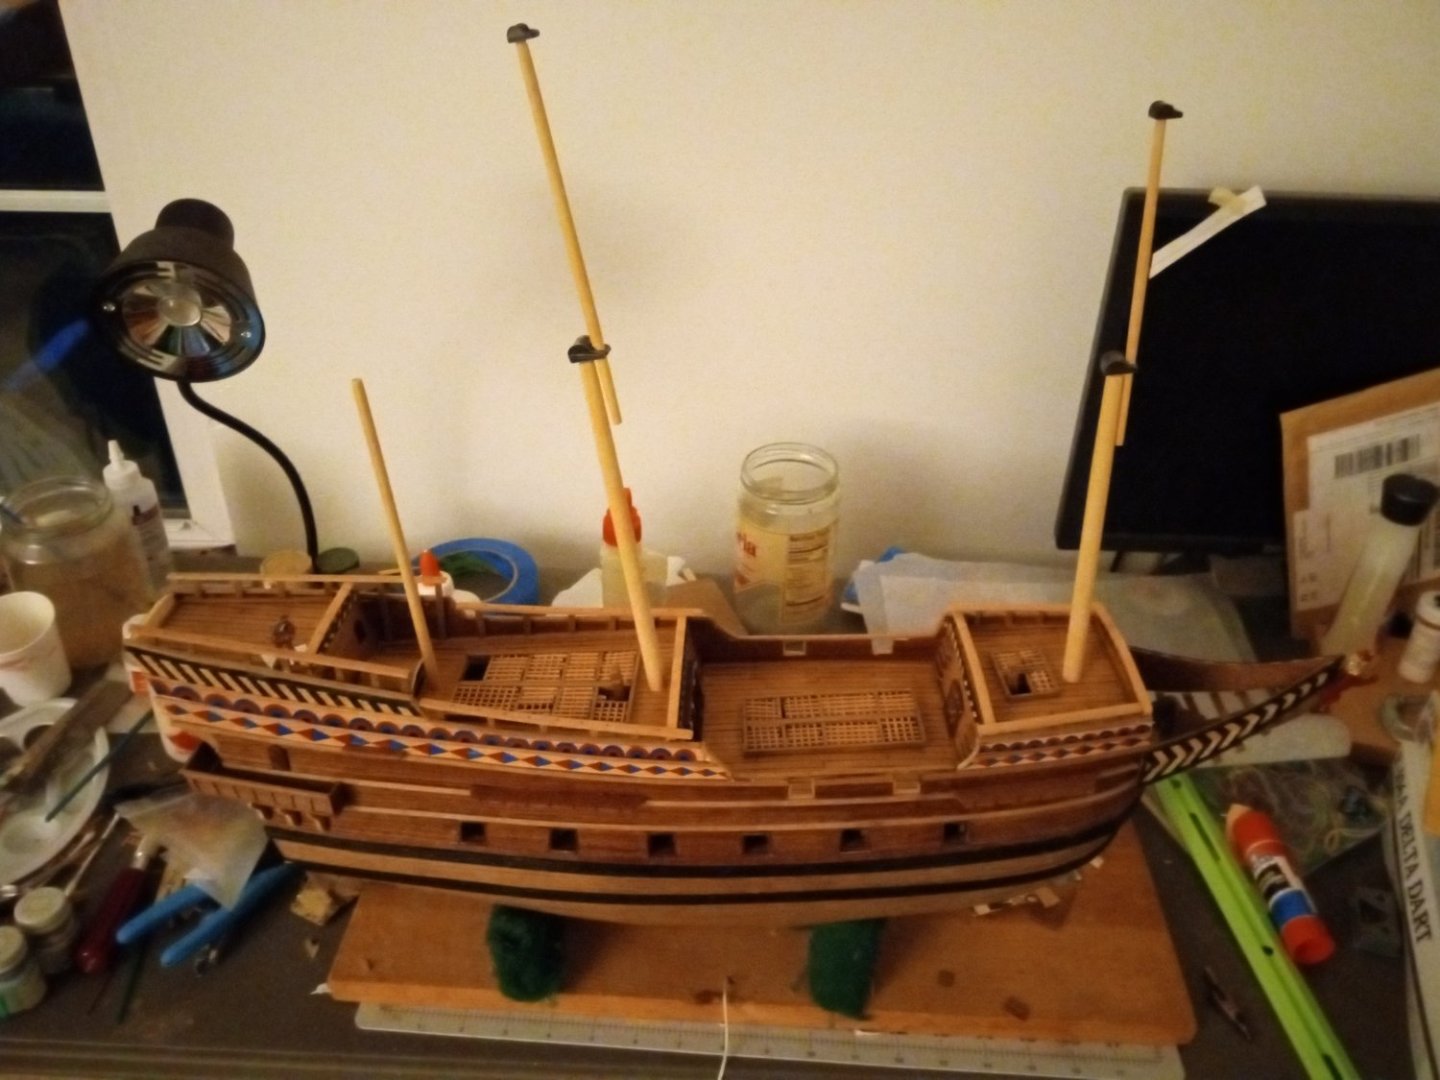
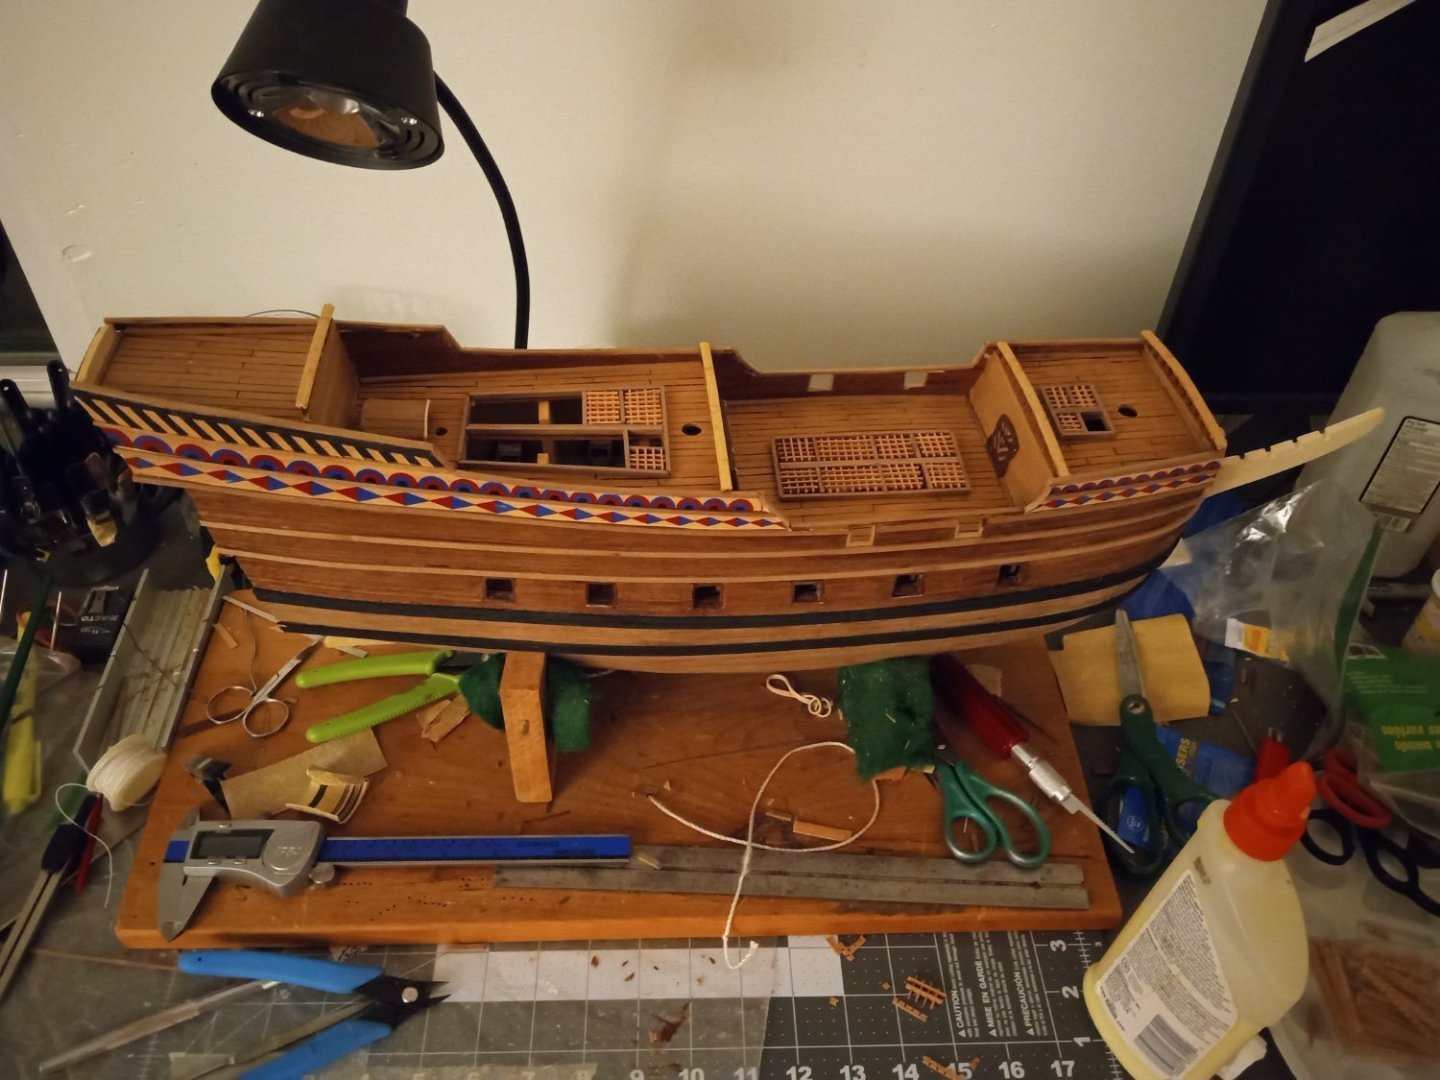
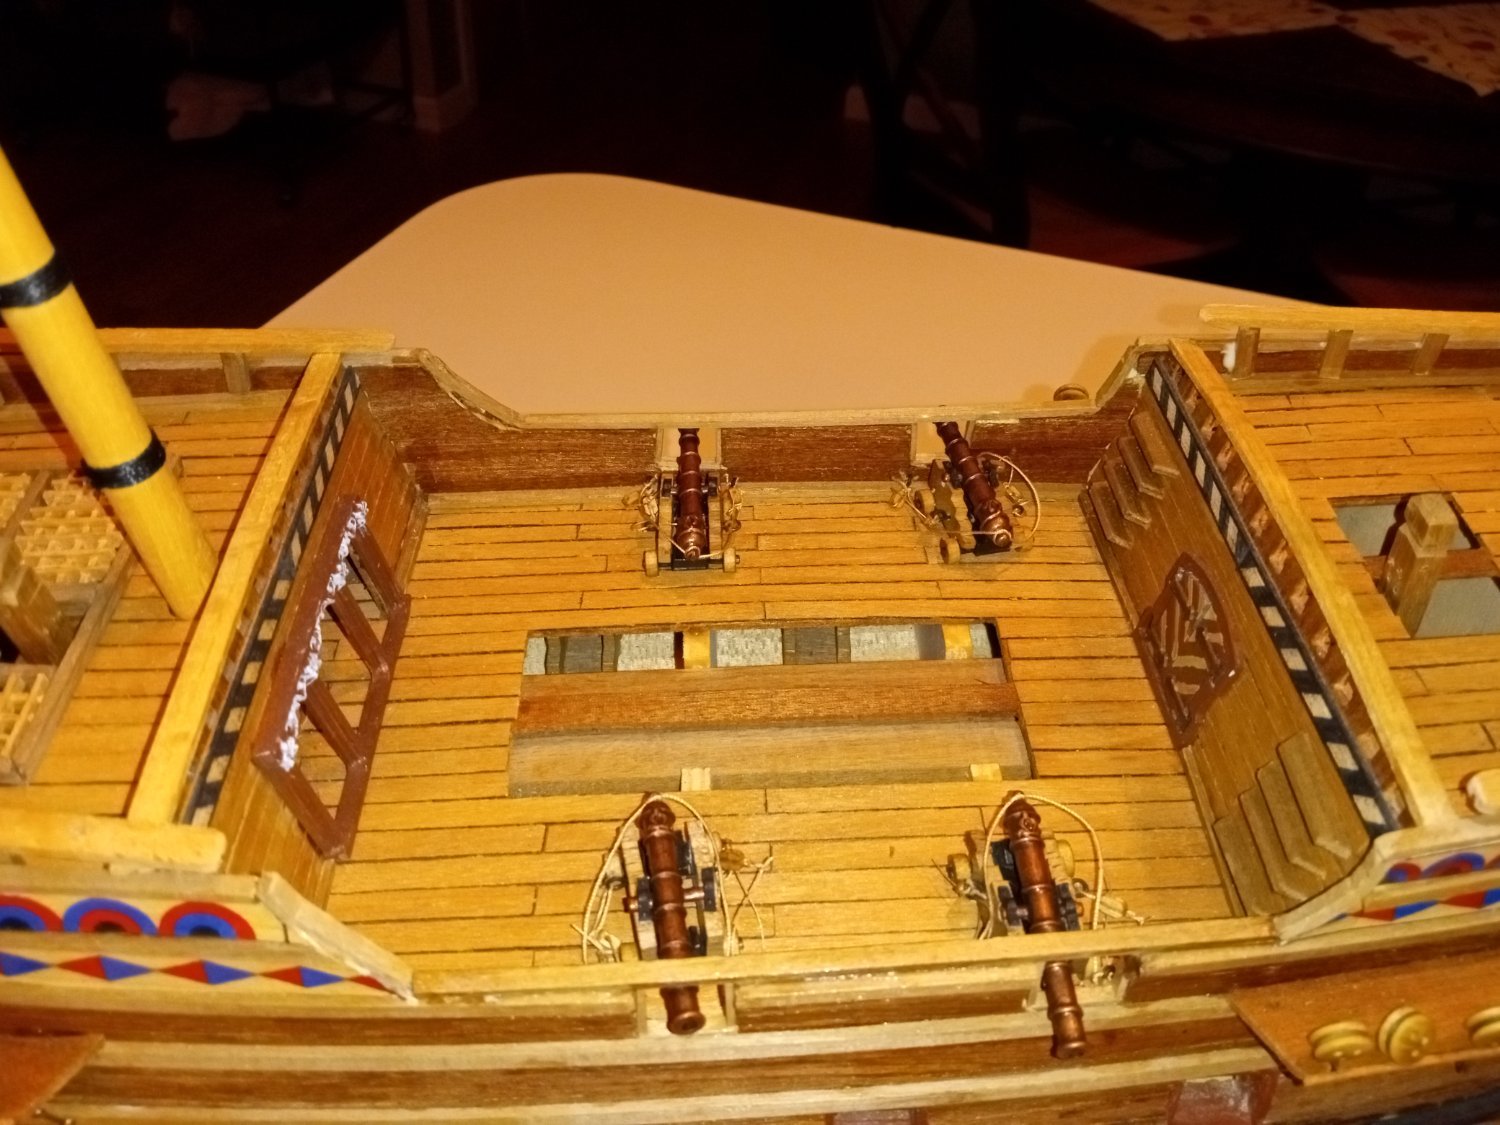
Some progress with gratings. One thing I hadn't thought about is how much of the frames show through the openings. The break in the grating on the forward starboard side of the quarter deck will host a bitt, but if you look closely, the frame takes up much of the space and will be visible. I don't think I can remove the cross piece, as it supports the deck I probably can trim the white frame sections a little further back, but might settle for staining them a darker, less noticeable color. Also, I removed the molding at the front of the poop cabin as I realized that the opening I left for the door, while it fit perfectly, would have had the door jamming up against the pilot house in real life. I'm going to move the door a few millimeters over to starboard and redo the molding.


.jpg.5bde27afe3c65c4c7162604483f95e85.jpg)
.jpg.9326b8f90e4e1d14aebdf8505e9e8503.jpg)

Roter Lowe by Stevinne - Mamoli - 1:55 - Dutch-built Galleon
in - Kit build logs for subjects built from 1501 - 1750
Posted
Put in the fore stays and the foremast shrouds.