Rustyj
-
Posts
2,535 -
Joined
-
Last visited
Content Type
Profiles
Forums
Gallery
Events
Everything posted by Rustyj
-
 Wow ten wonderful years! Congratulations.
 -
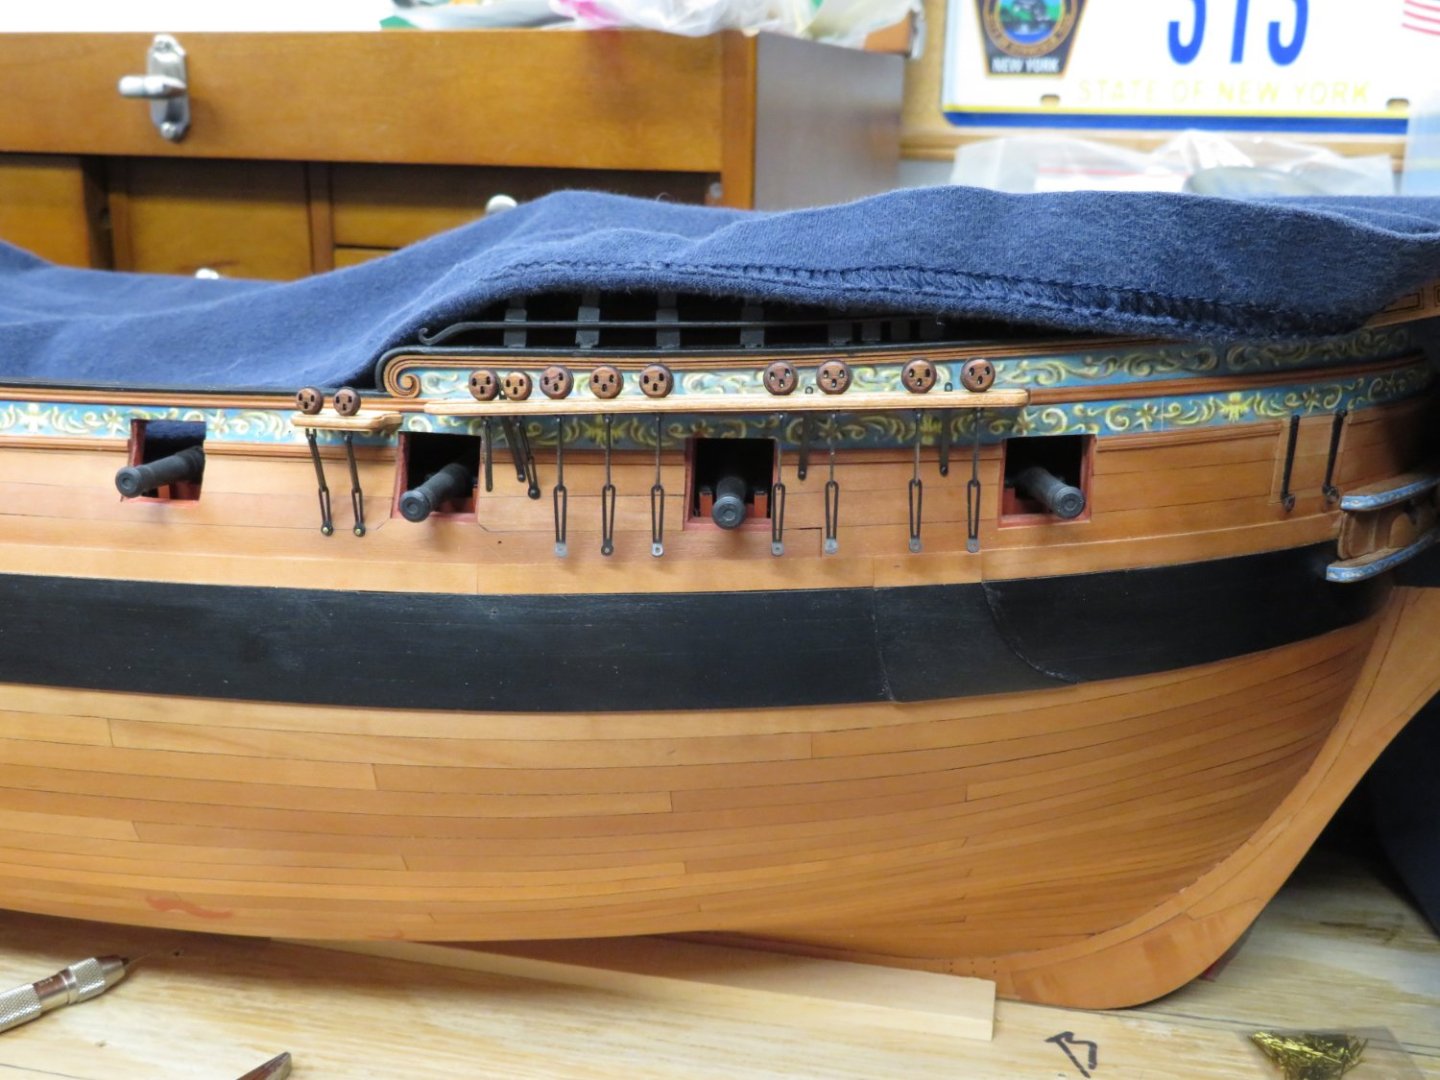
I've pinned all of the chainplates to the hull on the starboard side. I'm now moving to the portside chainplates. Once they are completed I'll start on the billboards, chesstrees, fenders and boarding ladders.


- 642 replies
-
- 19
-

-

-
- winchelsea
- Syren Ship Model Company
- (and 1 more)
-
Thats some nice planking Frank. Slow a steady as Chuck says. You've definitely gotten the hang of it!
-
Thanks for the kind words Frank. Also thanks for all the likes. Update coming soon!
- 642 replies
-
- 1
-
-
- winchelsea
- Syren Ship Model Company
- (and 1 more)
-
Congratulations Jim, You have made a beautiful model that you should be very proud of!
- 105 replies
-
- 1
-
-
- winchelsea
- Syren Ship Model Company
- (and 1 more)
-
Wonderful job on the planking Glenn. Not that I'd expect anything else! Enjoy your trip, be safe and I look forward to seeing the new photographs.
- 840 replies
-
- 2
-
-
- winchelsea
- Syren Ship Model Company
- (and 1 more)
-
Hi Joe. I'll talk to you tomorrow about this.
-
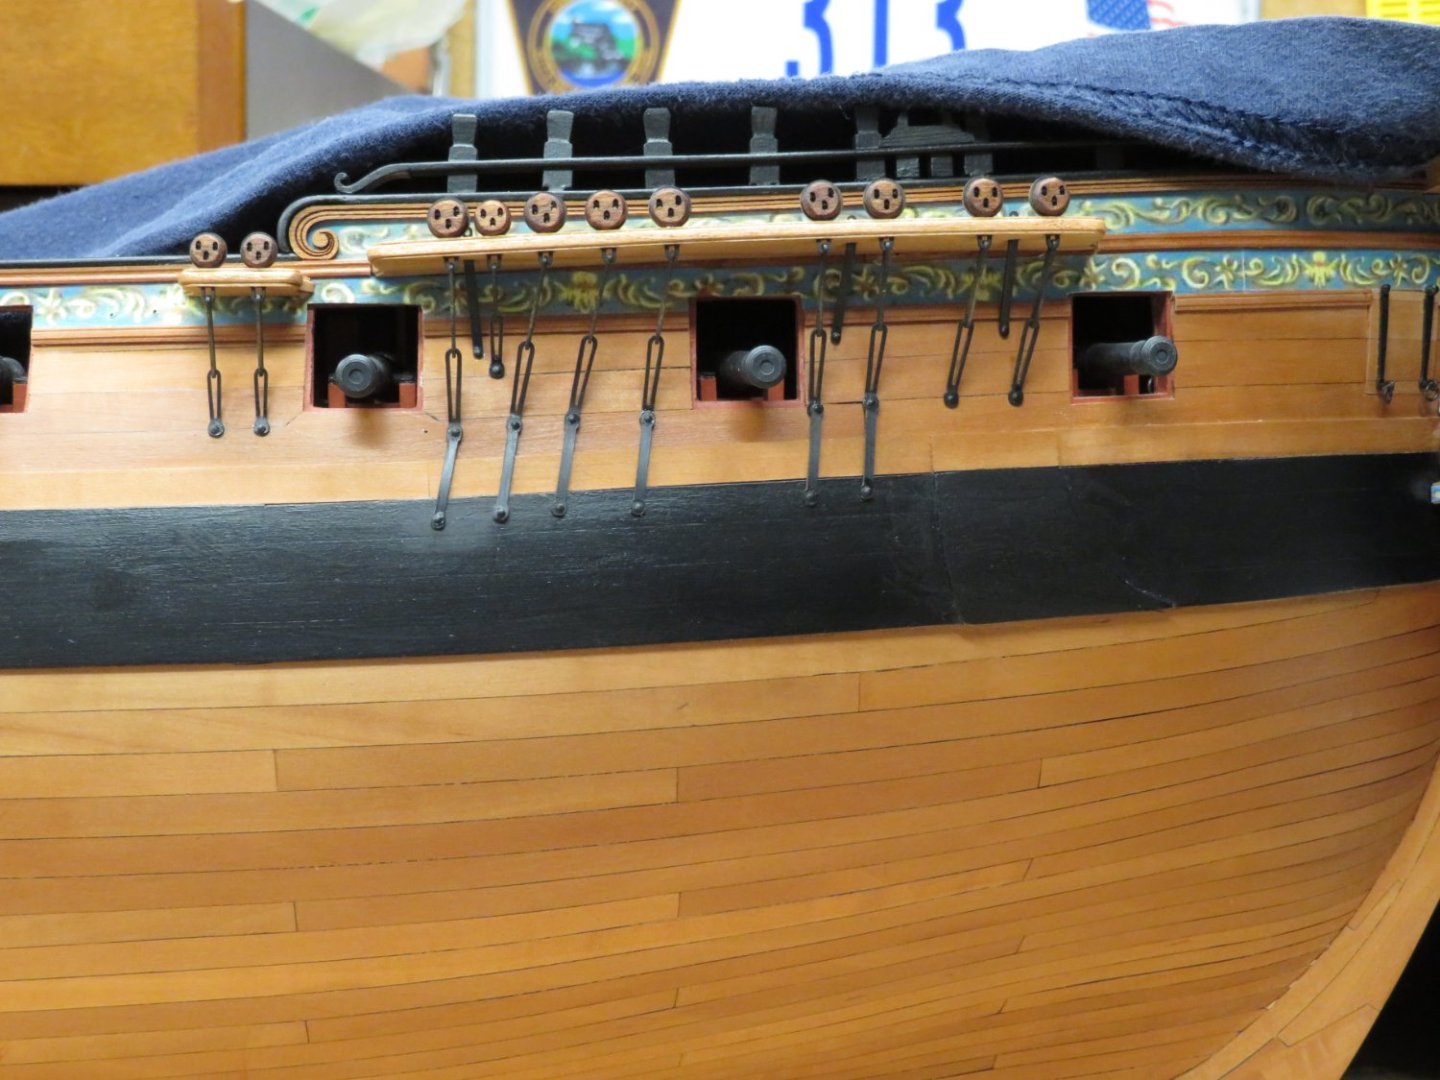
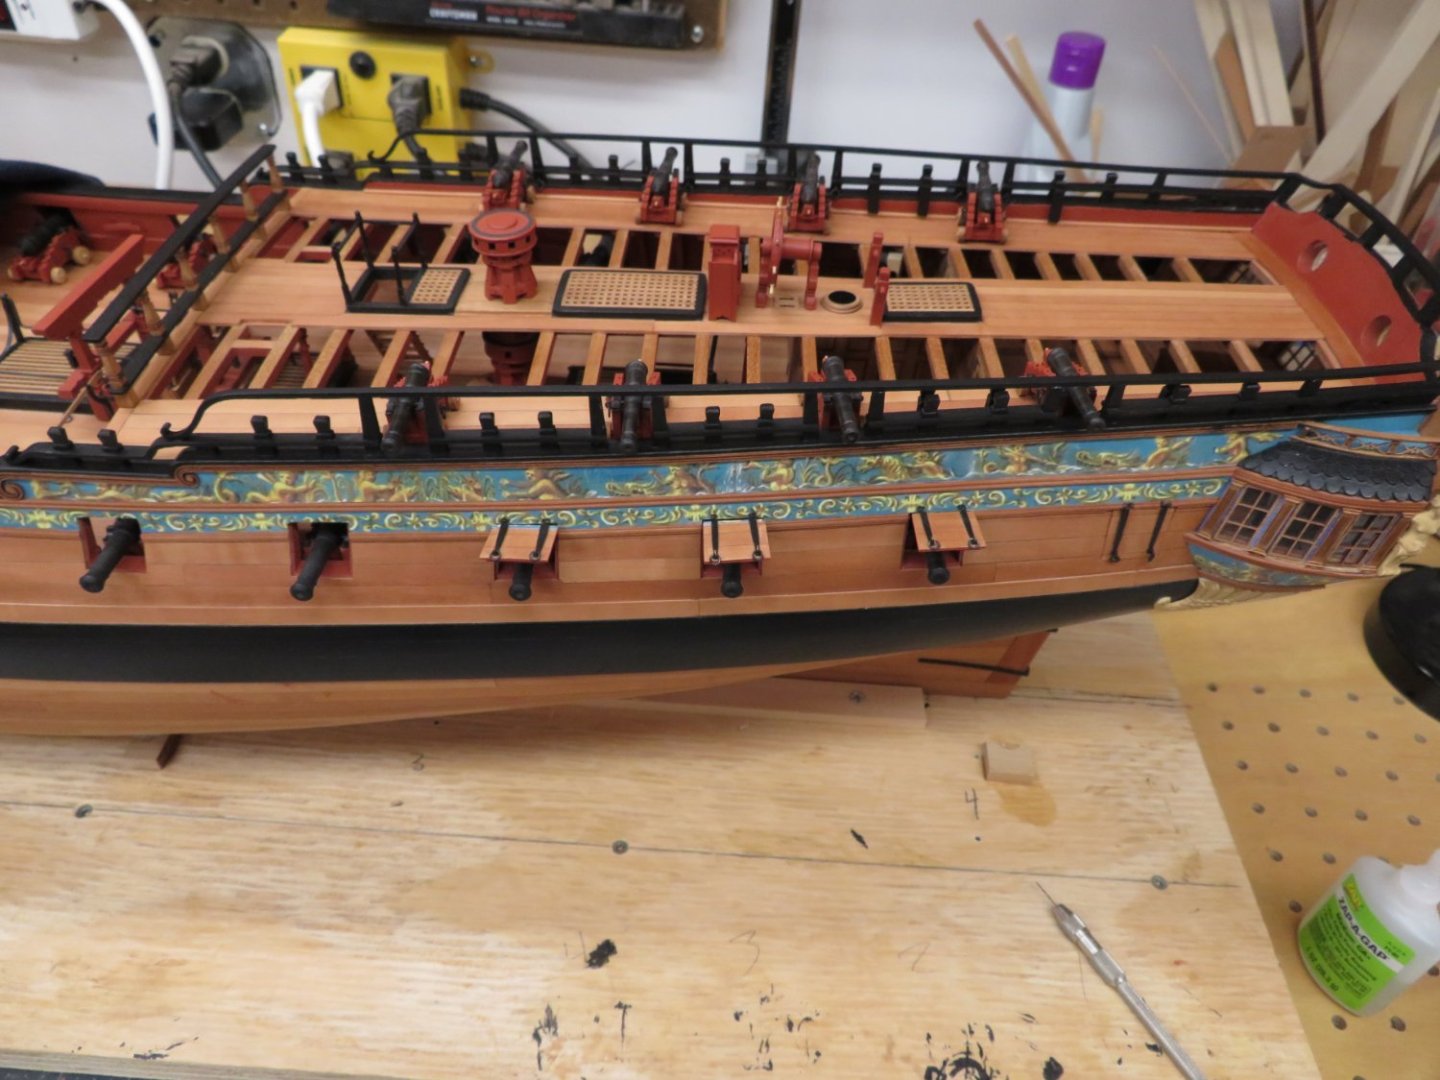
I've been slowly making some progress on the starboard side. The channels have been placed in their positions. Before adding the straps, I heated the ends of a pair of small needle nose pliers over a candle and bent them as Chuck described. The straps were then added and pinned. I then put all of the deadeyes in the strops and placed them in the correct locations. The chainplates and stools were added and are ready for pinning them to the hull.

- 642 replies
-
- 13
-
-
-
- winchelsea
- Syren Ship Model Company
- (and 1 more)
-
That is beautifully done. I'm gonna have to break down and finally learn how to use my airbrush!
- 488 replies
-
- 5
-
-
- Indefatigable
- Vanguard Models
- (and 1 more)
-
Wonderful job Matthias!
-
That is a fantastic planking job Glenn! Also remember that you need patience!
- 840 replies
-
- 4
-

-
-
- winchelsea
- Syren Ship Model Company
- (and 1 more)
-
Very nice and creative work!
-
Outstanding work Derek. She is one to be very proud of! After seeing this I may have to go back and add anchor buoys. Thanks!
- 345 replies
-
- 3
-

-
-
- Duchess Of Kingston
- Vanguard Models
- (and 1 more)
-
Thank you Mike. Yes they were fun to do. Hi Glenn, Yes it is very enjoyable, though it means I'm now much closed to the end than the beginning. Thanks Chuck. They are well designed and went through without any issues. Thanks all for the likes too!
- 642 replies
-
- 3
-
-
- winchelsea
- Syren Ship Model Company
- (and 1 more)
-
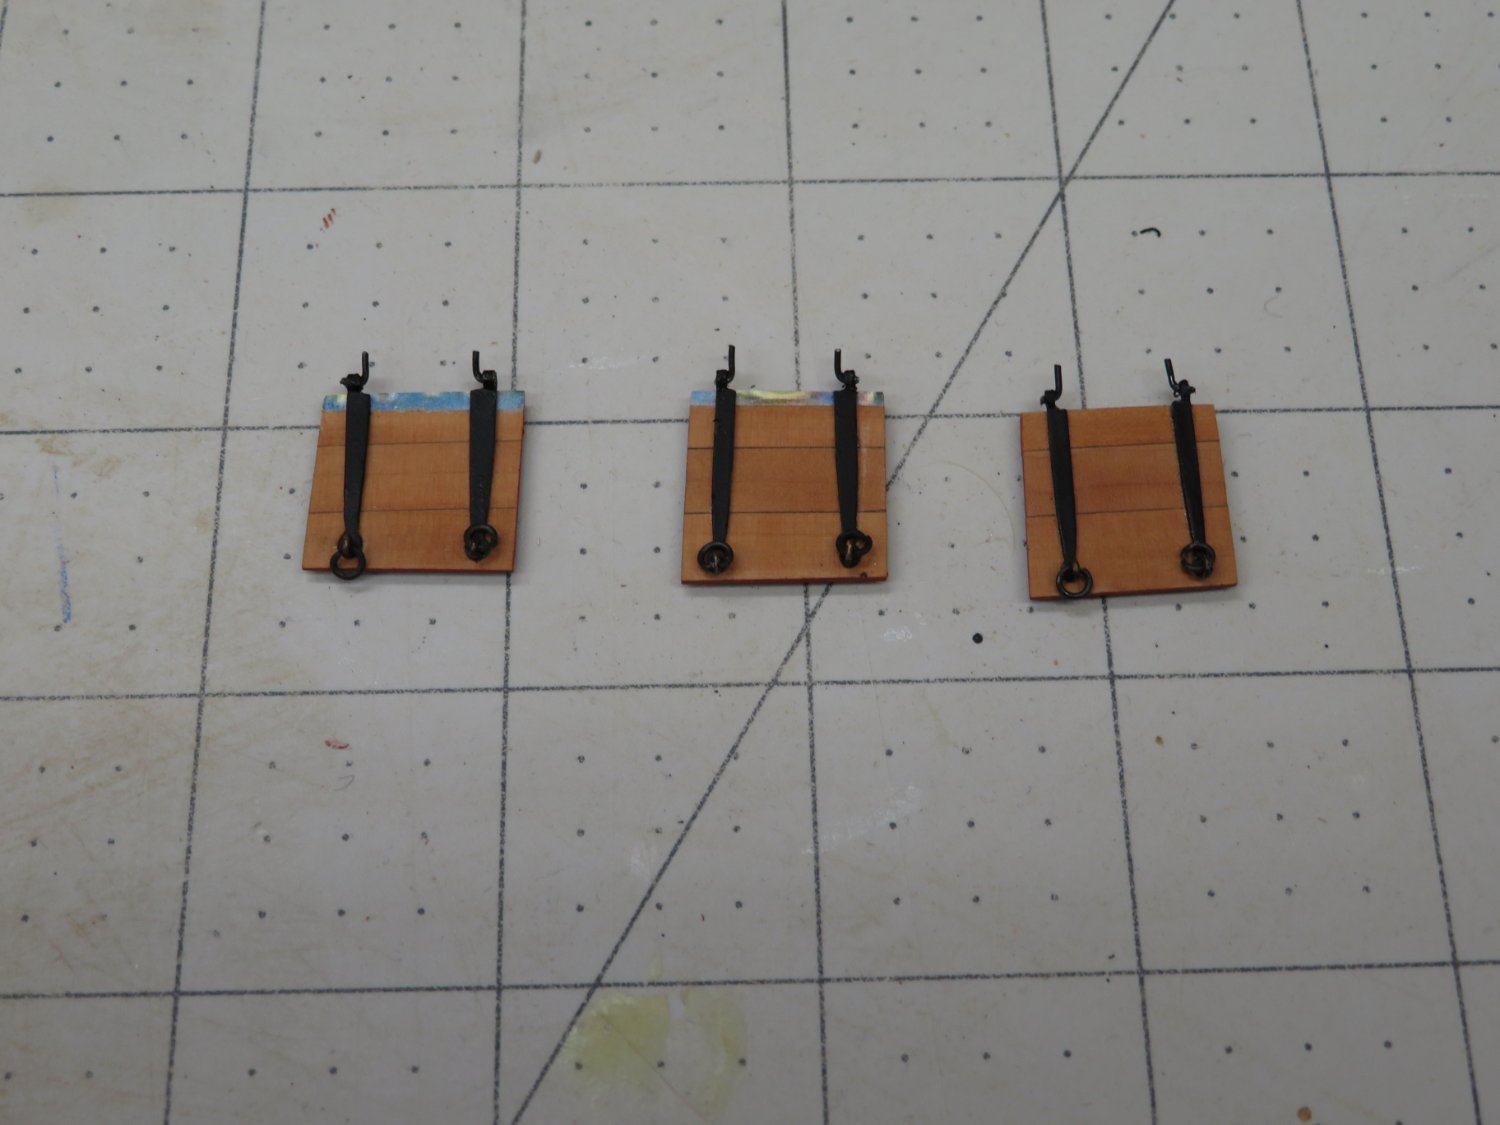
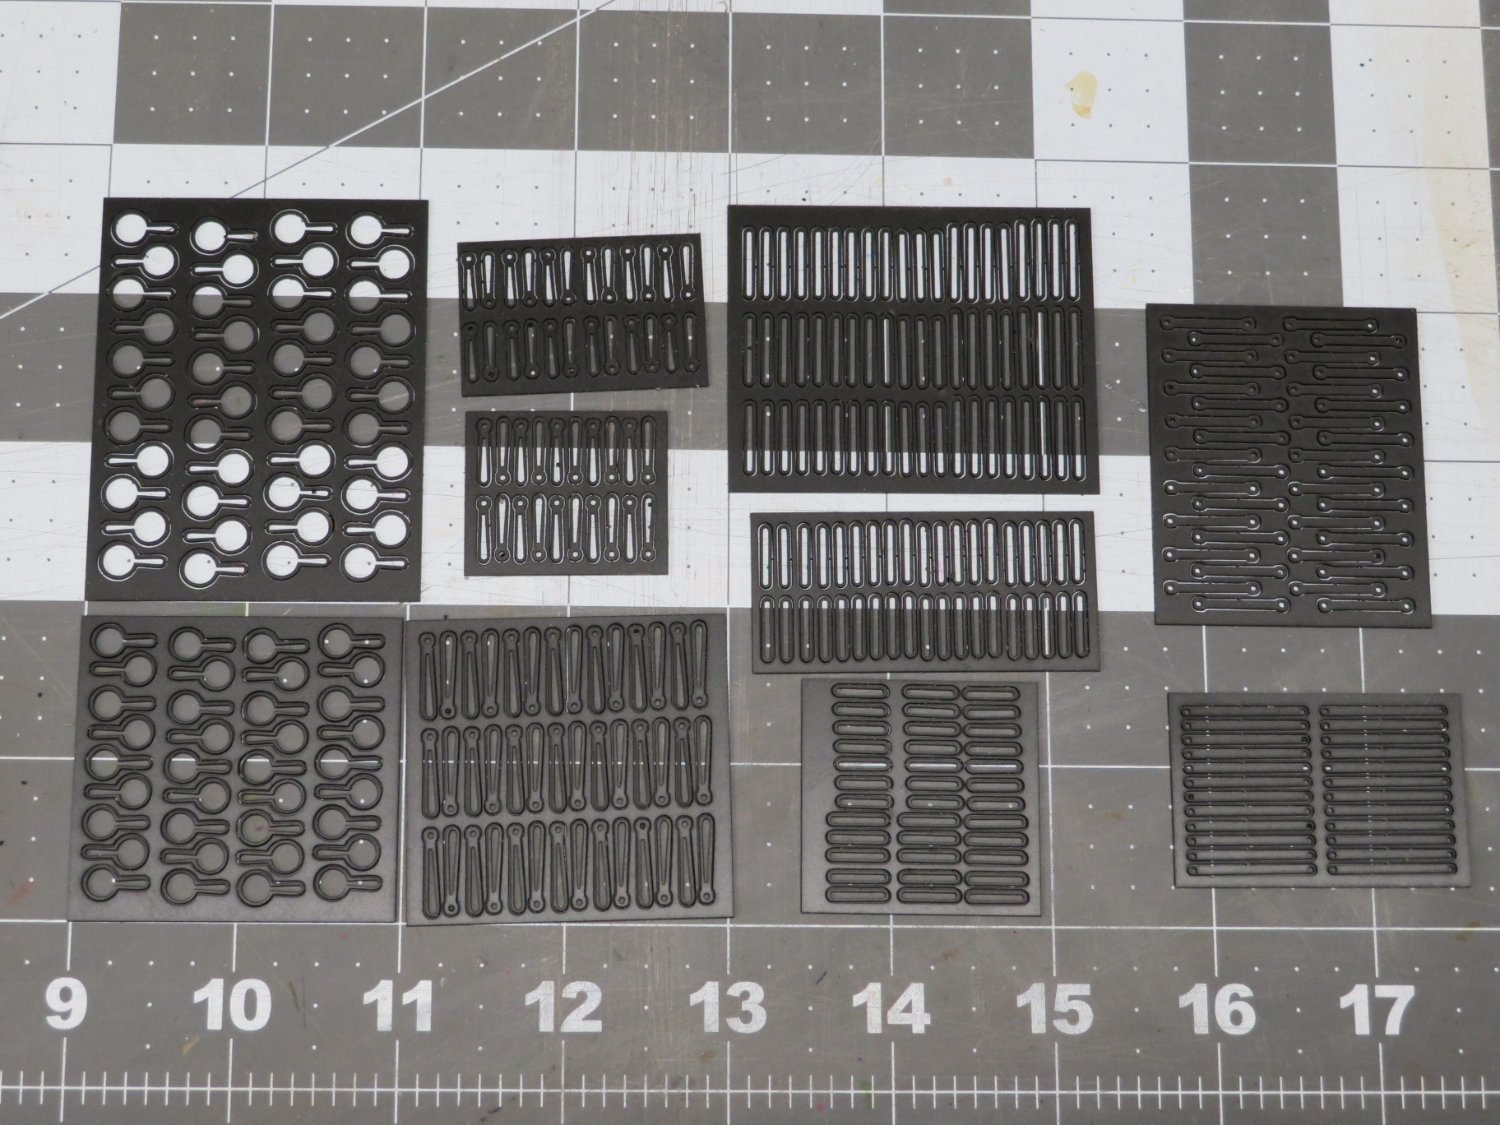
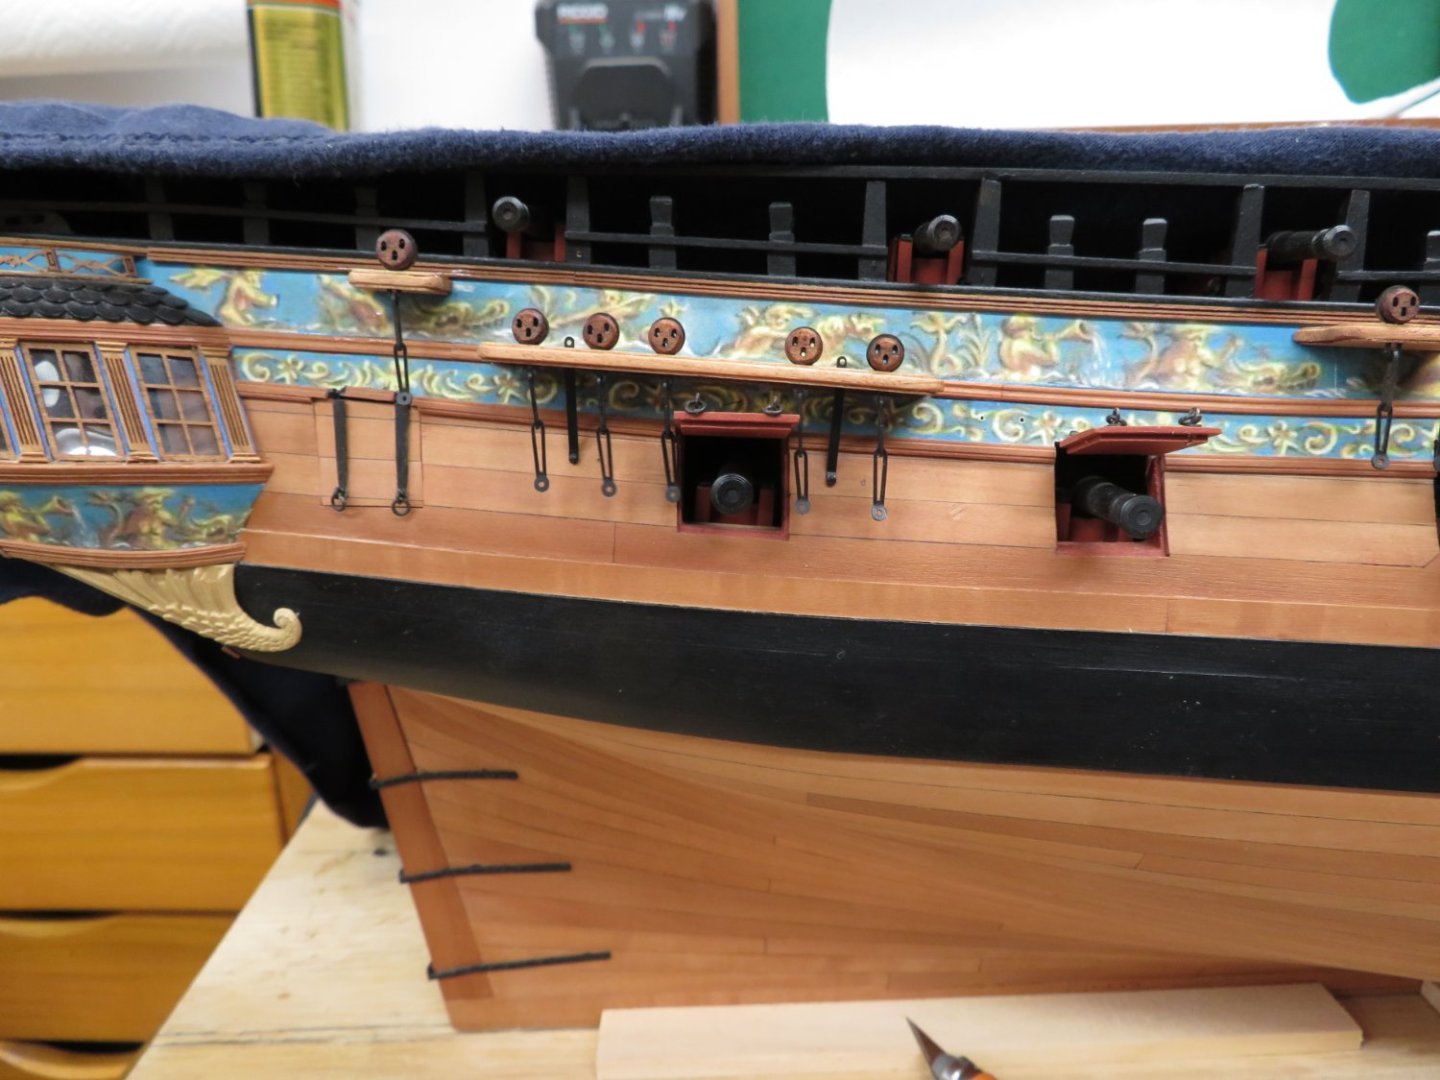
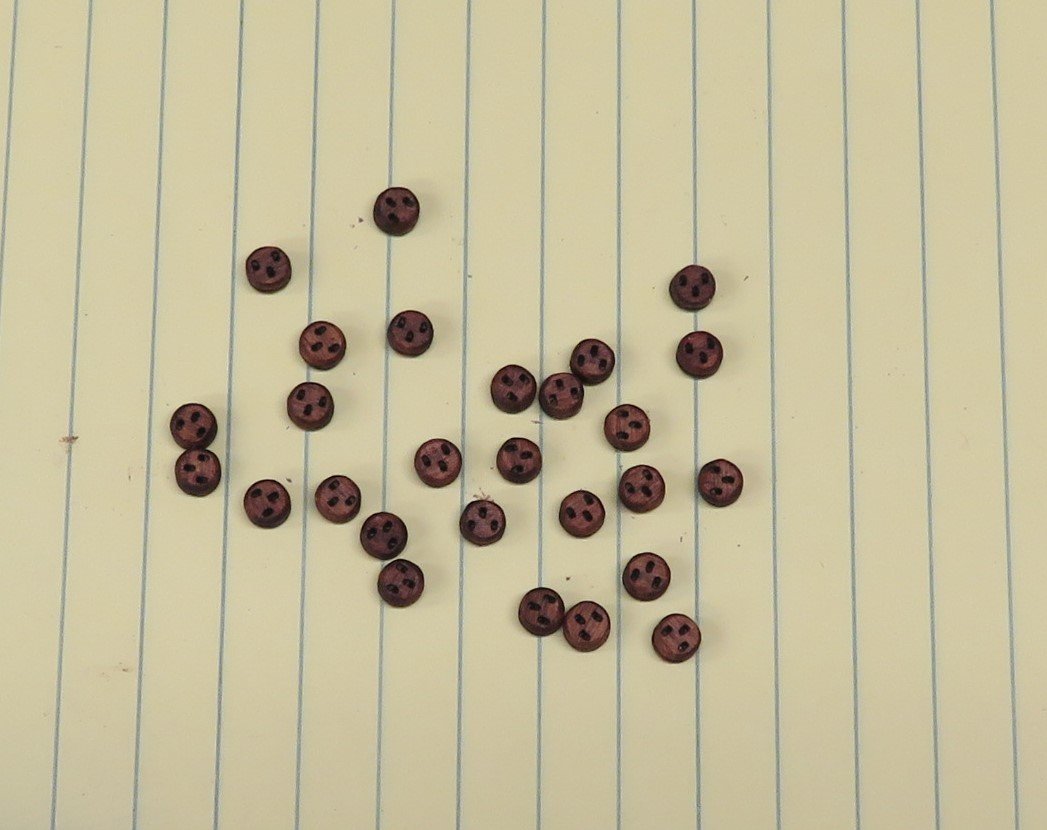
Some progress has been made though most of it is preparation work. I did put the hinge pins on the remaining gunport lids and installed them. I then worked on the channels, sanding the char and gluing the layers as Chuck described. I too used the Scotch spray adhesive on them. After they were dry, I also put on a coat of wipe on poly. Next I assembled the 5mm deadeyes from Syren, sanded them and dyed them dark brown. Also here are the acrylic strops, chainplates and straps. I have to lightly sand them with 400 grit and then apply some weathering power. Once I assemble and finish the 6 mm deadeyes, I'll start placing the channels and deadeyes on the Winnie.


- 642 replies
-
- 13
-
-
- winchelsea
- Syren Ship Model Company
- (and 1 more)
-
Great to see you at the planking point Joe.
-
Welcome aboard Jim, it's never too late to start a great build like the Winnie. I like the others look forward to seeing your progress.
-
That is some really beautiful work Mike!
- 607 replies
-
- 1
-
-
- winchelsea
- Syren Ship Model Company
- (and 1 more)
-
Thank you Mike. You've long been an inspiration! Yes JJ the gun carriages are done now I see there are a bunch of swivel guns yet to do! Hey Glenn send them along and I'll get them back to you in say .... a year or two.
- 642 replies
-
- 4
-
-
-
- winchelsea
- Syren Ship Model Company
- (and 1 more)
-
That looks really good!
-
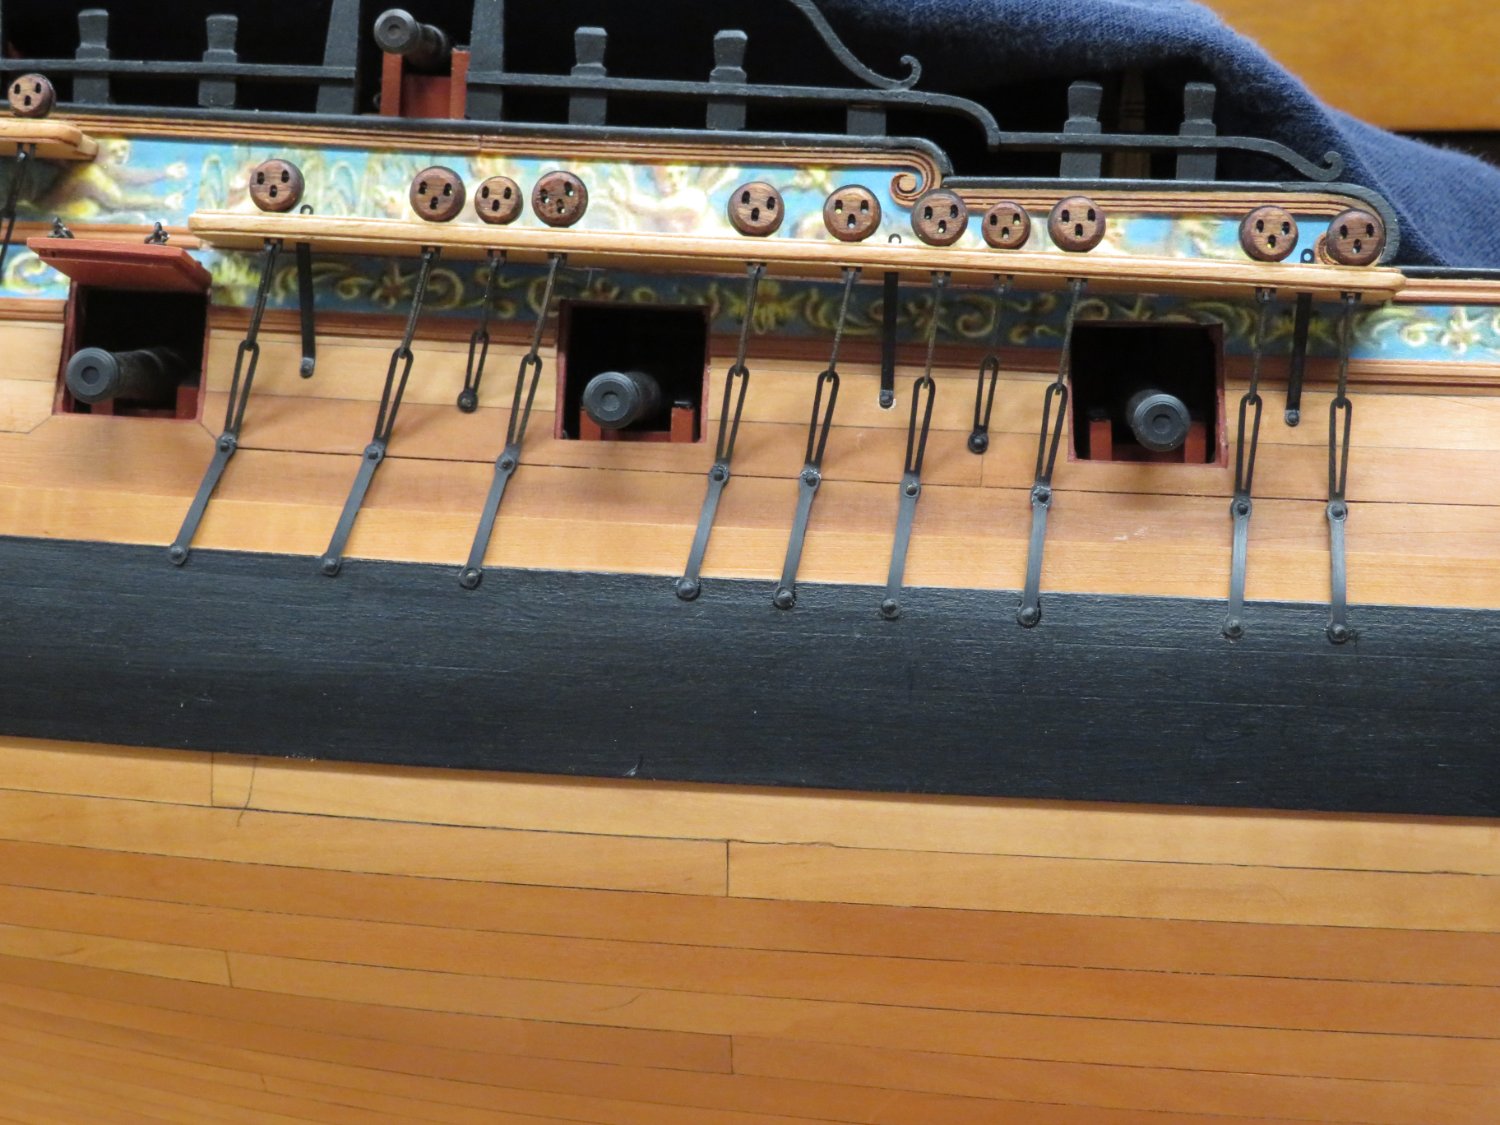
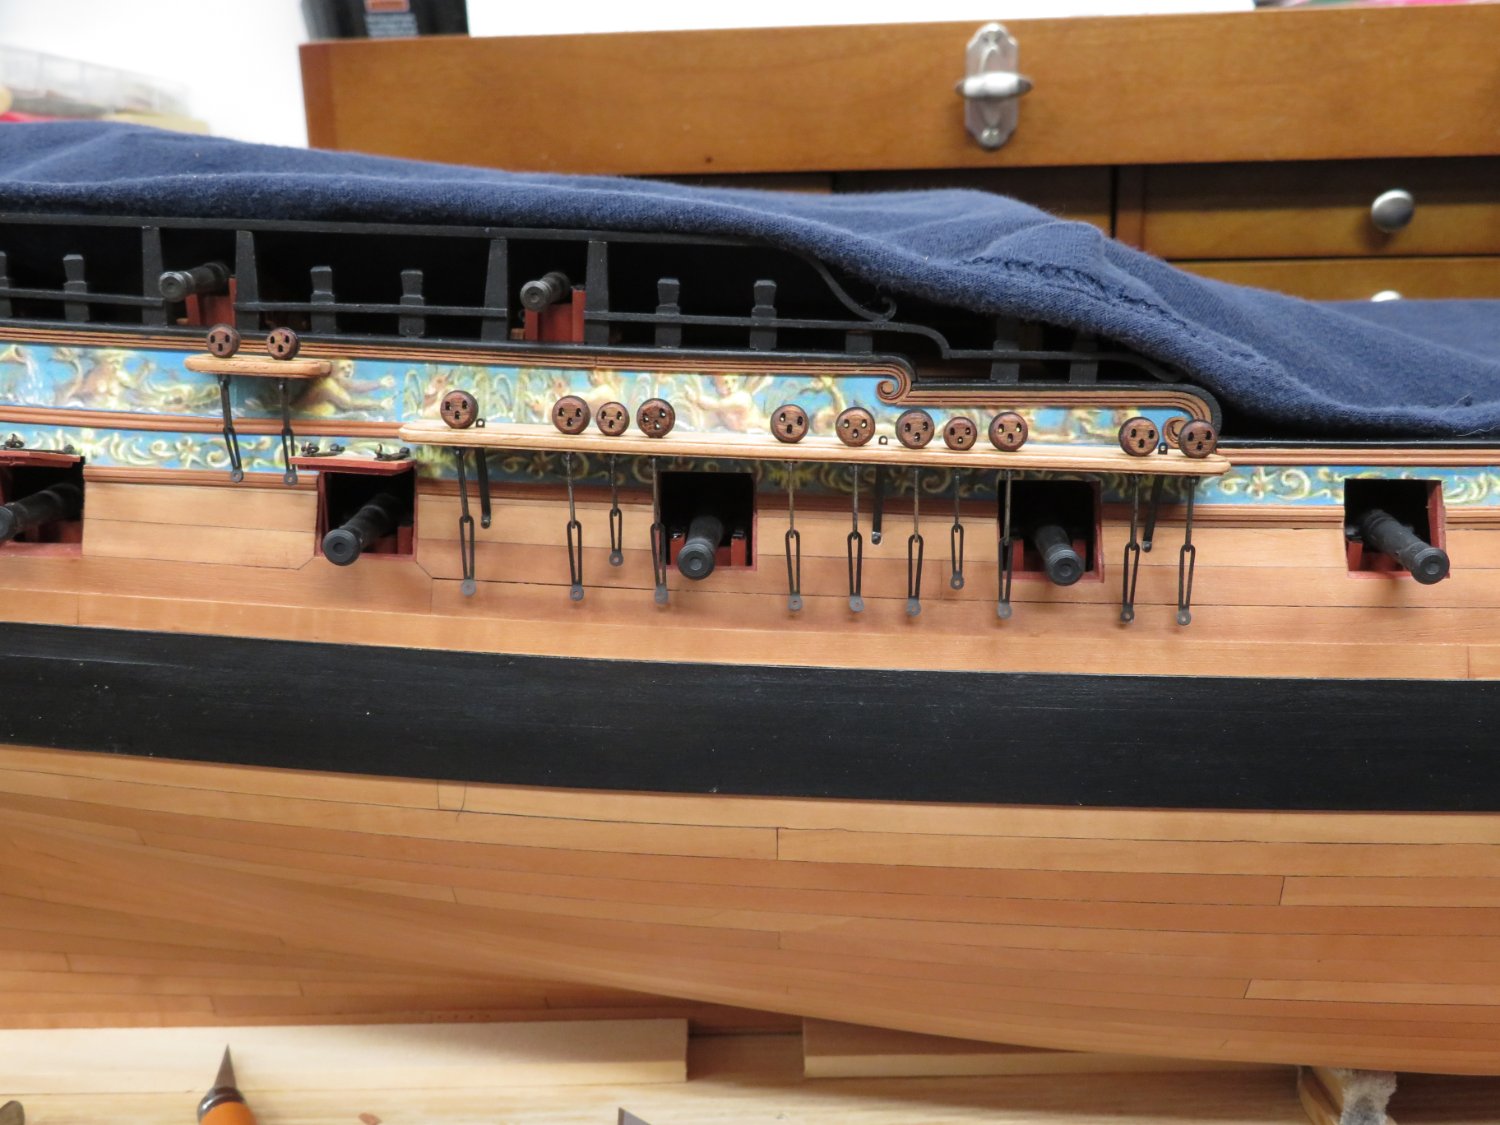
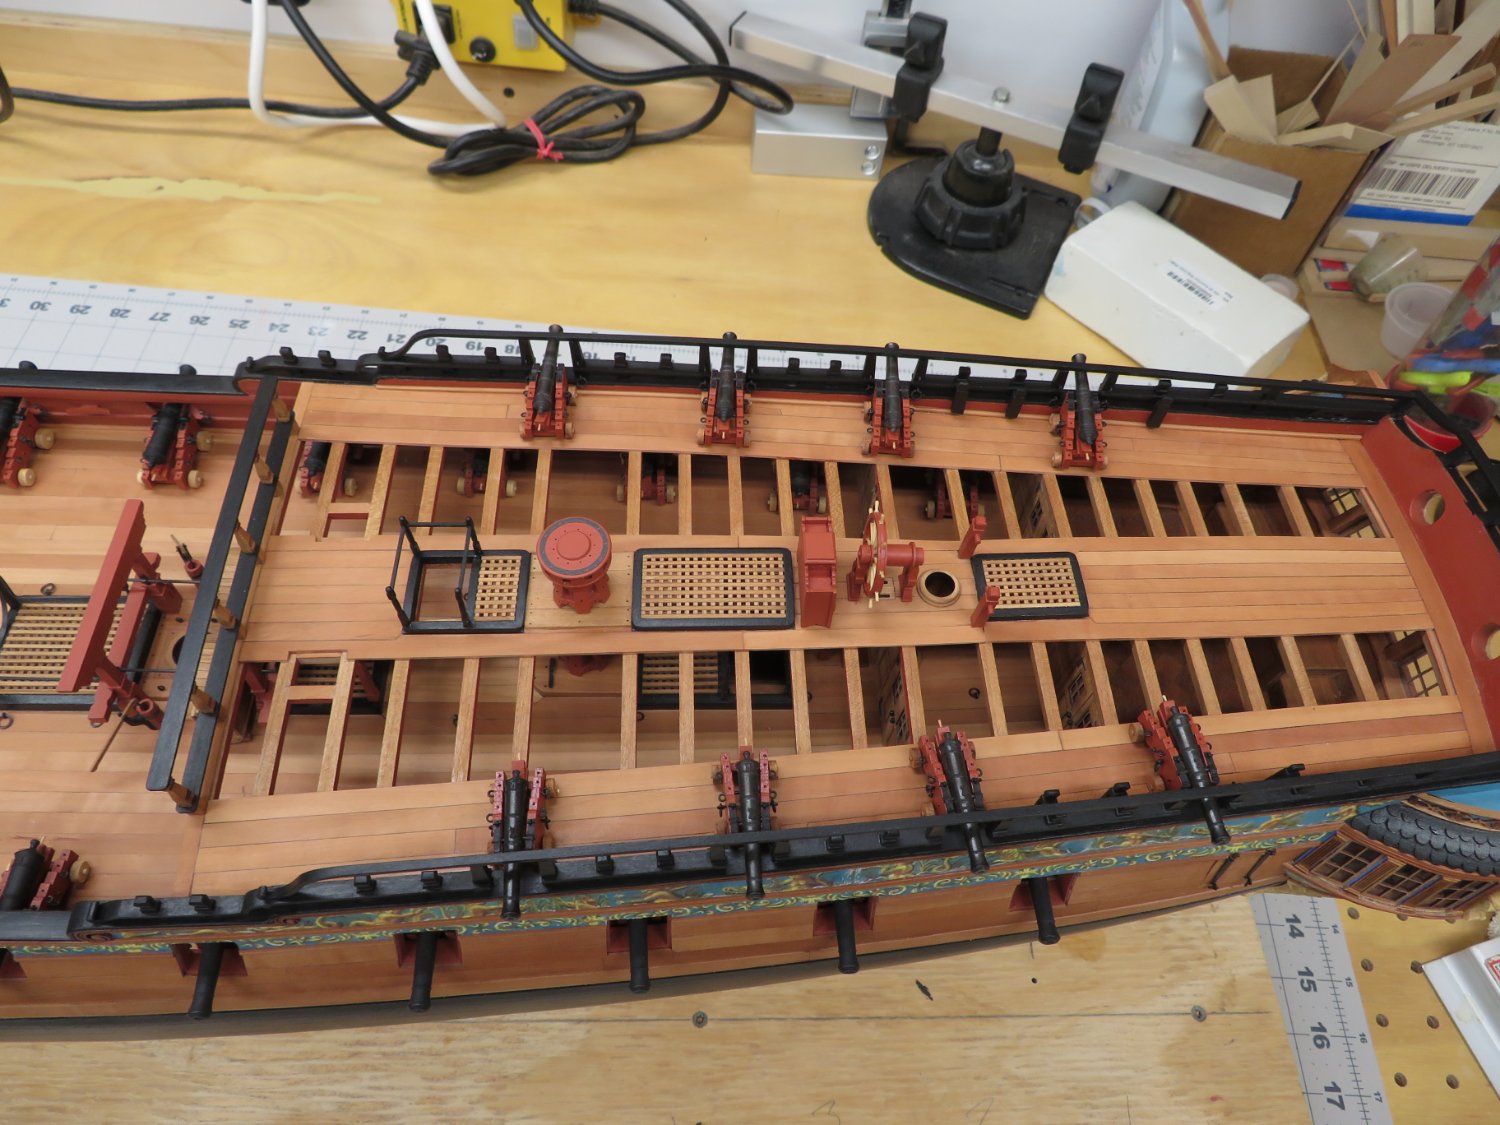
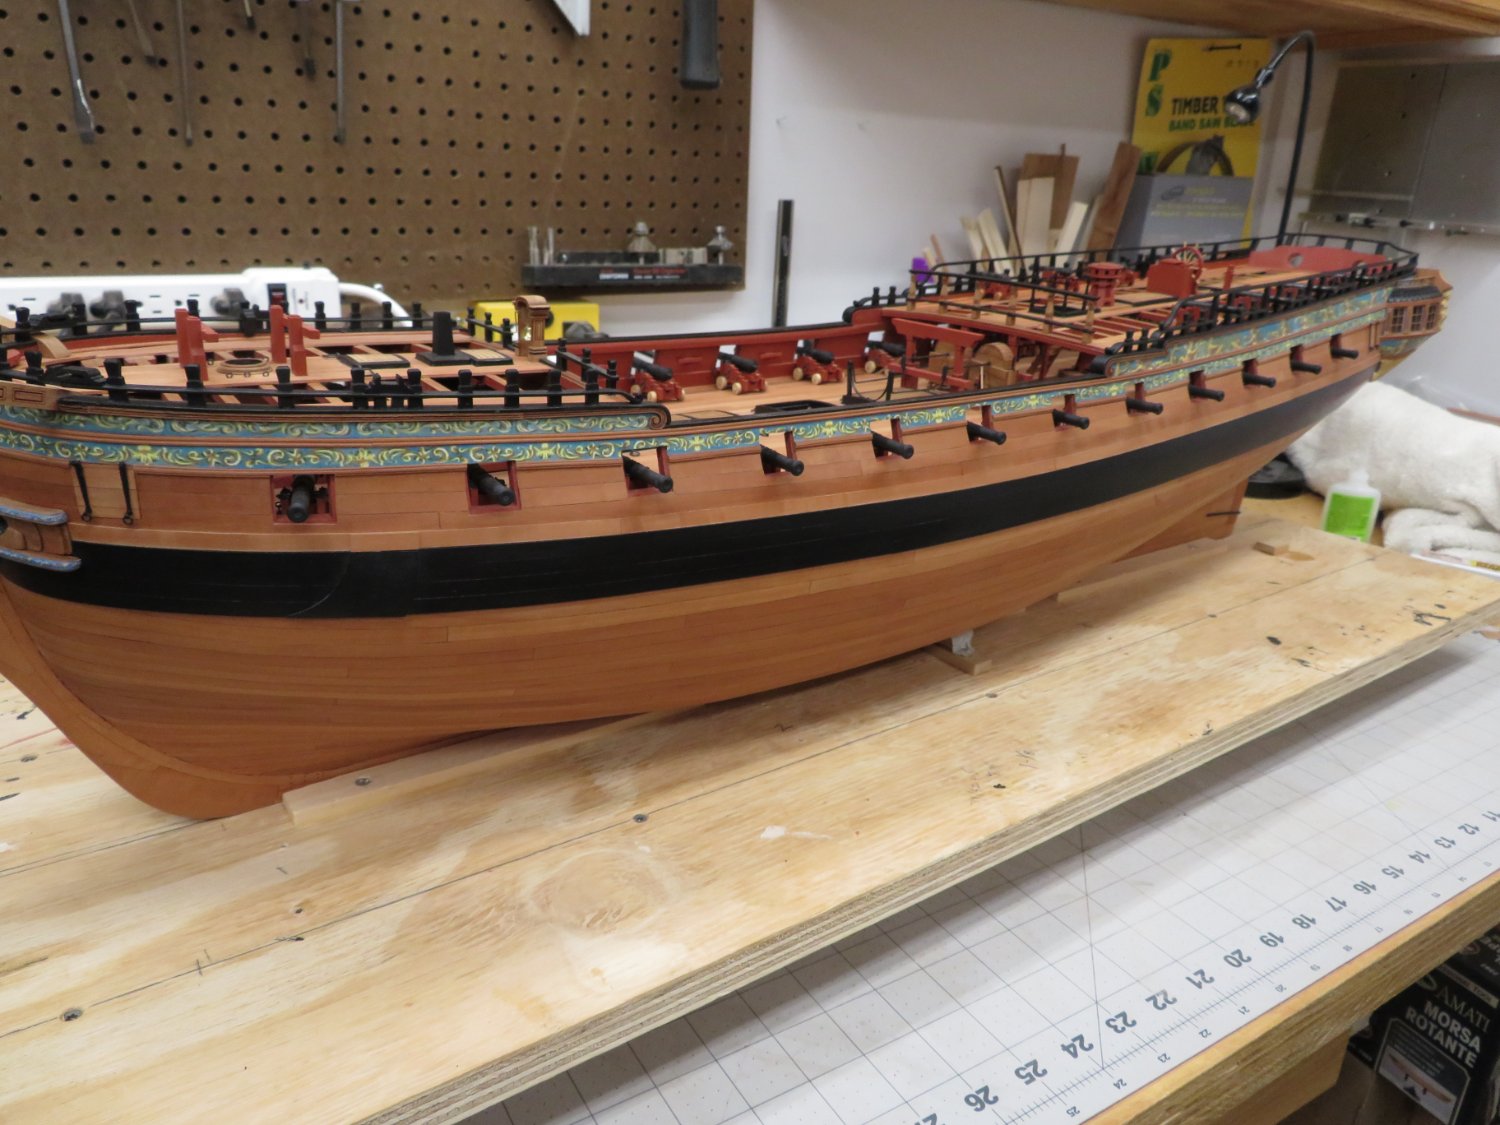
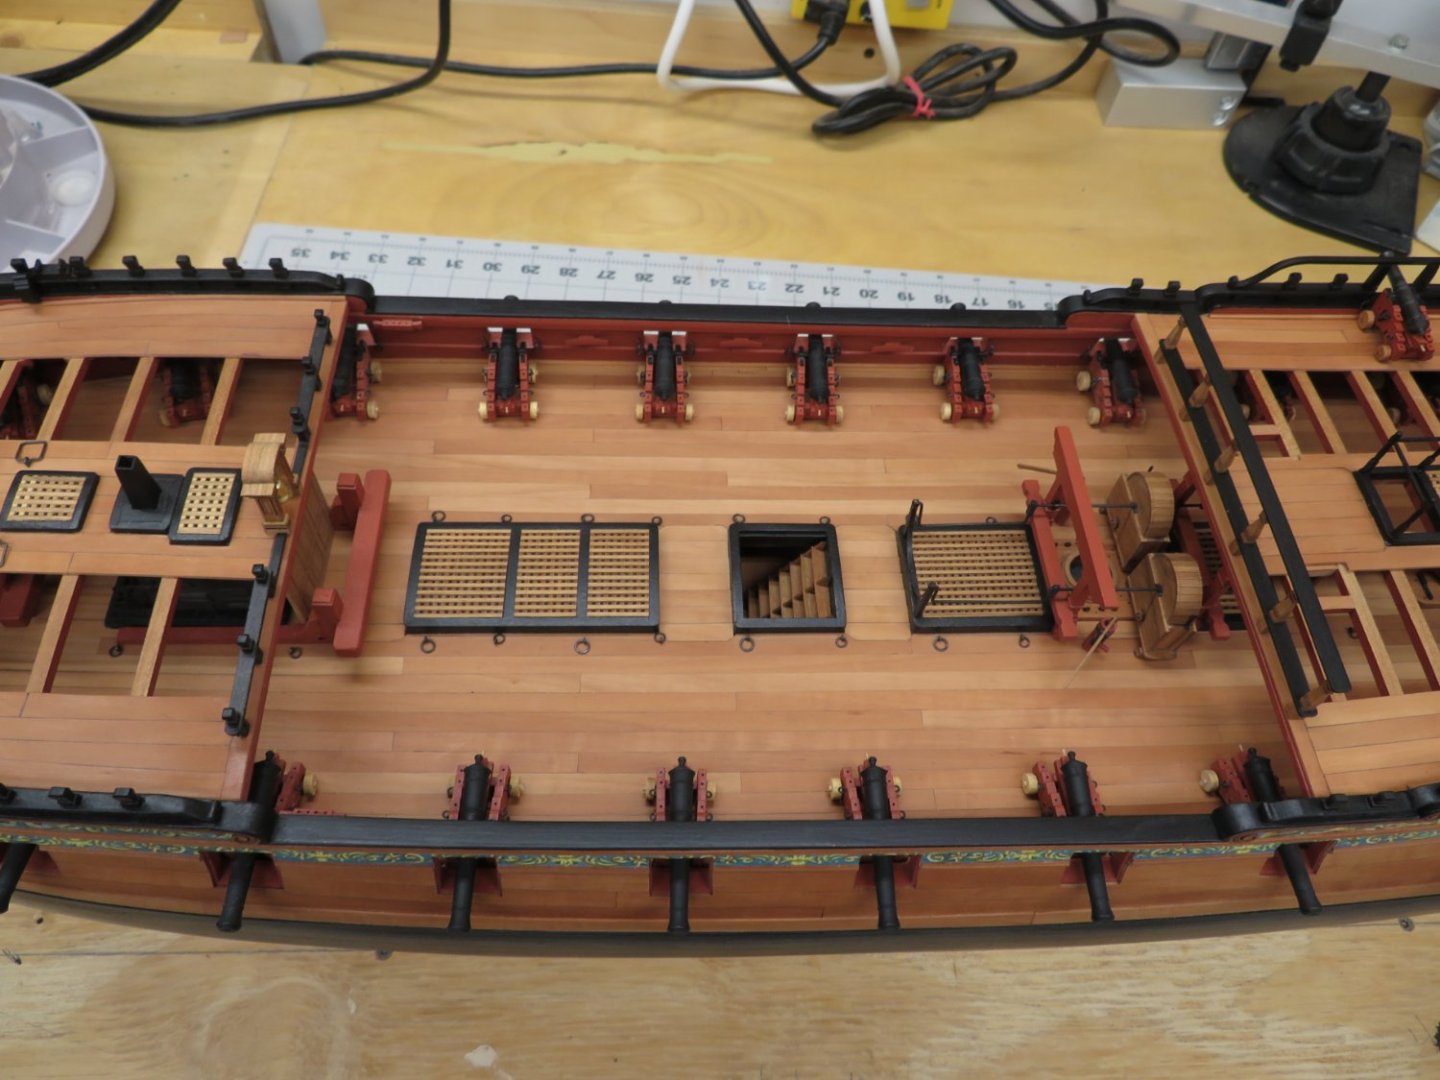
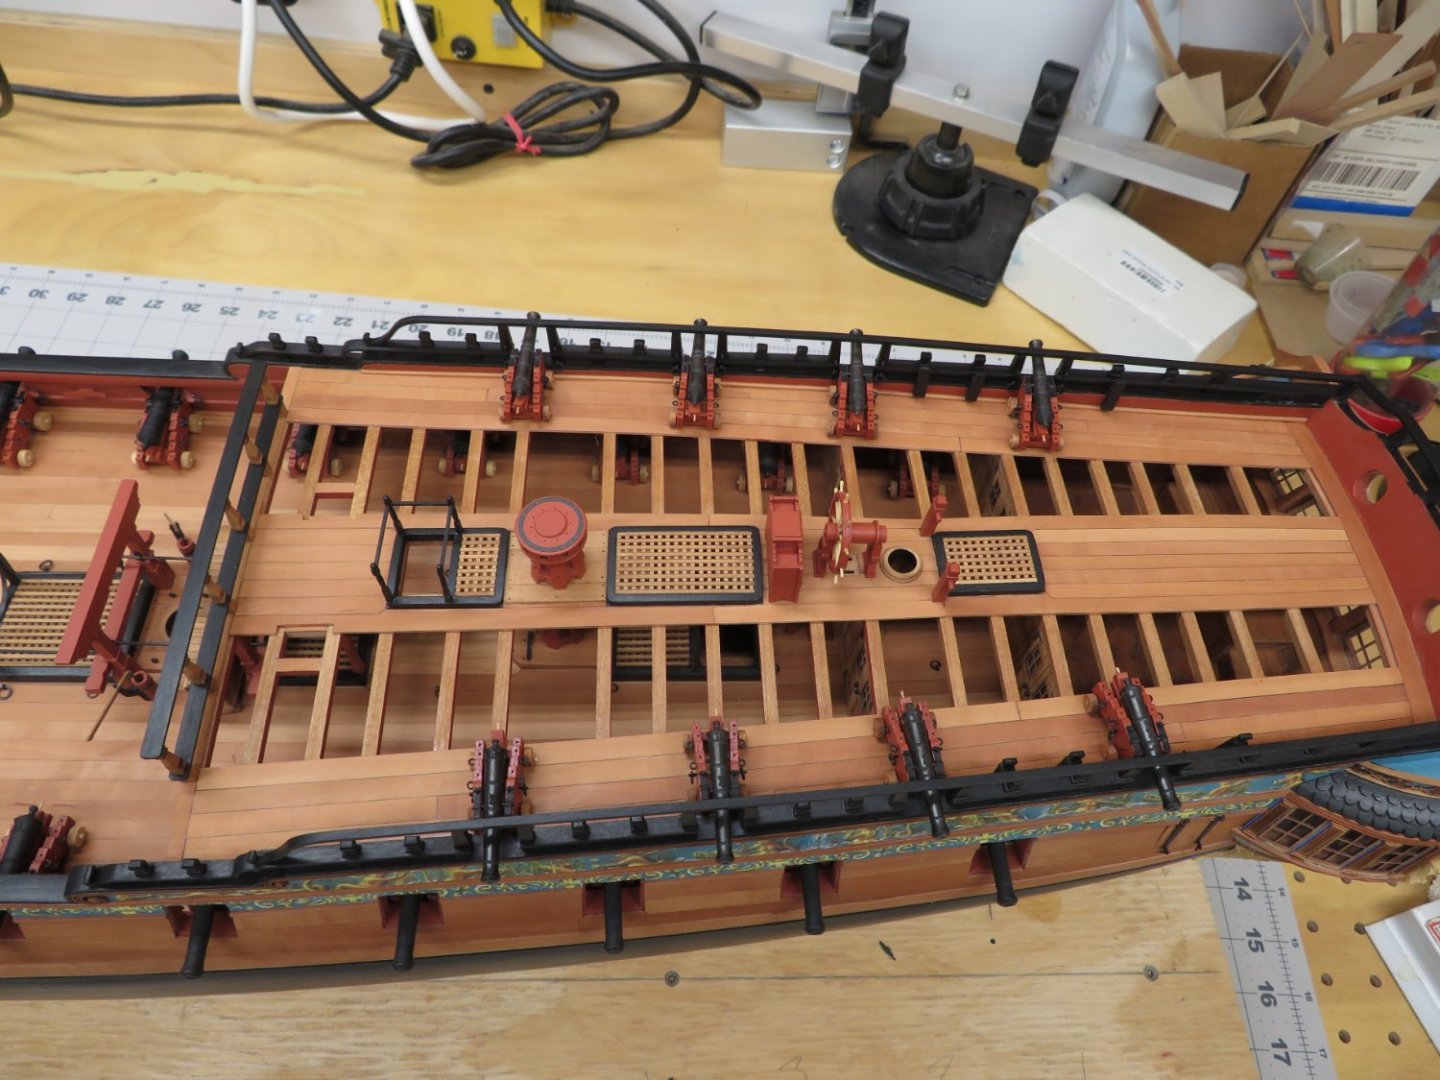
Well, I've finished and placed the remaining eight 6 pounders on the quarter deck as well as the last eight 12 pounders on the gun deck. That completes chapter 10. Before I start chapter 11. I still have to go back and put on the gunport lids. I've been holding off on placing them until the last minute to lessen the chance of accidentally knocking them off. I can't wait any longer now.

- 642 replies
-
- 17
-
-
-
- winchelsea
- Syren Ship Model Company
- (and 1 more)
-
That is some fantastic work there Mike.
- 607 replies
-
- 3
-
-
- winchelsea
- Syren Ship Model Company
- (and 1 more)
-
Very nice Ben. I agree sometimes you need to shift gears on builds that take years to complete.
- 399 replies
-
- 2
-
-
- winchelsea
- Syren Ship Model Company
- (and 1 more)
-
Nice to see your progress. Chapter 7 is a lot of fun!