HOLIDAY DONATION DRIVE - SUPPORT MSW - DO YOUR PART TO KEEP THIS GREAT FORUM GOING! (89 donations so far out of 49,000 members - C'mon guys!)
×


Rustyj
-
Posts
2,532 -
Joined
-
Last visited
Content Type
Profiles
Forums
Gallery
Events
Everything posted by Rustyj
-
 Nice work Glenn. That's the nice thing about model building. You can build it the way that makes you happy. You are the ship's captain after all!
- 840 replies
-
- 4
-

-
- winchelsea
- Syren Ship Model Company
- (and 1 more)
-
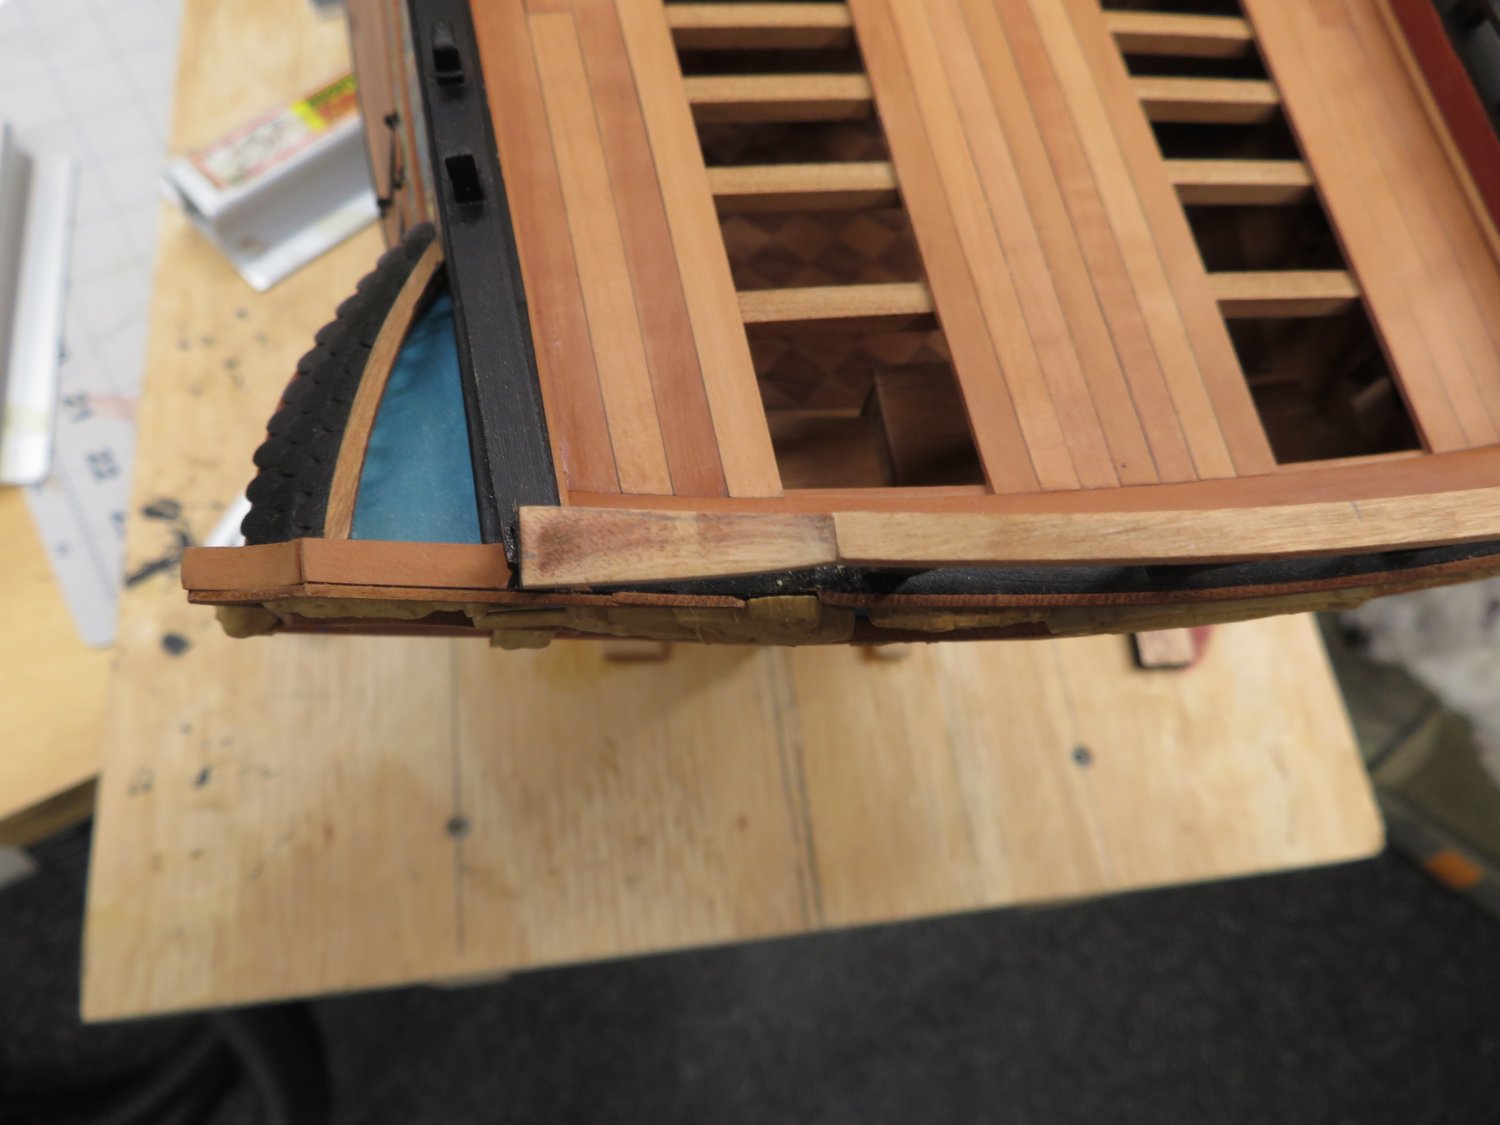
Excellent work Glenn. Though pictures don't seem exciting placing the margin planks is a great start to the decking. Merry Christmas to you too!
- 840 replies
-
- 3
-
-
- winchelsea
- Syren Ship Model Company
- (and 1 more)
-
Thanks JJ. Yes she's winding down to the final two chapters and really a happy/sad thought!
- 642 replies
-
- 3
-
-
- winchelsea
- Syren Ship Model Company
- (and 1 more)
-
Back up to post #7 in this post and you will see a PDF download for beams and knees. At least I think that's the one you need.
-
Thank you, Chuck, Mike, Glenn and Matt! I was apprehensive about doing the stern rail but the supplied template made it much easier. I still more eye bolts and rings to make too. Thanks for all the like too. Very much appreciated.
- 642 replies
-
- 2
-
-
- winchelsea
- Syren Ship Model Company
- (and 1 more)
-
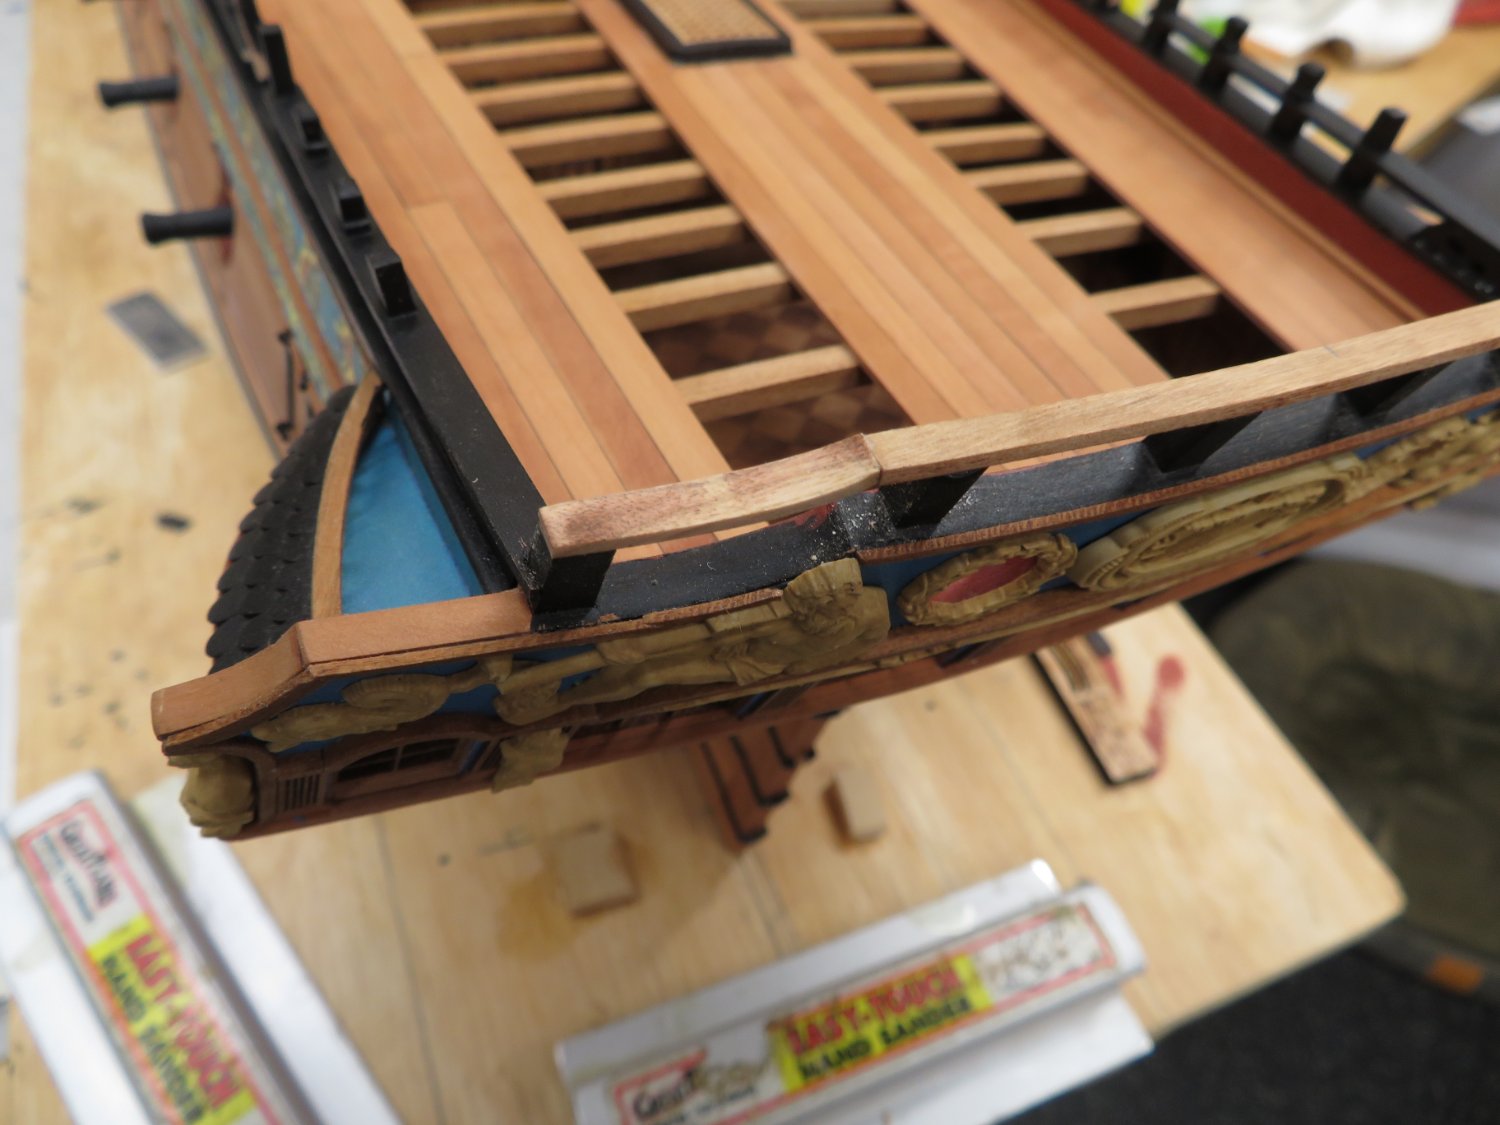
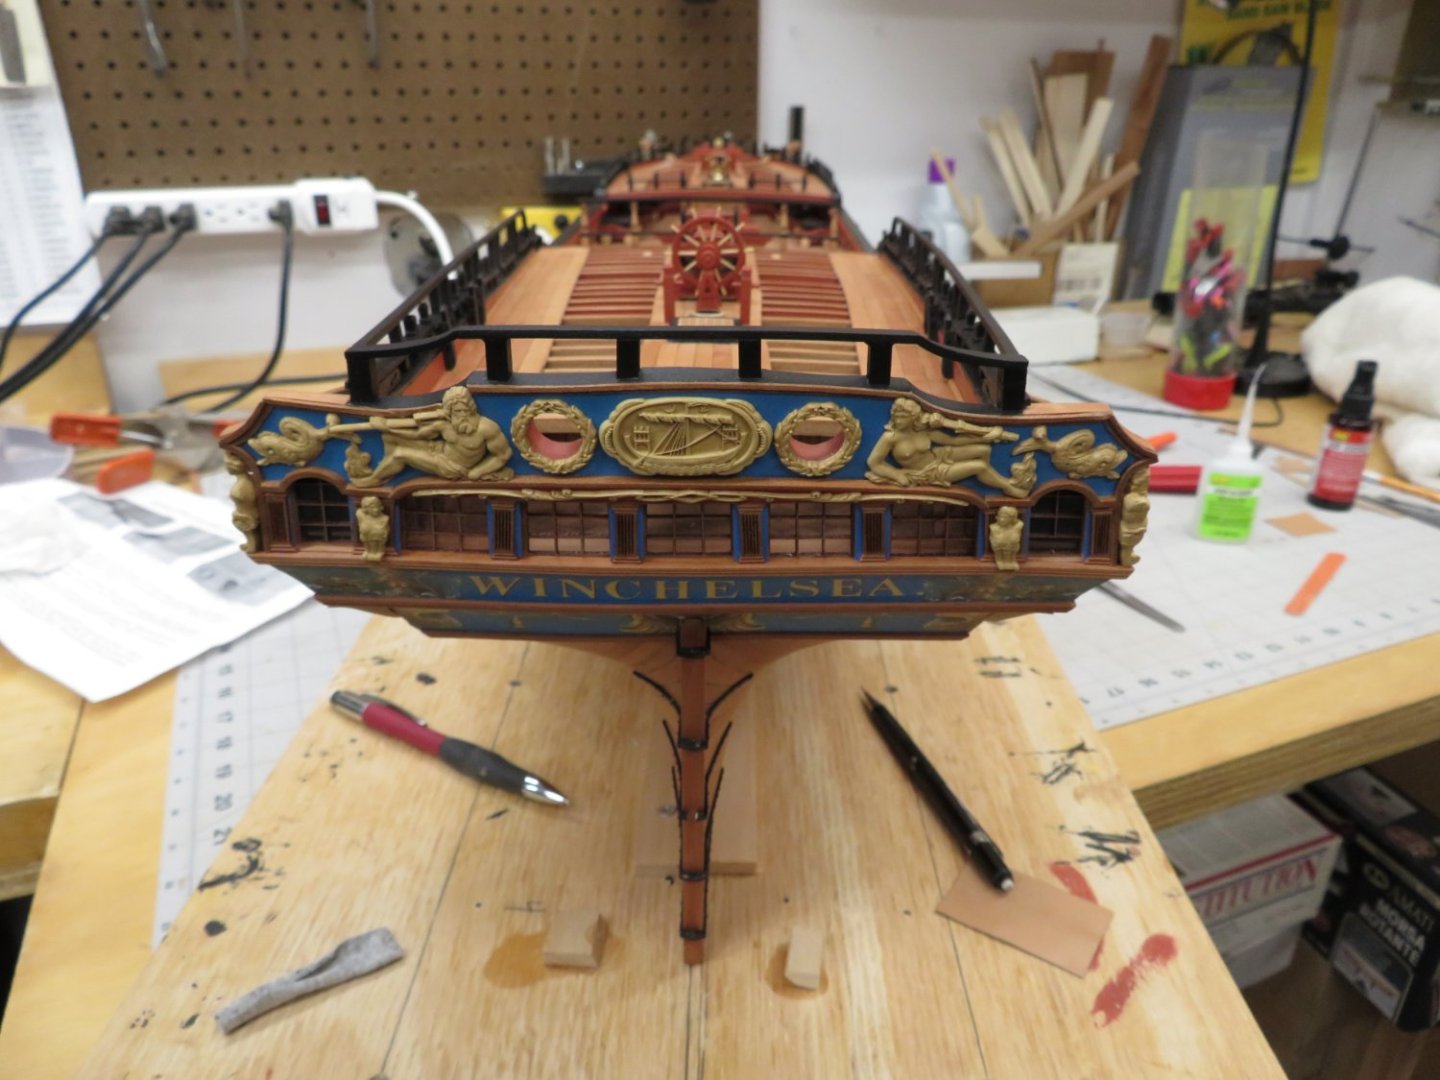
I finished the last portion of the rail with the timber heads and the transom cap was worked on. It appears that I was a little negligent taking pictures. I'd like to blame it on the camera, but it was me. You can see the shaping of the curved portion of the cap rail partially completed. Chucks template was used to determine the heights of the stern frames with some minor sanding to get the heights right. The top rail for the sides was completed and the fairleads added. Now there are eight more cannon carriages to assemble for the six pounders.


- 642 replies
-
- 17
-
-

-
- winchelsea
- Syren Ship Model Company
- (and 1 more)
-
Looking really nice Glenn. Your attention to the details now will pay off later when everything is close to spot on and "adjustments" will be kept to a minimum.
- 840 replies
-
- 3
-
-
- winchelsea
- Syren Ship Model Company
- (and 1 more)
-
Greg that is simply one of the most stunningly elegant models ever! Her lines are so nice, and your workmanship is exceptional. It has been a pleasure following along and learning so much. Thank you!
- 345 replies
-
- 11
-
-

-
Not a problem Glenn. You'll know when I'm on chapter 12 and doing the head gratings. You'll be able to hear the cussing all the way to your house.
- 642 replies
-
- 4
-
-

-
- winchelsea
- Syren Ship Model Company
- (and 1 more)
-
Thank you for the invitation. I have looked in on your build and you have made a good start. Unfortunately, I have a few months to go on the Winnie before she's finished. Also, I am already committed to the Speedwell project. So, at this point I don't feel I would have the time to properly spend with you on the Eagle. If I can, I would offer what little knowledge I have to you.
- 642 replies
-
- 2
-
-
- winchelsea
- Syren Ship Model Company
- (and 1 more)
-
Hey Glenn, I guess after 3 years and ten out of twelve chapters almost finished, I'm "almost" done? 😂 Well Chucks Speedwell is at the top of the list with Chris's Indefatigable. I also received Pavel Nikitin's Captain John Smith's Shallop as a fun little side project. But first I have many months of work on the Winnie yet to complete.
- 642 replies
-
- 4
-
-
- winchelsea
- Syren Ship Model Company
- (and 1 more)
-
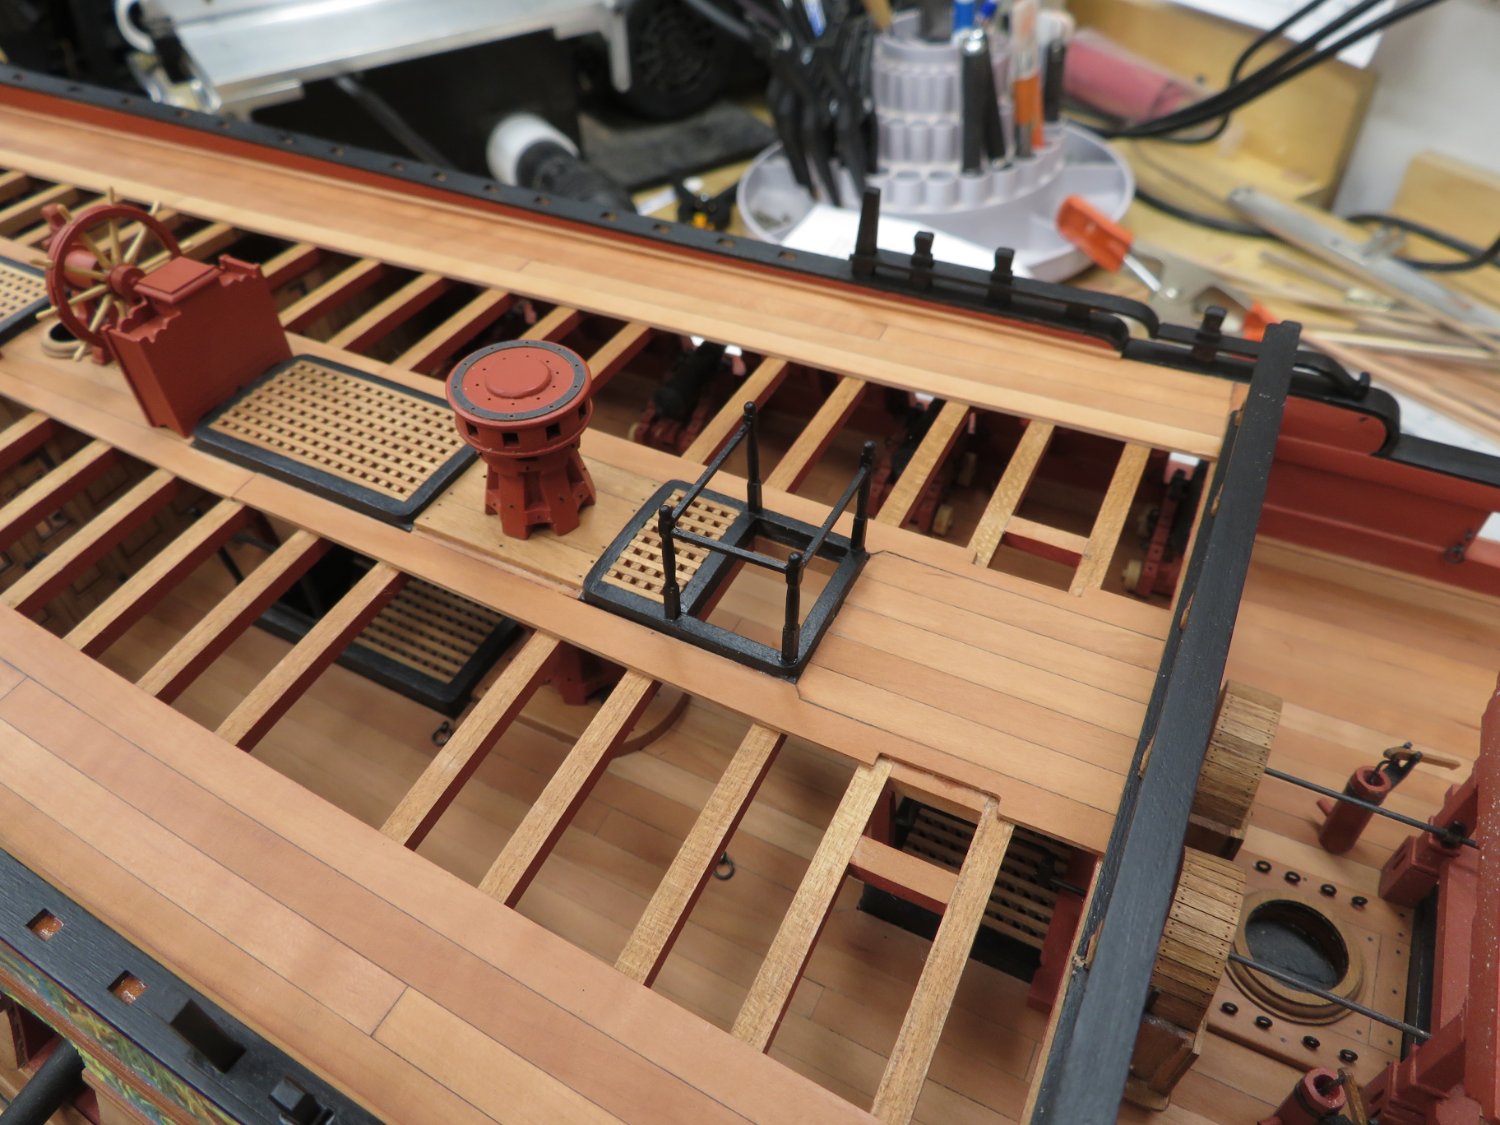
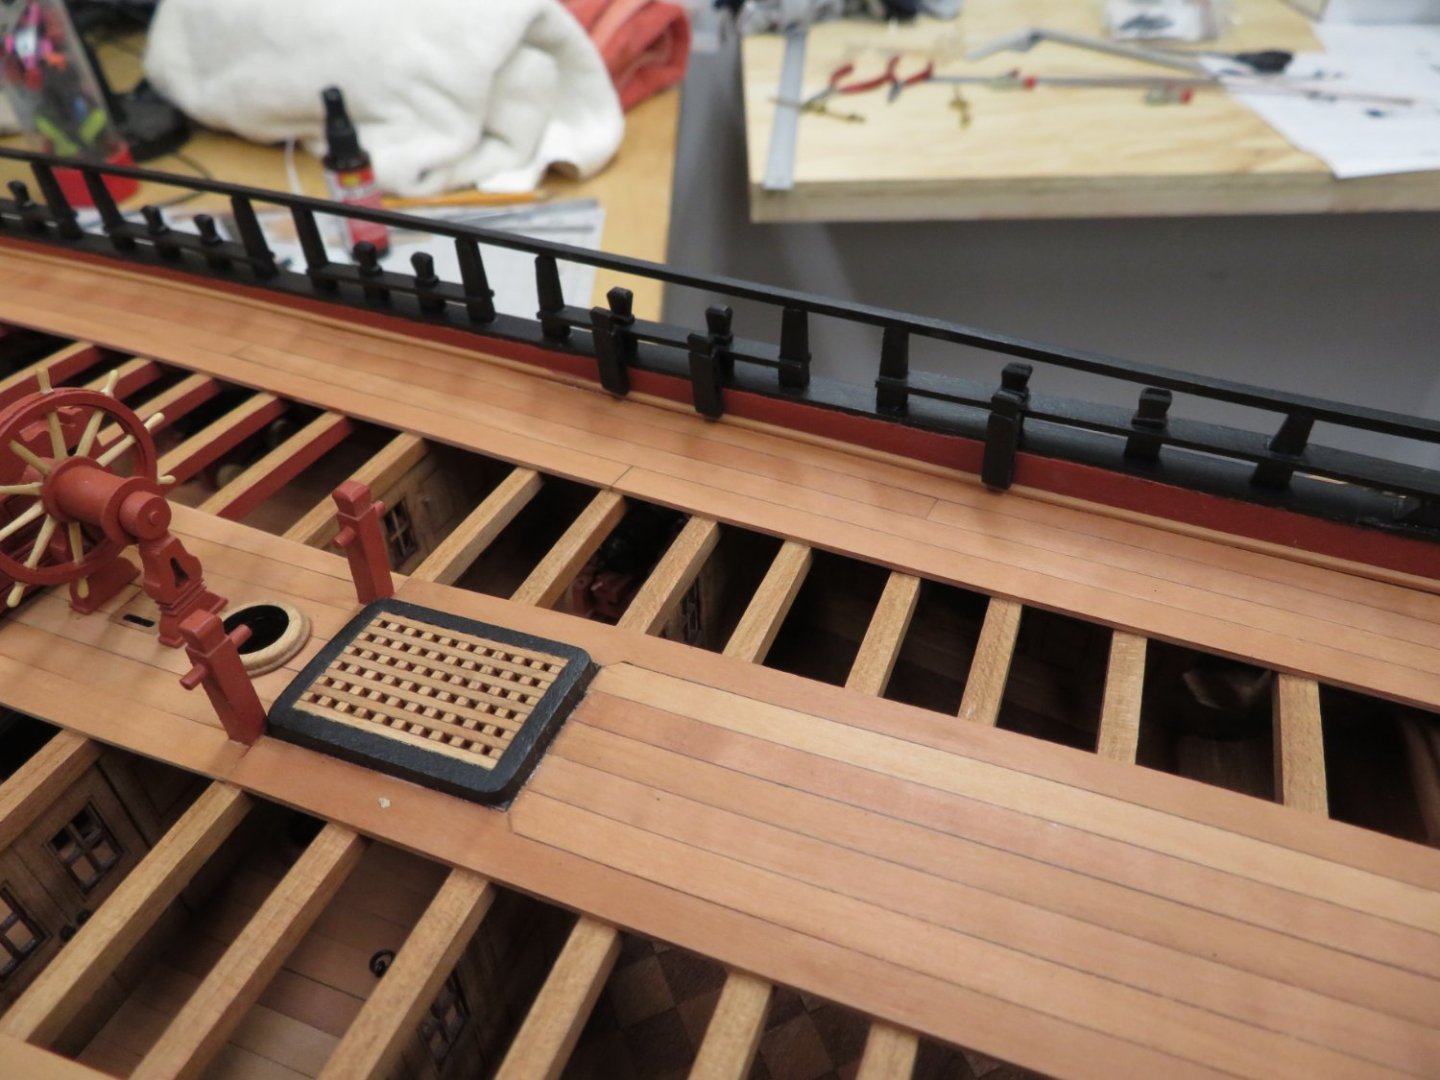
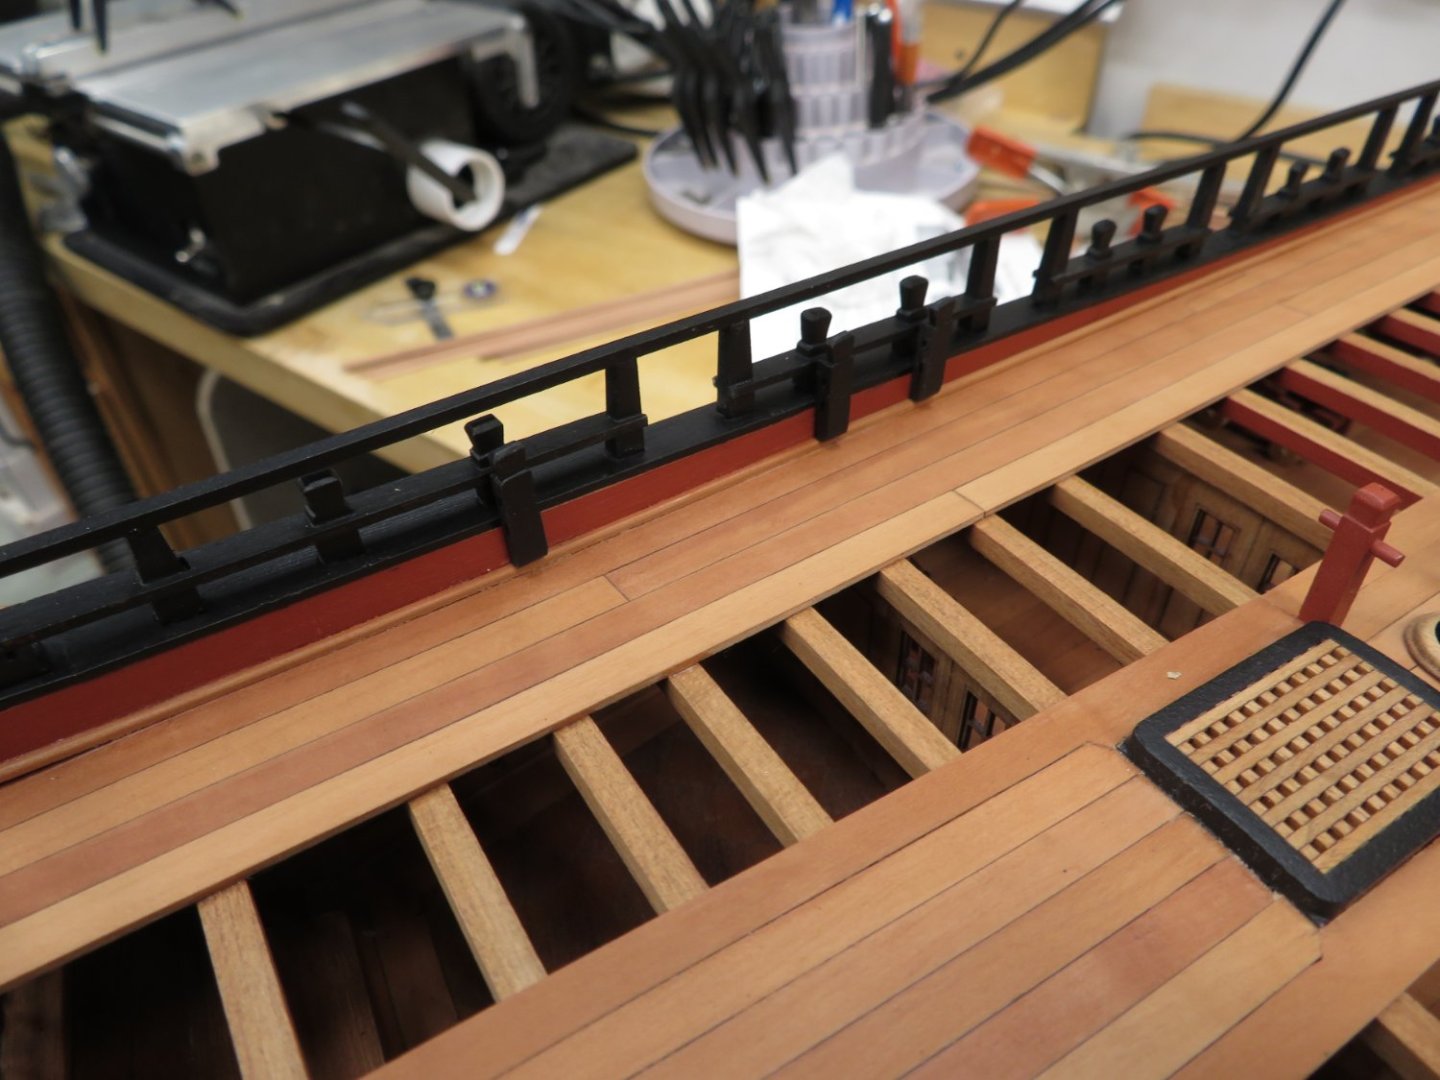
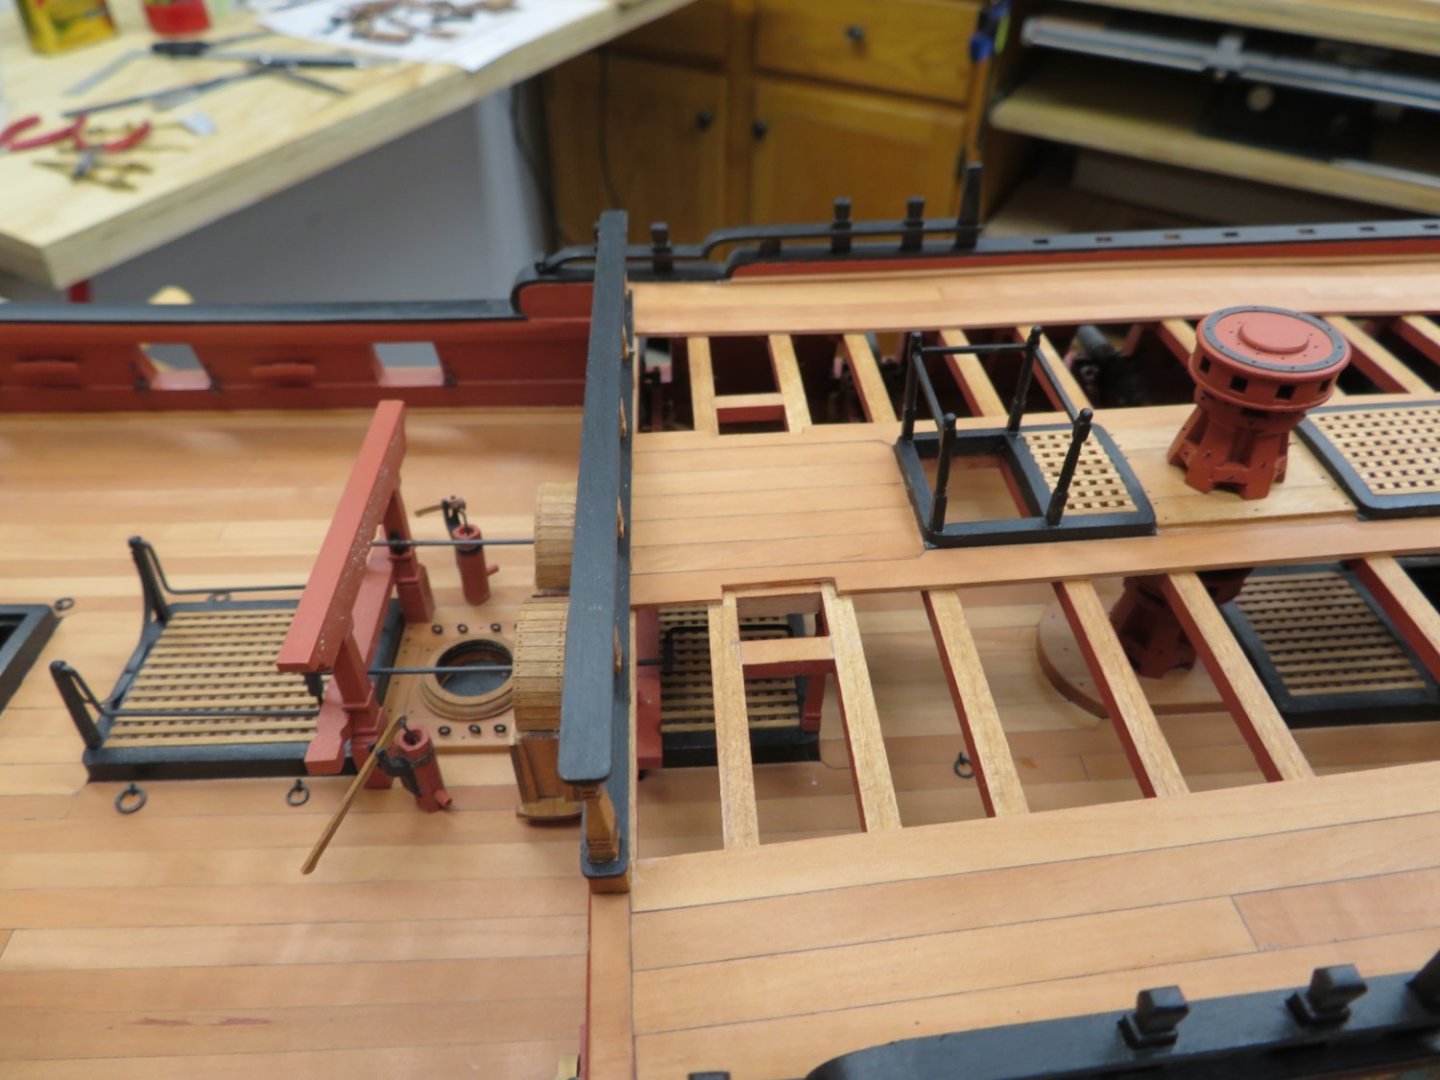
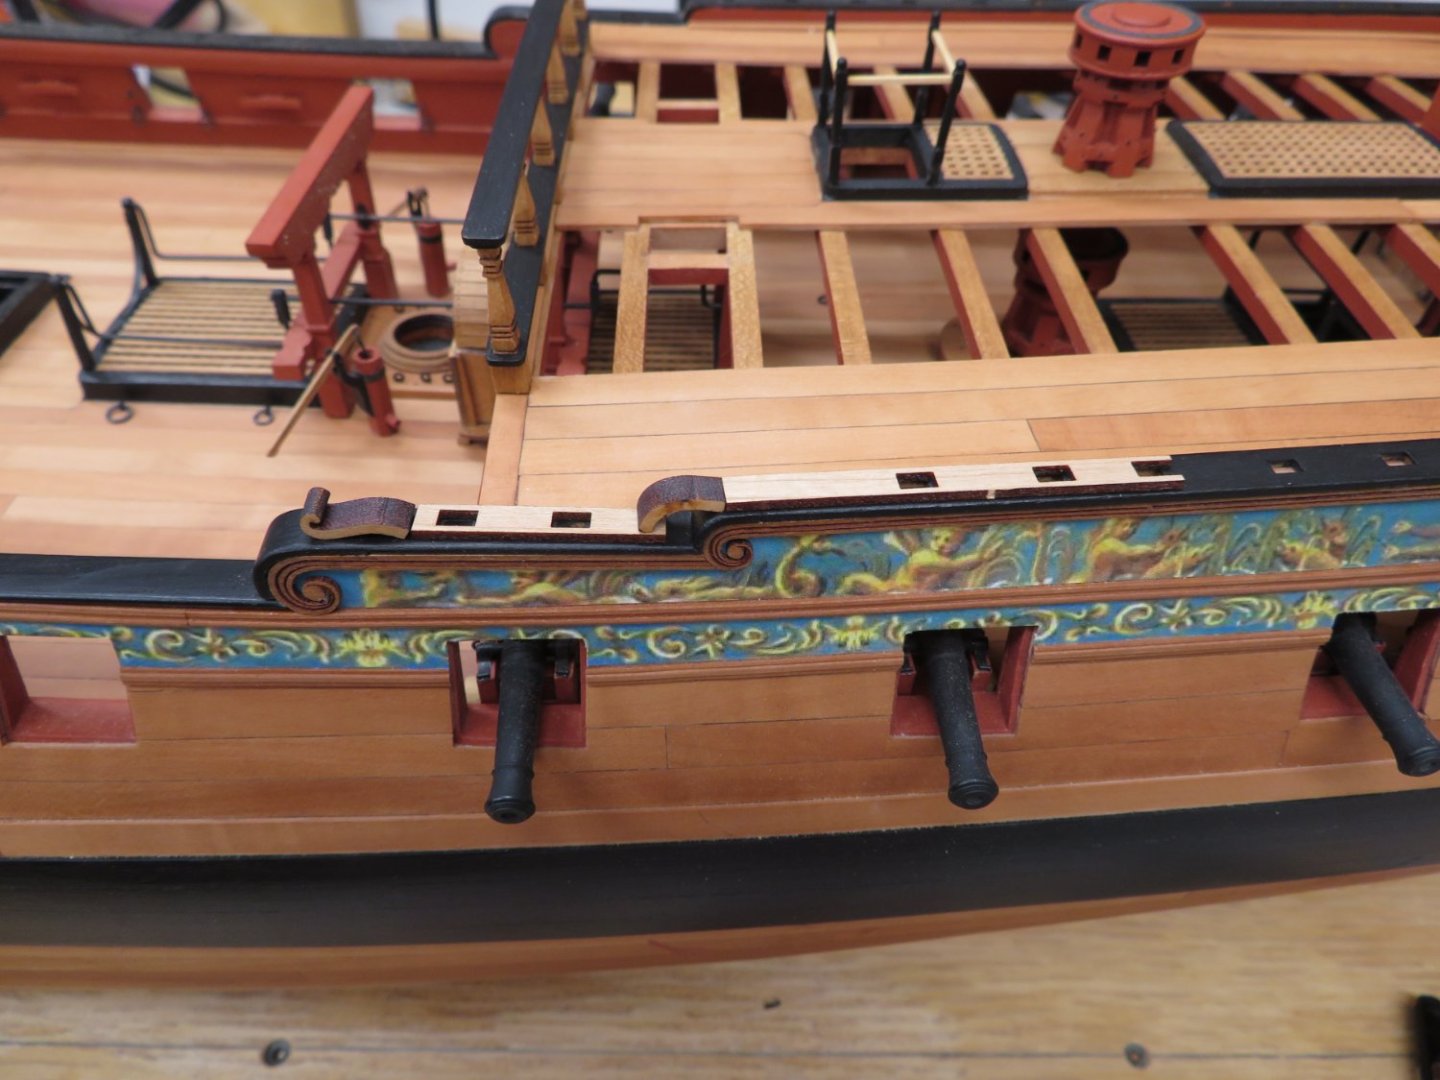
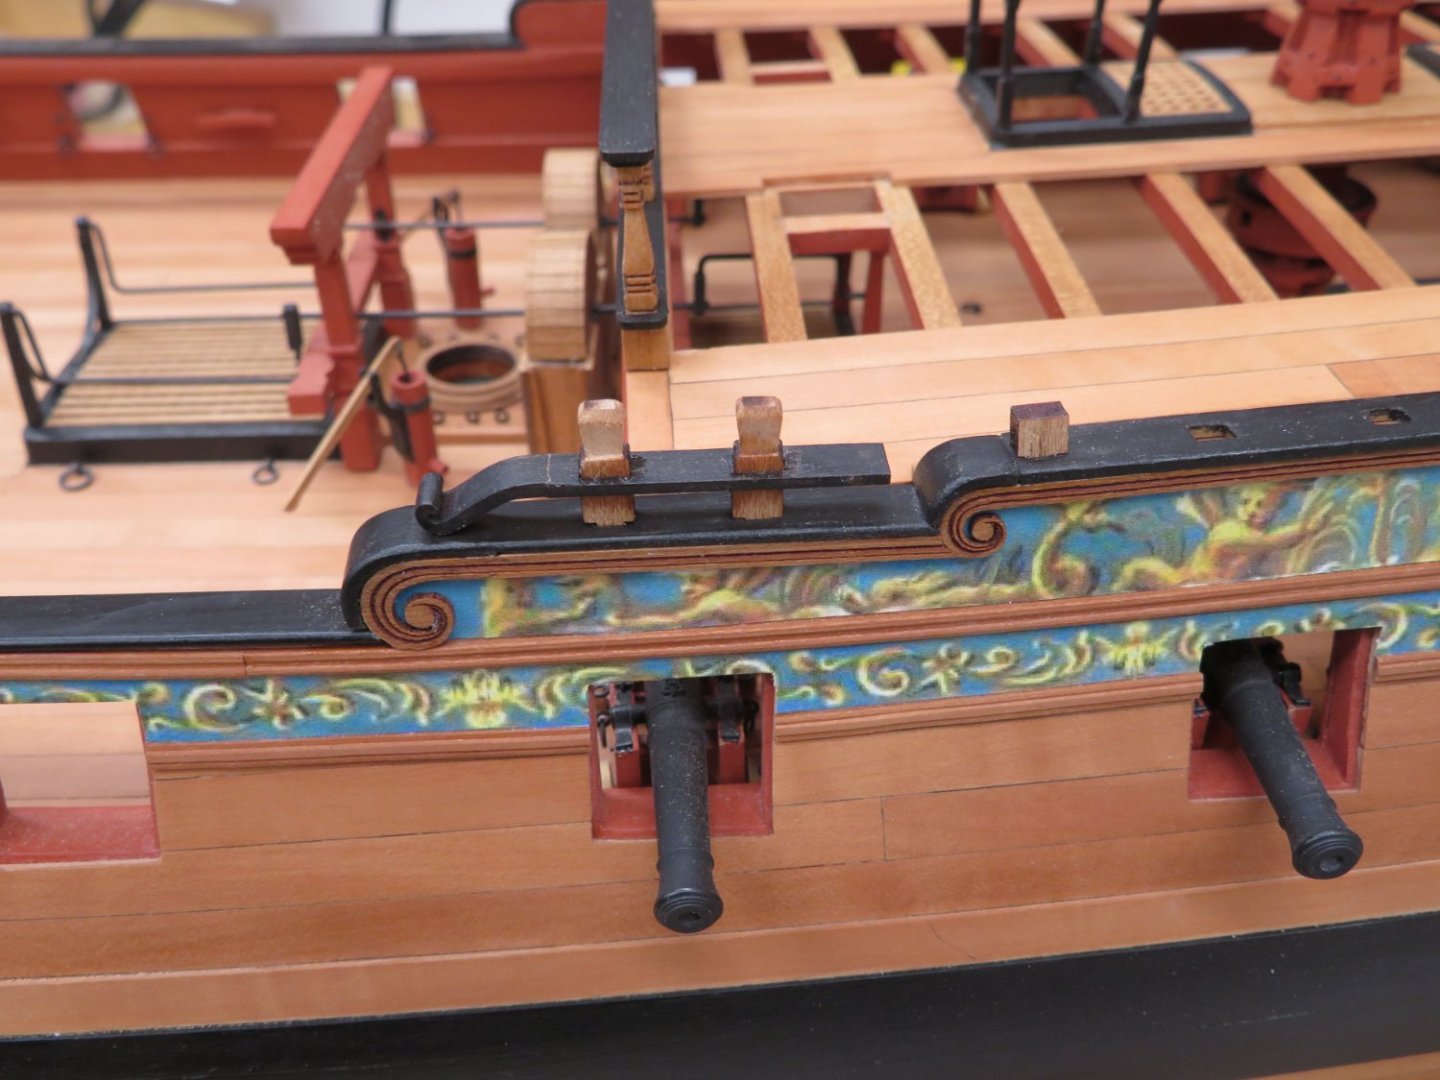
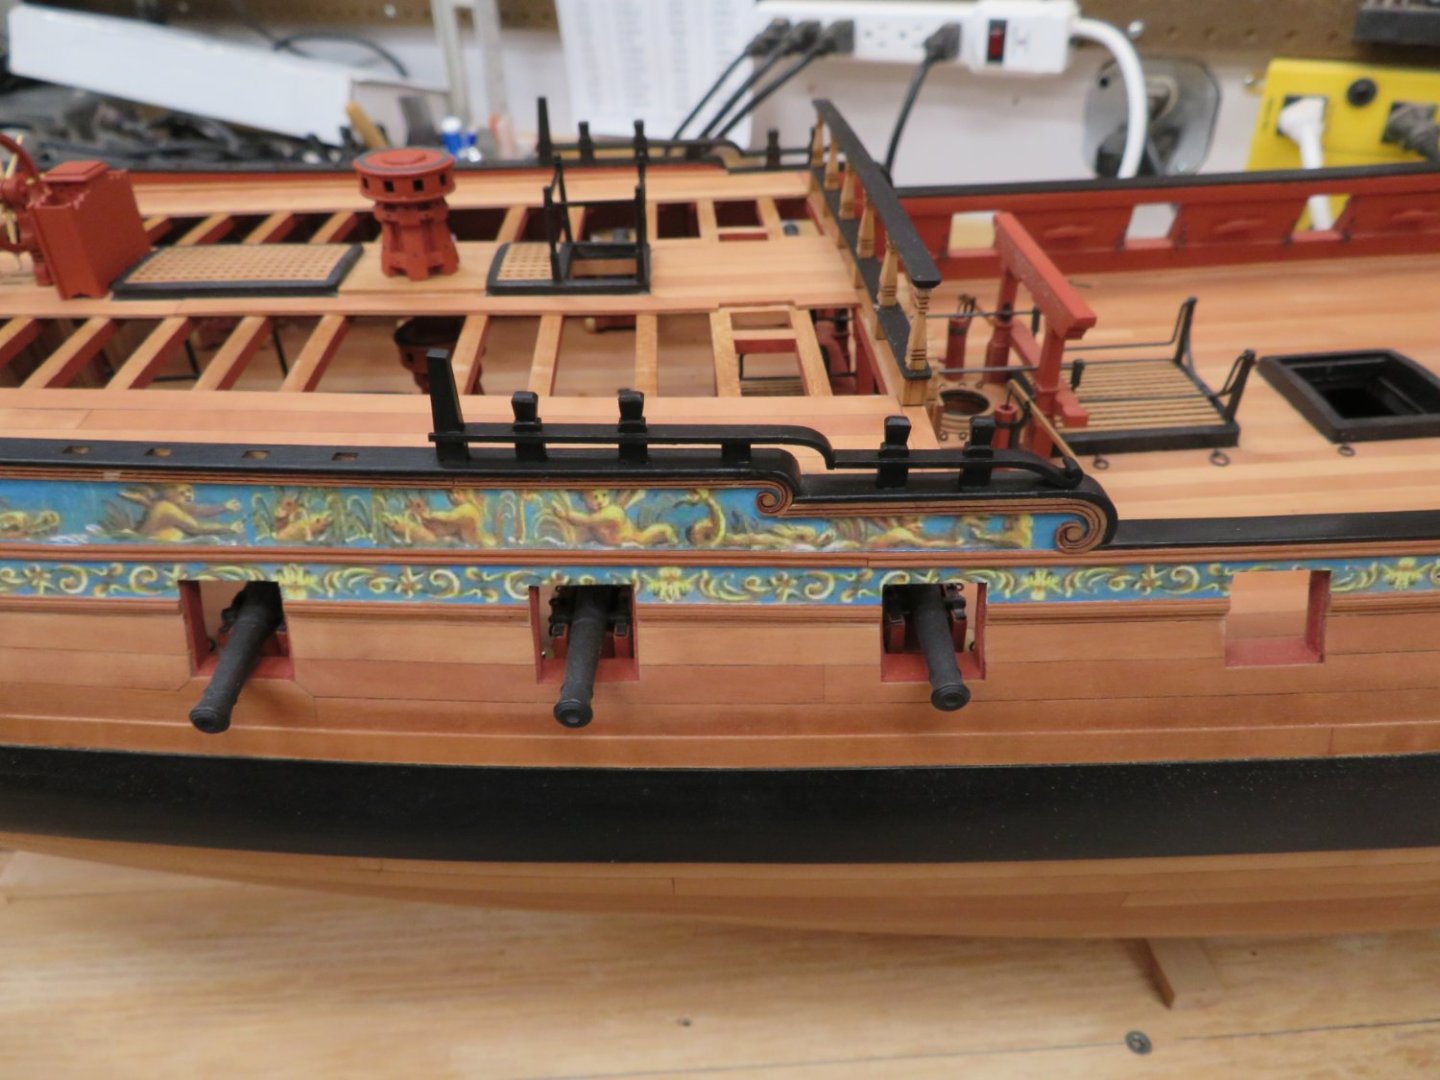
I've continued to work my way aft building one section at a time. Still some clean up and touch up needed.

- 642 replies
-
- 15
-
-
-
- winchelsea
- Syren Ship Model Company
- (and 1 more)
-
Thanks Glenn and Chuck. Yes it is a fun project. The design is such that a great result can be achieved with out a lot of stress. Work through each section and they can’t be rushed. Thanks for all the likes too.
- 642 replies
-
- 2
-
-
- winchelsea
- Syren Ship Model Company
- (and 1 more)
-
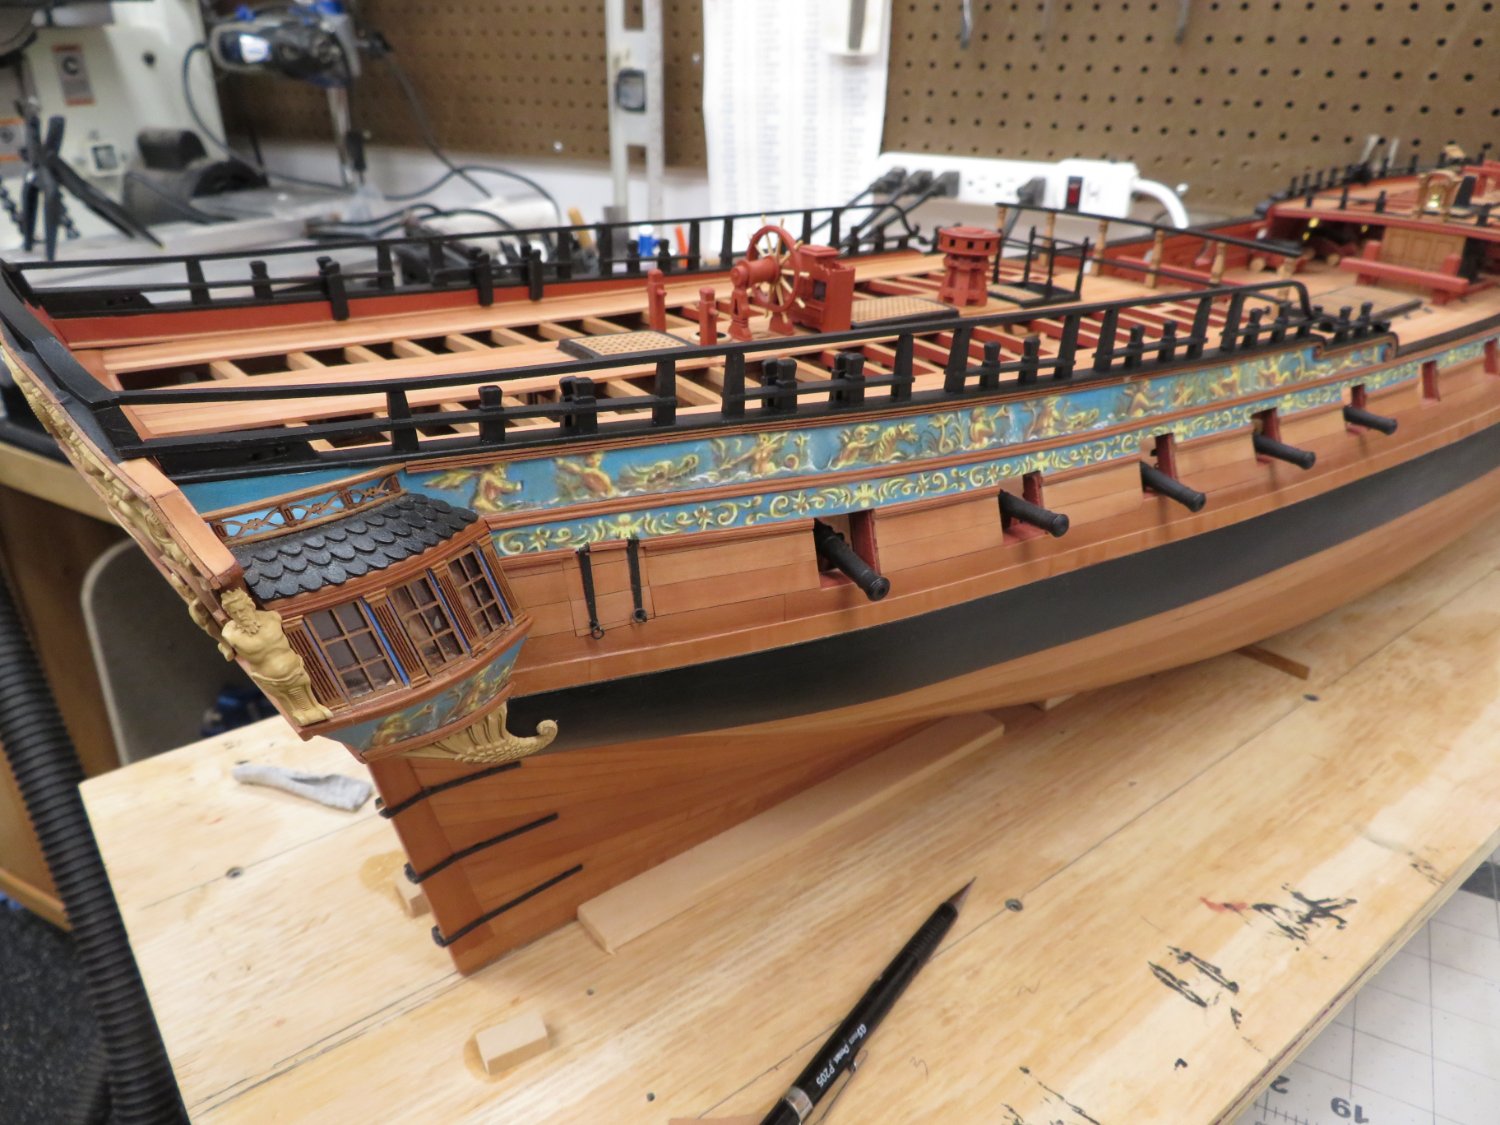
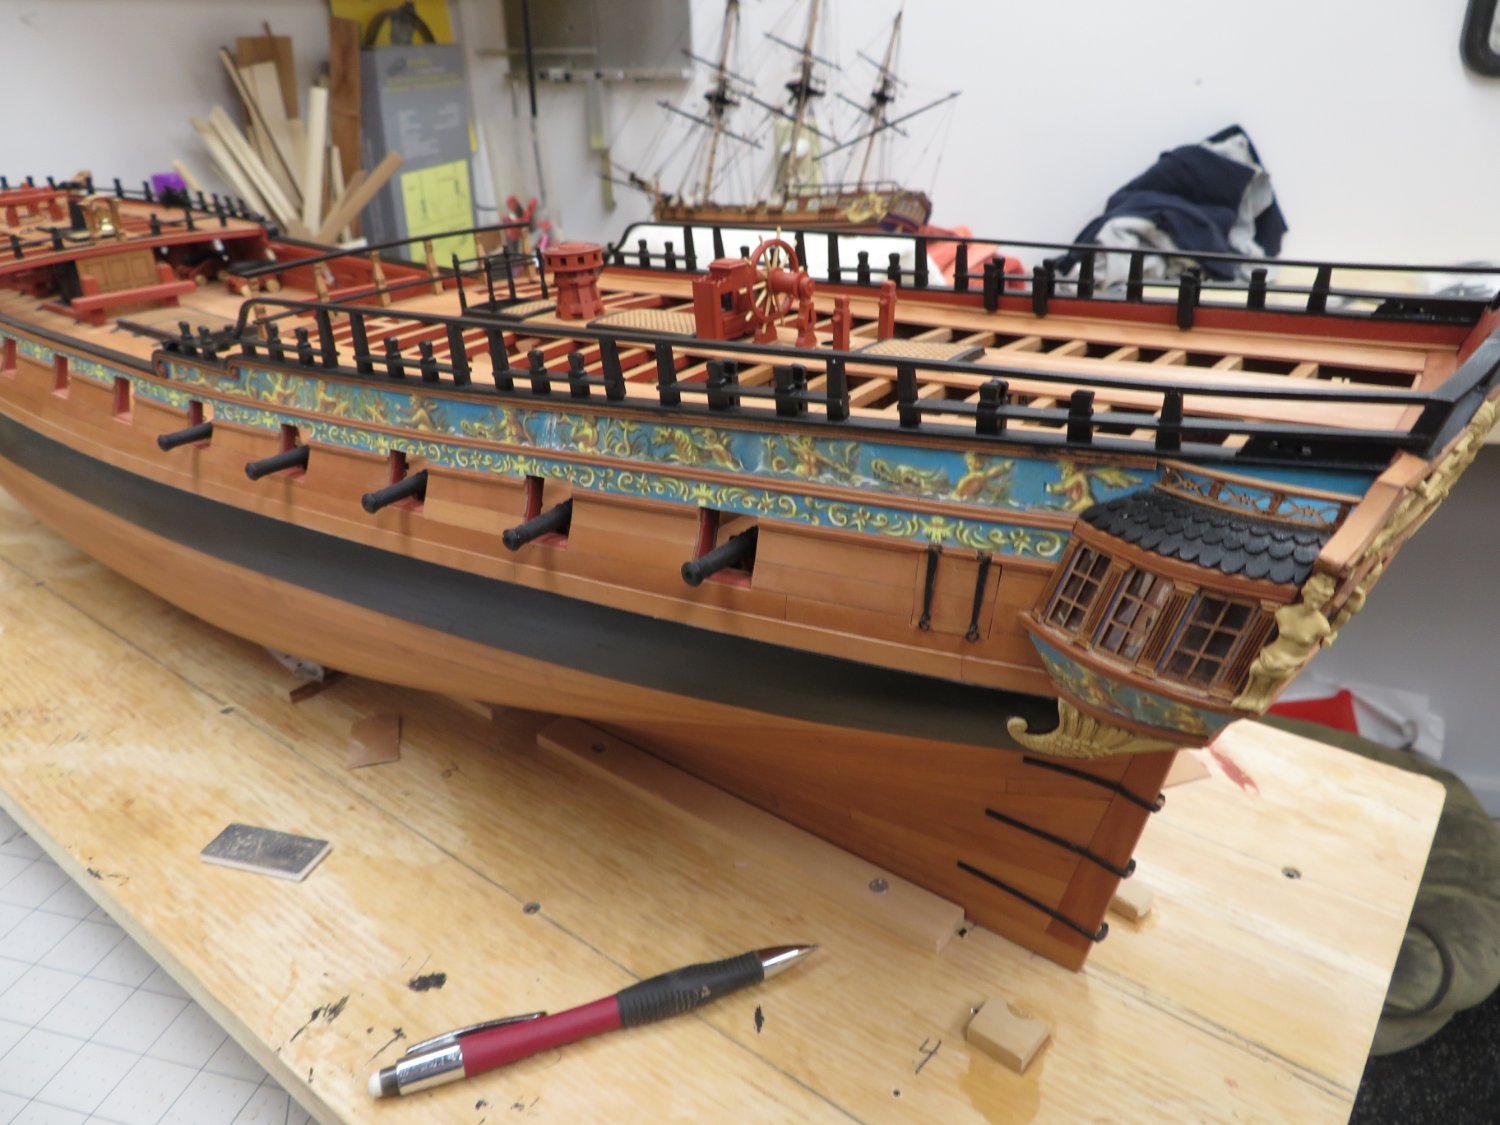
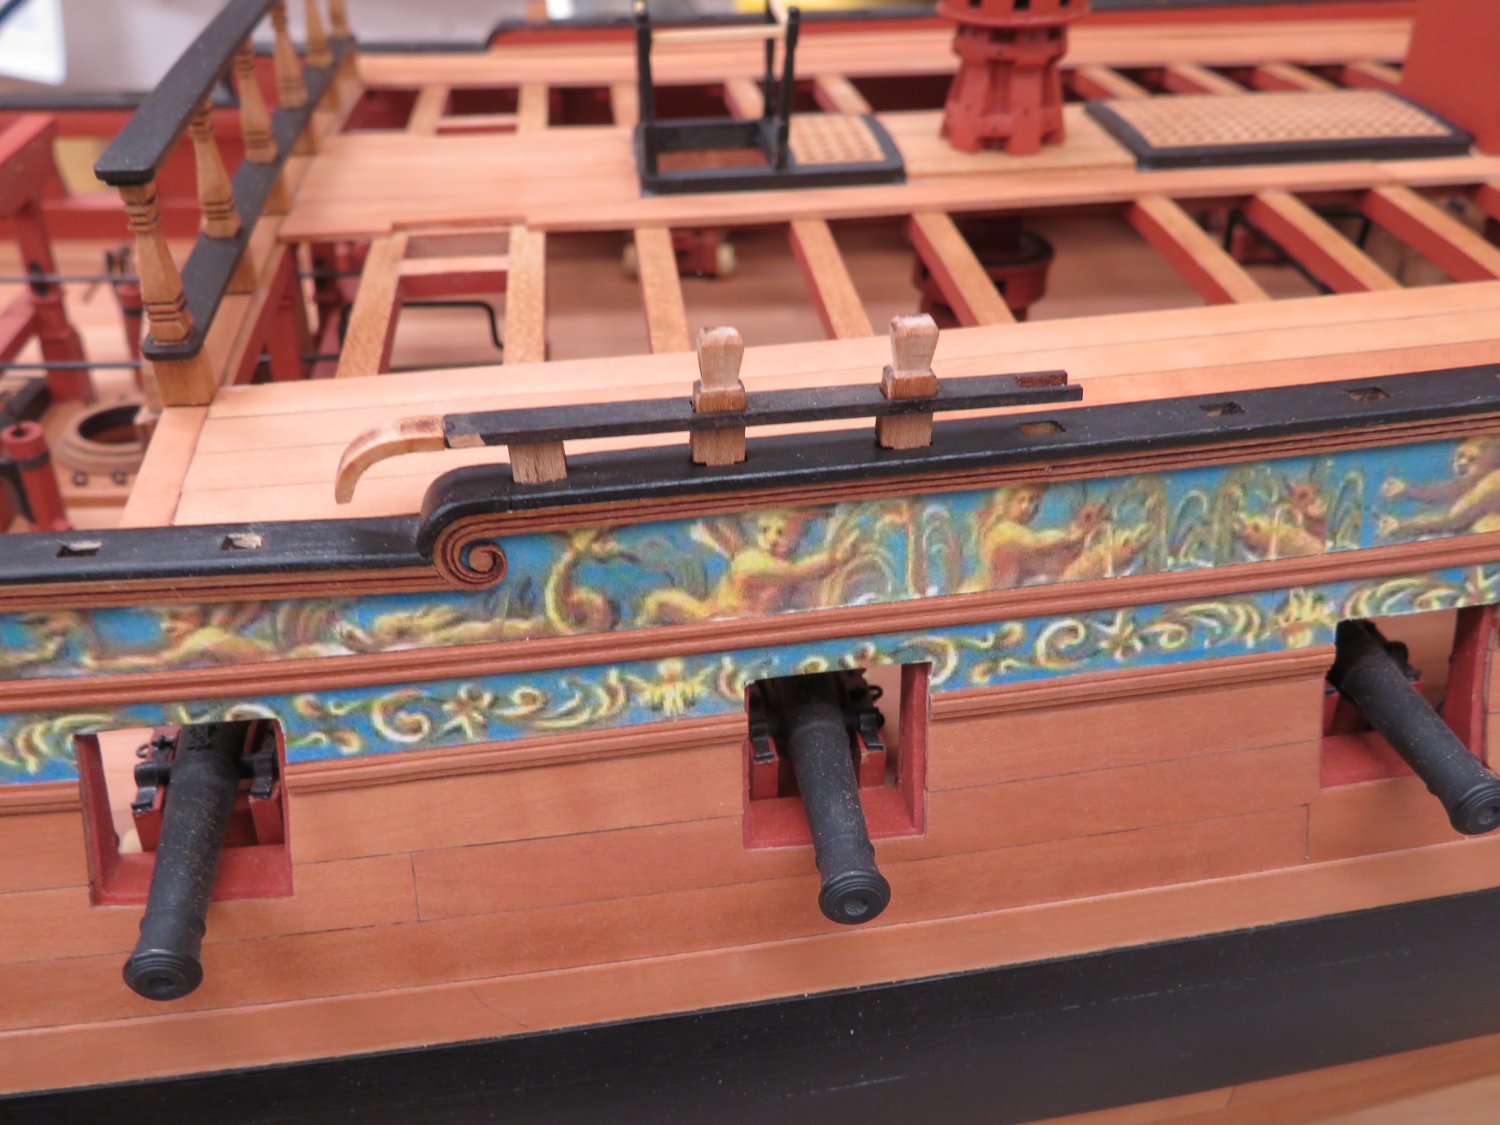
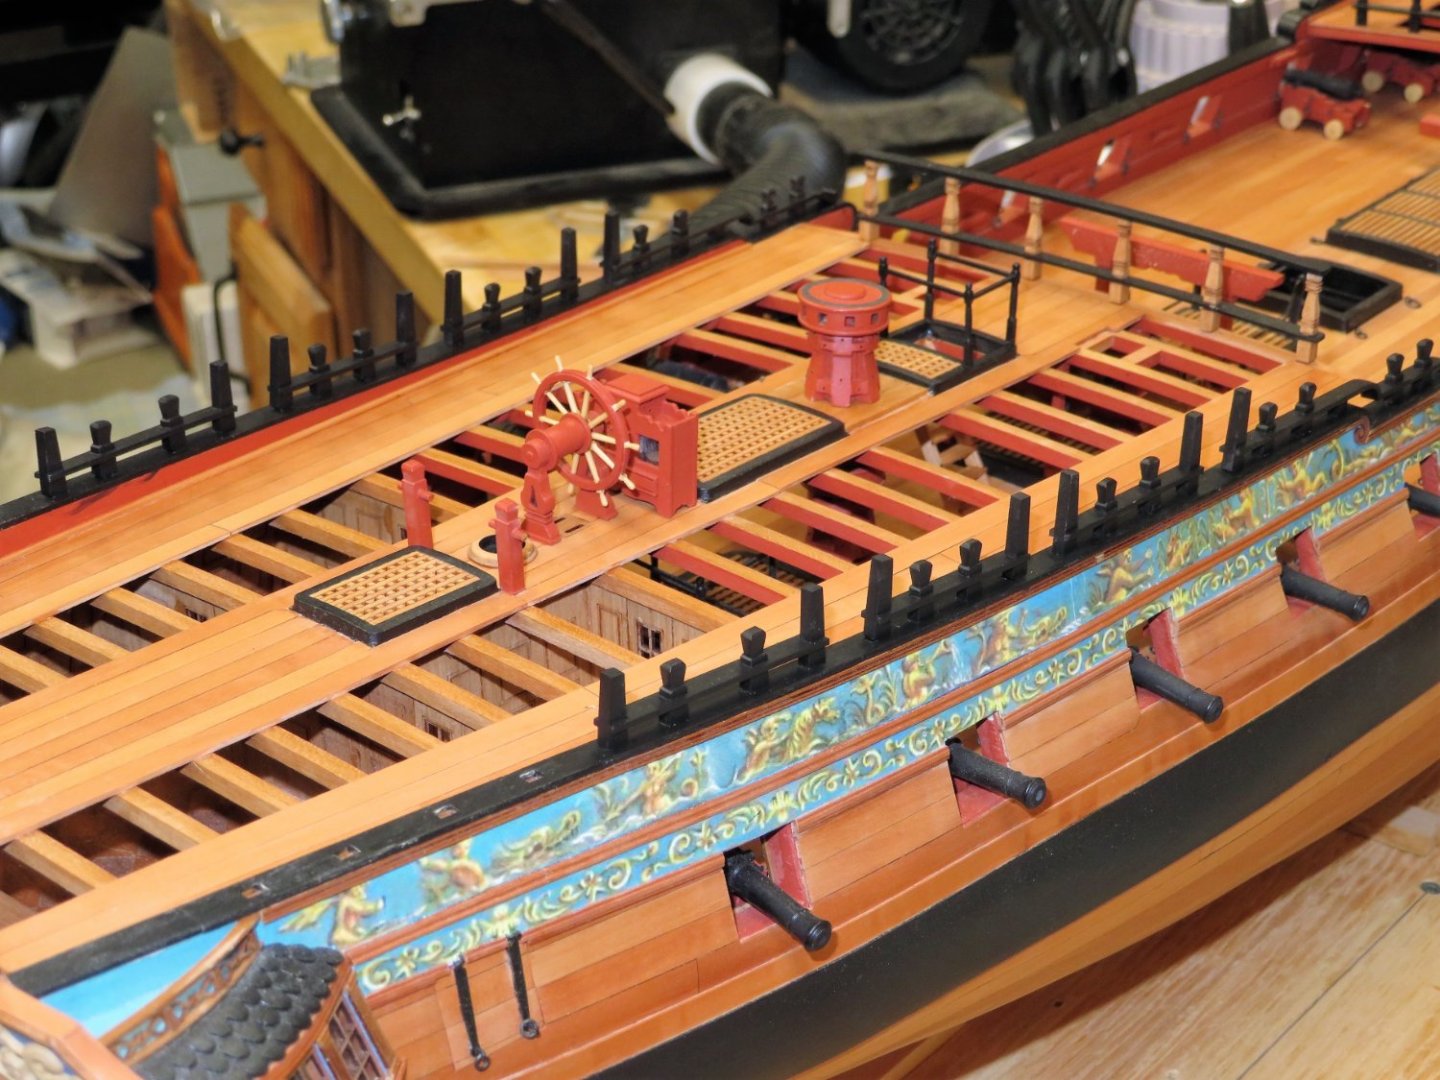
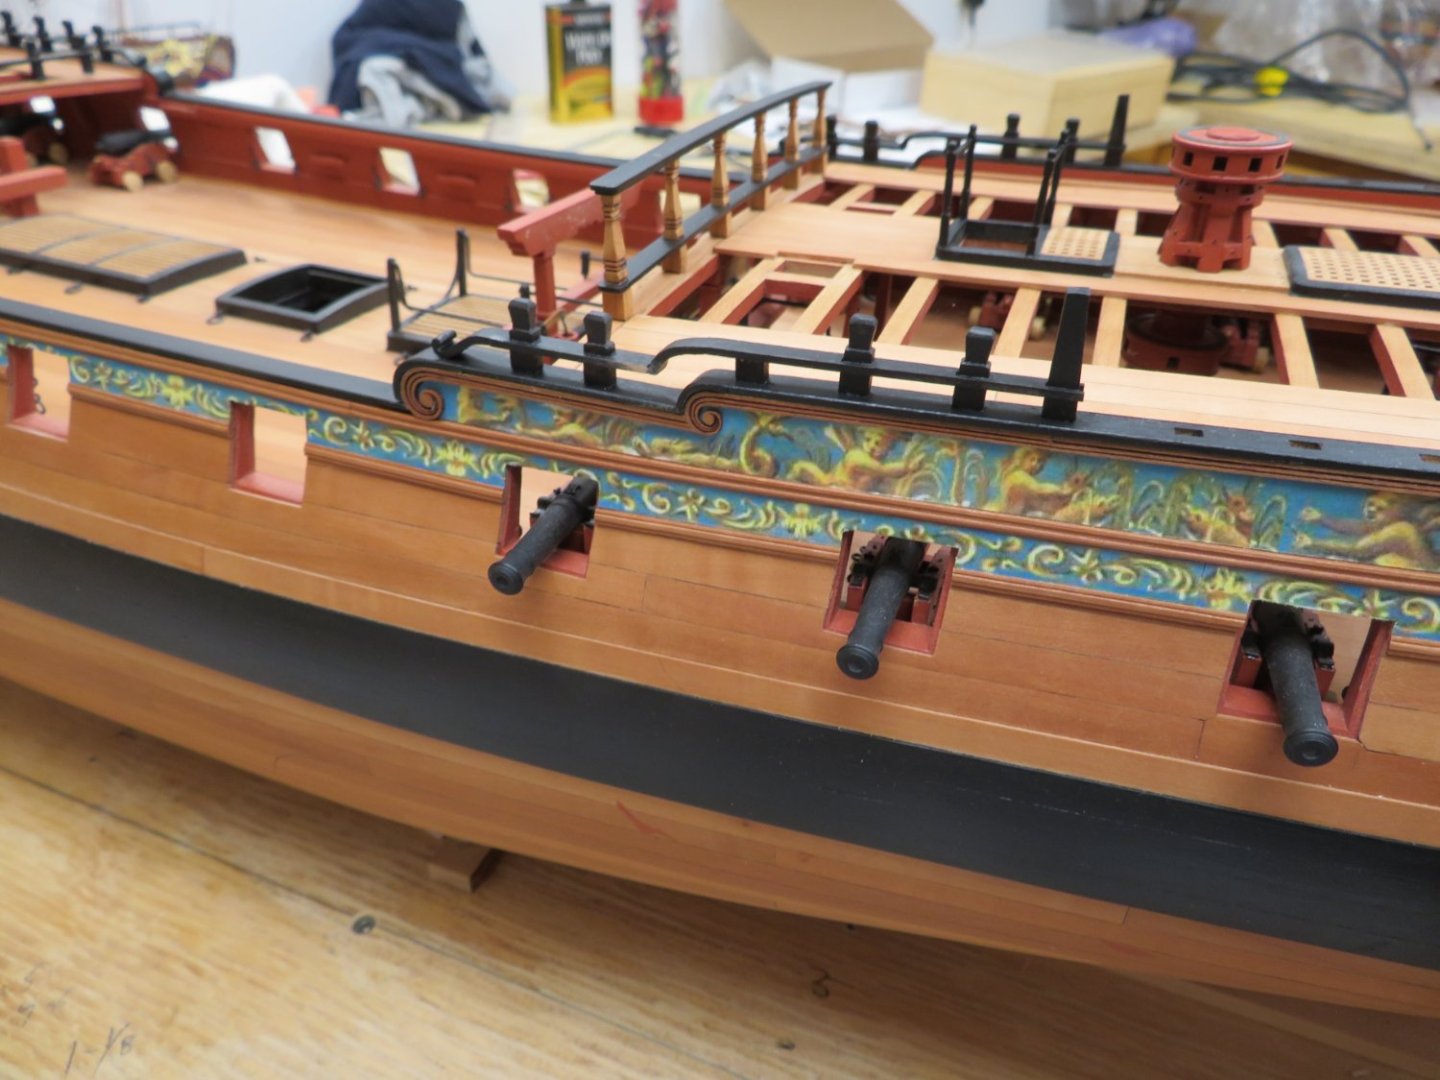
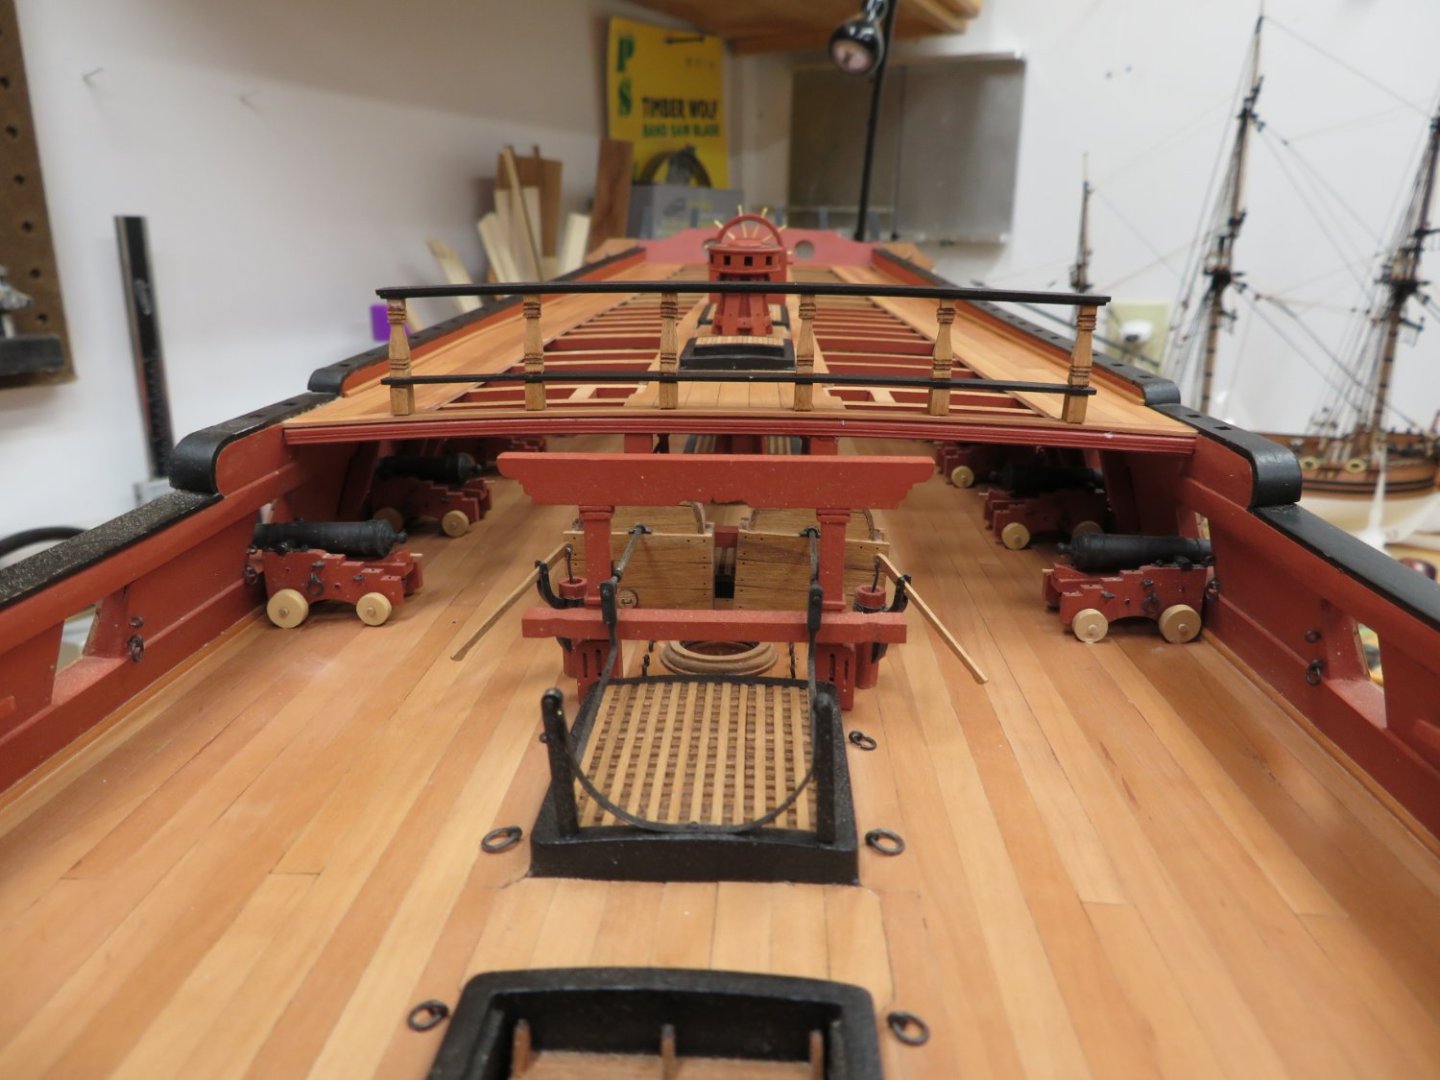
Chapter 12 part have been ordered and progress continues on chapter 10. In this portion I was assembling the companionway railings and the first sections of the quarter deck fancy rails. The companionway railings were turned and shaped using files. The quarter deck rails were all laser cut by Syren. The first thing I did was start cleaning up the parts and lay them out to see how they compare to the layout of my model. After confirming that I was in good shape I started assembling the rails. After assembling each section I test fit them adjusted as needed and then painted them. The two sections port and starboard were then permanently glued in place. Also, the companionway railings were finished at this time too.


- 642 replies
-
- 20
-
-
- winchelsea
- Syren Ship Model Company
- (and 1 more)
-
I am crushed. We conversed for many years trading so many ideas and ways to do things. He will be sorely missed. Rest in Peace my good friend!
-
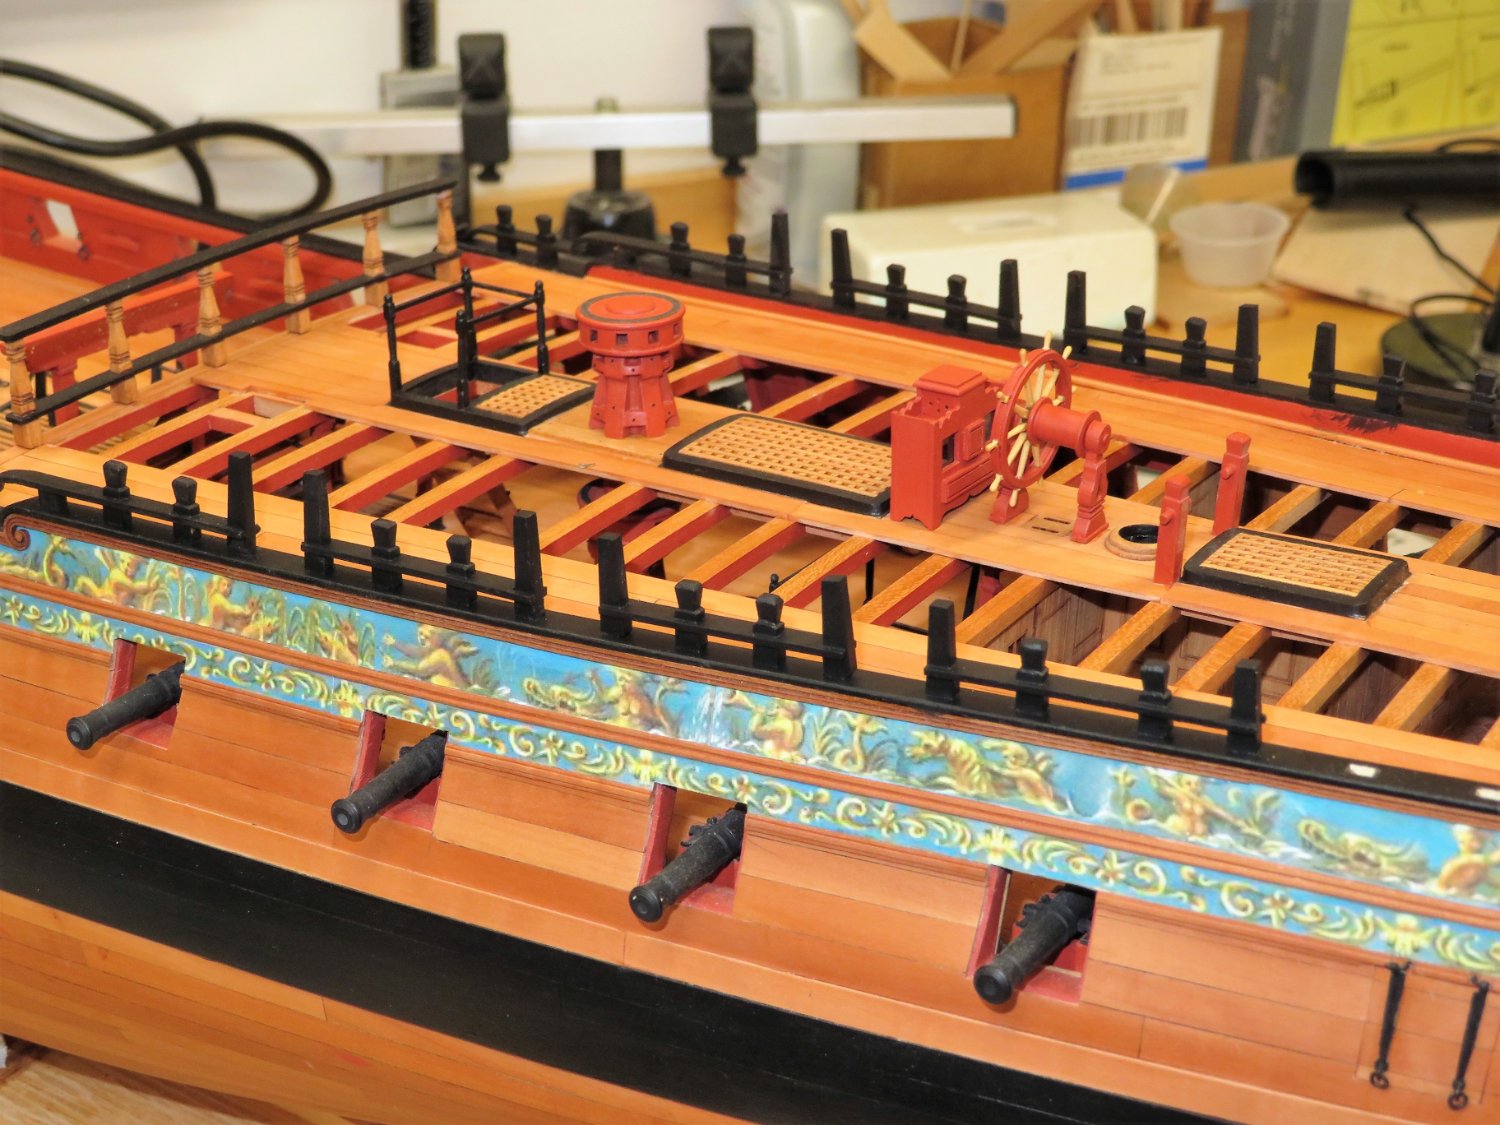
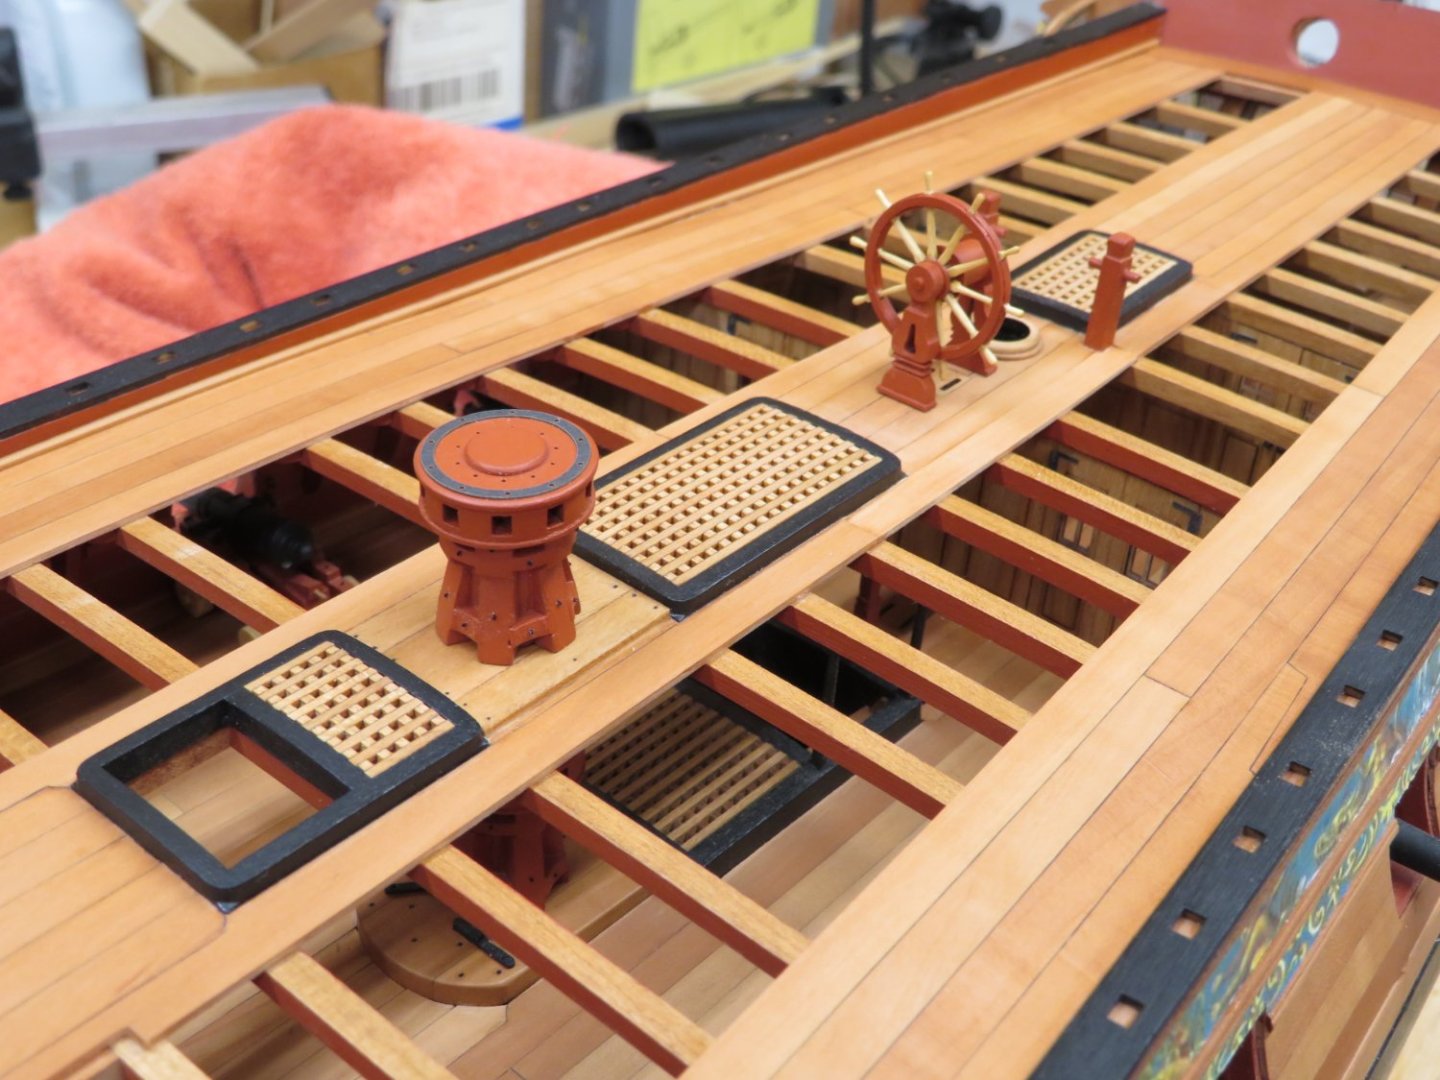
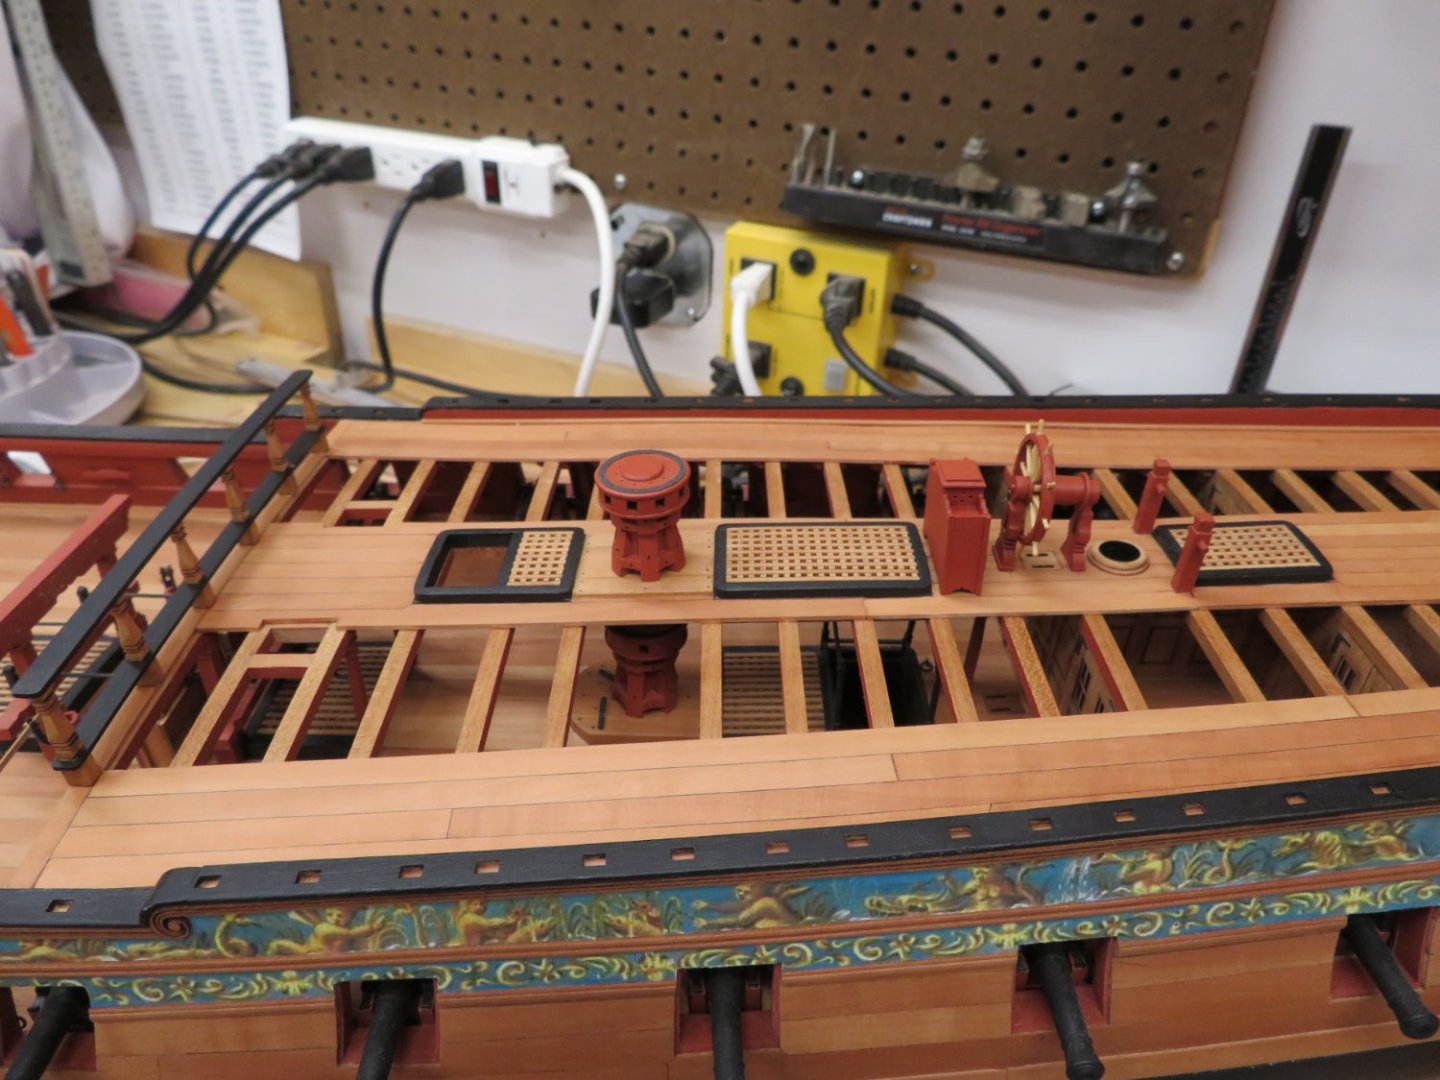
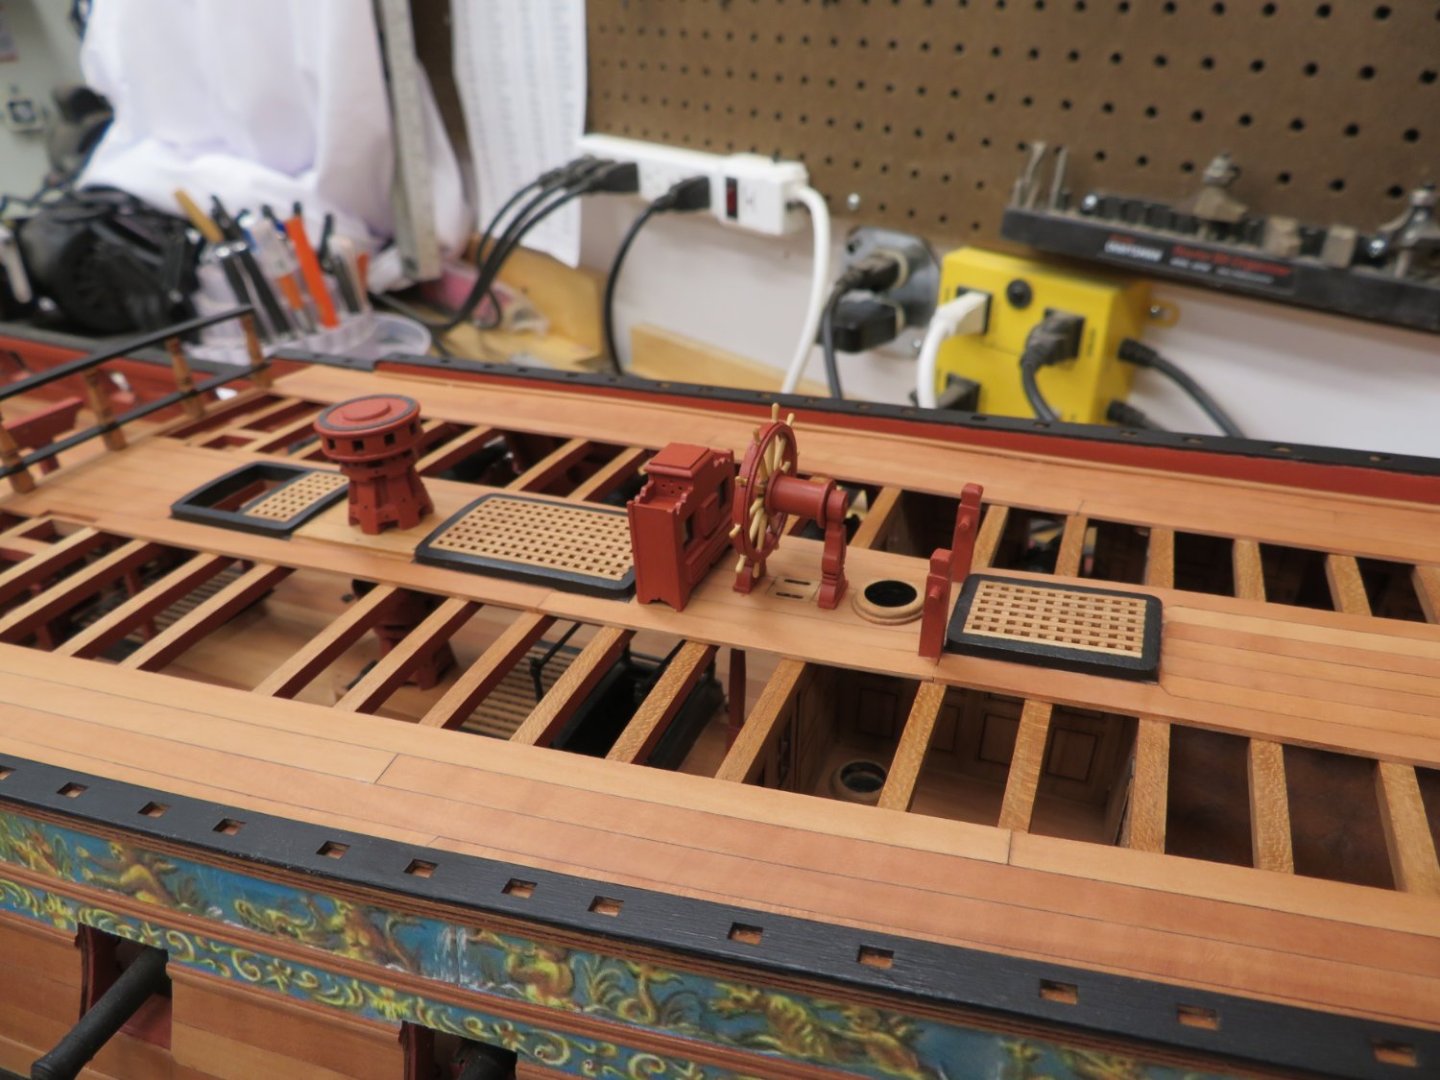
Thanks Ben. Not a big deal. Just a little irritating when you think you've selected better. I built the ships wheel, binnacle and breastrail per Chuck's direction and placed them in their correct locations as well as the already completed capstan. Just take your time and follow the directions and all will be fine. I still have to add the pawls to the capstan and the companionway railings. I'm still toying with adding the rope to the ships wheel. I'll probably add some to see how it looks and decide from there.
- 642 replies
-
- 14
-
-
-
- winchelsea
- Syren Ship Model Company
- (and 1 more)
-
What is a perfect model? I have some I'm very happy with, but none are perfect!
- 642 replies
-
- 2
-
-
- winchelsea
- Syren Ship Model Company
- (and 1 more)
-
Pavel Nikitin 1:32 Captain John Smith's Shallop - Ships of Pavel Nikitin
Rustyj replied to James H's topic in REVIEWS: Model kits
I too have ordered one and it's in route. Looks like a fun little build. -
Beautiful workmanship Dusan!
-
Welcome aboard Aceso! I'm looking forward to seeing another Winnie come to life.
-
The pear I used was all cut from one block into sheets and then strips from each sheet. I could see color changes from sheet to sheet and from one end of a strip to the other. They were sorted by color variation, marked and I still came up with differences in color. Next time I'll go the one step further and wipe them down with WOP or alcohol and see how that works. Then again 15 years from now I'll probably not see much variation as the wood ages.
- 642 replies
-
- 4
-
-
- winchelsea
- Syren Ship Model Company
- (and 1 more)