


Rustyj
-
Posts
2,516 -
Joined
-
Last visited
Content Type
Profiles
Forums
Gallery
Events
Posts posted by Rustyj
-
-
I always liked Christmas in July!
-
17 hours ago, glennard2523 said:
Also many thanks to Jim Hatch for his build log for the prototype which has been essential reading
And so is your log! Well done Glenn.
- Glenn-UK and chris watton
-
 1
1
-
 1
1
-
Thanks Steve. It felt great getting to work on her again.
Hi Matt, Not too afraid of turning her over though a spotter isn't a bad idea.
")
It's cutting the hole in the lower counter that has me spooked the most!
Also thanks for the likes!
- FrankWouts, Zarkon and scrubbyj427
-
3
-
Hi All,
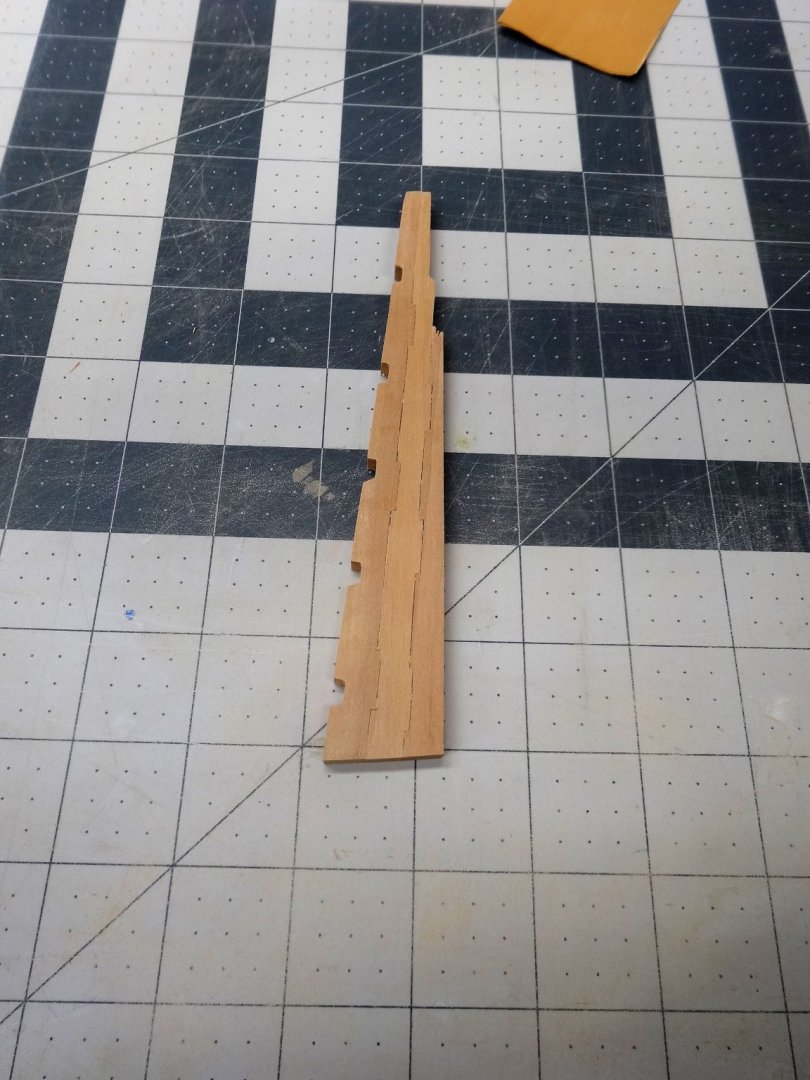
My chapter 5 Cherry parts arrived a while ago and I've found sometime to get back at the Winnie.
Though Chuck supplied a superb laser cut rudder I tried my hand at cutting one out of pear on
my scroll saw. I'm pleased with the way it came out so I will be using it.
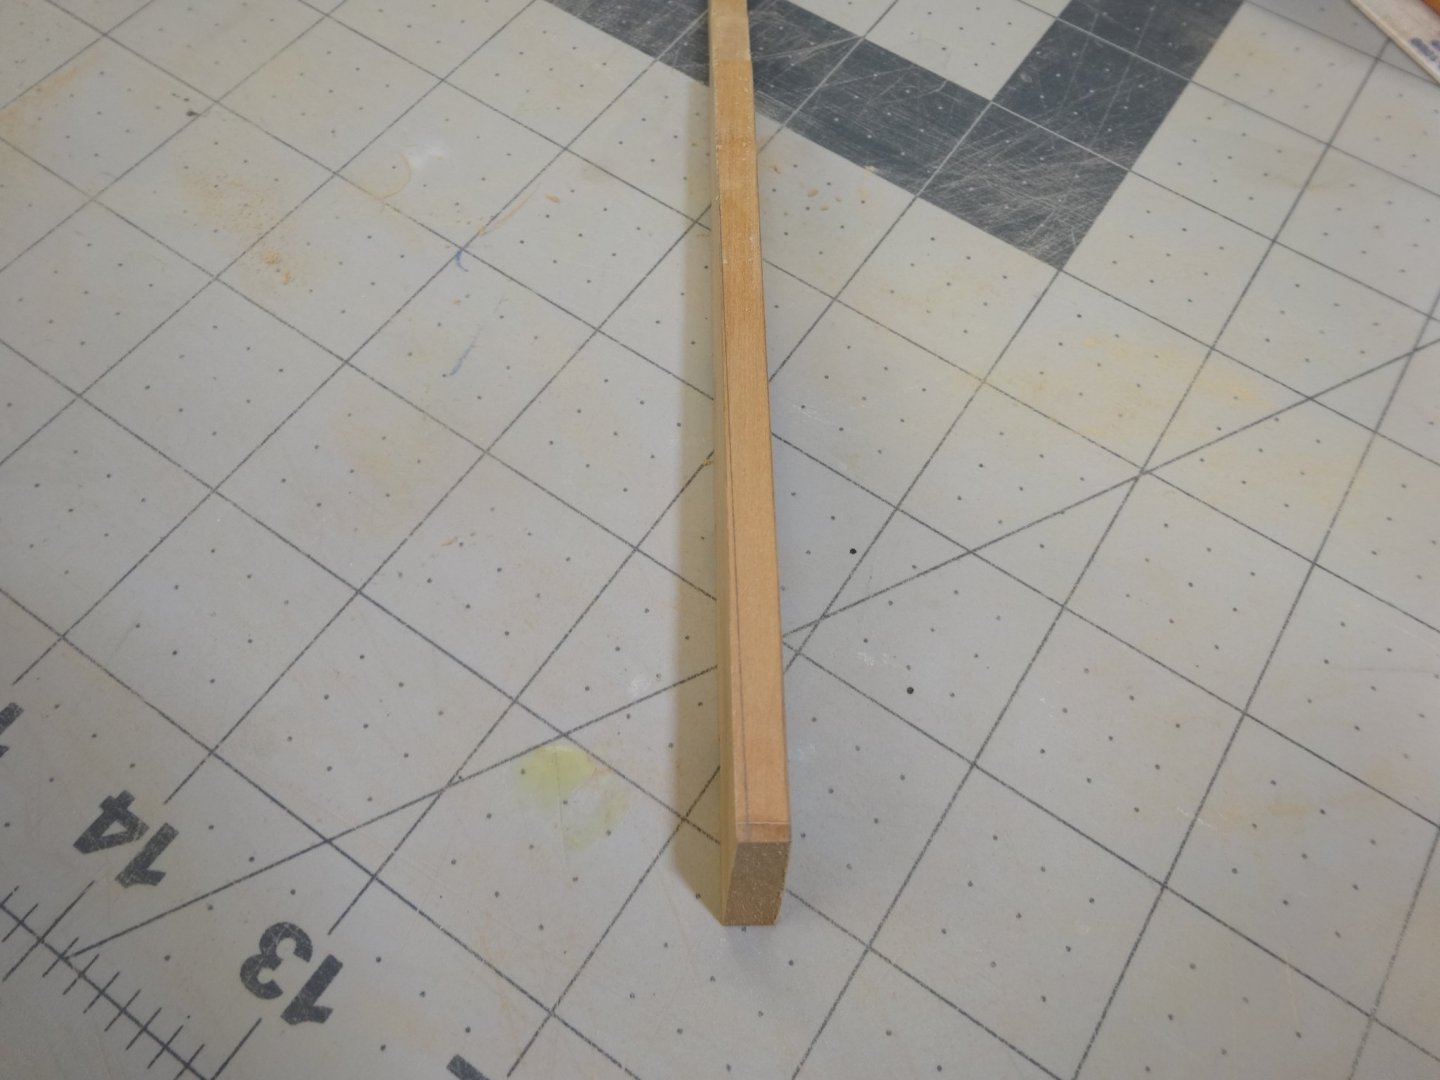
Here it is assembled waiting to be tapered on the aft side towards the bottom. It needs to end up
around 5/32" wide. I marked it off and you can see one side sanded to the correct thickness.
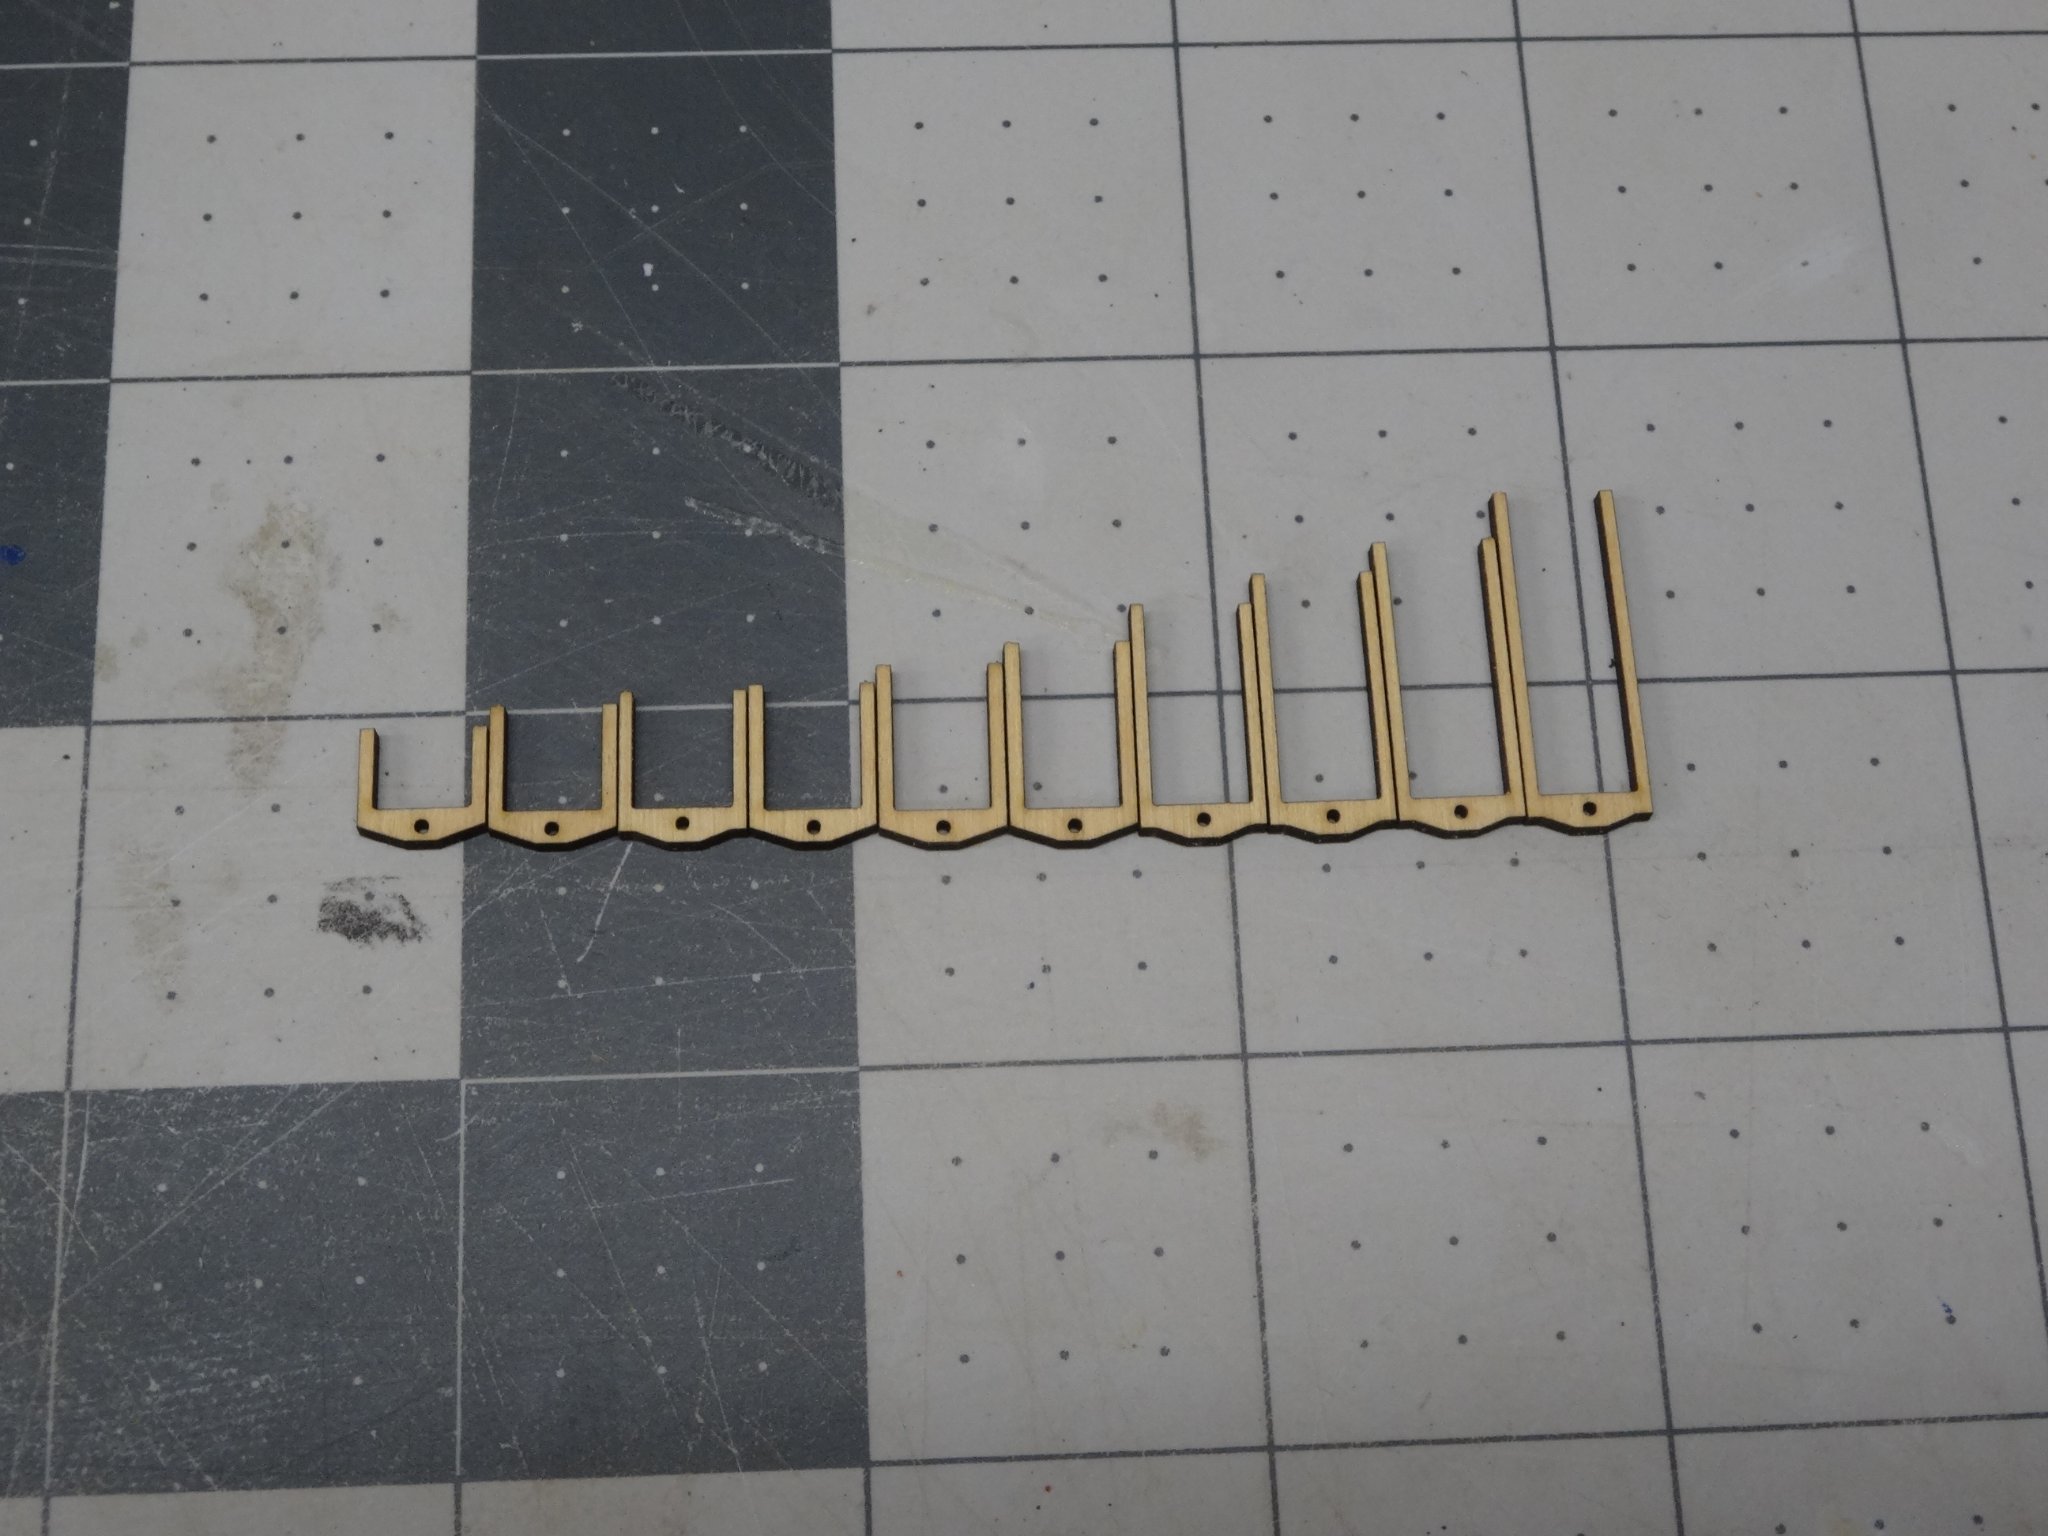
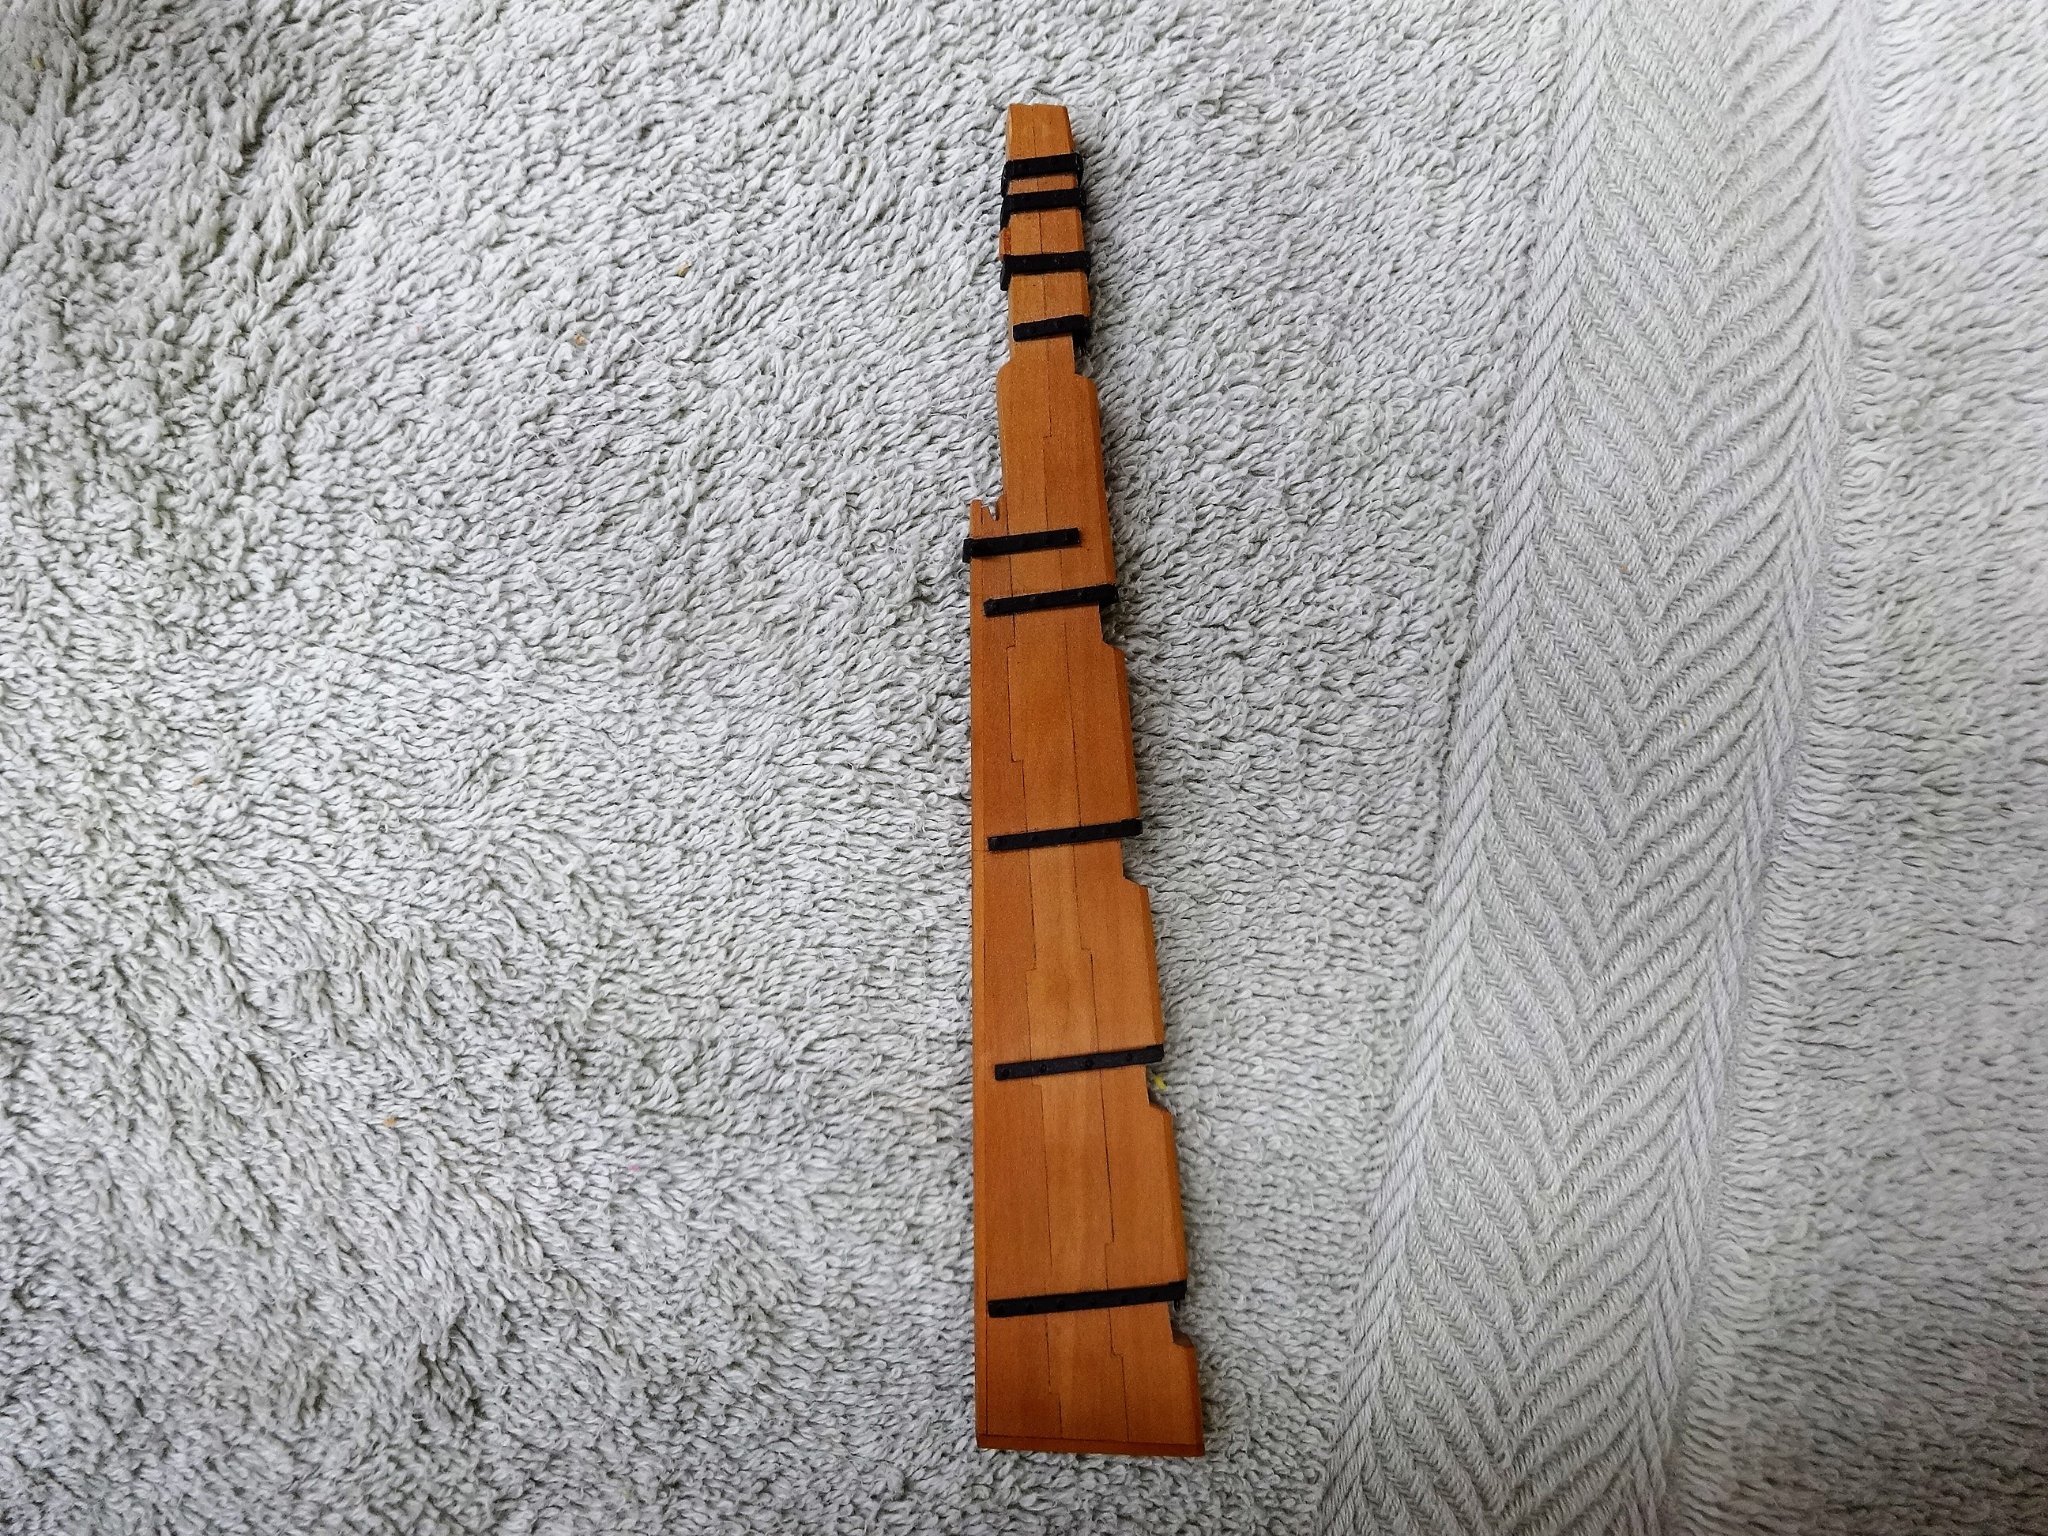
These are the boxwood laser cut pintels and gudgeons. They were added to the rudder along with the straps
and 20# monofilament to simulate the bolts.


Next I'll have to flip the hull over and, gasp, cut the rudder port in the lower counter and hang the rudder.
Nothing can go wrong doing that can it?!
- Matt D, VTHokiEE, scrubbyj427 and 14 others
-
17
-
I agree with Chuck and Matt. I did alternate the rows but that was just my way of doing it.
-
Thank you Chuck, Glenn and Glenn.
5 hours ago, glbarlow said:maybe call in sick for an extra day
Oh so tempting. They tell me we'll be back to a more normal schedule in early May. Hopefully they're not blowing smoke up you know where!
")
-
-
-
-
18 hours ago, rafine said:
I went with natural gun carriages, but a red capstan. It just seemed "right " to me. It is my intention to rig the guns with breach ropes and side tackles
Hi Bob, Everything is looking really nice. Red capstan for me also. I'm undecided on the gun carriages as I think both ways look really good. I intend to add at least the breach ropes and eagerly look forward to seeing how your side tackles come out!
-
-
Oh yeah for me the red capstan is definitely the way to go.
- FrankWouts and Stuntflyer
-
2
-
she's looking great Chuck. I think the red is a great look. It really makes the column stand out more. As far as questions go I'm sure we'll swamp you with them when we get to that point!
- FrankWouts, Chuck, KentM and 3 others
-
6
-
-
-
Thank you Glenn and Jean-Paul. Also for all the likes.
On 4/2/2021 at 2:04 AM, glennard2523 said:It will not long before you start adding the rigging.
With my expanded work schedule unfortunately rigging will go slowly. With one day off a week it leaves little time available. When rigging I don't like to jump in and out with a half hour here, forty five minutes there. I prefer to have a couple of hours at a time so I can "get in a grove".
-
Beautiful work Glenn!
- Moab, glbarlow, Ryland Craze and 1 other
-
4
-
-
This all looks fantastic. I can't wait to get back at her!
- FrankWouts, Chuck and Jack H
-
3
-
Your rigging is coming along nicely!
-
On 3/25/2021 at 8:43 AM, Blue Ensign said:
Did you first start by thinning the inboard rails, or the frames? It seems to me that the rails would be sanded horizontally along the grain, and the frames vertically.
Sorry for the late reply B.E.
If I remember correctly it was a combination of both. I would sand horizontally at the rail and the first 7-10mm or so as of the frames as they were strong there. Then the as much as possible the lower portions of the frames were sanded vertically.
Hope this helps!
-
Excellent job JJ!
- scrubbyj427 and FrankWouts
-
2
-
Hi B.E. I just got a moment to catch up on your barge work and you've done a great job on her!
-
Very very nice workmanship Mike. You're an inspiration to us all!
- FrankWouts, Stuntflyer and RichardG
-
3


Duchess of Kingston 1778 by Rustyj - FINISHED - Vanguard Models - 1:64 - Royal Yacht
in - Kit build logs for subjects built from 1751 - 1800
Posted
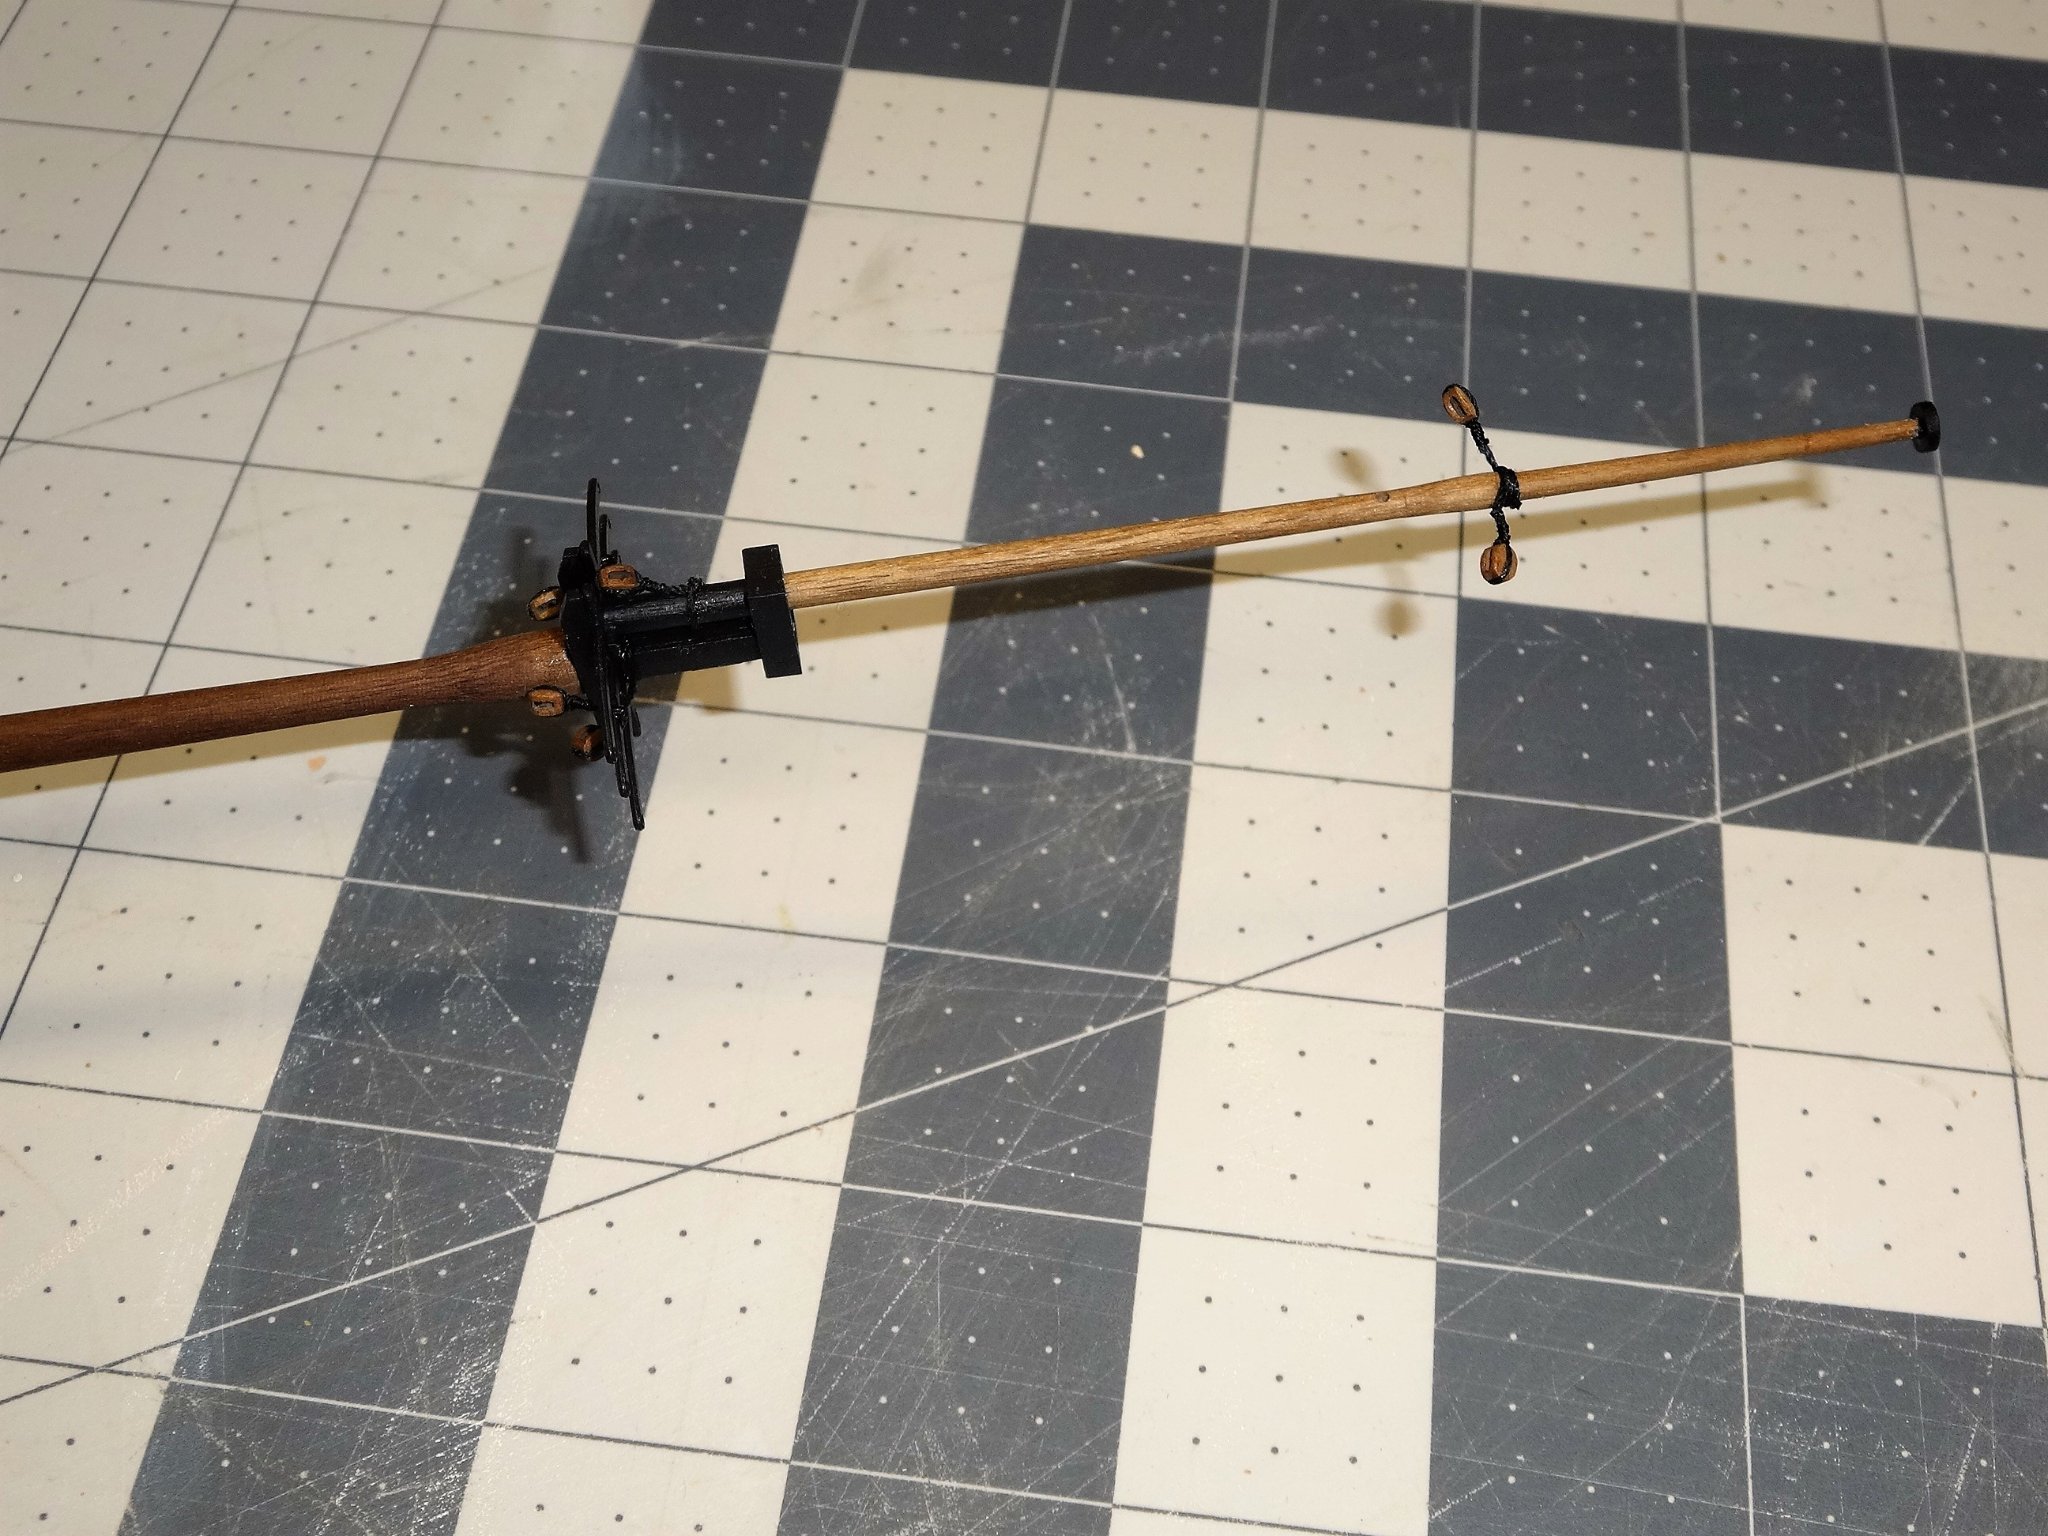
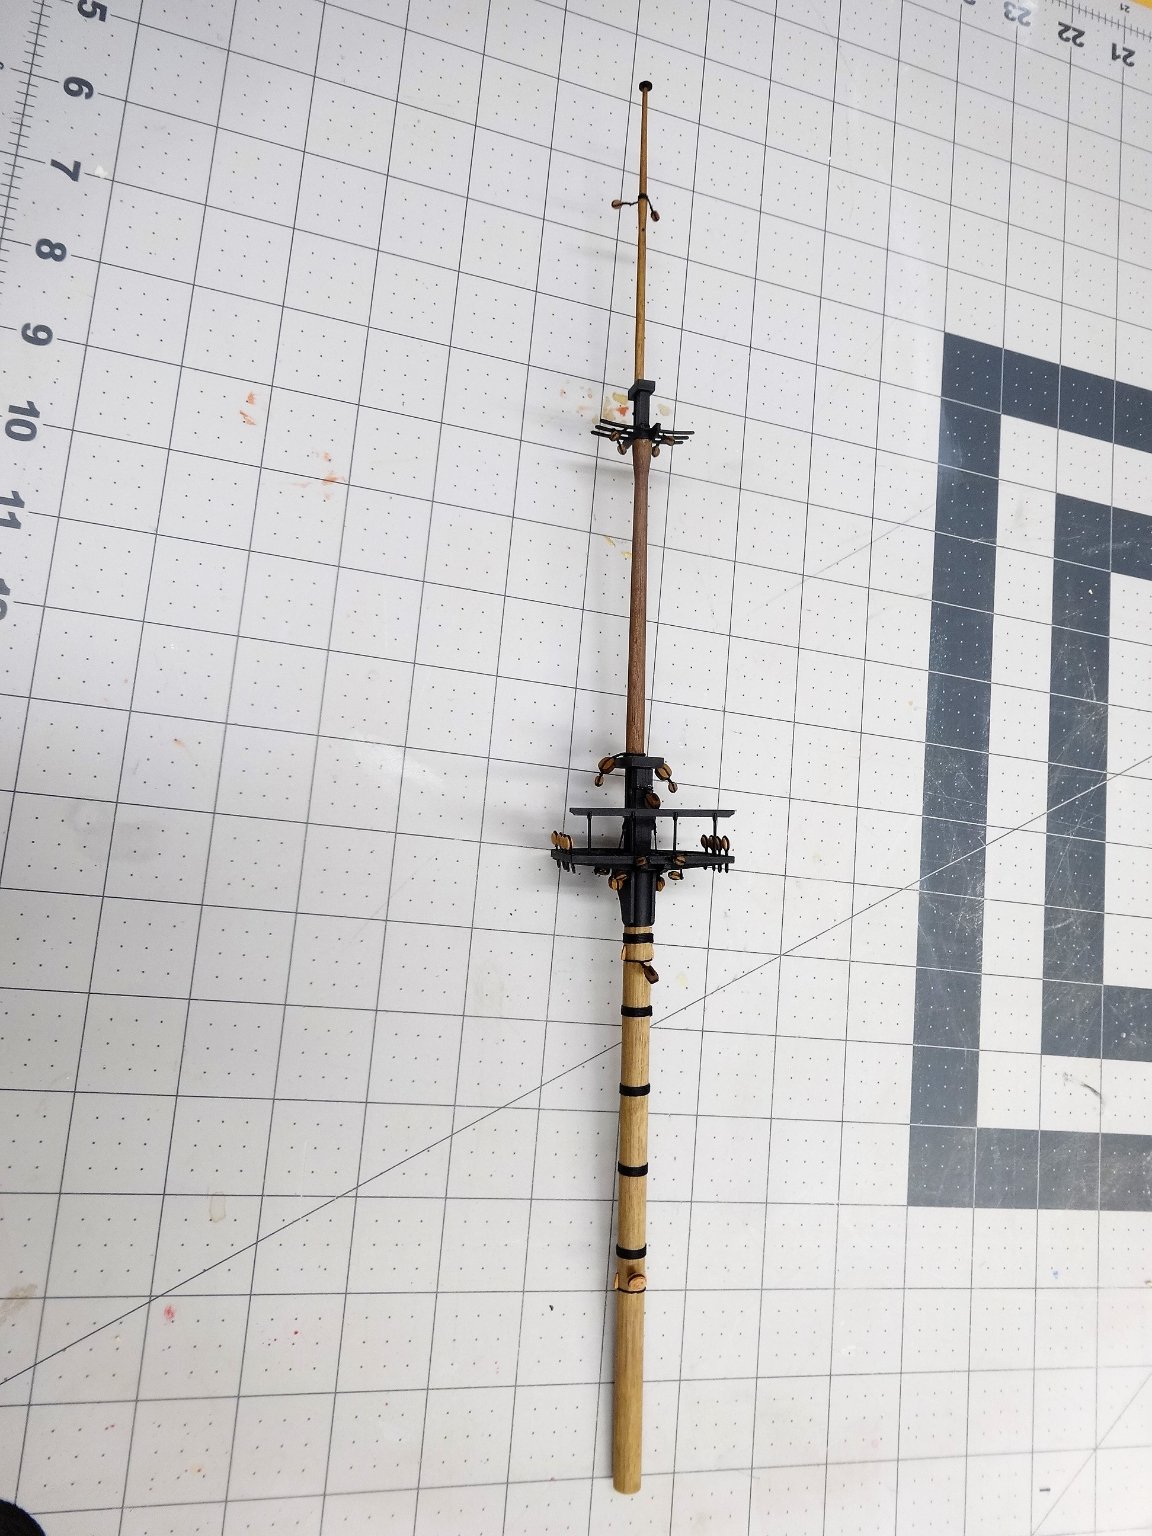
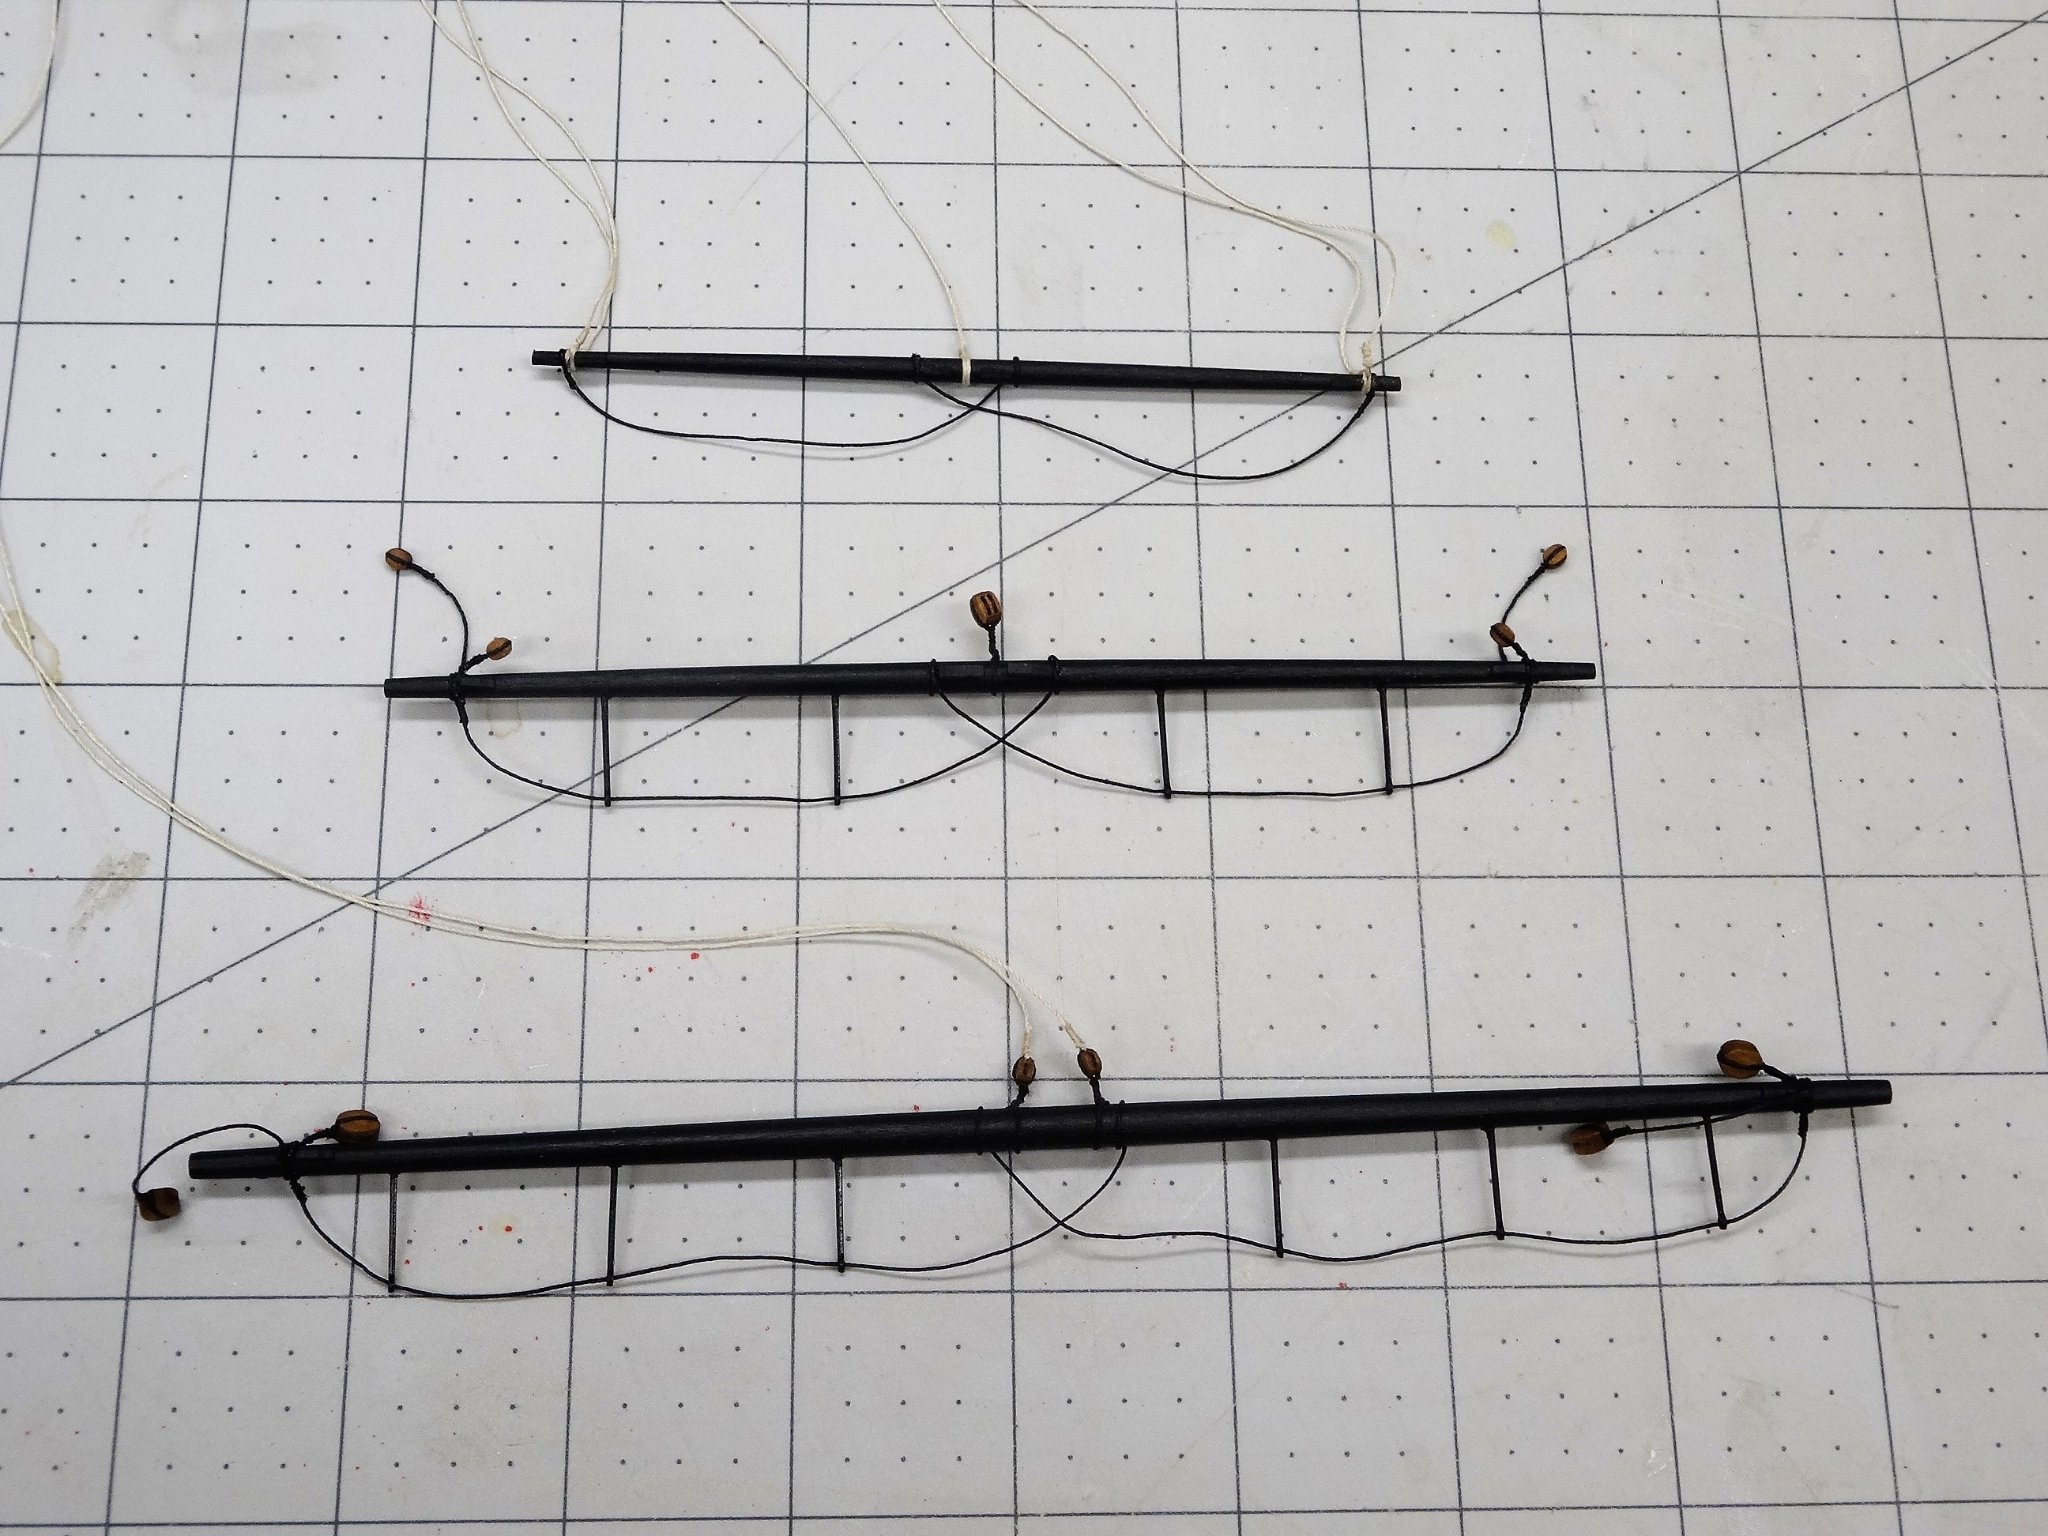
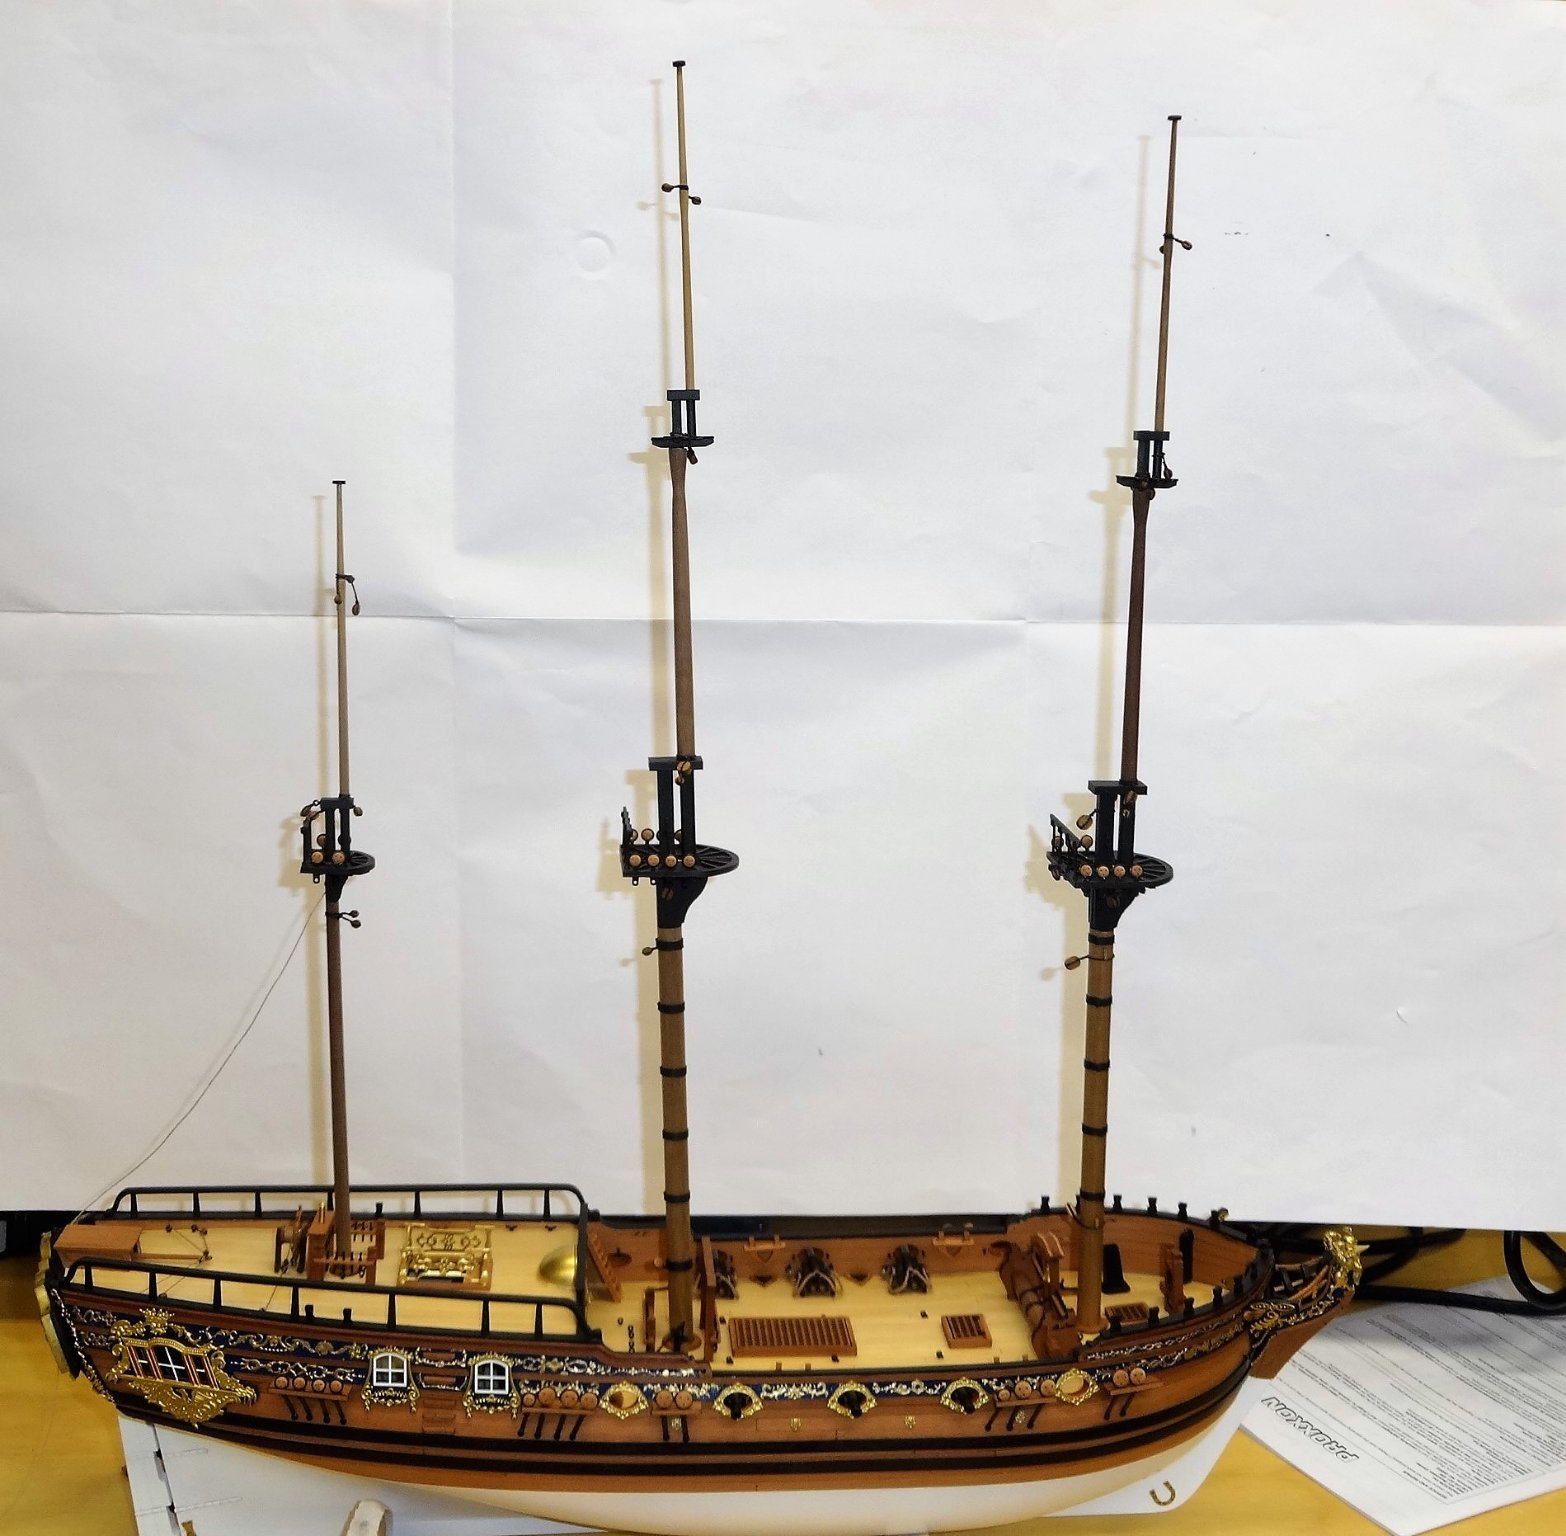
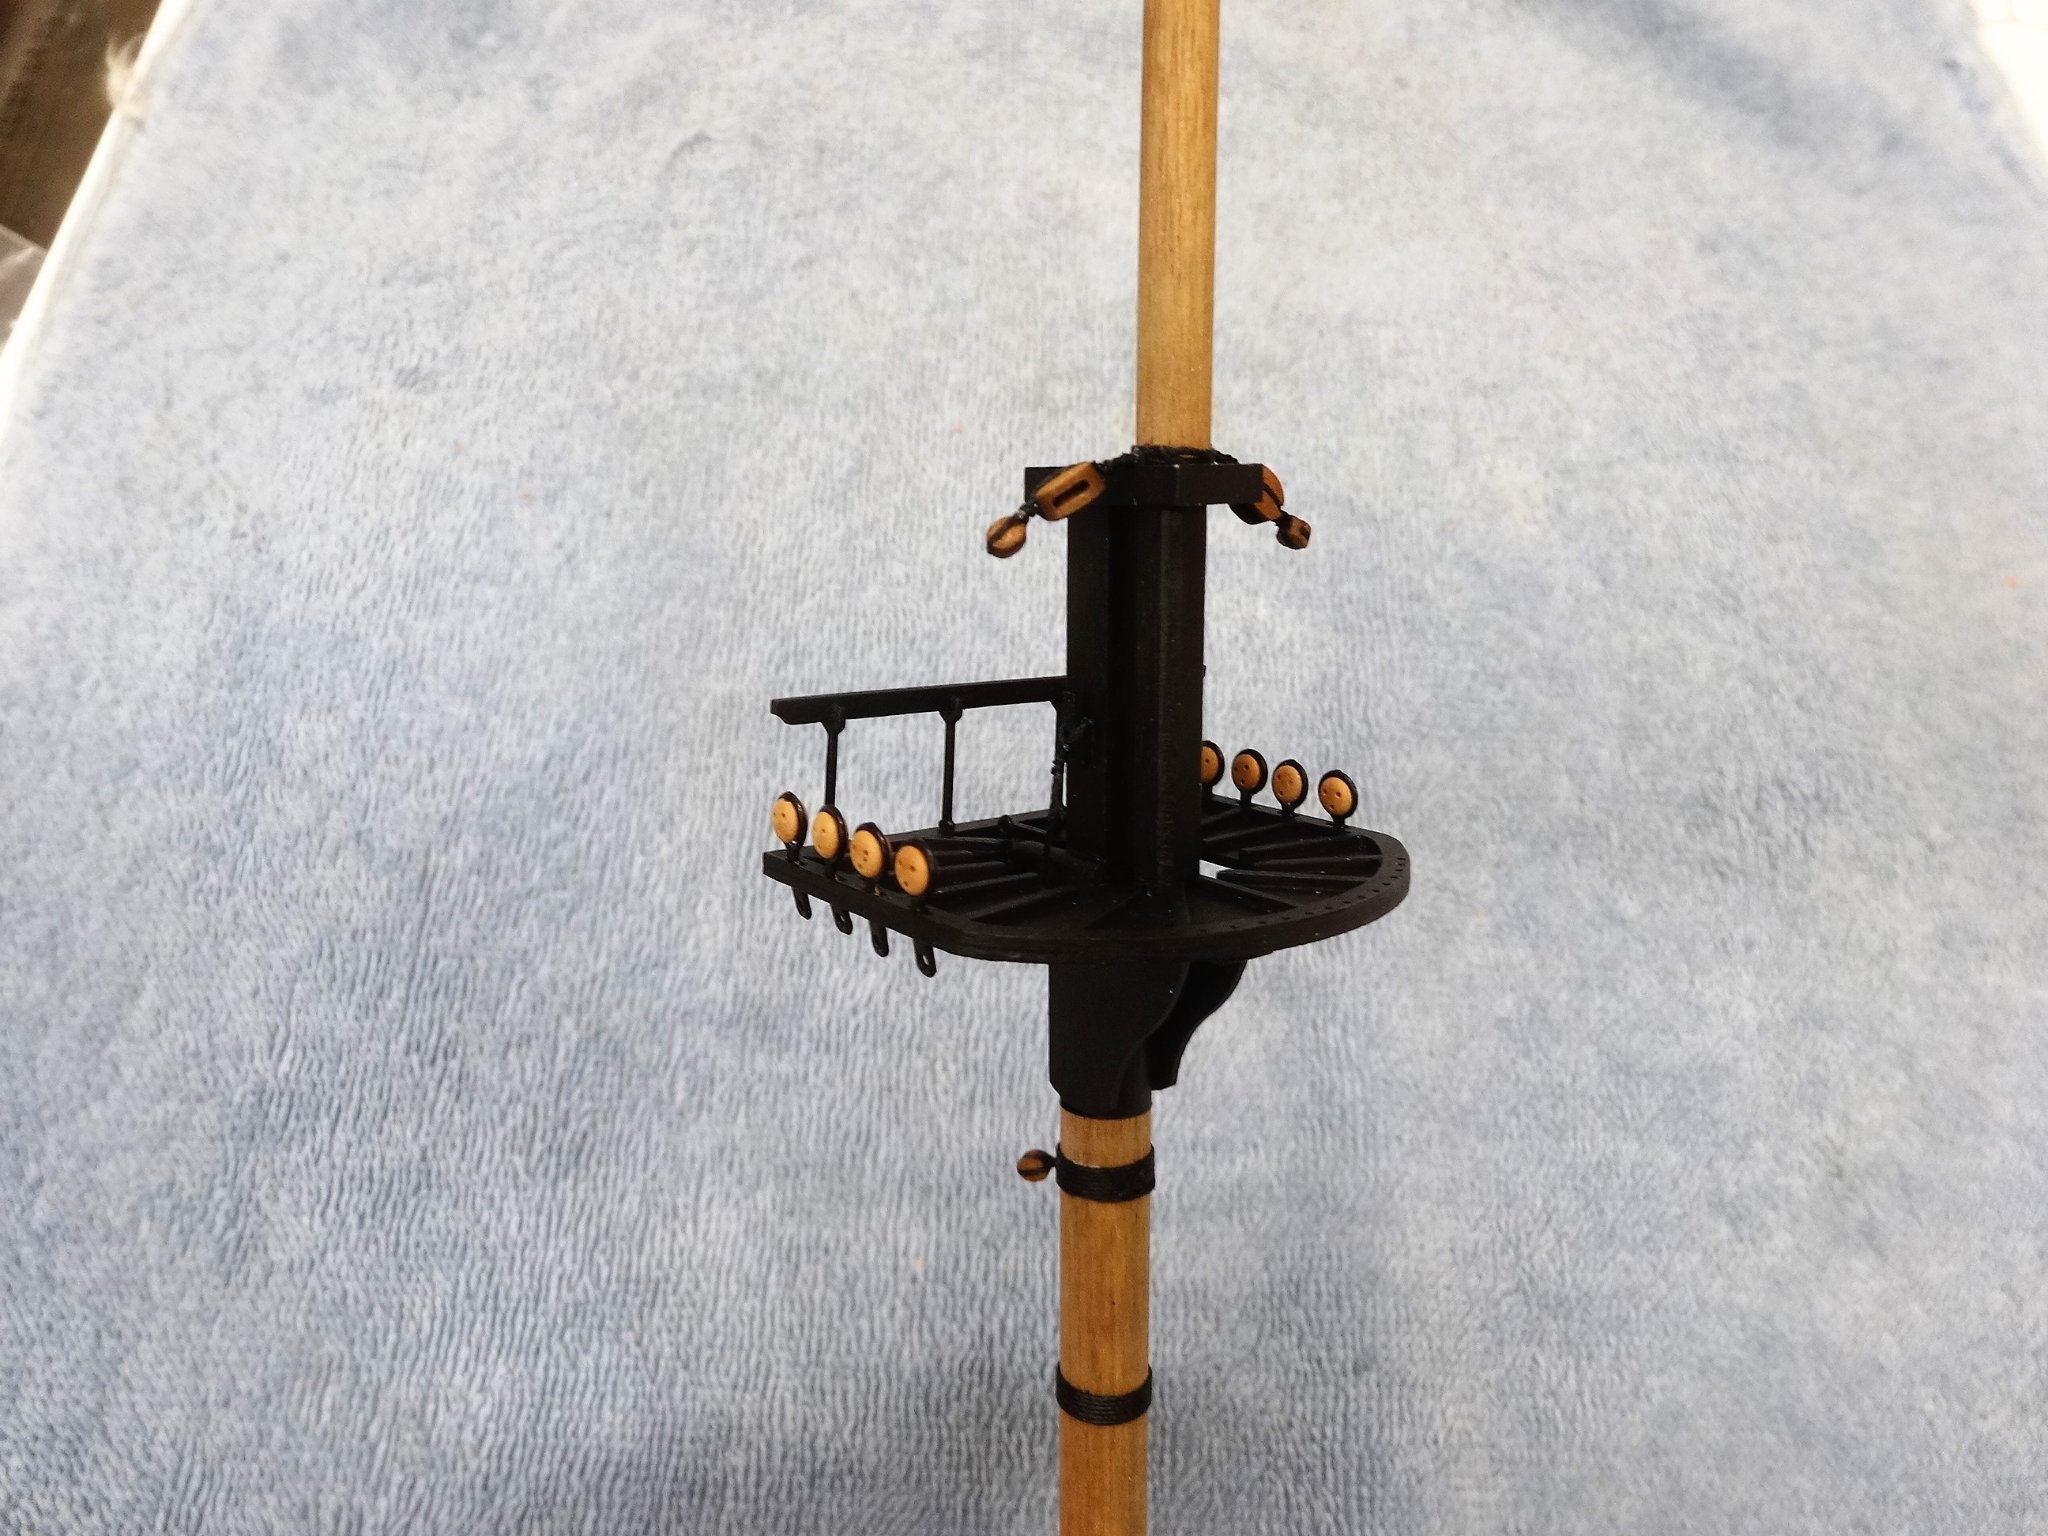
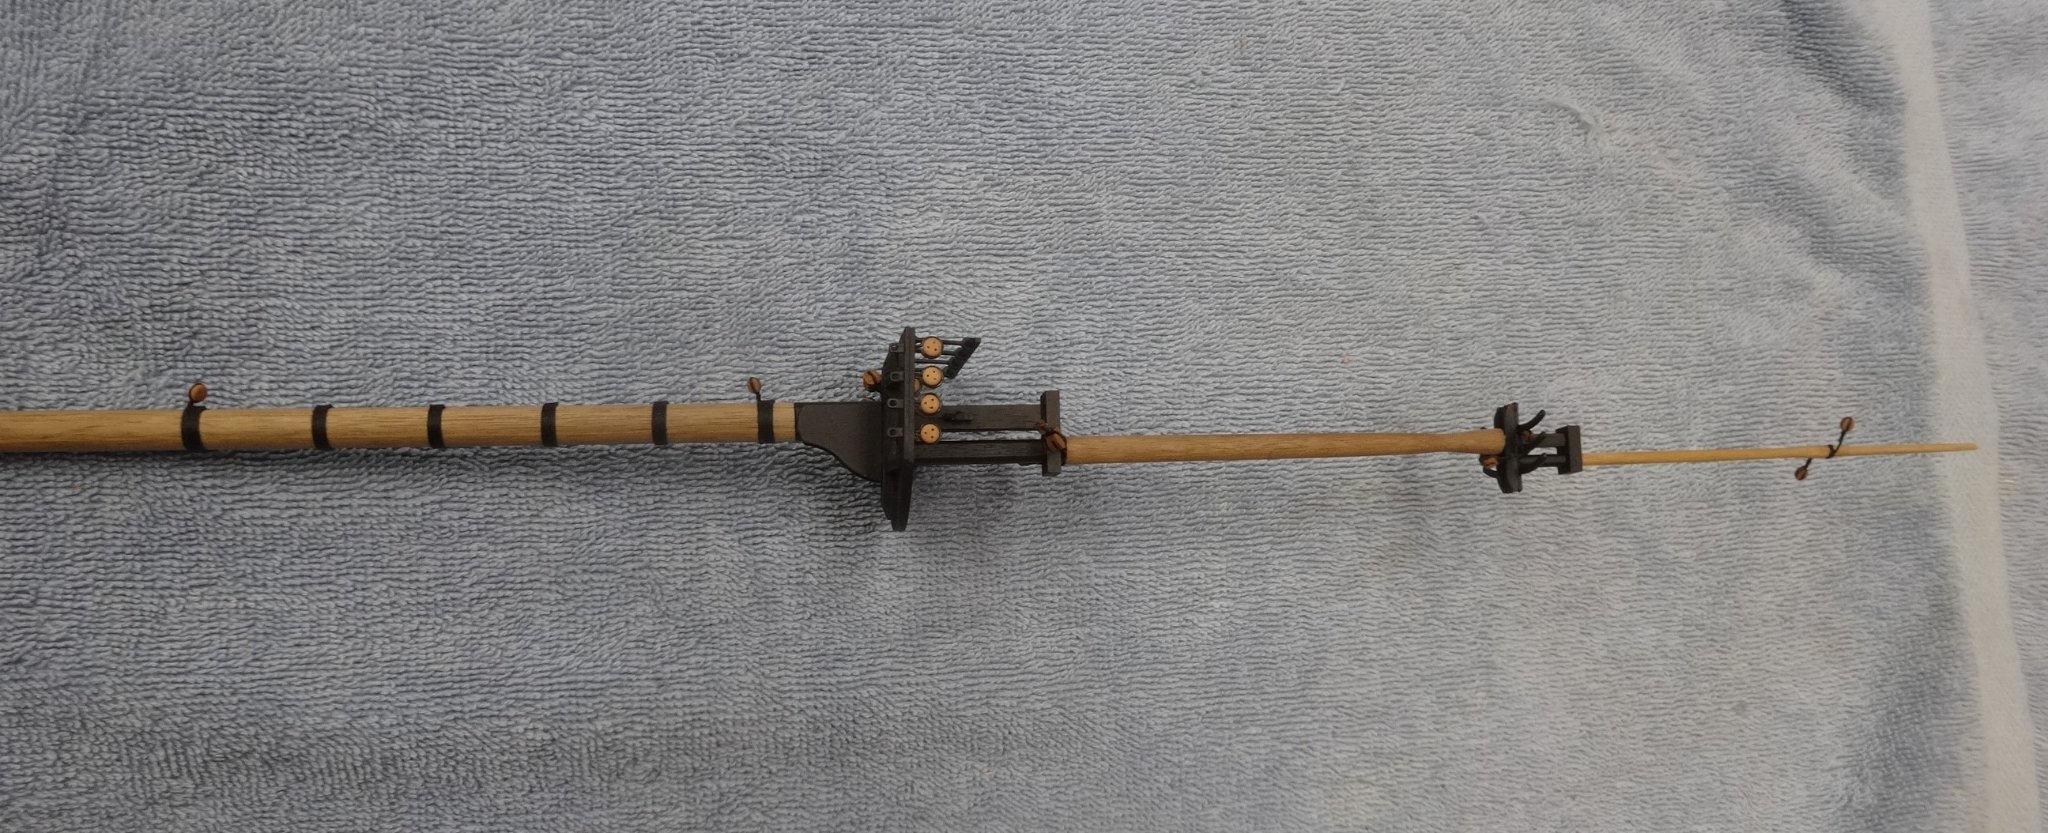
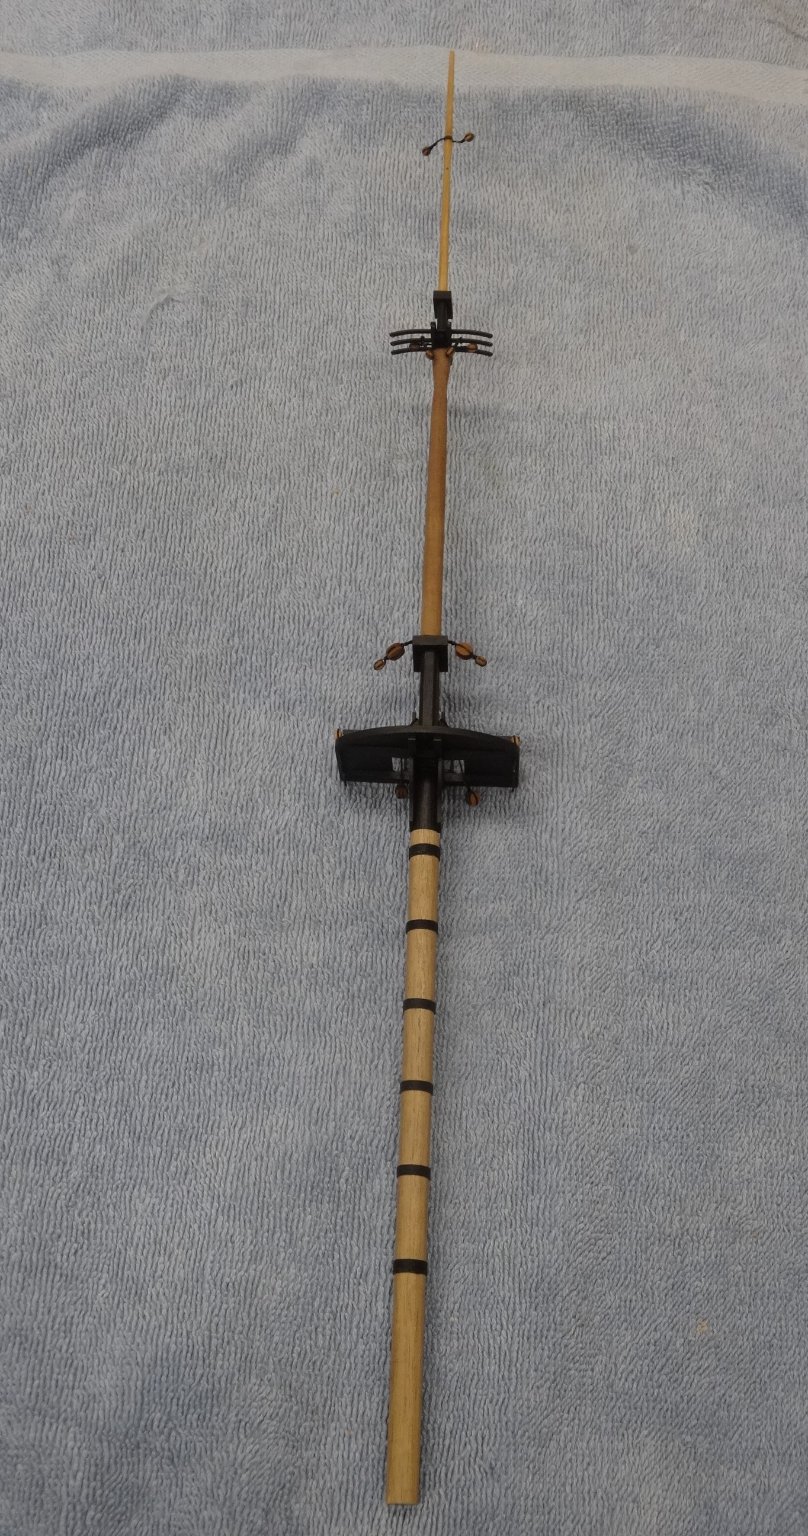
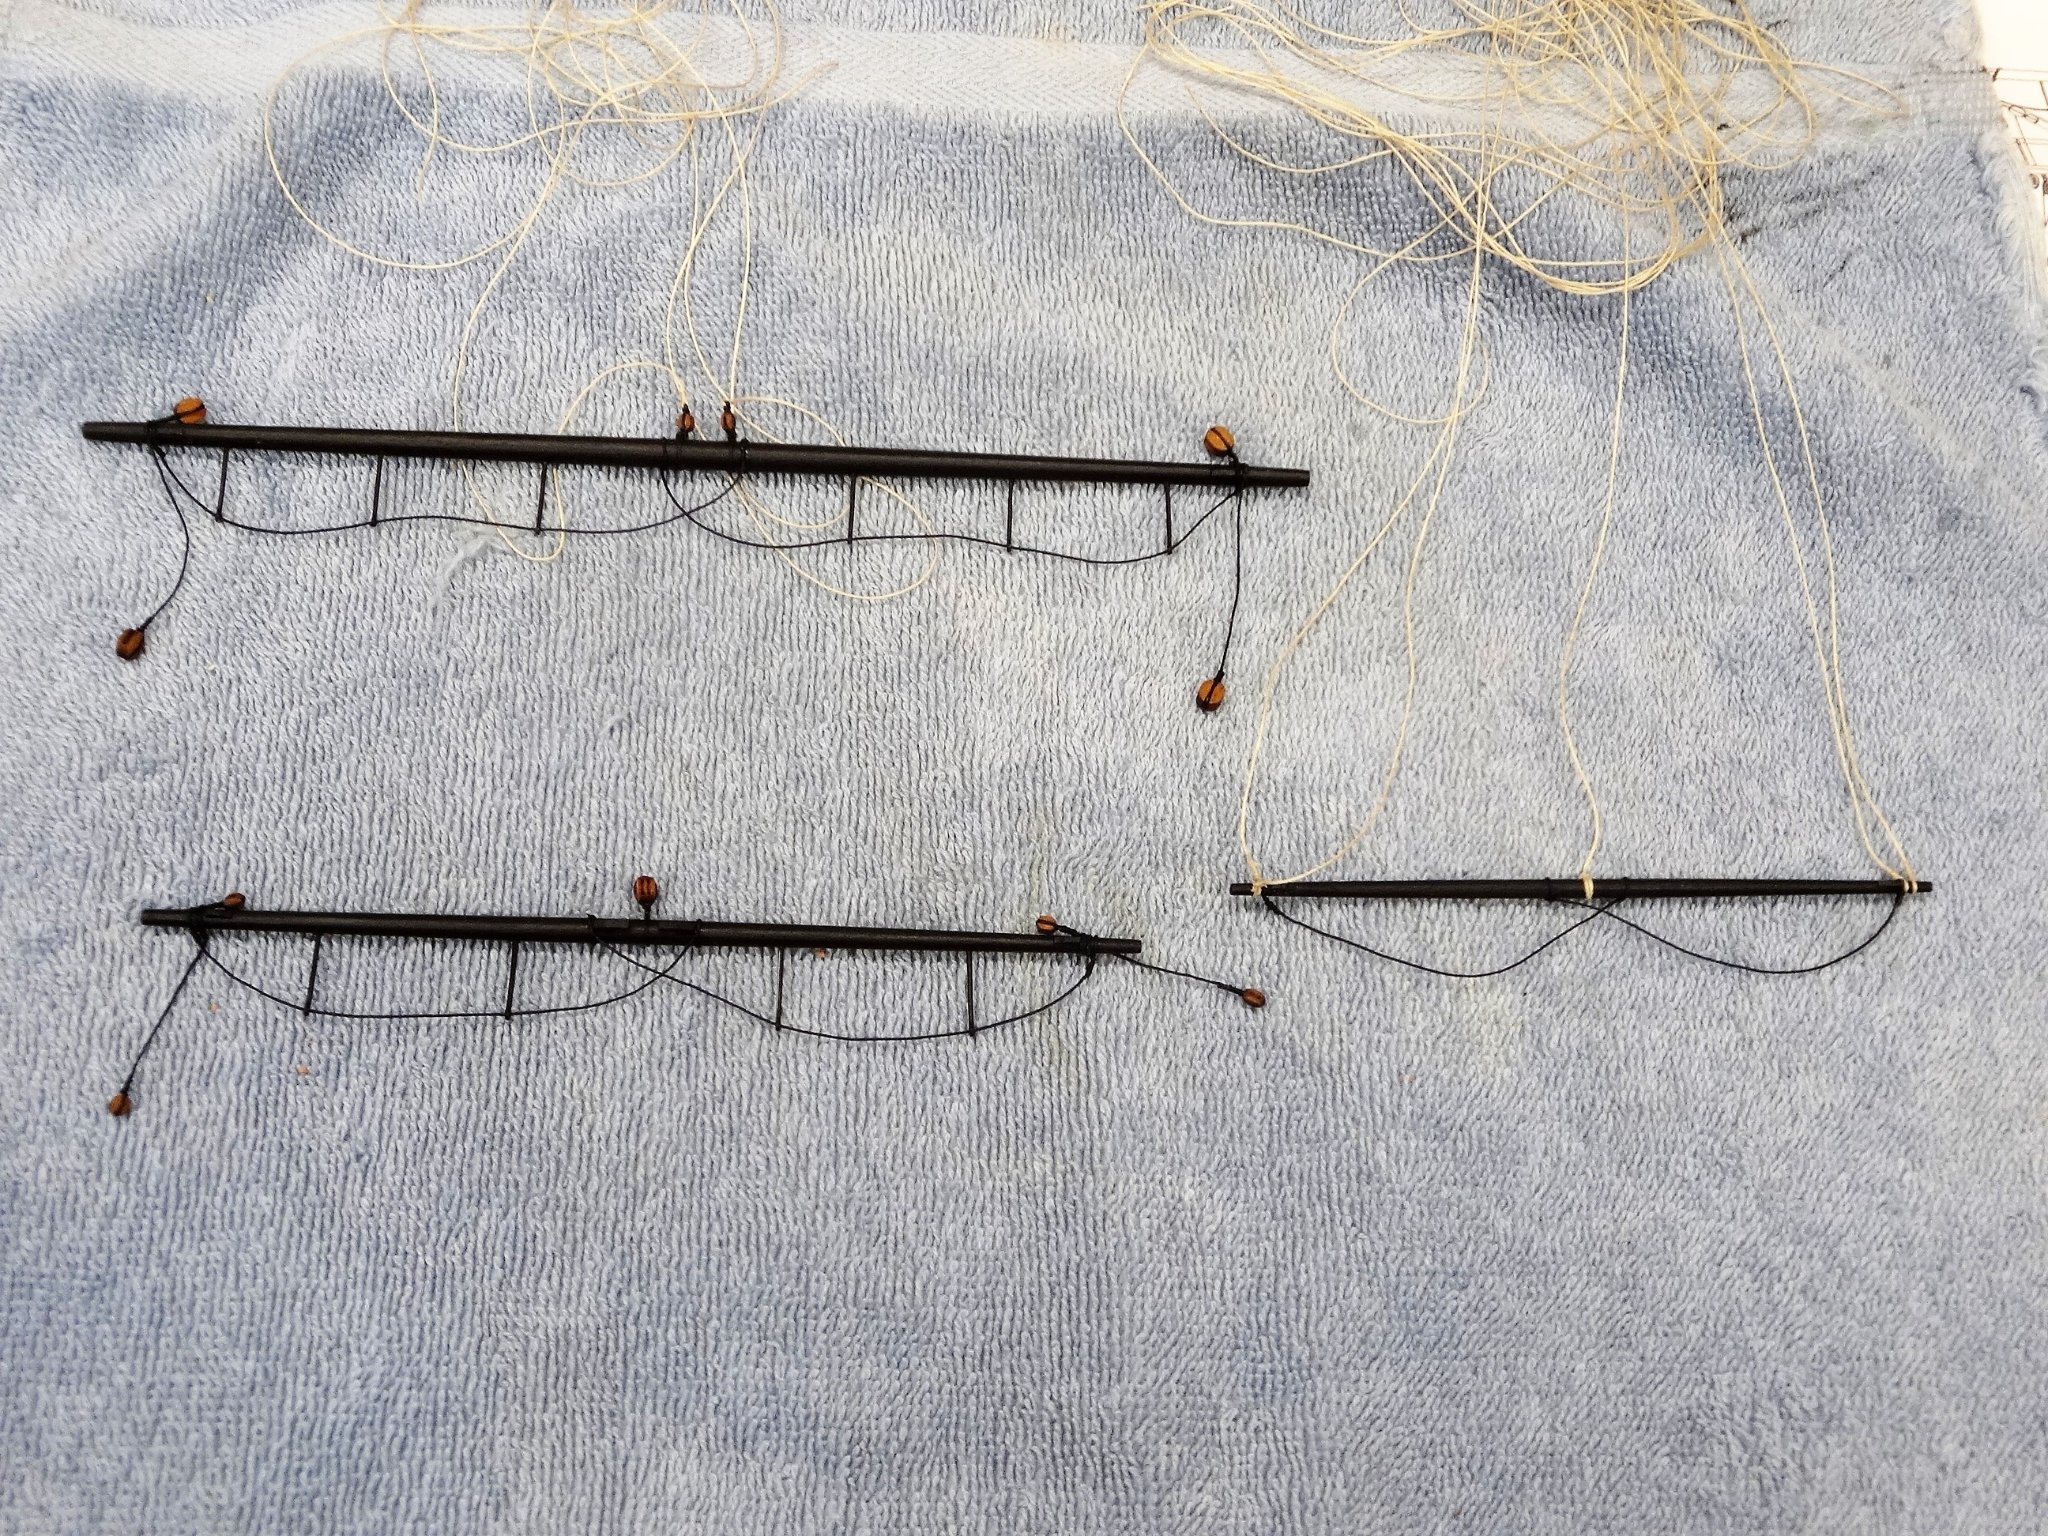
I've started the rigging with the bowsprit first. I mounted the bowsprit and then the gammoning.
The spritsail was then attached. The running rigging was then added. The ends were tied off with
the extra line left attached in case adjustment