


Rustyj
-
Posts
2,449 -
Joined
-
Last visited
Content Type
Profiles
Forums
Gallery
Events
Posts posted by Rustyj
-
-
-
-
44 minutes ago, fnkershner said:
If I read you correctly, are you suggesting that I not drill all the way thru the plank?
On the butt joints if you feel that you can't hit the frame then drill just deep enough to hold the line. I don't think they really supply structural support.
- BobG, Canute and Ryland Craze
-
 3
3
-
I gave in and ordered the DoK yesterday!
")
- VTHokiEE, chris watton and Glenn-UK
-
2
-
 1
1
-
Thank you Jean-Paul, Sjors, JJ and Bob. Much appreciated. Also for all the likes.
3 hours ago, Stuntflyer said:I'm curious though if there was a reason for your not painting the QD clamp.
I'll give you the same answer I used to give my dad when I was a teenager and I quote,
"Ummm, ahhhh, welllllllll, maybe, I don't know." That should about cover it.
- Stuntflyer and FrankWouts
-
2
-
Thanks Mark and Sjors. Sjors I've been following your Flirt and you're doing a great job on her! Also thanks for the likes.
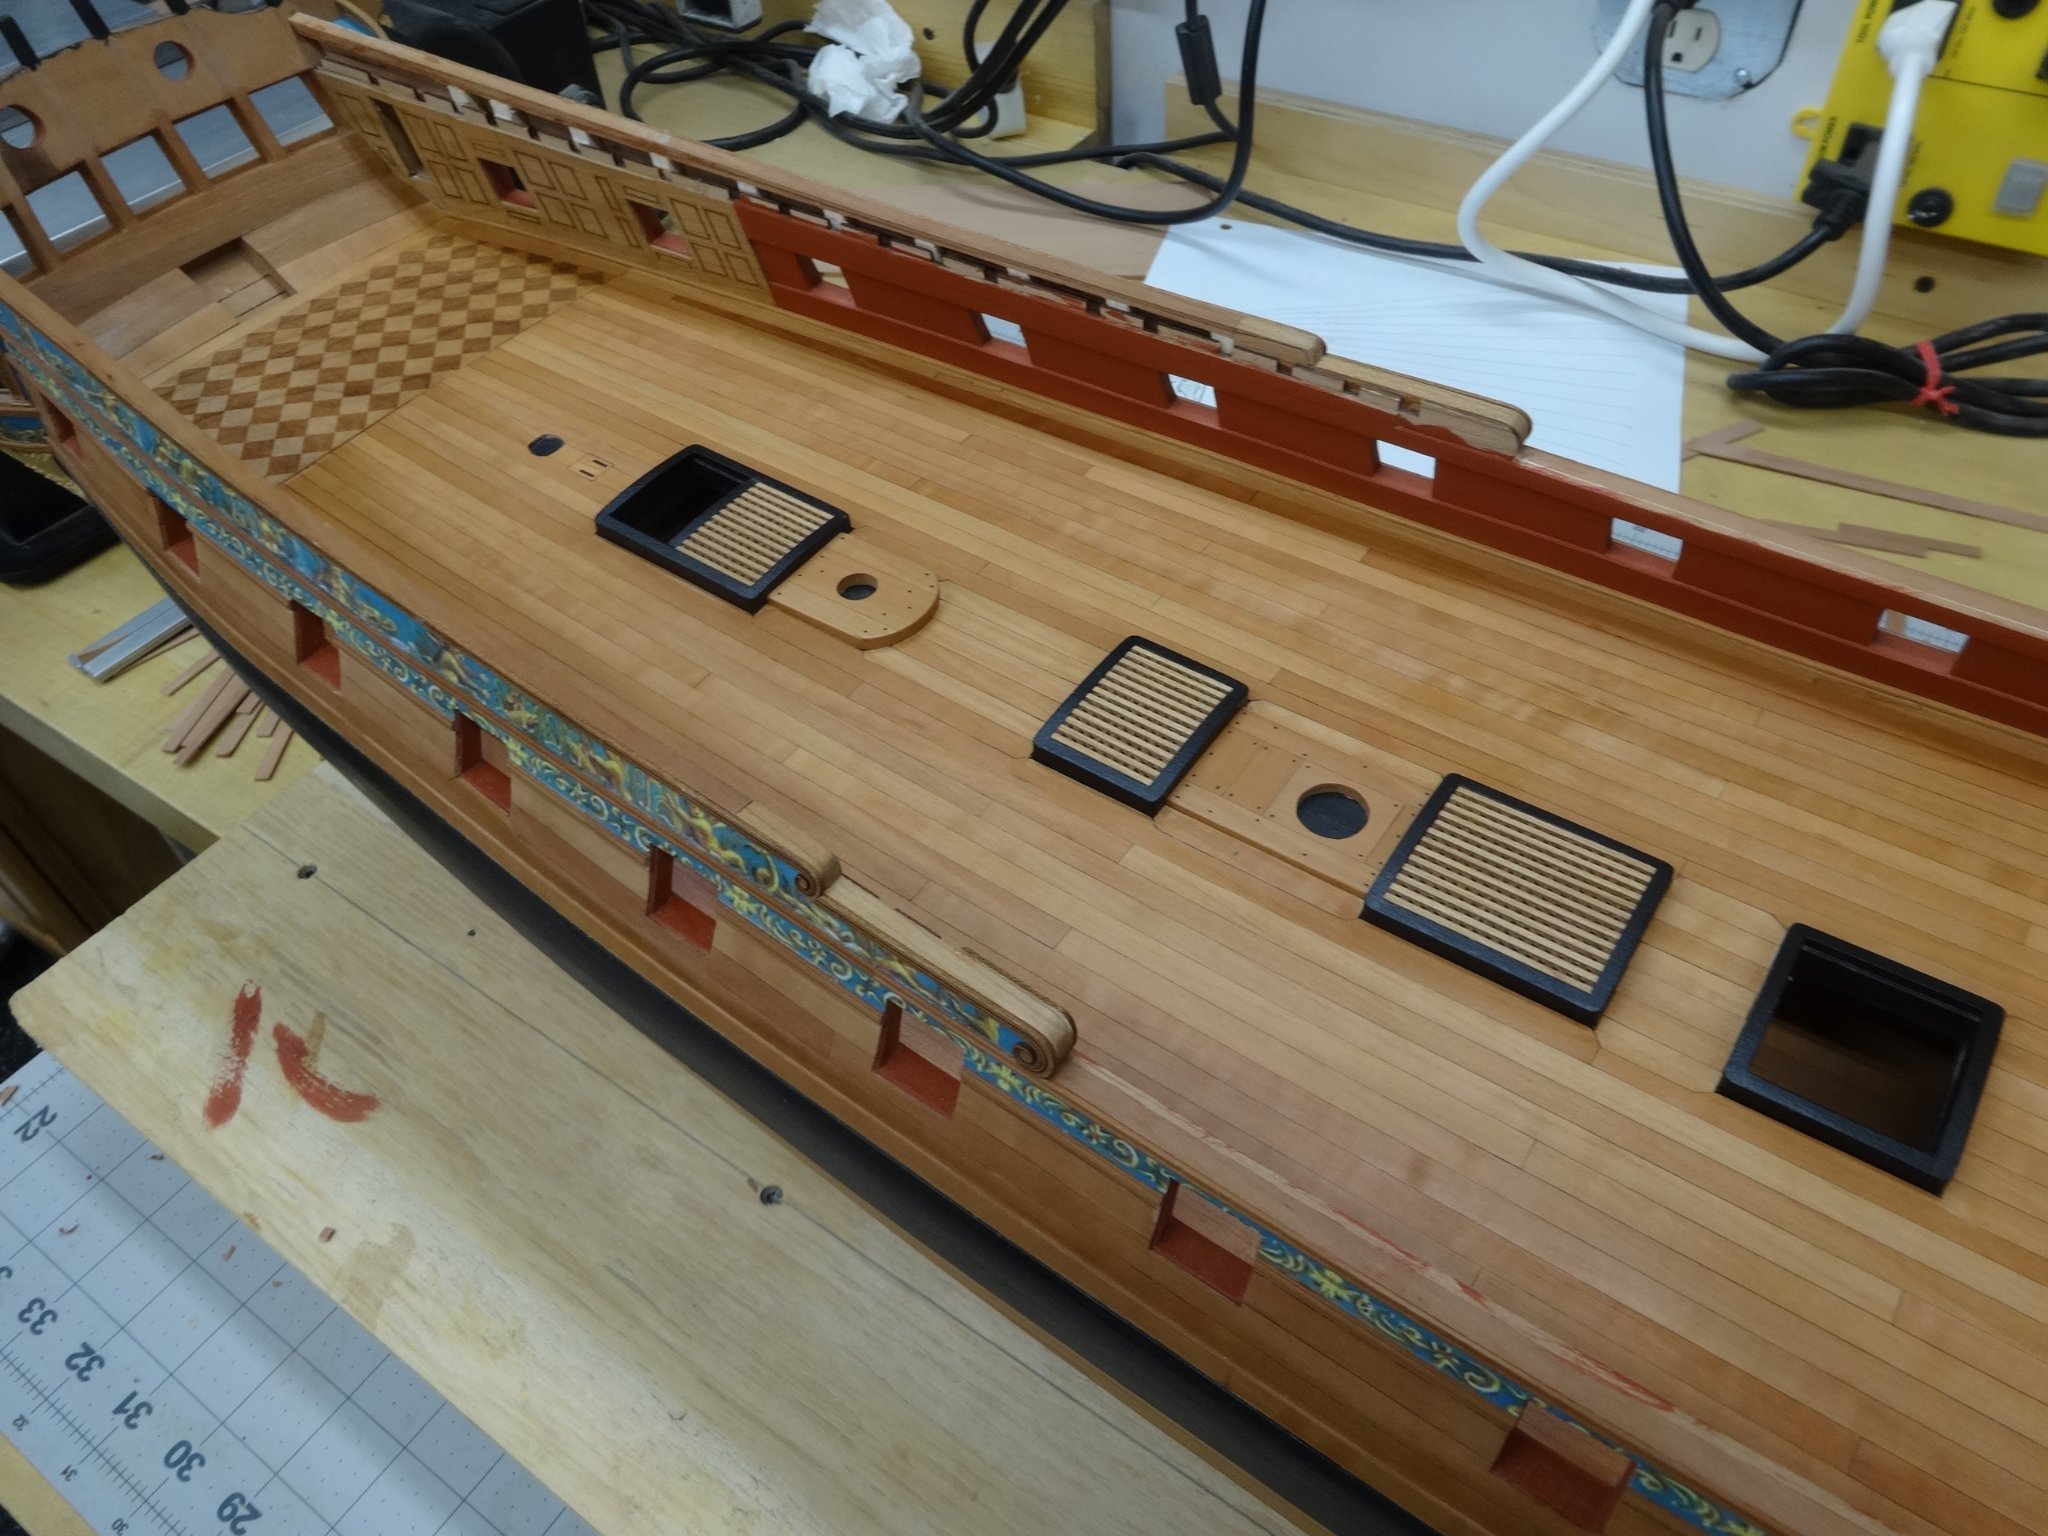
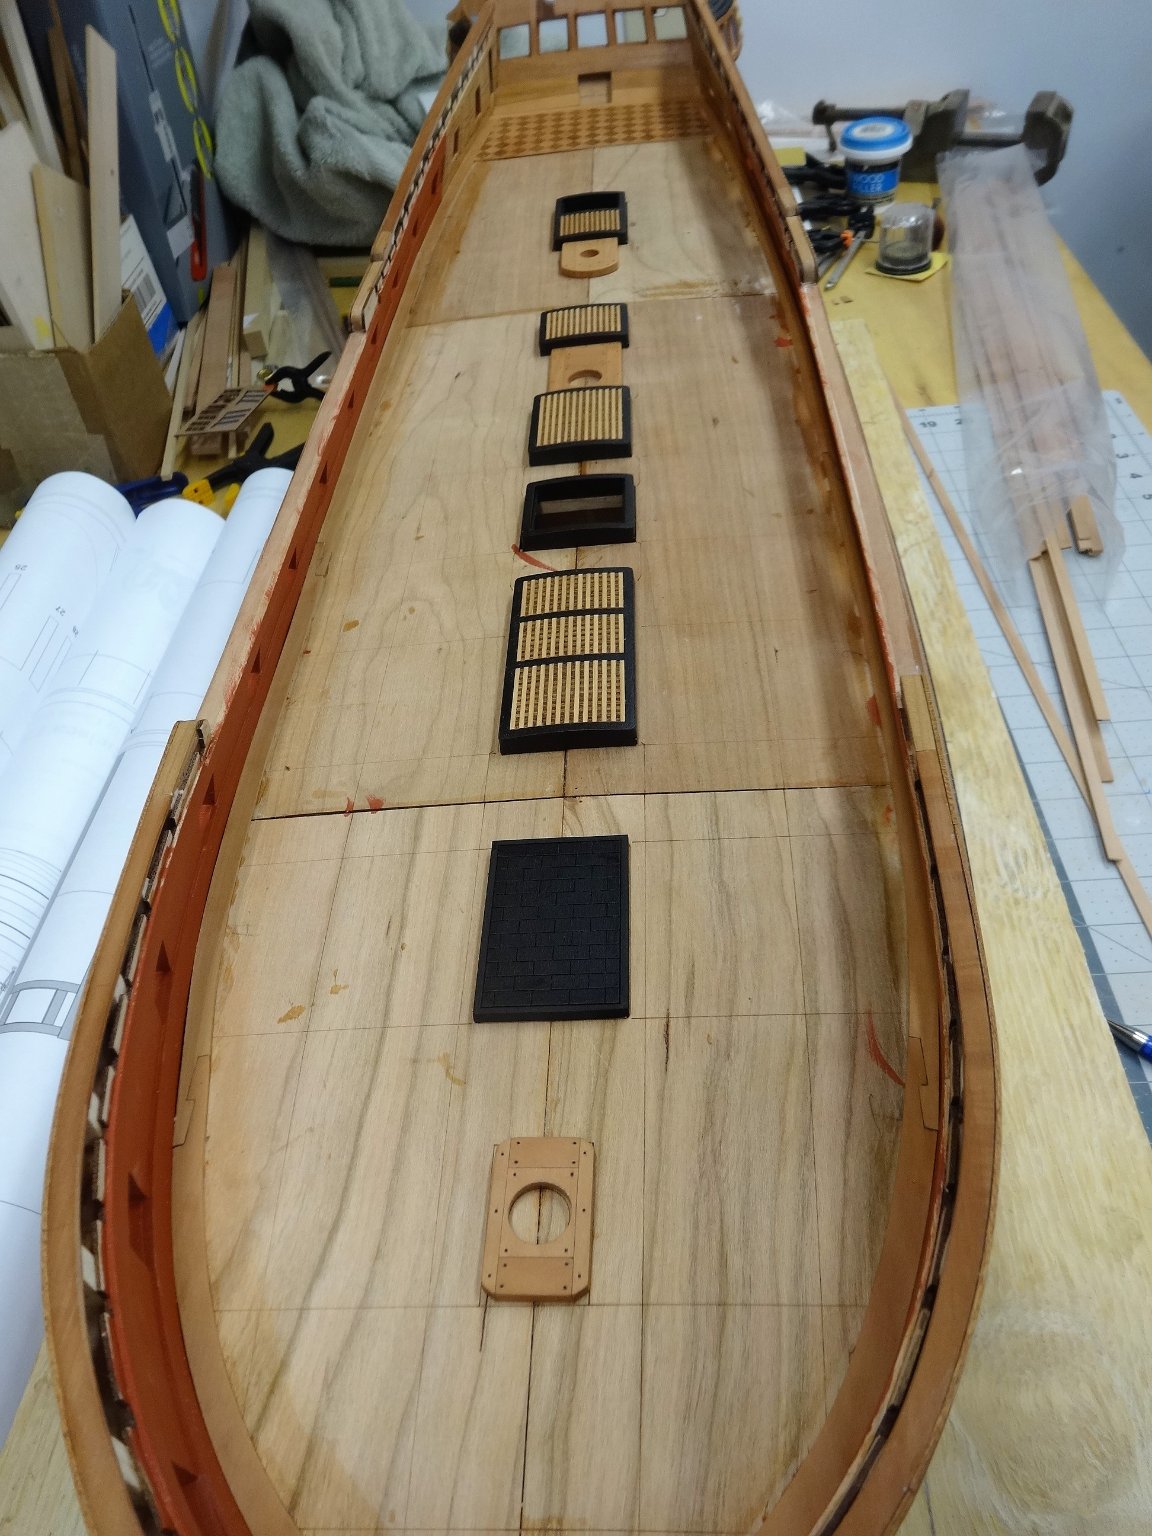
On to planking the deck. I planked her using pear wood. No big surprises, just follow Chucks directions!
")
Here you can see the start of laying the first center line plank and the the filling in between the hatches etc.
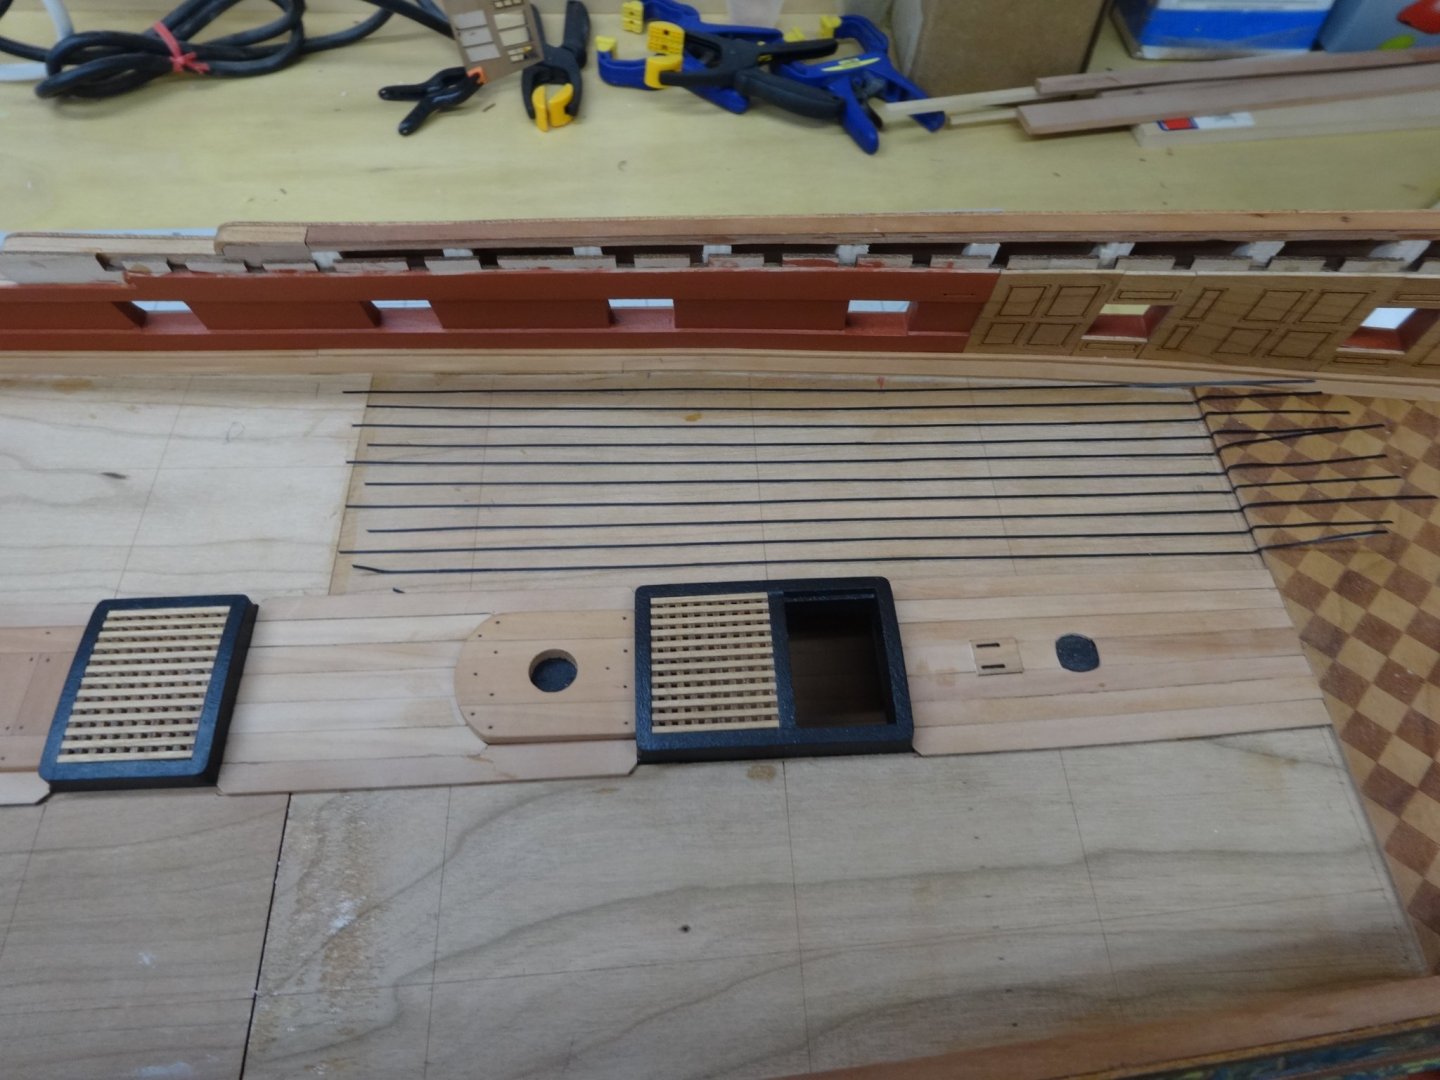
Then came the tabs around the hatches. You can see how I started figuring the cuts and just kept making small cuts and sanding until a tight fit was obtained. More pieces than I care to count went into the waste bin!
Here all the tabs have been completed. Planking the remaining deck came next.


First coat of wipe on poly going on. Brings out the colors nicely.
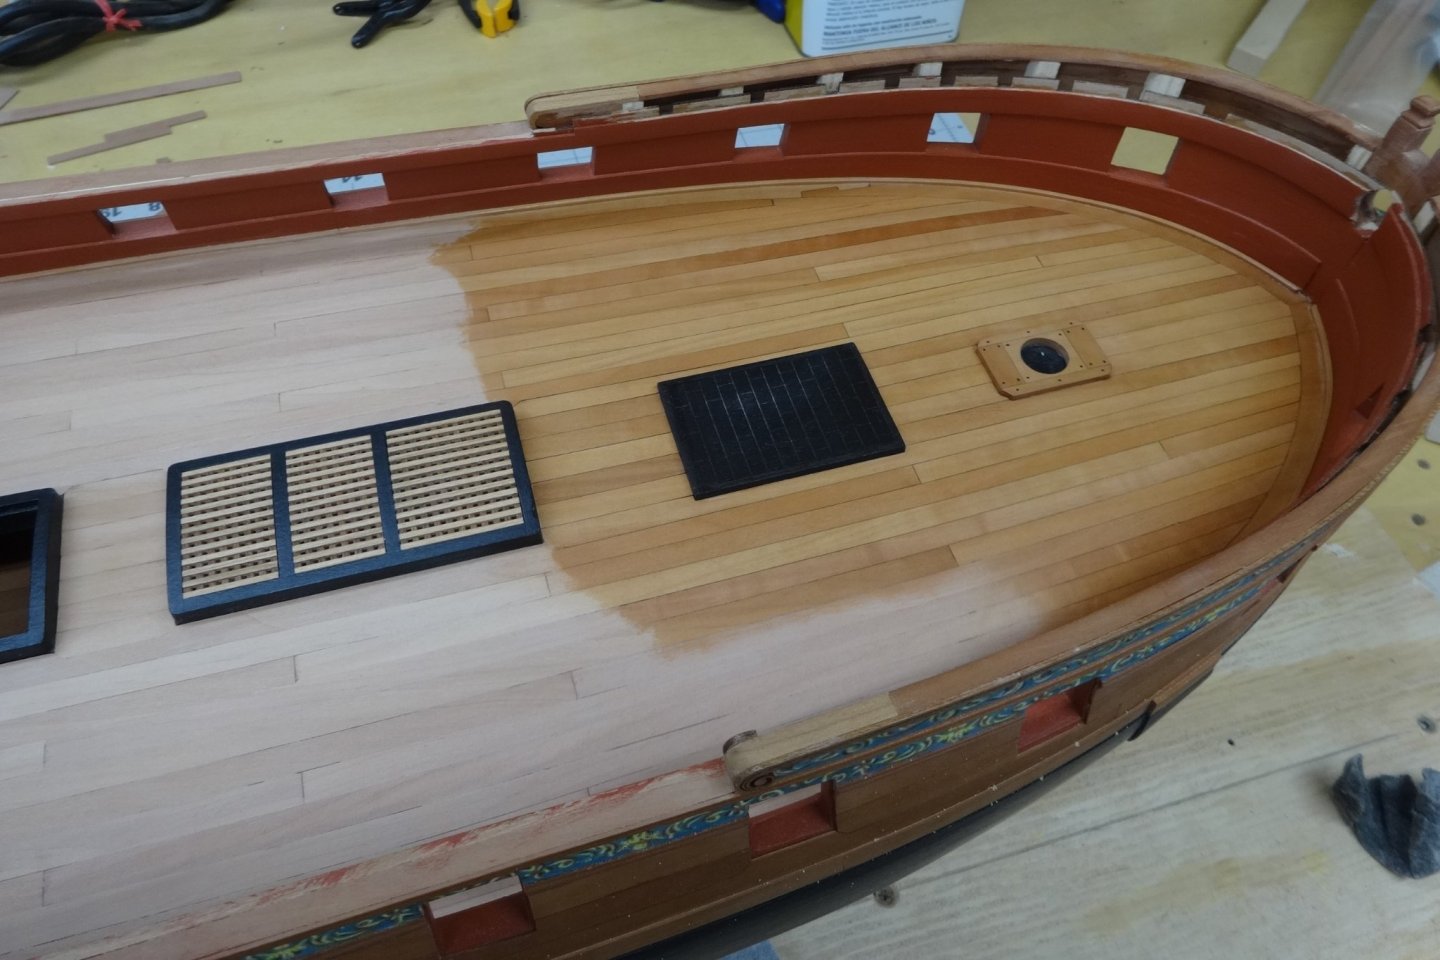


Whew that was a lot of fun!
- Sjors, FrankWouts, iosto and 25 others
-
28
-
Very nice Grant. I'm glad you restarted it too!
- Ryland Craze, Canute and gjdale
-
3
-
-
Very nice job Don. We must have gotten our hands from the same store!
- Nunnehi (Don) and FrankWouts
-
2
-
On 11/5/2020 at 4:41 PM, rafine said:
Matt, I thought about the guns, but after checking the plans against Chuck's available guns, it seemed to me that there are none that match up well.
Hi Bob. I spoke with Chuck regarding the cannon a while ago and he said "The cannon are in fact the 1 15/16 resin for the gun deck. 1 9/16 for the upper decks. If you leave the aft port empty like I will you will need 24.....1 15/16 cannon. None in the foremost port either."
By the way great choice on the Duchess of Kingston. I'm severely tempted to get her.- Matt D and FrankWouts
-
2
-
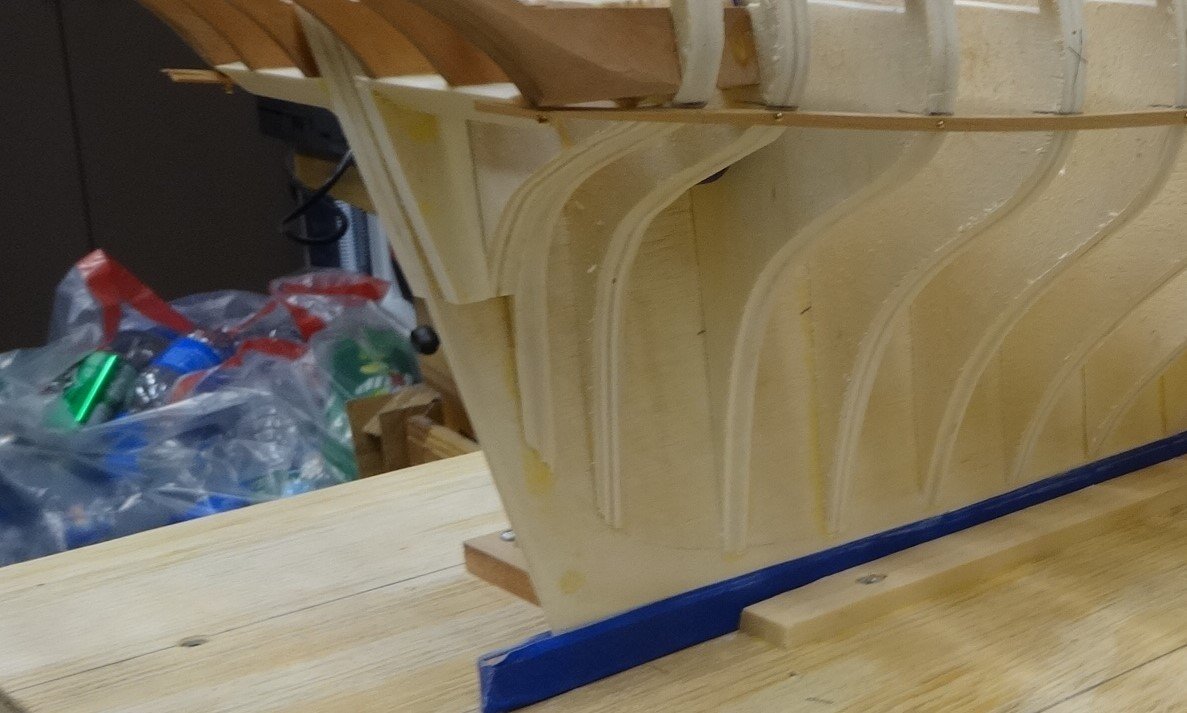
From the pictures it looks like you were a little to aggressive with the sanding. You can build the frame back up with stripe wood on the face if needed. I would wait until you've framed in the stern. Once that's done I would think it will give you better idea of just how much you are off.
I hope this helps
- FrankWouts, Ron Burns, sfotinos and 1 other
-
4
-
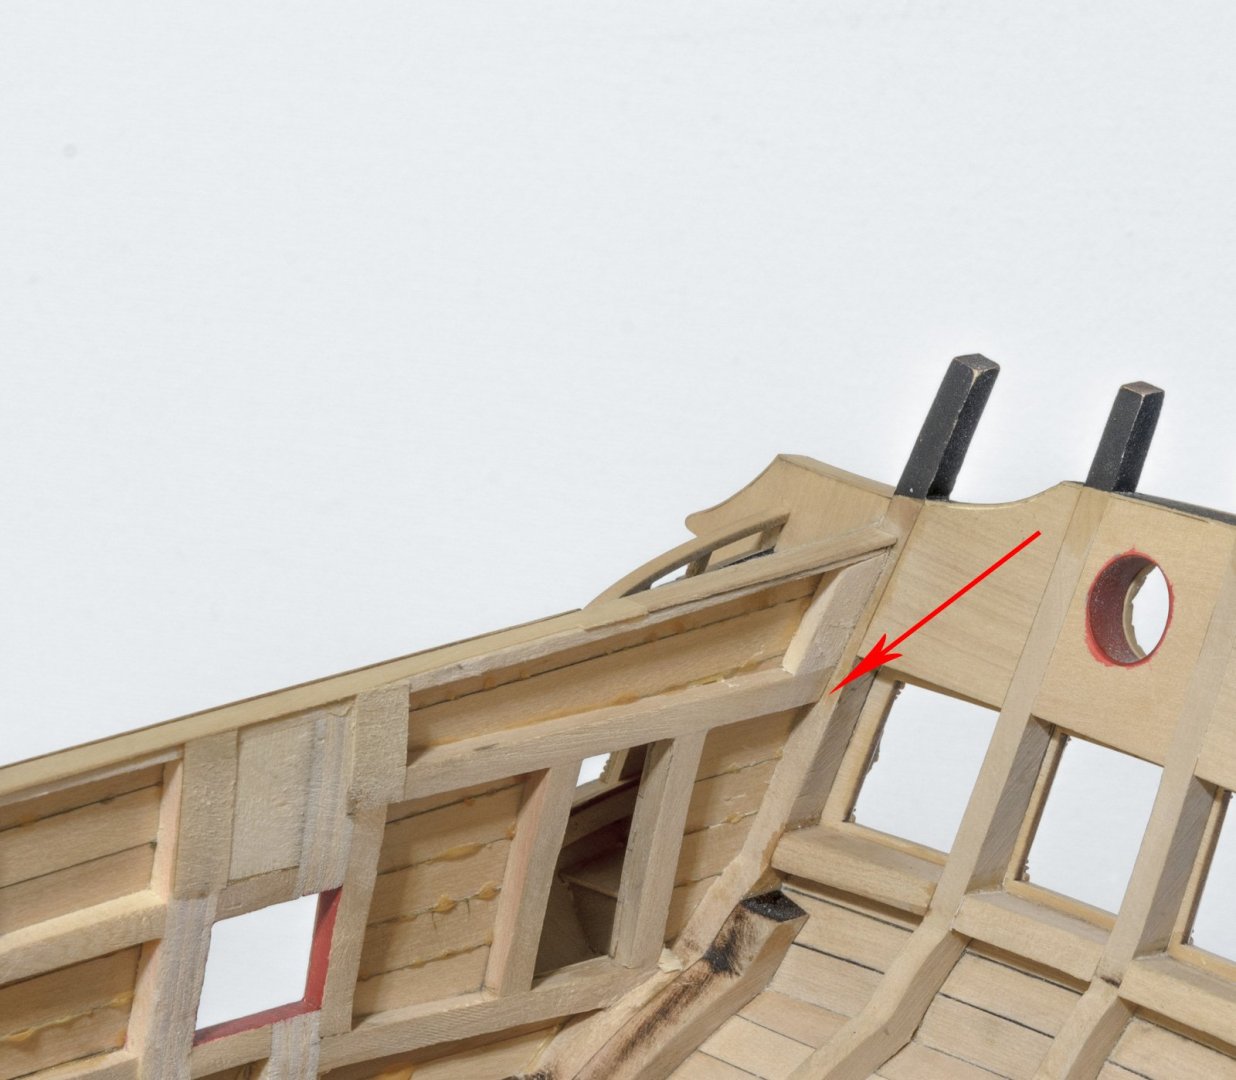
Mike explains it perfectly. See below.
On 9/30/2020 at 2:06 PM, Stuntflyer said:There is something I forgot to mention with regard to fairing the inner hull. If you want the bulkhead paneling to sit flush with the stern frames inner edge, then leave room for that. I left about 5/64". The panel height will not go above the height of the window opening.
- FrankWouts, Ryland Craze and Greg M
-
3
-
-
Coming along nicely. I can tell you from experience keep looking forward and checking
your measurements. It will save a lot of anguish later on.
-
-
Thank you Zarkon and Glenn.
I used Admiralty Paints Matt (Metal) Black but I think Dull Black would work just as well.
Thanks for the likes too!
- FrankWouts, Ryland Craze and Saburo
-
3
-
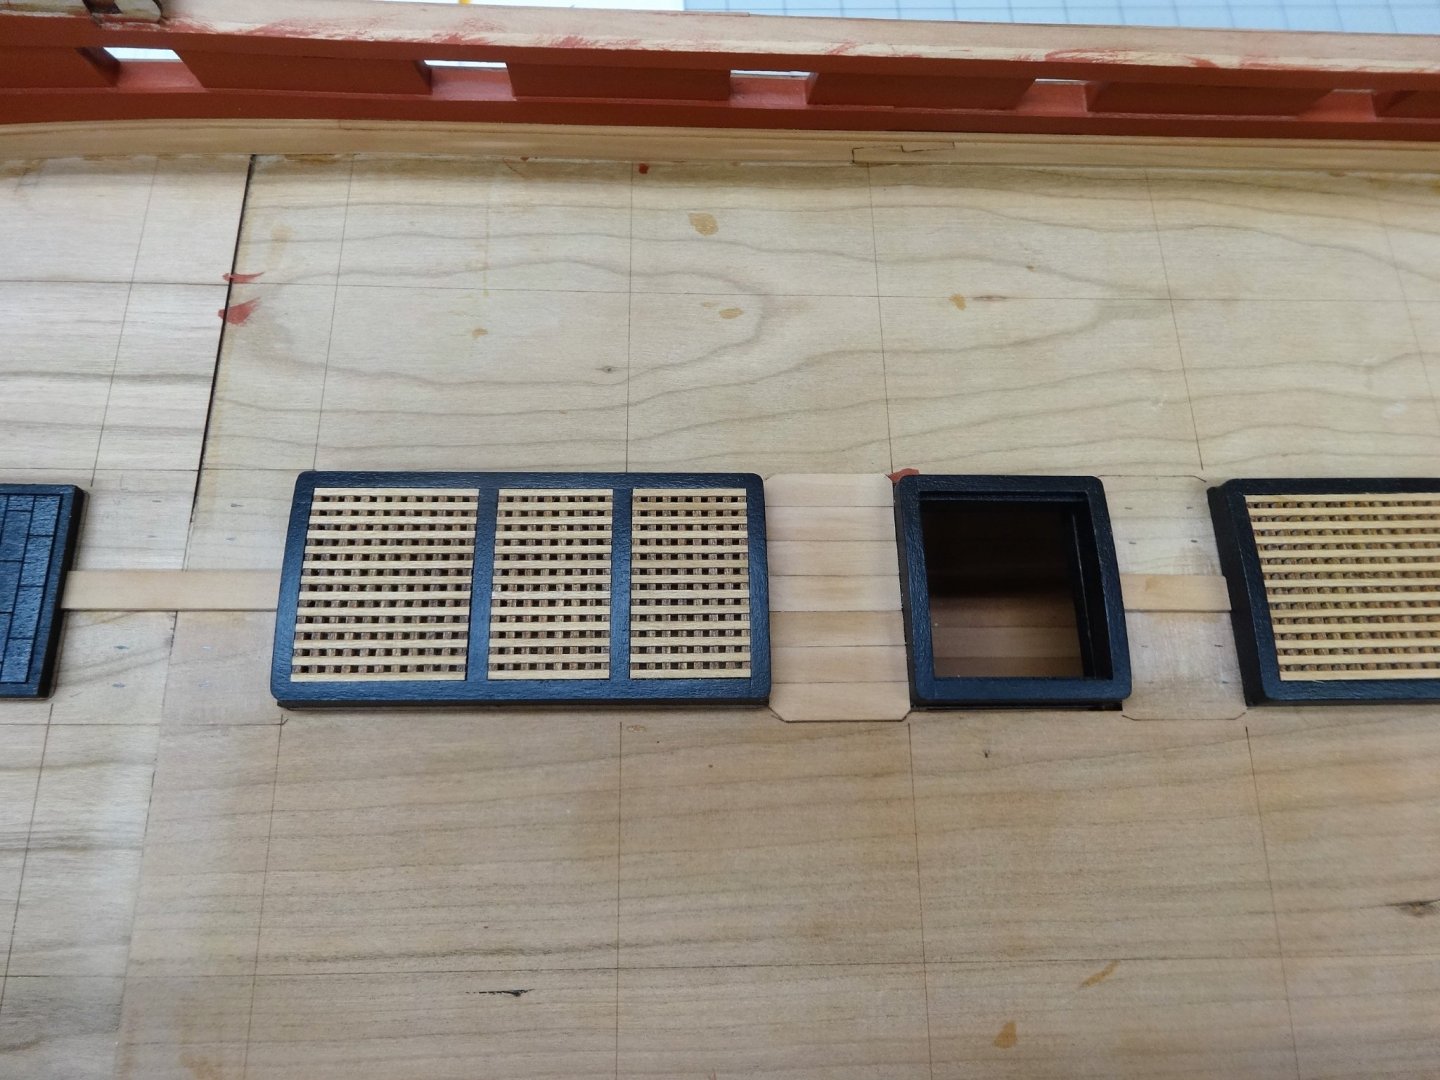
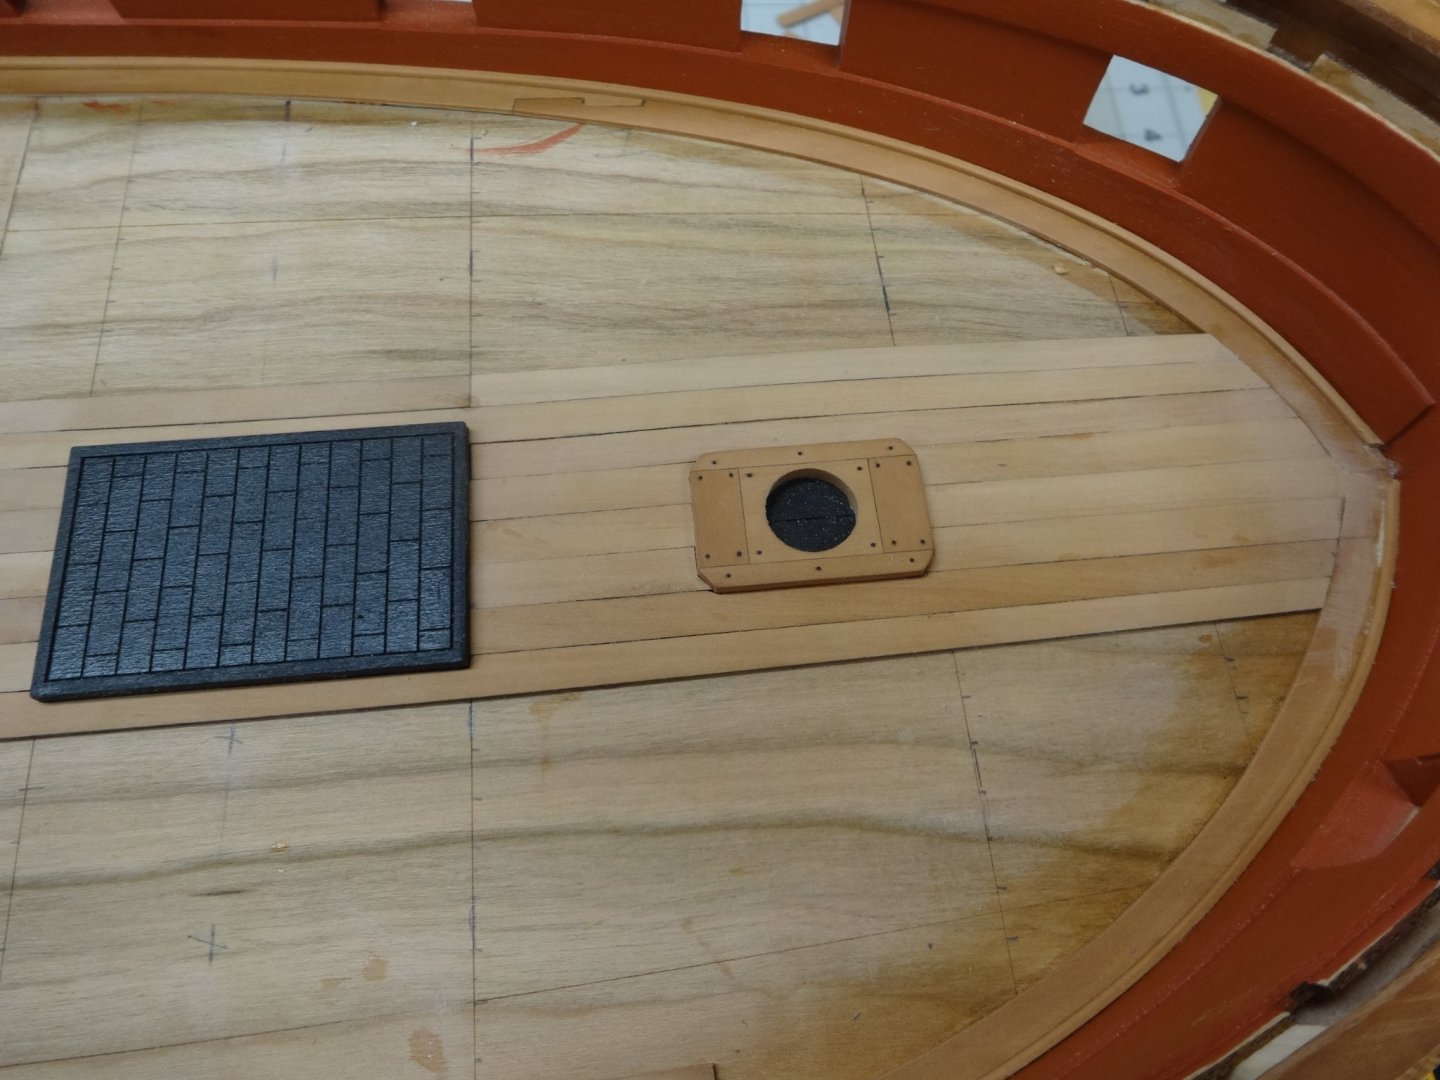
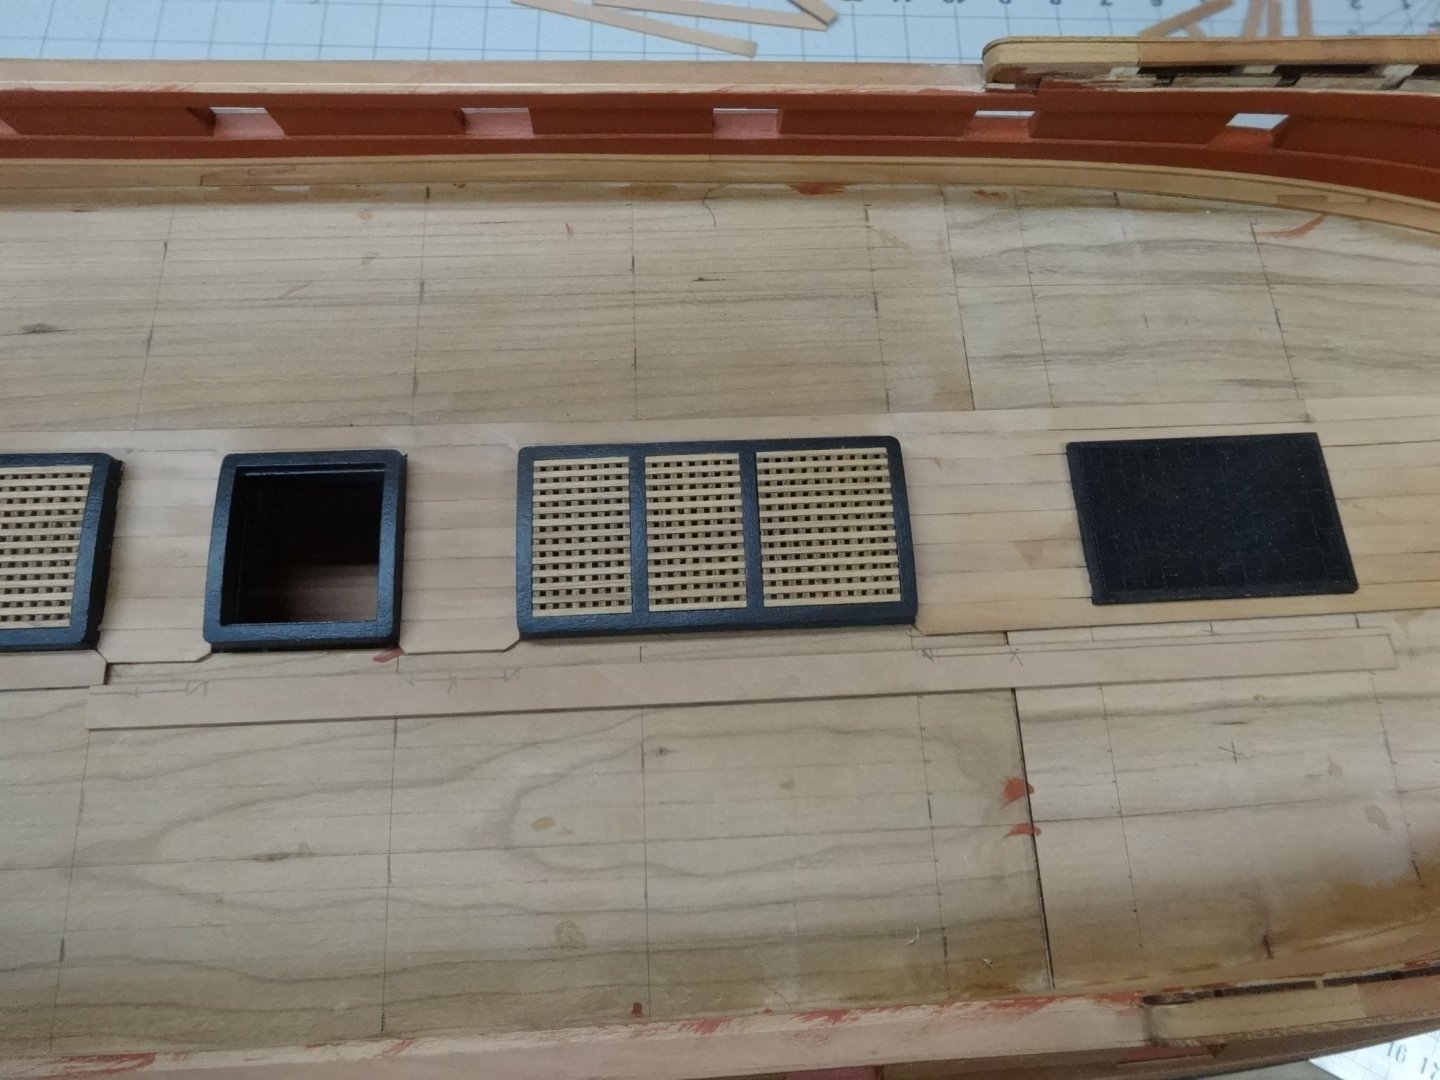
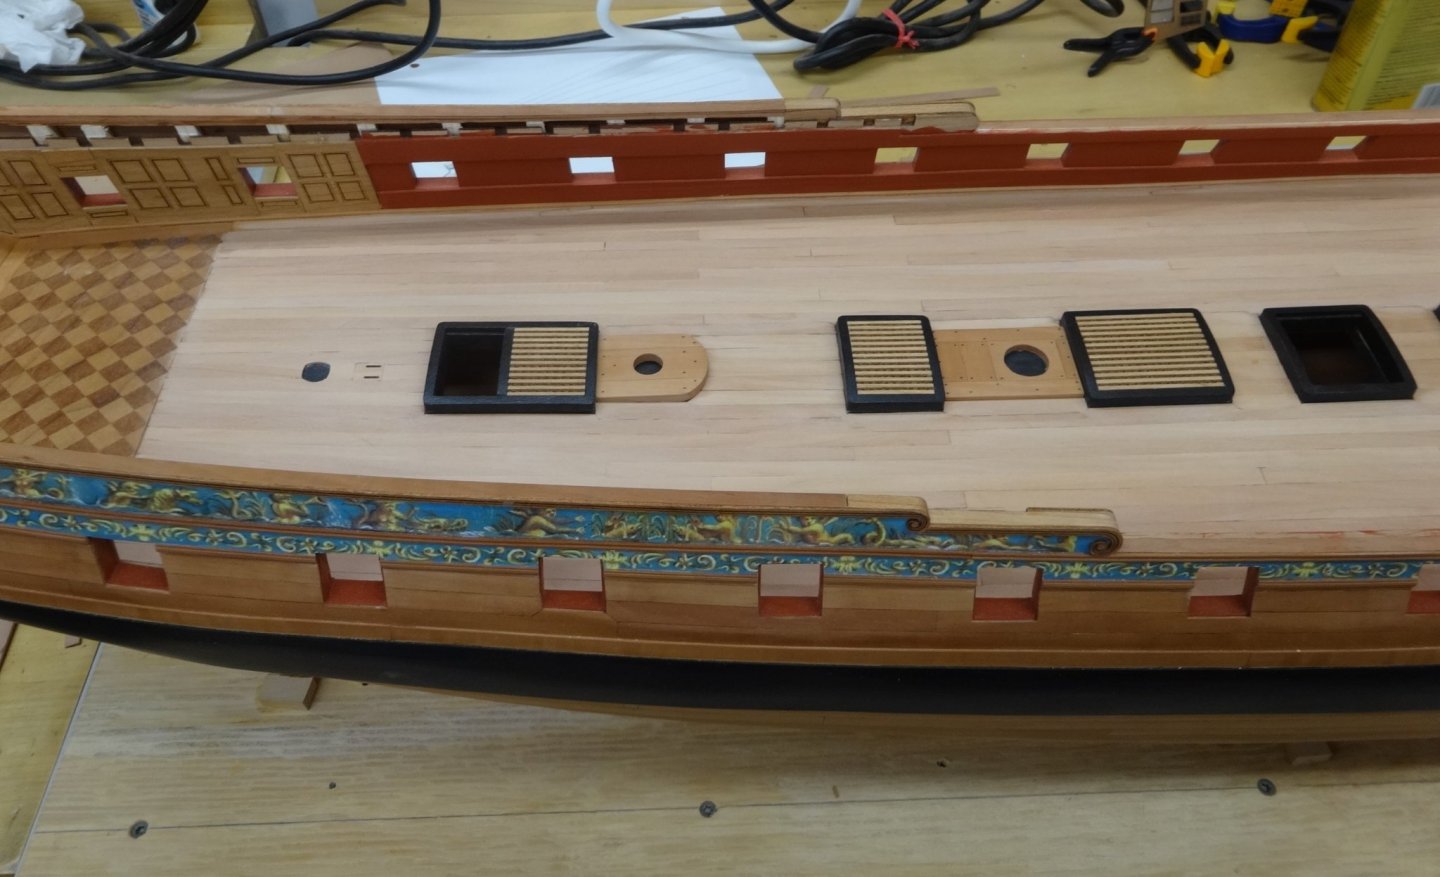
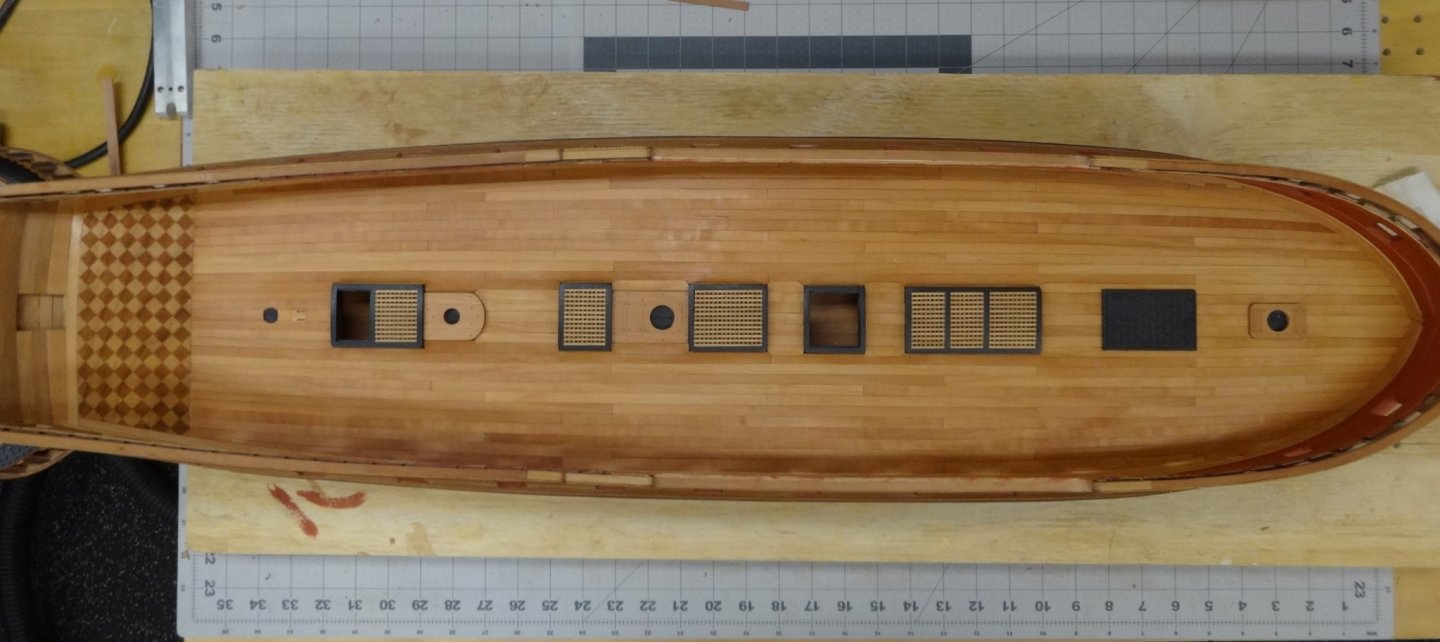
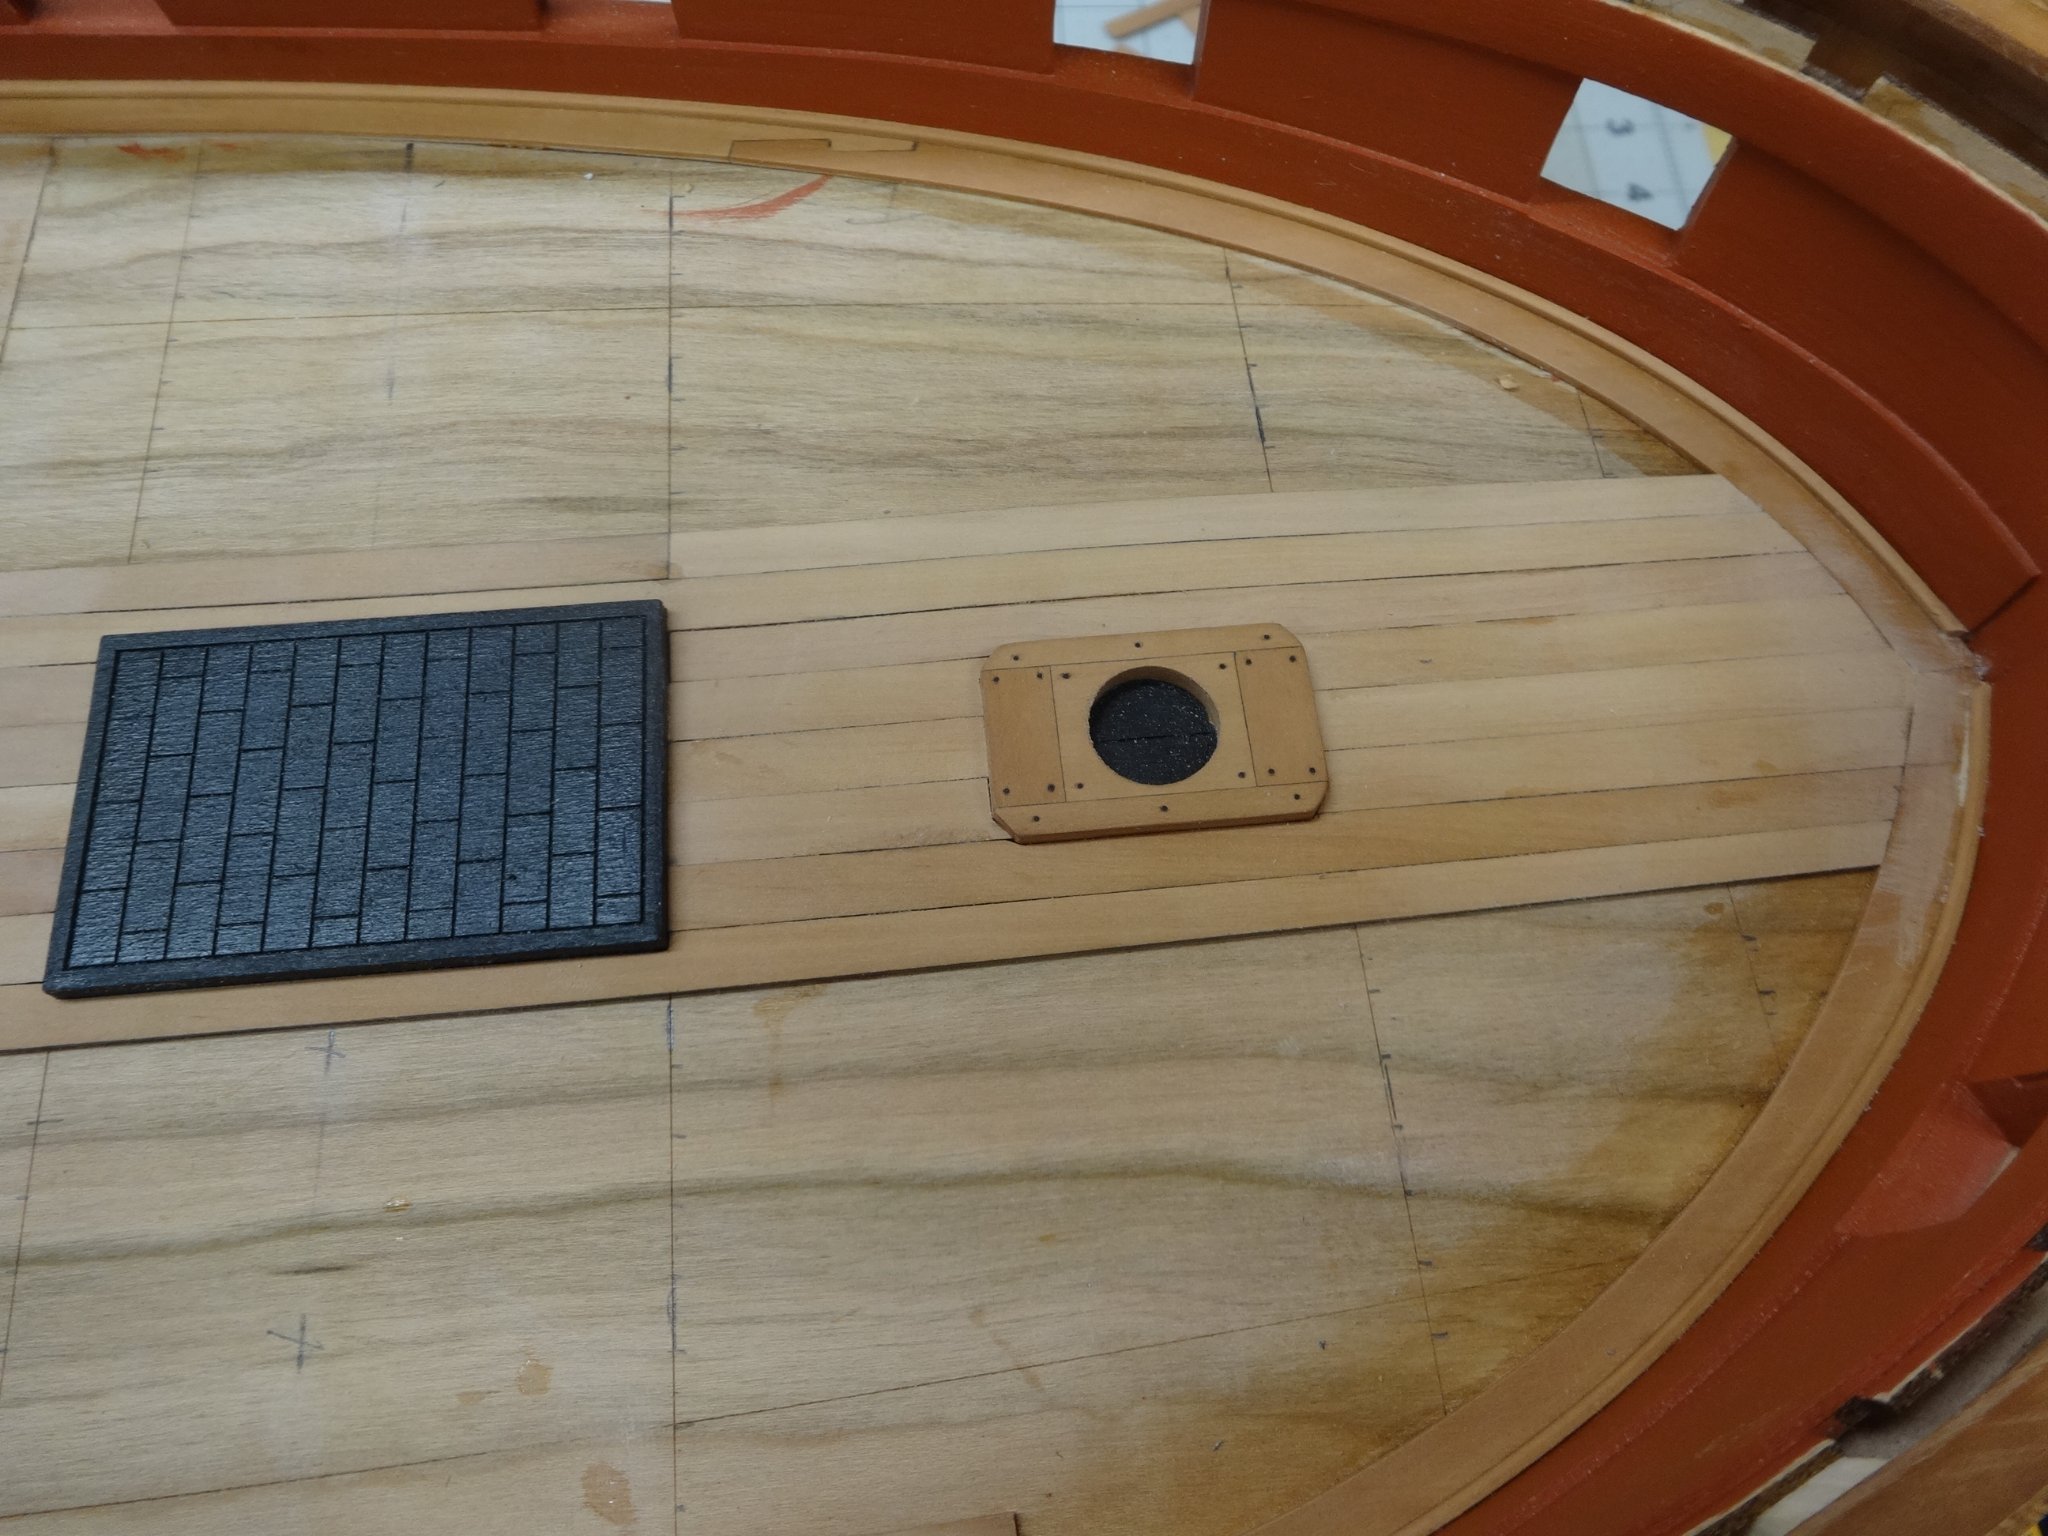
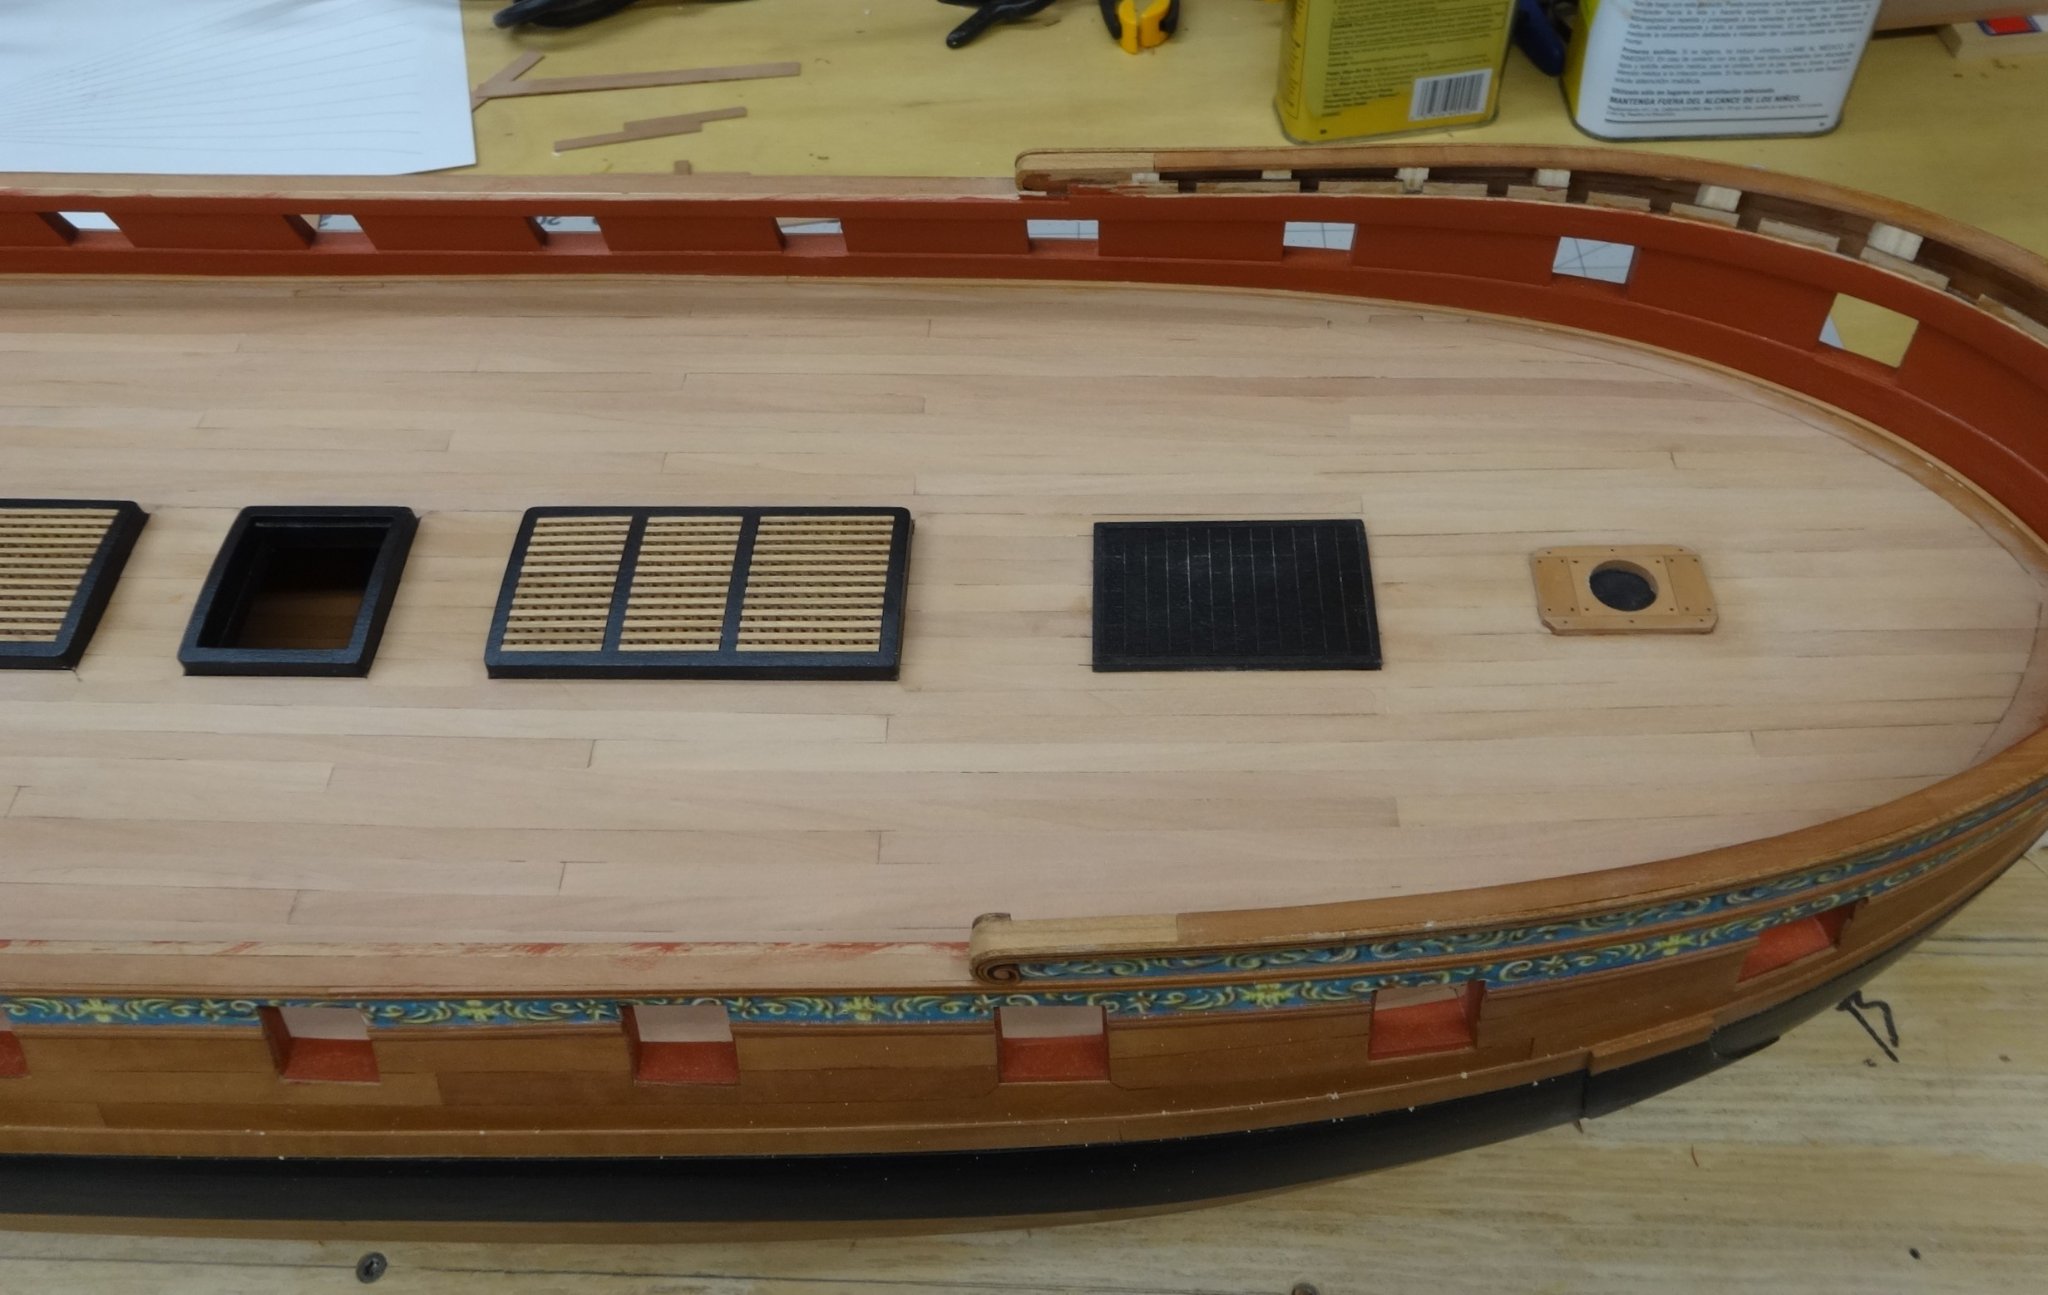
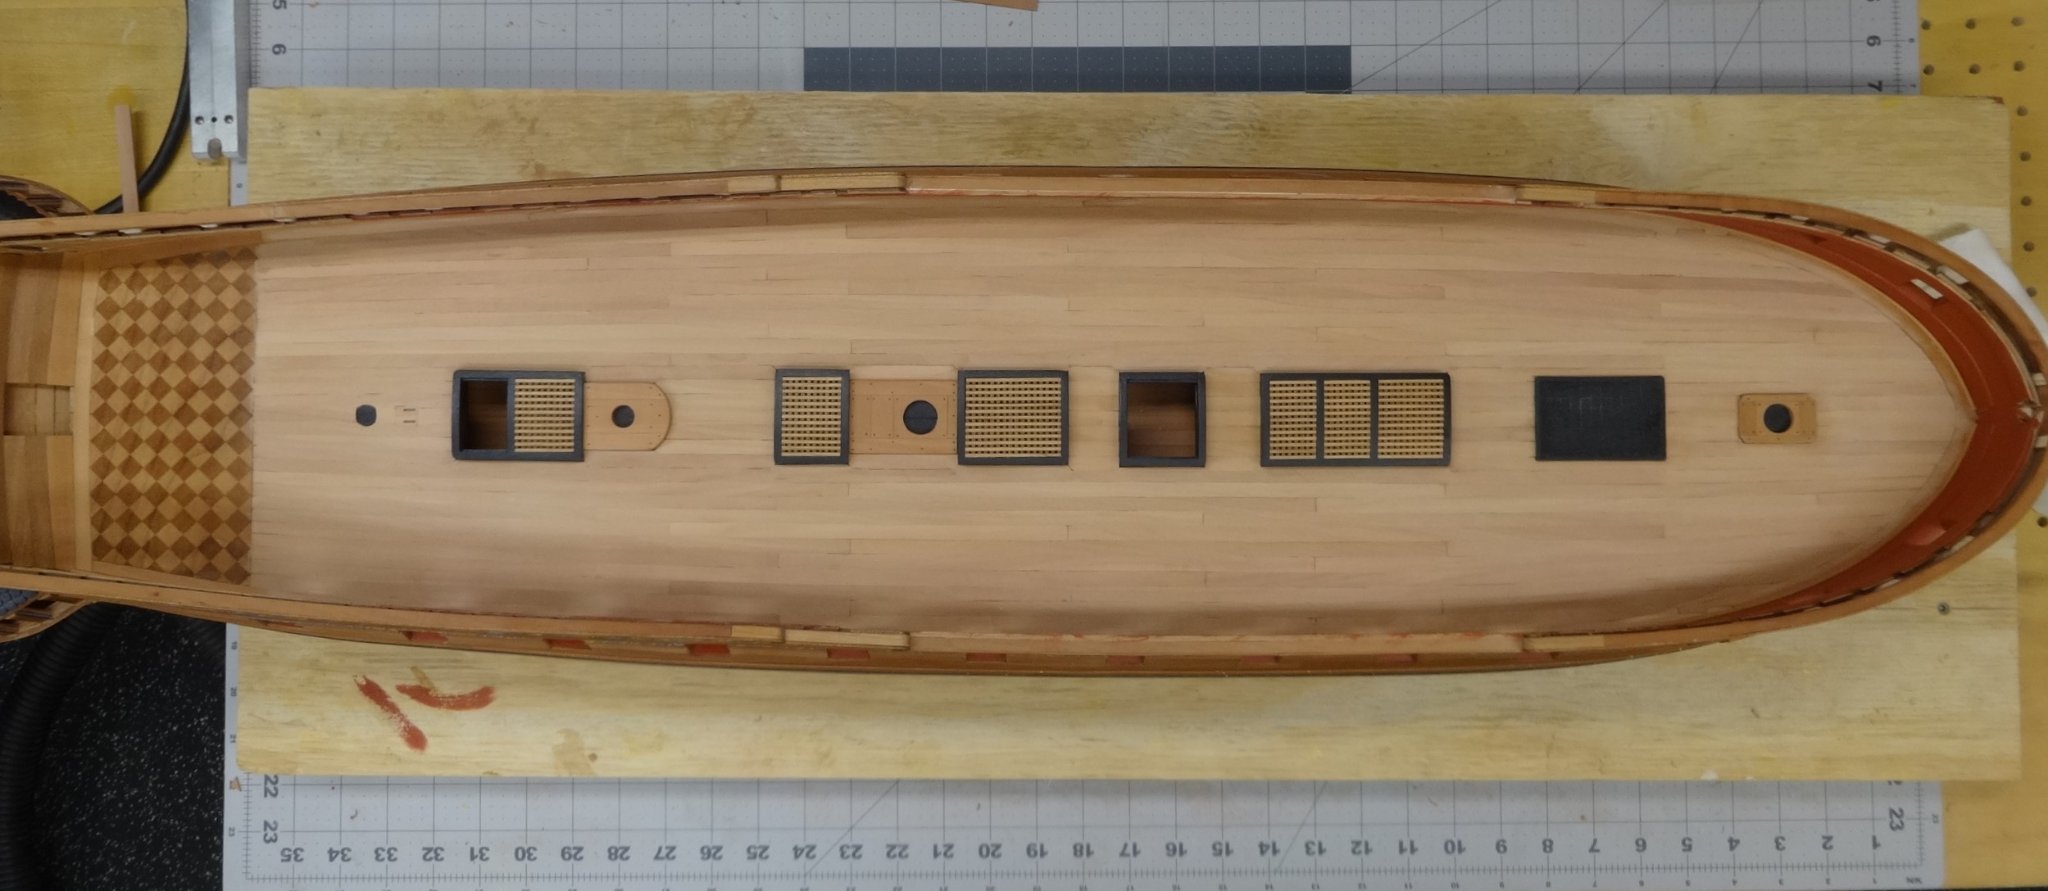
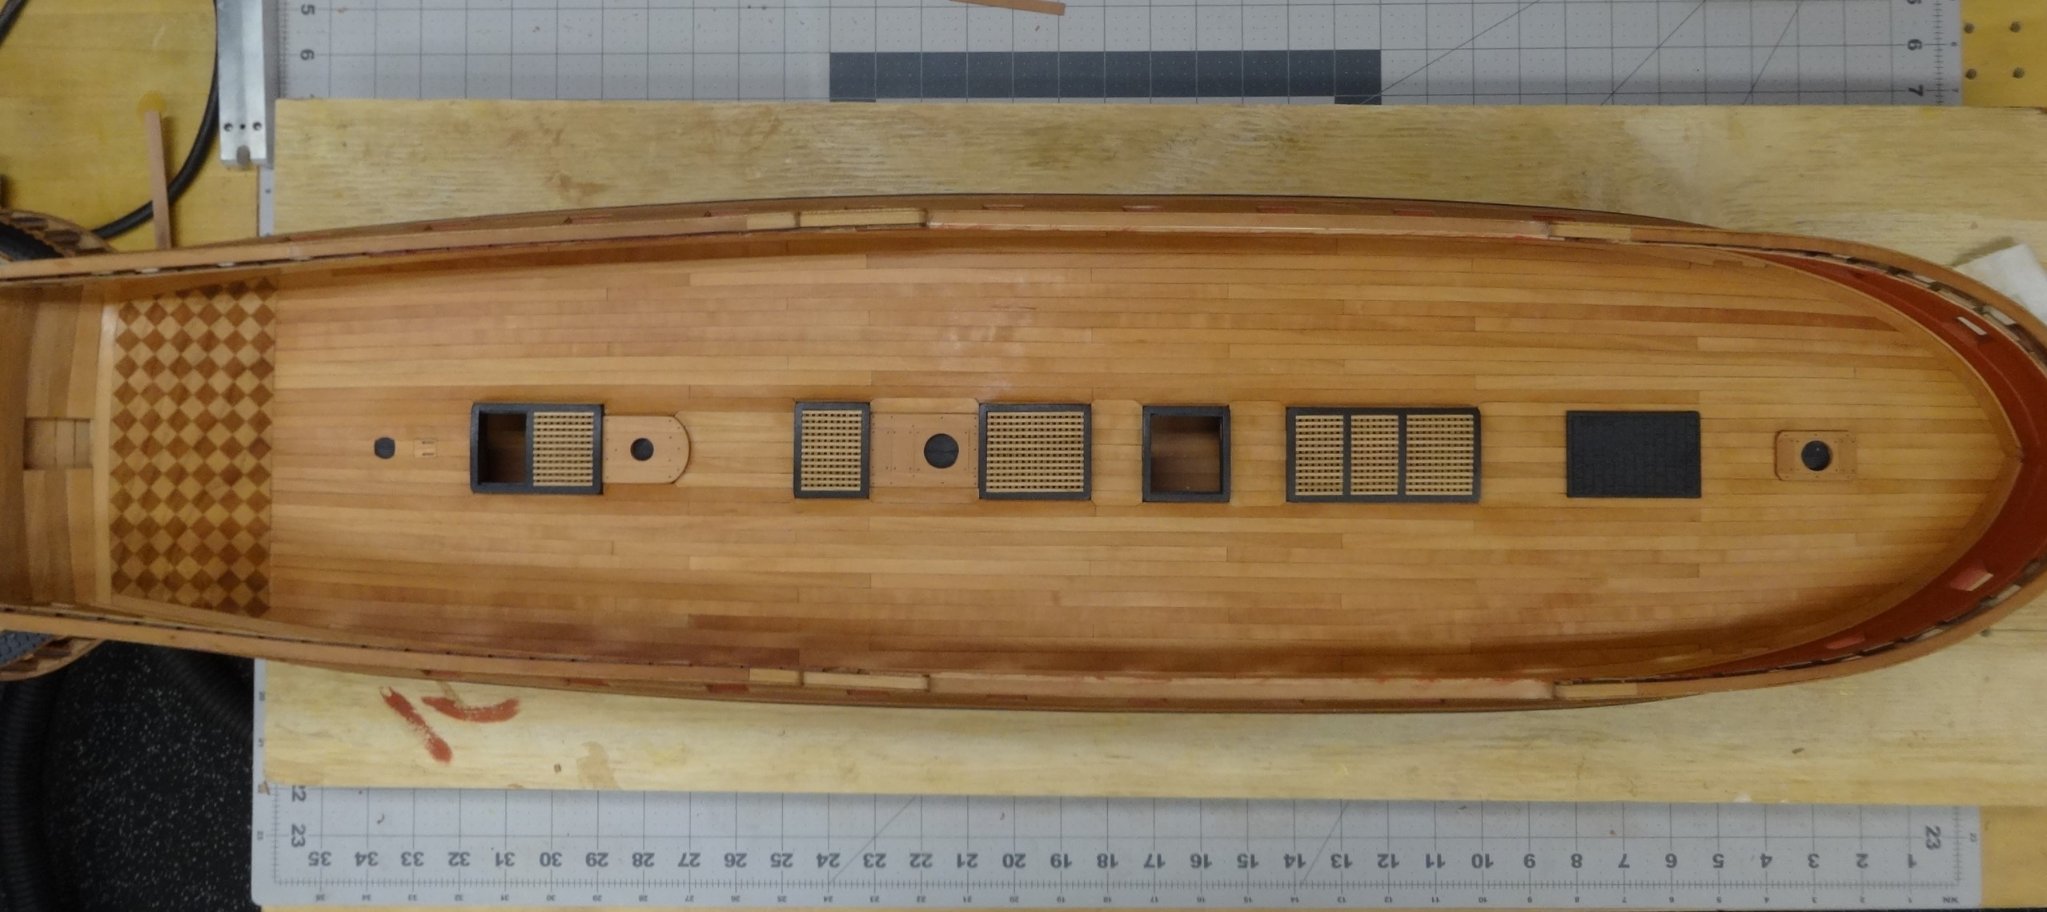
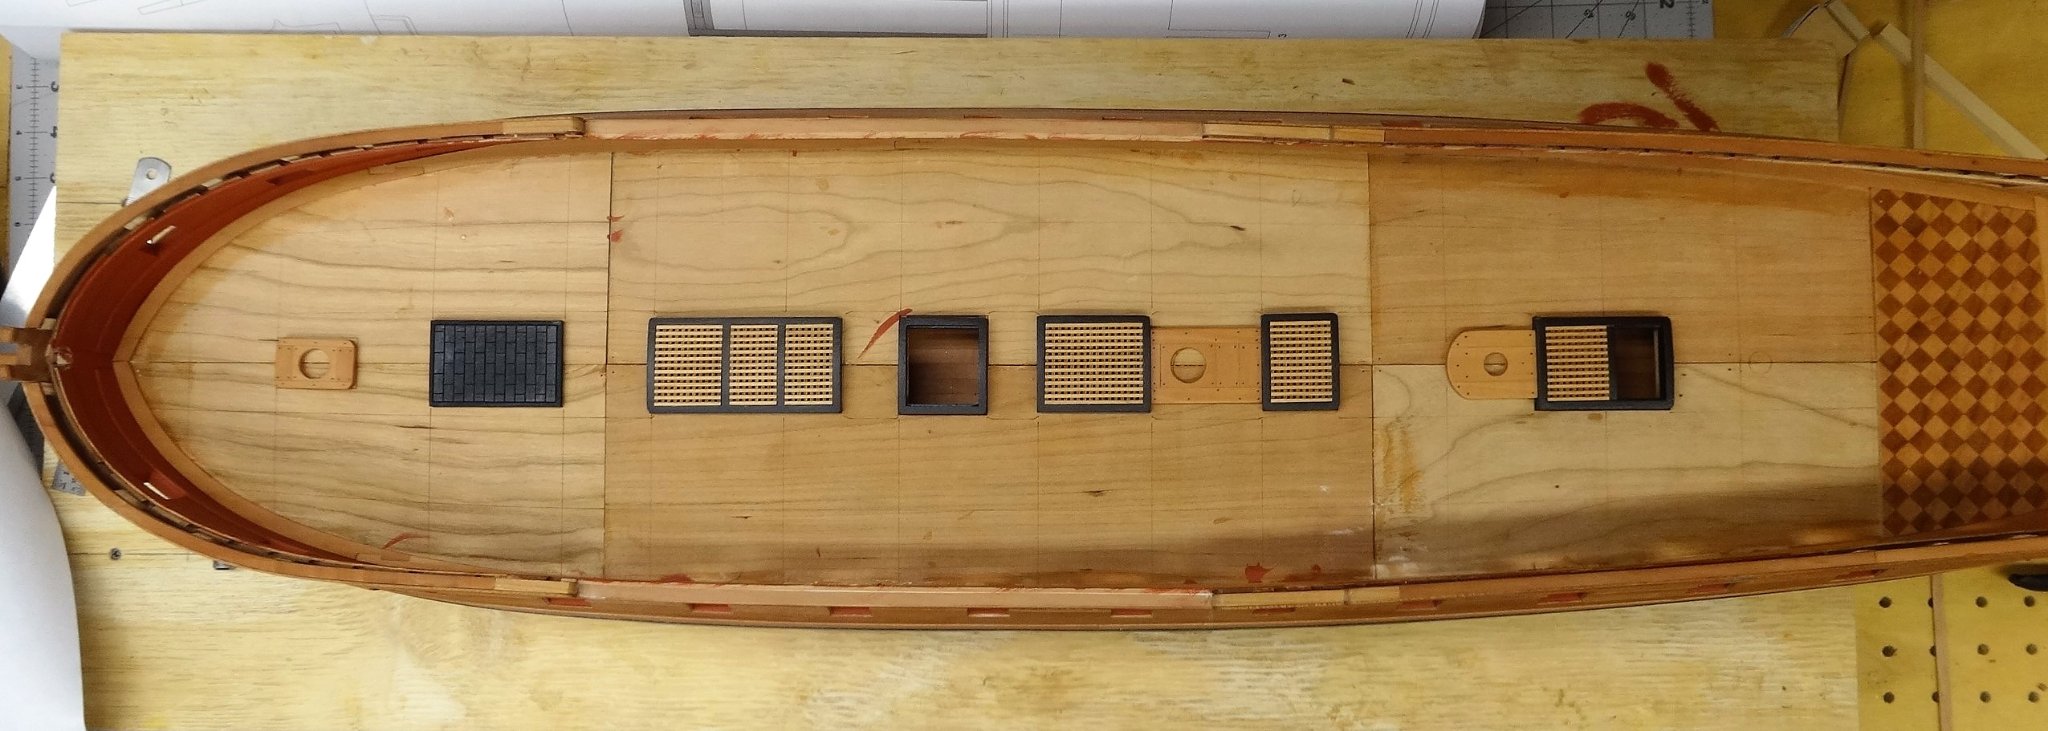
I've now set the hatches and partners in place. I tried real hard to keep them centered. Time will tell.

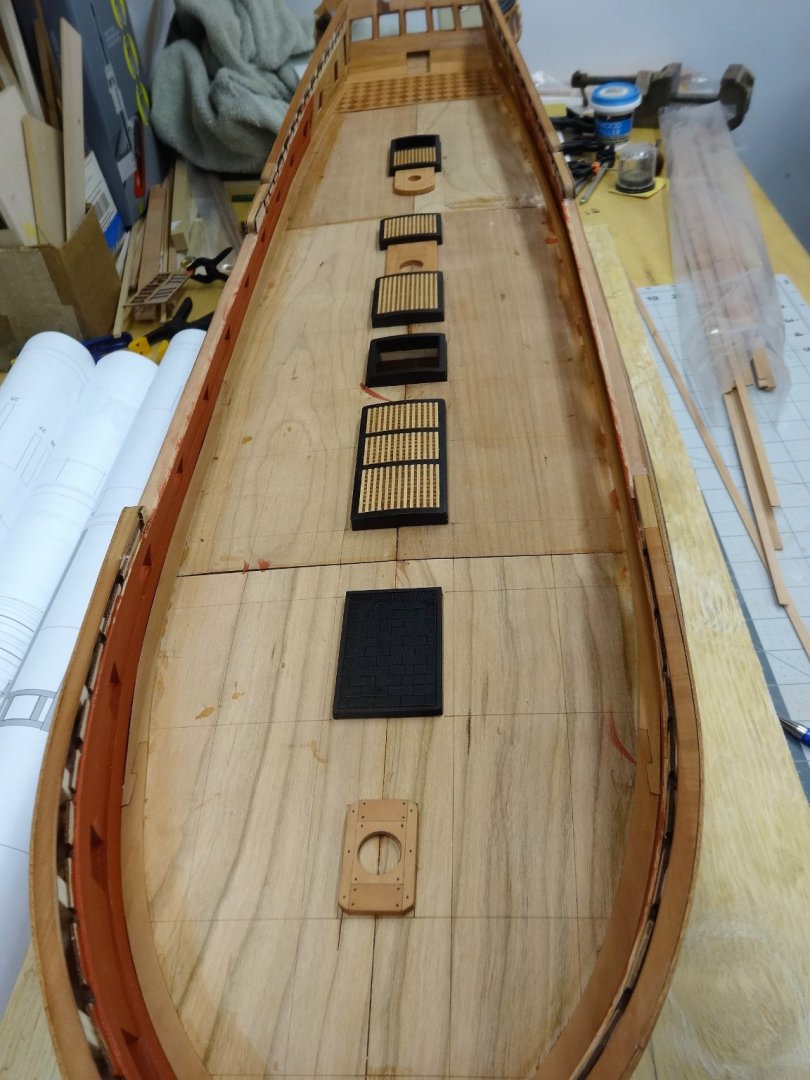
I elevated the capstan partner by 1/32" as called for.
I also forgot to include a pic of the waterway. It's 3/64" x 3/64" with one side rounded off to a quarter round molding .
Tips of the finger took a bit of a beating from the sandpaper.
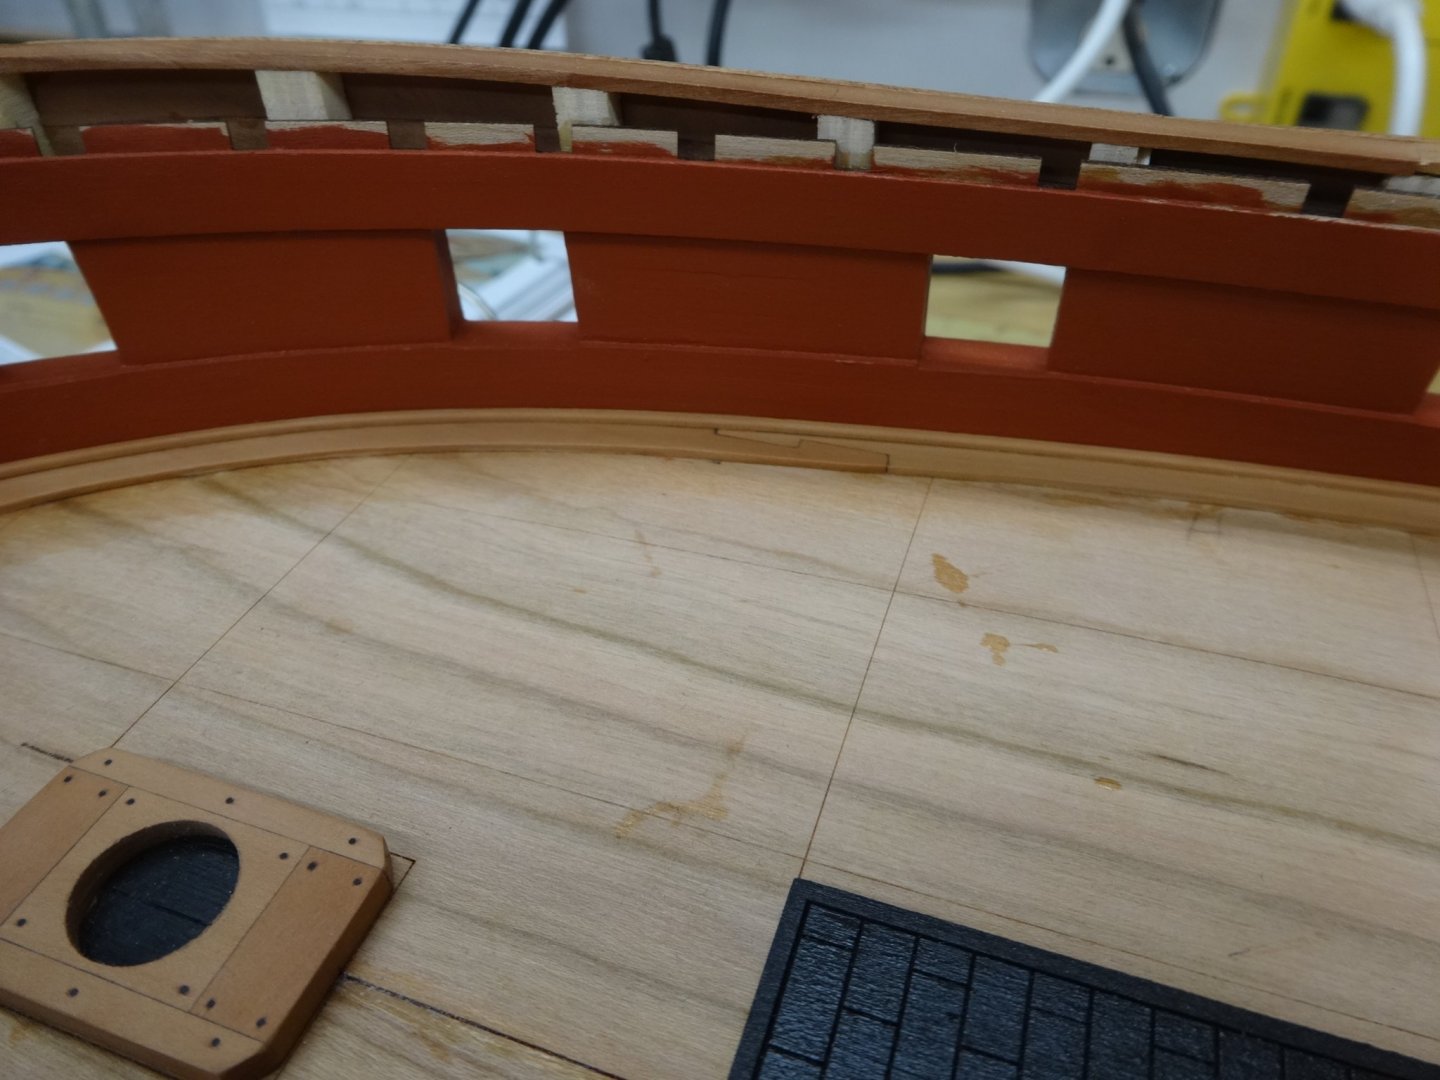
Next up will be planking between the hatches and lining off the deck for planking.
Thanks for stopping by!
- Chuck, iosto, FrankWouts and 18 others
-
21
-
Looking good. I think once sanded the curve will show up better.
-
27 minutes ago, rafine said:
I feel like an addict searching for a "fix"
That sentiment pretty much fits me to a tee. Nothing wrong with it by the way!
- rafine, FrankWouts and Old Collingwood
-
3
-
13 hours ago, jfhealey said:
W2 was supposed to eliminate the errors I made on W1 not introduce new ones I didn't make first time round.
You're doing a good job Fred. Unfortunately we continue to bump our heads as we move along. The key is to find the errors (as you have done)
and correct them before they cause further problems. I continuously have to check, recheck and then check some more!
- Ryland Craze and FrankWouts
-
2
-
That looks really nice Bob. I'm sure you'll find something to build.
-
Thanks Chuck. Also thanks for all the likes.
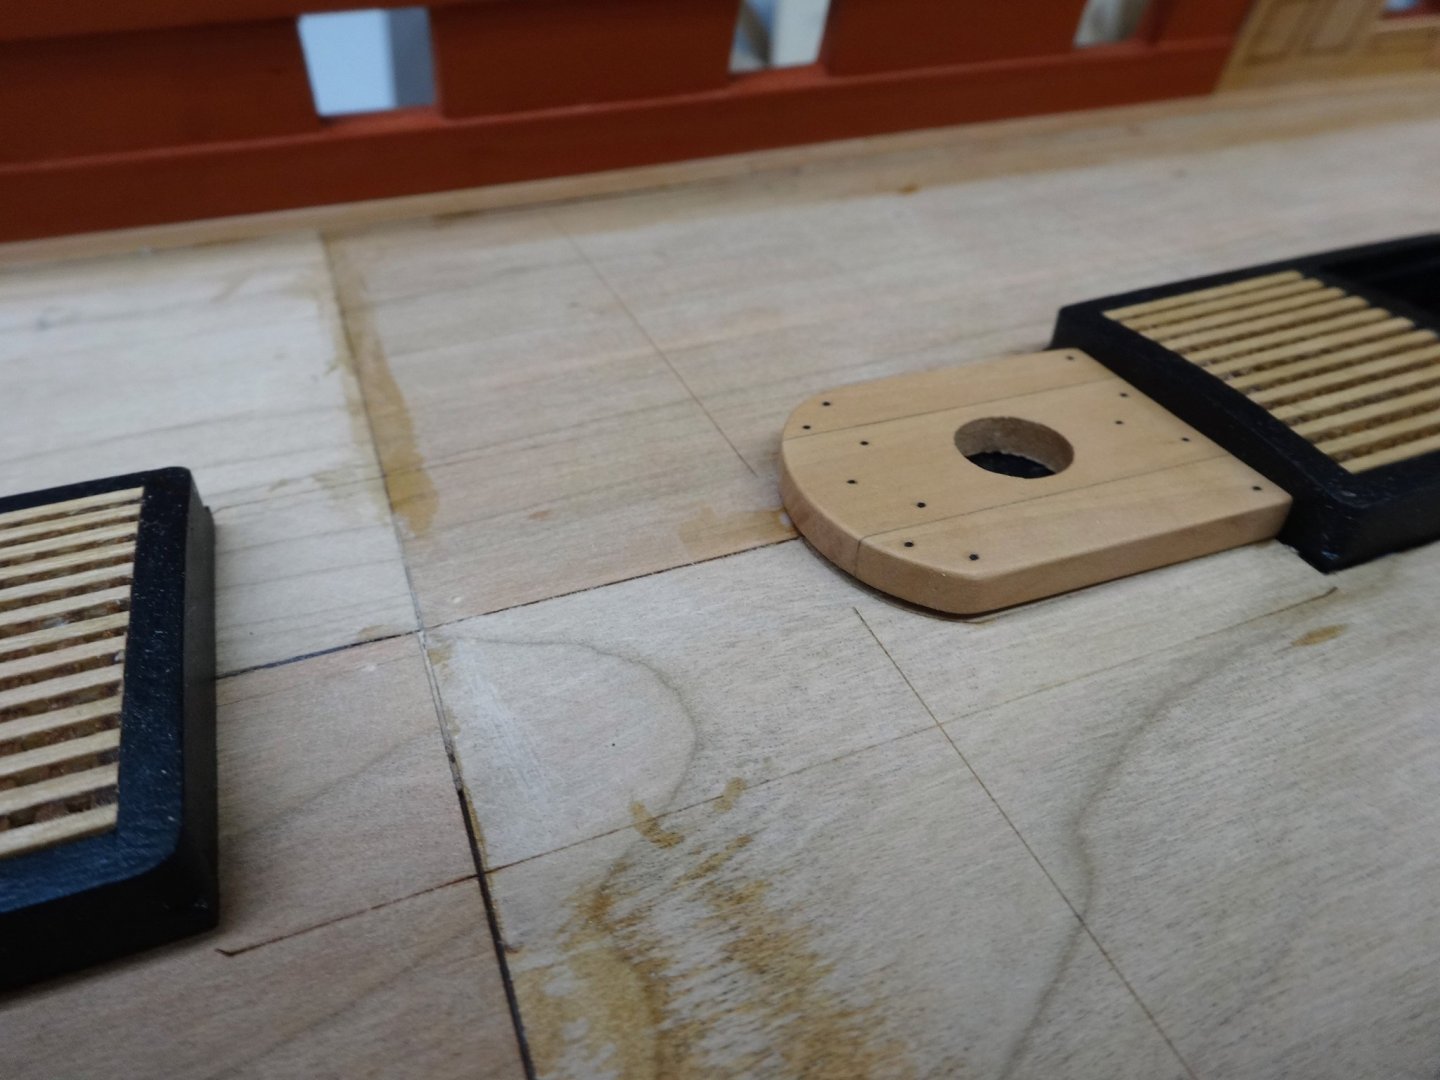
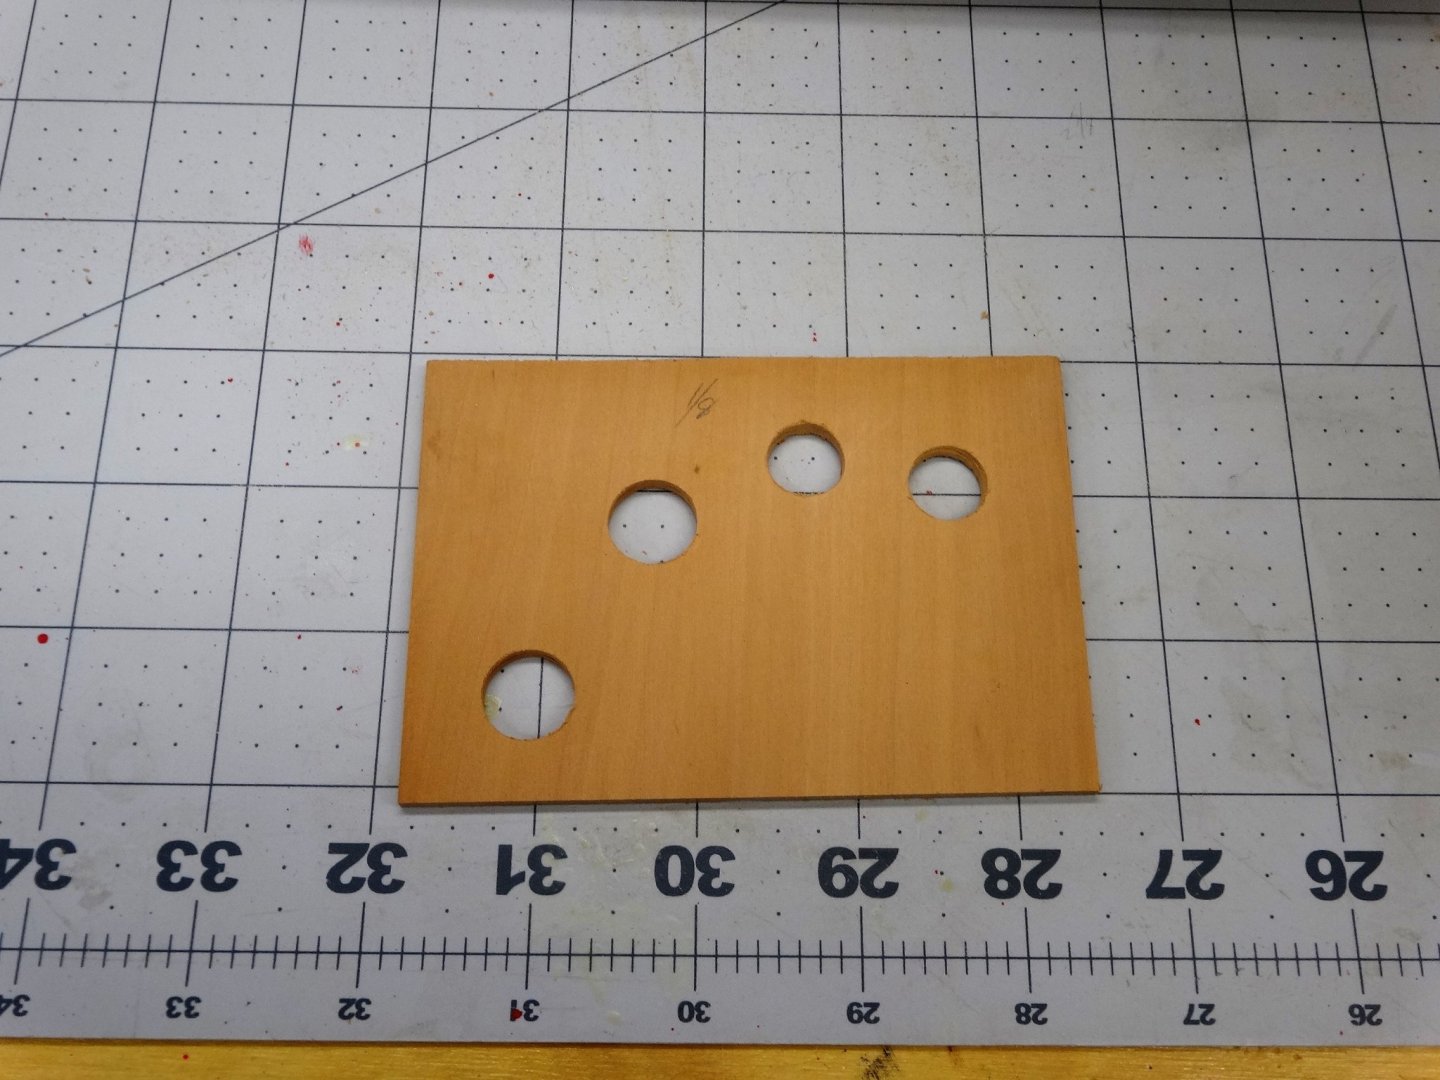
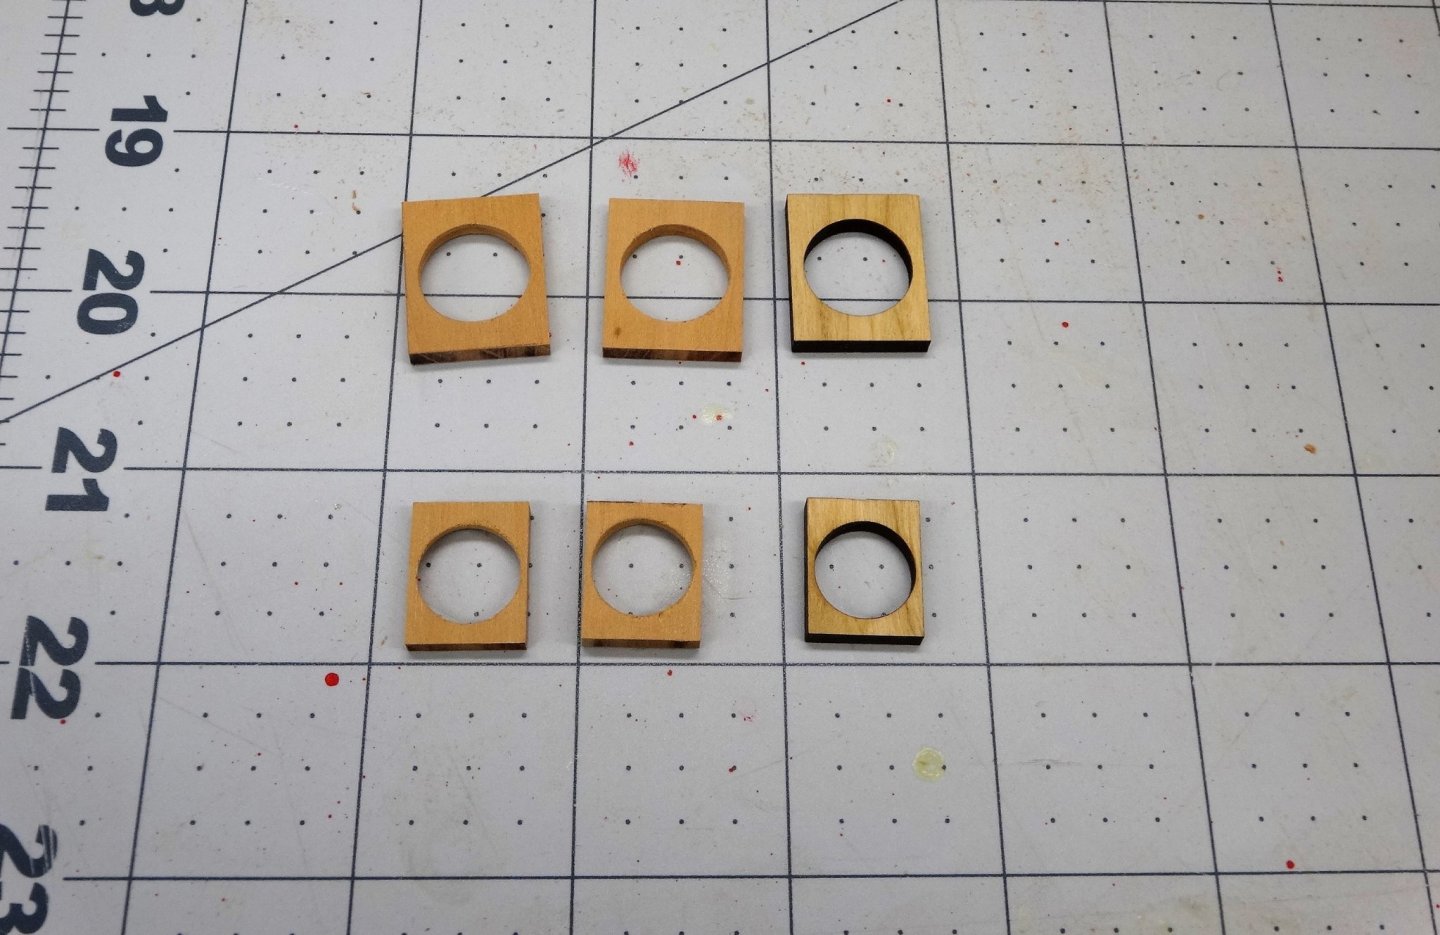
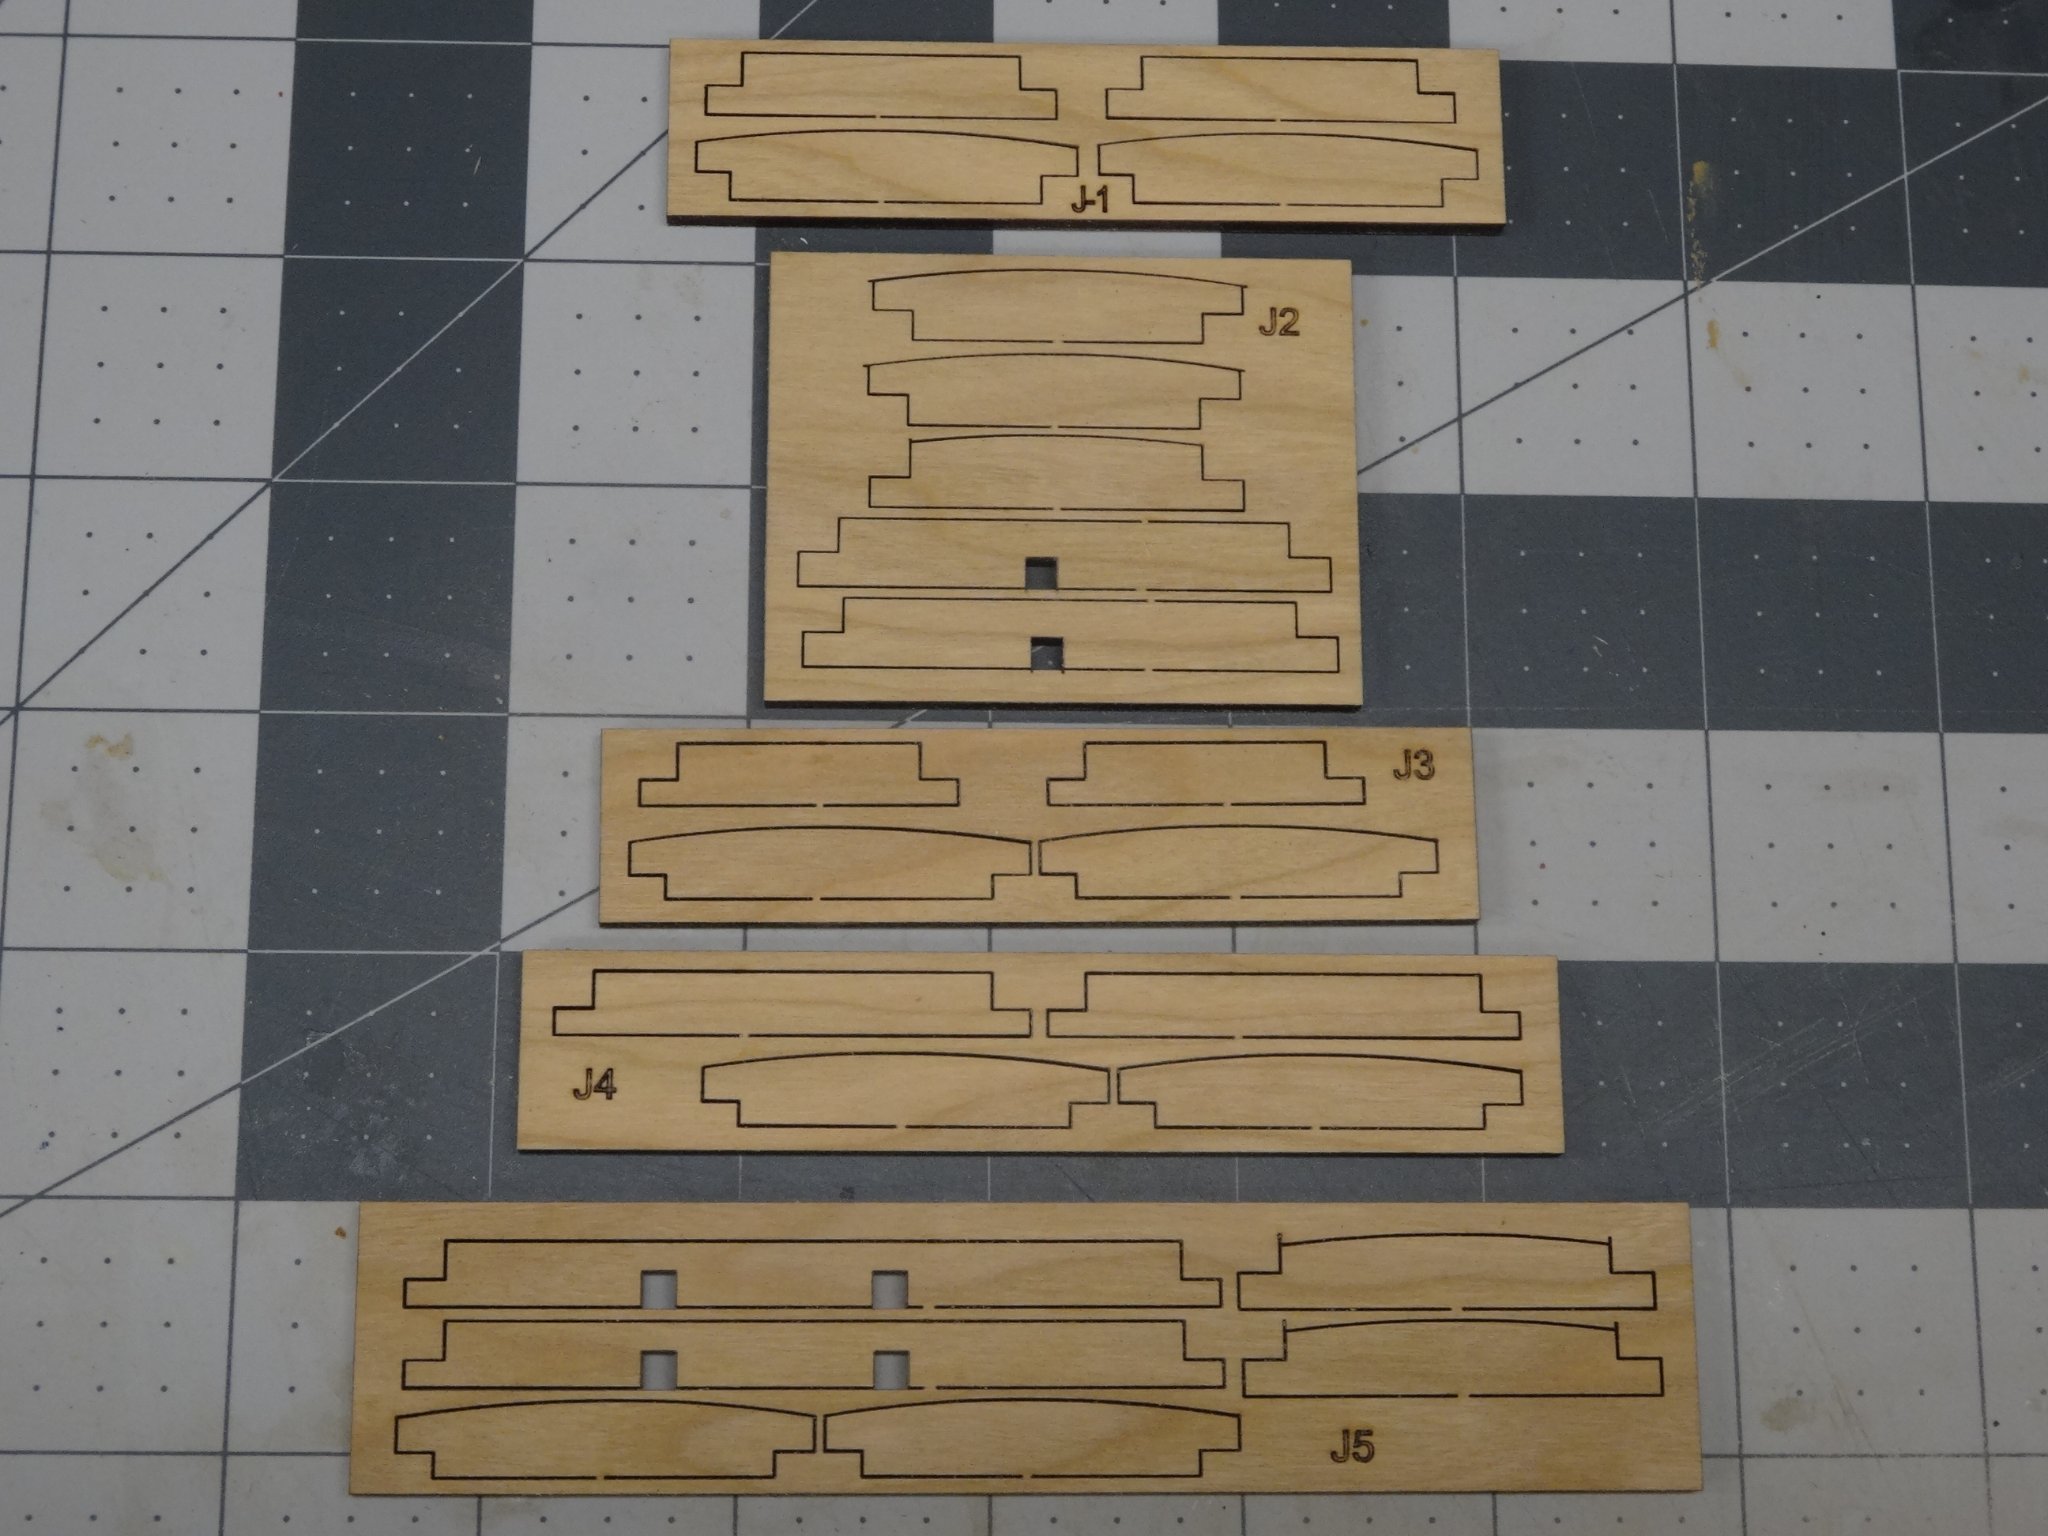
In the chapter 4 parts there are laser cut parts for the mast and capstan partners.
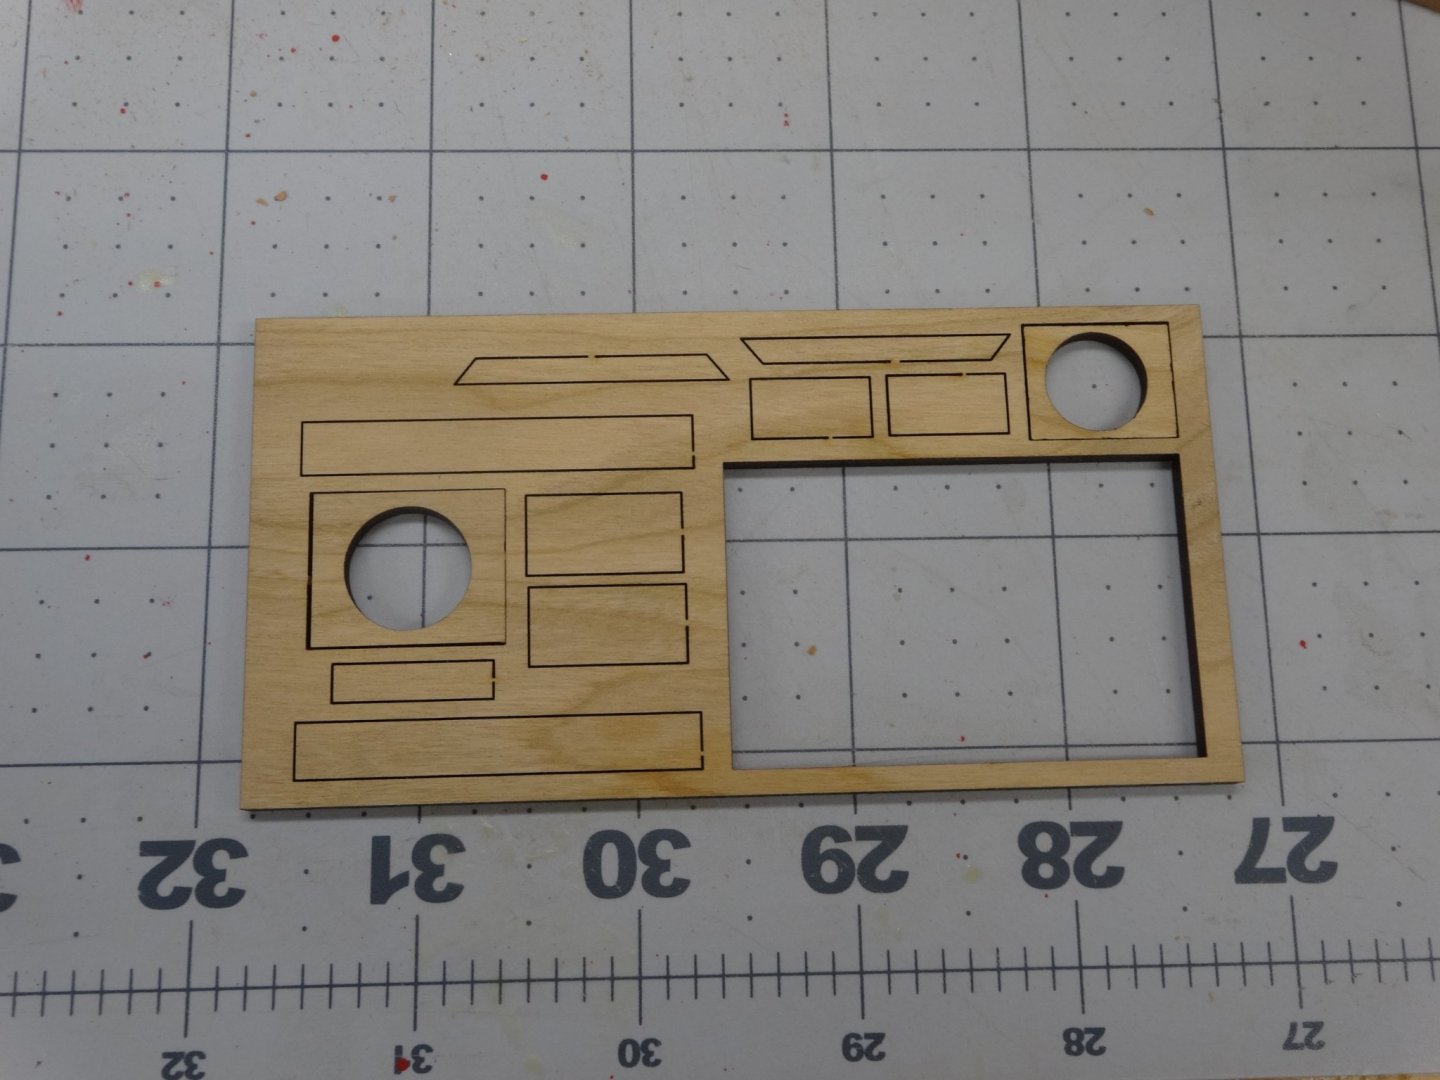
I was feeling creative so I wanted to see is I could reproduce them in pear. I used Chucks parts
as a guide for cutting. First I drilled two holes the same size as the originals. One extra for each size.
I figured it was easier to cut them on the full sheet to minimize the chance is splitting and cracking.
I cut them on the table saw and then used the disk sander to get them to the correct size. I then
cut the remaining pieces to size and assembled them.
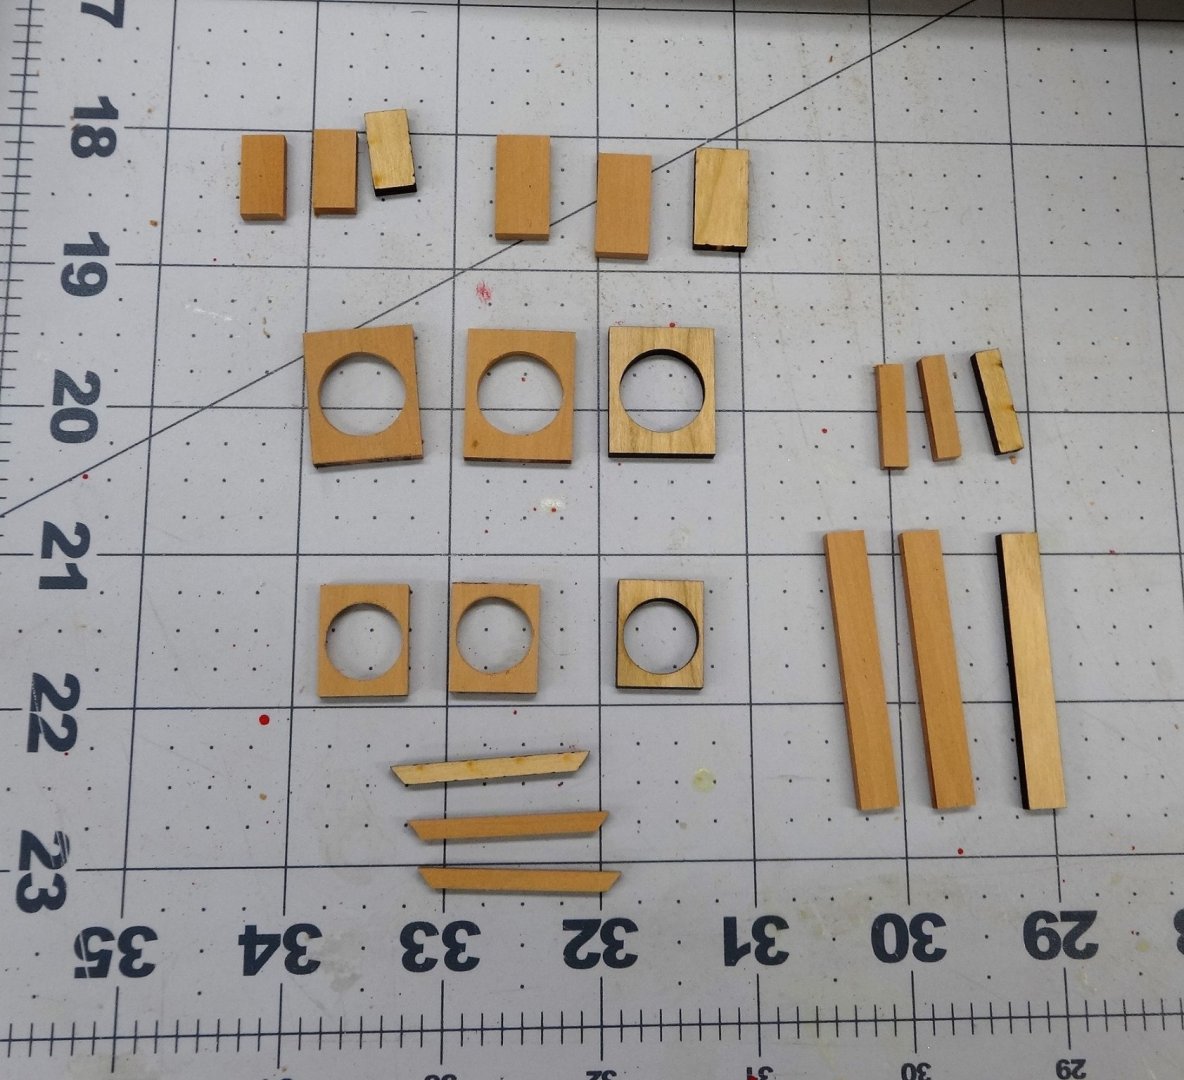
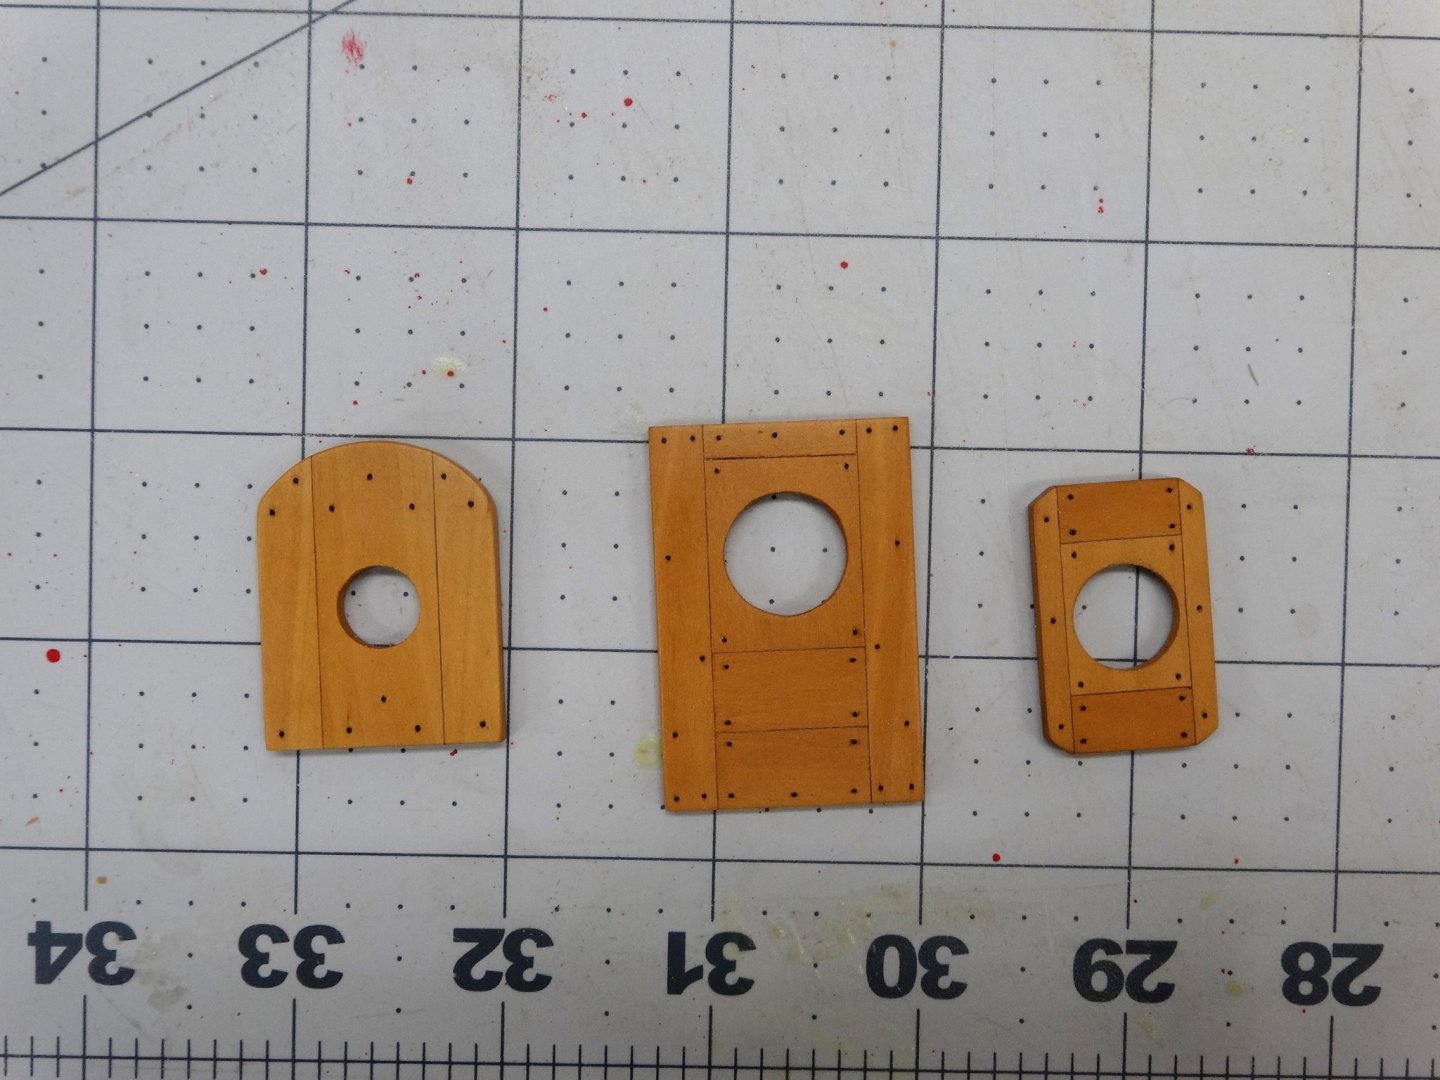
Next I'll start placing the hatches and partners on the deck.
- Chuck, Trussben, scrubbyj427 and 16 others
-
19
-
Wonderful looking! Well worth all the effort.
- glbarlow, Ryland Craze and mtaylor
-
3
-
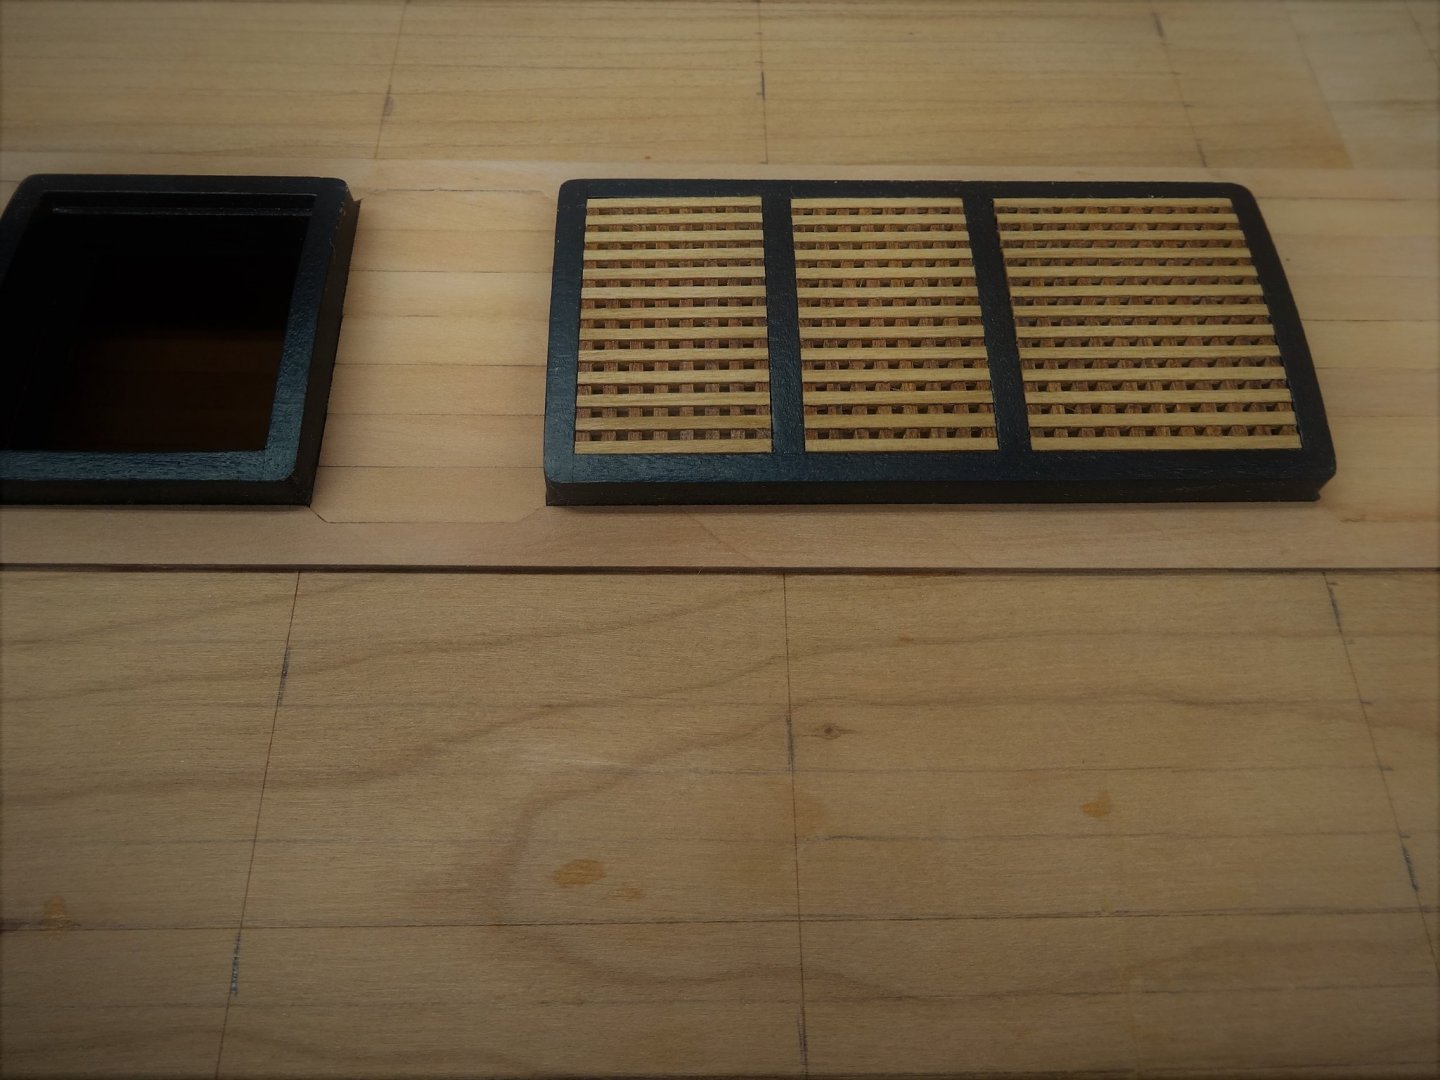
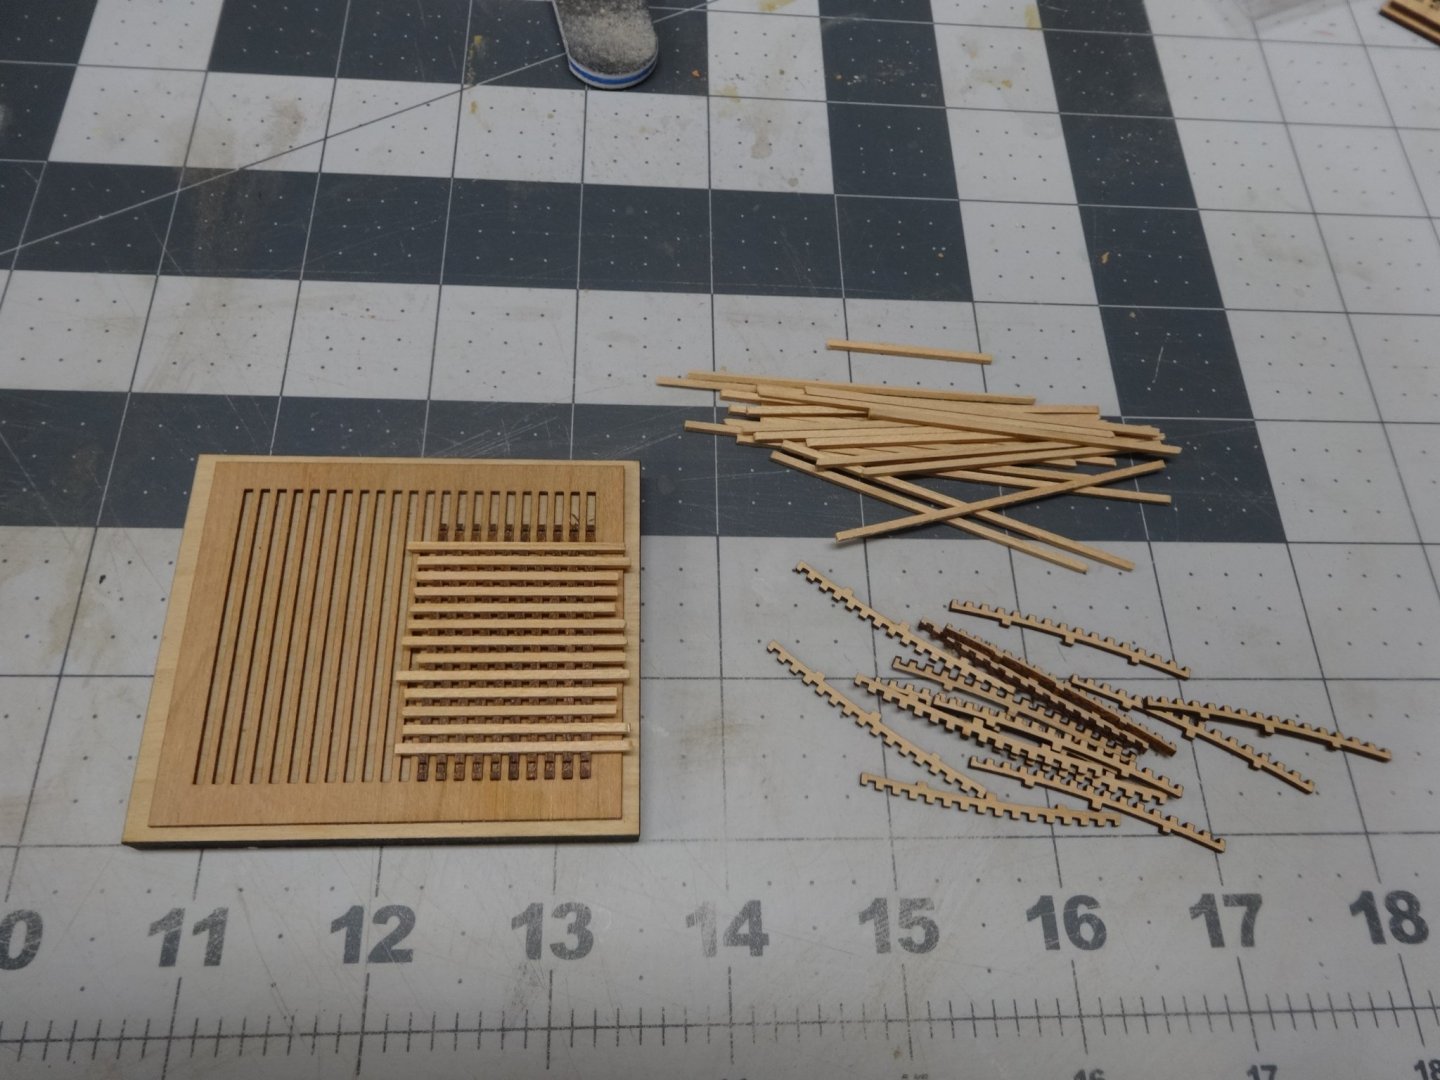
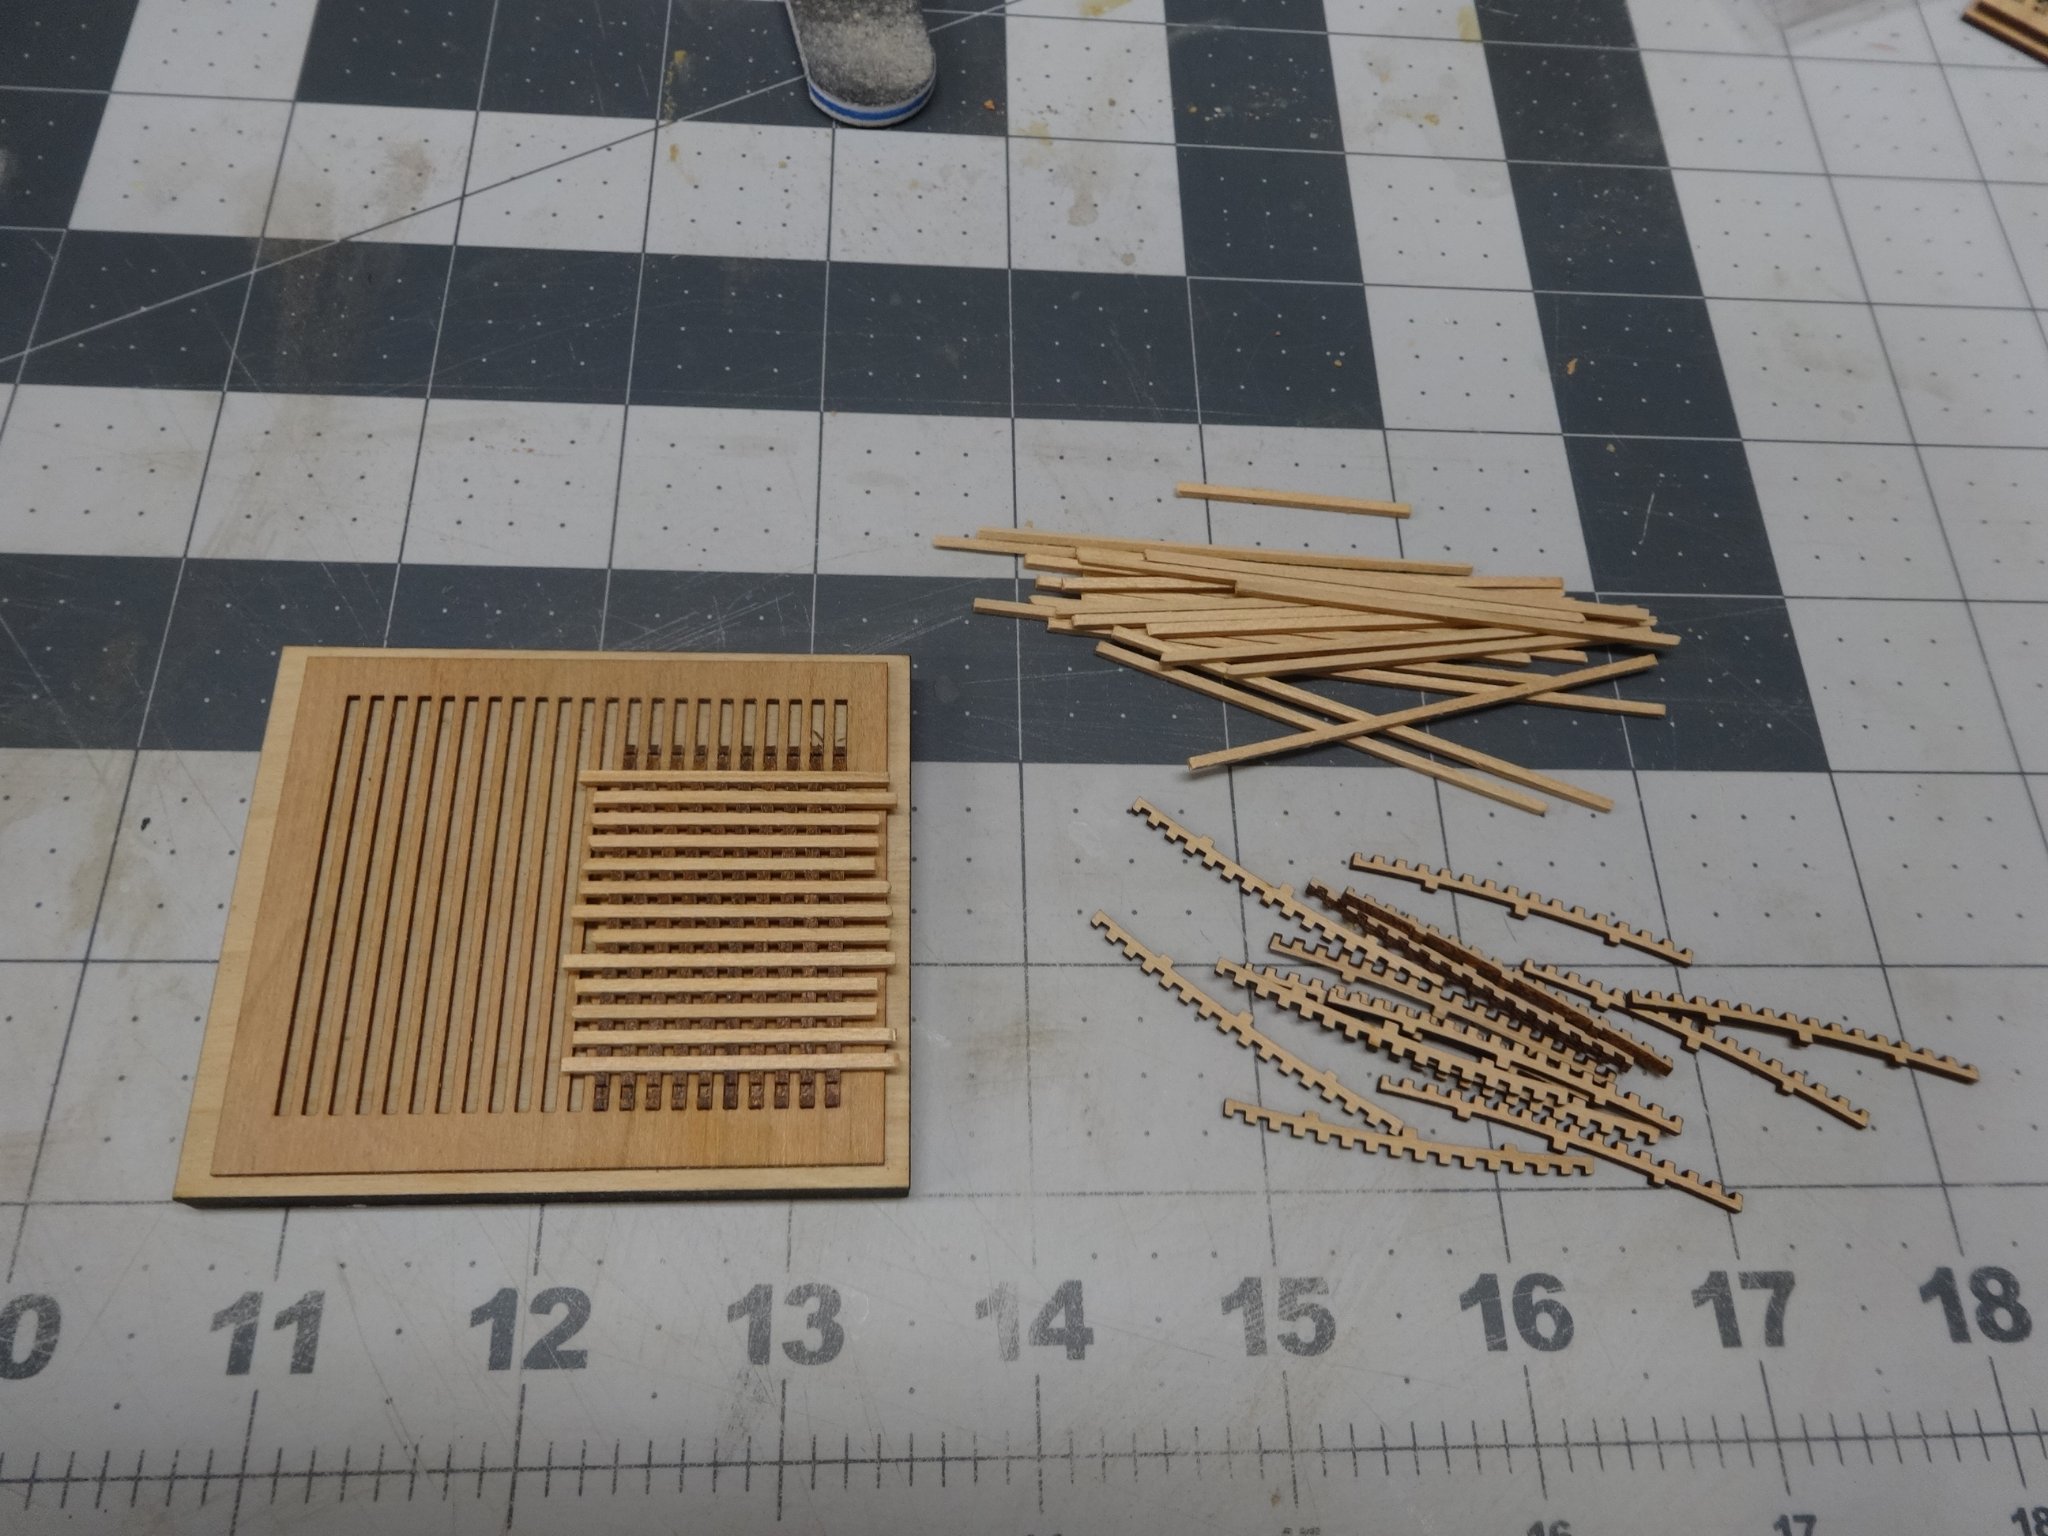
I used the hatch coamings and gratings from the Syren. The laser cutting was
perfect and everything went together without issue!


- Stuntflyer, iosto, Greg M and 18 others
-
21


Duchess of Kingston 1778 by rafine - Vanguard Models - 1:64
in - Kit build logs for subjects built from 1751 - 1800
Posted
I'm in the same boat as you Bob.")
It'll be a lot of fun building along side with you and the others.