


Rustyj
-
Posts
2,447 -
Joined
-
Last visited
Content Type
Profiles
Forums
Gallery
Events
Posts posted by Rustyj
-
-
Doris I am so sorry to hear of the loss of your loved one! I hope that every time you gaze at your splendid model it gives you some comfort and fond memories. My very best to you.
- FrankWouts, DORIS and mtaylor
-
 2
2
-
 1
1
-
Looking great. I like the switch to the 1mm thick limewood.
- Canute, mtaylor, hollowneck and 1 other
-
4
-
7 hours ago, glennard2523 said:
Did you soak and bend the stern decoration before painting blue and gold?
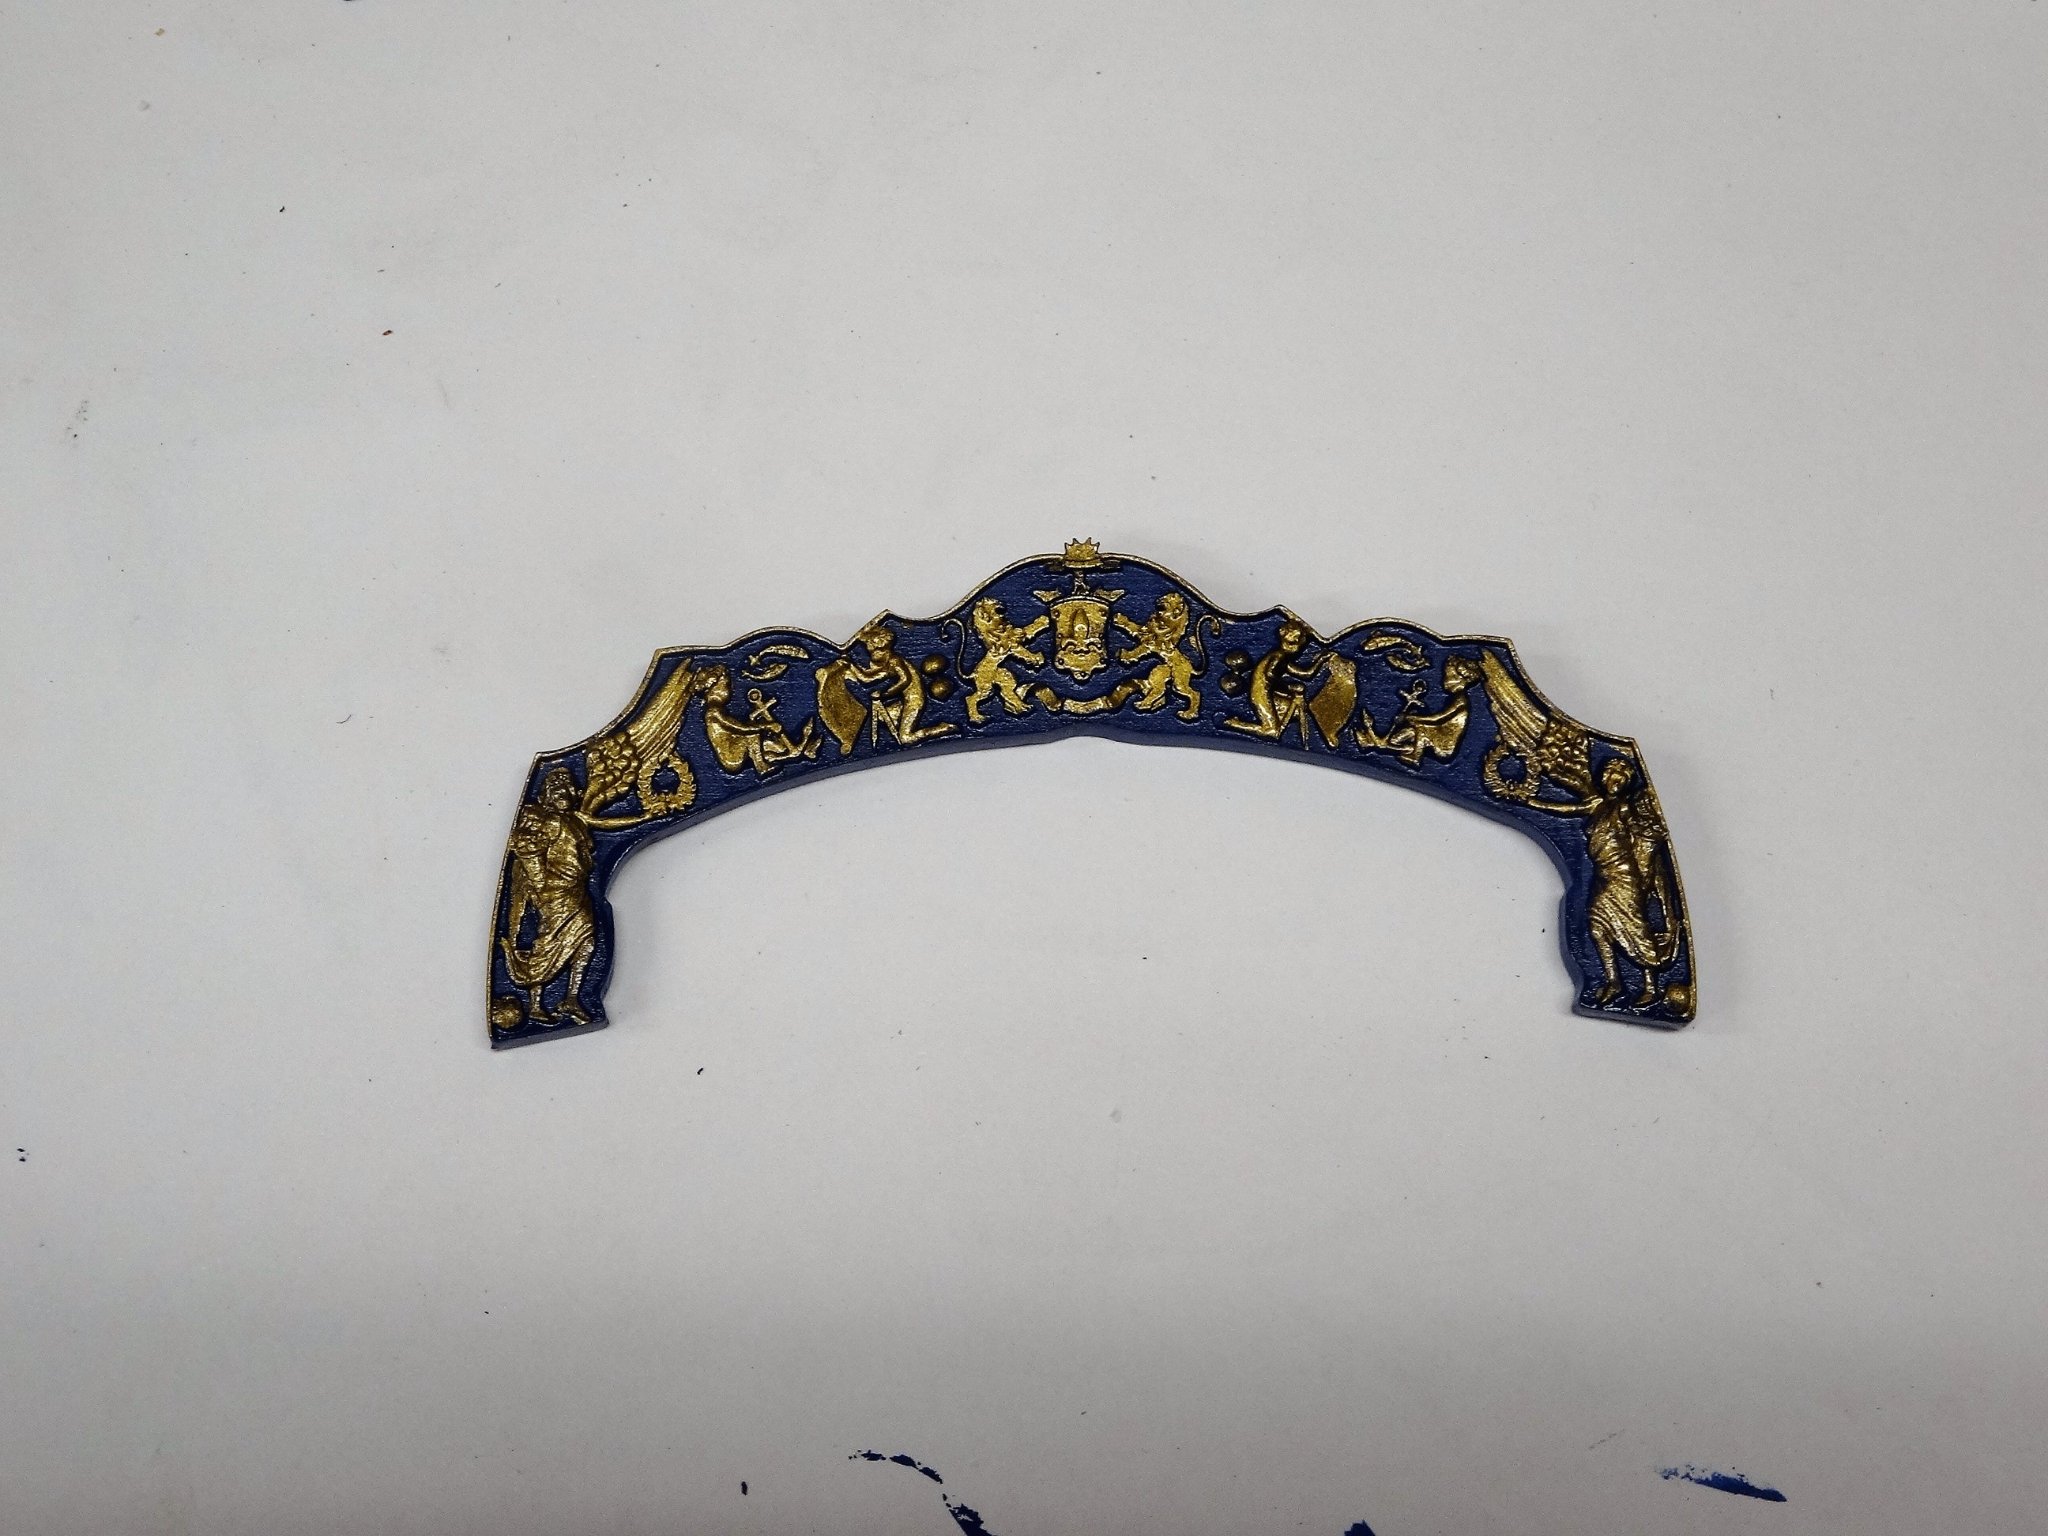
Thanks Glenn. I did not soak it as I thought the resin wouldn't get warm enough. I instead clamped it to
the stern and then warmed it with a hair dryer. There was a little spring back but not enough to effect the gluing.
Thanks Bob. I purchased a very fine tipped paint brush just for the stern painting.
2 hours ago, DelF said:I'm not so hot on hull planking though, and I wonder if that's because I try and complete each strake with a single planking strip? I've noticed that you and many other builders follow full size practice and use several planks in each strake. I'd always thought I'd have problems with the joints, but do you find that the convenience of dealing with shorter lengths outweighs any disadvantages?
Thank you Derek, I find the shorter pieces works better for me. The ends are flushed with a sanding stick and
checked and adjusted as needed. For me the longer strips are the disadvantage.
Thanks everyone for stopping by and all the likes.
- BobG, chris watton, DelF and 2 others
-
5
-
2 hours ago, glbarlow said:
that takes a really steady hand
Yes it does Glenn so there was a lot of touching up.I
Hi Bob. Yes I painted the blue first then the gold, touched up the blue, touched up the gold, repeat!
")
- FrankWouts, ccoyle, glbarlow and 1 other
-
4
-
-
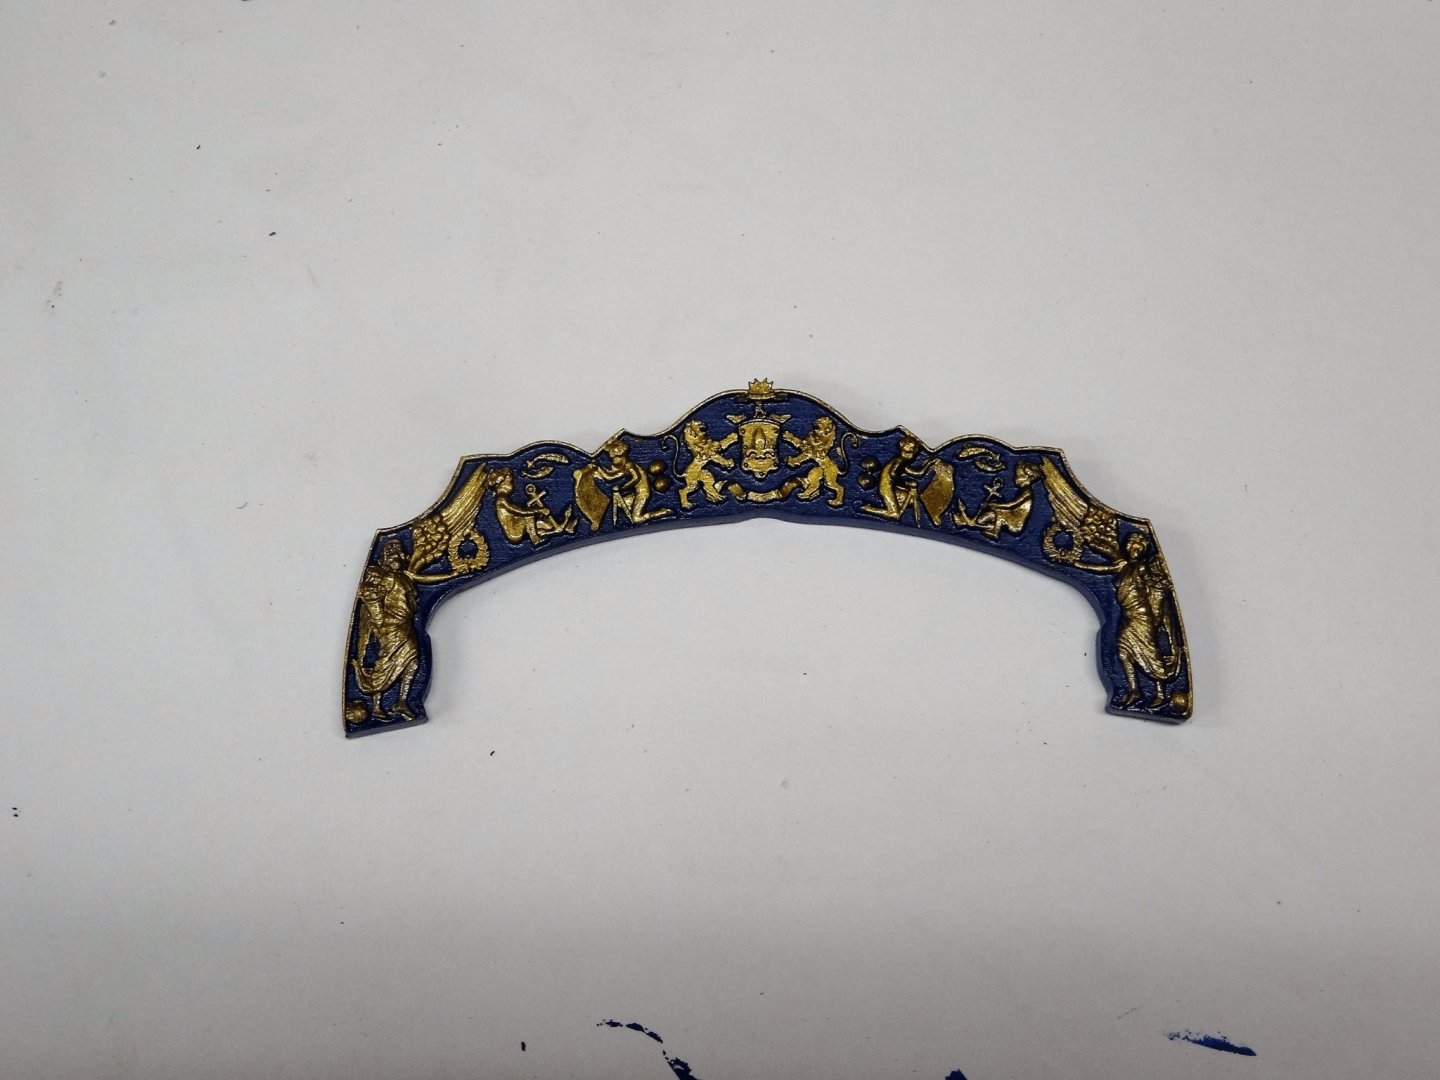
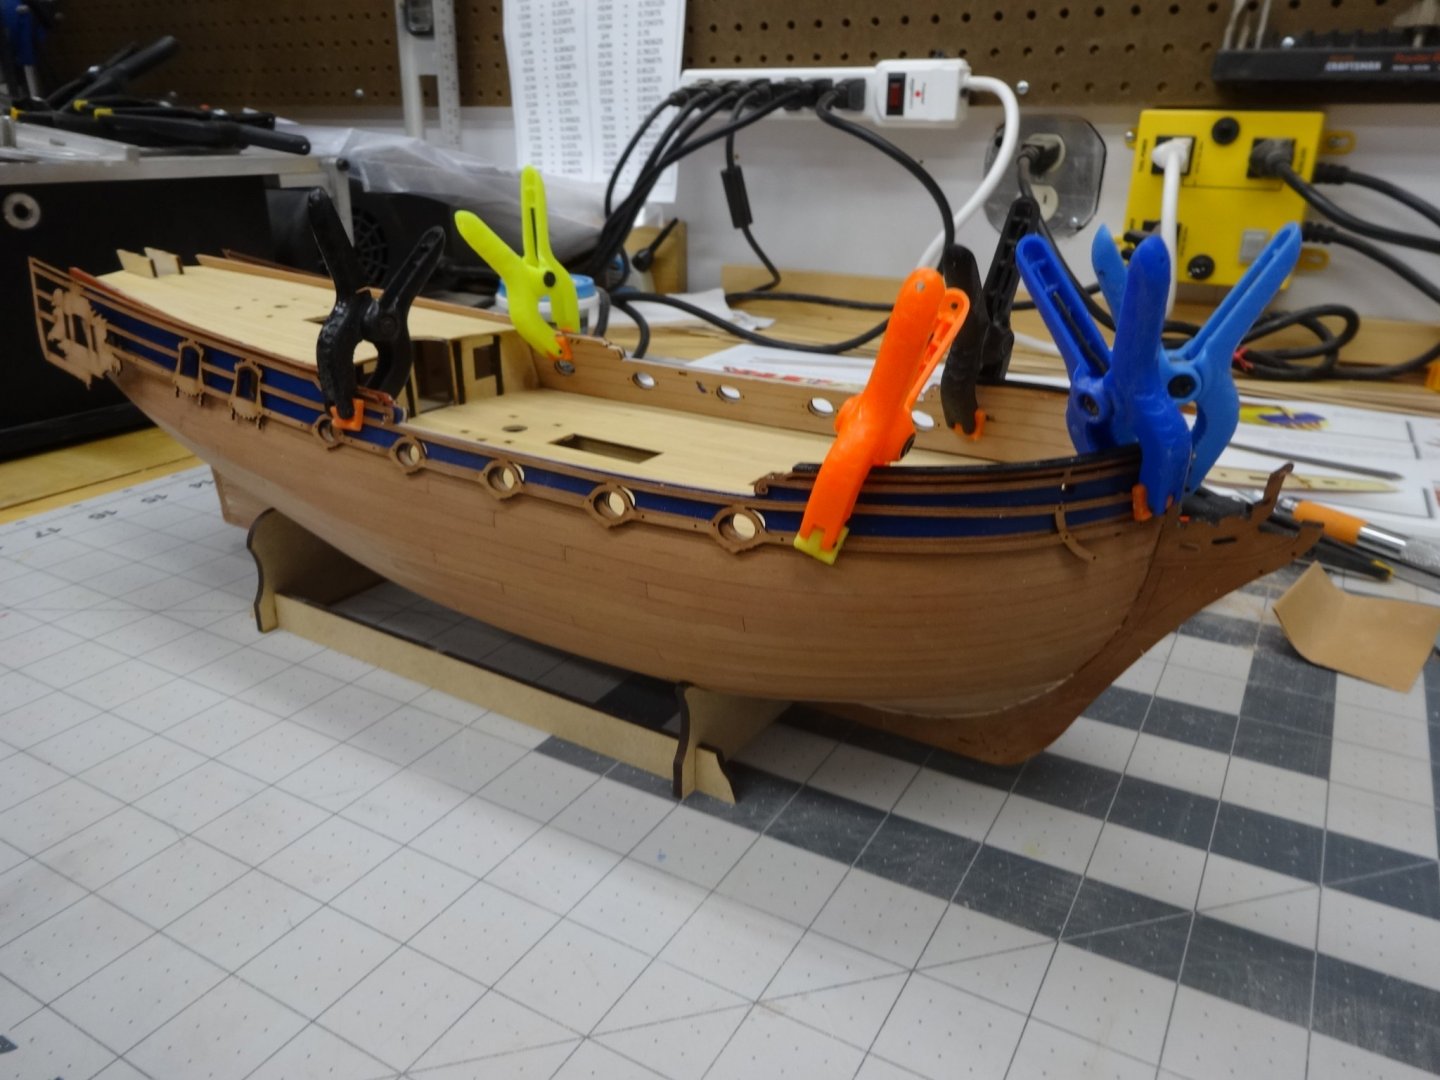
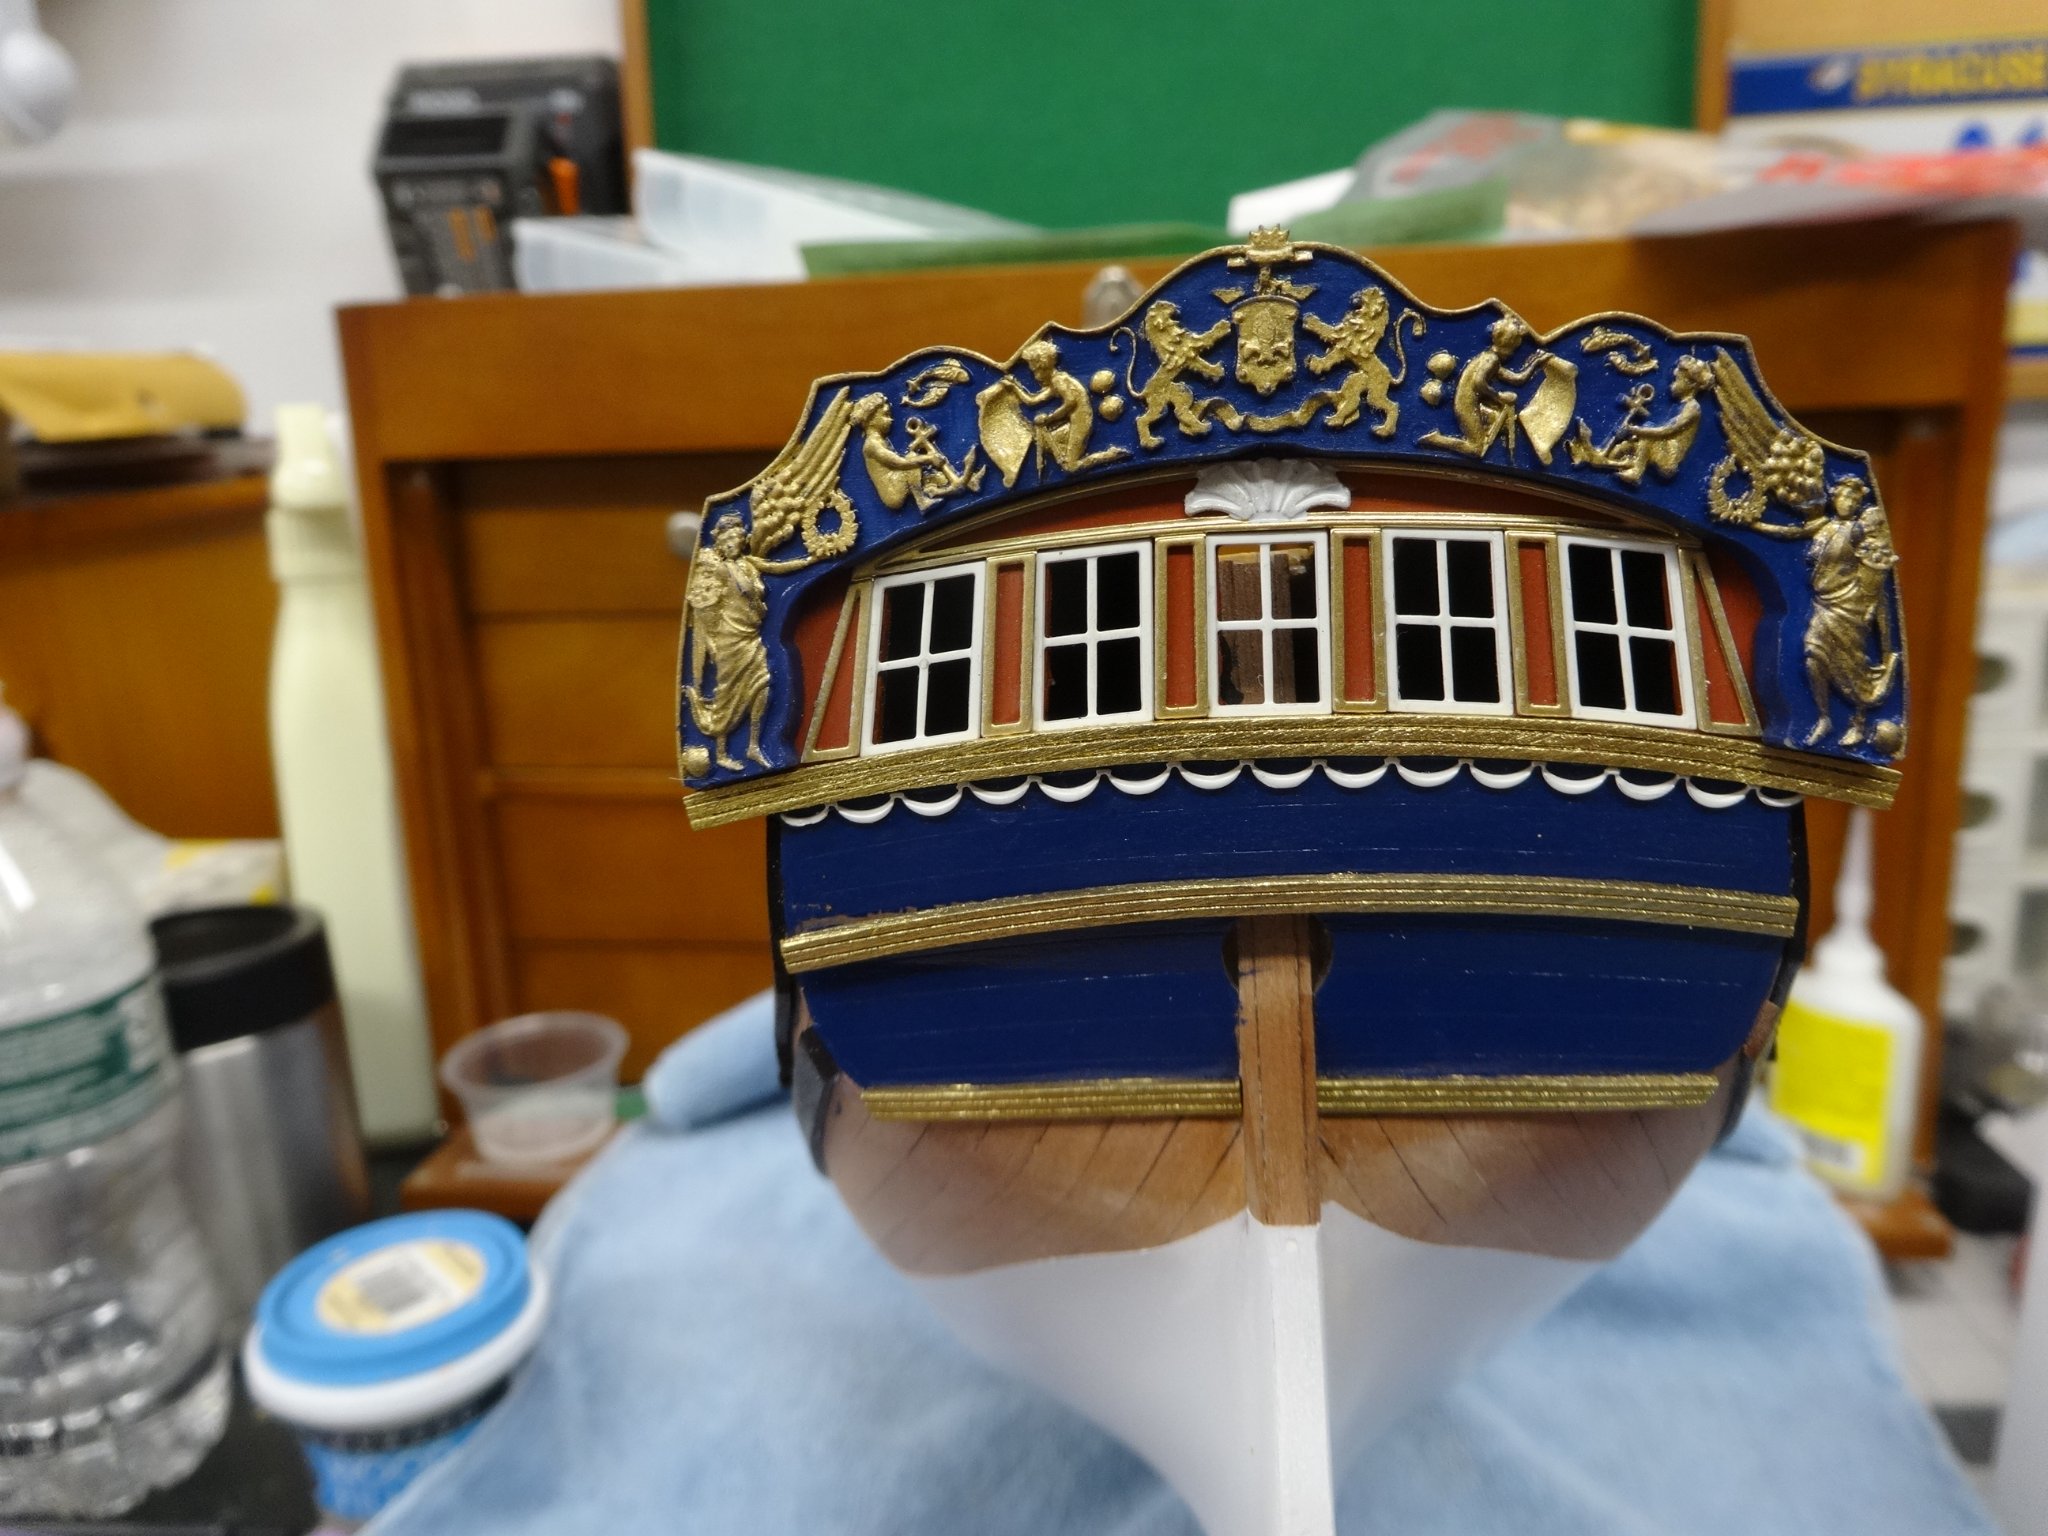
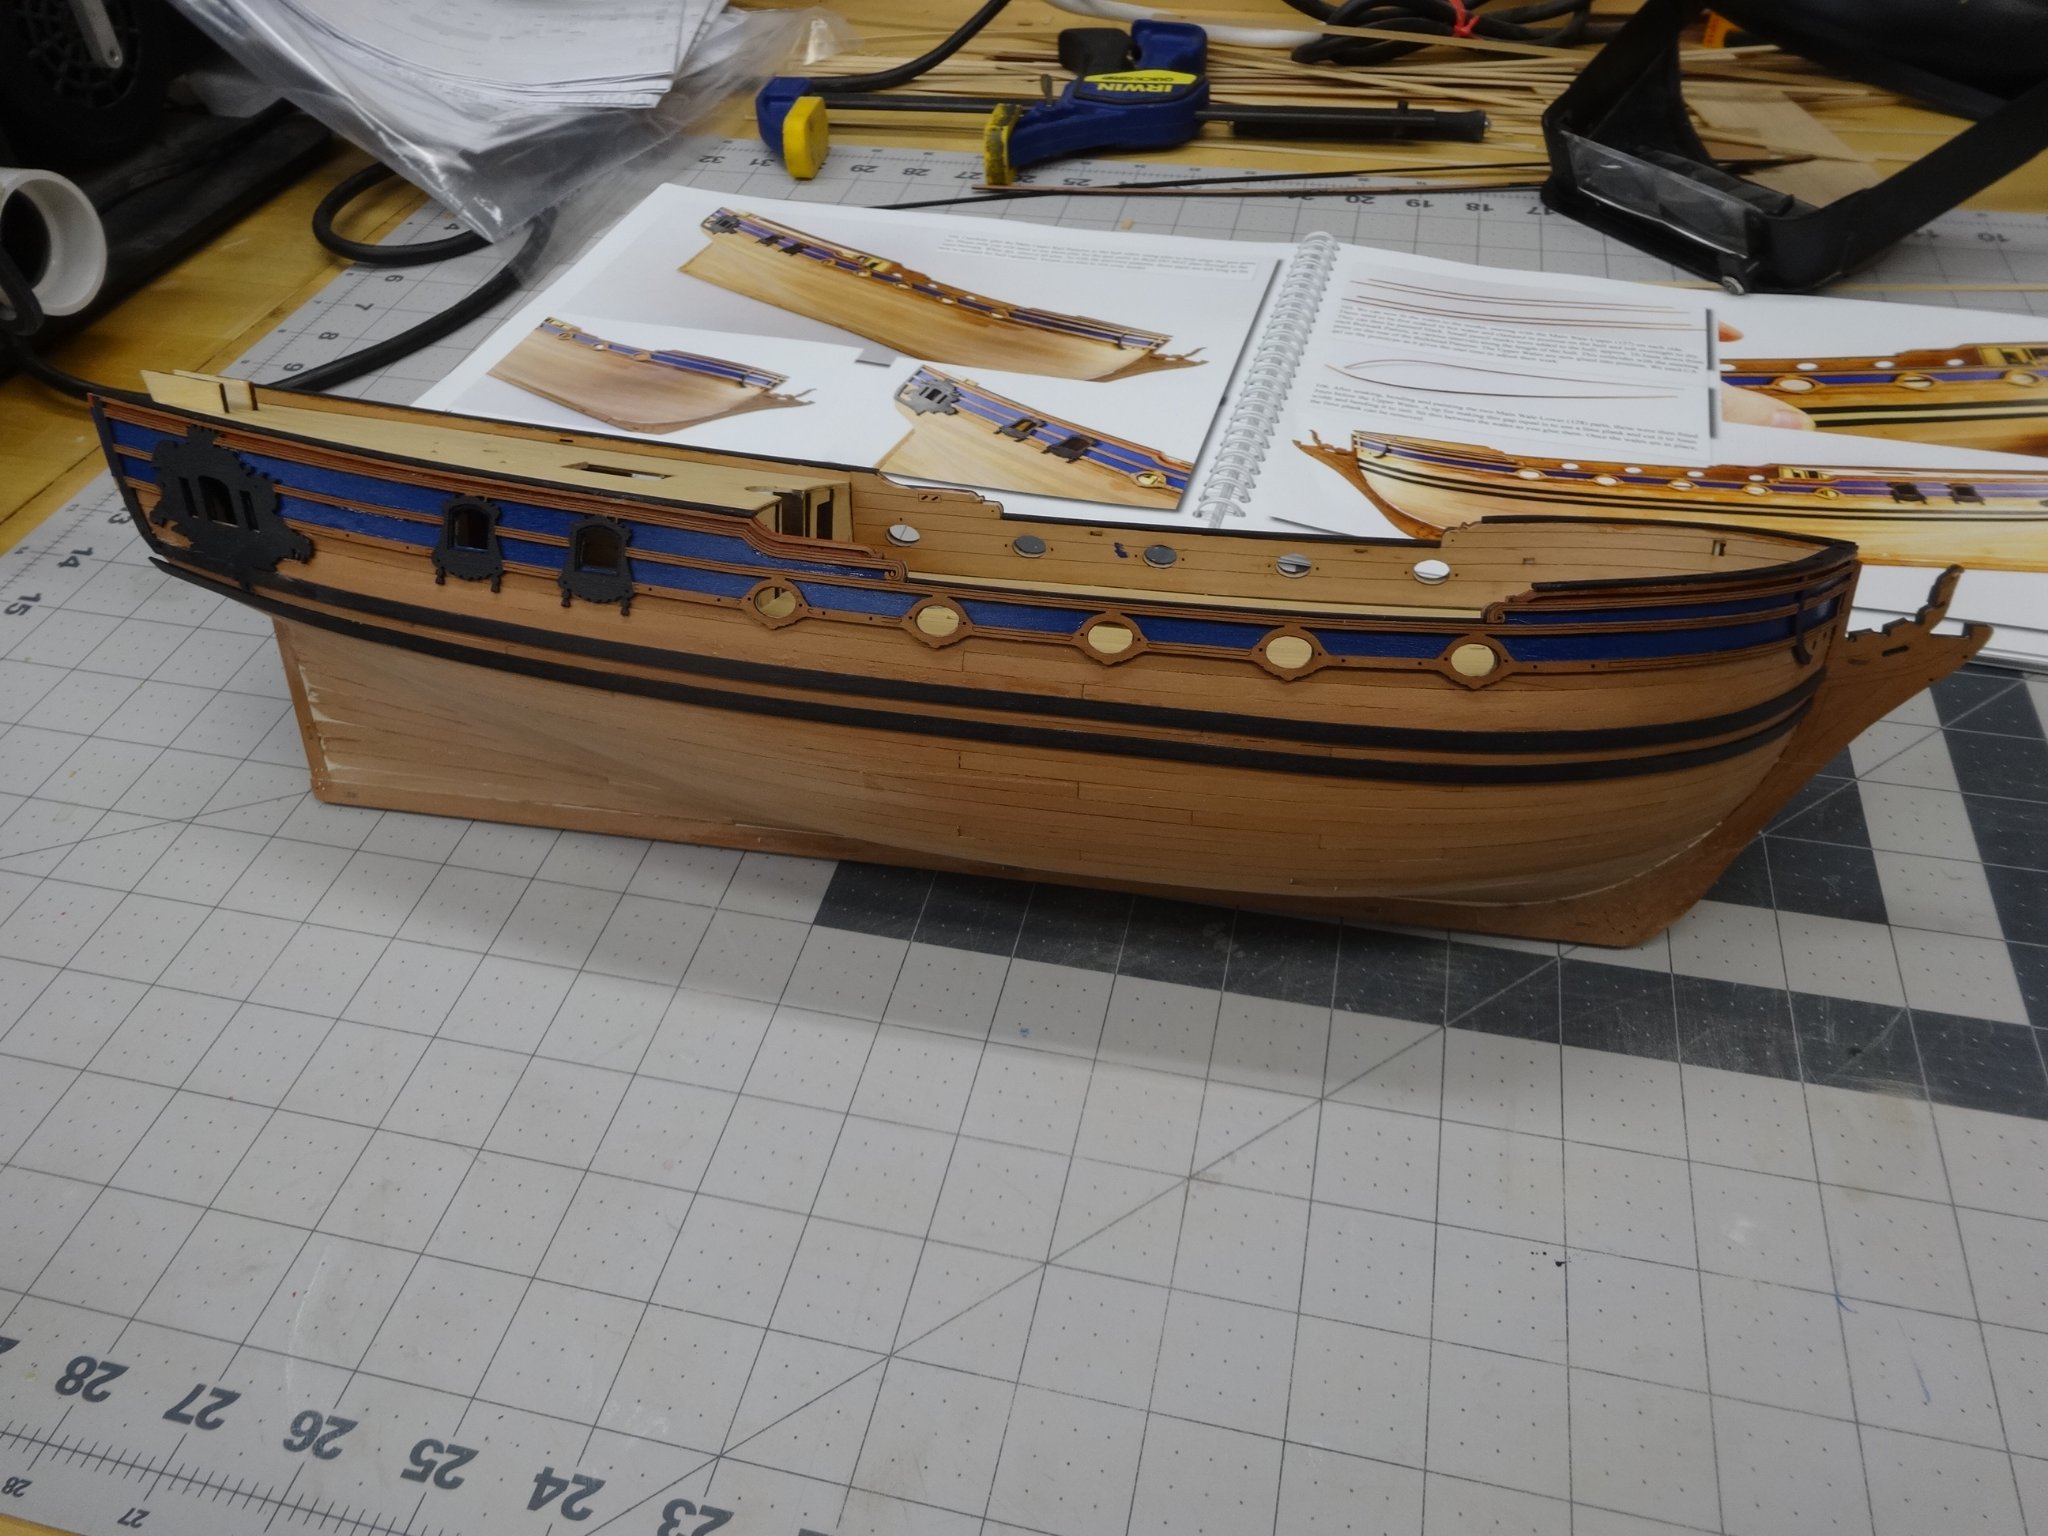
I've completed working on the stern. The stern decoration has been painted as per the
instructions as well as the PE stern paneling decoration and the upper and lower counter rail parts.
Everything fit really well!

- BobG, Blue Ensign, ccoyle and 13 others
-
16
-
Looking real nice Jeff.
- Zarkon and FrankWouts
-
2
-
Hi Frank and to want to welcome you to the group. It's a great model and a fantastic group of modelers to build with.
-
Outstanding model B.E. It was a real joy watching and leading from your builds.
-
Very nice! They look so good in place.
-
-
18 hours ago, Matt D said:
How did you plot the waterline for your masking tape?
Thanks Matt,
I used a marker similar to the one Jim used in the picture below. I took waterline height at mid ship from the plans, set the water line marker at that correct height and marked the hull. I then ran my tape to match the marked line. Checked the run from multiple angles and tweaked it as necessary to get a good looking flow.
-
Thanks Jim.
I did a google search and it's now called Pledge Revive It Gloss Finish and you can get it at places like Walmart, Kmart etc.
There are a couple of modeler related topics on how modelers use it.
https://ilovewood001.tripod.com/modeling/future.html
http://www.swannysmodels.com/TheCompleteFuture.html
Also thanks for the tip on the Tesa Tape. When I use up the Tamiya.
Looks like a visit to Walmart is in my future!
- FrankWouts, BobG, JpR62 and 1 other
-
4
-
Thank you, Joe, Glenn, JJ and Wyz.
Glenn by the time I get the ninth additional port lid done there will many many more in the bin!

- scrubbyj427, Ron Burns and FrankWouts
-
3
-
Sorry but I really don't know where you can find it now. I only have a little left from what I bought many years ago.
Enjoy the Medway. It's a great choice.
Thanks Don, You really can't go wrong choosing this model. It's great fun and a good learning experience!
- Nunnehi (Don), mtaylor and Canute
-
3
-
3 hours ago, James H said:
I'm having Déjà vu !!!
😂. Thanks Jim. One question. When you attached the PE details to the out side of the hull what did you use? It's so clean and no glue marks.
Thanks Glenn, Yes I used Tamiya tape and then regular painters tape over that.
Thanks for all the likes too!
- BobG, glbarlow and FrankWouts
-
3
-
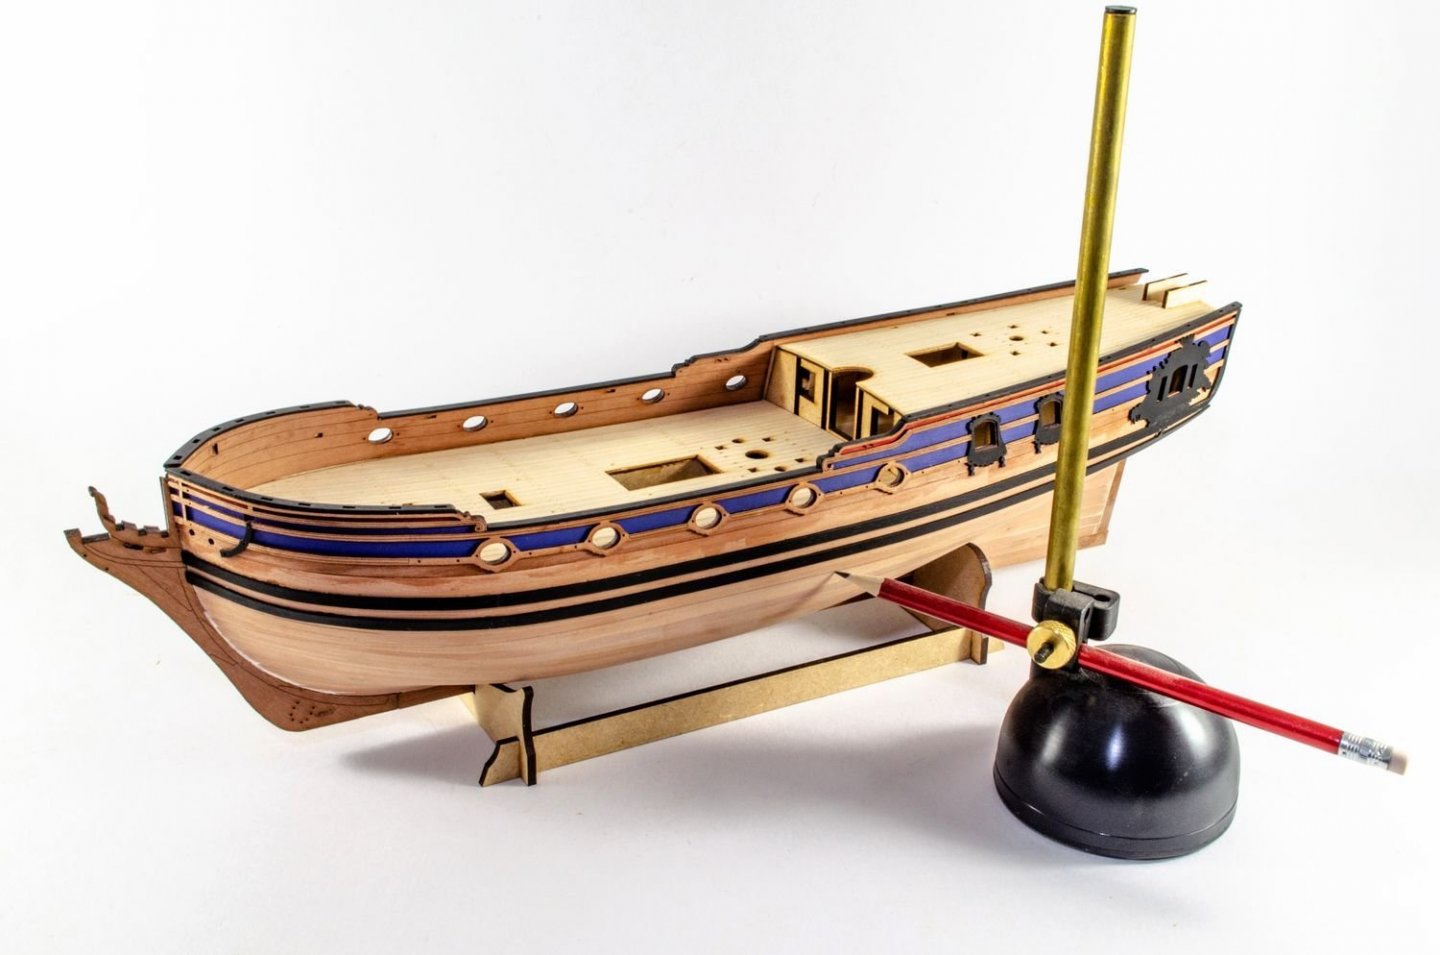
Thanks Bob!
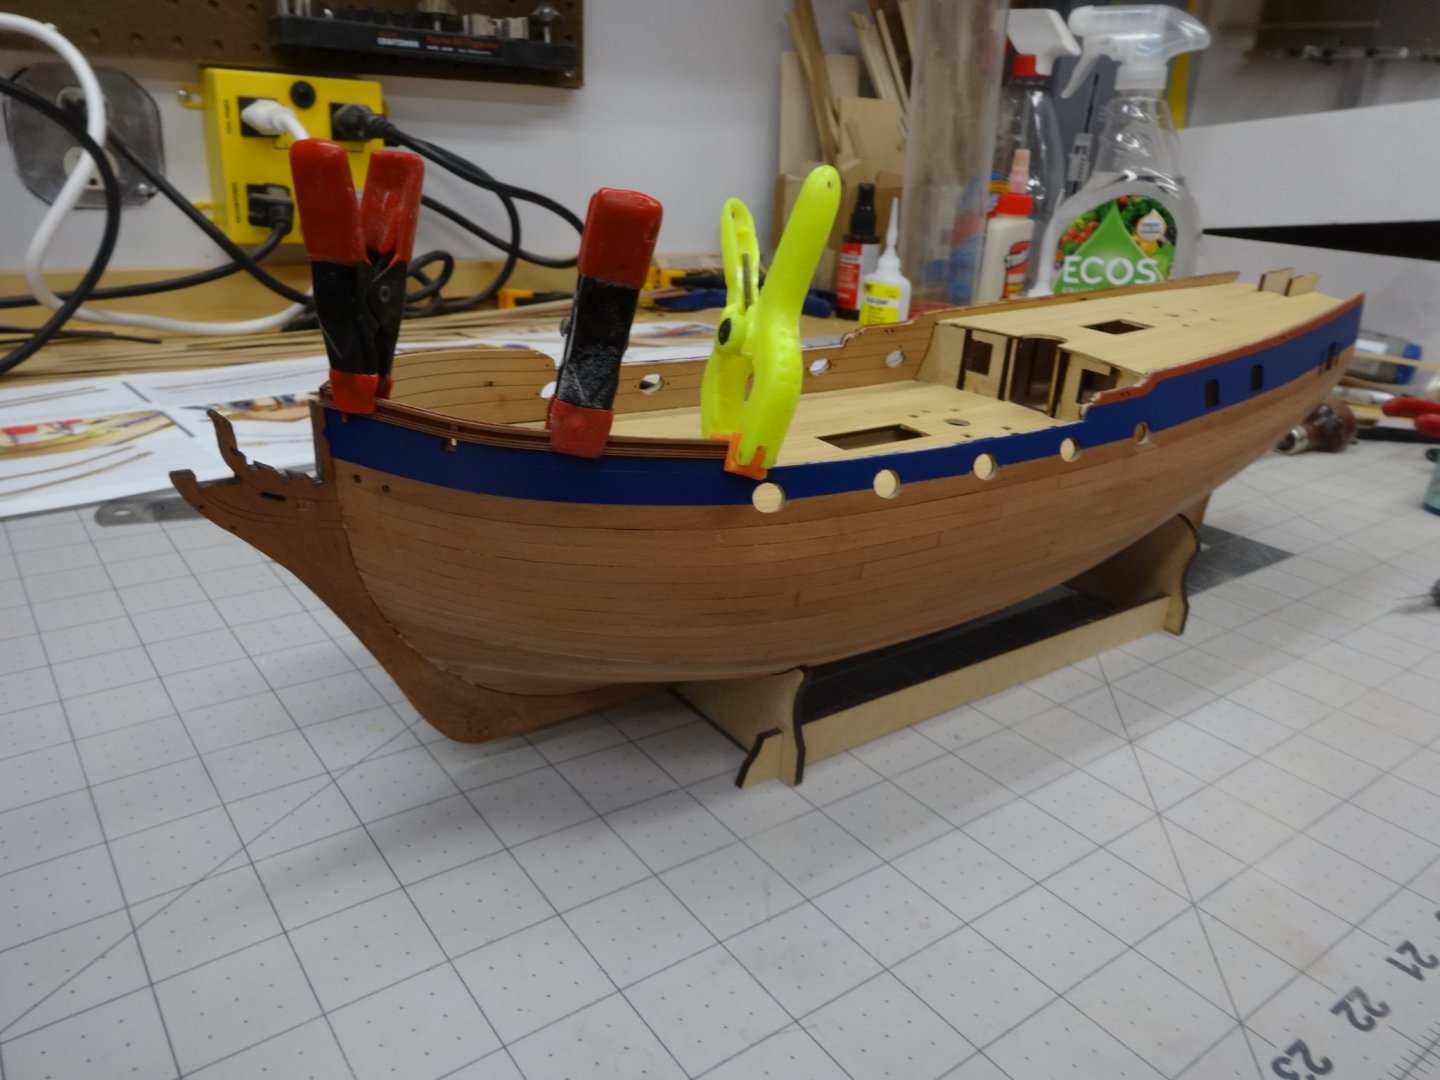
The hull was taped off at the water line and painted with a satin white spray paint.
I also added the stern fascia and the PE stern window frames. Everything was a nice fit.

I'm painting the stern decoration and panels and once dry I'll add them too.
- BobG, Haliburton, ccoyle and 15 others
-
18
-
-
Thanks Bob, The speed is a bit deceptive as I don't keep the log up to date as I should.
Also I'm on vacation since before Christmas until the 4th so I've had a lot of time in the shop.
7 hours ago, Blue Ensign said:it would make a wonderful hull only Admiralty style model
Thanks B.E. You are absolutely correct about it making an excellent Admiralty style model.
If you do succumb I don't think you'll be disappointed.
Also thanks everyone for the continued likes.
- FrankWouts, chris watton, glbarlow and 1 other
-
4
-
Welcome aboard Christian!
-
Now a word of warning. Chris has done some fantastic laser work but because of this some
pieces are very fragile. Please use caution when handling some of the pieces. I knocked off a
piece inside the red circle. Luckily I found the piece and was able to glue it back on.
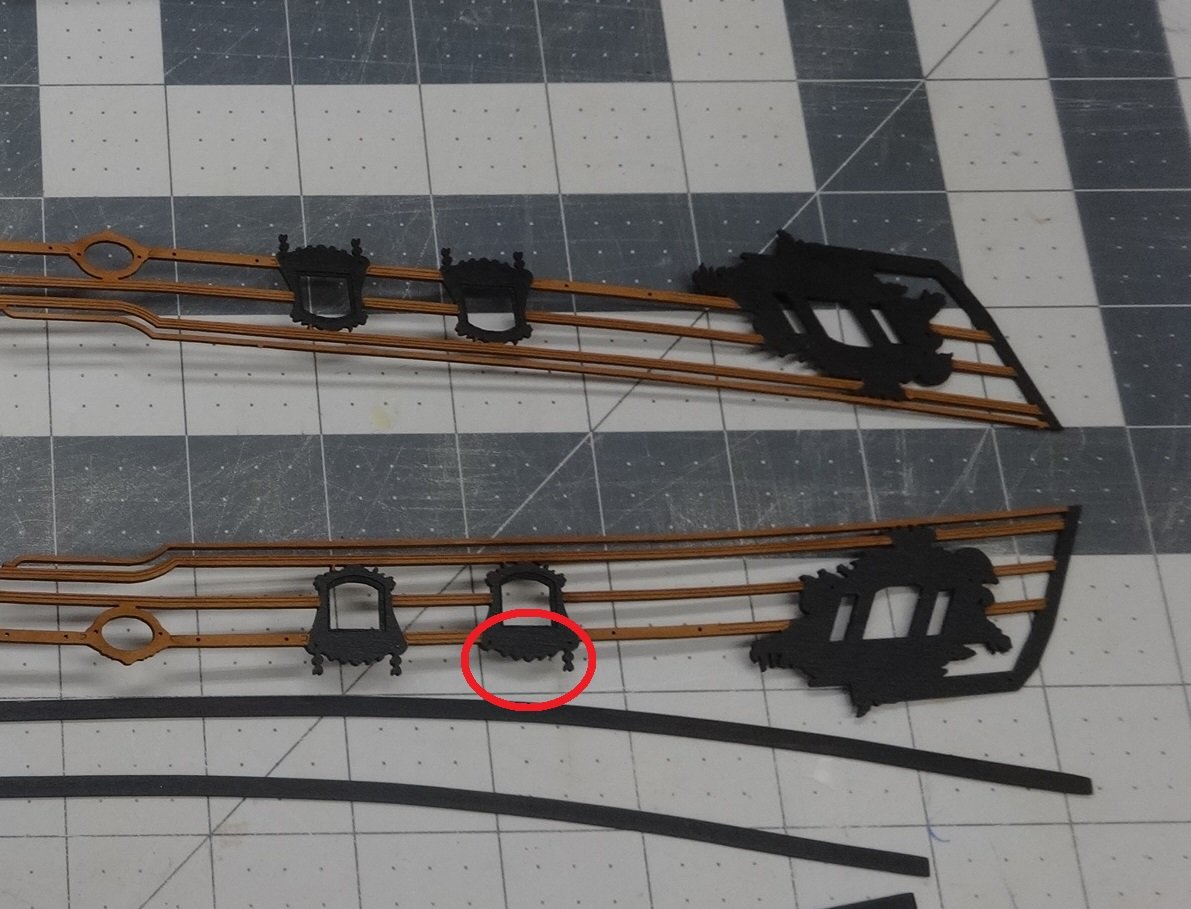
So let my meat hooks be an example of what not to do! 🤪
-
Thanks Glenn and Jean-Paul and all the likes too!
Trying to catch up the build log.
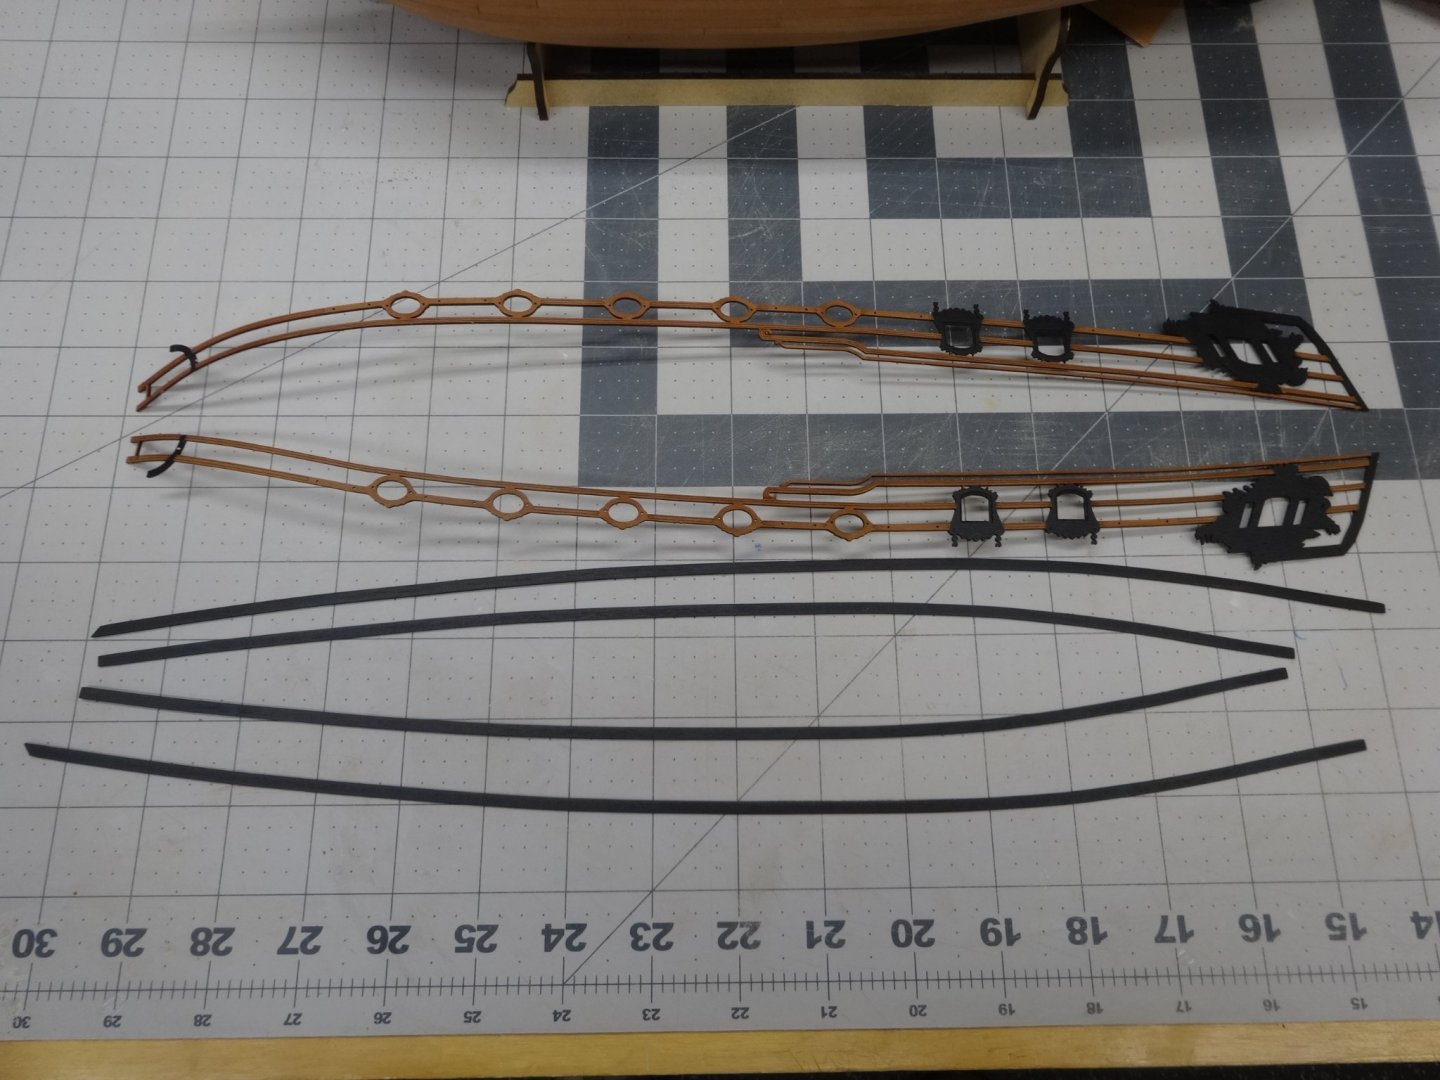
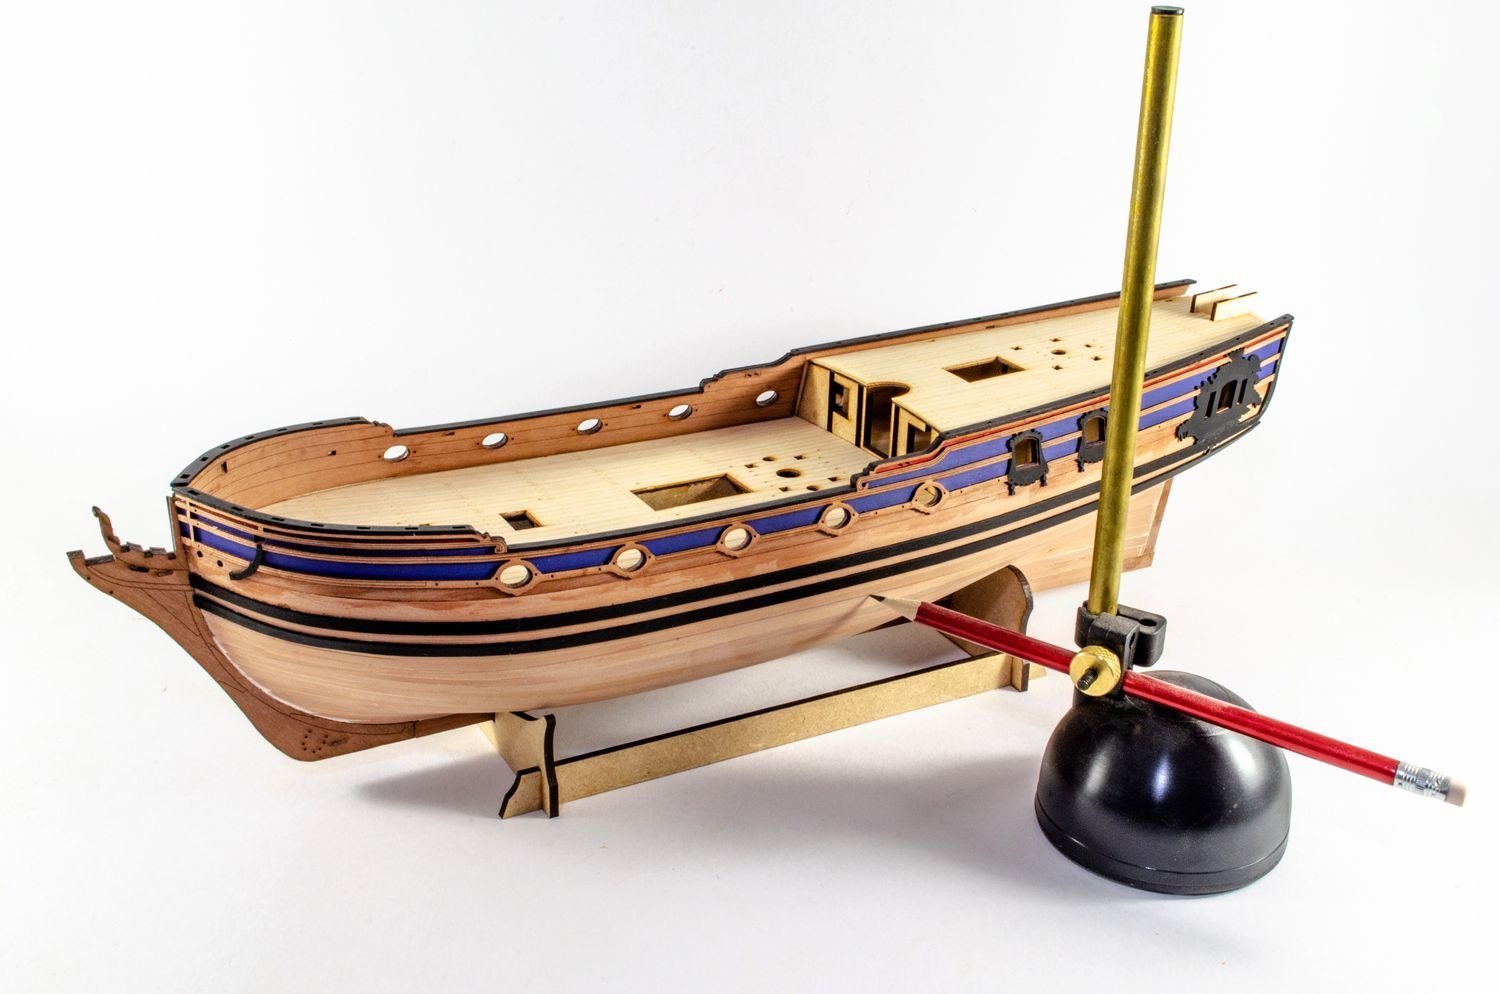
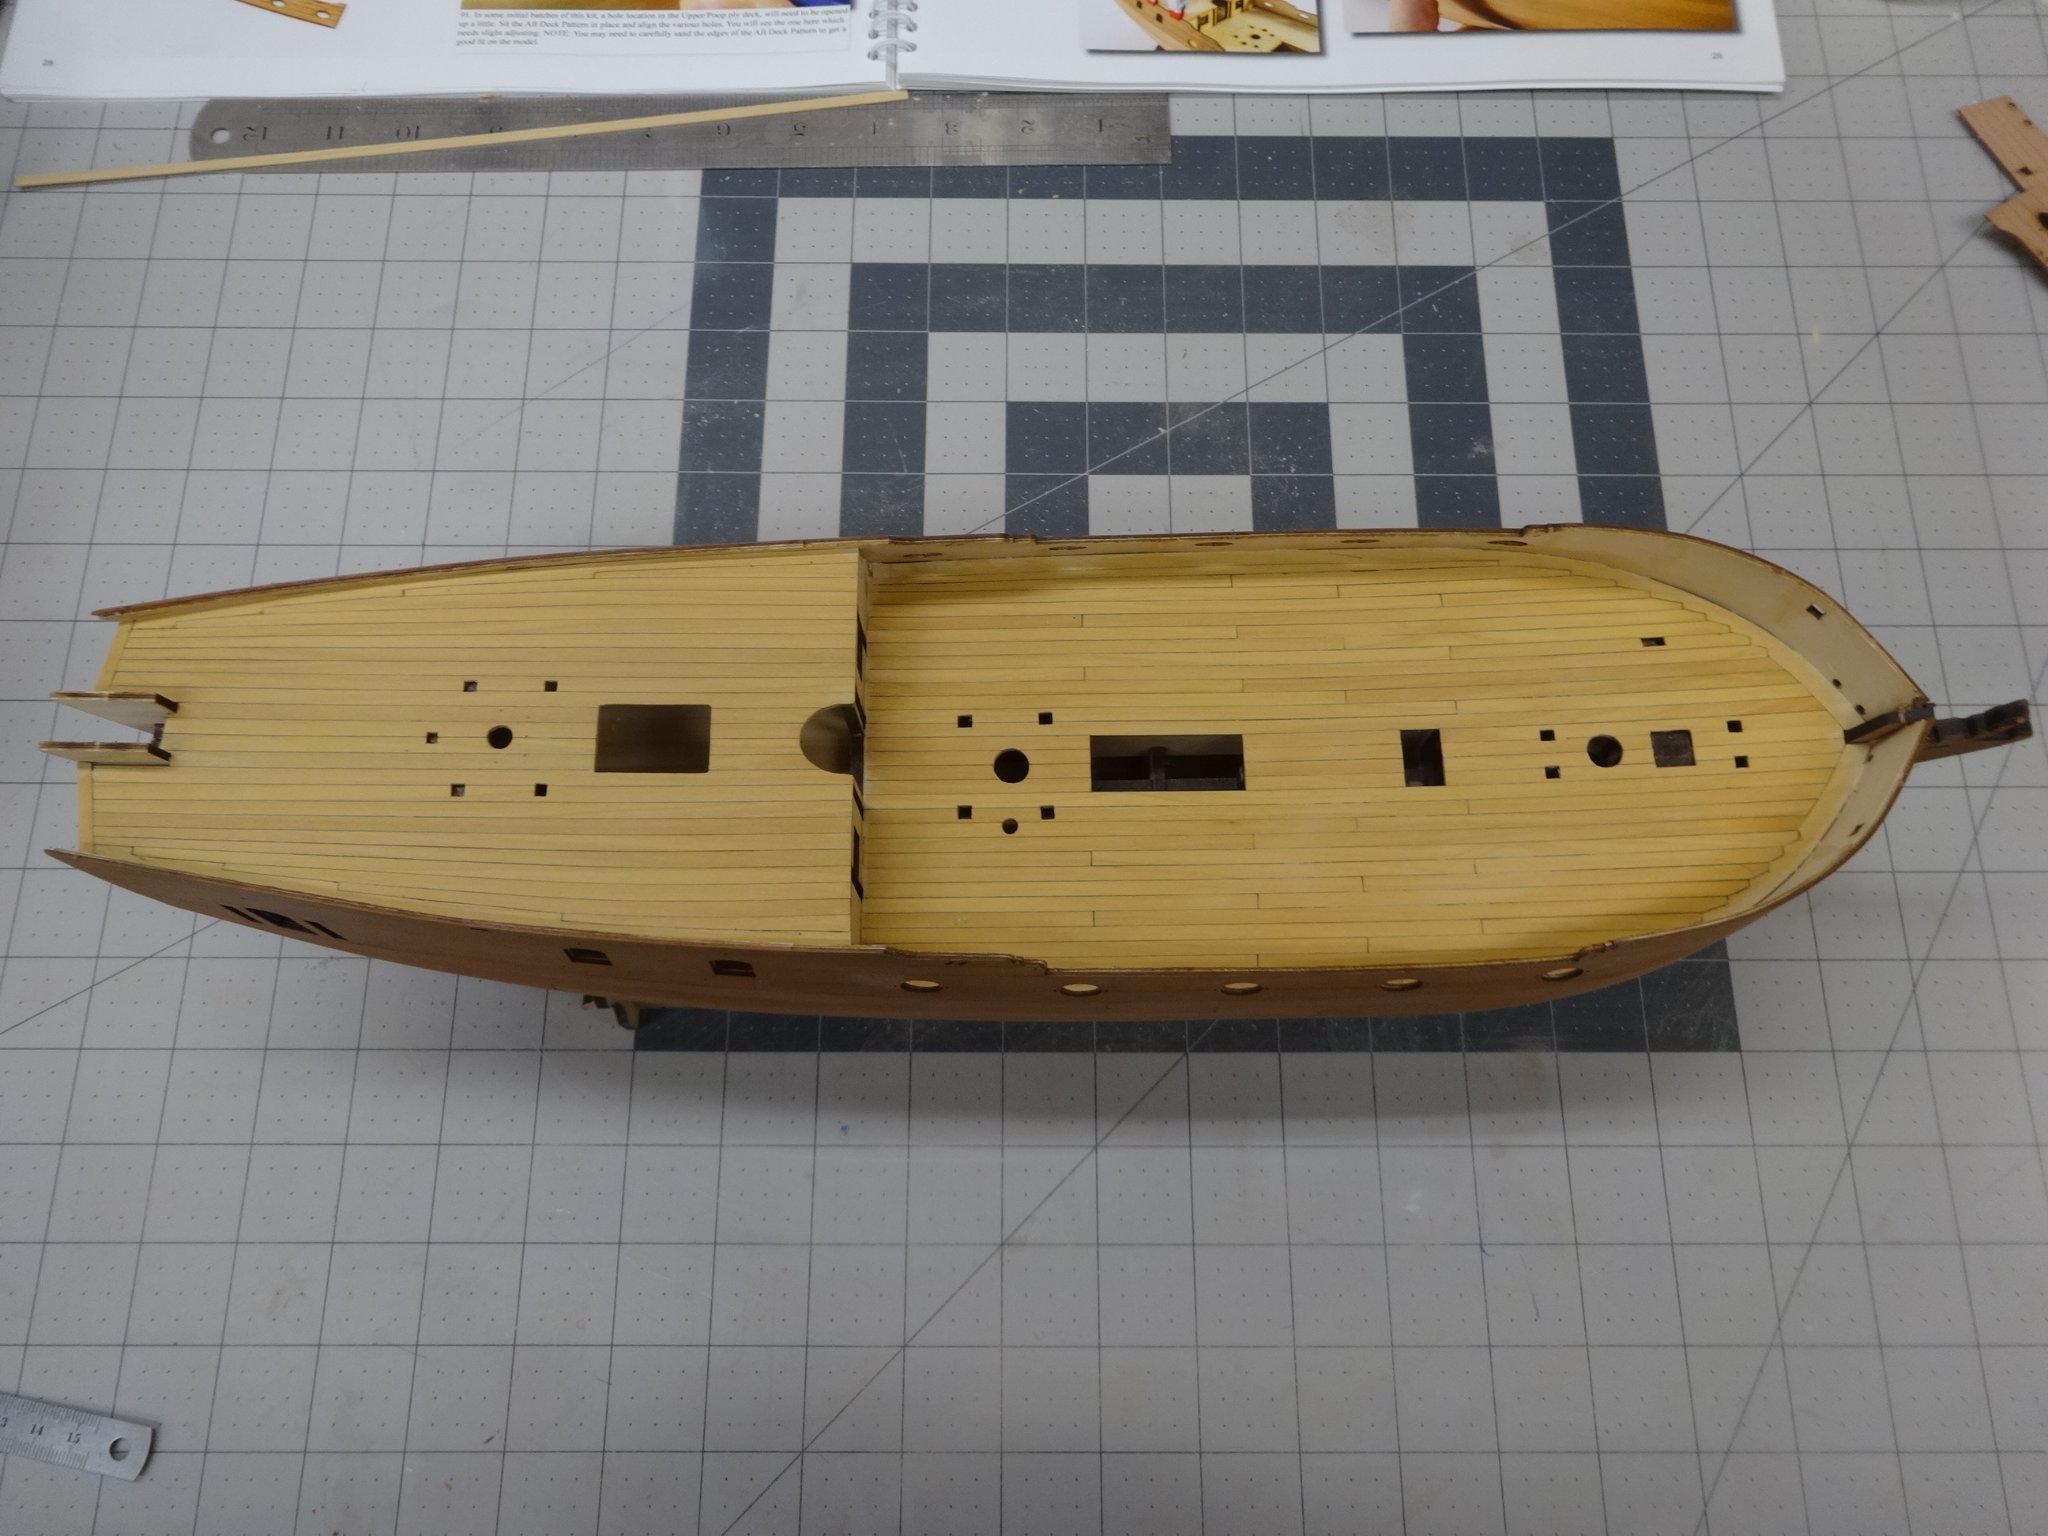
Here you'll see the inner bulwark patterns, the outer bulwarks painted blue and red, upper fore and main upper rail patterns clamped in place to dry.
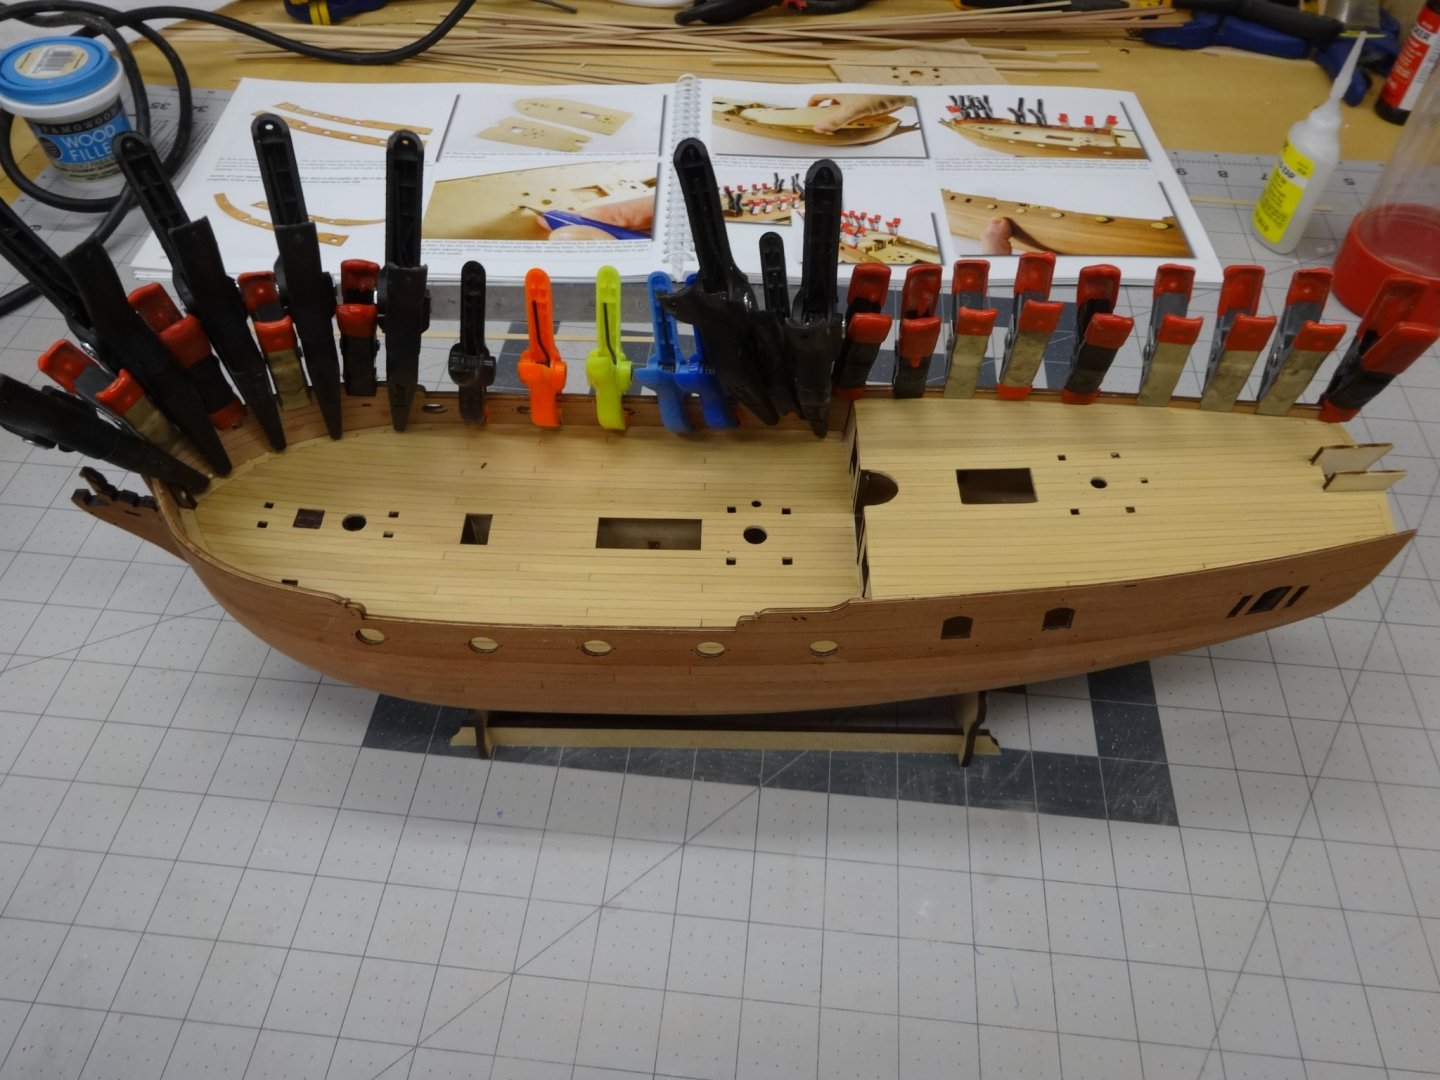
Now the fore mid and aft gunwales have been painted and glued in place.

Here are the main upper rails and wales formed and painted and glued in place.


- Ryland Craze, BobG, chris watton and 11 others
-
14
-
17 hours ago, glbarlow said:
As in I don’t relish making one let alone multiples. Those little things are tough to build🤣🤪
Come on Glenn! A little stress and aggravation is just what the doctor ordered.
")
Seriously I think they would be a great addition to the completed model.
- mtaylor, chris watton, Canute and 1 other
-
4
-
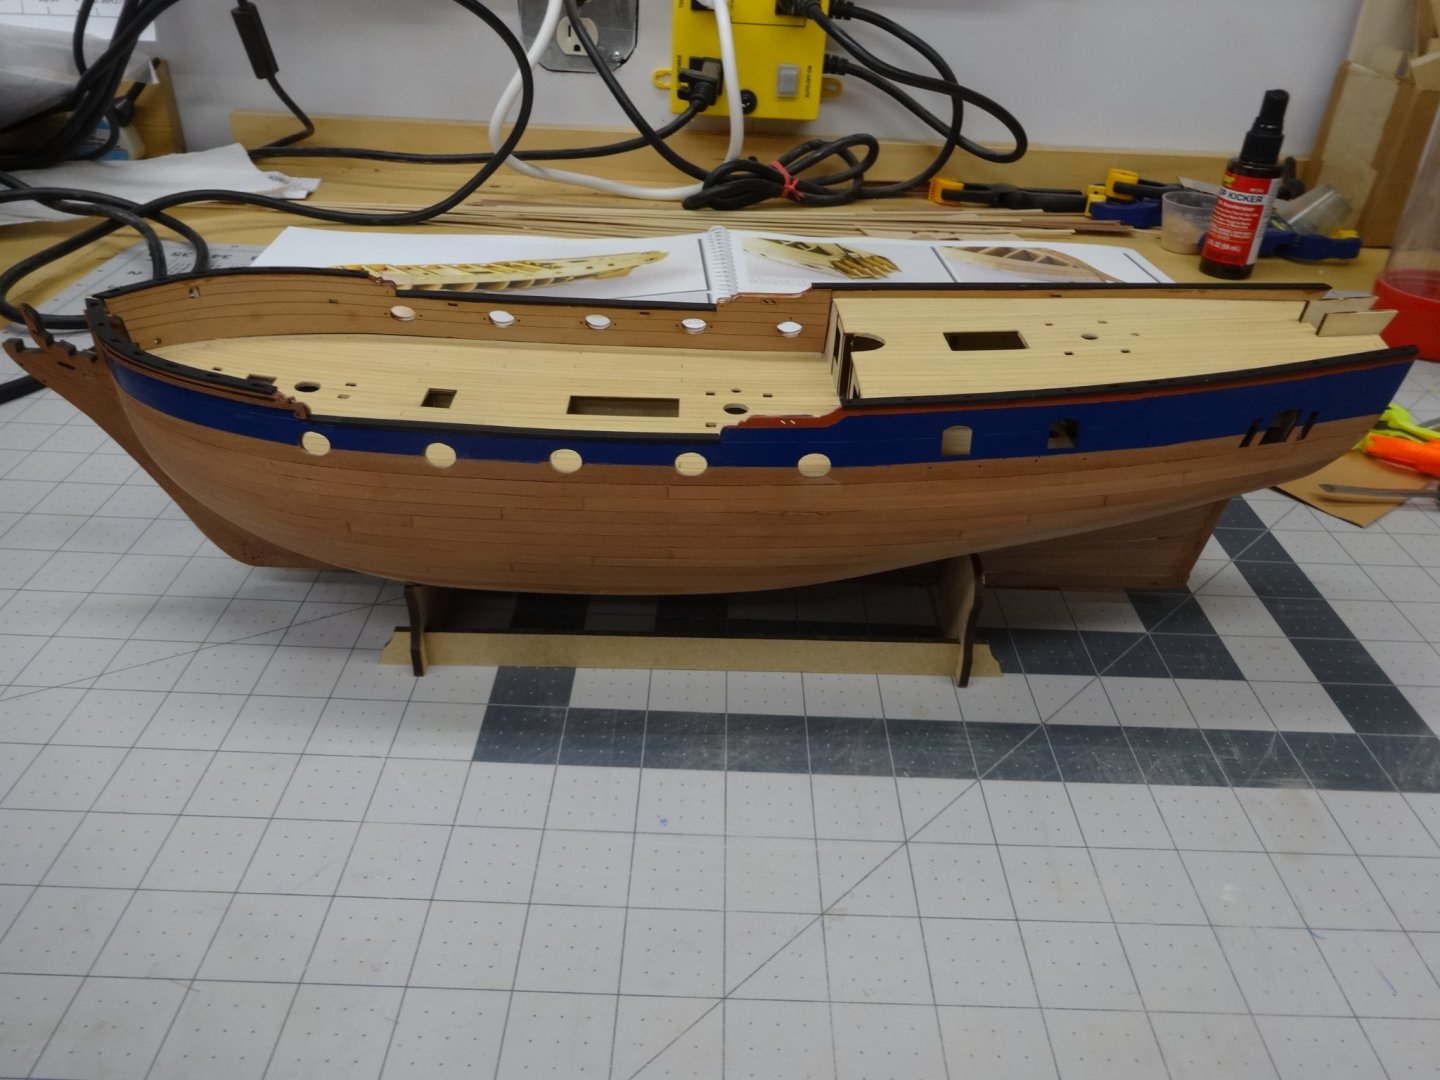
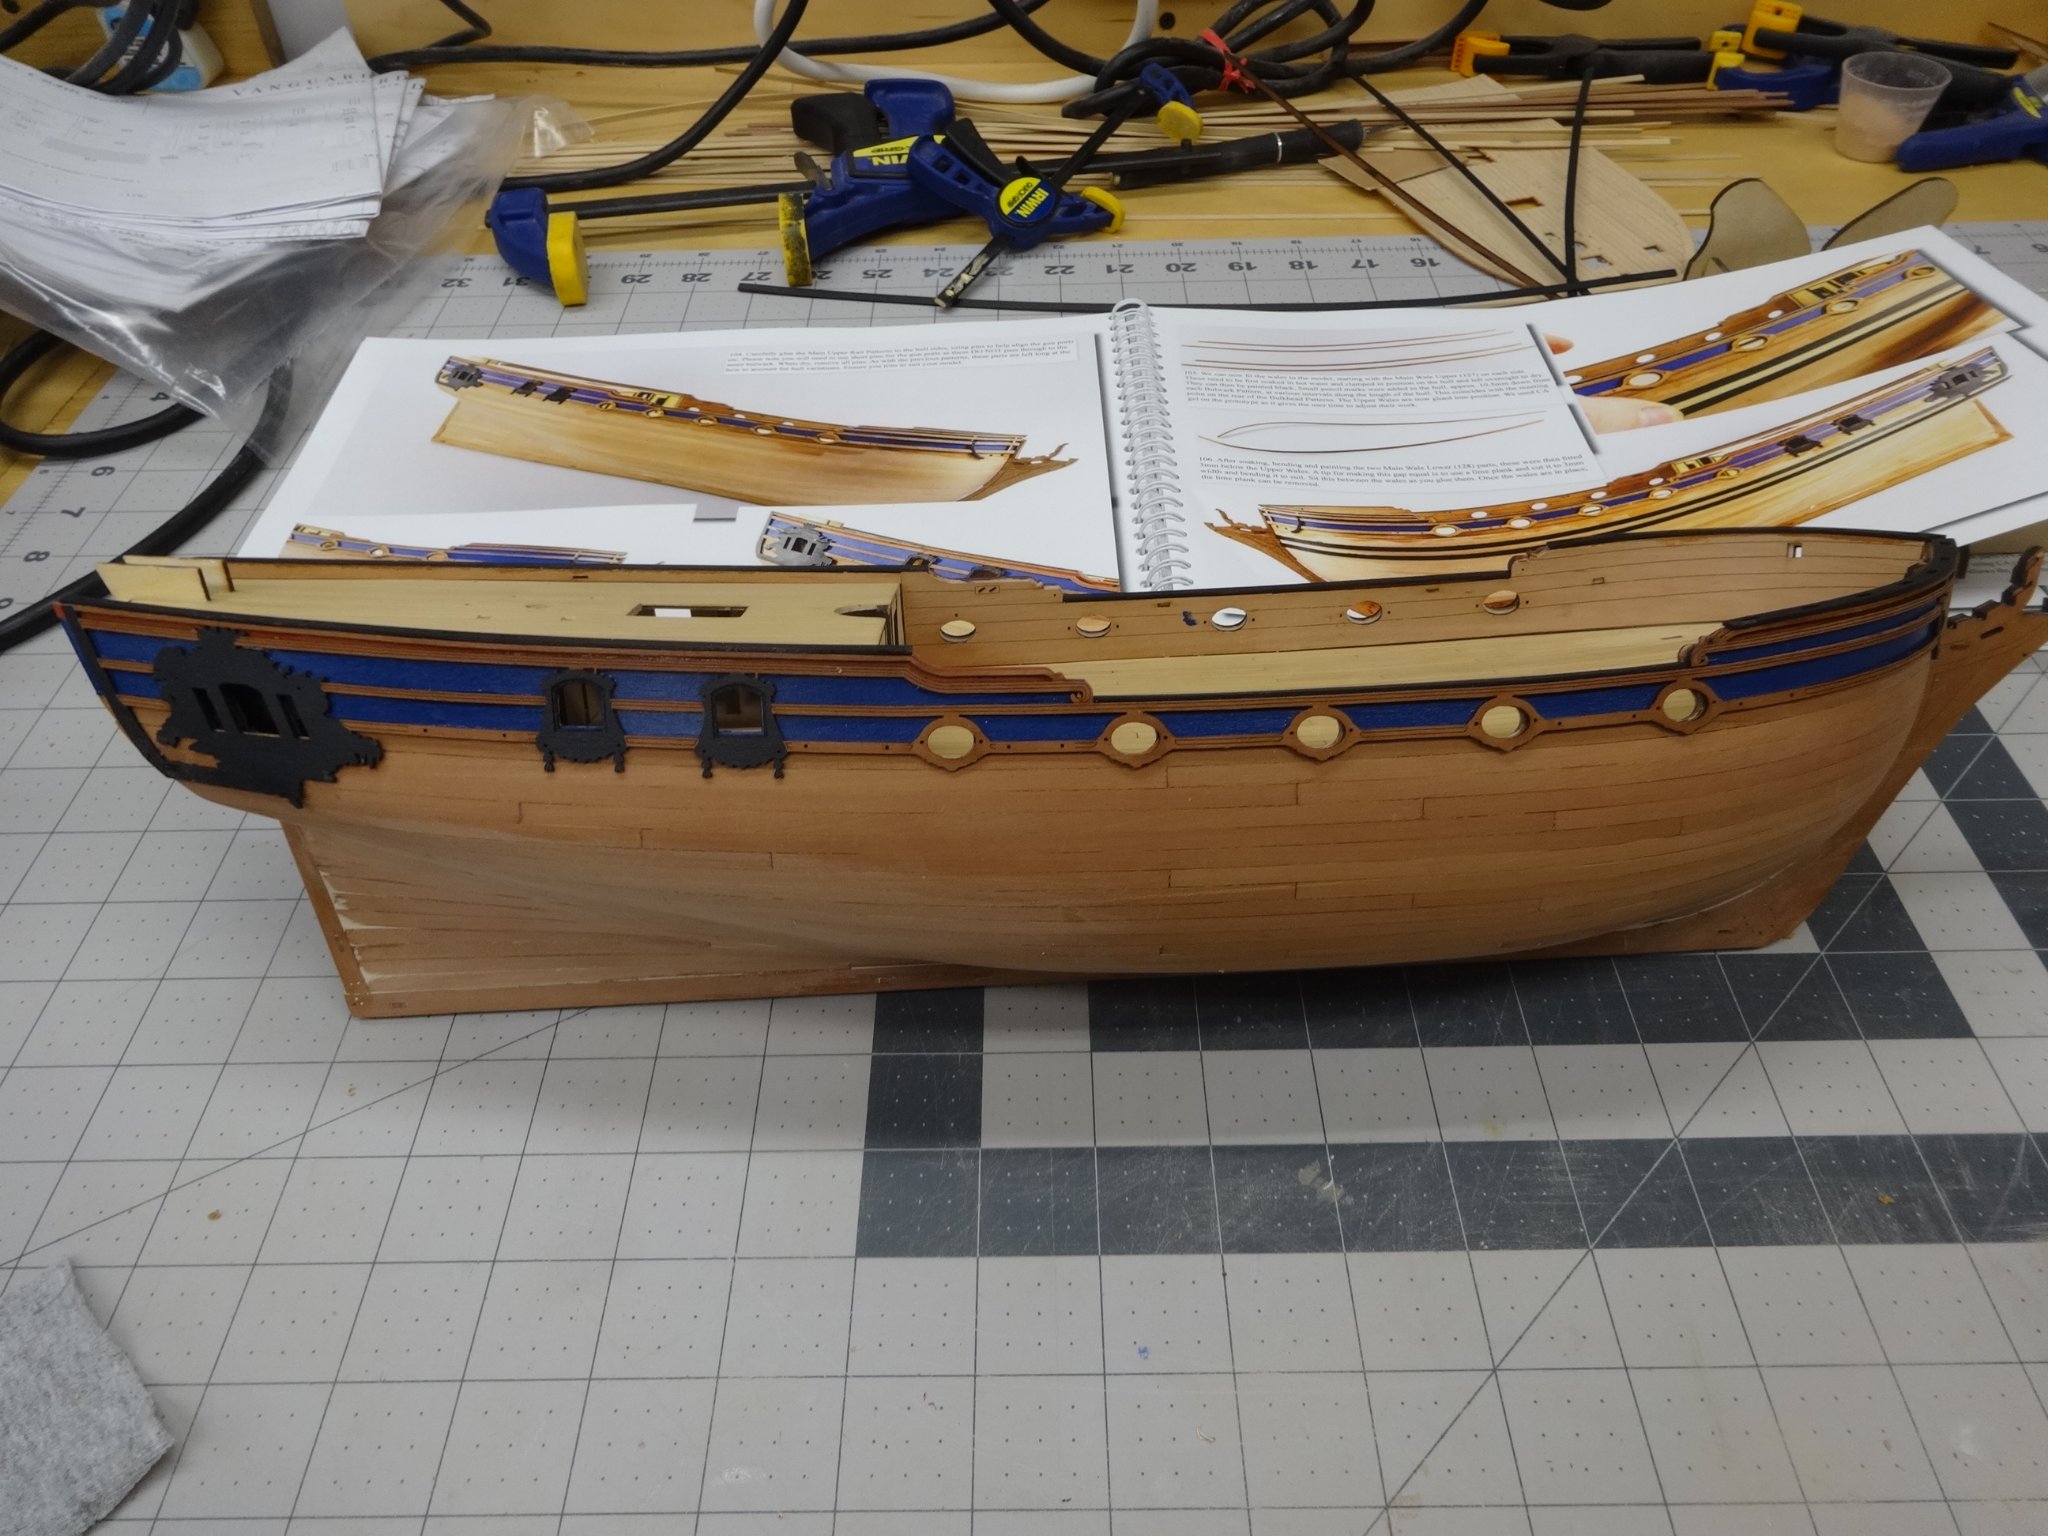
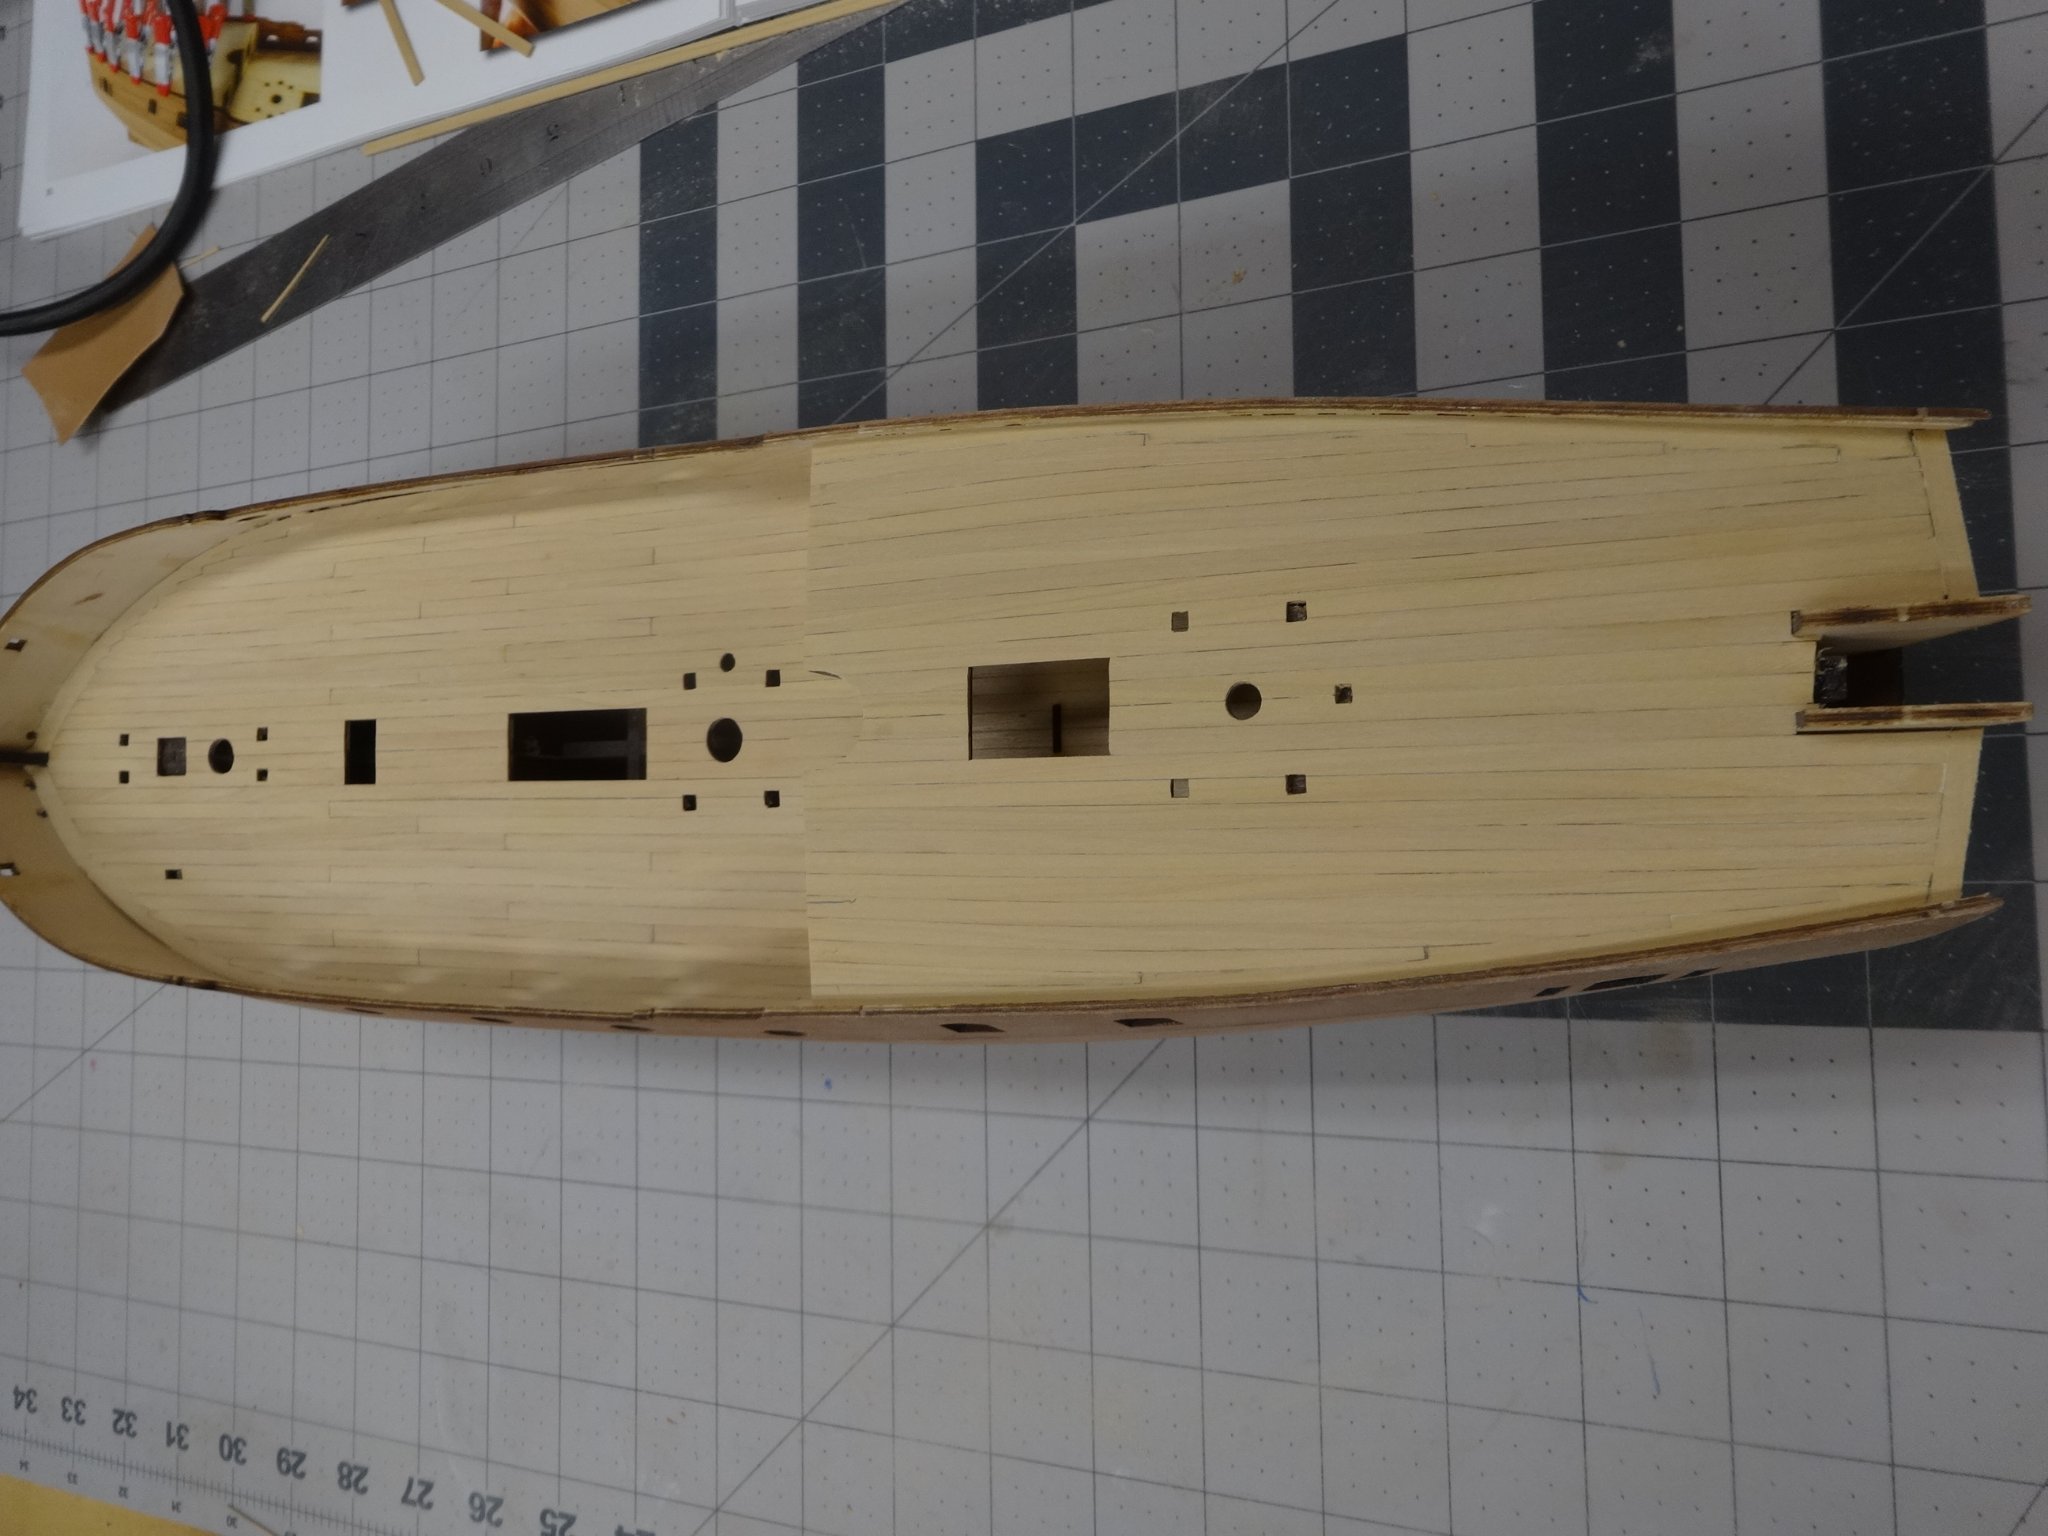
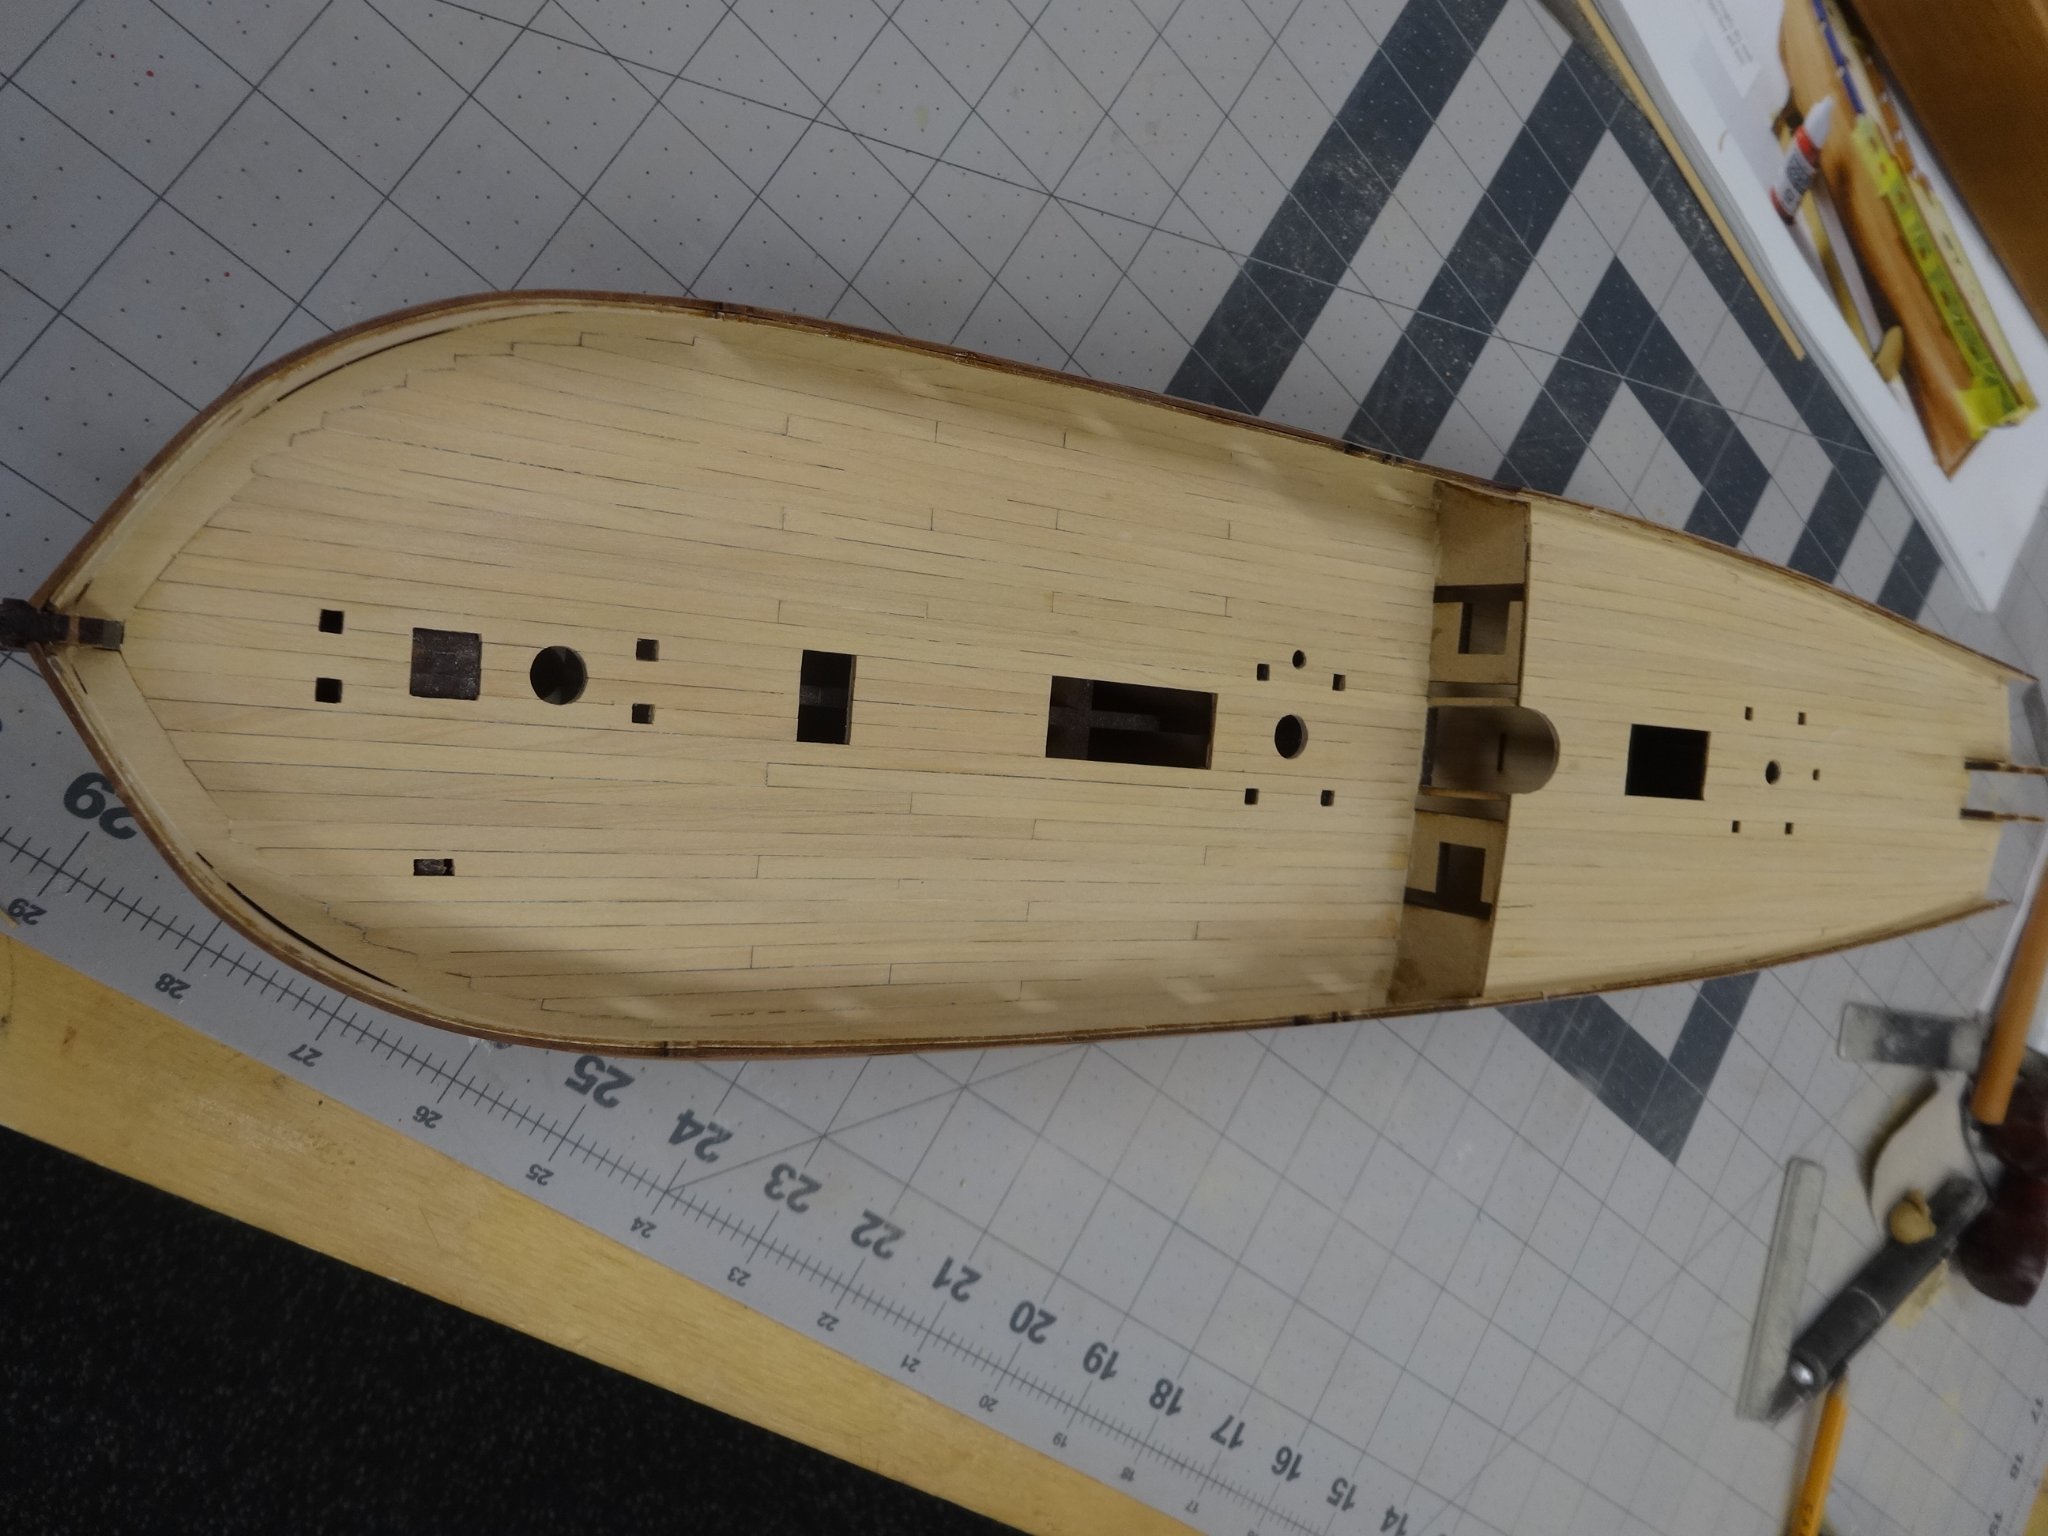
I've completed planking the deck. It was a fun project and I'm happy with how it came out.
Here it is rough sanded with no finish.
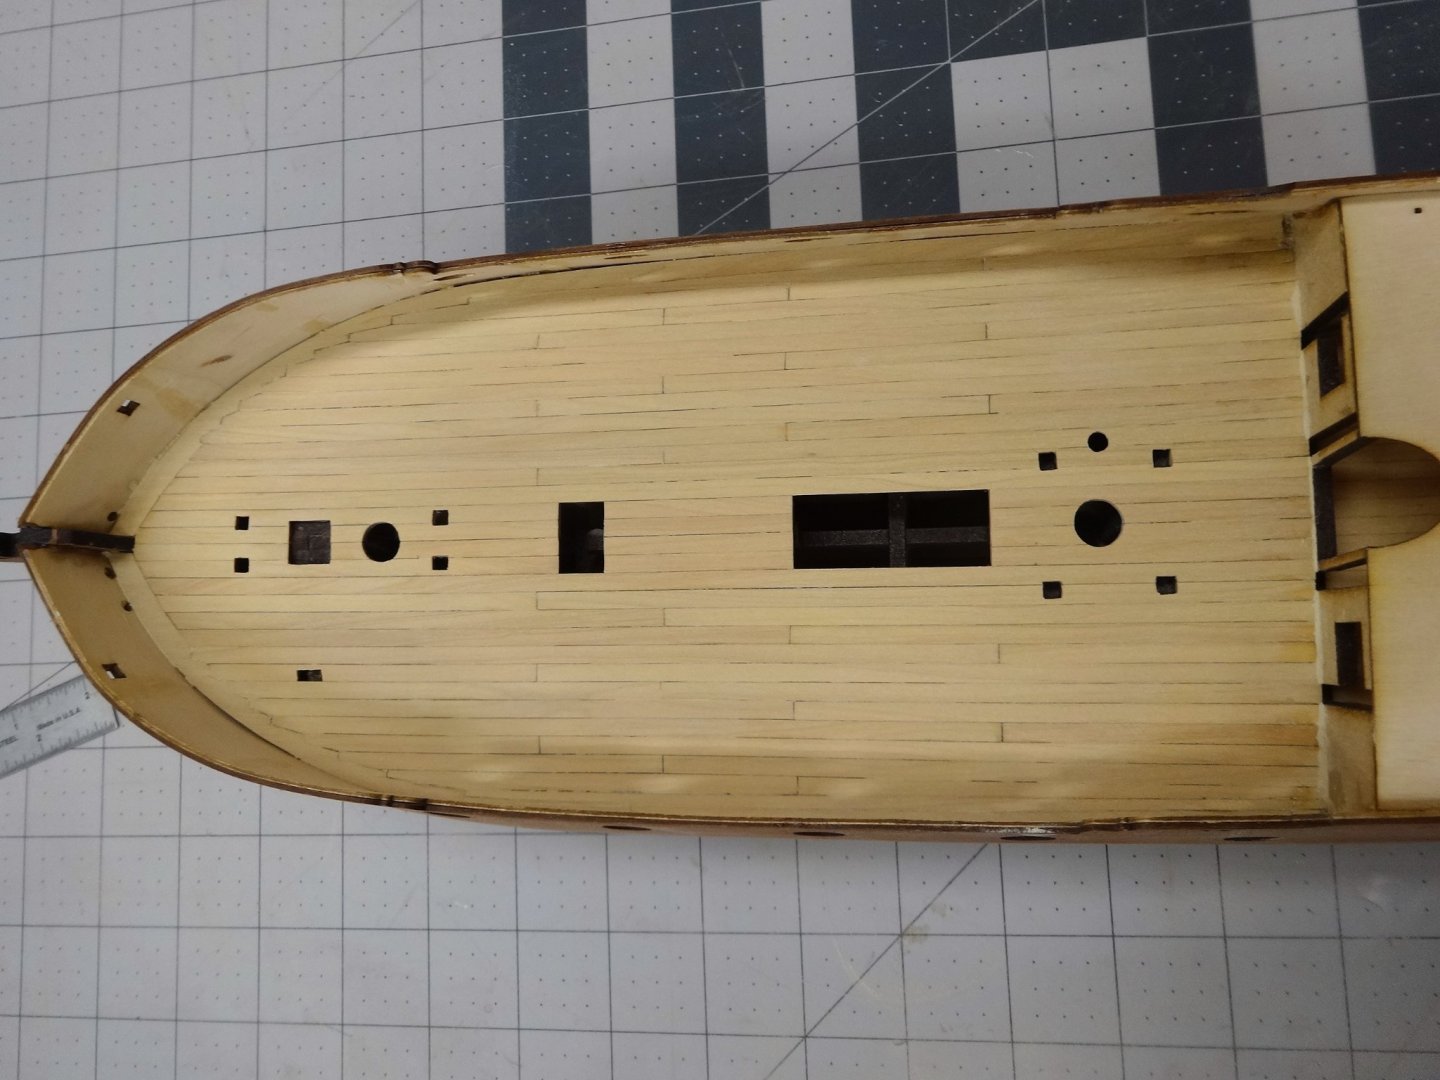
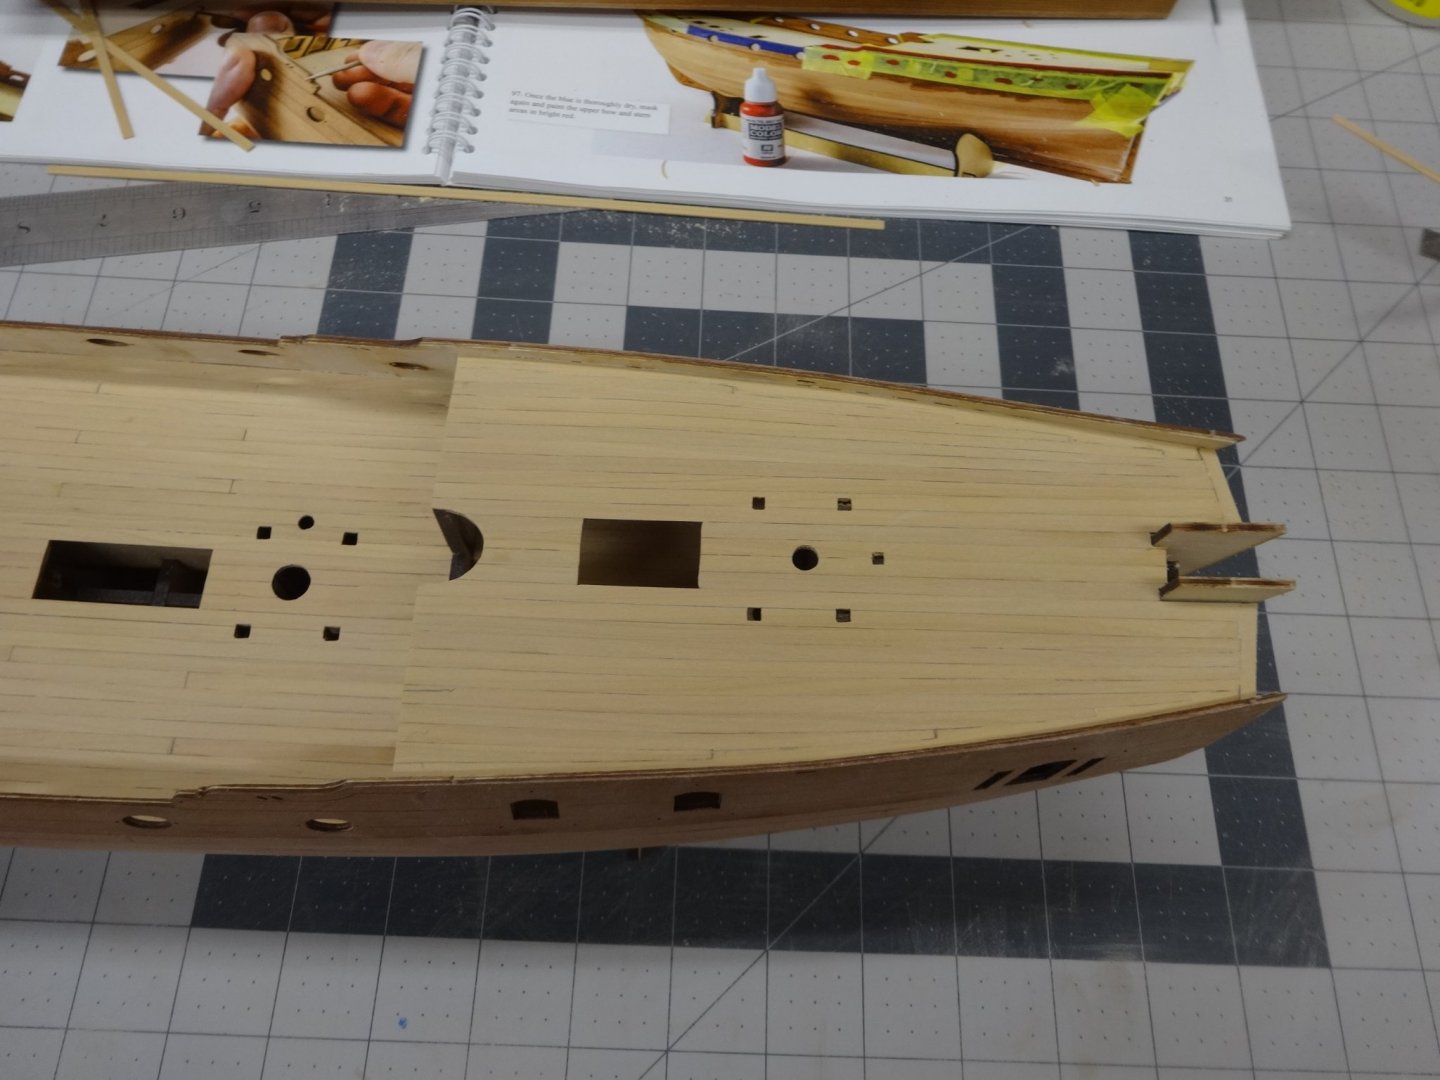

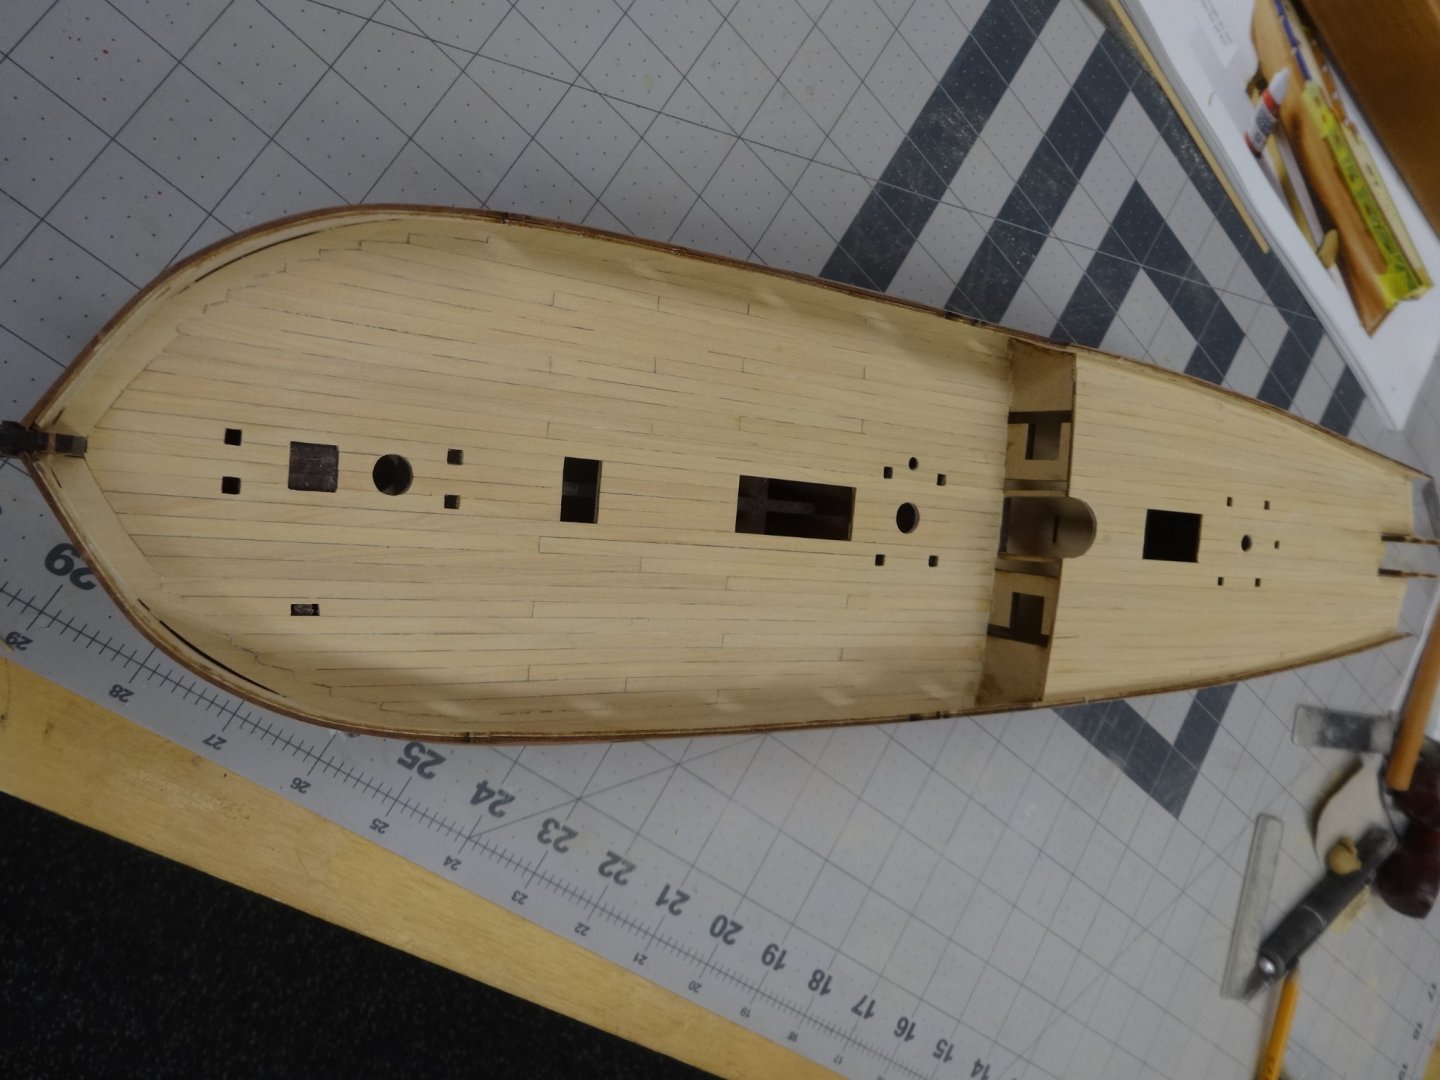
And here it is sanded with 320 and a coat of wipe on poly.

I will lay Chris's laser cut deck back over my deck to mark off the various precut hole, hatches
etc. to make sure they are in the correct location on my deck.


Duchess of Kingston 1778 by rafine - Vanguard Models - 1:64
in - Kit build logs for subjects built from 1751 - 1800
Posted
Looking really nice Bob!