NenadM
-
Posts
3,254 -
Joined
-
Last visited
Content Type
Profiles
Forums
Gallery
Events
Everything posted by NenadM
-

Cutty Sark by NenadM
NenadM replied to NenadM's topic in - Build logs for subjects built 1851 - 1900
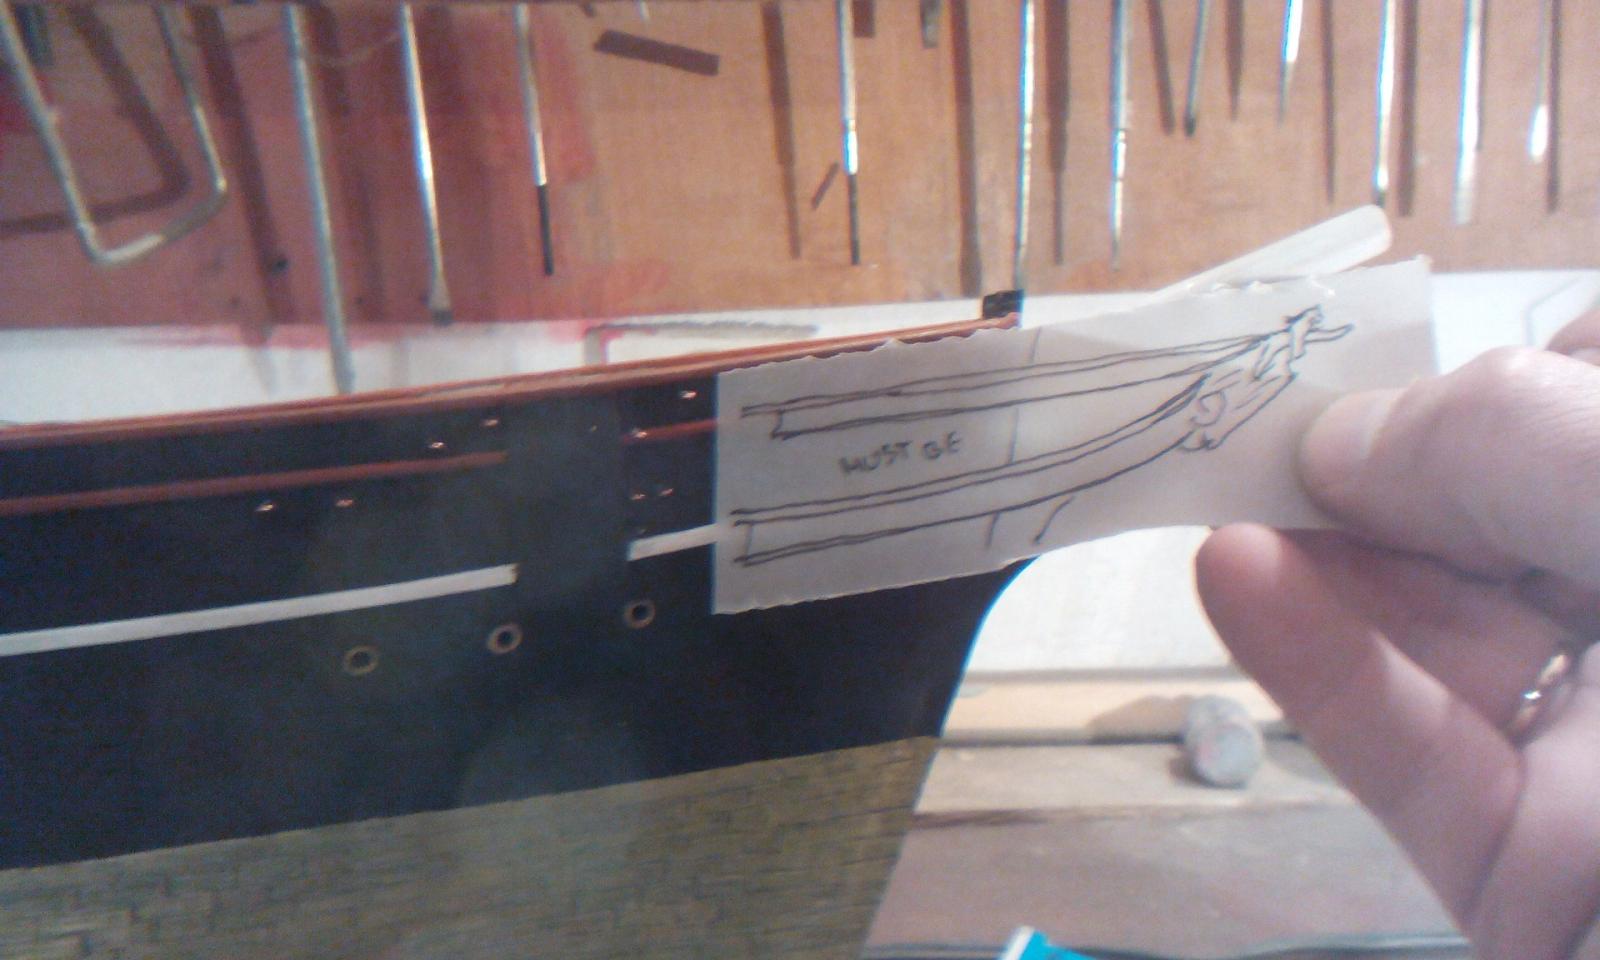
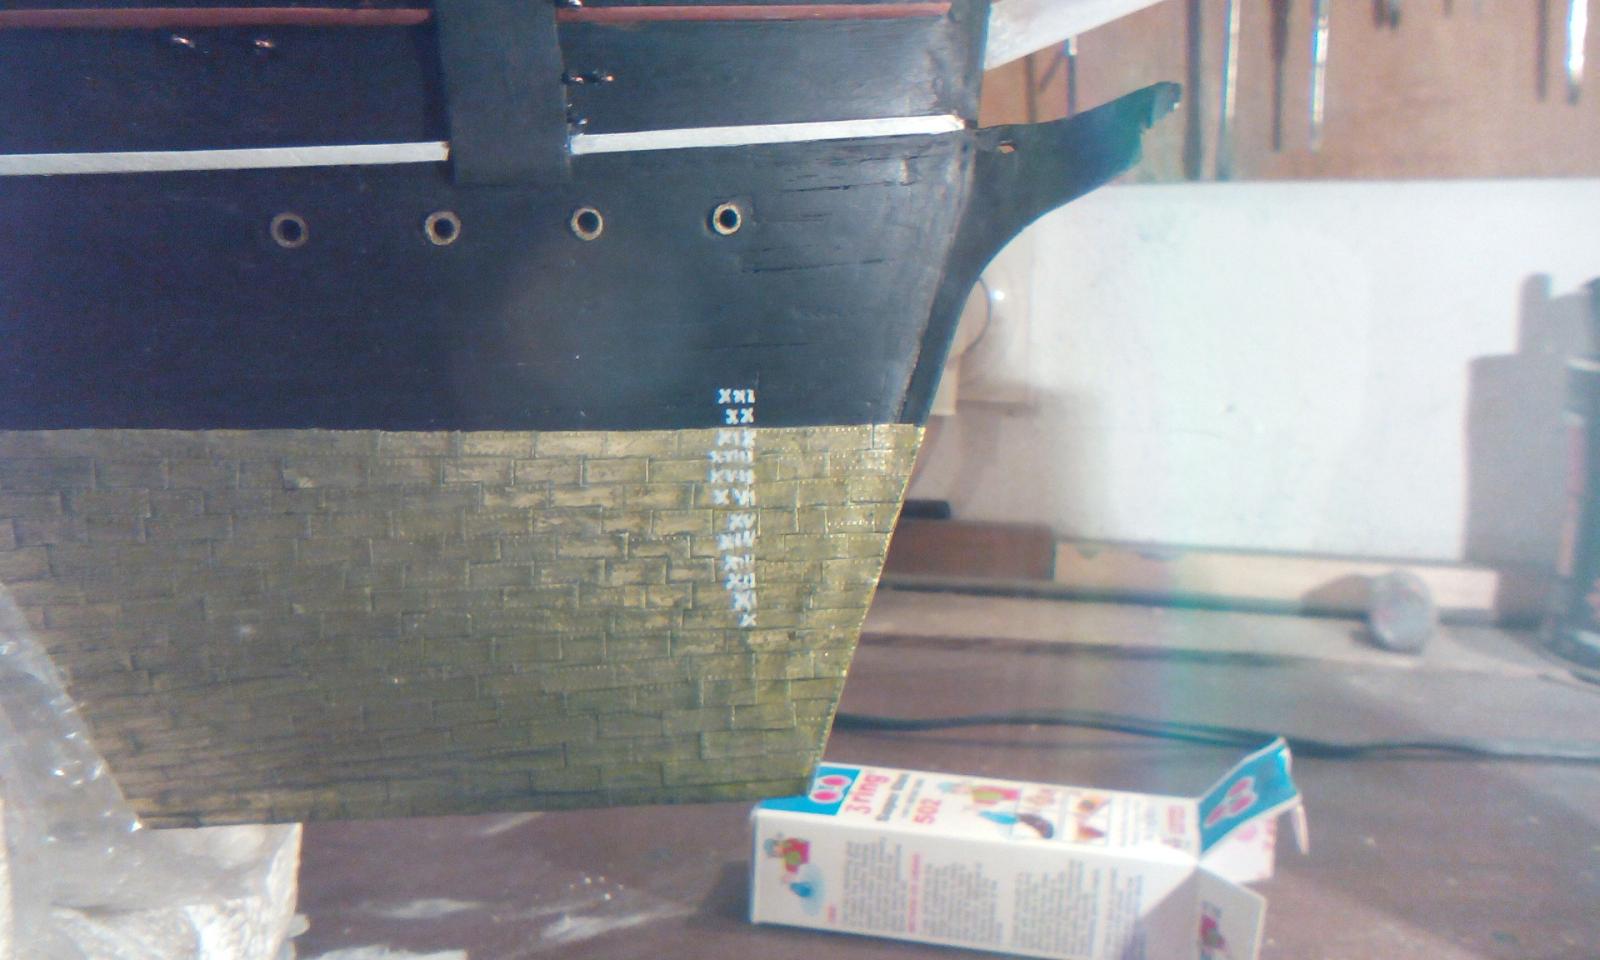
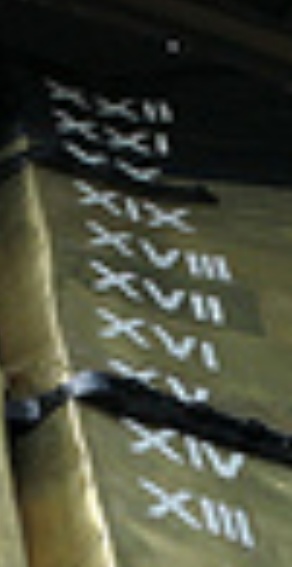
My third sense was right. Yes, there will be problem with front name panels. Toward C-plans, white rail is about 4mm more down than it has to be, and there is no return. (LHL sindrom again) There are lines as on C-plans And lines how has to be Considering main goal is look of panels as on CS, it is sure that solution will again be in a arthistic approach ( something little wider, something little more narrow, some lines more straight, some lines more curve). But first I have to analyze support structure. Until that, go to finish romanian numbers on bow At stern, numbers start with XIII not with X as on bow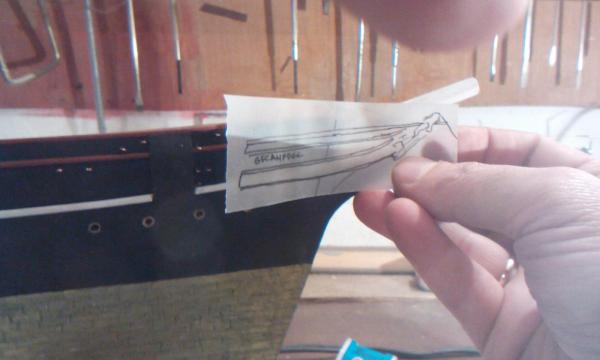


- 4,152 replies
-
- 11
-

-
- cutty sark
- tehnodidakta
- (and 1 more)
-
Cutty Sark by NenadM
NenadM replied to NenadM's topic in - Build logs for subjects built 1851 - 1900
All the knights survive "battle for bow crater" , and after they win, one of them sit over bowsprit proudly showing his two heads
- 4,152 replies
-
- 10
-
-
- cutty sark
- tehnodidakta
- (and 1 more)
-
Cutty Sark by NenadM
NenadM replied to NenadM's topic in - Build logs for subjects built 1851 - 1900
Aaaa, Knight Head it is called ... I thought this is knighthead My english ...
- 4,152 replies
-
- 8
-
-
- cutty sark
- tehnodidakta
- (and 1 more)
-
Gold hands you have
-
Cutty Sark by NenadM
NenadM replied to NenadM's topic in - Build logs for subjects built 1851 - 1900
I am planing also to research on same way masting, yards, rigging, and sails, combining with some books about riggin I found. I do not know absolute anything about sails and rigging, and maybe you are in better position. Something I learned on MSW following different logs, but it seems to be just first few letters of alphabet, and in front of us is "war and peace" to read and write. I can imagine paper/digital materials produced by ssuch a work ... only bowsprit research gives me about 20 A4 pages of comparaative schemes, drawings and photos Mixed feelings about. On one side - I can not wait to reach this stage, on another, scared about. But it seems to me that there is some logic in rigging, and that makes it a bit easier- 4,152 replies
-
- 5
-
-
- cutty sark
- tehnodidakta
- (and 1 more)
-
Cutty Sark by NenadM
NenadM replied to NenadM's topic in - Build logs for subjects built 1851 - 1900
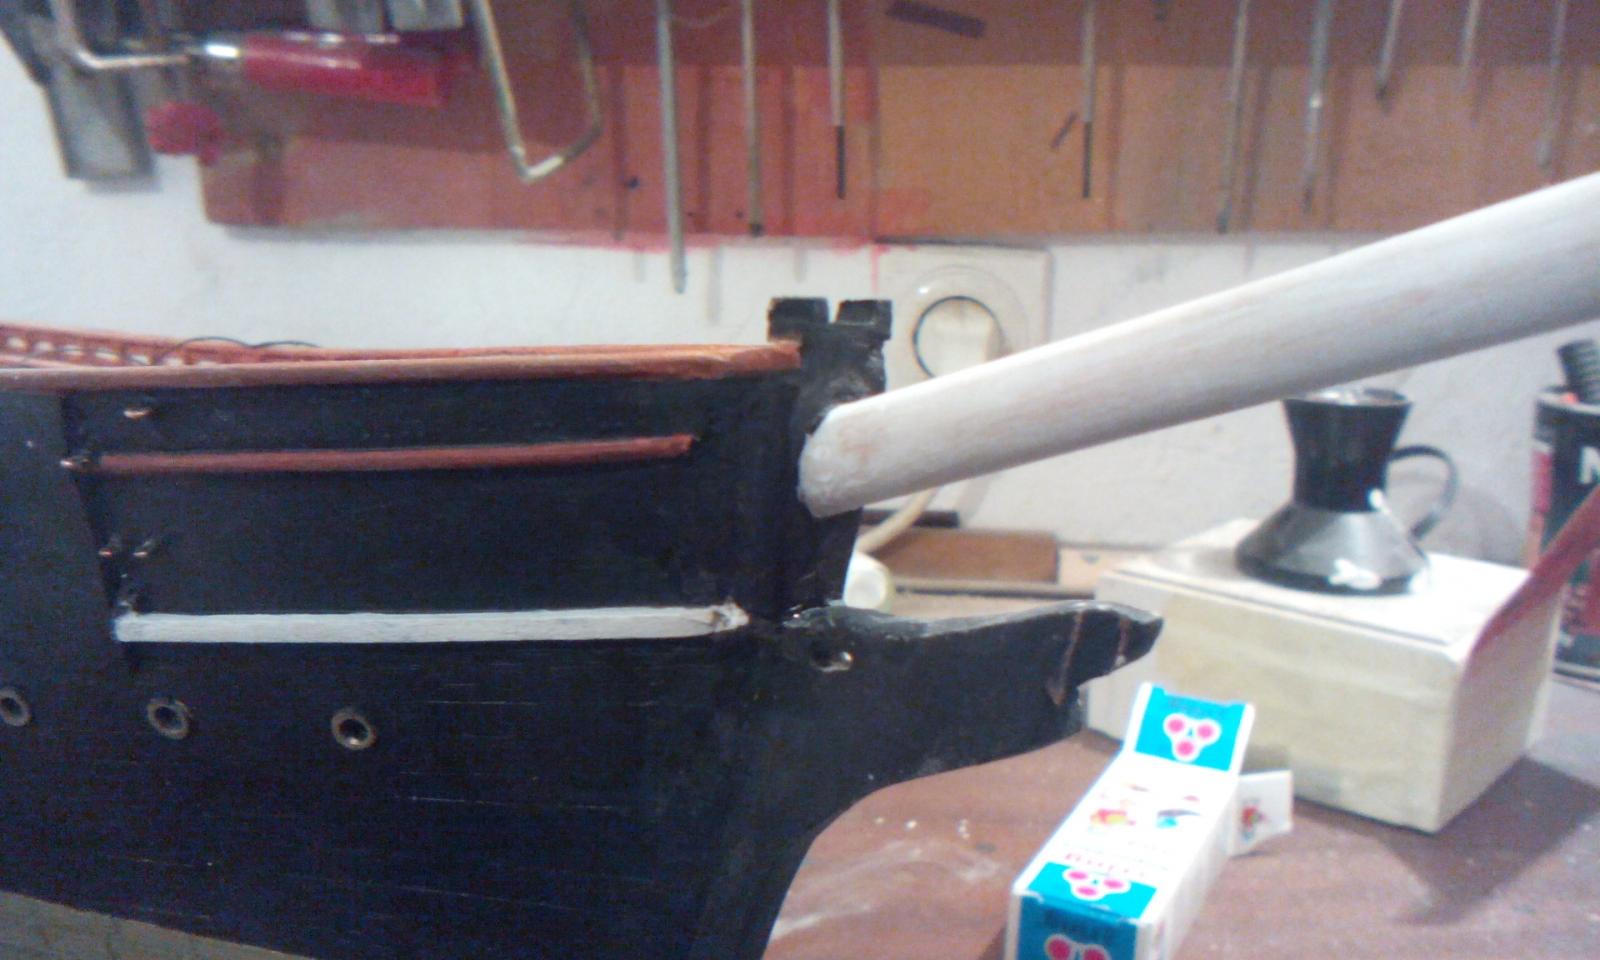
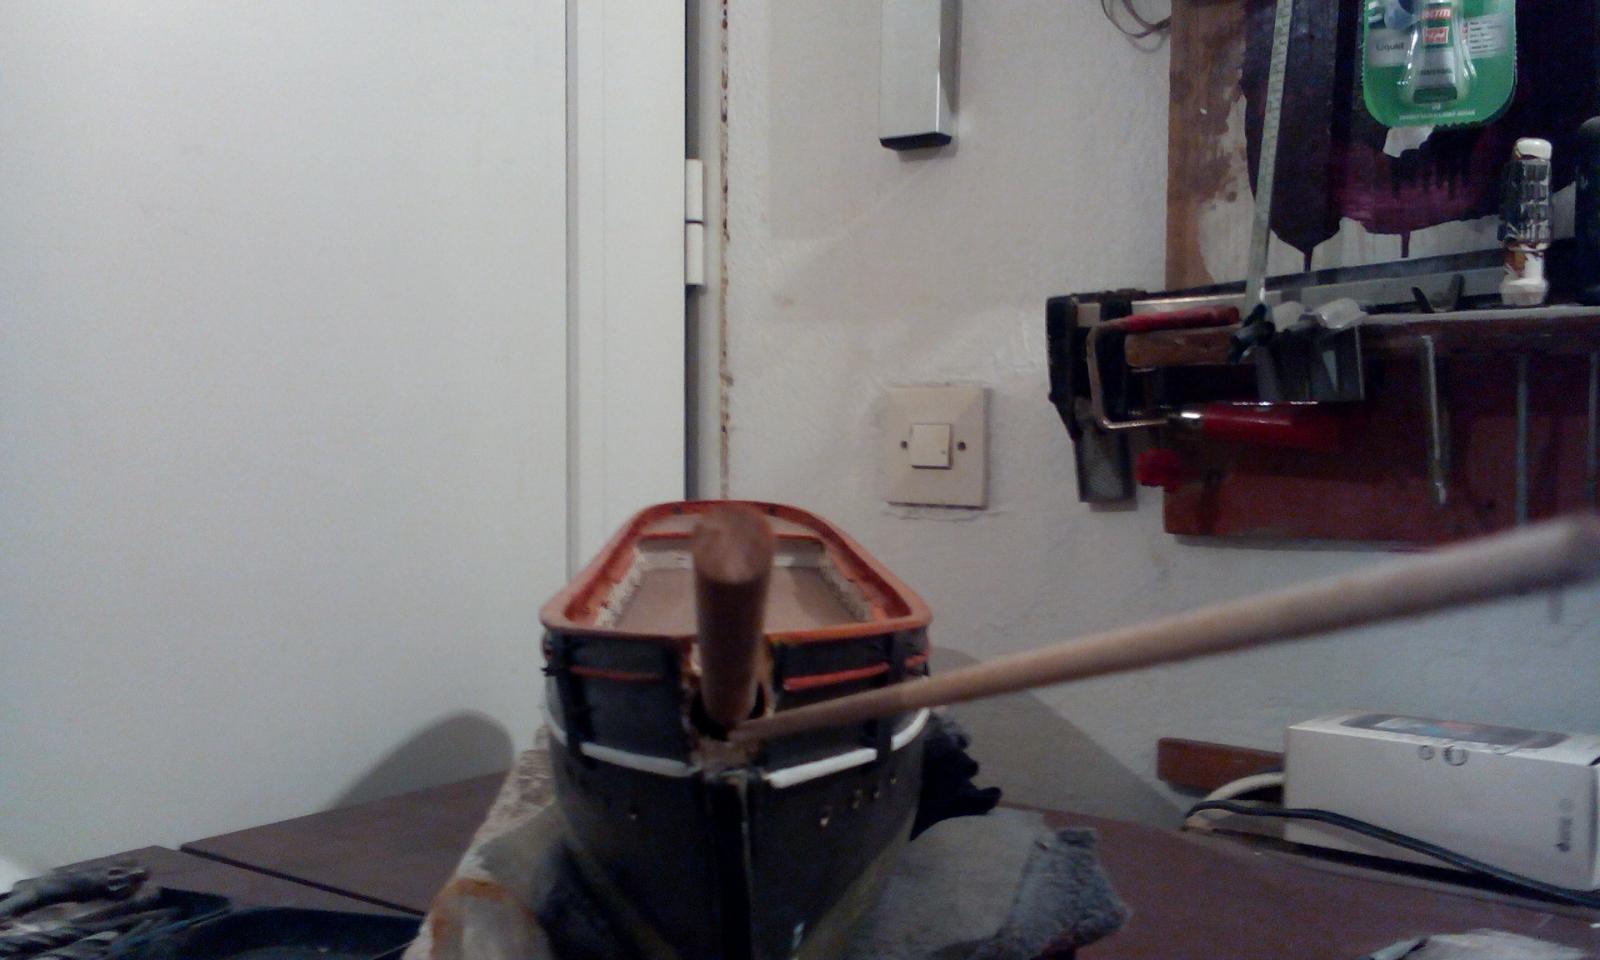
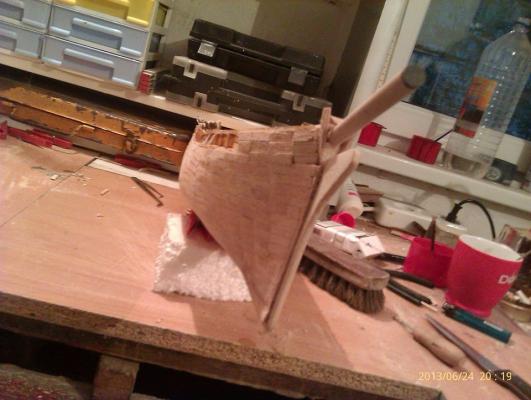
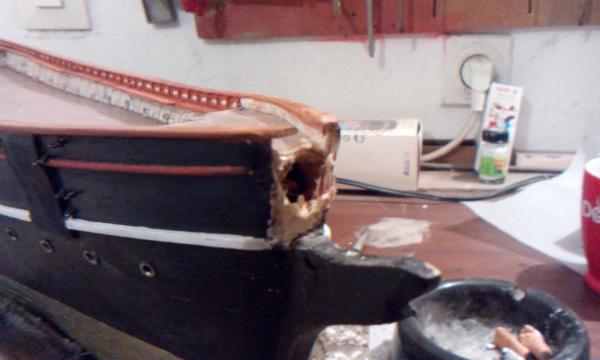
Work on bow/bowsprit continues. New "rib" made, glued, putty apllied Because my HTC has very bad camera, this pictures are made through magnifier glasss, so perspective is a bit strange Next, before painting, this black structure (did I mentioned I am not so familiar with ship terms in English?) has to be made tomorrow And a litlle nice cheating My bowsprit is not on position to go through fore deck as on plans and photos ( known reason - lost h....) and this is such a nice detail I just couldn't resist to have, so cheated a little, making this little mask to simulate it. When black structure will be on place, and the rest of bowsprit too, I think nobody can see that this is fake bowsprit runing throuhgt fore deck Looking on bow, I have strange feeling that something is wrong, and that name panels will be pretty hard and problematic to conect with bow and Nanny ... It seems that there will be more surgery than I want ... we'll see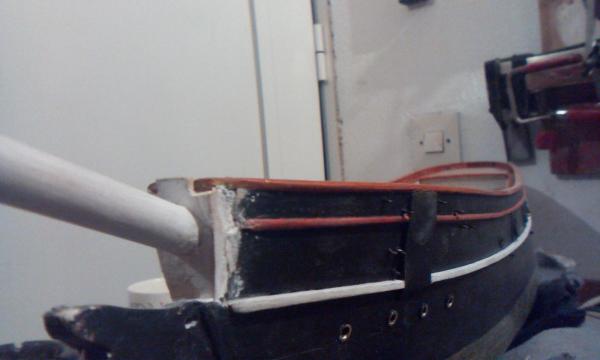
- 4,152 replies
-
- 8
-
-
- cutty sark
- tehnodidakta
- (and 1 more)
-
Cutty Sark by NenadM
NenadM replied to NenadM's topic in - Build logs for subjects built 1851 - 1900
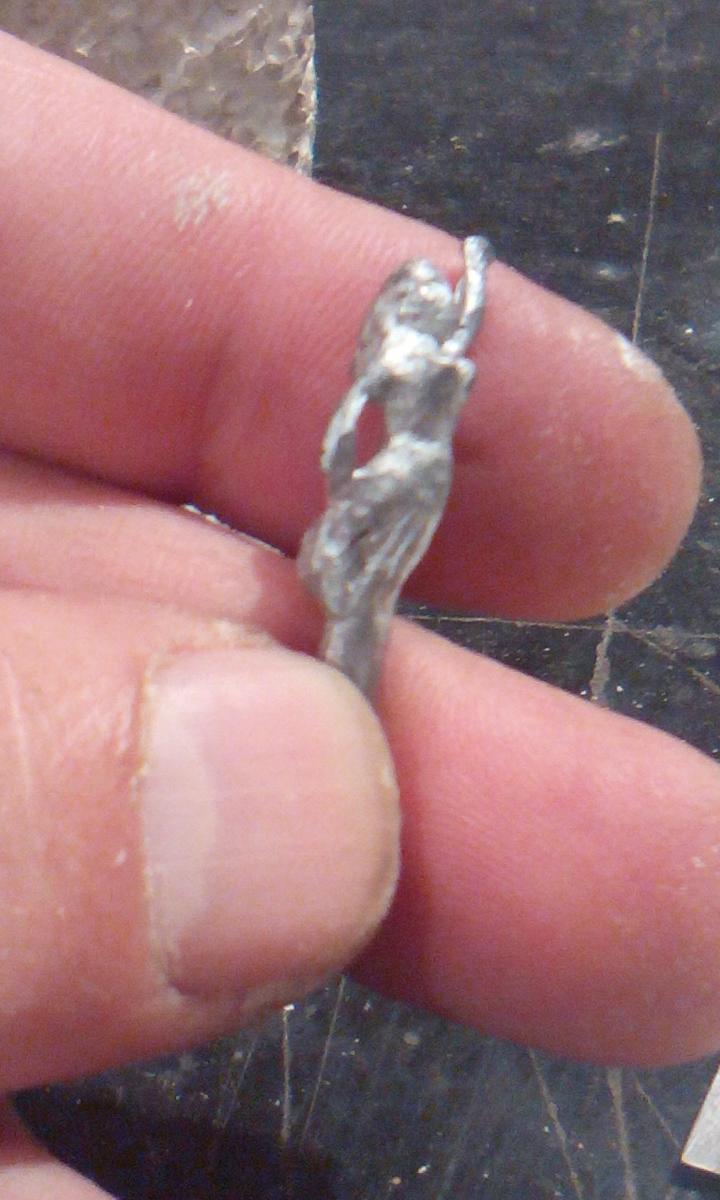
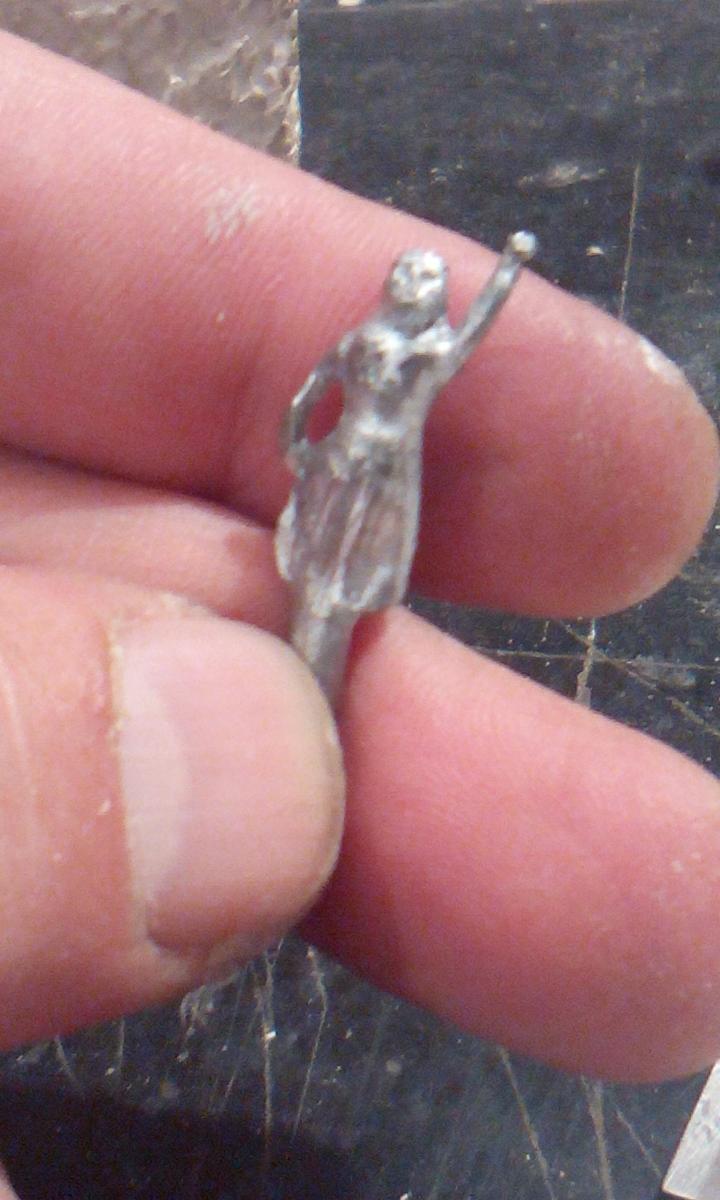
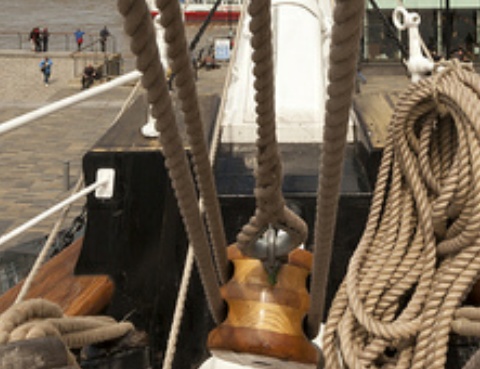
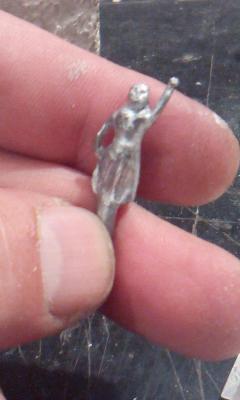
Thank you, Marc for kind words Thank you Lou for your support. Your pictures are important resource for invedtigation about thiny details. Yes, I think also it is a light. Analyzing front panels, it seems that Nanny has to be mounted in this stage. But her arm is thinny and fragile, and here is real chance to broke it Speaking about Nanny ... here is figure from original Tehnodidakta Kit I do not like it. Thinking about trying to carve Her Or I am idiot - Nanny figure without arm is less than 2 cm long with arm exactly 2,1,cm. I am not sure I can do it better on such a scale.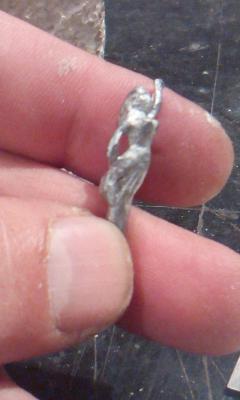
- 4,152 replies
-
- 6
-
-
- cutty sark
- tehnodidakta
- (and 1 more)
-
Cutty Sark by NenadM
NenadM replied to NenadM's topic in - Build logs for subjects built 1851 - 1900
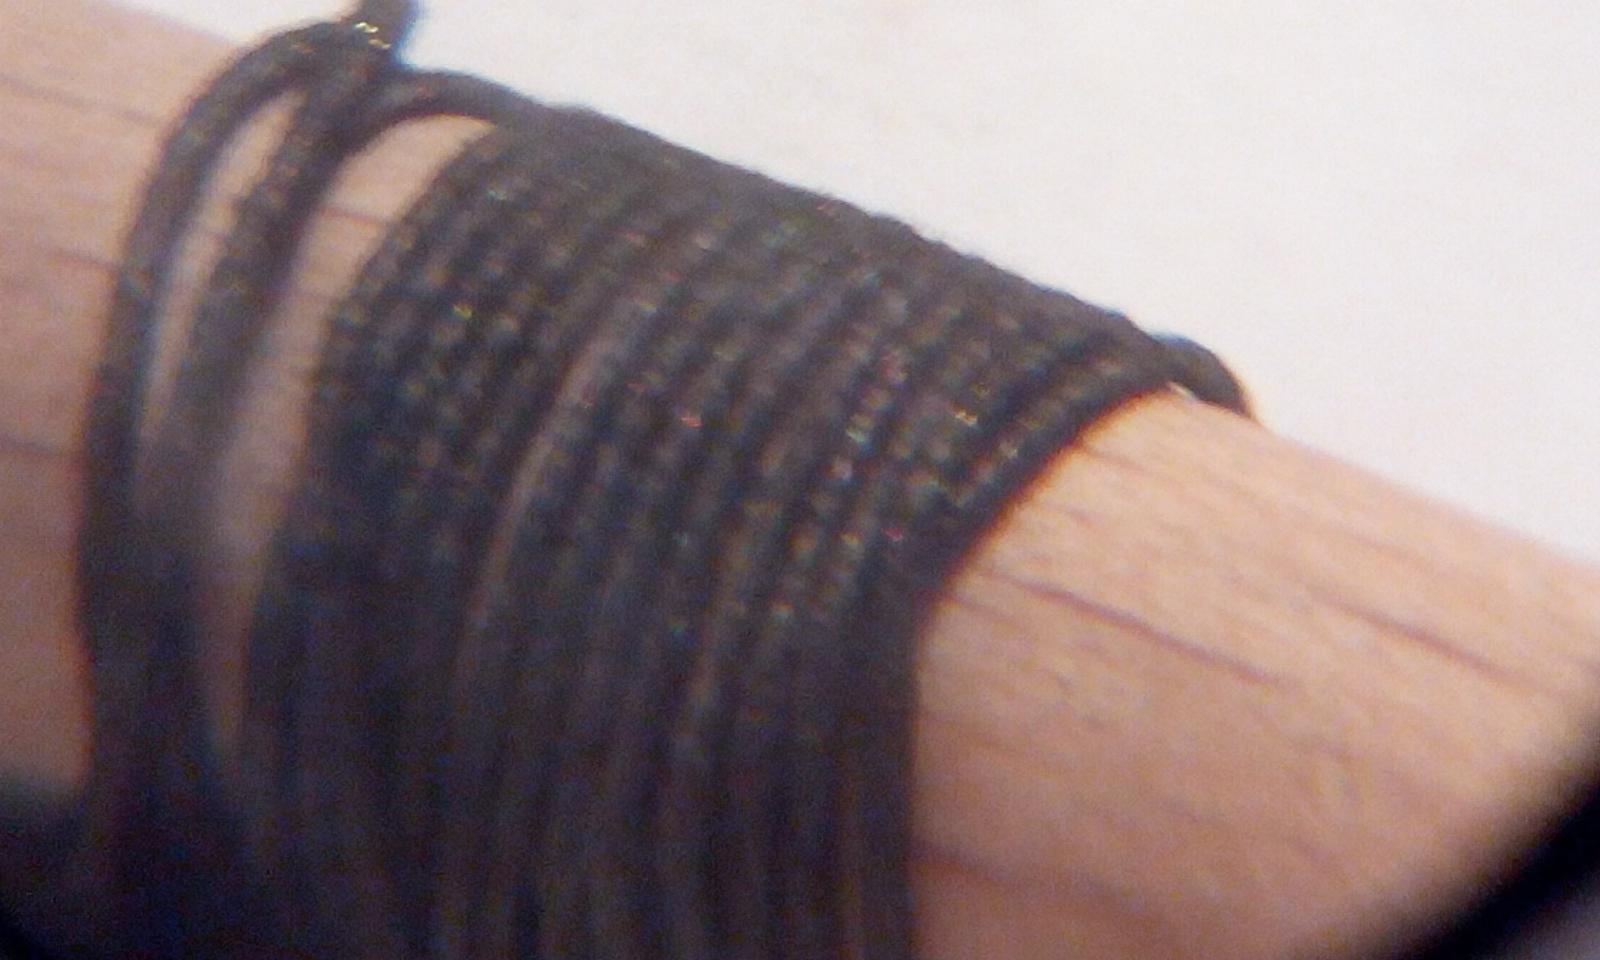
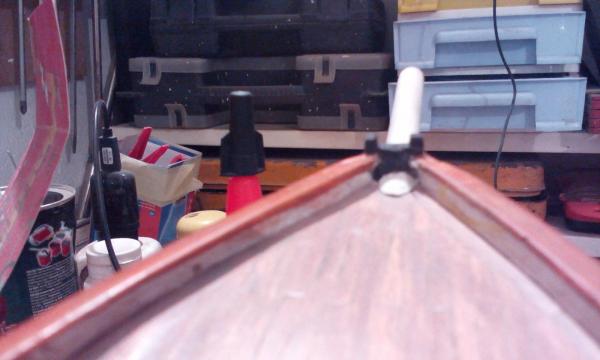
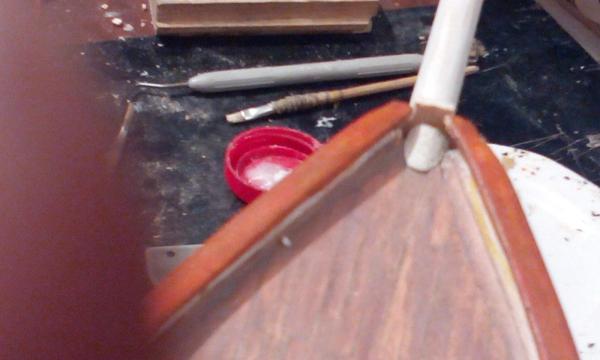
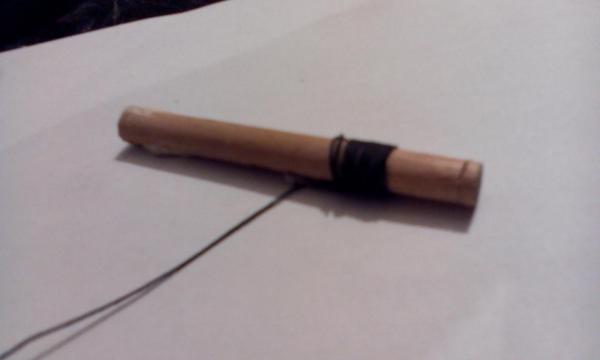
And finally .... little peace for me, work continues with filling crater ( mix of alabaster Gyps and wood glue) smothing base of bowsprit, and when mixture harden to half, mounting it in crater under top of foredeck Ugly in first step, but linening with ship axes in crater is more important Some toothpicks are used to fine corect line Waiting for mixture to harden, I run some test how to make imitation of chain 0,5 mm thick which belted base to bow Here is result on a scrap piece at same diameter as bowsprit Little traces of thin gold acrylic will be added to imitate metal shine Hmmm ... maybe this is new way for making all kind of ropes? After a hour, mixture hardened as stone which made me happy having in mind all lines, ropes and chains with their little forces which will summarize in this point. In every kit plans of CS I have opportunity to see, base of bowsprit is deeply involved and hard fastened to hull-kell structure (longitudinal "spine" structure in POB models) under main and fore decks. My unexperience and moment of insanity when I decided to cutt it, lead me to problem how to fasten it hard and strong. This is the best I devised without removing fore deck (no way to do it) Corecting this little mess, I remembered that in early stage of building ( before my birthday when I got Dremell thing) I was not able to make final (or first) upper "rib" intended to fasten bowsprit to hull structure. Here is improvisation from this days, just to remember myself about two left legs by which I made my first steps Aftet couple of reconstructions of fore deck I made, and when I was working on front part of main rail, this ugly "rib" dissapeared somehow (probably cutted of) and now is last chance to recover it - statical and aesthetic reasons Started with test piece With mentioned Dremell thing it was quite easy to make now After three hours, my concentration went to deep ocean, and I went upstairs


- 4,152 replies
-
- 6
-
-
- cutty sark
- tehnodidakta
- (and 1 more)
-
Cutty Sark by NenadM
NenadM replied to NenadM's topic in - Build logs for subjects built 1851 - 1900
Different kind of "fun" those days keep me of my build, but I did some 20 pages comparative research about lower part of bowsprit and all details on it. Complicated structure withsome moves which have to be done before name tables, considering some wrong extra space which I have to mask somehow Right now is 09:00 am, and I'm sitting in pub drinking morning doze of coffee, waiting for appointed time in Court, and browsing MSW Hope to continue this evening- 4,152 replies
-
- 5
-
-
- cutty sark
- tehnodidakta
- (and 1 more)
-
Suprime Court of MSW Case No __ : SNOW vs MODELONG Who will win? Denis, of course
- 956 replies
-
- 3
-
-
- andrea gail
- trawler
- (and 1 more)
-
Good to hear this. One problem less to deal with
-
It seems to go in right direction. She starts to show Her beautifull lines
- 33 replies
-
- 1
-
-
- Cutty Sark
- Constructo
- (and 2 more)
-
I'd say you are more experienced builder than me, and I doubt I can help you pointing on issues you already do not know know, in this most important stage of building ( I realized that too late) Just to share one point which can be helpfull Considering questionable accuracy of plans I used to pull out ribs as basic hull structure, with a little "help" of my inexperience and luck of patience in this early stage, I was faced to big differences between this I have got toward lines and look She has in Campbell's plans and lines I saw on photos. Only way out of this sotuation was - start ovet, or try something ... I was forced to redo some points by deep surgery, and for another - something I call "artistic approach" - just believe in your feeling and sense - from time to time during sanding and applying putty, stop, and look at Her often from distance from different angles of view with question - Hmm, does She LOOK as She has to look. If not, what is and where is luck or less of material. In my situation, this approach helps me a lot to make quite proper hull lines which "seems like", as solid base for second plank layer and coopering. When you latter add hull rails, rudder and stern and bow decorations and another details, eventual mistakes on hull lines are just not visible for 99% people. When you look at her from distance and from outside If you are interested and have enough patience and time, in my log you can see many negative examples how mistakes with lines reflects later as source of large amount of another problems ( almost nothing of structural elements is on place it has to be) Even you have correct hull lines, this approach can be helpfull for final look Nenad
-
Can I pull up a chair and watch? Clippers are something really special. Do you plan whole rigging and sails spreaded?
-
Ir seems pretty tricky, but you swim throught very well
-
Very well constatation - soft things when they are in very small pieces become elastic and hard. Little bit of acrylic paint - dry in a minute. To glue only dot with CA you have only few seconds, etc etc Spice of our hobby. But this makes things more interesting, isn't it?
- 2,250 replies
-
- 2
-
-
- model shipways
- Charles W Morgan
- (and 1 more)
-
Oh, boy ... breathless
-
Briliant planking! My old wish is model in natural wood color, wich means ... no planking mistake, wich means ... in some another life of mine I like it!
-
Cutty Sark by NenadM
NenadM replied to NenadM's topic in - Build logs for subjects built 1851 - 1900
Editing post I just remembered that I forgot to draw numbers on right side of bow and on both sides of stern ... so inpatient to leave brush and to make some wooden dust- 4,152 replies
-
- 2
-
-
- cutty sark
- tehnodidakta
- (and 1 more)
-
Cutty Sark by NenadM
NenadM replied to NenadM's topic in - Build logs for subjects built 1851 - 1900
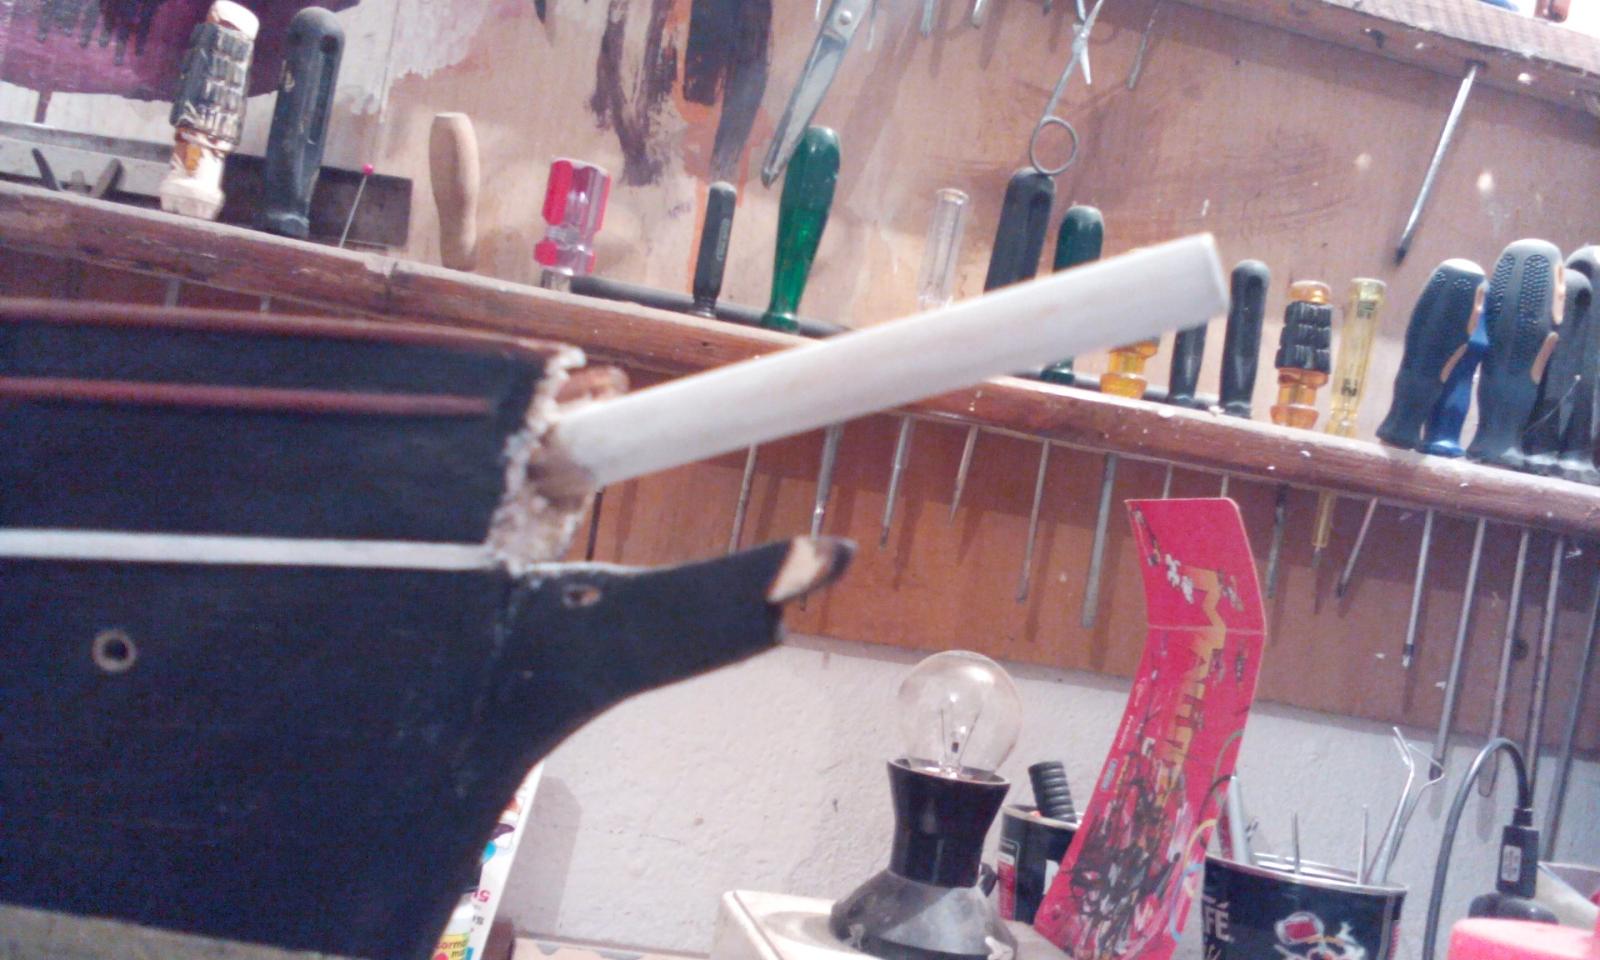
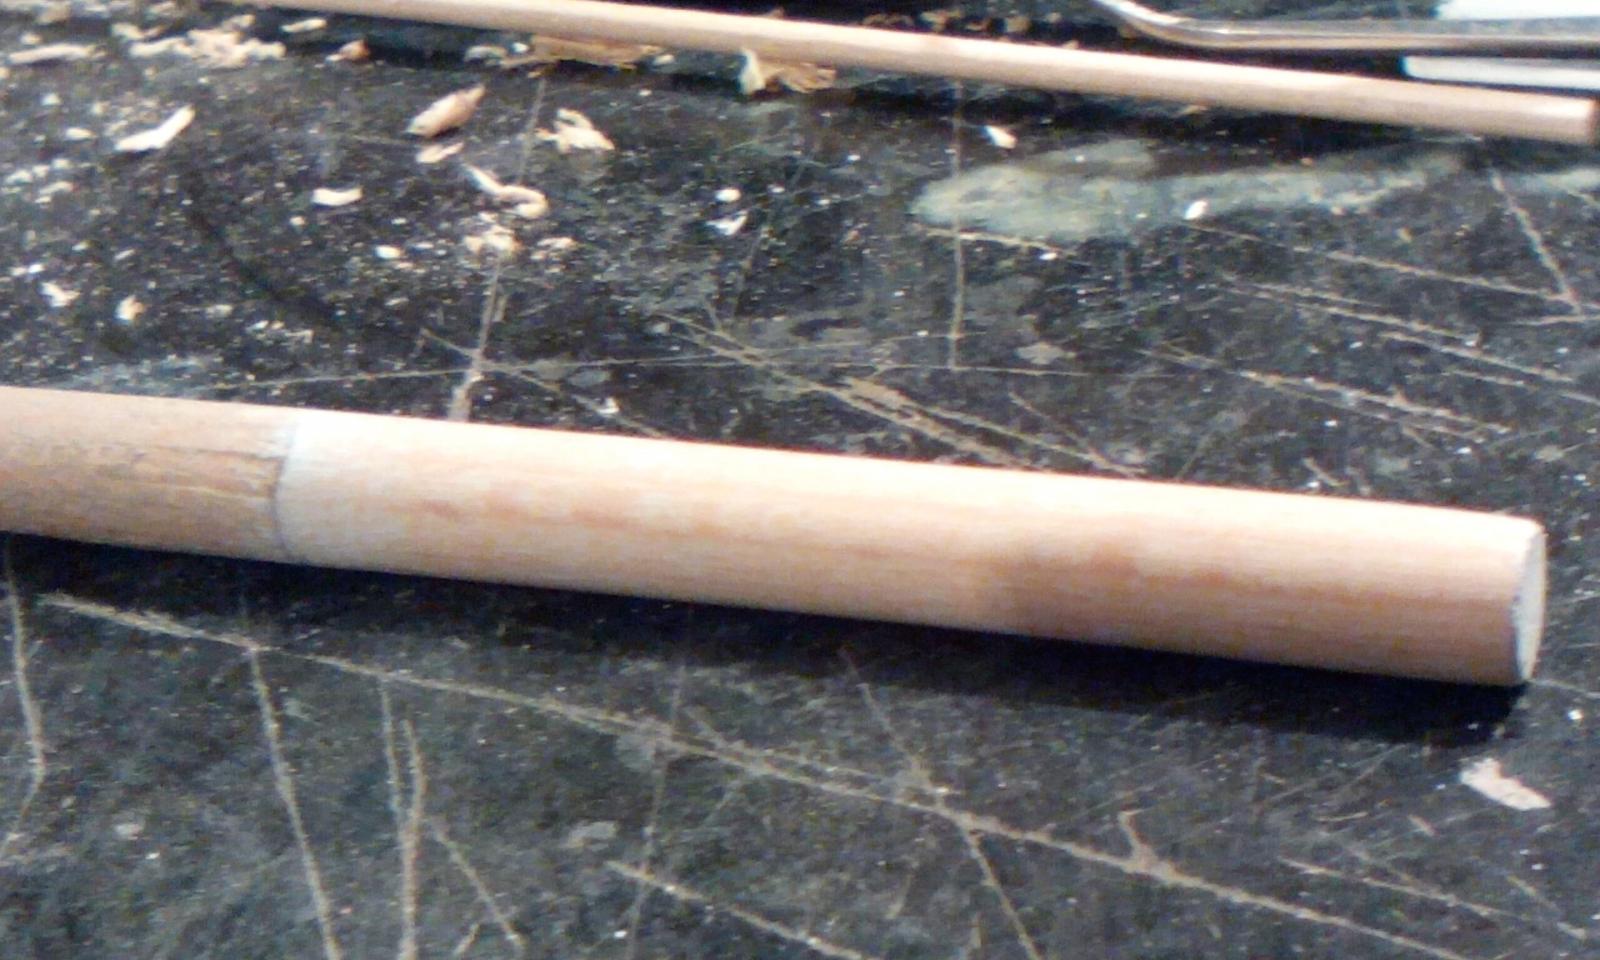
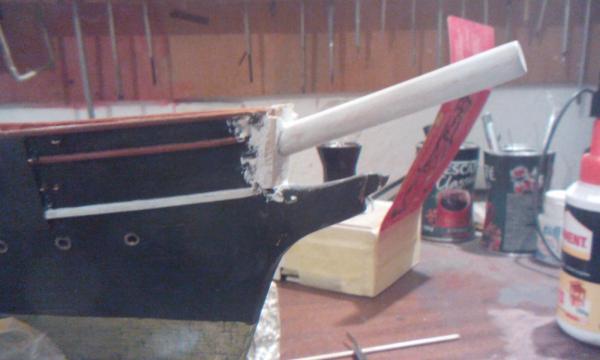
Thanks Marc. Waiting for your progress and comments. Thanks for your interesting about my job - a bit better, but ... near luck of money horror ... economic crisis and clients rapidly get poor, companies also... but ... life must go on Few days without work, full of drinking 10 l of tea and water per day, because I have got a sand in a wrong place of me followed with booring, but not so strong, but continious pain ... I feel like geyser .... Im ok now, and had a regular working and life day Make up finished today, finally. This non-working days, I was thinking a lot about very next step, and concluded that next I have to make bowsprit first with bow ornaments after. Without this, hull is not complete, and I can not start to fill fore deck with belonging stuff. Also, this gets me extra time to rethink deadeyes mounting method So, let's start making something from wood. More than a year ago, I cutted old wrong bowsprit when I had to do one of reconstruction of fore deck, so, drilling a hole for a new bowsprit is first step. Main question is line and position of hole Hmm, it wil not work with Dremell... Must call some hard artilery to help OMG what a hole ... ok, it will be filled and fixed, and completly hiden Diameter of this crater is, quess what, again, result of lost hull lines - consequence I faced with - bowsprit must be a bit thicker ( 1mm or less than in C-plans) and 3mm longer and a bit rised up, to get its proper angle and its right position toward to fore deck, and to get profile look even a bit like CS. There will be ornament panels to hide this little extra space added Preliminary mounted in looking for and checking proper longitudinal position ... seems to be ok Next ... considering bowsprit is dressed in iron shirt, before mounting, surface have to be very very smoth, to imitate metal painted white. I dare not to dress it in aluminium. After thined bowsprit forward the top ( about 1mm in diameter longitudinal to the top), I decide to use acrylic instead putty, and srarted to evenn surface. This is first pass: Must wait for acrylic to dry and harden, and that was all for tonight


- 4,152 replies
-
- 7
-
-
- cutty sark
- tehnodidakta
- (and 1 more)
-
Helo, I have just dropped to watch with interest Nice soldering. Something I just/still have to learn. Much better with silver than regular Nenad
- 128 replies
-
- 1
-
-
- artesania latina
- Finished
- (and 2 more)
-
Story not to be forgoten, particulary with such a nice model If Her was not in this stage, probably wouldn't remain for today
-
Mayflower by SawdustDave - Finished
NenadM replied to SawdustDave's topic in - Build logs for subjects built 1751 - 1800
Little sister with her big brother Very nice job, Dave