yvesvidal
-
Posts
3,637 -
Joined
-
Last visited
Content Type
Profiles
Forums
Gallery
Events
Everything posted by yvesvidal
-
 You are definitely pimping up on the original Model Shipways kit. You are actually doing what they should have done to start with. Yves
 -
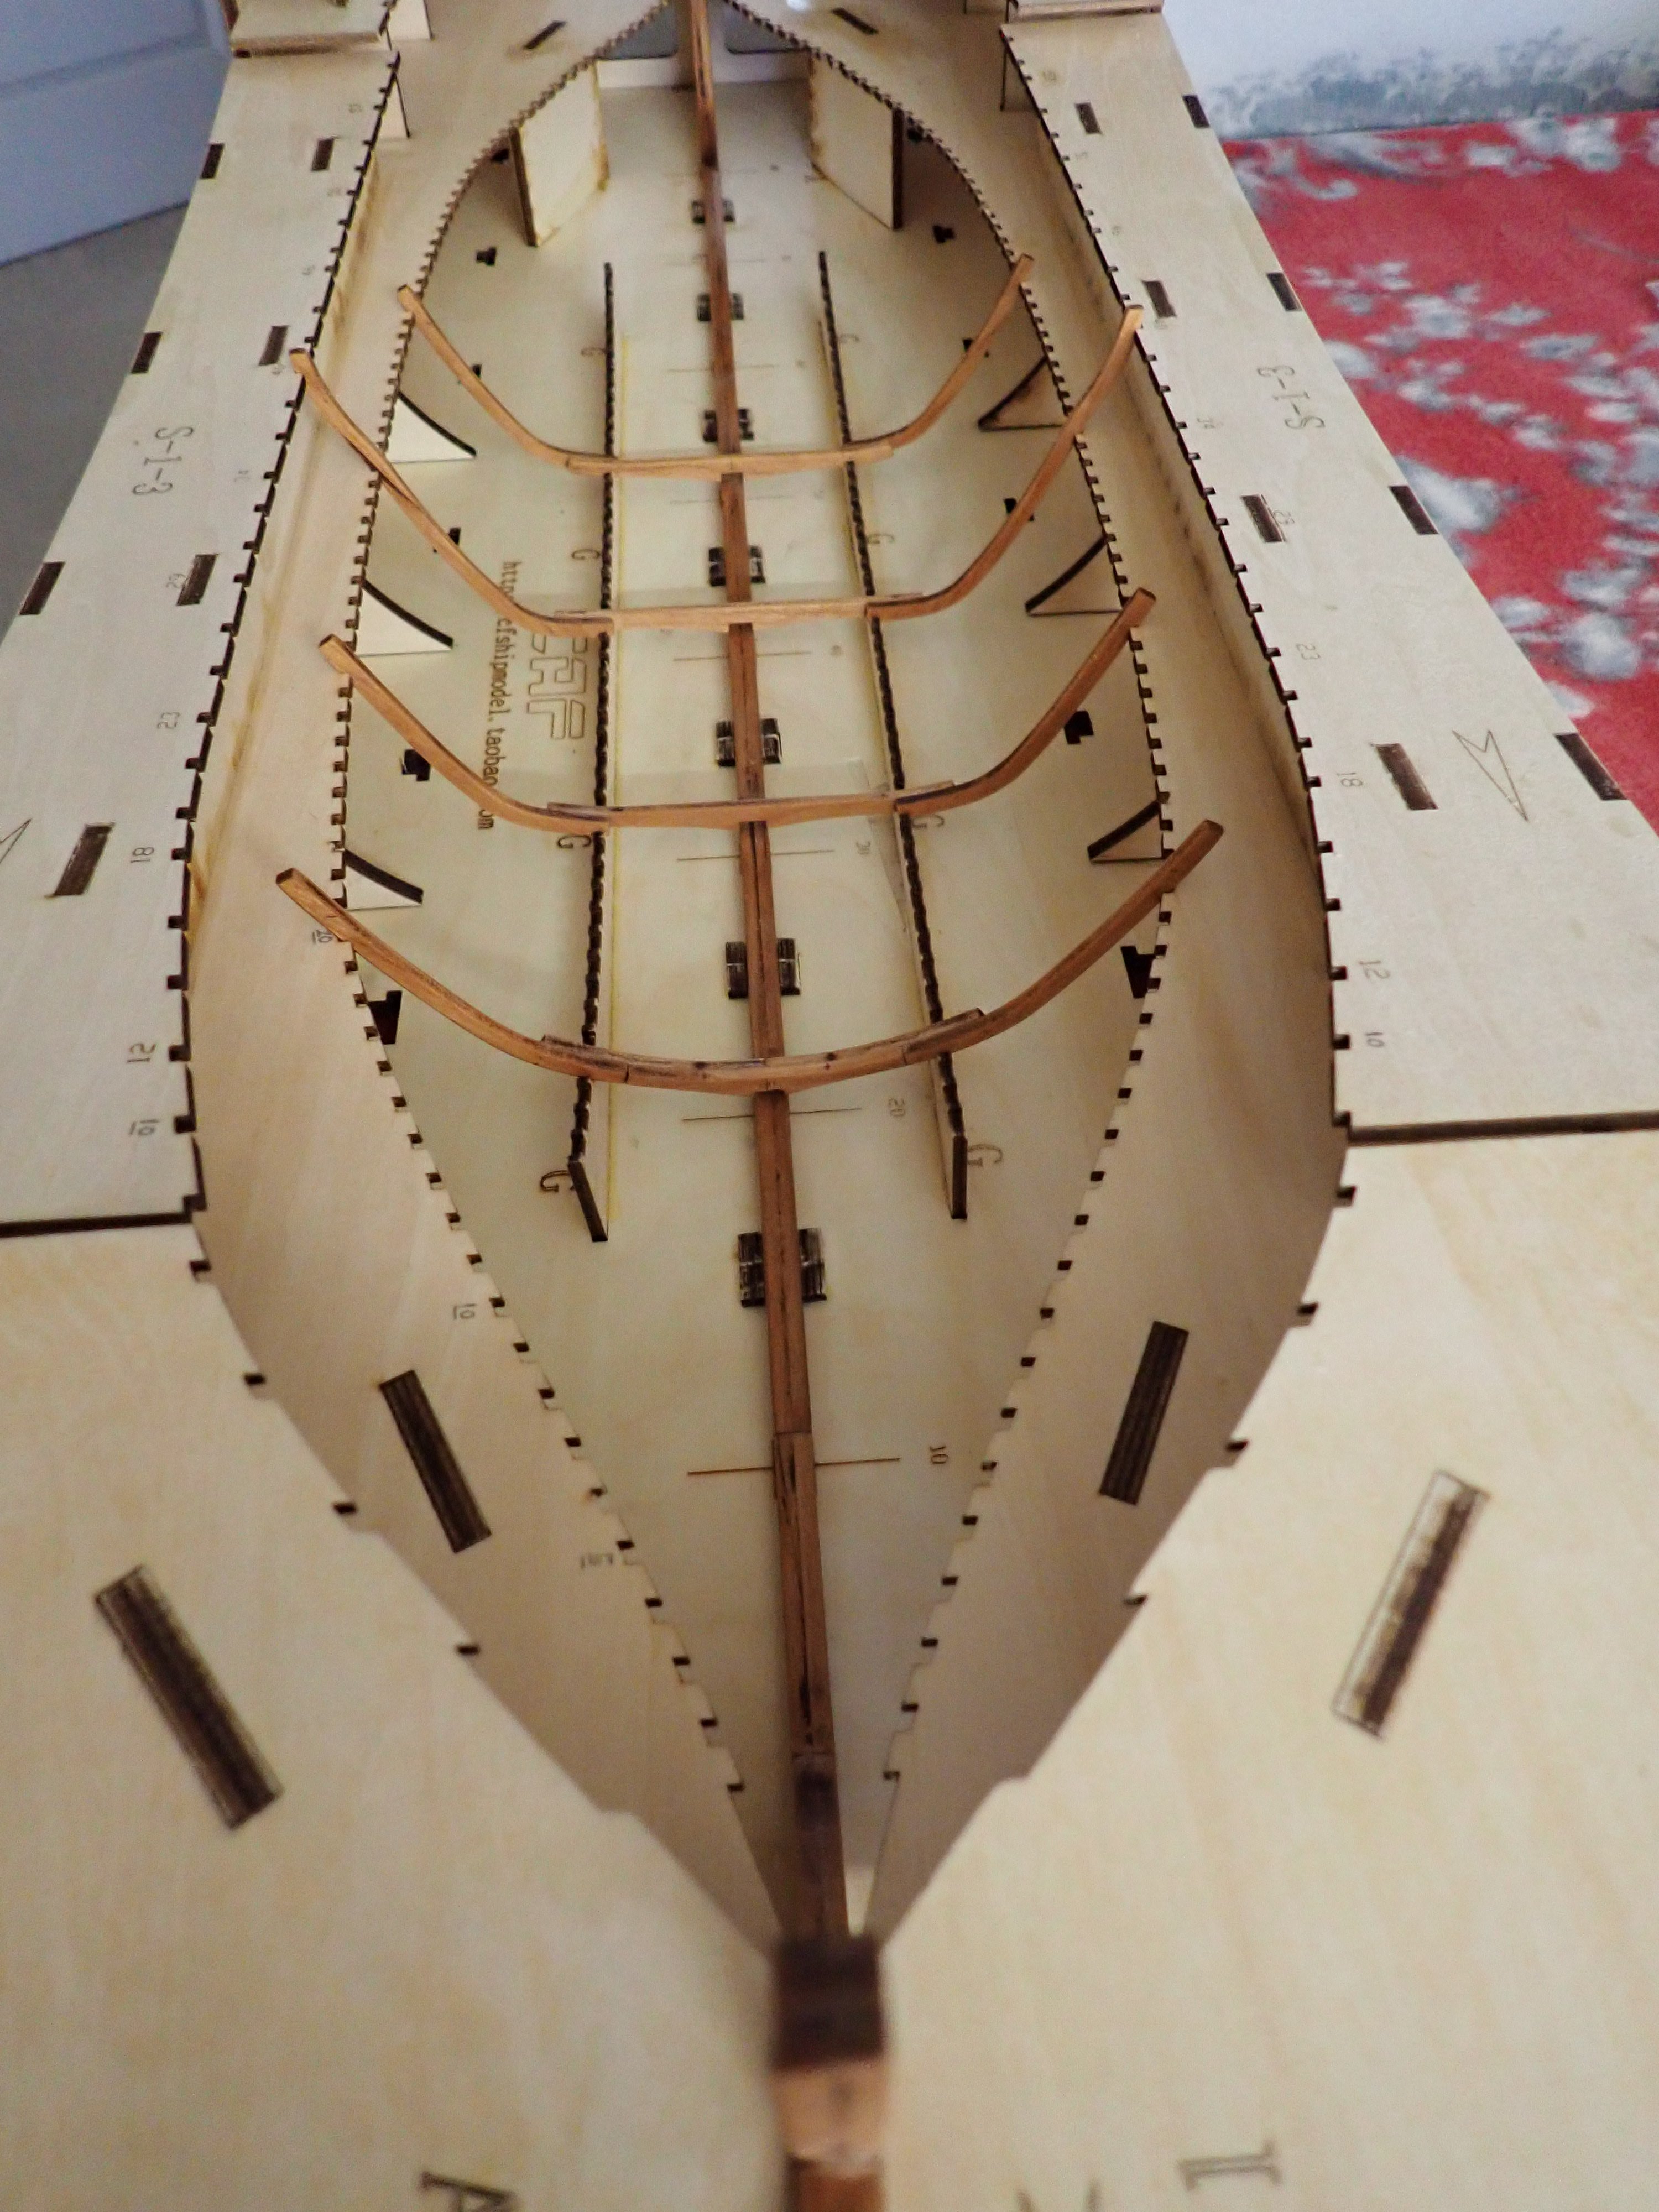
The tedious and repetitive assembly of the frames has started. I have decided to populate first, the "easy" frames located in the middle of the hull. These do not require any fairing, for the most part and are composed of only three parts. Bow and stern will be kept for the end as they are significantly more advanced and delicate. Frames #30 to #40 are now completed and ....glued to the keel: The next series will be #41 to #50. I have started using a DREMEL equipped with a round abrasive head, after loosing a good chunk of skin on my fingers....due to sand paper abrasion. It really helps. Yves


- 185 replies
-
- 19
-

-
Time to start a new thread for the Aston !!! Yves
-
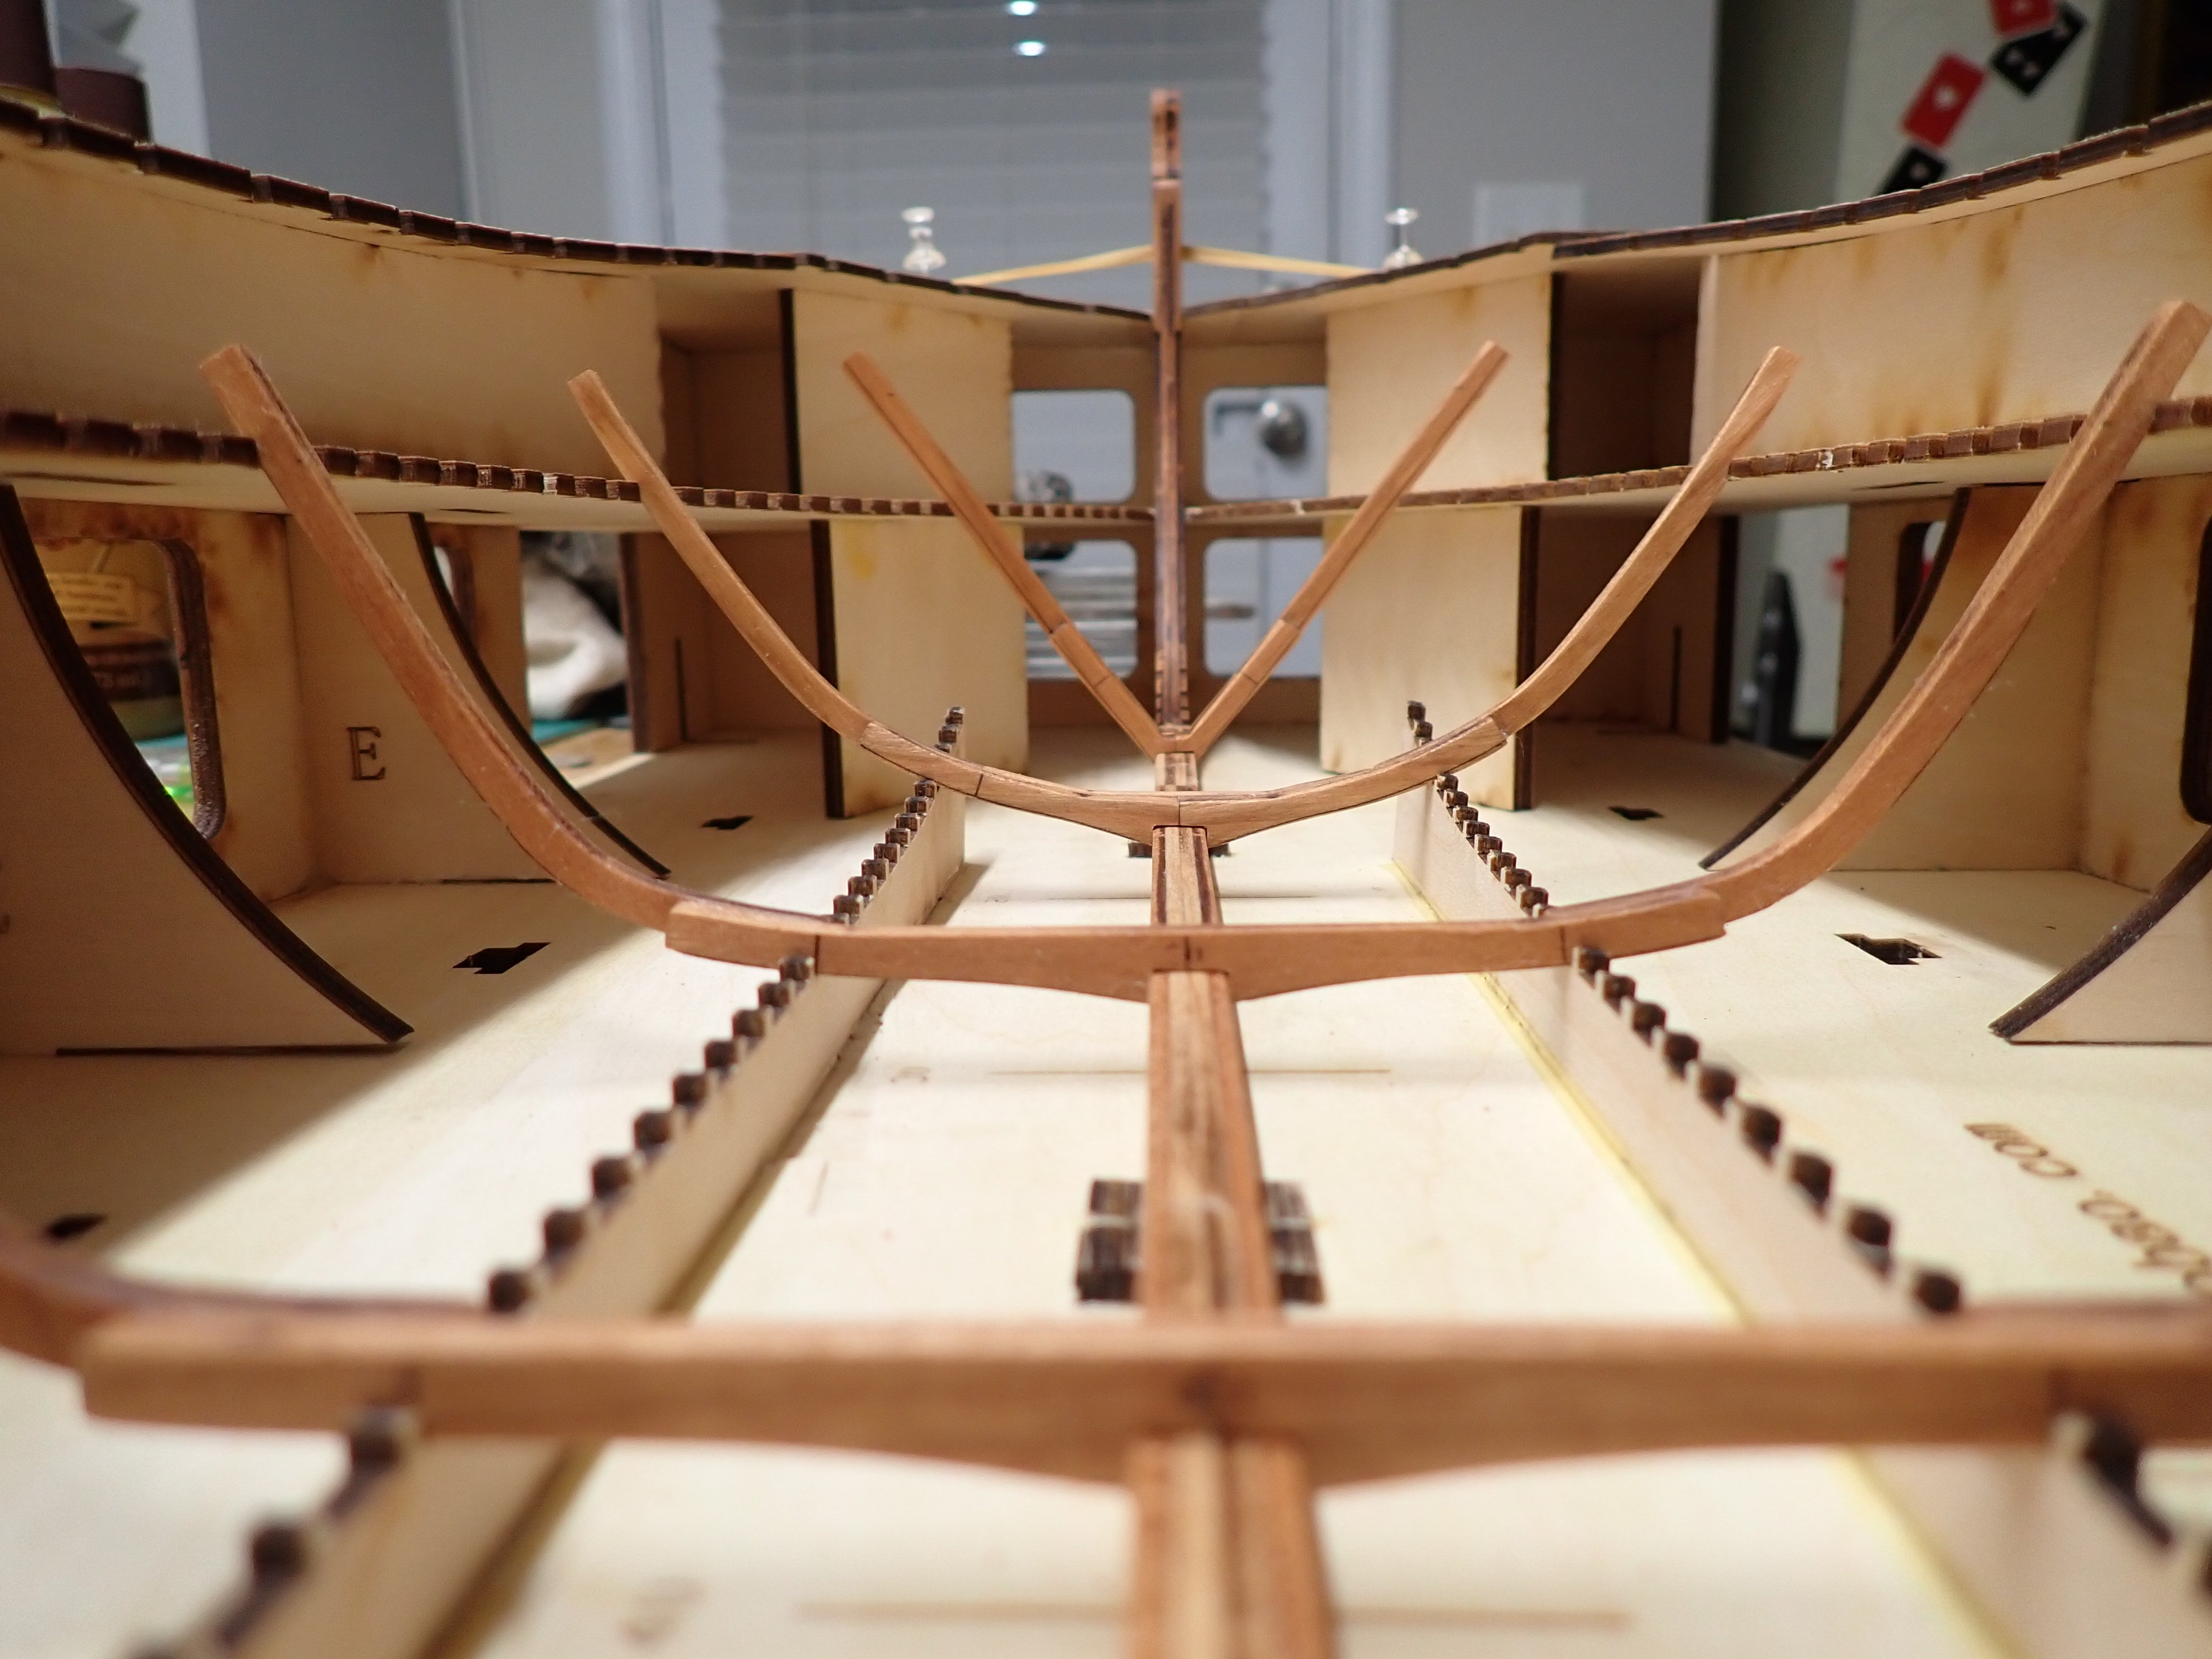
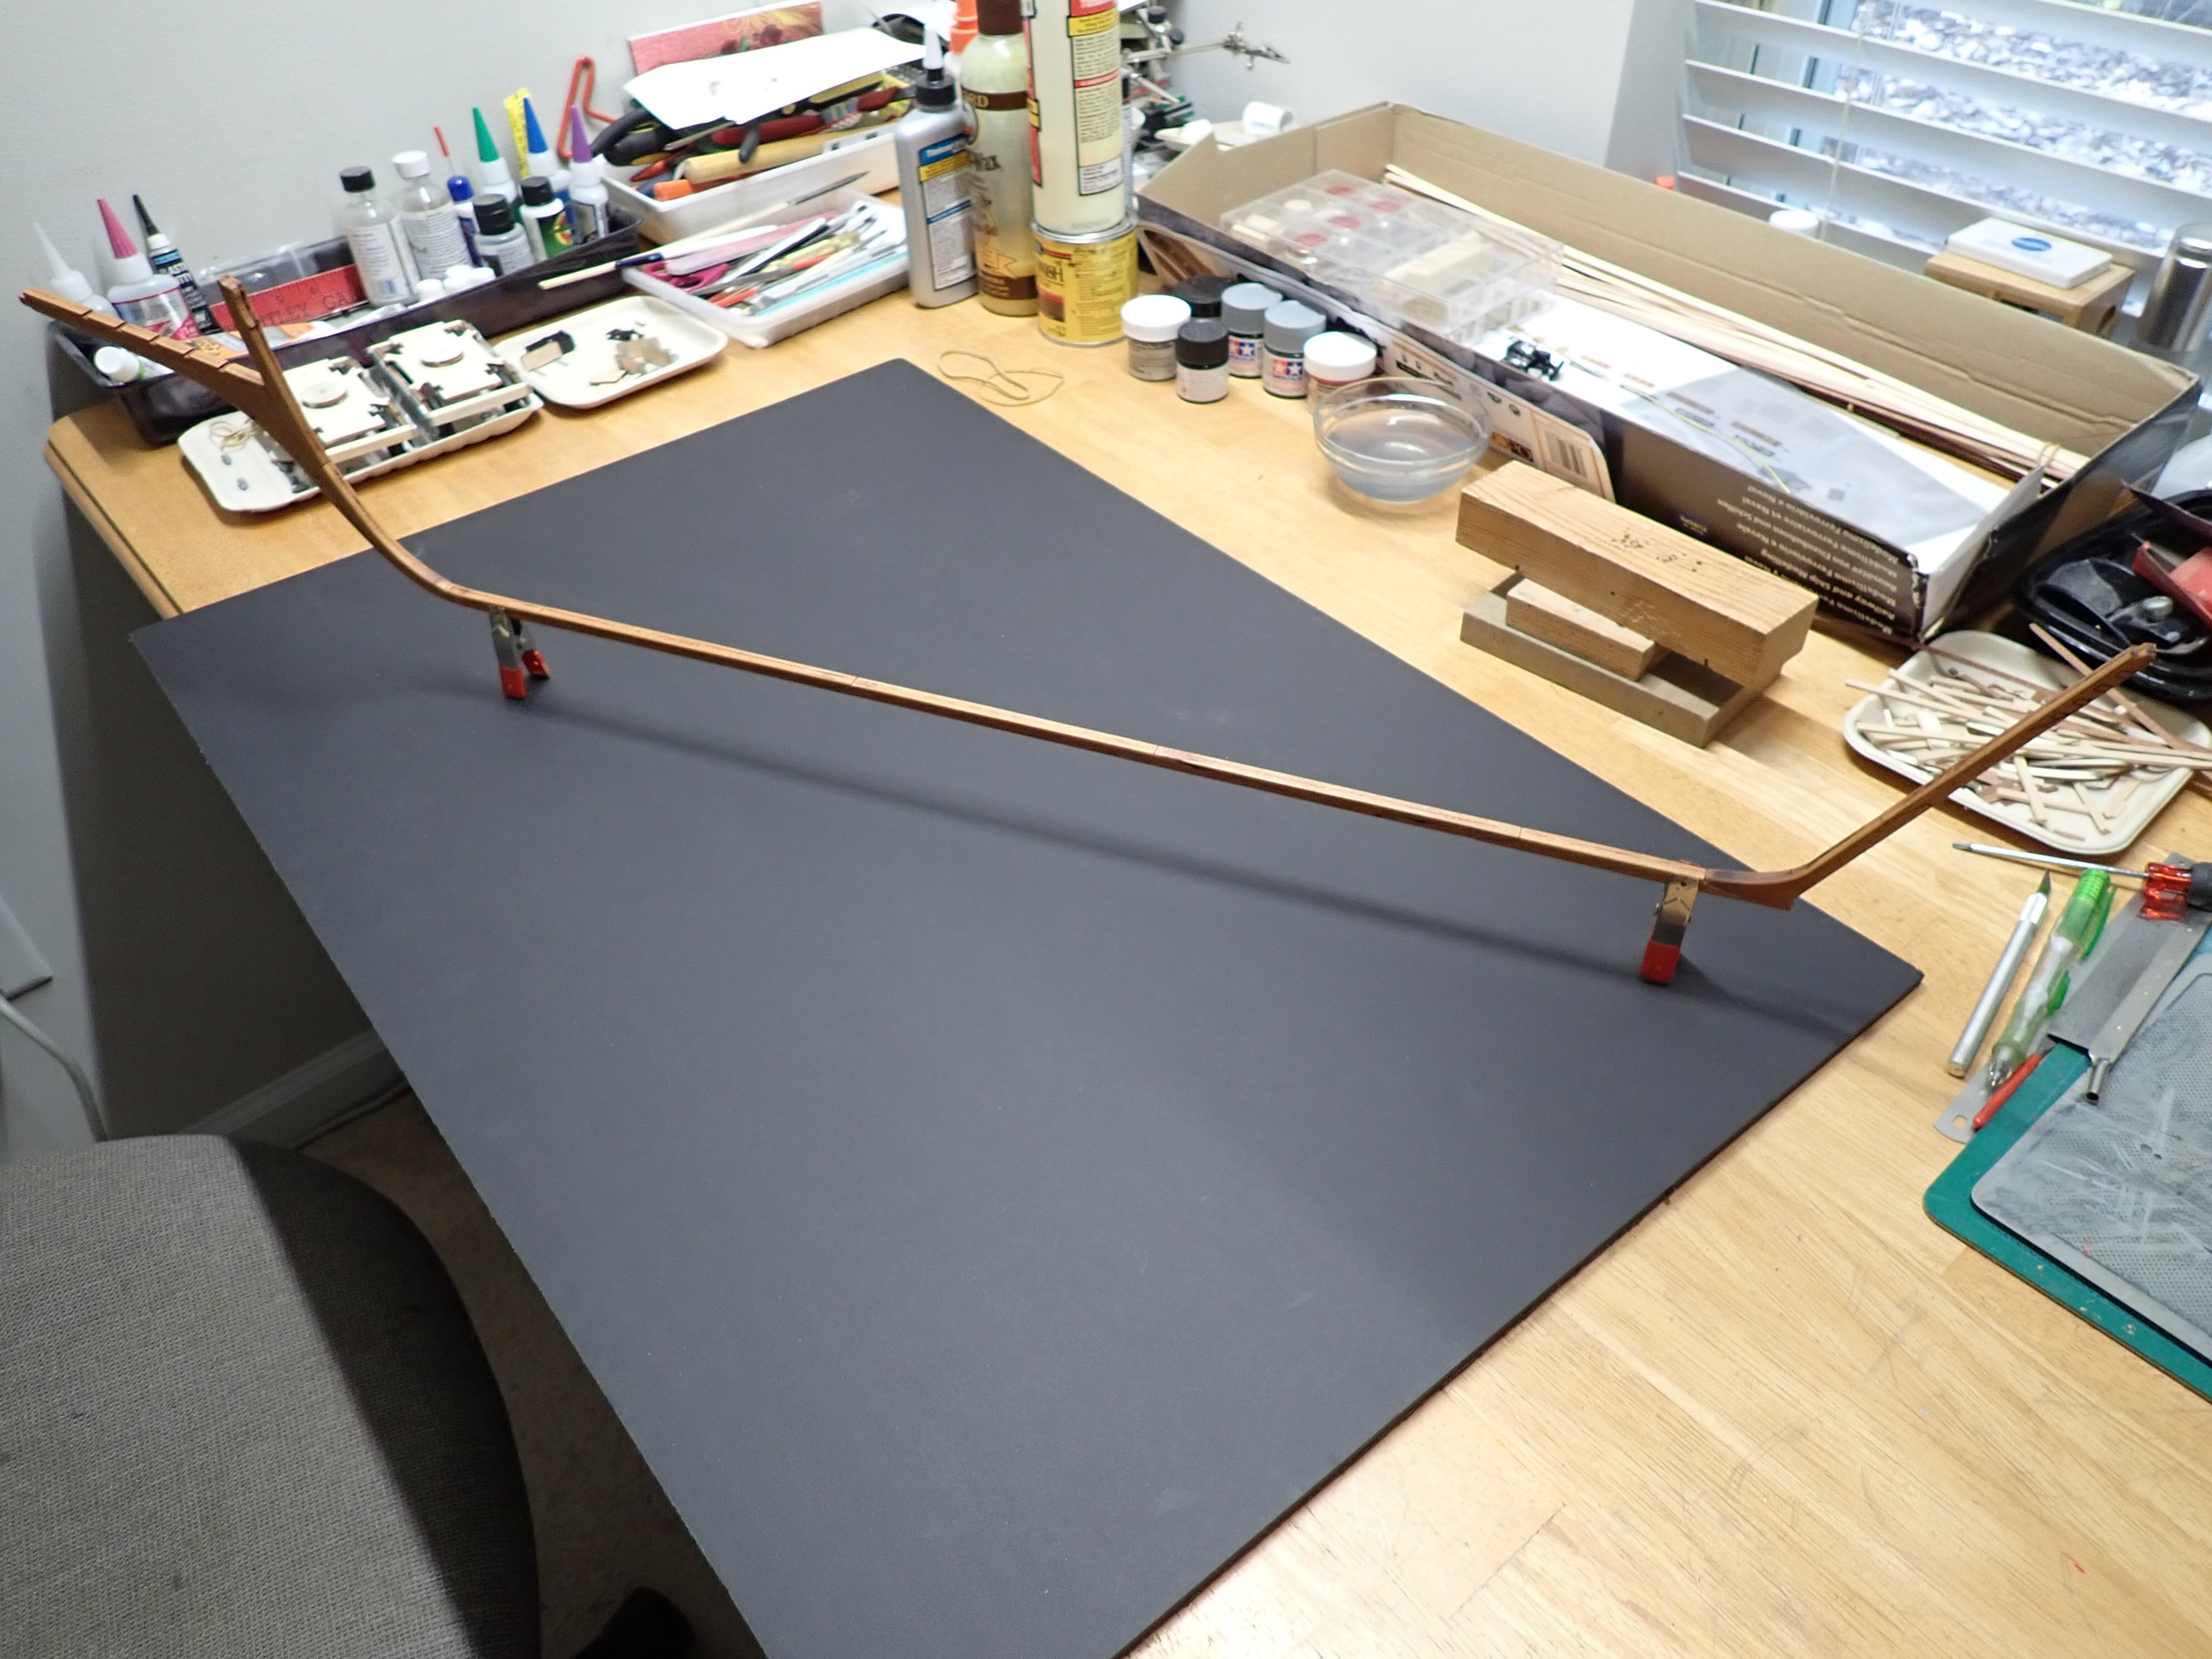
Major point of no-return.... The bow assembly has been glued to the keel: When reaching that stage, the only thing left is to place the keel/bow assembly in the cradle and start assembling the numerous frames: At this stage, pulling out the keel is still very easy. Once the frames are installed and glued to the keel, it will be another story.... Yves


- 185 replies
-
- 16
-
-
Did you use real dirt, clay ? Super realistic. Yves
-
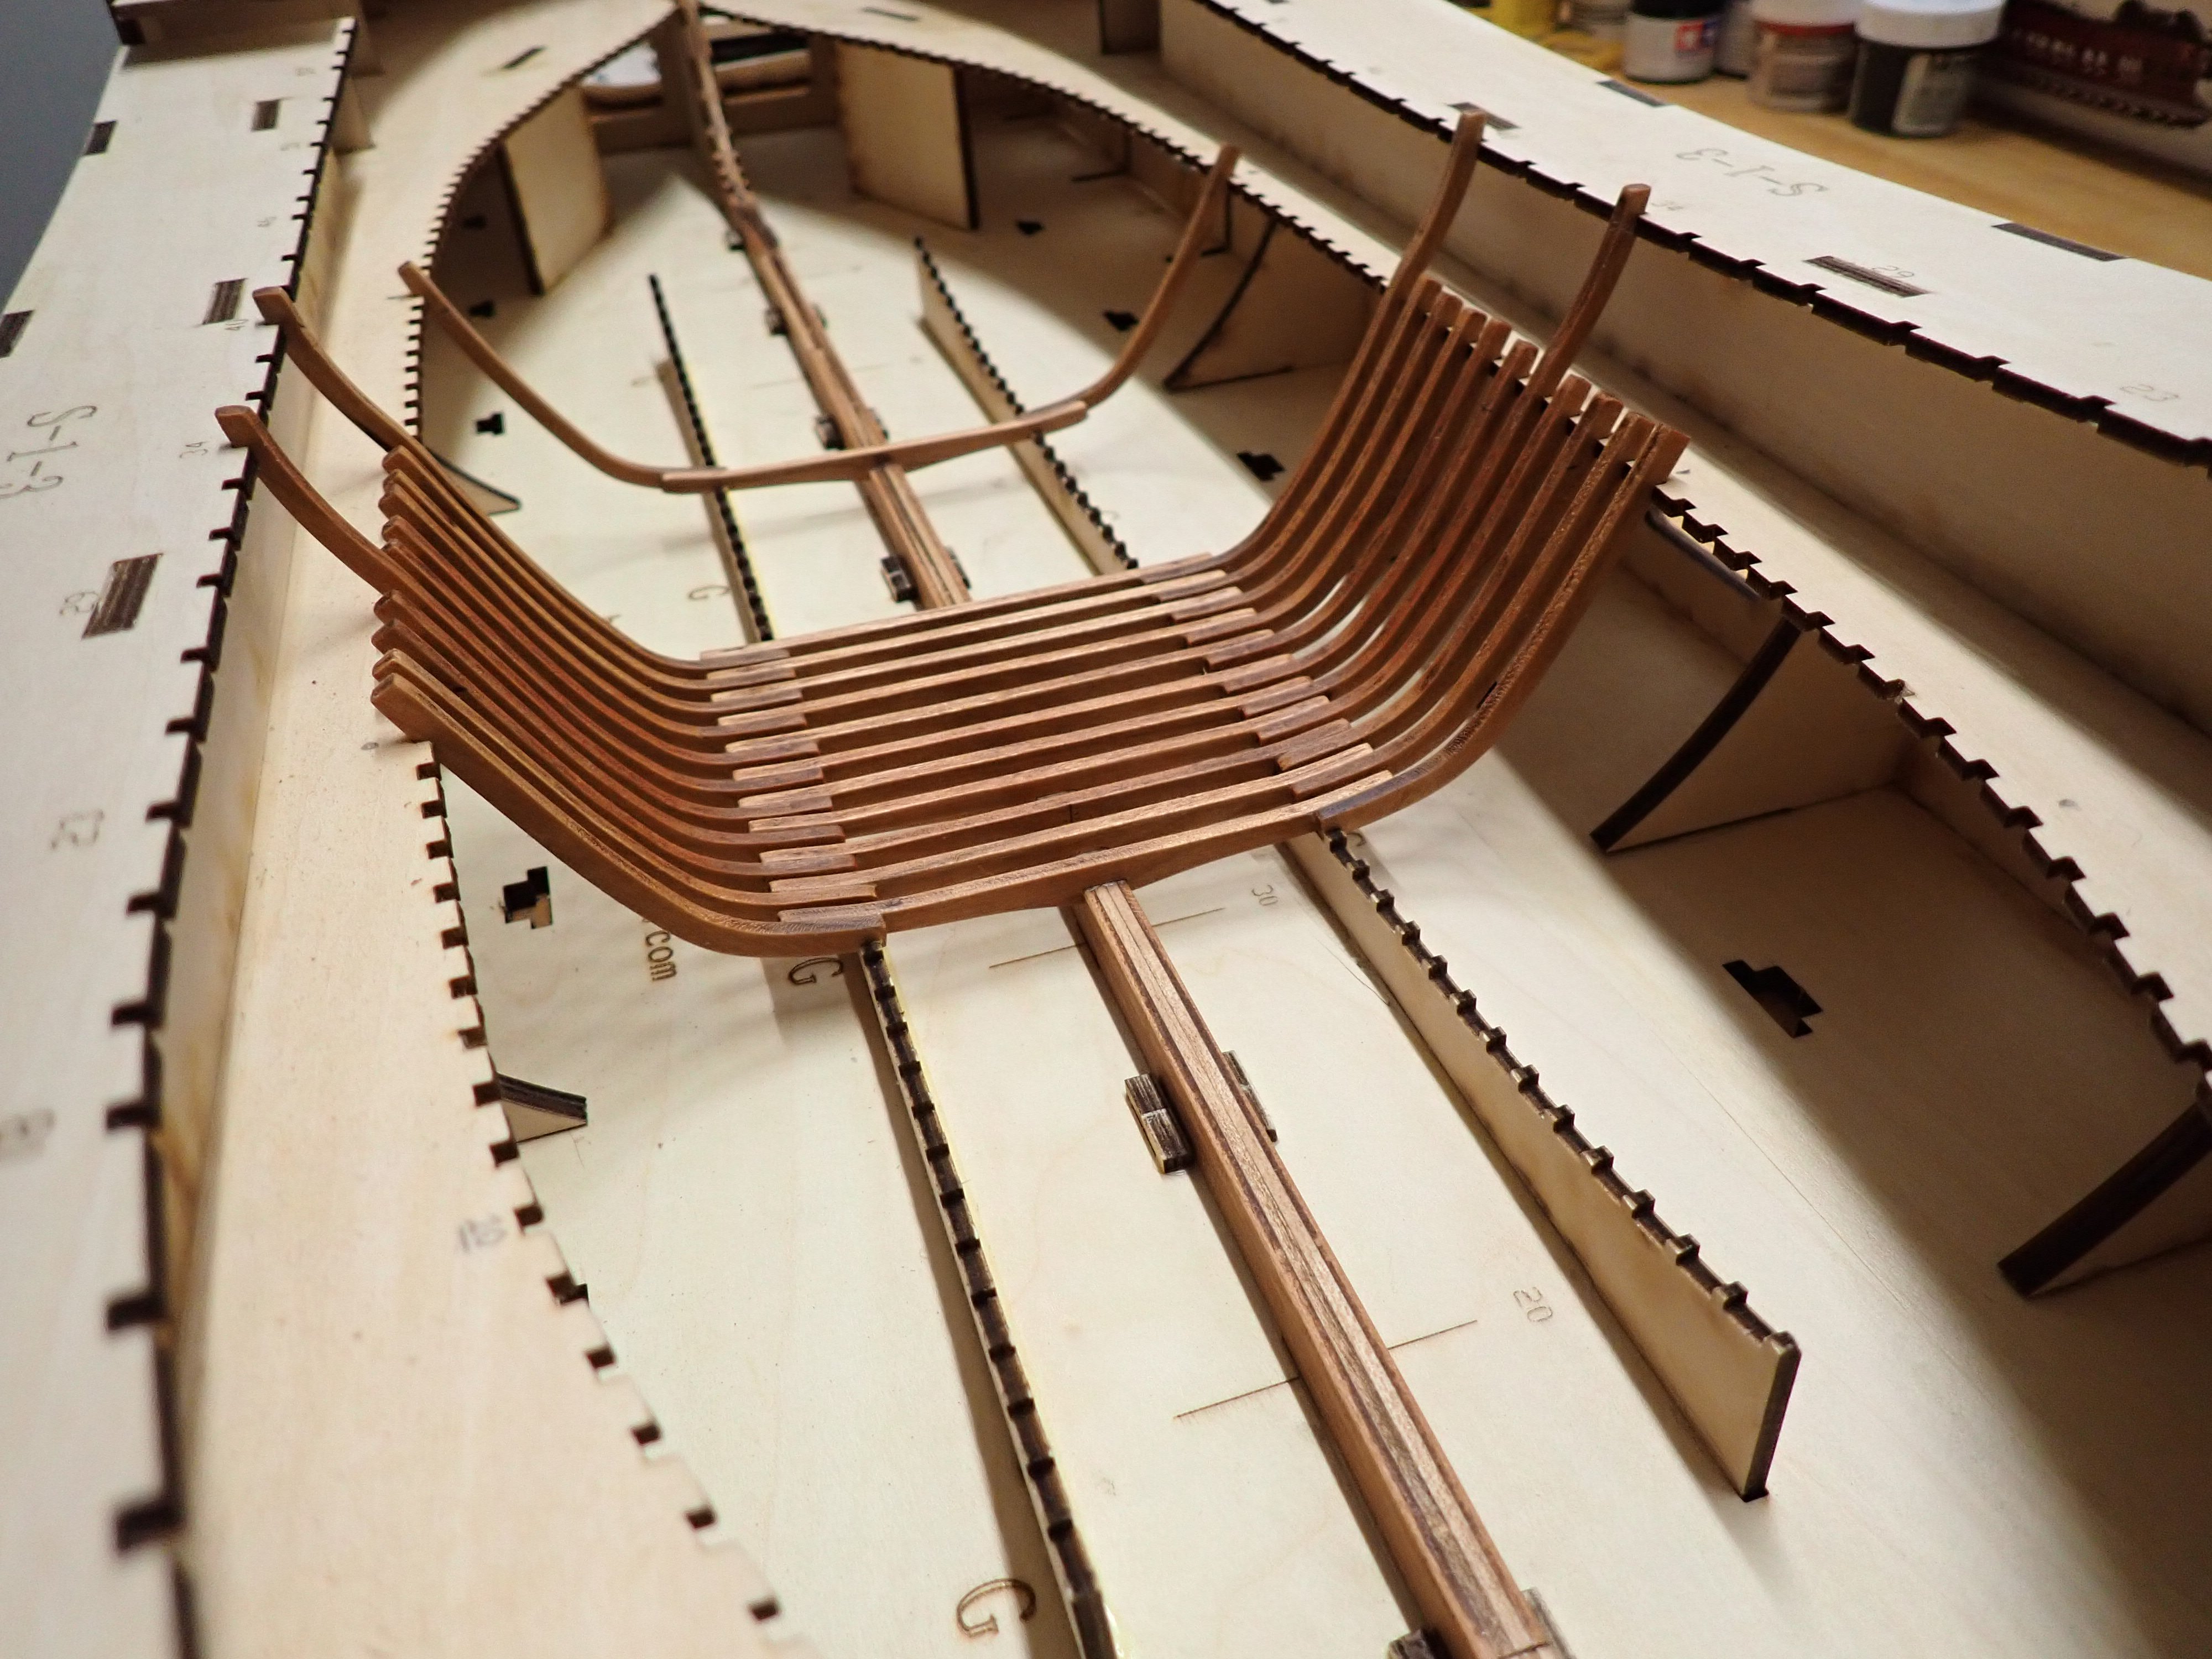
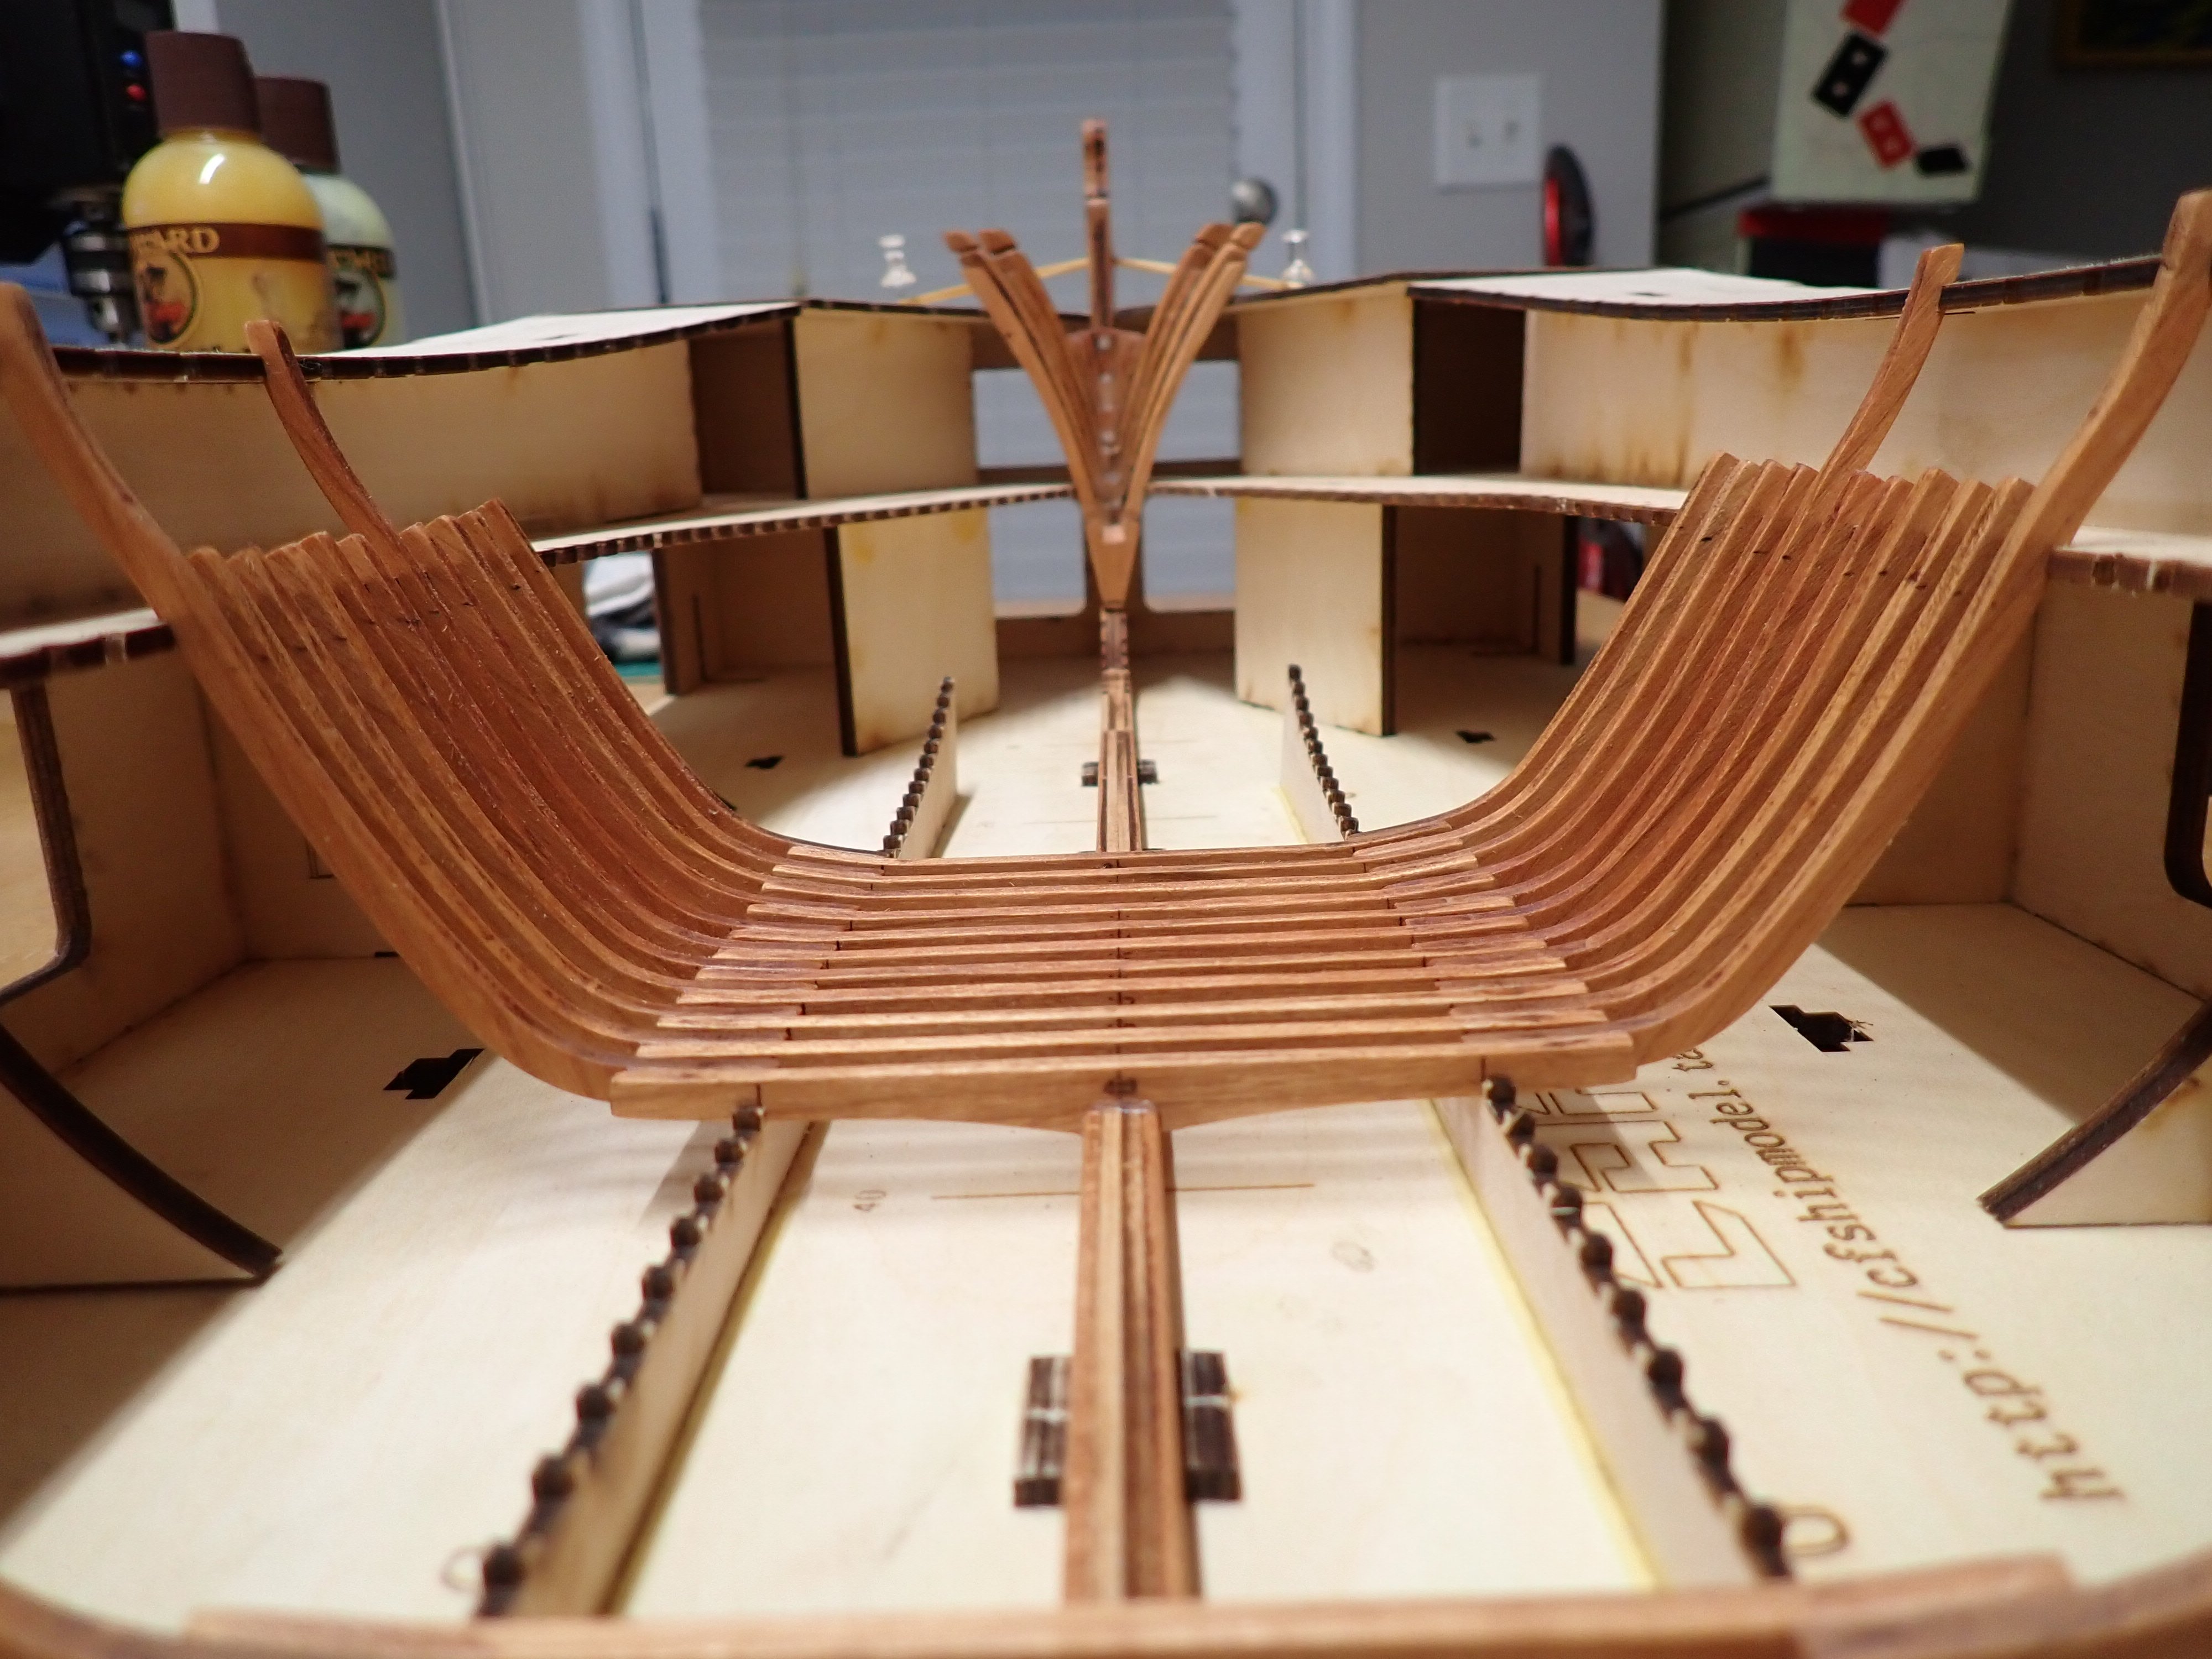
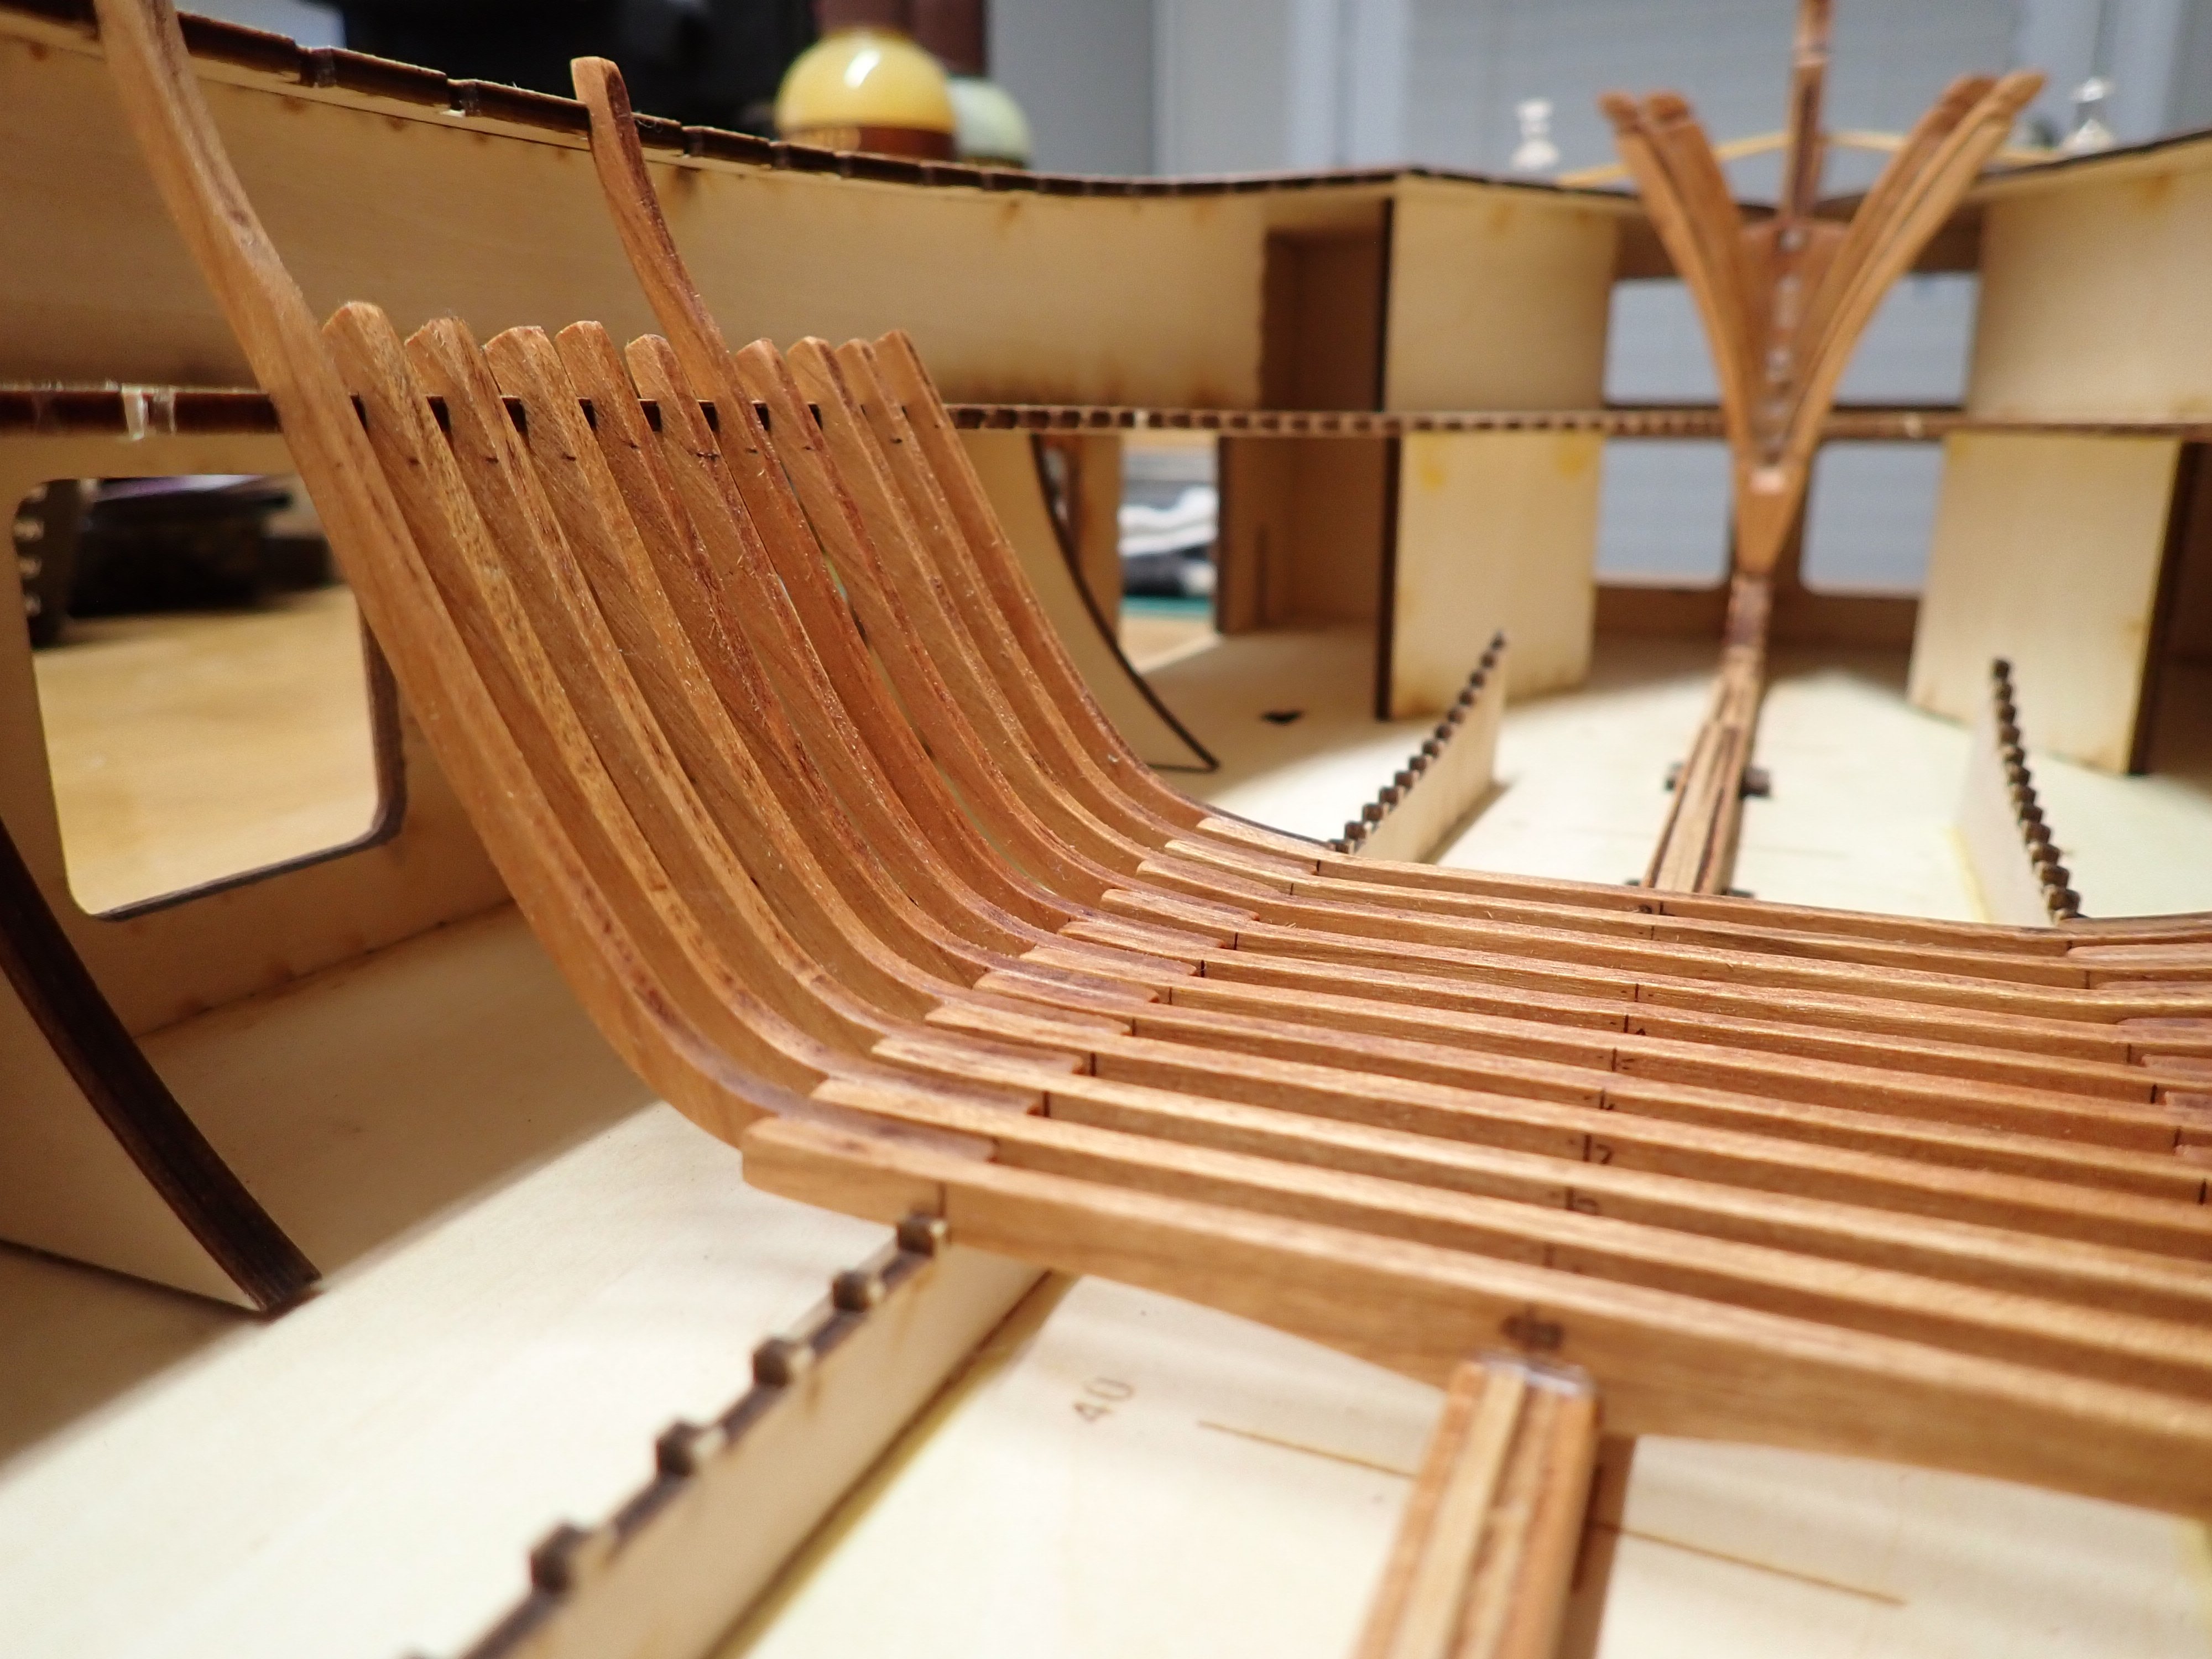
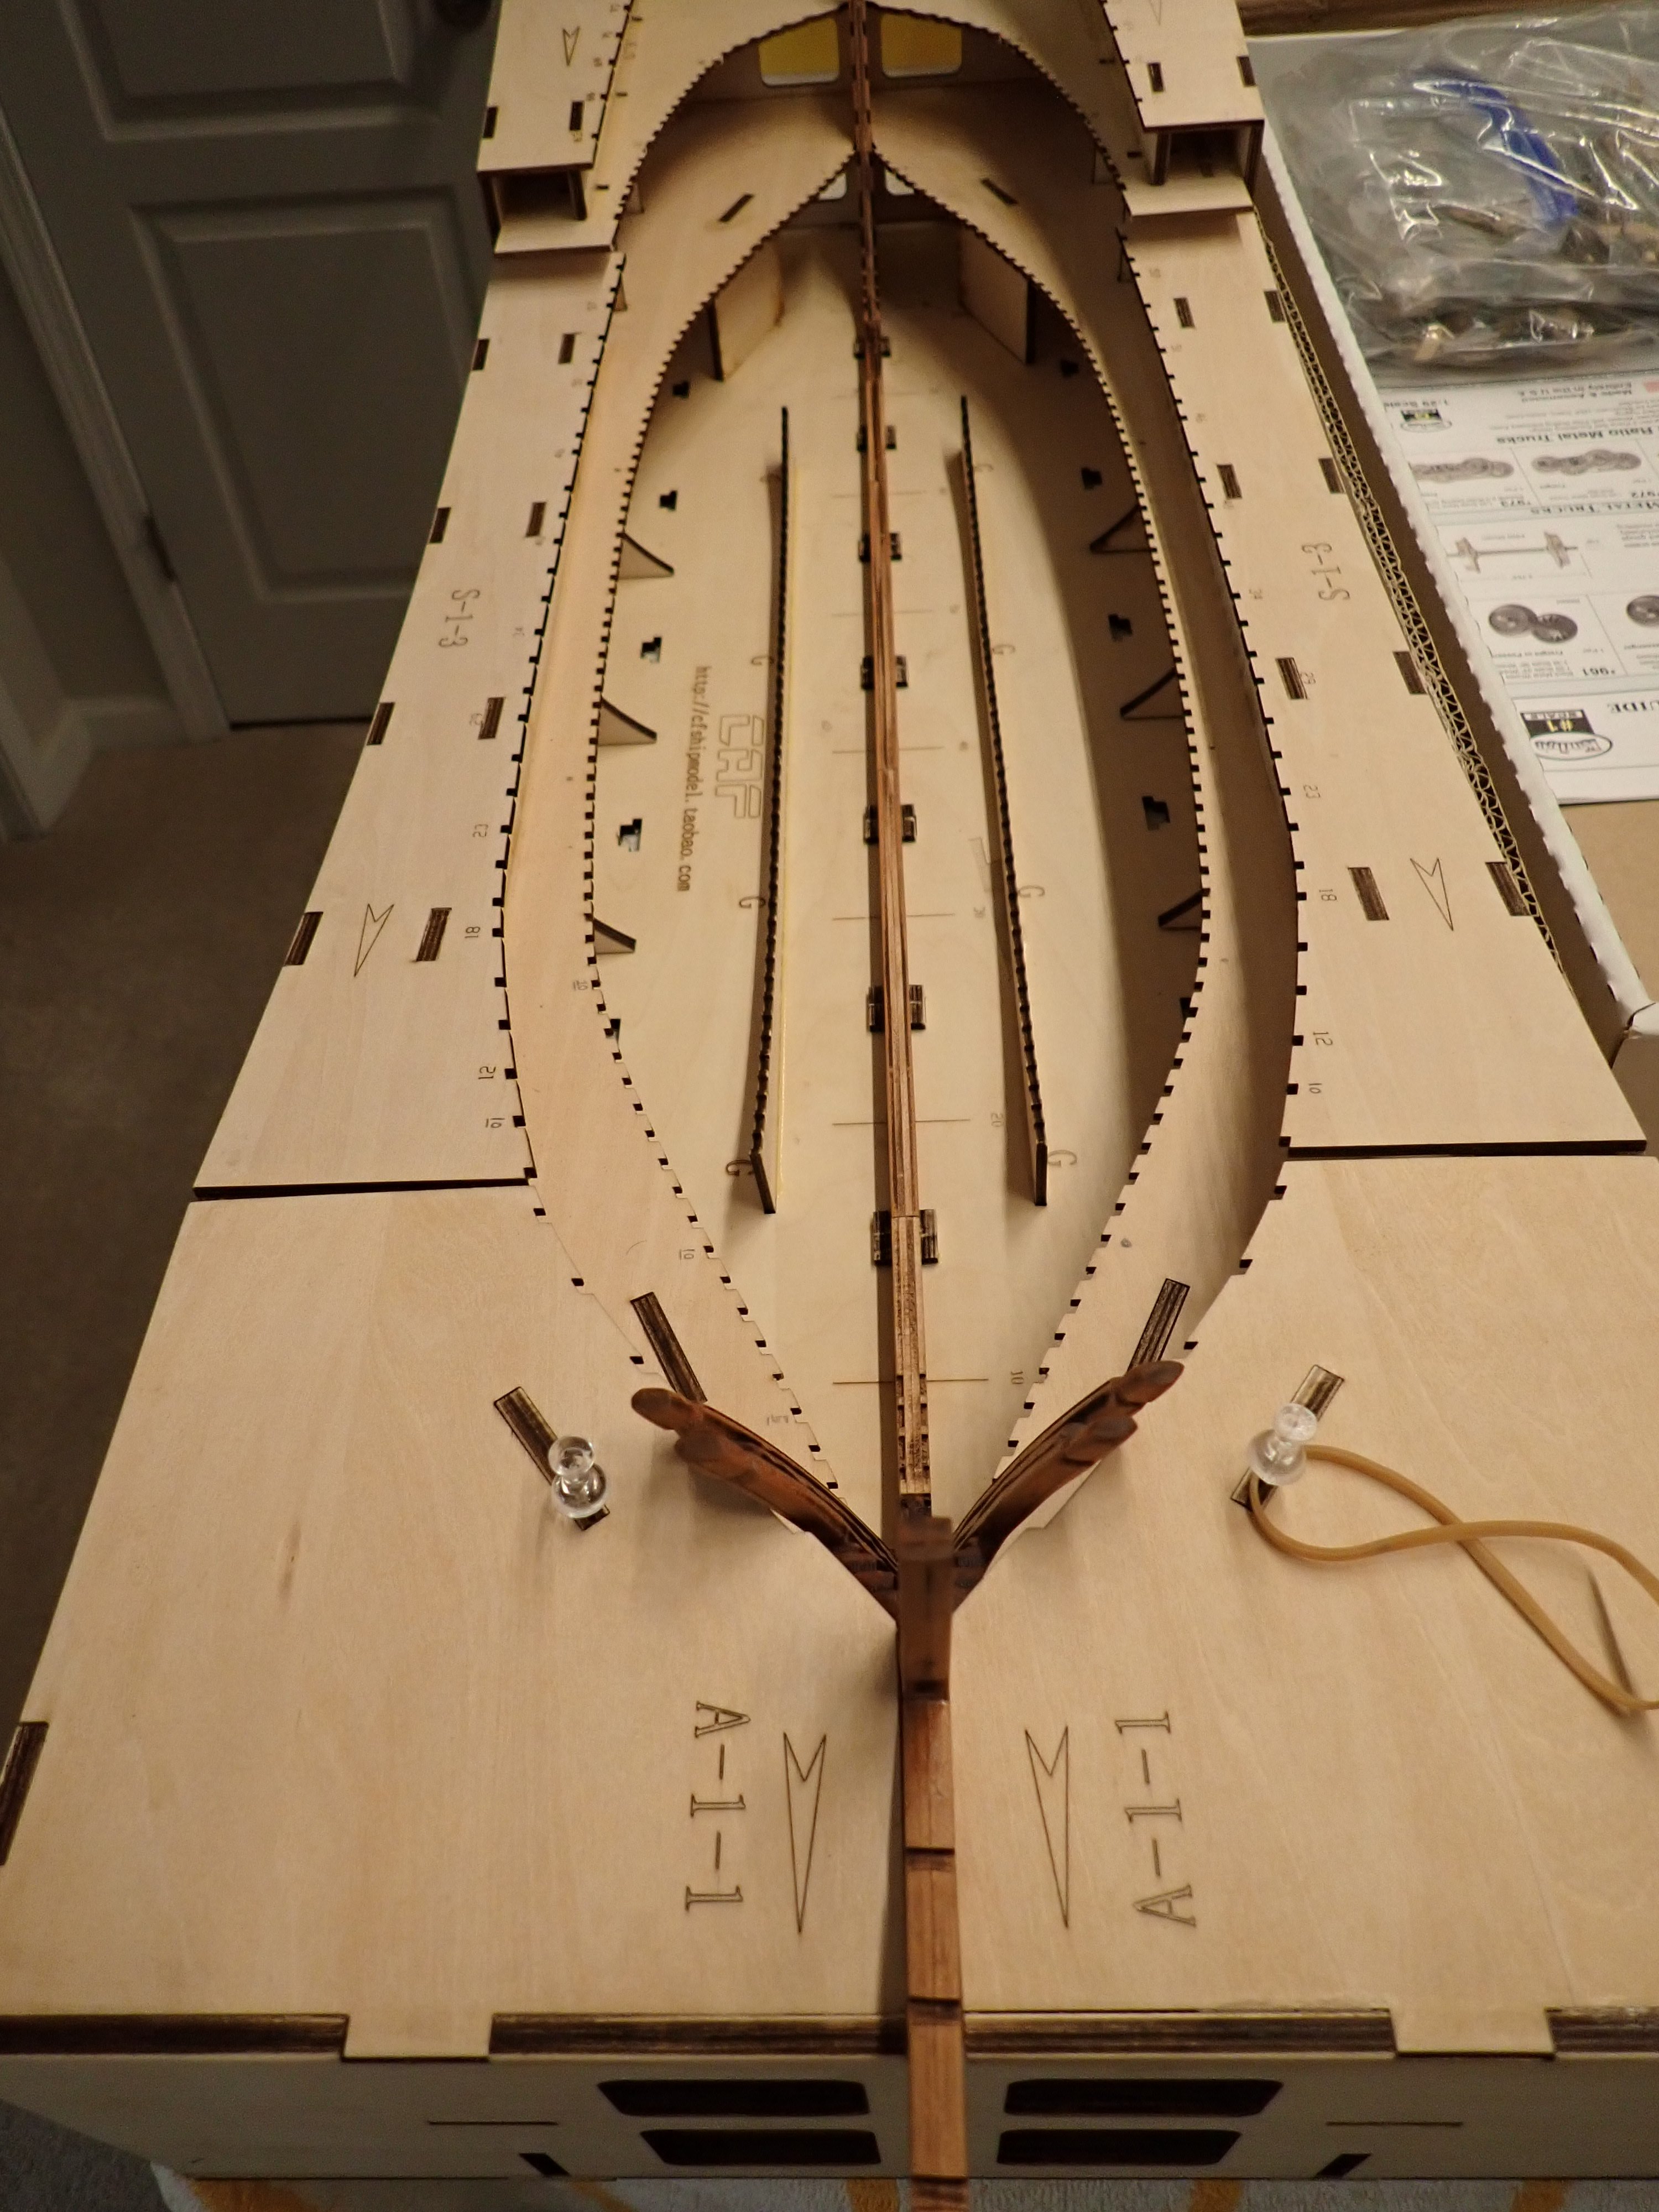
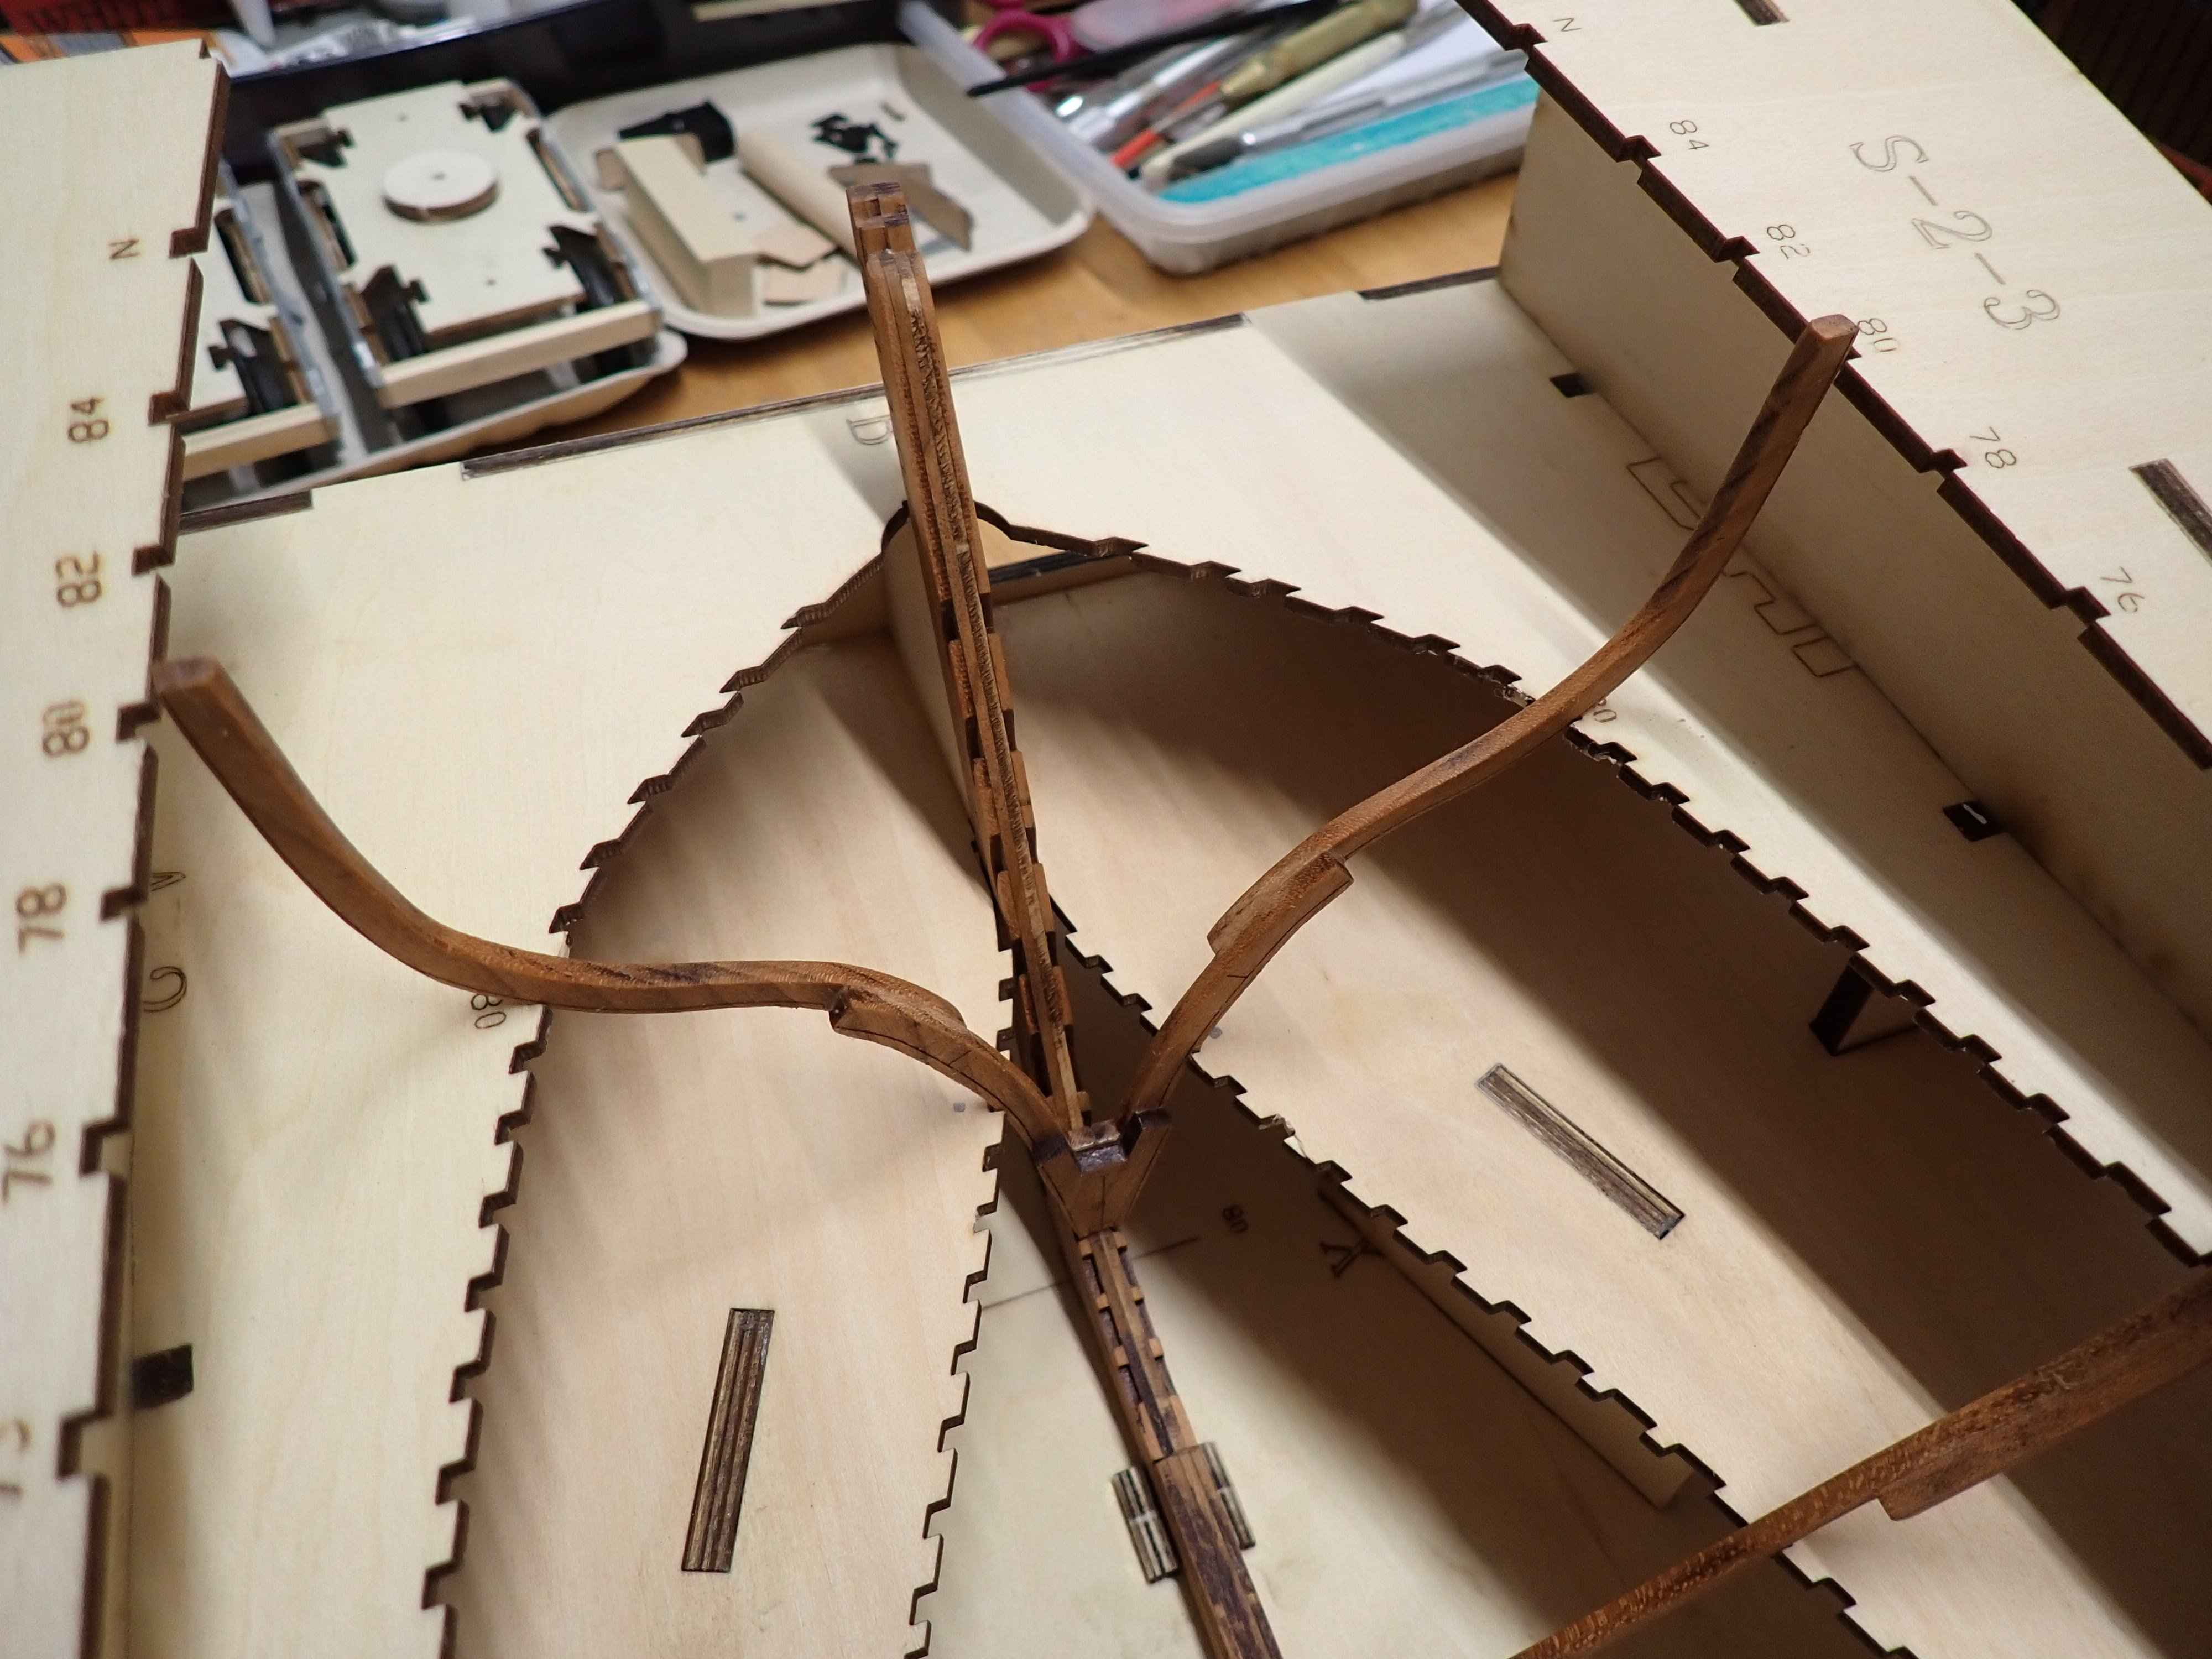
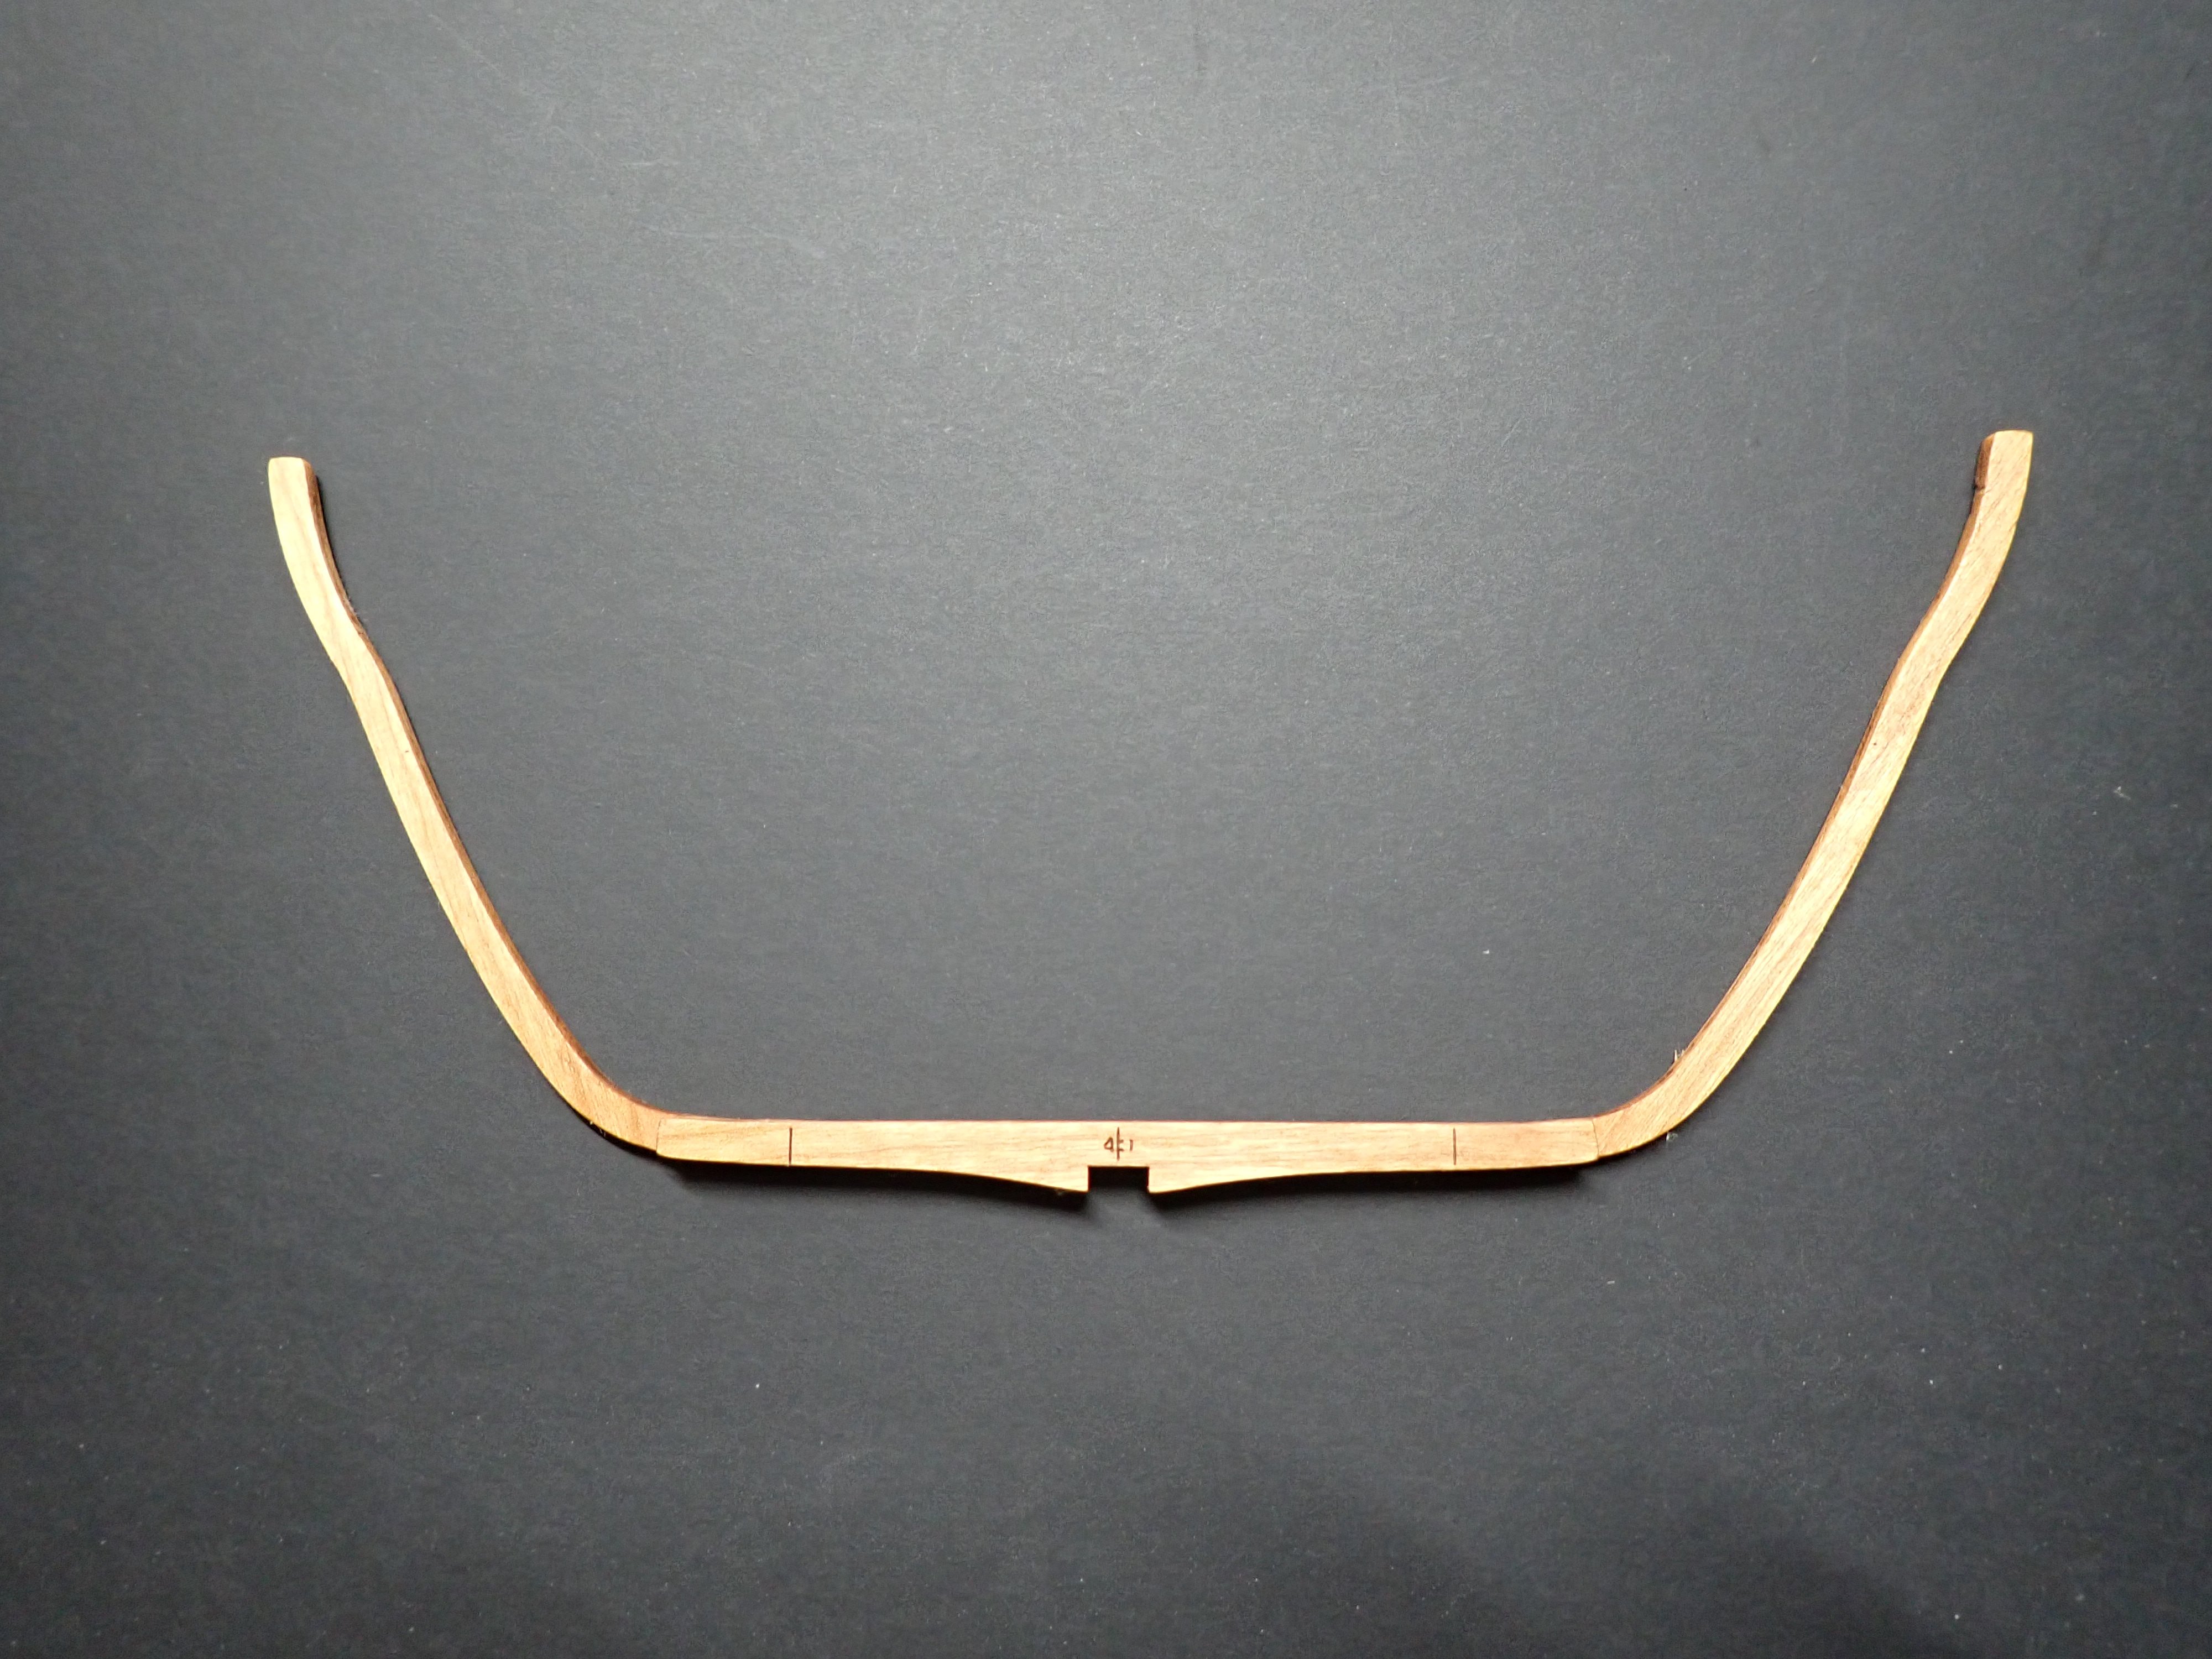
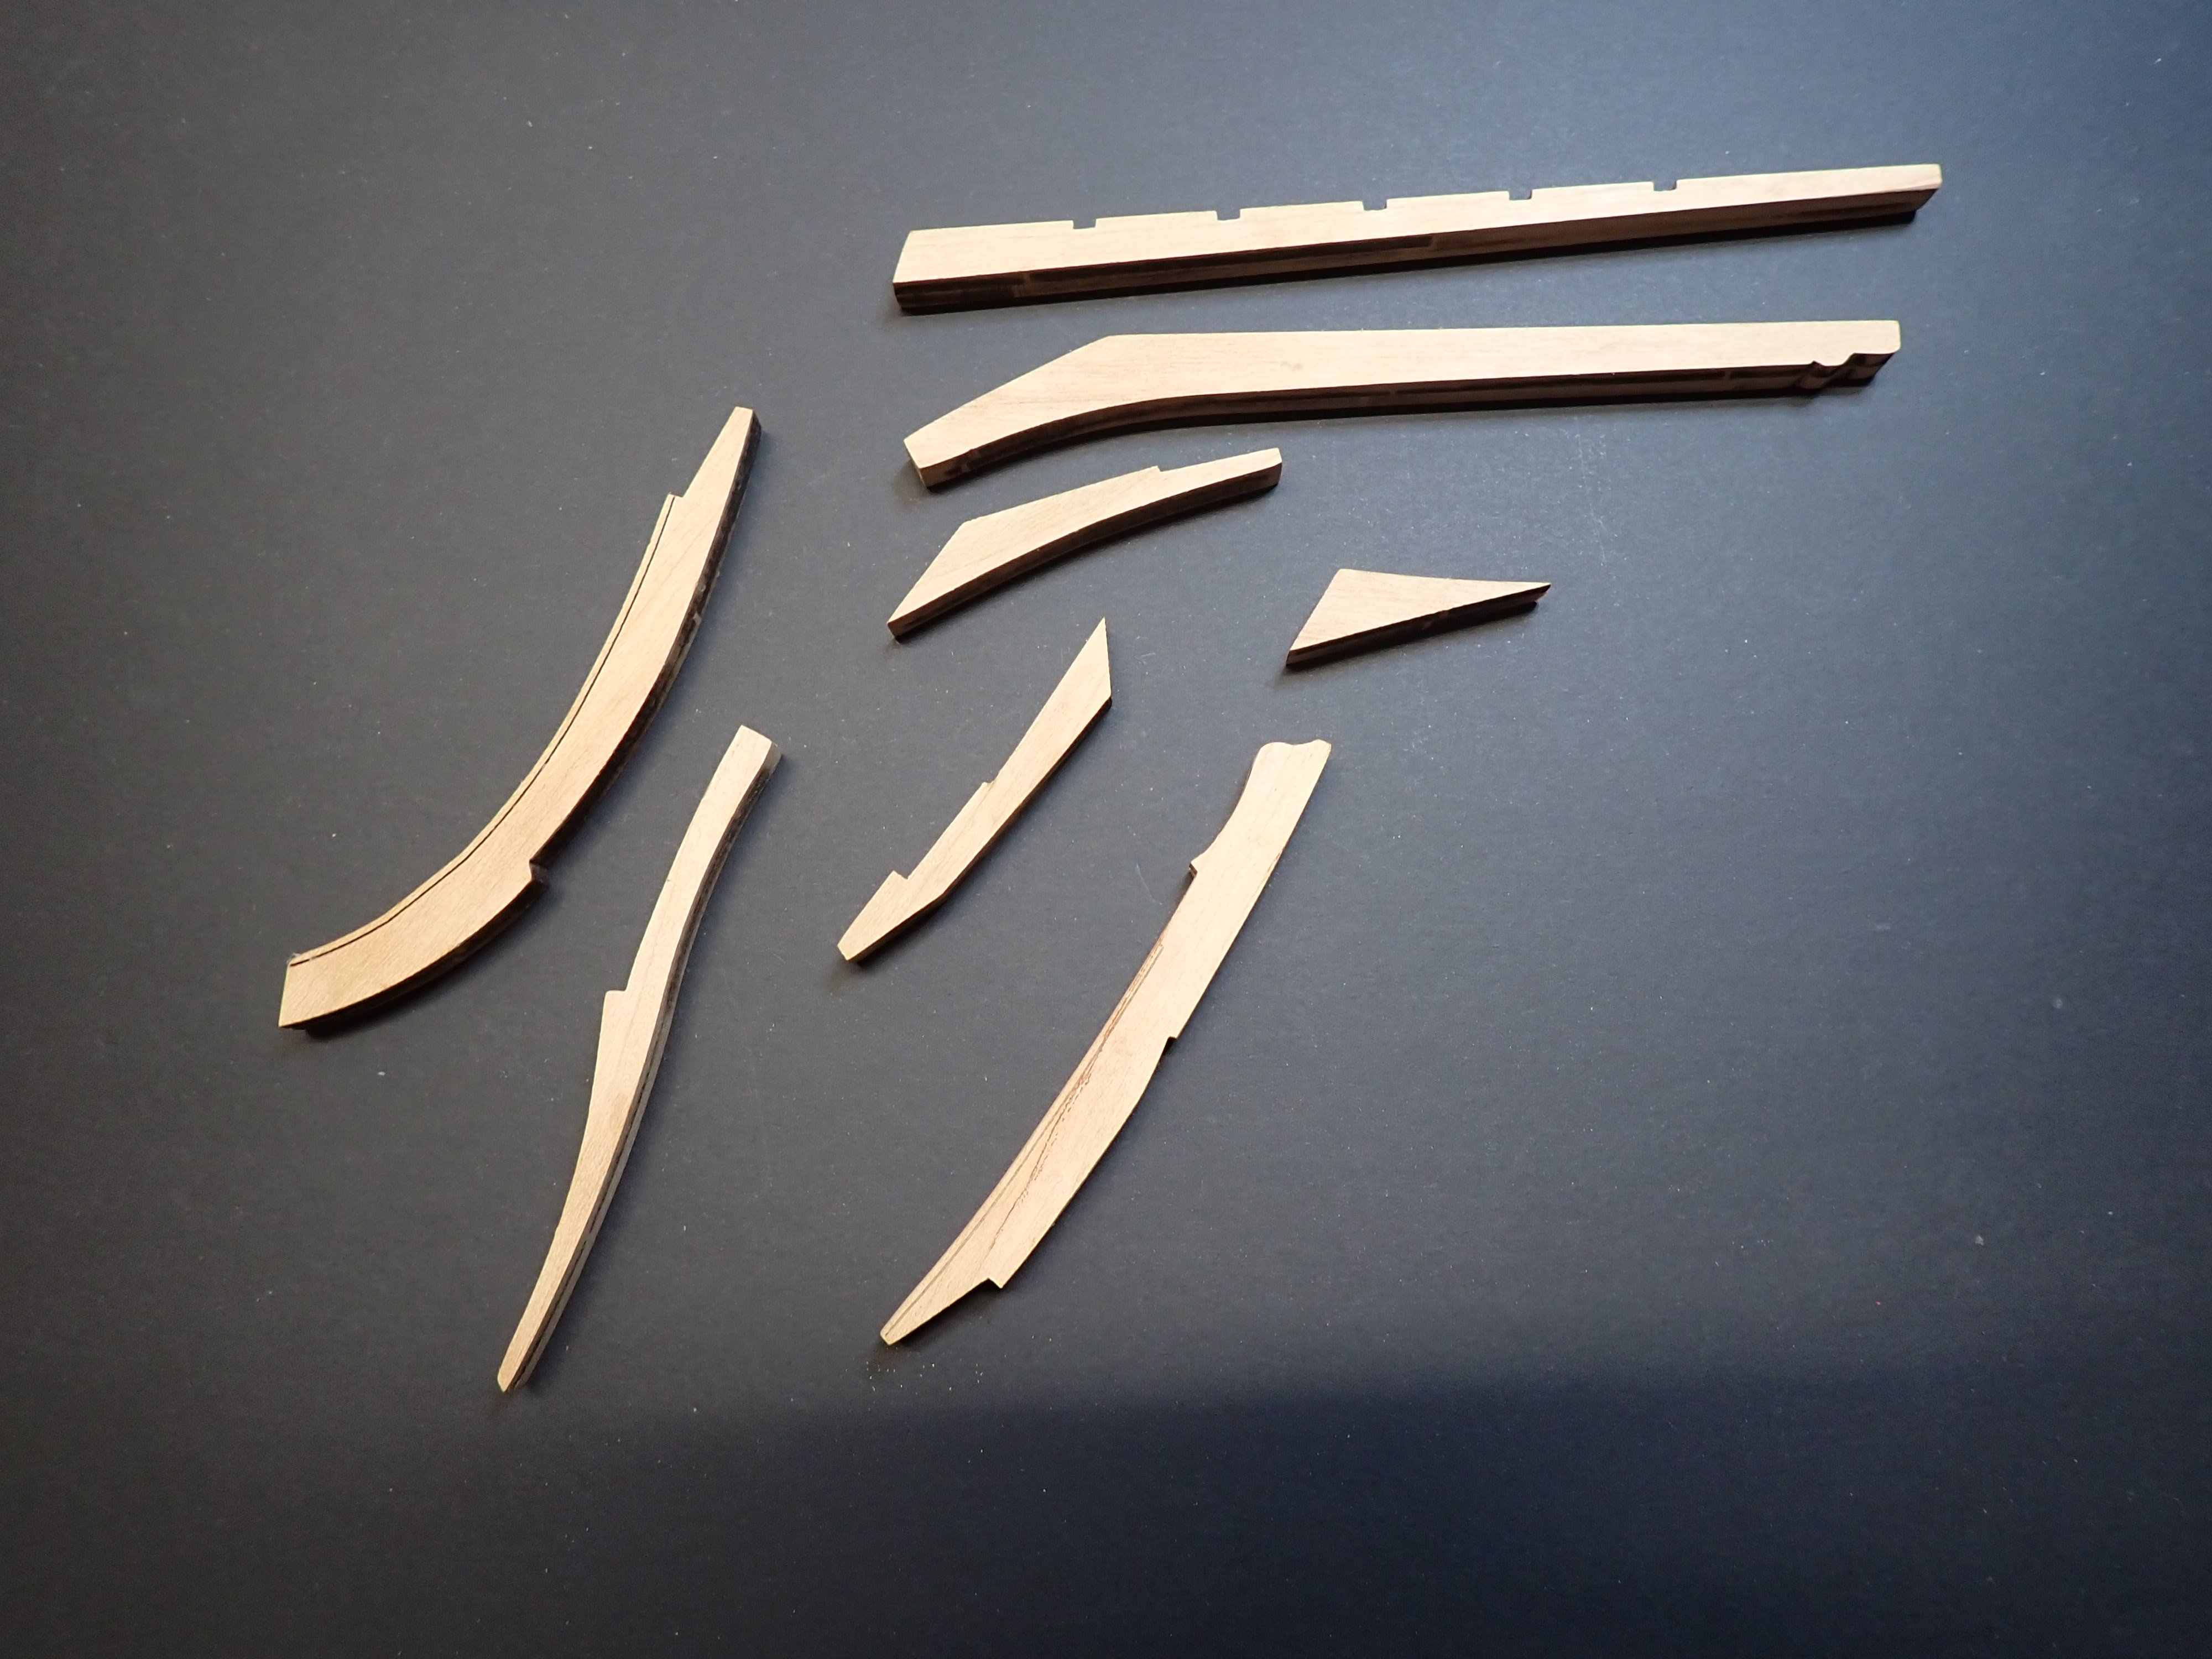
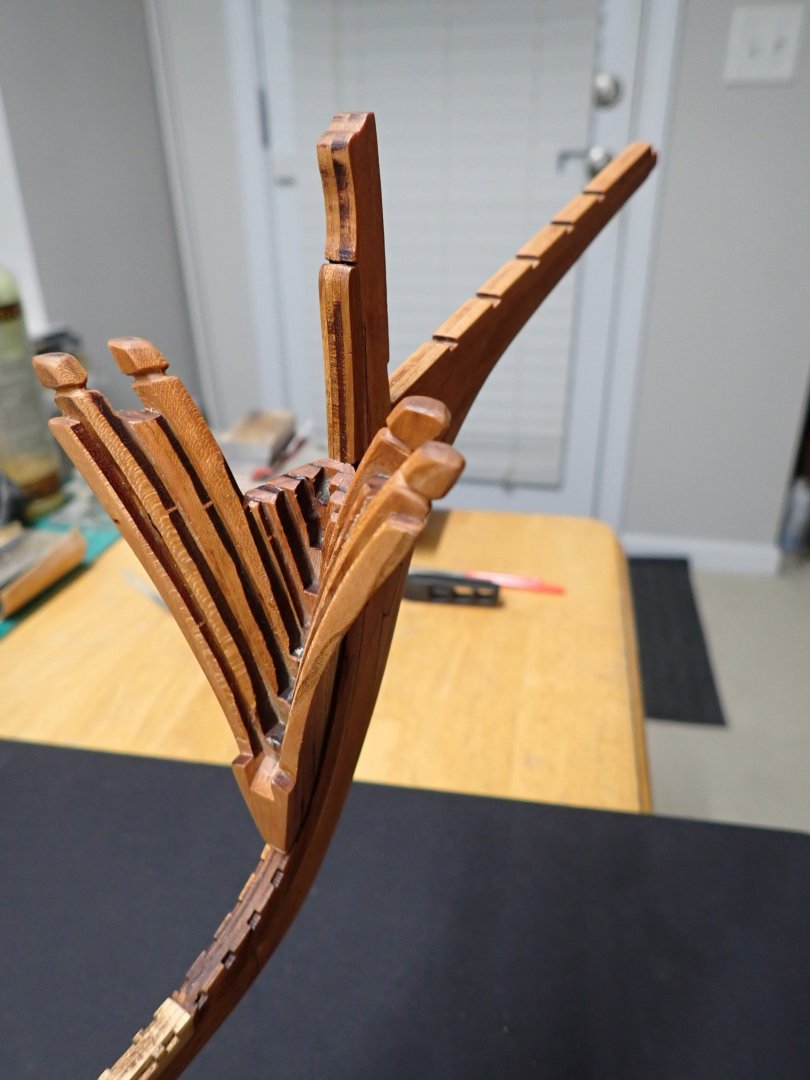
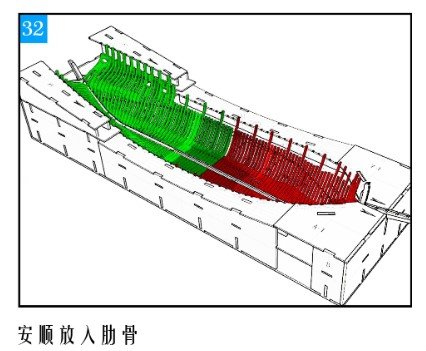
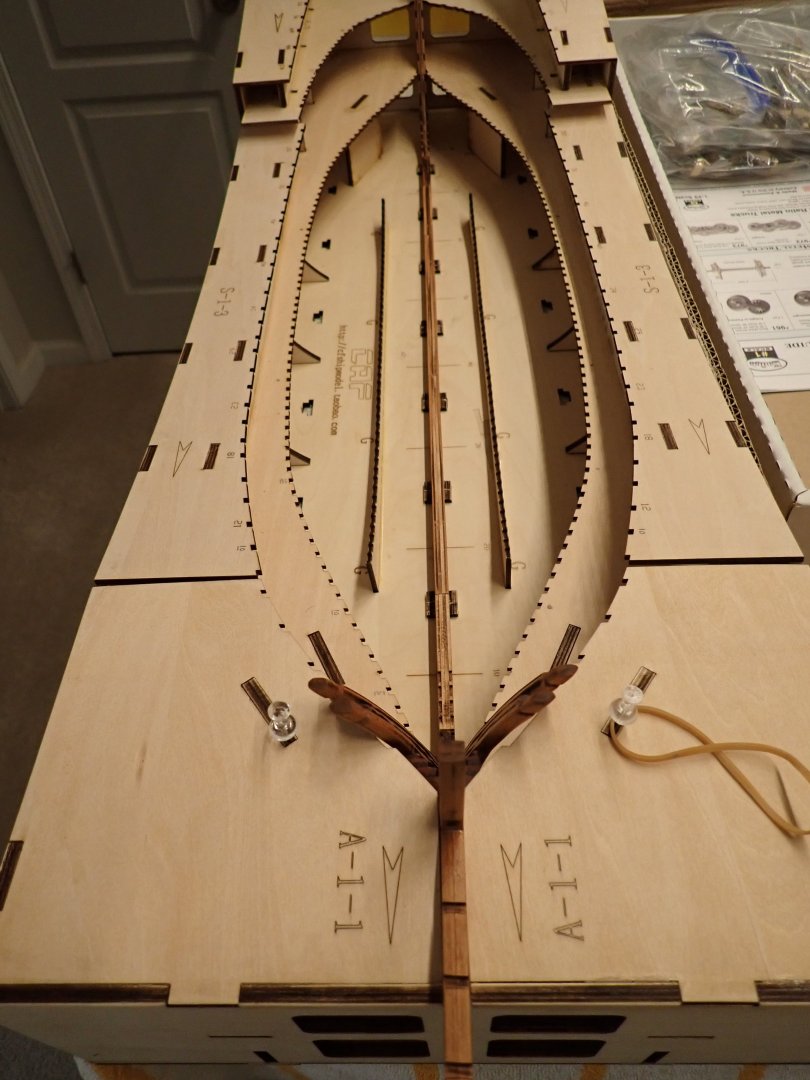
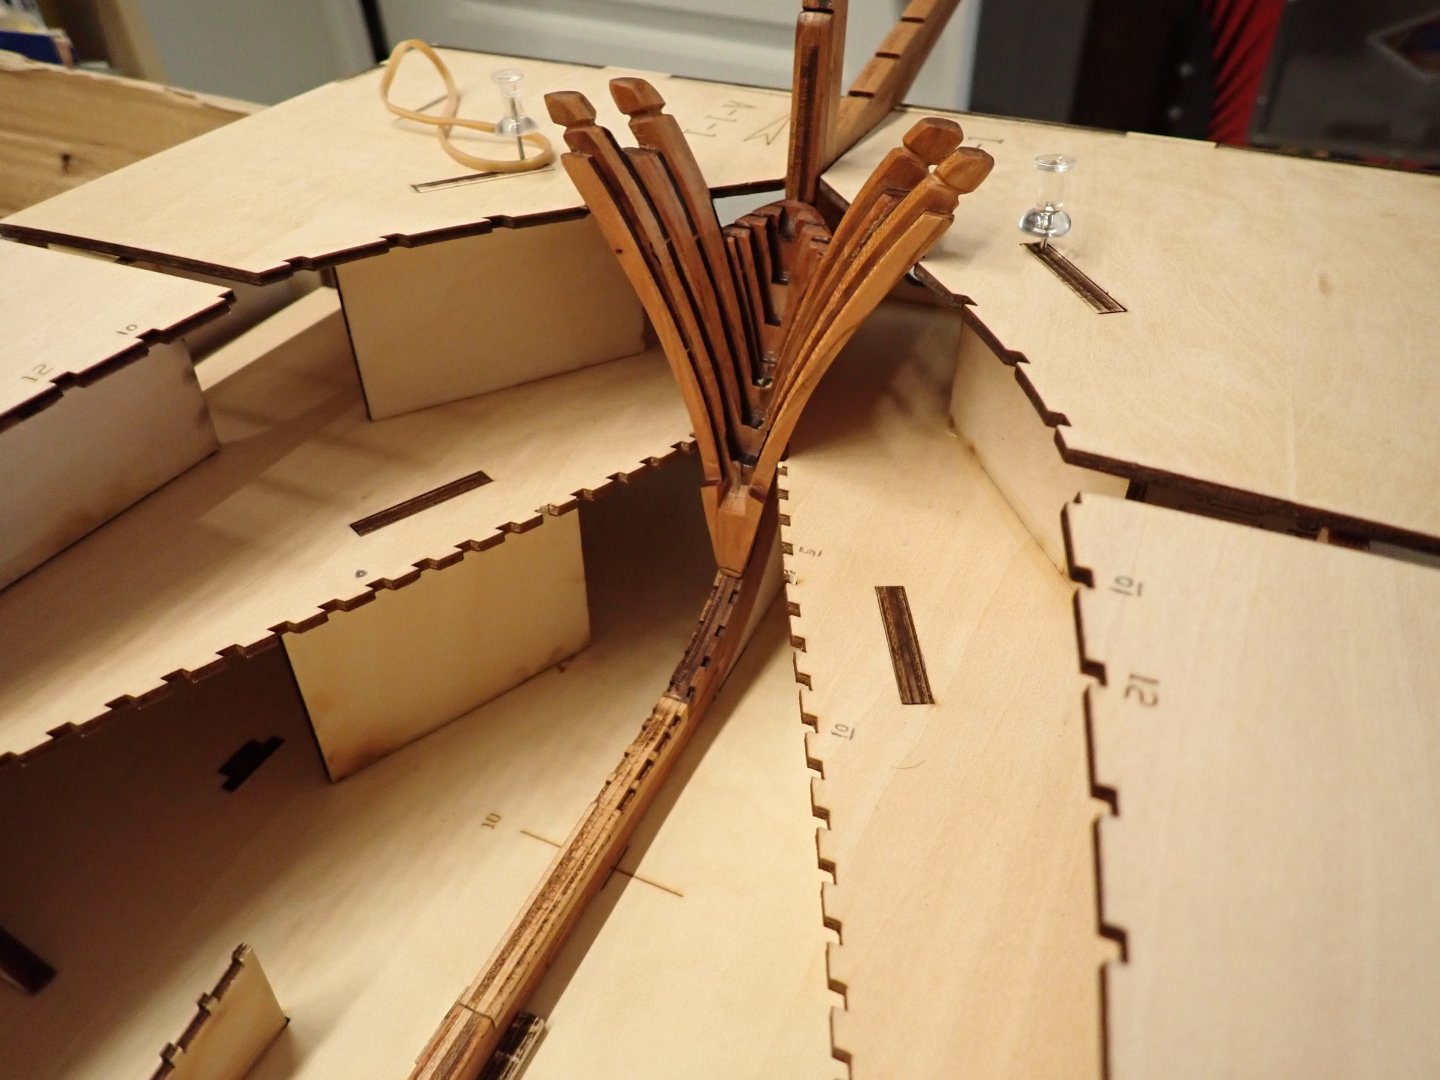
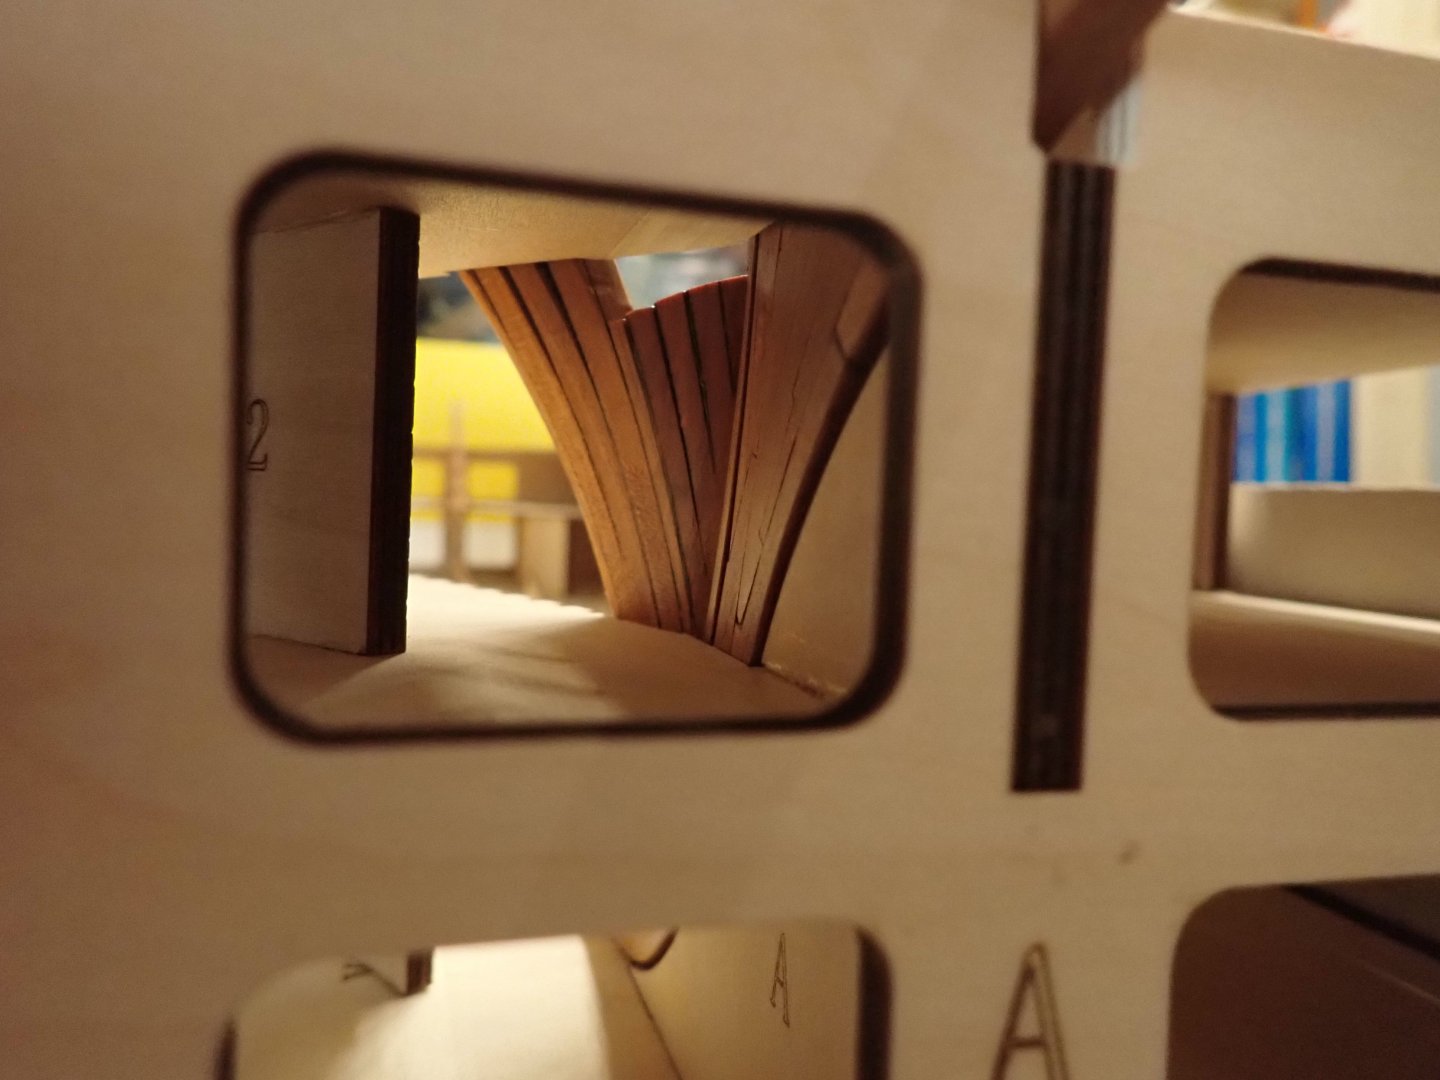
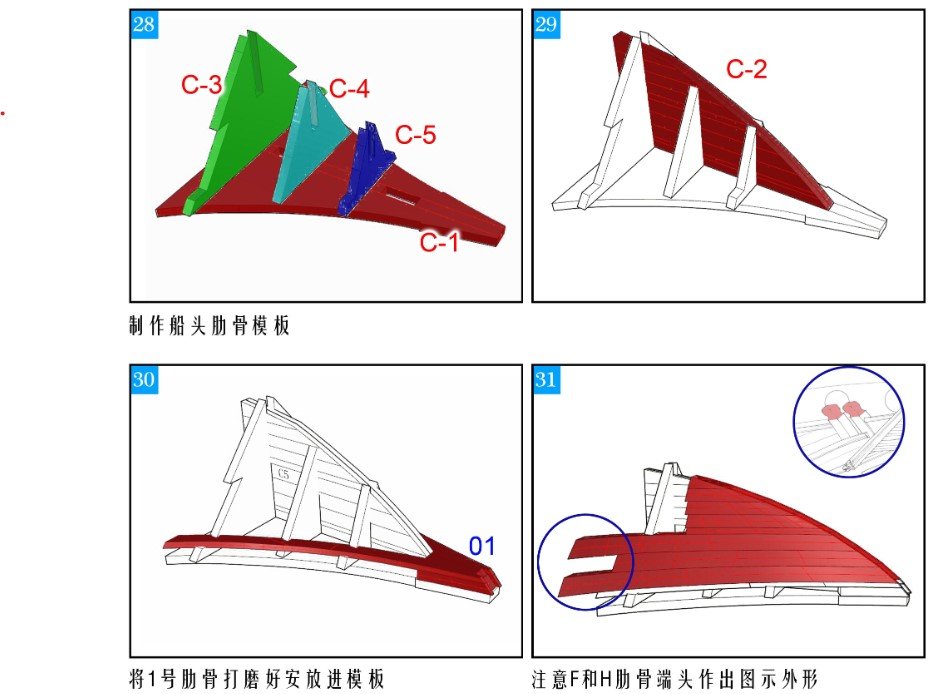
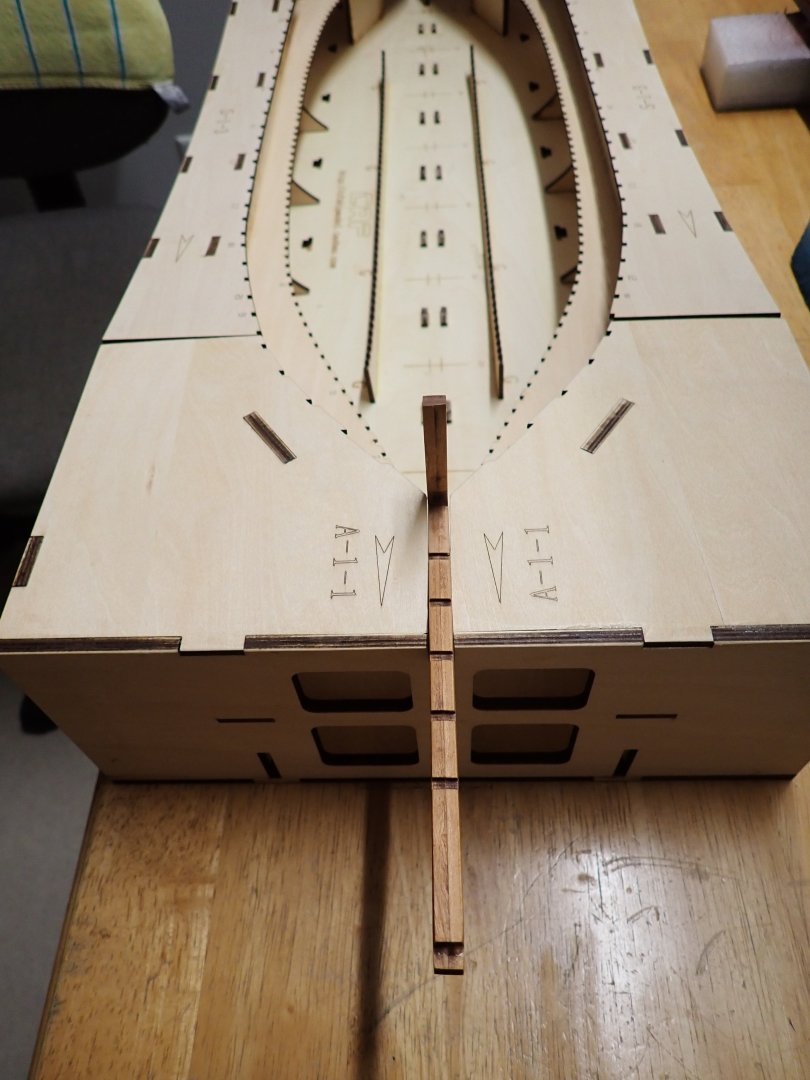
This past weekend I worked on the bow and got very confused at the beginning. The instructions are showing this: I tried the assembly C1-C5 in all directions but it would not fit in the cradle or on the keel. Then I started looking into the Monograph and CAF plans: And it made much more sense. C1-C5 is just a jig and is not part of the ship. As a matter of fact, that jig is useless and if you glue carefully Frames A to H and 01, on top of each other, following carefully the laser marks, you end up with a very good result: Below, you can see the assembly with the jig inserted underneath: A lot (and I say a LOT) of sanding is required to come up with a decent shape that fits tightly in the keel and slide into the cradle accordingly. I like the slight separation of the frames, as it brings more depth and realism to the model. Most bows I have seen on the Internet look like a big block of wood perfectly shaped, which would not have been like the real ship. Inside fairing was also done to a certain extent: Yves


- 185 replies
-
- 14
-
-
Very true. I have not done any "detailed" fairing yet. Yes, there will be a lot of sanding required on that kit. If you do not like sanding and adjusting, then this is not a kit for you 🙂 Yves
-
I would add a drop or two of acrylic resin in the pools, for realism. Your model looks incredible for such a small scale. Yves
- 5 replies
-
- 4
-

-
-
- Queen Mary 2
- Revell
- (and 1 more)
-
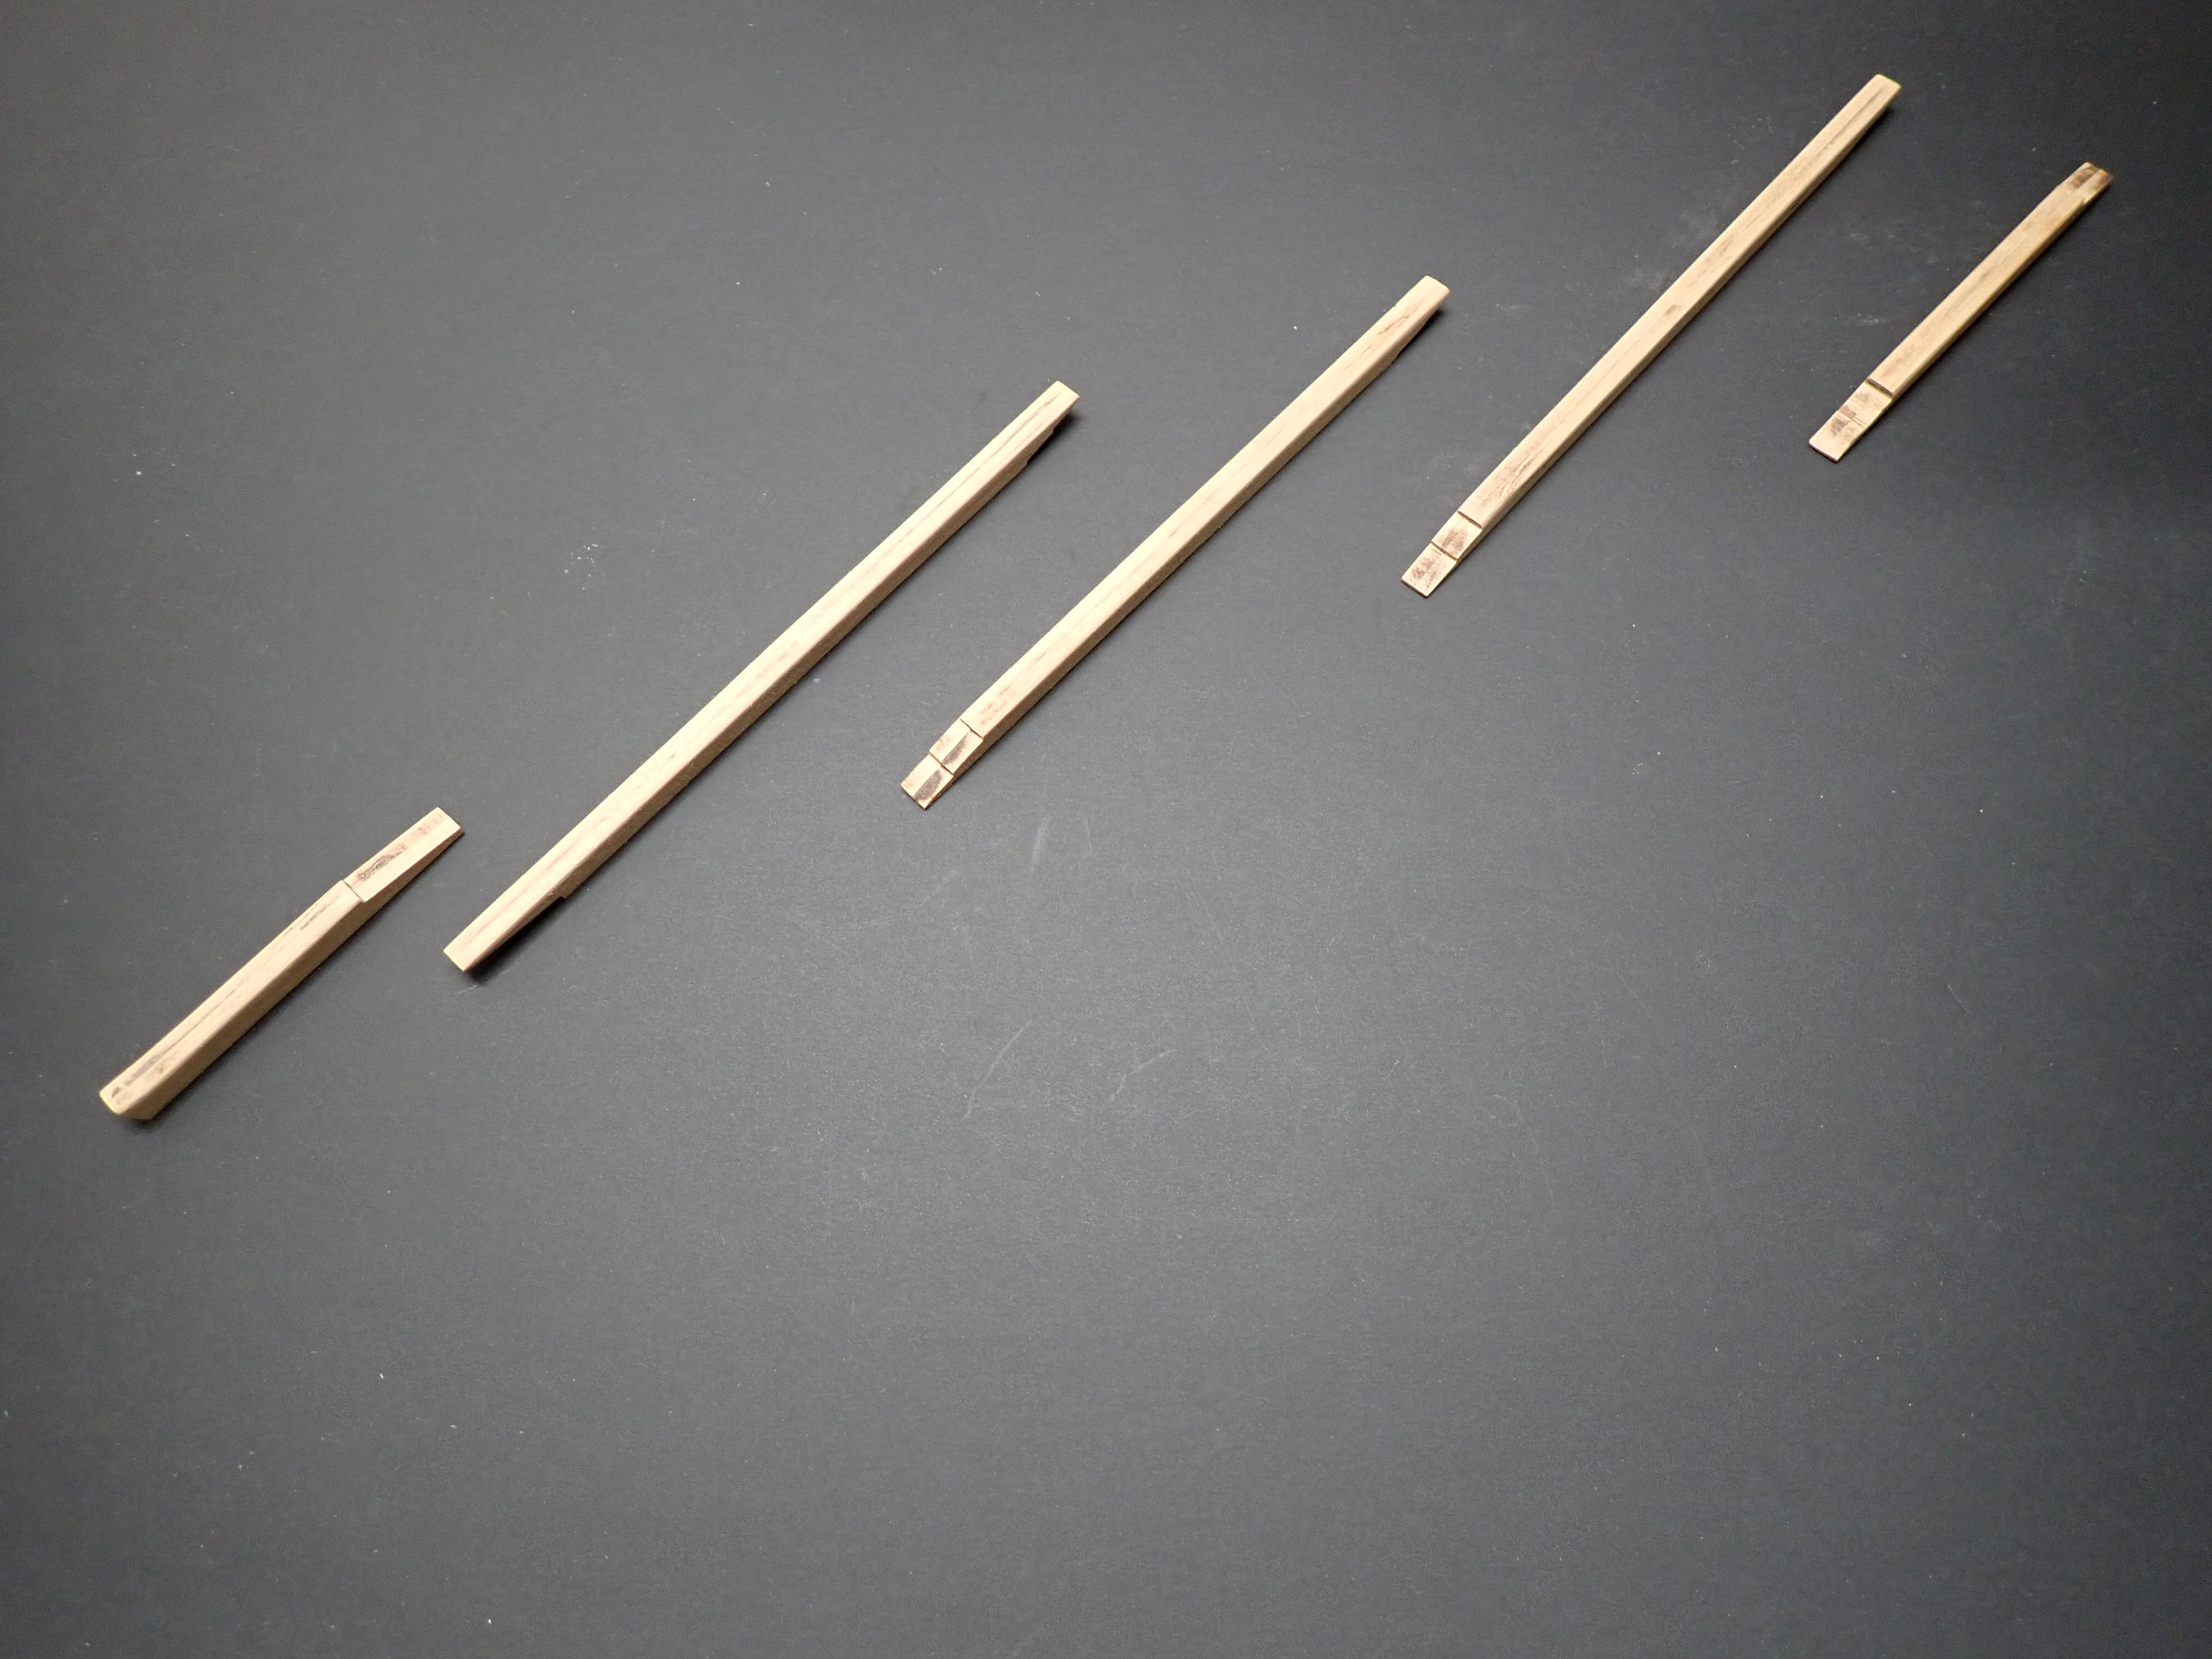
Frames are 3 mm thick and from 5 to 6 mm wide, depending of their positions in the hull. CAF is a Chinese company and as such uses the metric system. Yves
-
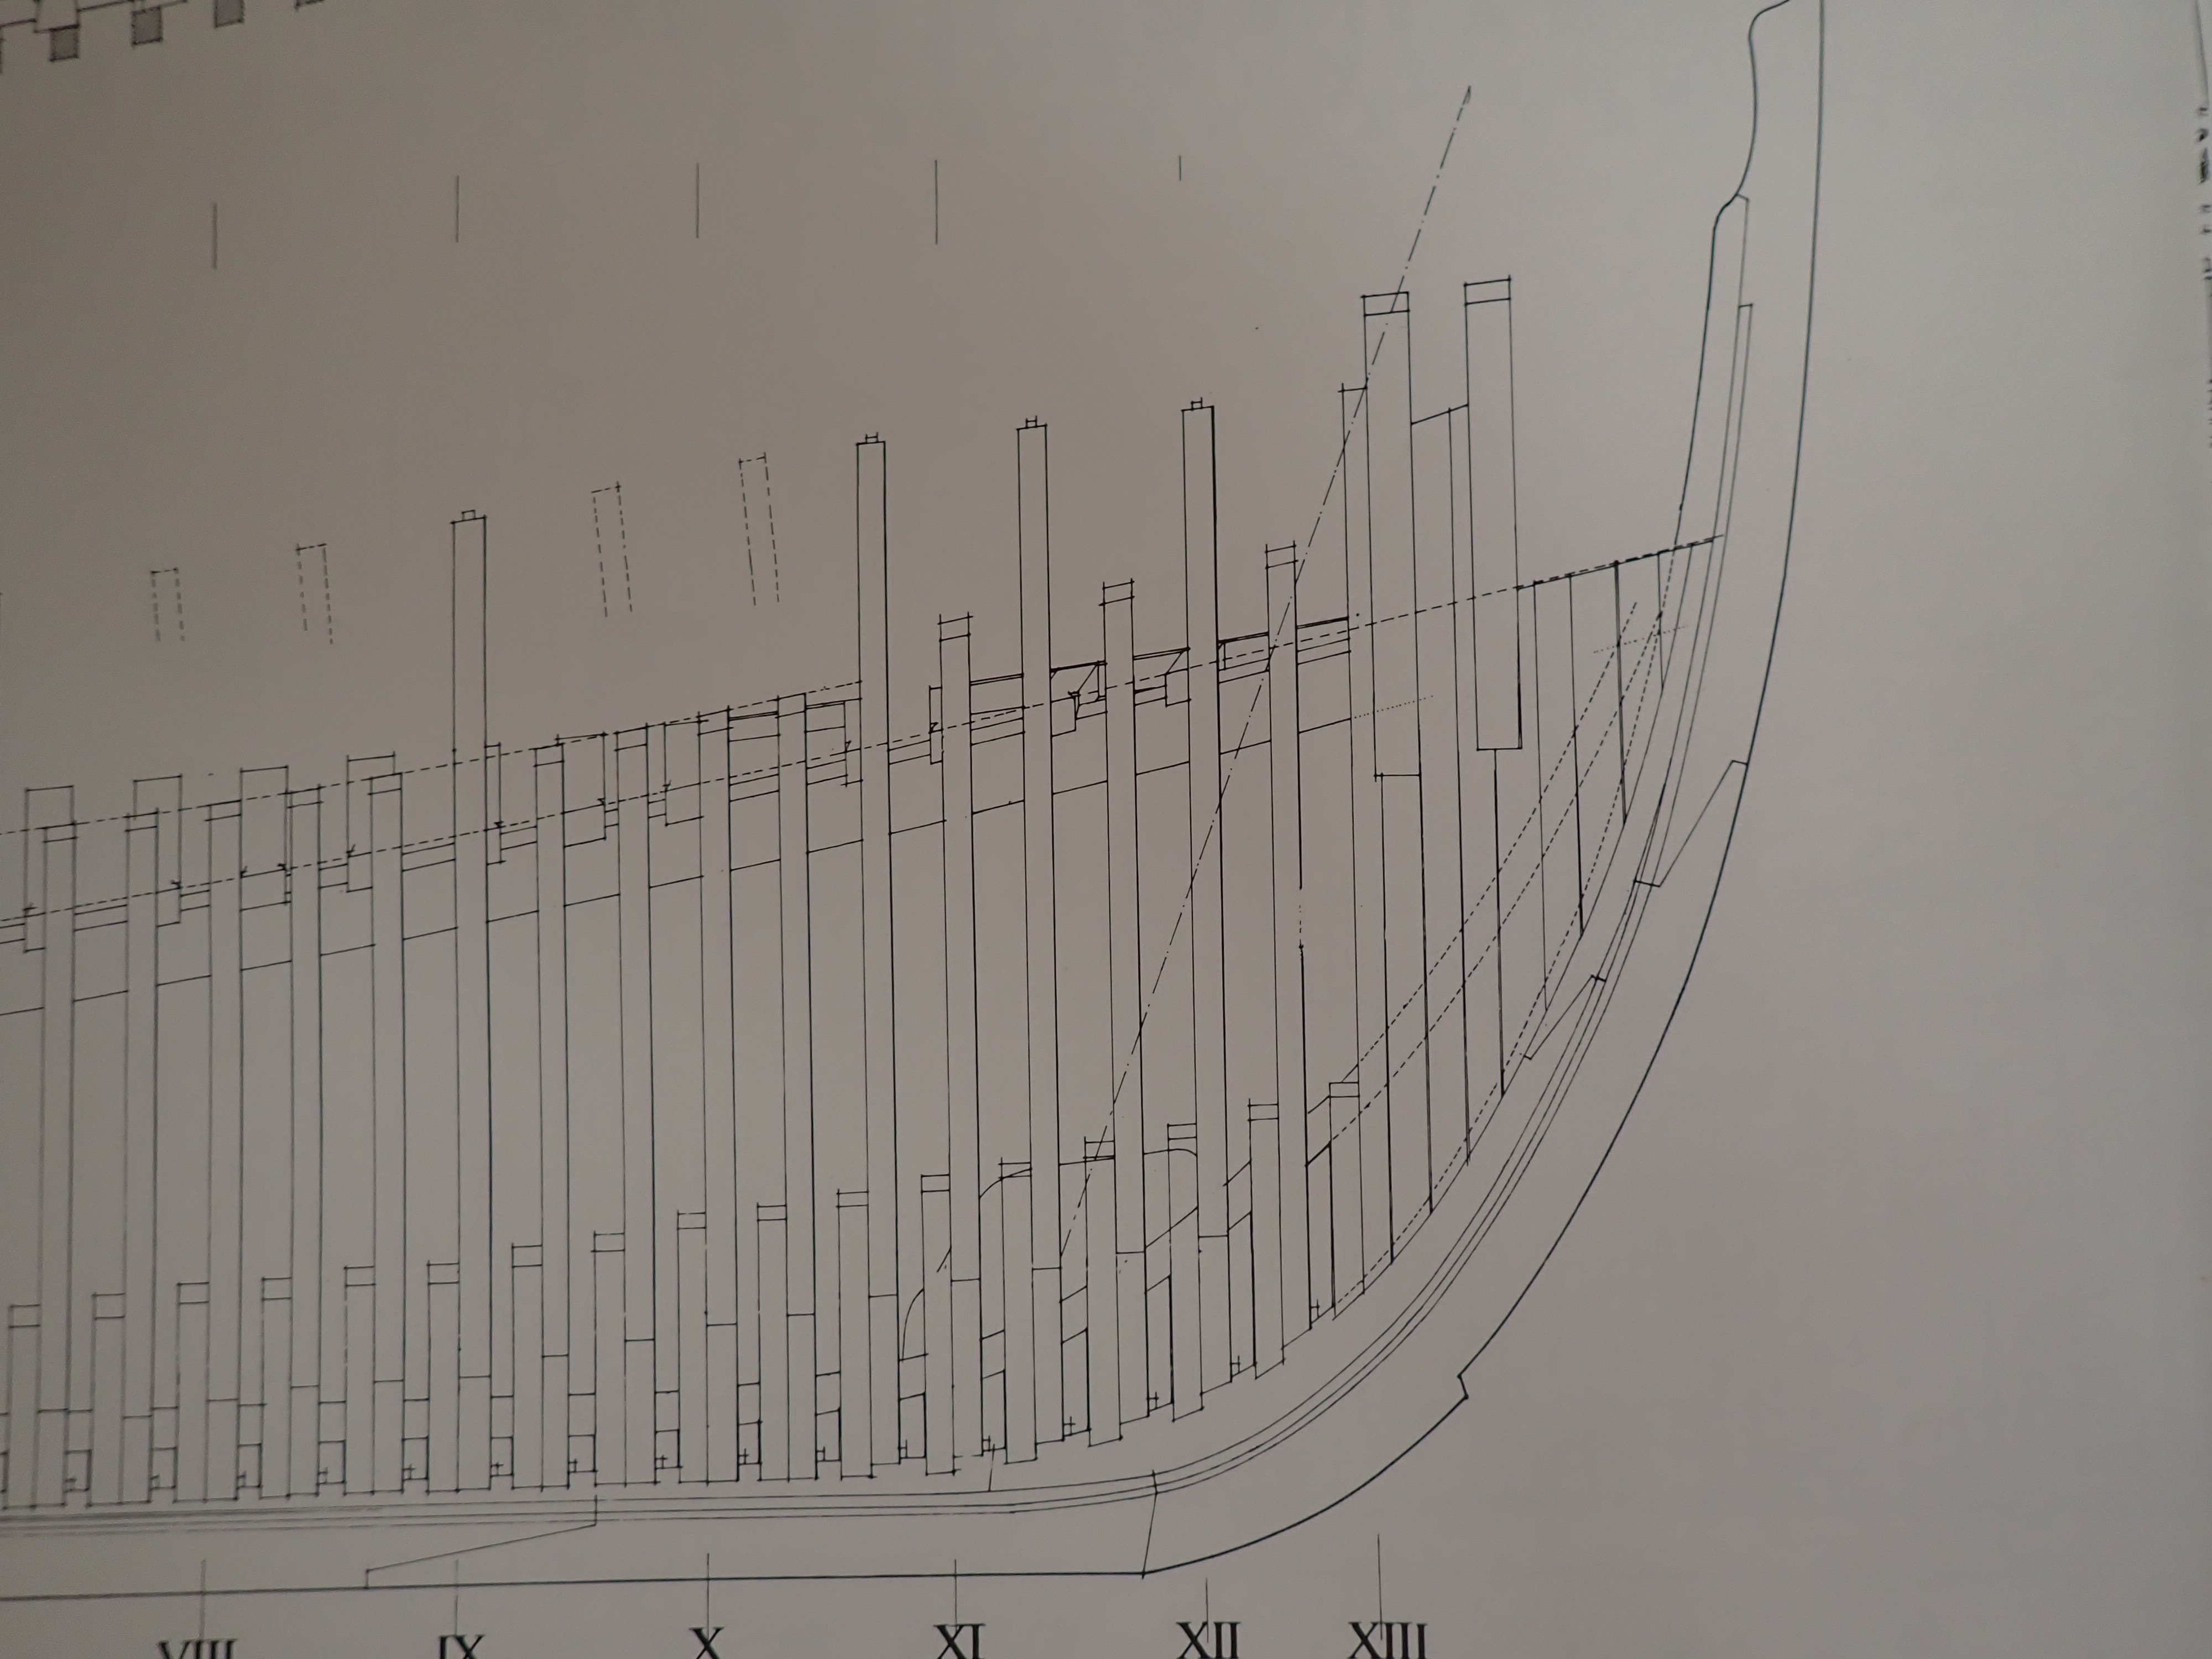
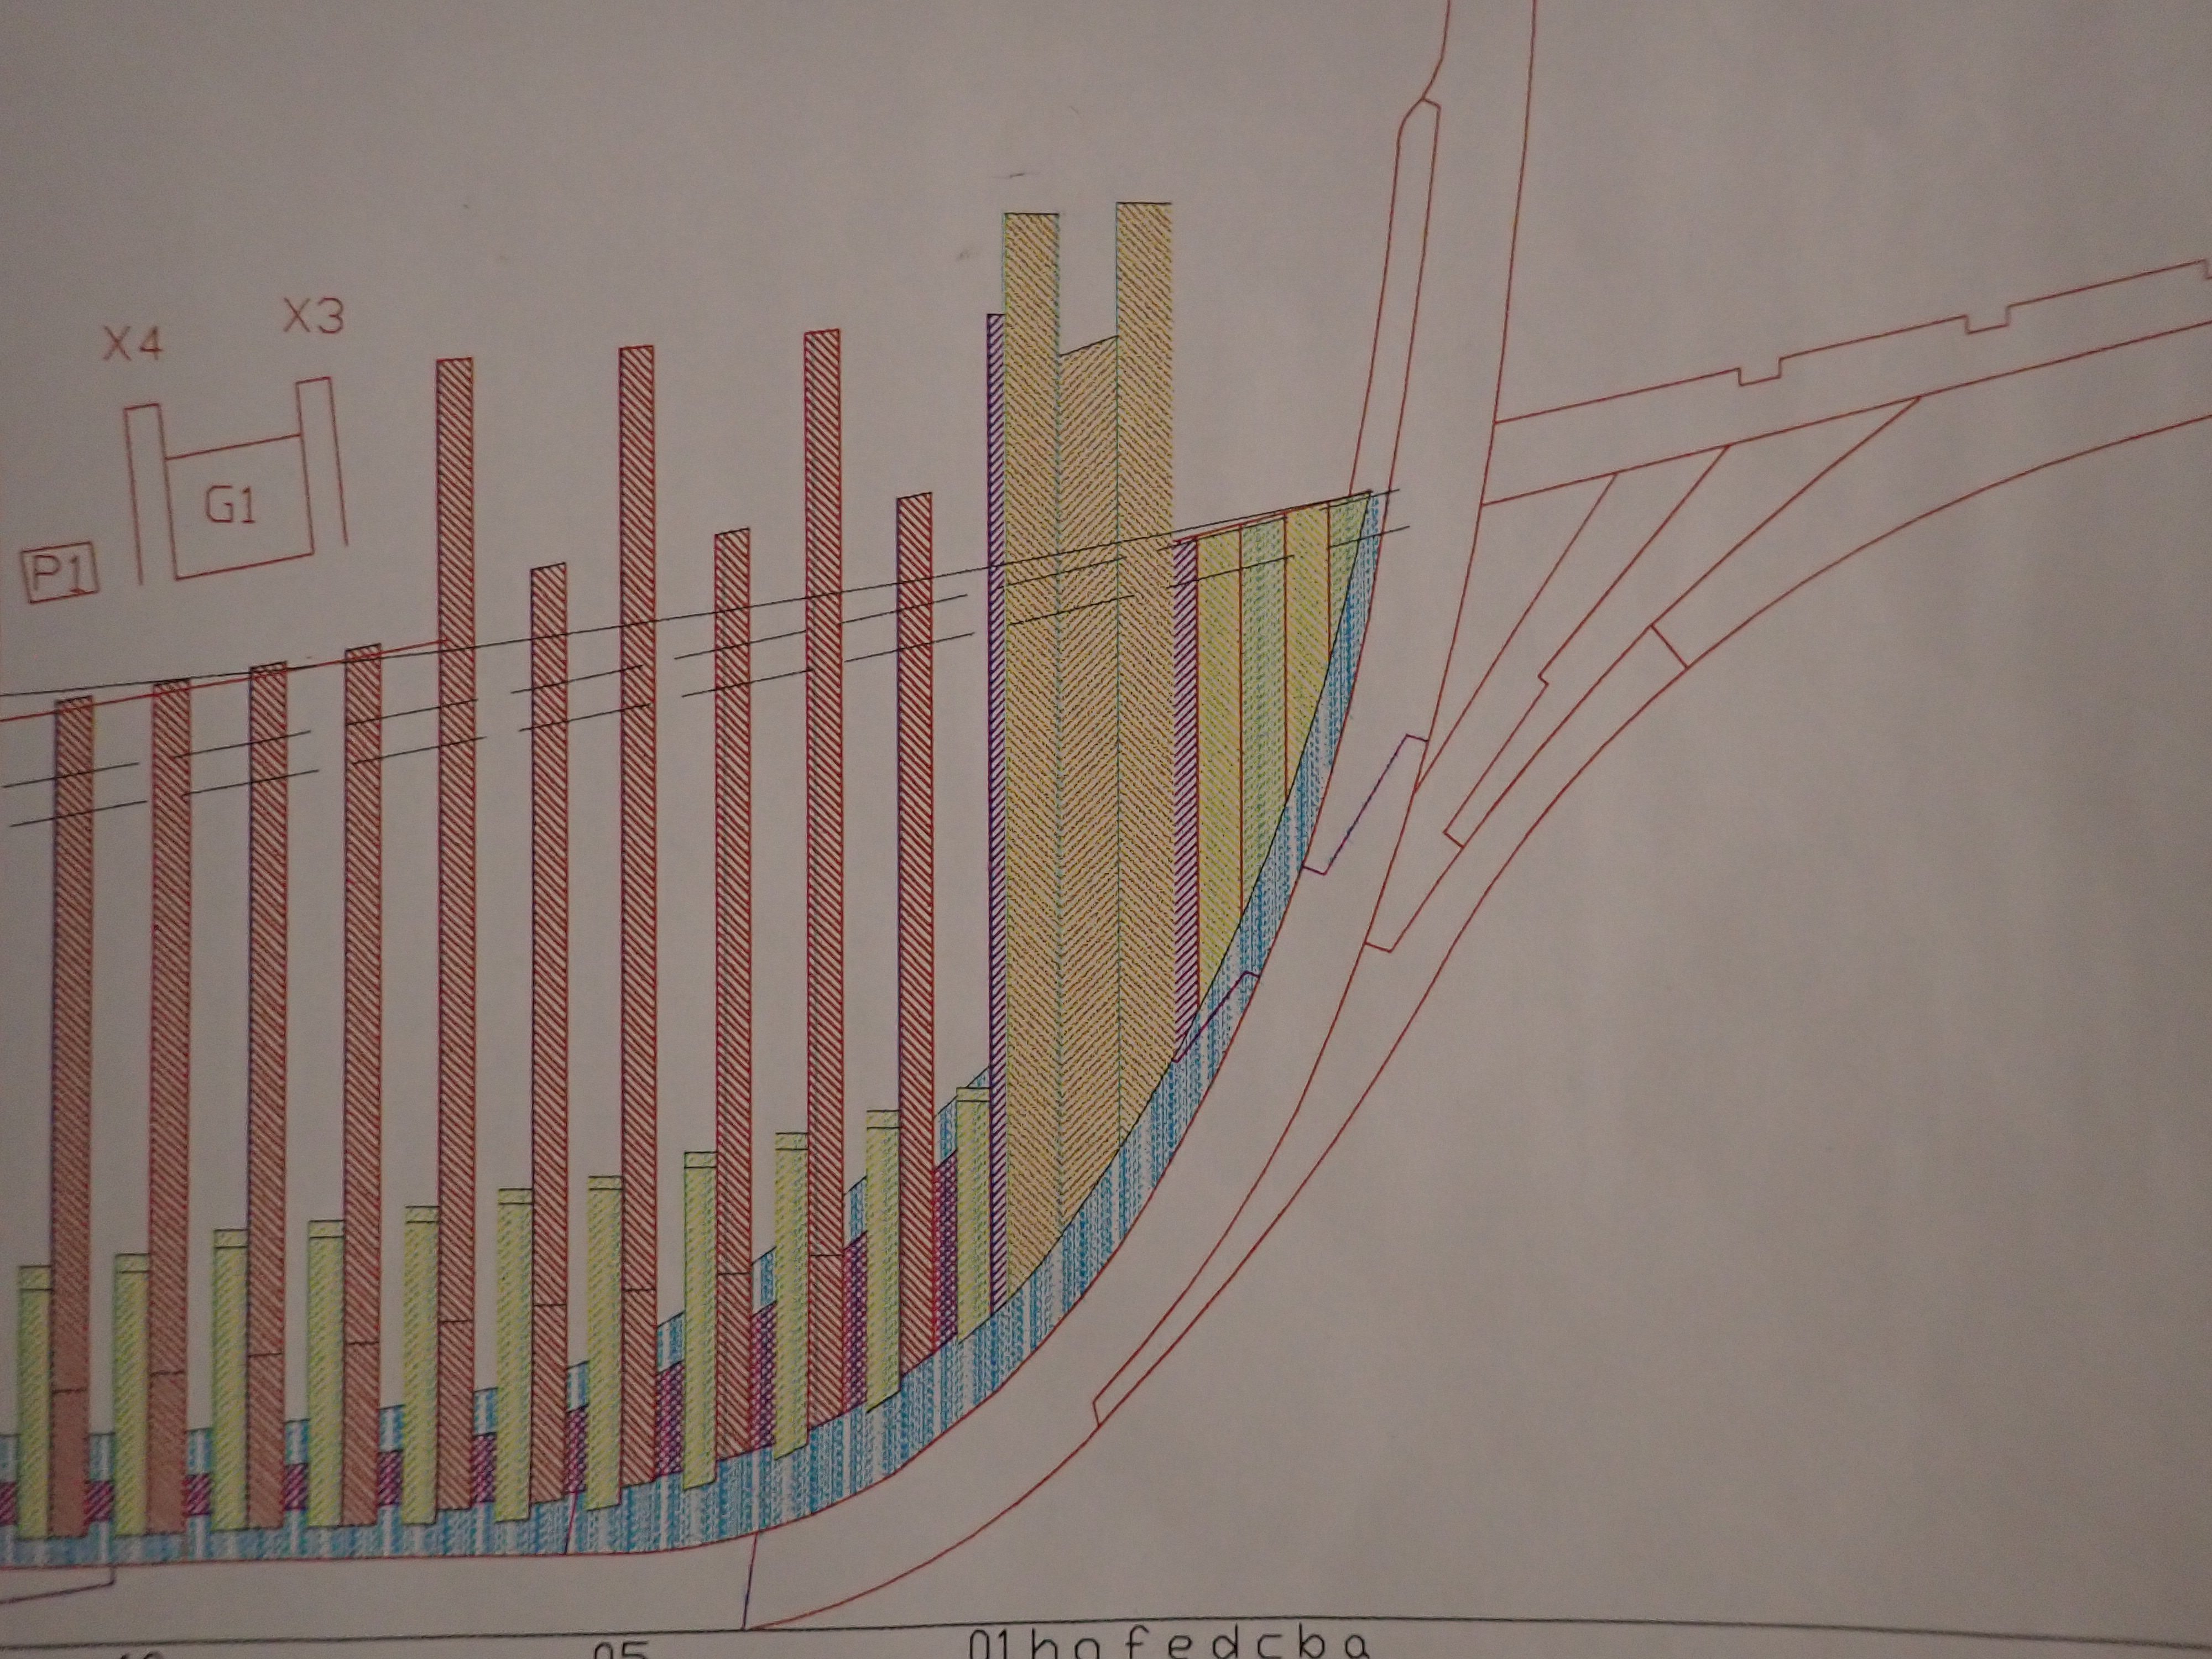
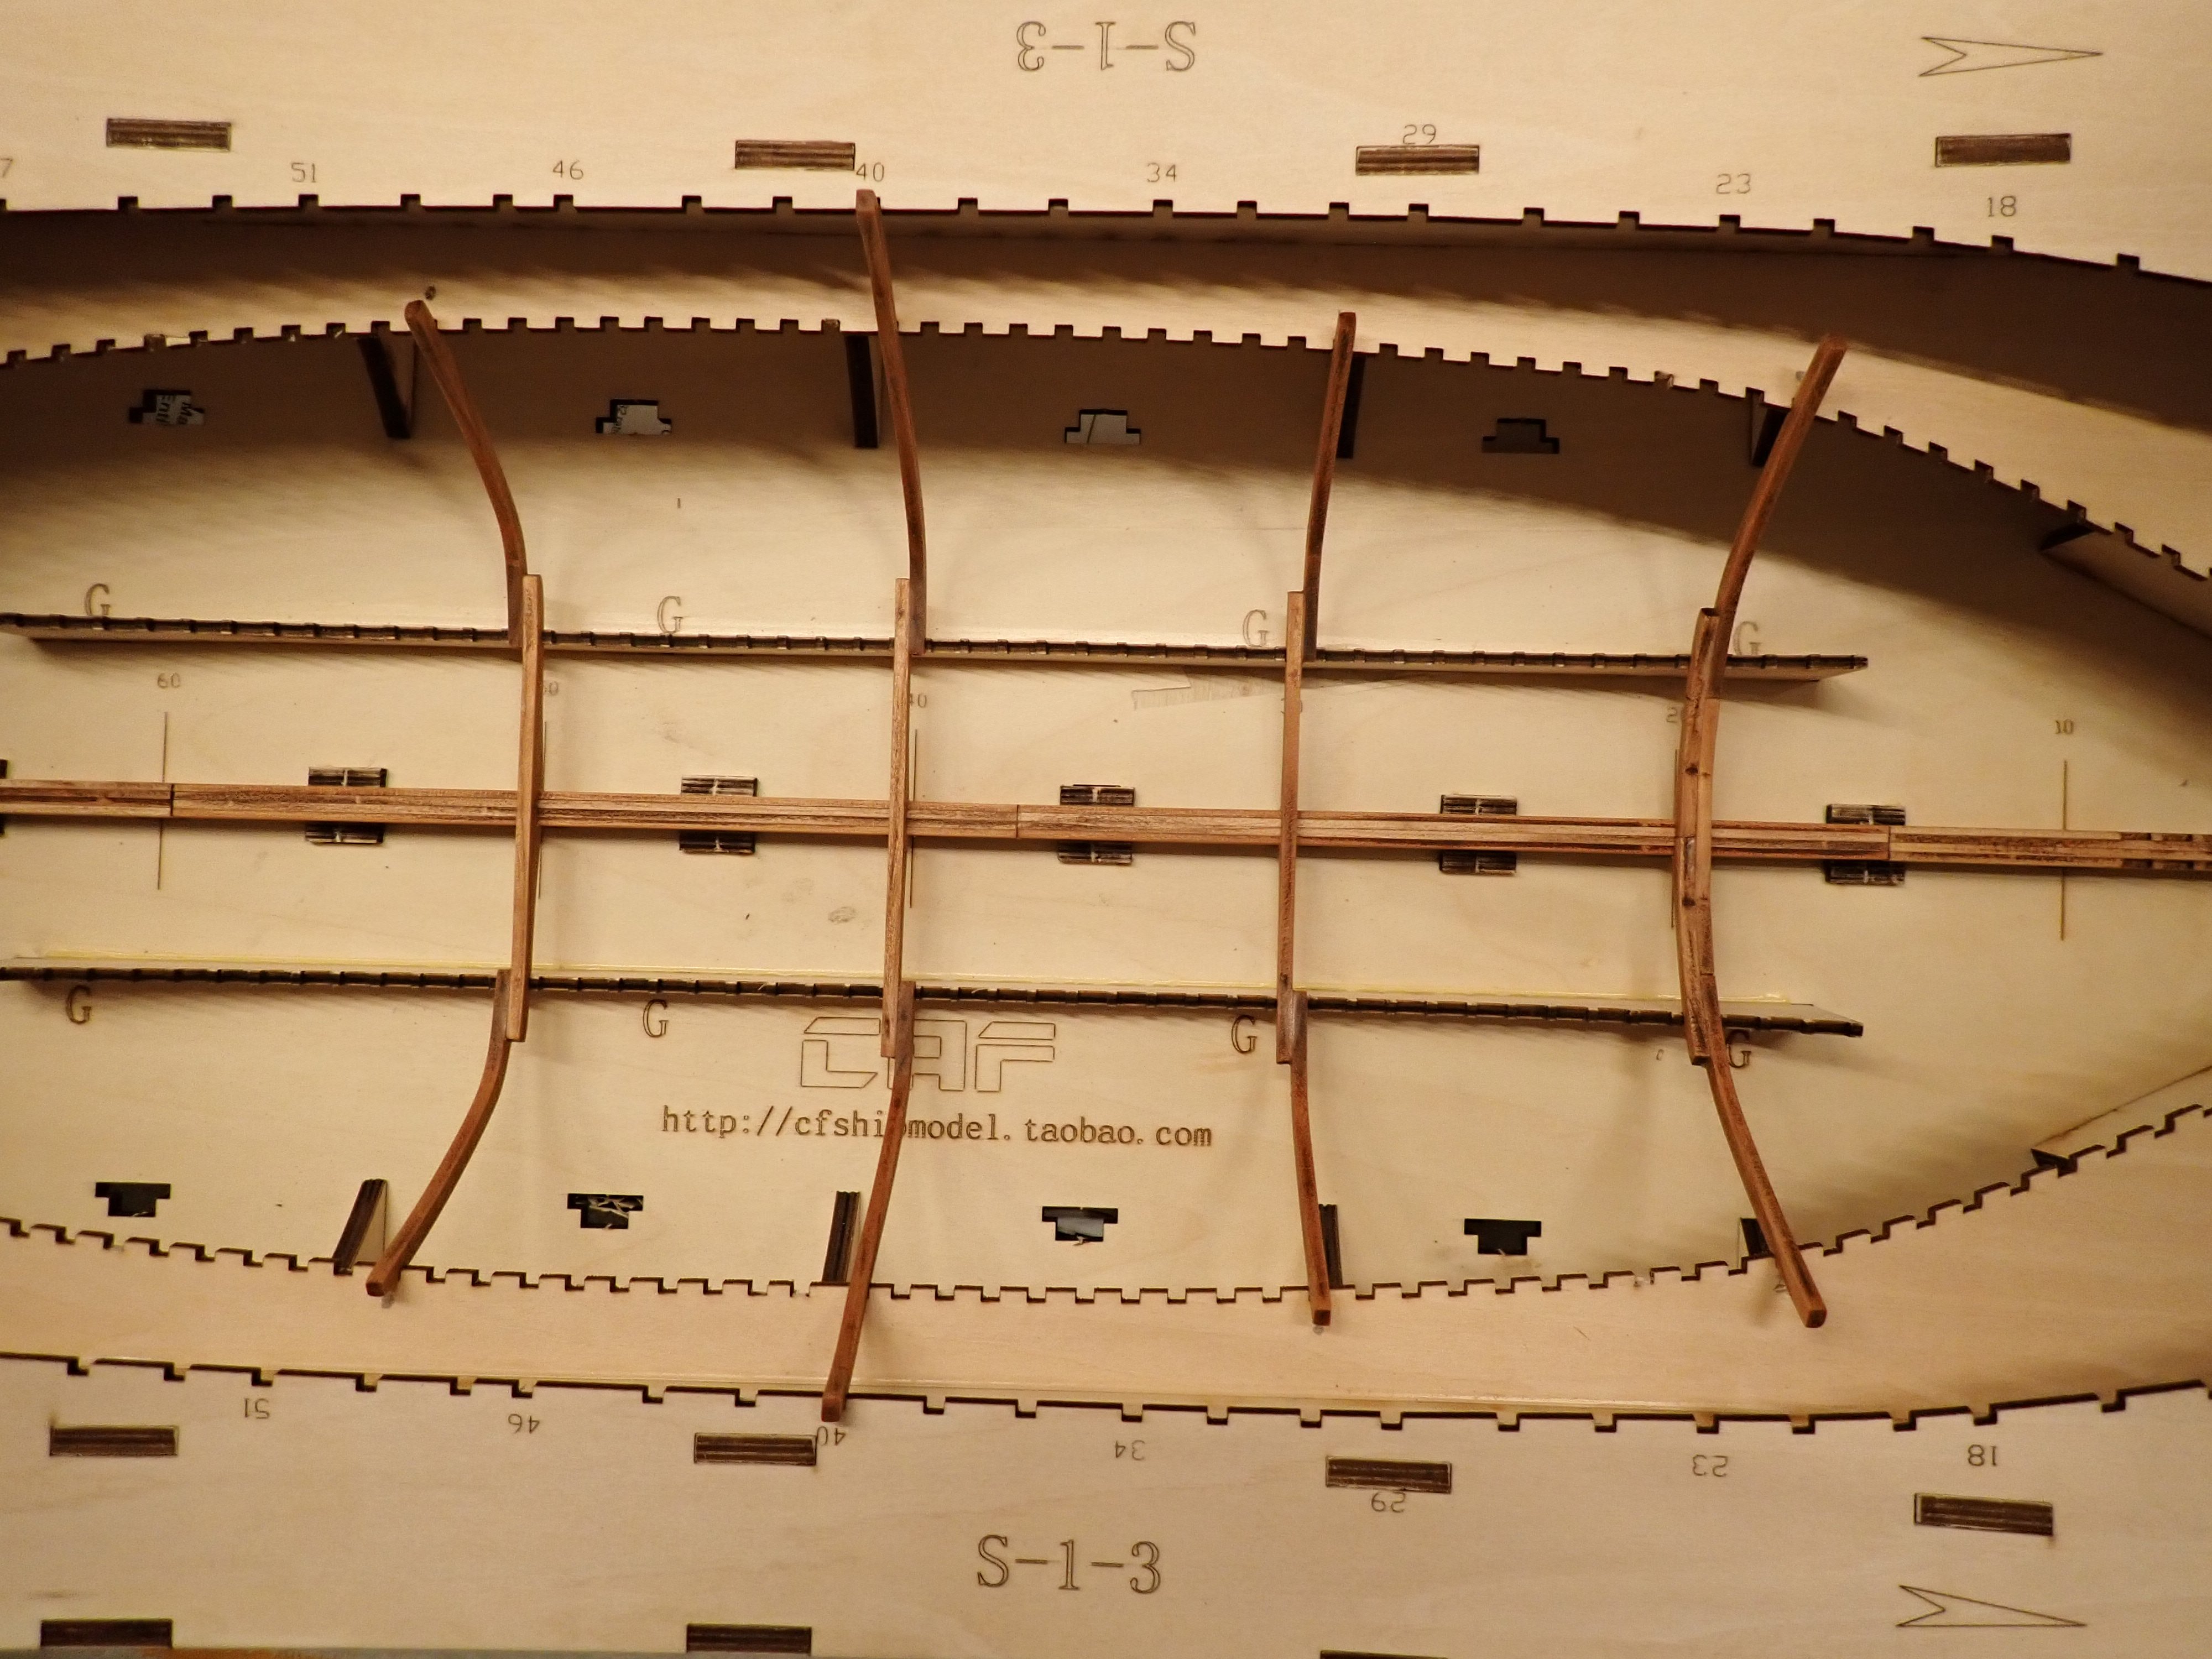
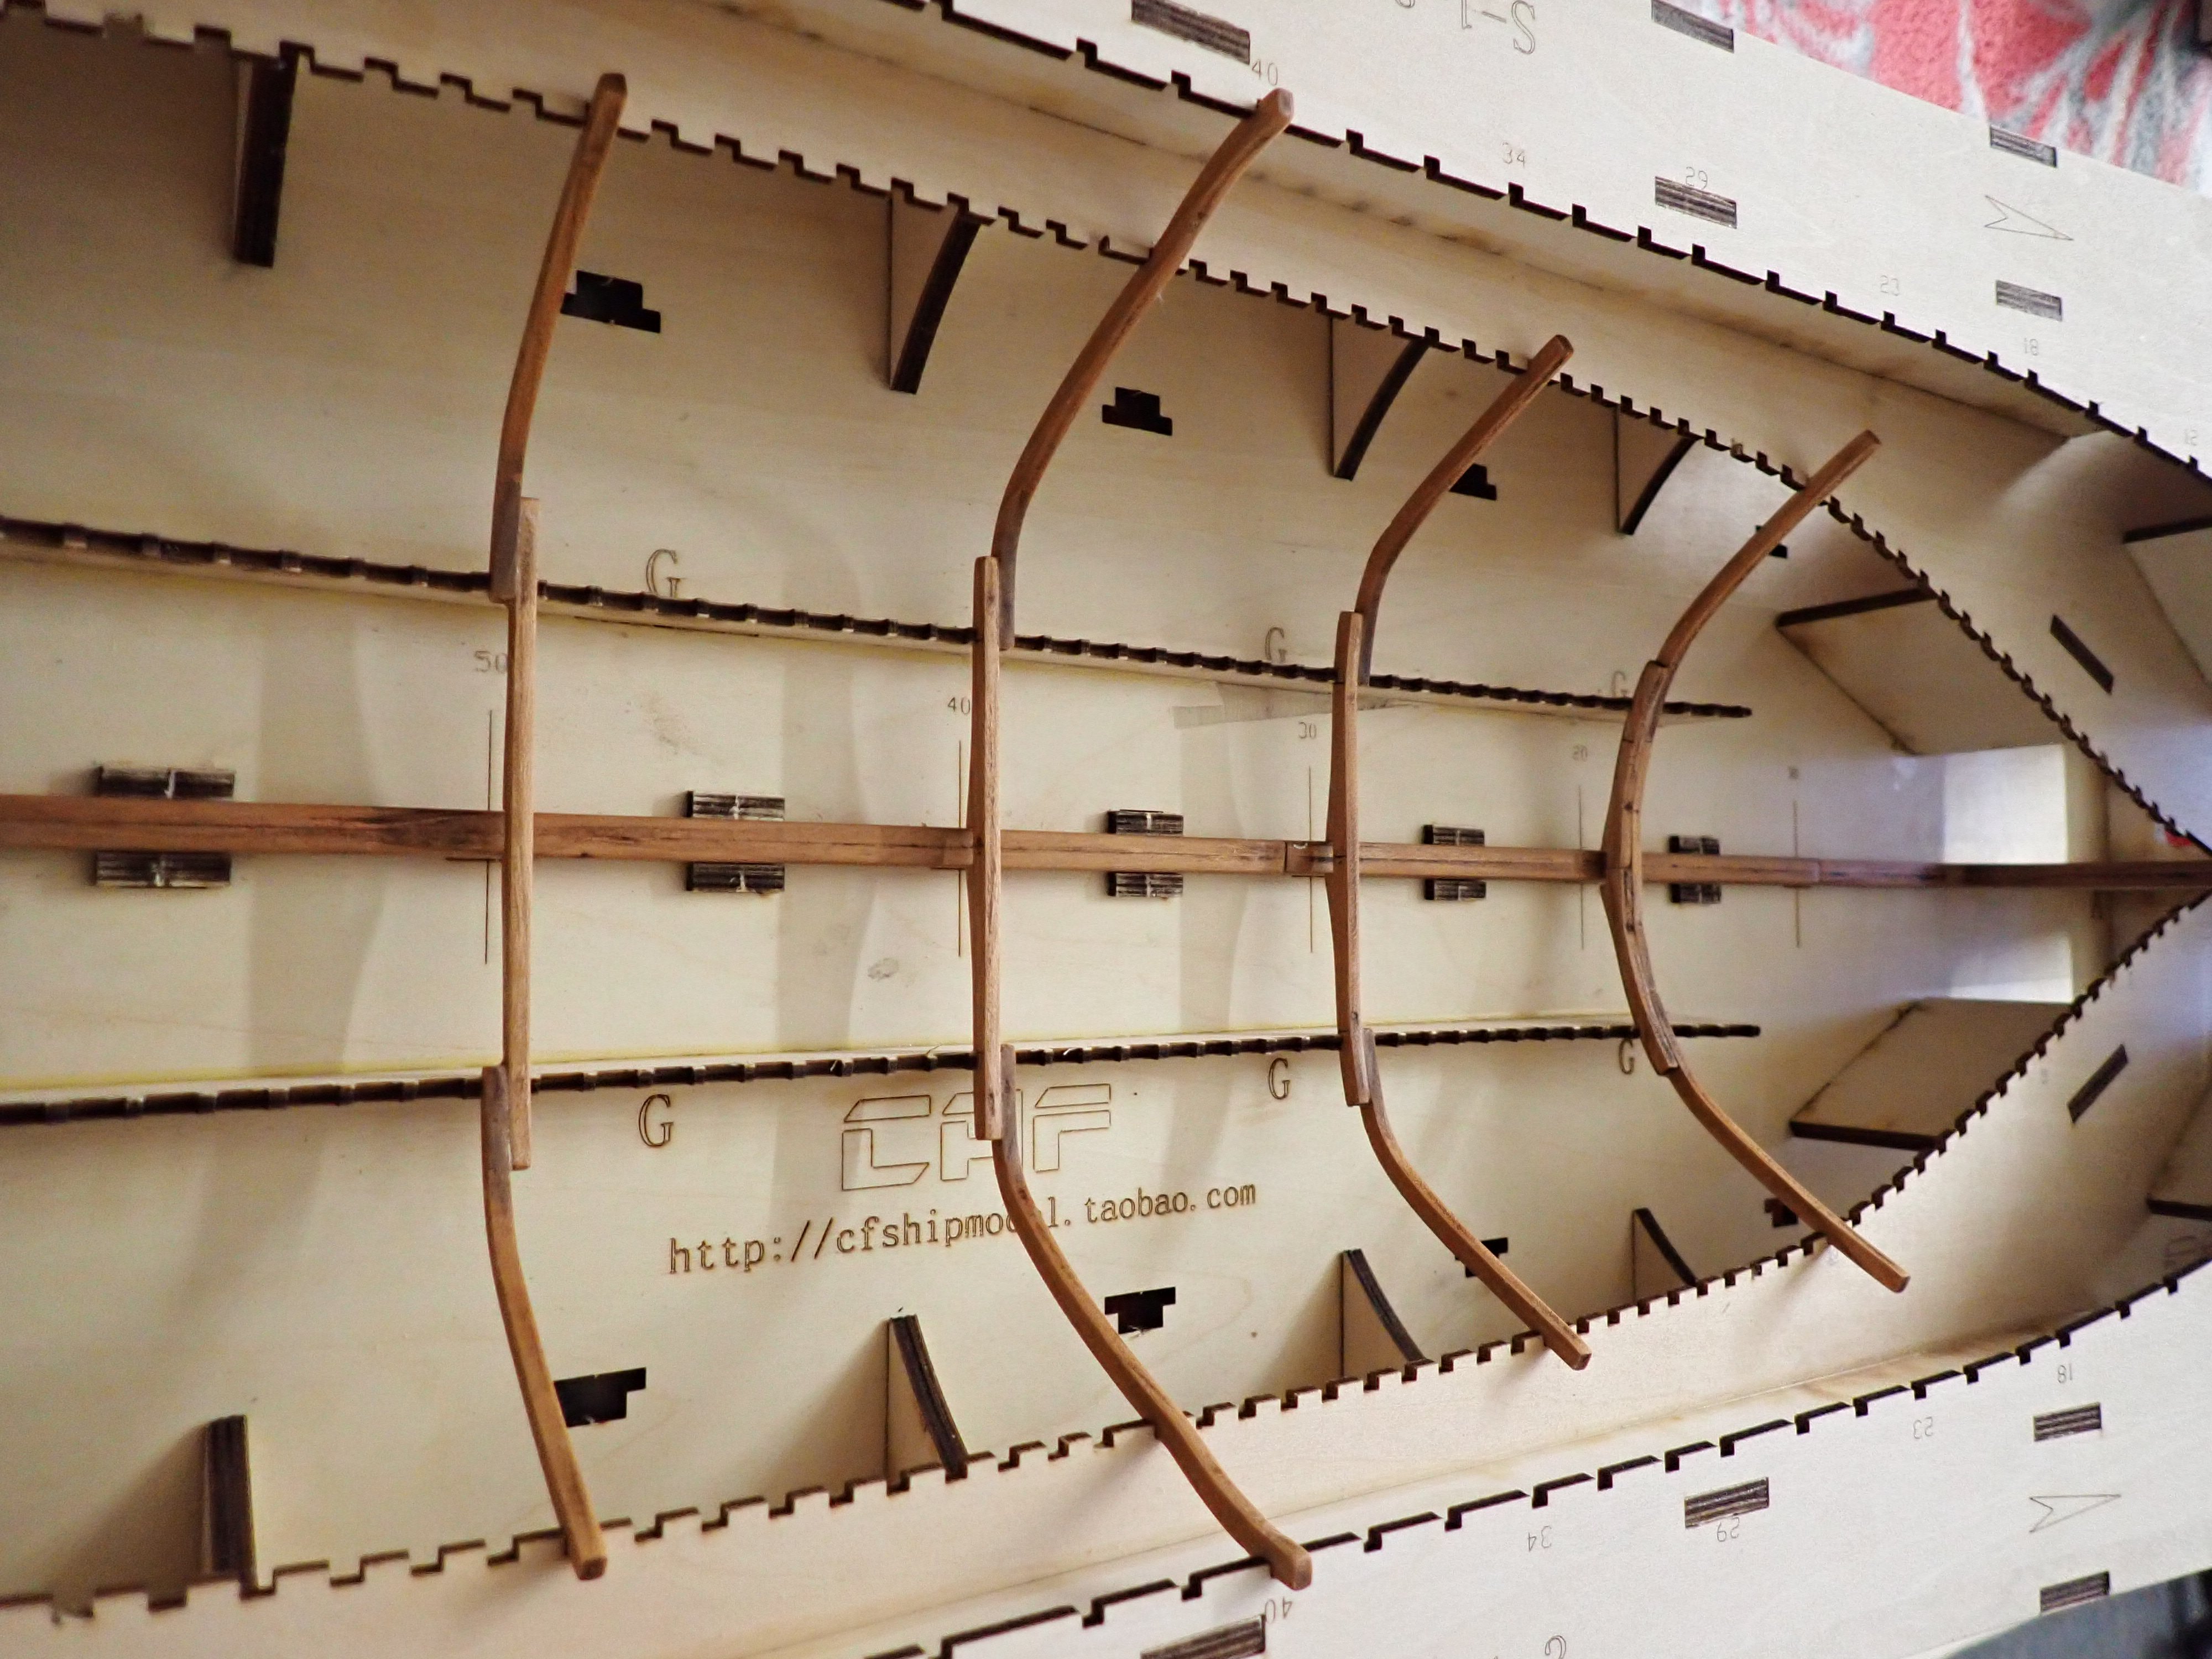
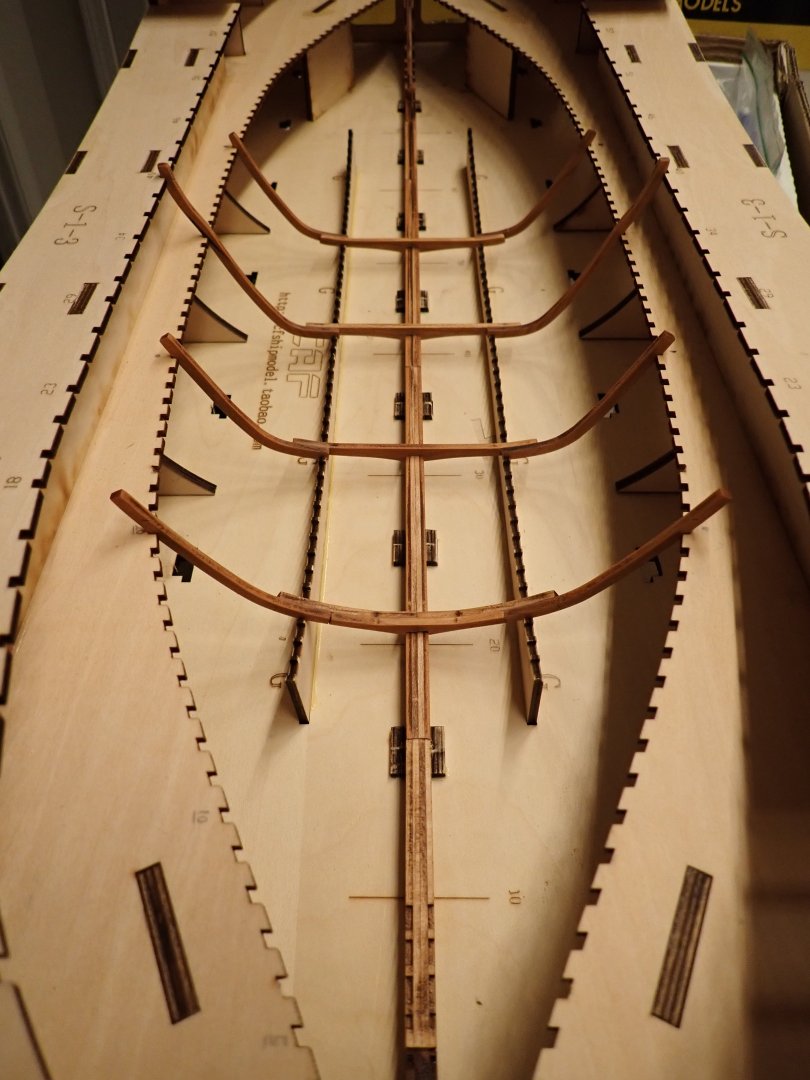
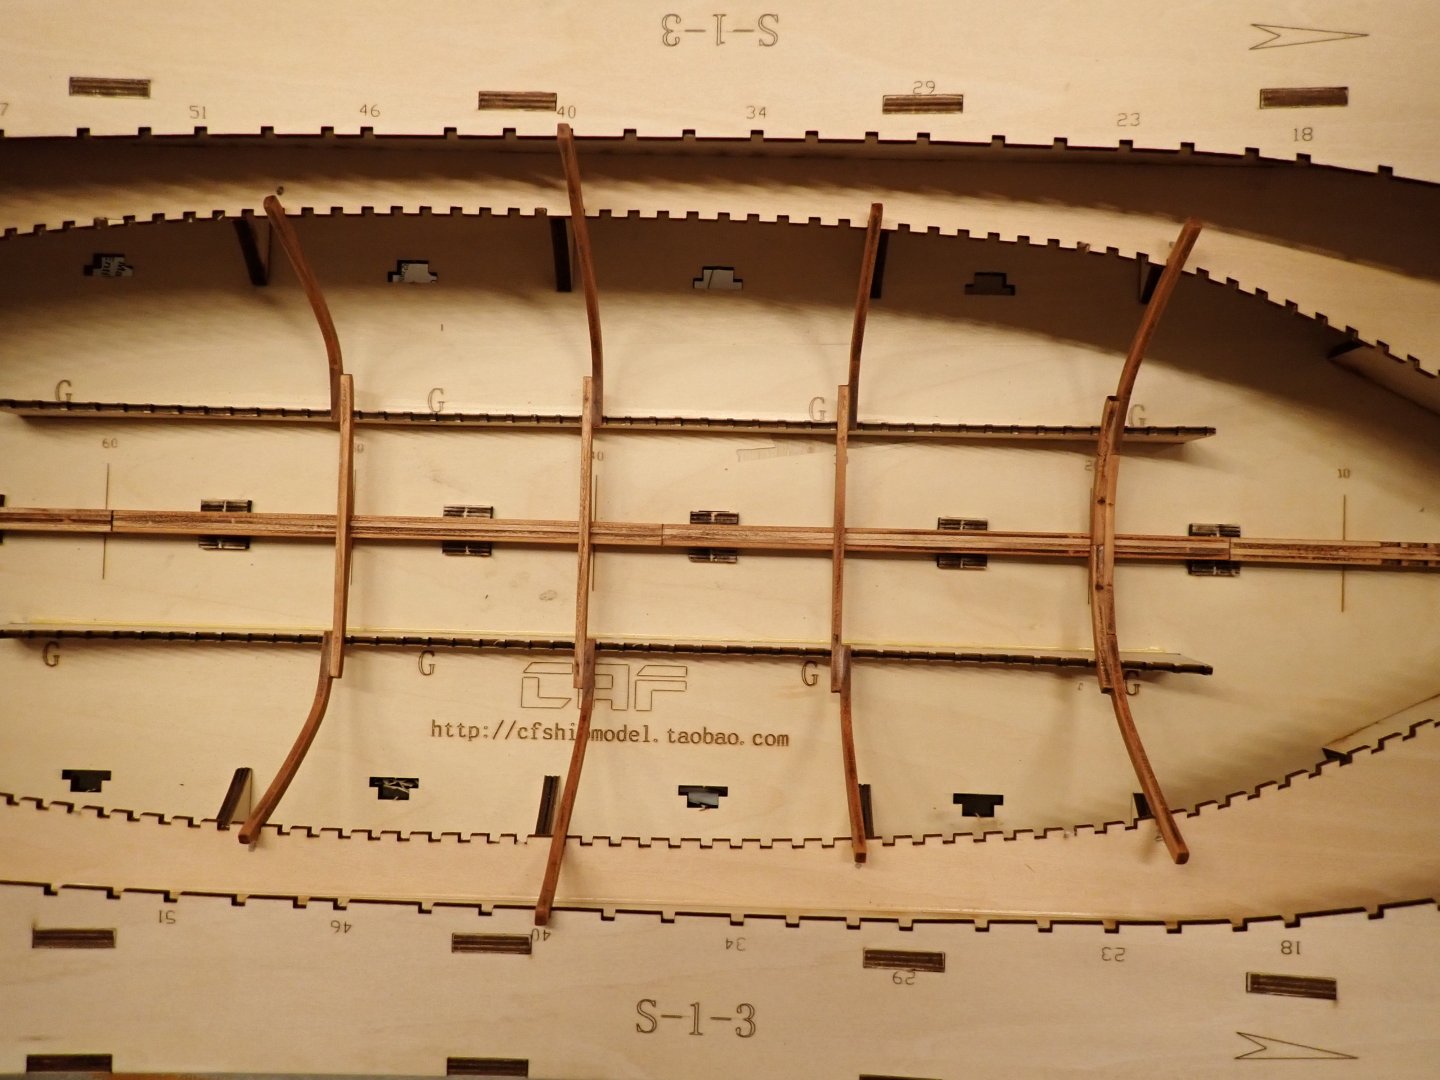
I have completed (more or less) the eight frames #10 to #80 in increment of 10. These frames will still require some more sanding and fine-tuning to fit perfectly and to allow a smooth fairing of the hull. Each frame is made of at least 3 parts, all the way to 5 and 7 parts in some cases. I have to make sure that the frames slide freely into their respective notches, otherwise it will be impossible when glued, to remove the skeleton from the cradle. Also, all this sanding really hurts the fingers.... I may have to use Dremel in the future. Frame #80 is giving me some problems to sit perfectly in the cradle. We will revisit this issue later on, with the building of the stern. Just another 80 frames to build..... 😞 Yves


- 185 replies
-
- 14
-
-
Beautiful track and very realistic. This module is going to be gorgeous, once you complete the water and place the structures. Yves
-
So, the inner keel: it helps strengthen the outer keel and provides a seat for the numerous frames. Bellow are the parts used to build it. Each section is comprised of four layers glued together: Again, the parts are very close to the Monograph. The notches are not spread all along which is not a problem in itself. The seven parts are glued on the outer keel (on a flat table) and left drying for a while. After a little bit of filing, the four frames I built previously, are placed and fit perfectly: Yves

- 185 replies
-
- 13
-
-
In fact, it should be the "Beautiful Hen" rather than the Pretty Chicken. Also, in French slang, a "Poule" is a girl !!! Yves
- 62 replies
-
- 2
-

-
-
- belle poule
- OcCre
- (and 1 more)
-
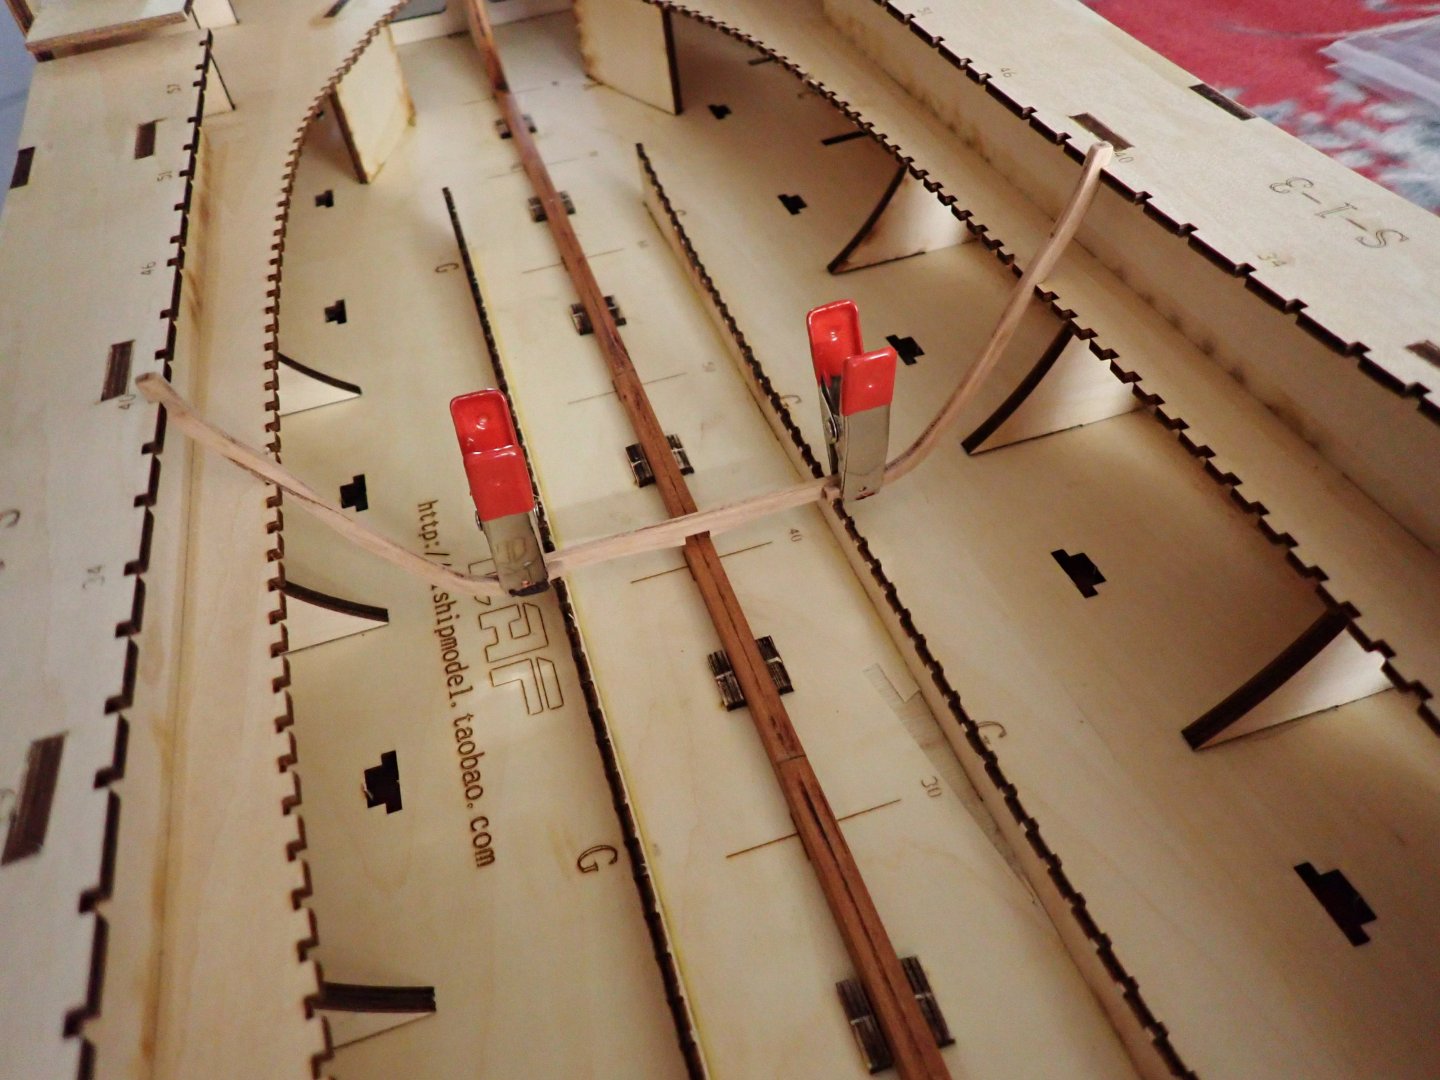
Yes, I do in "situ", clamp the frames, verification against the plan/Monograph, and back in "situ" for the glue to dry. And yes, 88 frames is a lot to do.... I am going to start with 10, 20, 30, 40, 50, 60, 70 and frames #80. That should give an idea of what the hull looks like. Yves
-
These are serious tools. You will be saving a lot of time (and efforts) with these. Yves
- 63 replies
-
- 1
-
-
- Norwegian Sailing Pram
- Model Shipways
- (and 2 more)
-
Phil, When you "laminated up", what do you mean exactly? I am completely ignorant when it comes to paper models and was wondering what is the exact process. Thank you. Yves
- 288 replies
-
- 4
-
-
- Card
- Pre-Dreadnought
- (and 3 more)
-
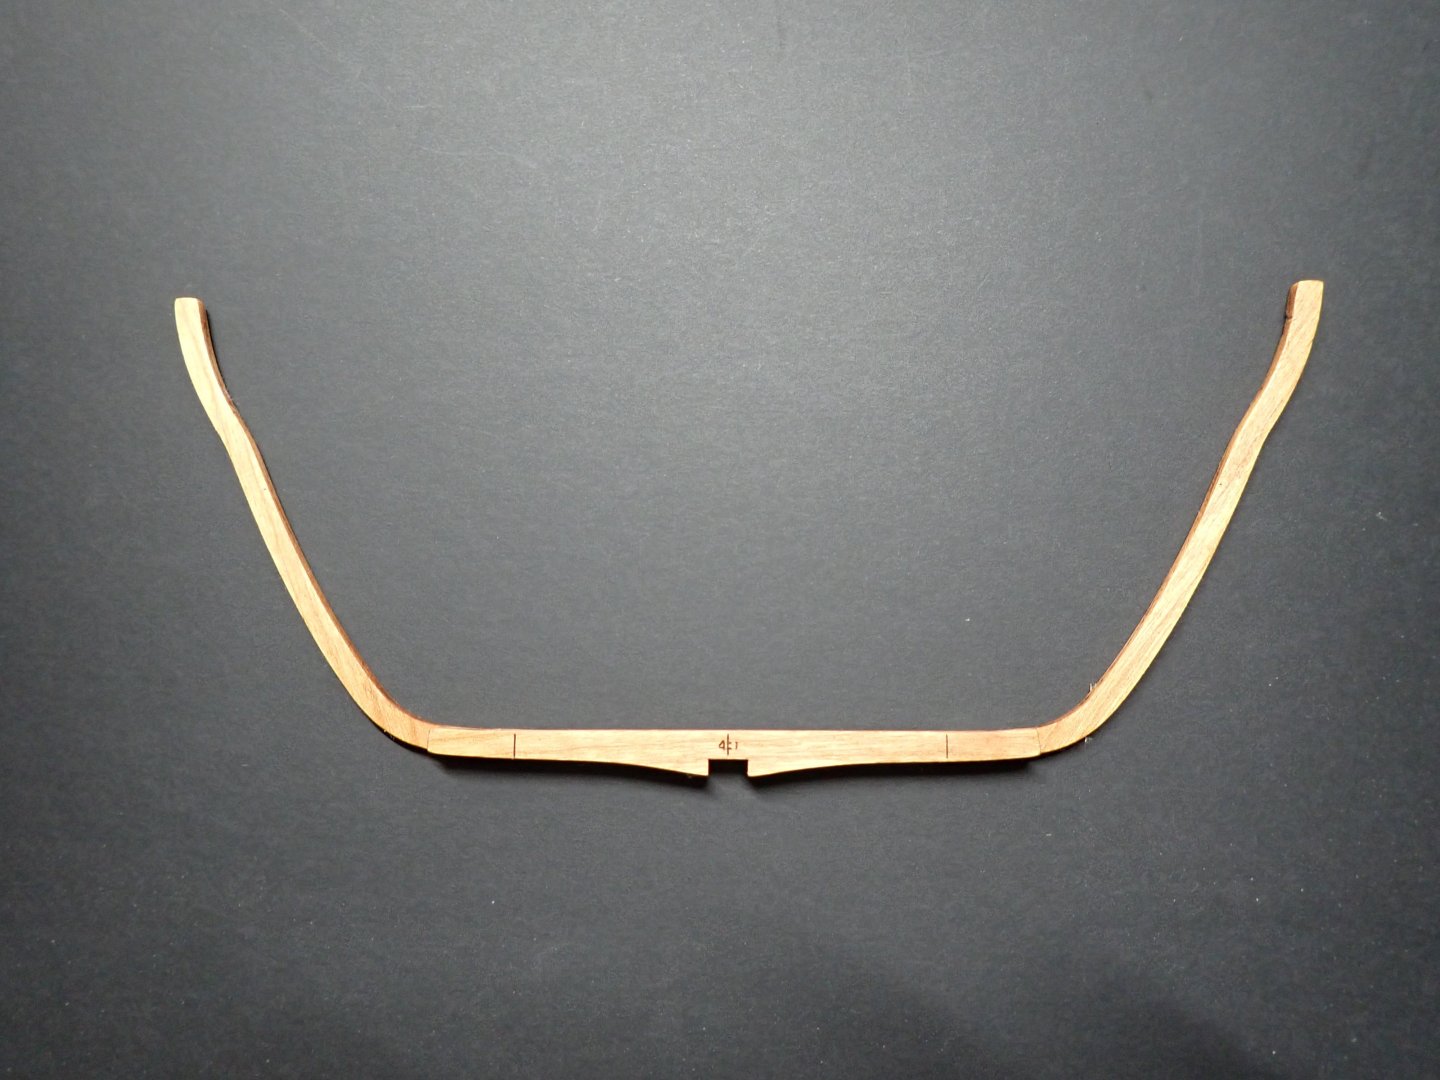
I was curious about how these thin frames will fit in the cradle and decided to build one (the easiest one), #40. There are 88 frames in total. There are multiple way you can build these frames: You can assemble them on the plans, as each frame is clearly depicted in real size. Or you can assemble them in situ, directly inside the cradle. I decided to use Option 2. After removing all the chars (most of it...) from the parts, I glued them in situ: When dry, the frames is finely sanded and oiled: And then placed back in the cradle. The frame does not touch the keel yet, since I have not assembled the inner keel. This is not going to be easy and I will be happy if I do one or two frames per day. The most tedious is of course, removing all the traces of charring. Yves
- 185 replies
-
- 16
-
-
I am cleaning up my sunglasses.... 🙂 Yves
-
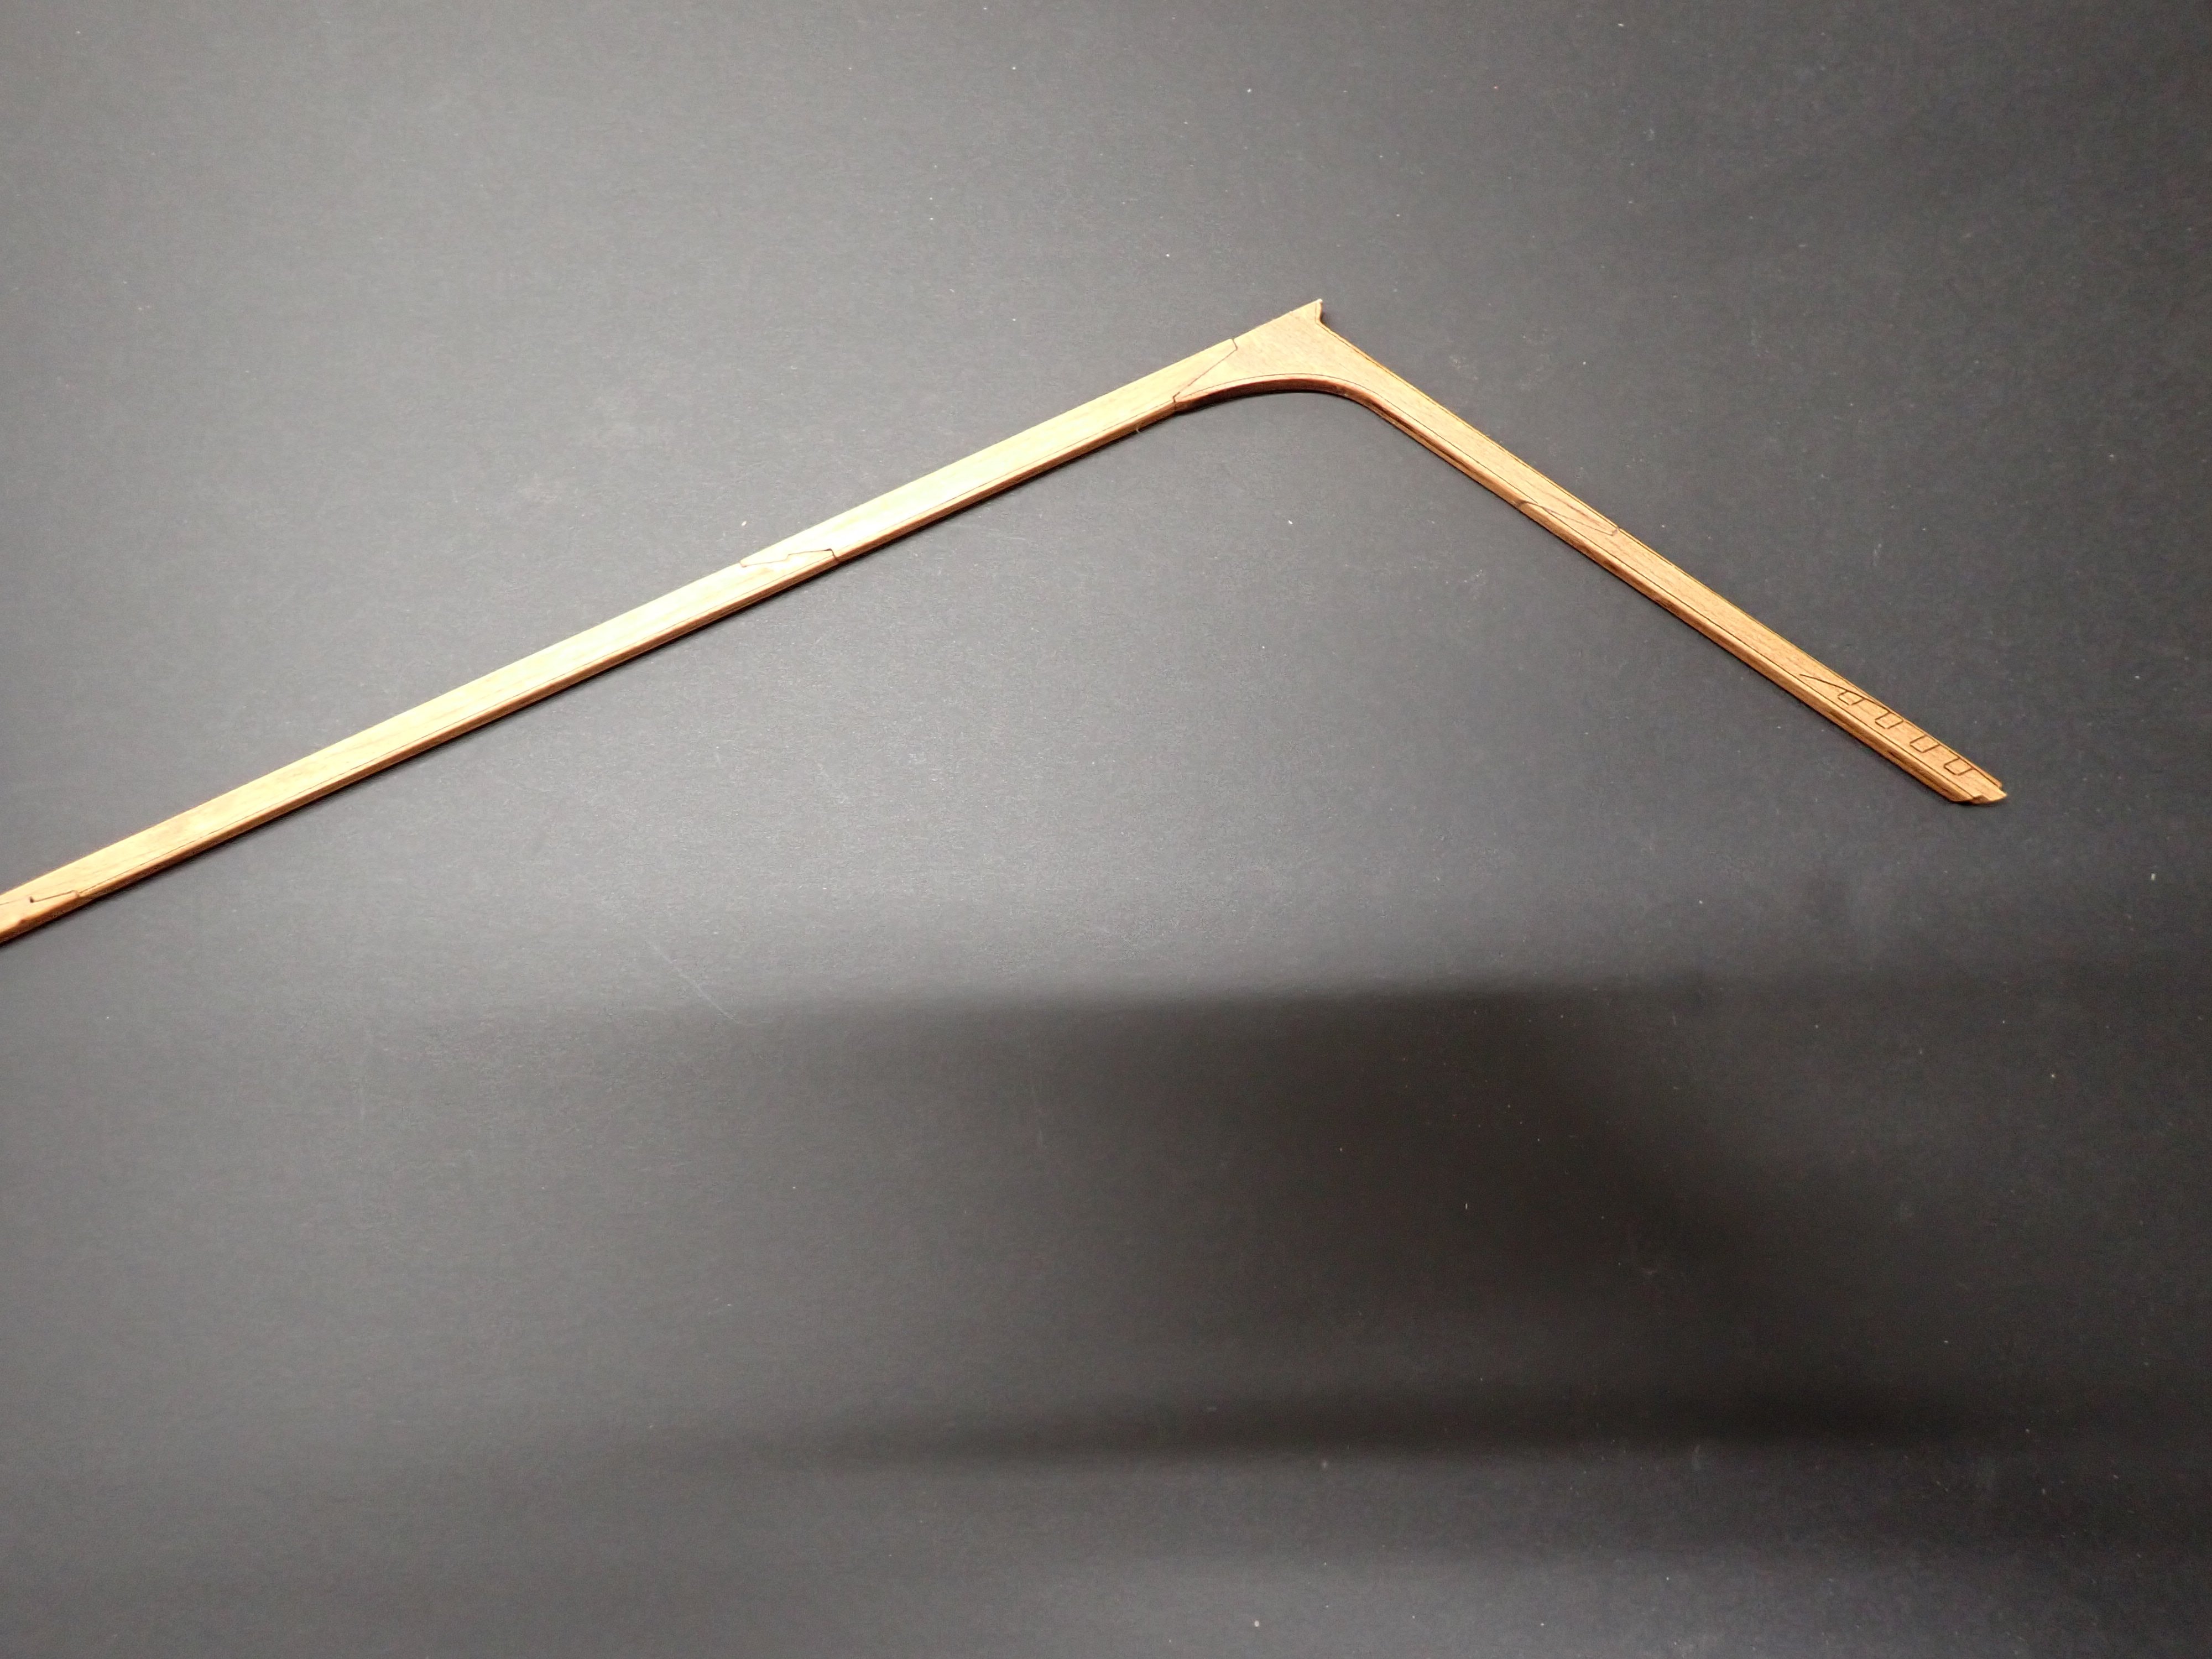
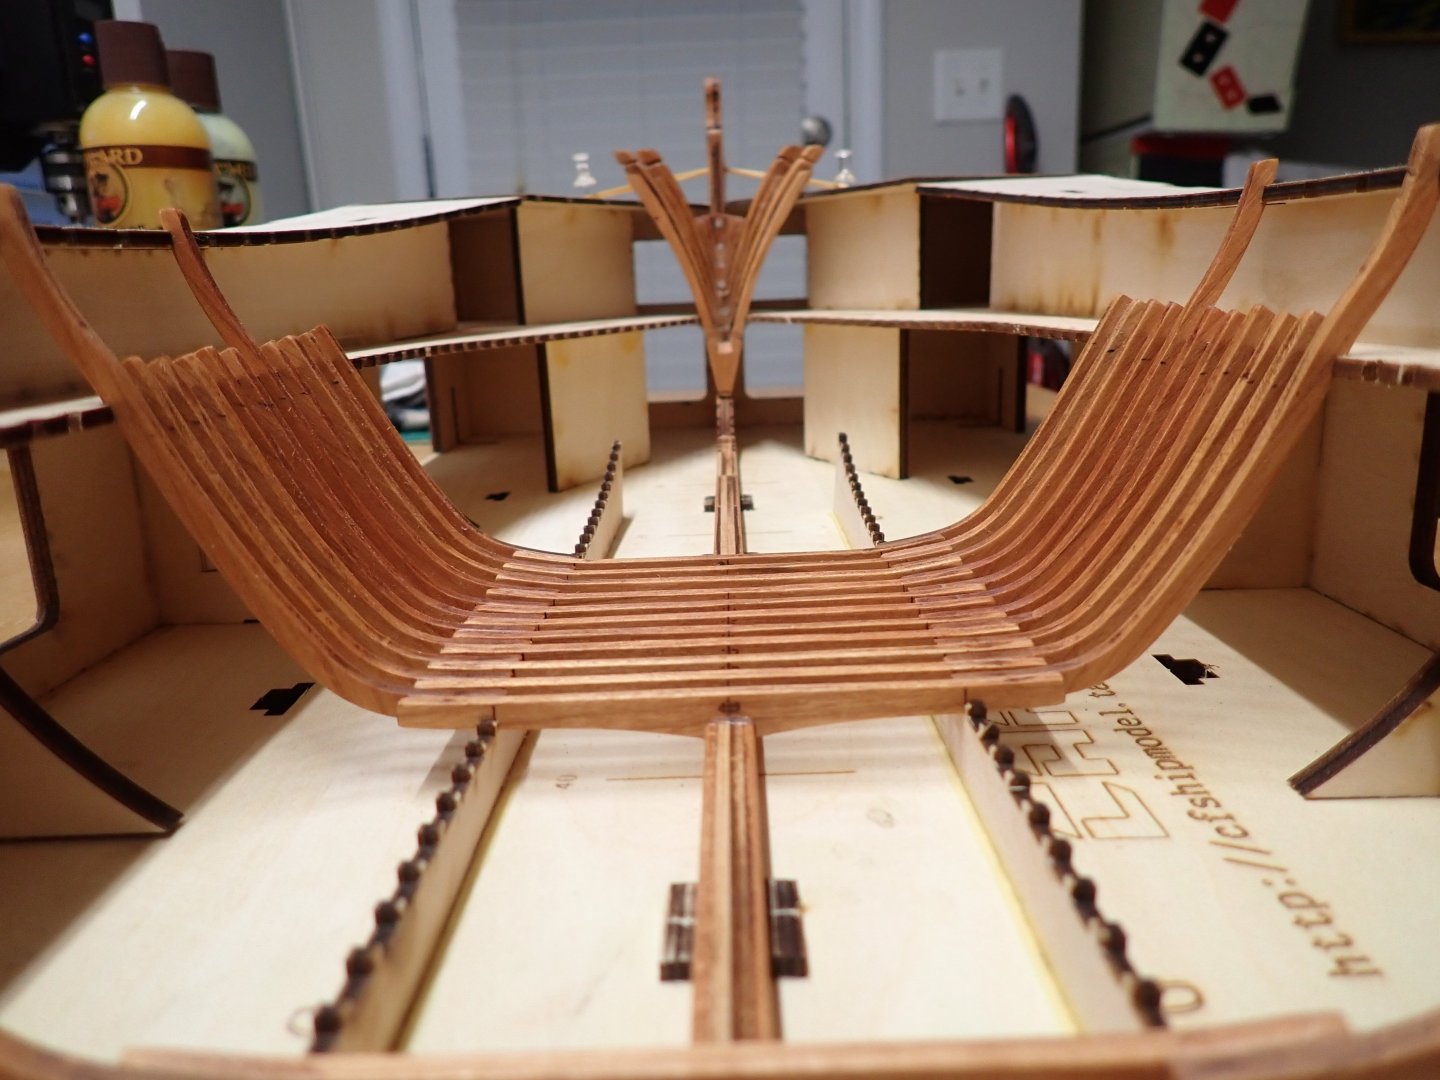
On the Chebec CAF Model kit, there are two keels: the external keel and the internal keel, that supports all the frames. I started building the external keel. Again, each segment is made of two pieces of cherry tree wood, glued together. Their shape and length match the Monograph of the Requin. I like straight keels and similarly to what I did with the CAF Bellona, the Chebec keel is sandwiched between two straight rulers and left to dry for a few hours. The bow and stern pieces are then glued: At this point, the keel is very fragile and needs to be manipulated with a lot of care. It does fit perfectly into the cradle, which is a good thing. It will be re-enforced by the inner keel later on. Yves

- 185 replies
-
- 16
-
-
An interesting build. I will be following with a lot of interest. Yves
- 288 replies
-
- 3
-
-
-
- Card
- Pre-Dreadnought
- (and 3 more)
-
Yes, they are. Old stuff that was dismantled 20 years ago. Yves
-
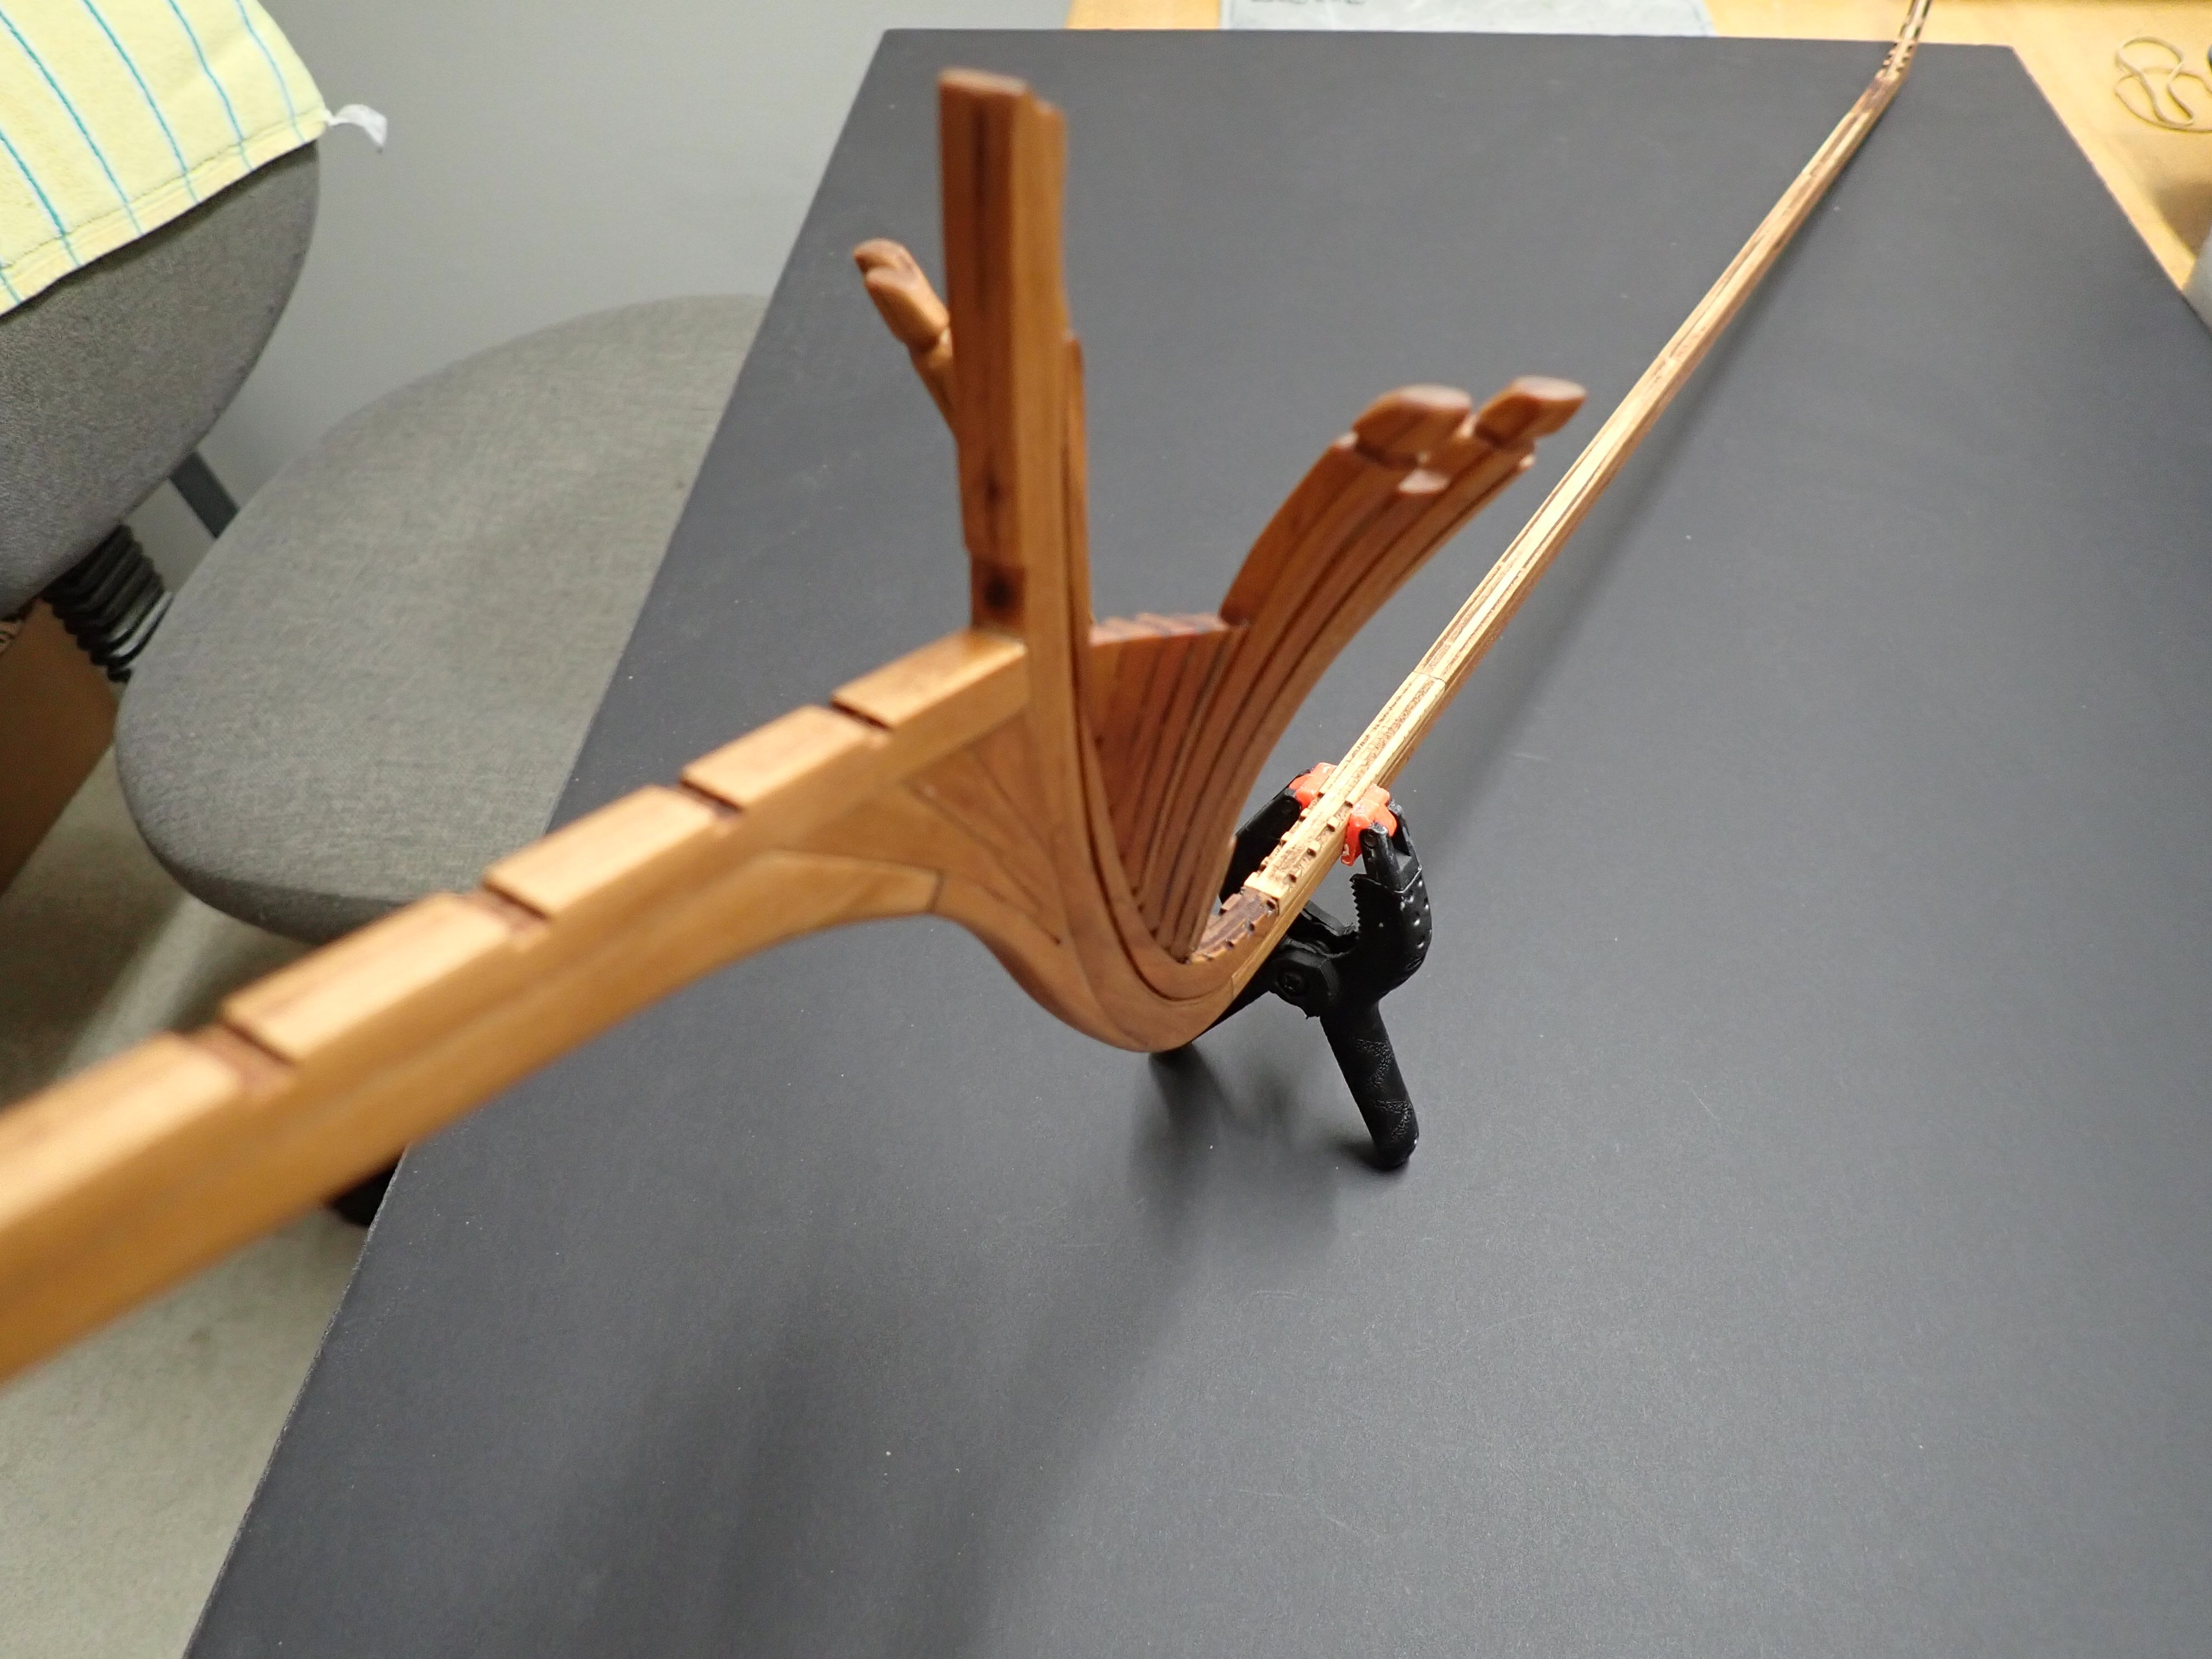
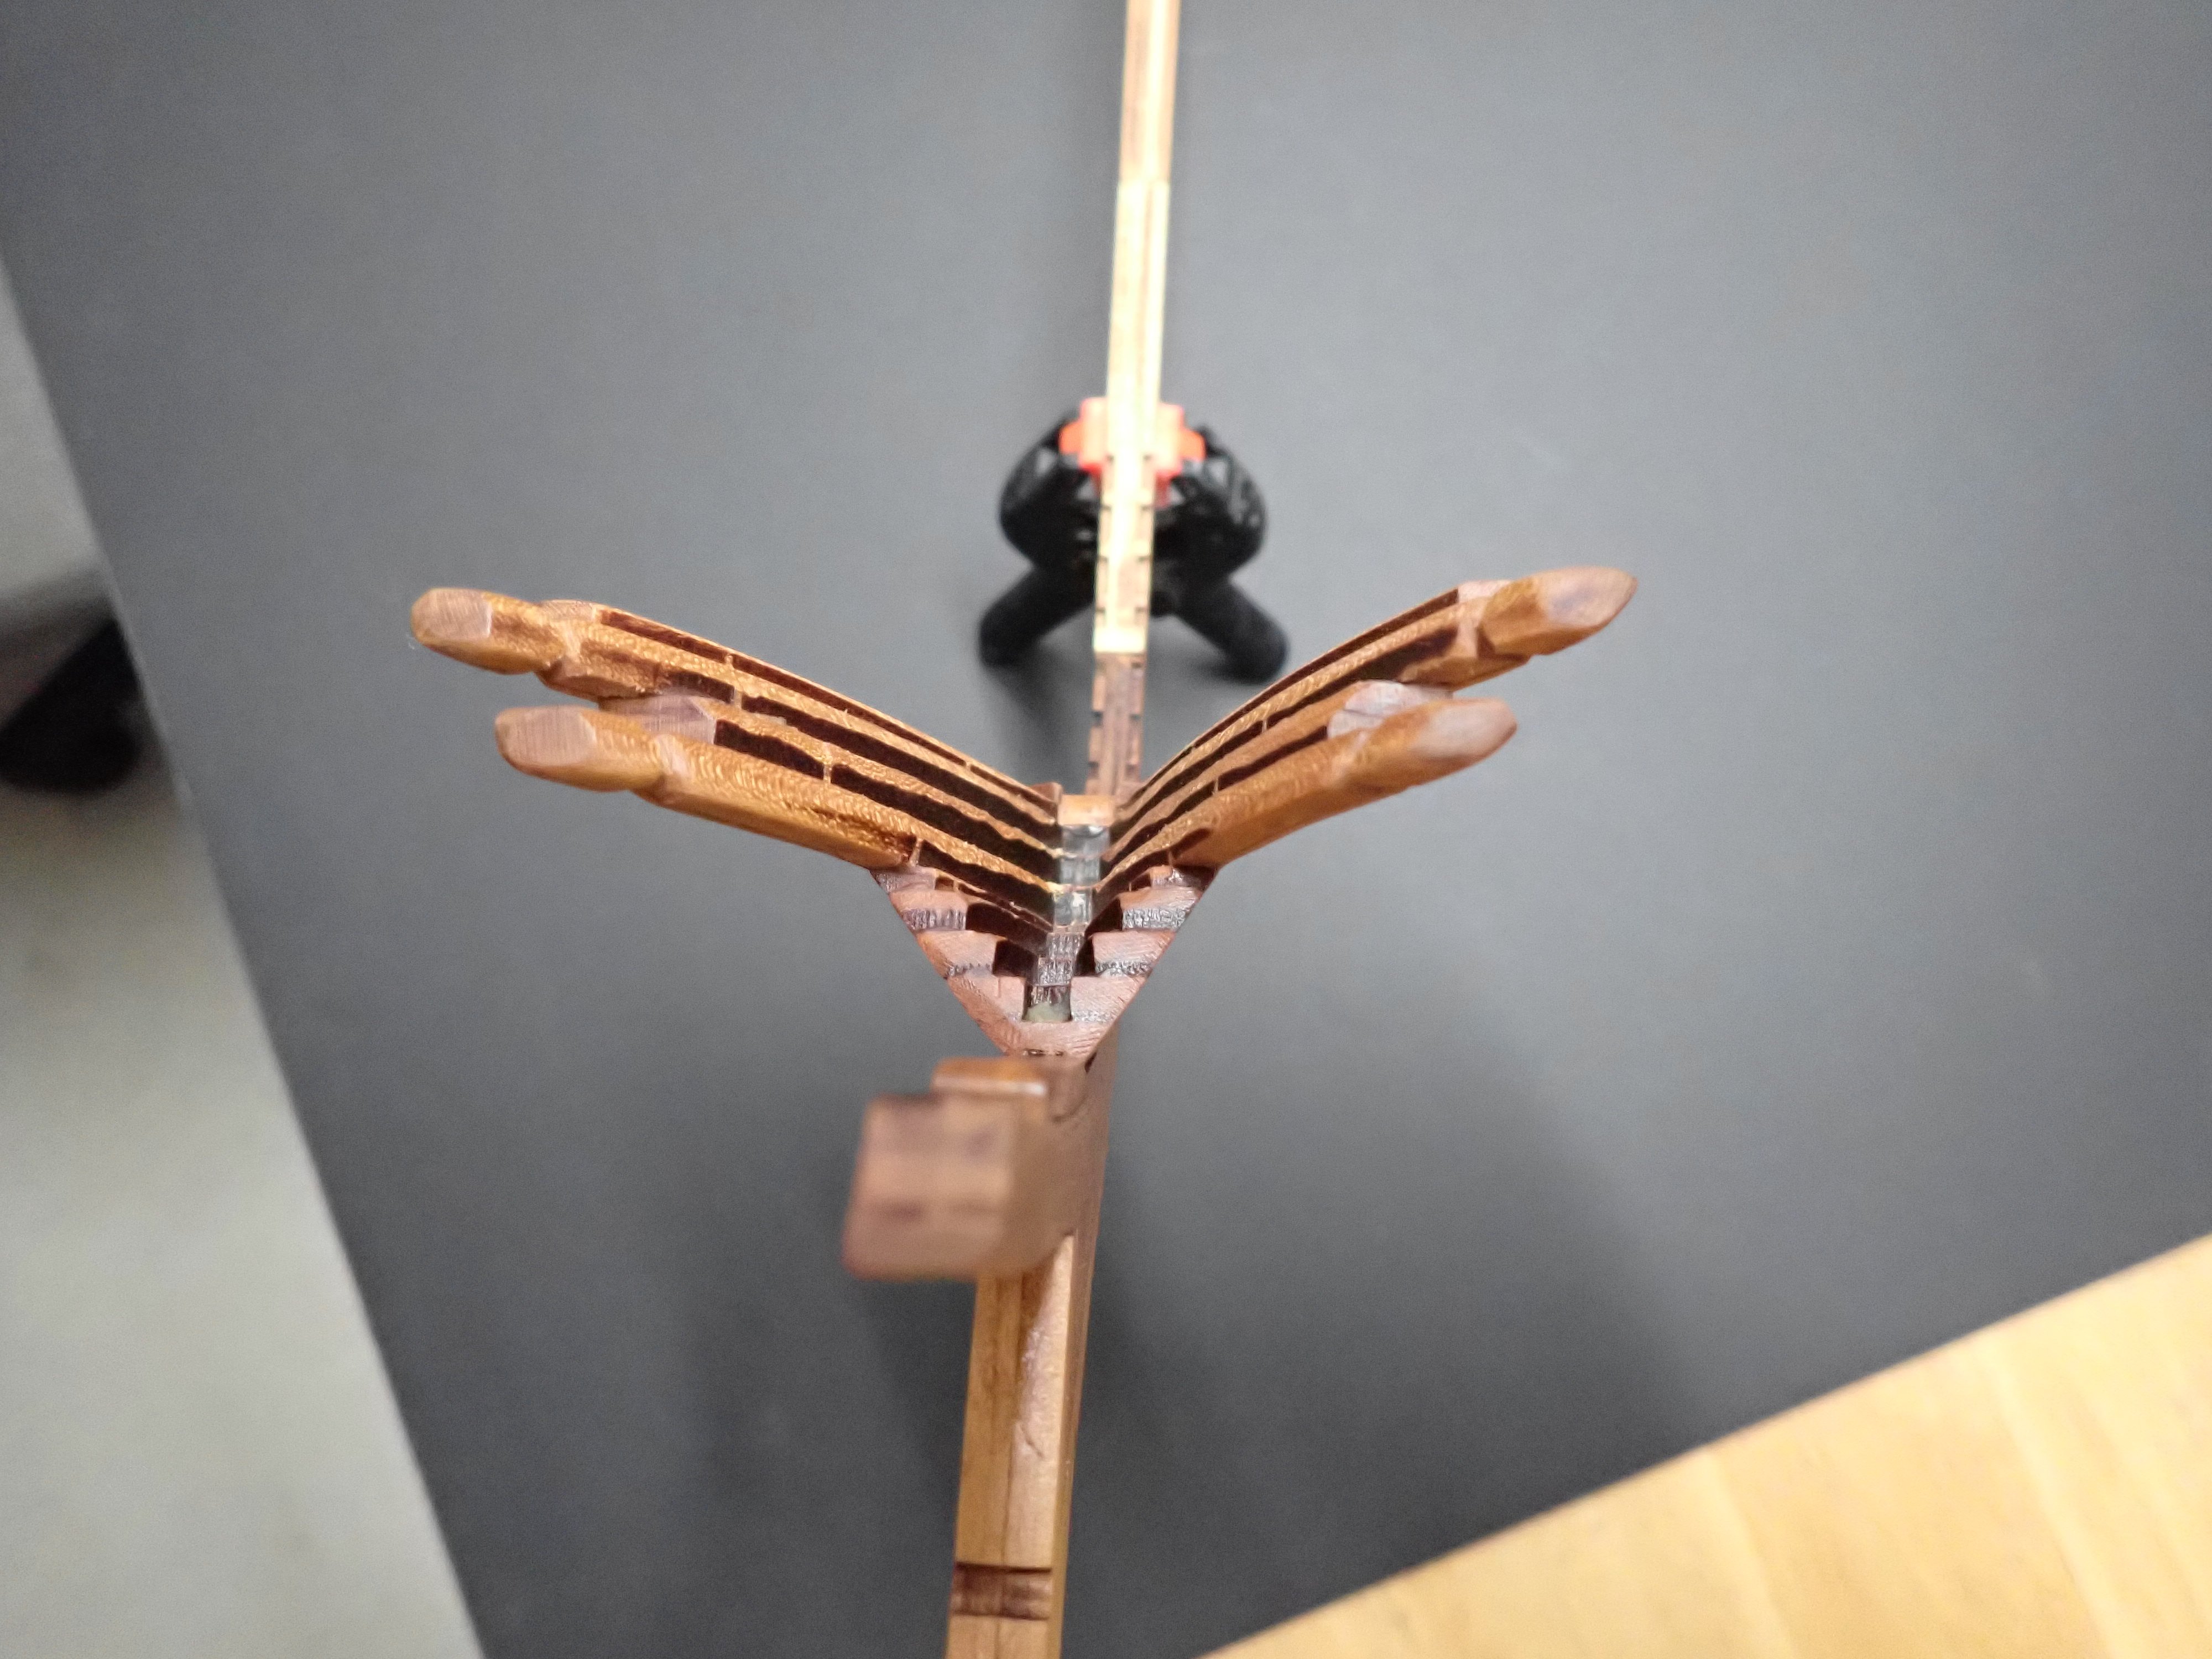
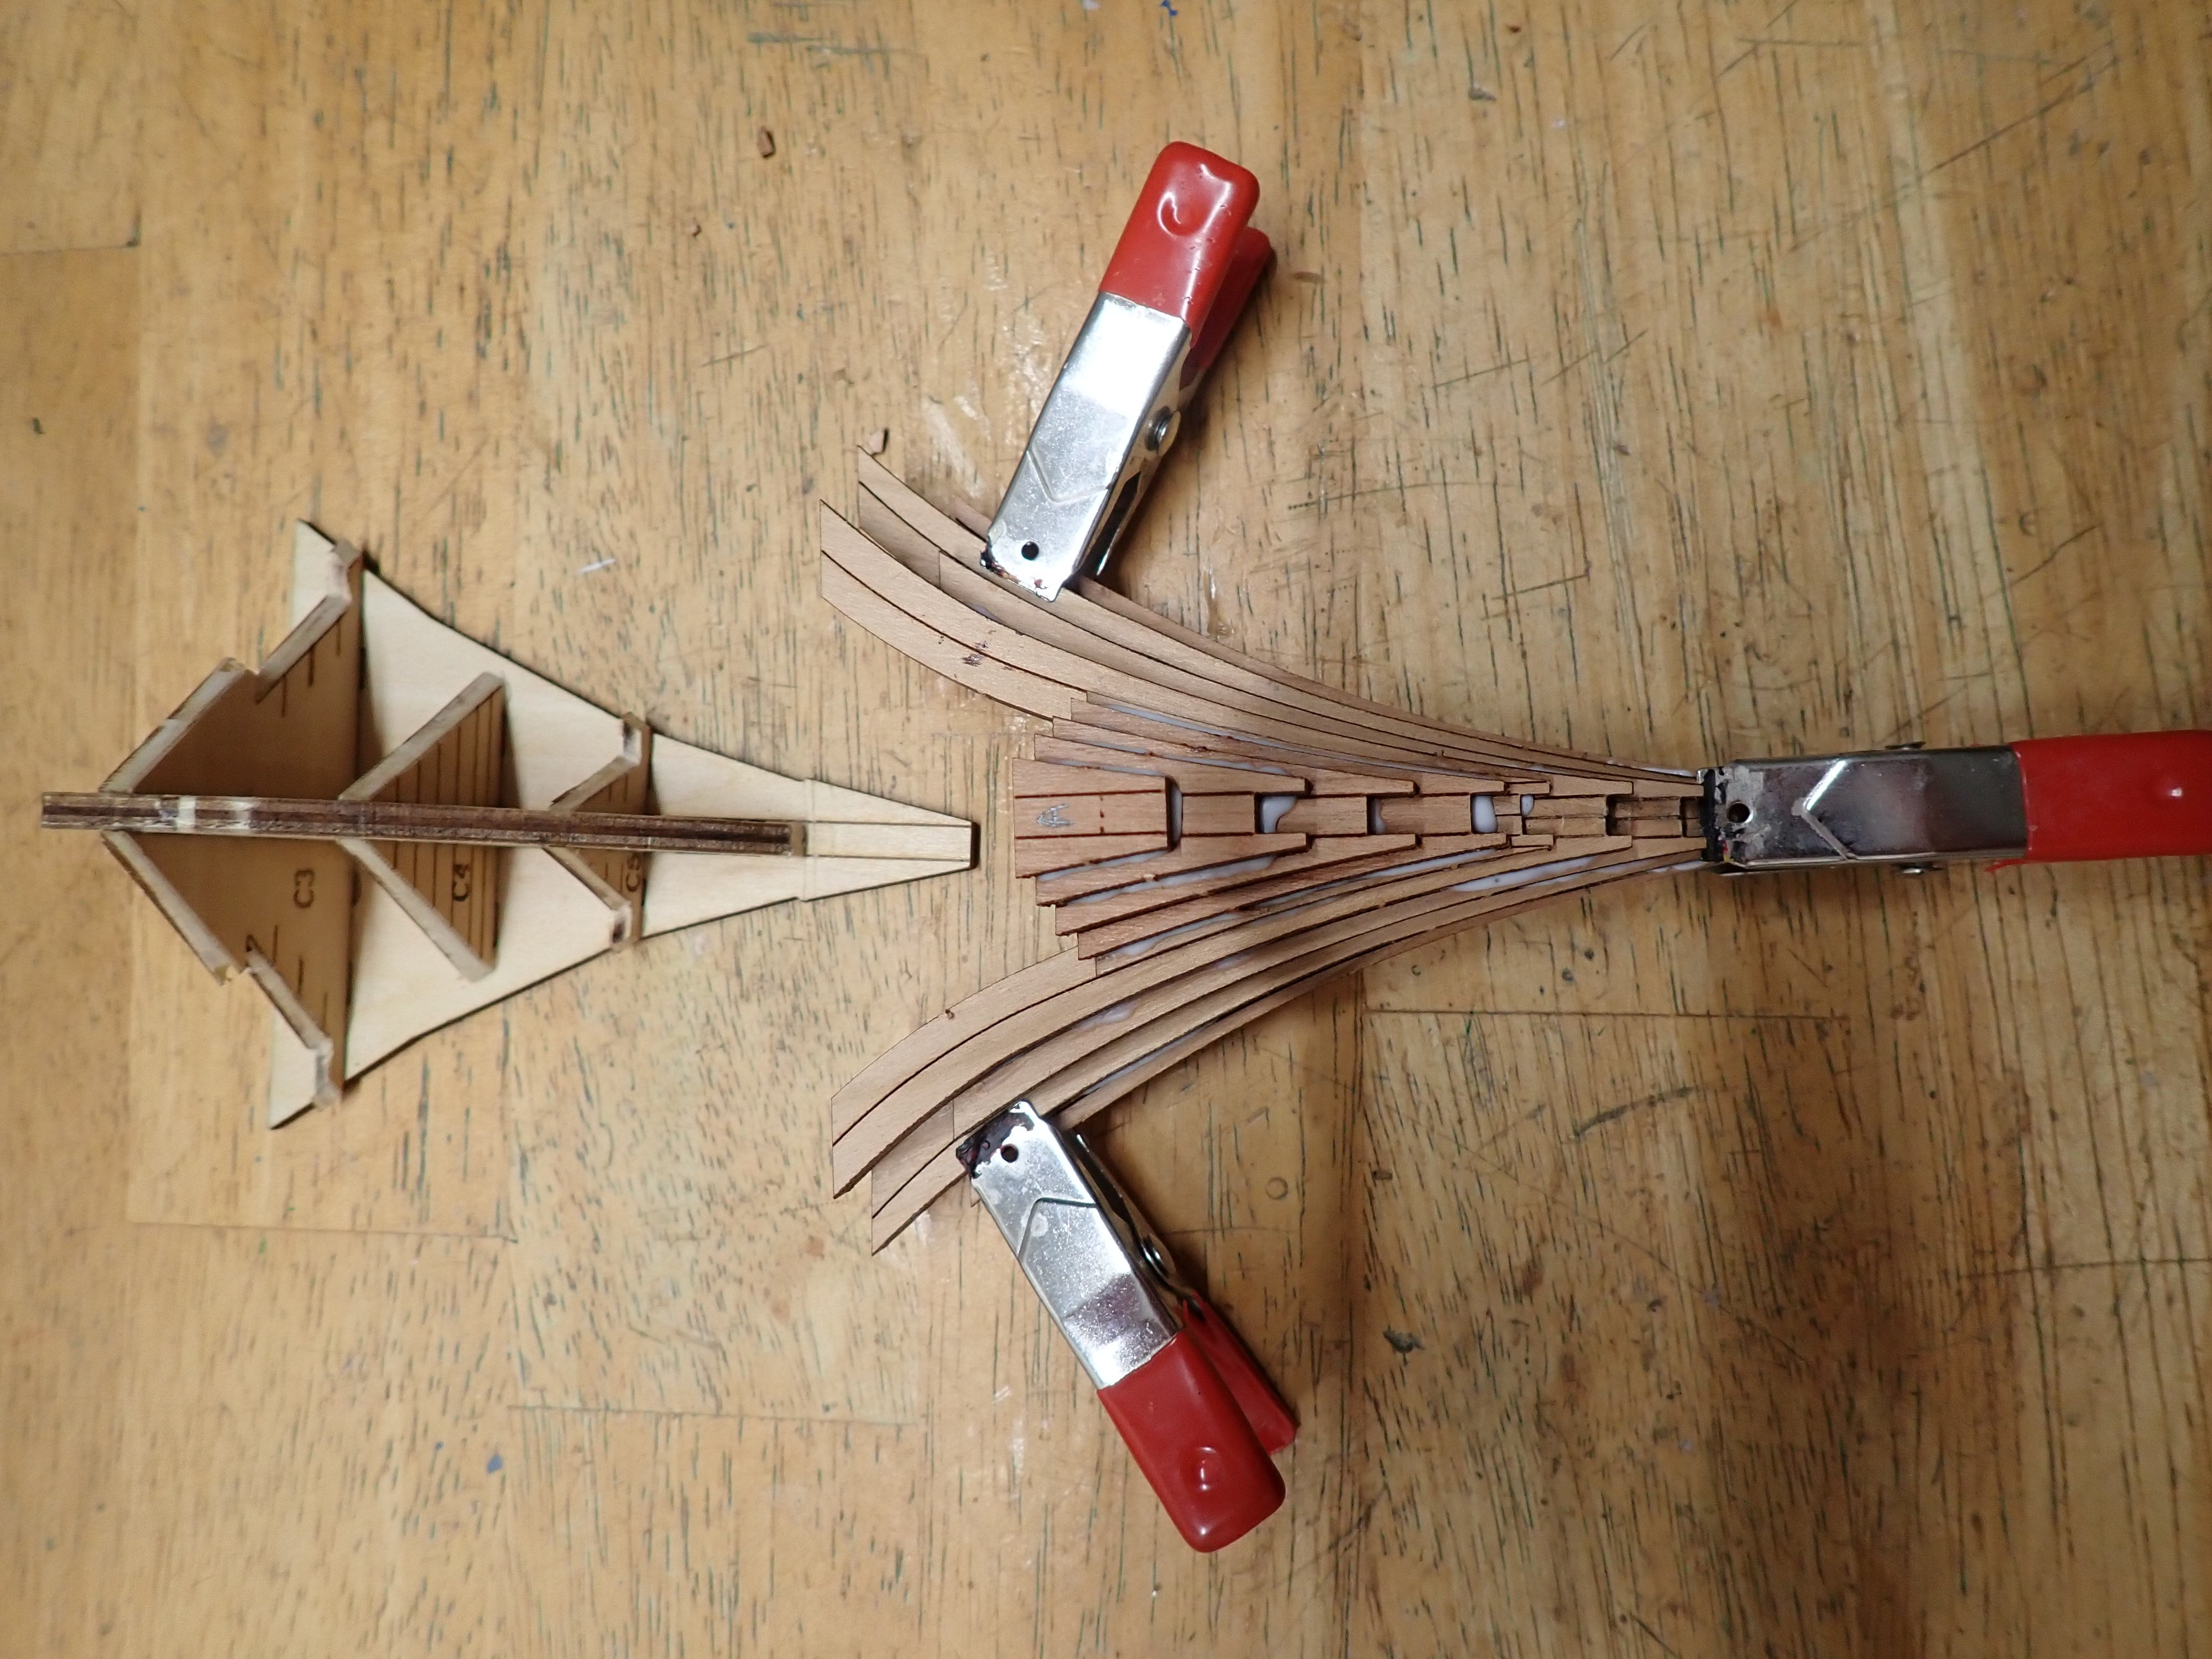
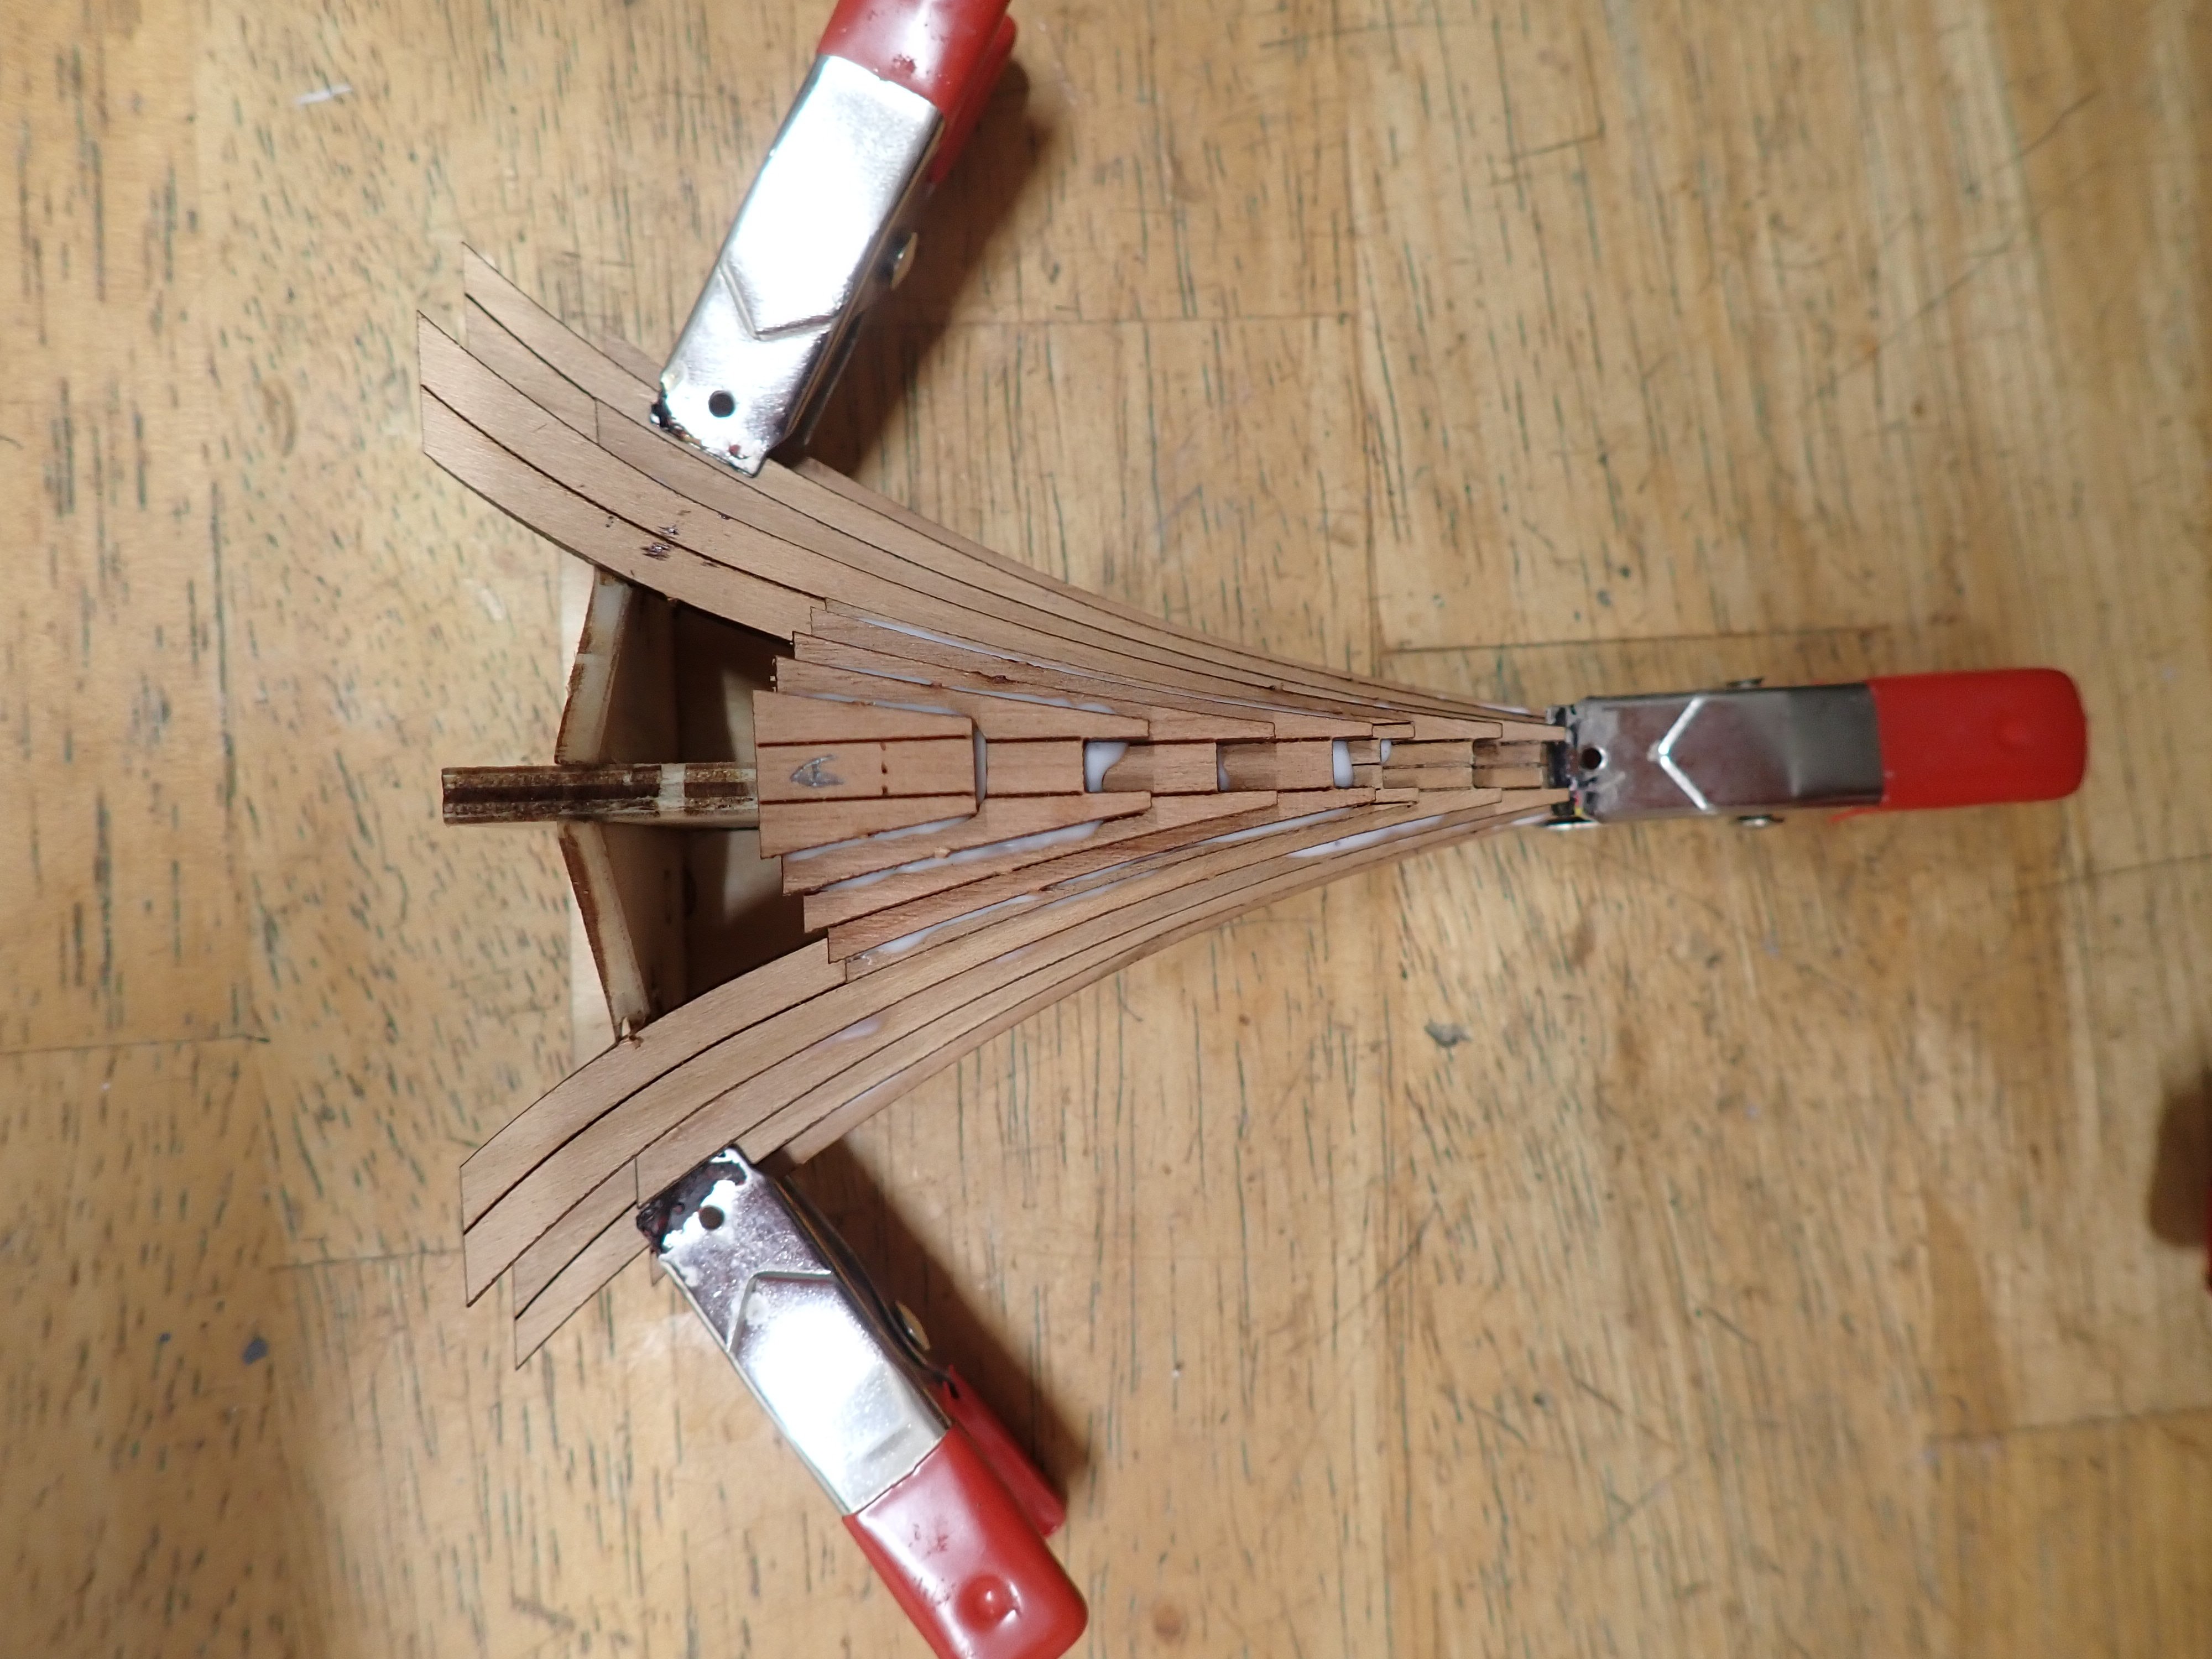
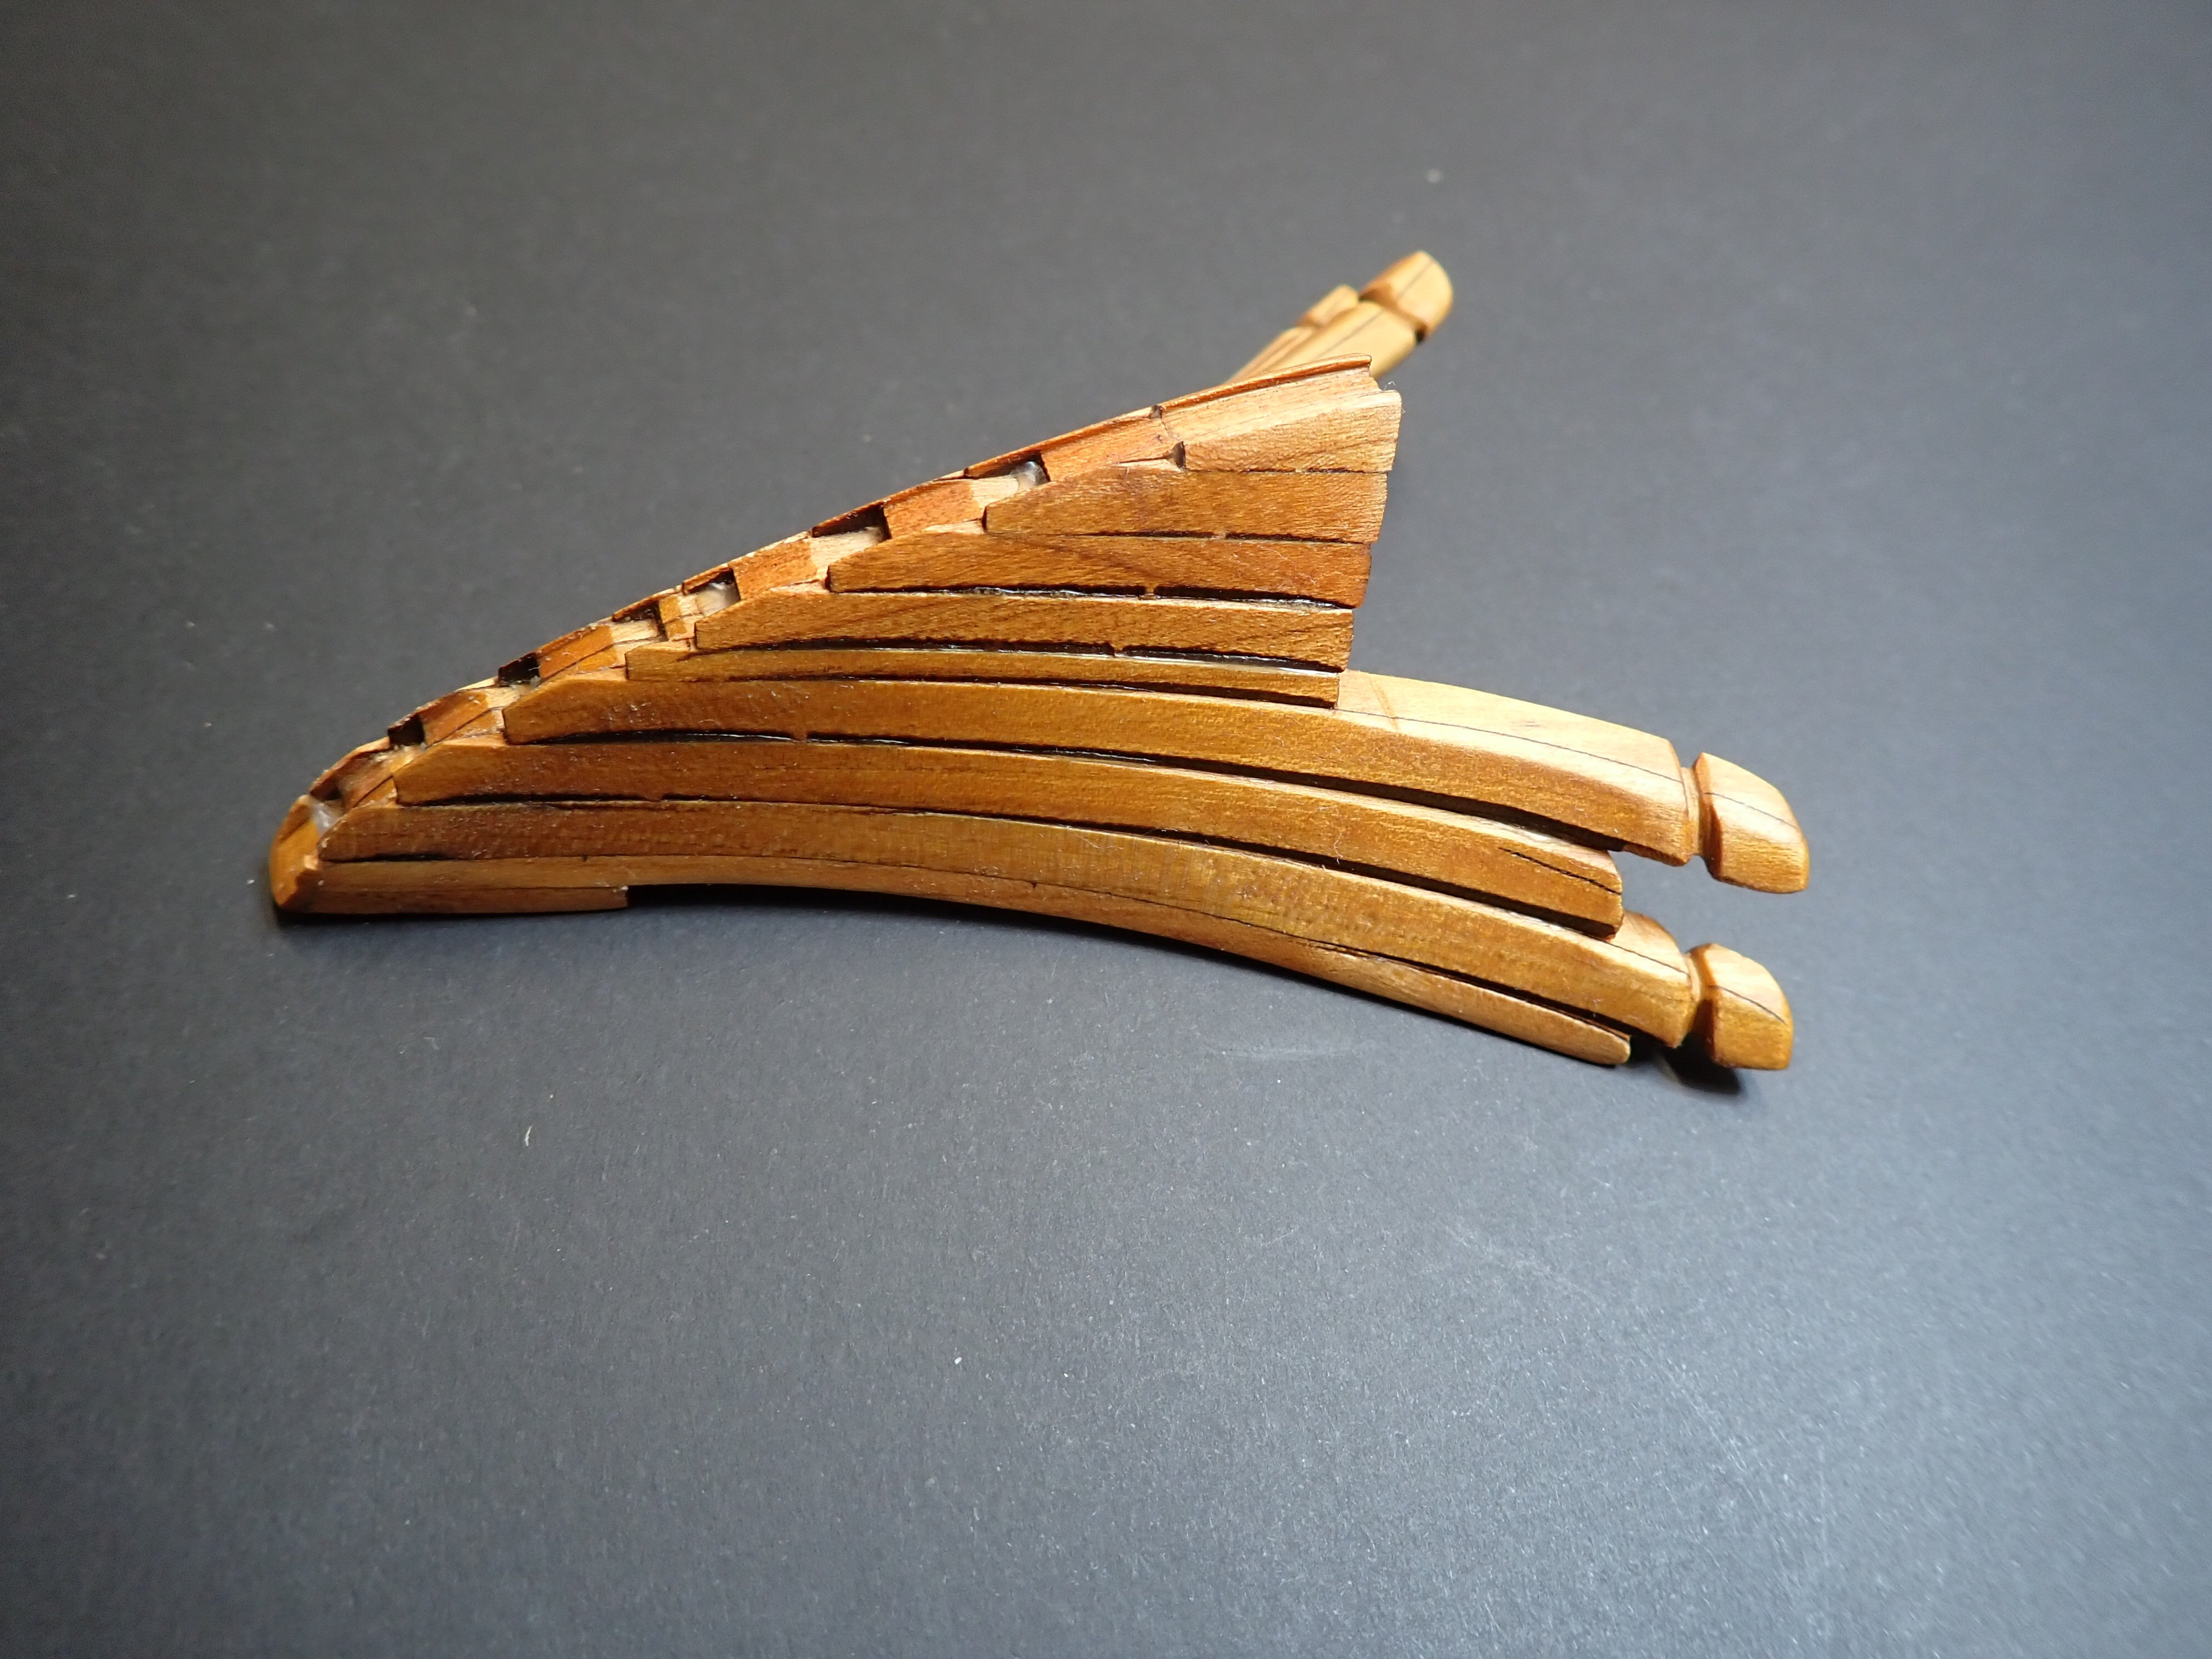
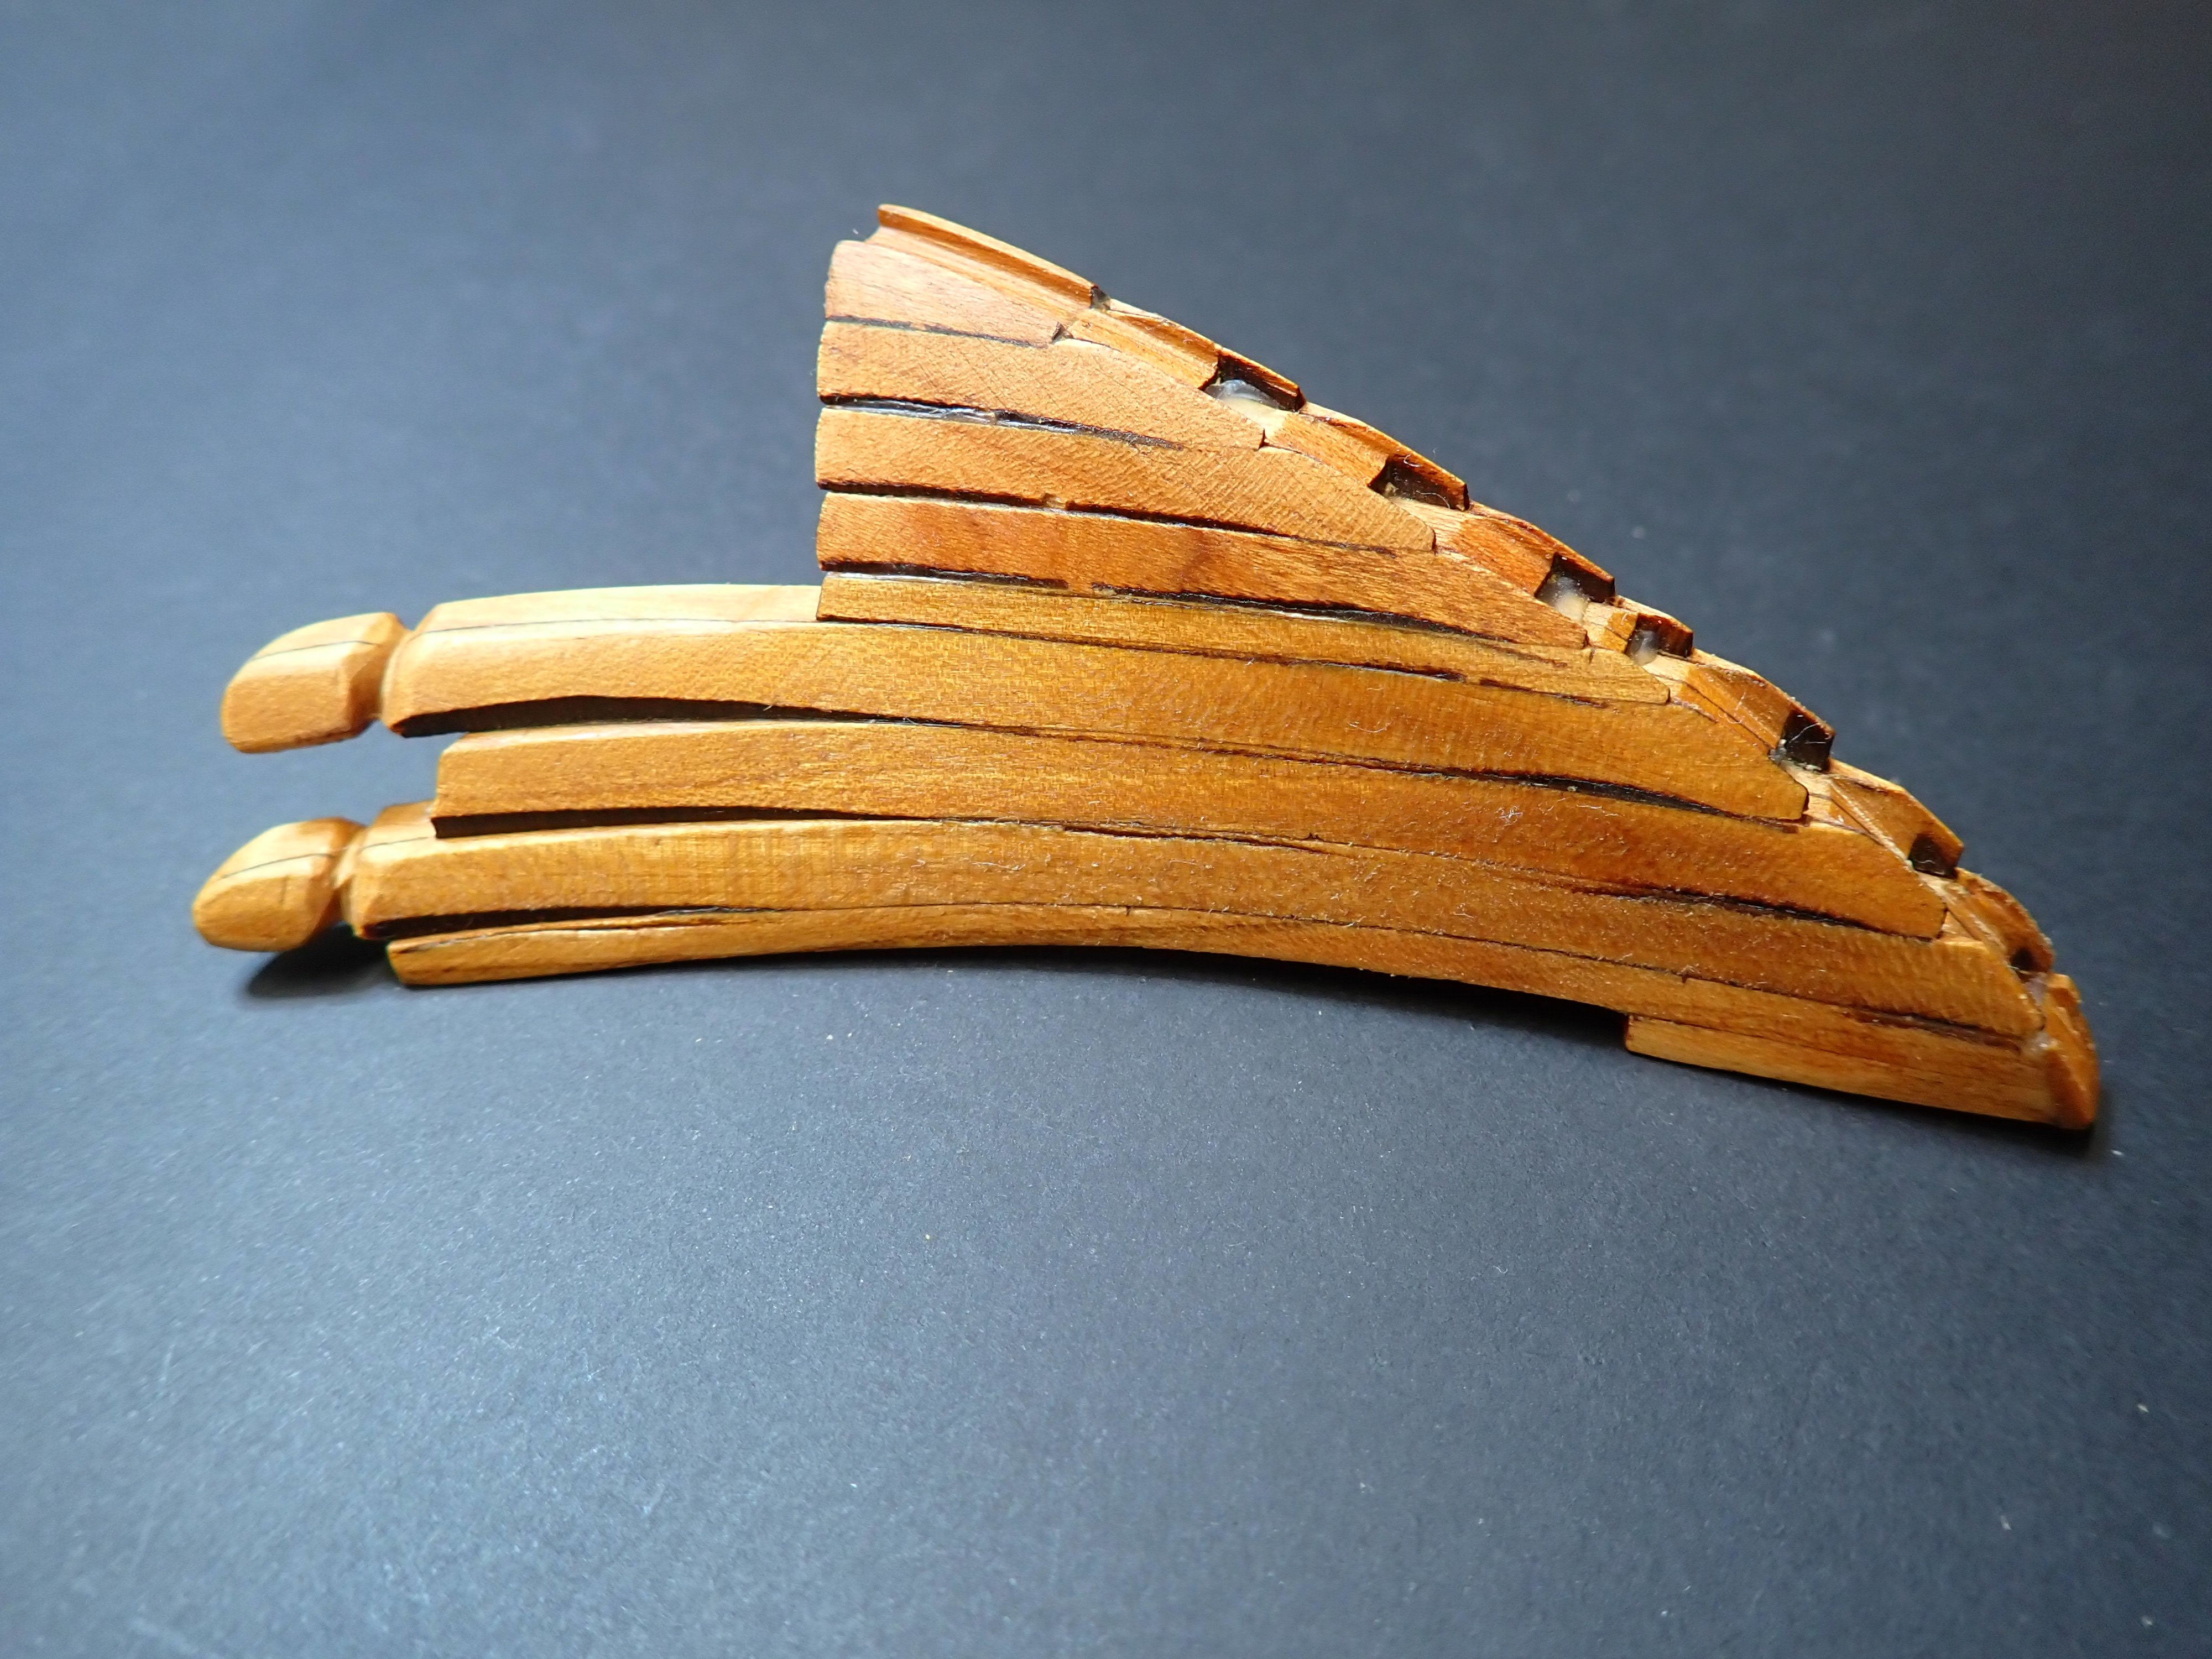
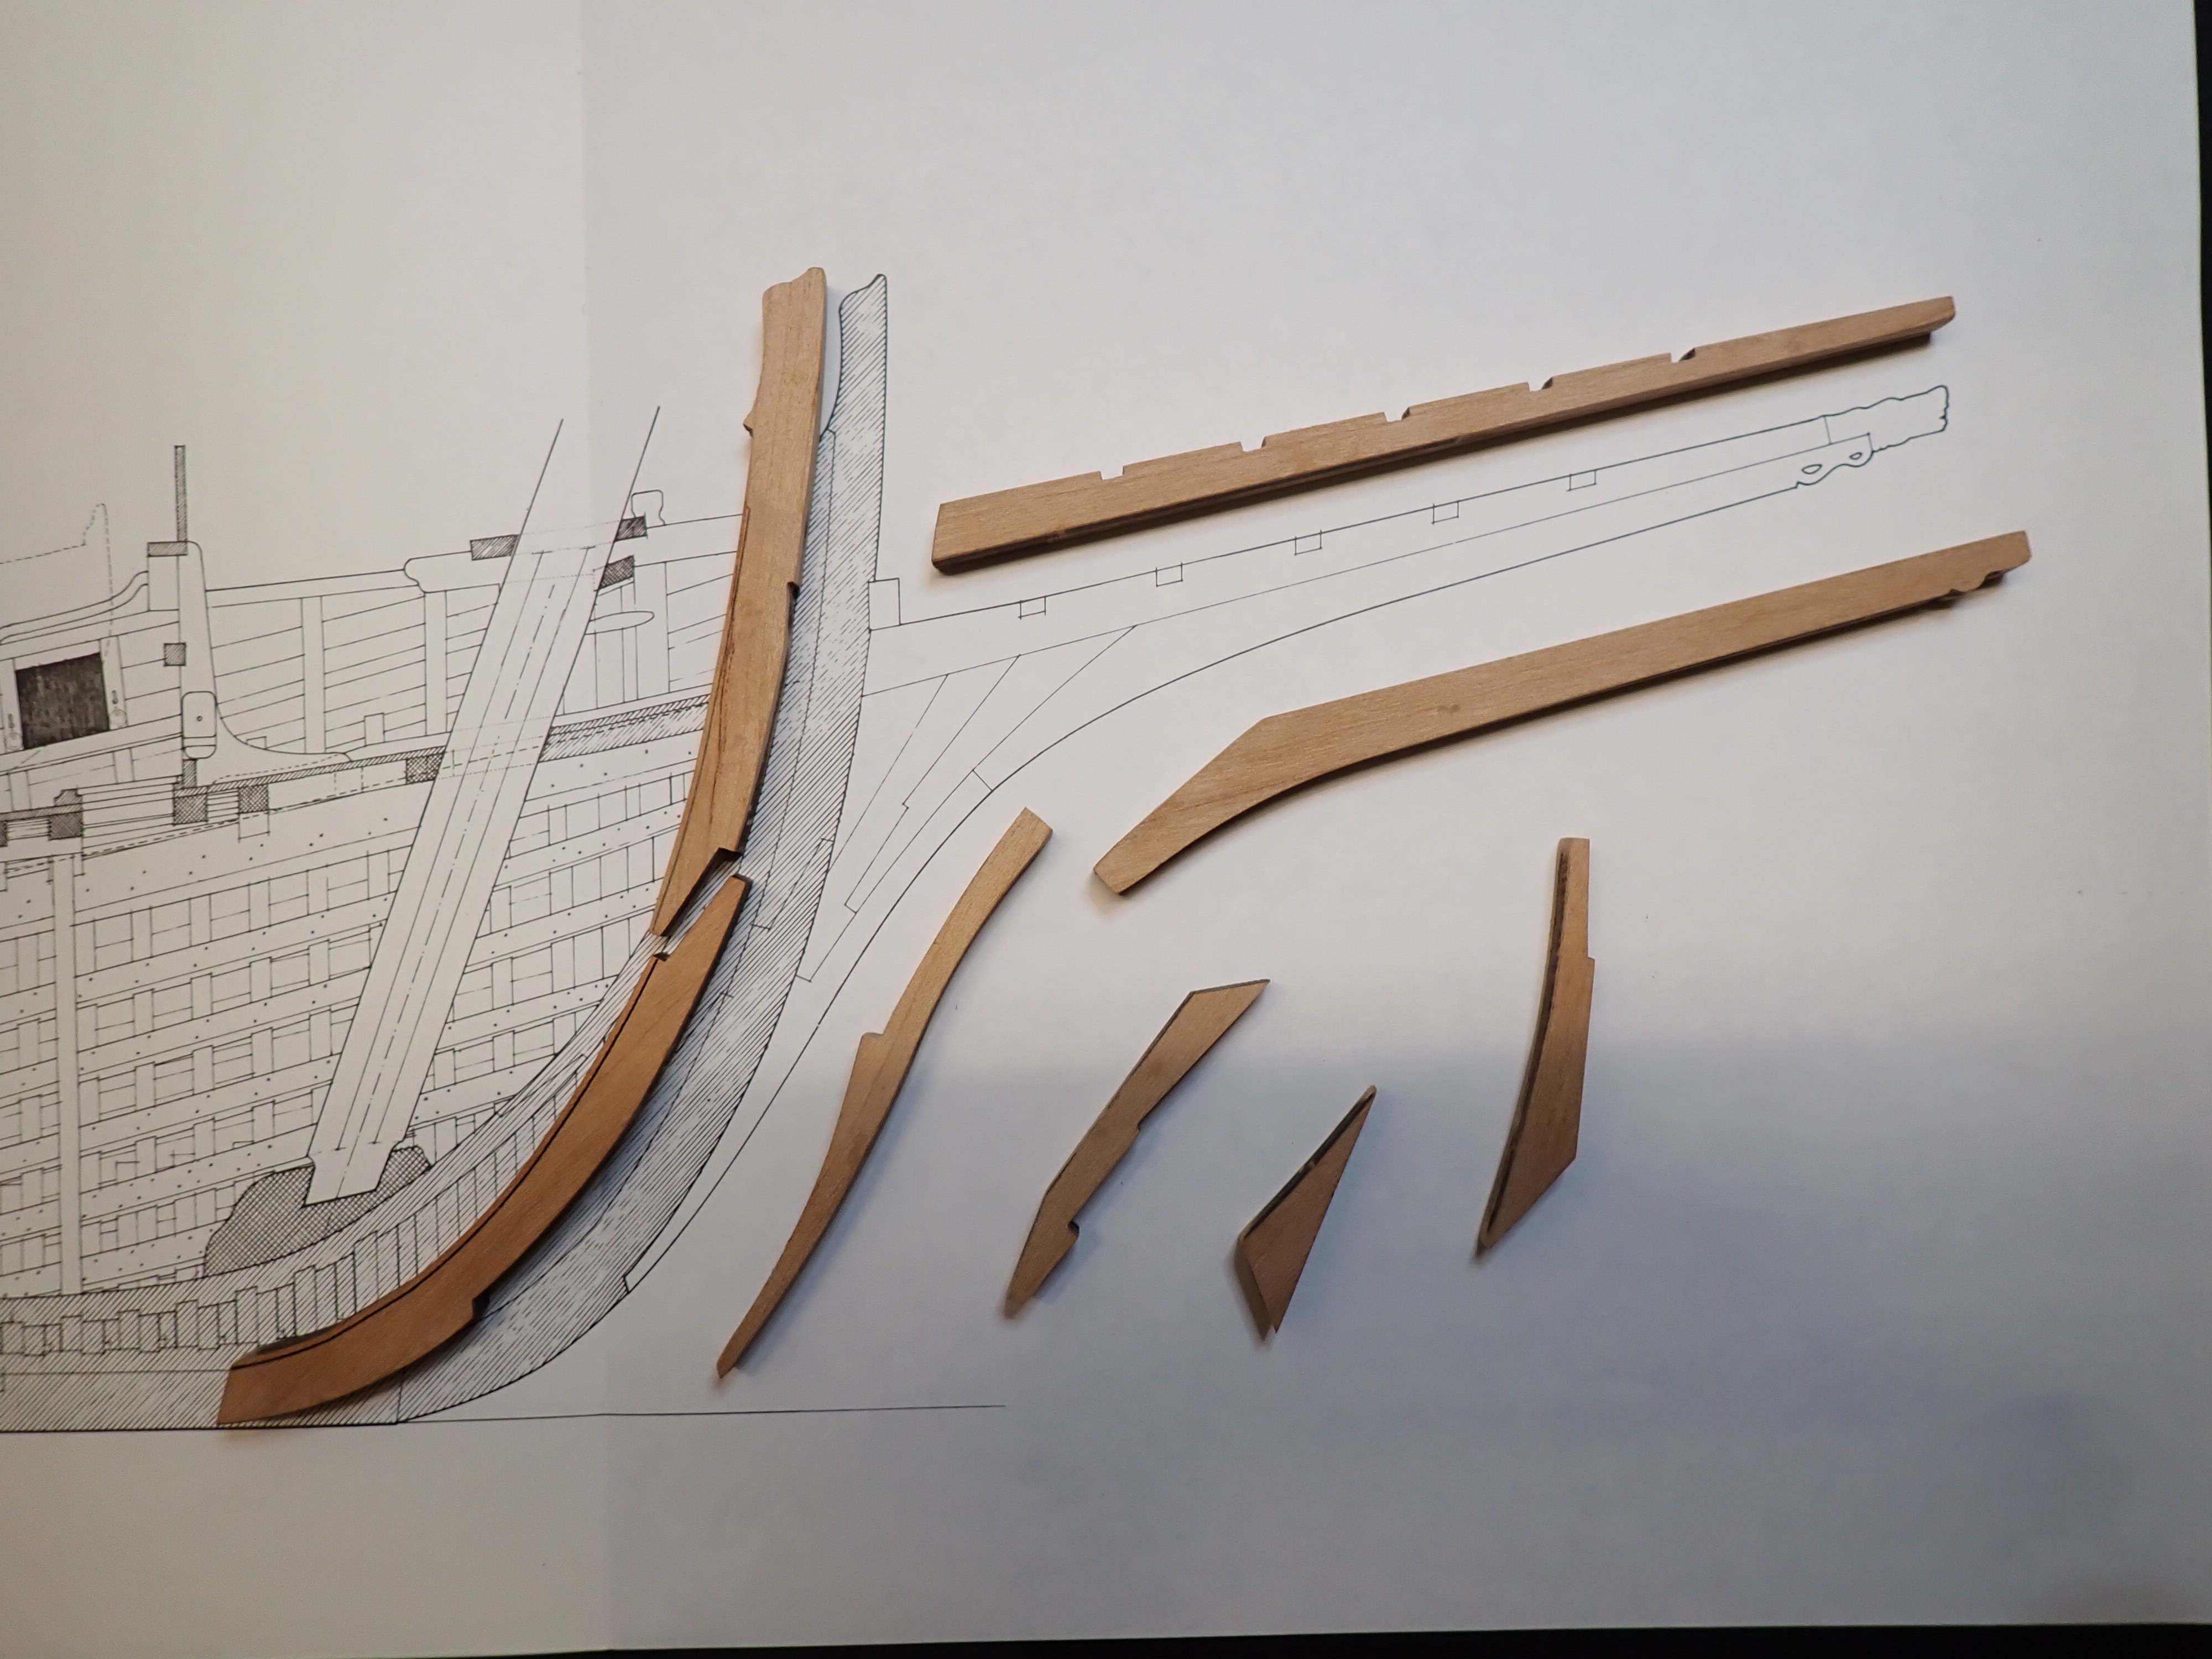
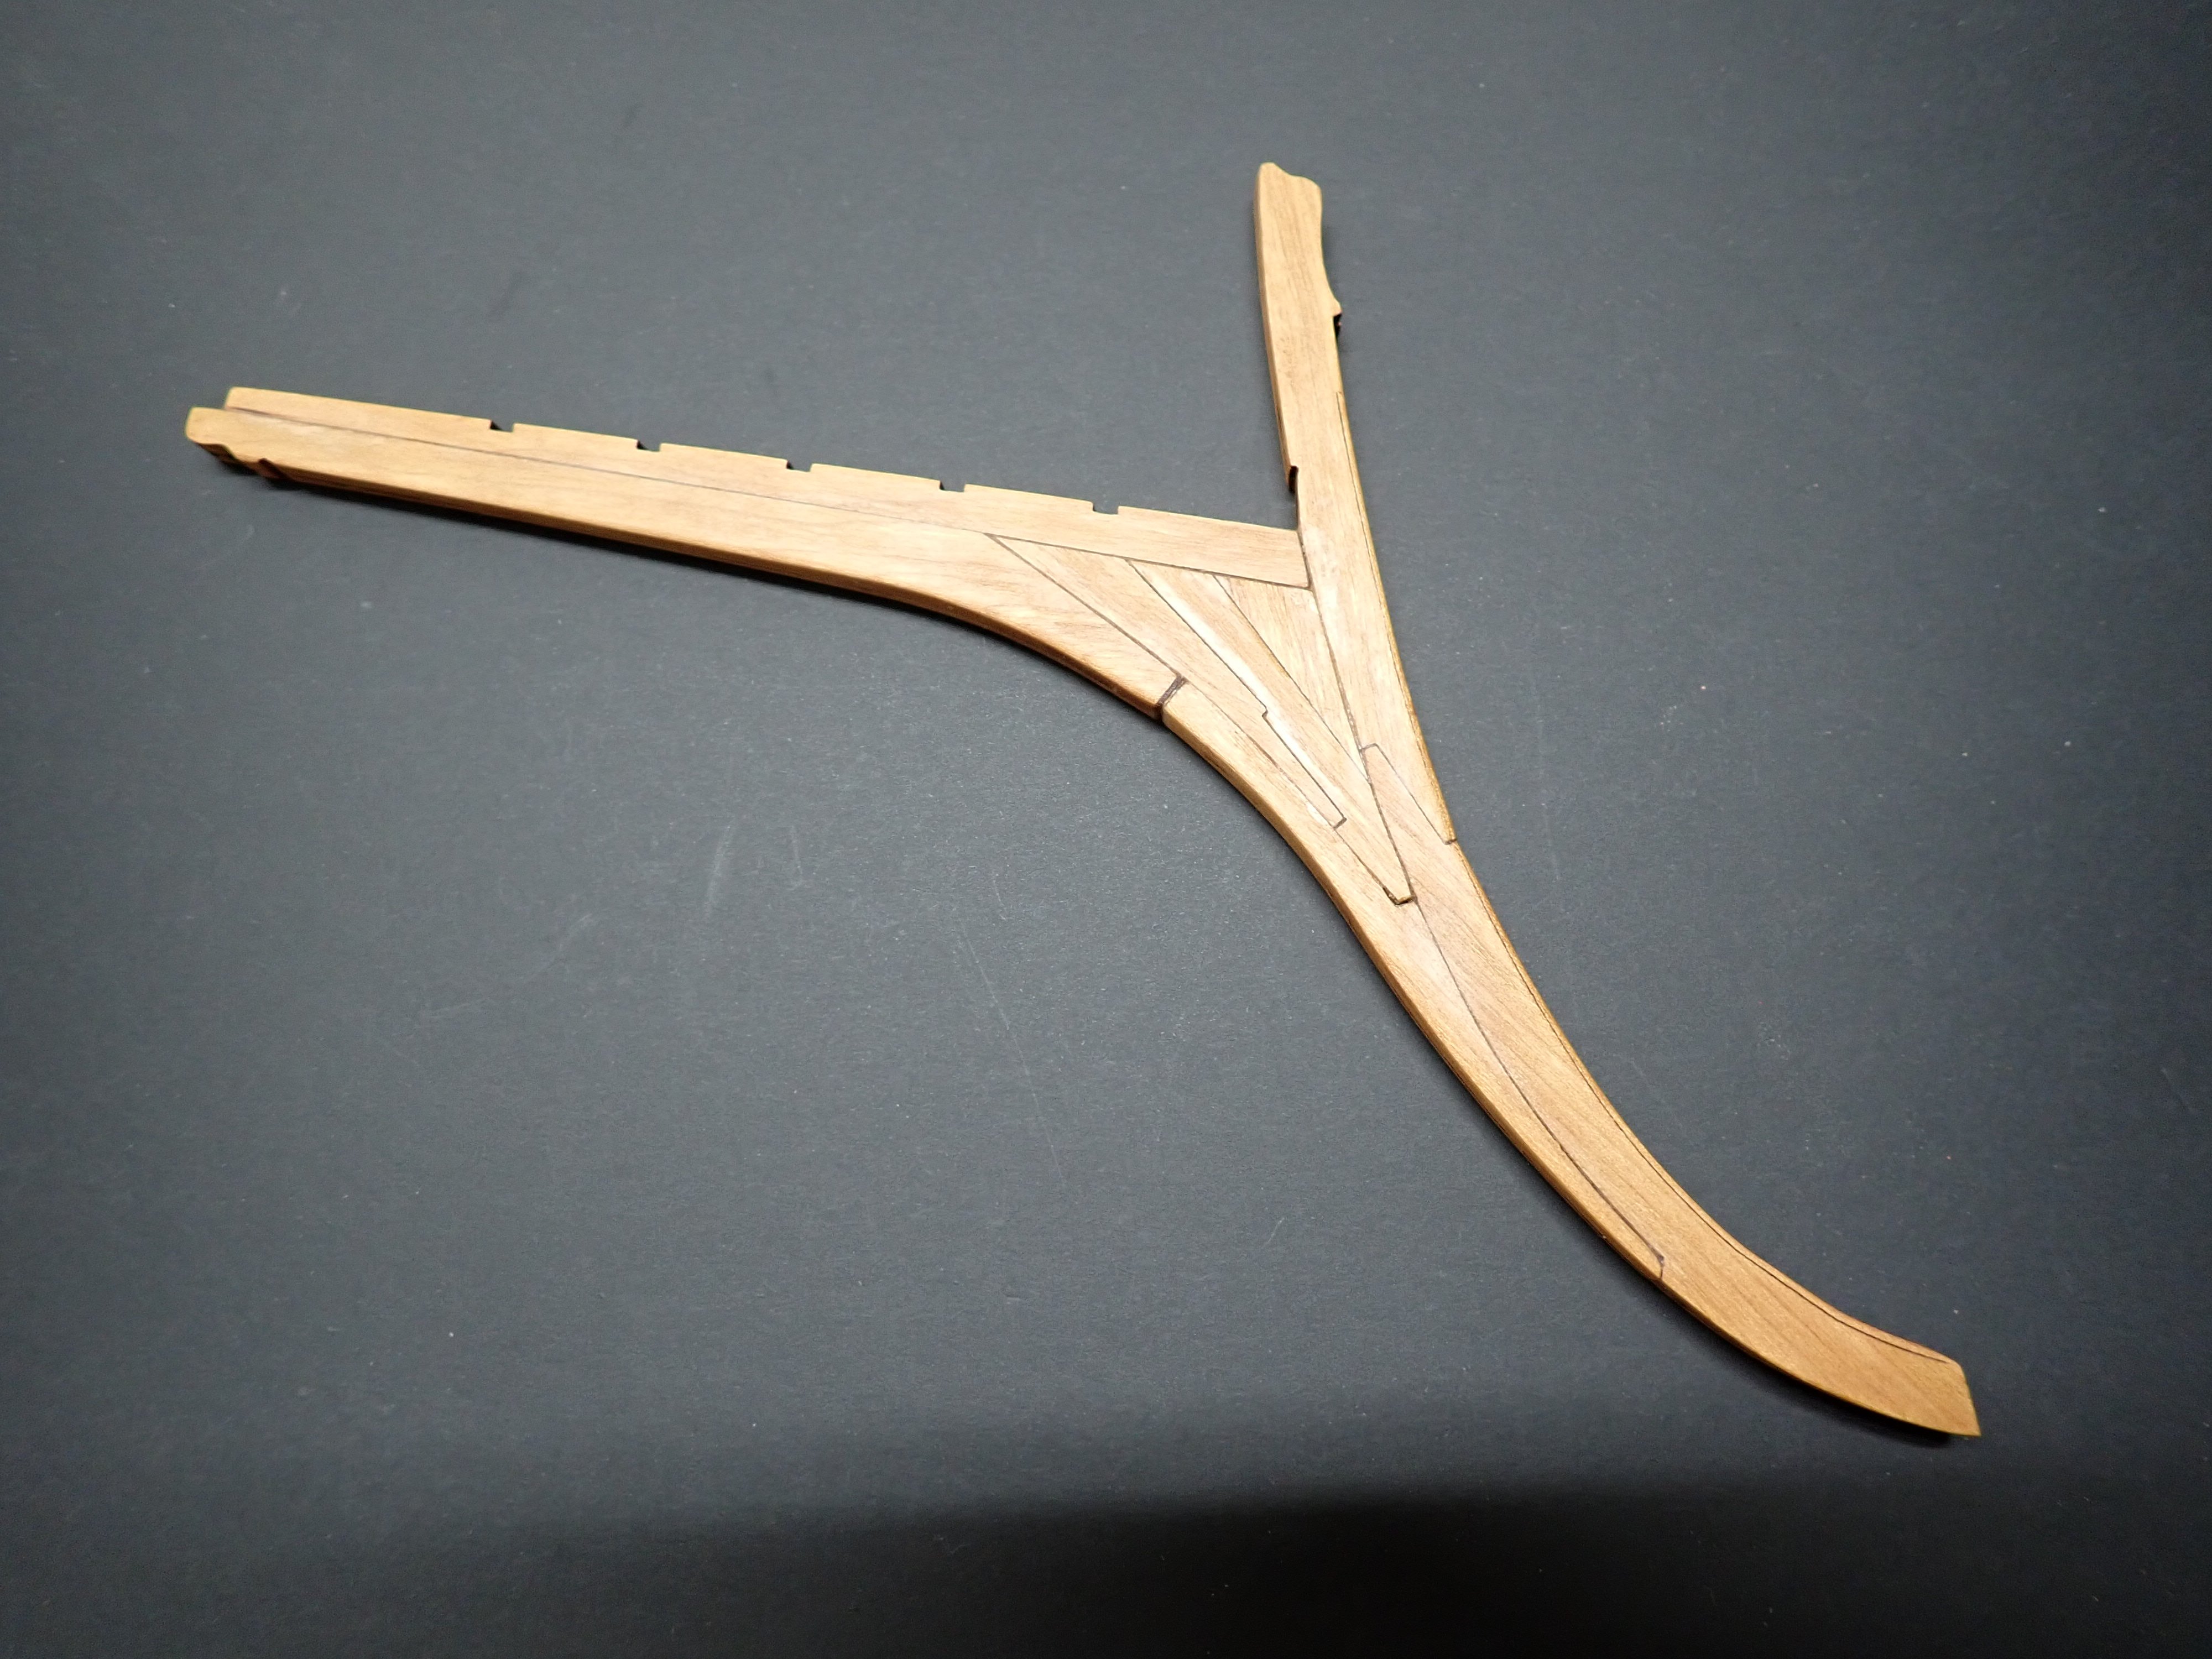
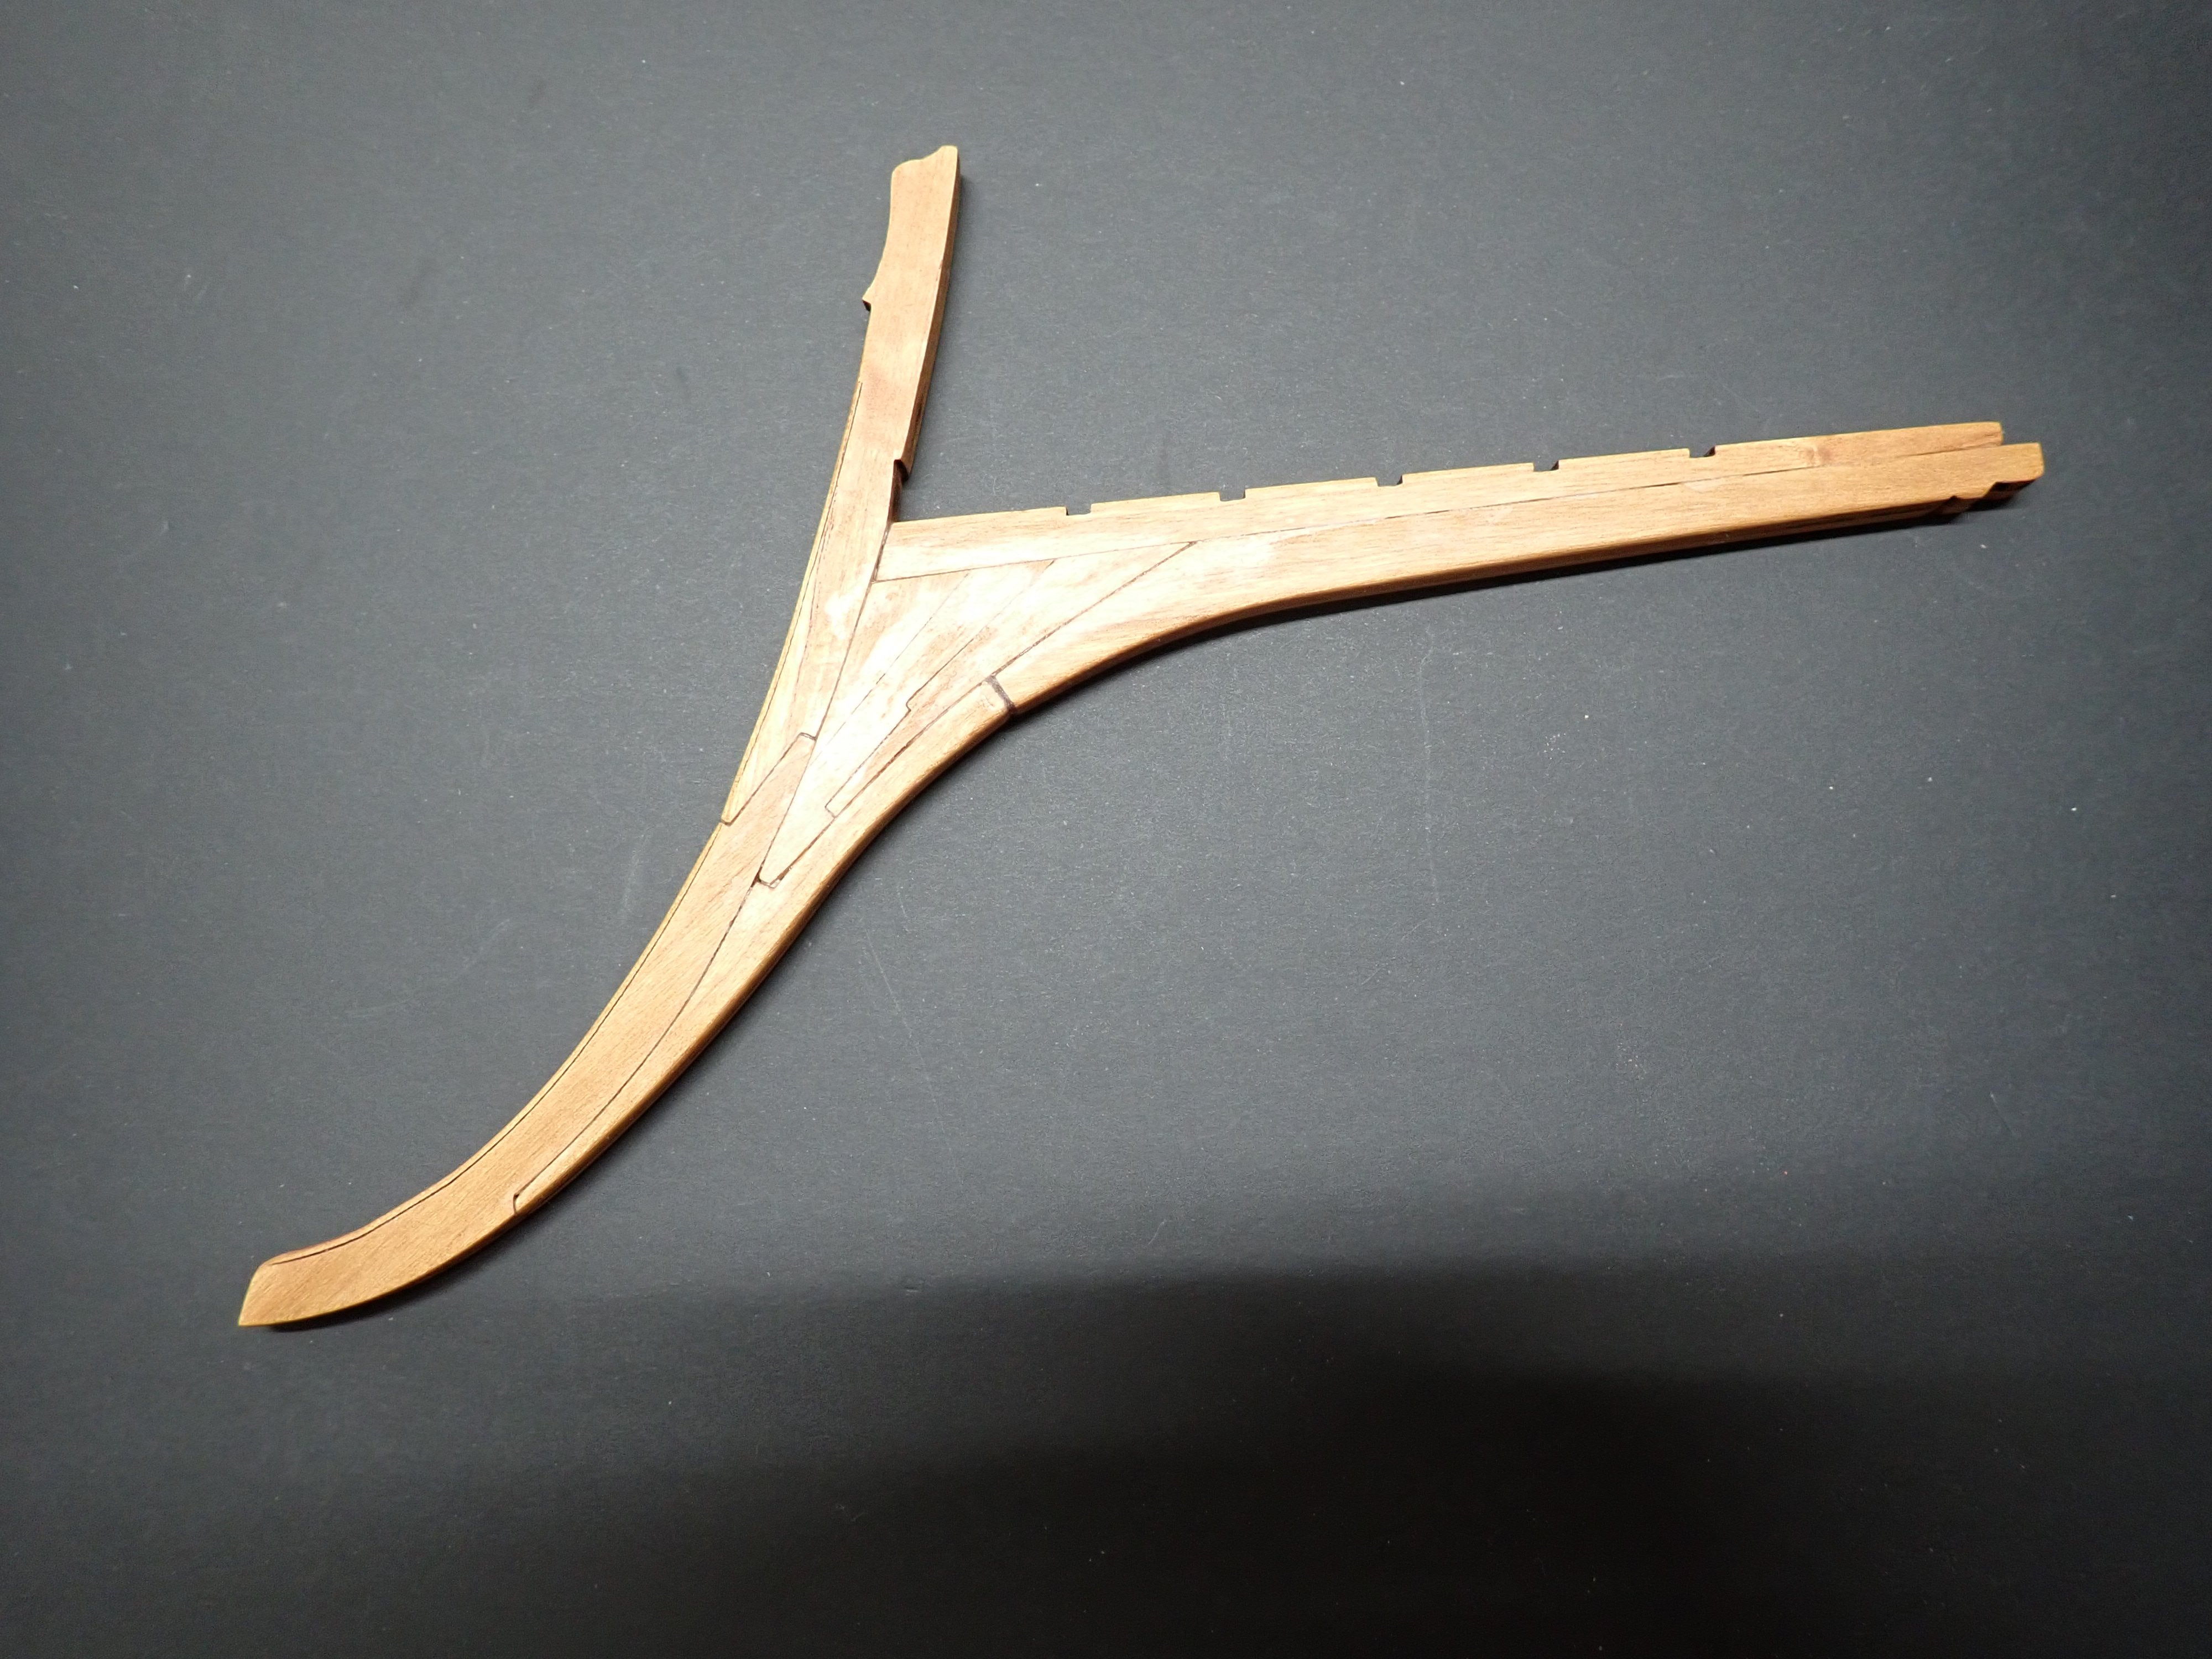
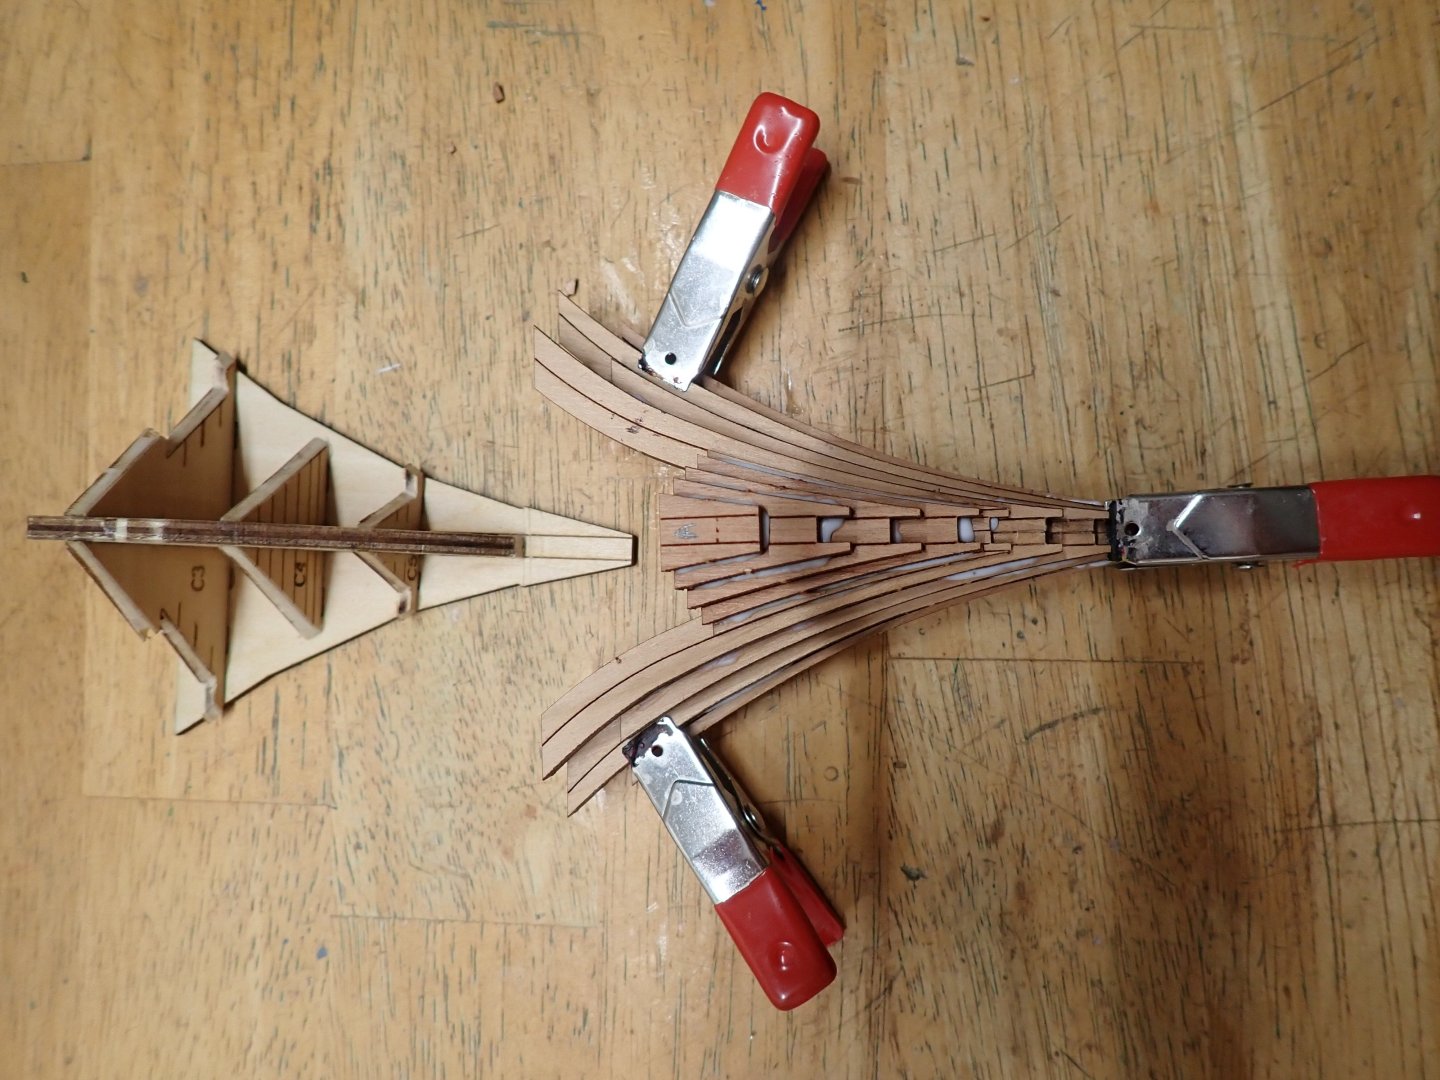
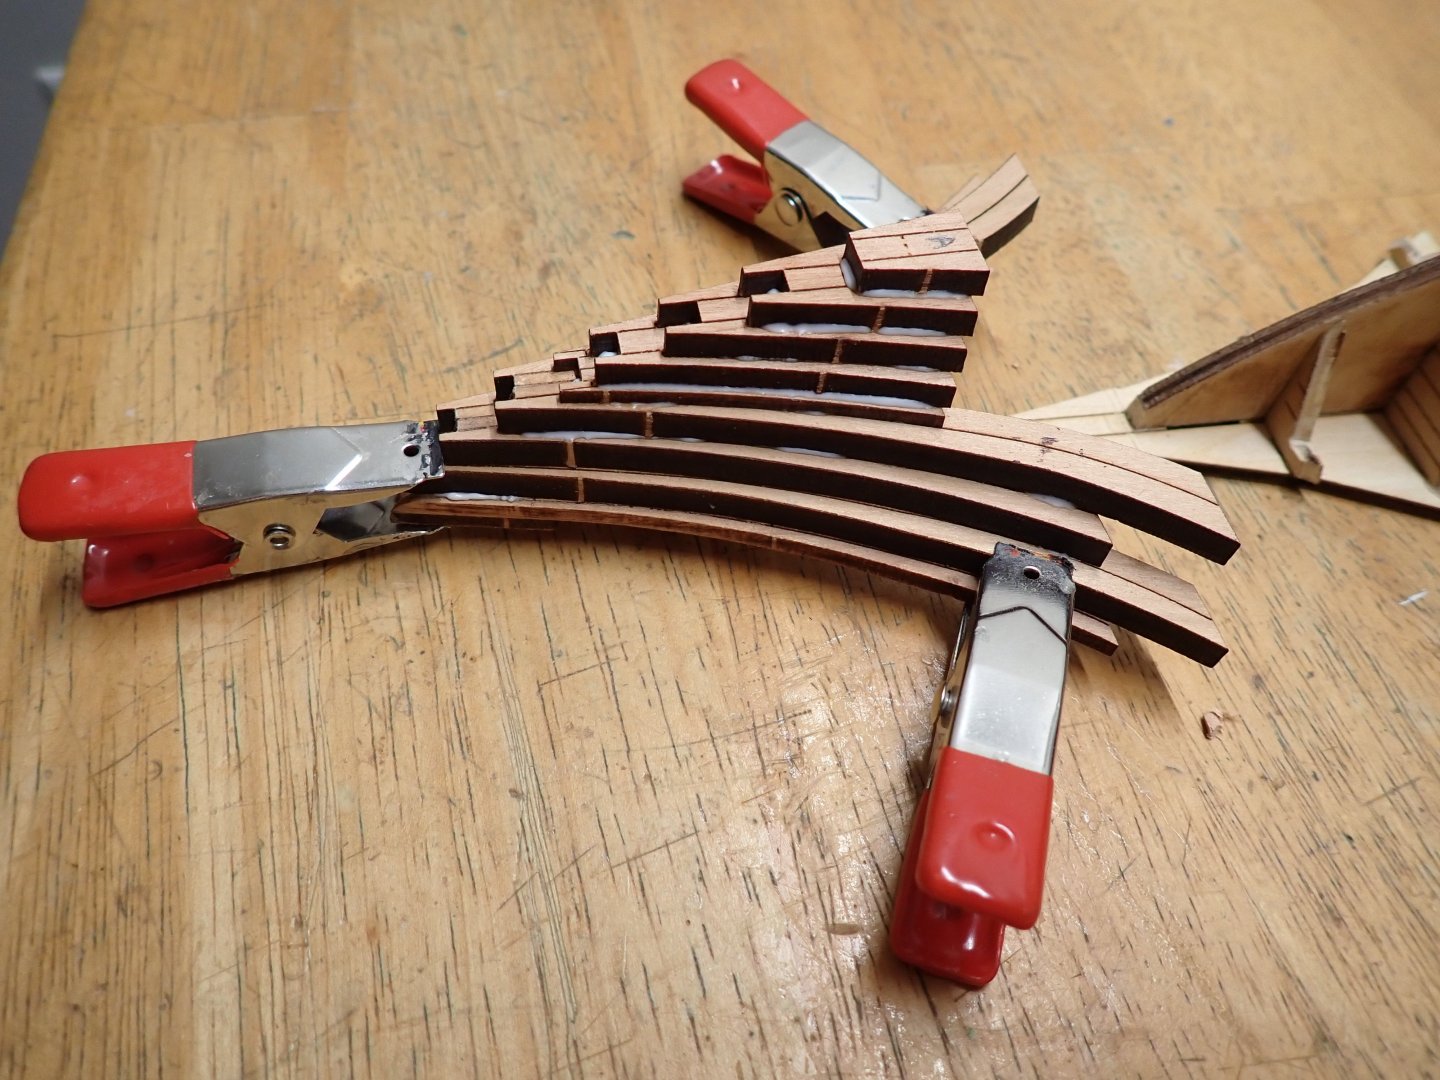
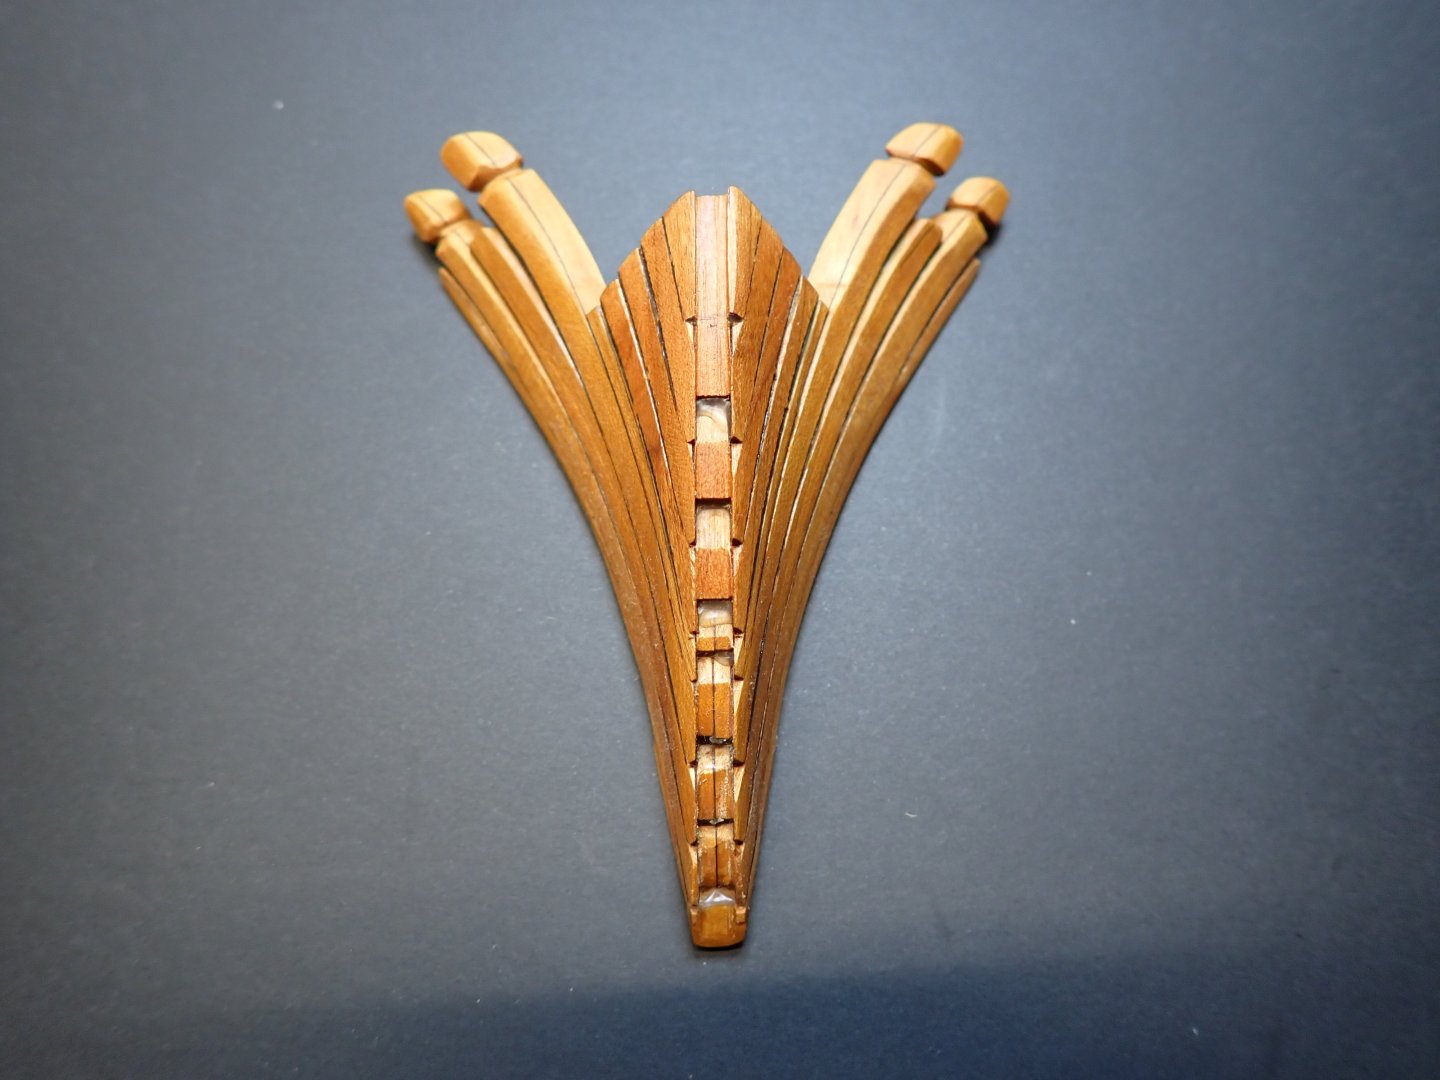
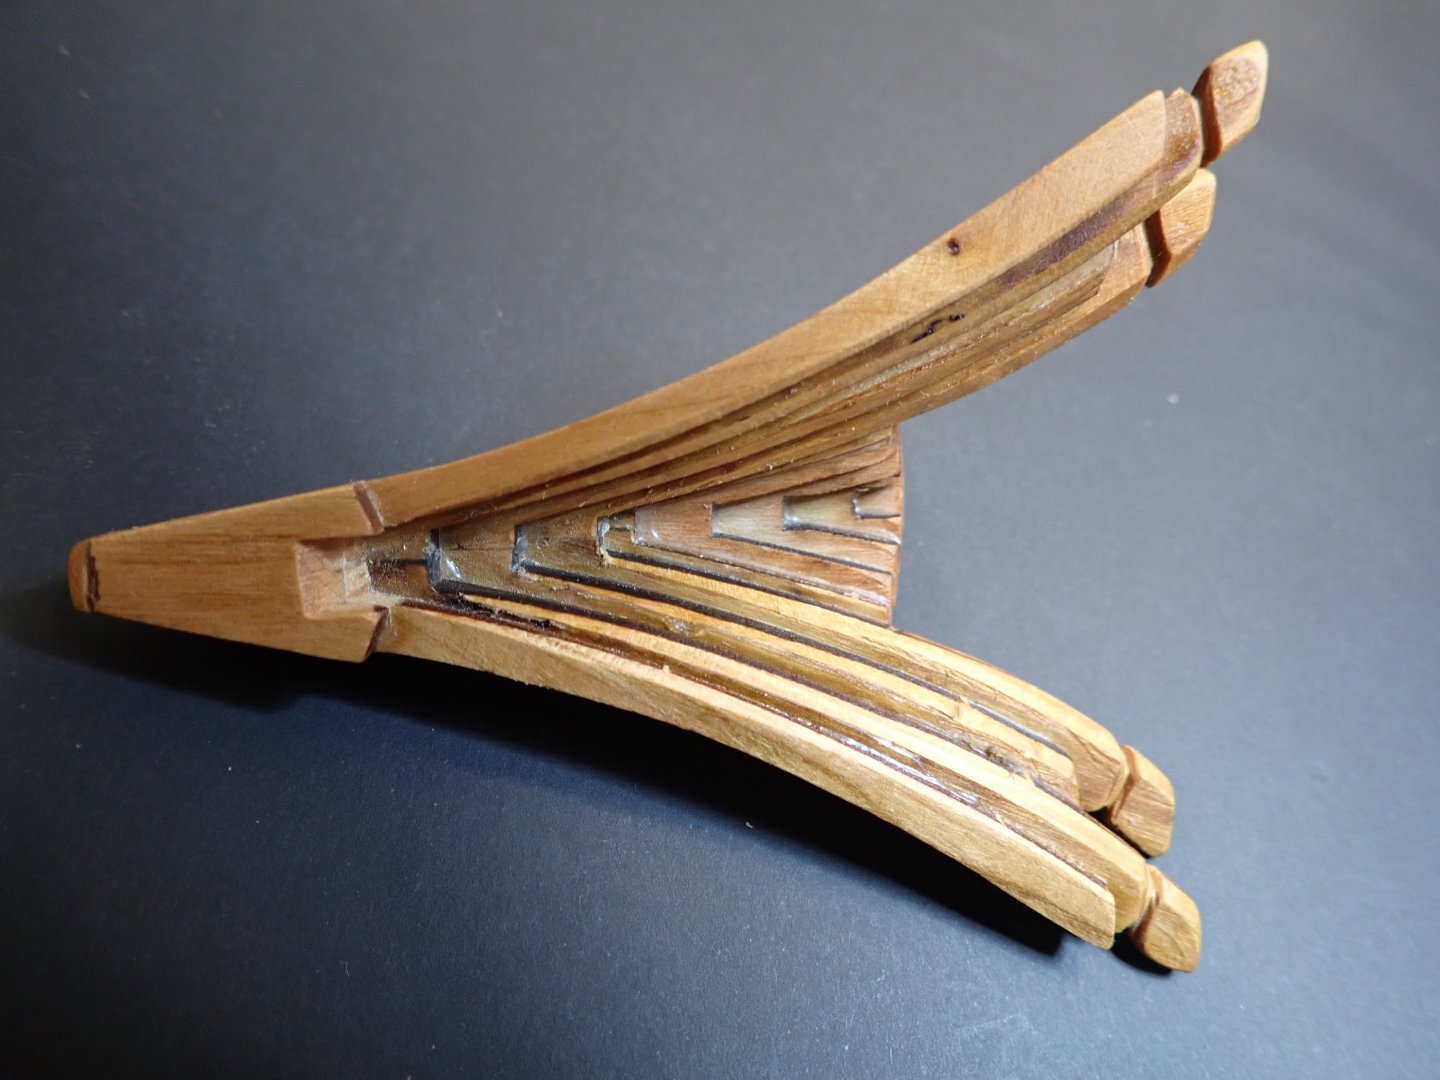
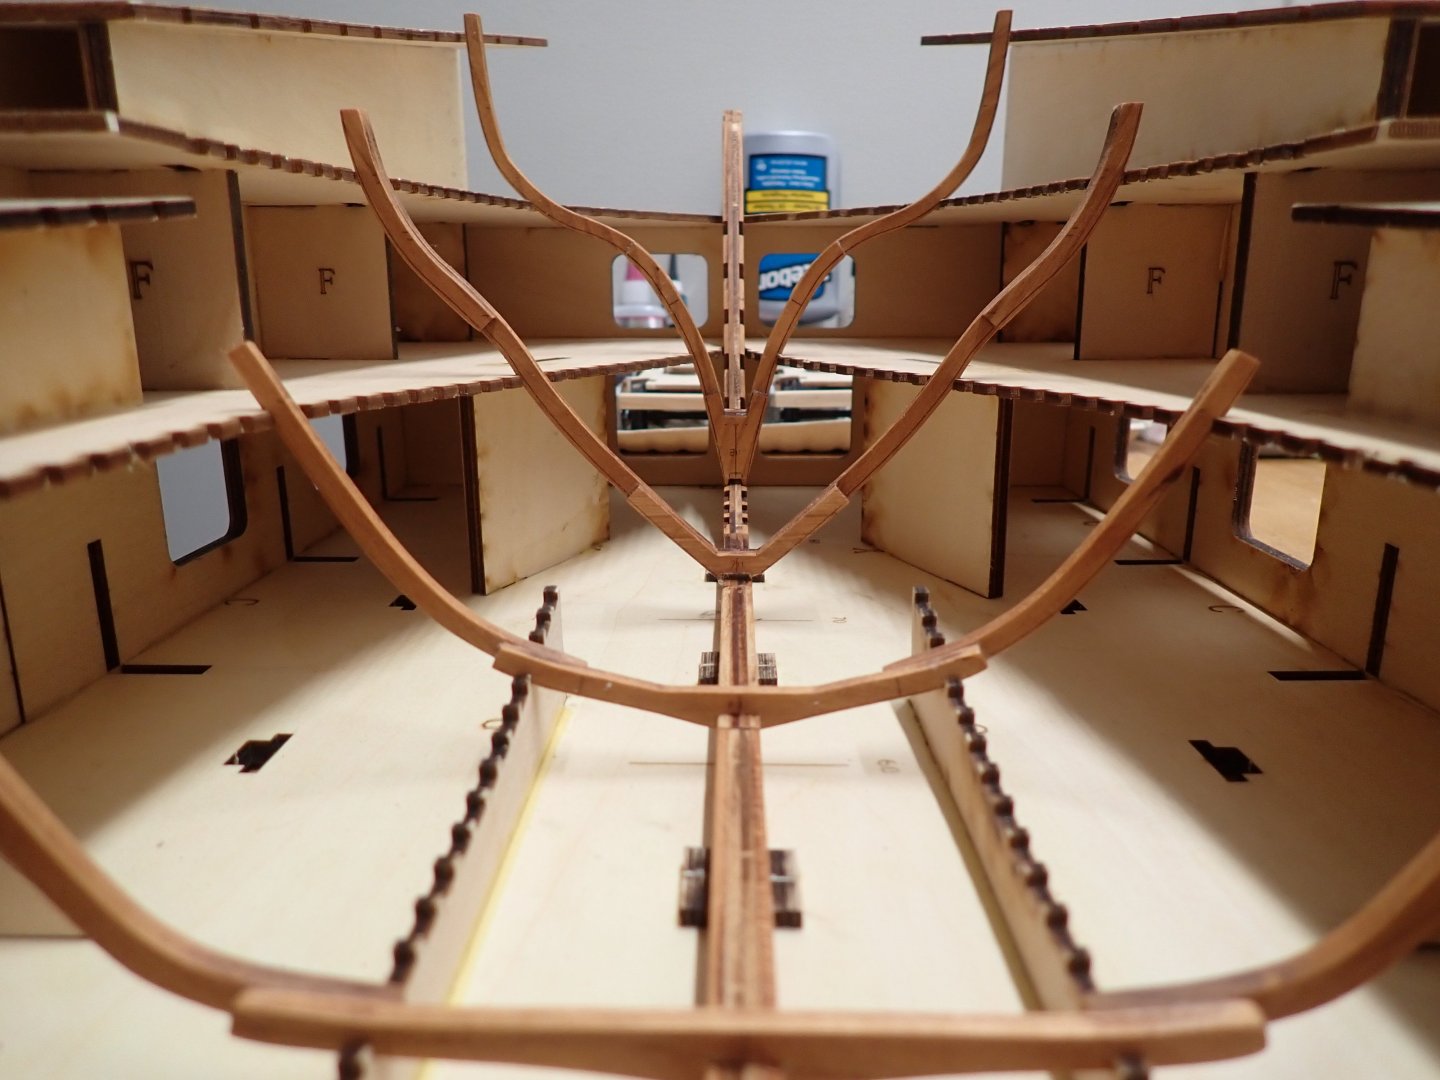
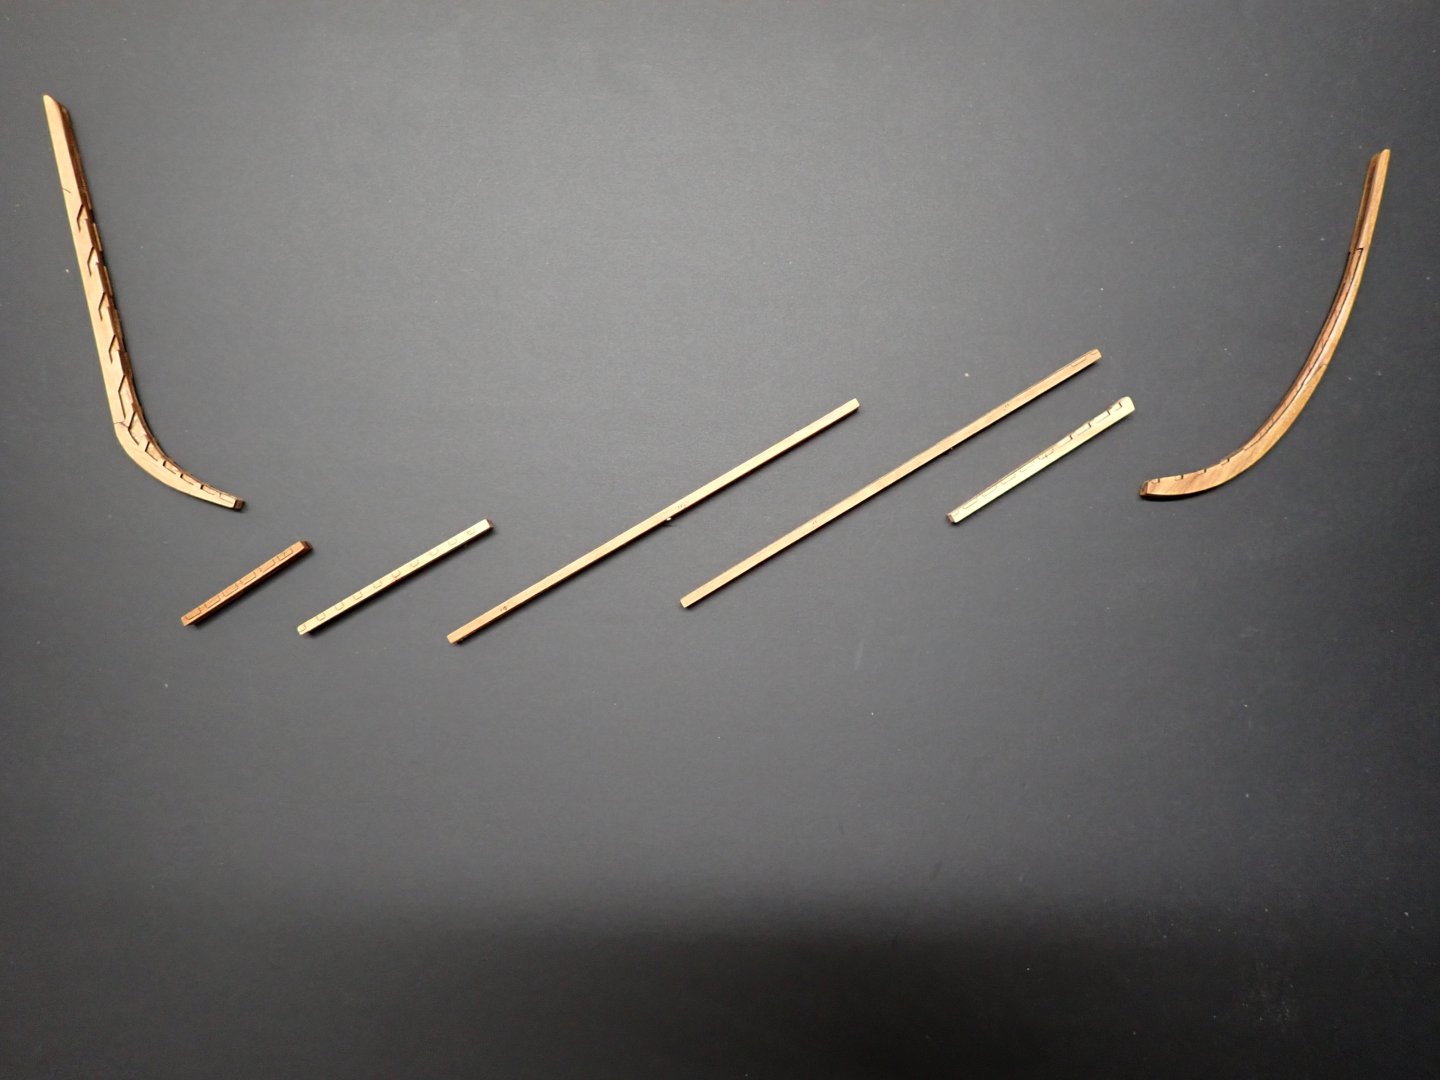
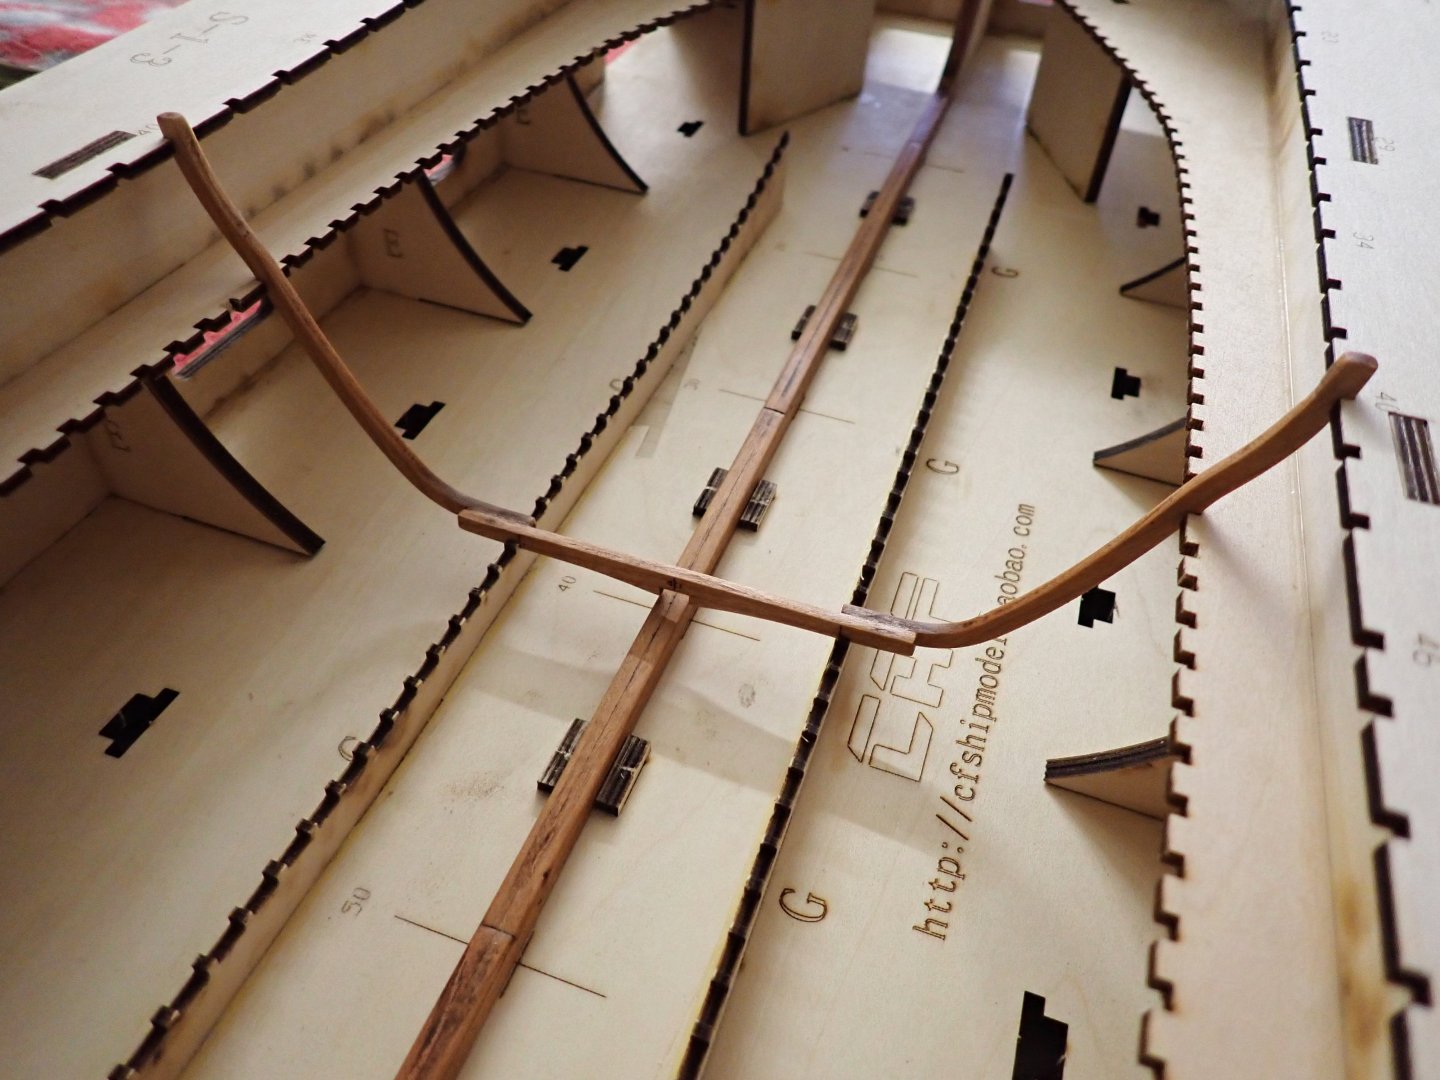
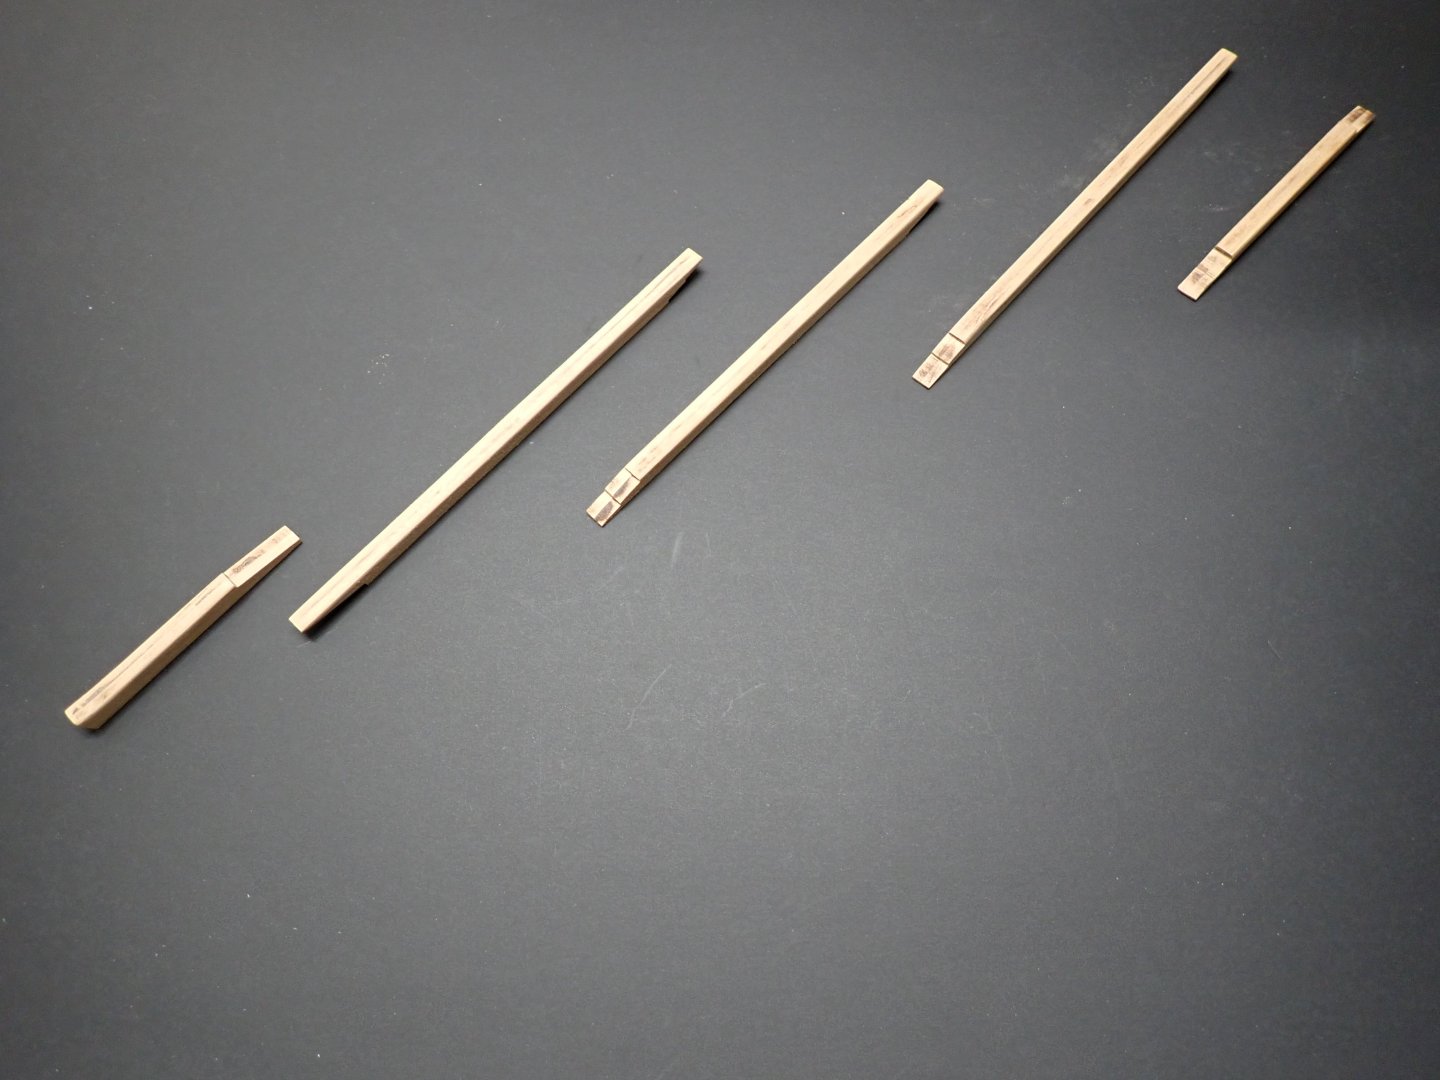
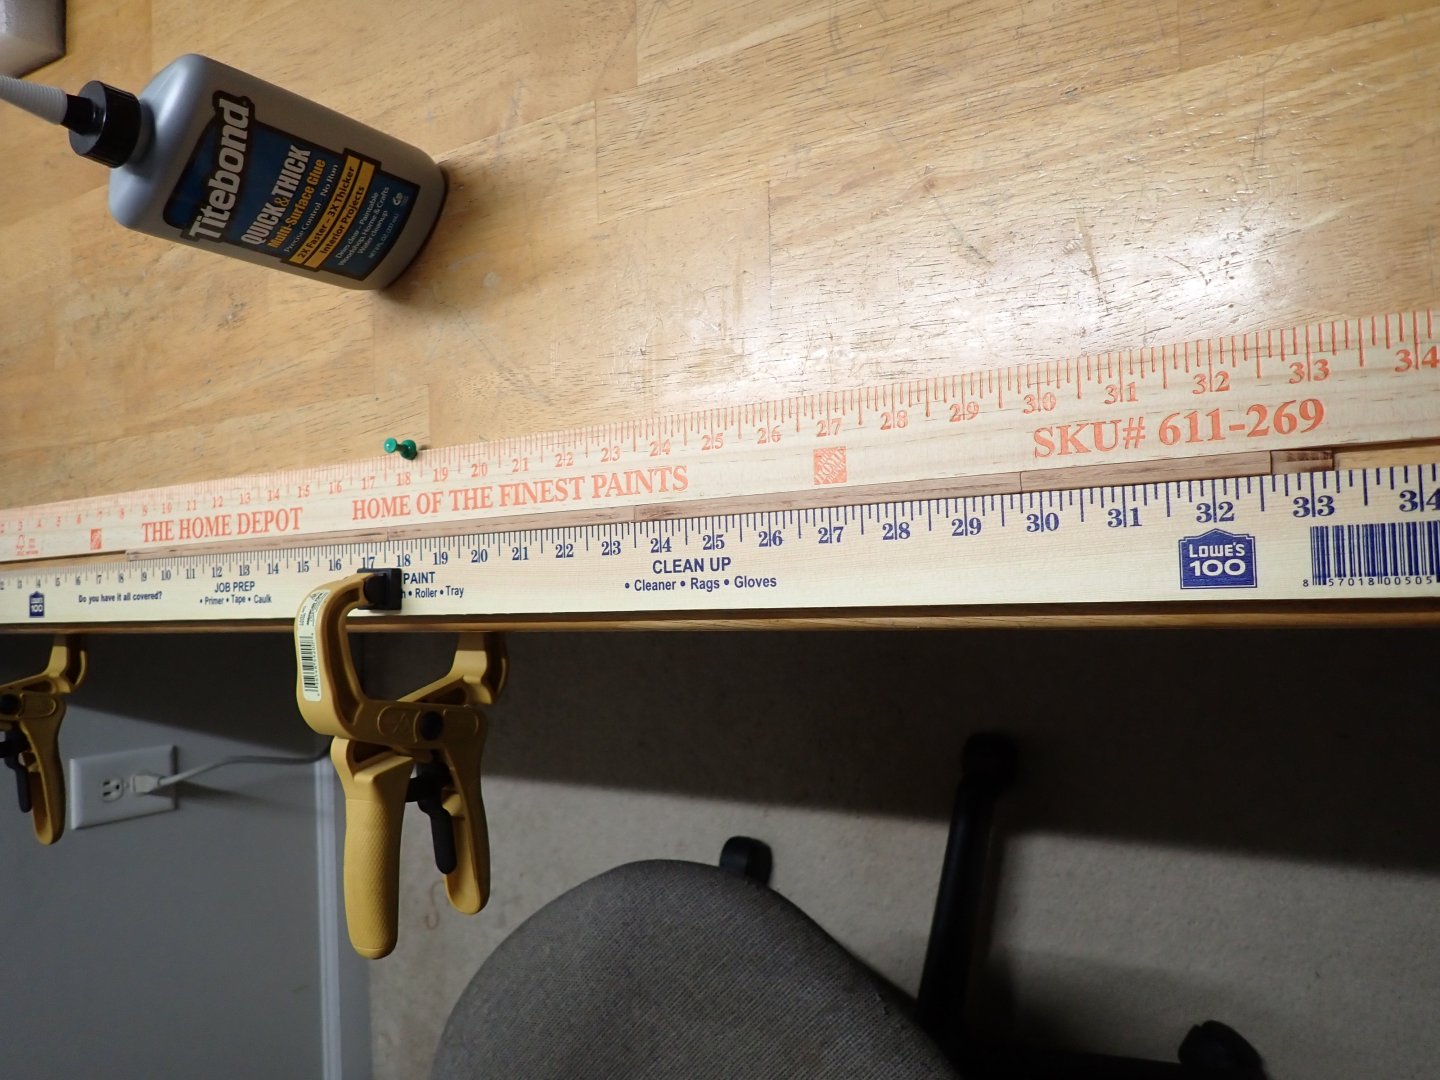
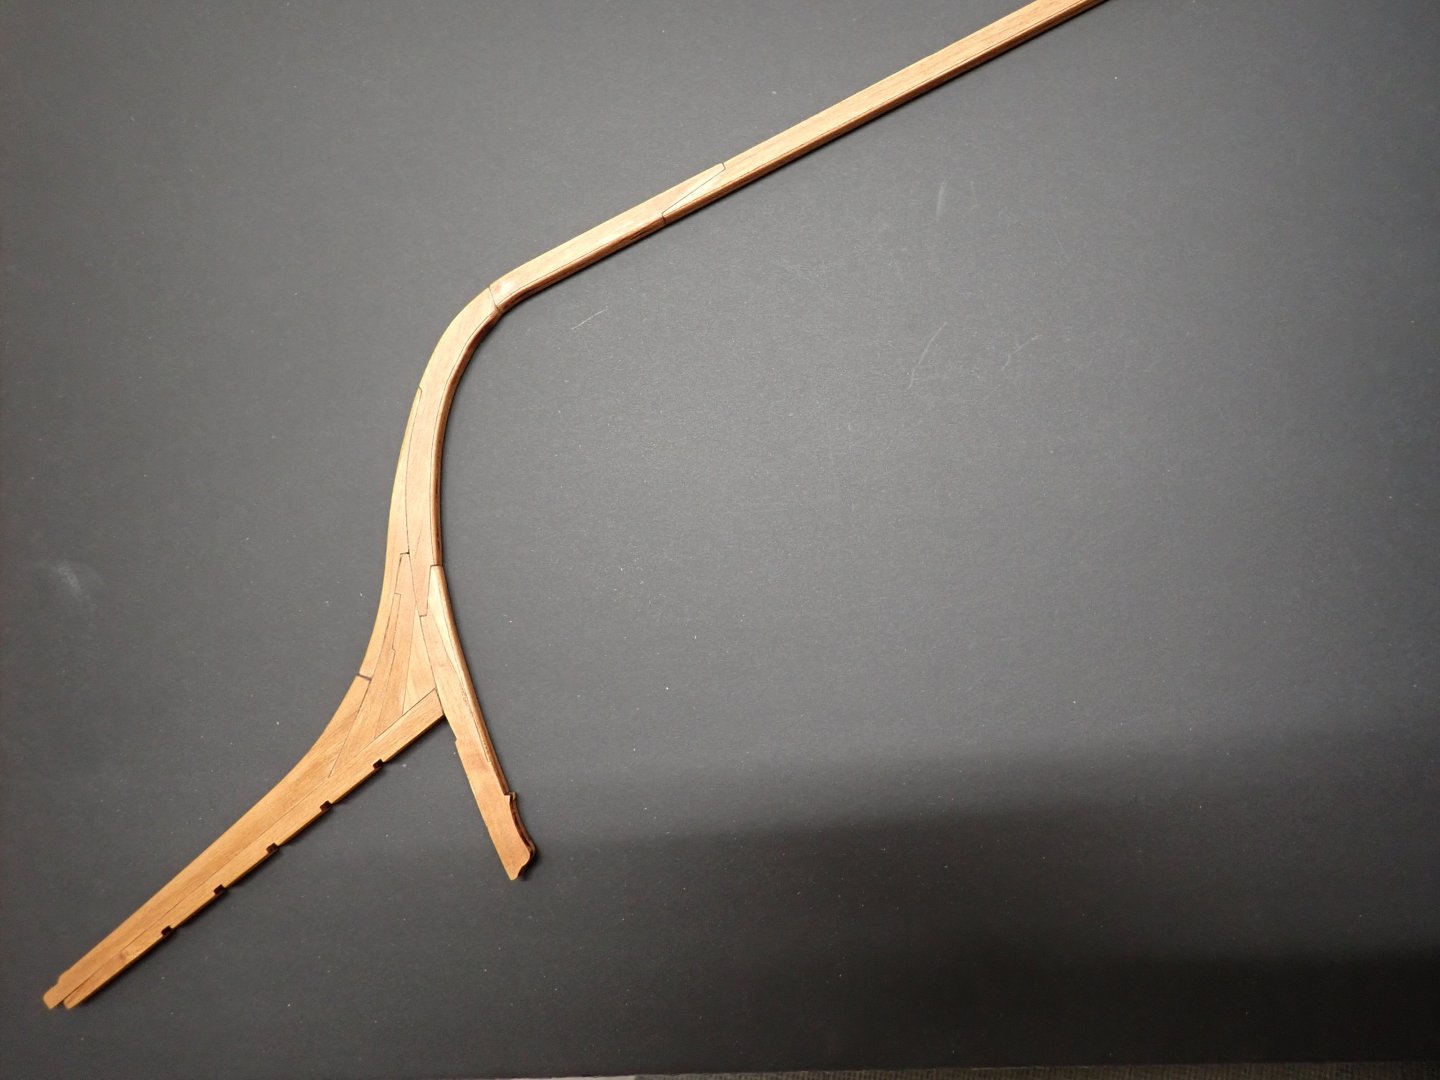
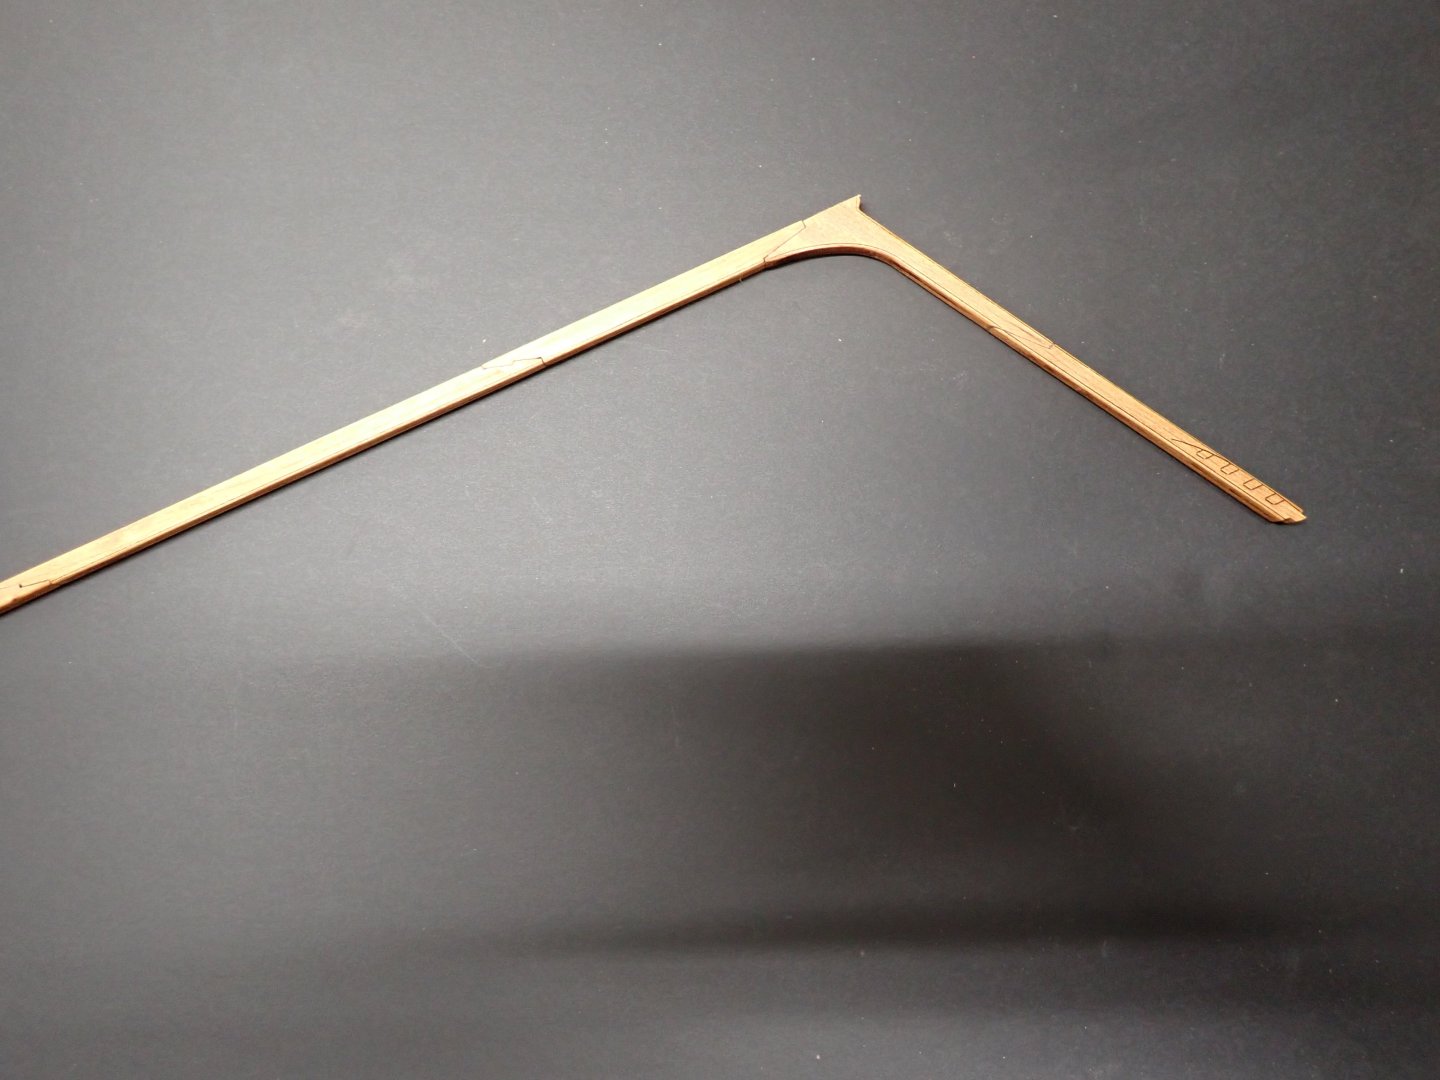
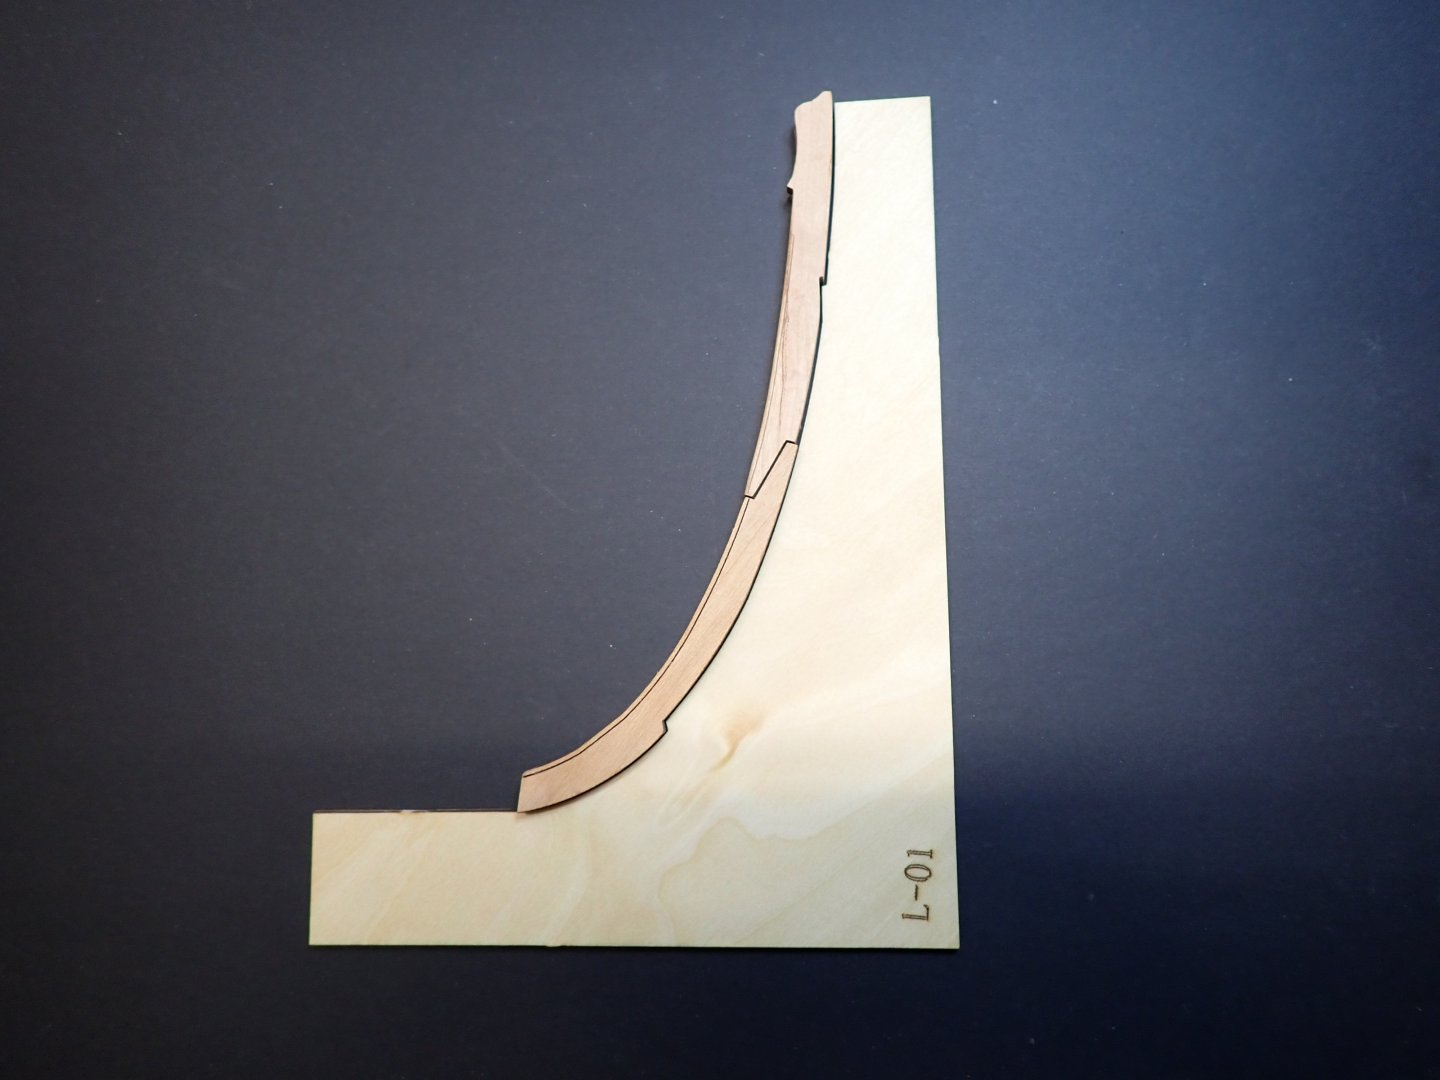
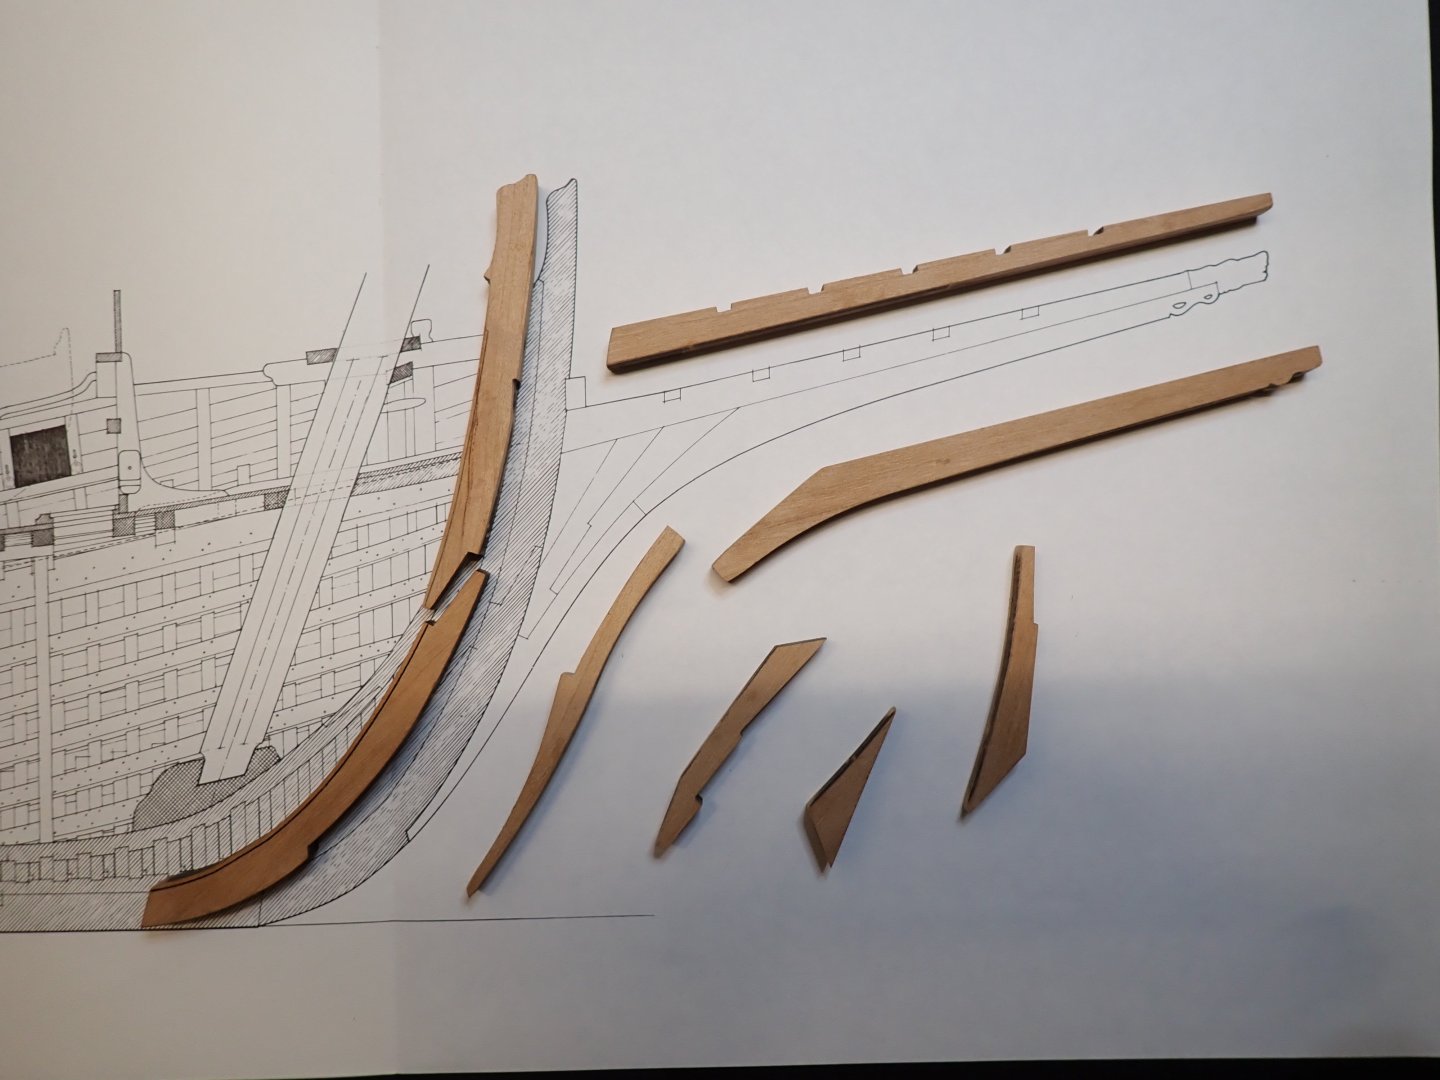
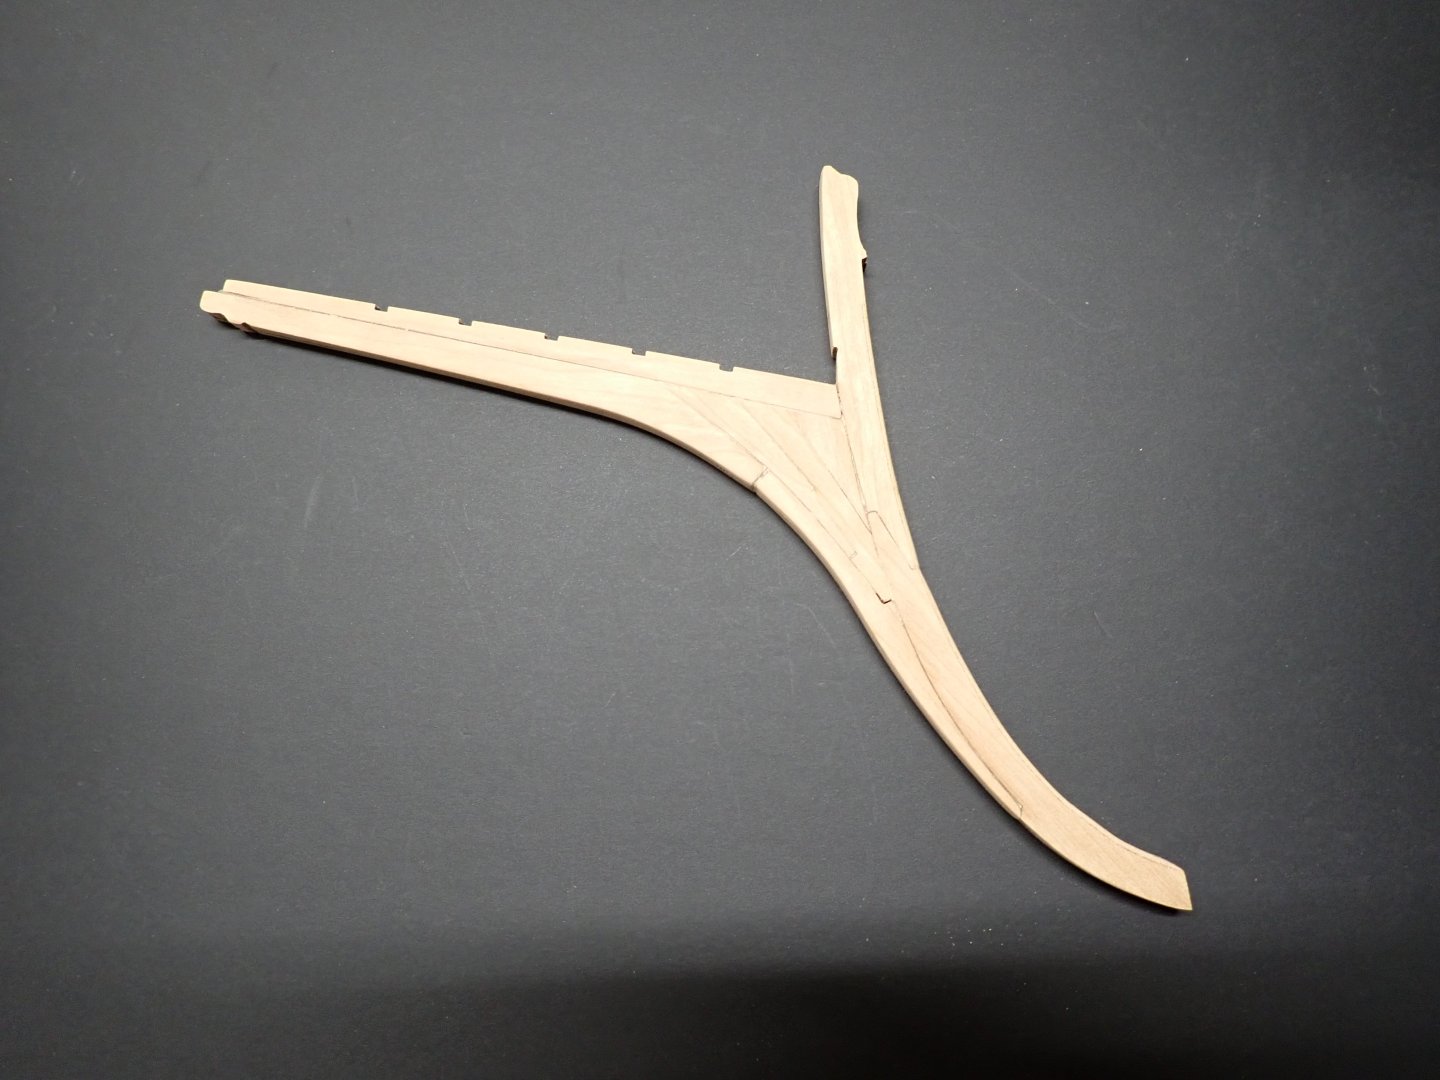
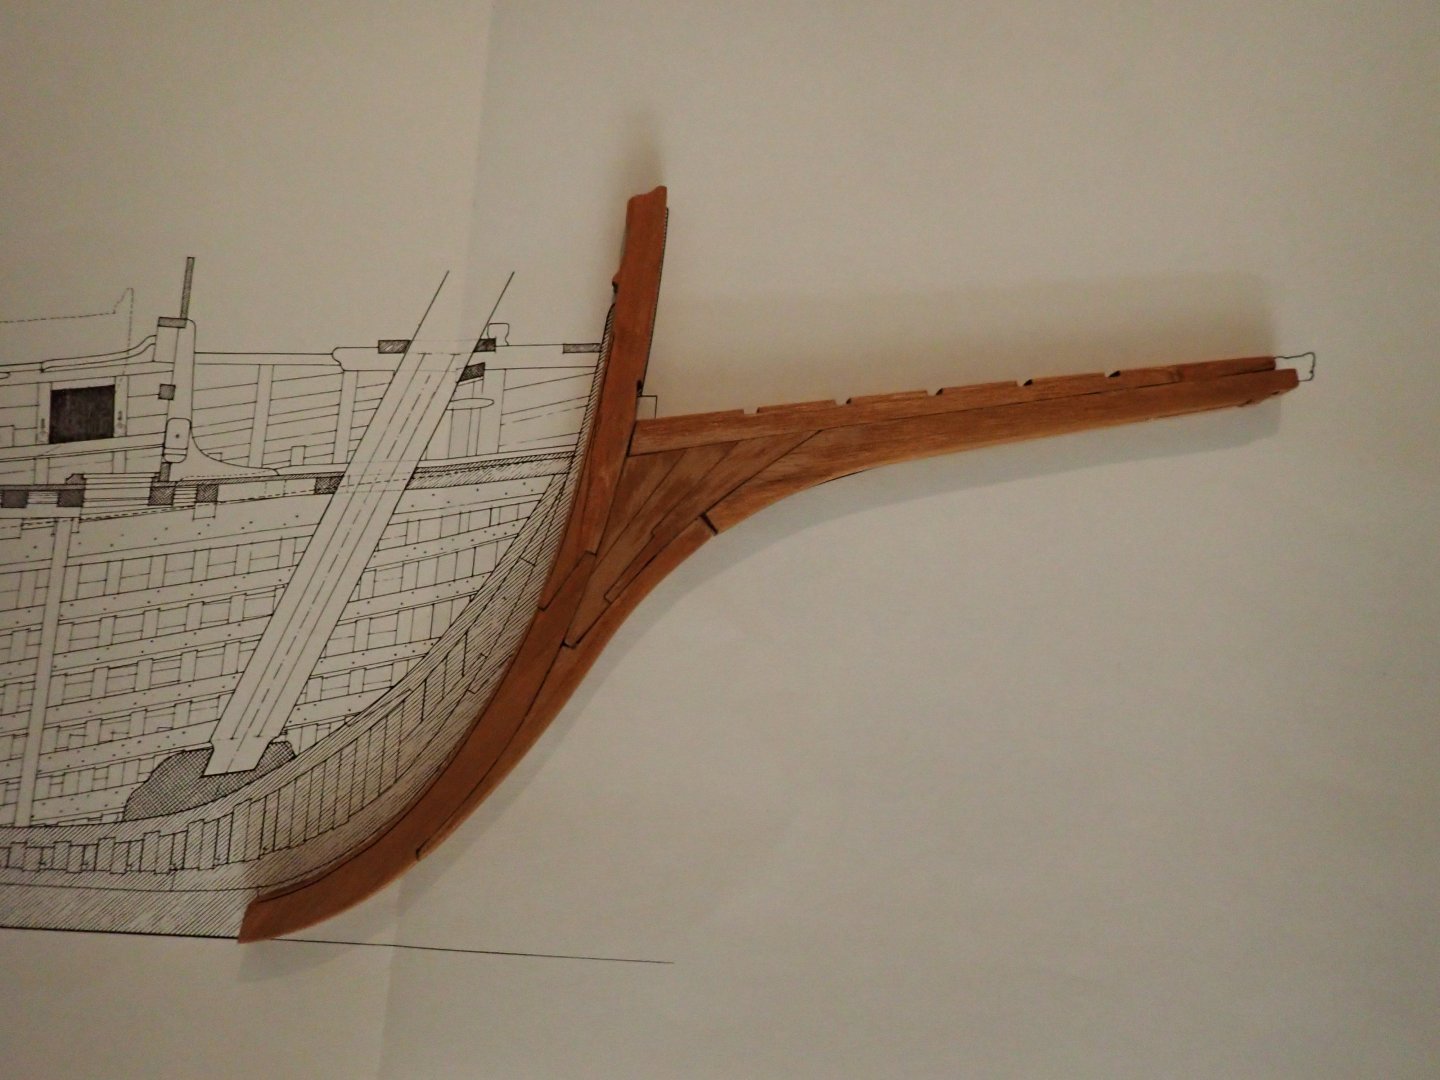
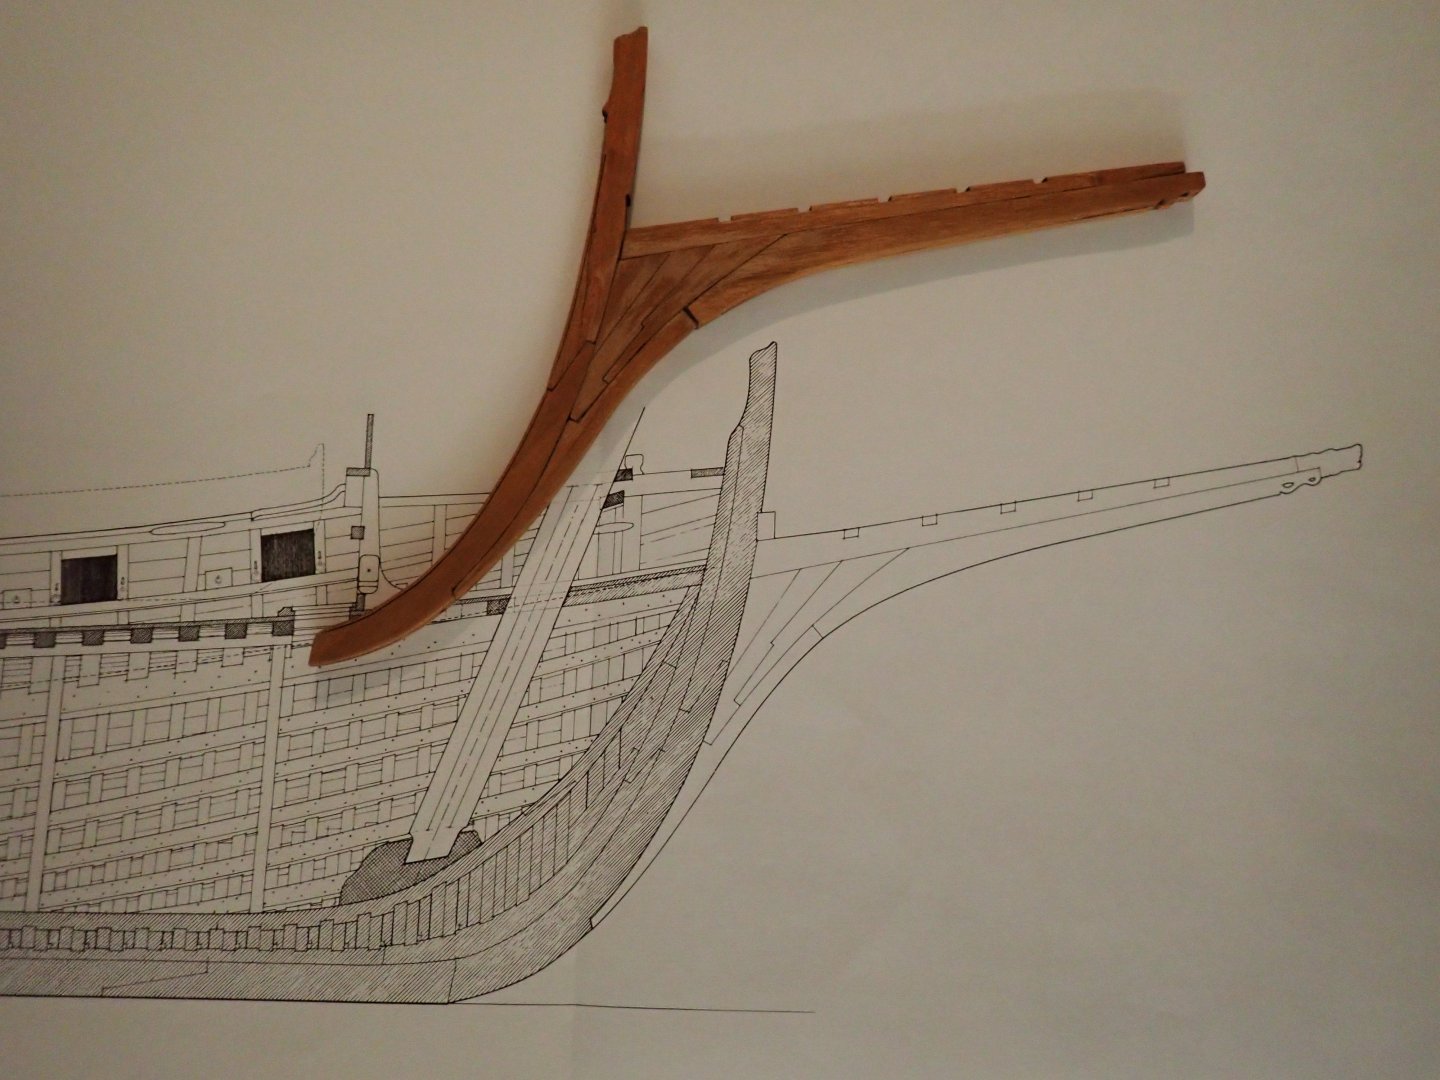
Some update related to the bow and bowsprit. All parts are made of a sandwich of two layers of cherry wood: A jig is provided to assemble and give the perfect curvature to the bow: Quick comparison with the Monograph. As it turns out, all the parts provided in the kit, match perfectly the original document: All the pieces are then glued with Titebond: The monograph is quite useful to figure out exactly how the parts dovetail. As usual, the documentation/instructions from CAF Model need some improvements. I am very happy I could find a used Monograph for this ship, on E-Bay for half of what you normally pay for this document. With some oil on it, it brings the richness of the cherry tree wood: Verification that it fits nicely into the cradle: And verification that it matches the Monograph: Et voila for today. Yves


- 185 replies
-
- 21
-
-
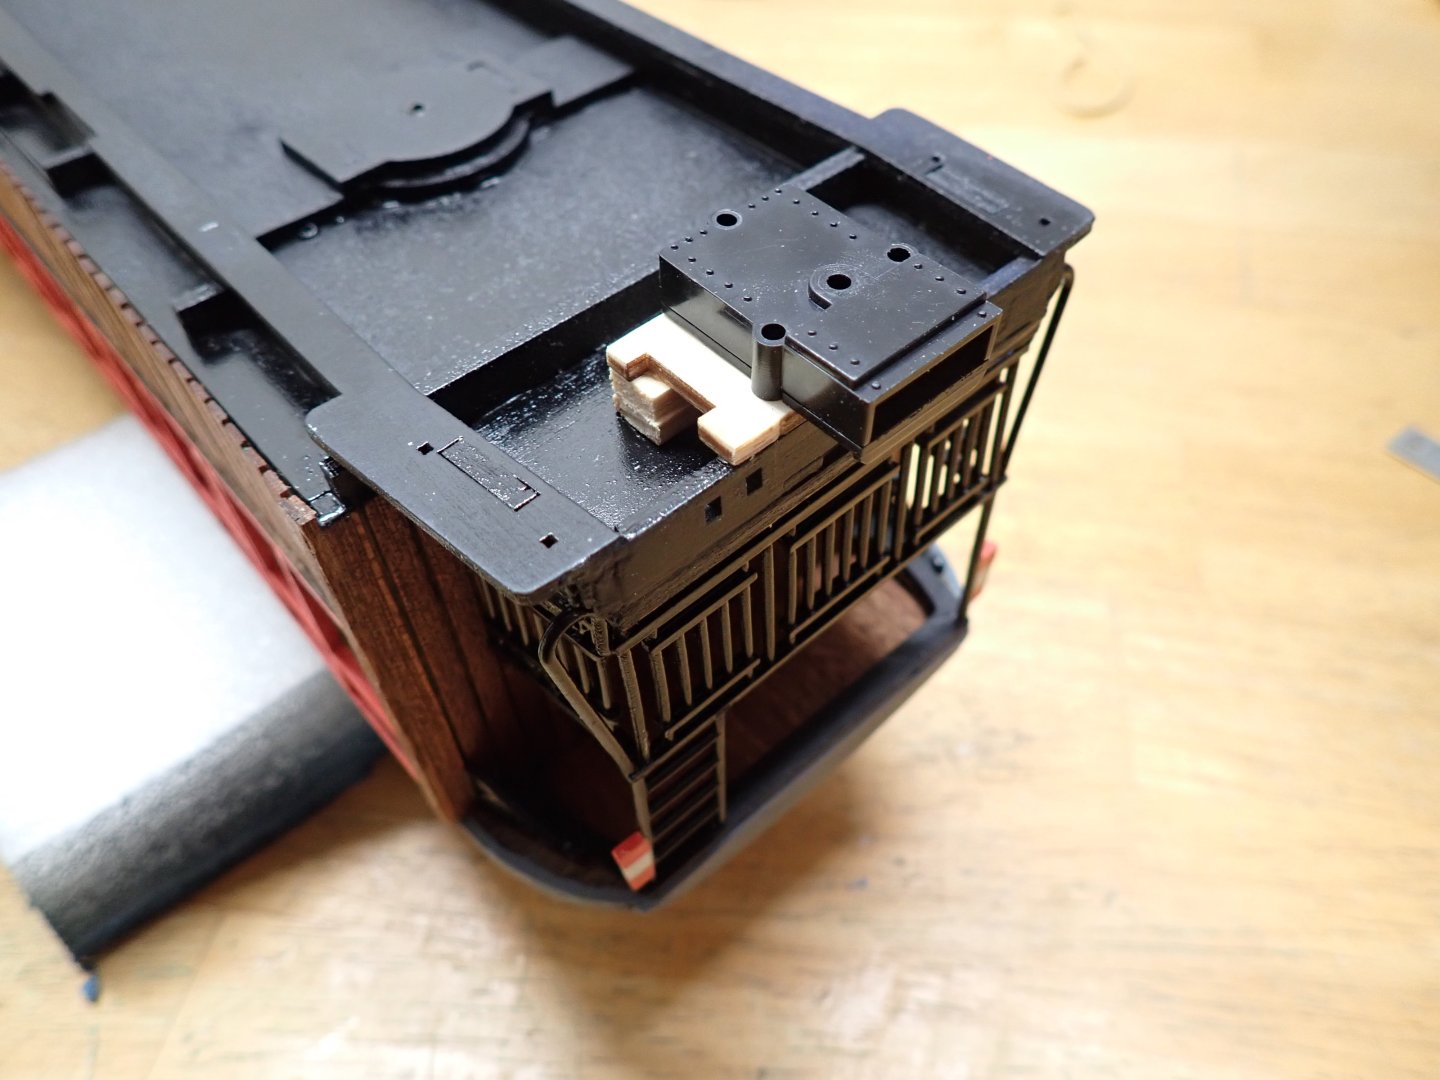
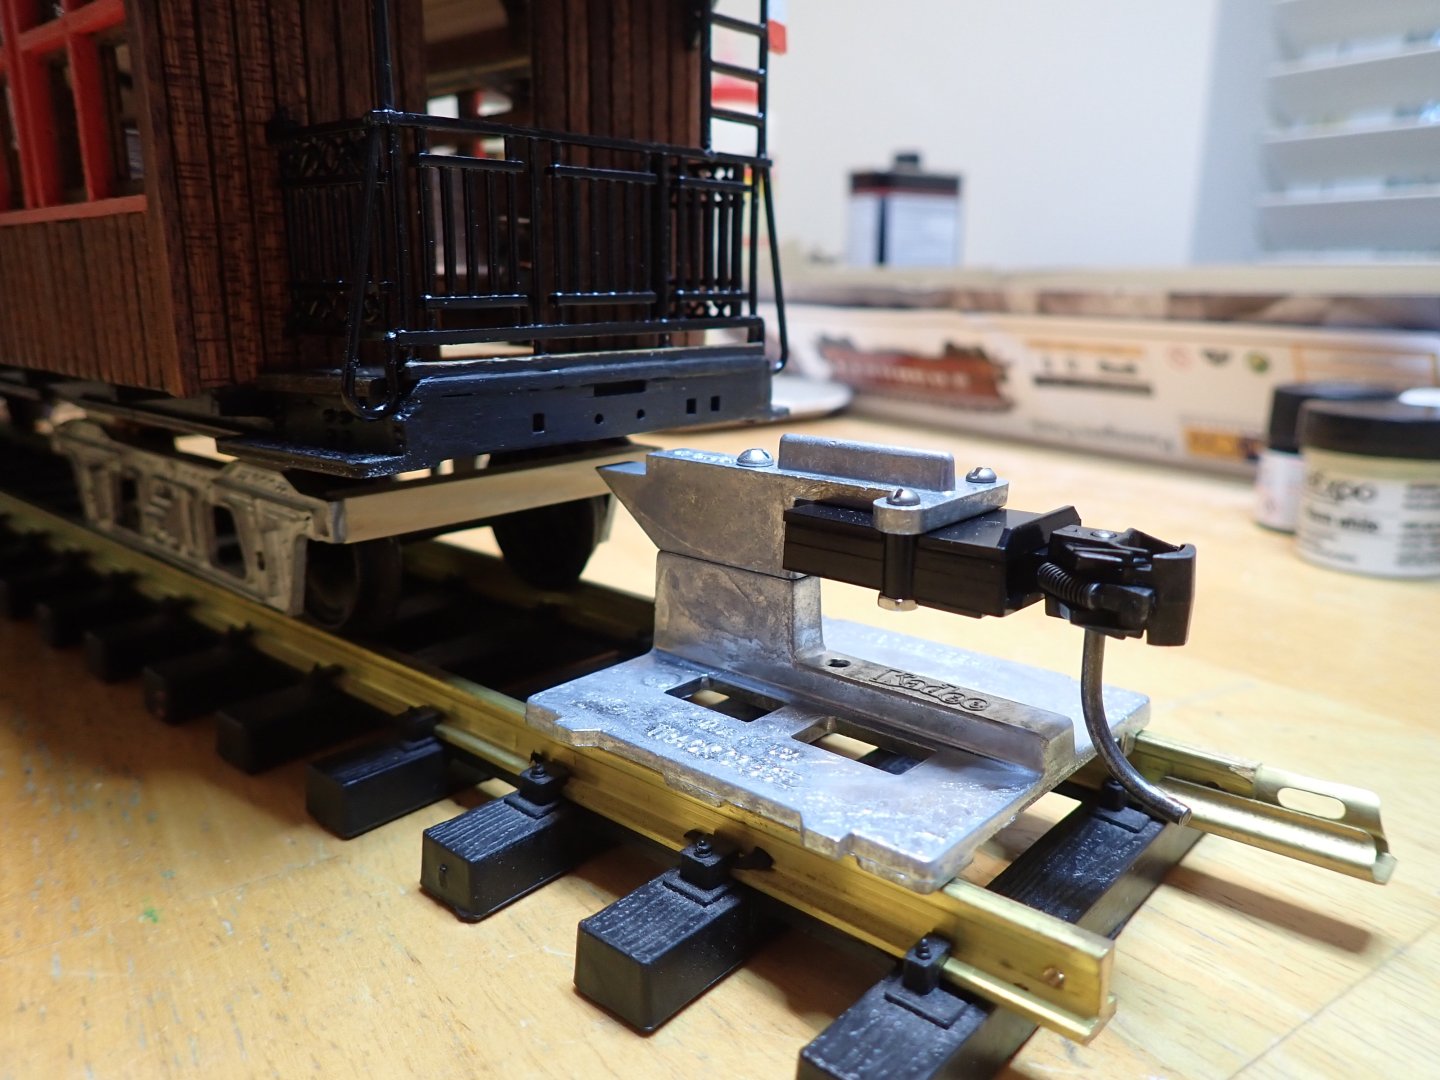
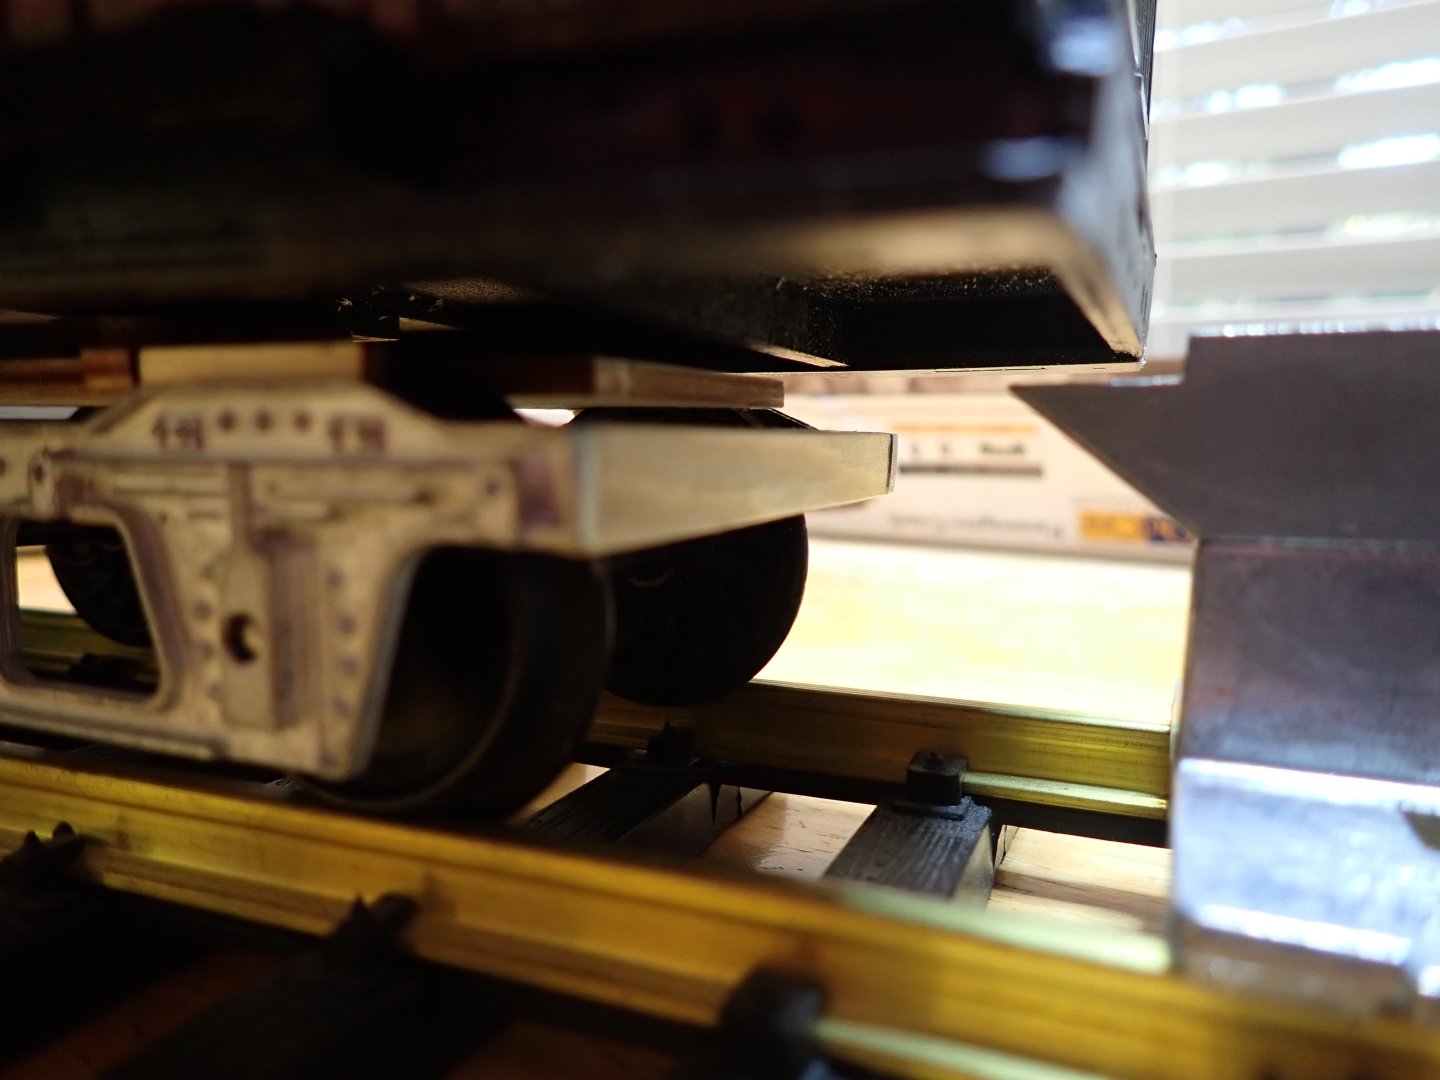
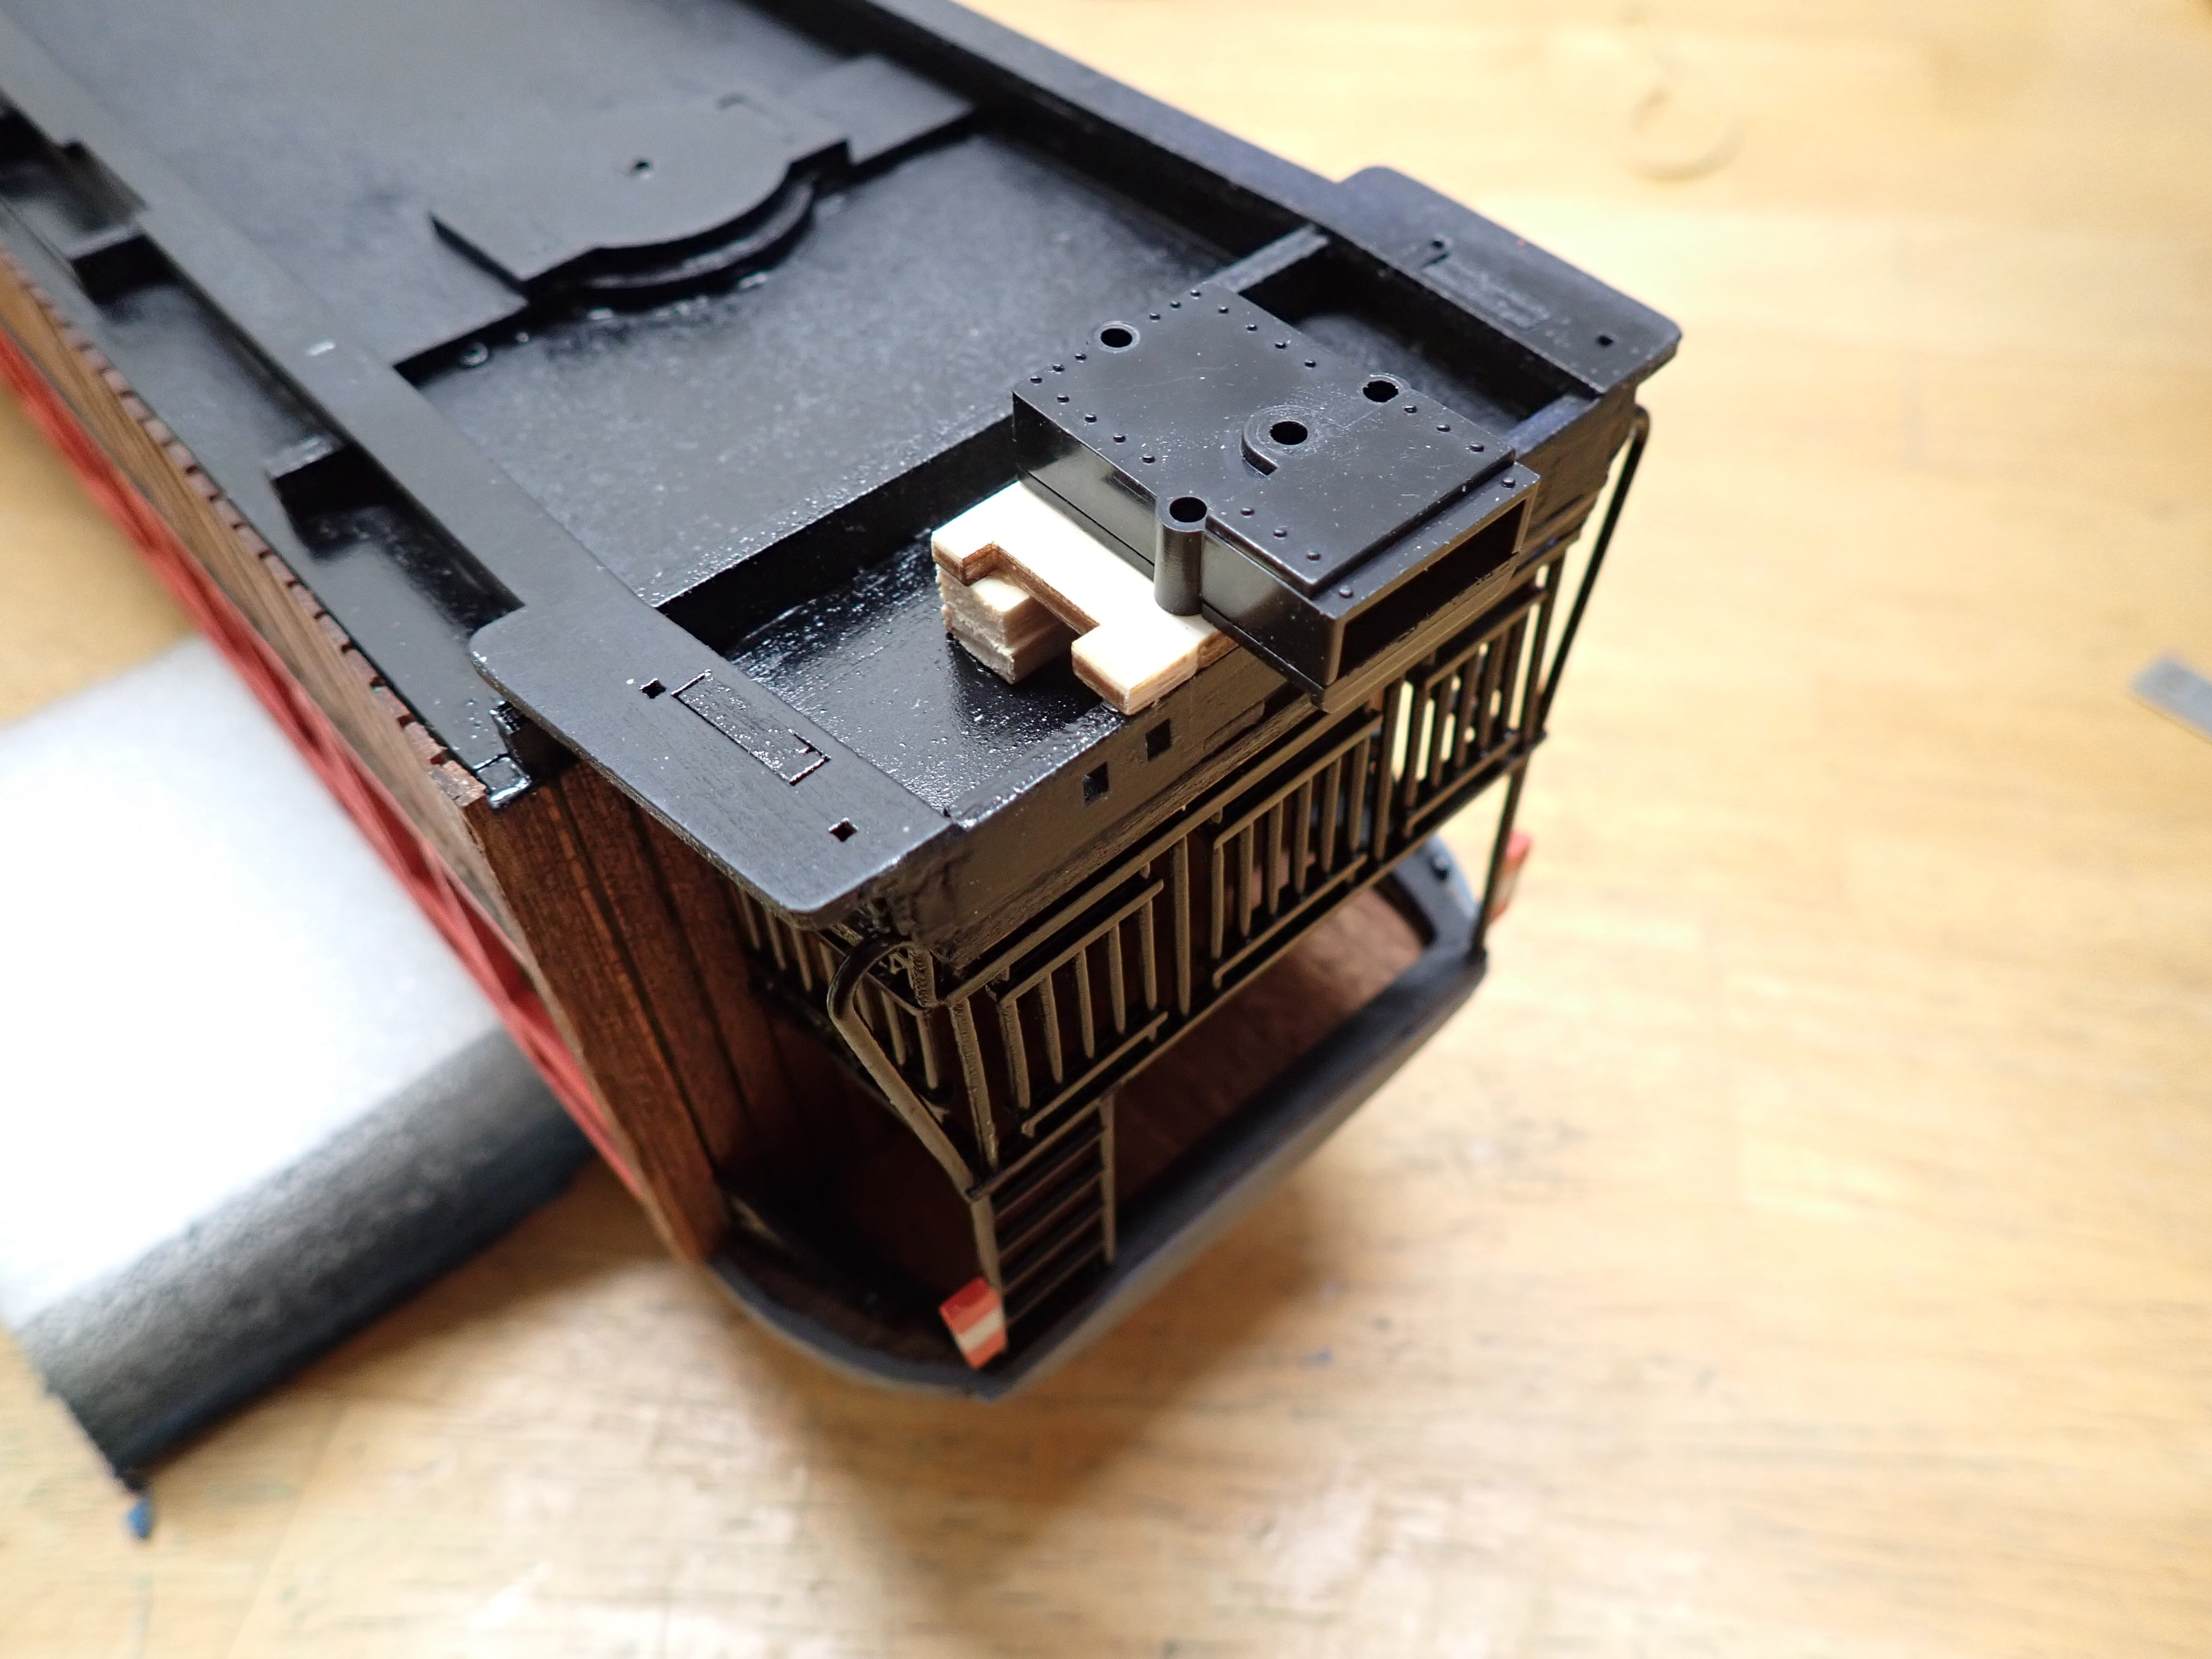
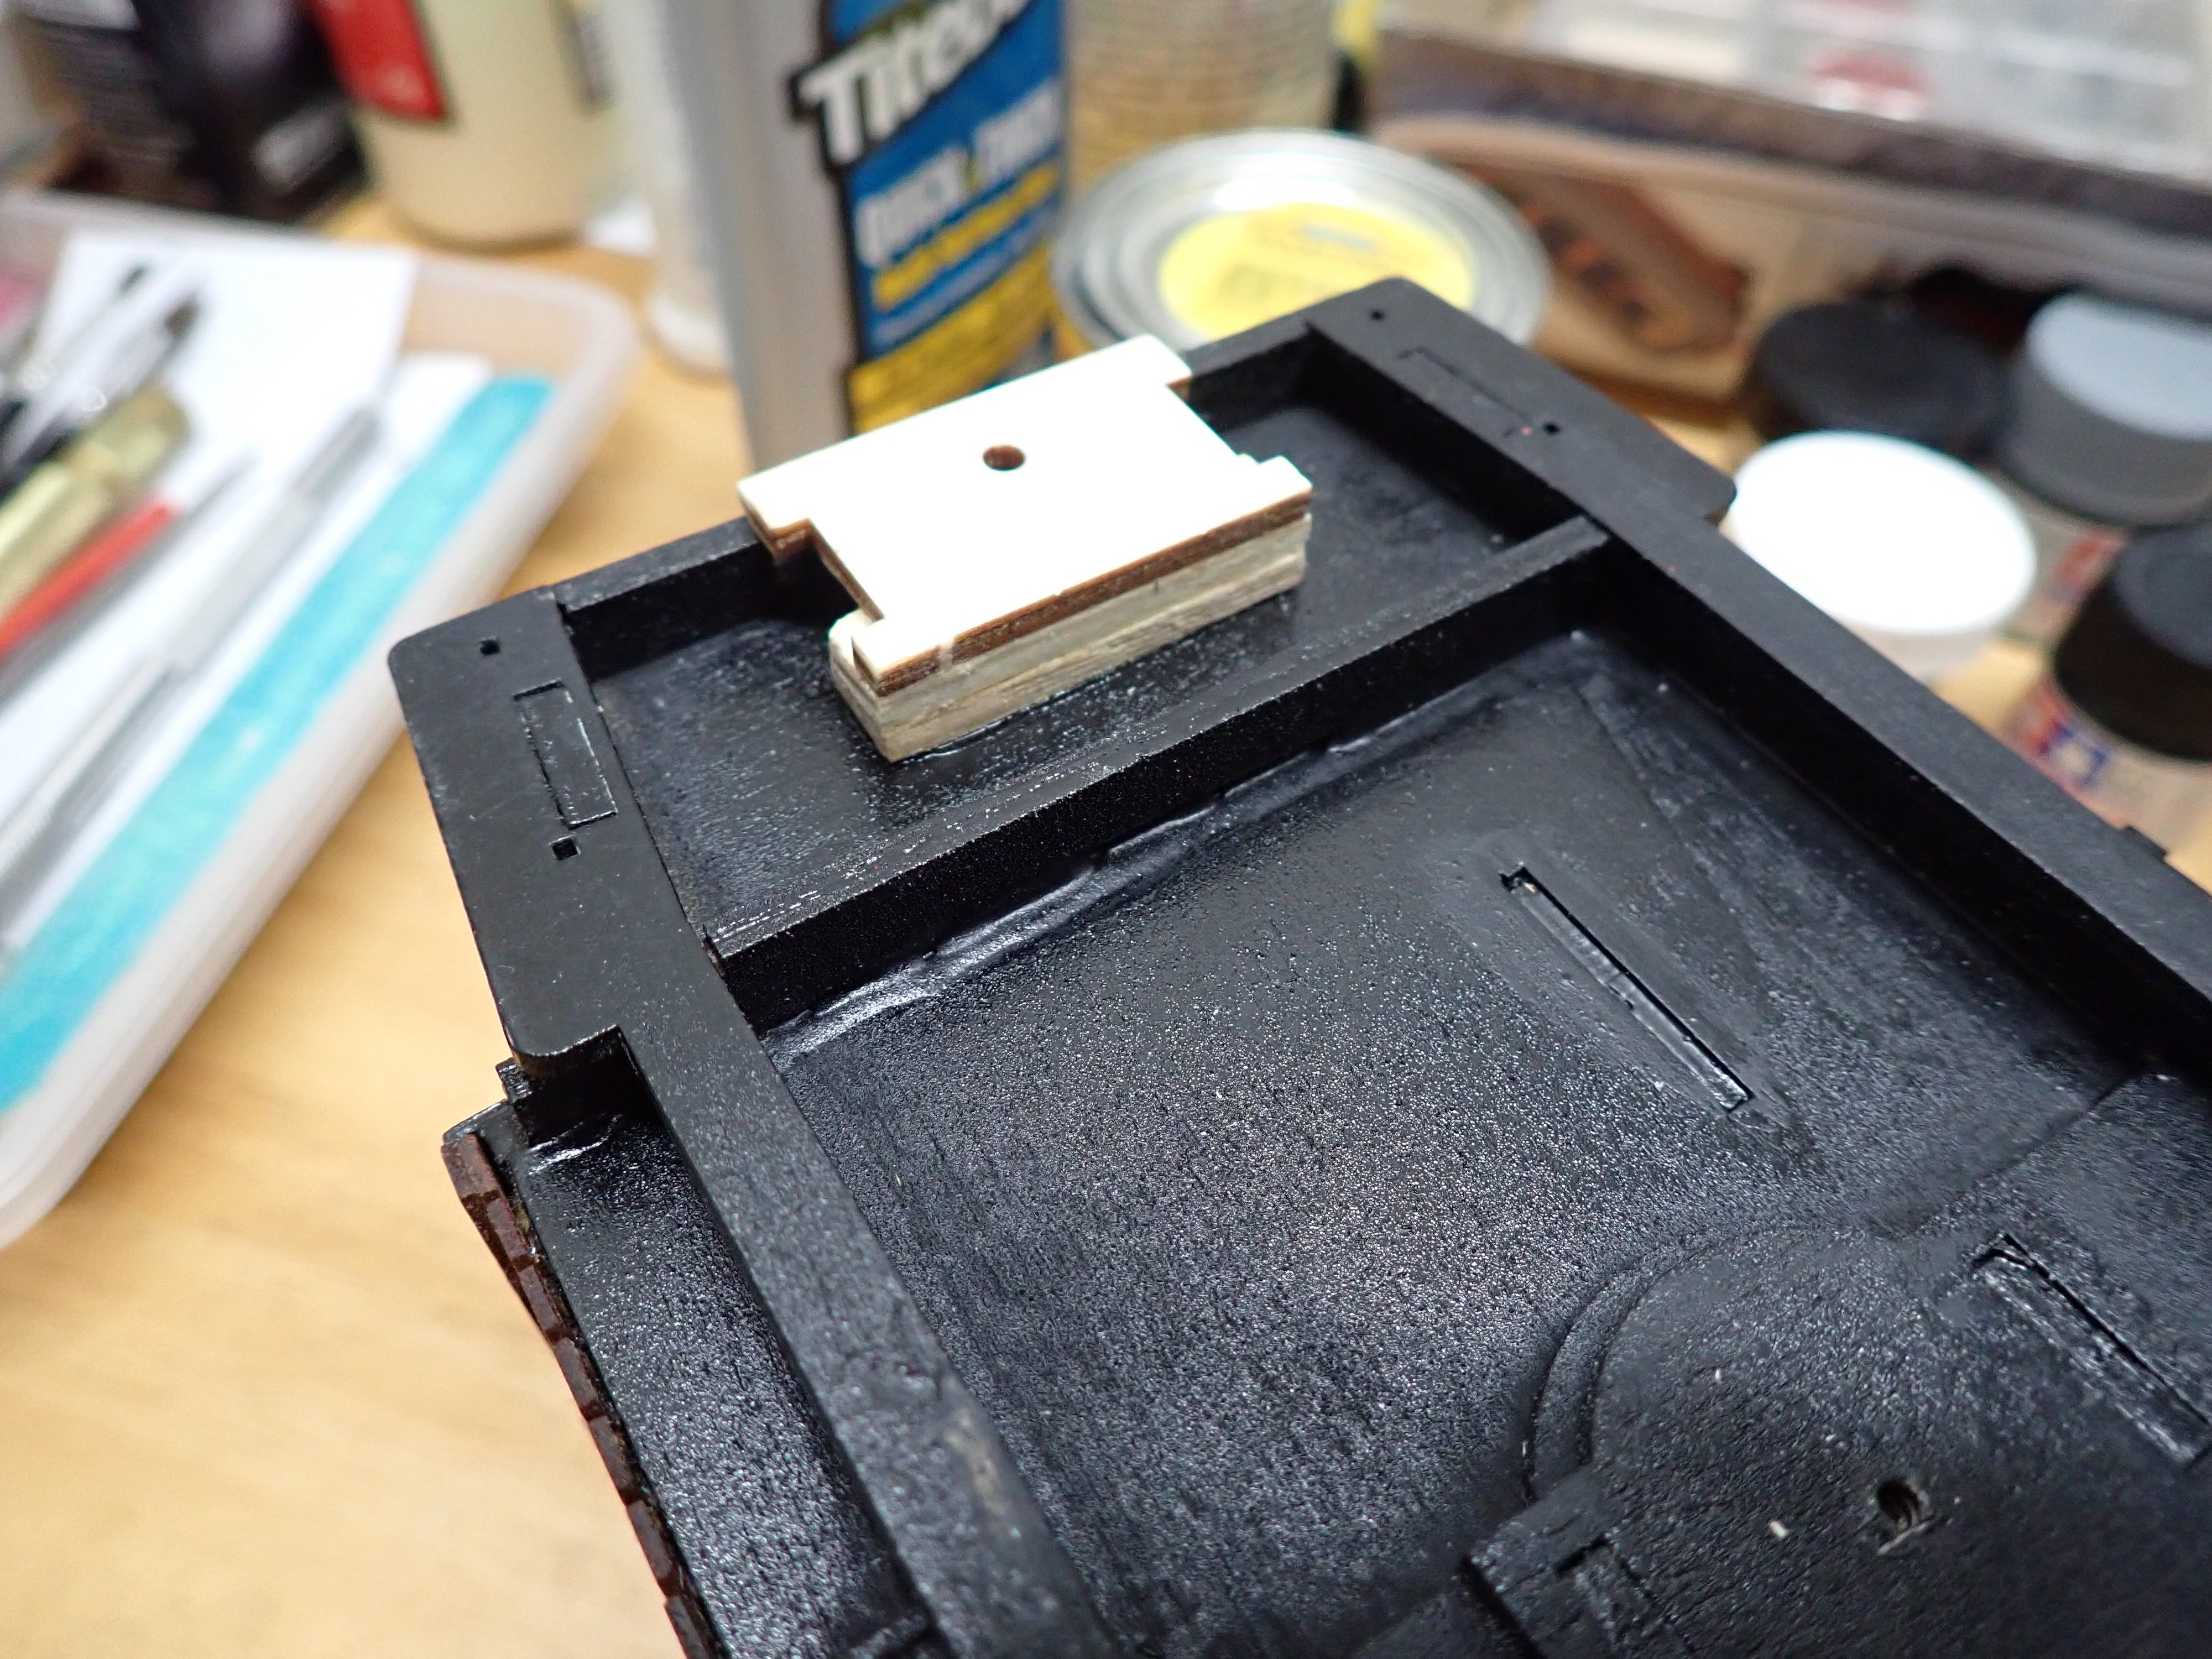
A quick update with not much done: preparing the platform to attach KADEE couplers, if one day, this coach is ever used on a Gauge 1 layout. Very unlikely, but just in case.... Gauging the height, with a KADEE Gauge 1 gauge: Yves