yvesvidal
-
Posts
3,642 -
Joined
-
Last visited
Content Type
Profiles
Forums
Gallery
Events
Everything posted by yvesvidal
-
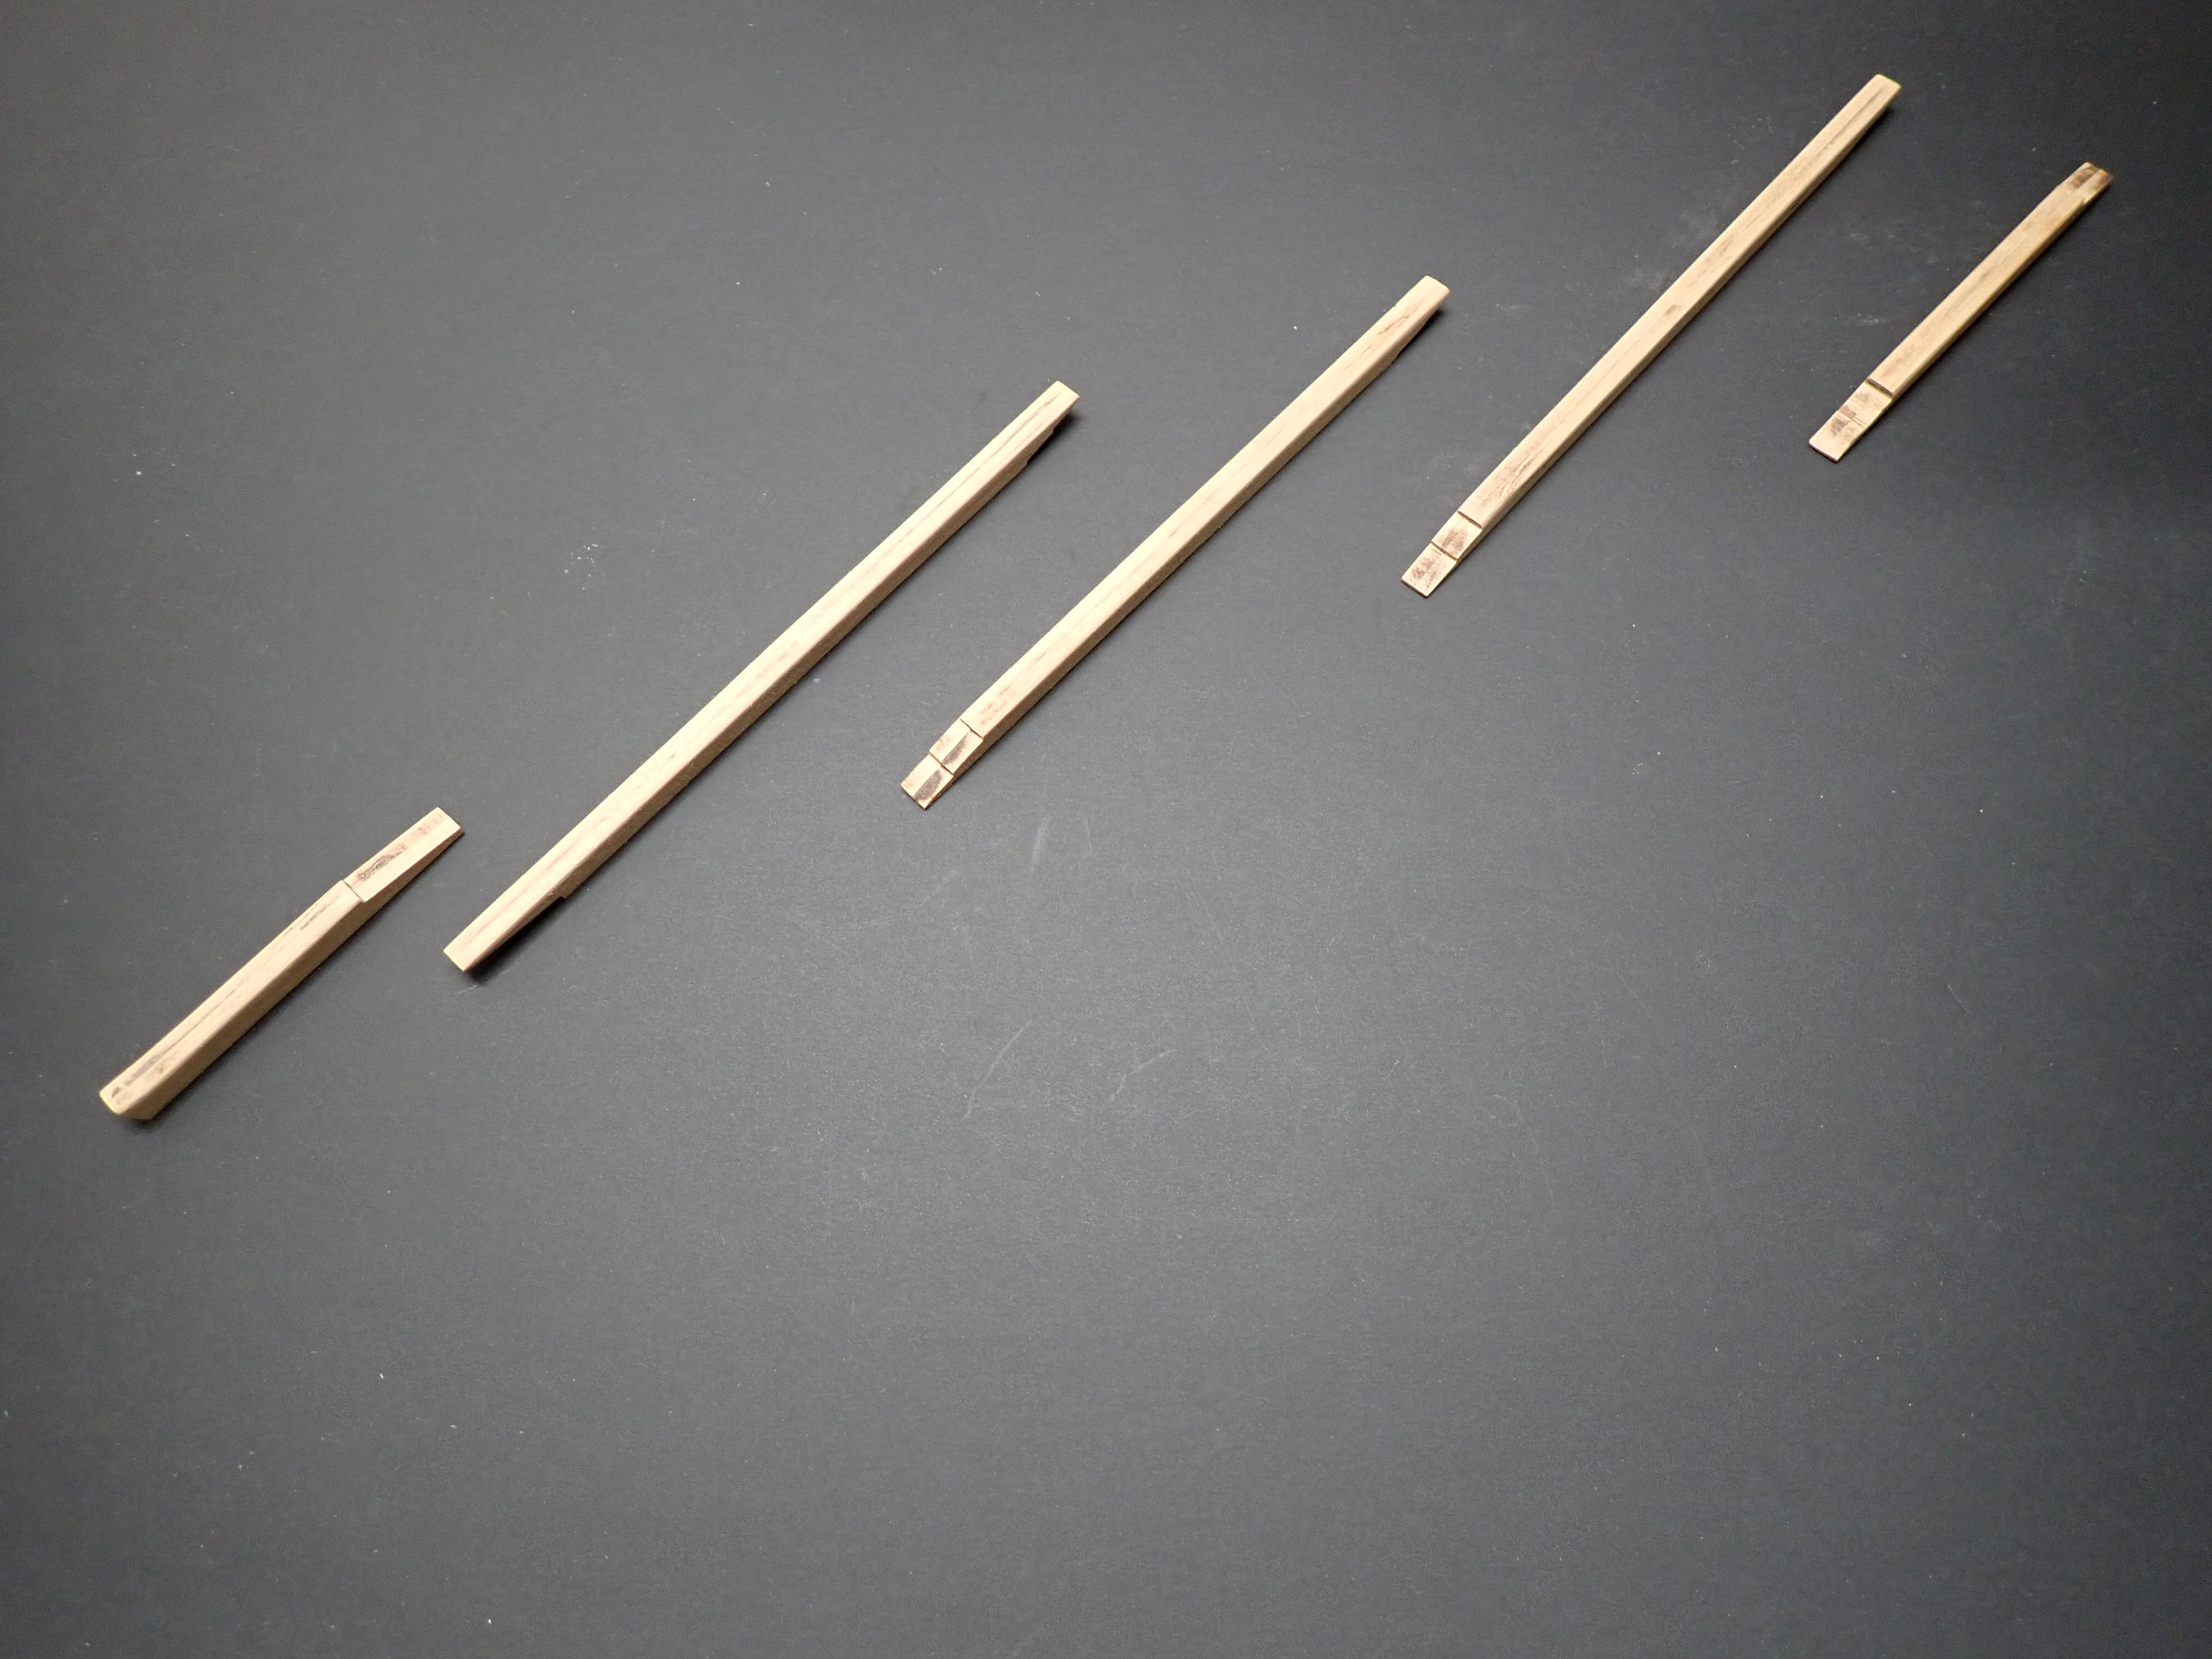
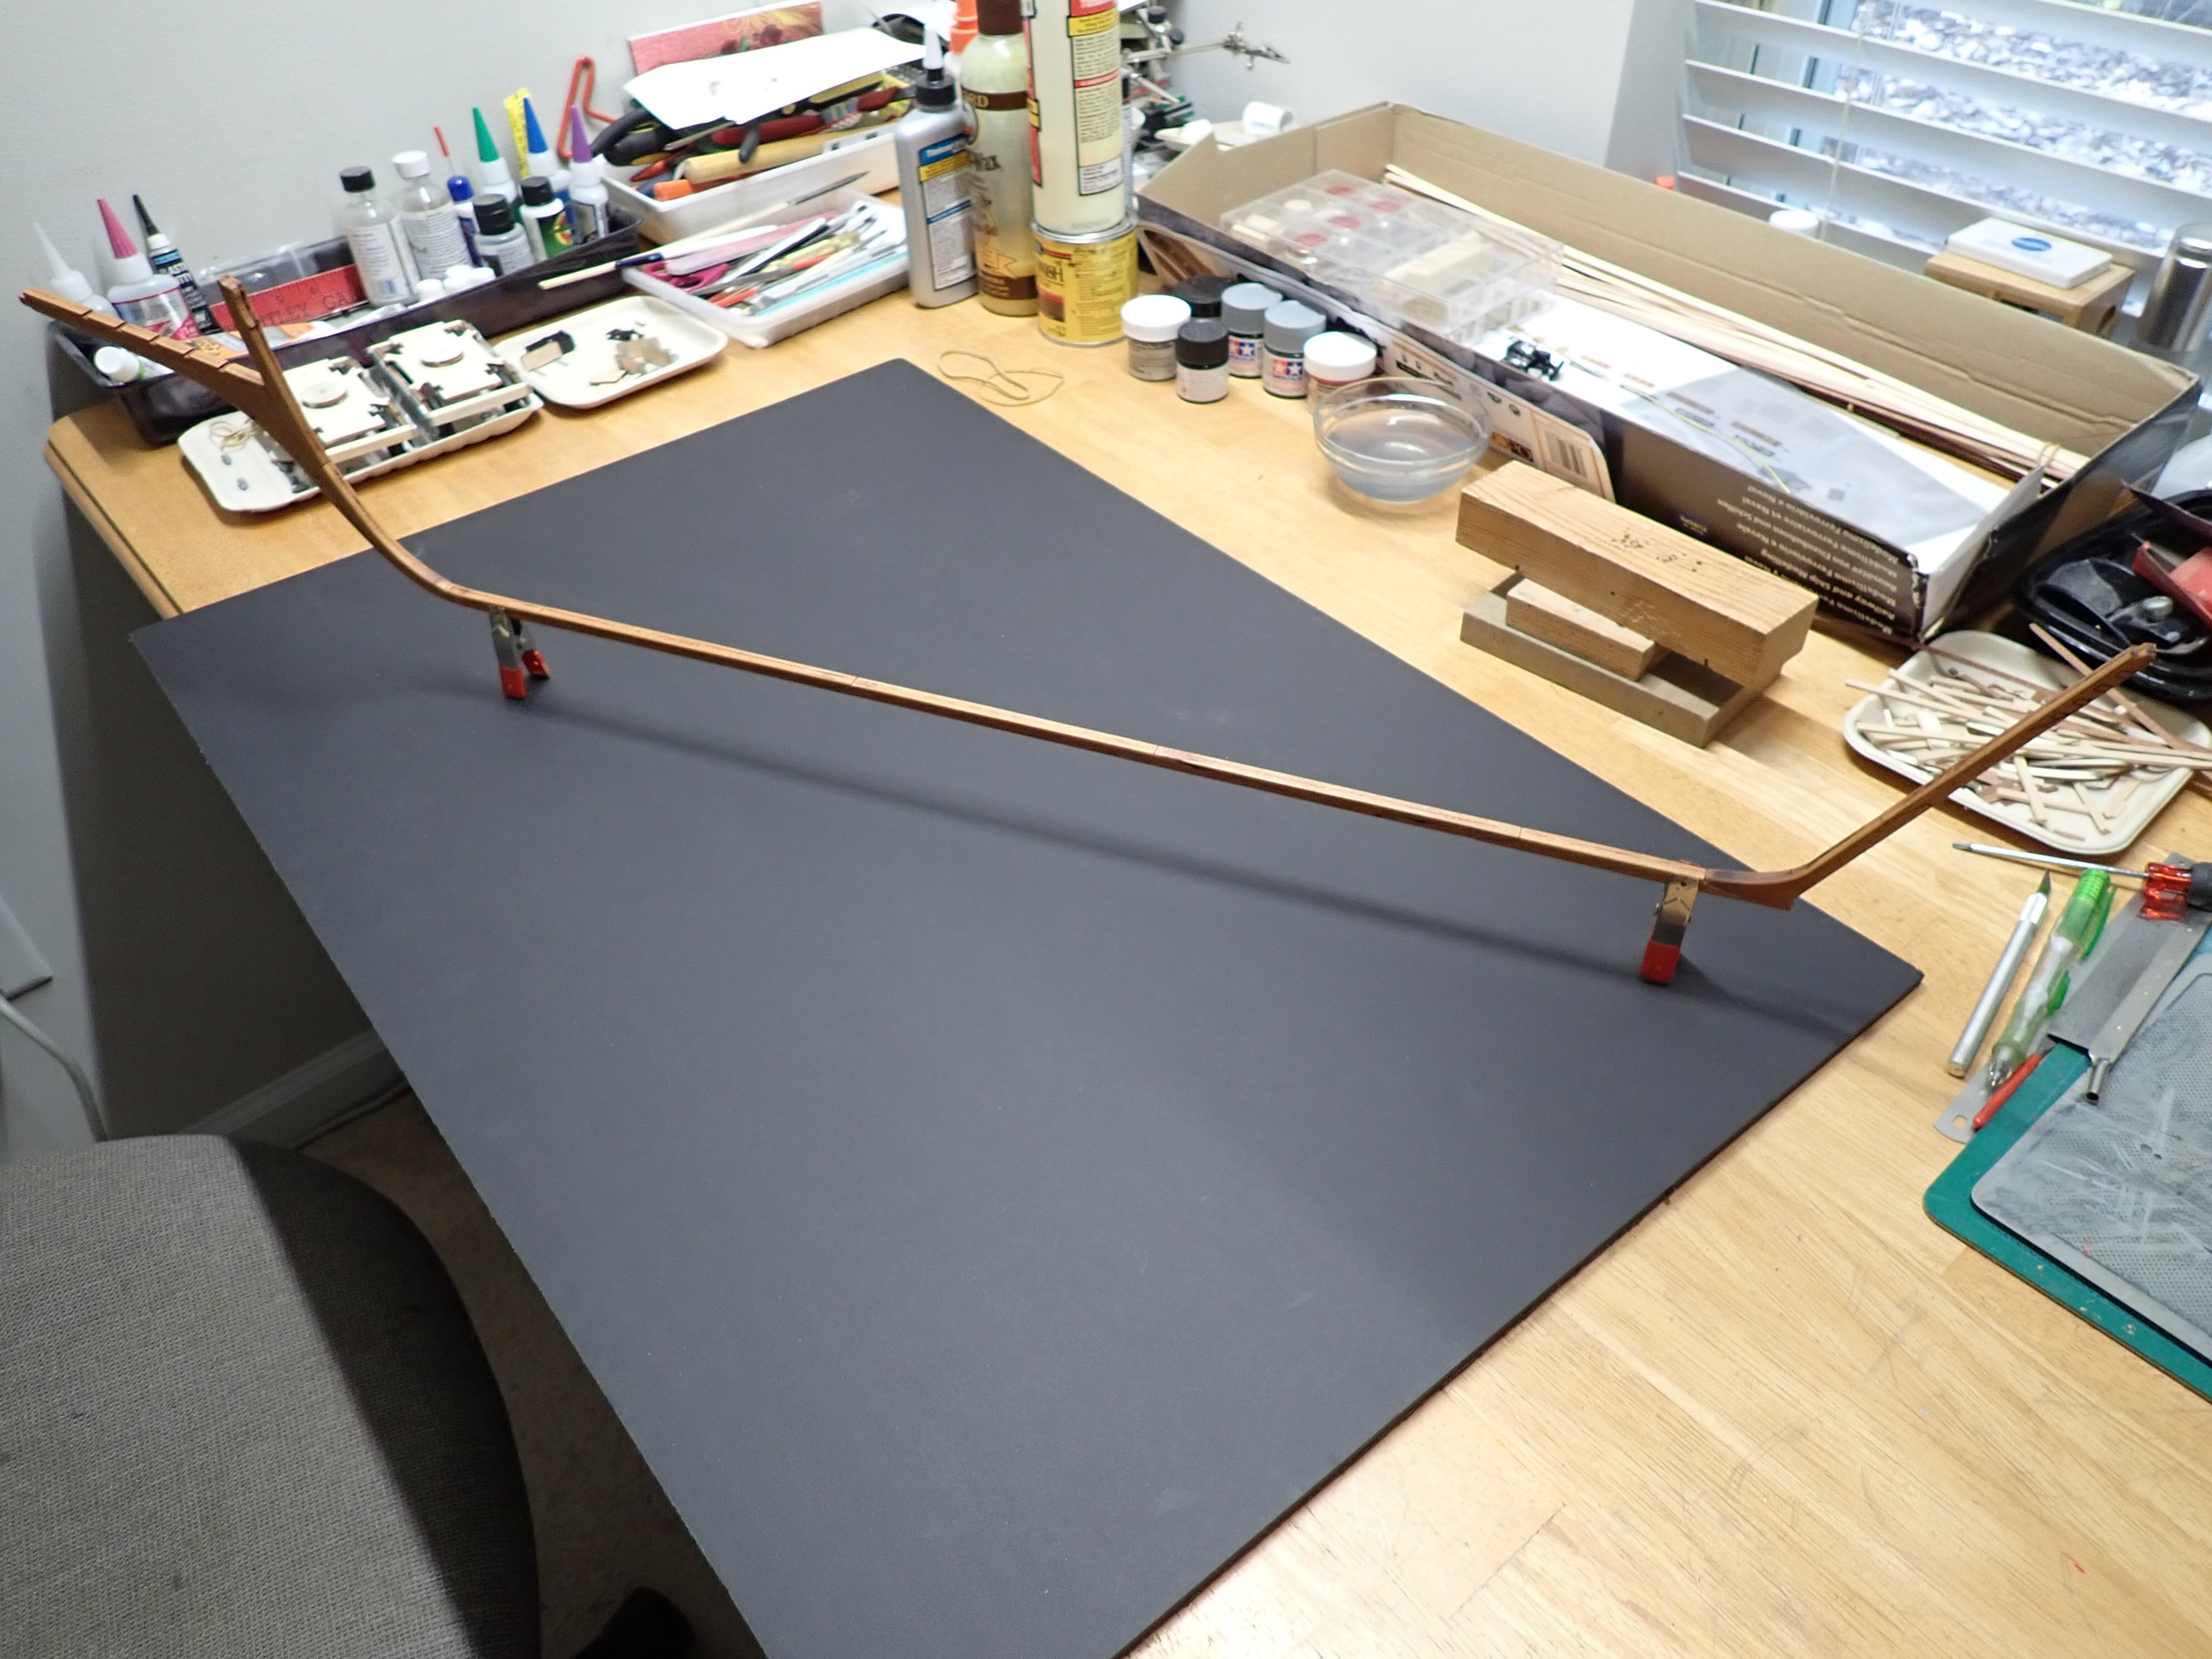
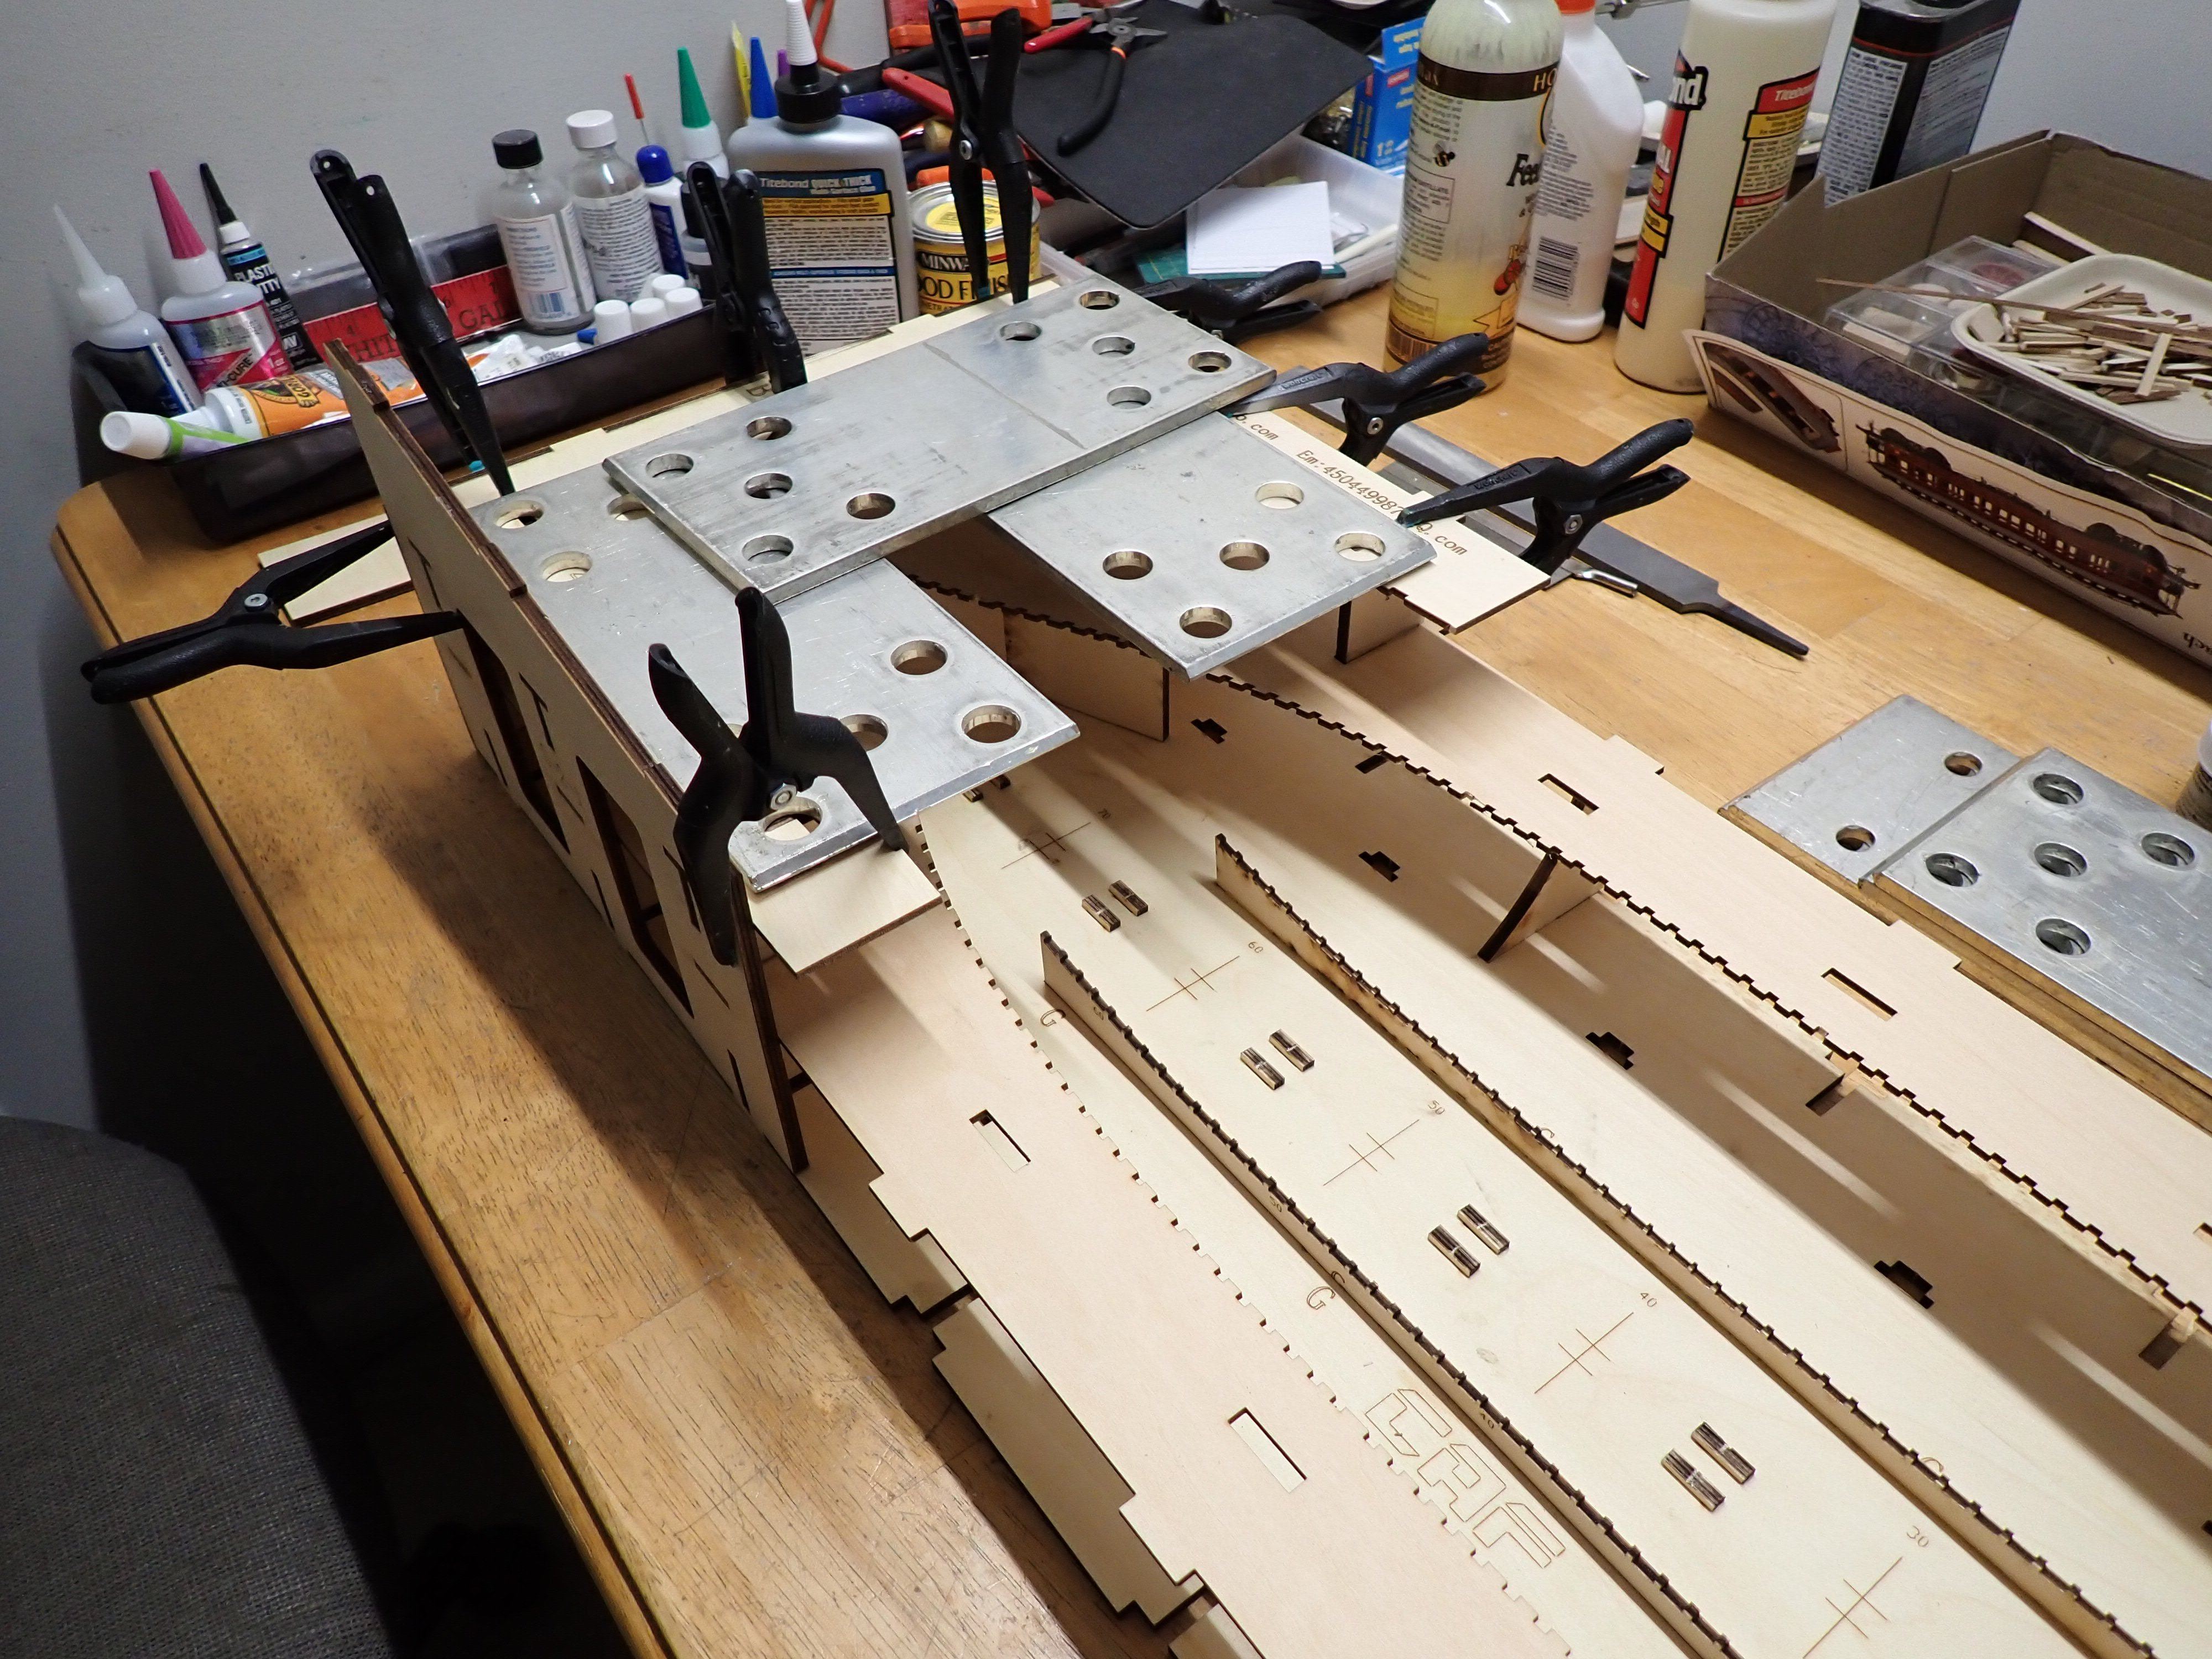
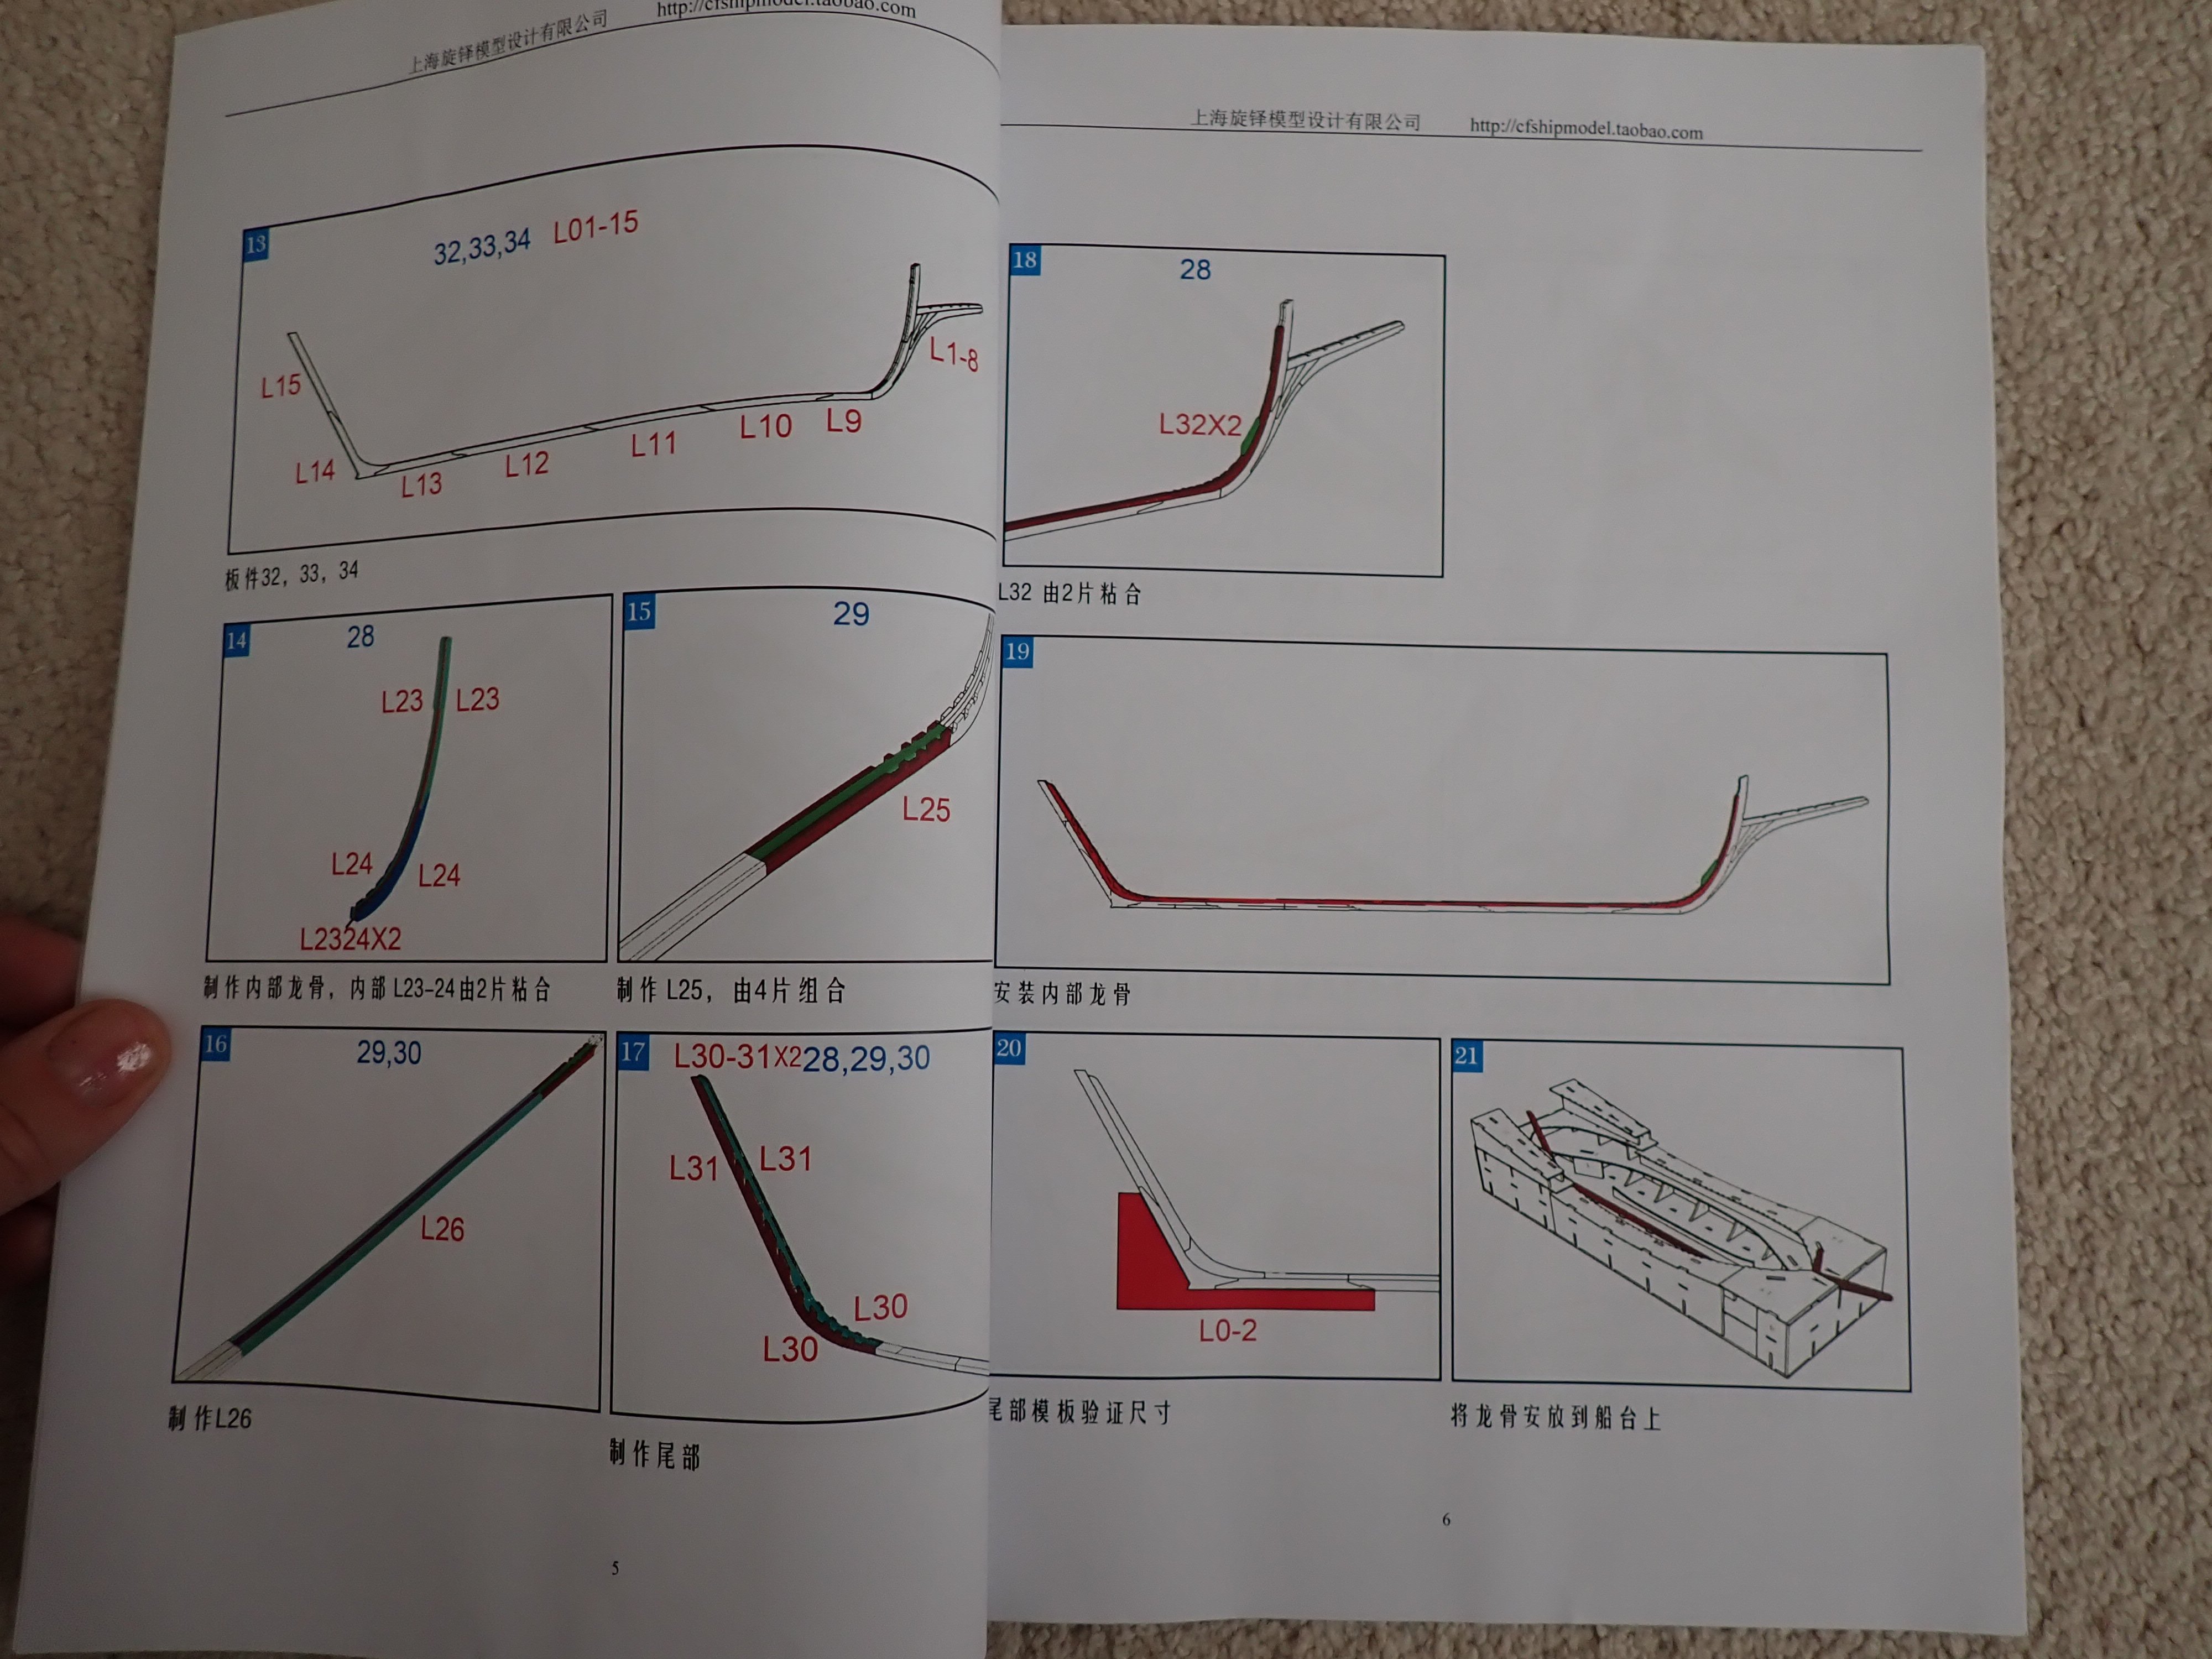
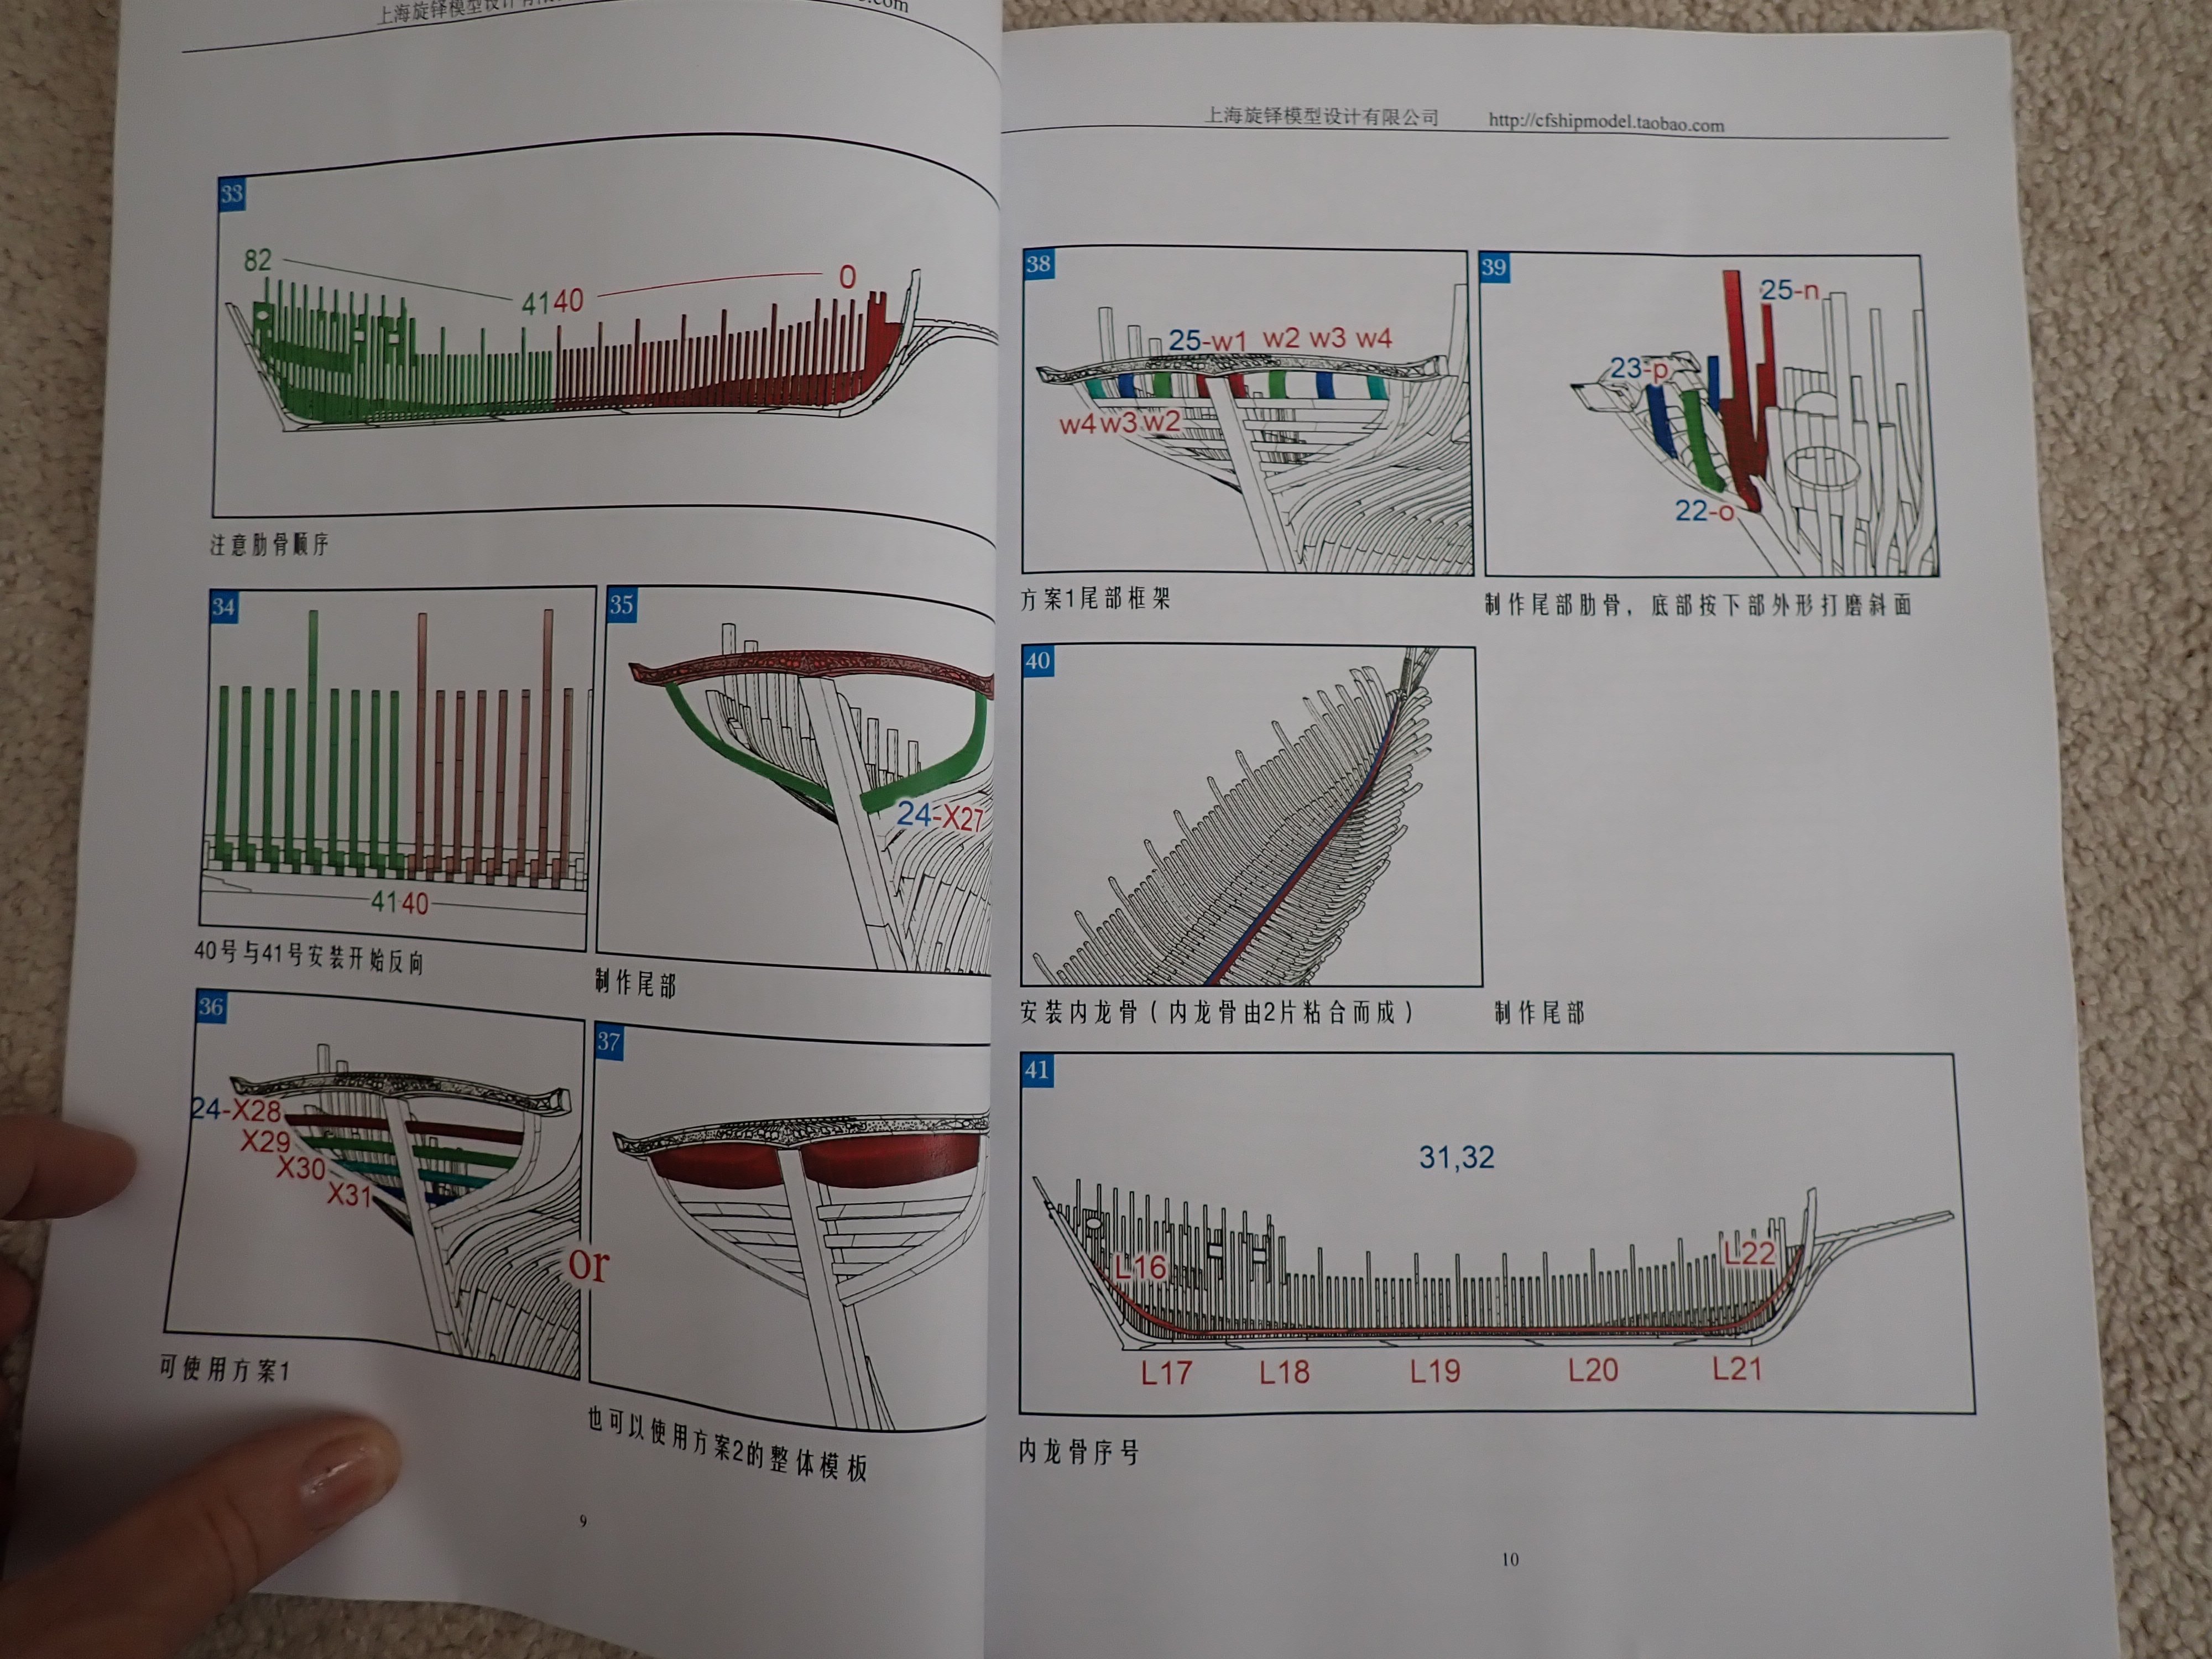
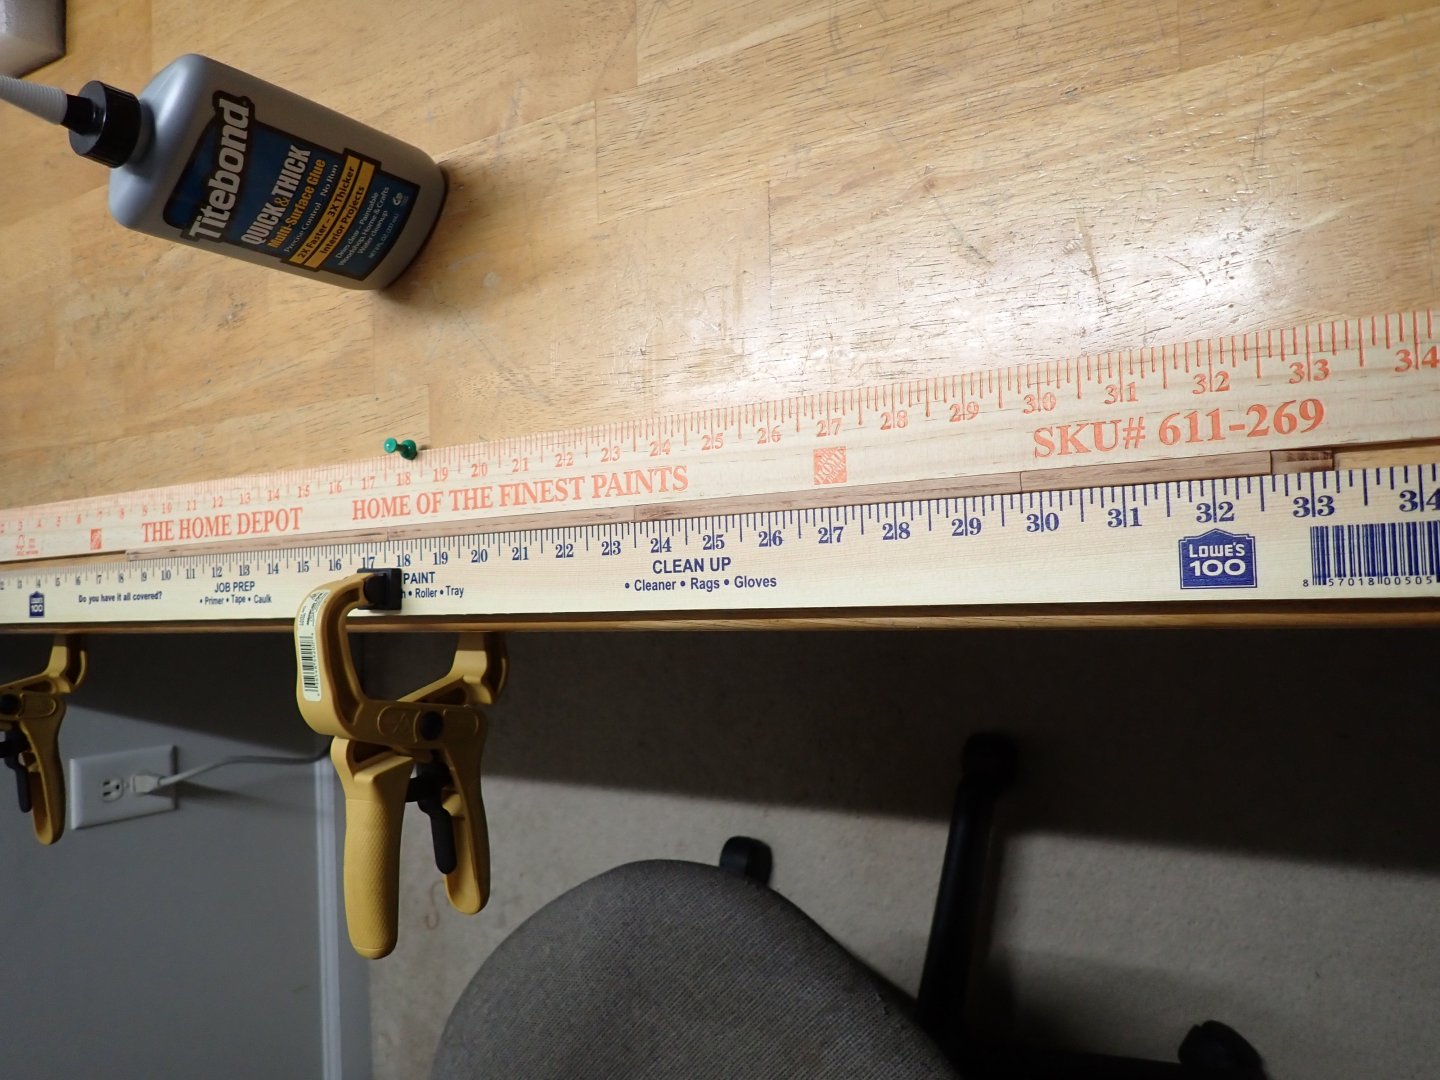
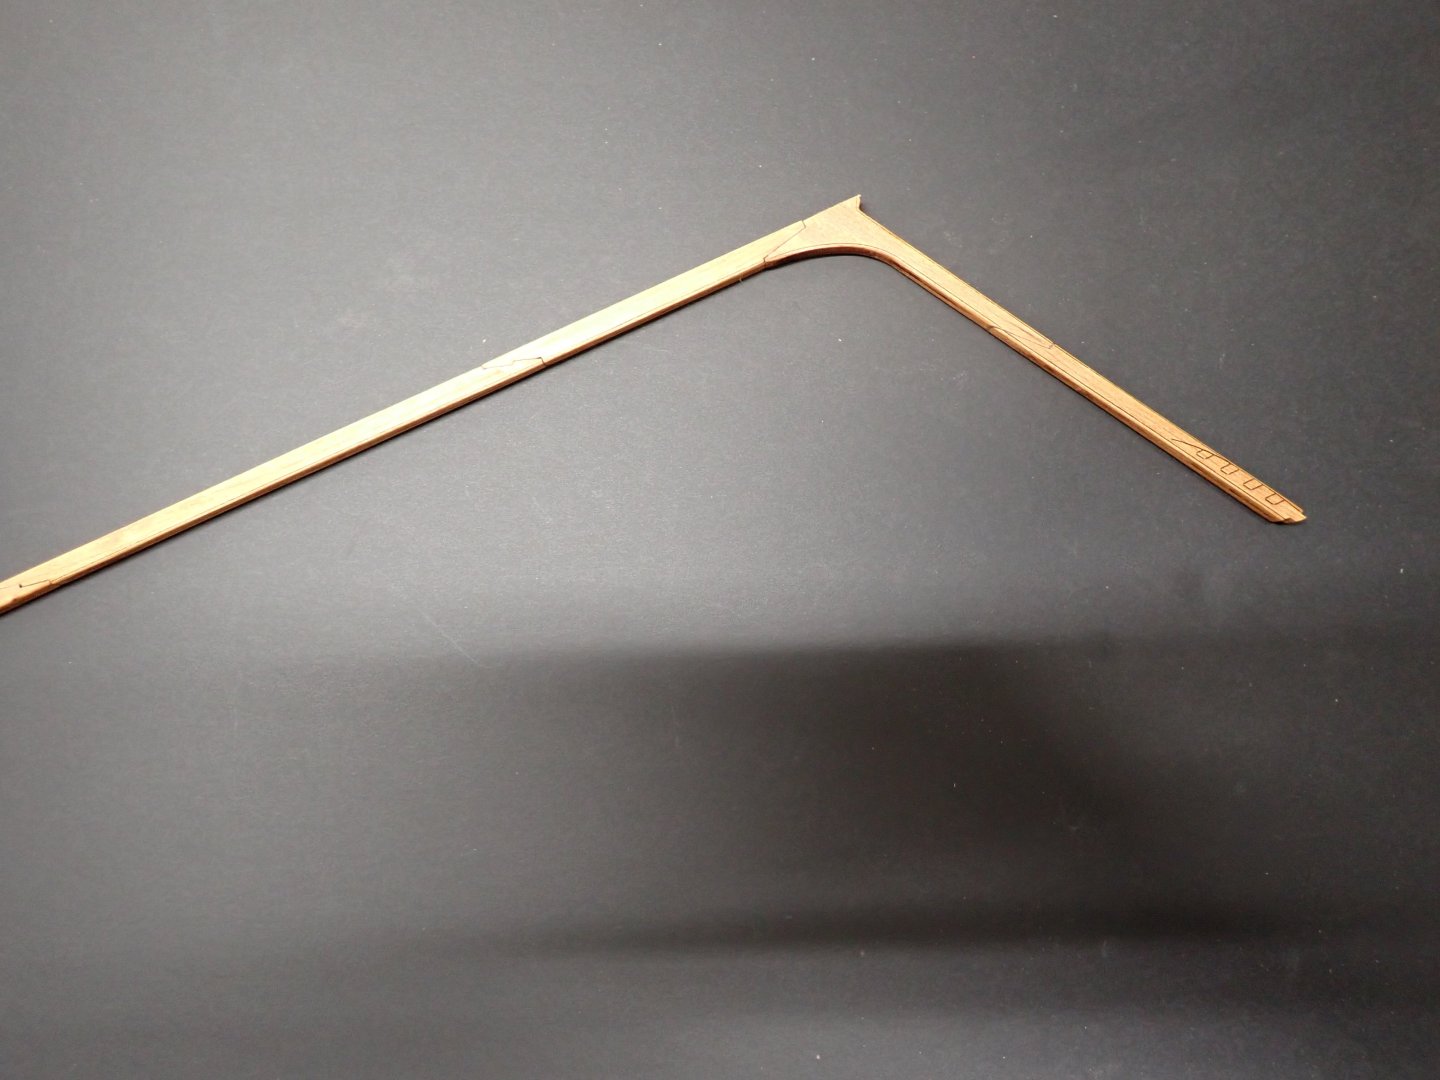
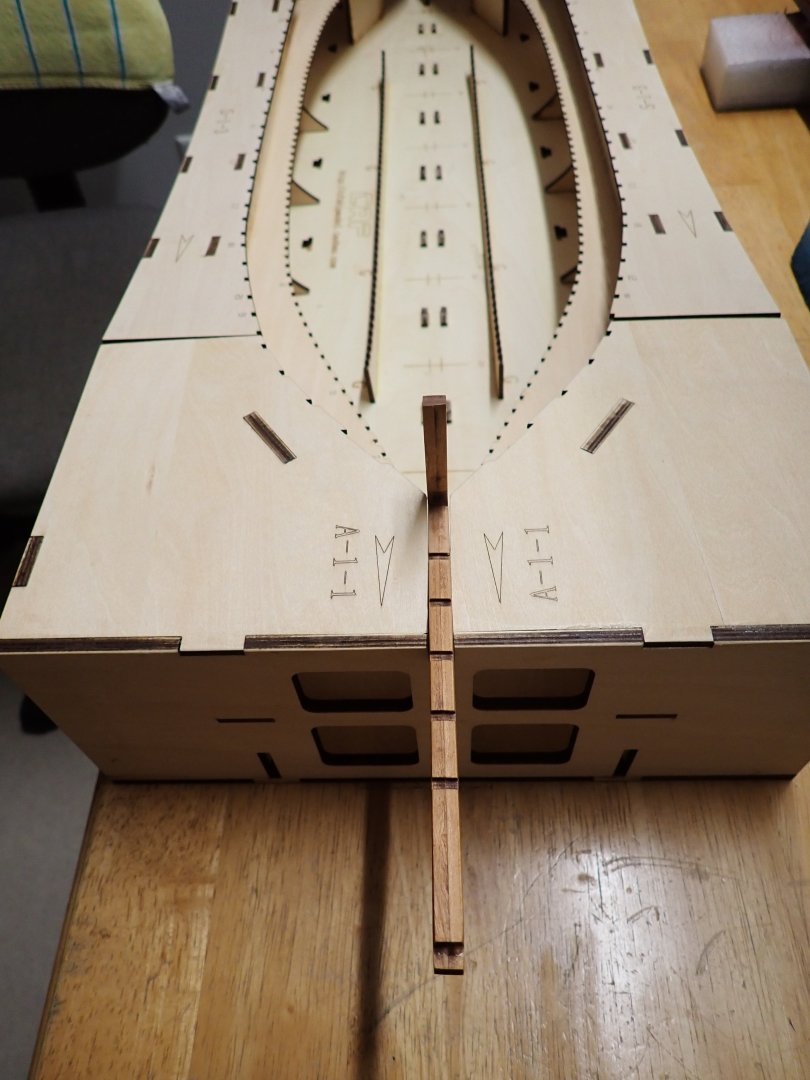
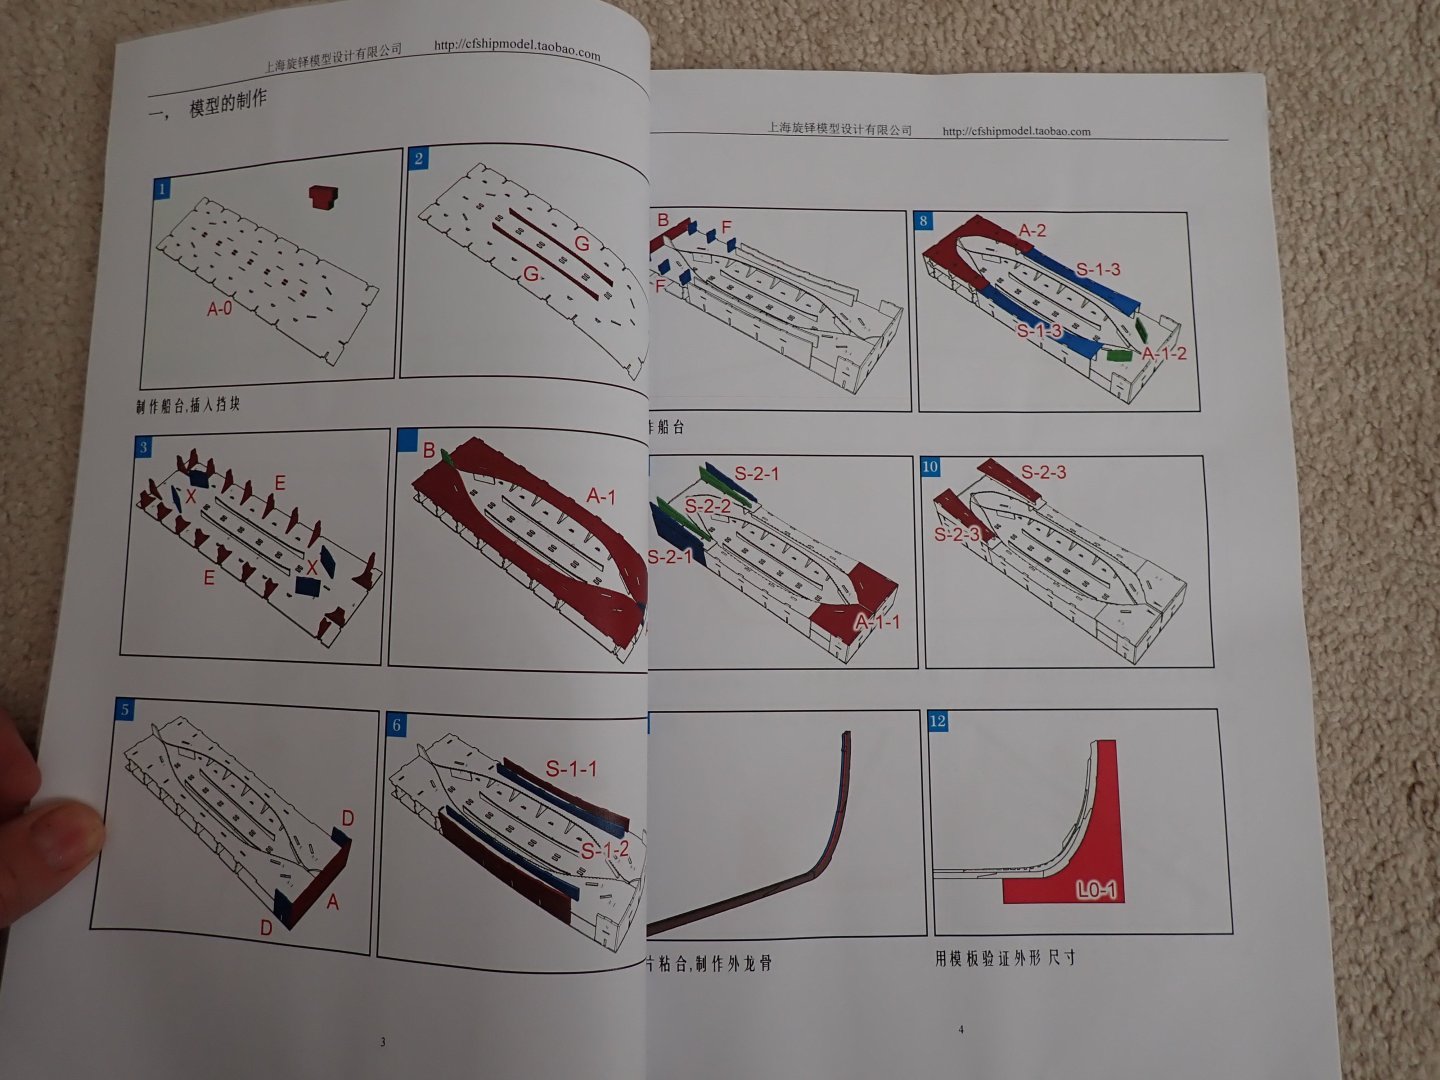
 On the Chebec CAF Model kit, there are two keels: the external keel and the internal keel, that supports all the frames. I started building the external keel. Again, each segment is made of two pieces of cherry tree wood, glued together. Their shape and length match the Monograph of the Requin. I like straight keels and similarly to what I did with the CAF Bellona, the Chebec keel is sandwiched between two straight rulers and left to dry for a few hours. The bow and stern pieces are then glued: At this point, the keel is very fragile and needs to be manipulated with a lot of care. It does fit perfectly into the cradle, which is a good thing. It will be re-enforced by the inner keel later on. Yves
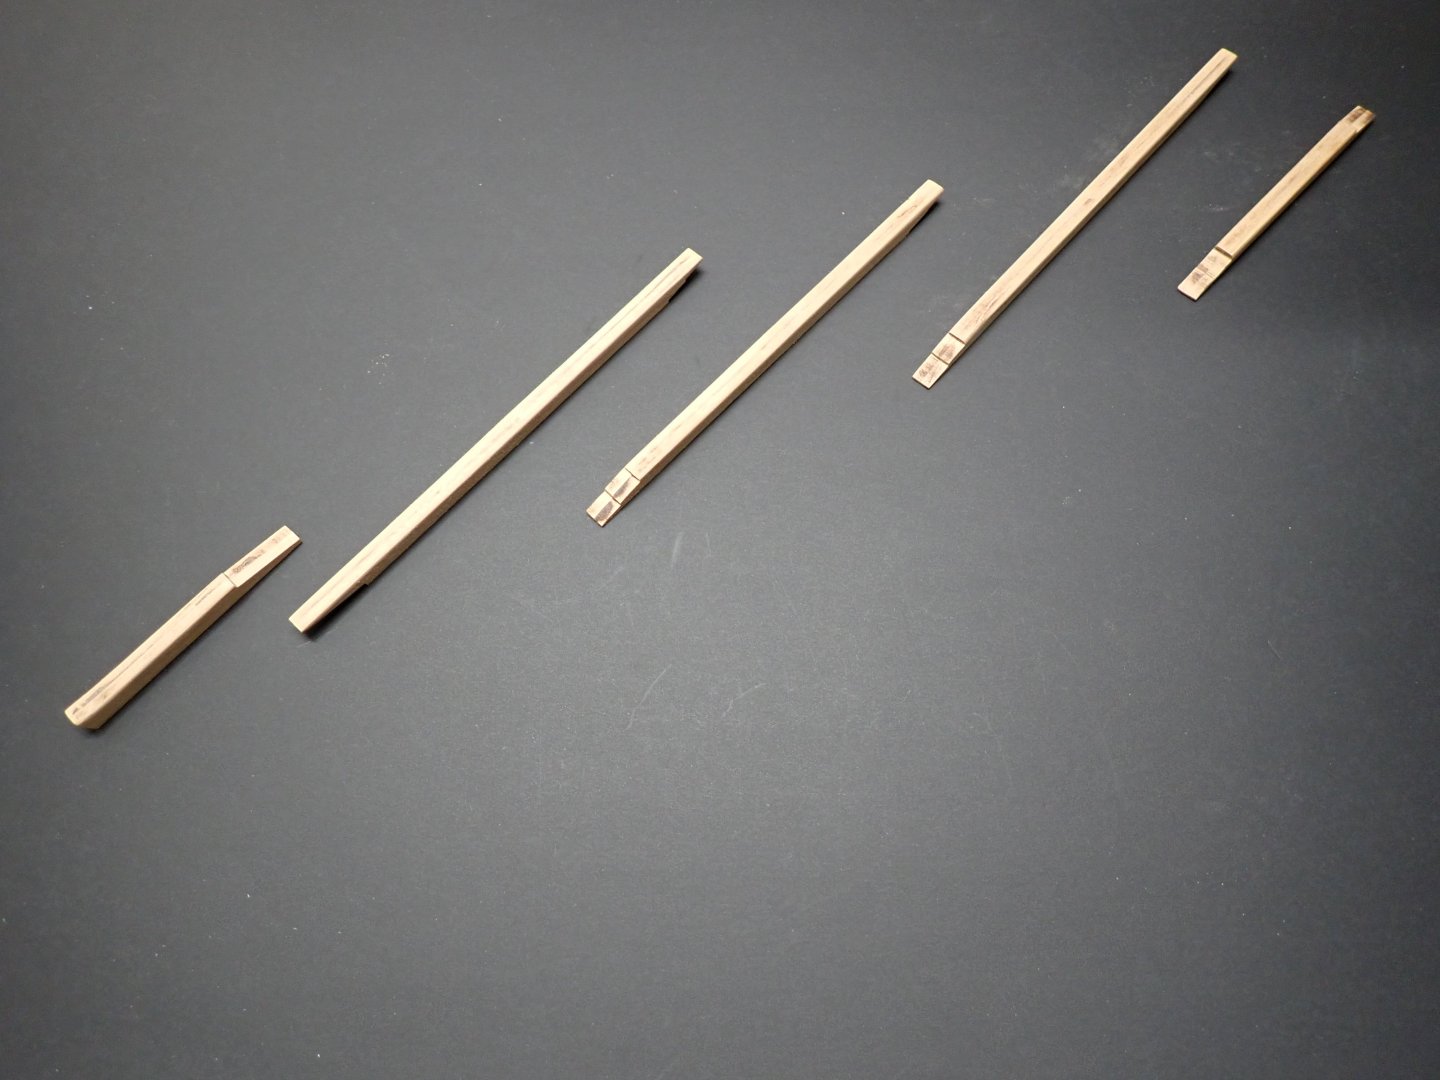

- 185 replies
-
- 16
-

-
An interesting build. I will be following with a lot of interest. Yves
- 288 replies
-
- 3
-

-
-
- Card
- Pre-Dreadnought
- (and 3 more)
-
Yes, they are. Old stuff that was dismantled 20 years ago. Yves
-
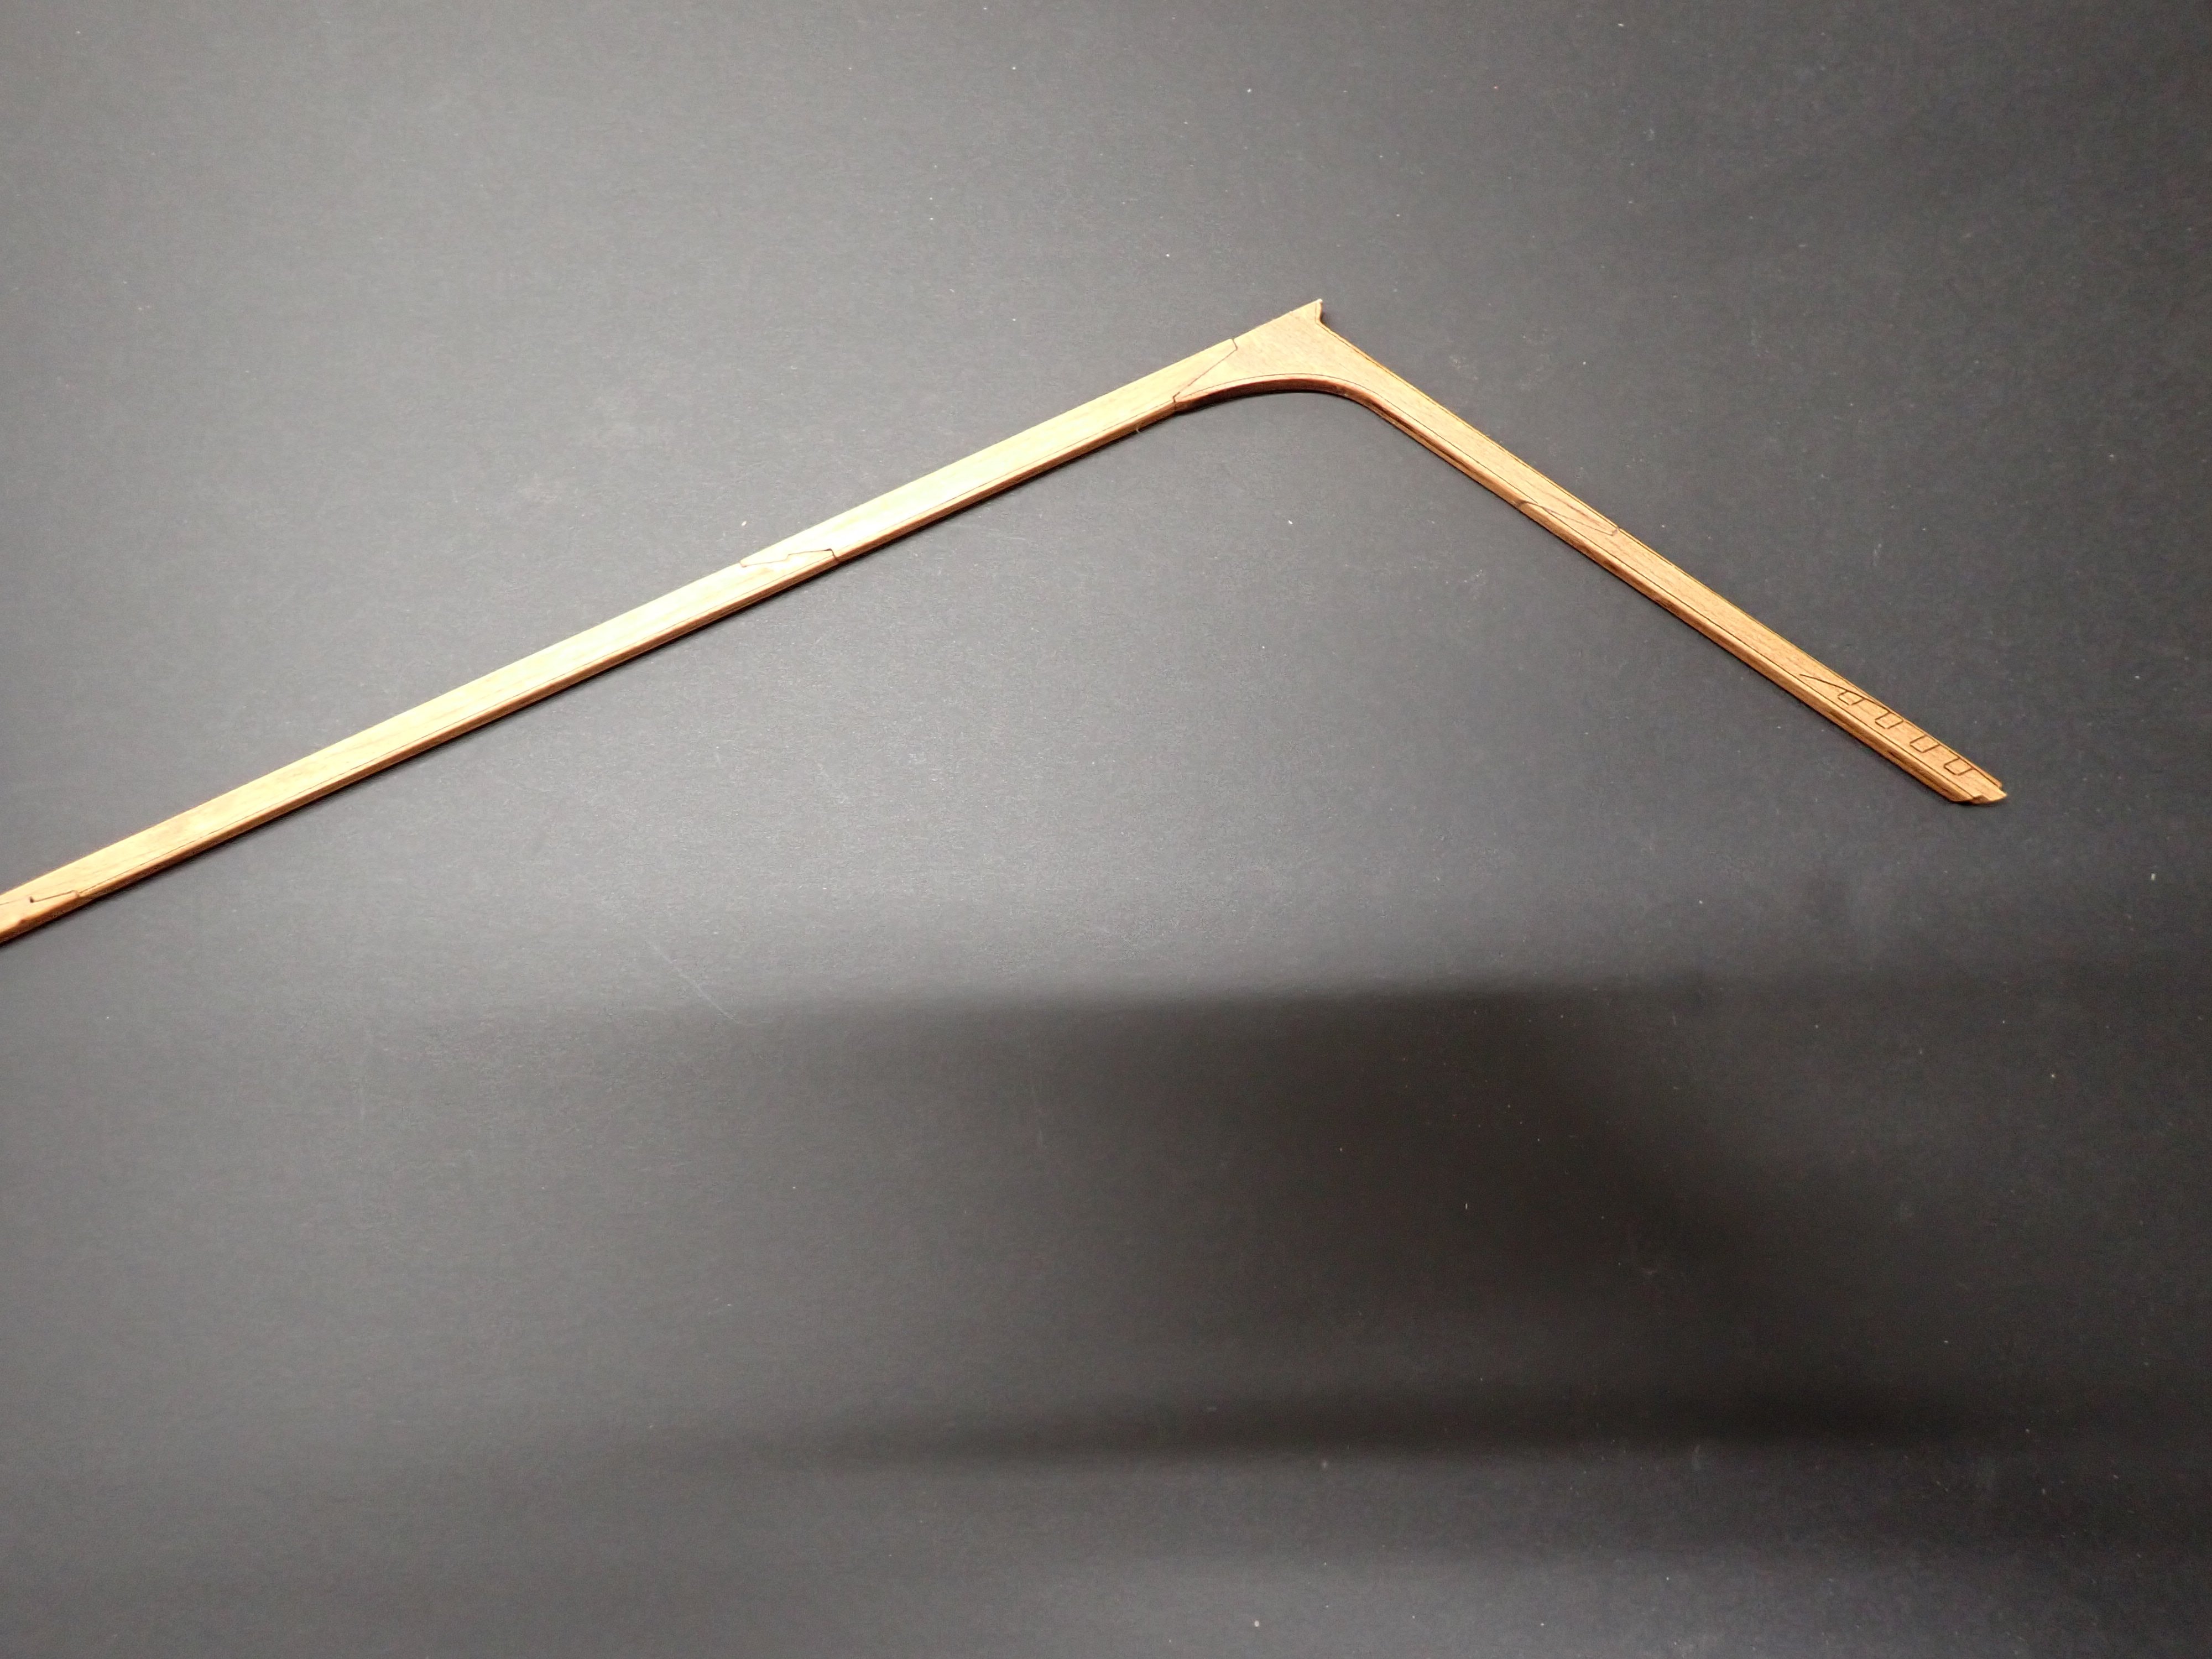
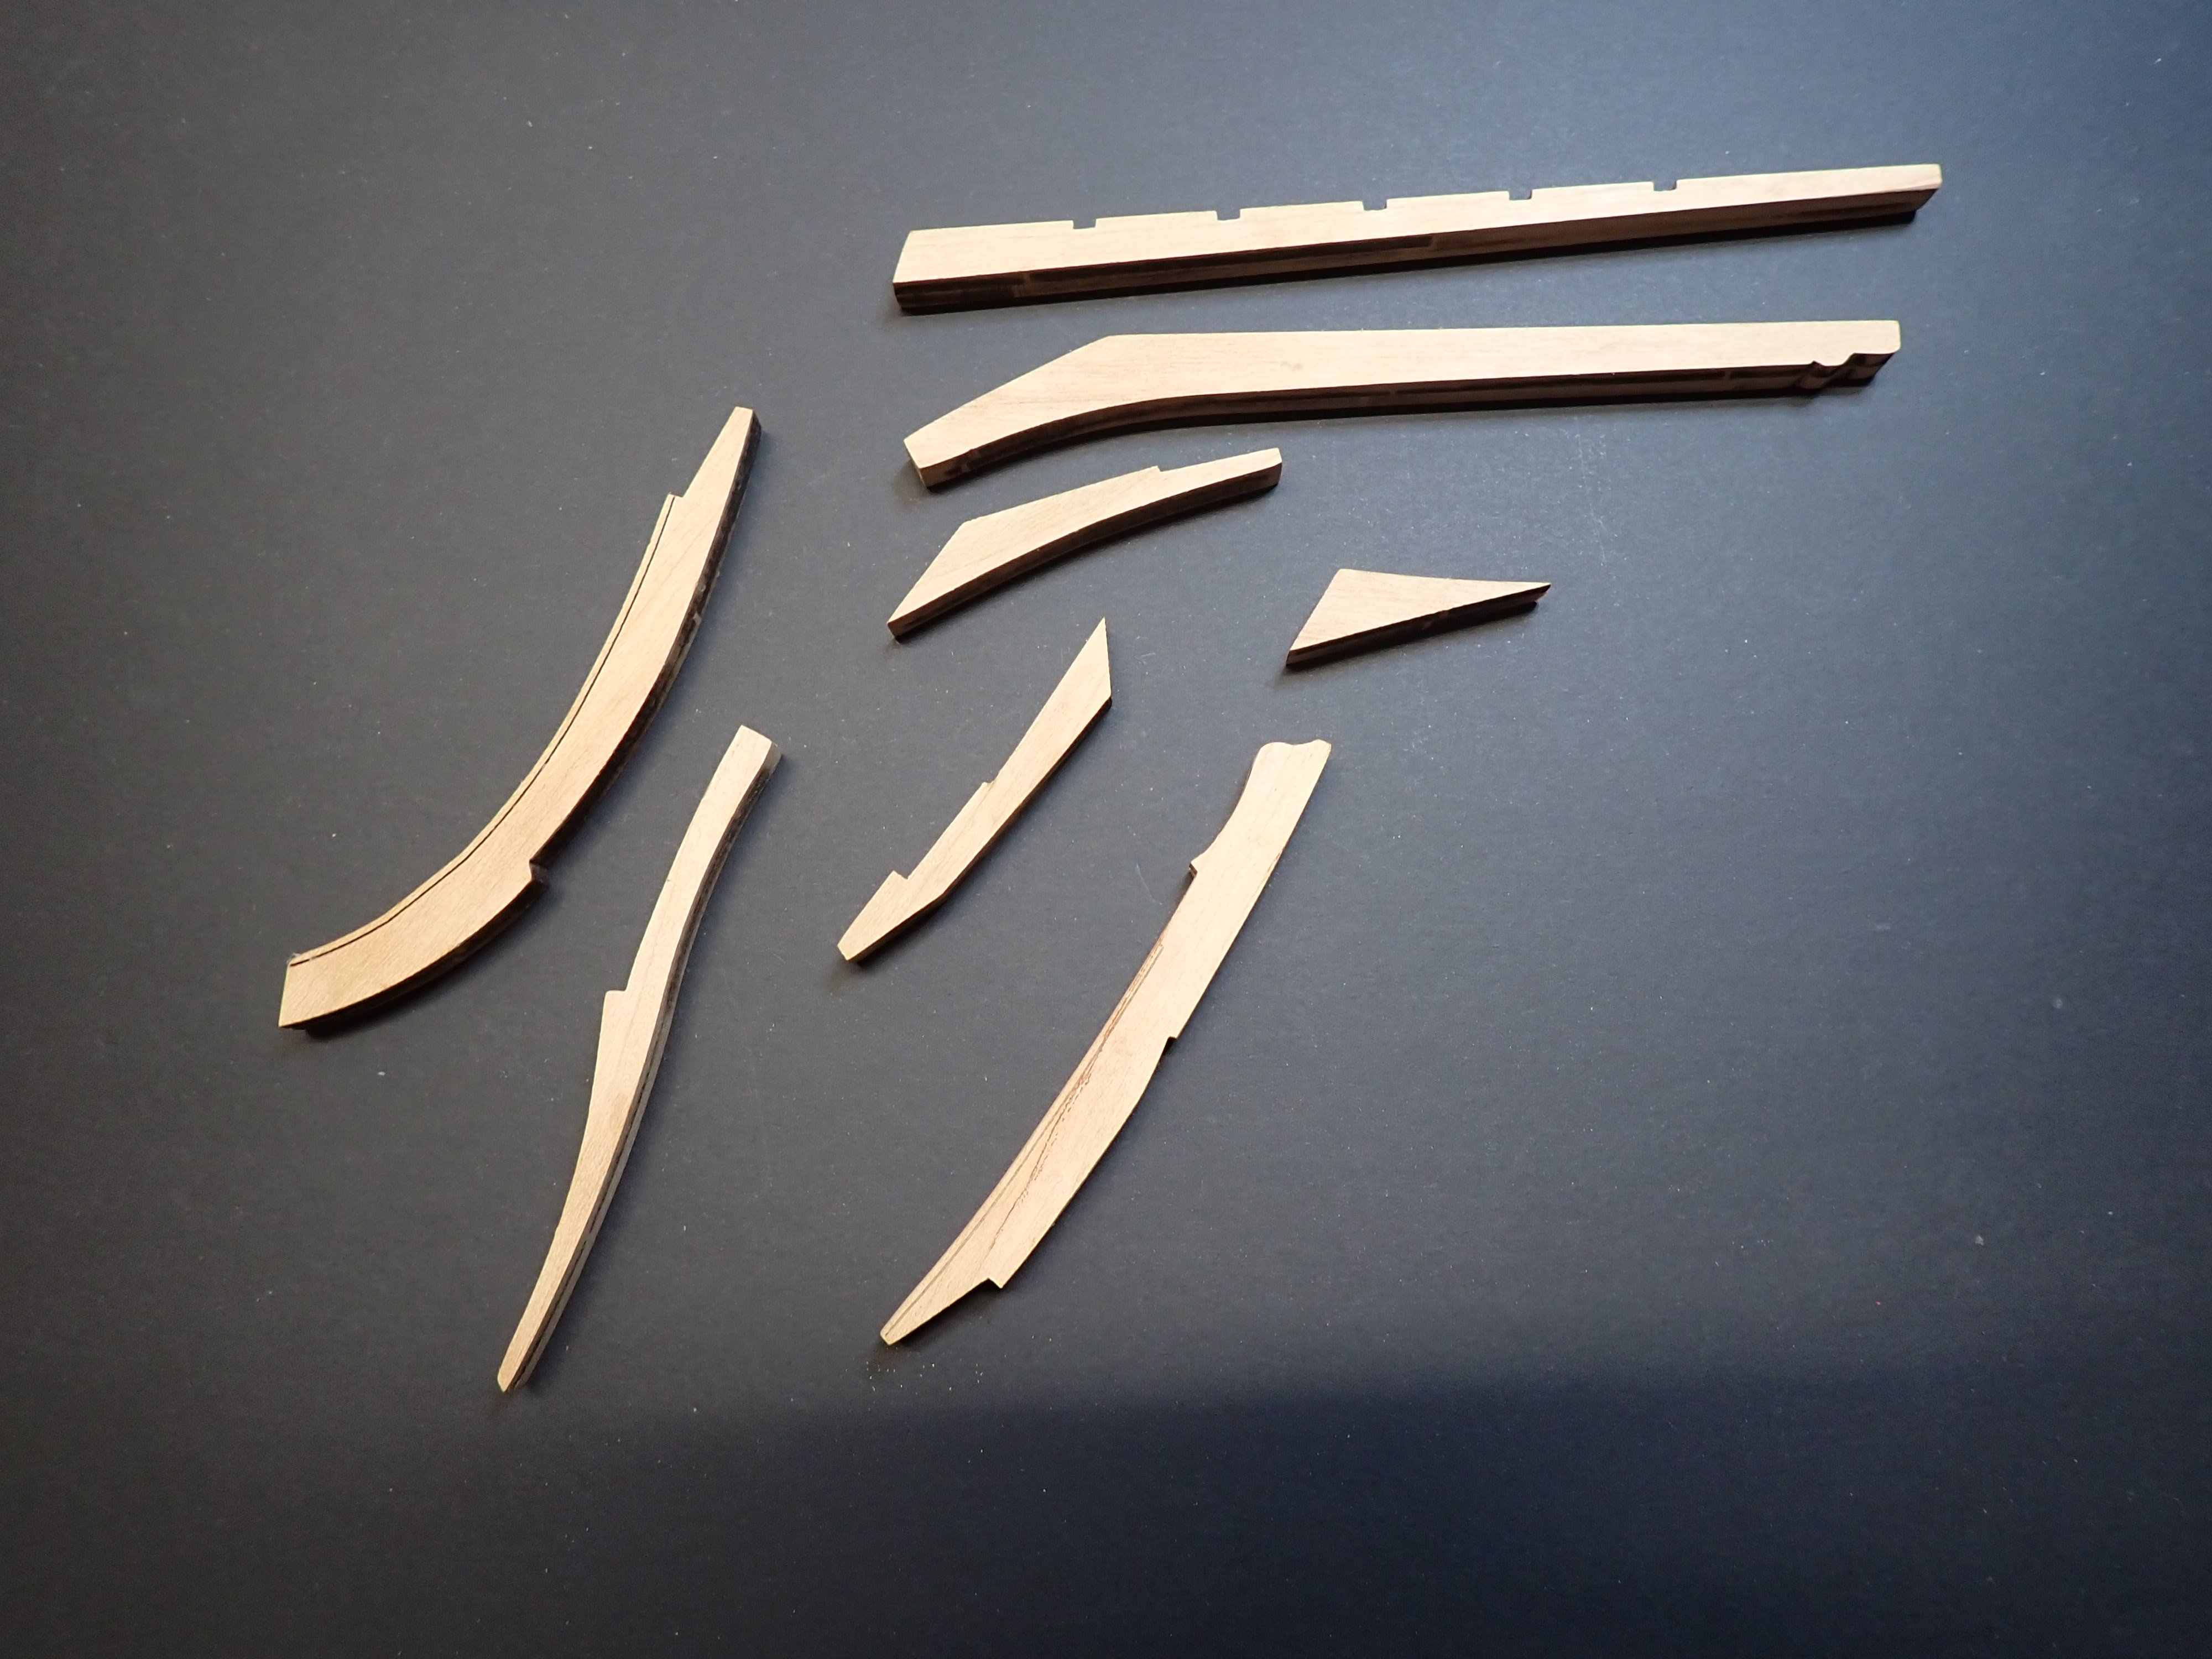
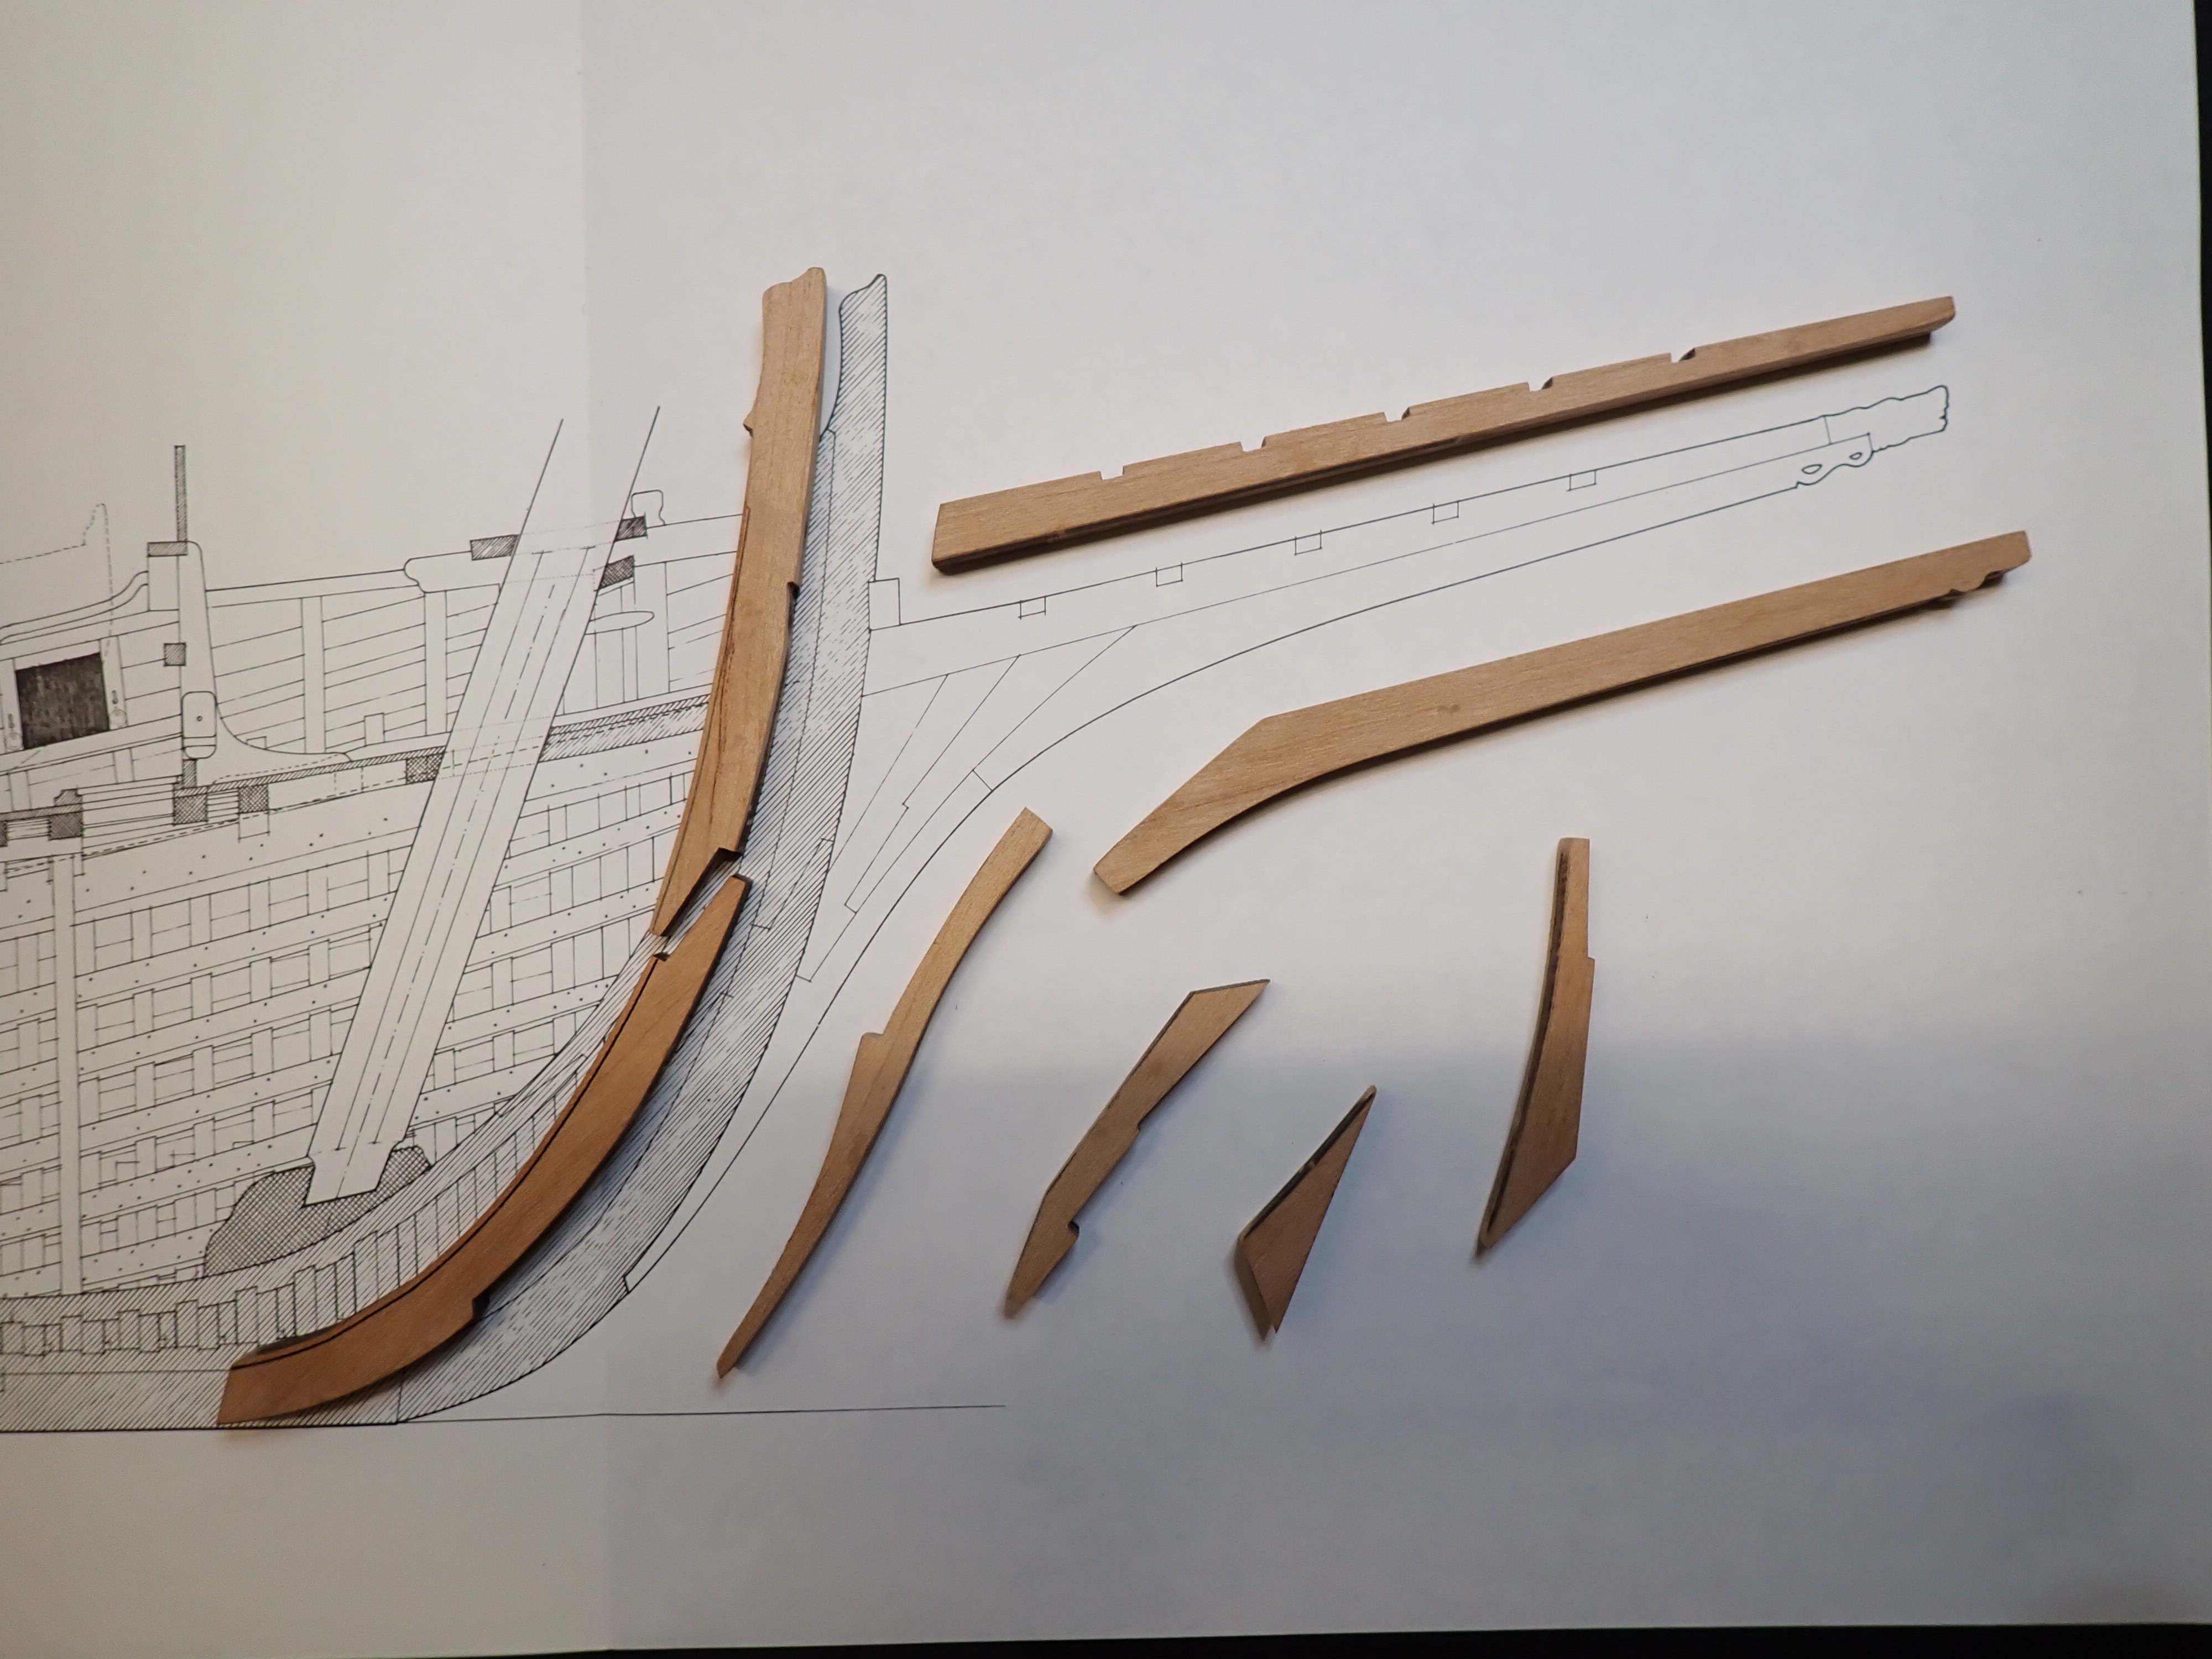
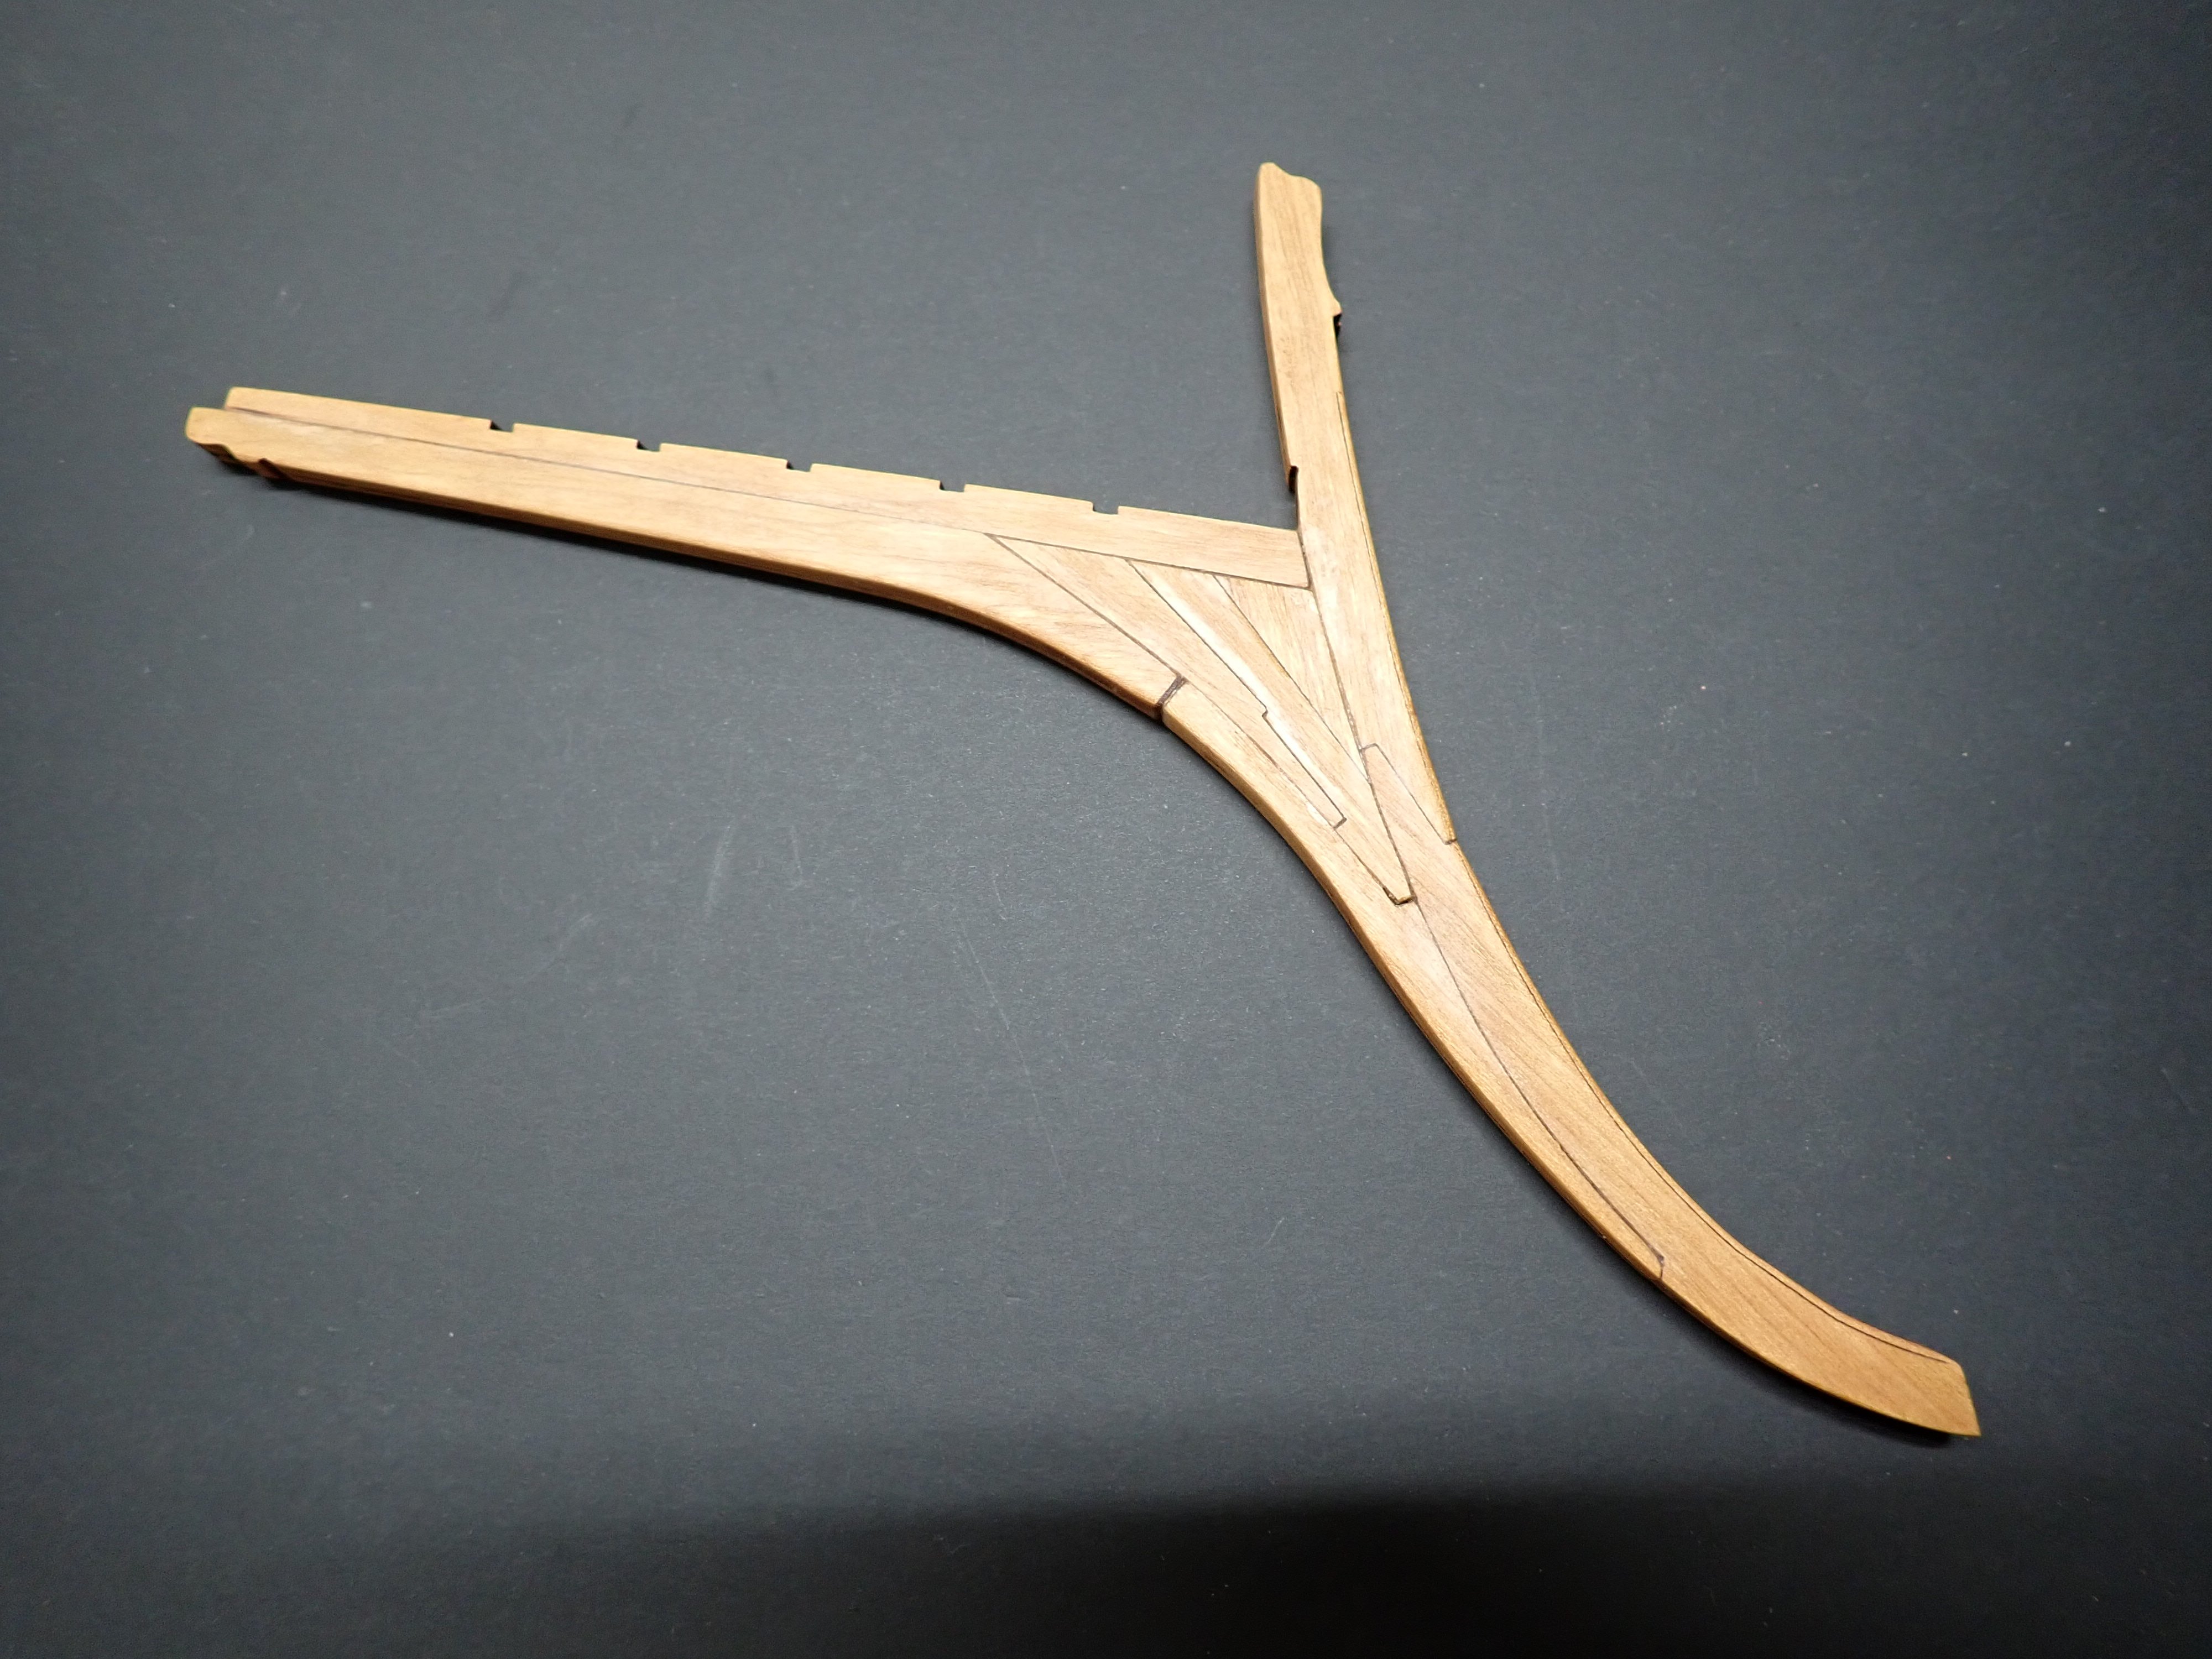
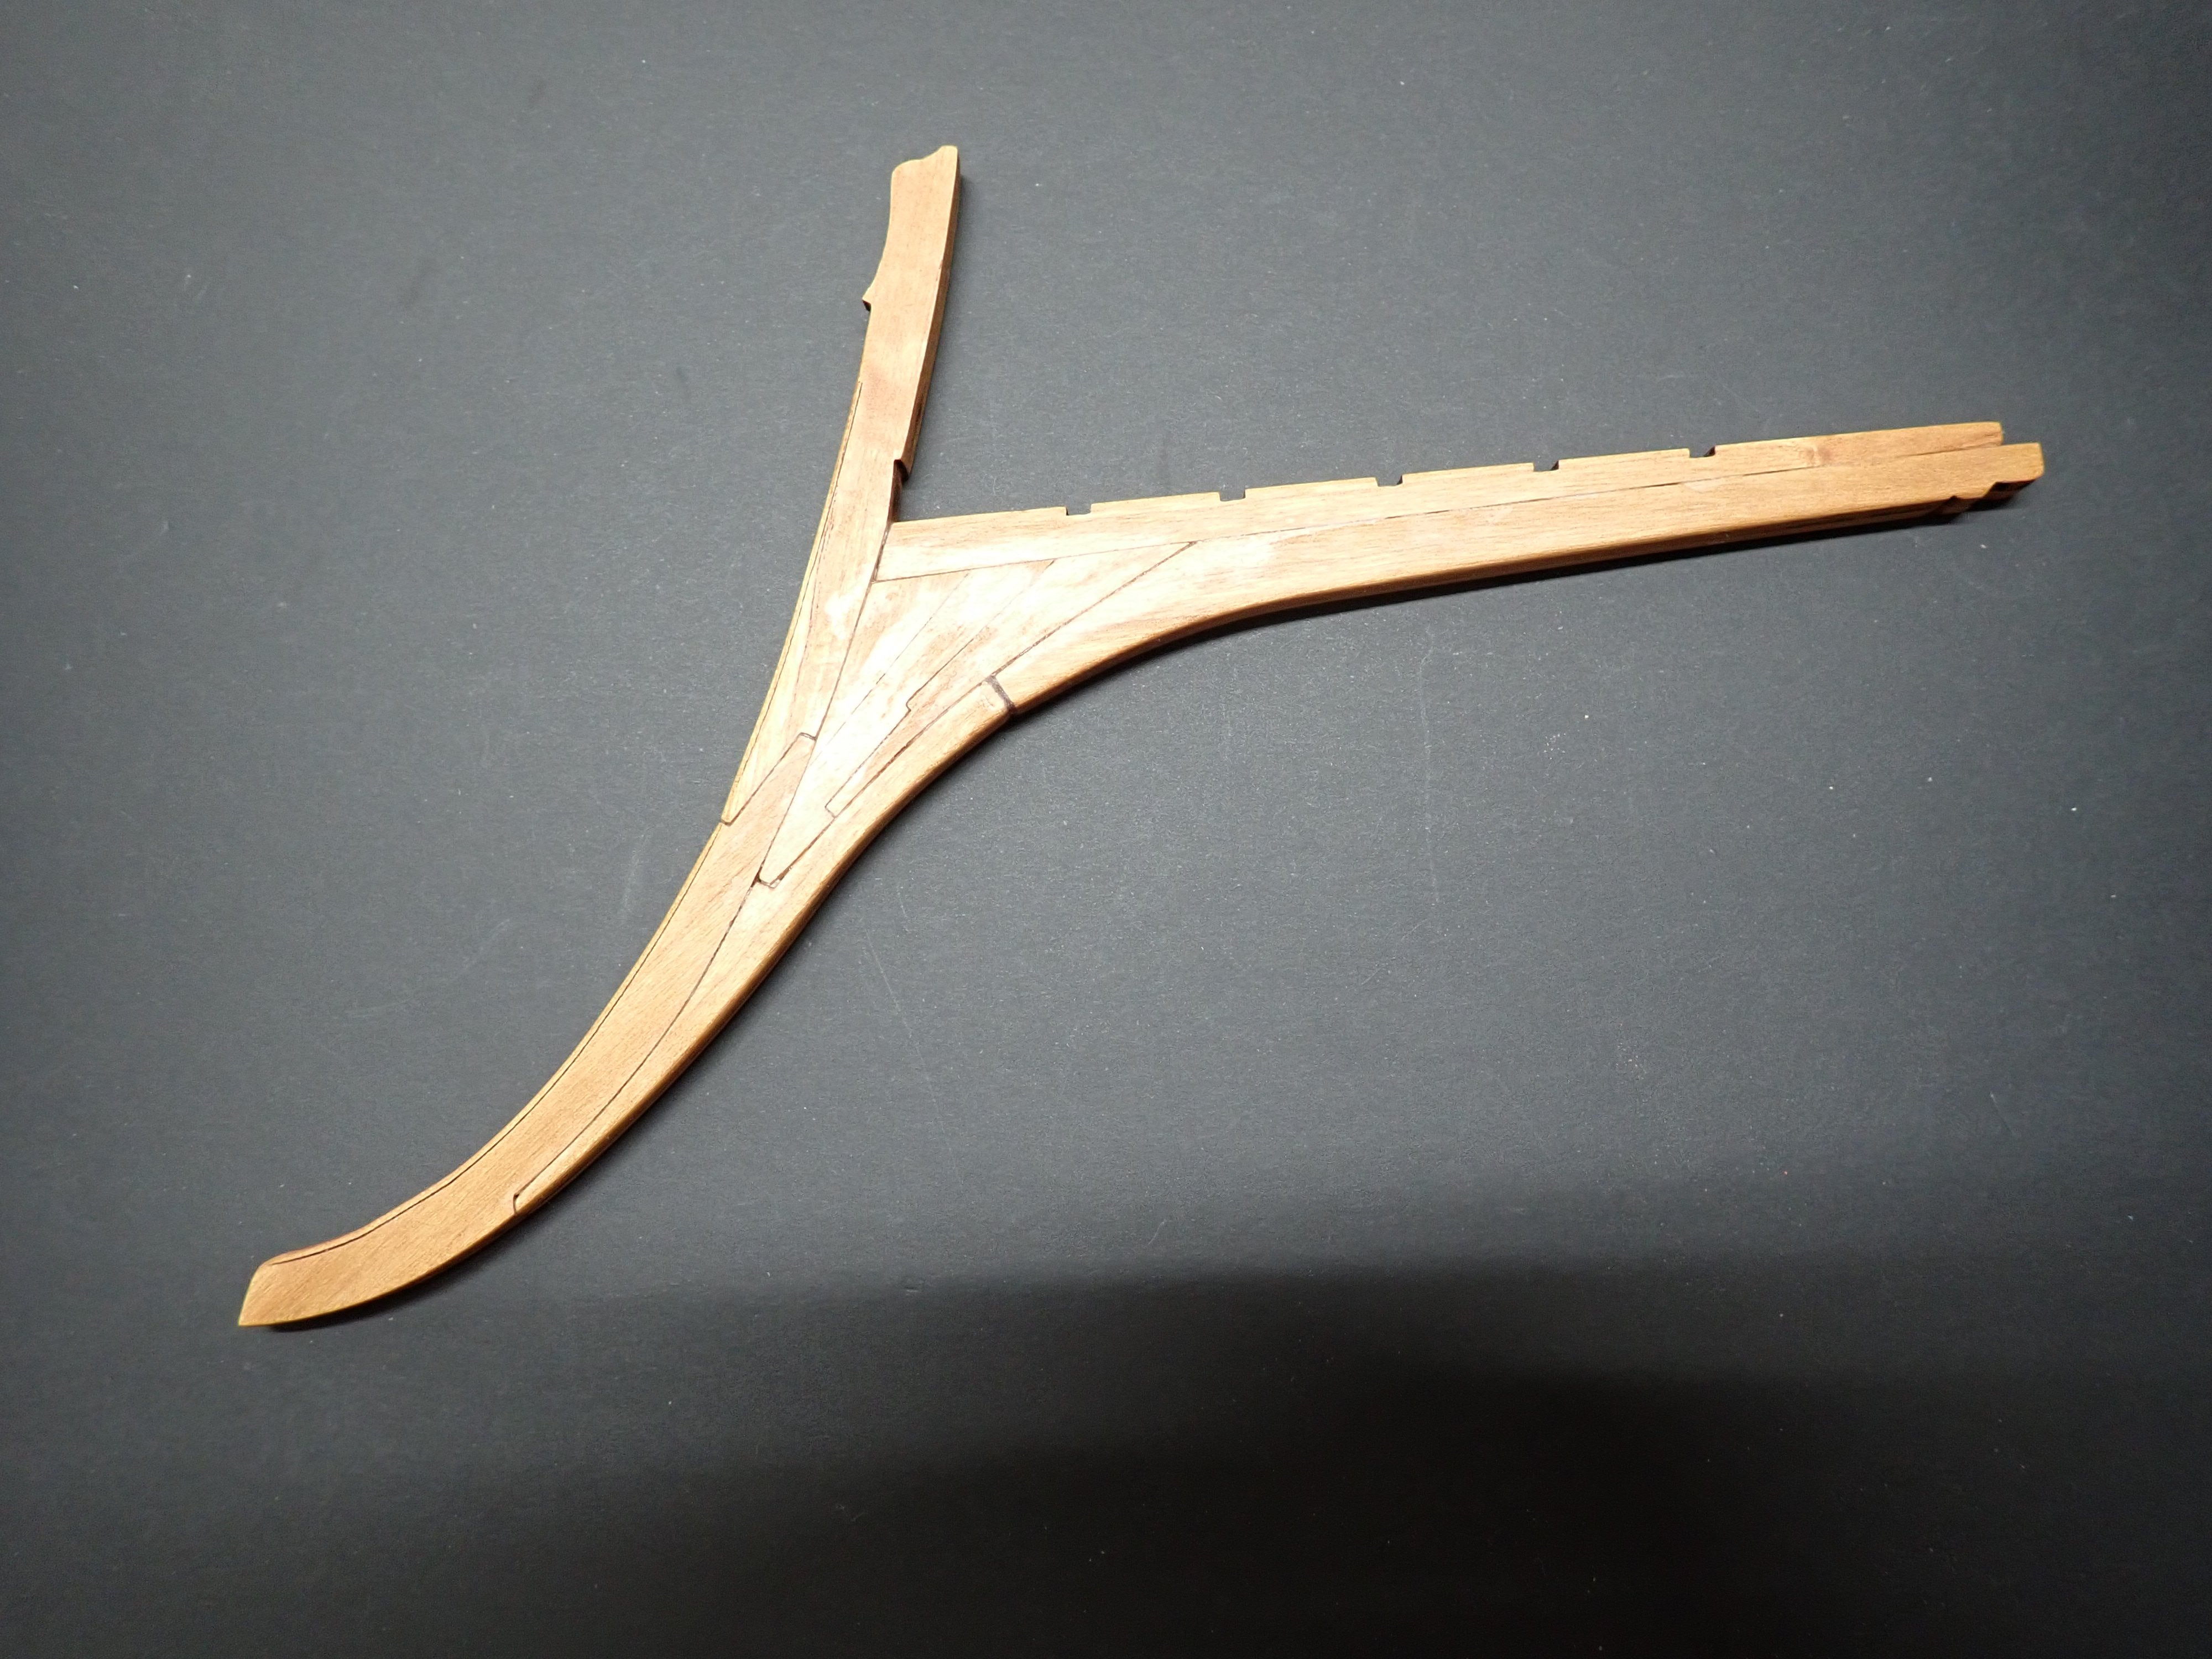
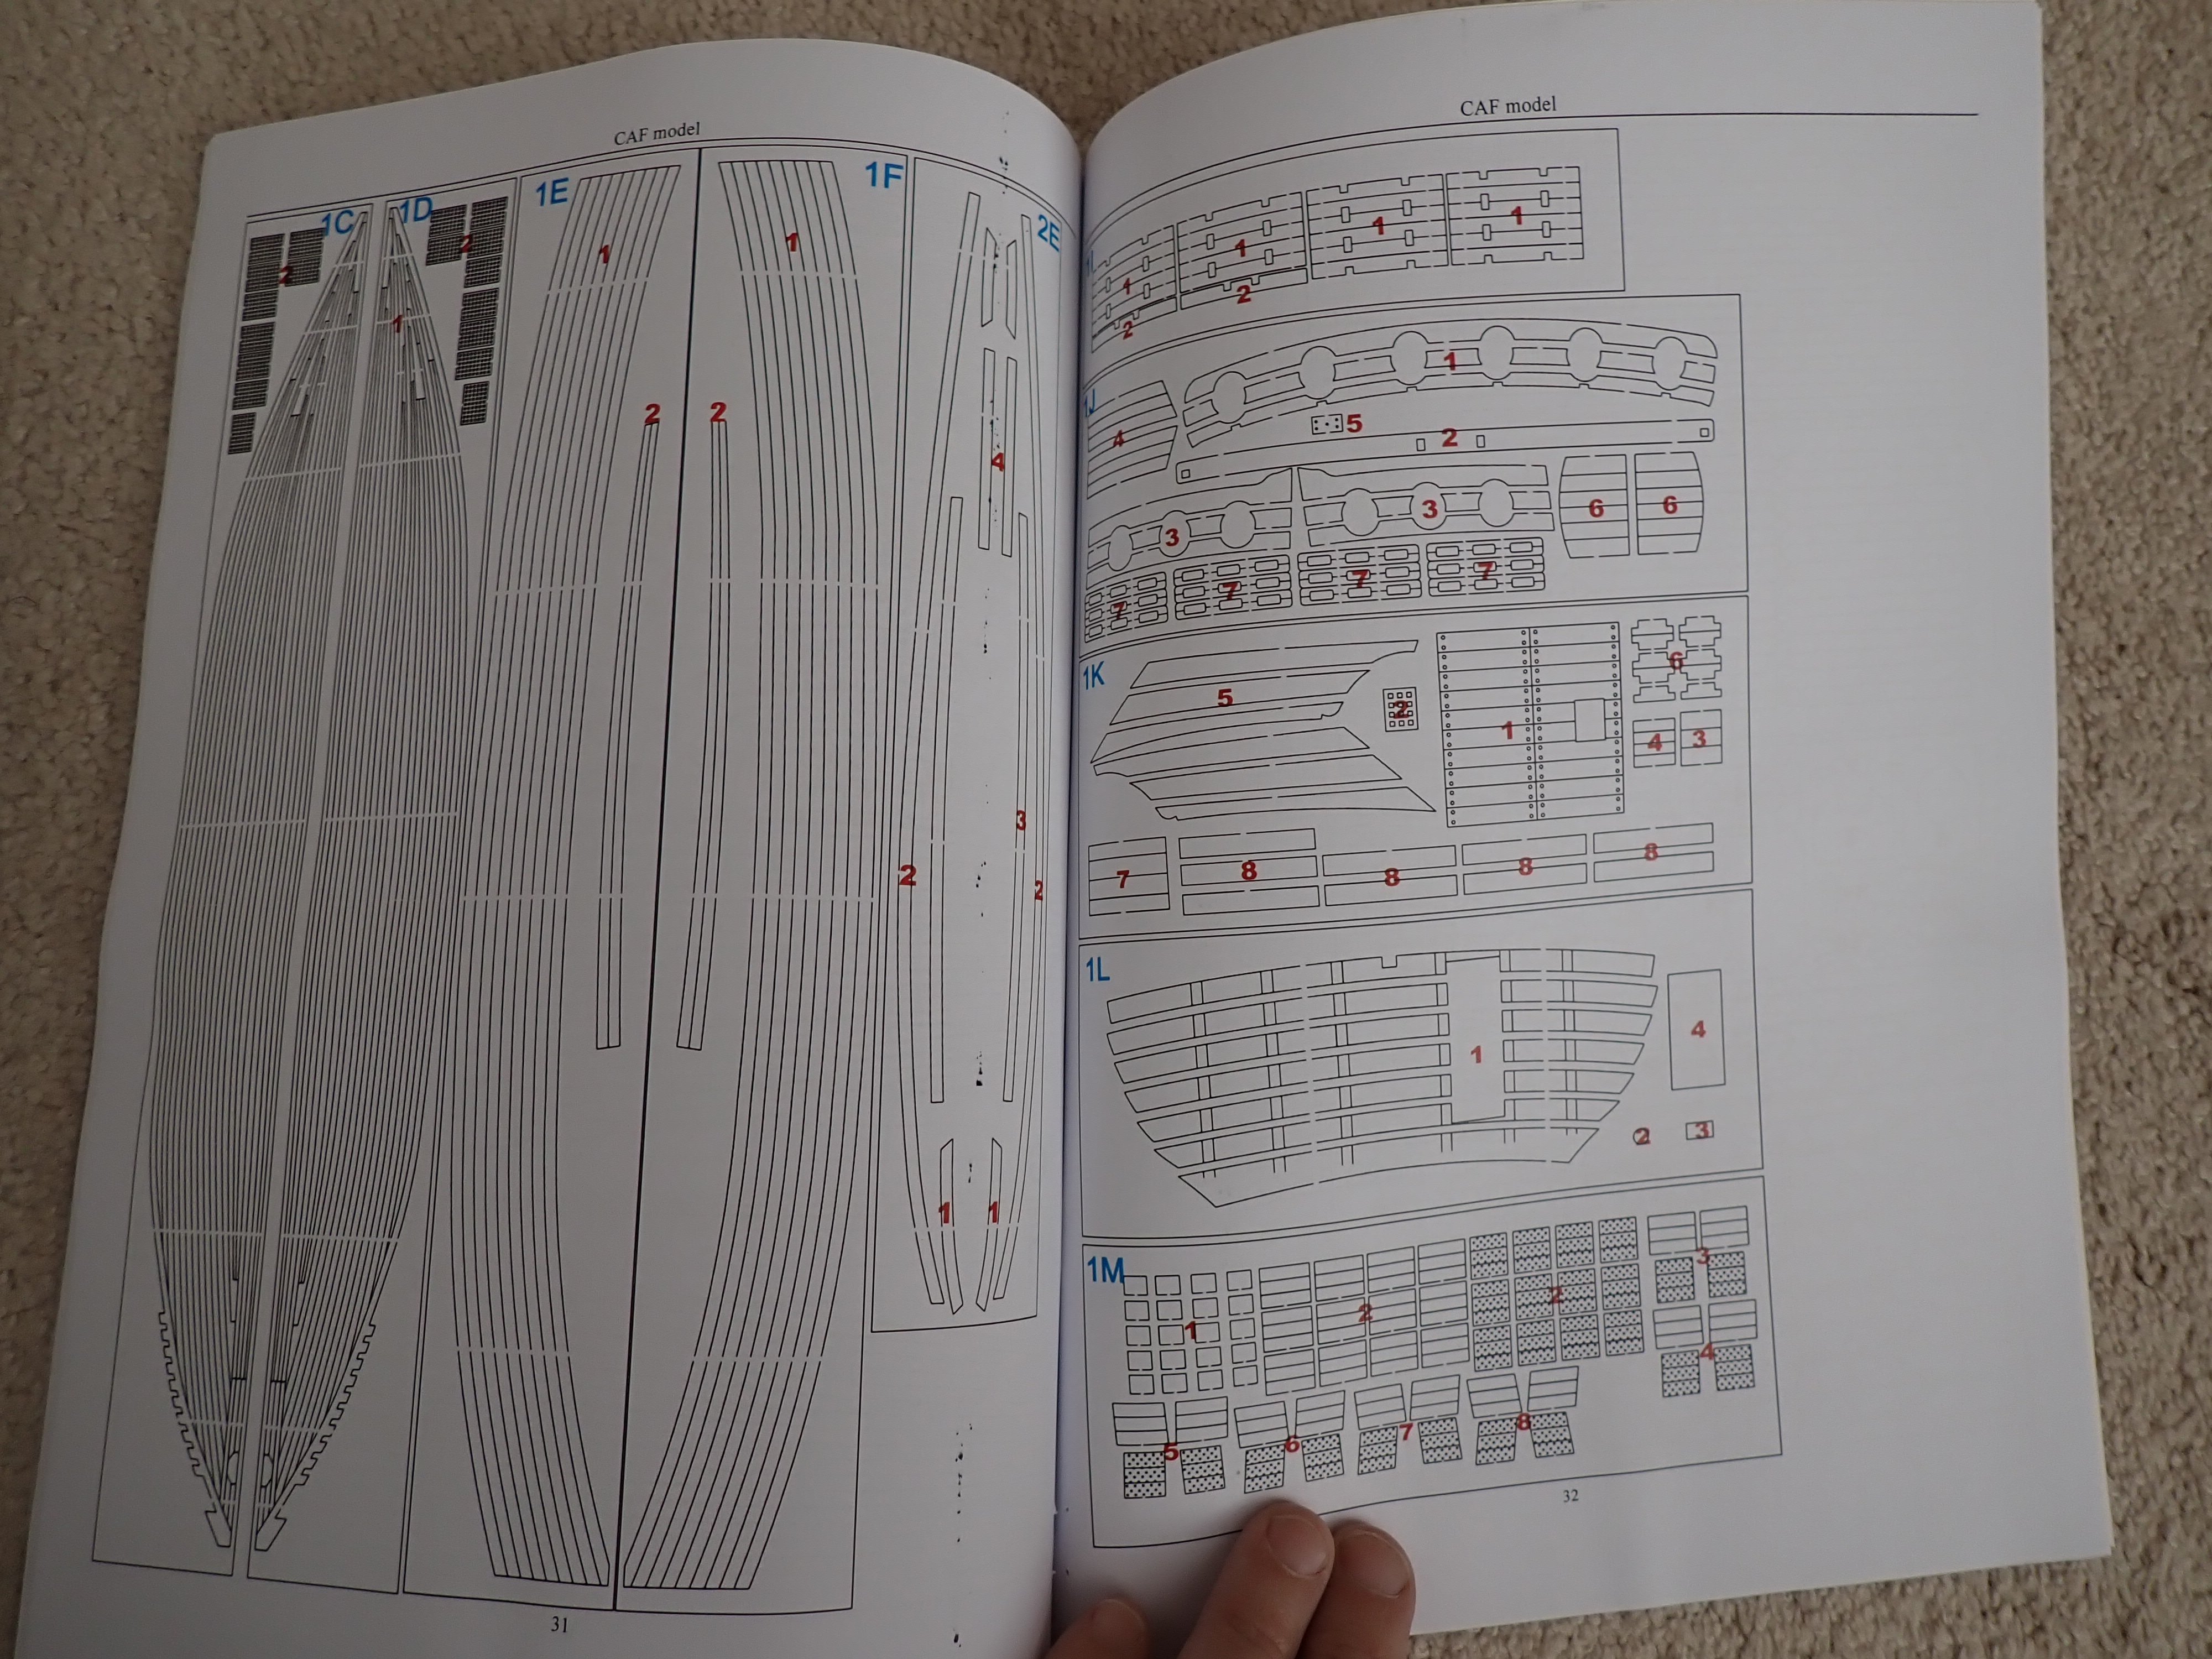
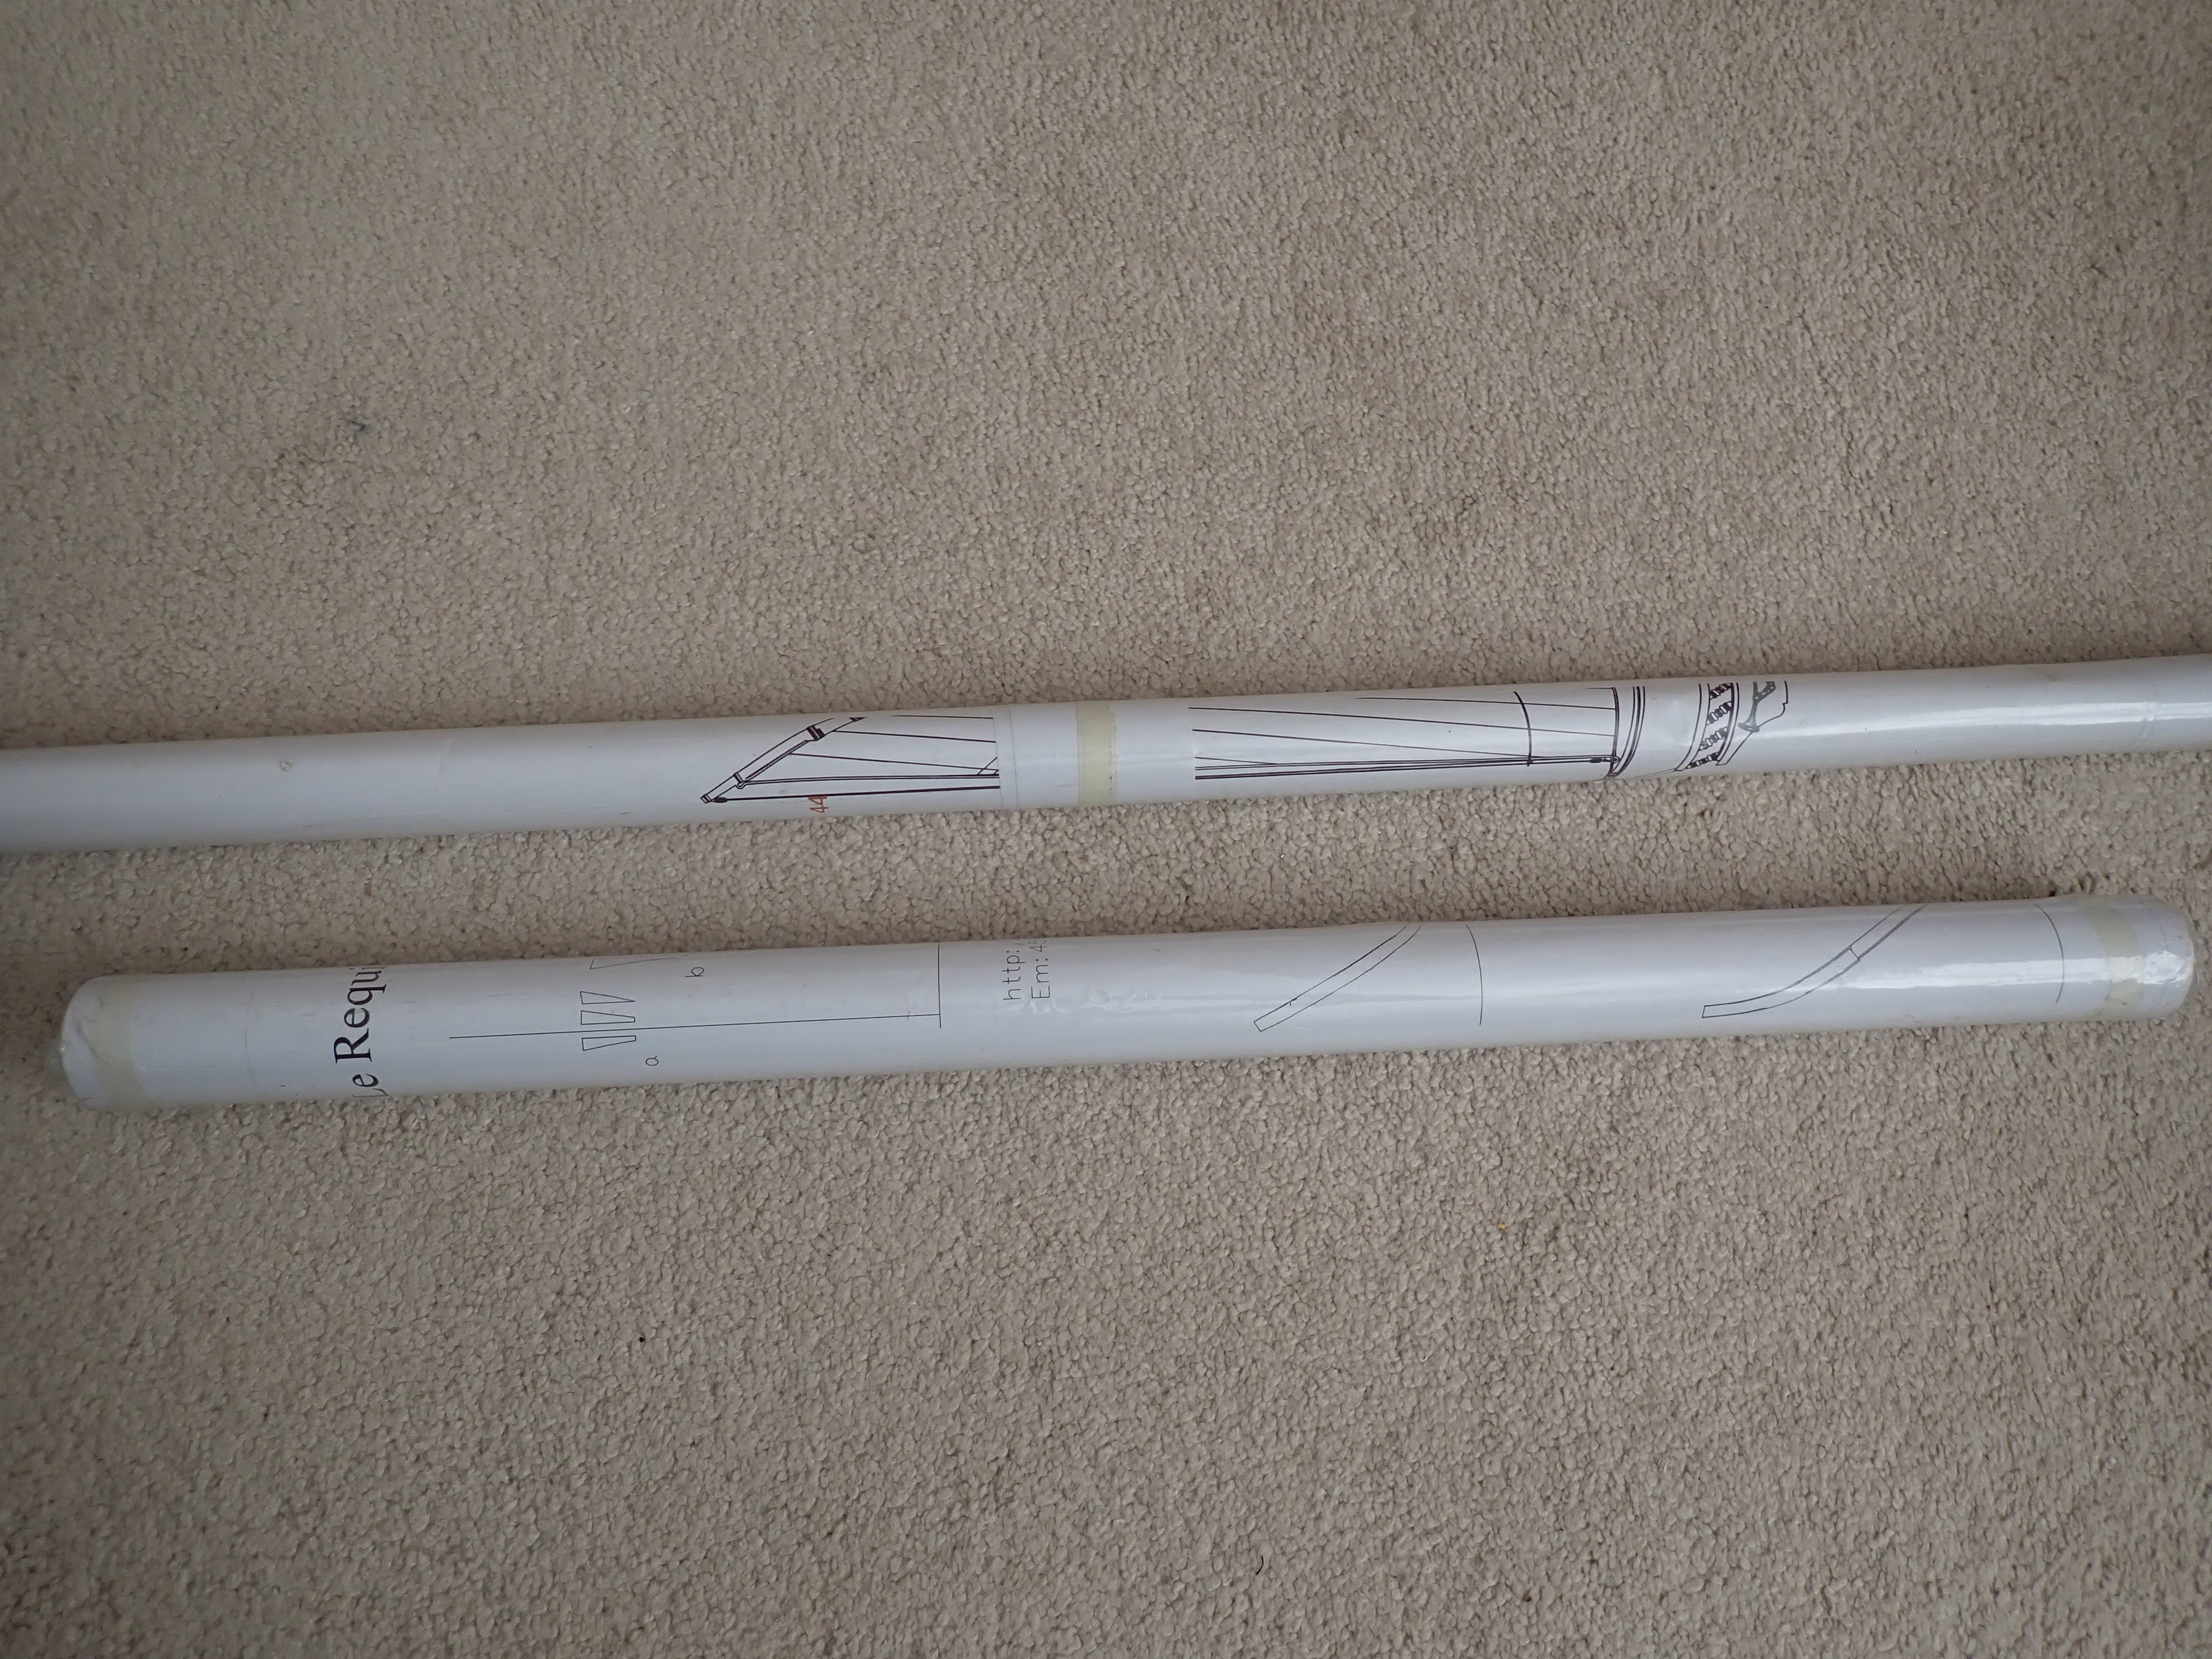
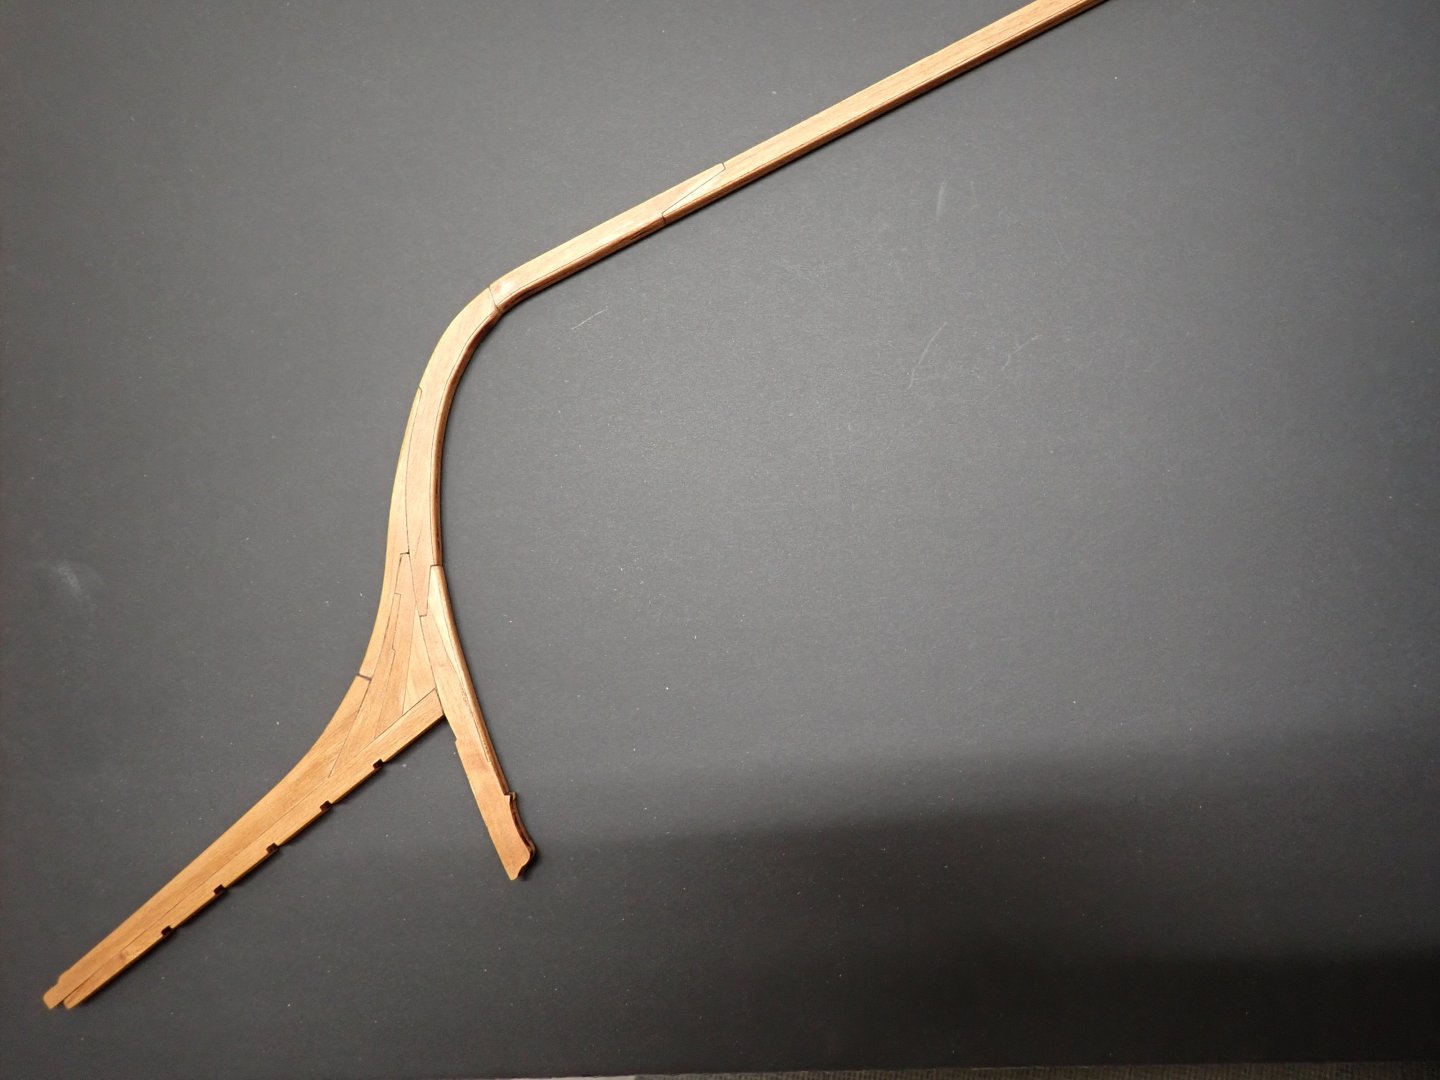
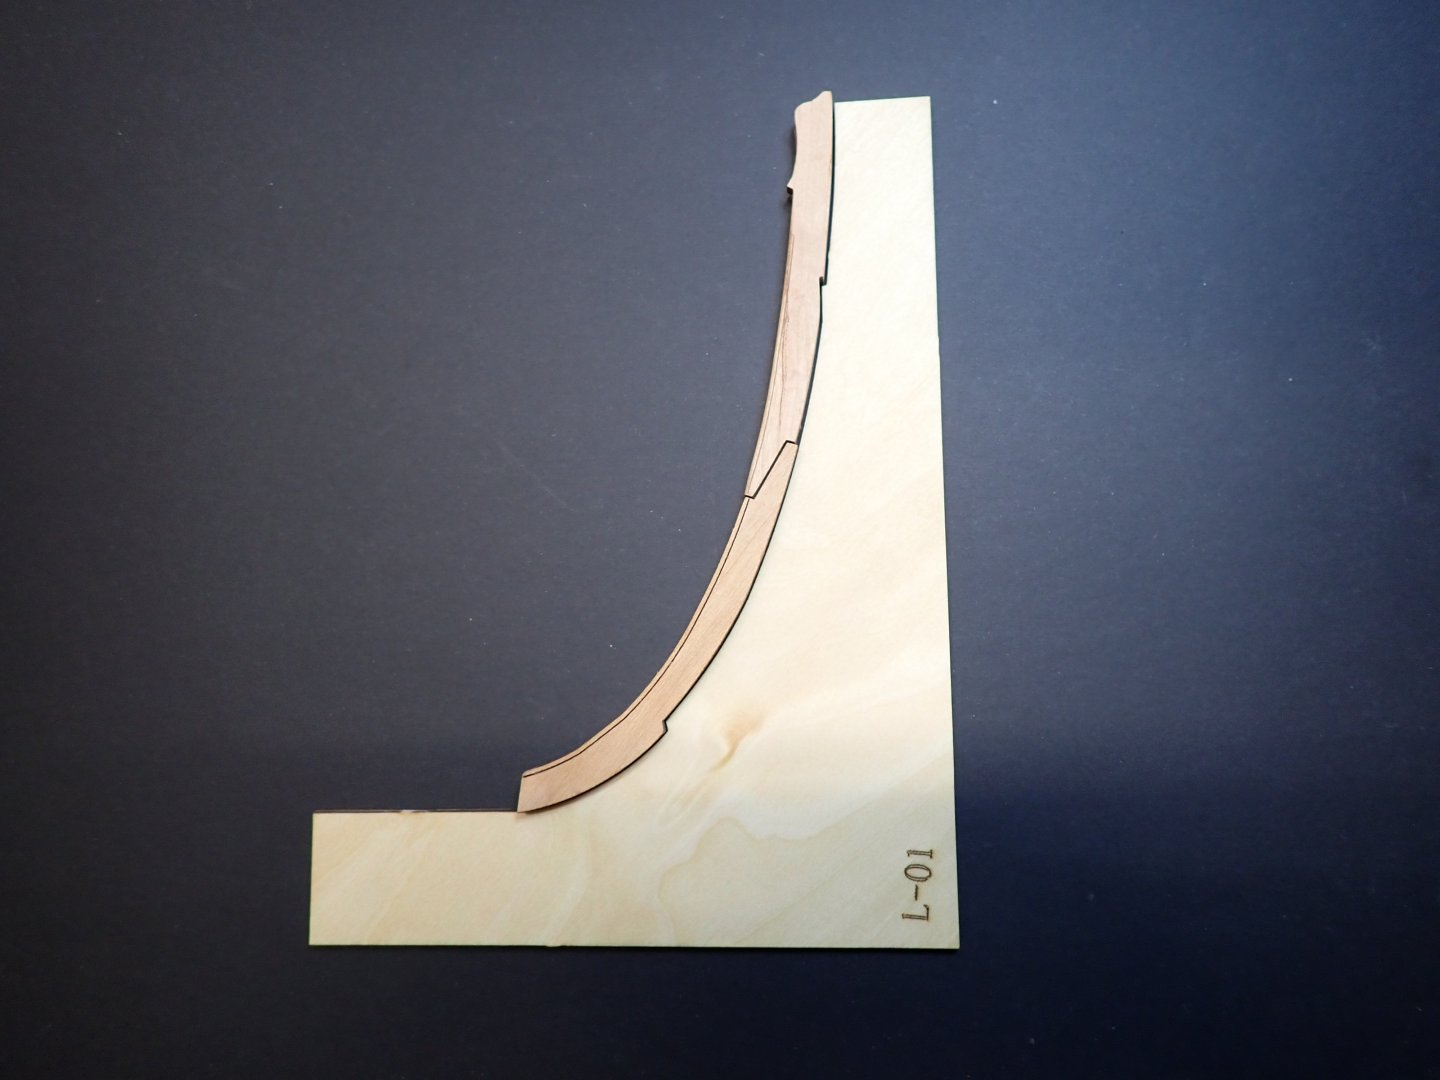
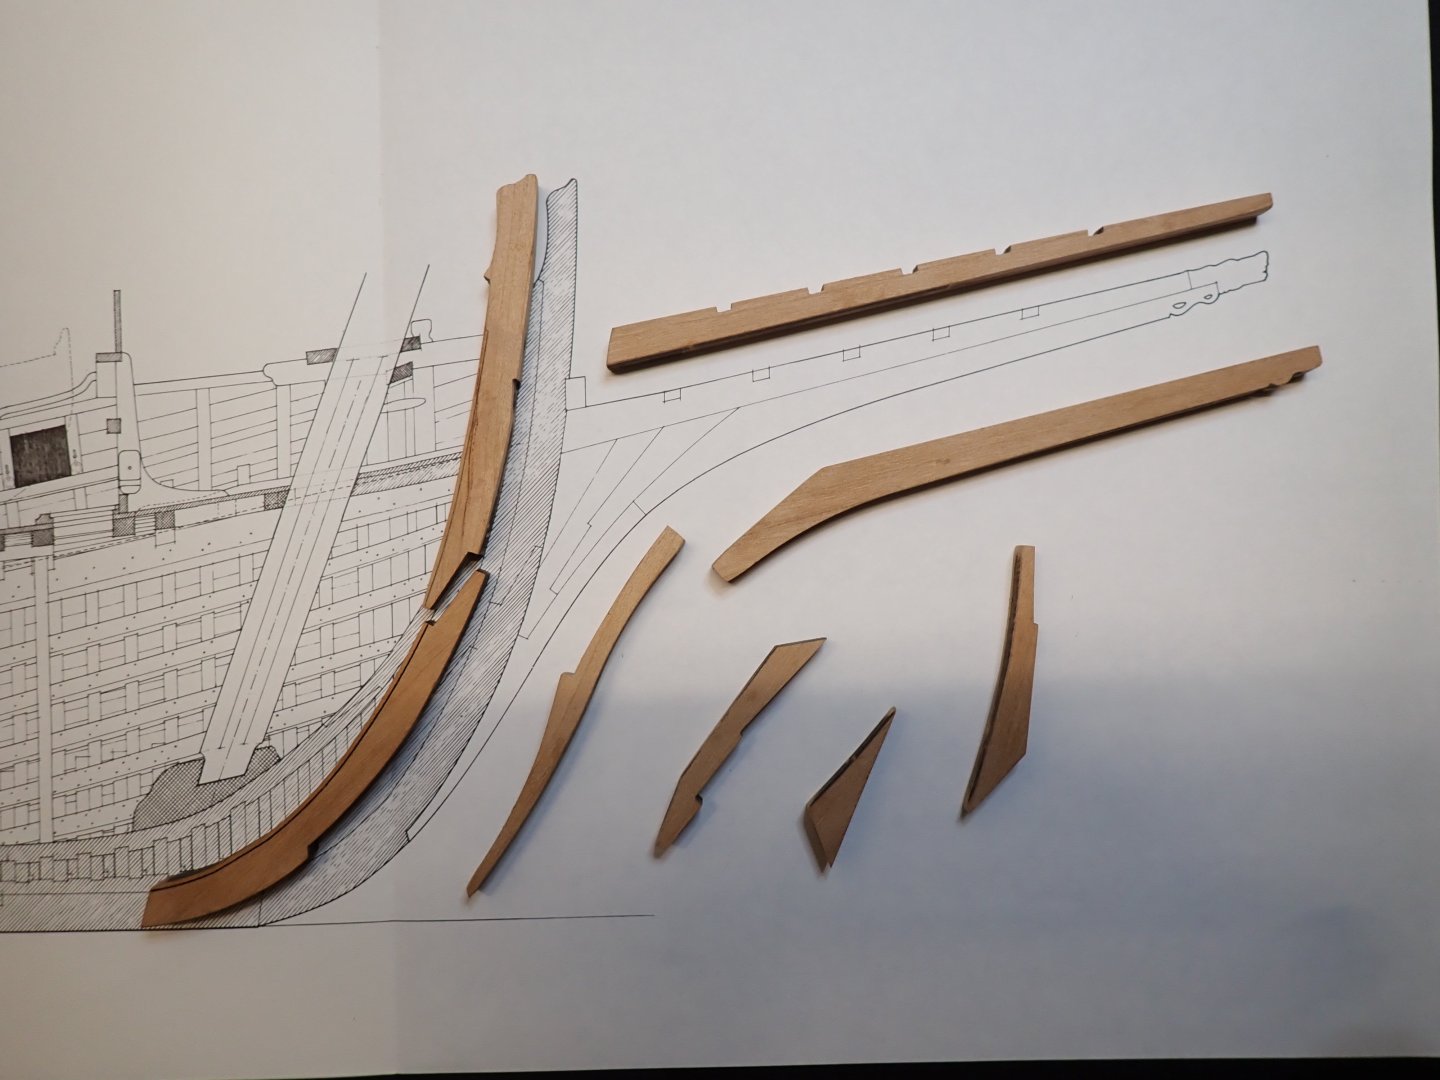
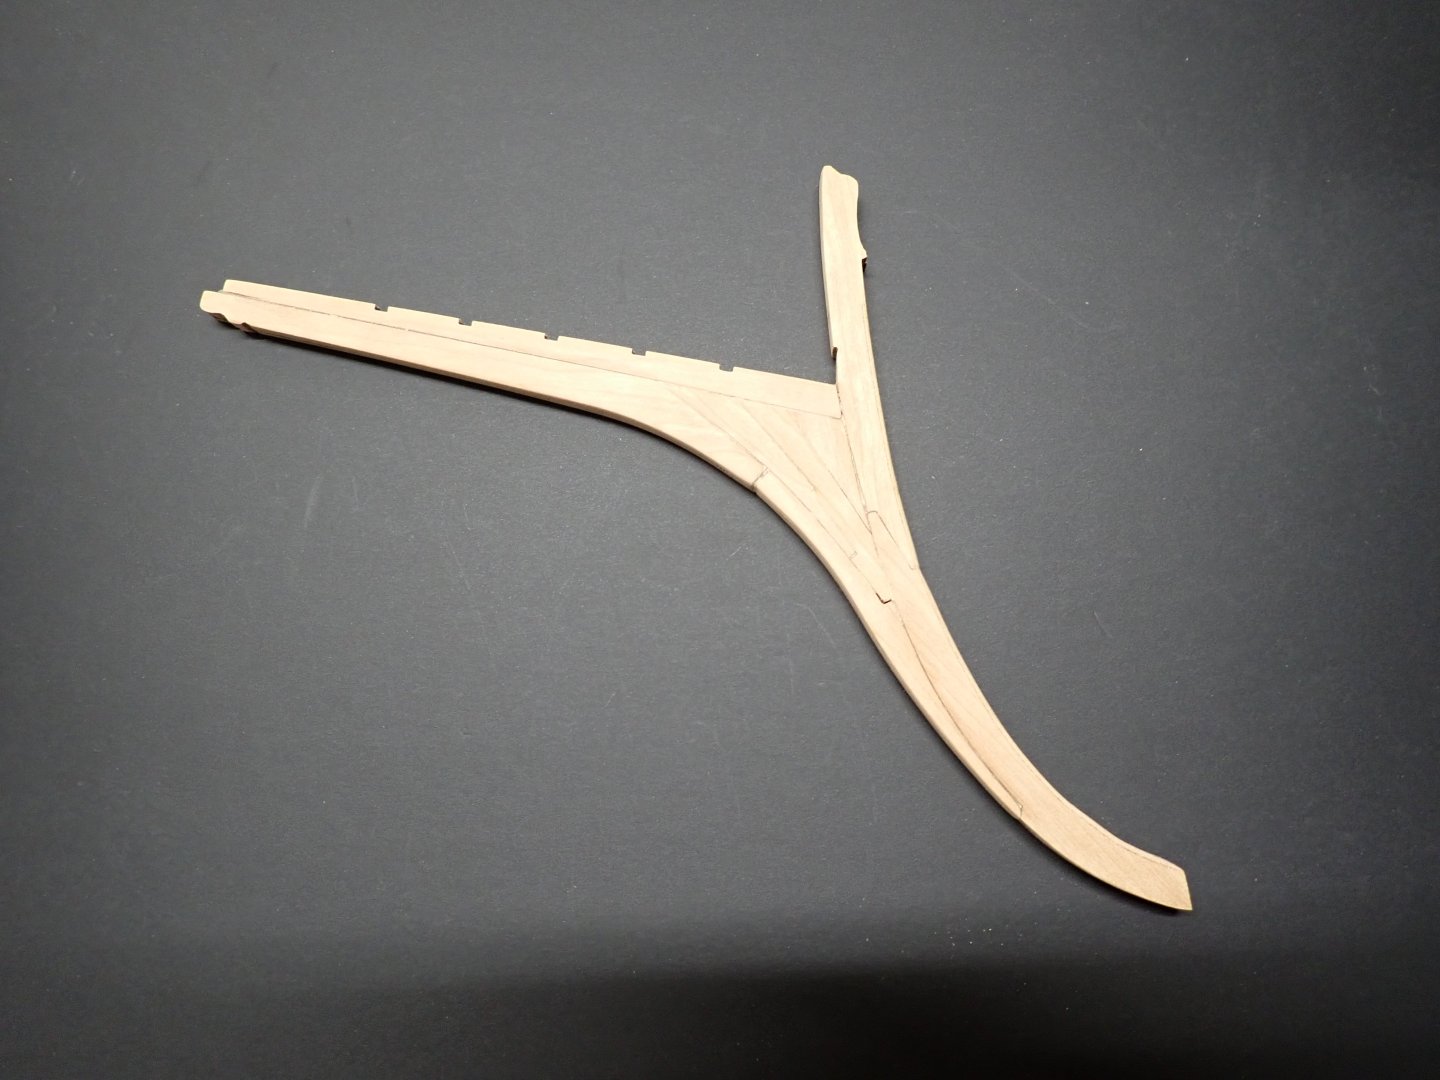
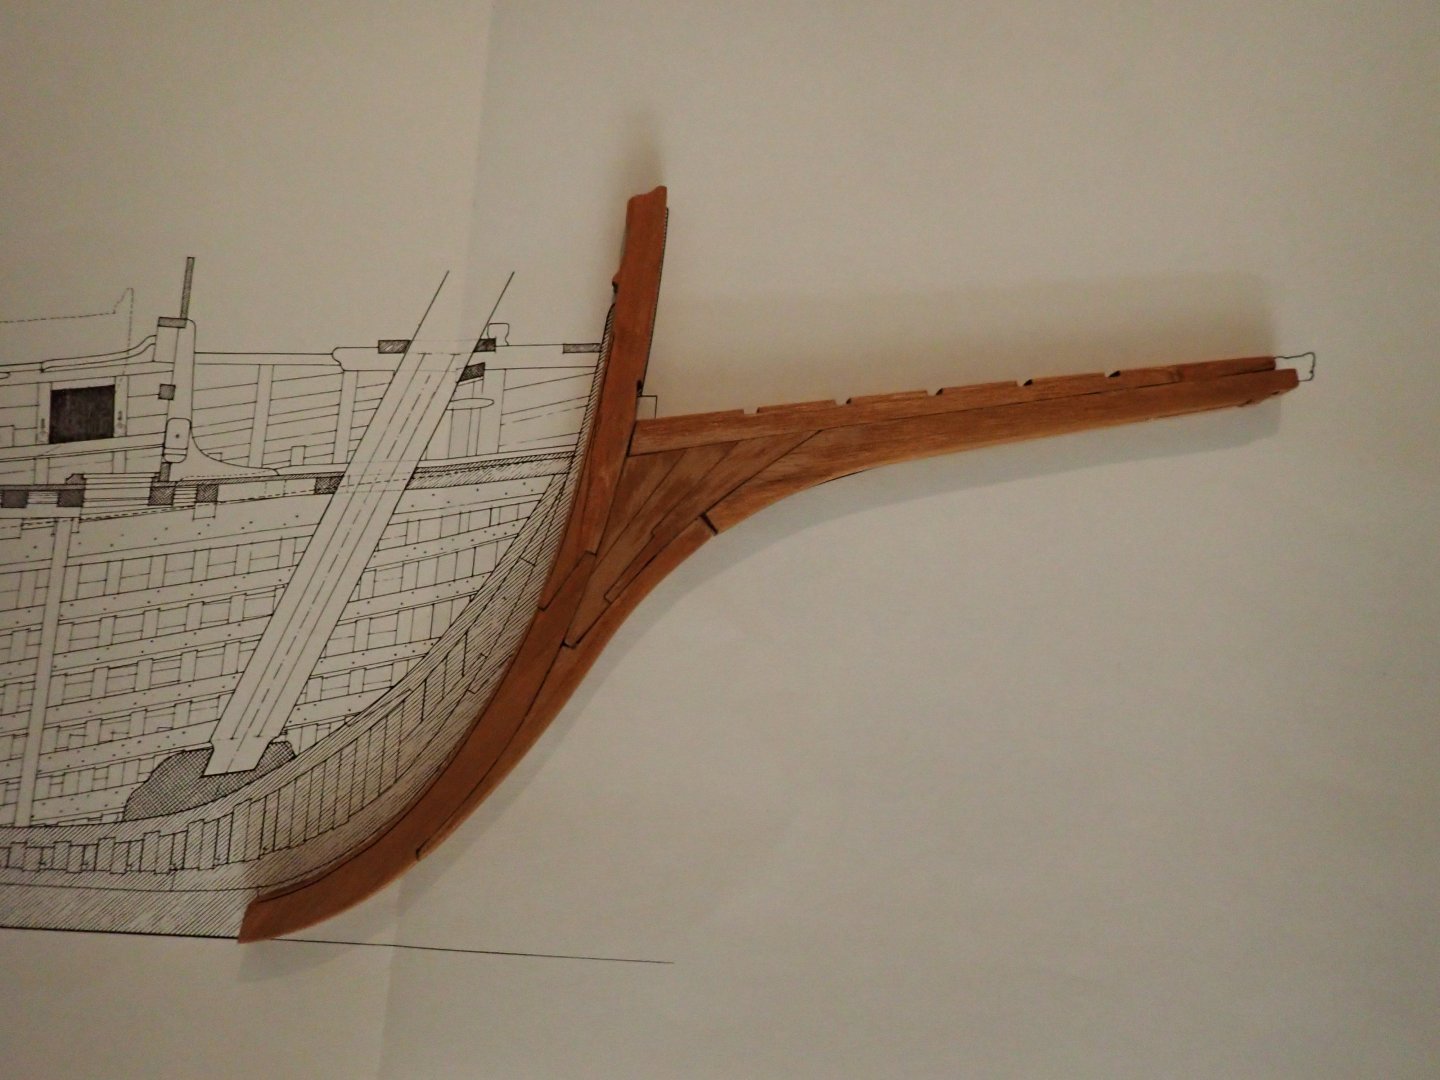
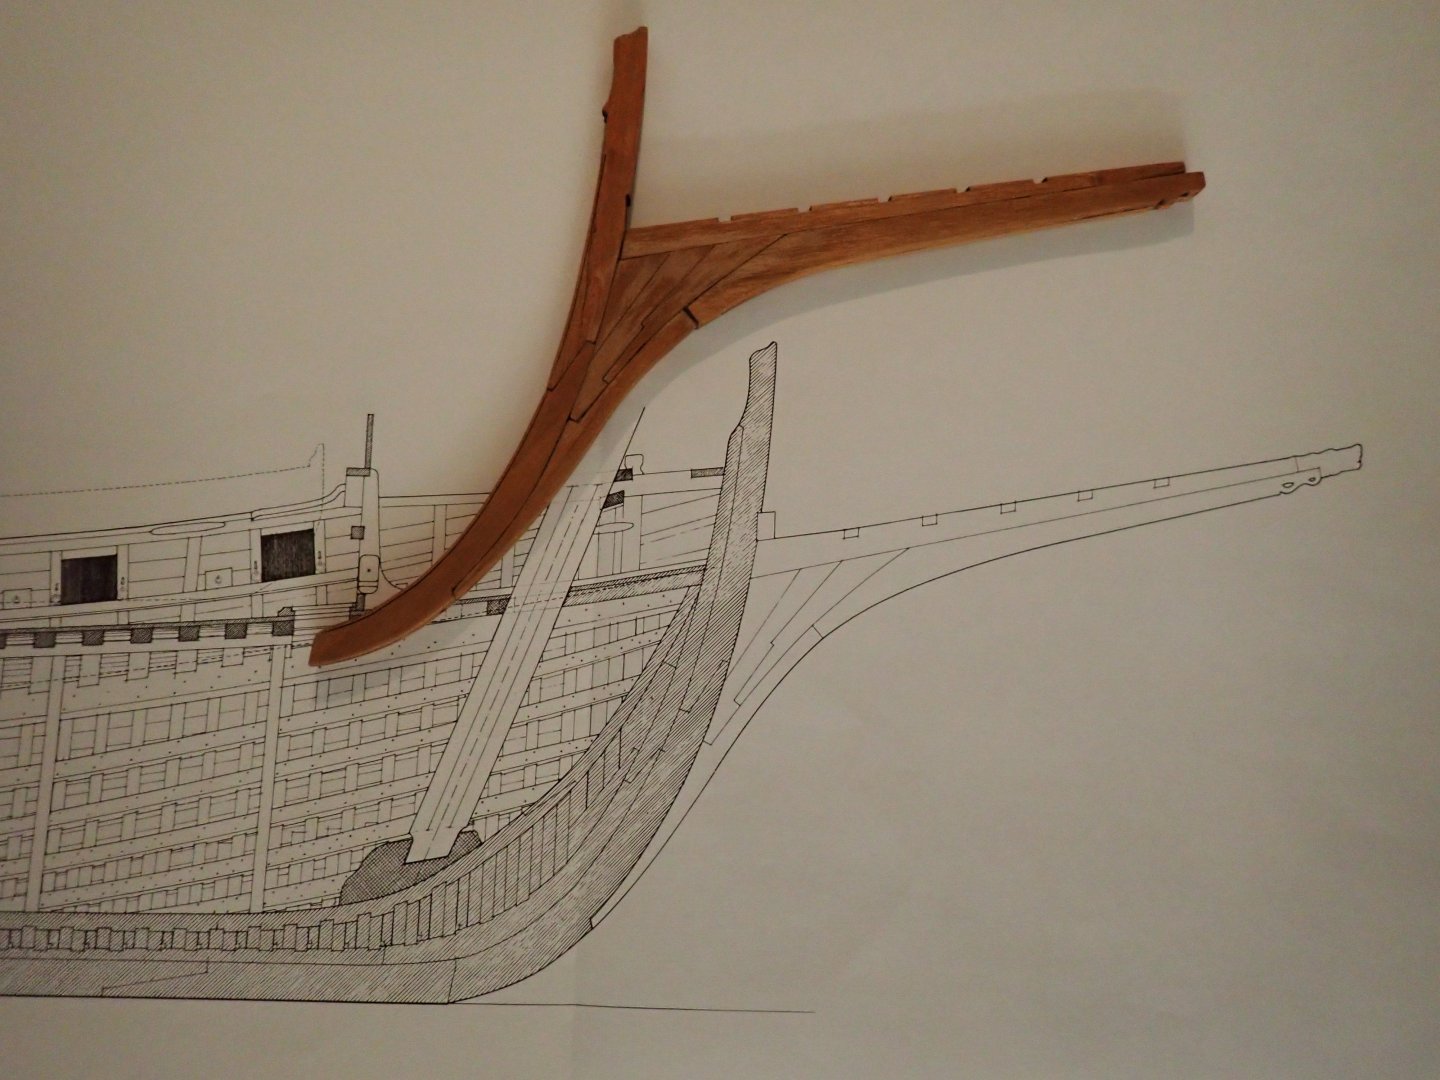
Some update related to the bow and bowsprit. All parts are made of a sandwich of two layers of cherry wood: A jig is provided to assemble and give the perfect curvature to the bow: Quick comparison with the Monograph. As it turns out, all the parts provided in the kit, match perfectly the original document: All the pieces are then glued with Titebond: The monograph is quite useful to figure out exactly how the parts dovetail. As usual, the documentation/instructions from CAF Model need some improvements. I am very happy I could find a used Monograph for this ship, on E-Bay for half of what you normally pay for this document. With some oil on it, it brings the richness of the cherry tree wood: Verification that it fits nicely into the cradle: And verification that it matches the Monograph: Et voila for today. Yves


- 185 replies
-
- 21
-
-
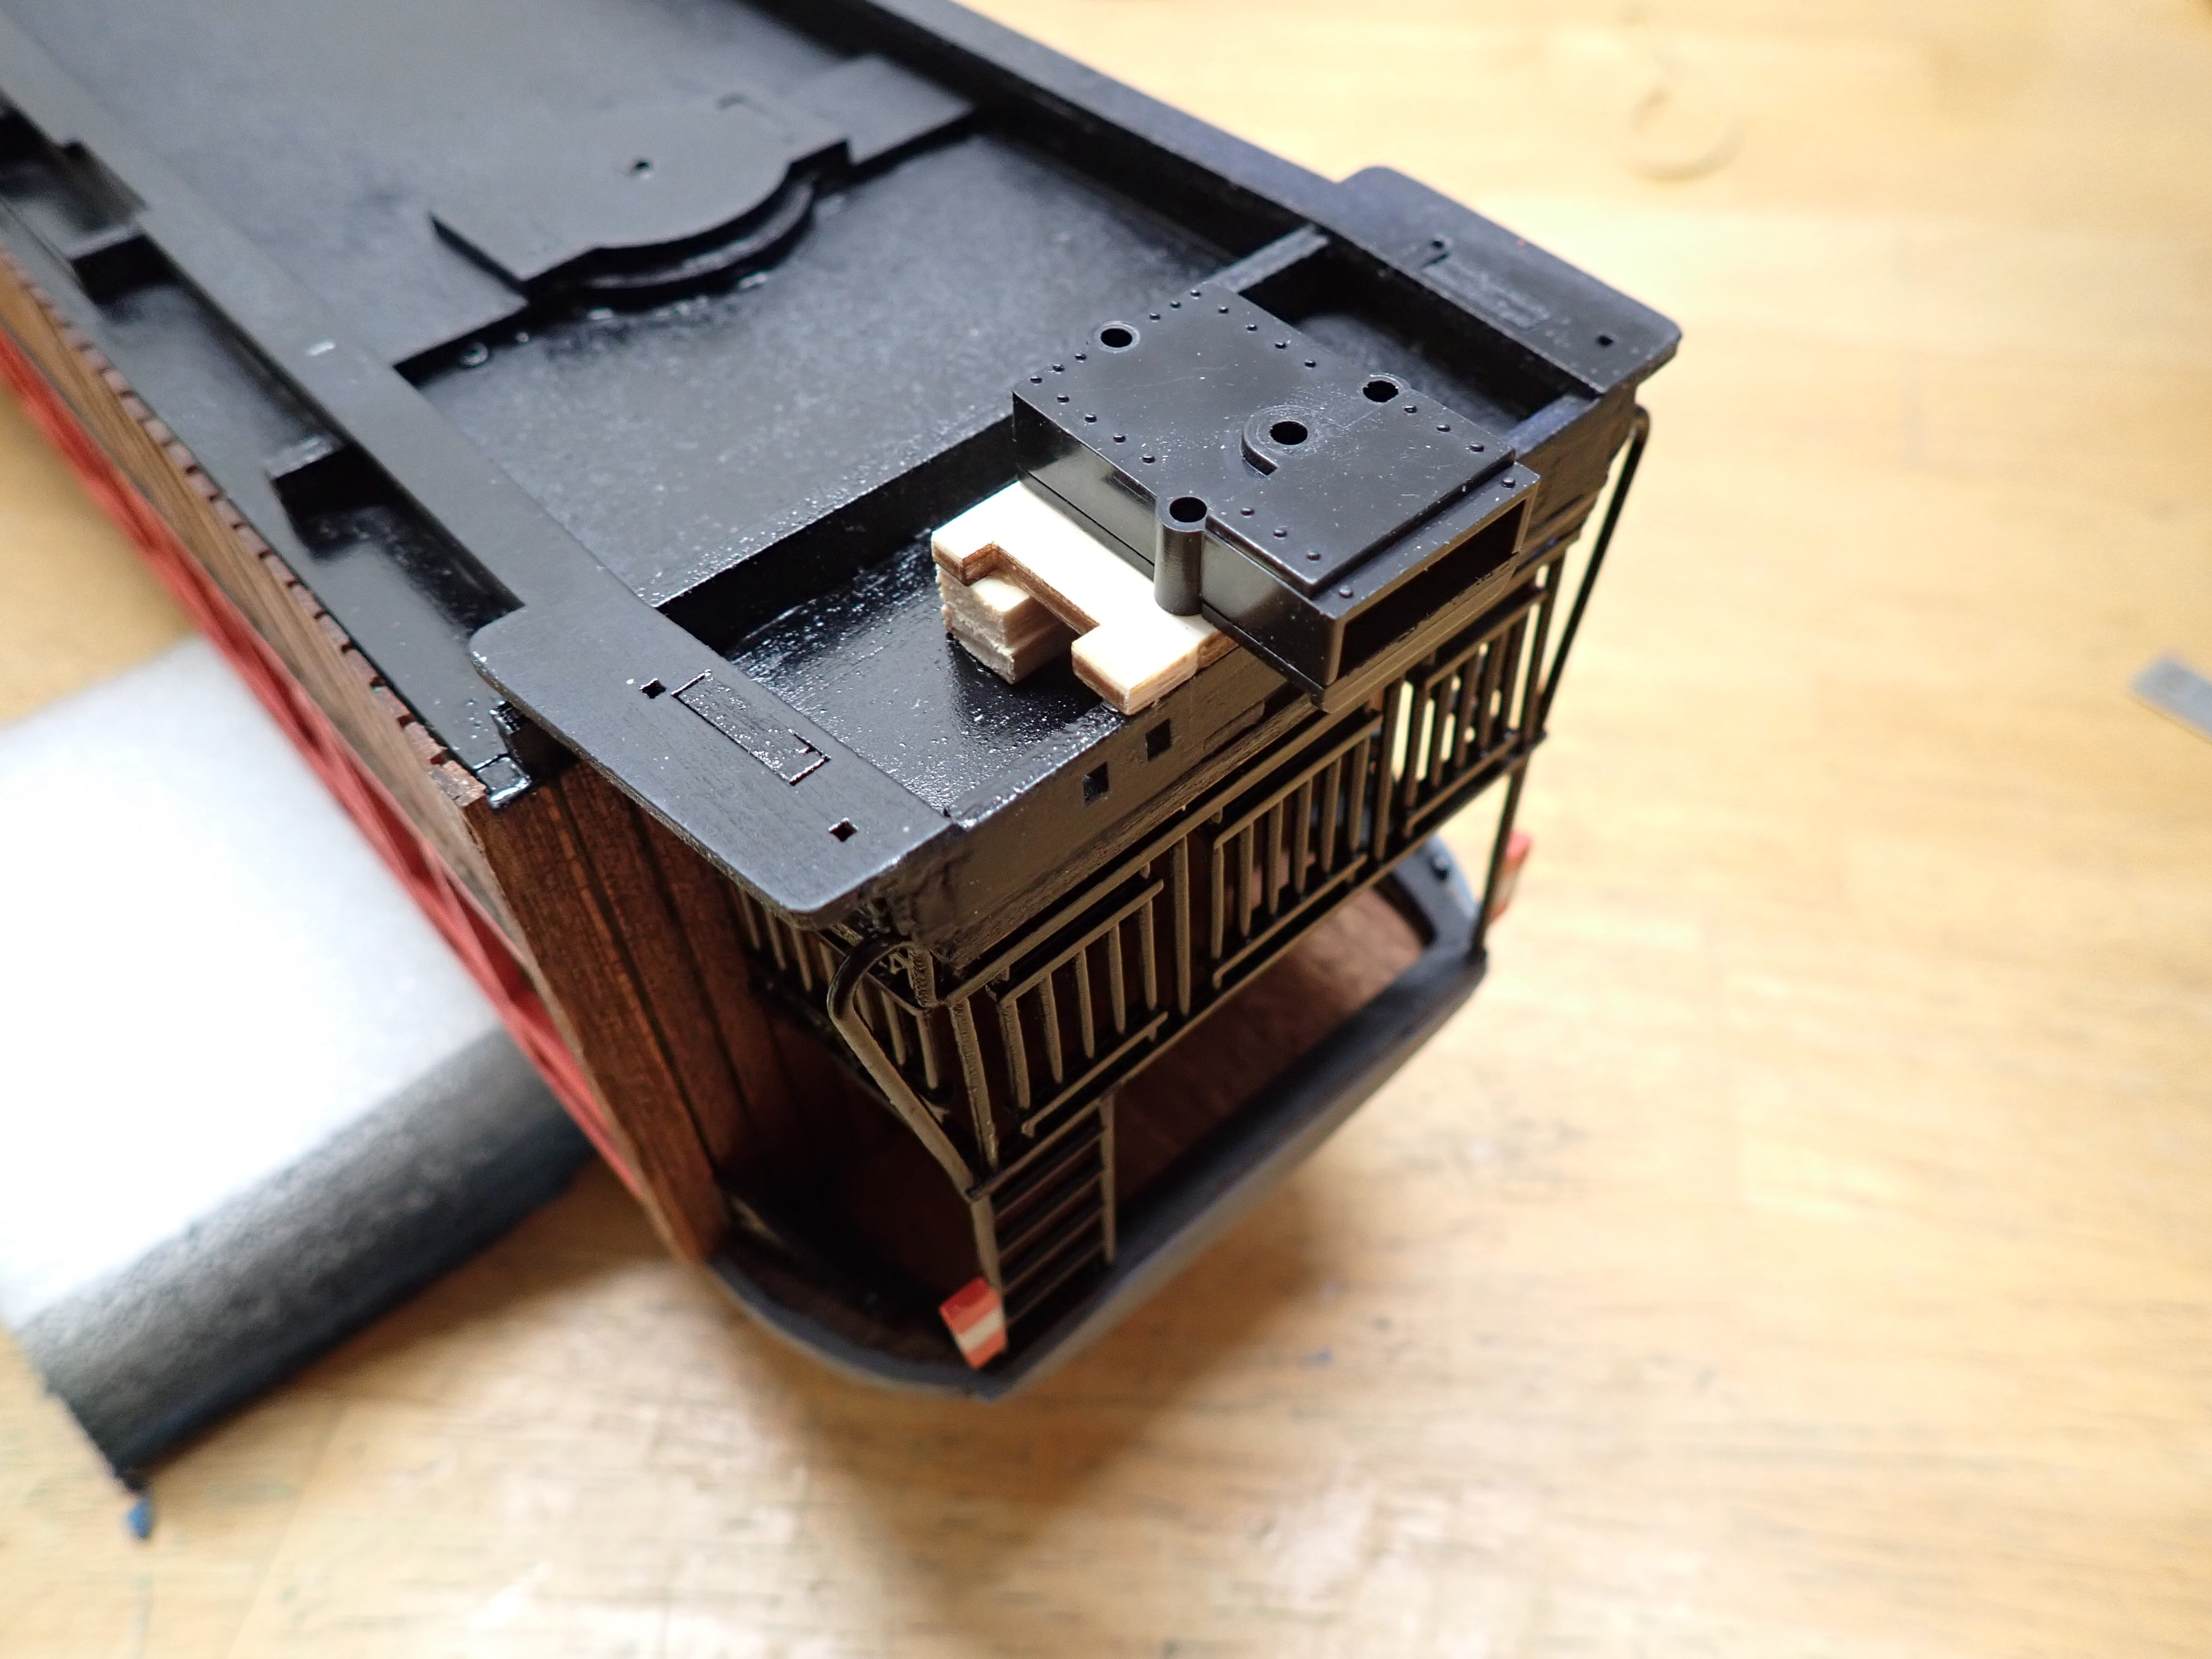
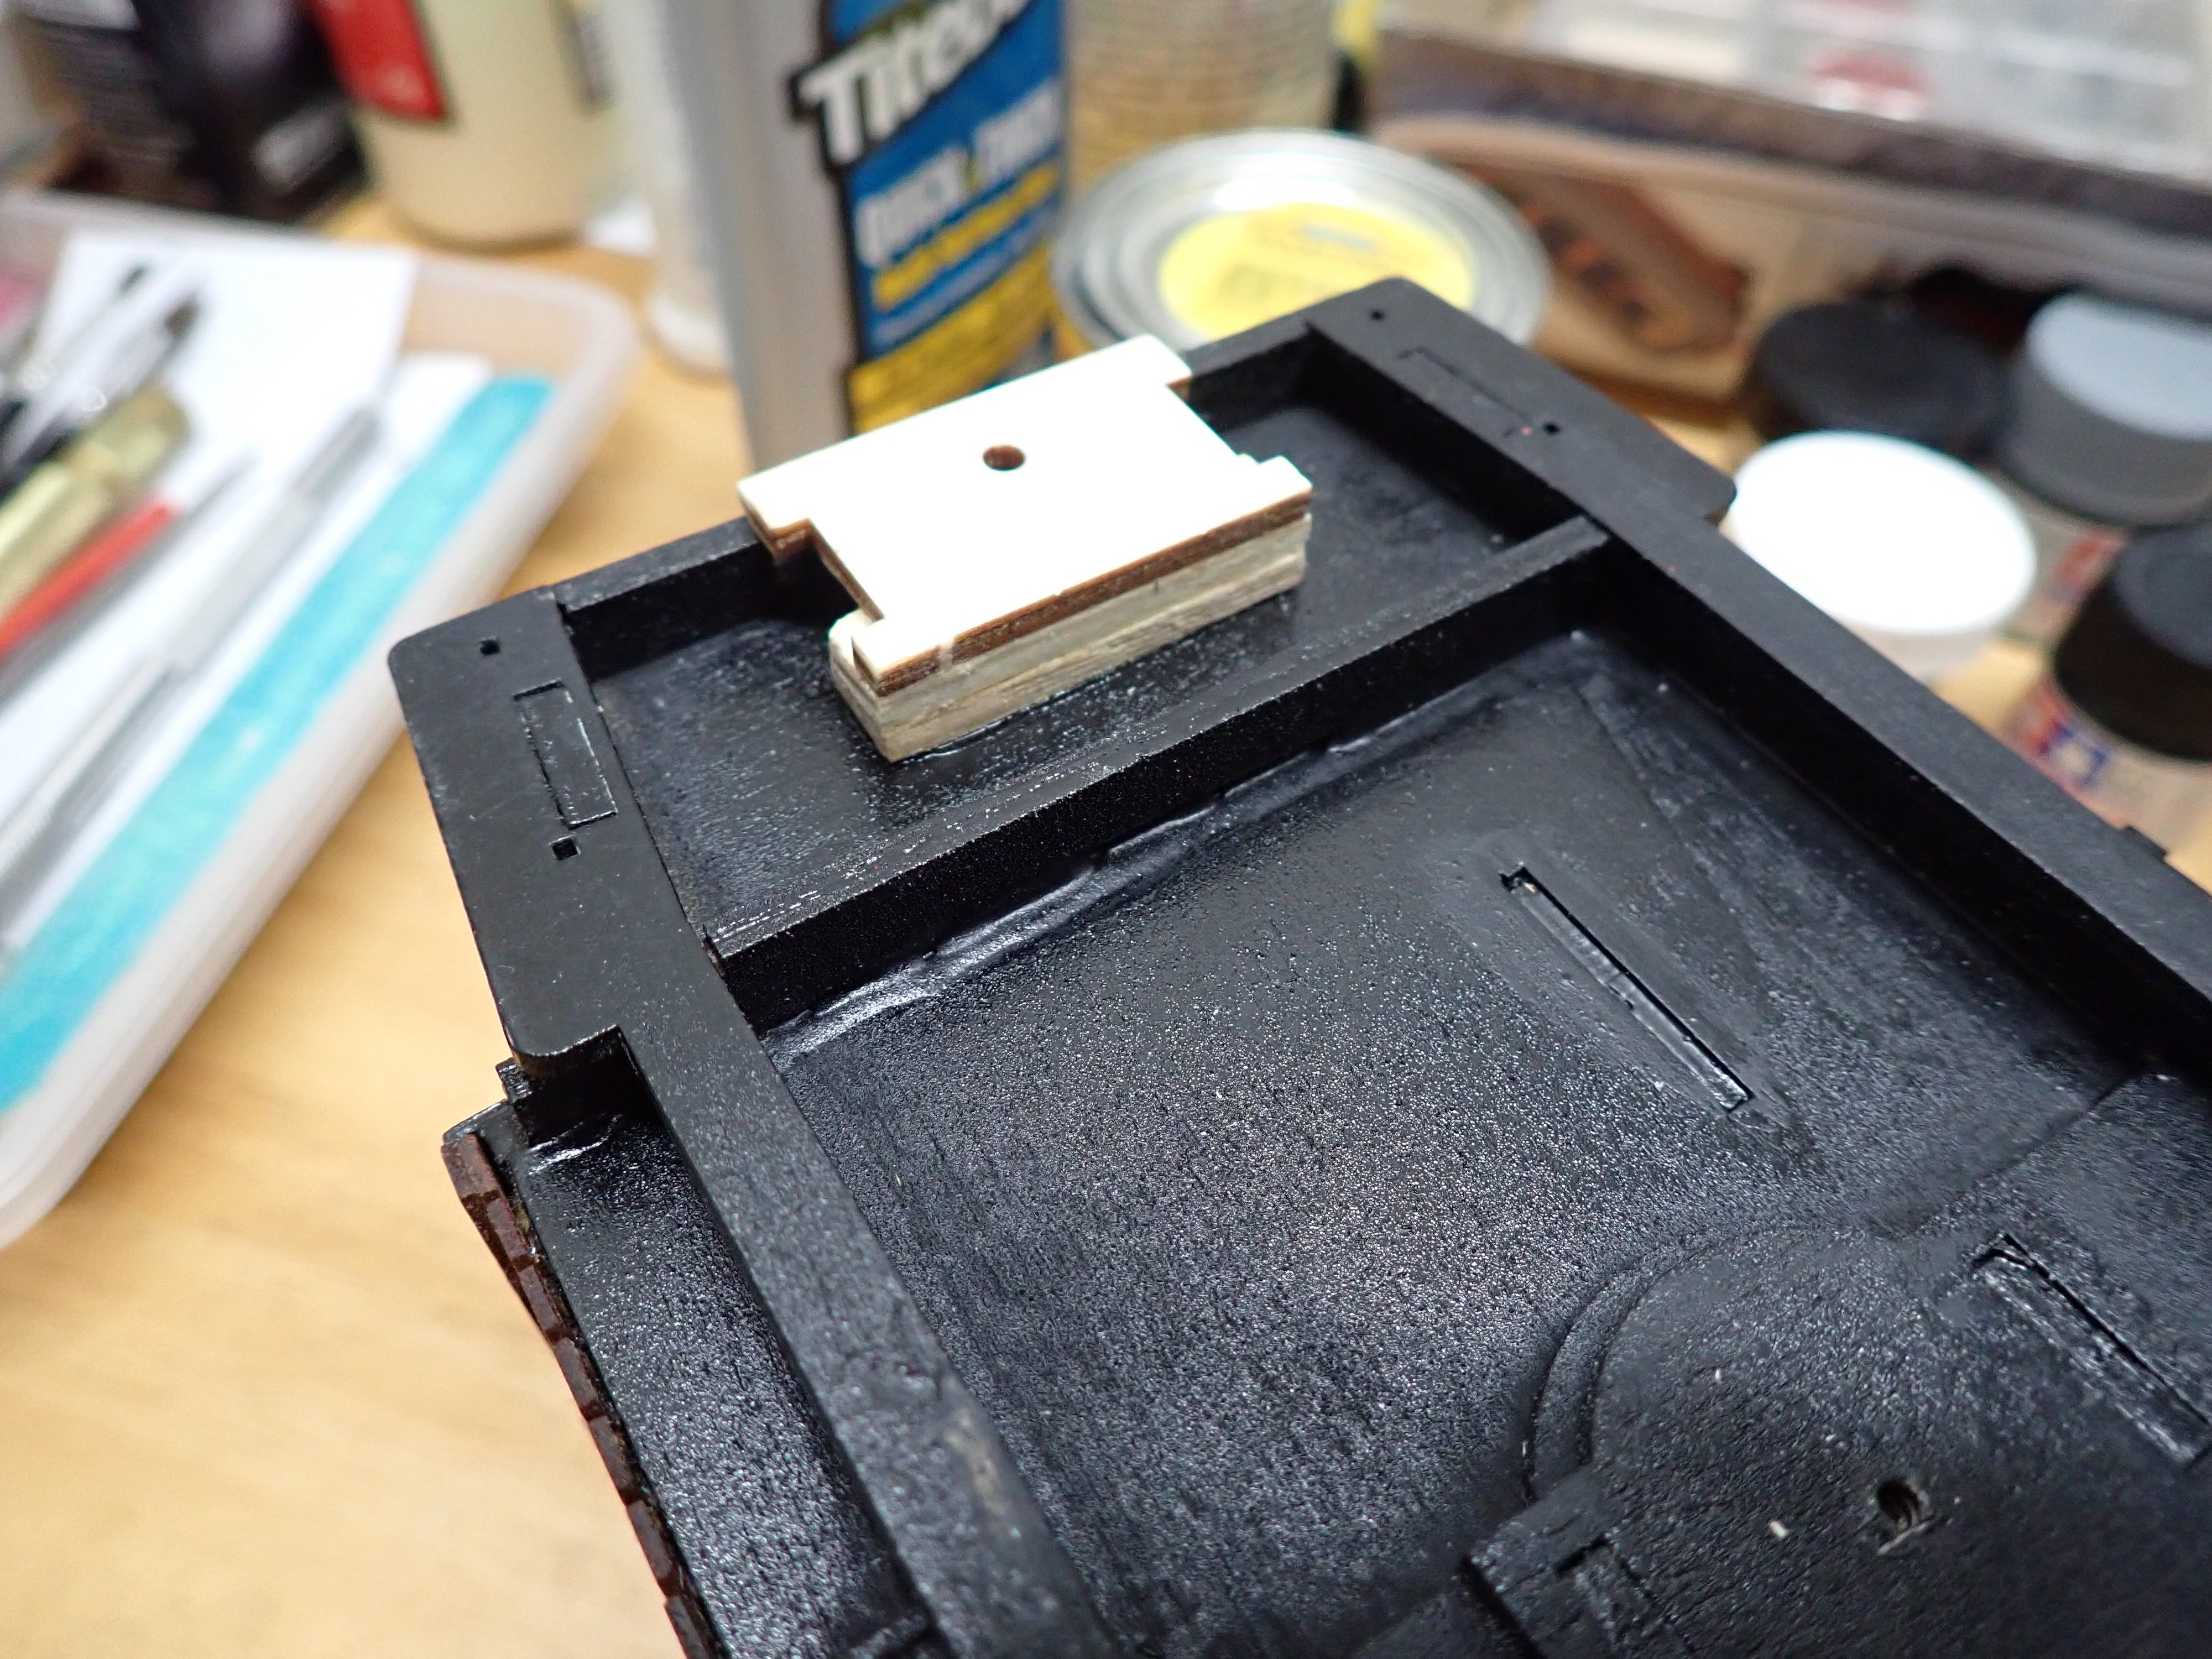
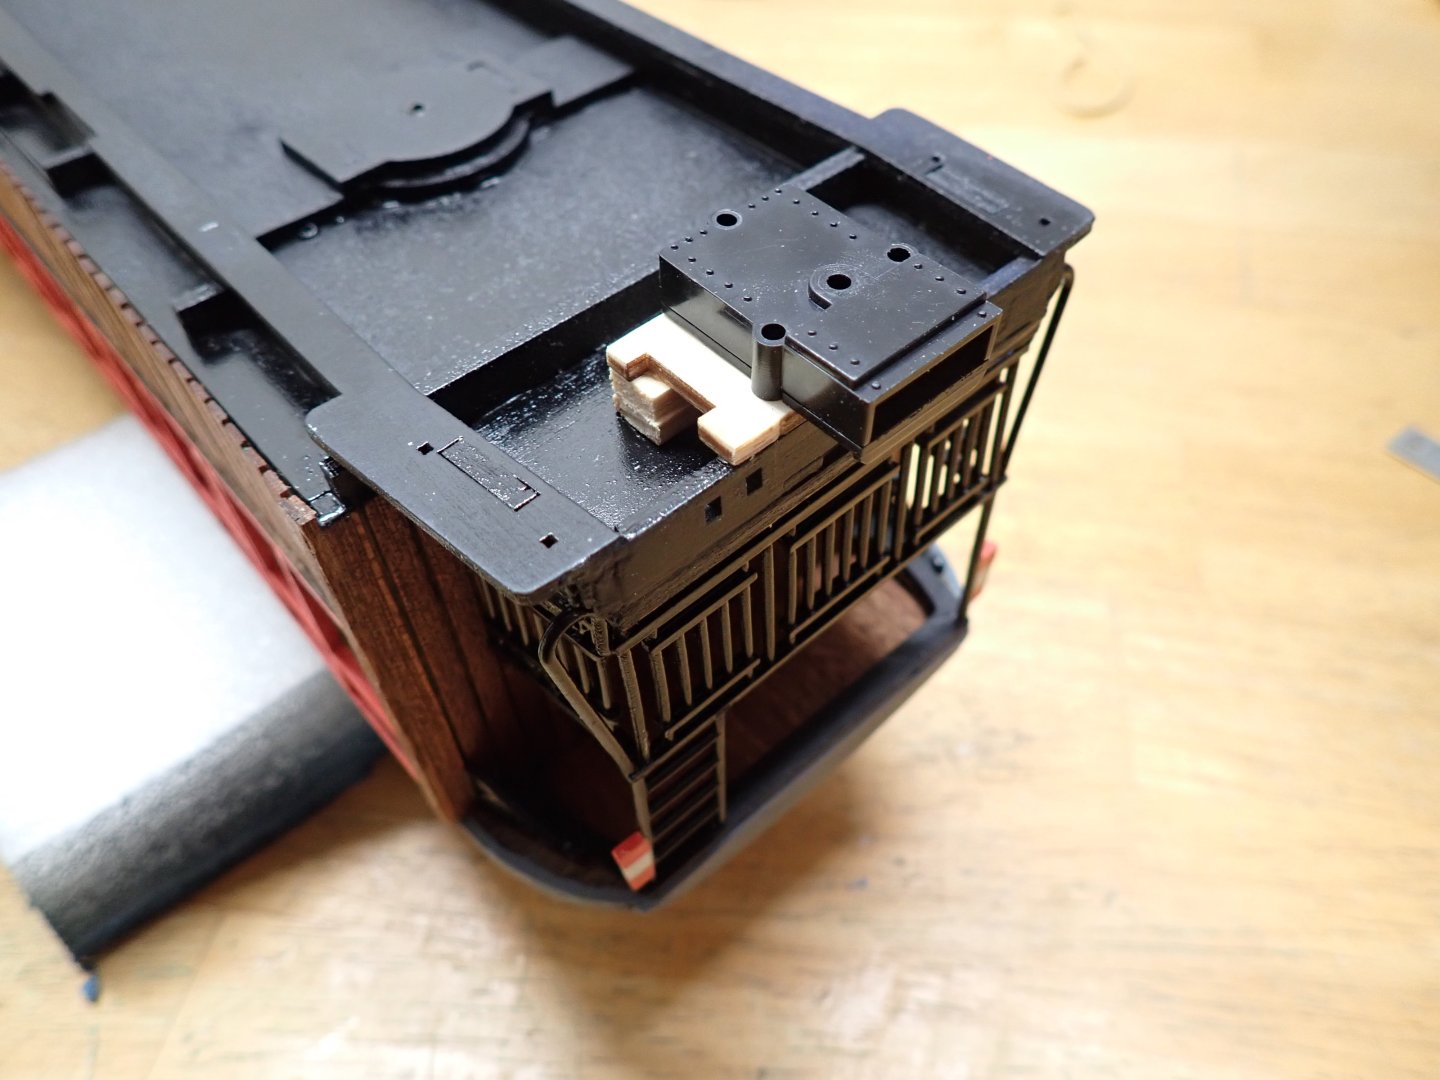
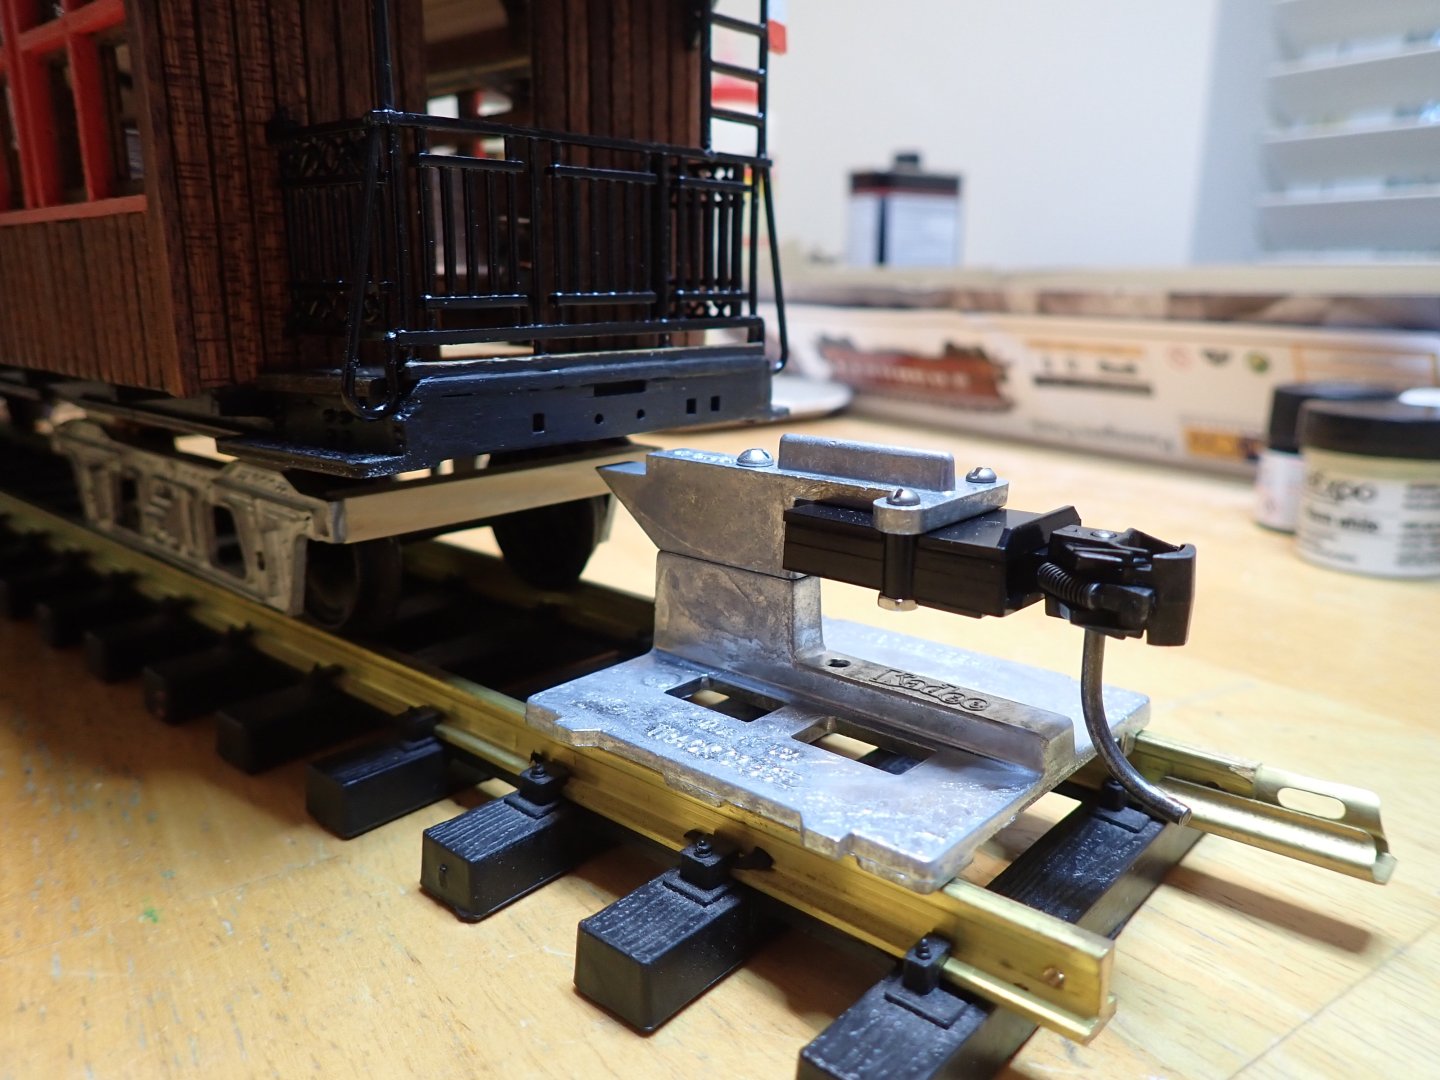
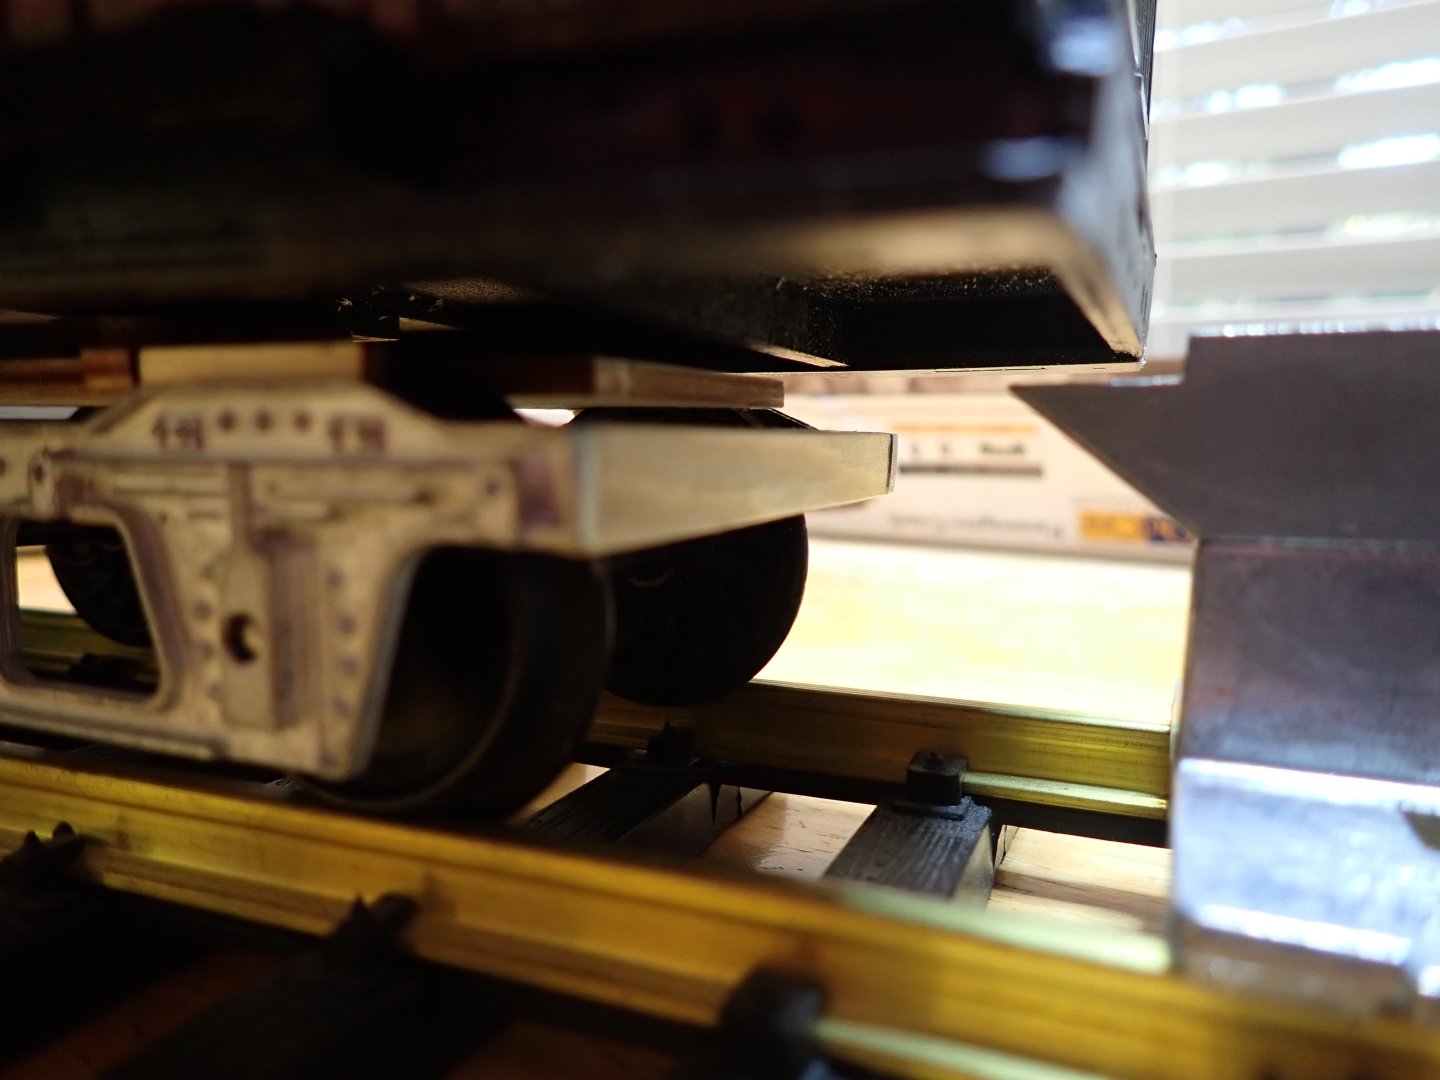
A quick update with not much done: preparing the platform to attach KADEE couplers, if one day, this coach is ever used on a Gauge 1 layout. Very unlikely, but just in case.... Gauging the height, with a KADEE Gauge 1 gauge: Yves

-
I just procured the ANCRE monograph and can confirm that the parts do match perfectly the drawings of Boudriot. I will try to publish some excerpts of the monograph as we build the various parts. Yves
-
I remember gluing 2400 copper tiles on my HMS Bellona. I wonder if using thin aluminum sticking tape would not have been easier than styrene plates.... I admire your work. Your Titanic will be one of a kind. Yves
-
Beautifully executed!!! What a different subject from what we are used to see. I can see a Venetian Vaporetto in your future 🙂 Yves
-
Beautifully executed !!! One of the most delicate sections of the ship: you brought it home. I love the color of your woods and the various shades. Quite a departure from my Bellona 🙂 Yves
-
I just acquired a used Ancre Monograph and will be comparing the CAF parts with it. We will see how close to it, it is. Yves
-
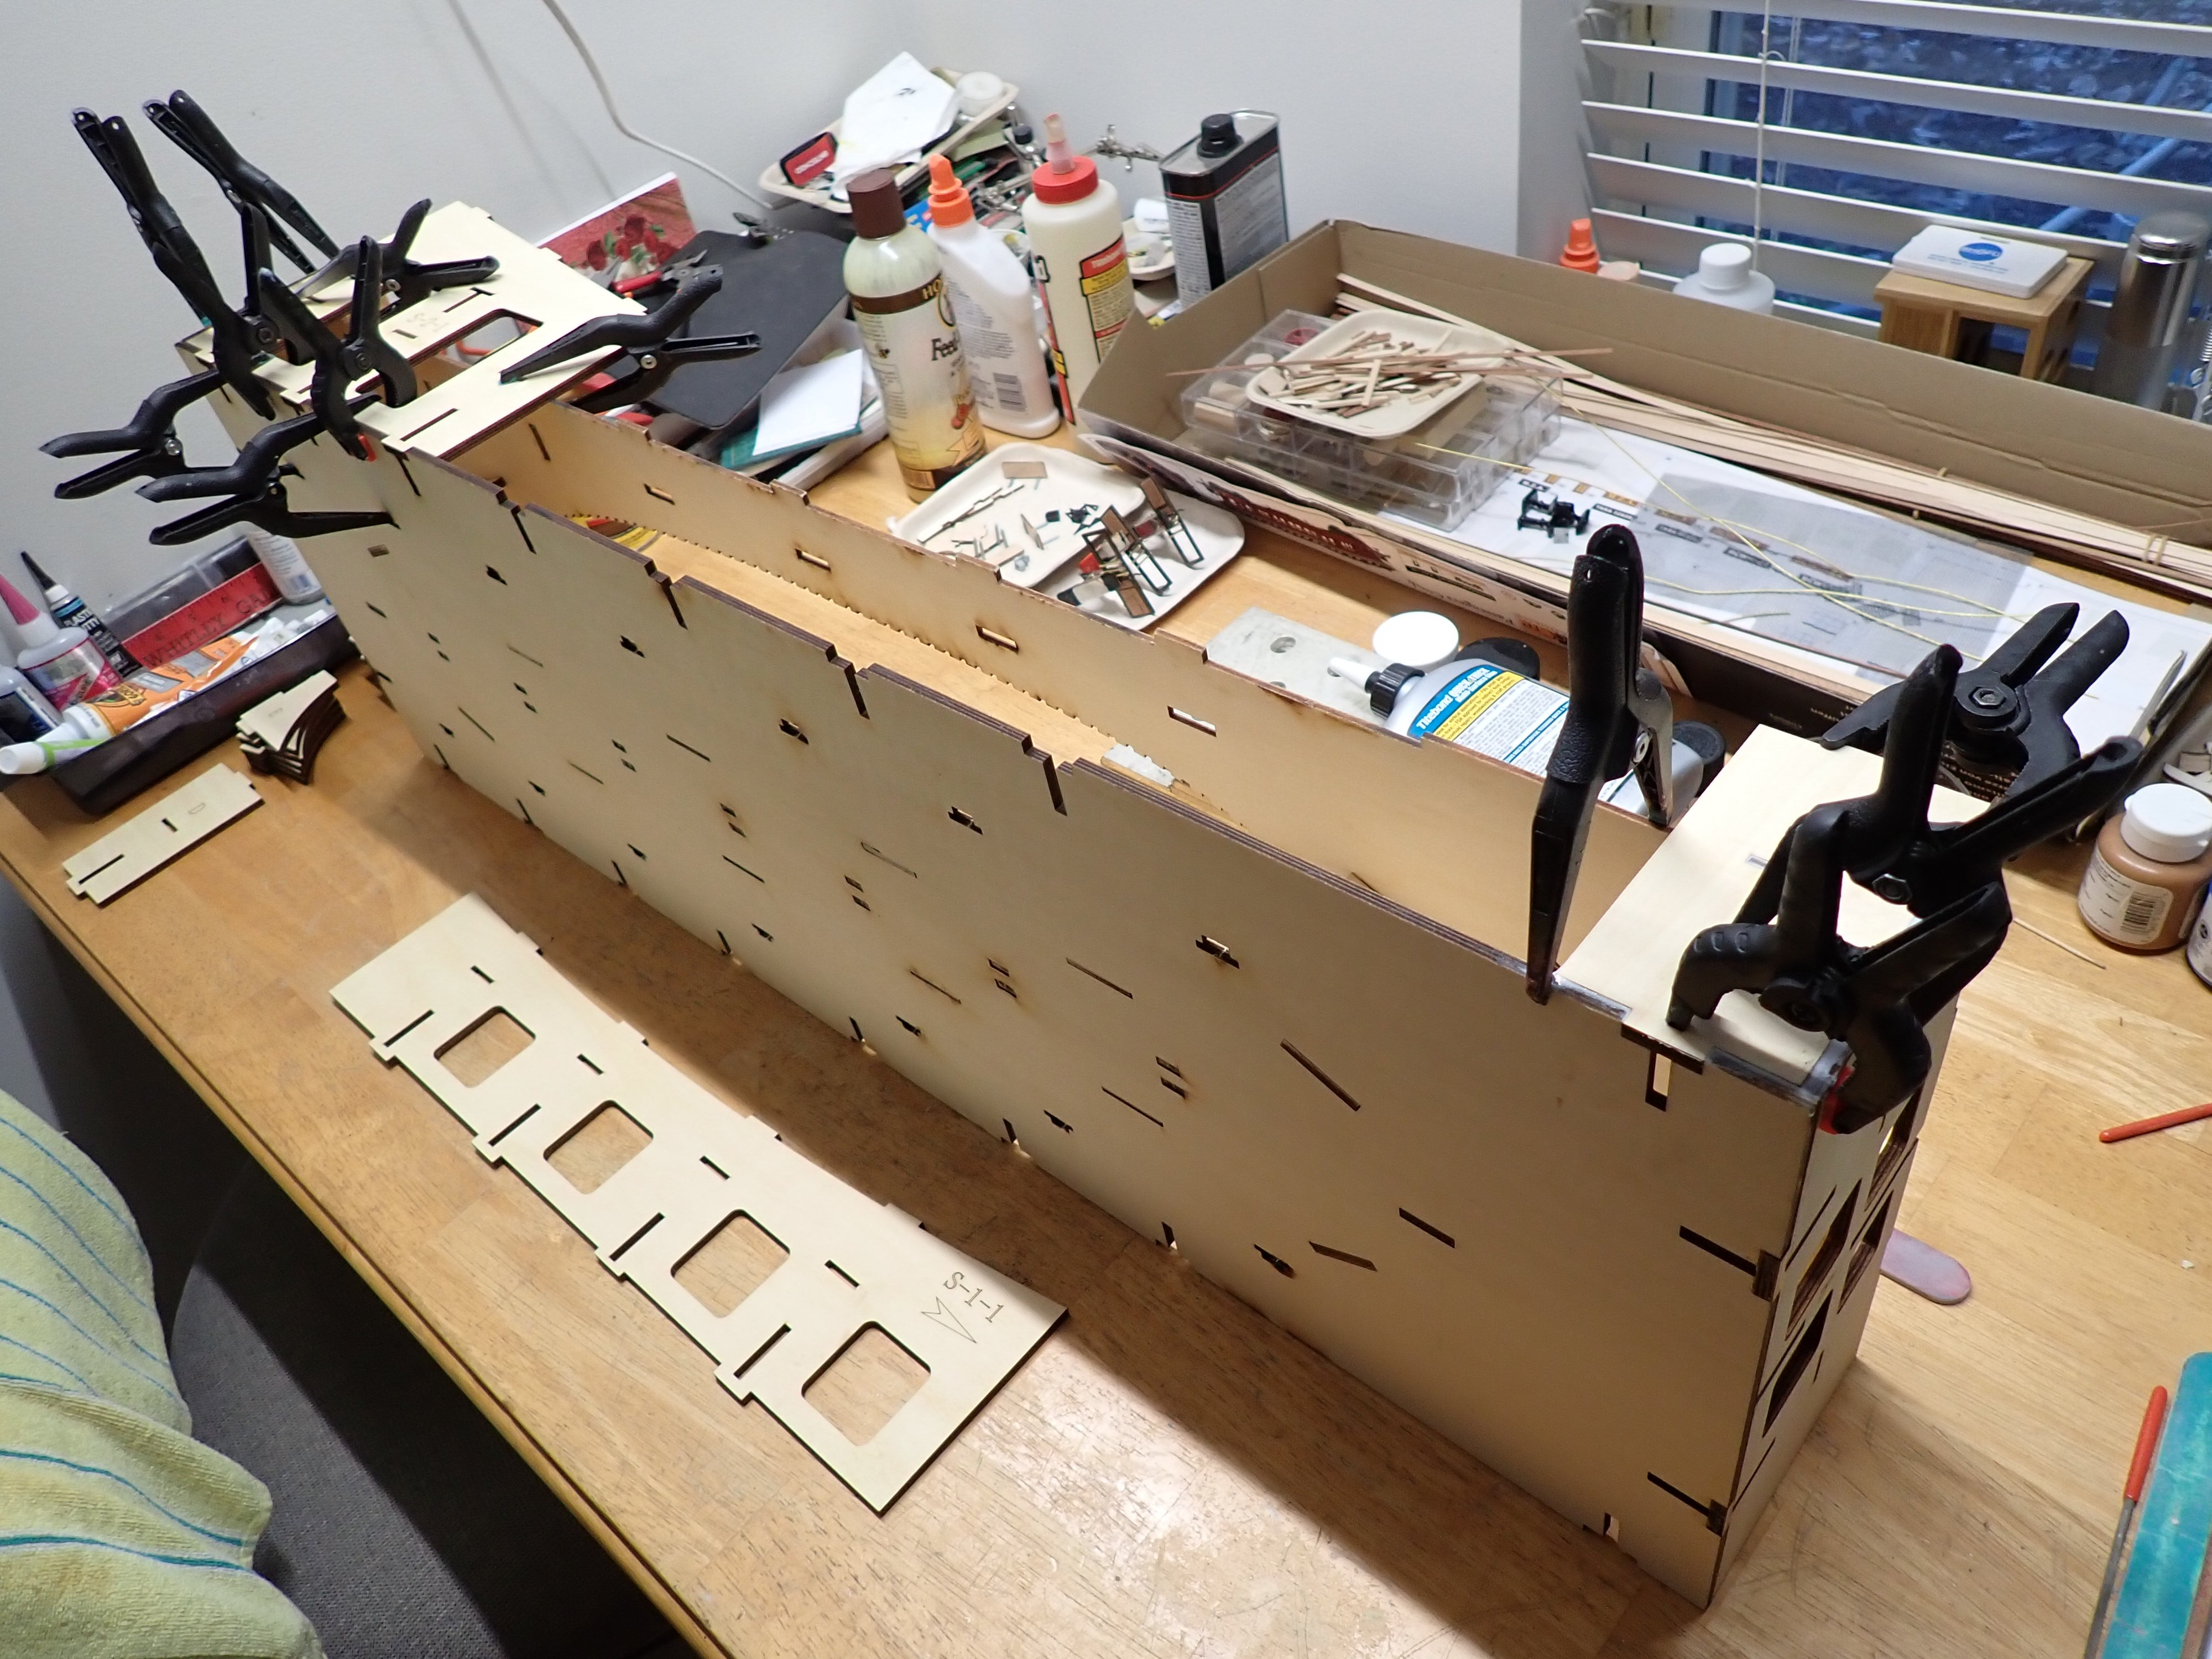
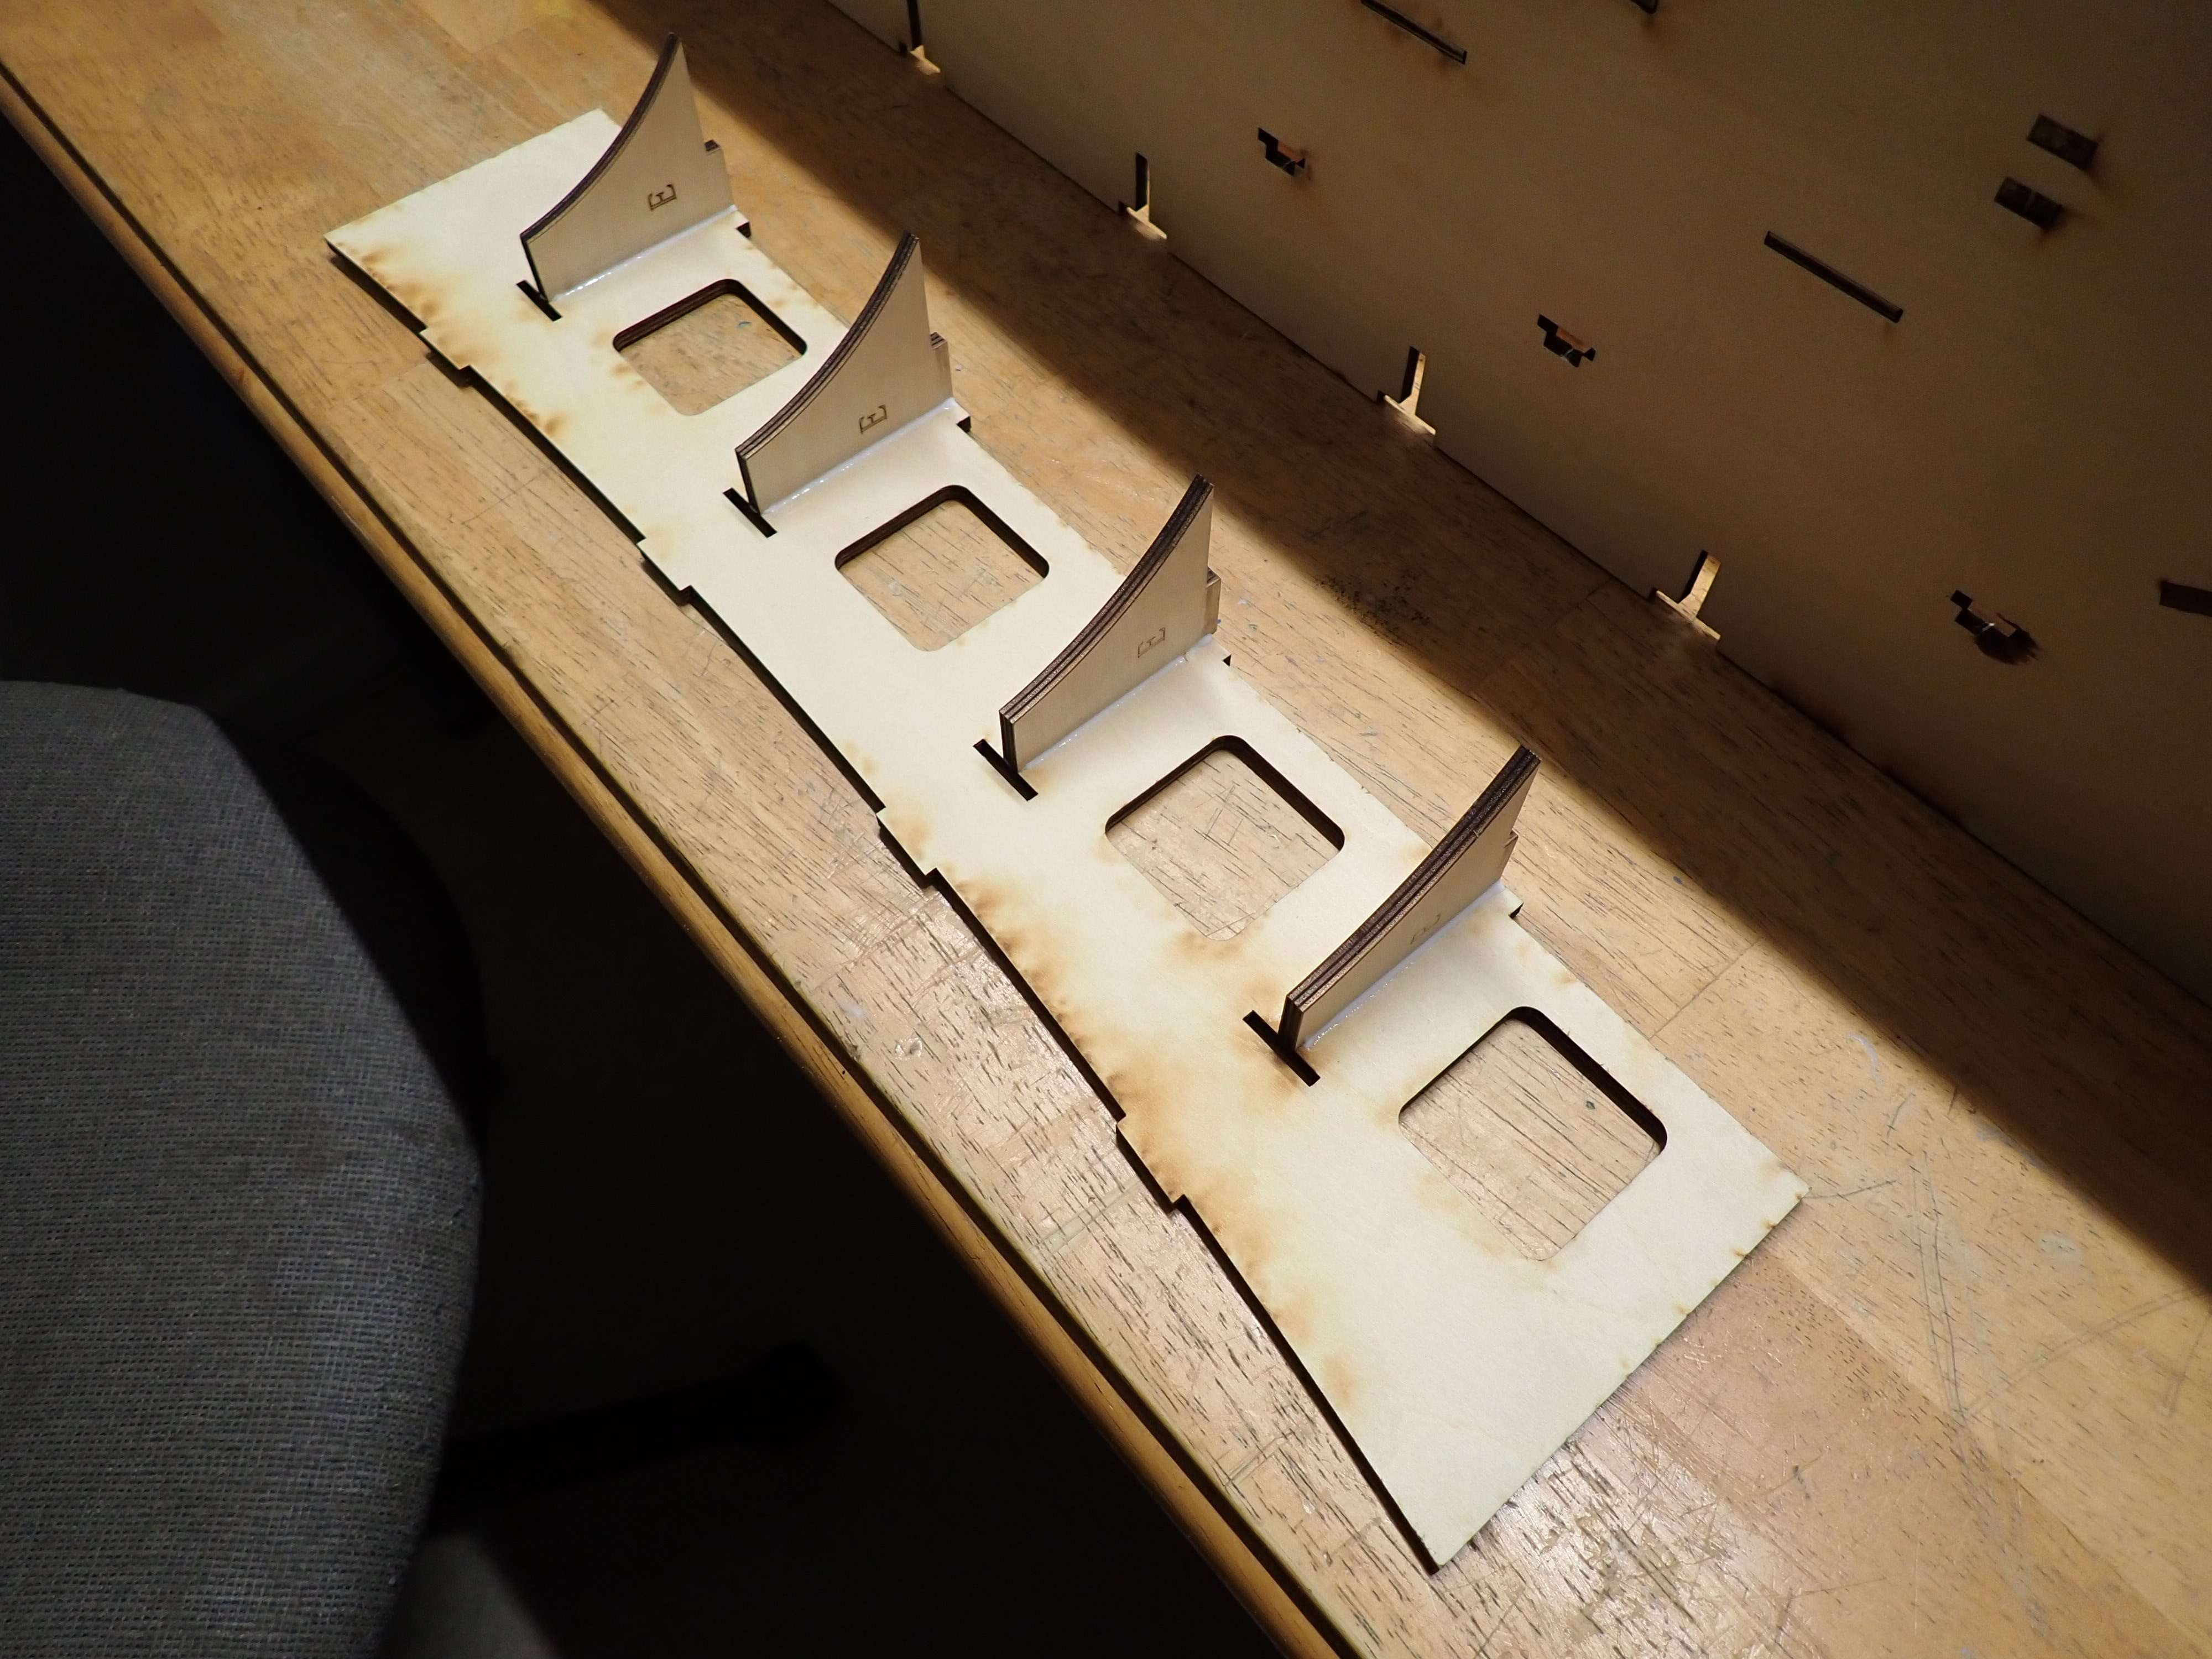
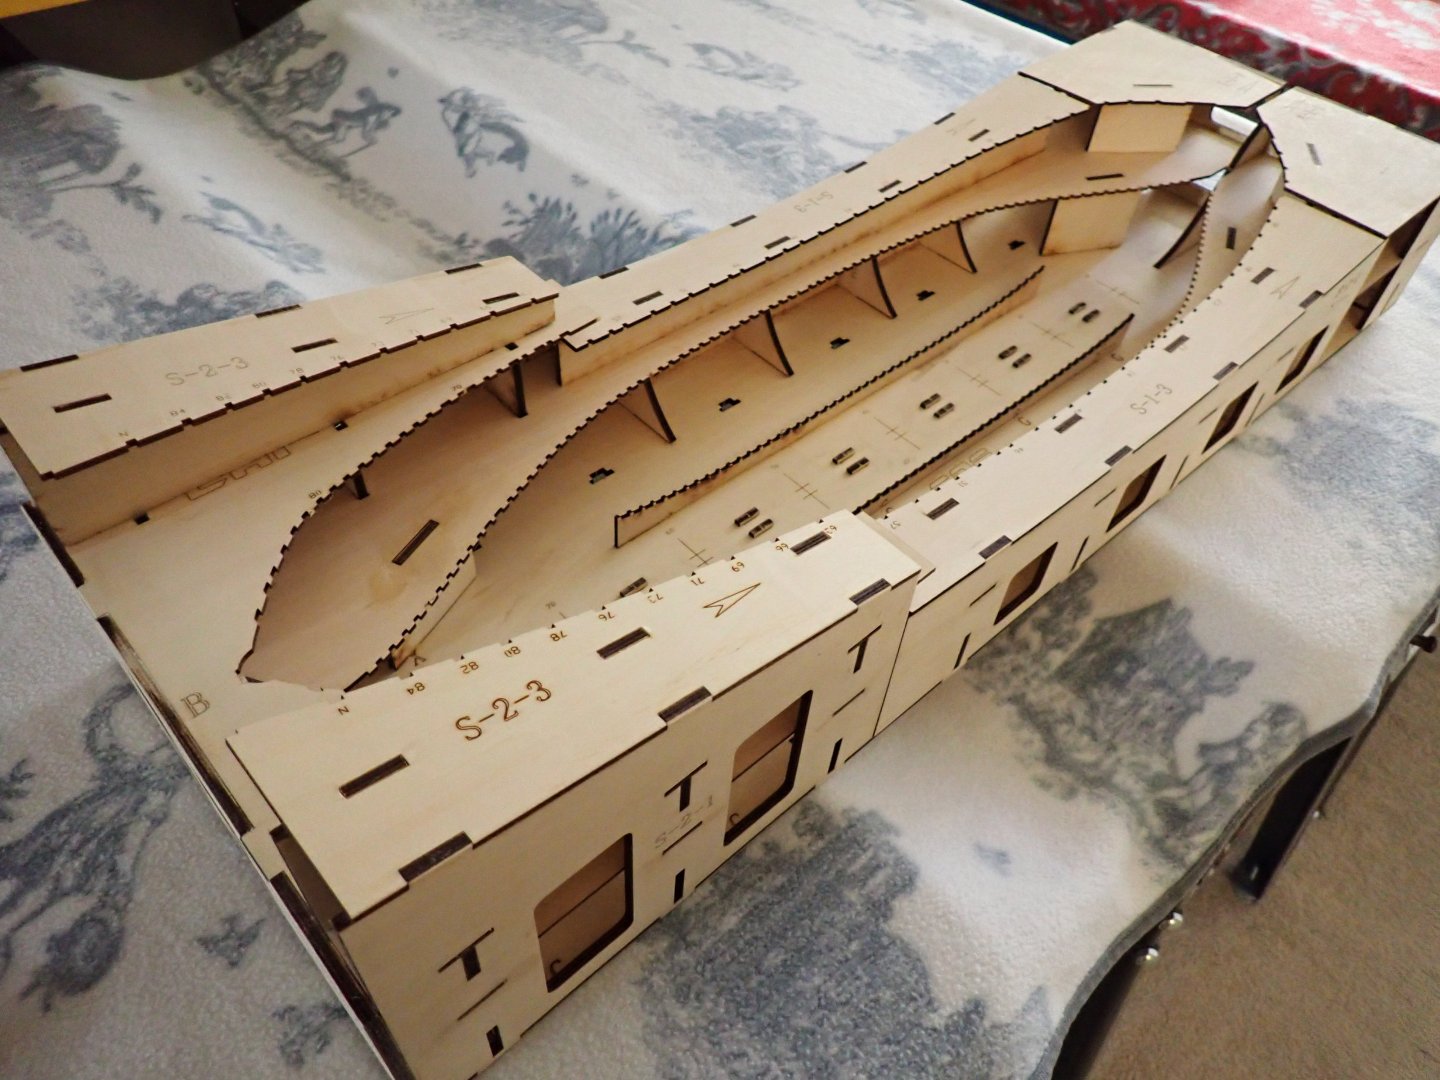
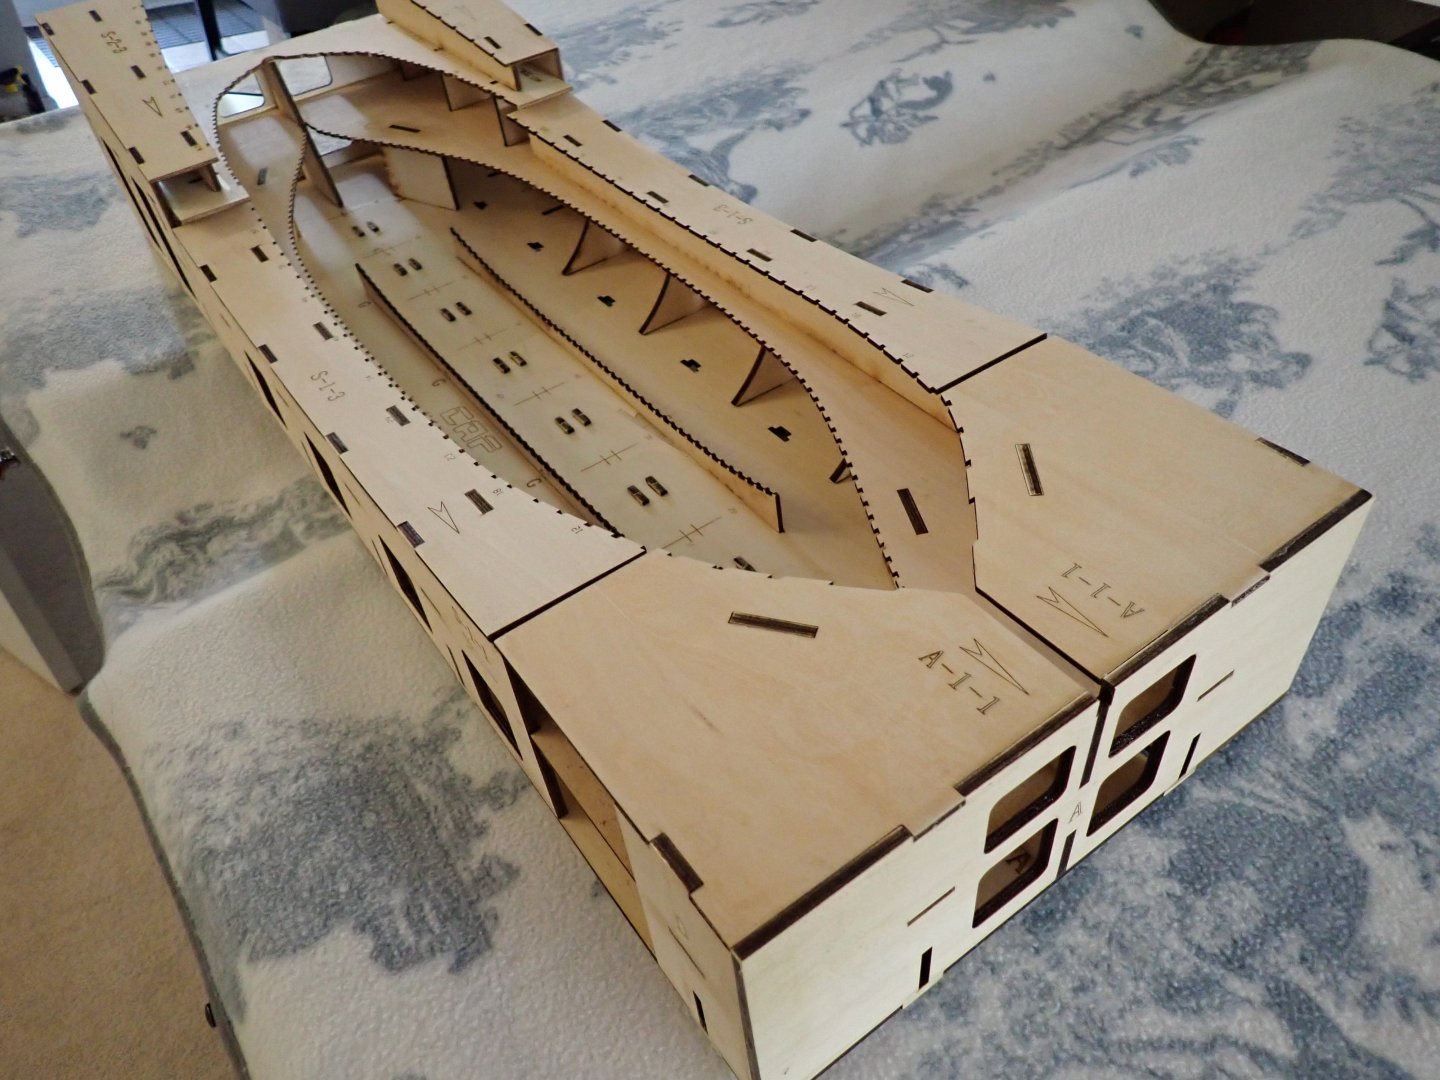
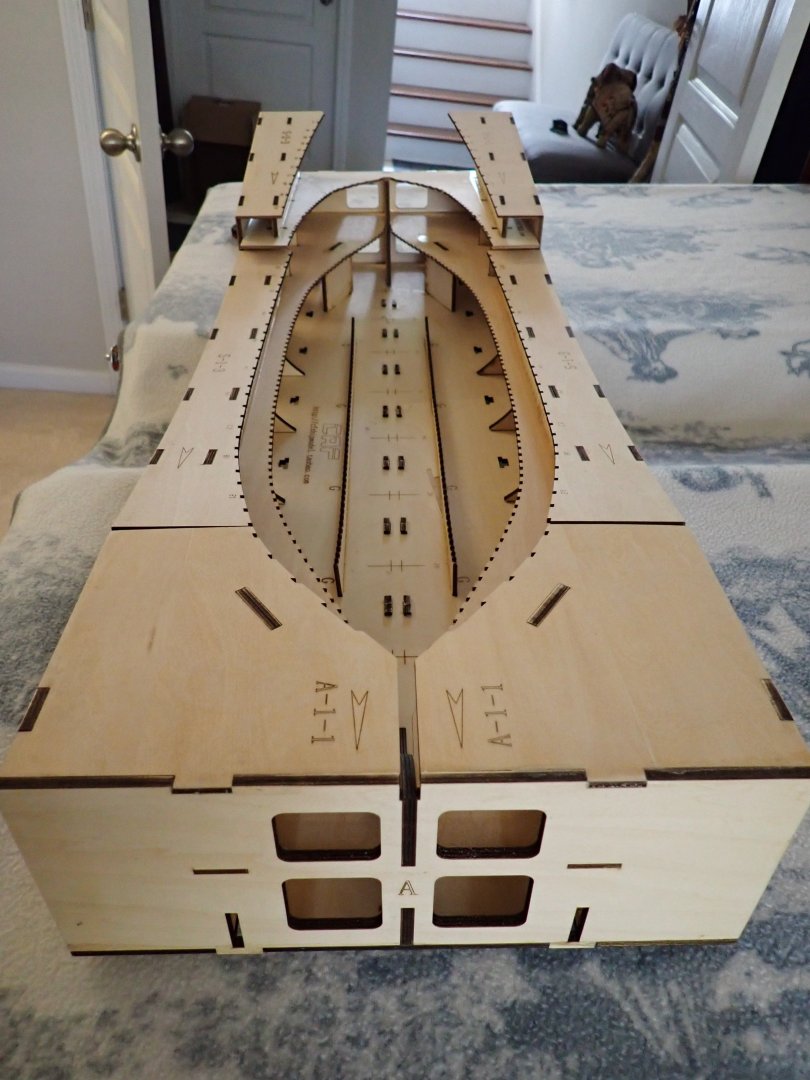
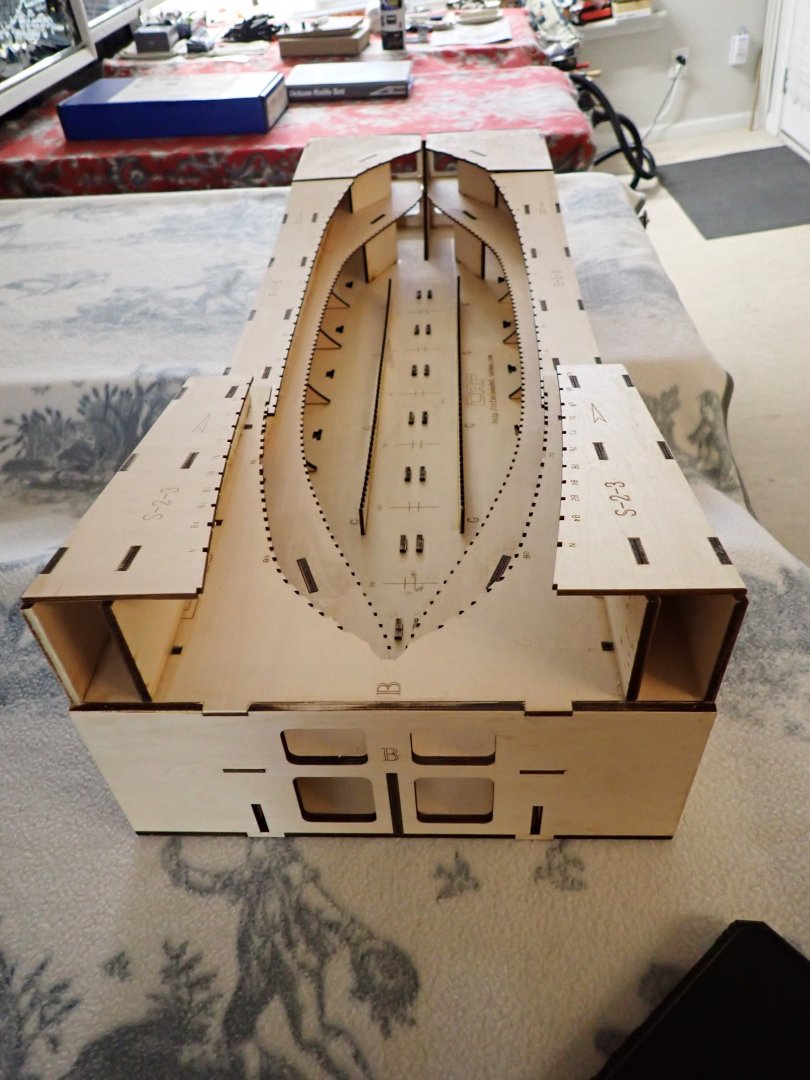
The "cradle" is now completed: It is quite a big "box" and rather heavy, being made with 7 ply very nice plywood. It is very "encompassing" to say the least and I suspect the hull and its numerous frames will be well protected inside. For comparison, below is the mounting berth ZHL and other Chinese builders are offering: As you can see, the approach between CAF Model and ZHL is quite different. We will see if the CAF Model cradle offers as much flexibility as the ZHL one. Yves

- 185 replies
-
- 20
-
-

-
Beautiful and rare model. You did an excellent job on this kit. Yves
-
I would definitely plank the stern, as it will look so much more realistic. You are doing a great job on this beautiful model. And yes, 1/48th is the scale Model Shipways should have authored that kit, 35 years ago. Yves
-
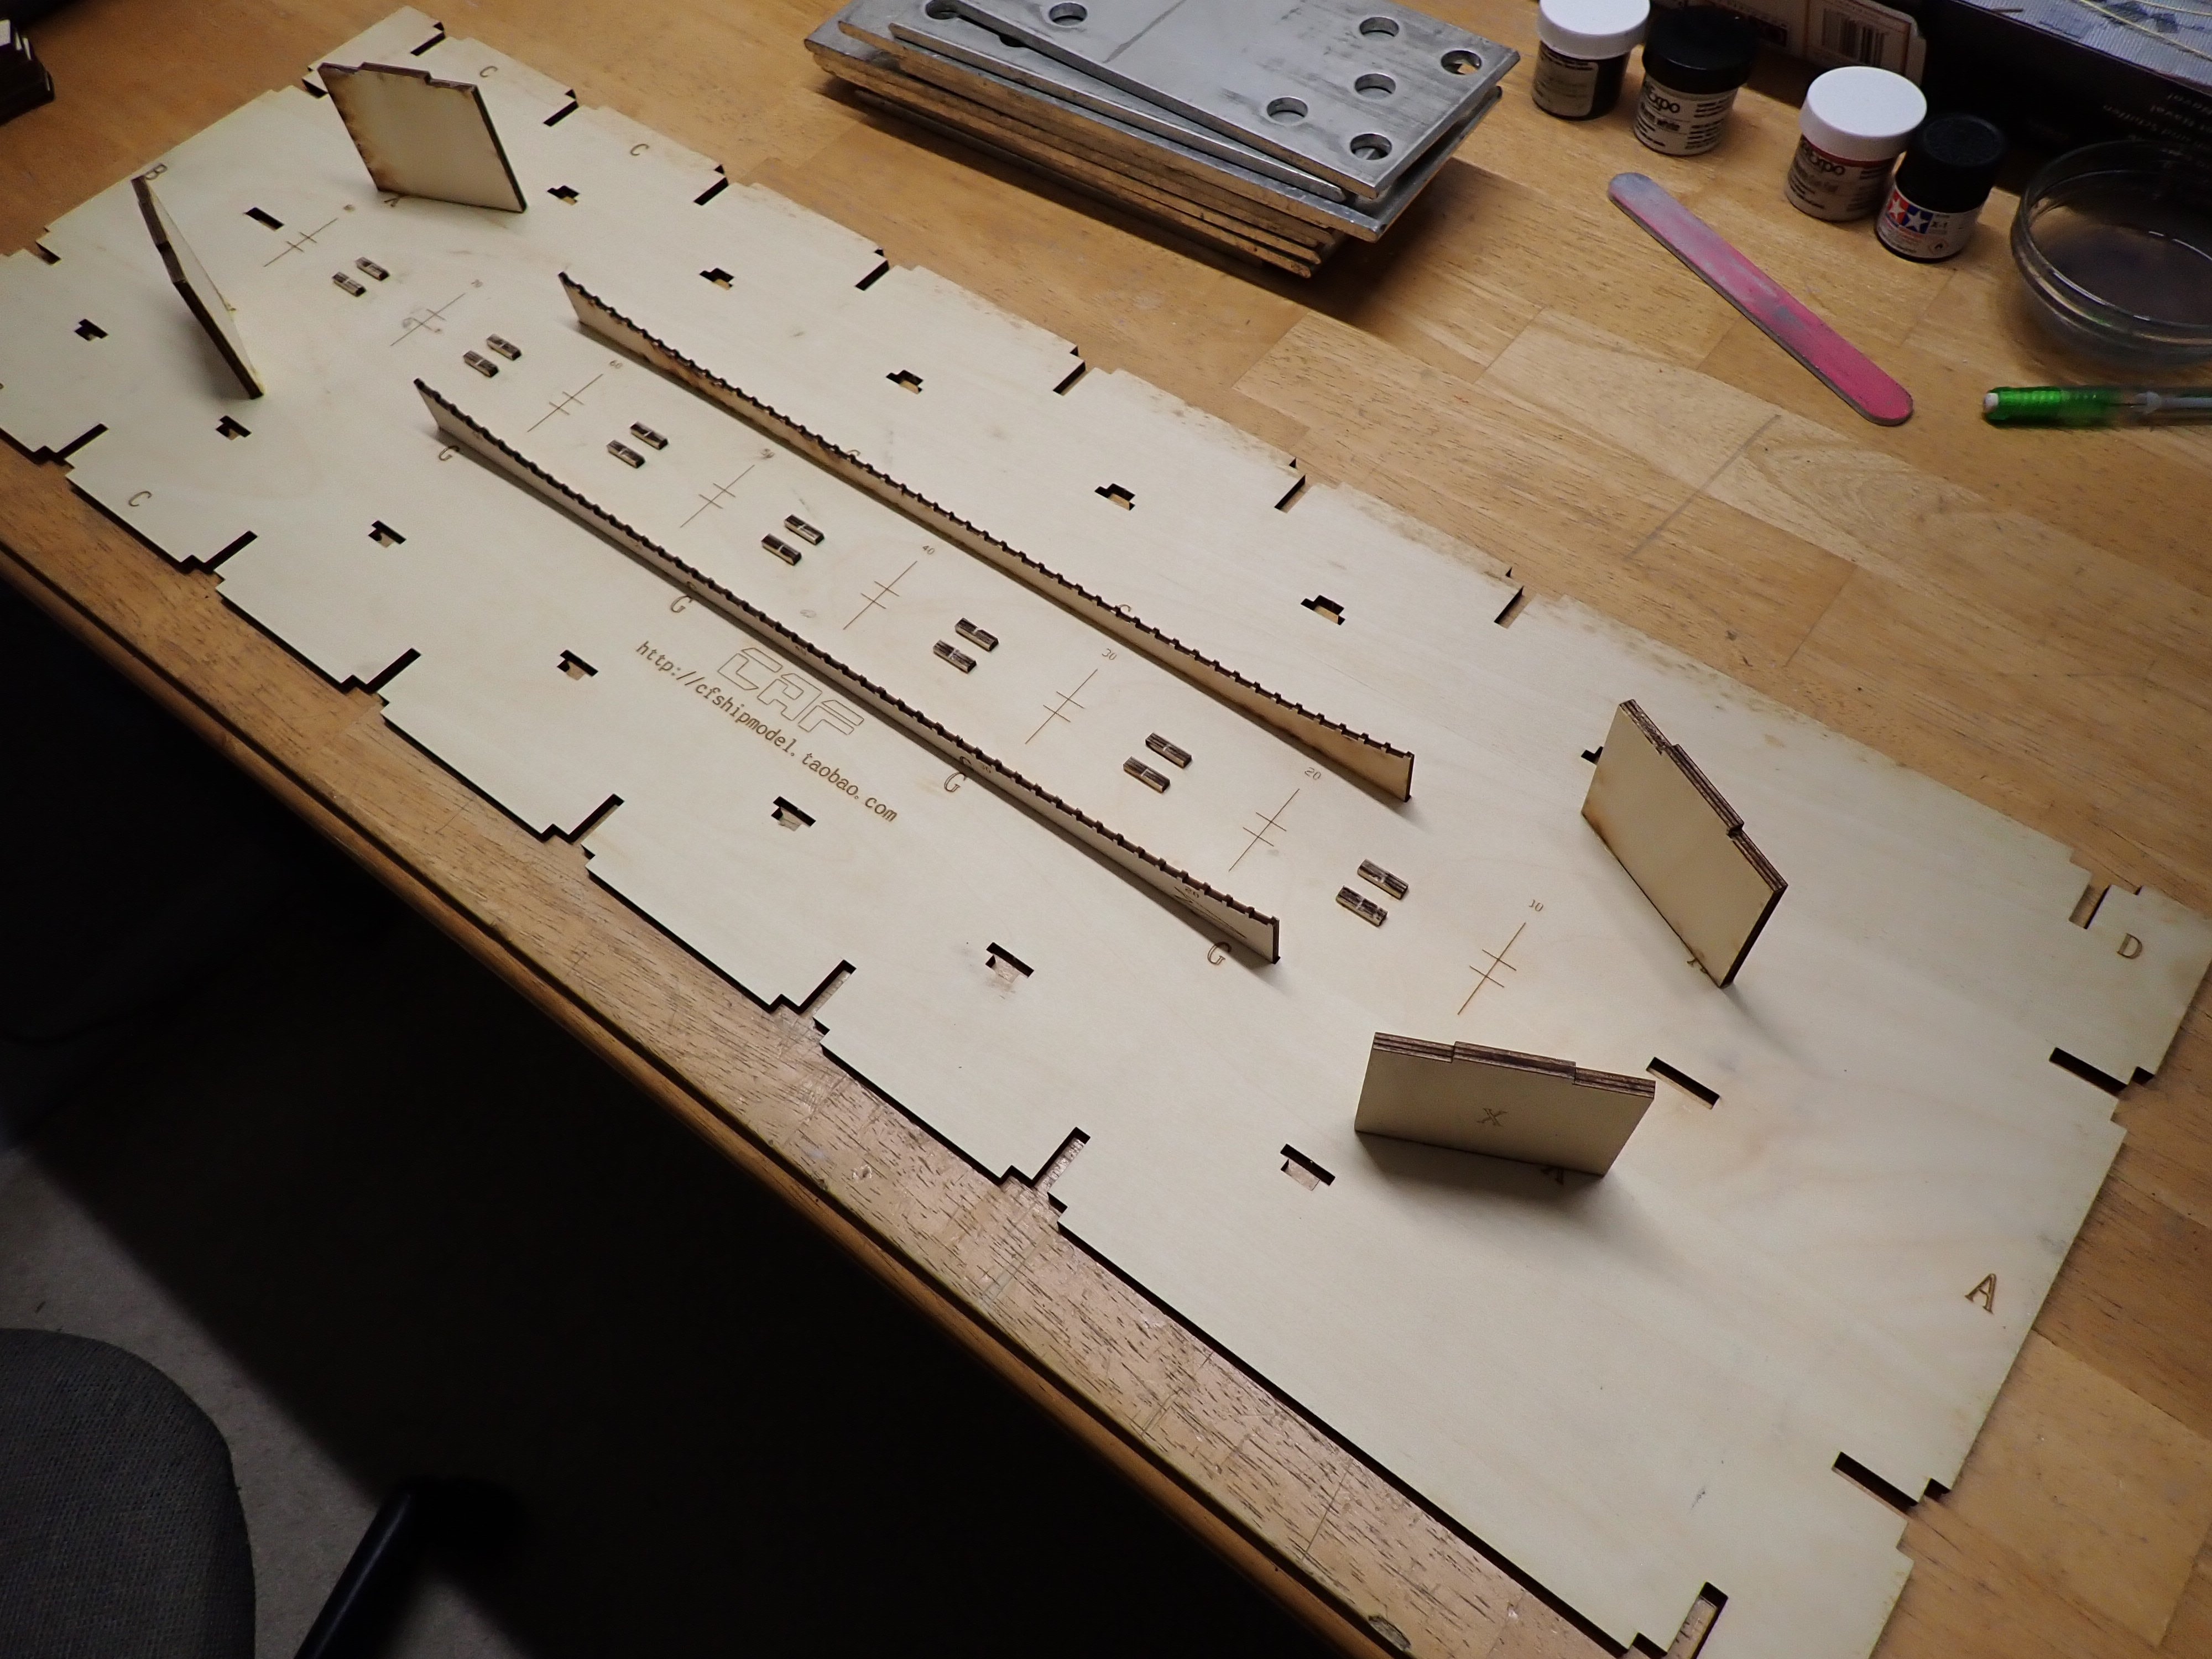
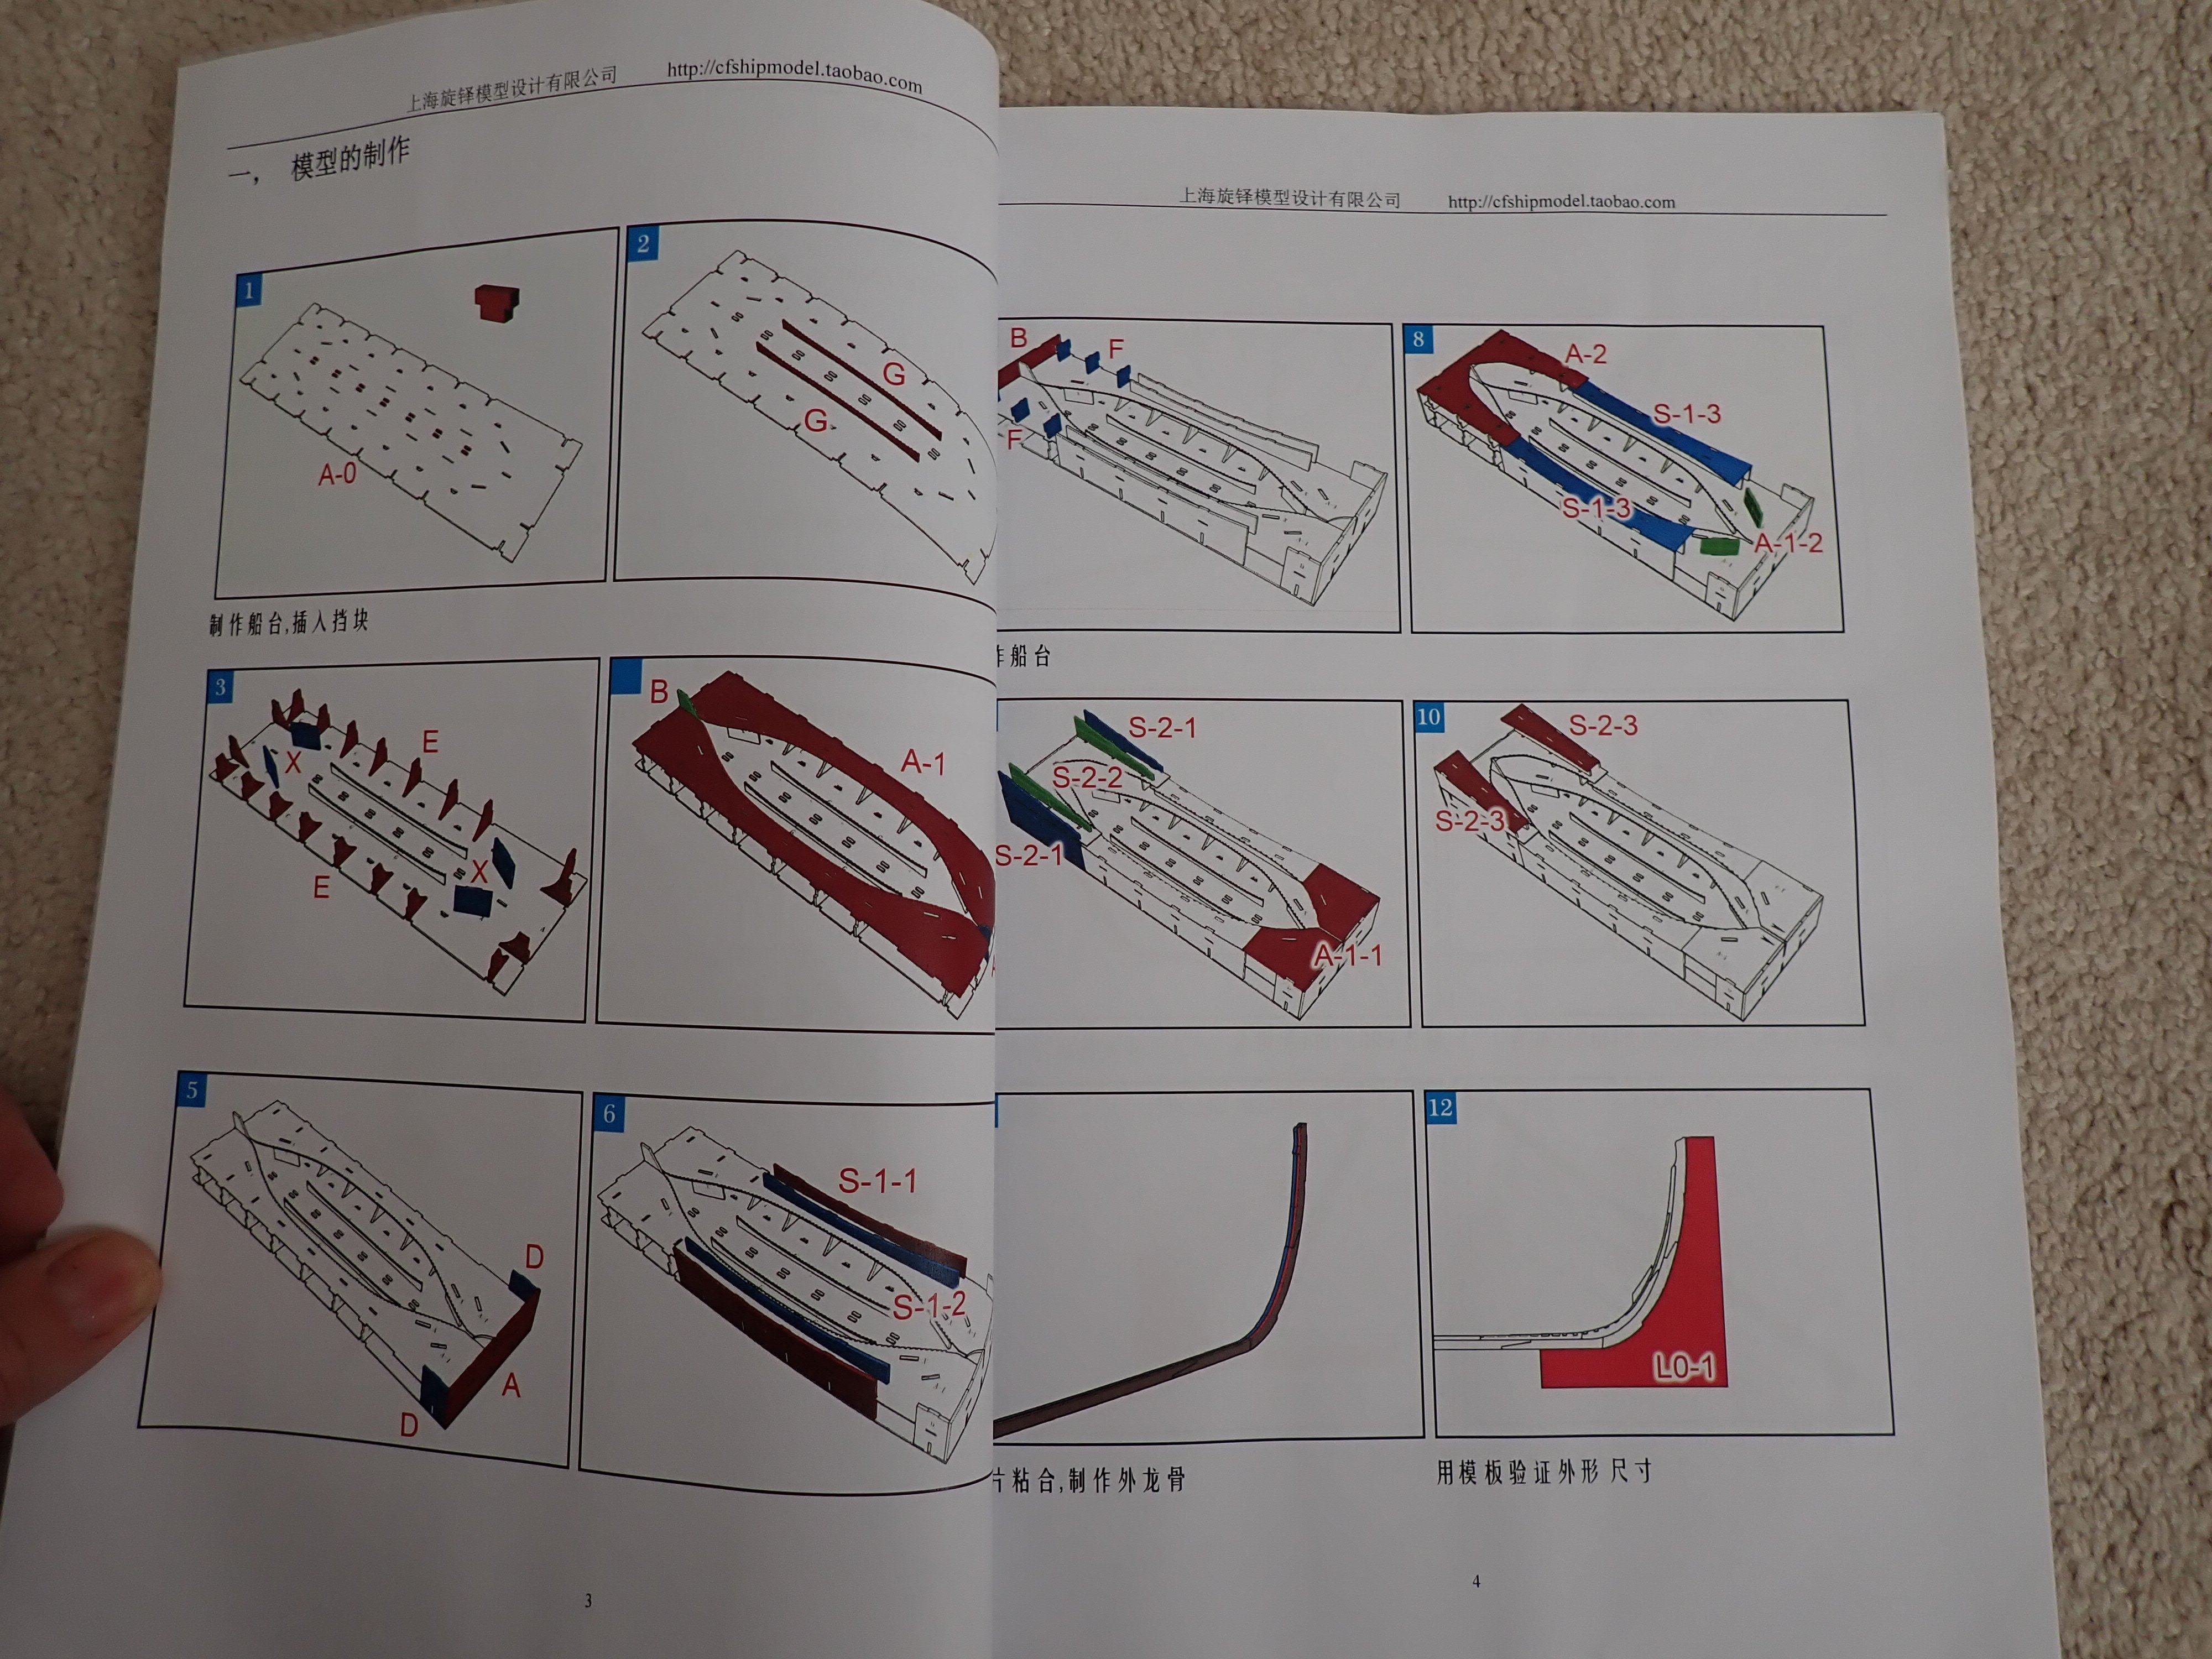
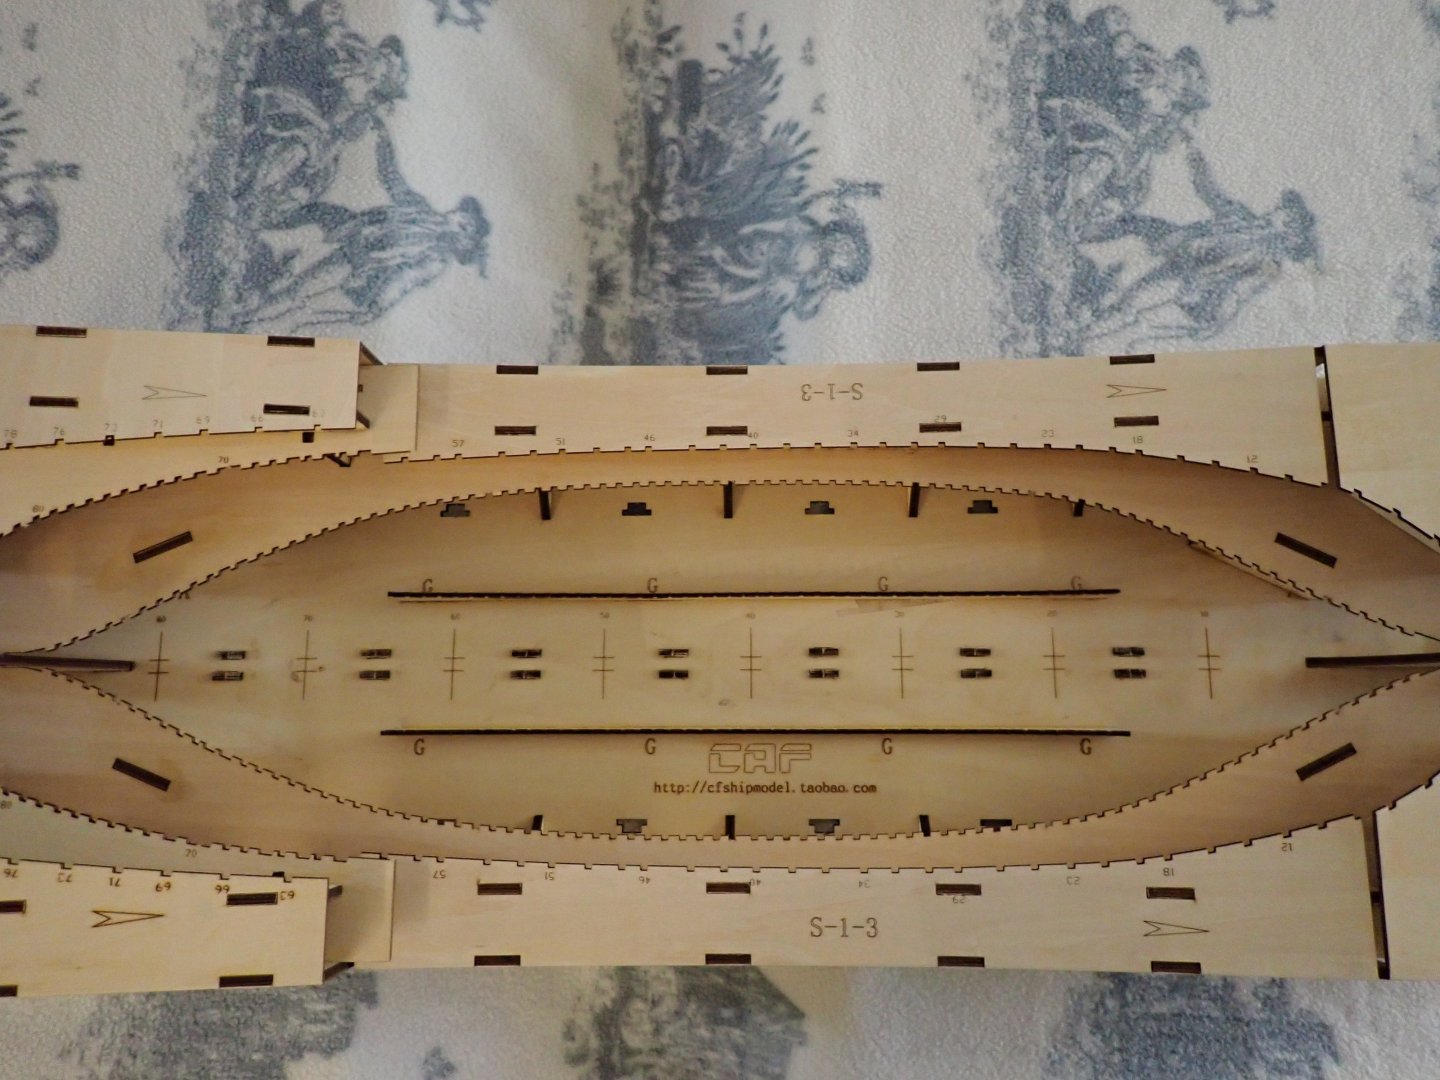
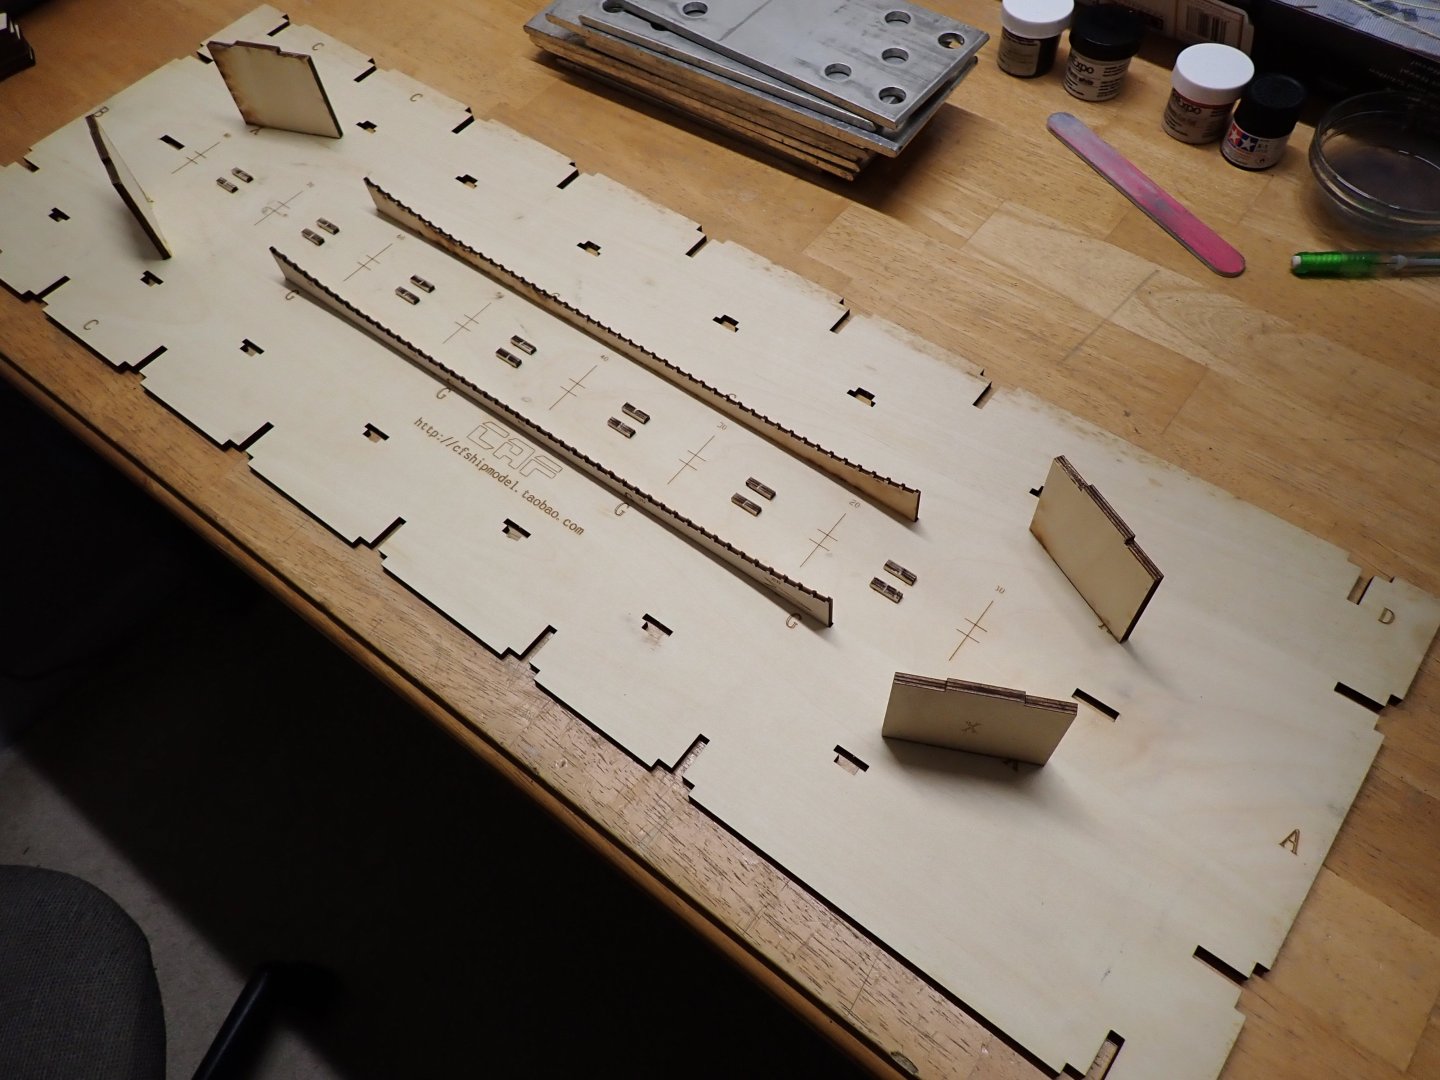
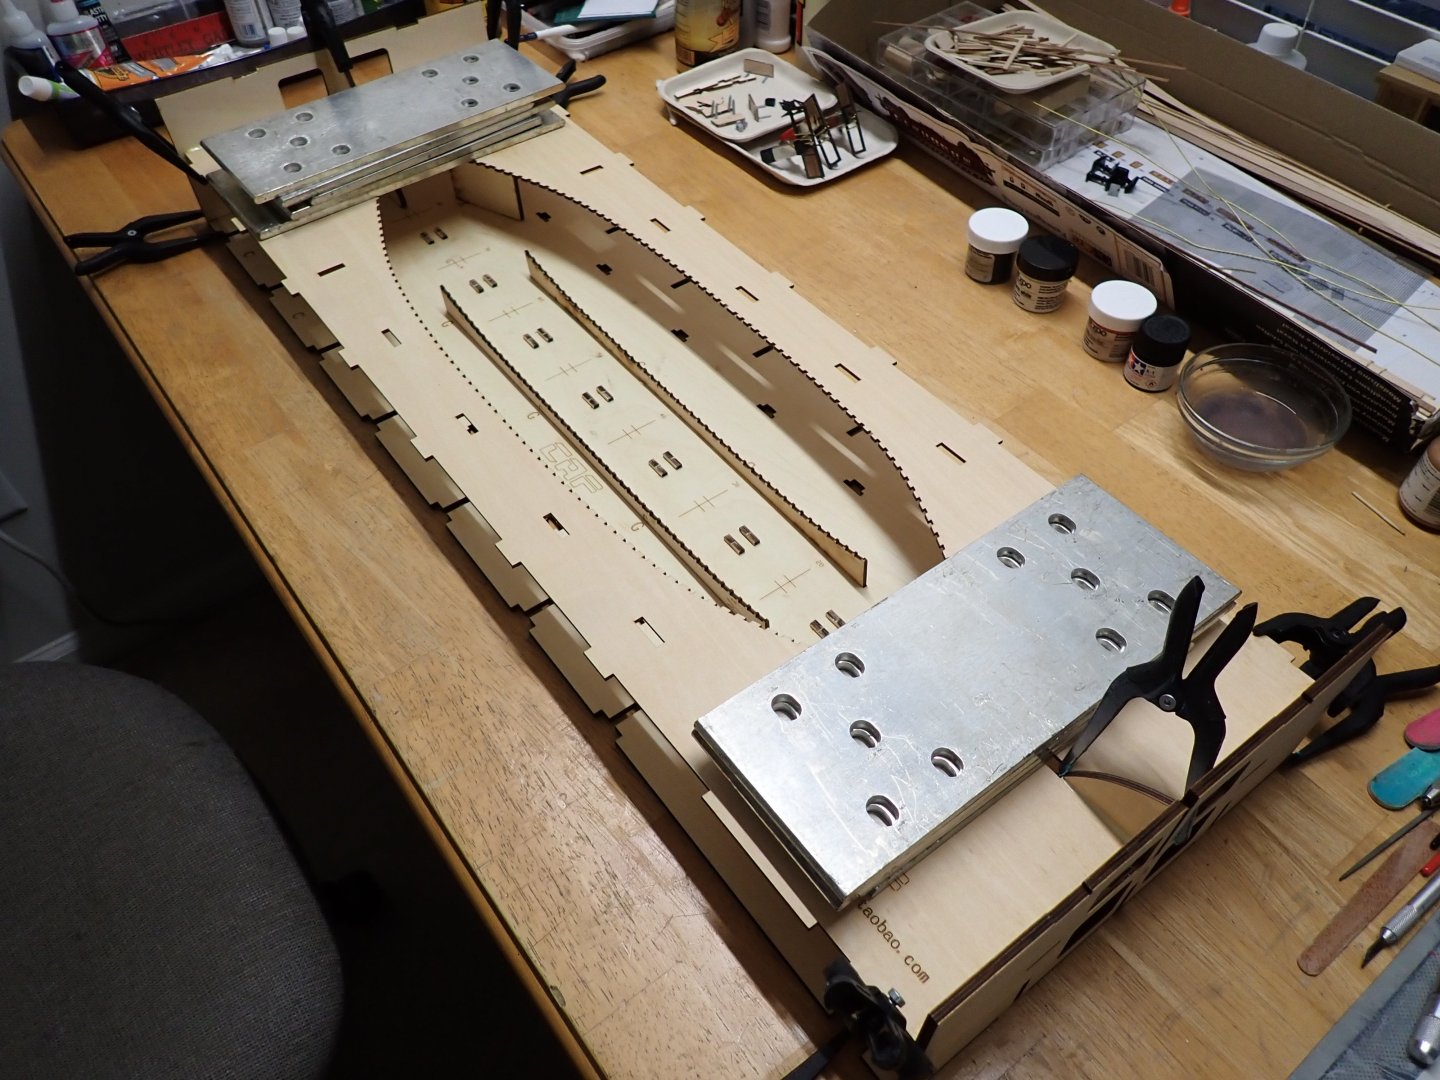
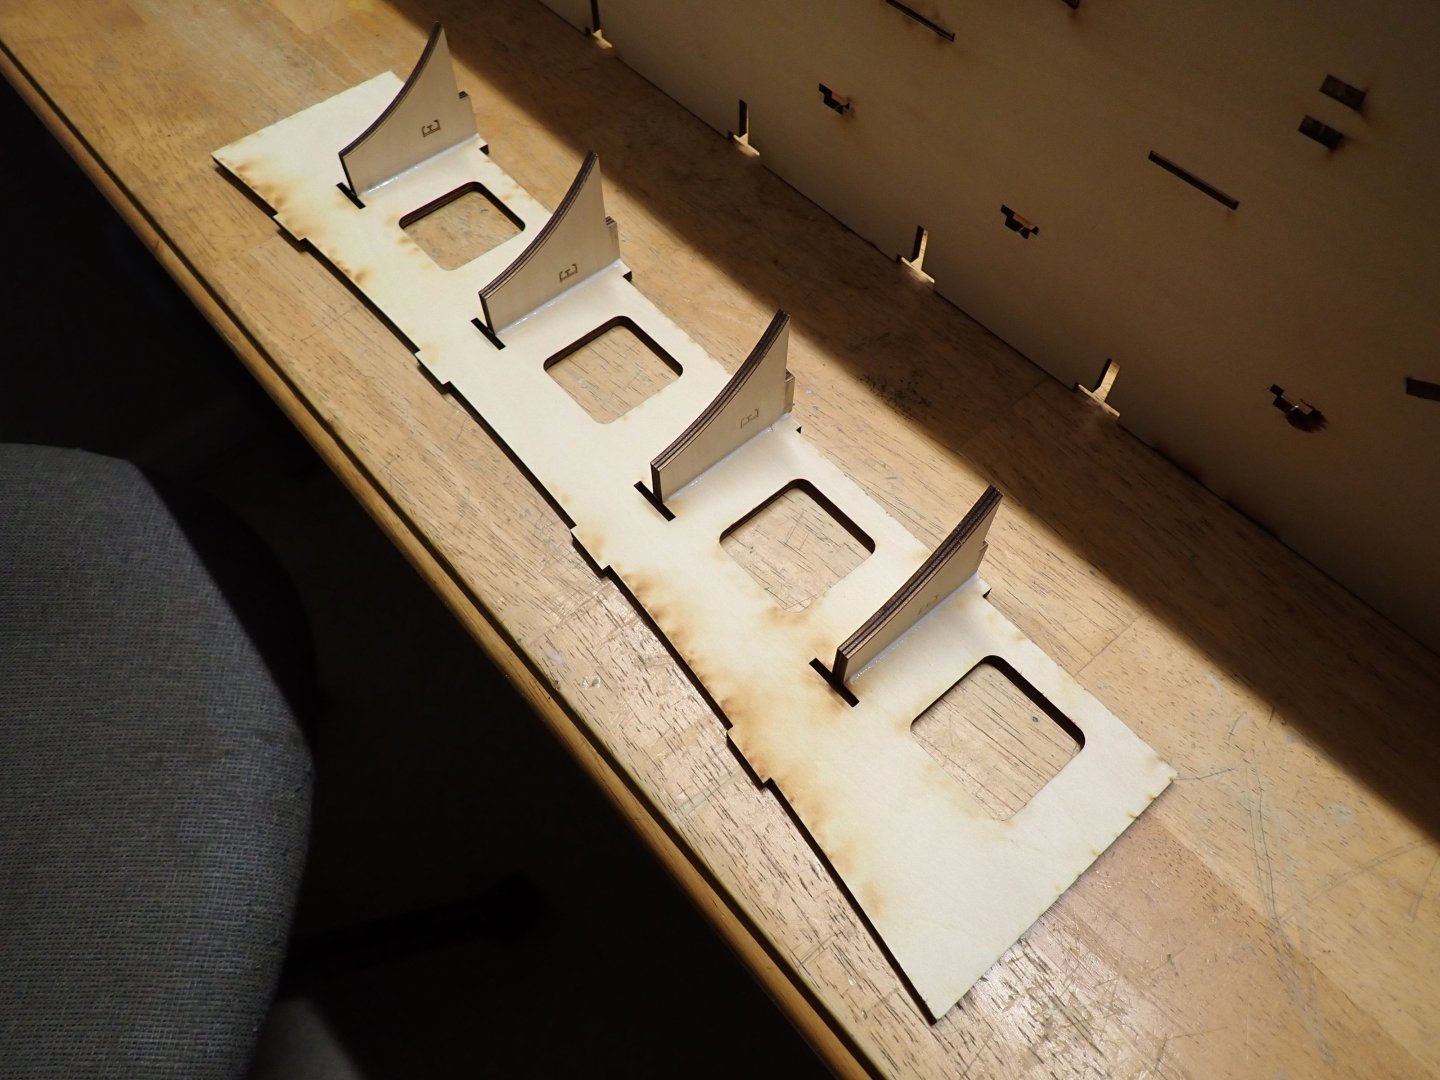
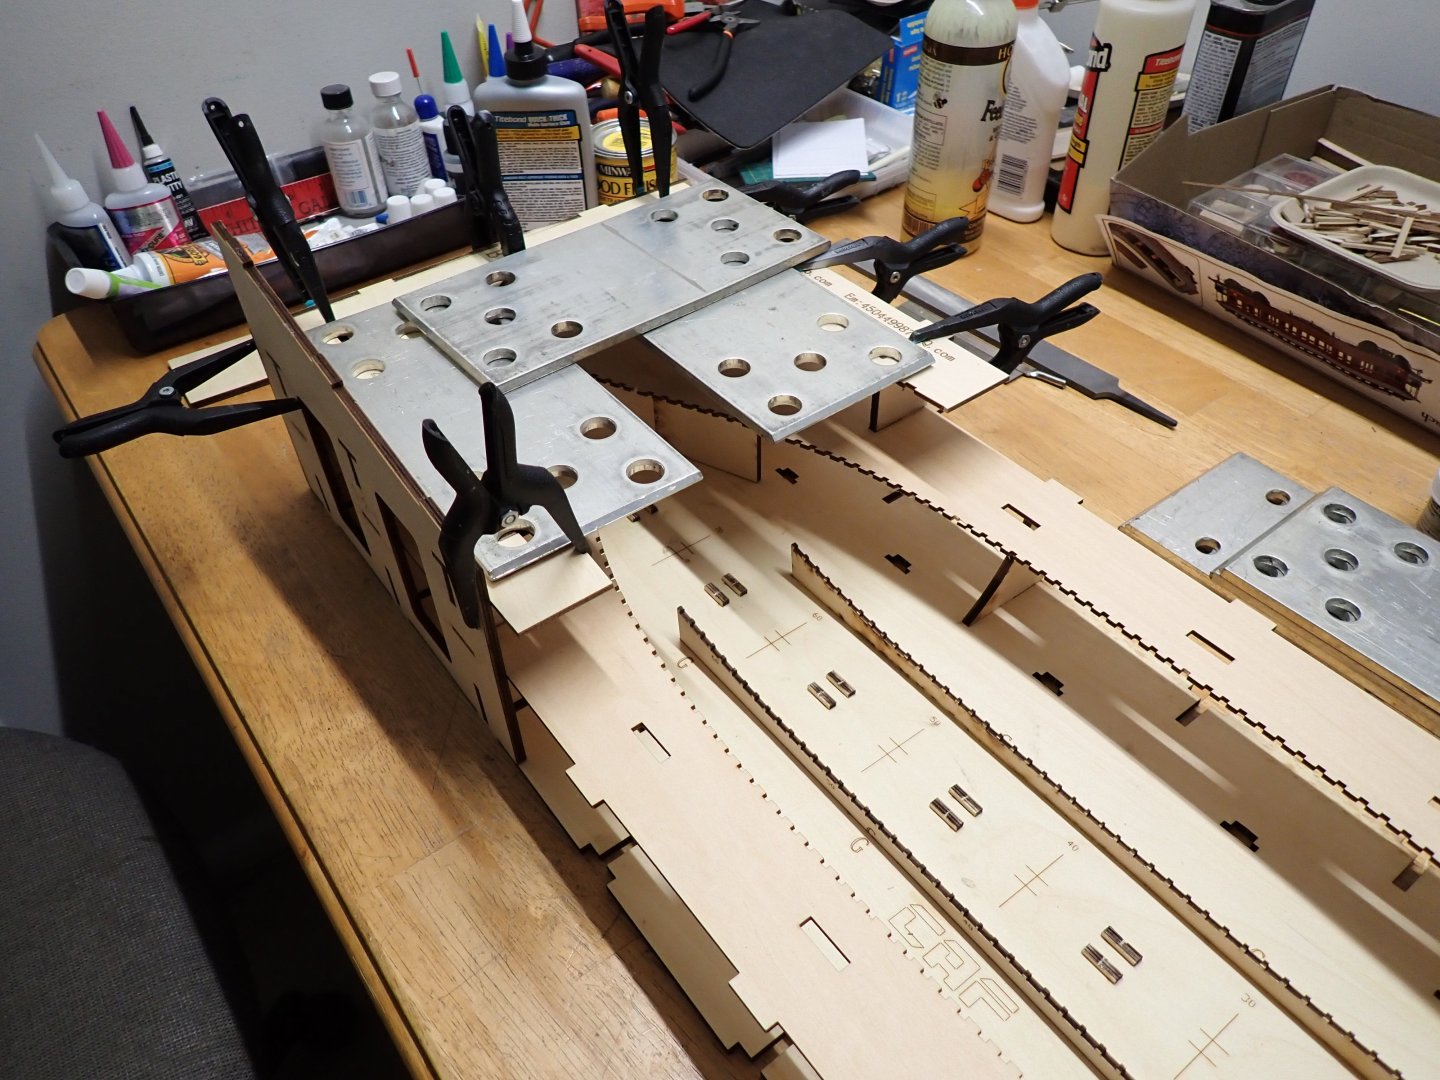
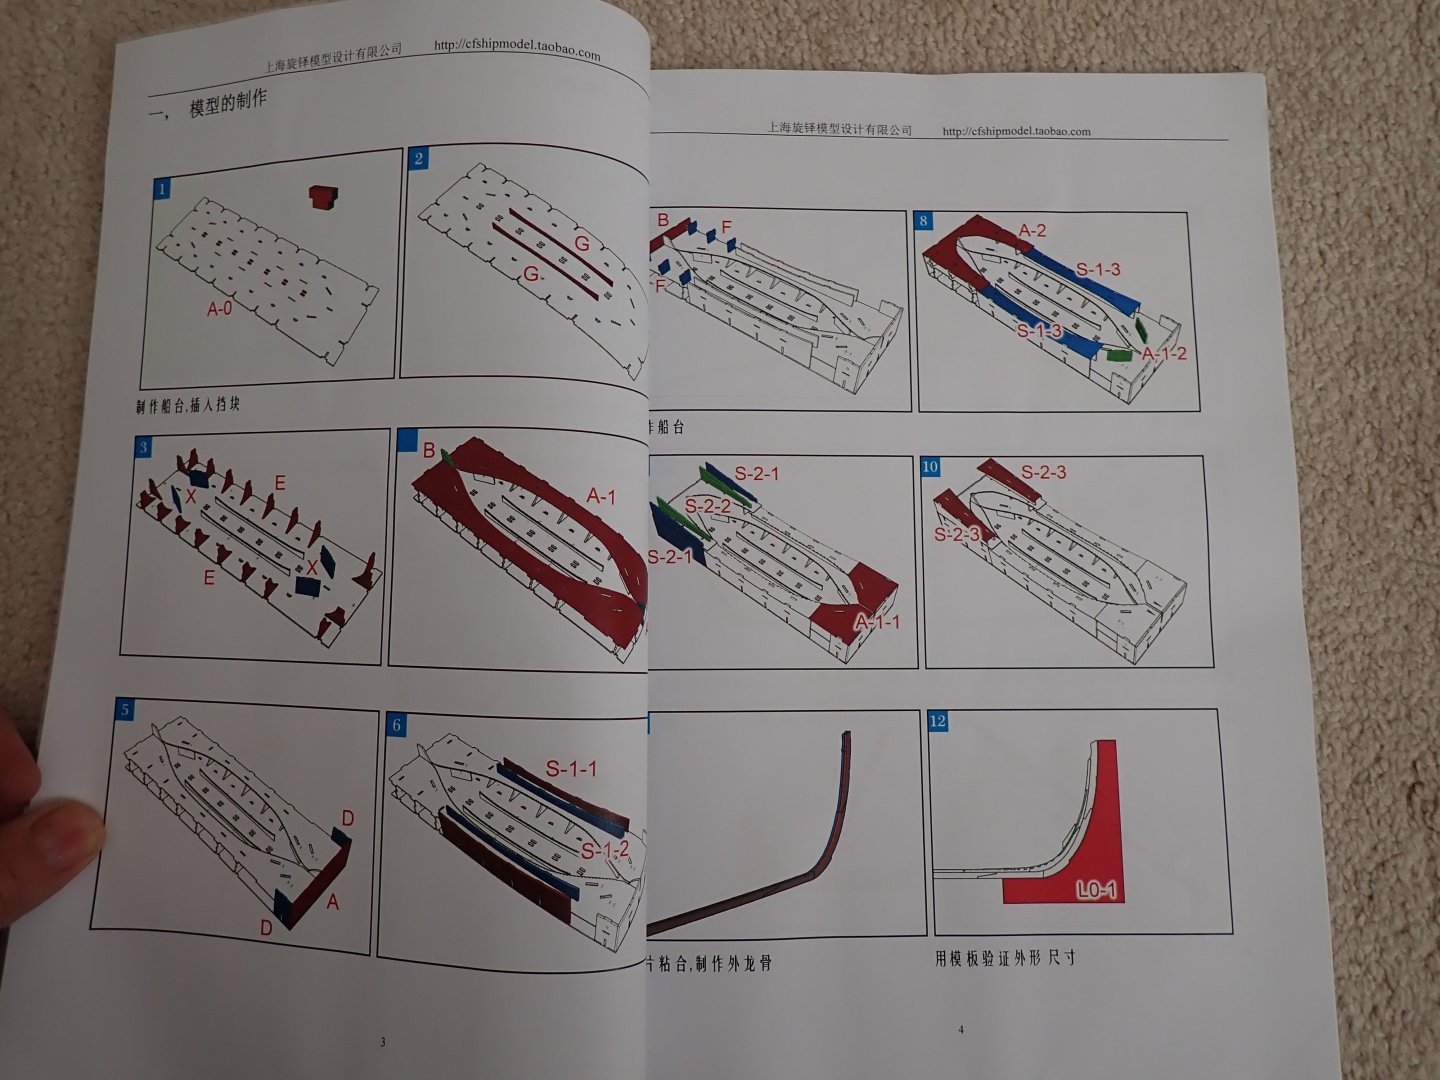
I was not planning to start this kit so early, but could not resist putting together the assembly berth for the hull. First the instructions: Overall, it is like a 3D puzzle and everything dovetails quite well. There are a few exceptions, where filing a few slots is required. Everything is glued with Titebond wood glue and as such it takes a while. However, it is by far the most solid way to assemble this contraption. I am using heavy plates of copper to make sure that the berth is absolutely flat during the gluing phase. No warping can be tolerated. Again, as I do most of the times, I am not following exactly the instructions order..... And this is where we stand at this moment: Once completed, that should be a good "dry-dock" to assemble the keel and its 84 frames. Yves

- 185 replies
-
- 15
-
-
-
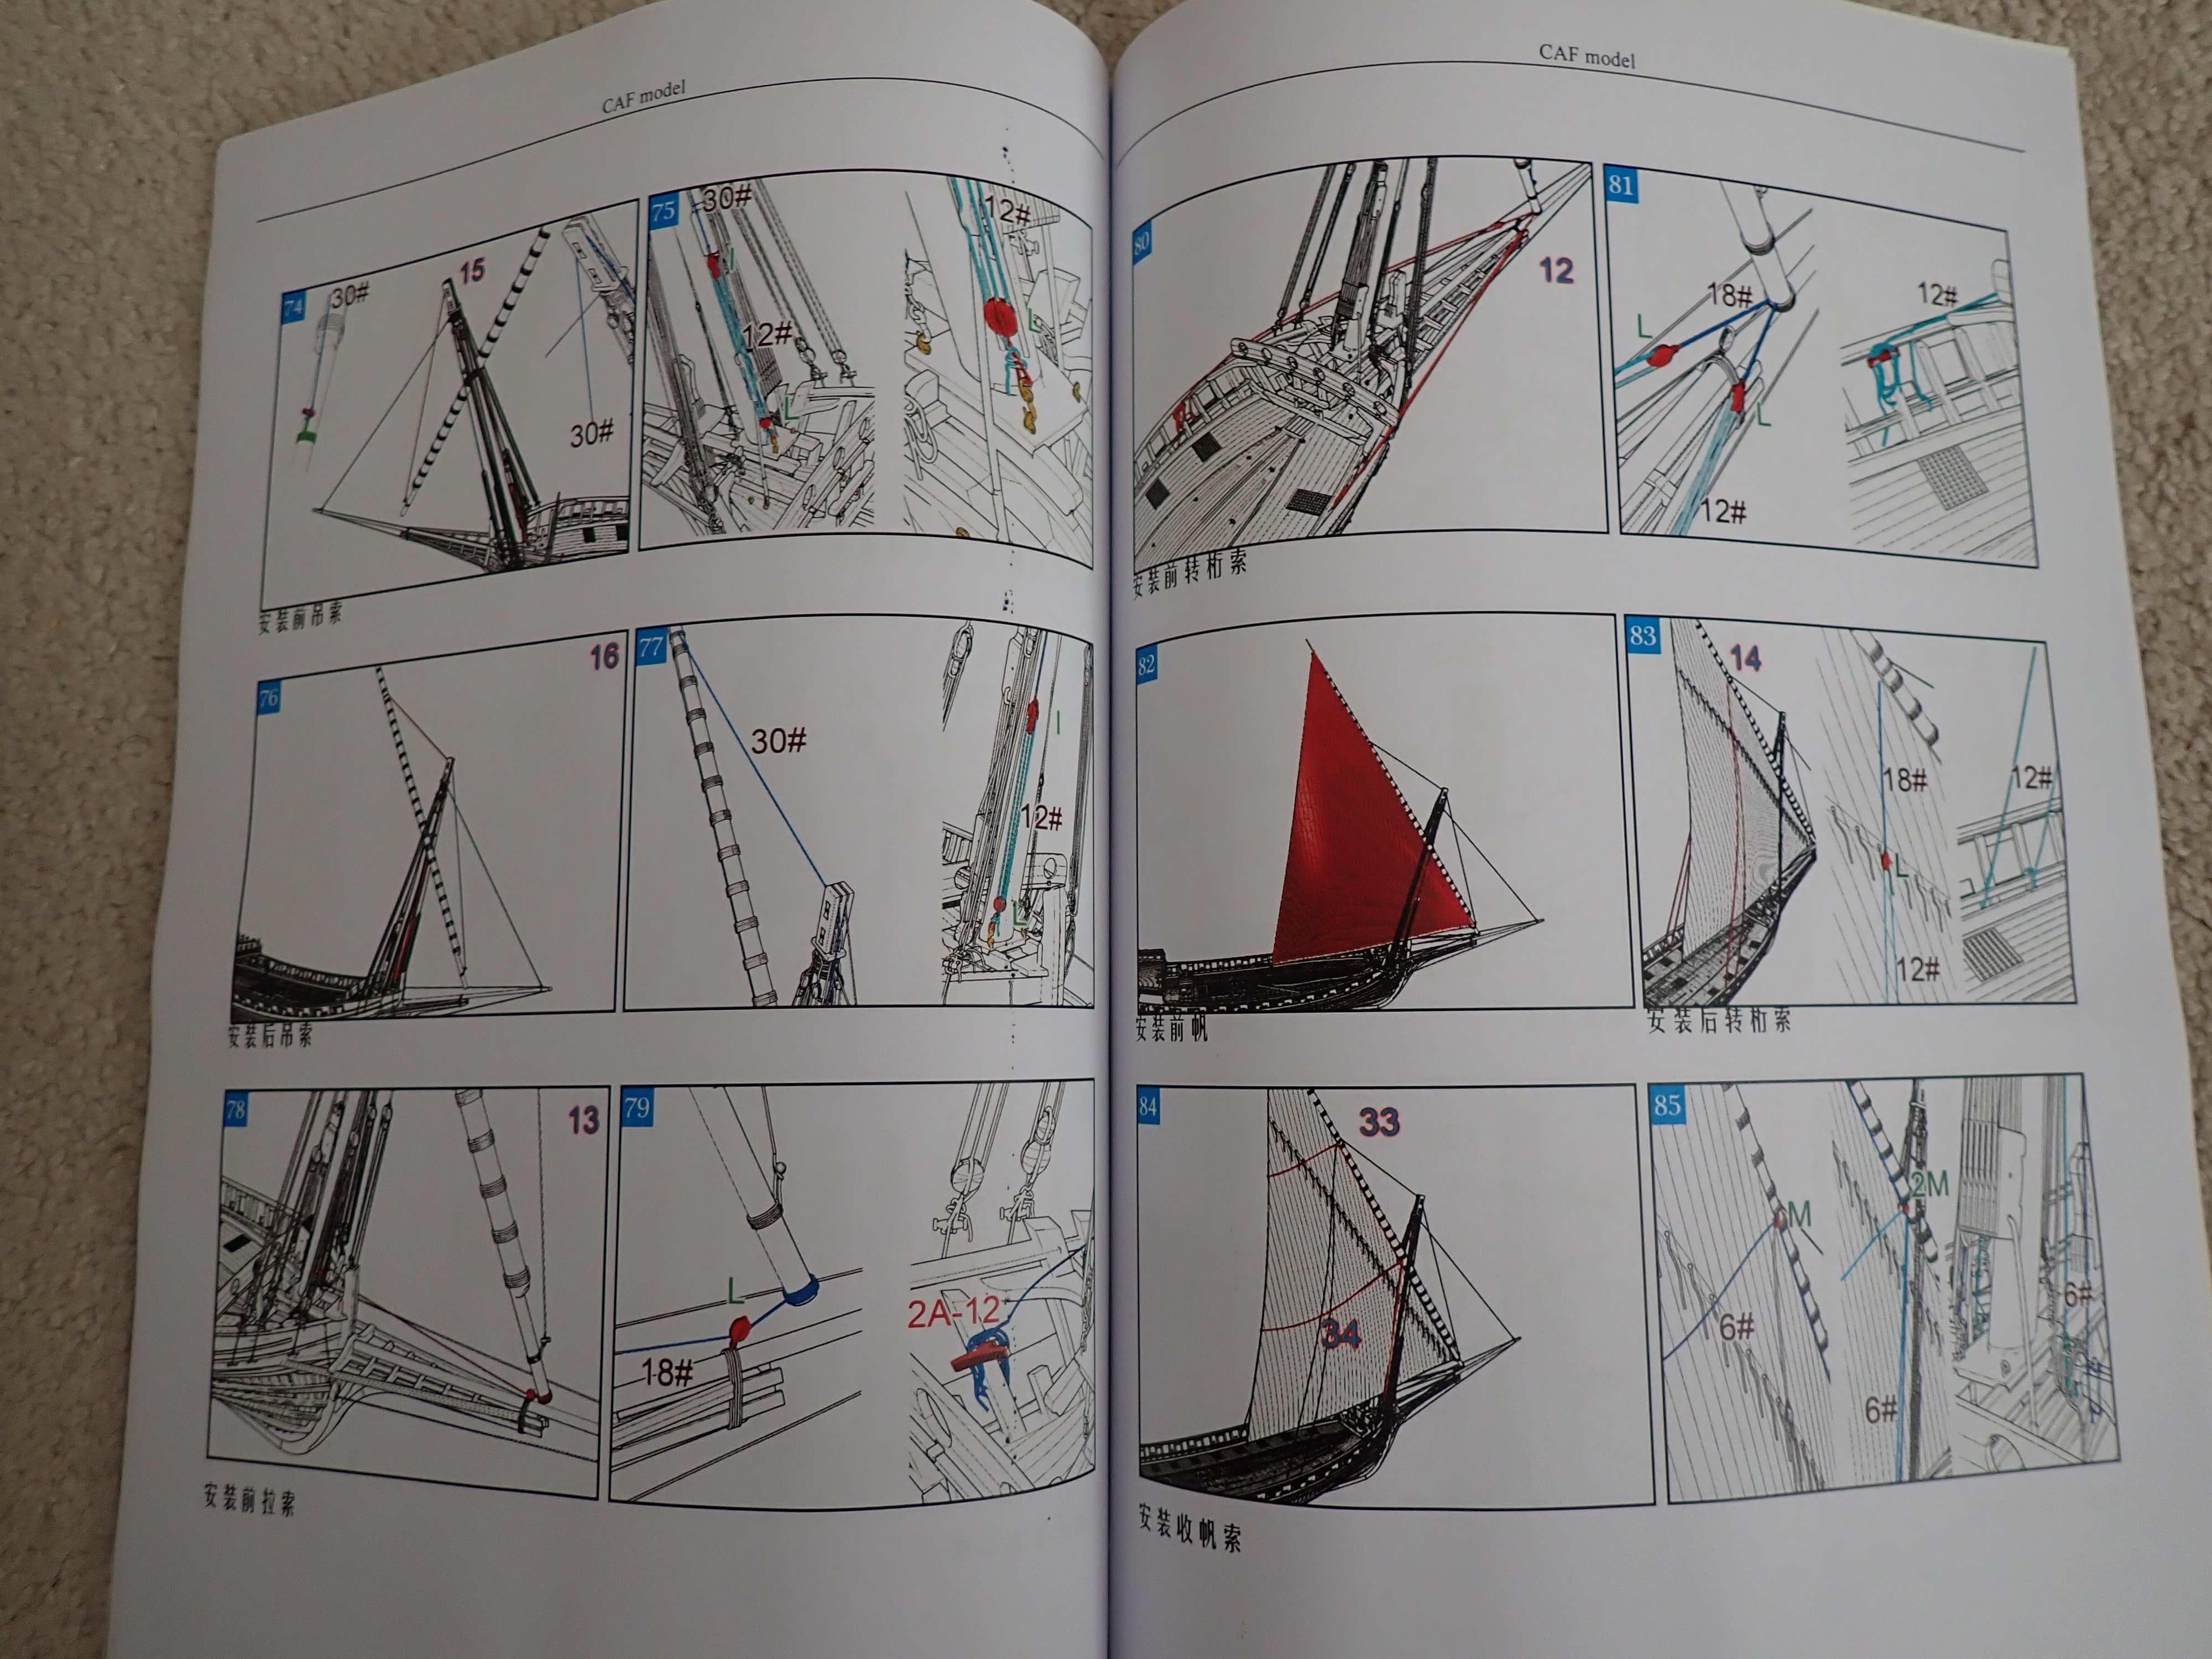
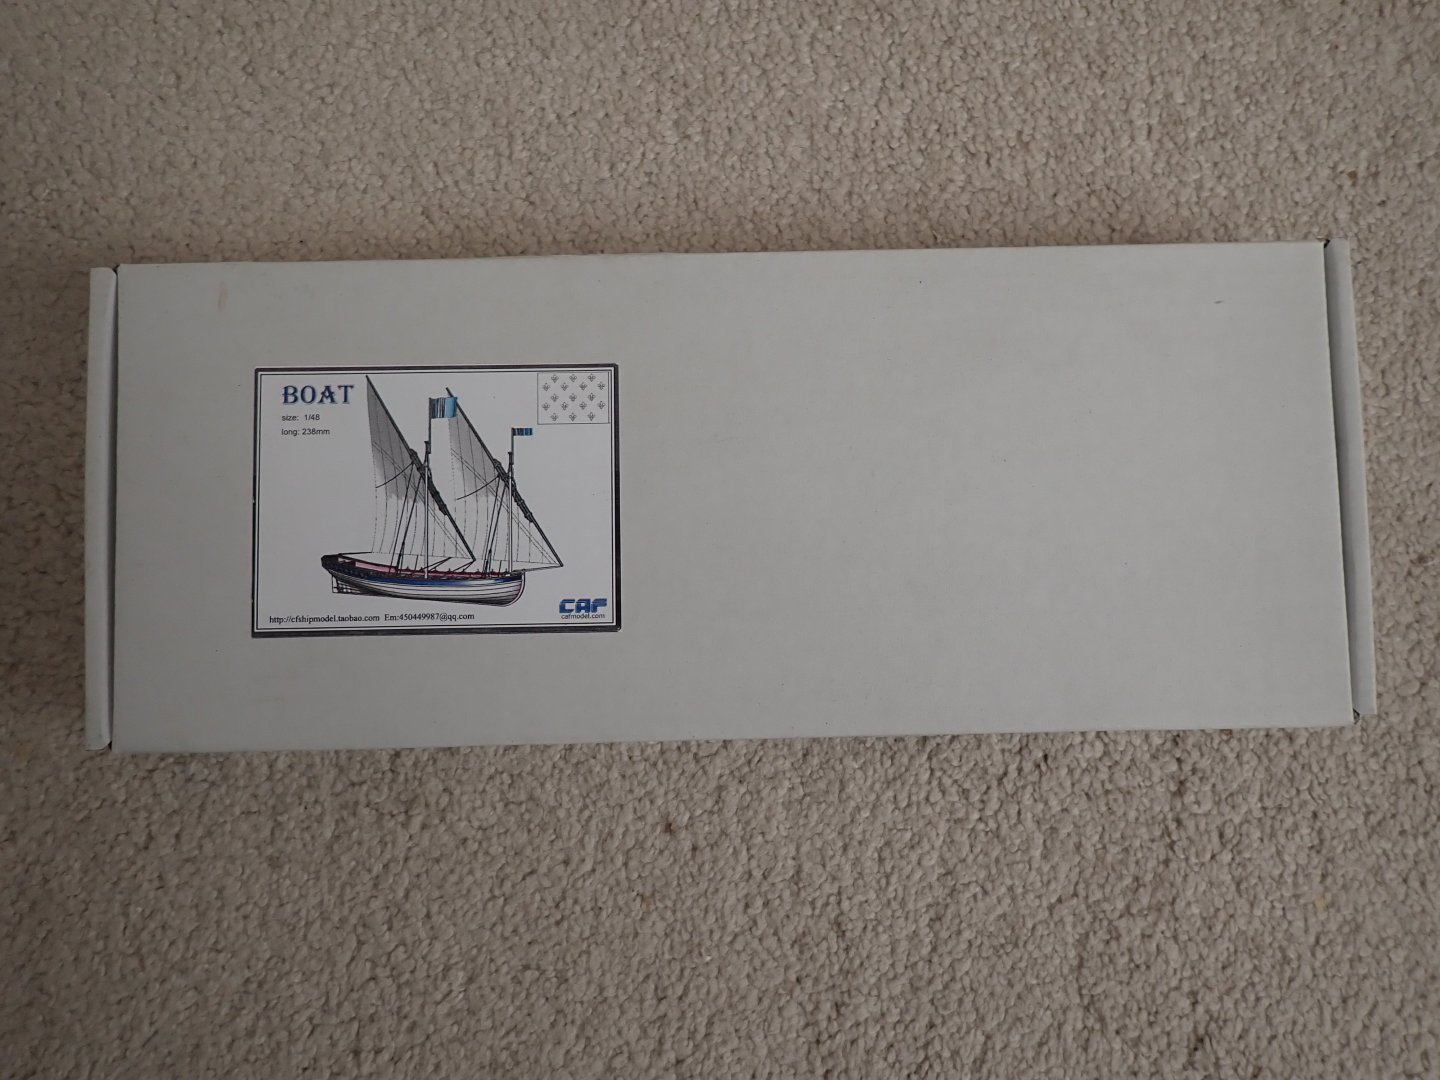
Yes, like you I love what they call the "voiles Latines" (latin sails) which are so different from the traditional rigging of period ships. The boat provided in the kit is also equipped with Latin Sails and is a mini-Chebec in itself. Yves
-
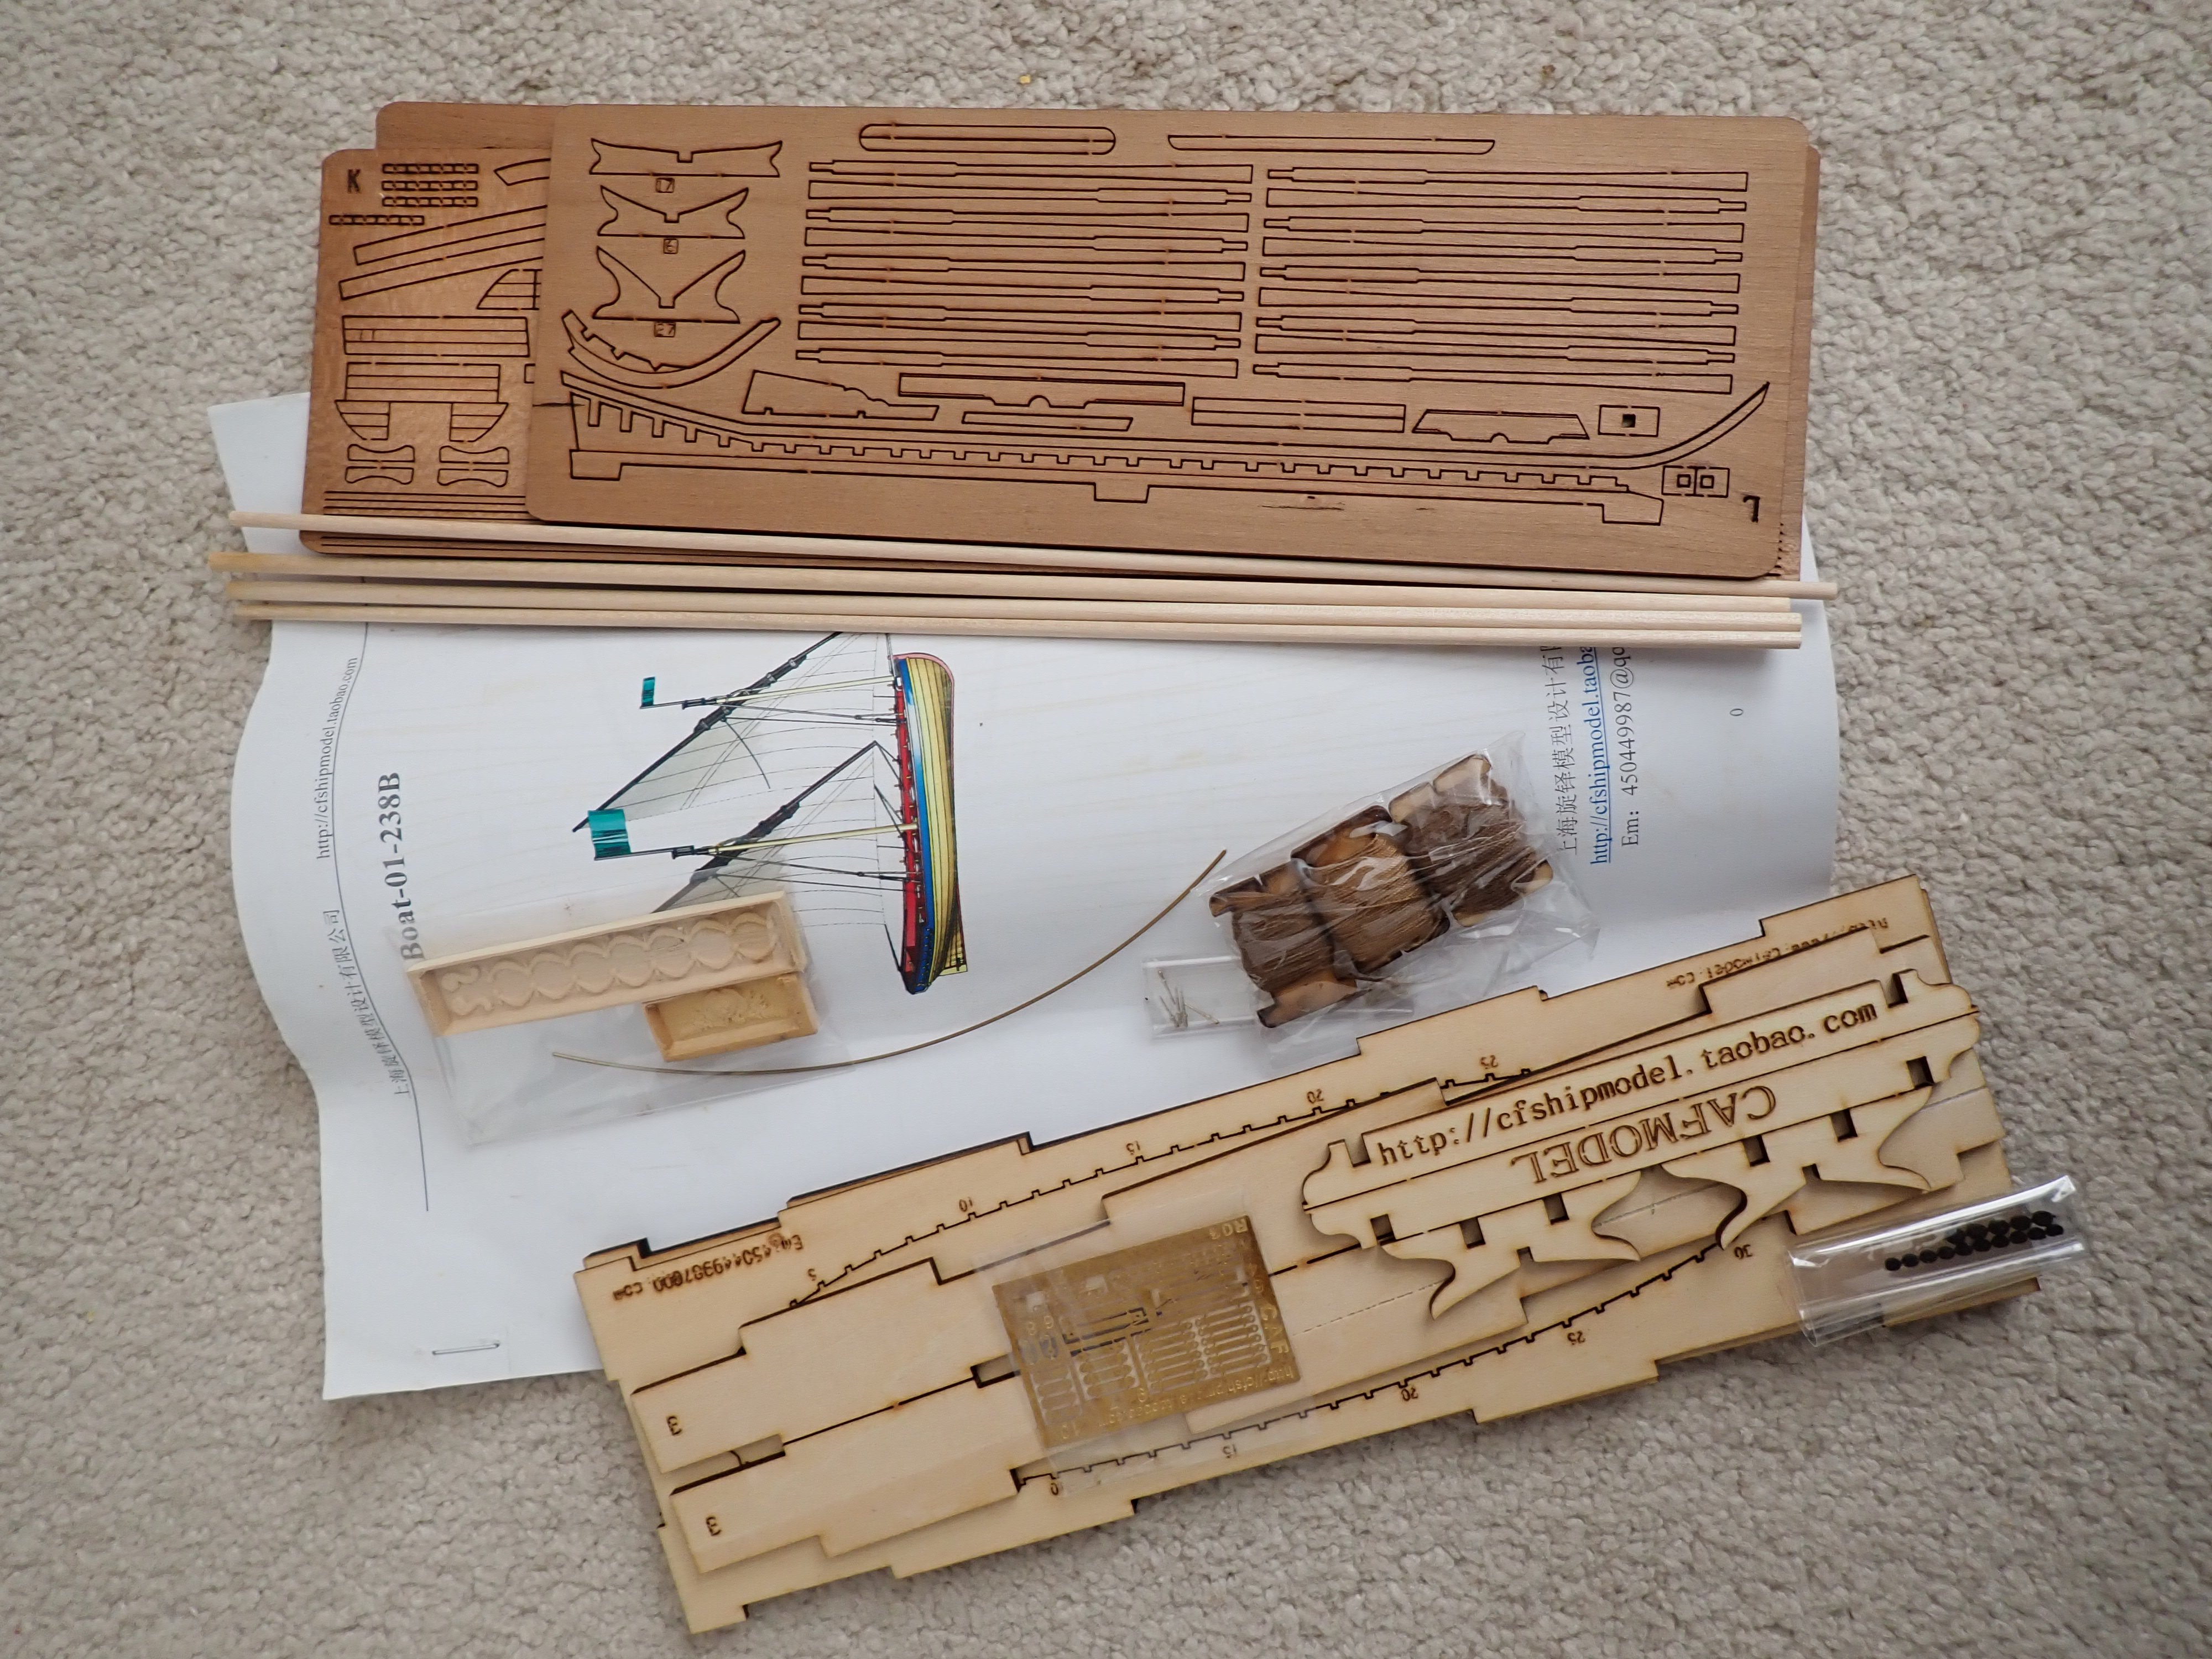
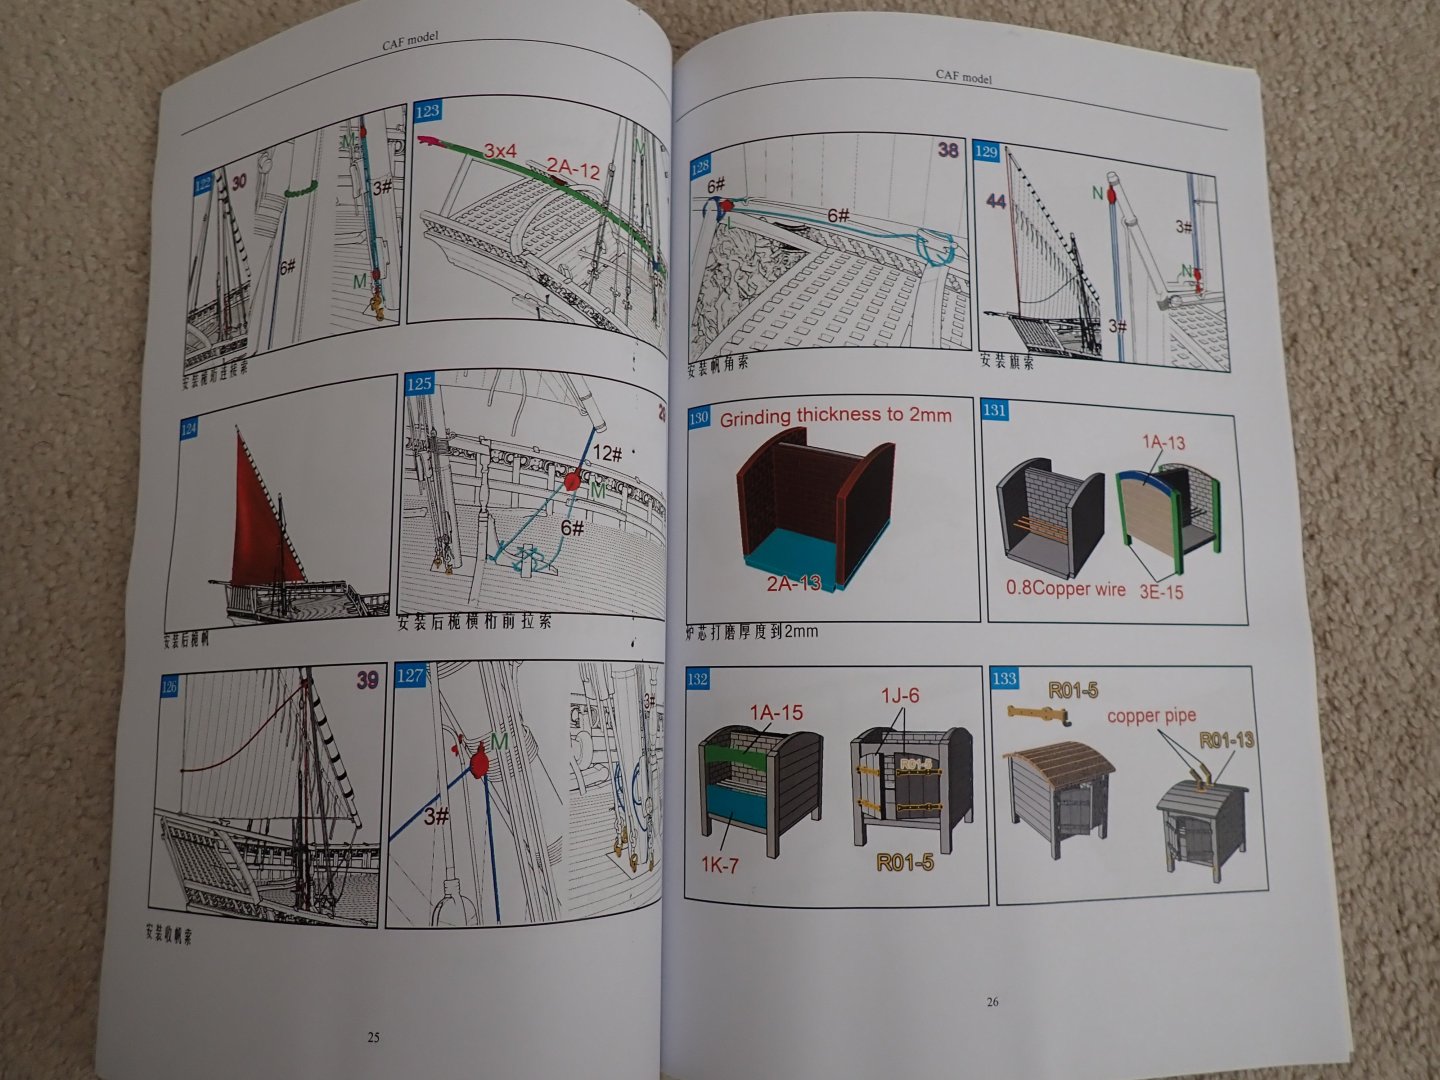
Let's take a quick look at some of the instructions. As usual, this is the CAF Model approach and it takes some thinking before jumping and starting to glue: The boat has its own instructions in the little box. Of course, that vessel is a lot smaller than the massive HMS Bellona. However, with its masts and oars, it will be a large model to display. Yves


- 185 replies
-
- 21
-
-
-
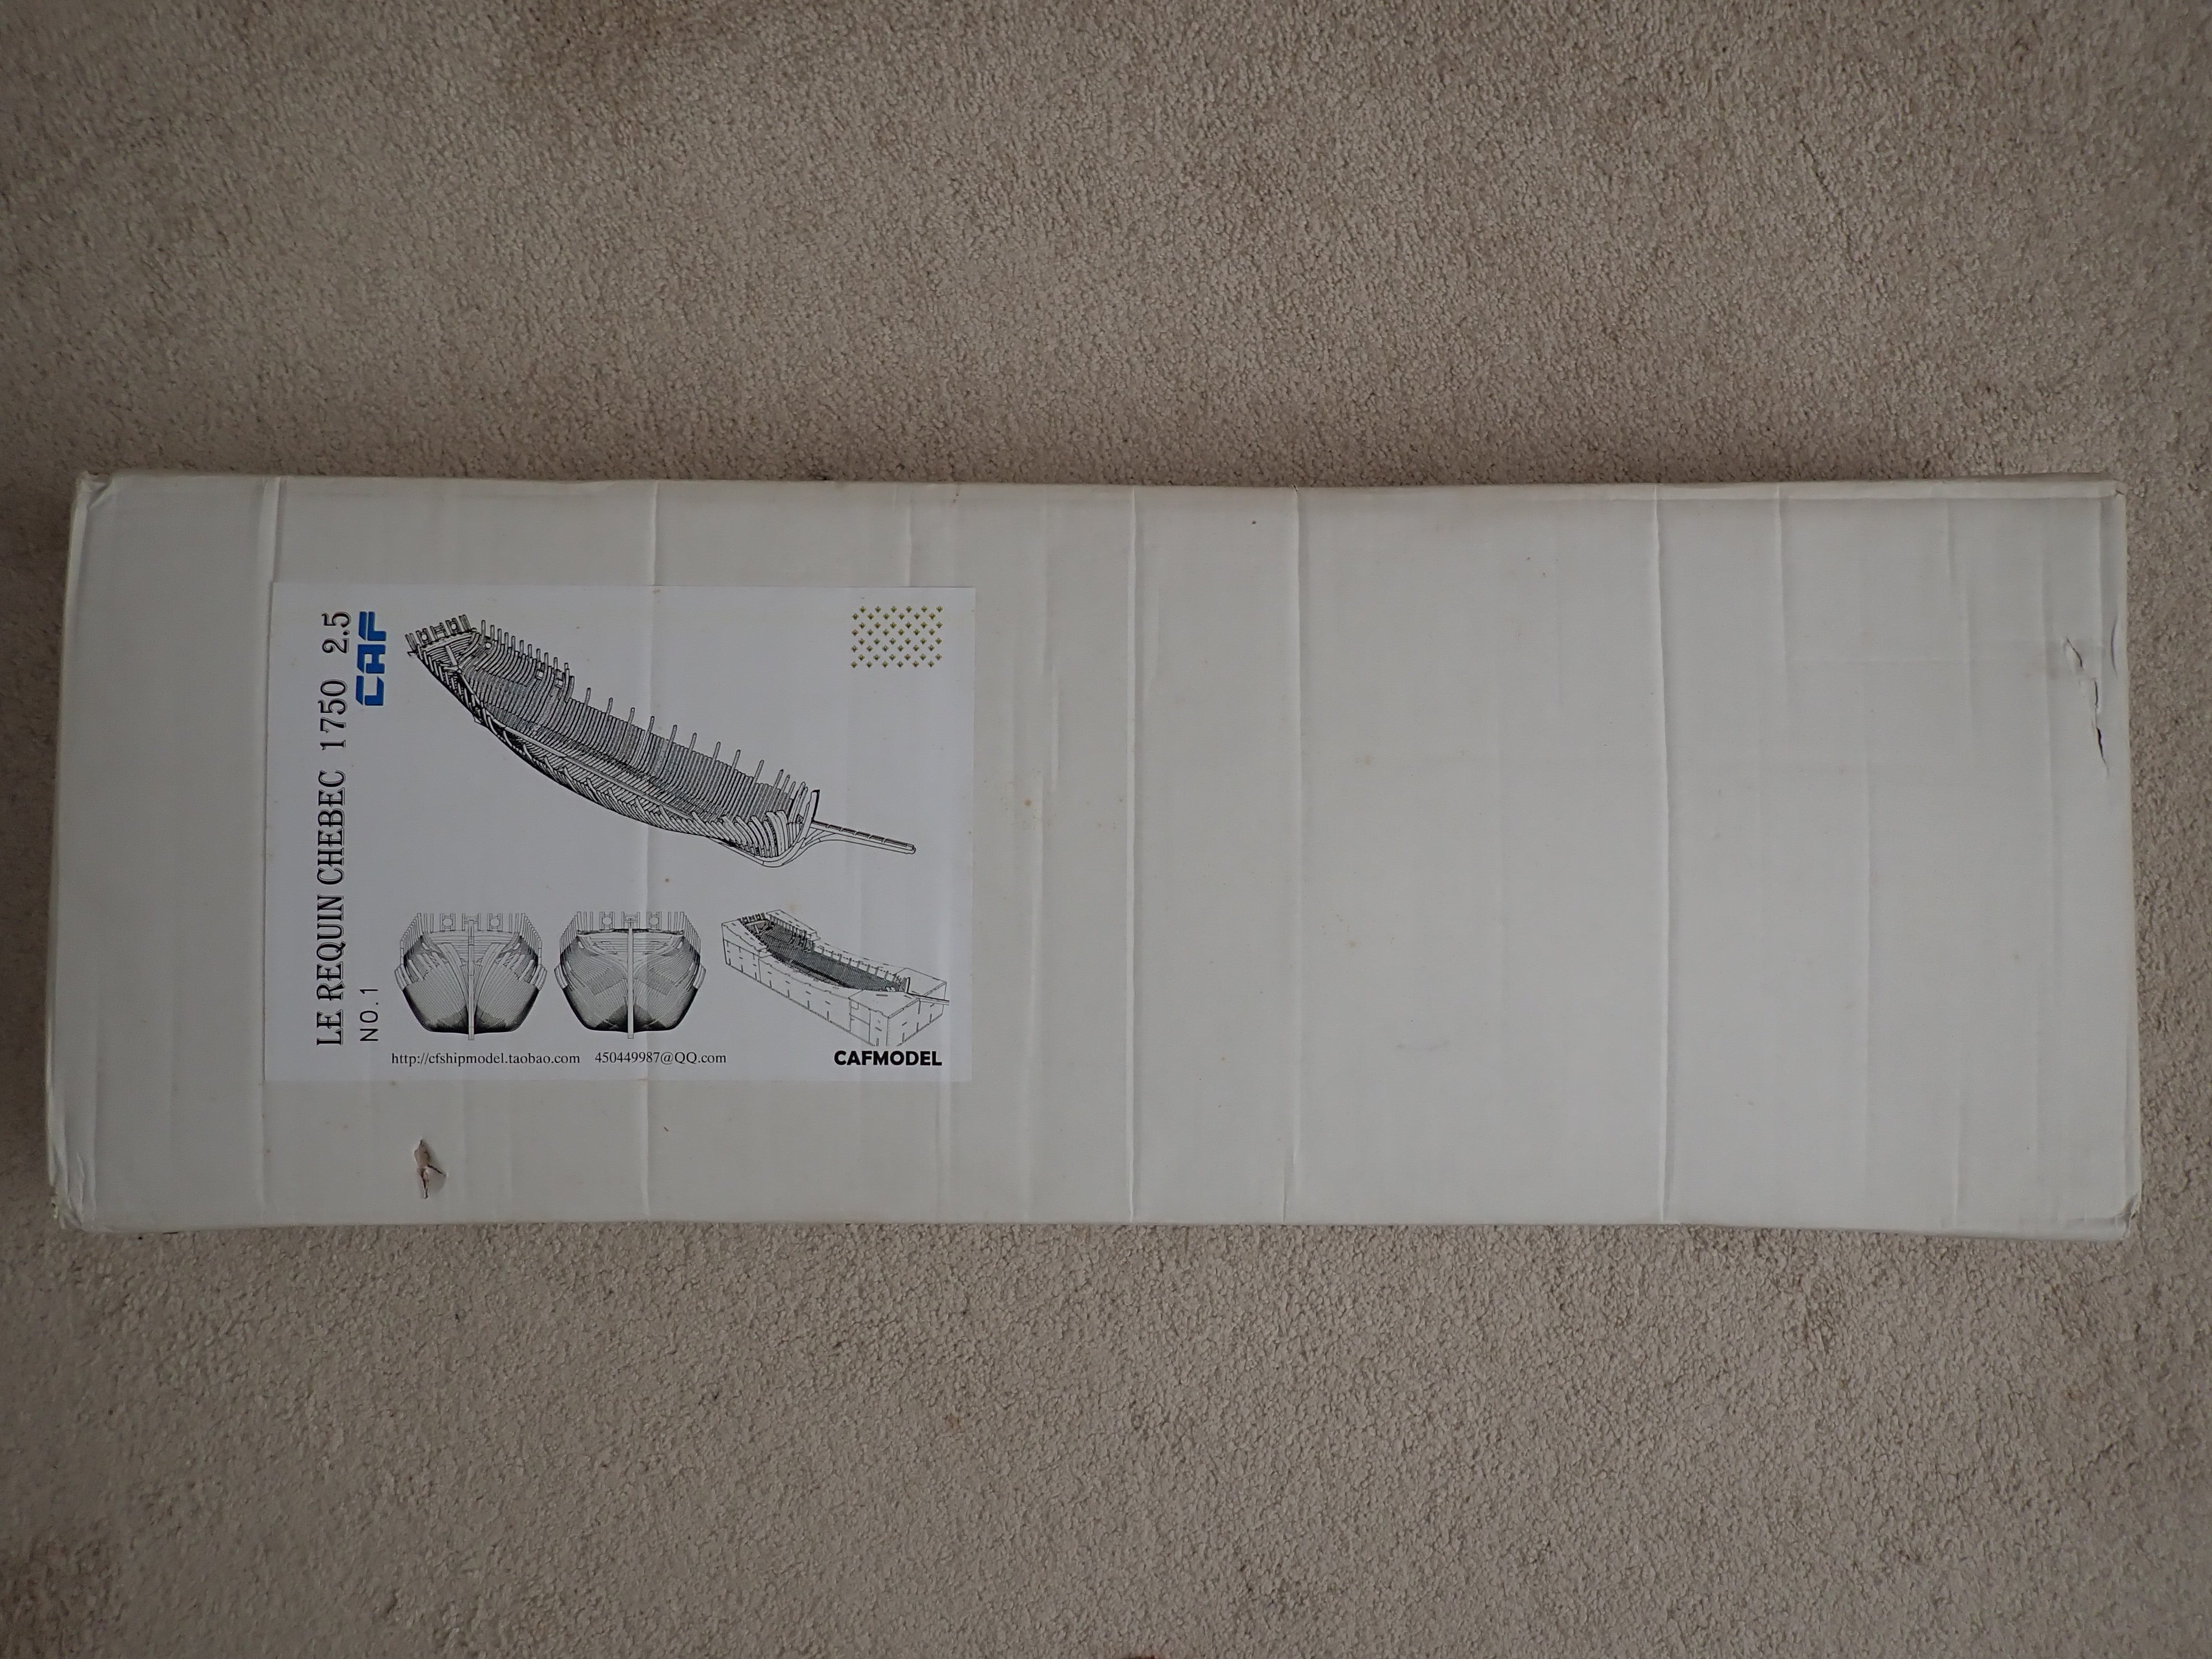
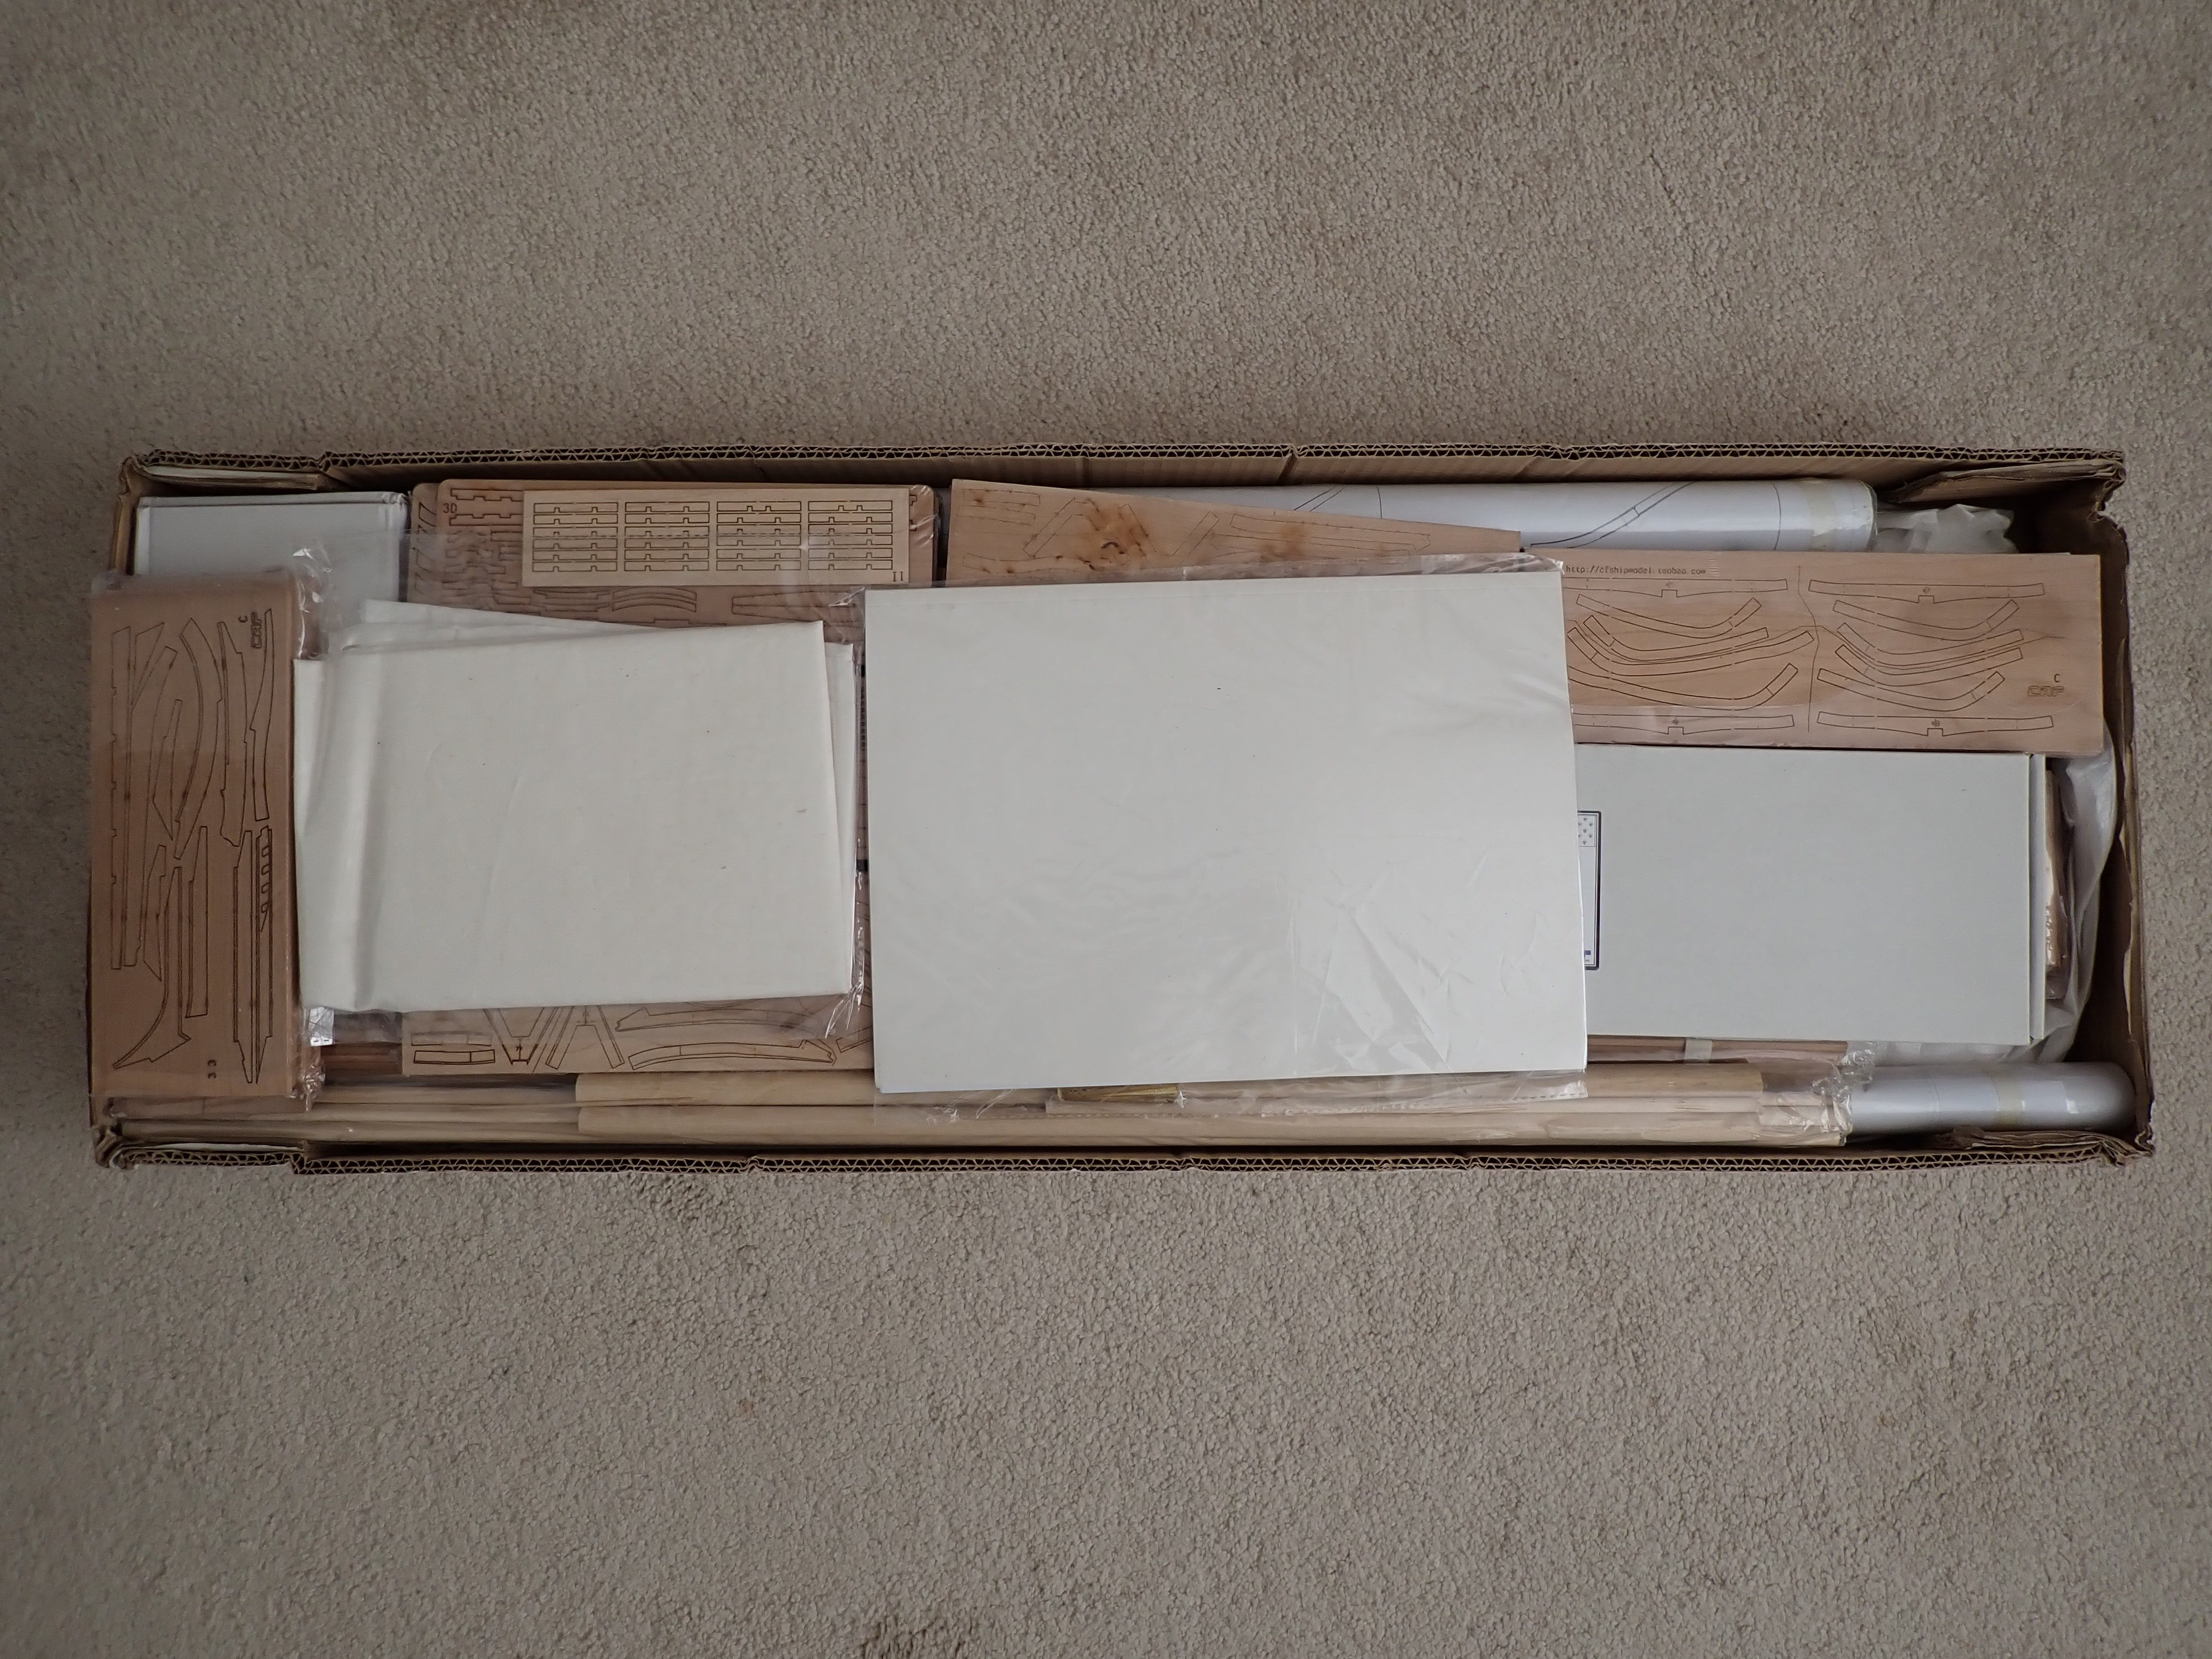
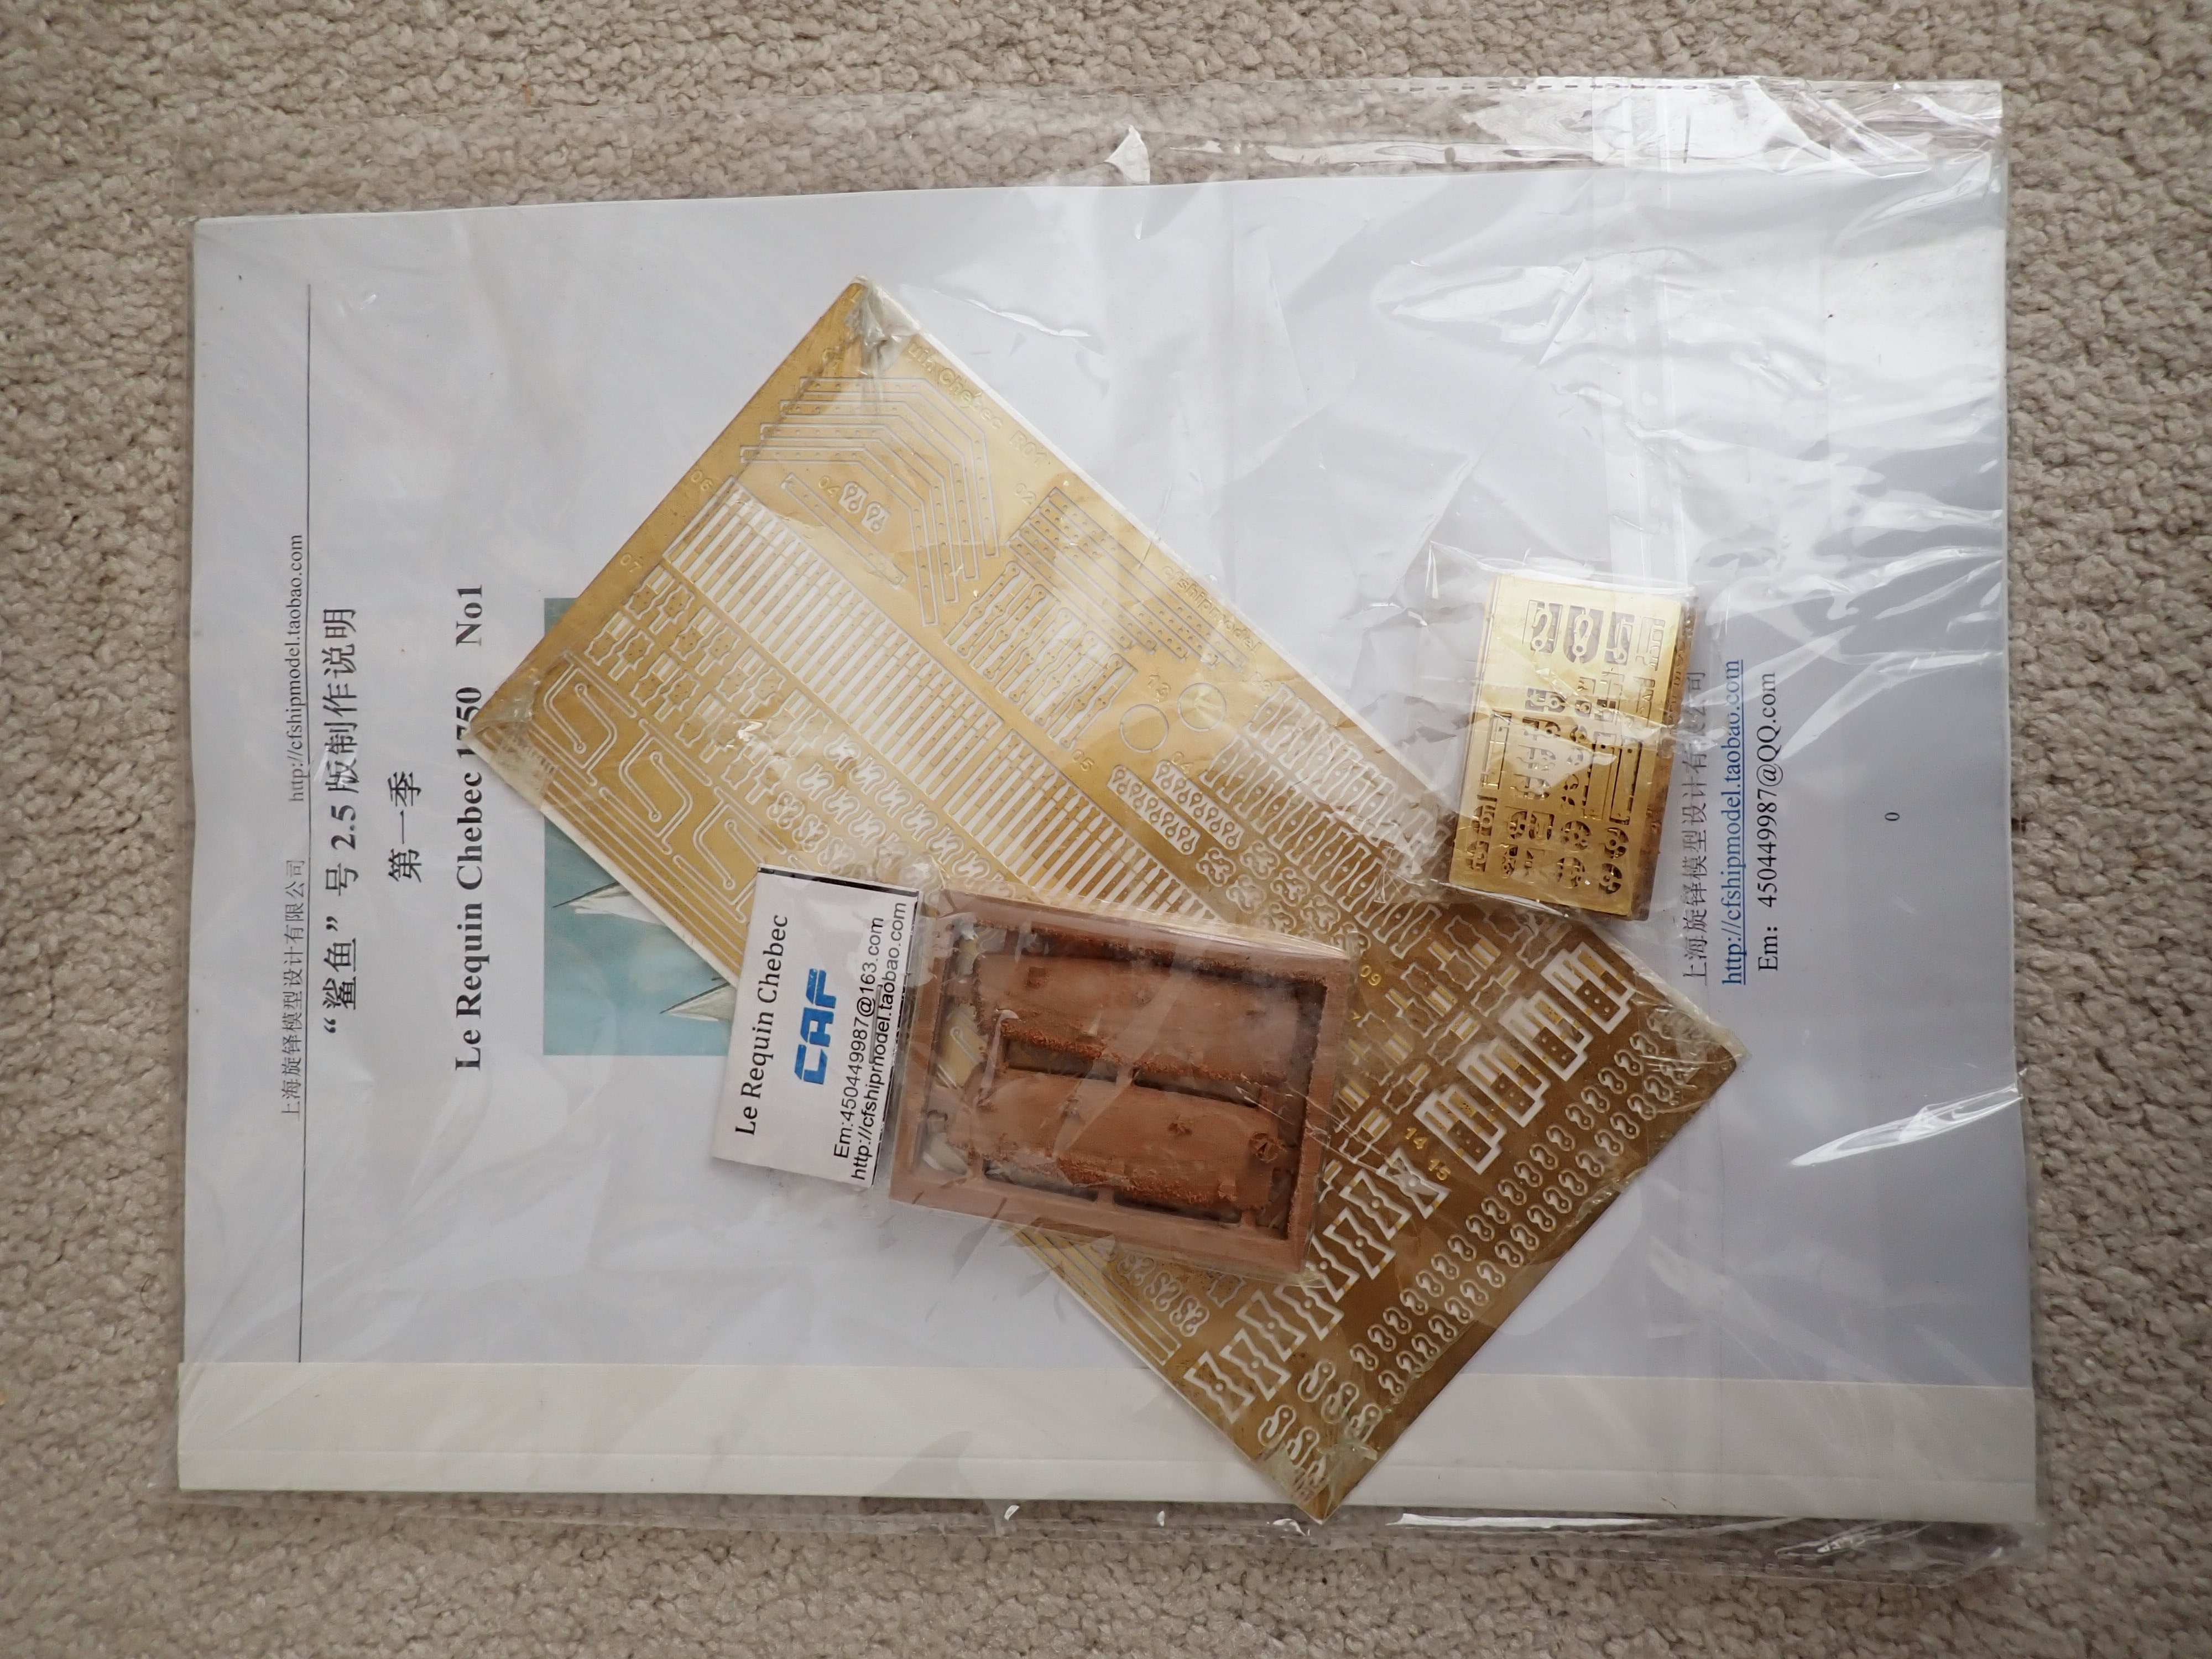
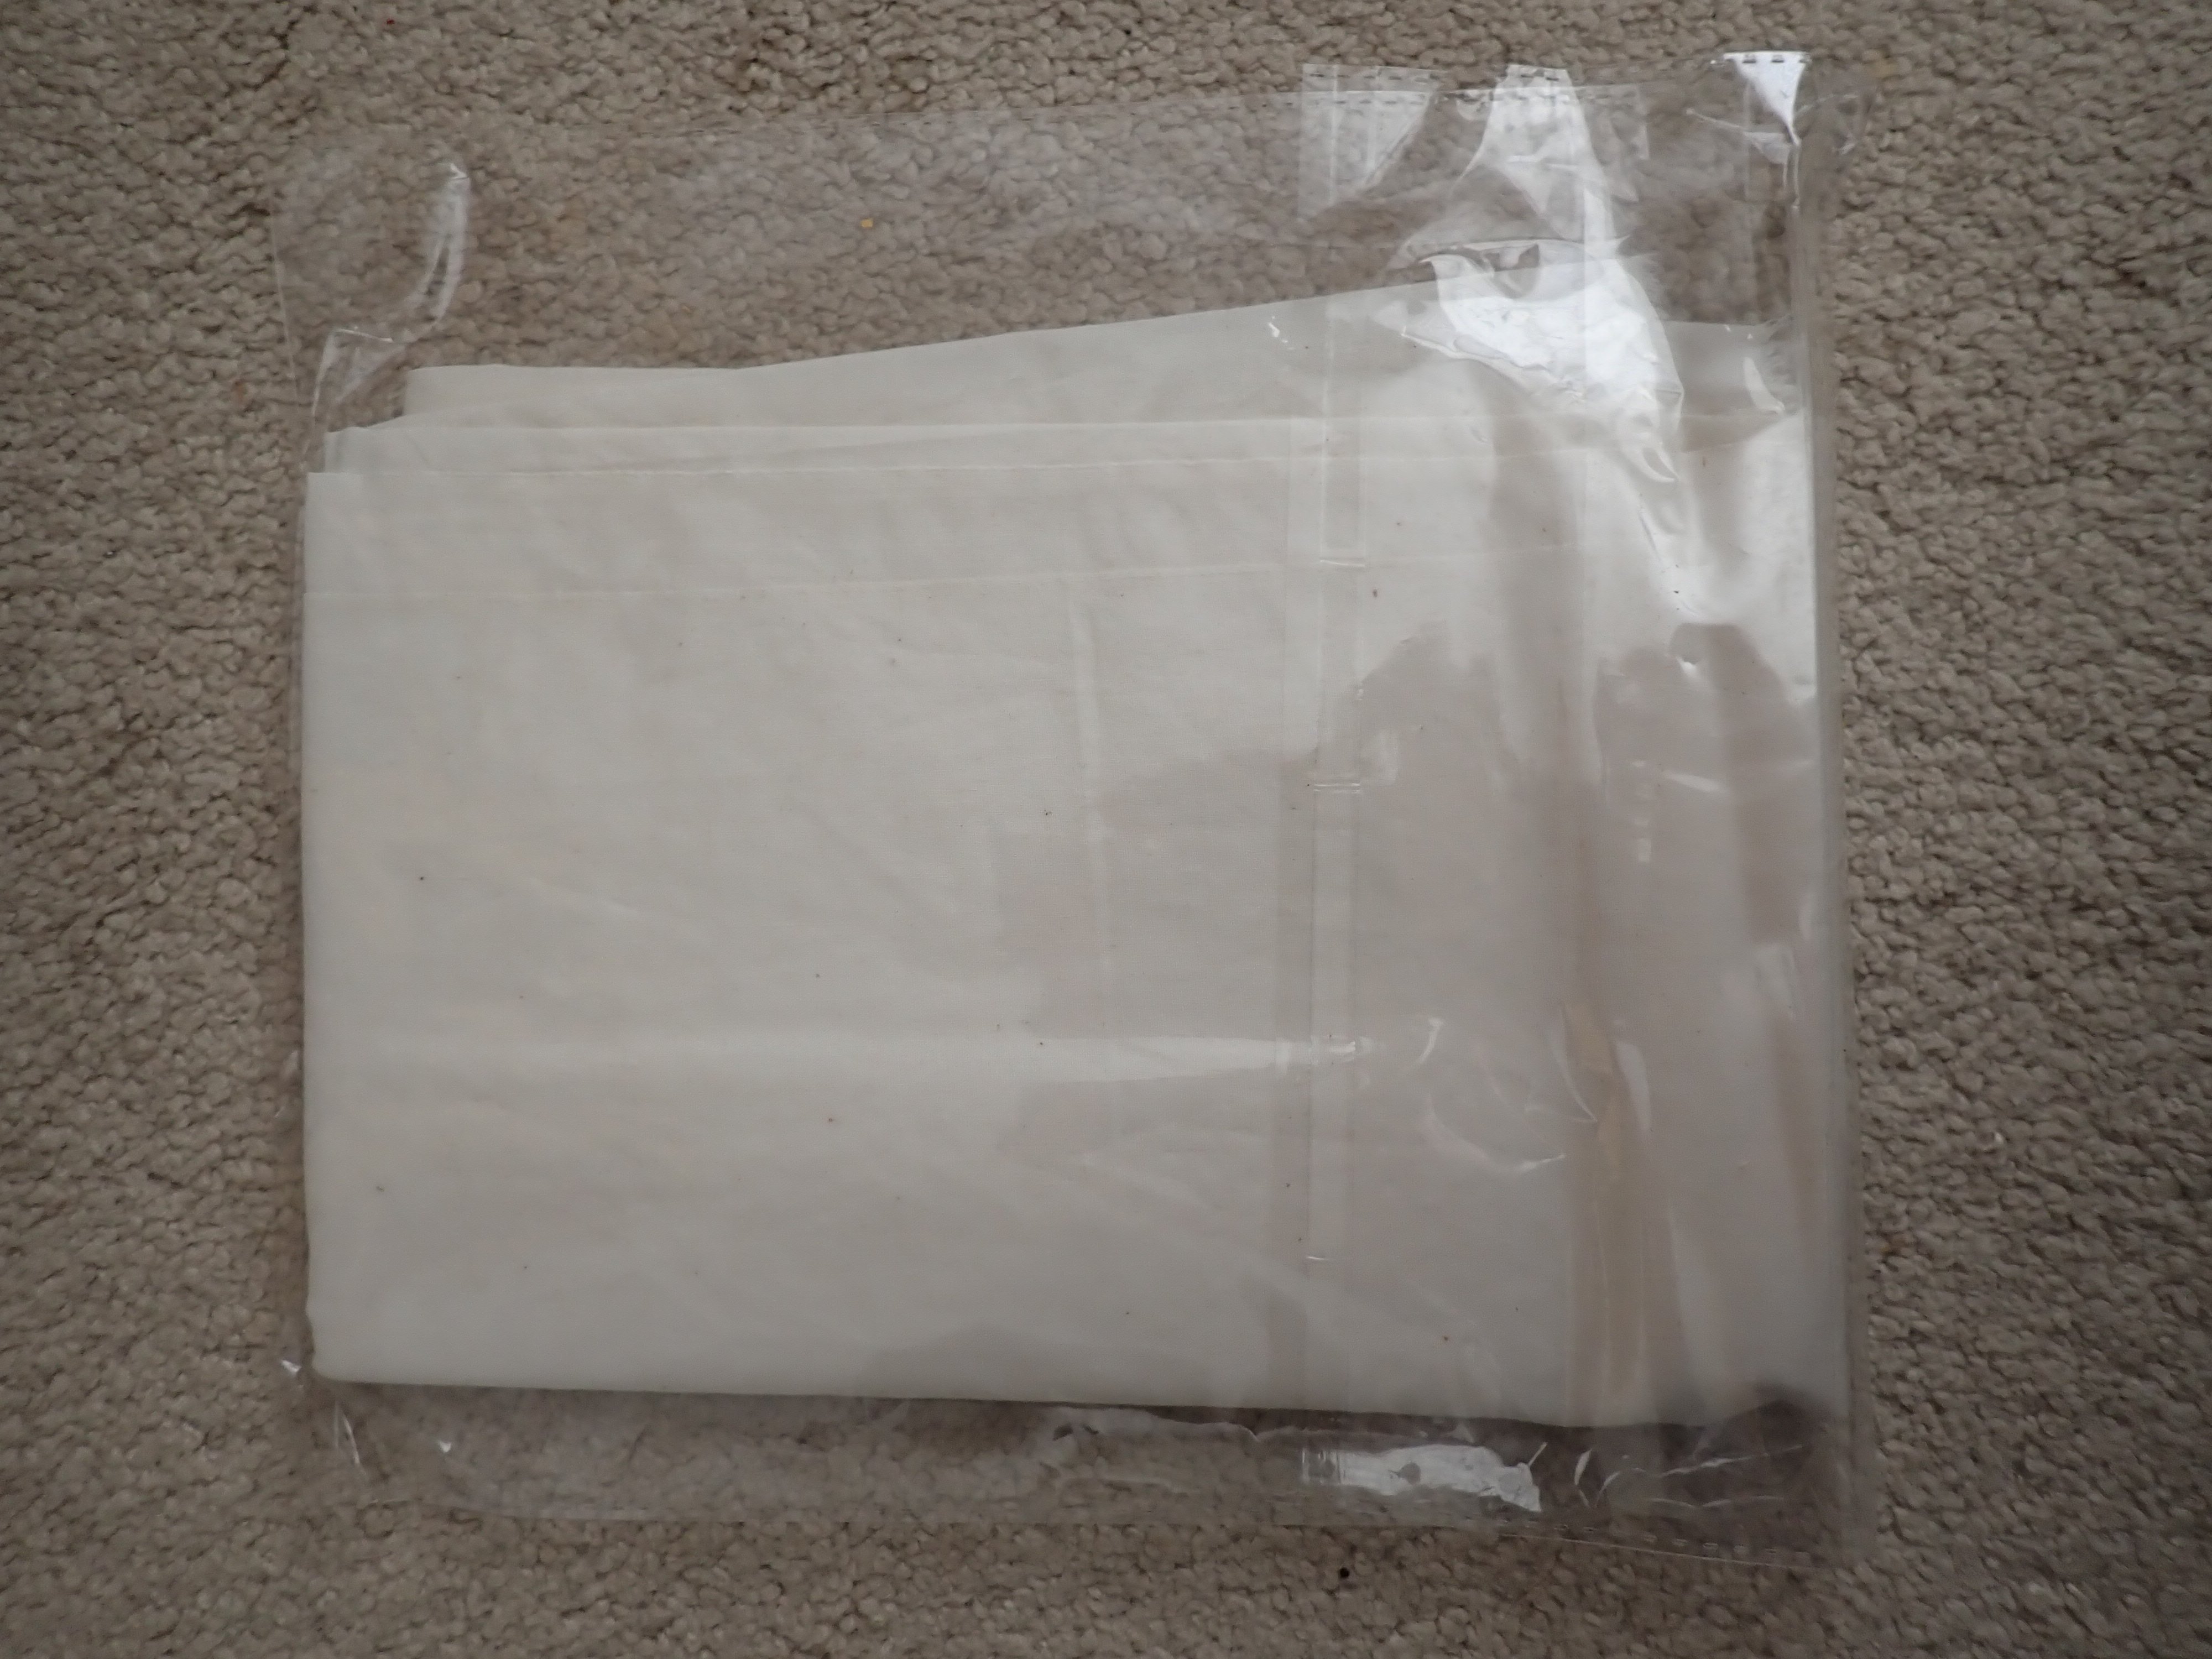
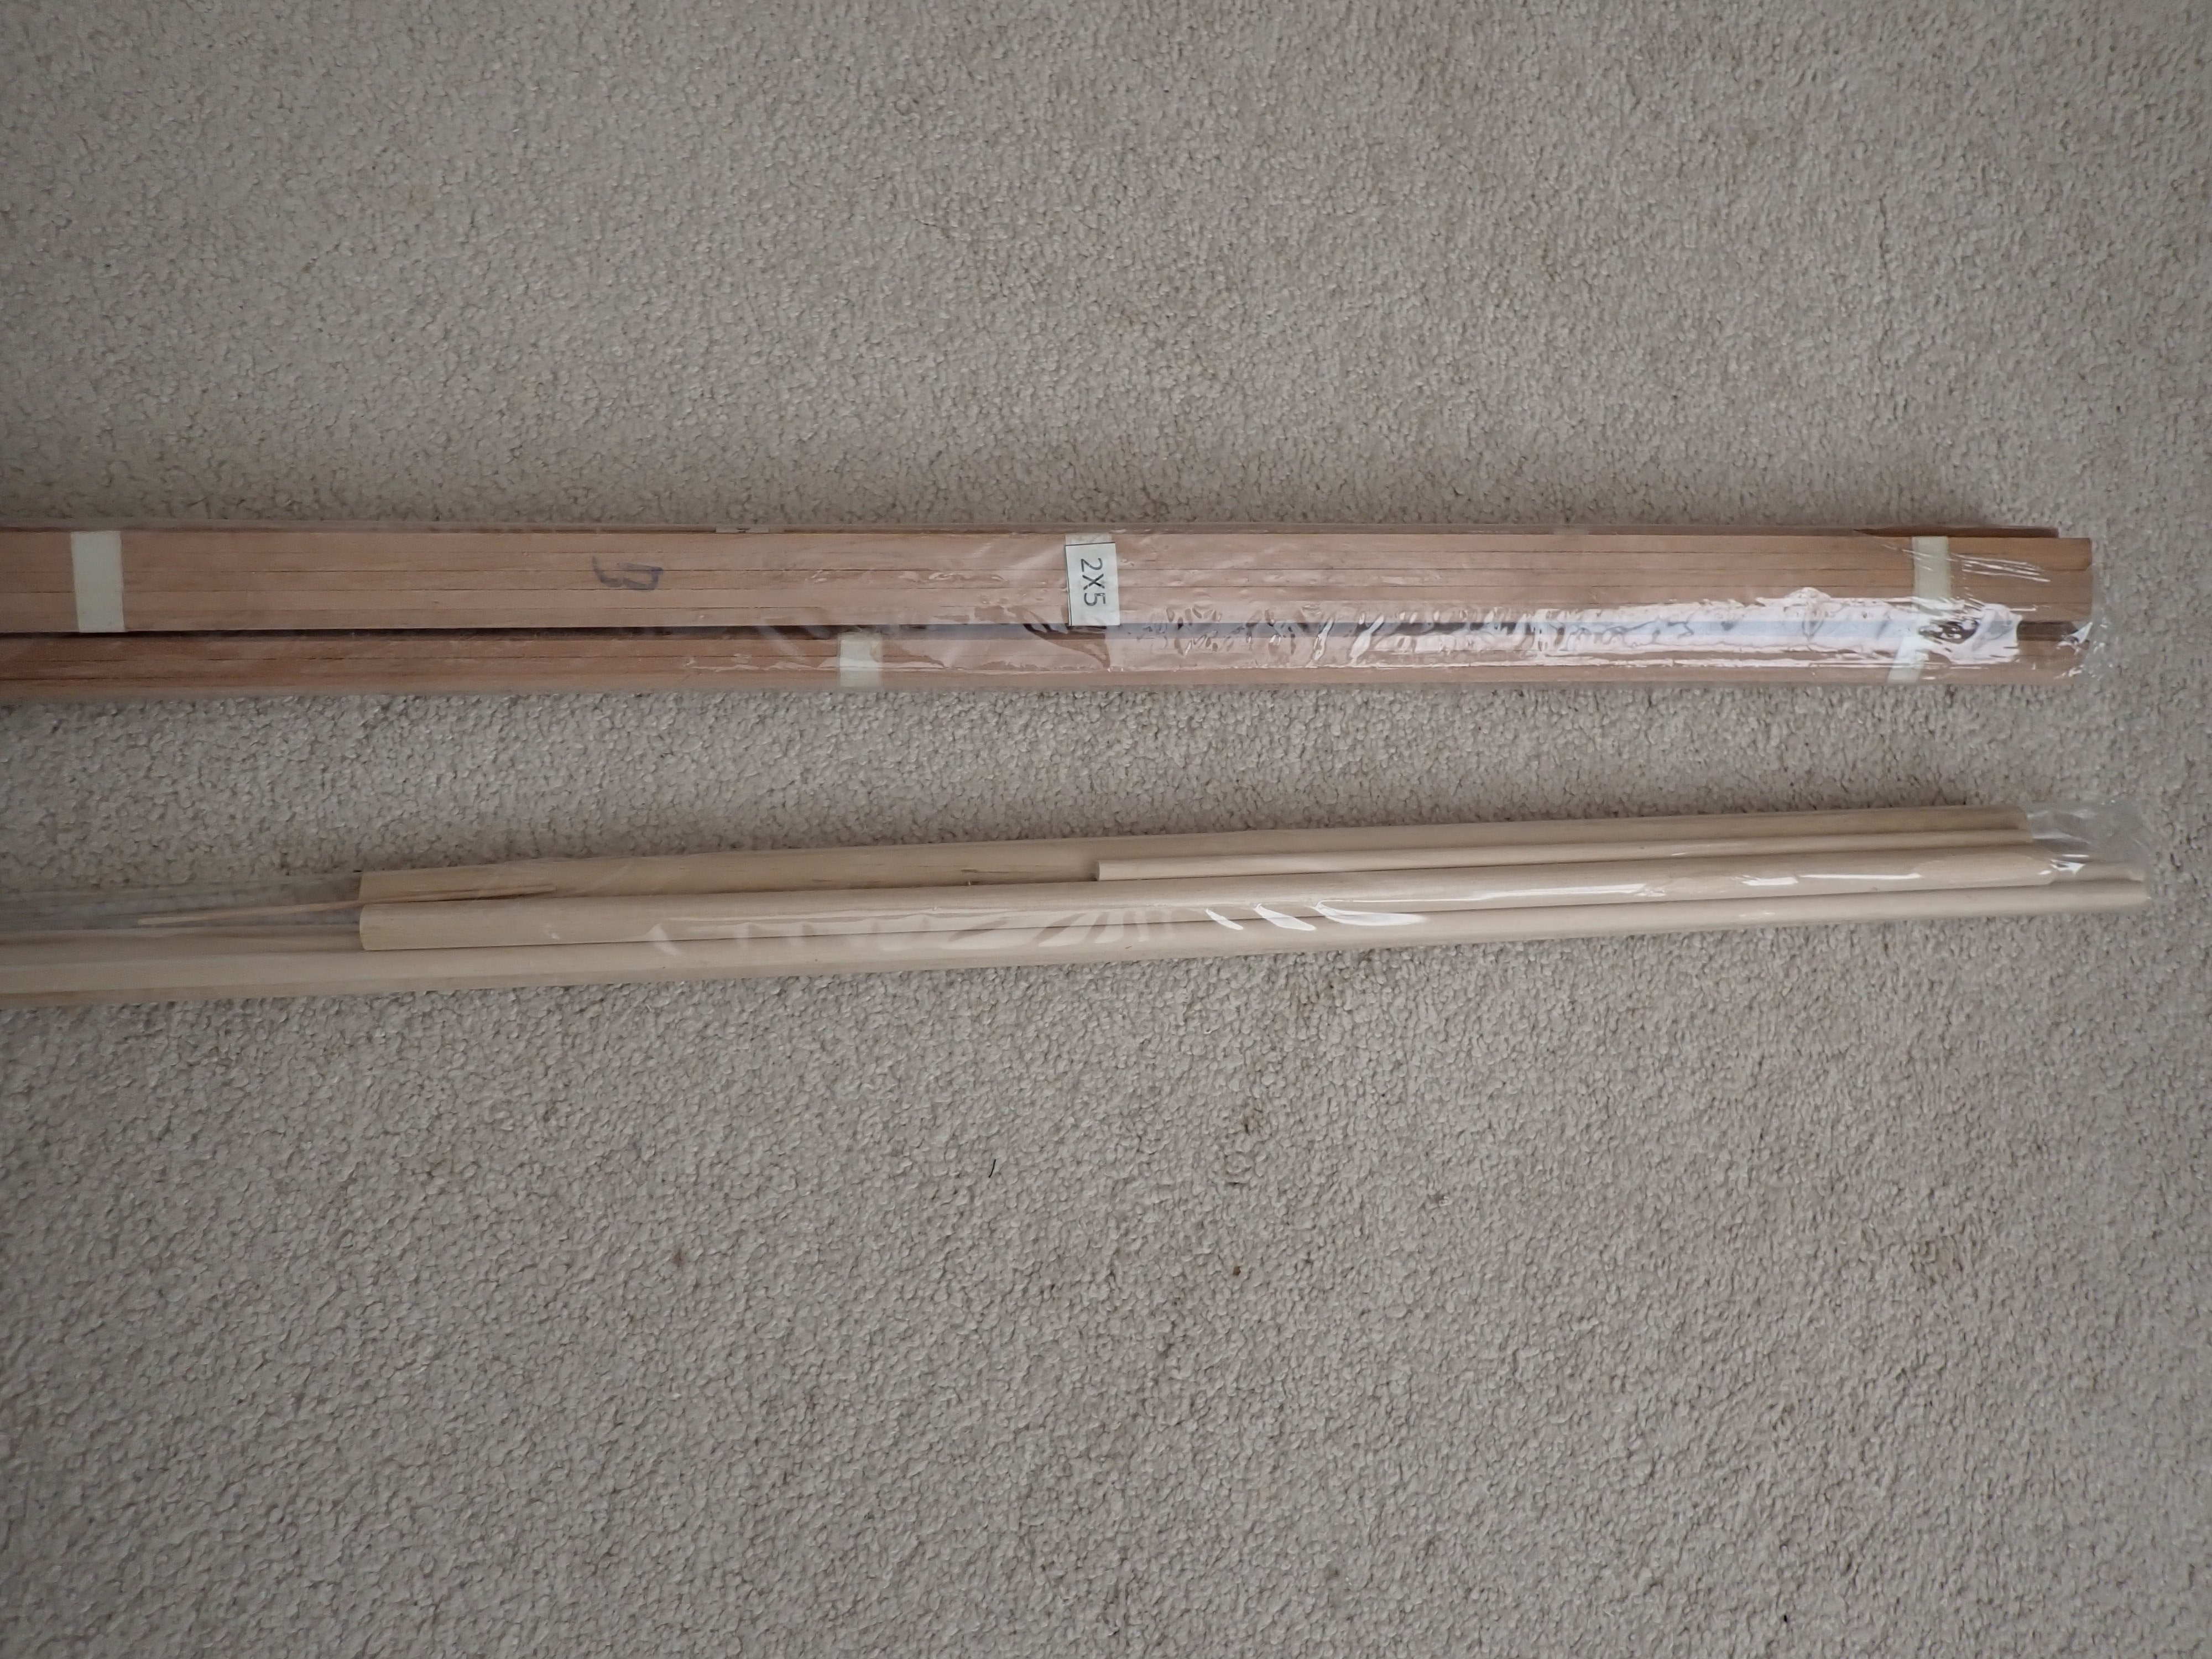
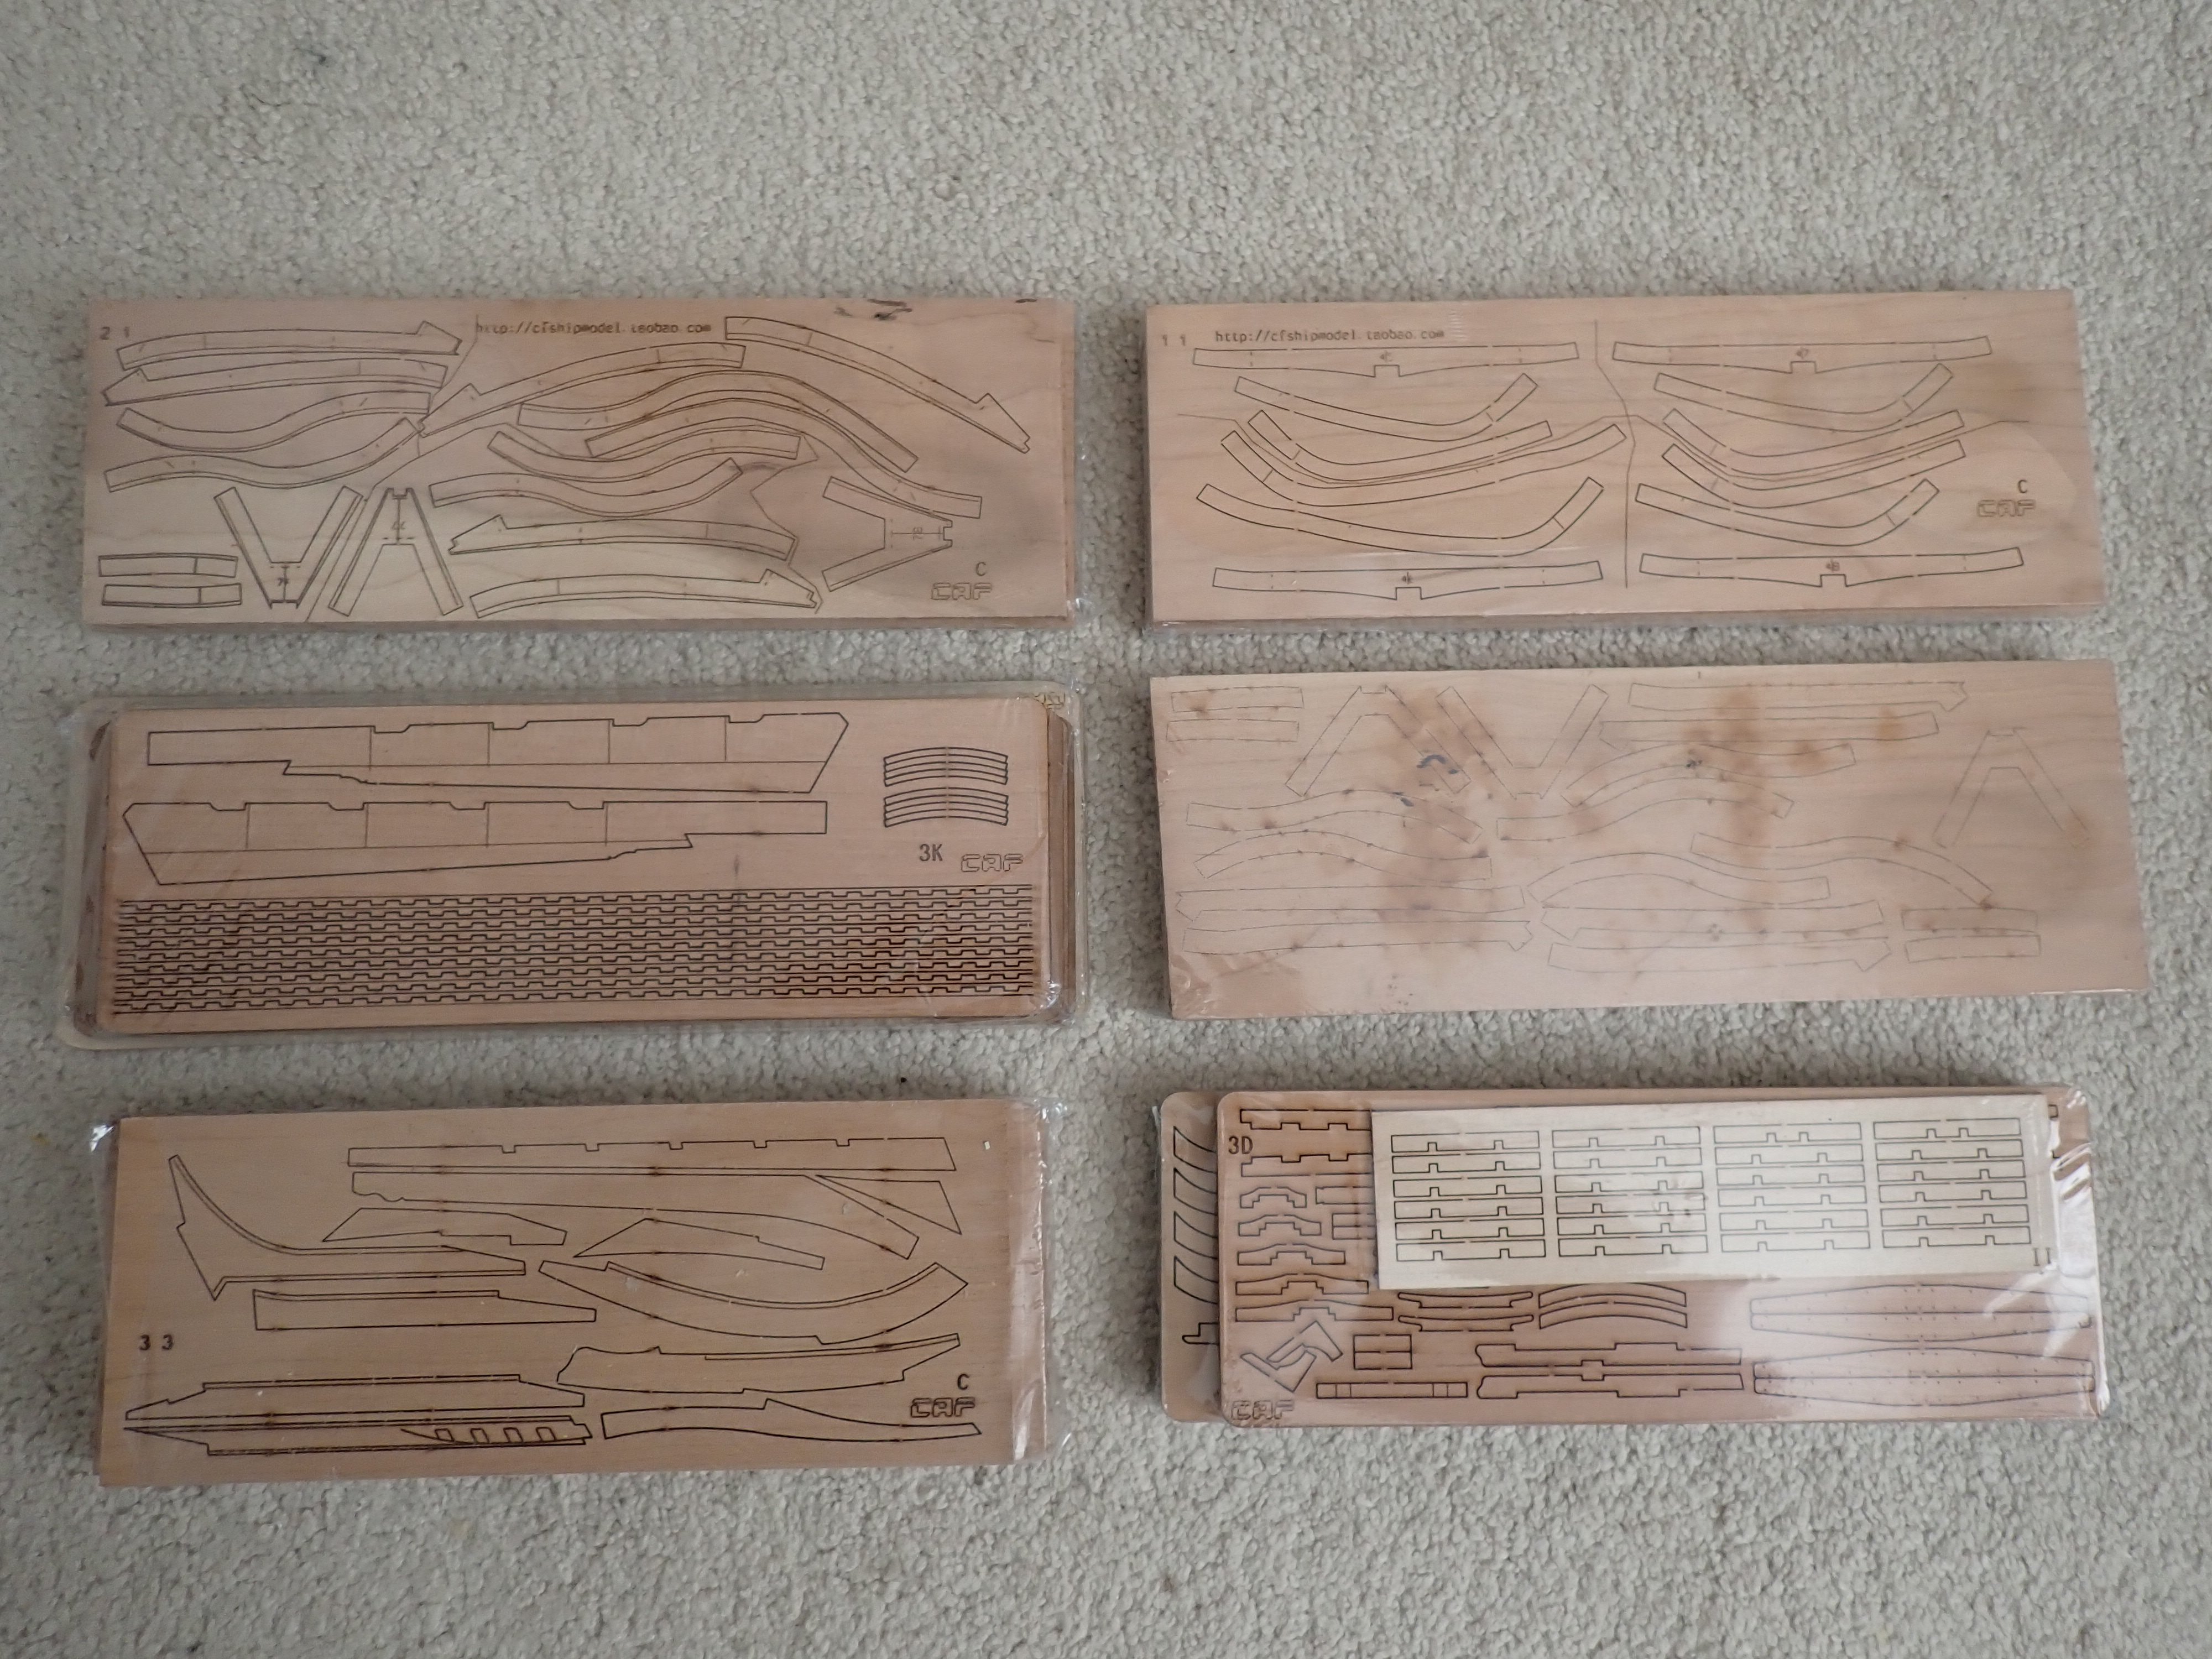
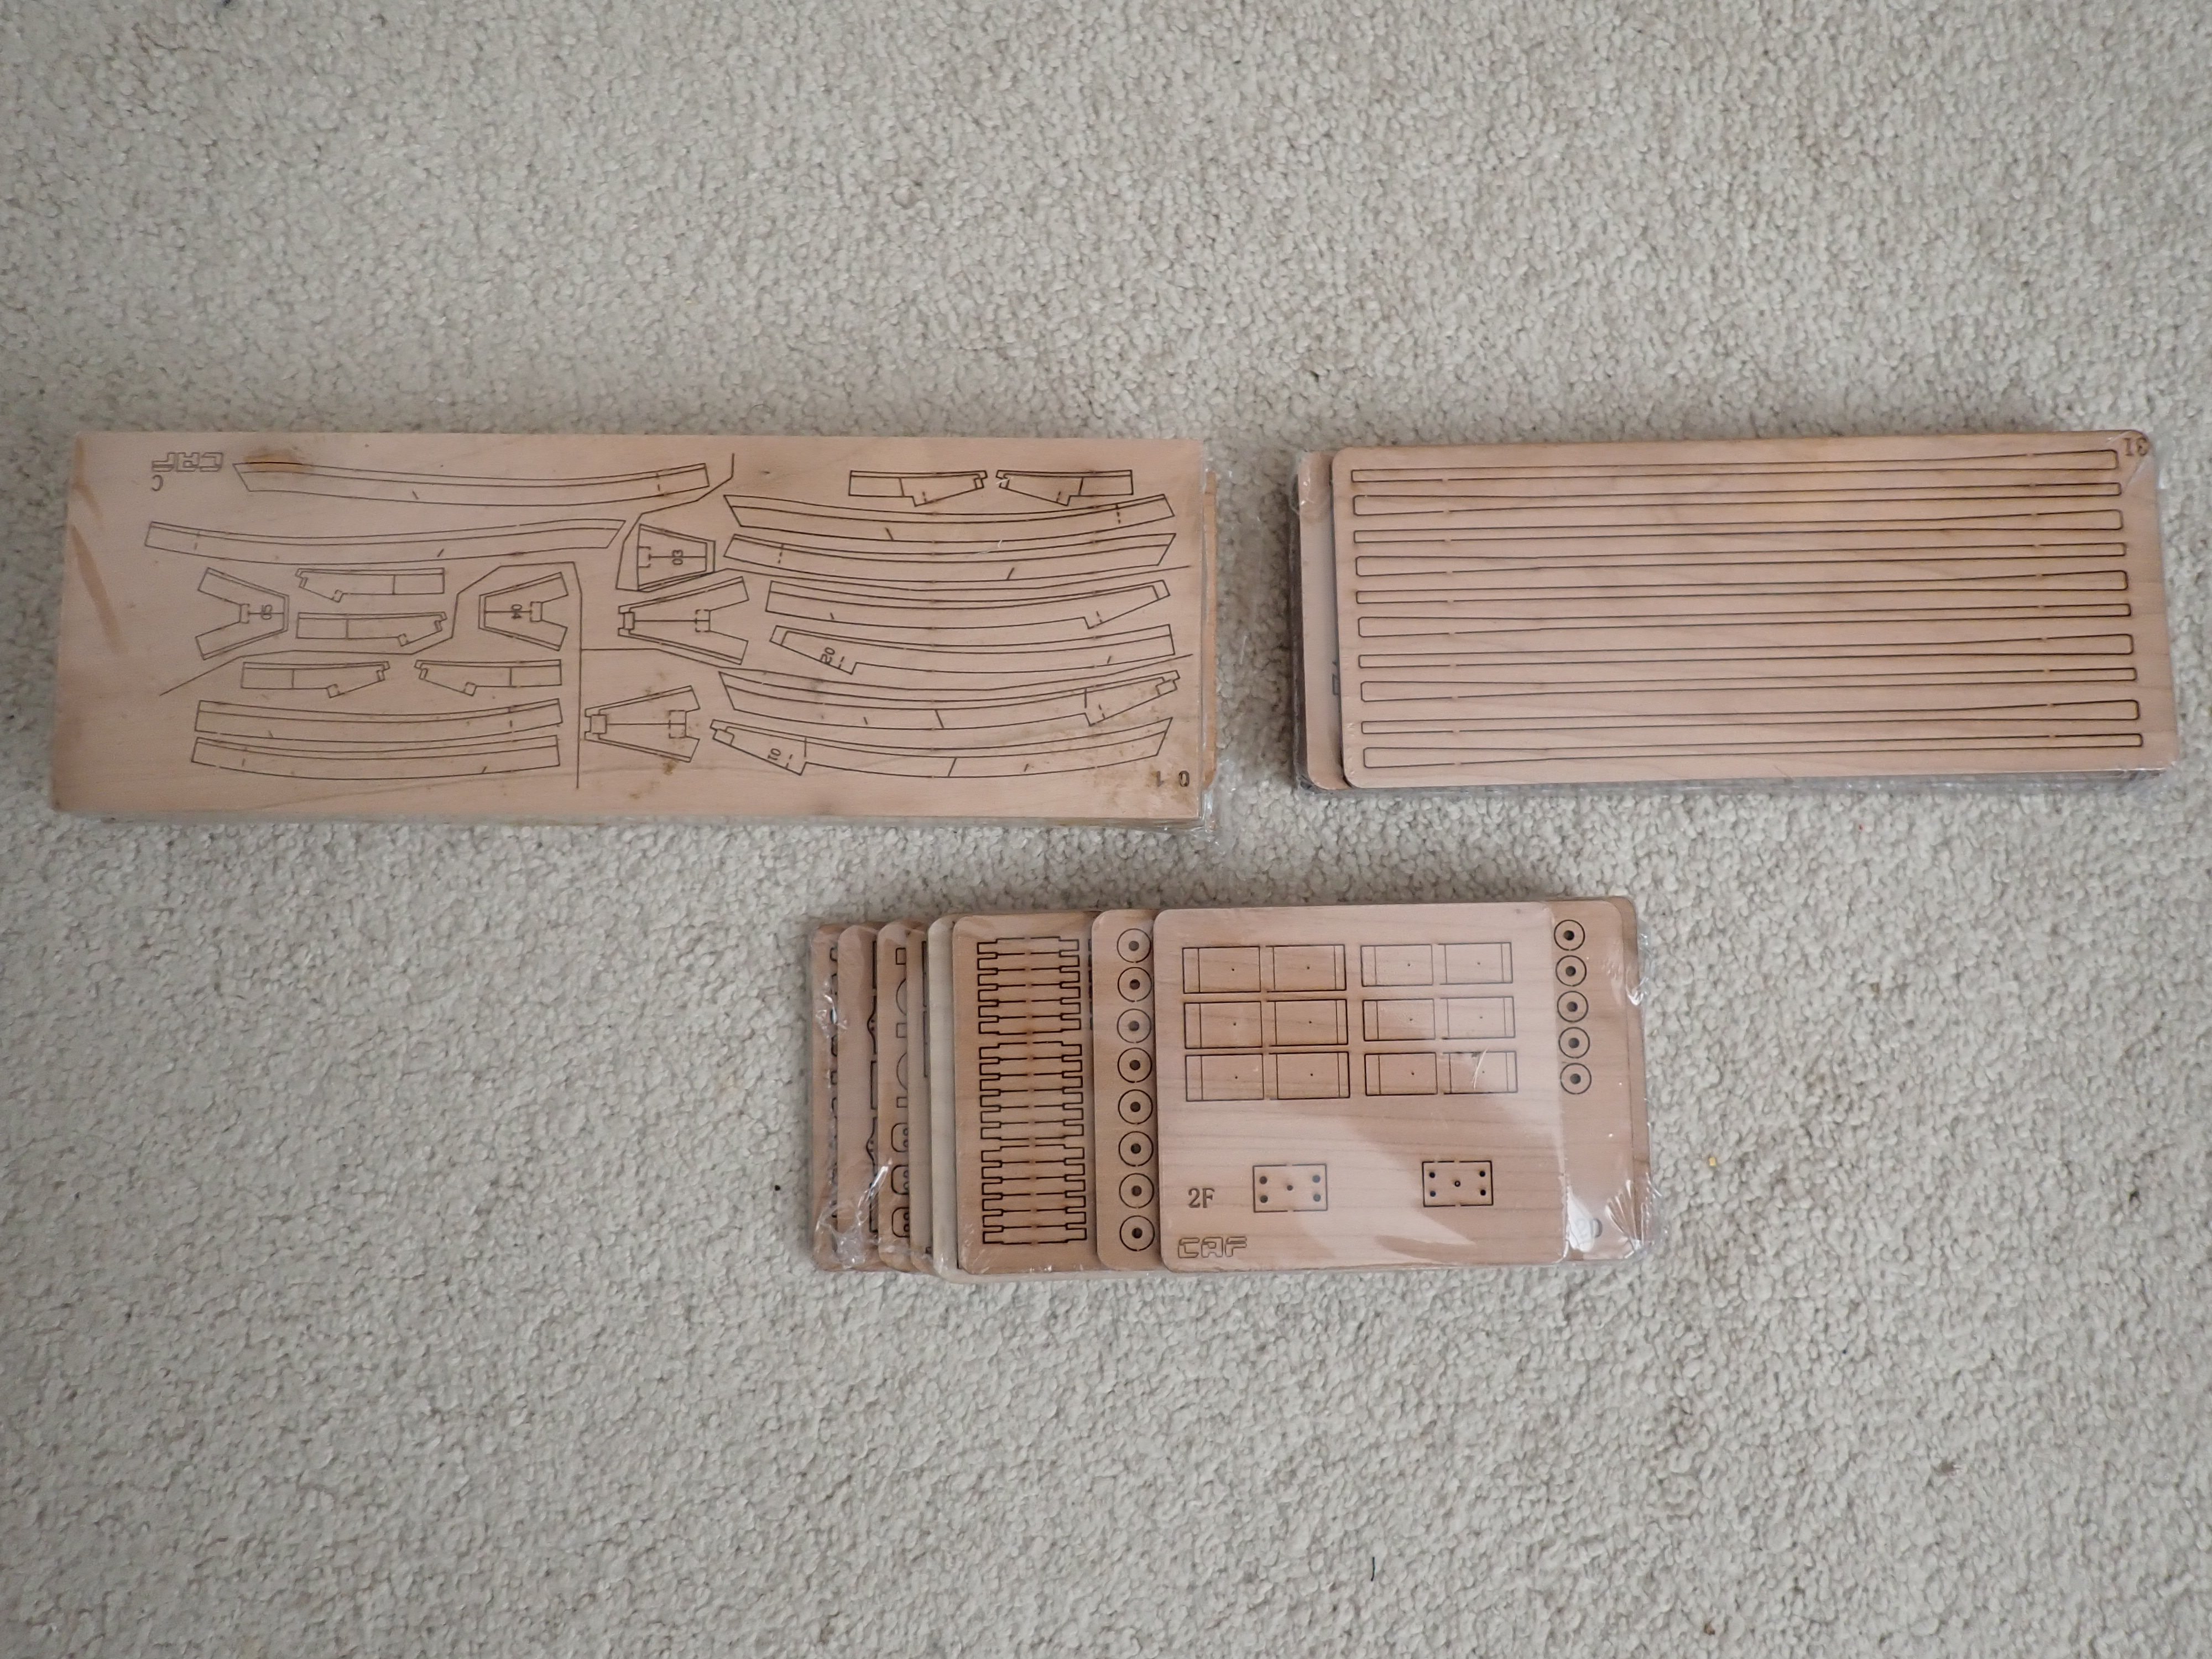
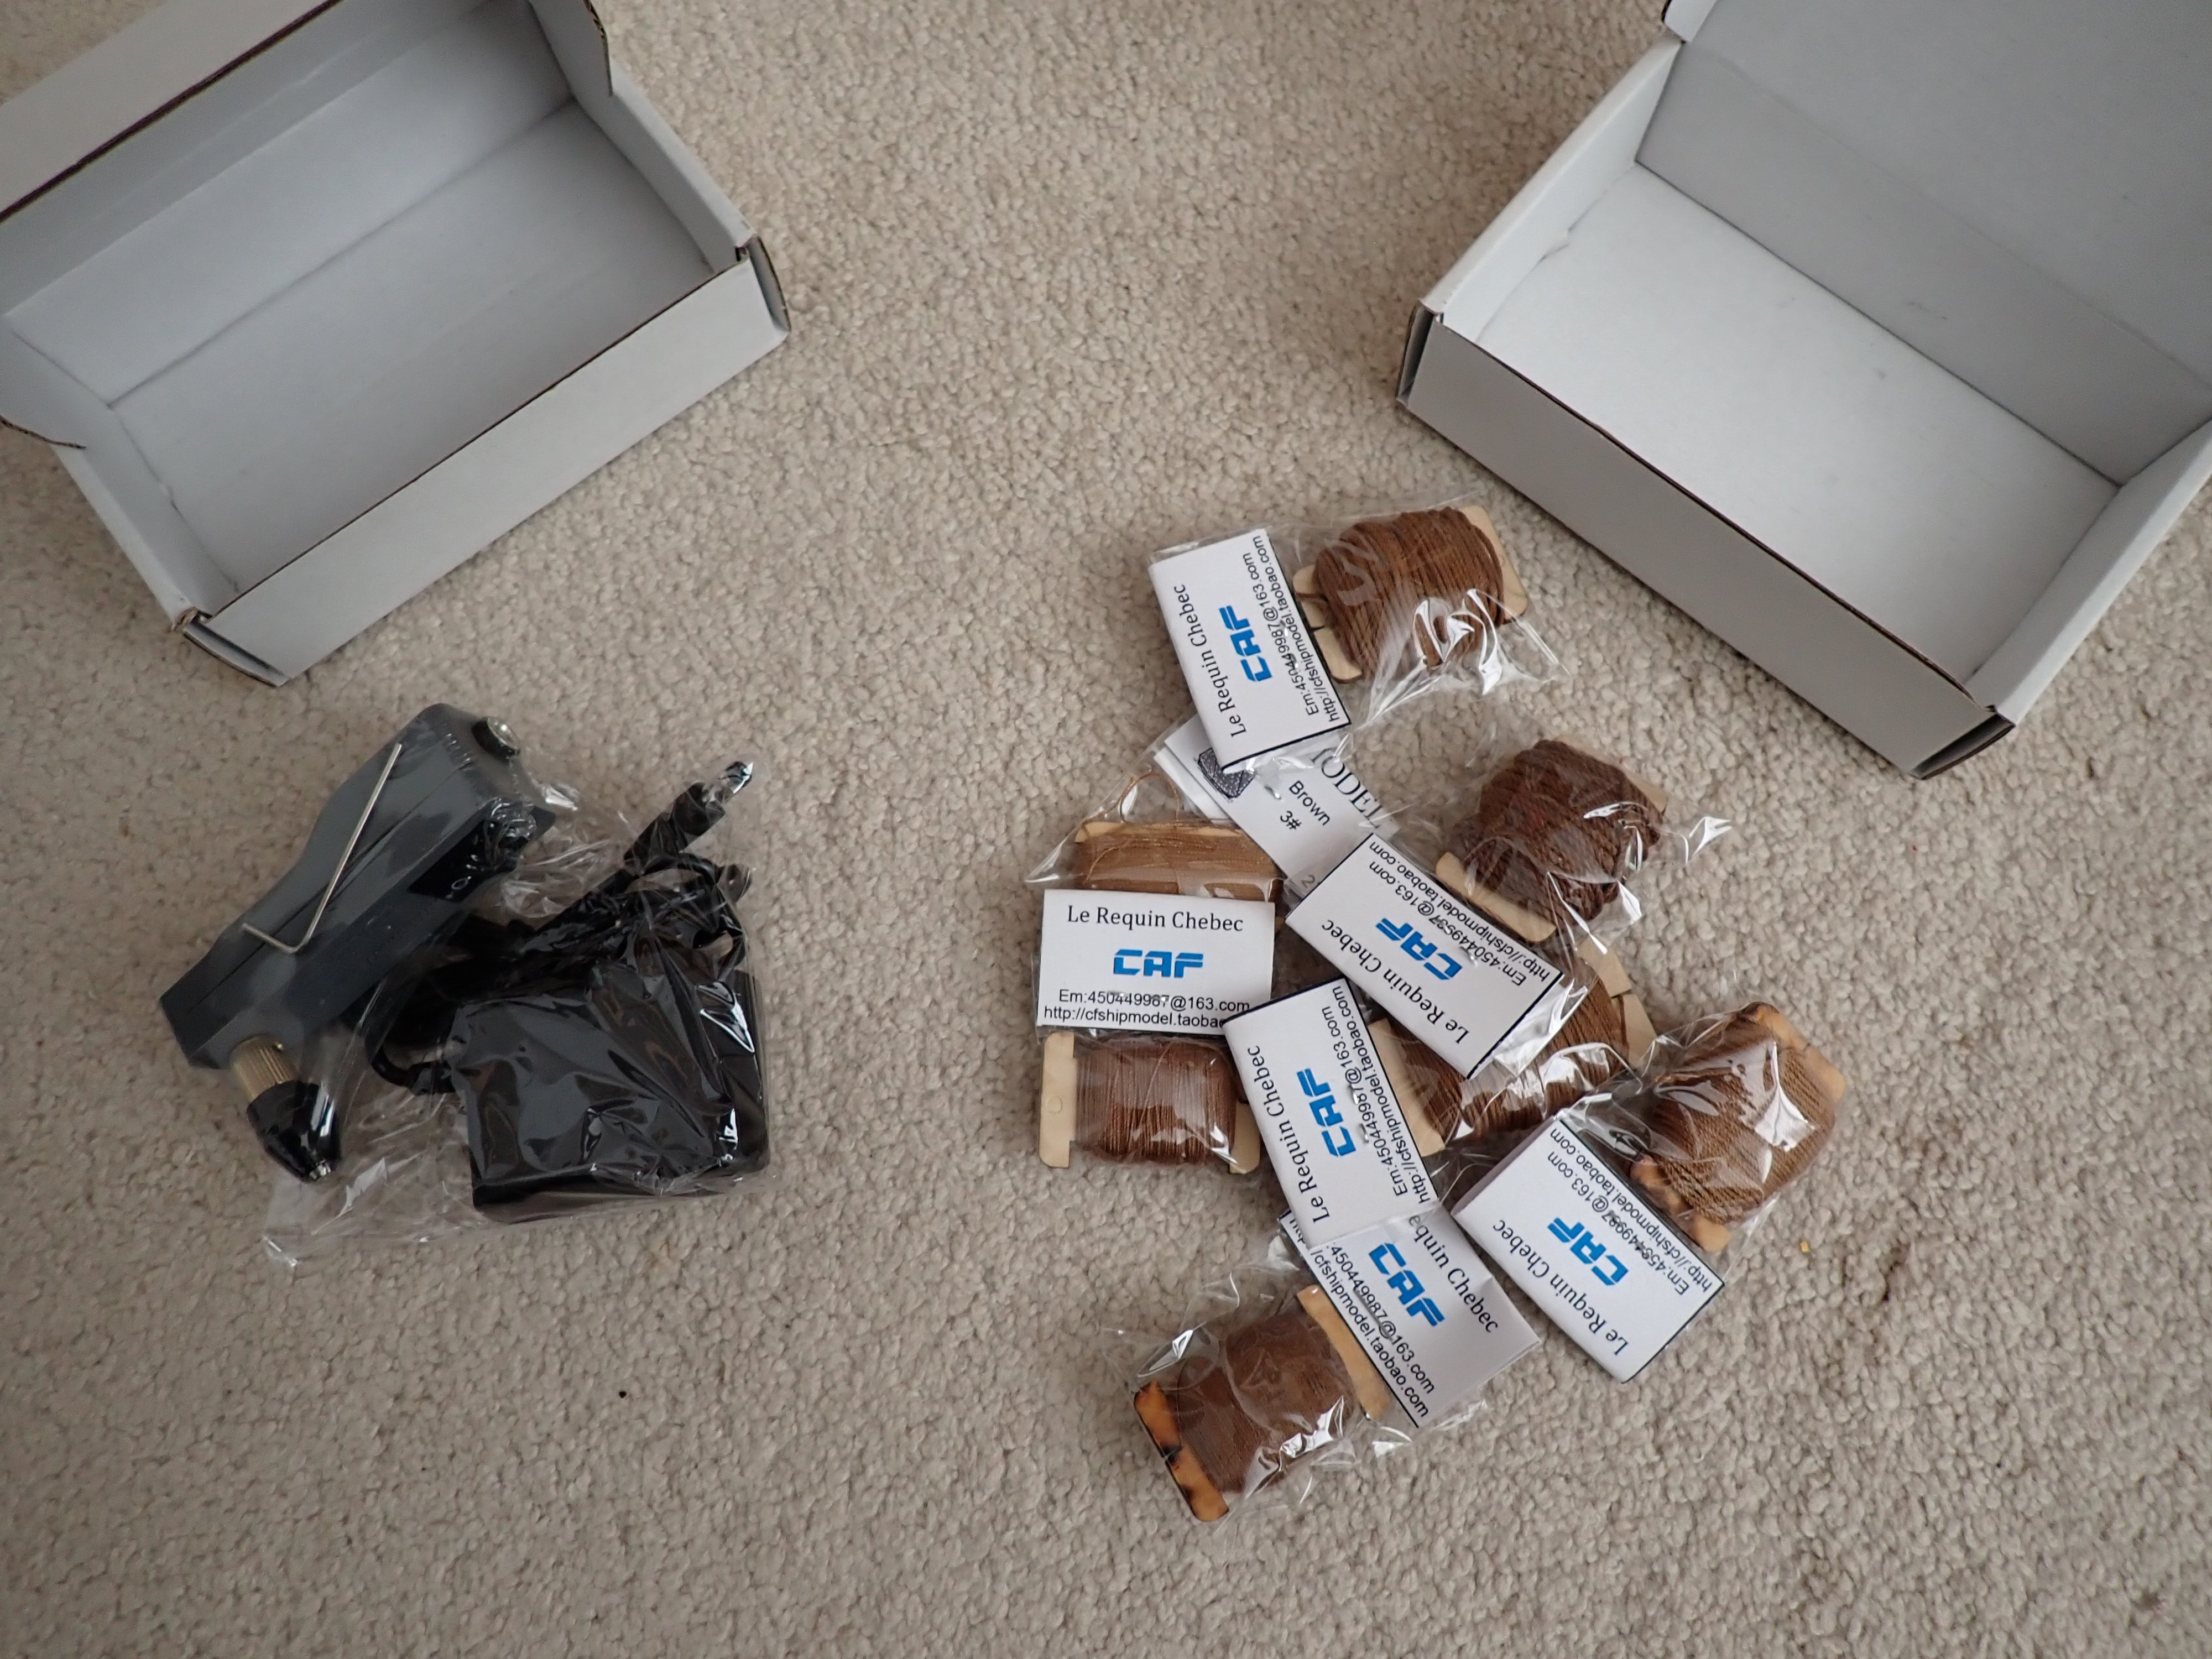
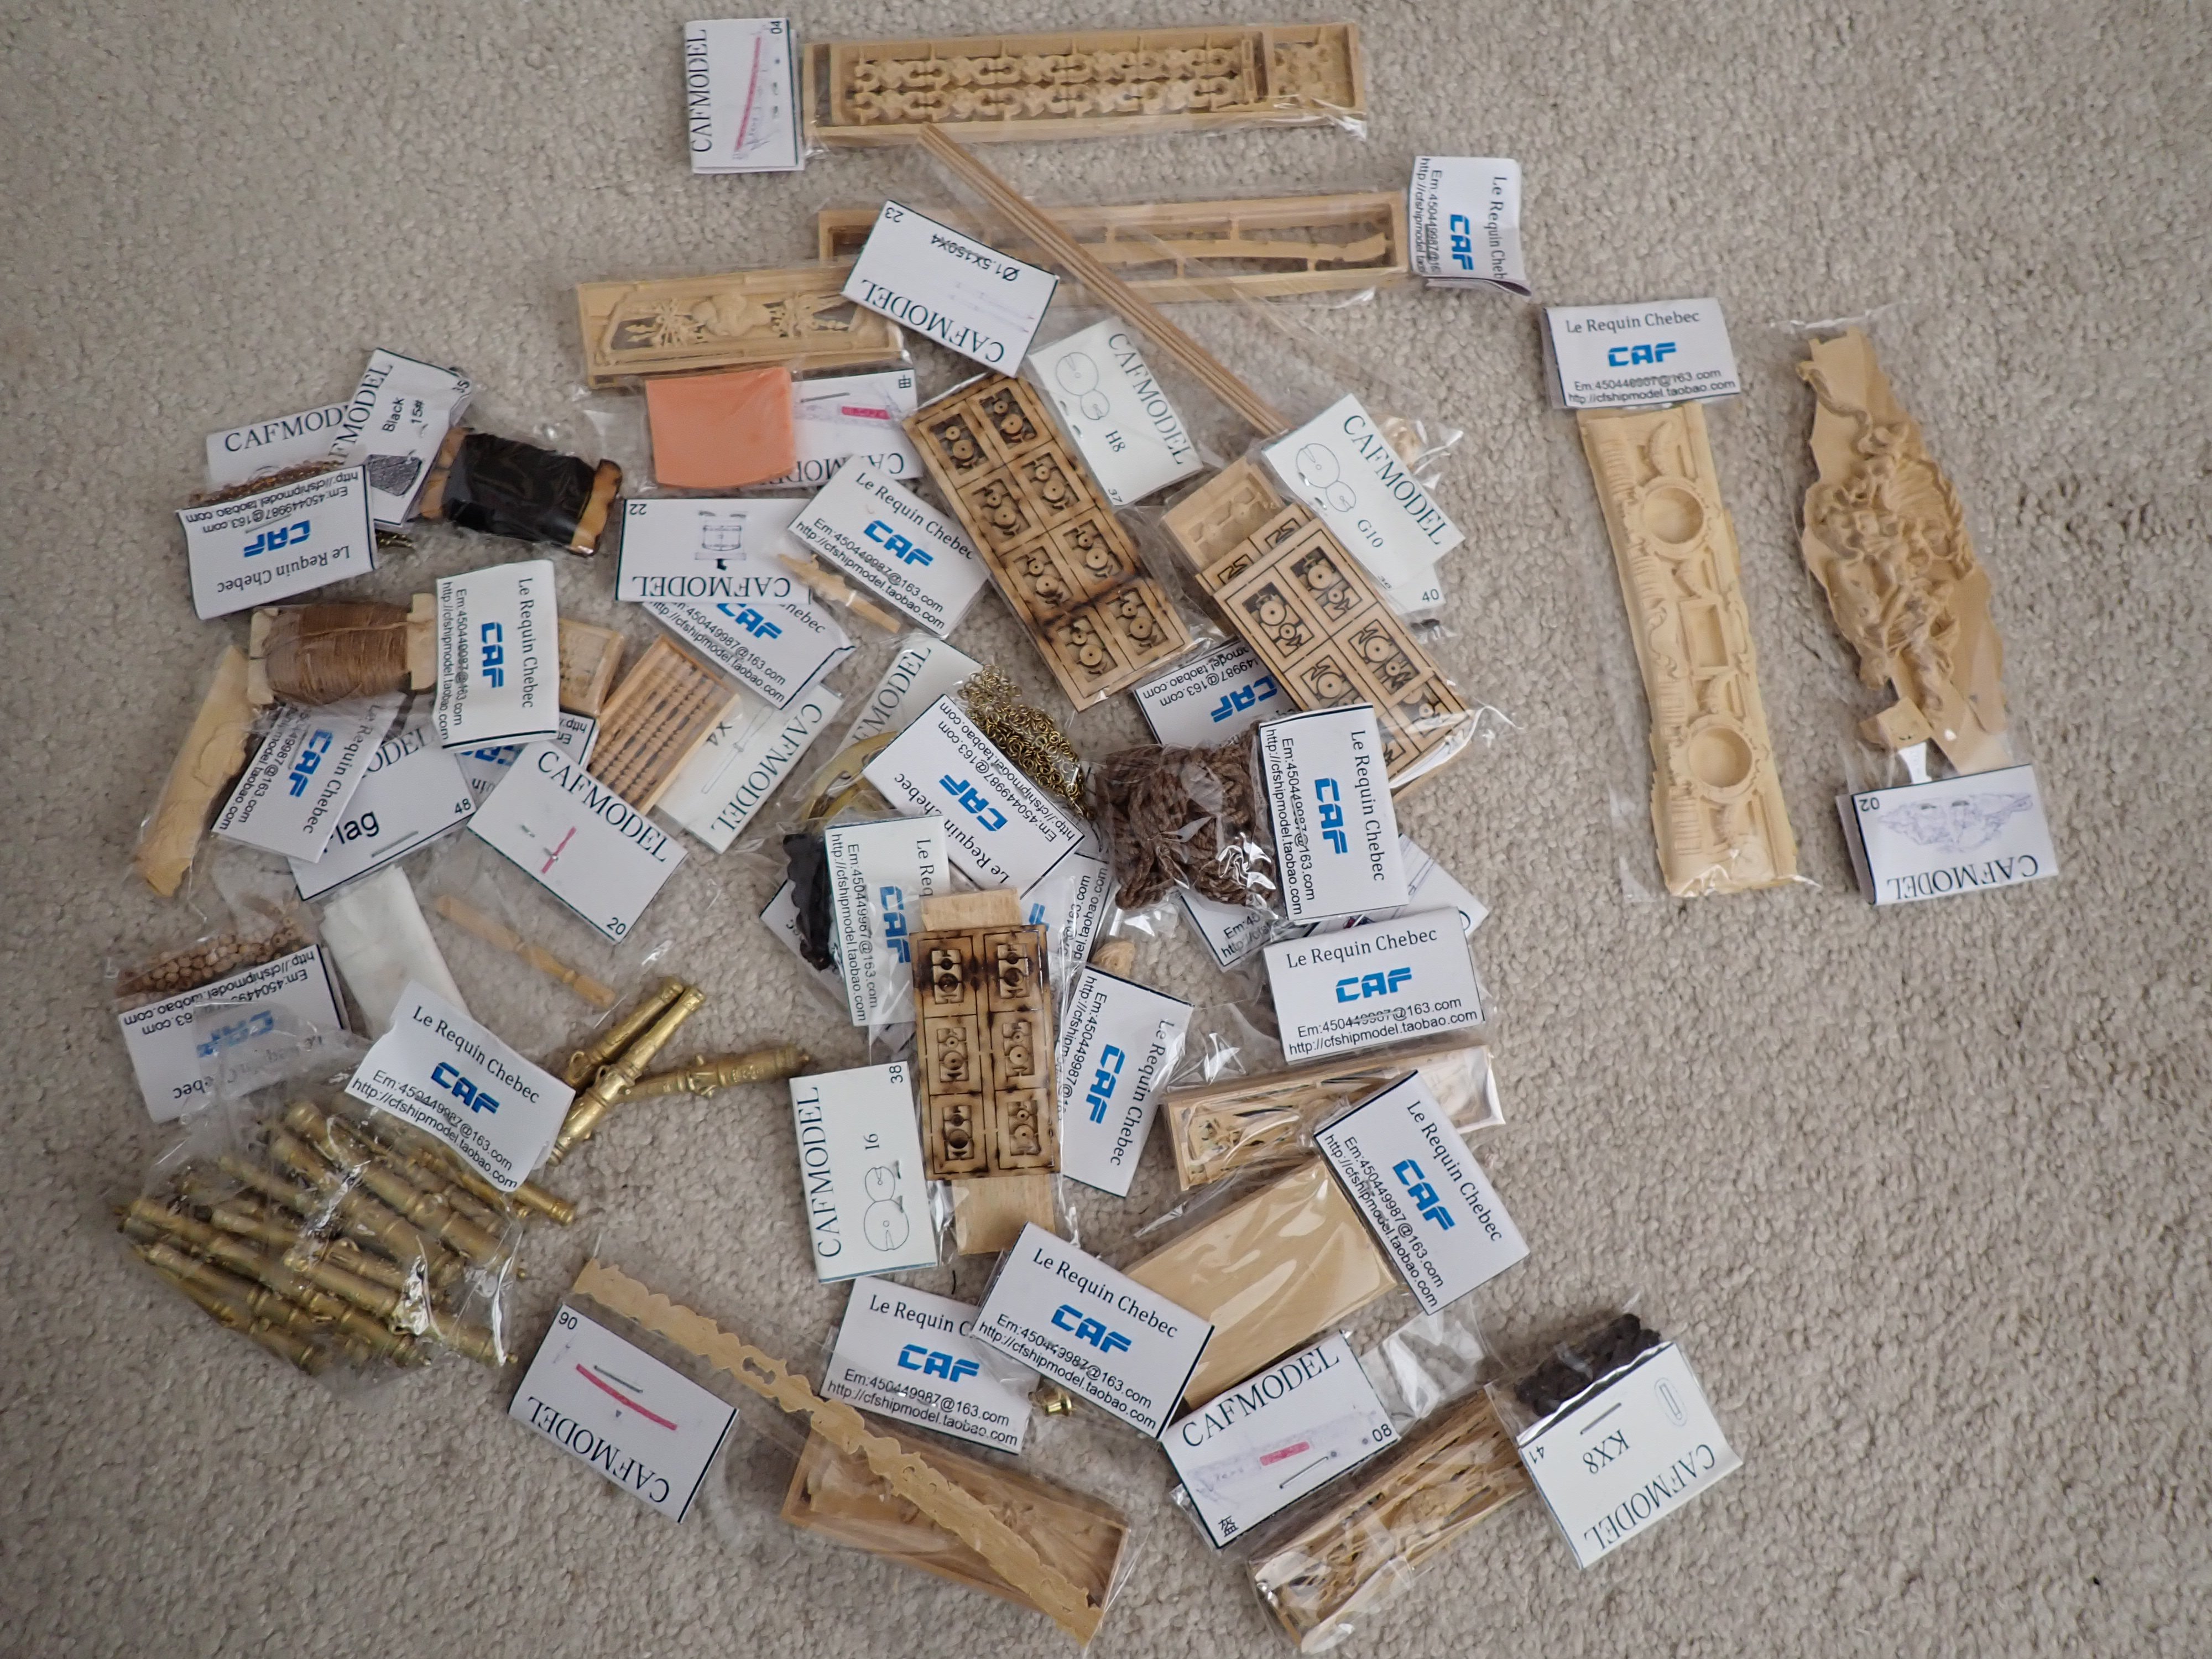
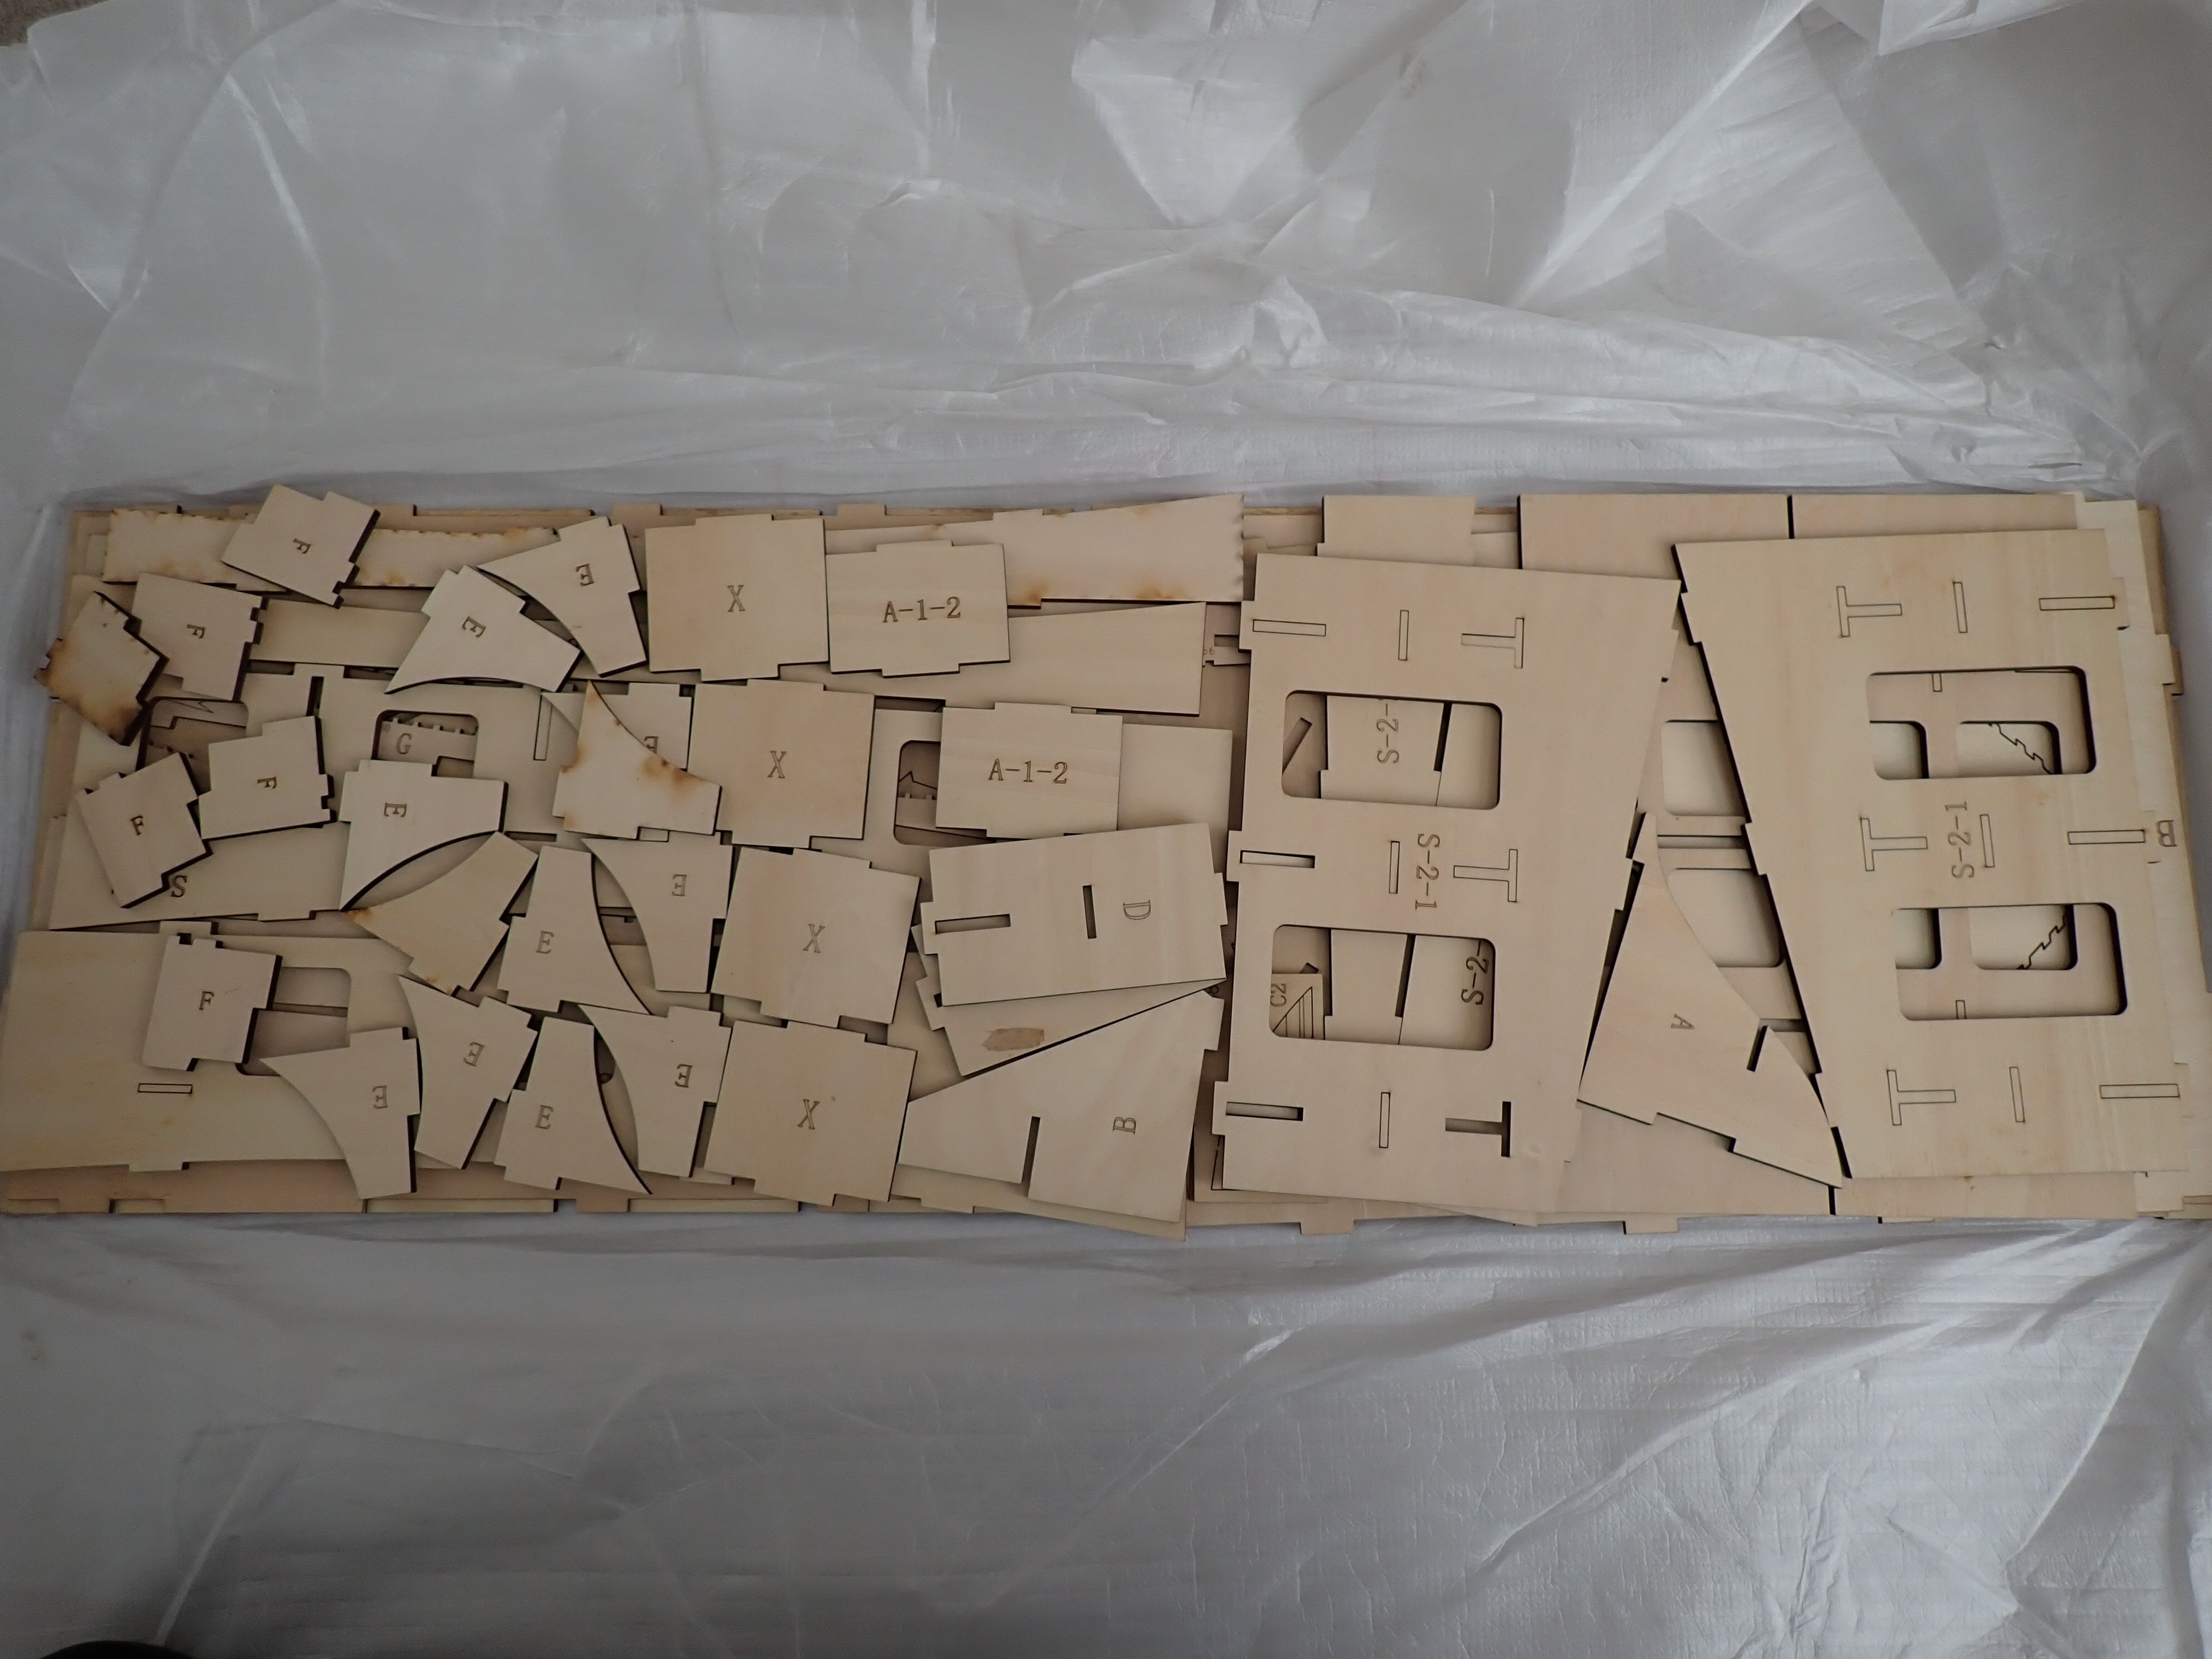
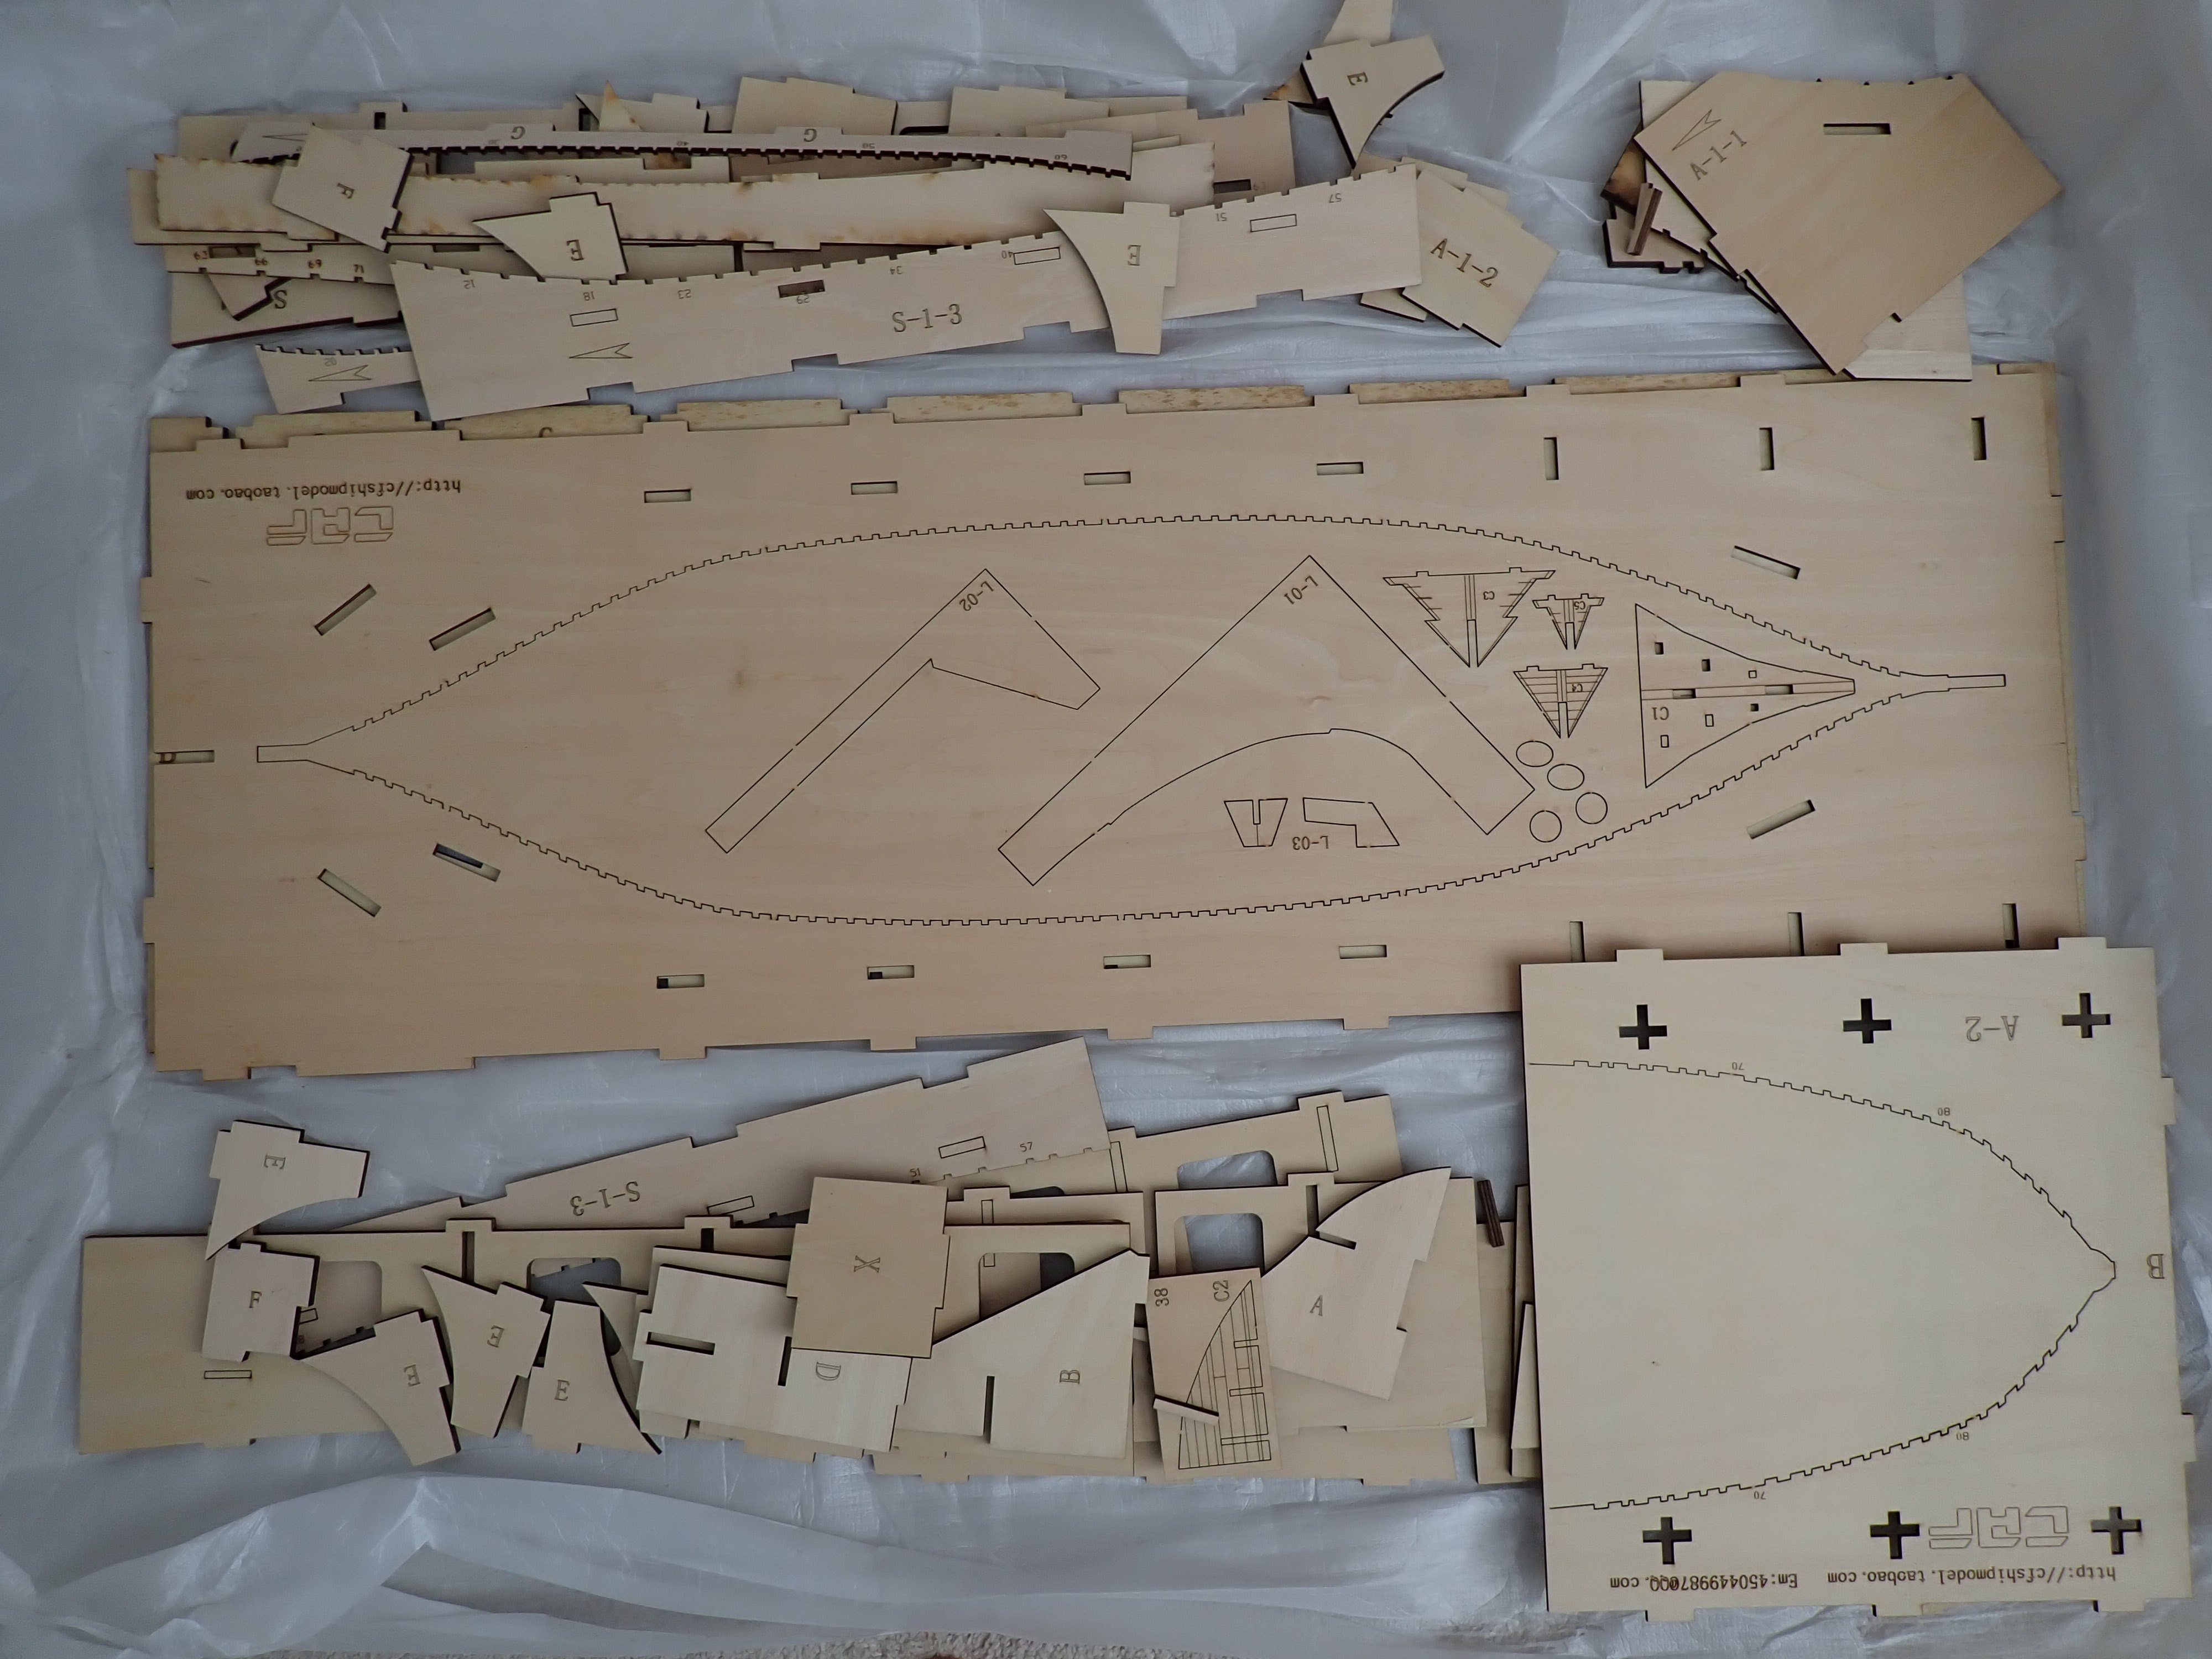
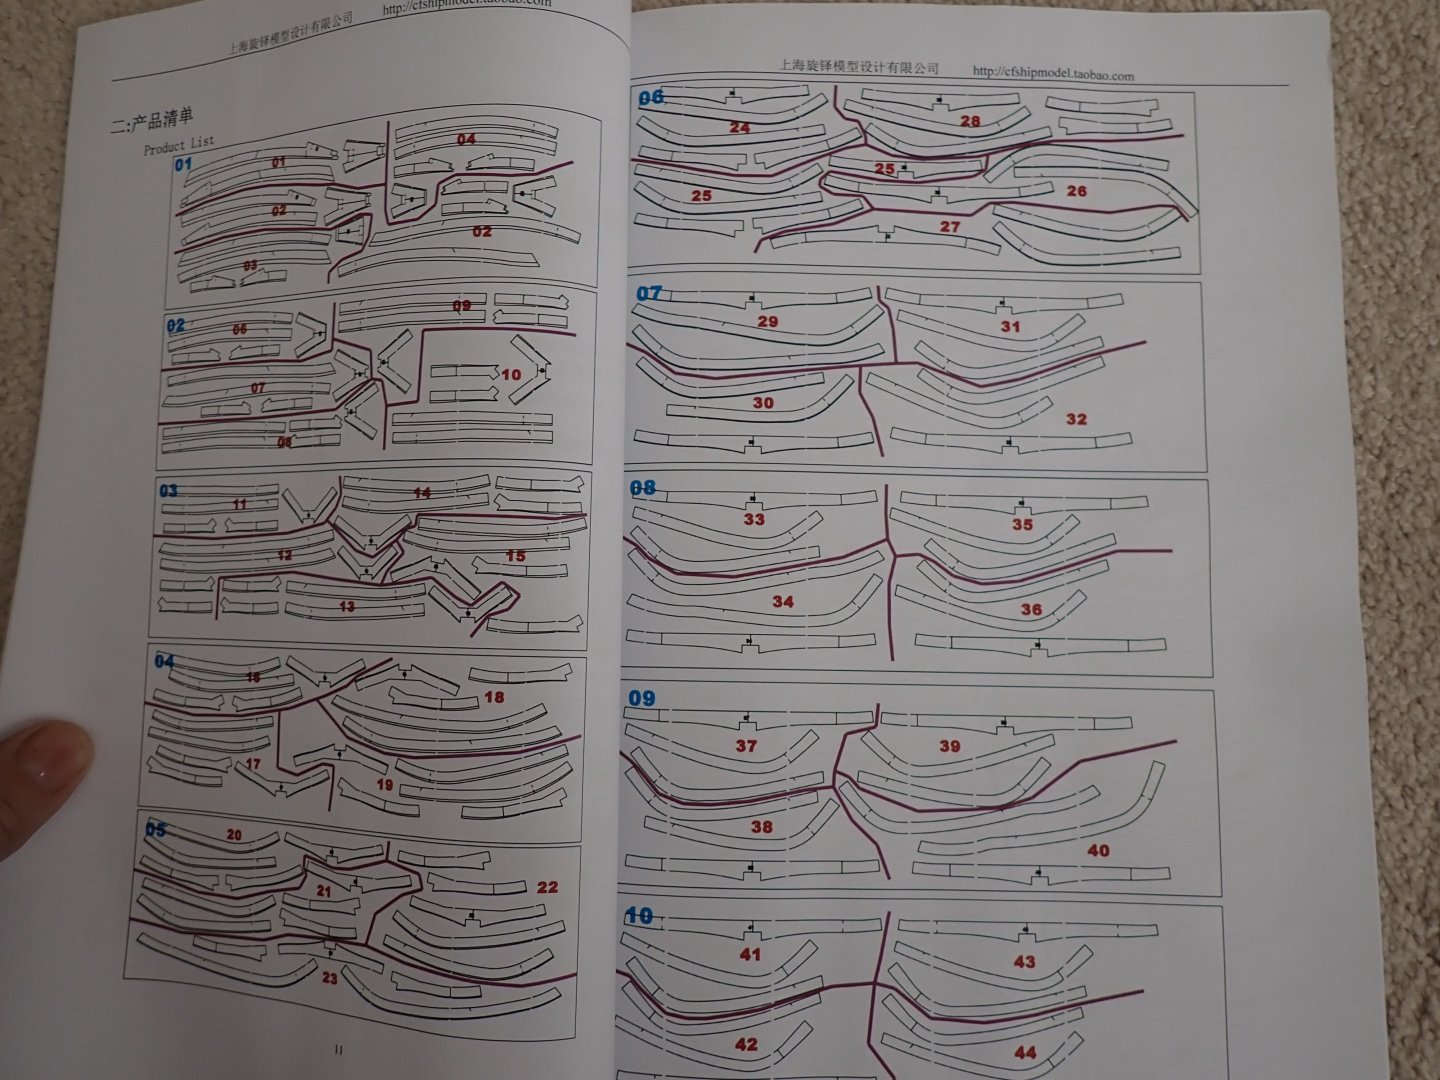
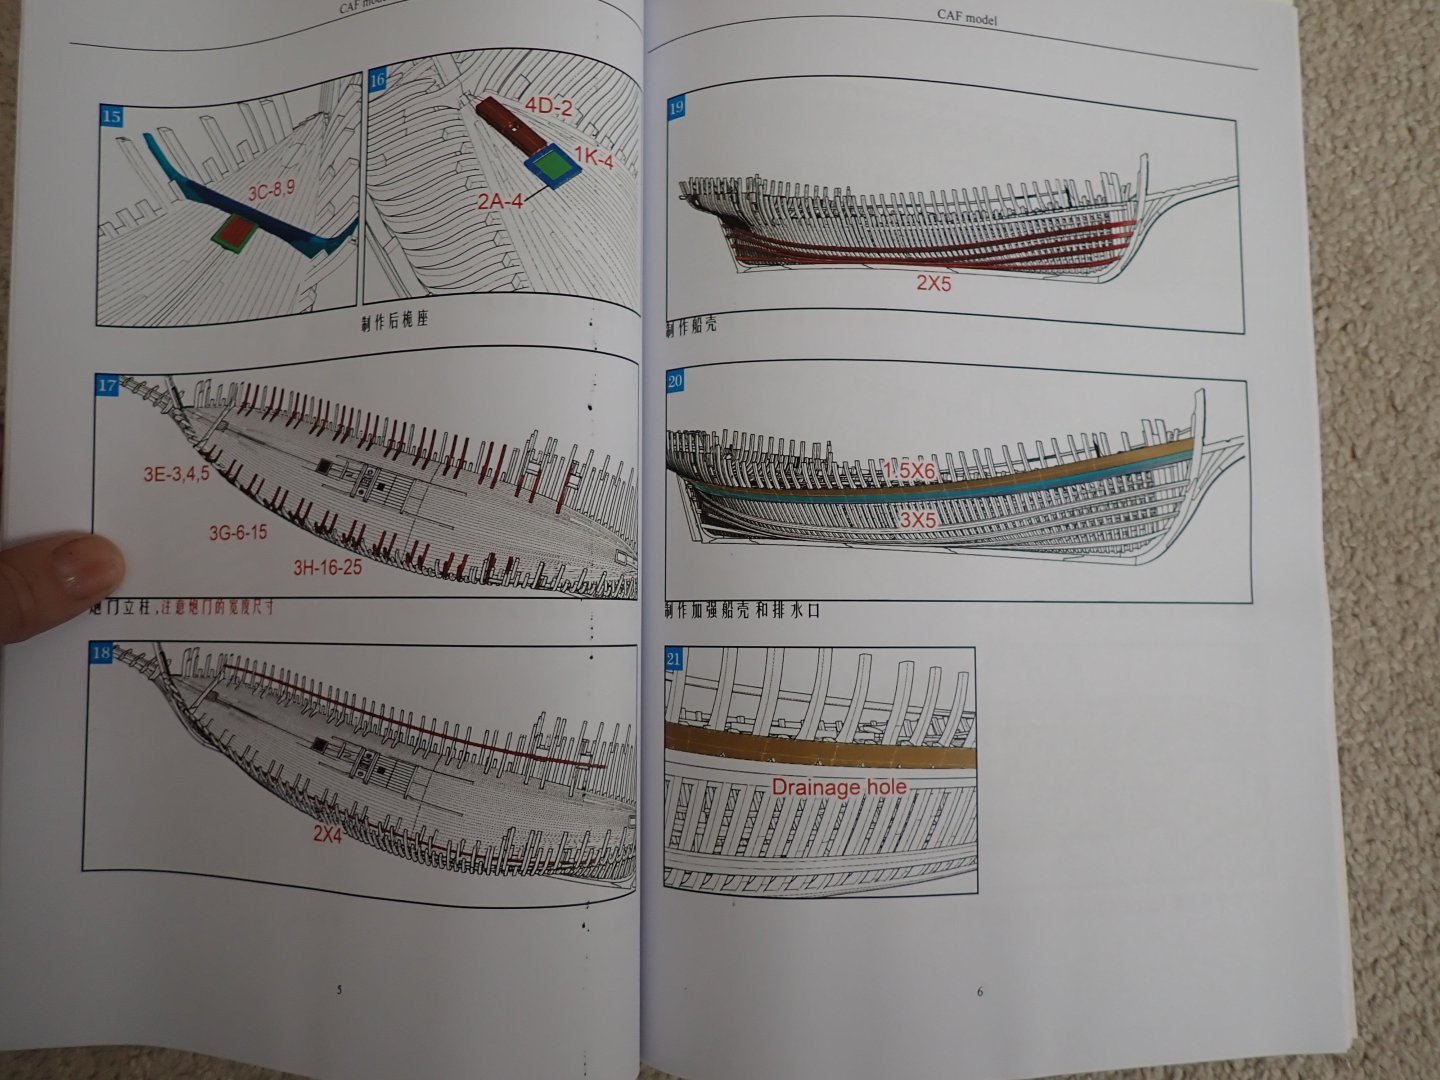
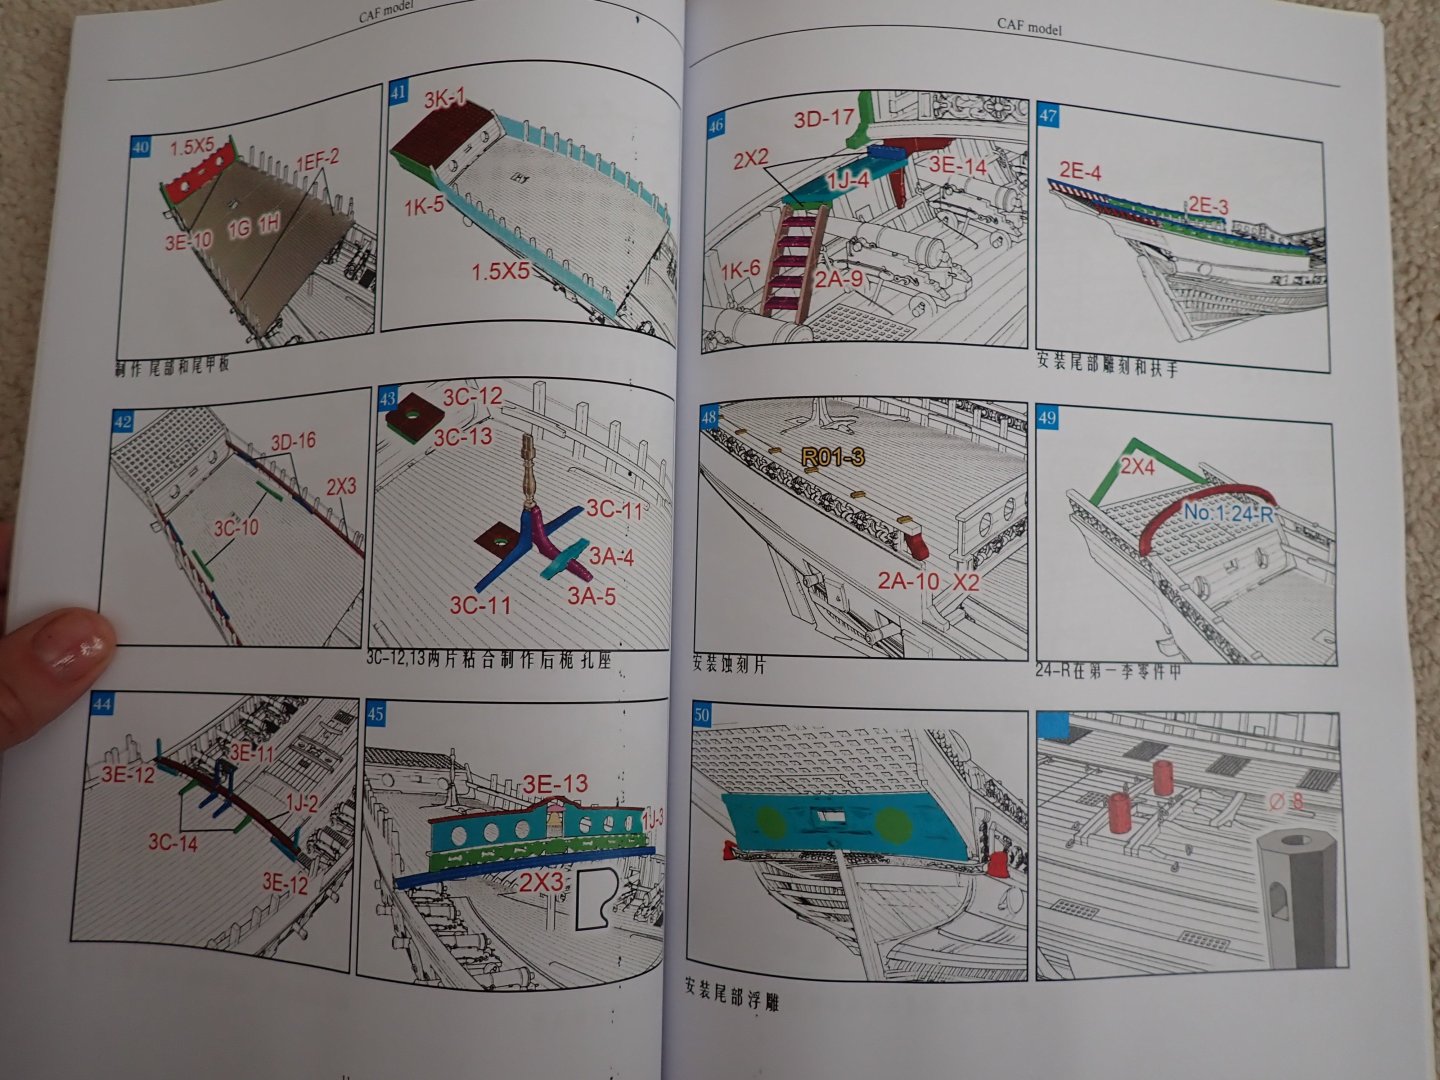
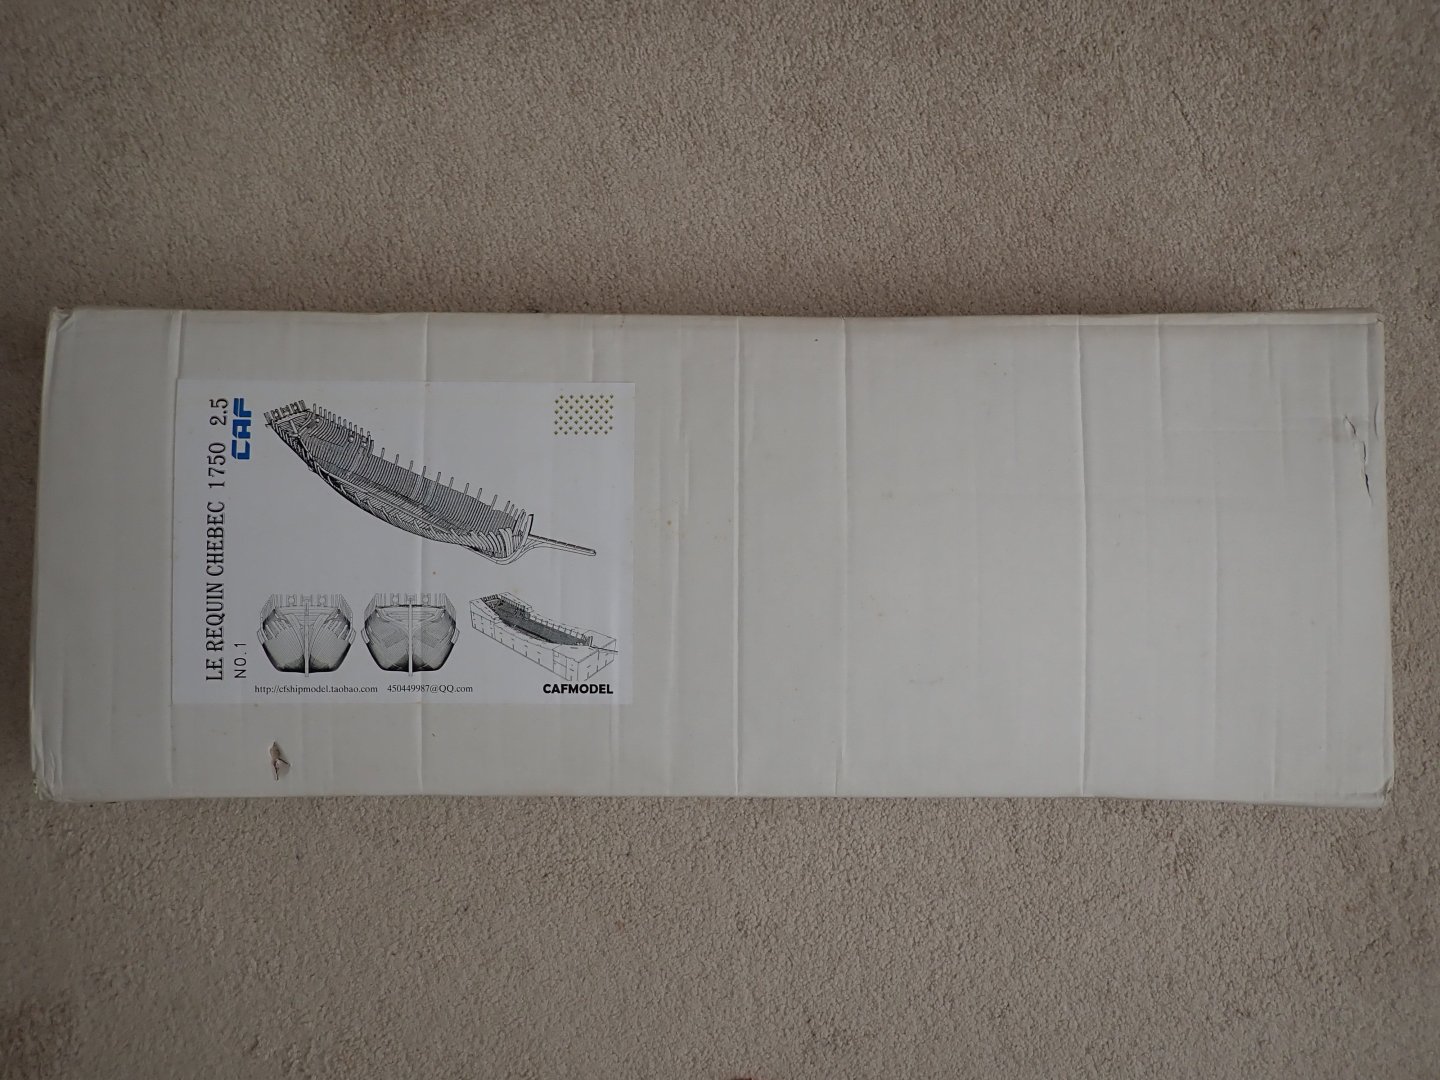
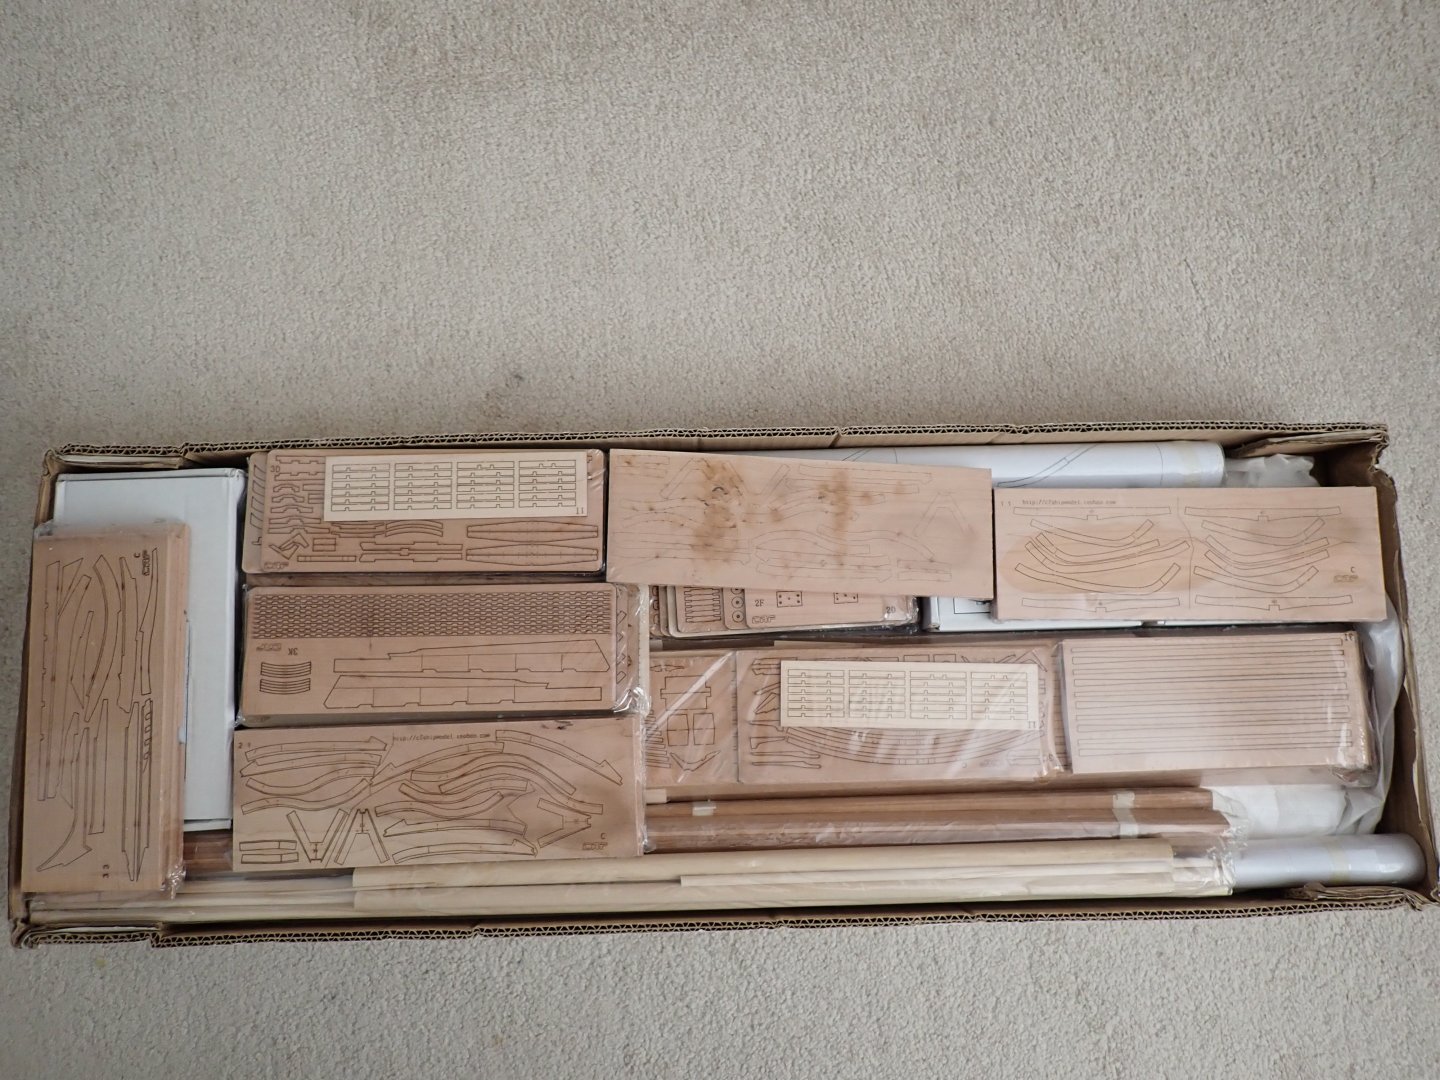
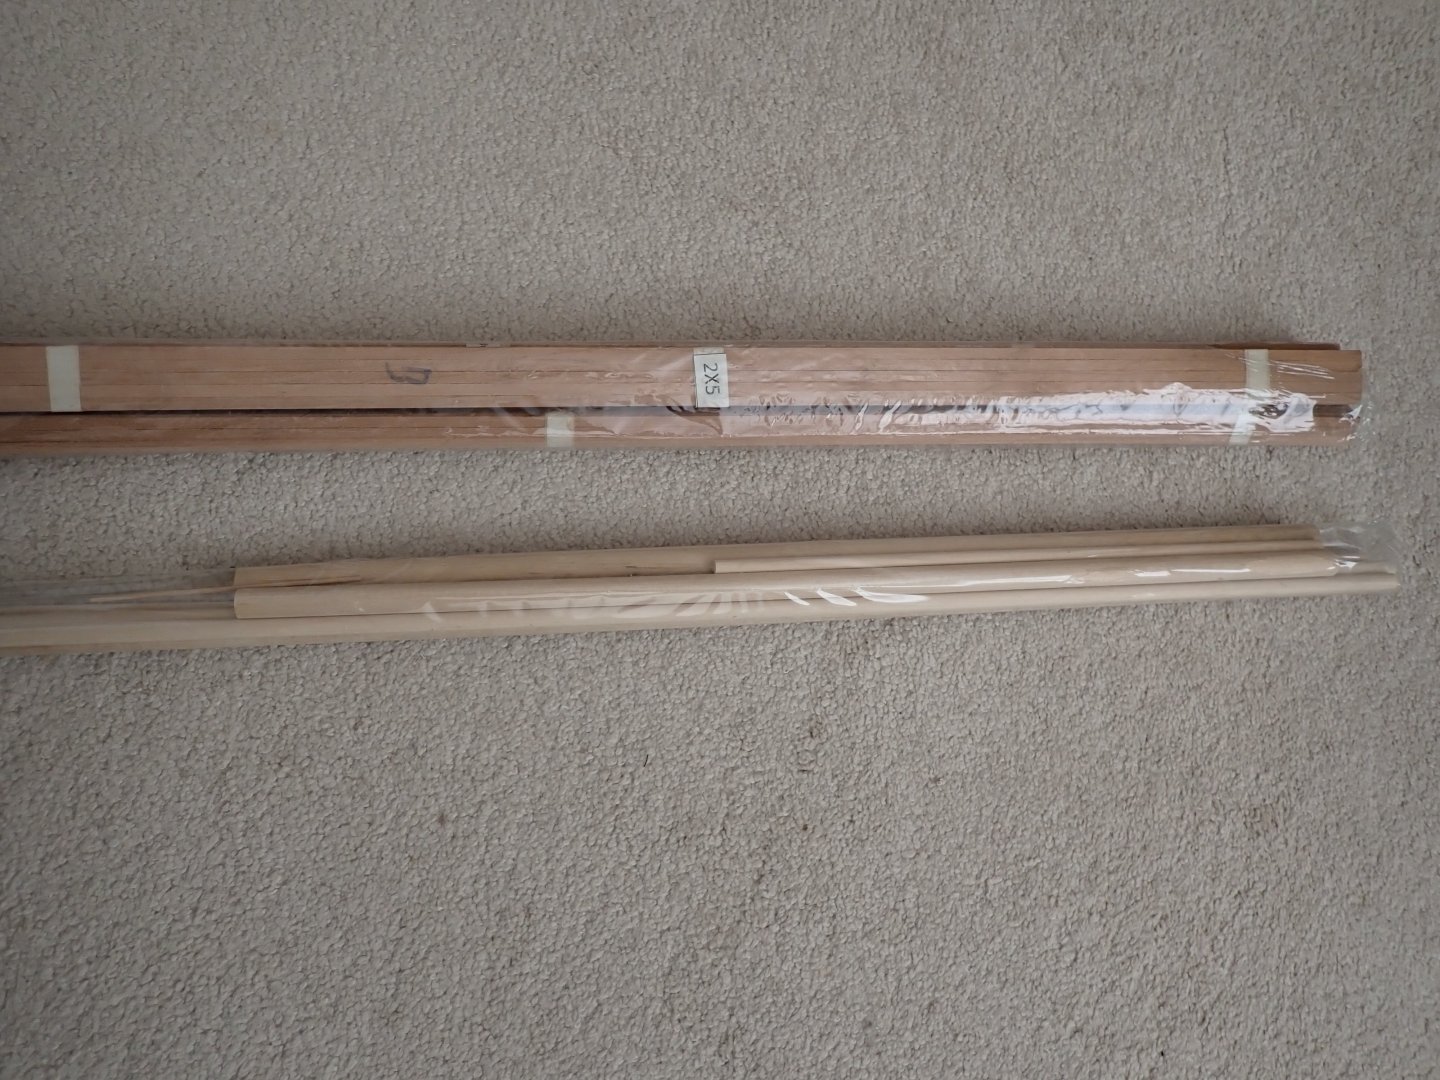
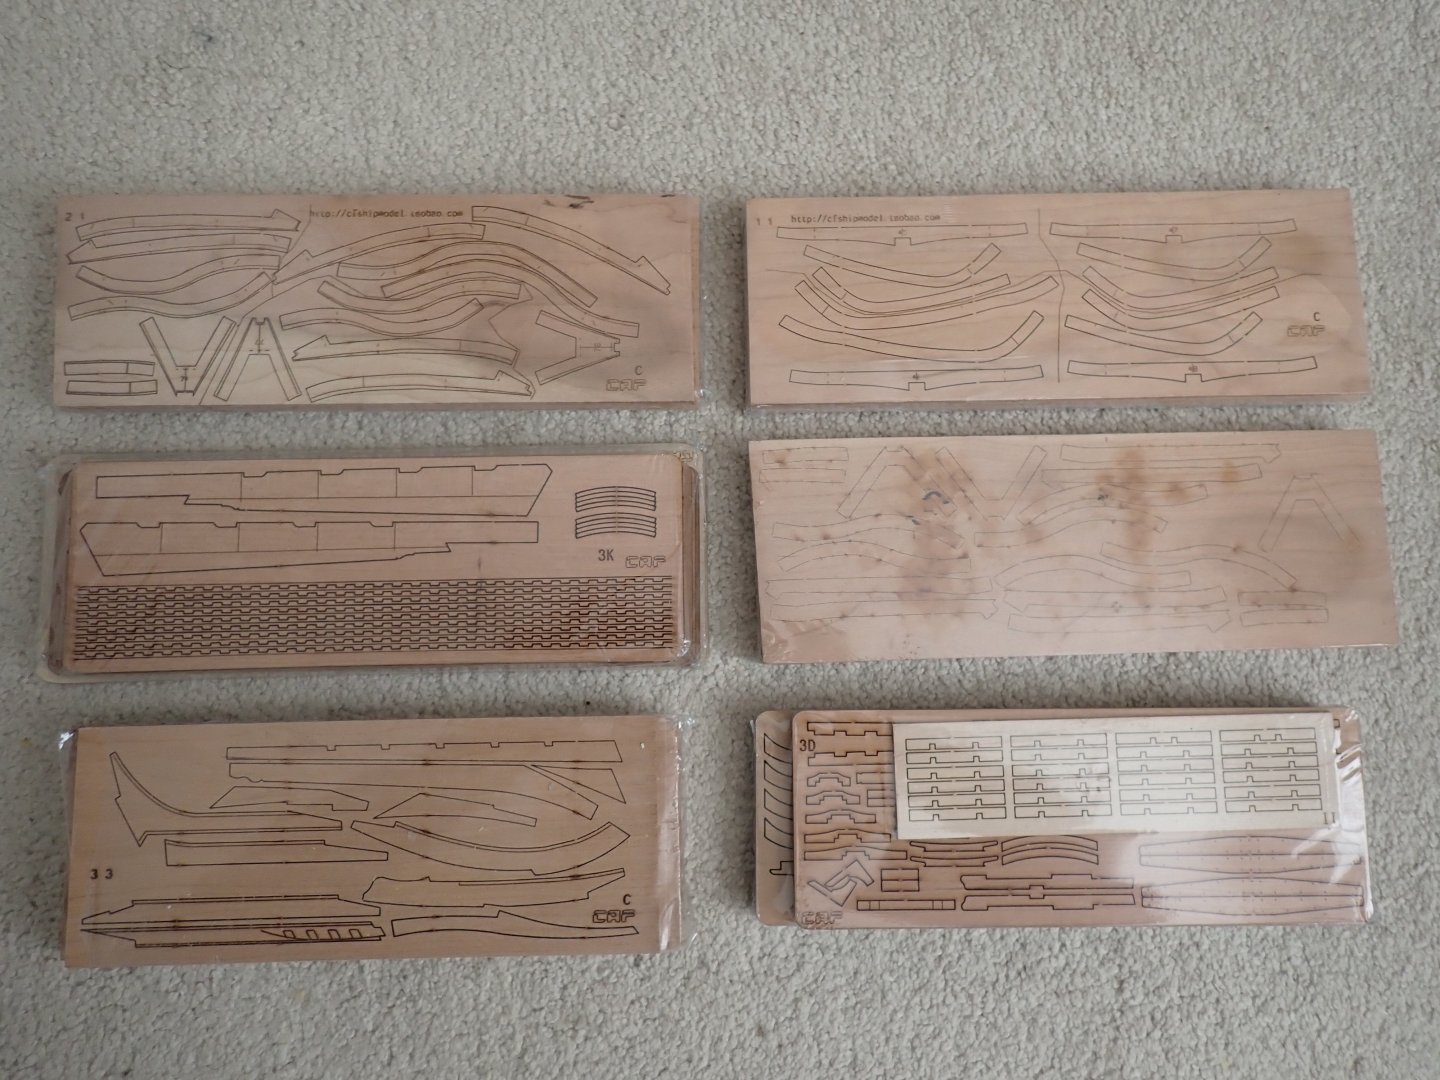
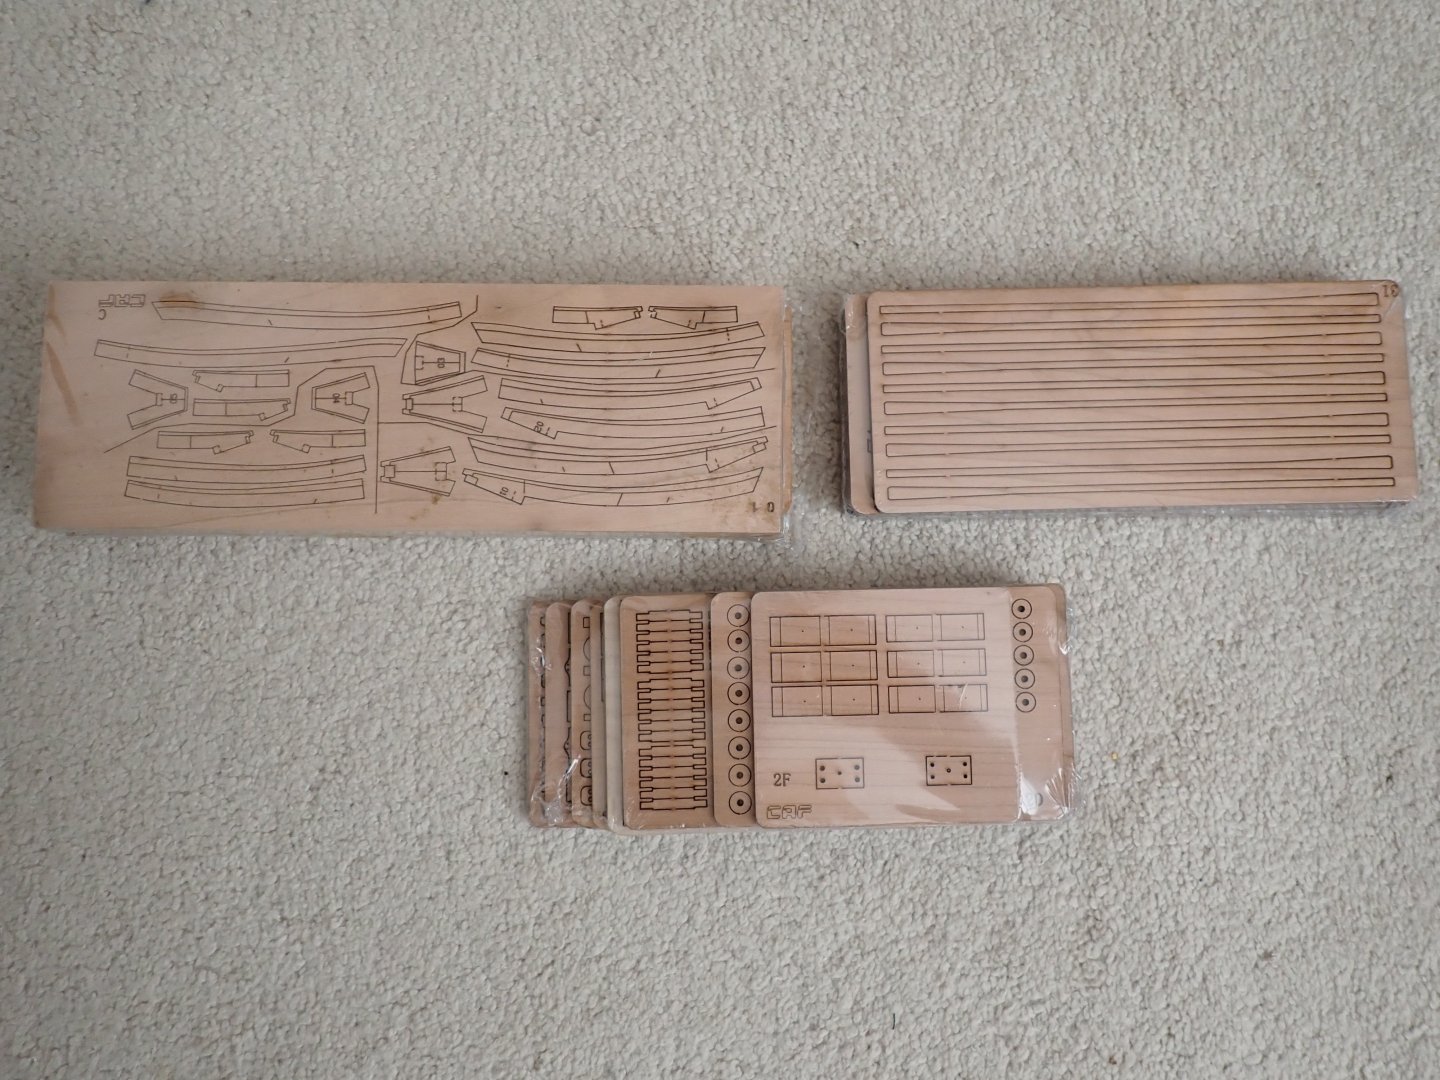
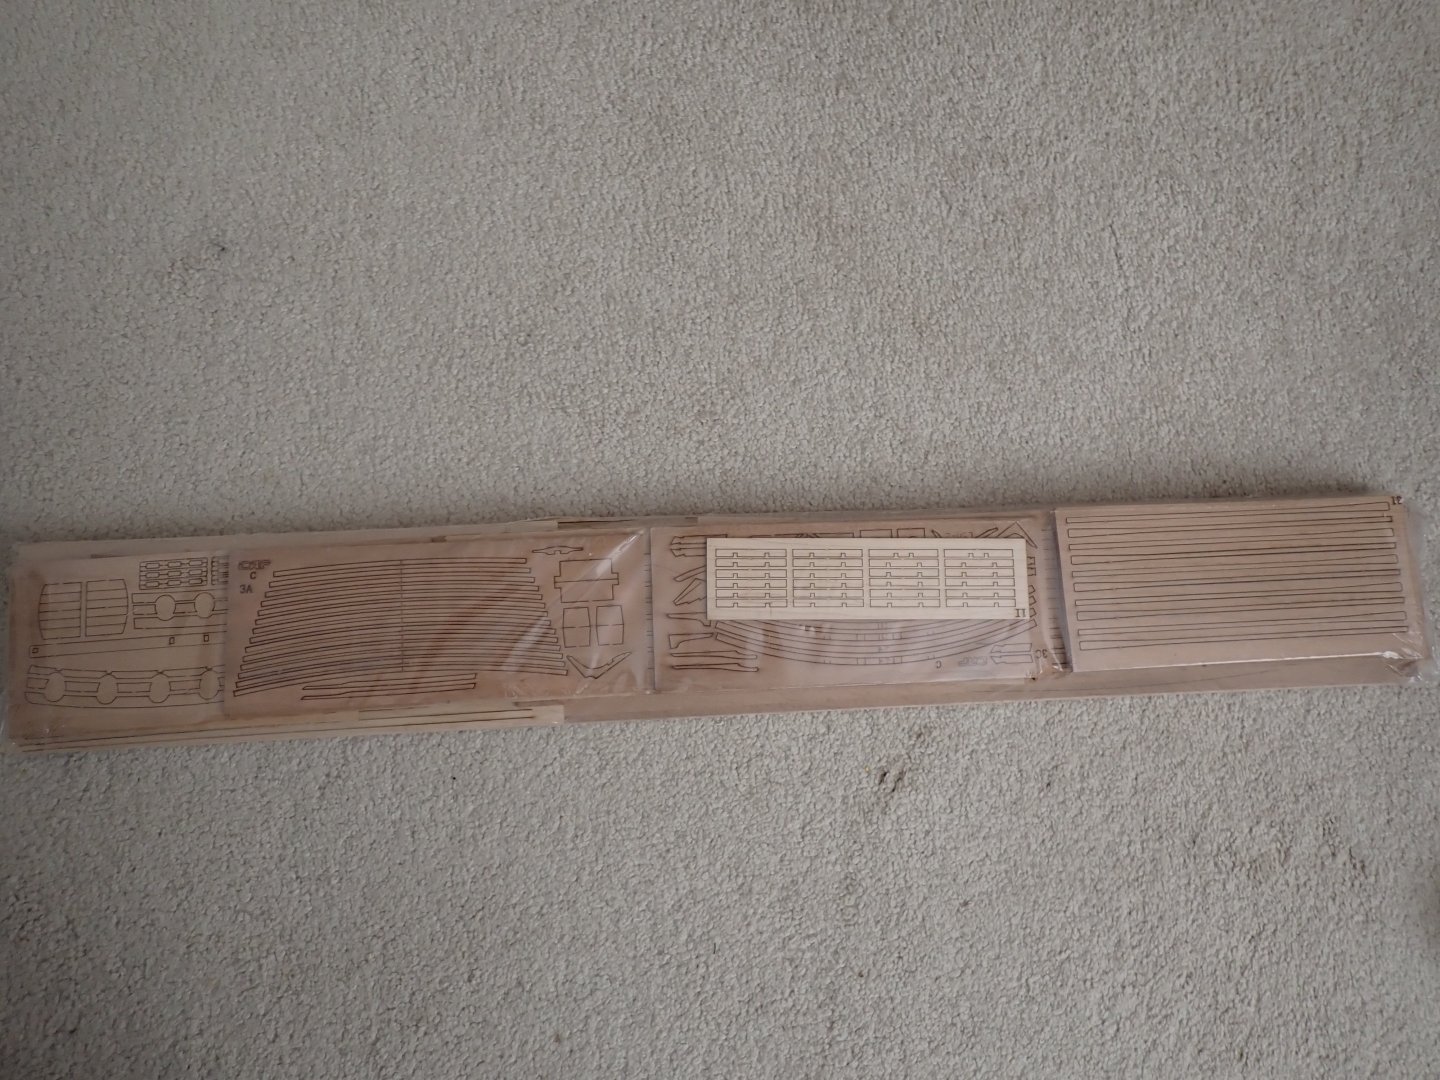
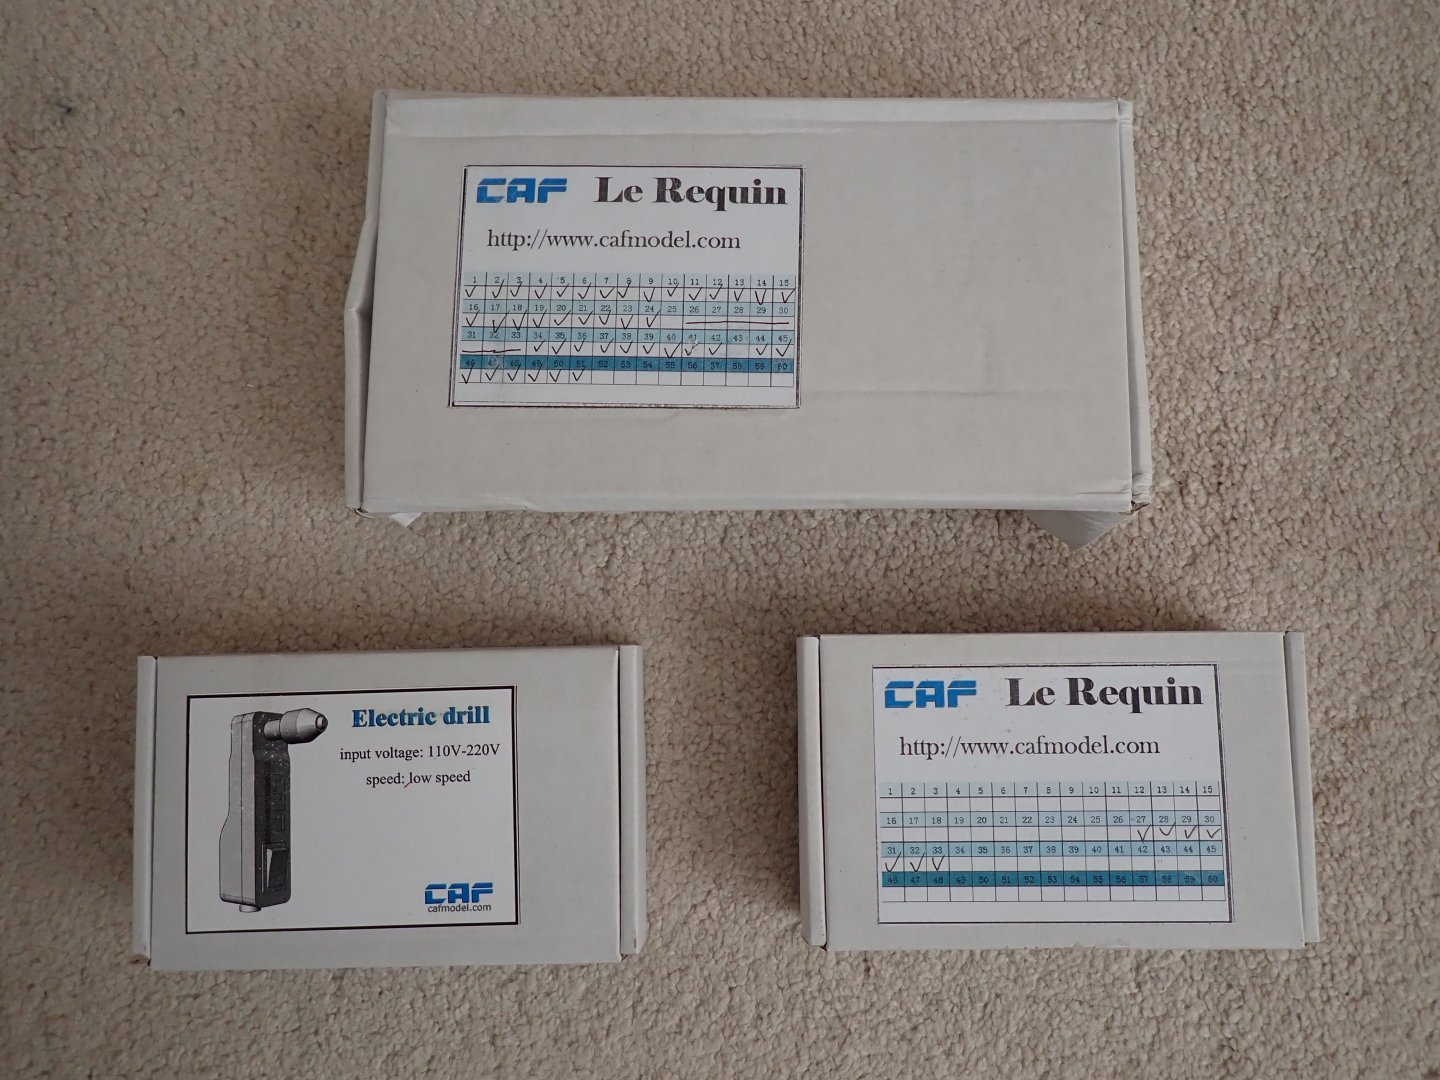
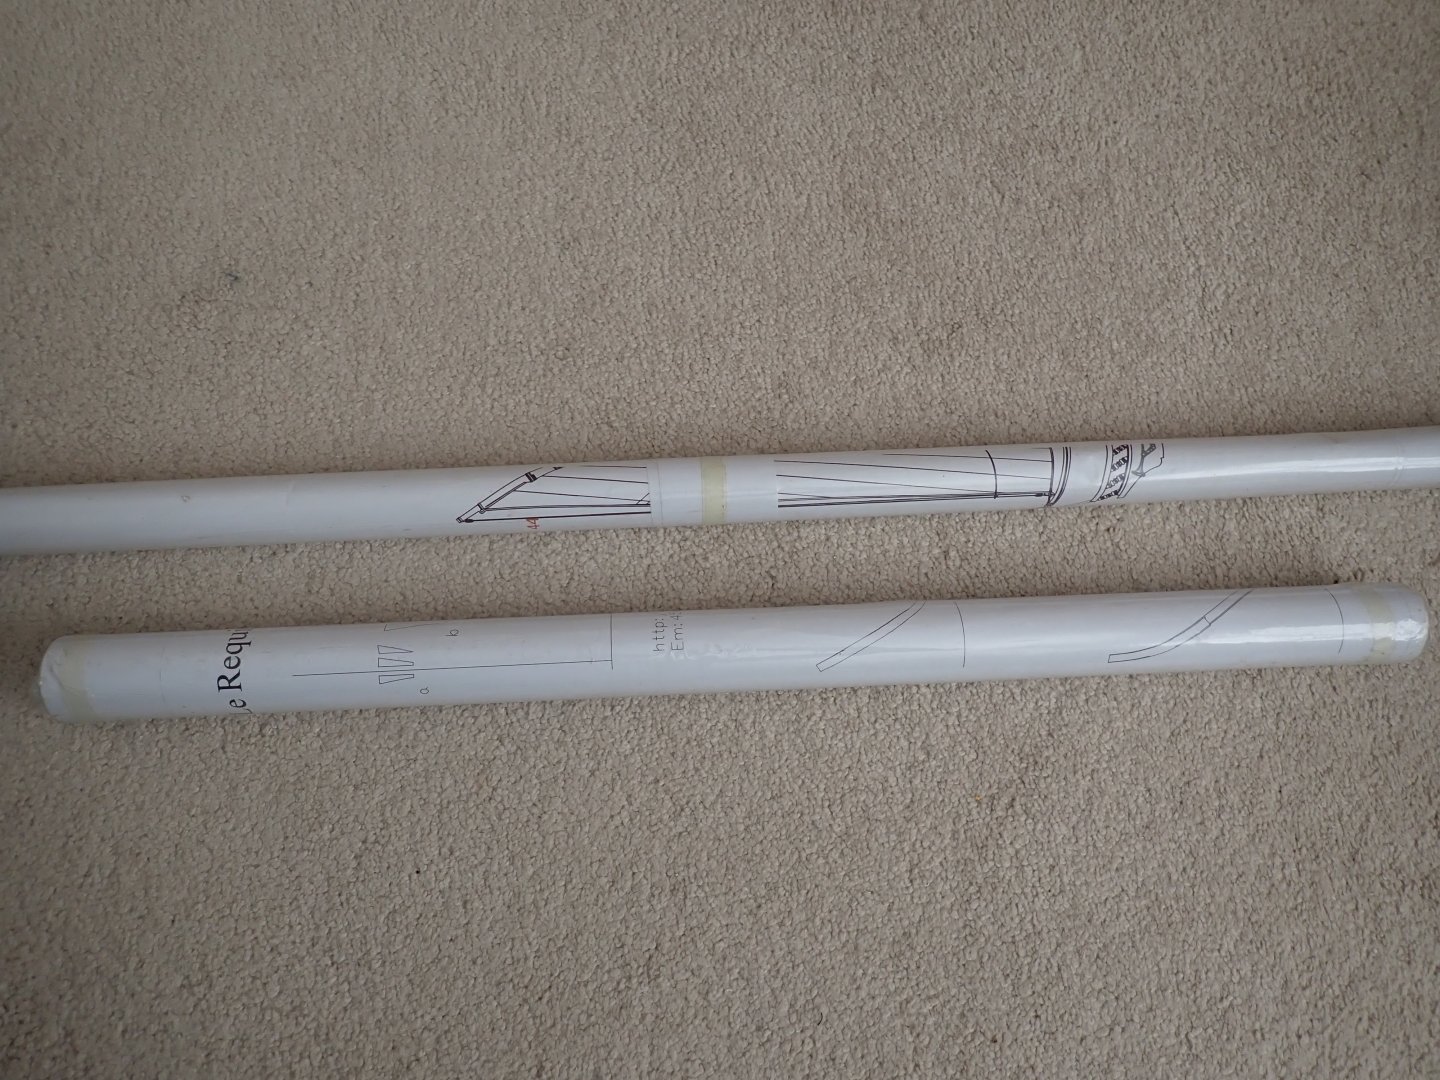
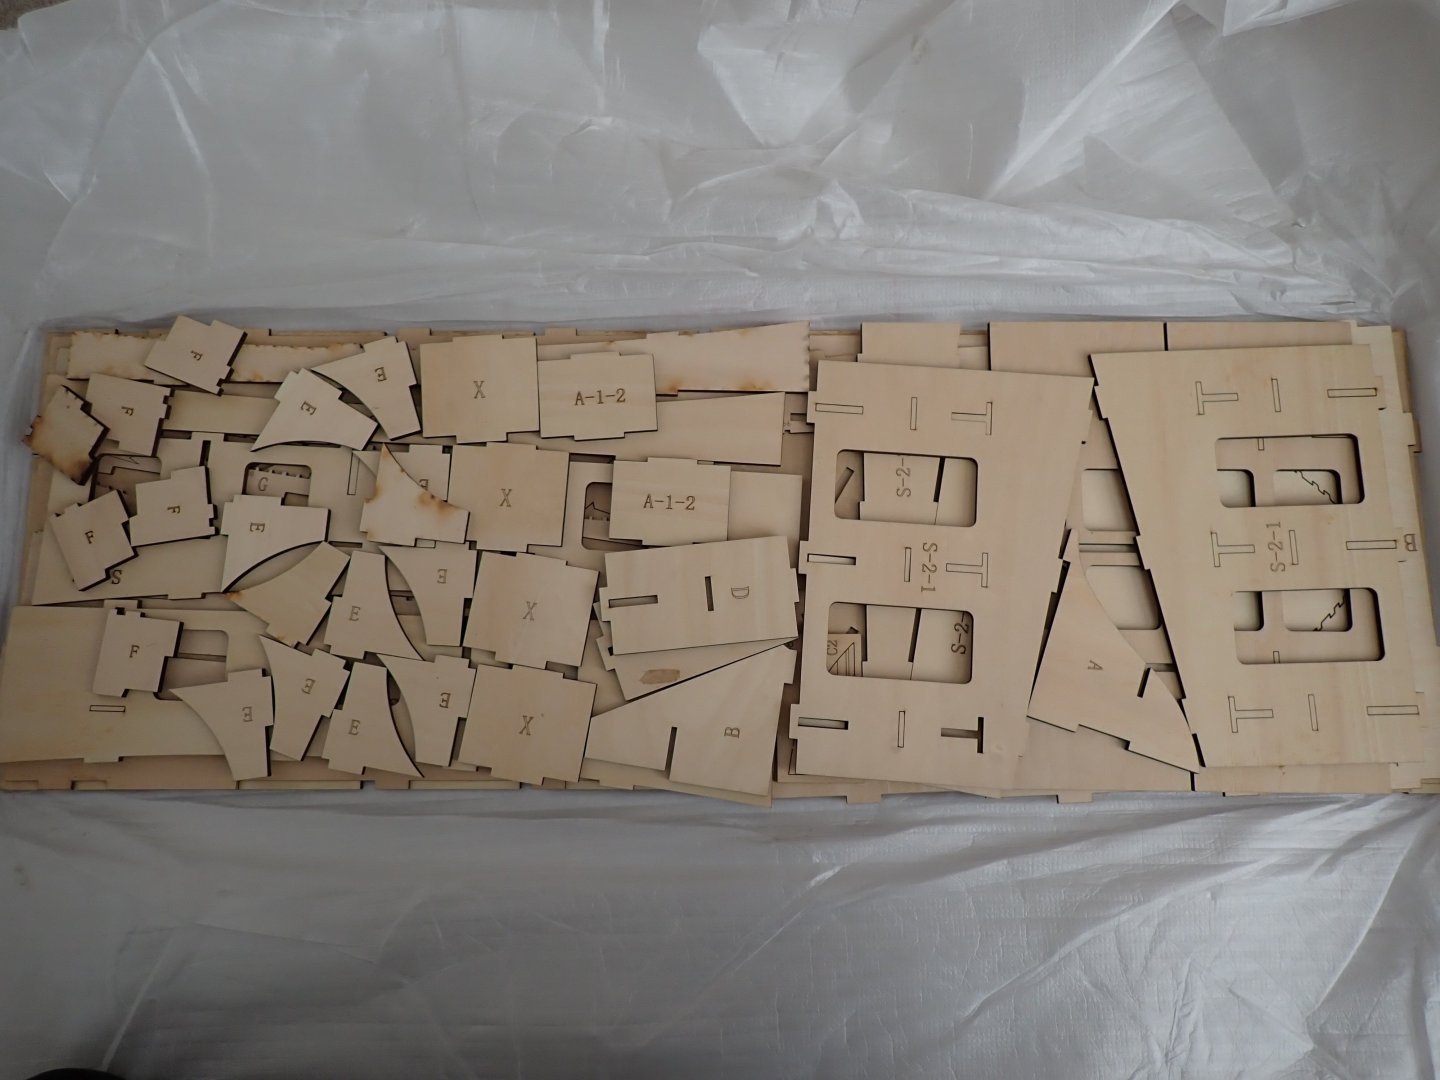
Quick presentation of the kit. More details about the parts and assembly will be given as we move (slowly) through this complex kit. The box as it arrived from China/CAF Model. Well protected and impervious to rain. And we open the lid.... These guys are champions at packing and stacking an incredible amount of parts into a tiny space. I could not put everything back into the original box: Instructions and PEs: Fabric for the sails.... A kit in the kit... KIK...the boat: Back to the main box: Masts and strips: Some of the numerous frames parts: Details and a little gift from Tom: a miniature drill !! Lots of ropes.... And tons of wood carved parts with brass guns and 3D printed details: Two full size plans: The special cradle to build the hull and assemble the frames: Yves


- 185 replies
-
- 16
-
-
-
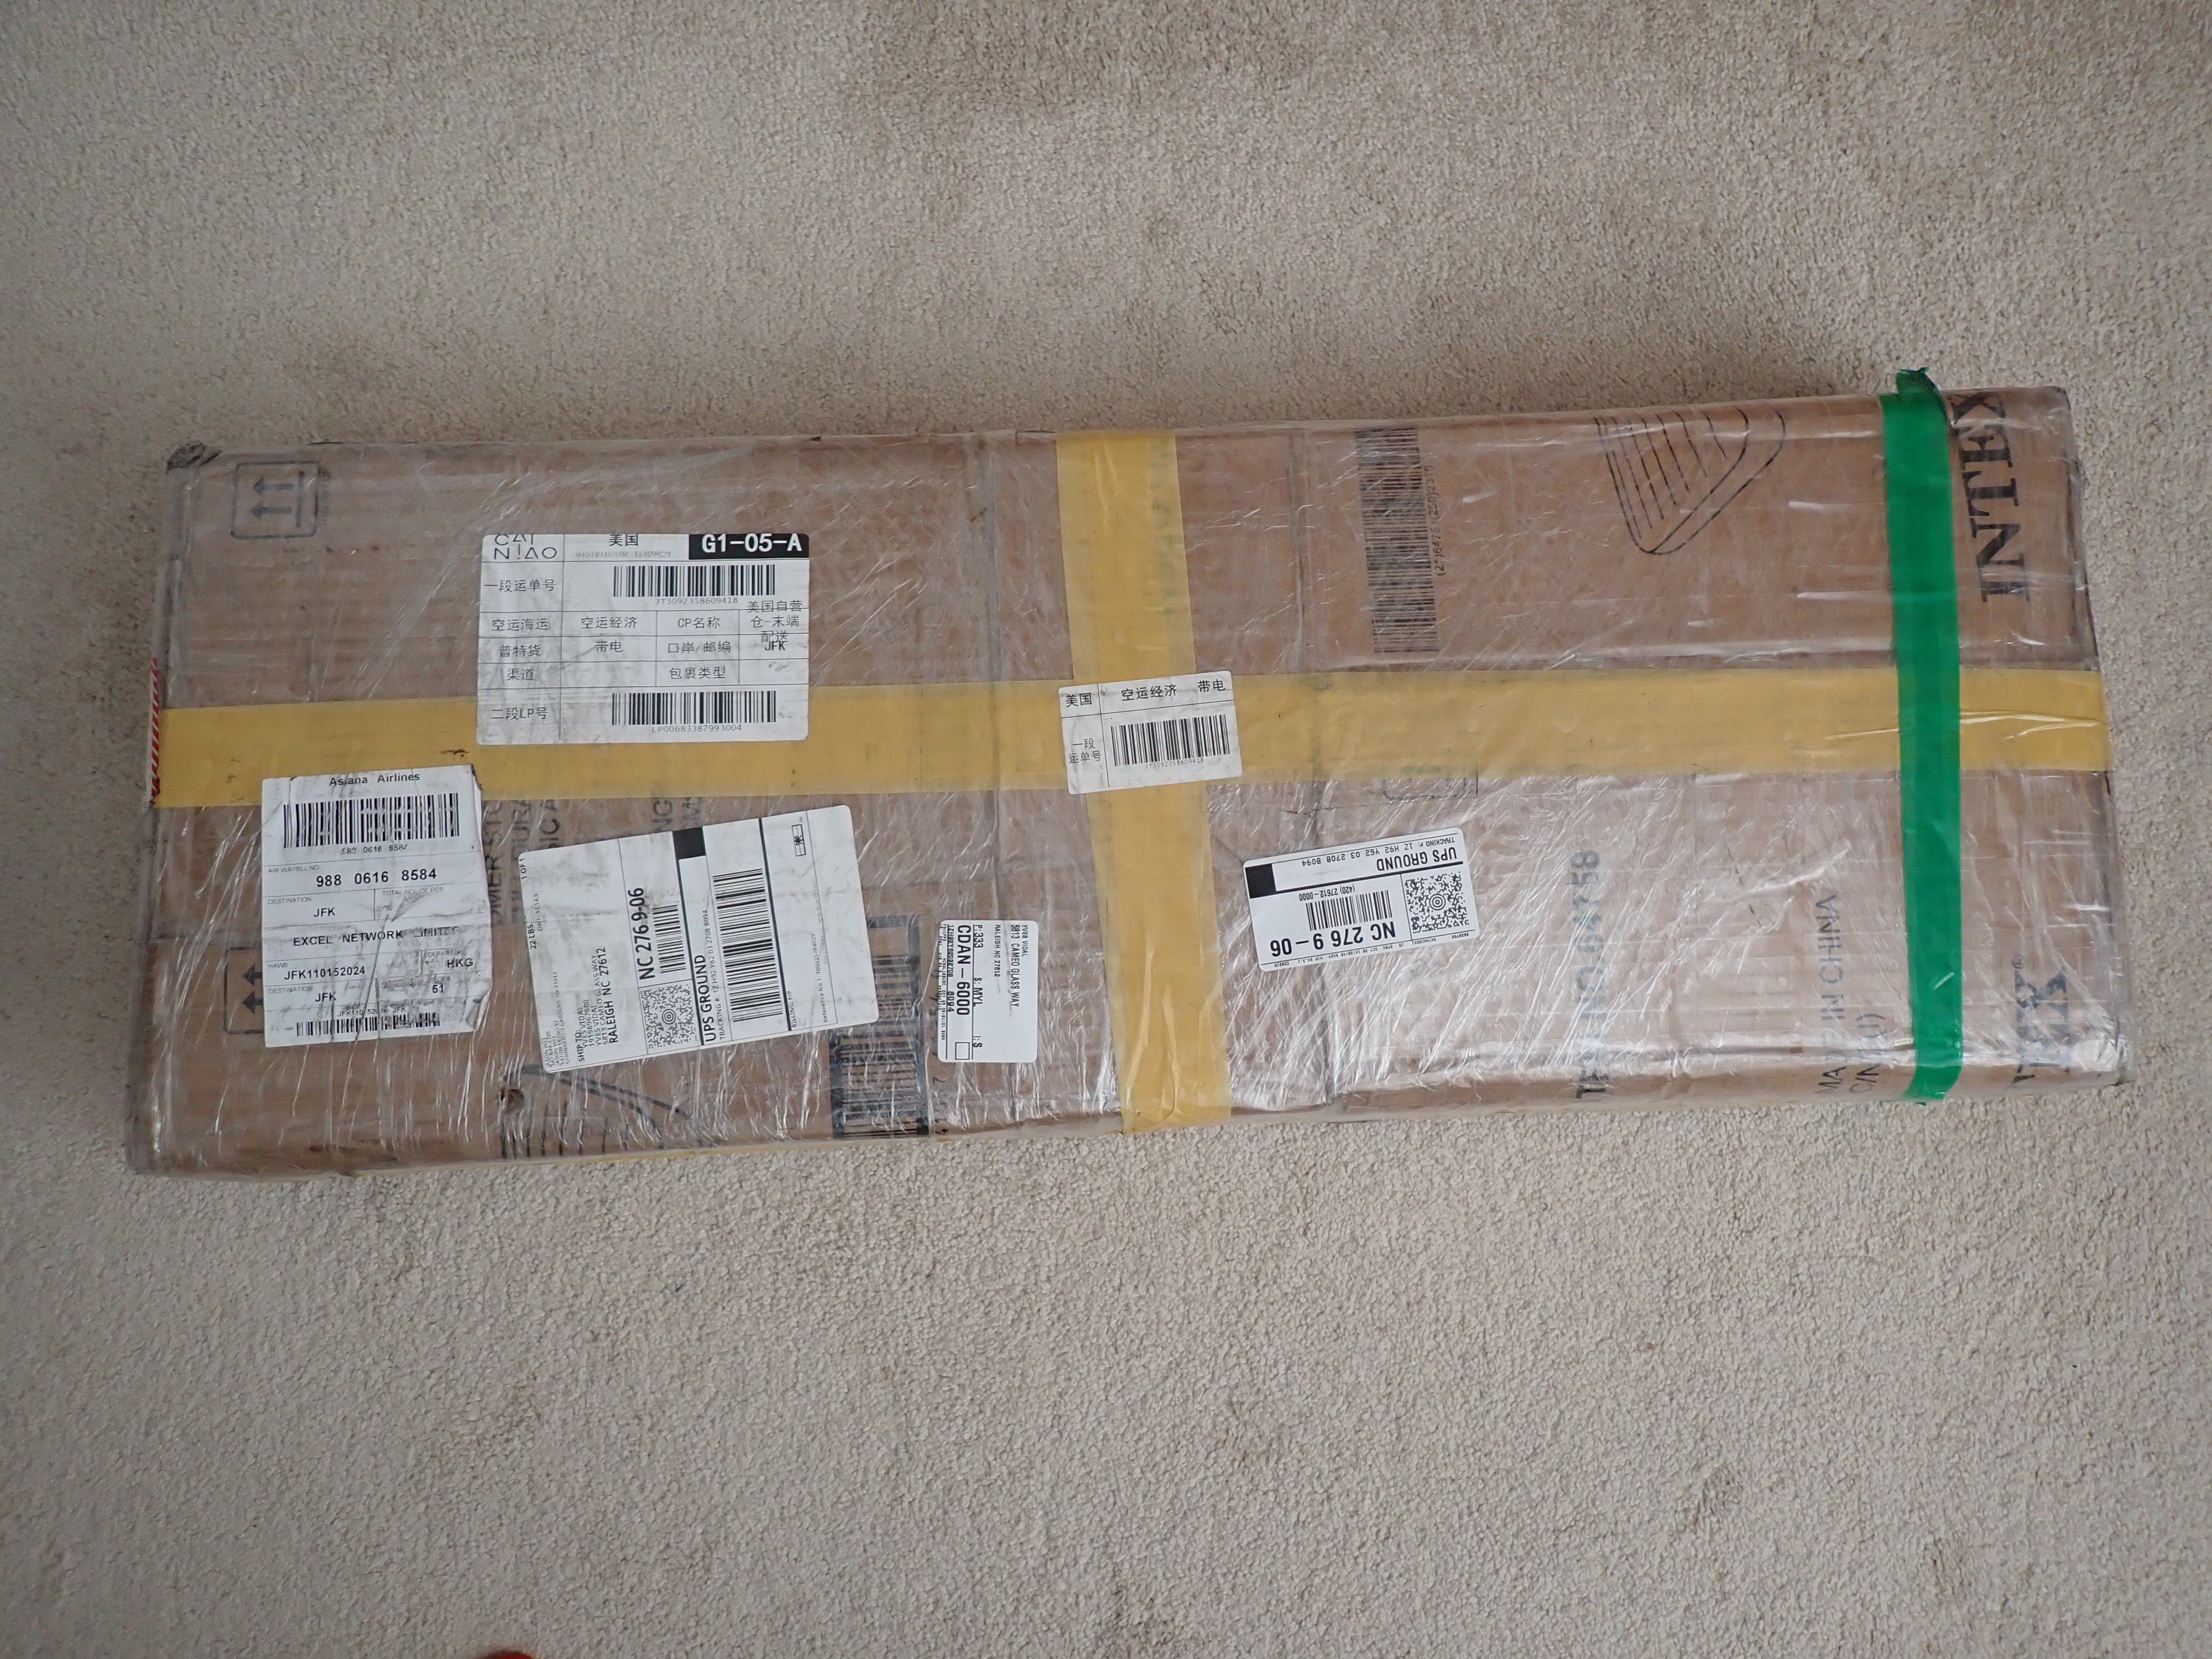
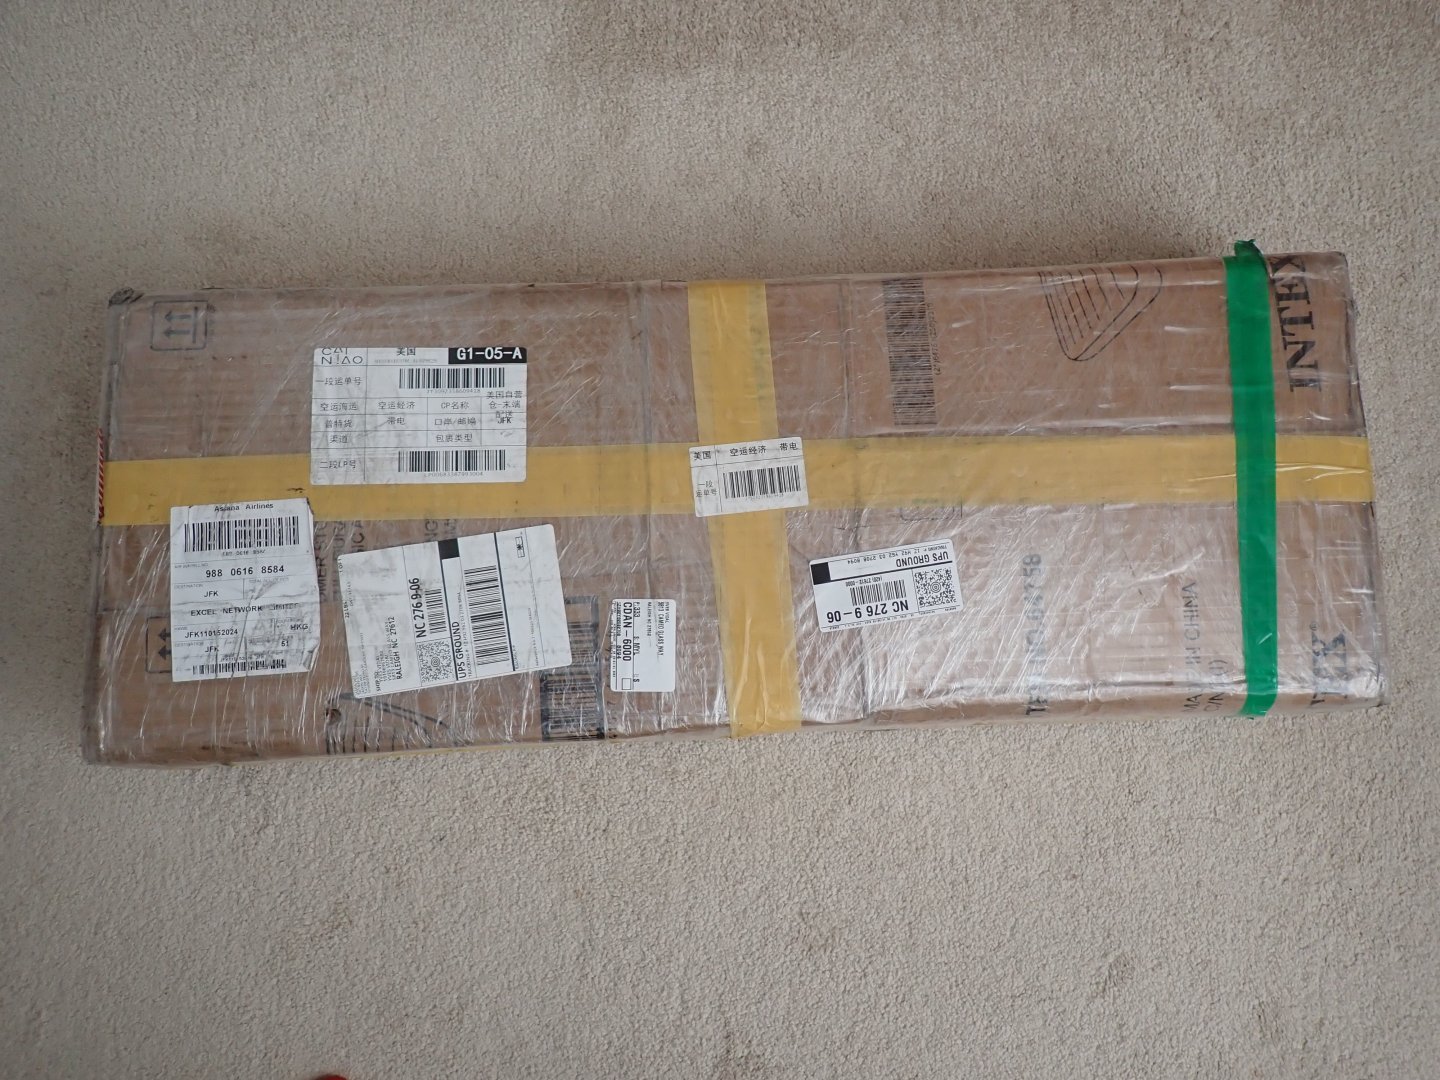
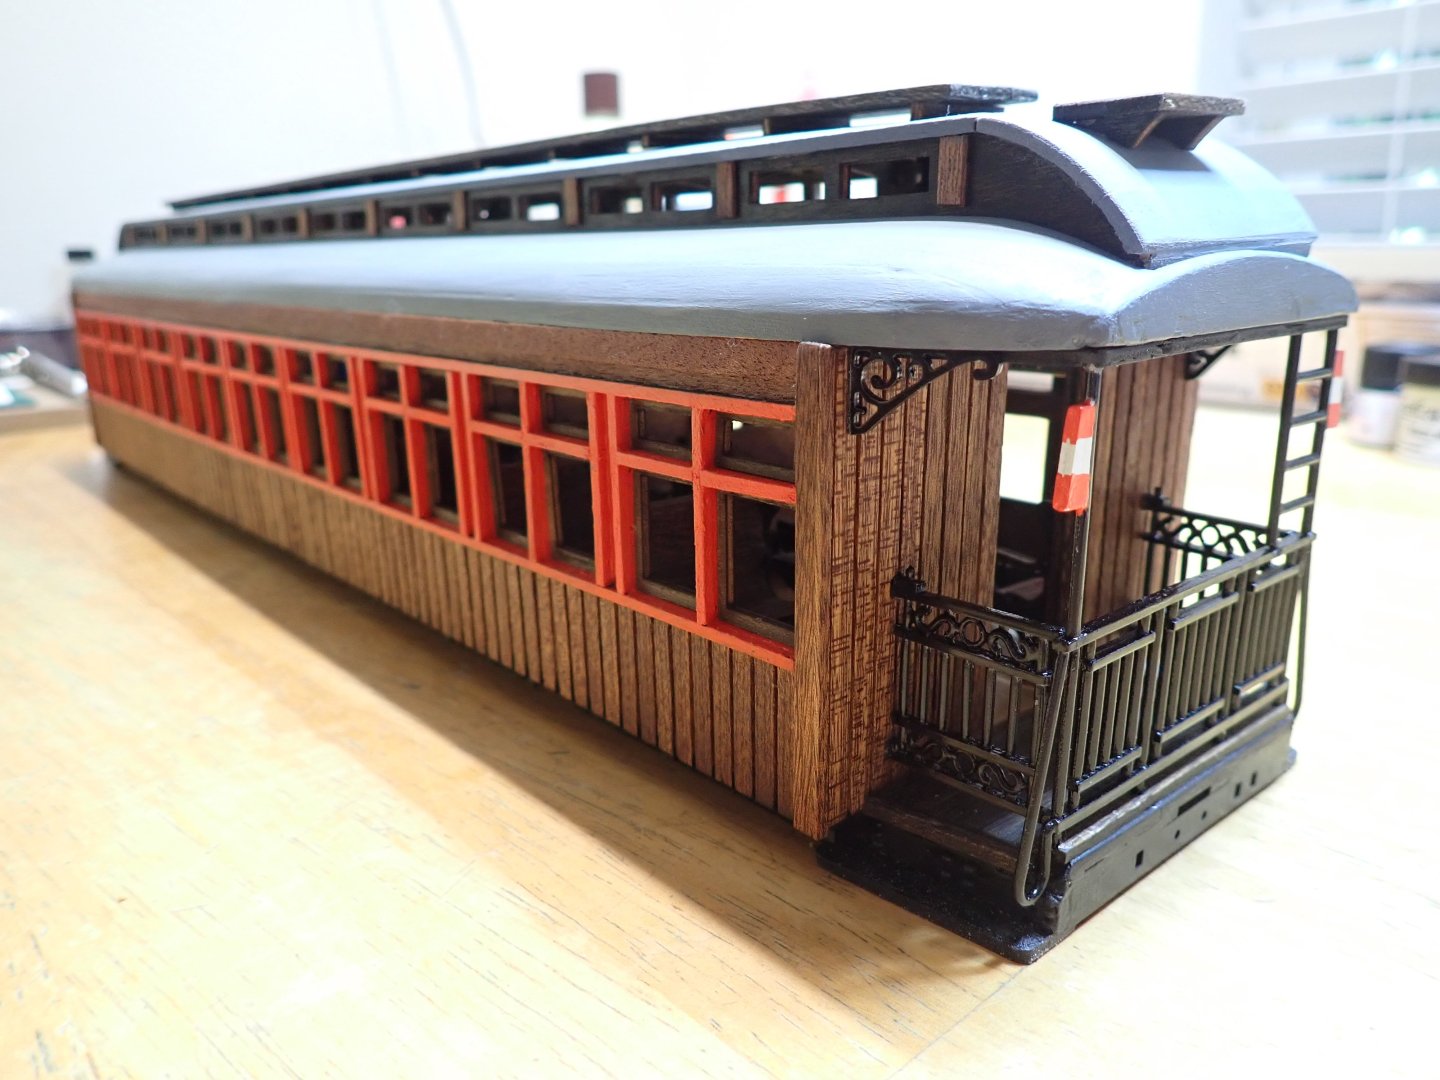
After completing with success the large 1/48 HMS Bellona by CAF Model, here is another ship that I always wanted to build: Le Chebec (one of the series, being called Le Requin). These eight (8) ships built by a French shipyard, were patrolling the Mediterranean sea and were used for all kinds of purposes. I love the sleek, flat, large and elegant shape of these ships and the combination of sails and oars, allowing them to move even when the wind was null, which happens quite often in the Mediterranean basin. There are multiple kits of that ship in the scale of 1/48 or 1/50th. The plastic model from Heller is a classic and still calls for a hefty price, due to its large size and complexity. The artist commissioned by Heller, also painted what I consider to be one of the most beautiful rendition of that legendary vessel: However, I wanted to build something made of wood and after building the Bellona using the plank on bulkheads technique, the desire to build a true "Plank on Frames" hit me. This technique allows for the display of the inside of the ship, which is always an exciting feature. A few Chinese builders are offering the Chebec in 1/48th scale, but having had a great experience with CAF Model, I decided to go with them as they just authored this new kit, recently. Besides, the other Chinese makes of this kit are not authorized on that forum. So, it was a big NO-NO! Procuring the kit was an adventure of patience, renouncement, frustration and finally relief. At the end of the story, I could appreciate and treasure the honesty and incredible dedication of "Tom" from CAF Model. After paying the price of the kit and ordering on the CAF Model web site, Tom sent the kit using UPS and one local "Courier Agency" in China. Tracking on the UPS web site was encouraging until.....I realized that the kit had been delivered to a small town south of Dallas, TX. Bummer! Tom checked the route and realized that the Courier Agency had screwed up and sent the kit to the wrong address. Despite all queries with UPS and the Agency, the kit was never located and the recipient of the kit never tried to contact me or Tom, for the mistake (my name and phone number were on the parcel). Tom initiated a second sending of a second kit (big losses for Tom - I hope that the insurance will refund some of that money) and gave me a second UPS tracking number. The second kit stayed 10 days in the American Custom department, not moving apparently as UPS was not getting the parcel. I lost it and asked Tom again, what was going on. Tom, feeling my frustration refunded me completely for all the money I had given him. He also indicated that he had used another Courier Company and was placing better expectations on them. A quick mail from him, indicated that the kit was now on US ground. Time passed..... And just today, the kit finally showed up at my door: a MIRACLE !!!! Of course, I am waiting for Tom's bill and I will pay him with gratitude and satisfaction. I am not sure what is going on in China at this moment, but I would recommend CAF Model and his owner Tom to all enthusiasts. His honesty, dedication to this hobby and diligence to fix all the problems and issues, are incredible. As Tom said in his last e-Mail, we are now best friends!! My next post will present the kit. It will be a while before I start the construction, but wanted to relay the purchase of that kit and present it to our readers. This is a place holder for my next Build Log. Yves
- 185 replies
-
- 15
-
-
Alan, That Flamenco diorama is a breath of fresh air and absolutely lovely. Very well done. Yves
-
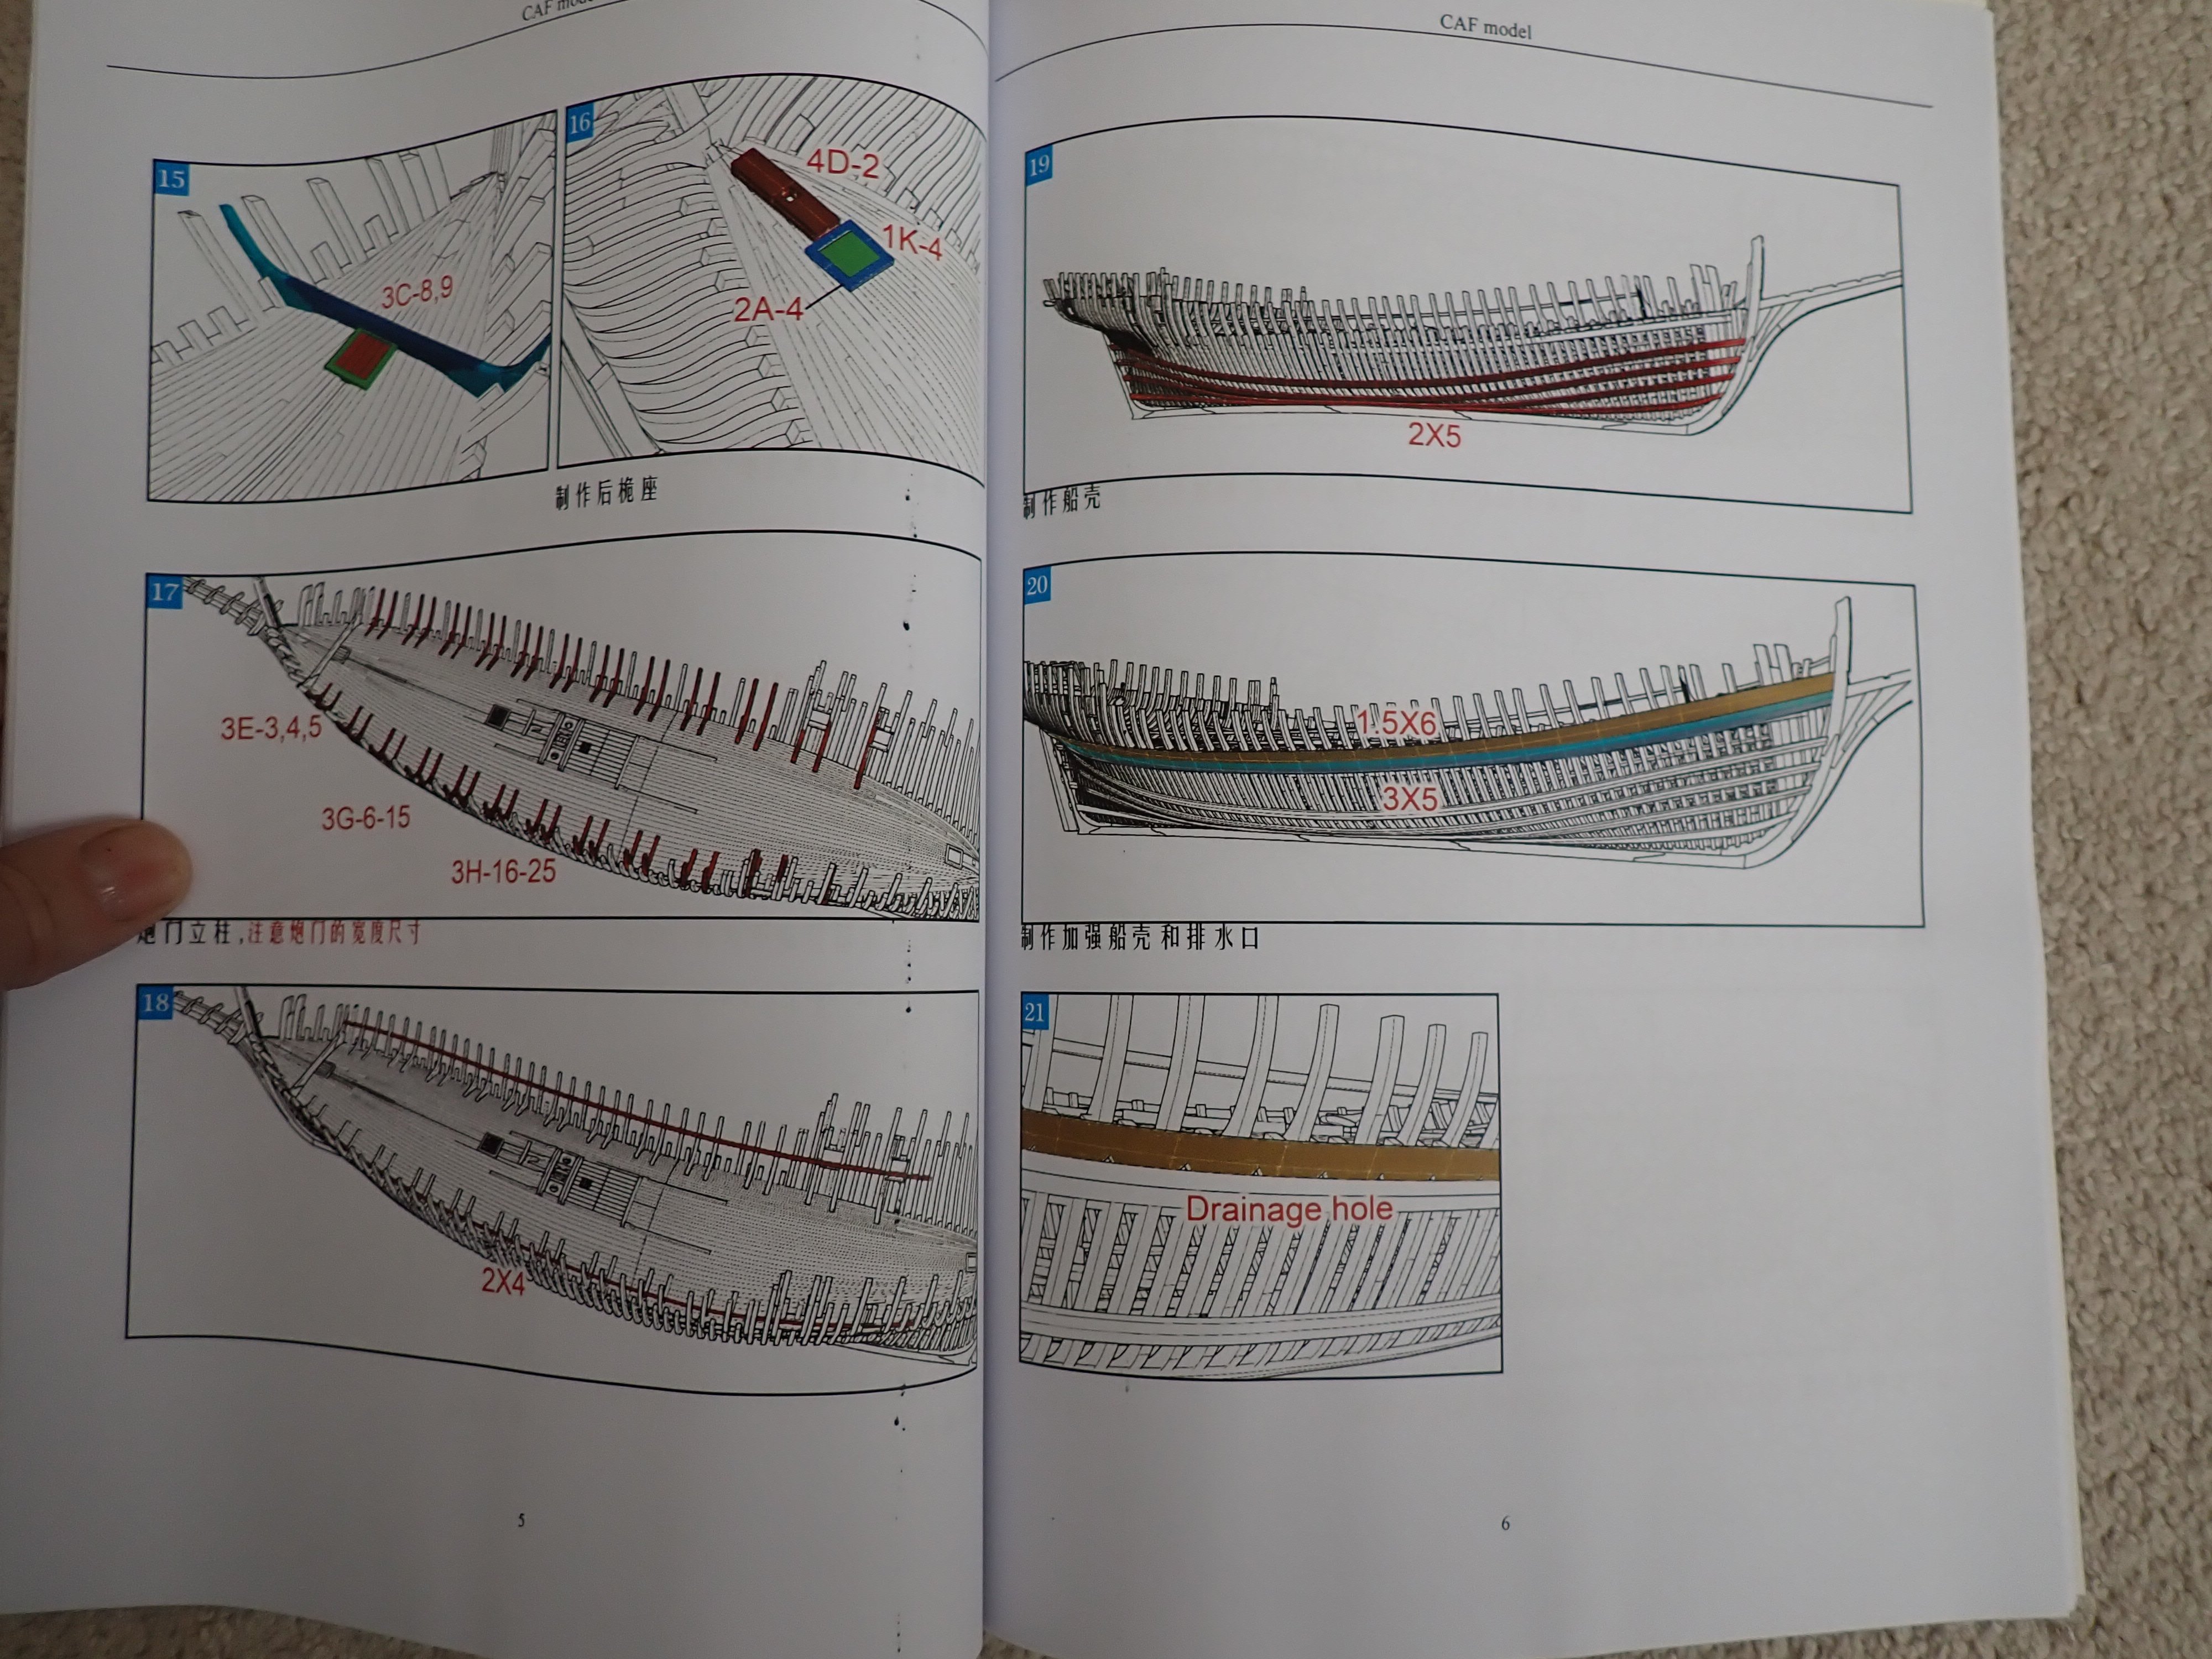
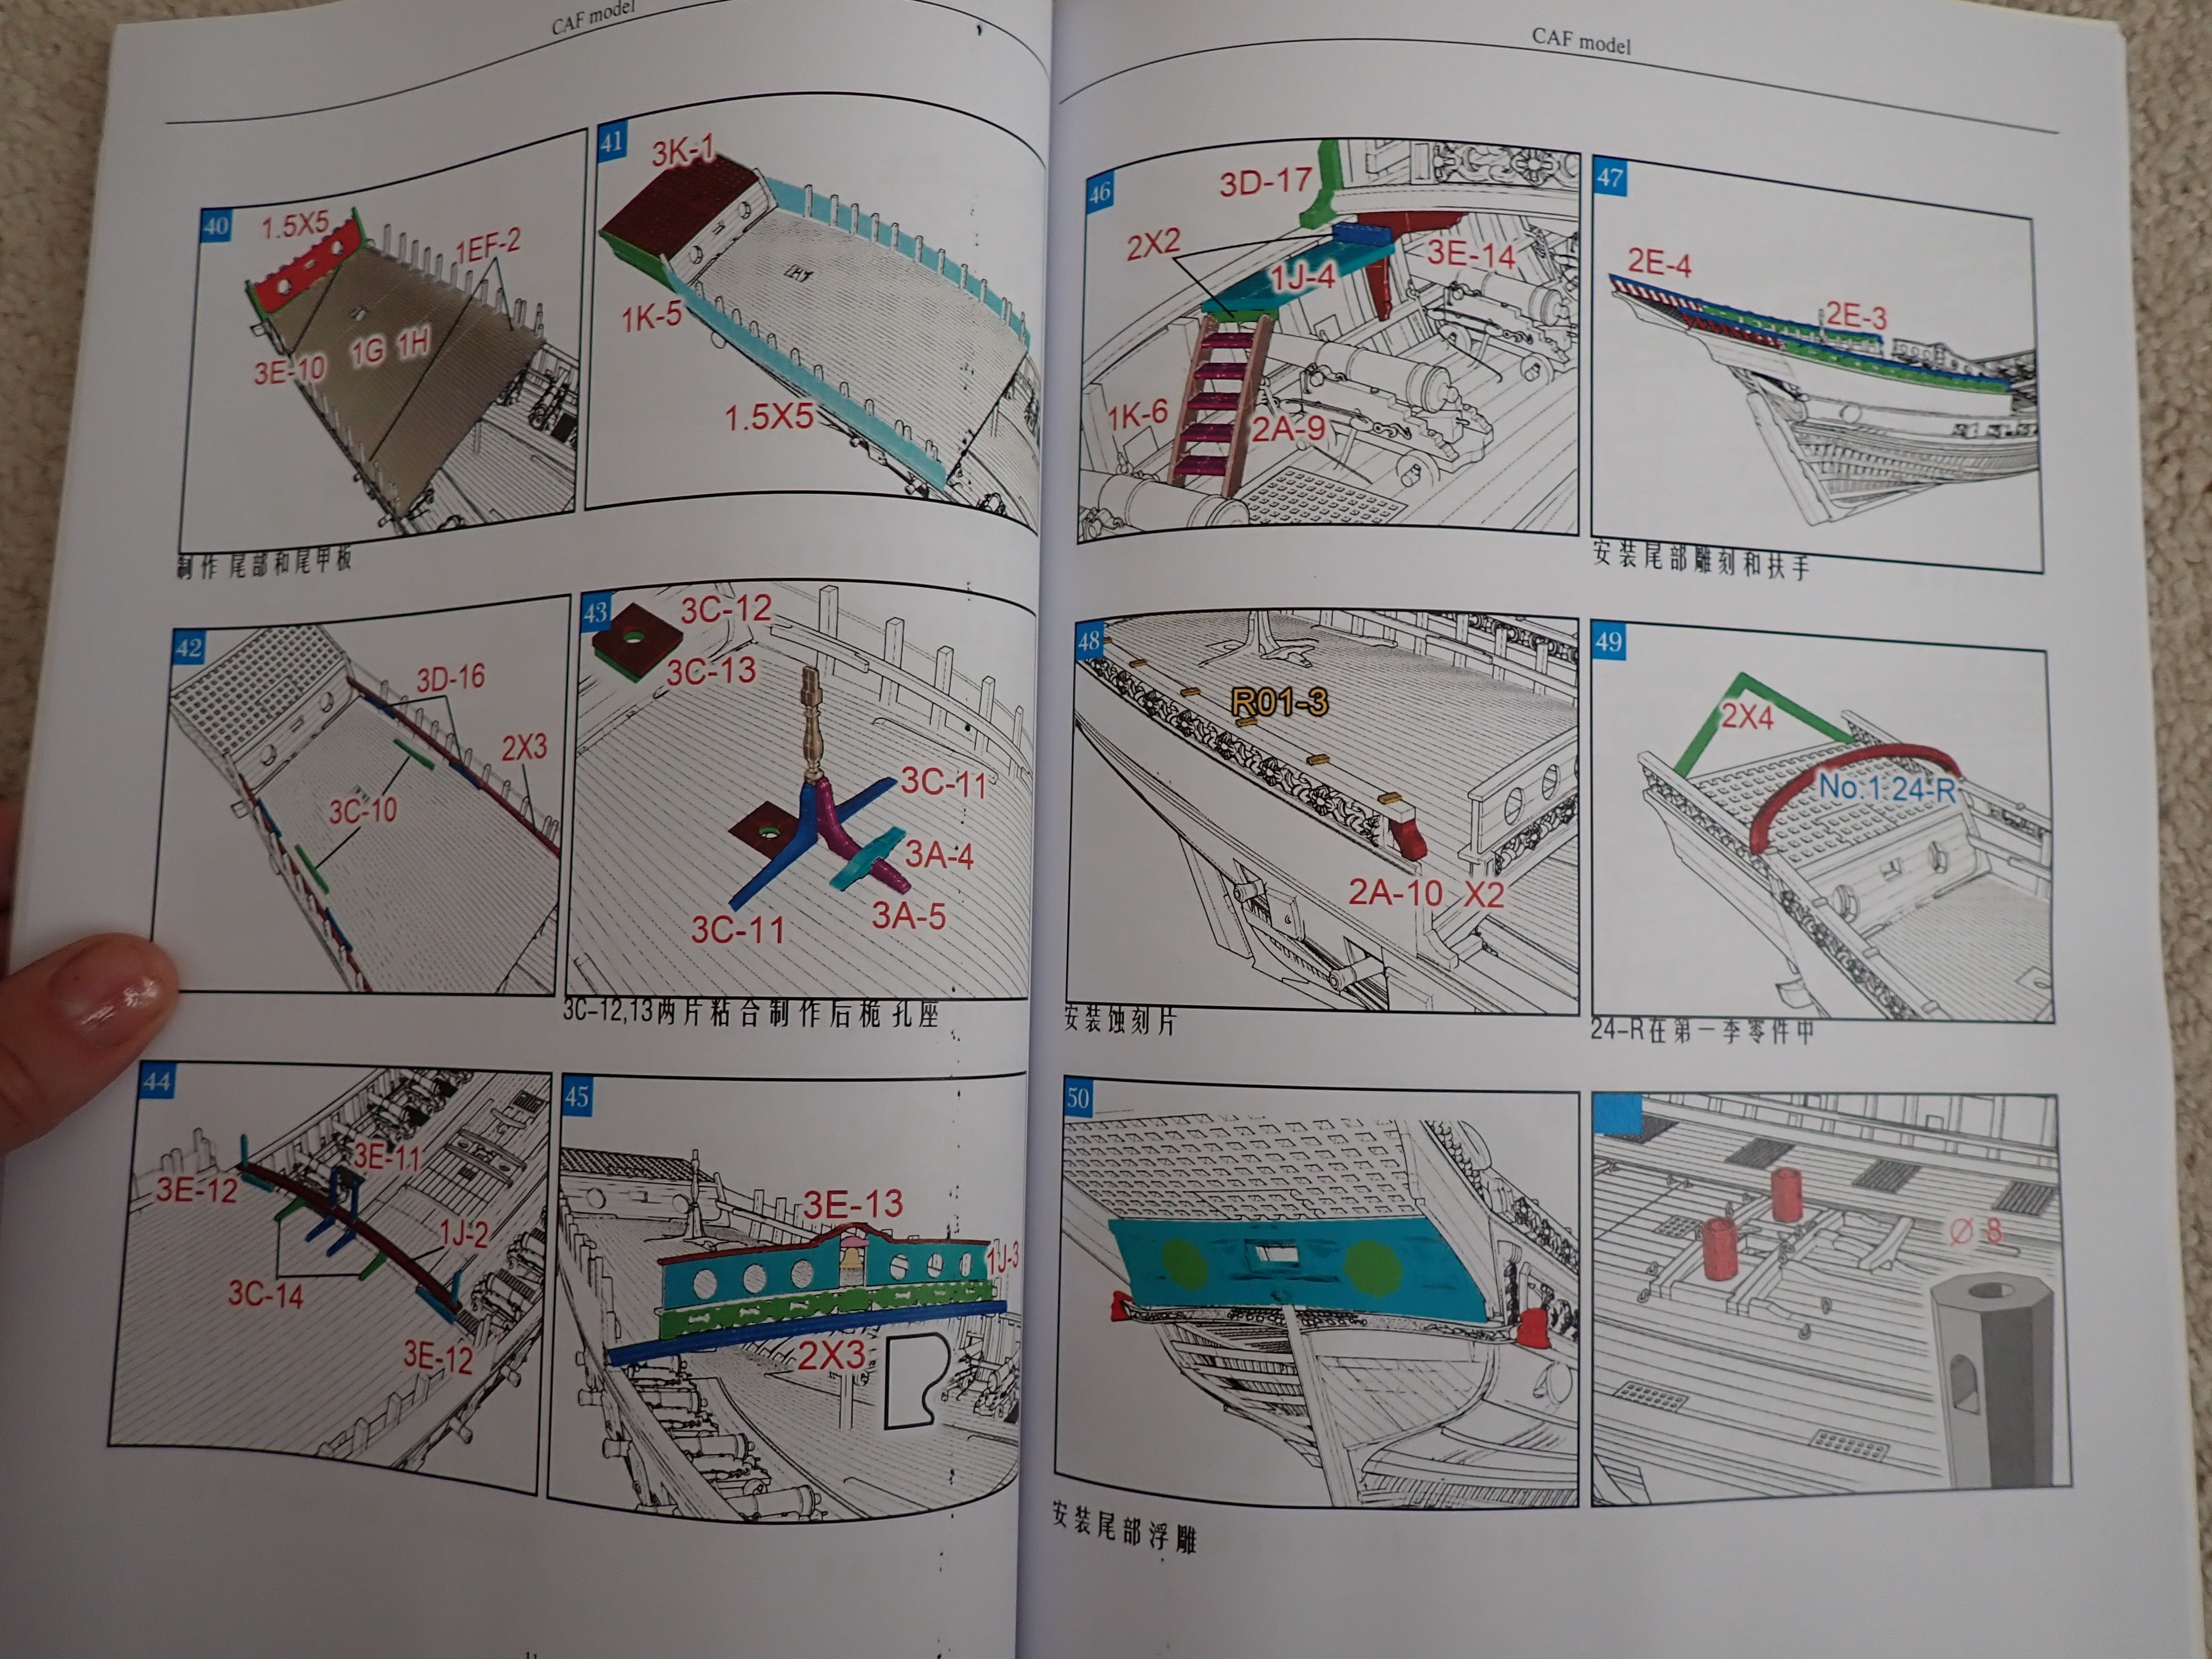
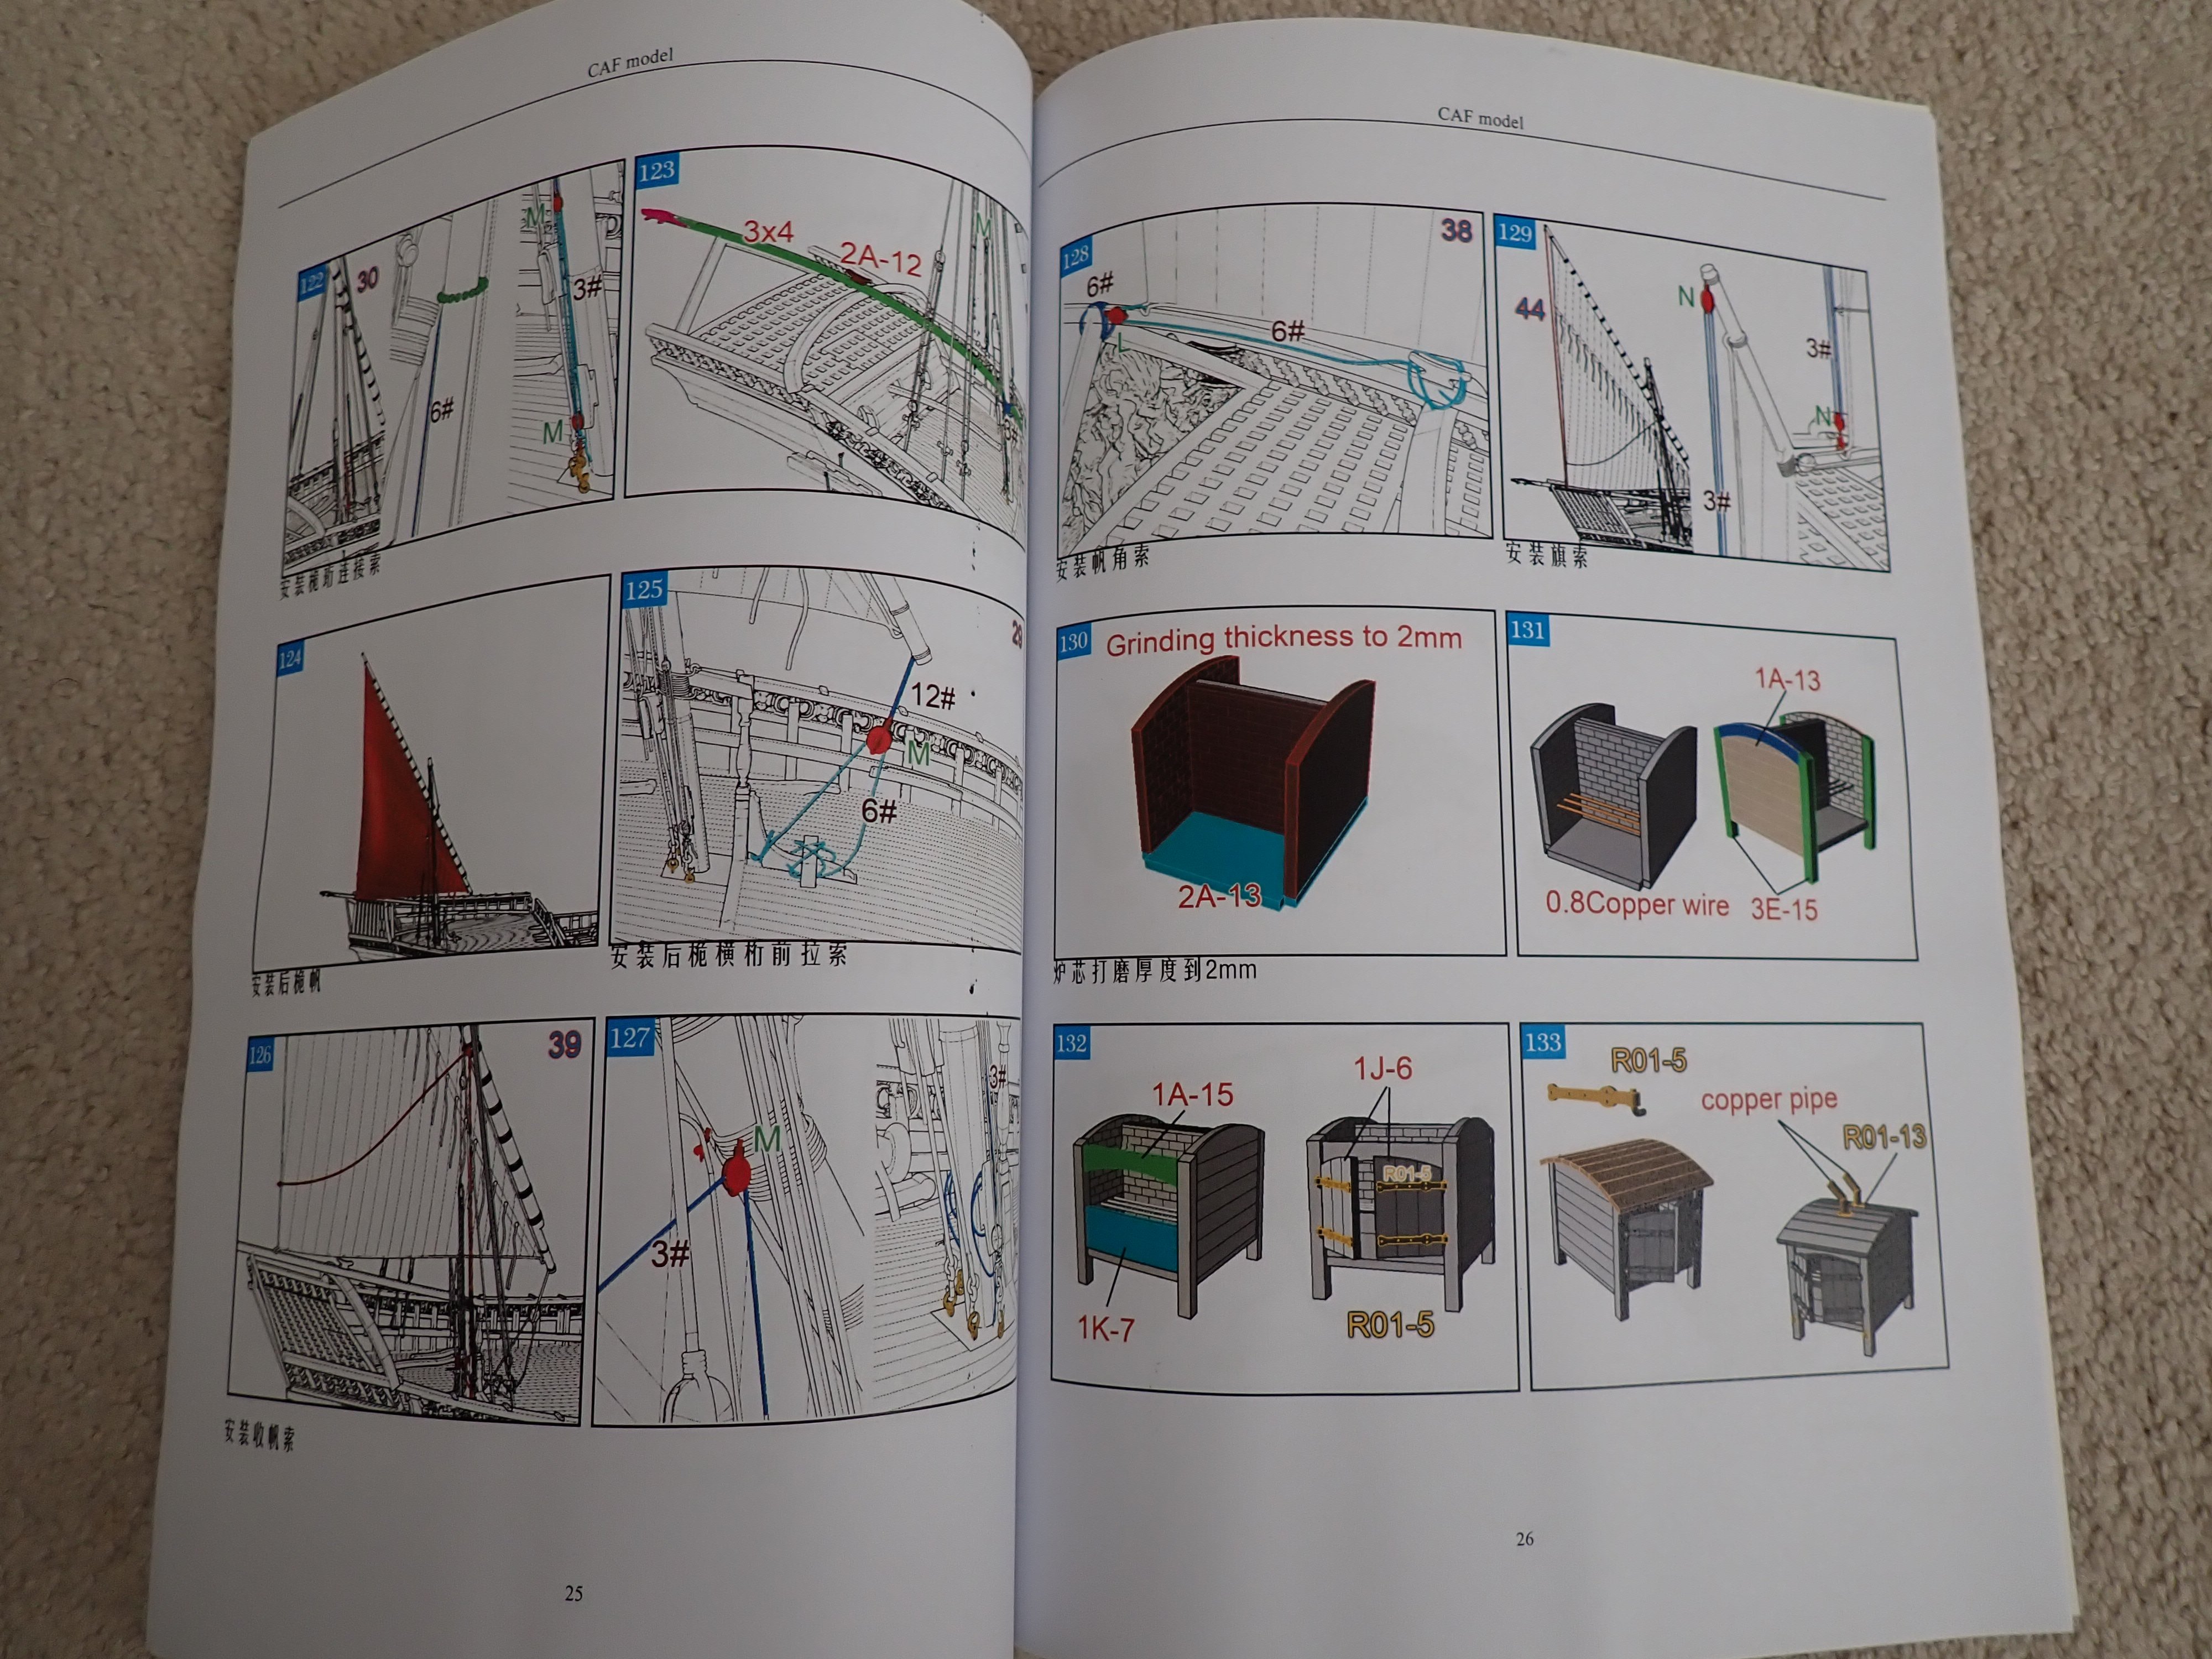
They were lacking, most definitely. I have posted pictures of the instructions at times and it is basically a snapshot of the CAD application running on the screen. It can be done (as I proved it), but will require a lot of forward thinking. Also, I would not follow the Sessions order as I have explained in my long Log. You can start with Session 1, but you will quickly need the other ones especially to build the stern. Tom of CAF Models, is a fantastic guy and will help you if you run into issues. Yves
-
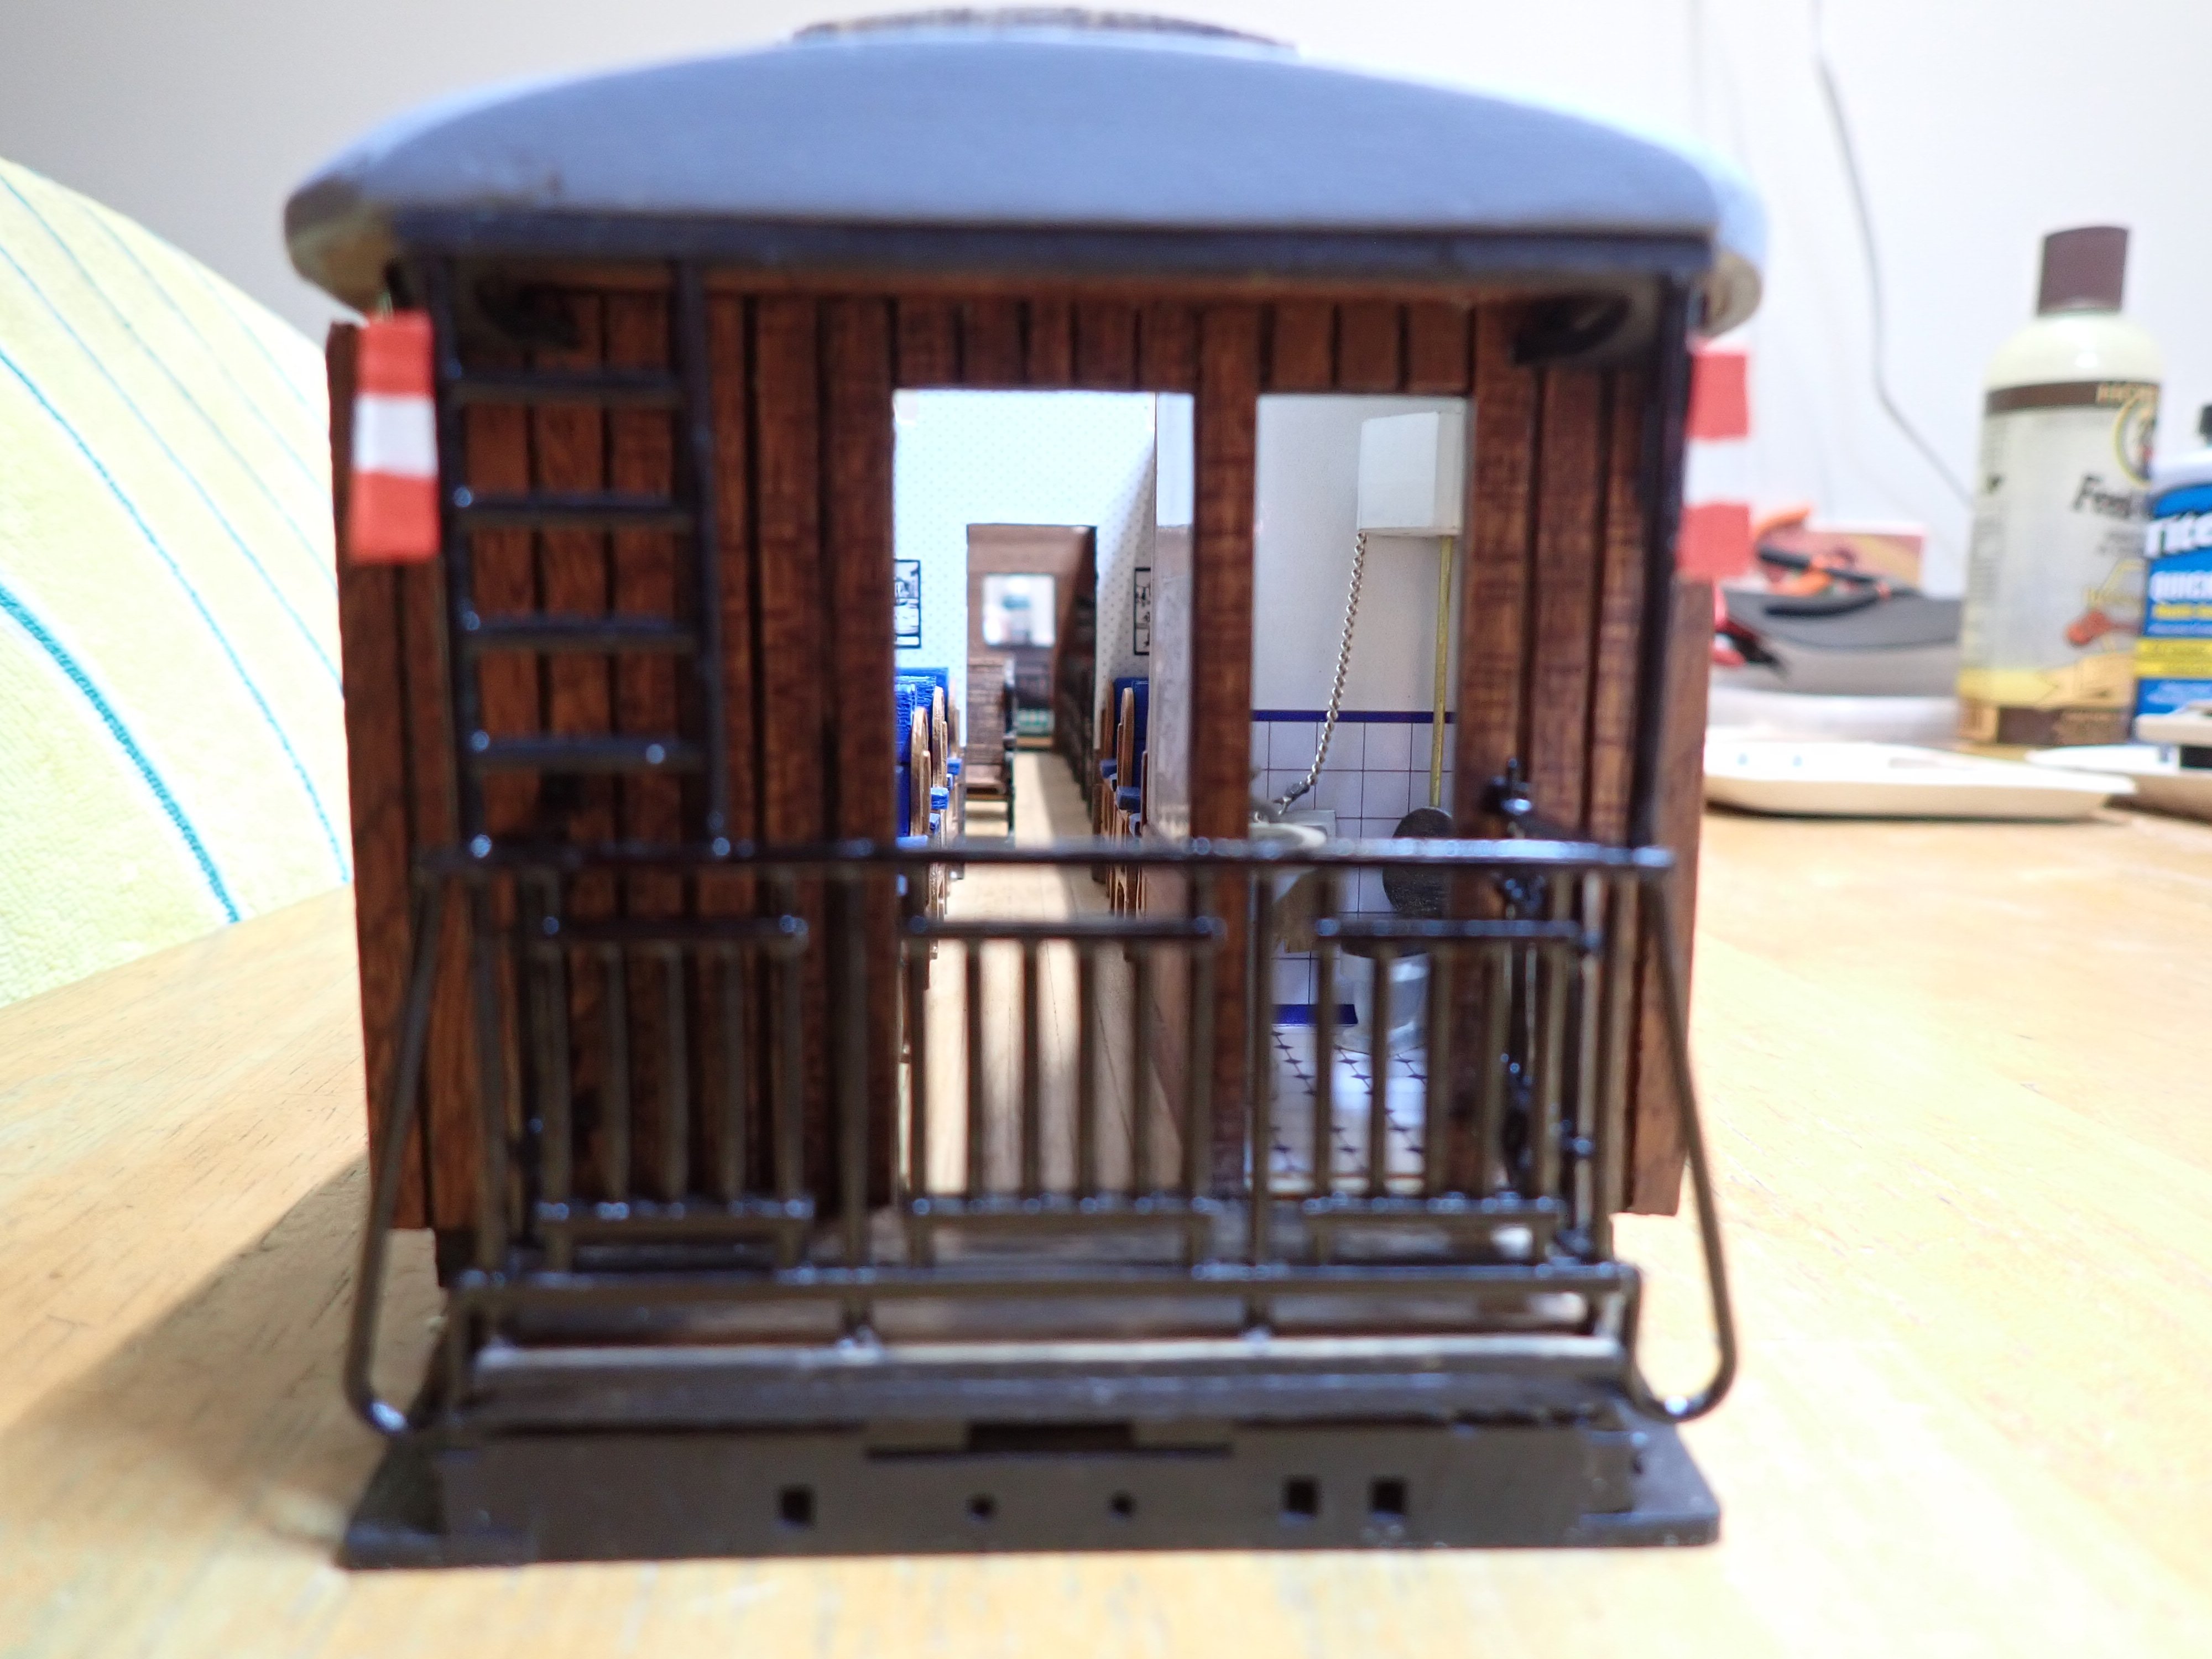
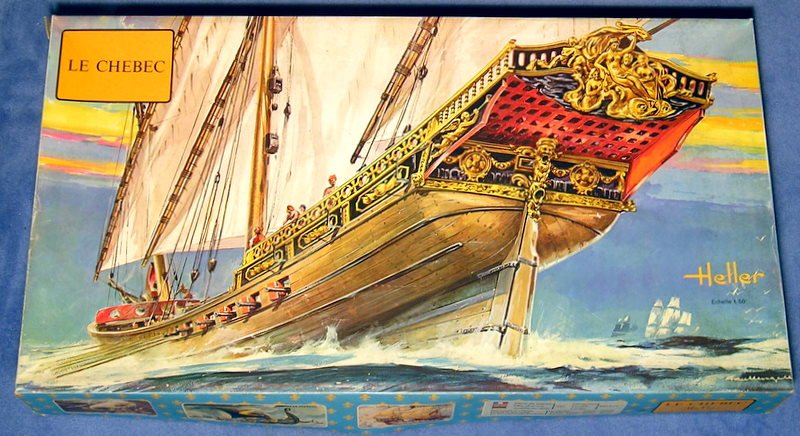
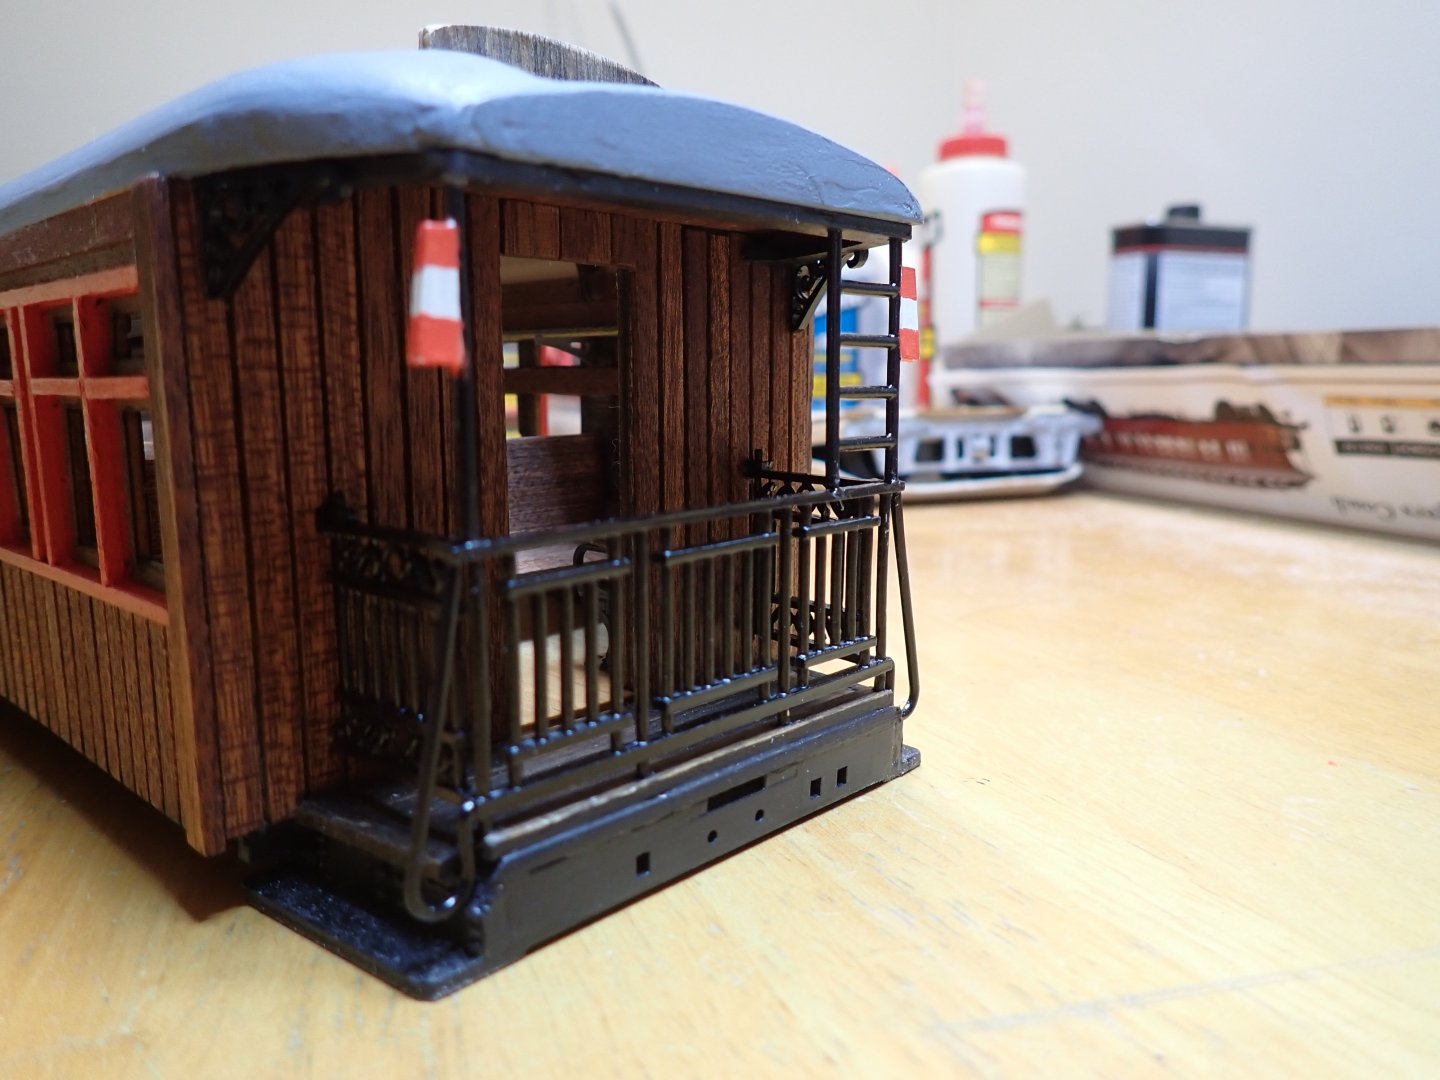
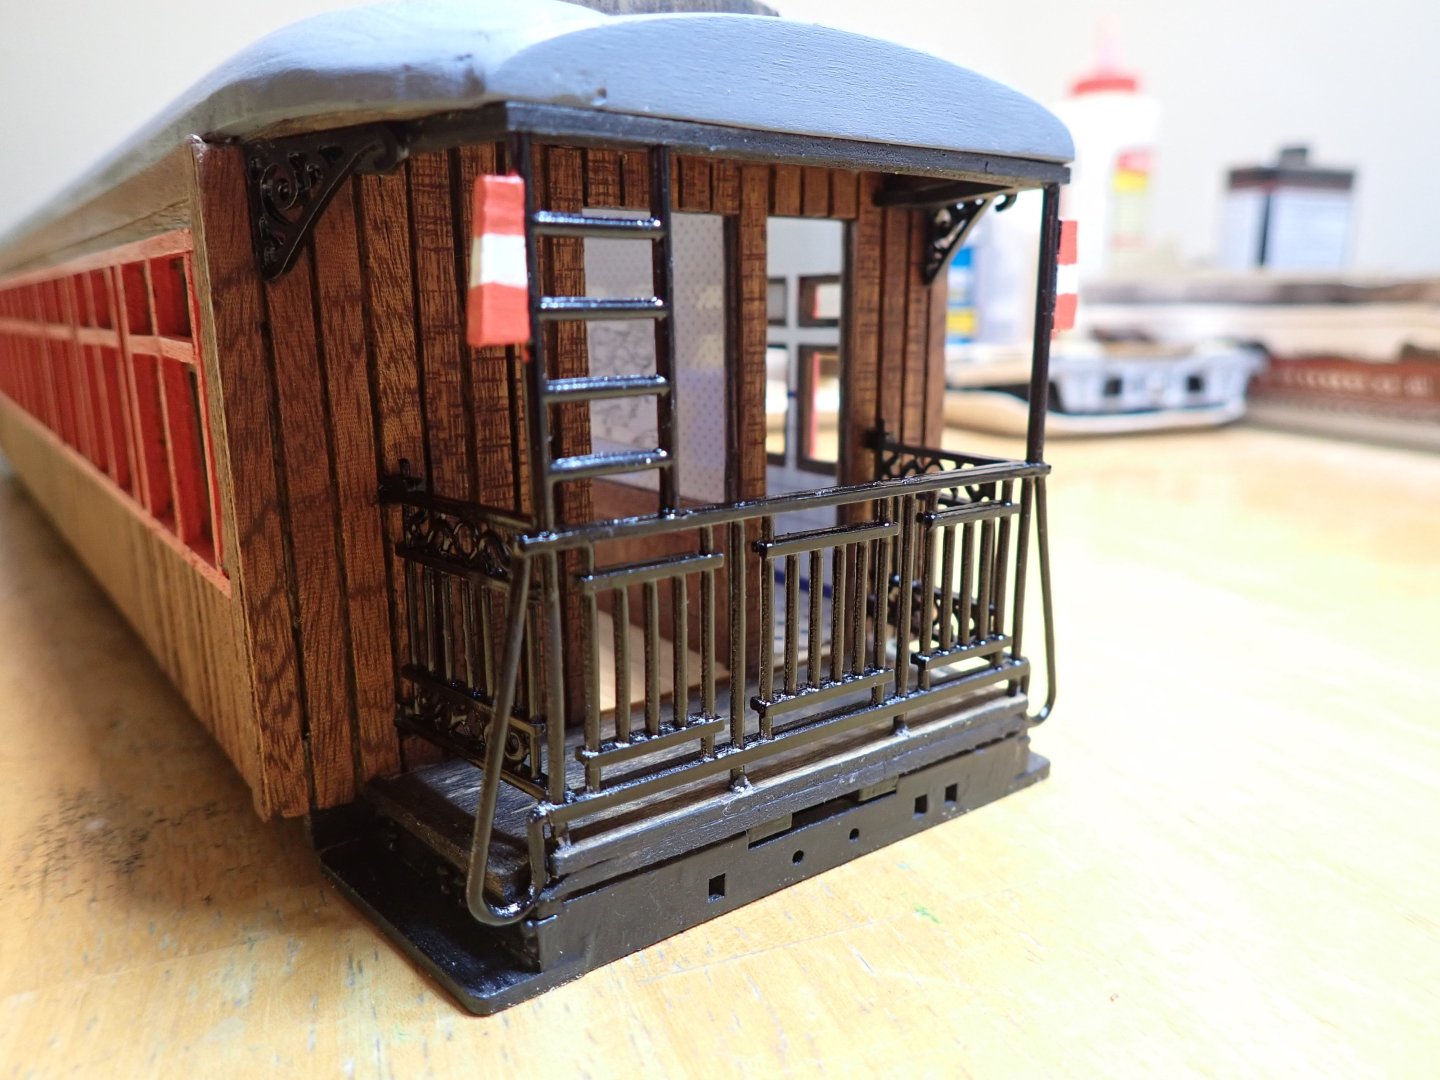
Both ends/vestibules have been assembled: On this side (above), the metal part holding the right flag was missing from the kit. I replicated it from a 2 mm brass rod and a small piece of wood cut accordingly. Fortunately, this was the only missing part in the kit.... Overall views: The next steps will be the building of the underneath of the car, with its braking system, battery boxes and various reservoirs. I also have to plan the support for KADEE couplers, in case this car ever runs on a layout. Yves


- 91 replies
-
- 13
-
-
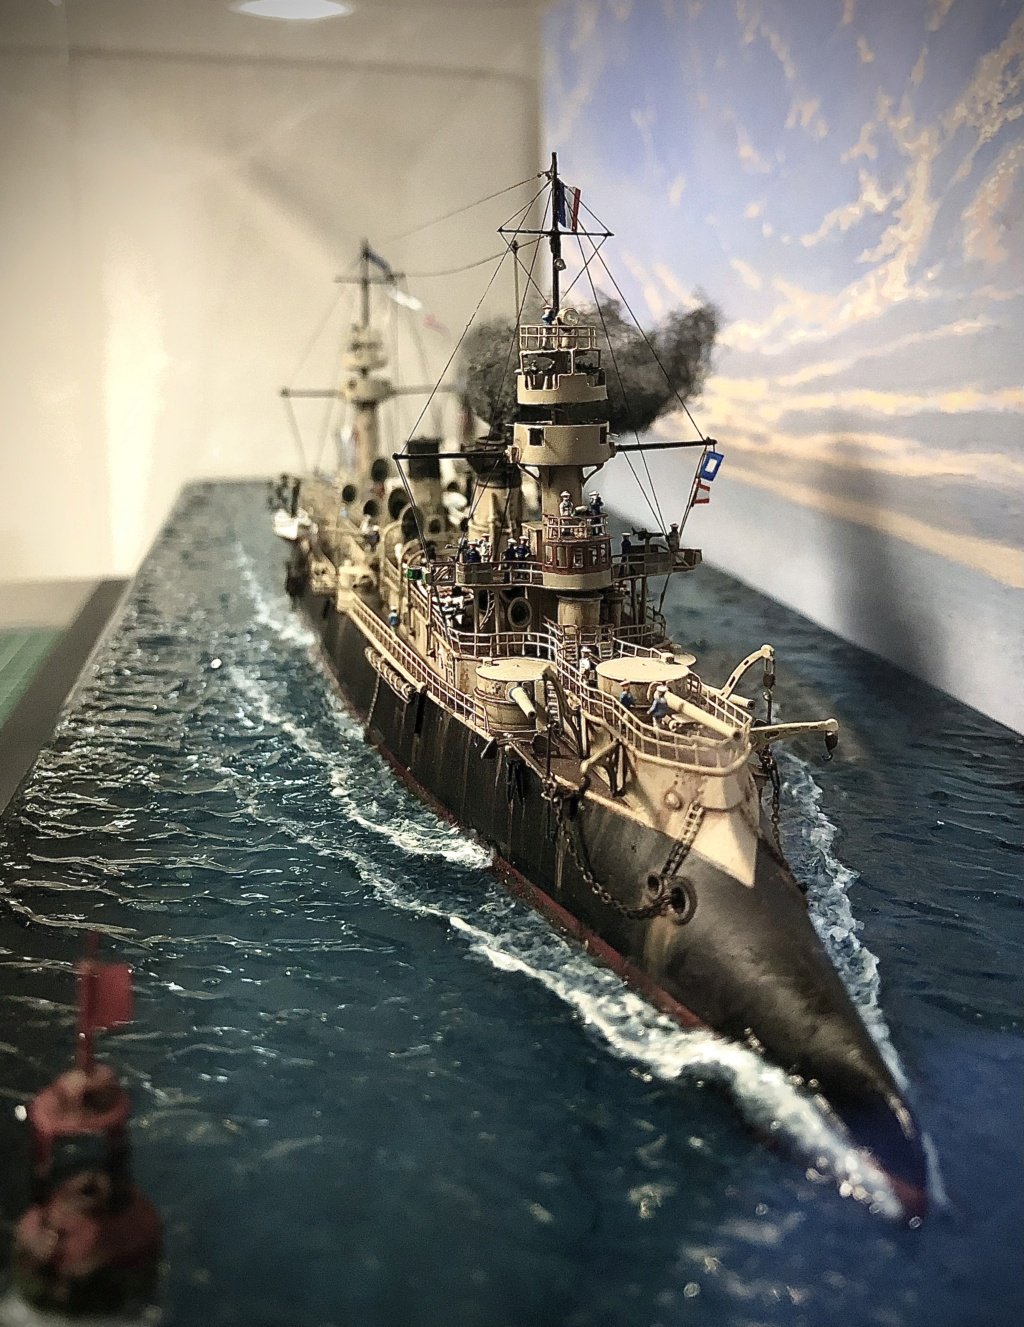
Not trying to hijack your thread, but since you talked about "waterline", here is a picture of the old French Dreadnought Dupuy de Lome, realized by a French modeller in the 1/350th scale: Yves

-
Yes, I love those prehistoric beasts of metal used around the end of the XIX century and early XX century. Sometimes you wonder how these vessels could float and handle rough seas. Yves
-
Beautiful and precious !!! I love the color of the North Sea and the fantastic work you did for the foam, around the vessel. I hope you keep that little marvel on your desk, and rest your eyes on it quite often. I know I would .... 🙂 Yves