HOLIDAY DONATION DRIVE - SUPPORT MSW - DO YOUR PART TO KEEP THIS GREAT FORUM GOING! (78 donations so far out of 49,000 members - C'mon guys!)
×


yvesvidal
-
Posts
3,607 -
Joined
-
Last visited
Content Type
Profiles
Forums
Gallery
Events
Everything posted by yvesvidal
-

Porsche 934 by kpnuts - FINISHED - Tamiya - 1/12 - PLASTIC
yvesvidal replied to kpnuts's topic in Non-ship/categorised builds
Very sweet. Will you be also showing the rear suspension and transmission shafts? Yves -
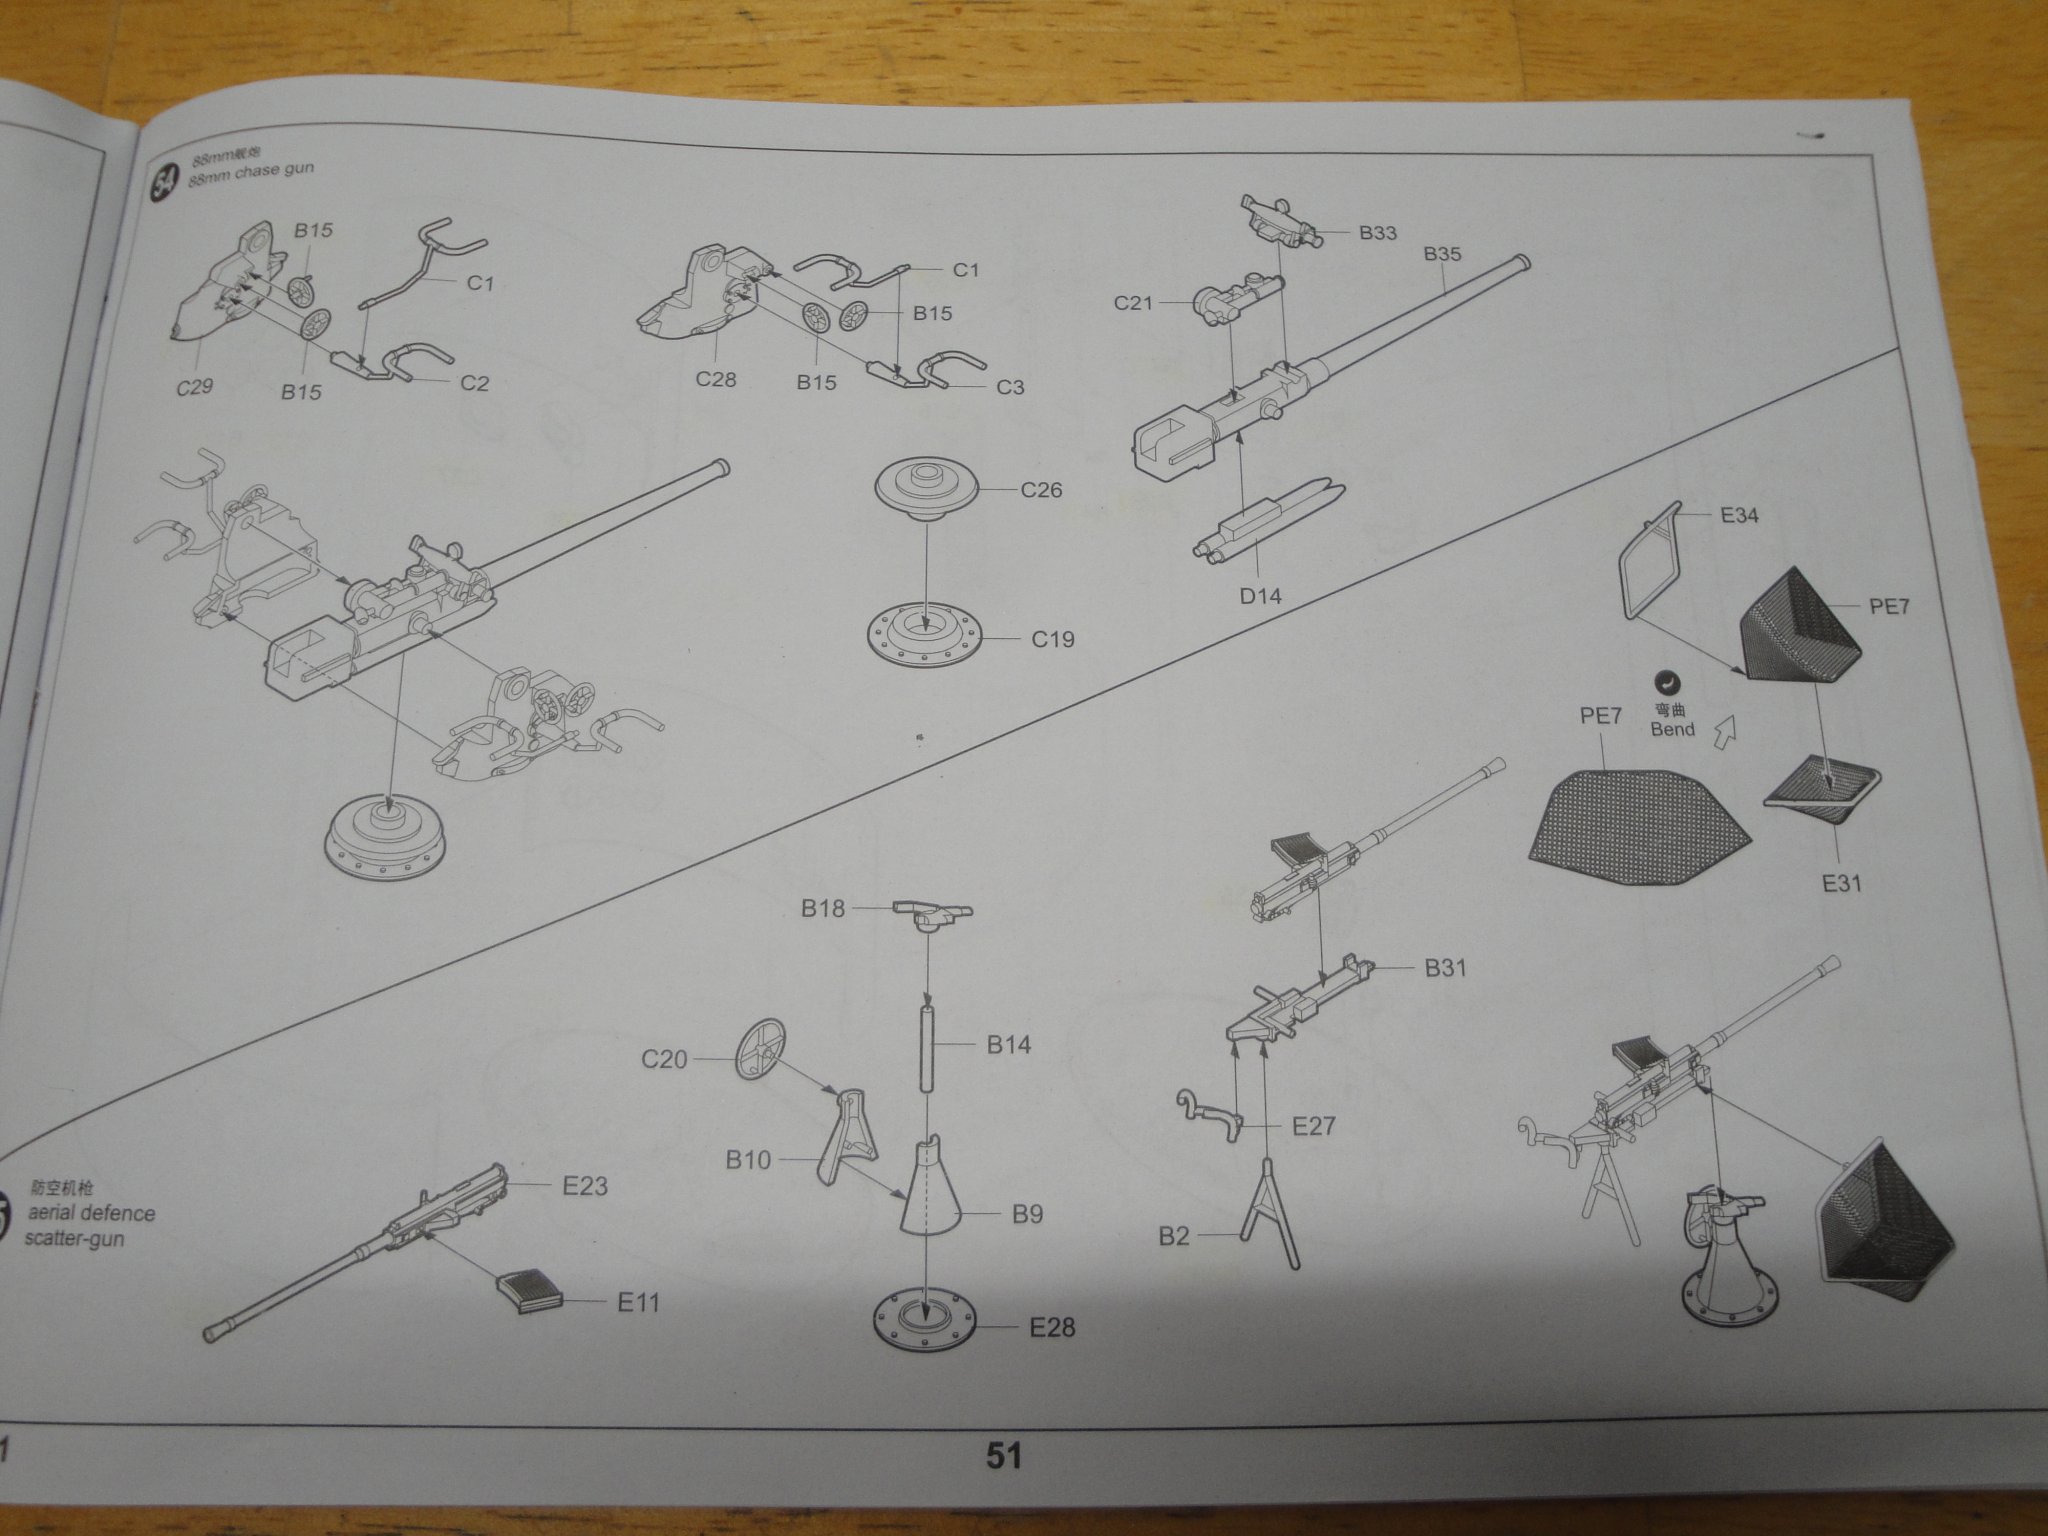
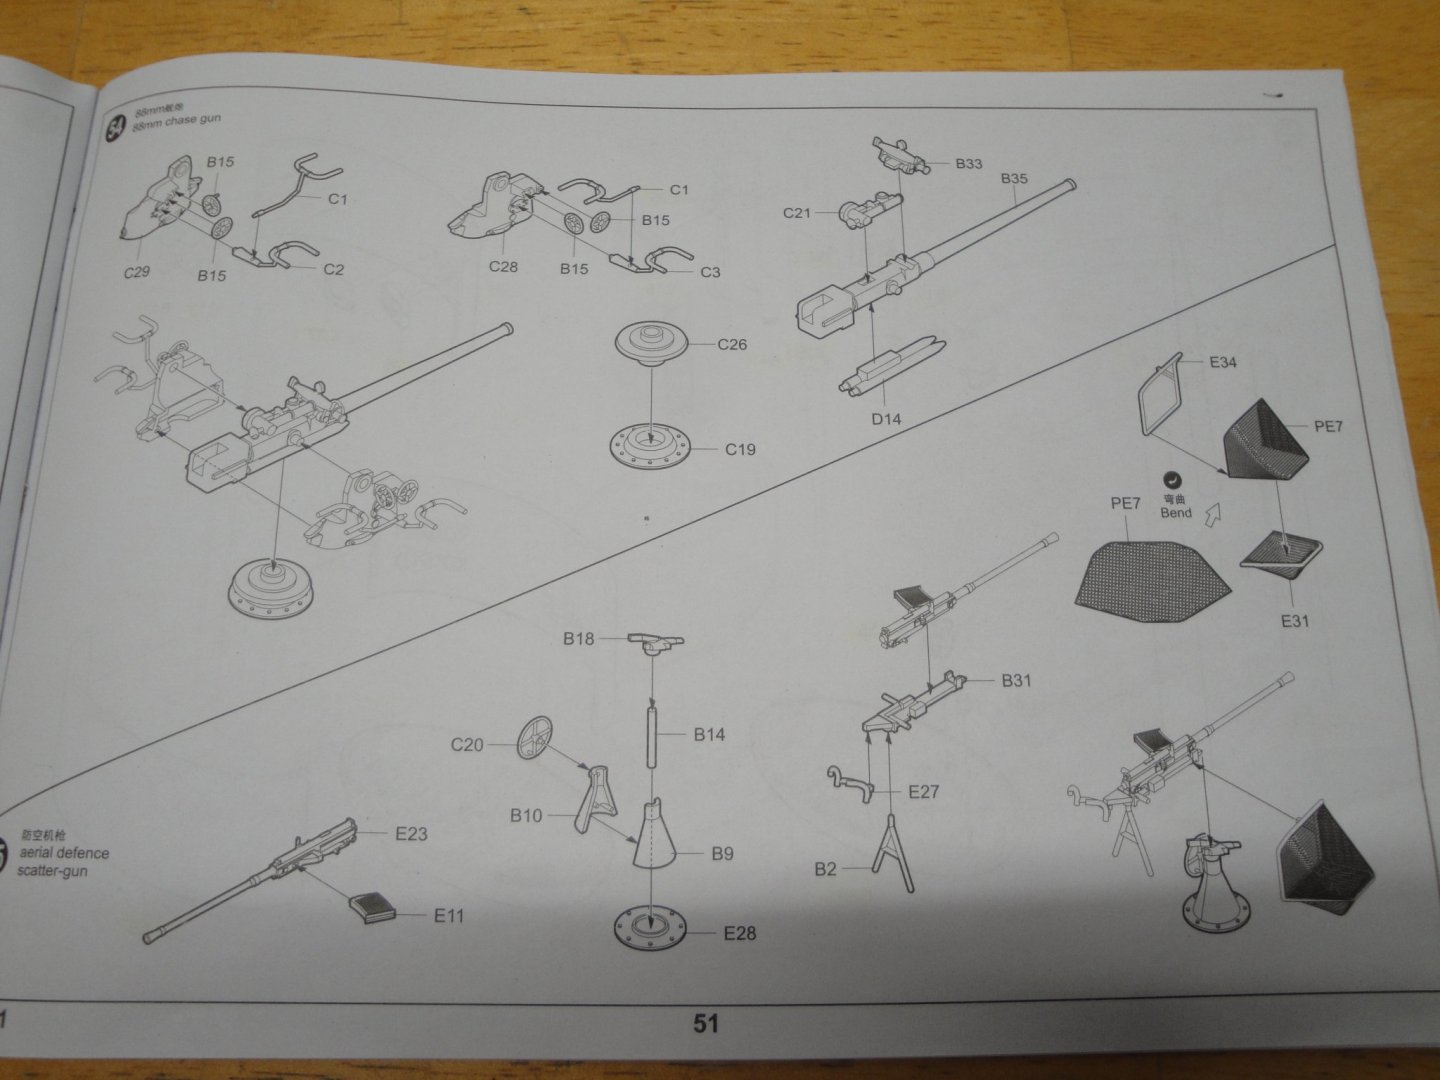
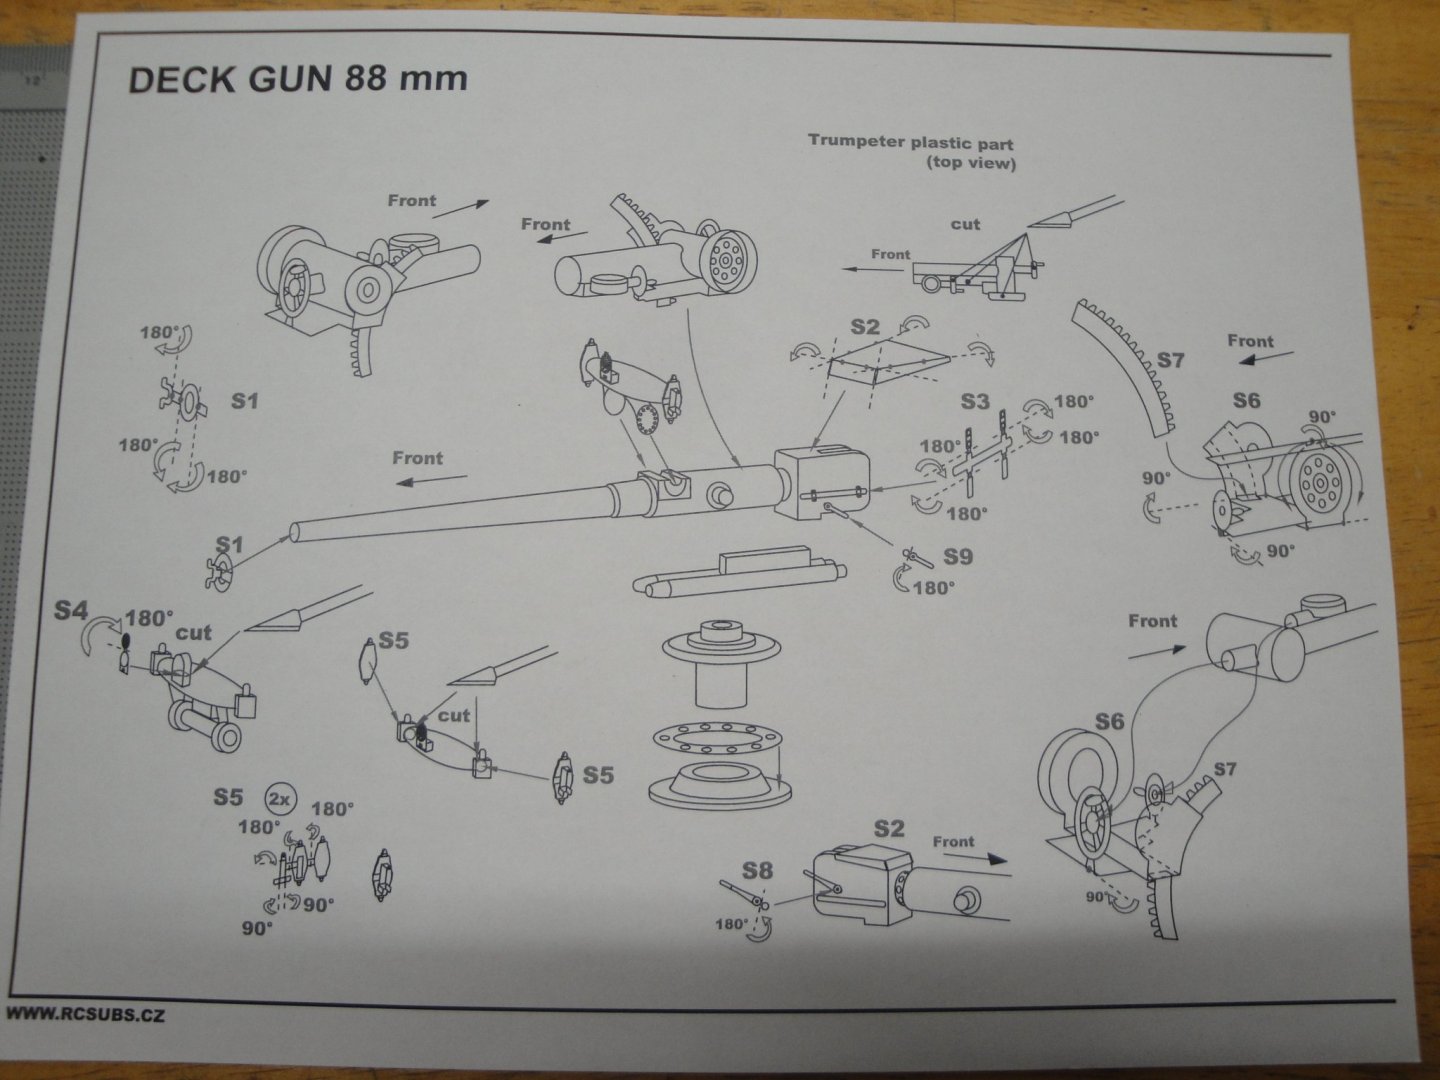
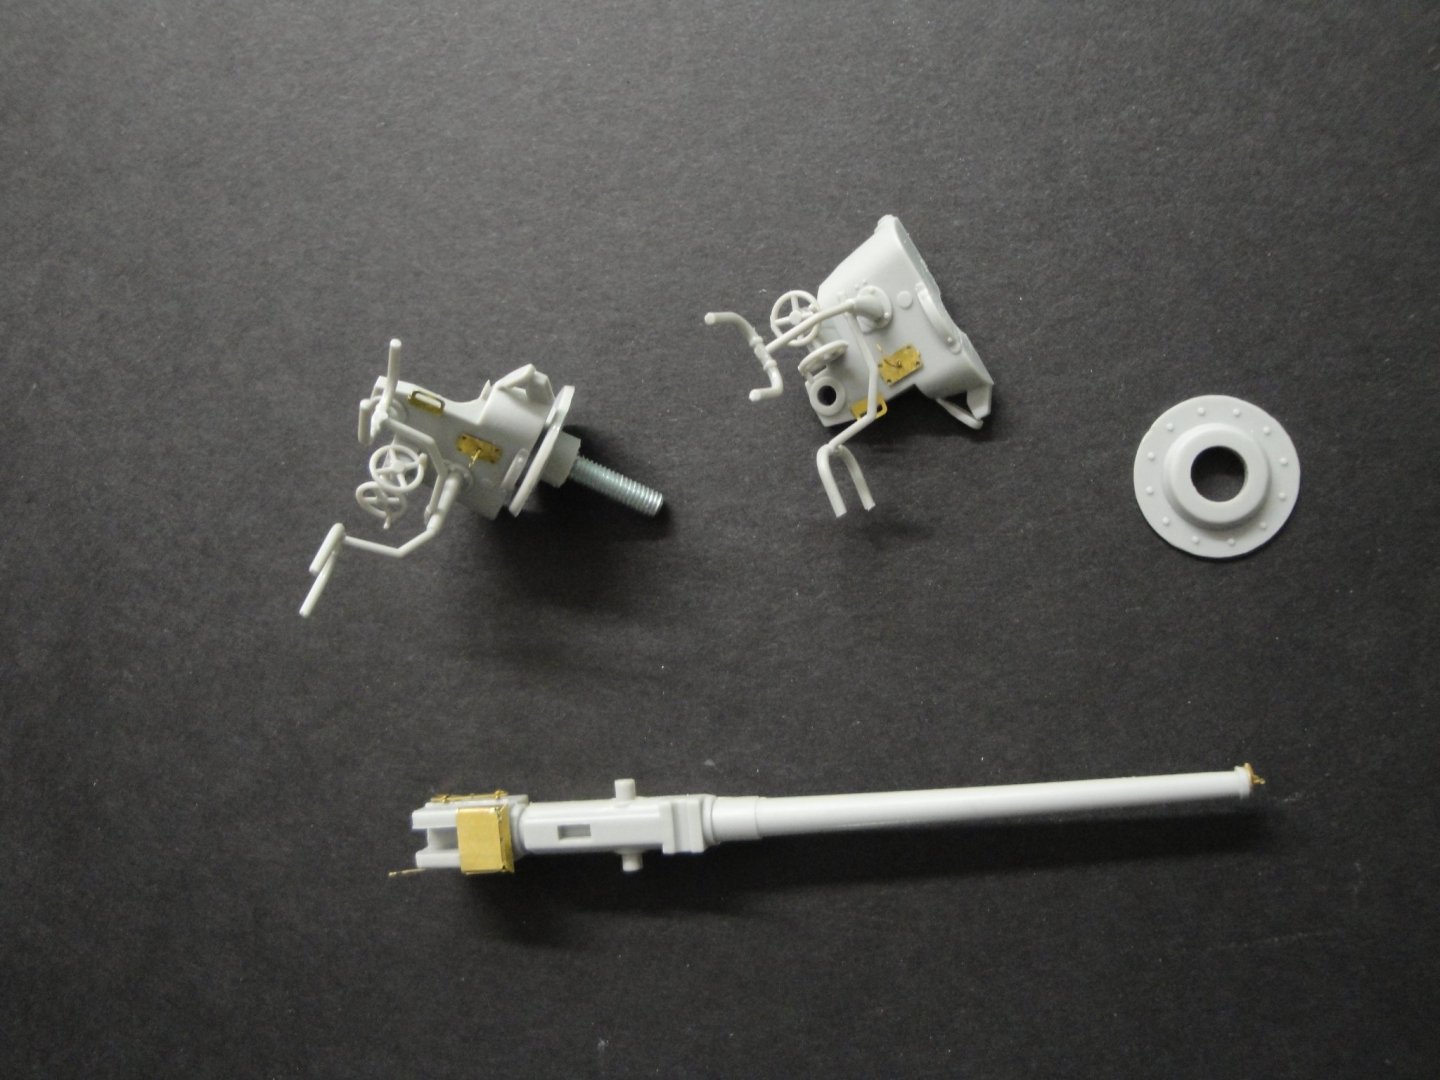
Folks, I have been working on the rigging of the submarine (among other things unrelated to modeling) but I am not finished yet and thus will not show my progress. The main gun is next. Trumpeter implementation of the gun is not the best you can find and after-market manufacturers such as Shapeways (and others), will have a blast in proposing some serious improvements: Fortunately, RCSubs comes to the rescue with a lot of details. However, finding the parts and understanding how to place them, requires some serious thinking and looking at the real gun on pictures which are most of the time blurry and washed out by the sun and the salt. Here are the instructions from RCSubs: I wish they had grayed out or indicated in a better way, which section of the Trumpeter parts need to be cut and removed. It is not too clear.... Anyway, this is where I stand so far: Yves

- 760 replies
-
- 14
-

-
You did a terrific job with the rigging. And I love your Photoshoping, too. Very realistic. Yves
- 40 replies
-
- 2
-
-
- aeronaut
- kriegsmarine
- (and 2 more)
-
WOW, that awning is amazing. I admire your patience and resilience in building this small struture. Those Italians knew how to sail in comfort, protected from the Mediterranean sun. Yves
-
Very interesting kit. I will be following your efforts with interest. Obviously, this model will be top-heavy, due to the amount of white metal on the superstructure. Yves
- 64 replies
-
- 4
-
-
- yamato
- deagostini
- (and 2 more)
-
Excellent "dressing". Yves
-
Outstanding work. What a nice way to celebrate this important anniversary. Yves
-
Porsche 934 by kpnuts - FINISHED - Tamiya - 1/12 - PLASTIC
yvesvidal replied to kpnuts's topic in Non-ship/categorised builds
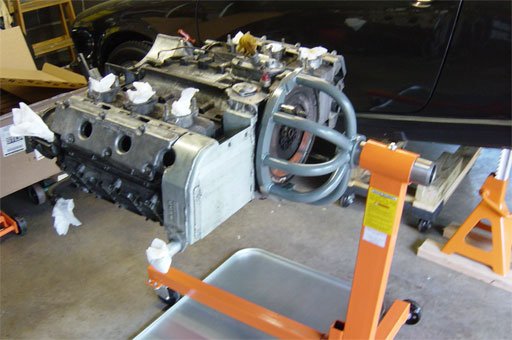
I think the stand depicted by KPNuts is perfectly fine for a Porsche engine. The engine is not that heavy, being built entirely of aluminum. Here are a few pictures of traditional Porsche engine stands: Yves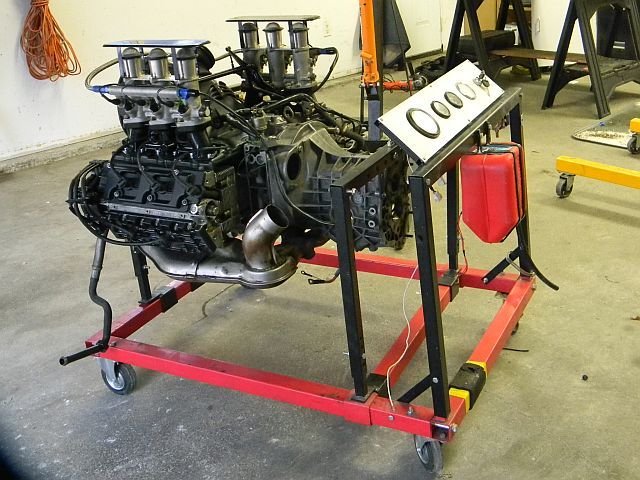
-
Despite some mistakes, you ended up with a lovely little Runabout. For an early/first model, this is a great achievement and you should be proud of yourself. Yves
-
Porsche 934 by kpnuts - FINISHED - Tamiya - 1/12 - PLASTIC
yvesvidal replied to kpnuts's topic in Non-ship/categorised builds
Well, Tamiya has been offering multiple engines at 1/6 scale: Honda CB750, Kawazaki 1300 and a couple more. There is also a Volvo truck engine available (Pocher/Italeri perhaps). Yes, I am like you and wish they would offer legendary engines such as the BMW V-12 equipping the Mc Laren F1 and other Porsche engines. Yves -
Absolutely adorable. Definitely my kind of place as I love bookshops and Libraries. Yves
-
Porsche 934 by kpnuts - FINISHED - Tamiya - 1/12 - PLASTIC
yvesvidal replied to kpnuts's topic in Non-ship/categorised builds
Nice touch with the mirror under the engine stand. Yves -
Porsche 934 by kpnuts - FINISHED - Tamiya - 1/12 - PLASTIC
yvesvidal replied to kpnuts's topic in Non-ship/categorised builds
Superb work, KPNuts. Yves -
I love these movies. I grew up with them and enjoyed each one of them. Yves
-
There are a few new kits coming up from China: Le Coureur (1/48) by CAF and a few others that may satisfy your desires. Check this forum and the Build Logs for Scratch Builds. Yves
-
Beautiful Hull. Congratulations Shipscat. Yves
-
Talking about the 2CV, it was notorious for a very nasty leak of fuel, on its cylinders. My brother used to have one and the end of the car was pretty dramatic. The car stalled at a Stop sign (the issue was always happening at low speed or while idling) and while trying to crank it up again, he noticed a very bad burning smell. He had just enough time to grab his wallet in the glove box, open the door and escape the car, as it started burning on the road, near the junction. He watched it completely surrounded by flames, from a safe distance. That was his last attempt at owning a 2 CV. He owns two Traction Avant 11 CV and 15 CV and a CX). The 2 CV could be a romantic car, but you had to make sure that piece of fuel hose above the engine was changed on a regular basis. Yves
-
Bob, this has been discussed further up, in this thread. E-Bay is an option (expensive) but there are other more affordable ways to get them. Yves
-
As you probably know, Model Motorcars just came up with a set of real steel leaf springs for the Alfa Romeo kit. They are superb but their price is a strong repellent to say the least... Yves
-
The Dutch people (as you most likely know) have a passion for all old Citroen cars, including the Traction, 2CV, DS and CX. It is not surprising that this old French commercial would be sub-titled in Dutch language. Yves
-
ancre Coureur by cafmodel - 1/48
yvesvidal replied to cafmodel's topic in - Build logs for subjects built 1751 - 1800
What a lovely boat. I hope you make the kit available to USA customers in the coming months. Yves -
Folks, The project is still going on. Because of other side activities, I have not been able to dedicate much time for it. I am working on the rigging and will then move to the guns. After that, a few more details inside and we can call it done. Yves
-
Your story sounds like a fairy tale. This is so great, that you would first find the skeleton of the kit and later on the original box with all the missing parts. Great build so far. I am following with interest. Yves
- 51 replies
-
- 3
-
-
- miss unlimited
- dumas
- (and 1 more)
-
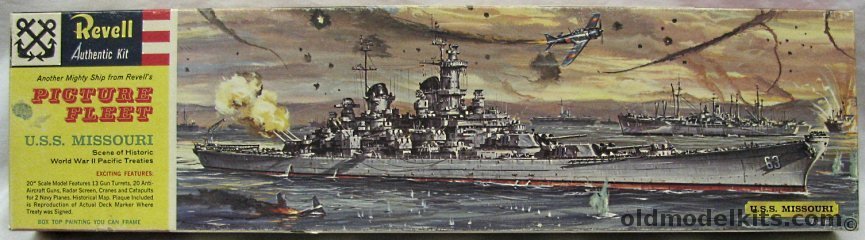
Bill, Welcome to the craziness (some call it art or passion...) of plastic scale ship modeling. I built that Revell model some 50 years ago (when I was still a little kid) and it is not an easy model to go back into plastic modeling, after a long stop. After finishing that kit, you may be tempted to acquire a Tamiya kit of the USS Missouri for a more realistic and easier model to build. I have posted a picture of the Revell kit I built, same model, different artwork: Yves