yvesvidal
-
Posts
3,641 -
Joined
-
Last visited
Content Type
Profiles
Forums
Gallery
Events
Everything posted by yvesvidal
-
 I am starting to really like that kit. Very nice assembly so far. You also need some Italian beverage on your shelf, a Chianti or some Asti Spumante to replace that beer. Yves
 -
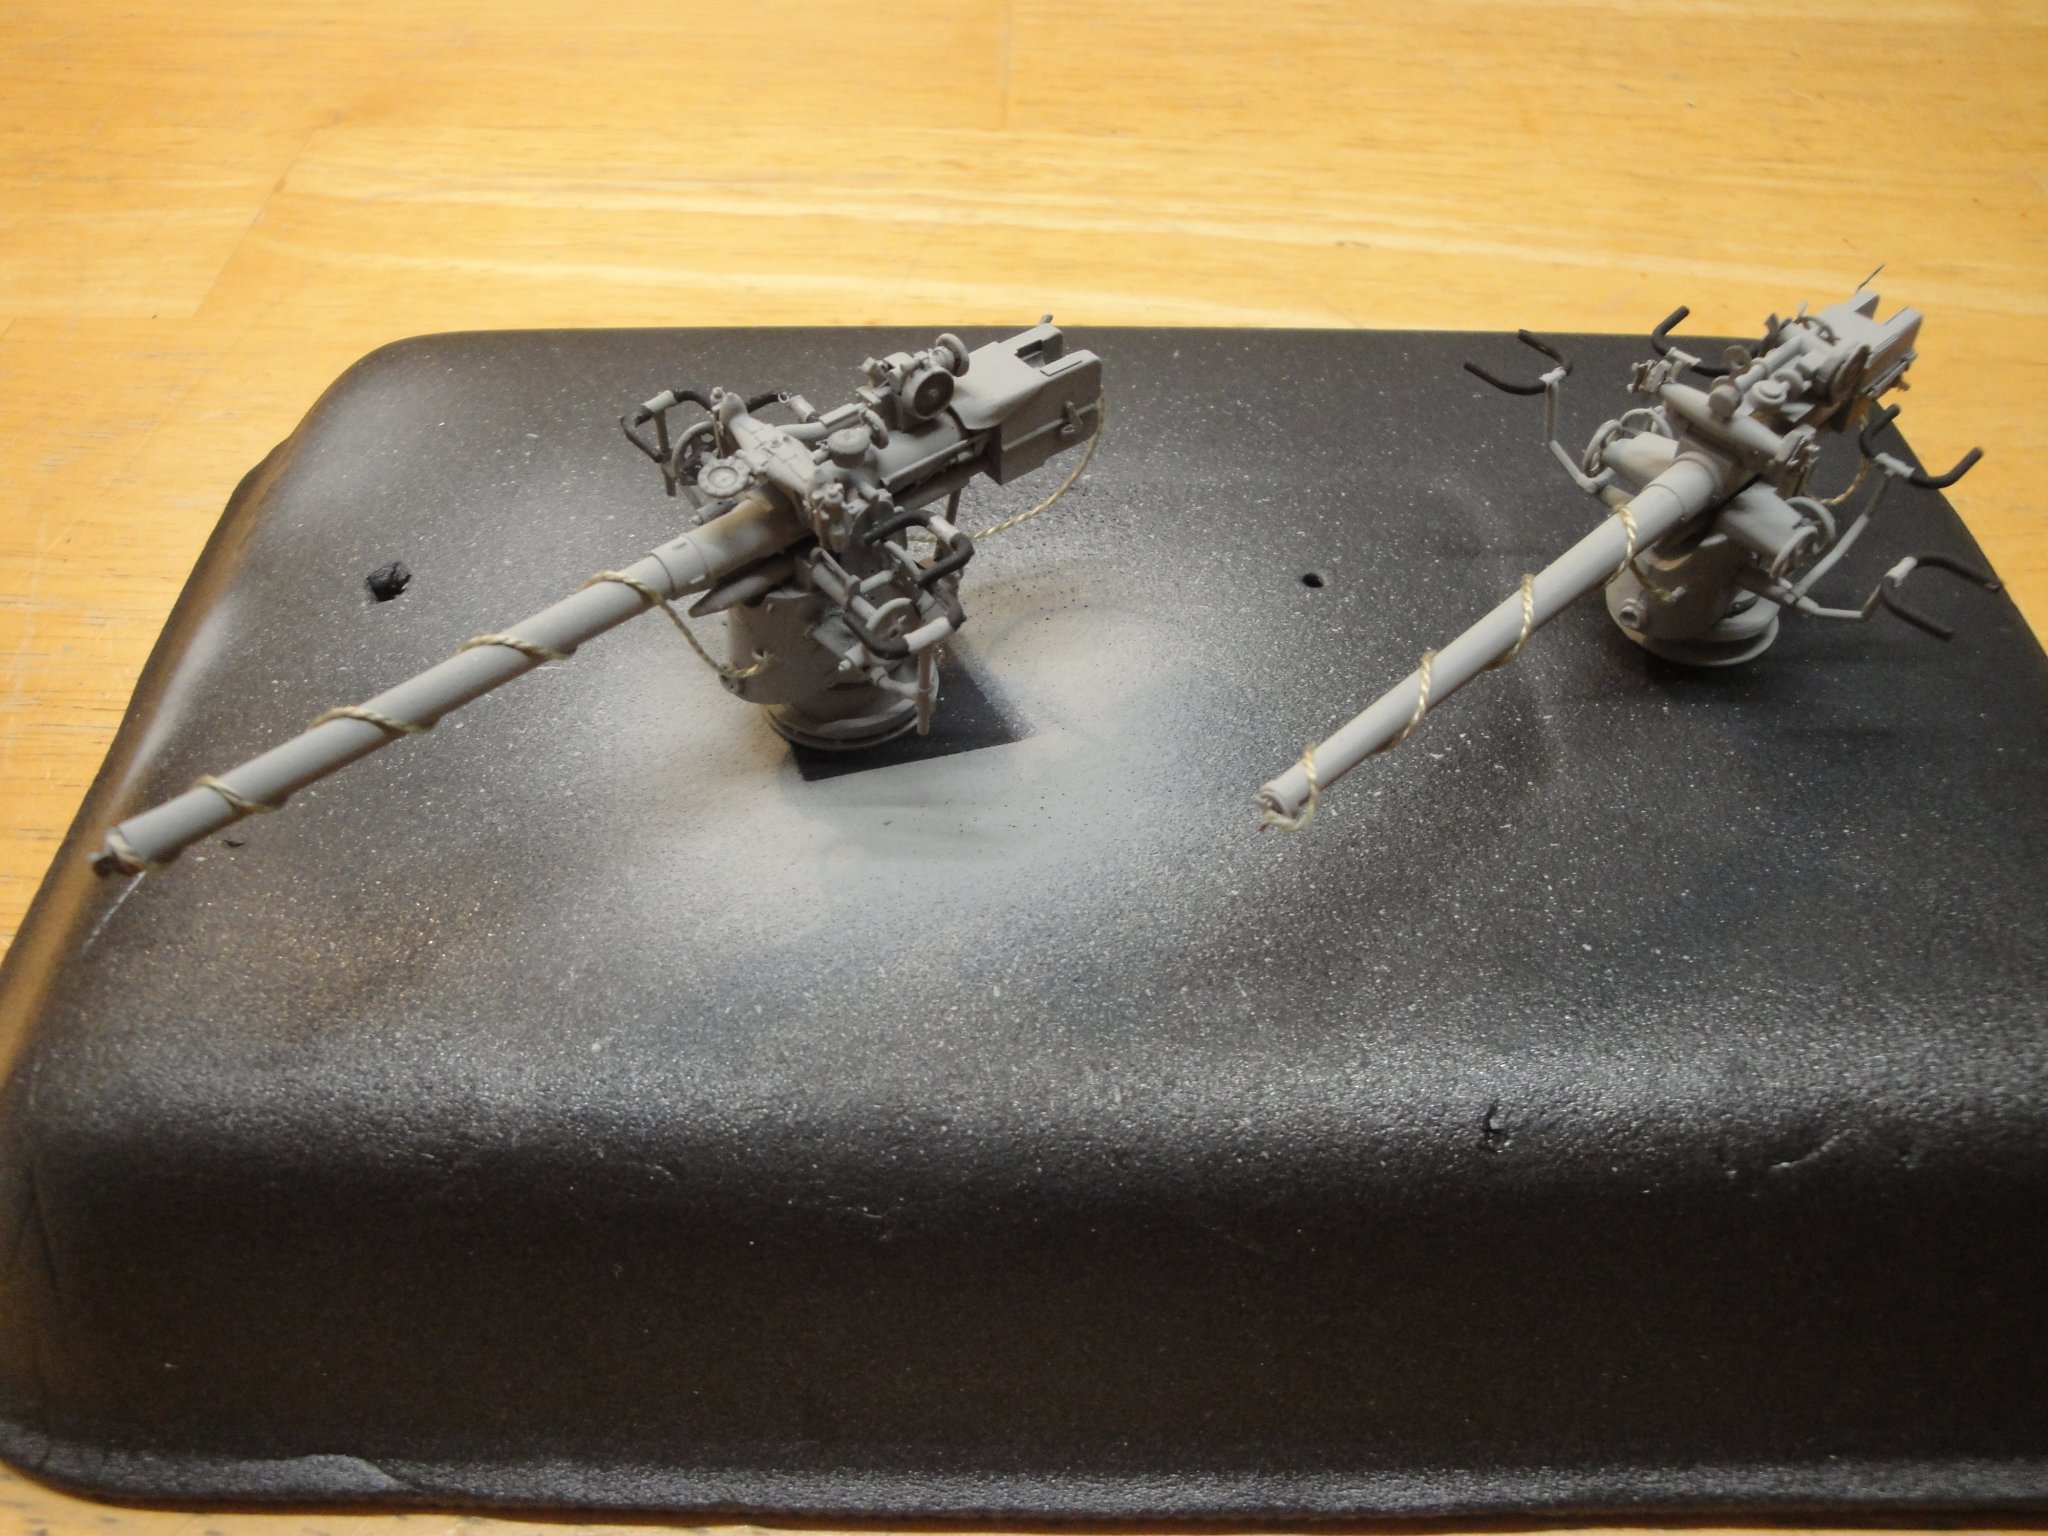
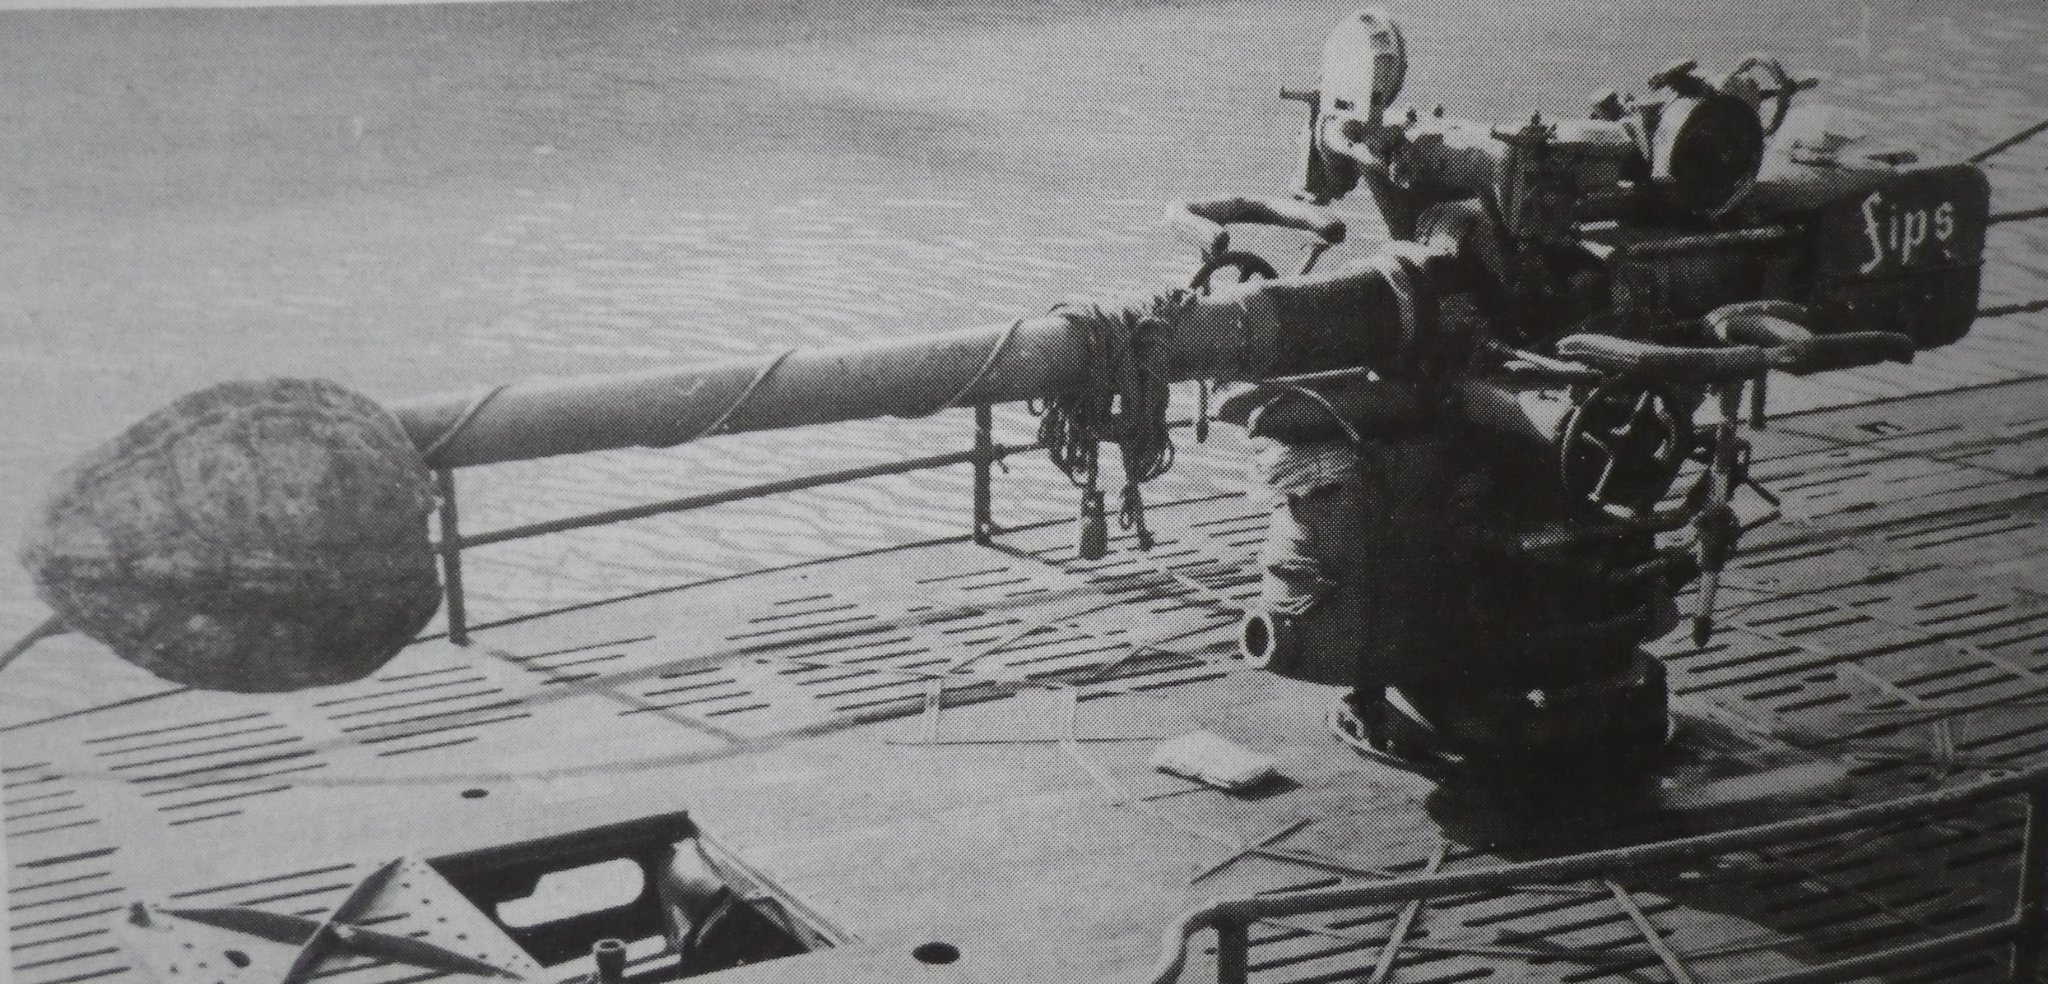
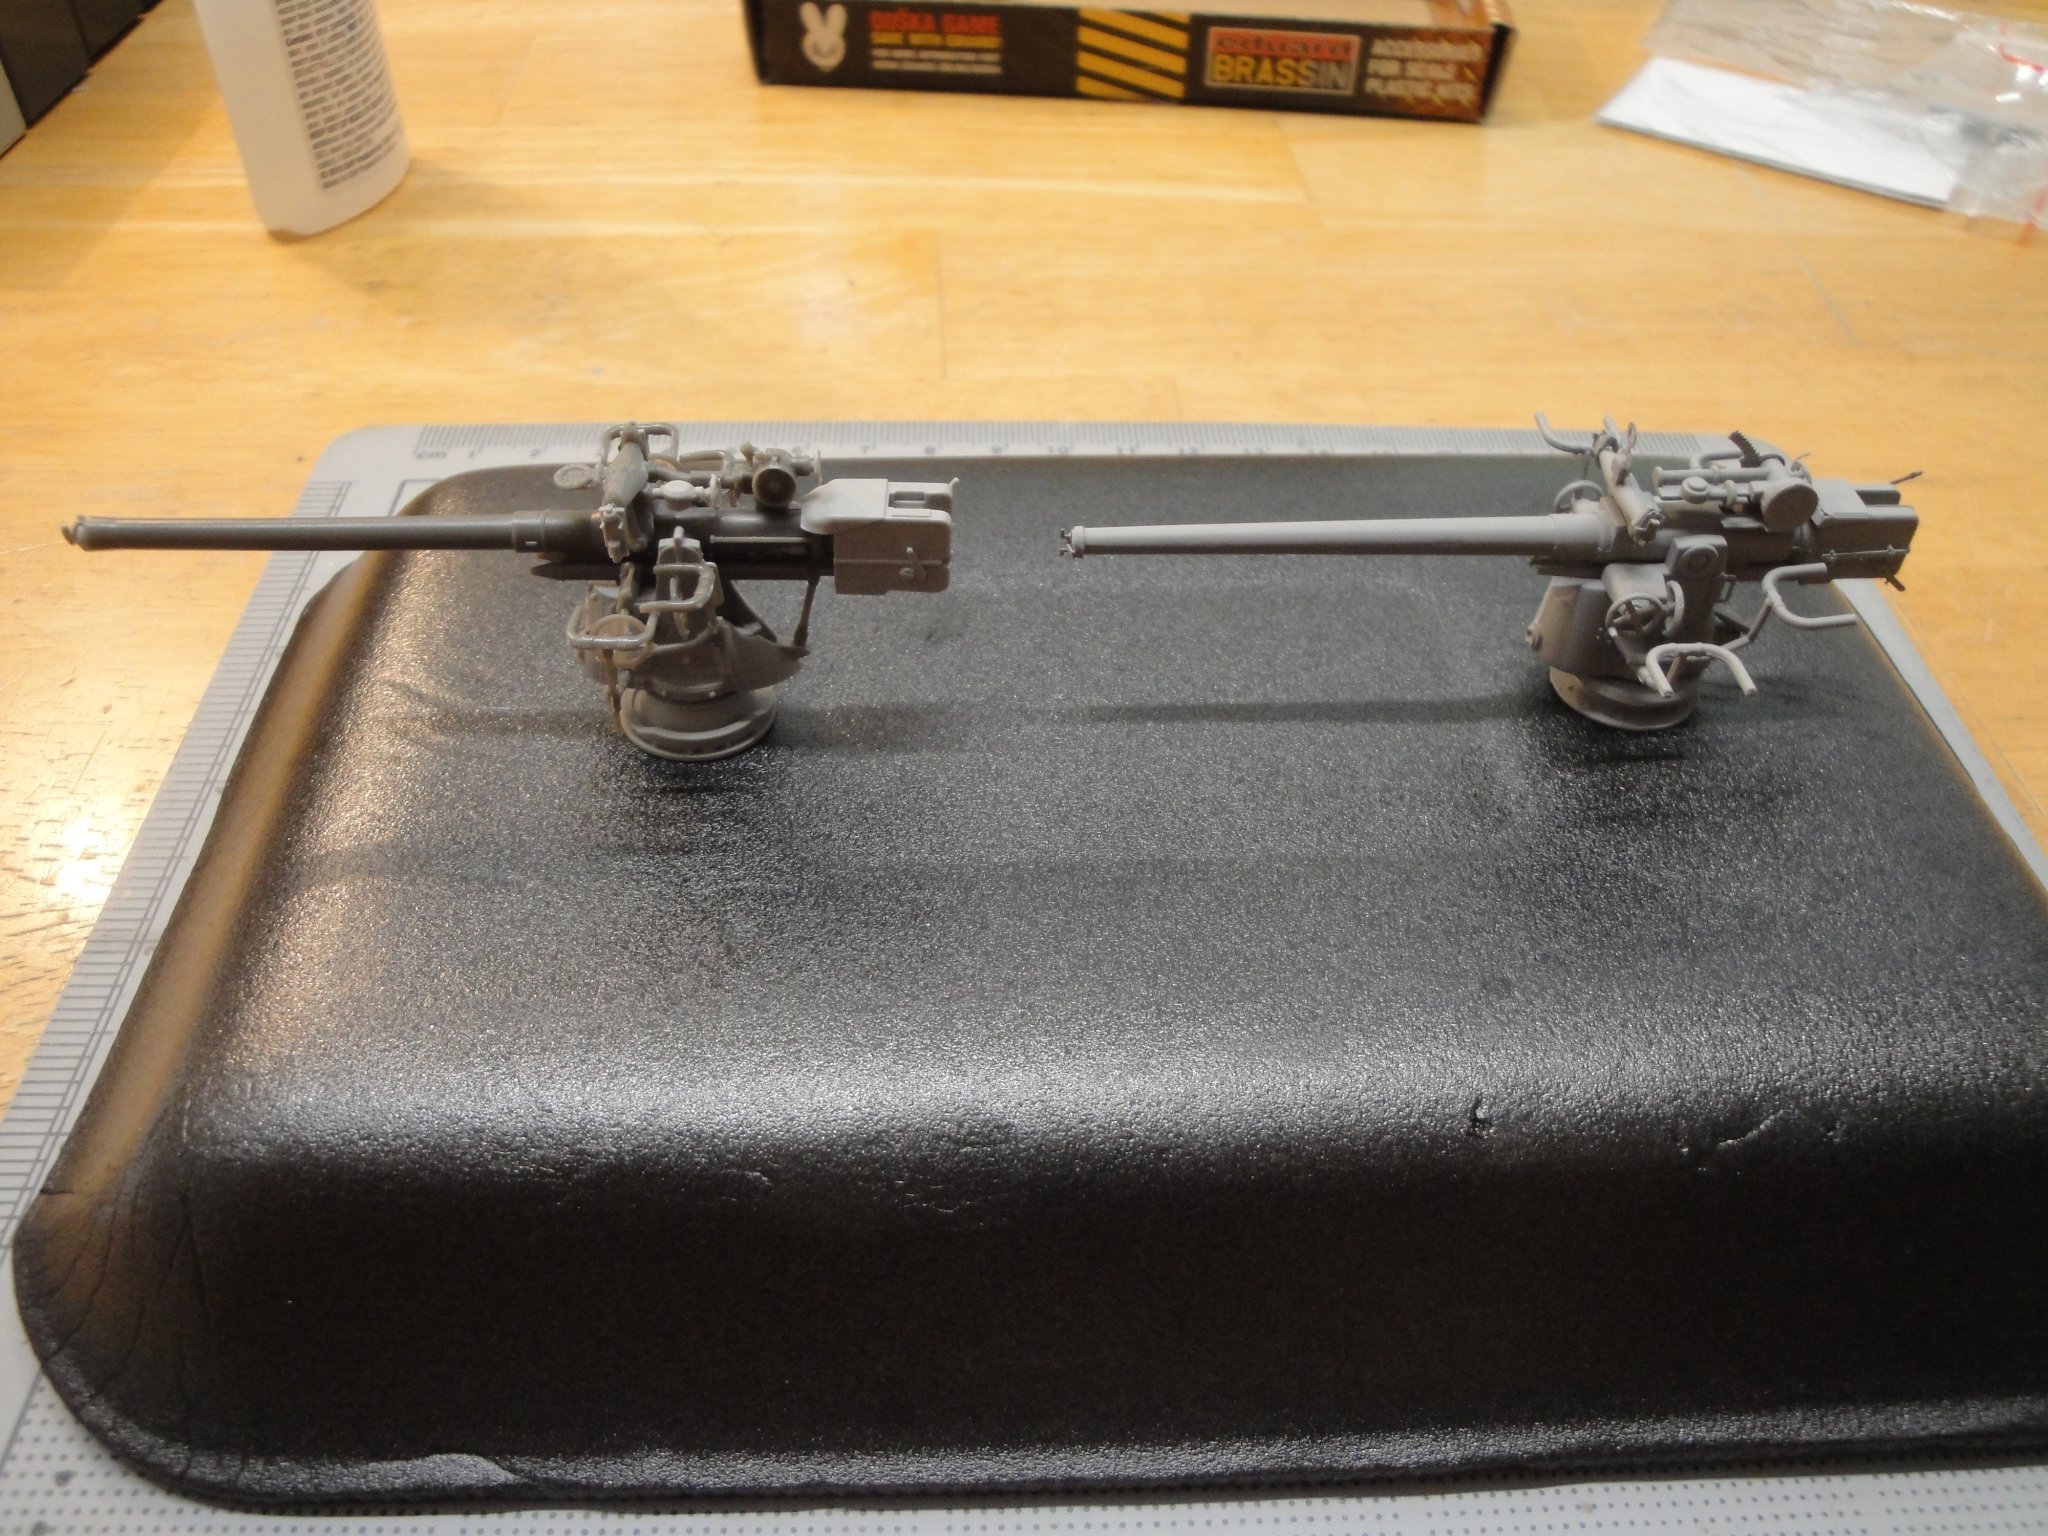
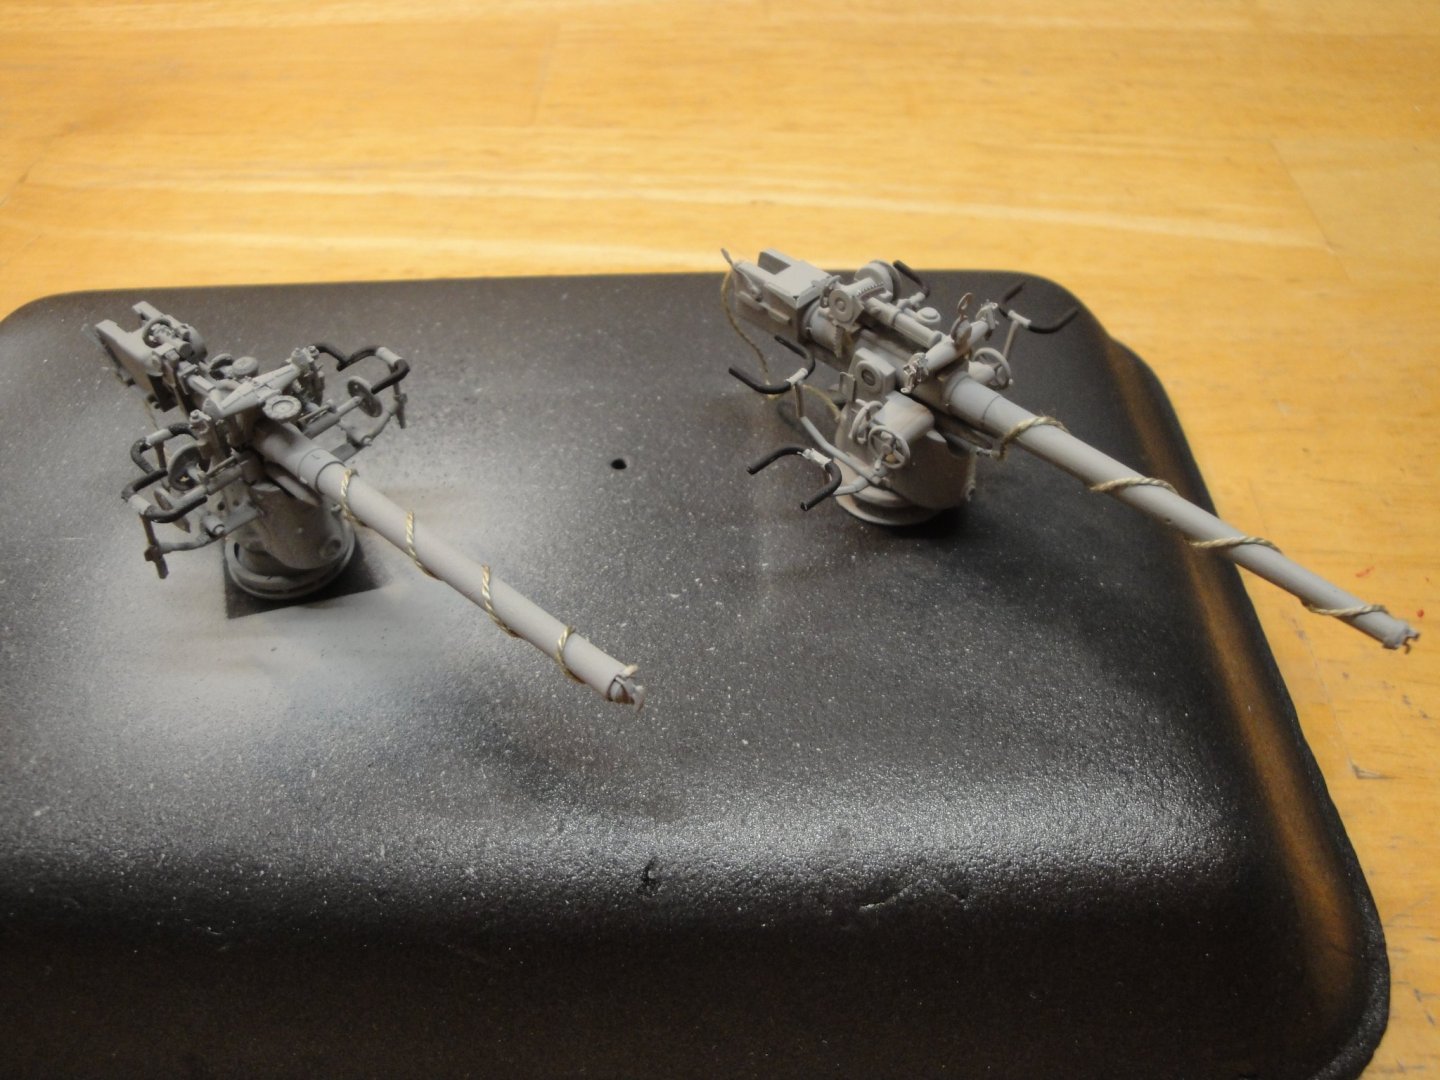
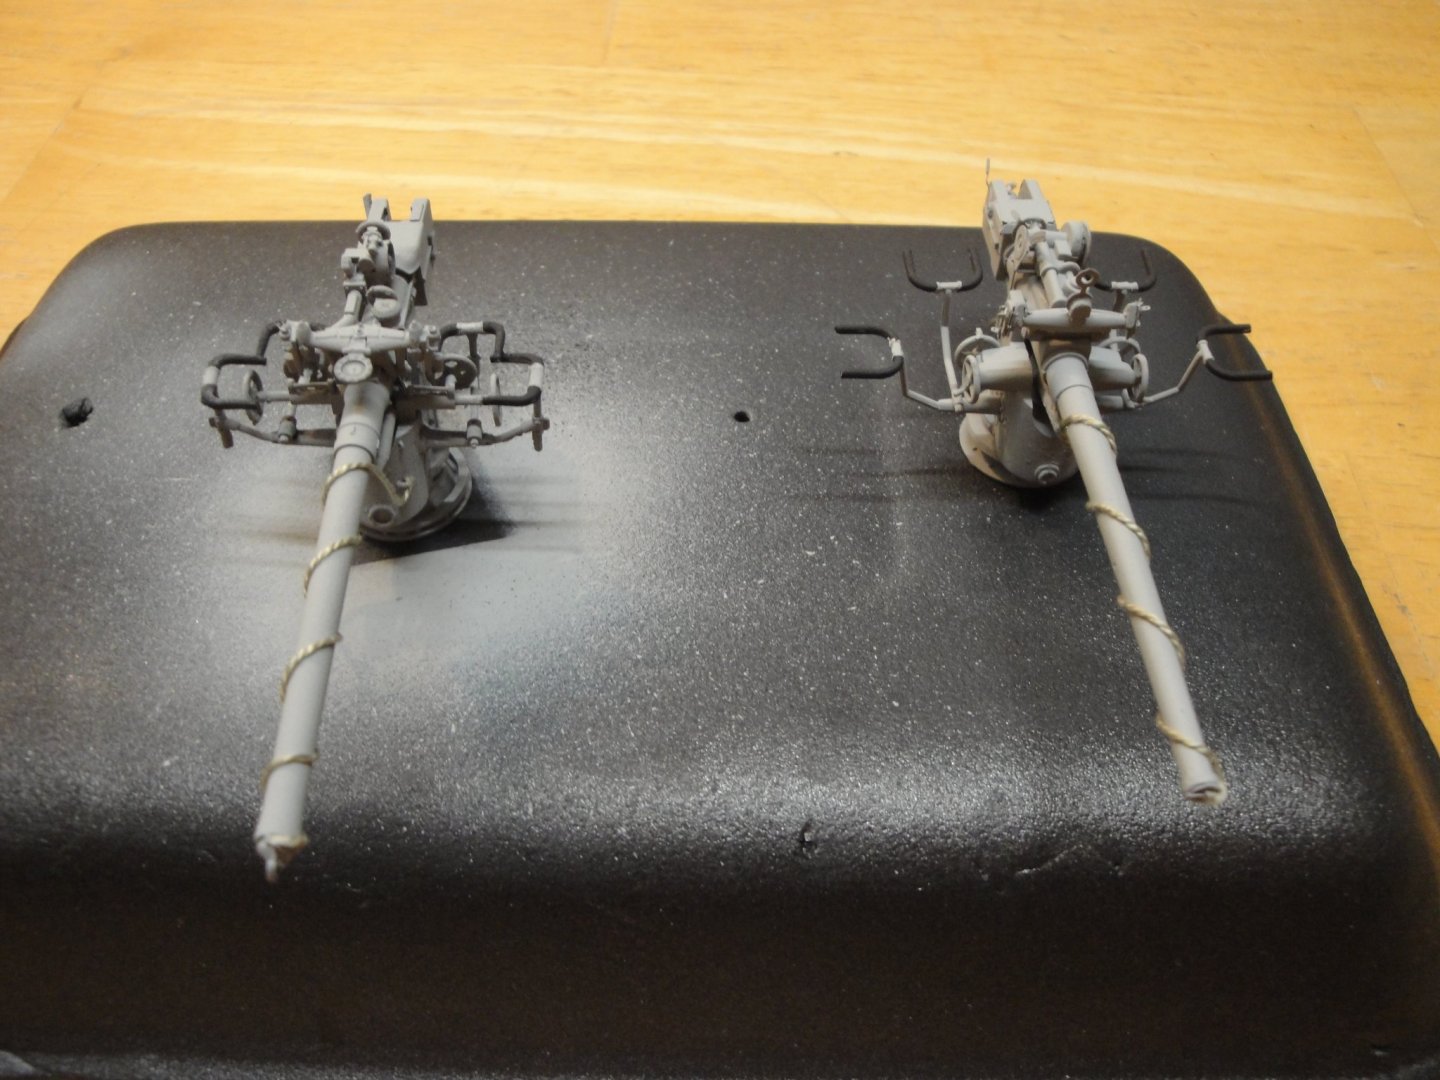
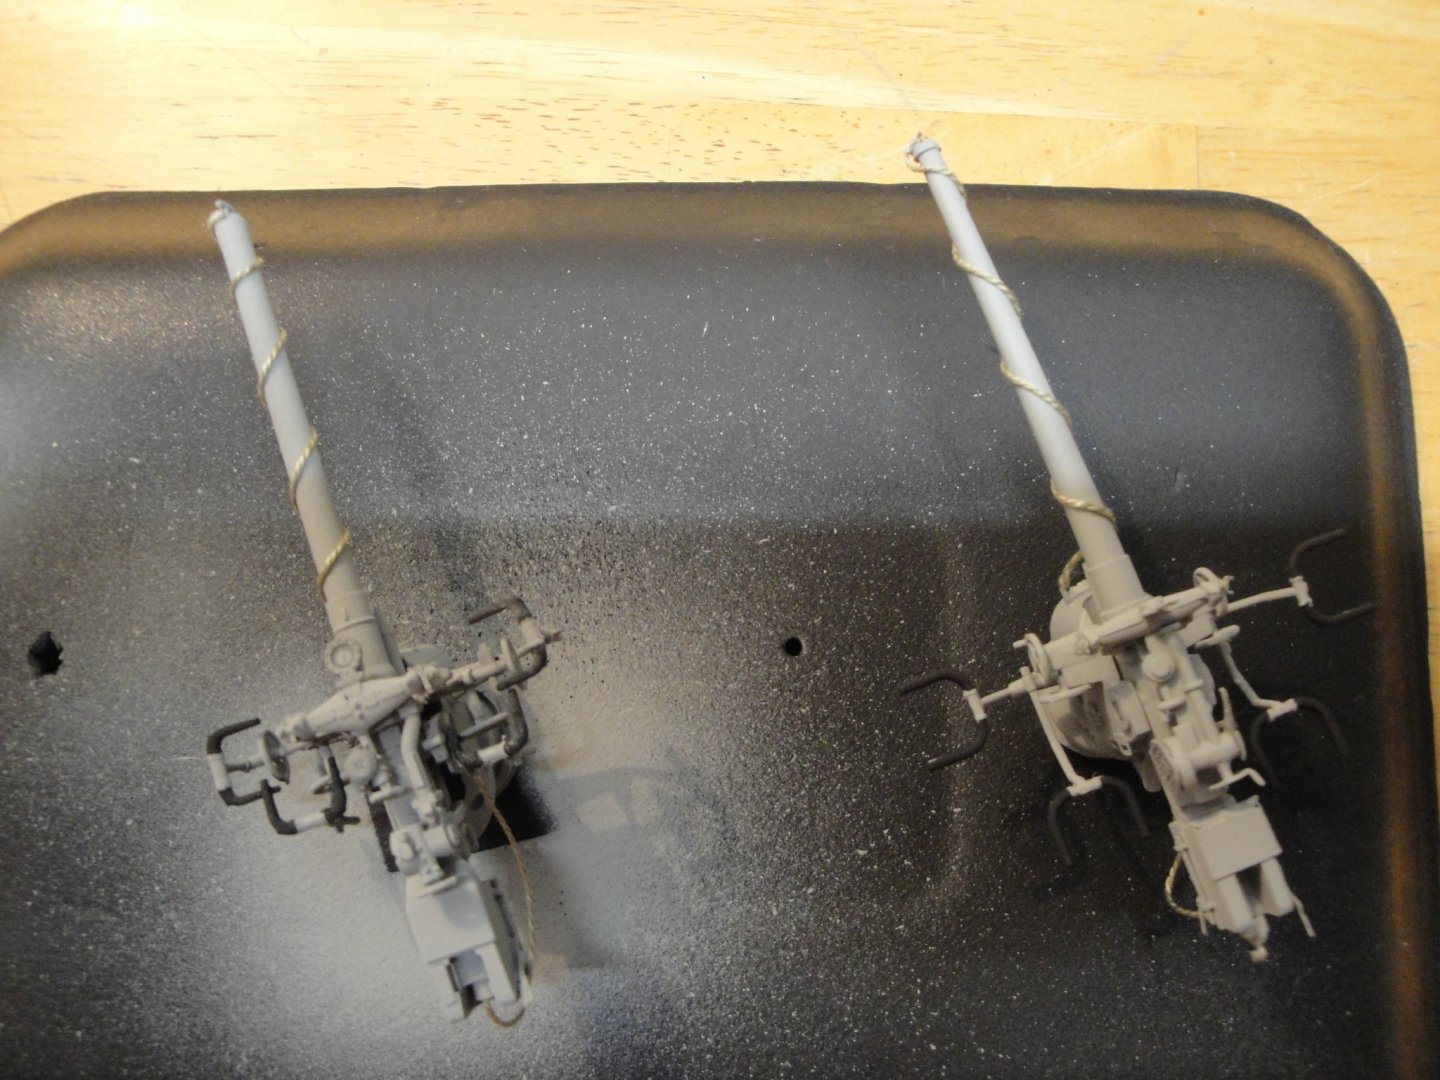
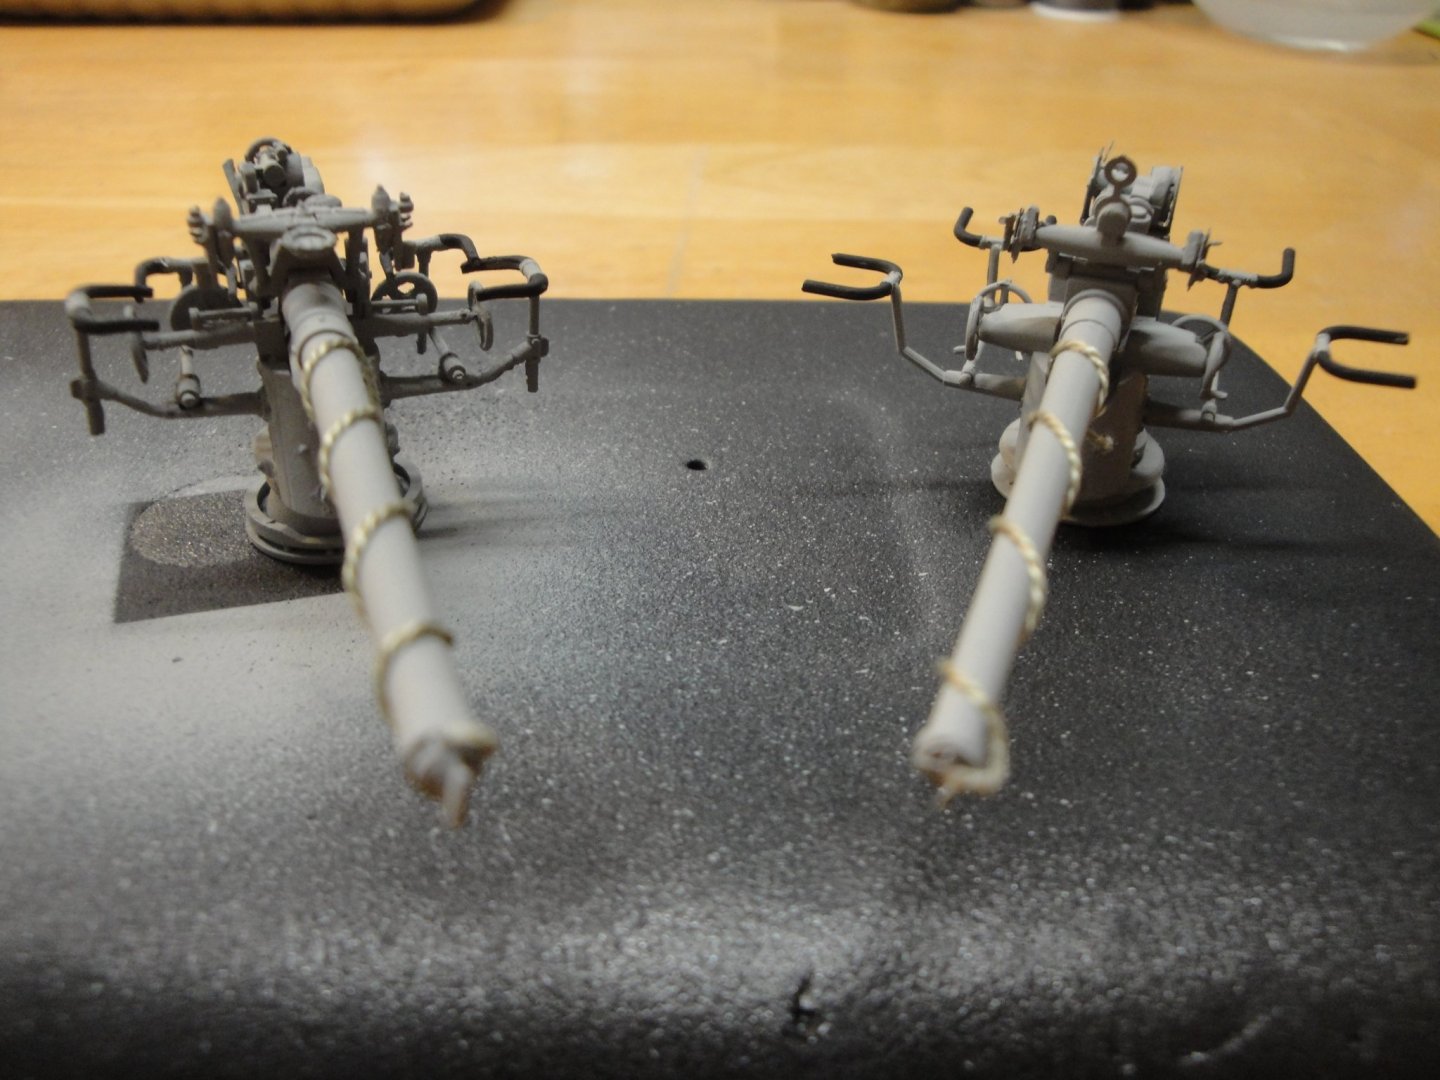
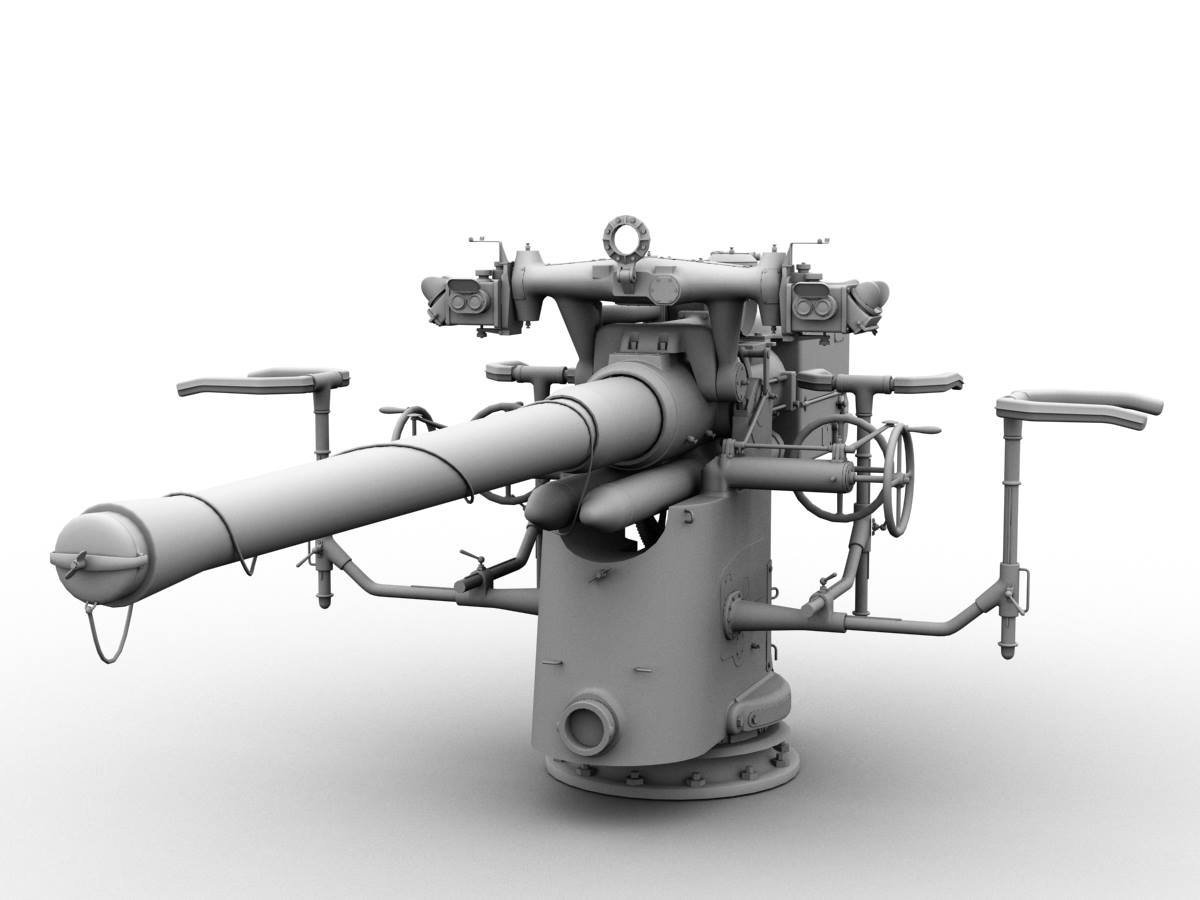
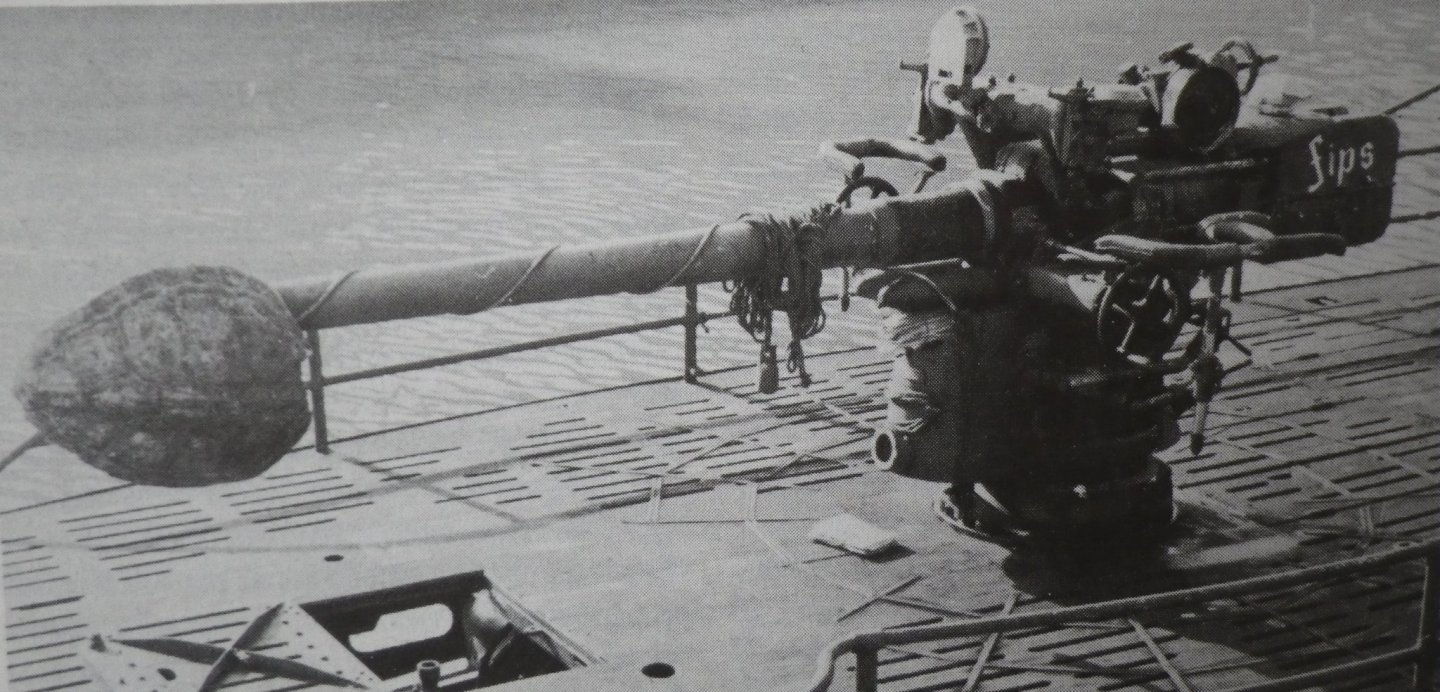
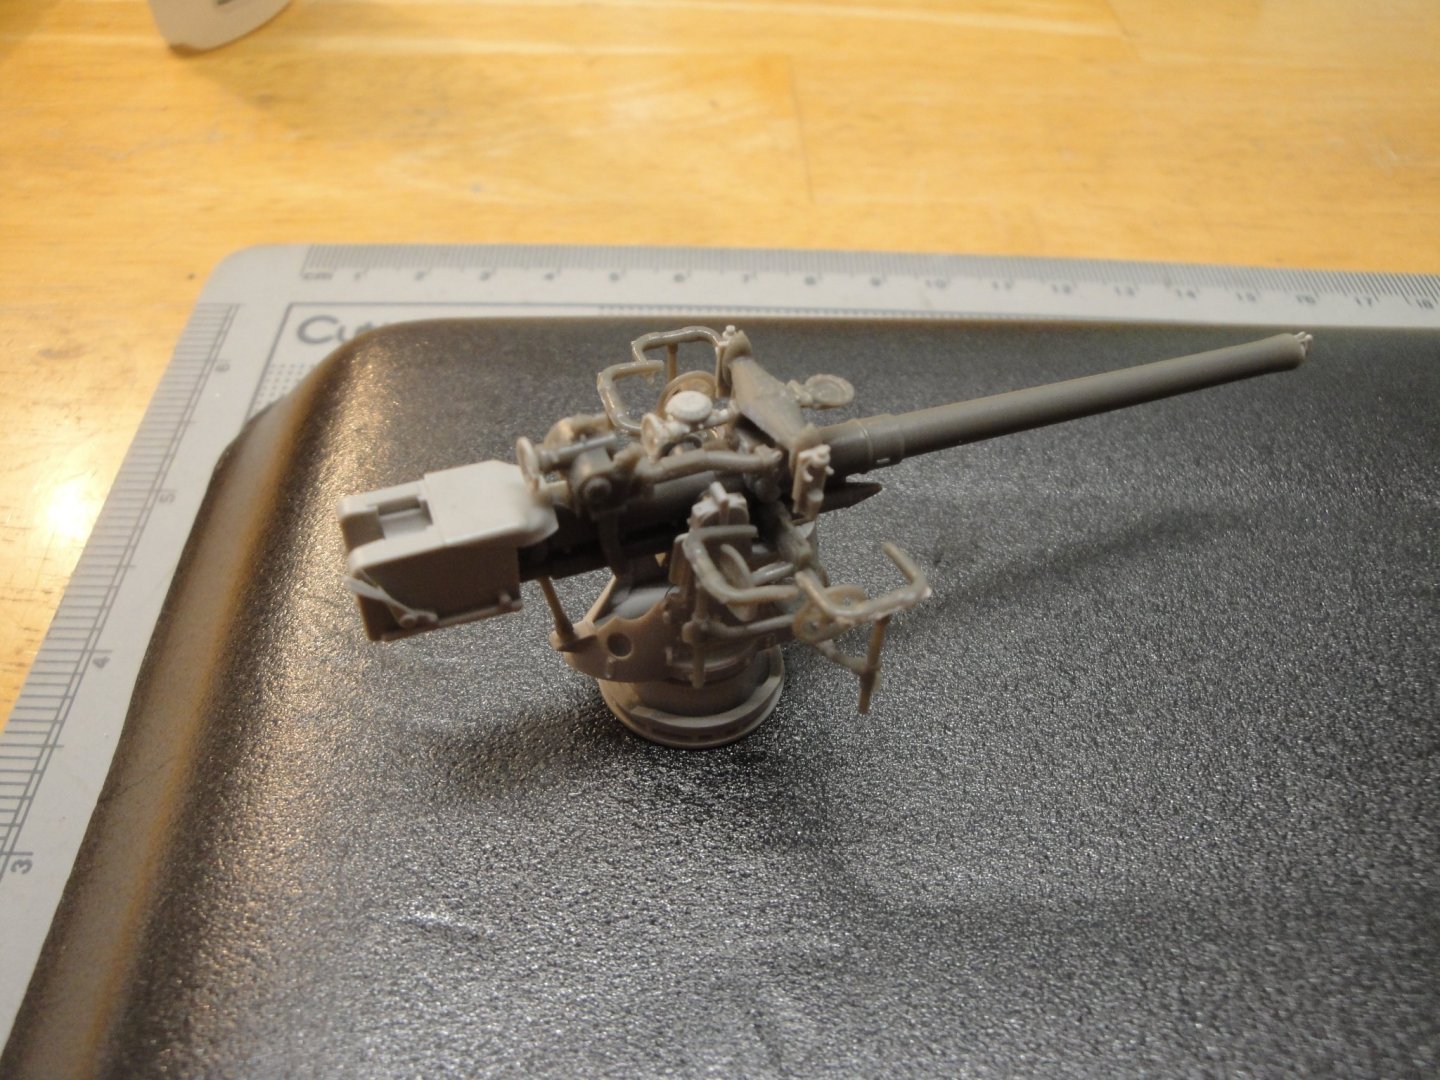
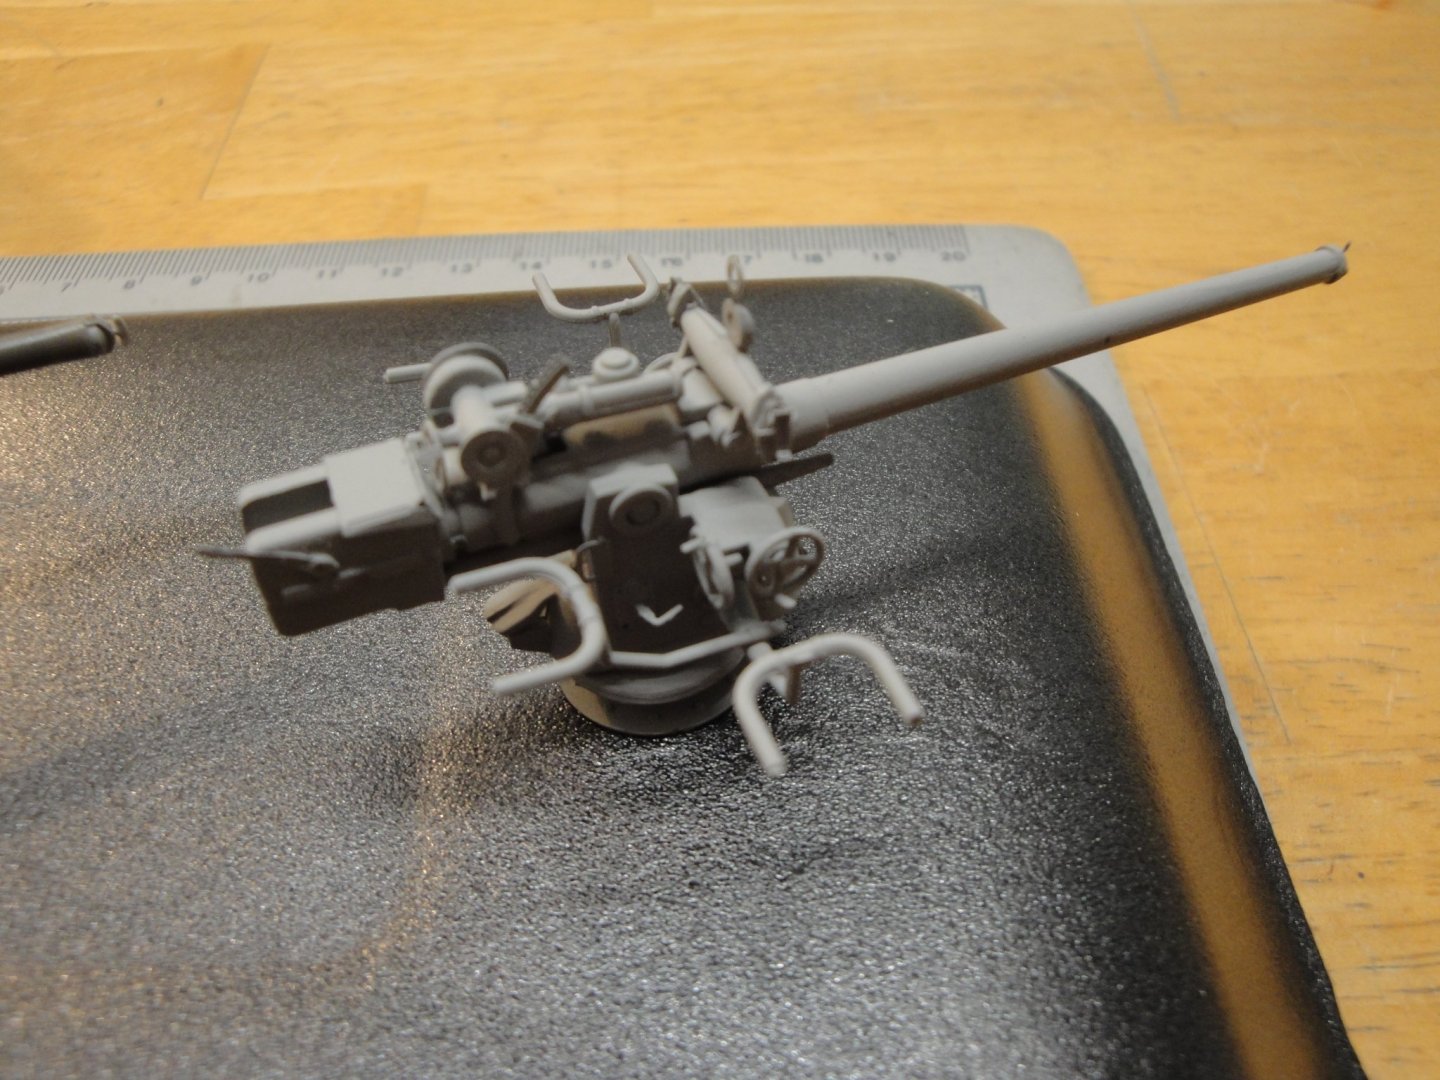
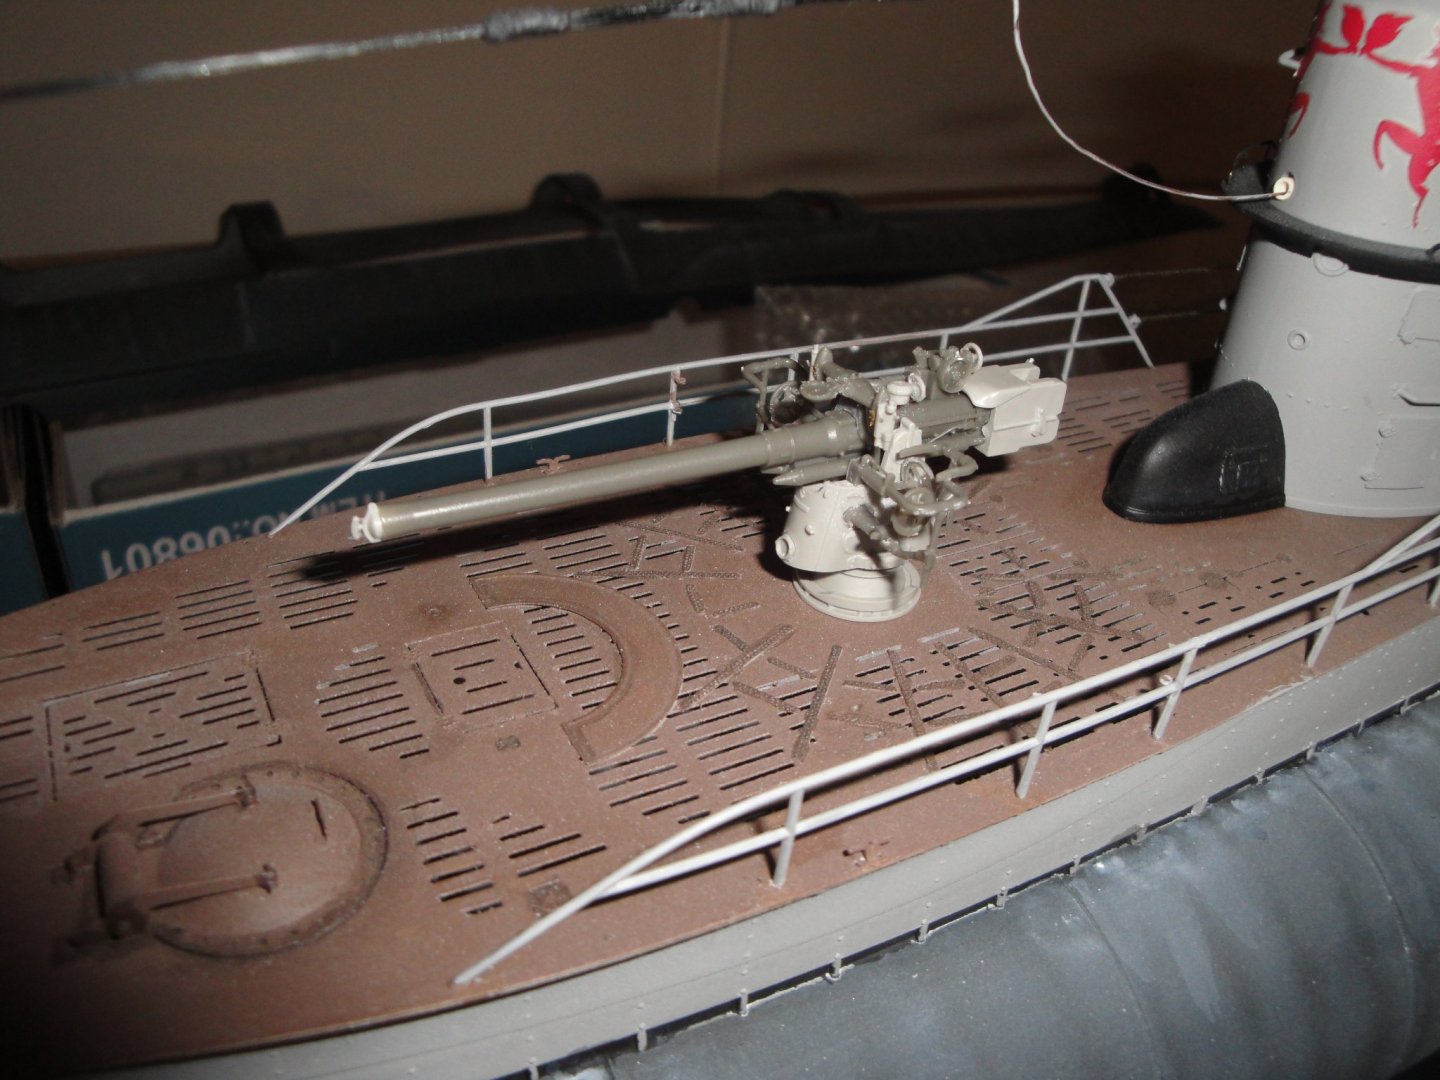
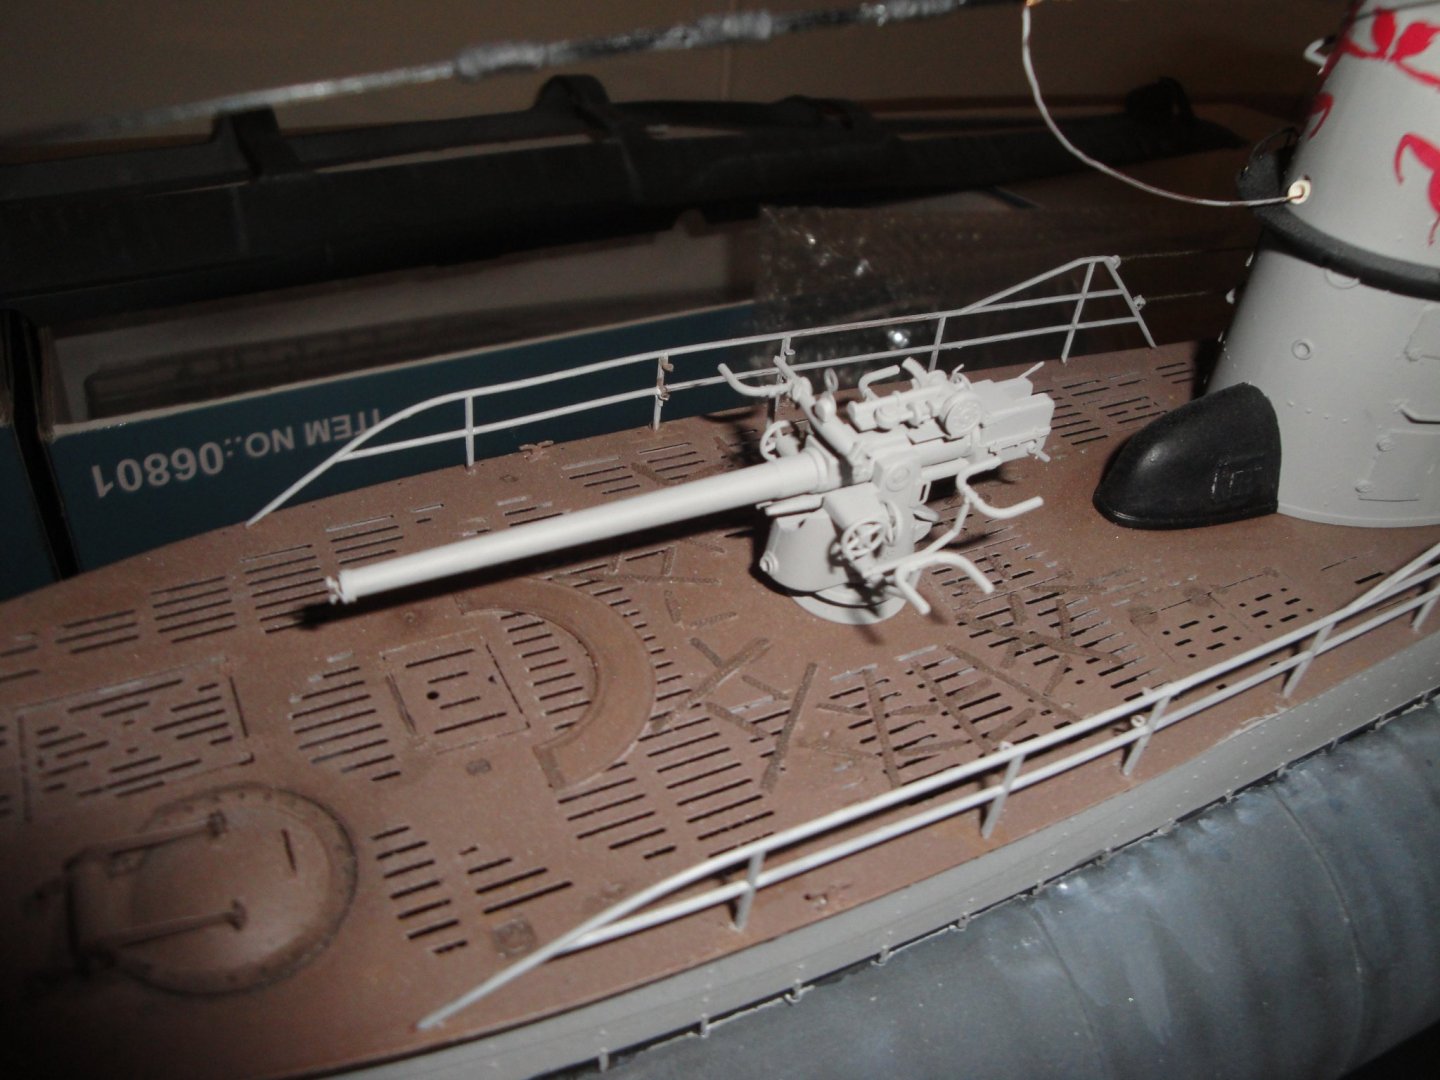
Well, both guns are now complete and I still do not know for sure, which one to mount permanently on the U-Boot..... Ideally, If I had known earlier that Eduard was offering this kit, I should have mixed parts of the Trumpeter, RCSubs and Eduard gun kits, to make the most realistic model possible. The Eduard kit is definitely more precise in the casting and offers some details that the Trumpeter parts miss completely. On the other hand, the Trumpeter/RCSubs kit offers a gun which can pivot and swivel. It is also more solid because of the flexibility inherent to the polystyrene. By comparison, the Eduard resin parts are very brittle and are just asking to fall apart if poorly handled. It is also completely static which may not be a bad thing. Maybe I should design the gun bases so that they can be interchangeable, based on my mood..... 😉 I think I am going to retain the Trumpeter/RCSubs version but it is truly a tough choice. I have agonized long enough and must keep moving if I ever want to finish this model. To end that presentation, a couple of pictures for a 3D rendering of the gun and the real stuff: Yves


- 760 replies
-
- 15
-

-
Thank you for publishing this picture. It really gives us a sense of how large the model is and how complicated. This is going to be a great model, no doubt. Yves
- 322 replies
-
- 7
-
-
- enterprise
- caf
- (and 1 more)
-
That is amazing. You may not be happy with the results, but it looks good from 6 inches away. Yves
-
That Molotow paint is fabulous. What a great work you did. Yves
-
Wonderful progress on the Emma. That is a lovely kit and I hope your Build Log will give me the urge to resurrect mine, which has been idle for way too long. Yves
-
Nice work, Kevin. I am glad you went ahead with the glue! Yves
- 322 replies
-
- 4
-
-
- enterprise
- caf
- (and 1 more)
-
What a beautiful collection of heavy weight ships. Yves
- 136 replies
-
- 3
-
-
- strasbourg
- finished
- (and 2 more)
-
Beautiful kit. I am looking forward to following your progress. Yves
-
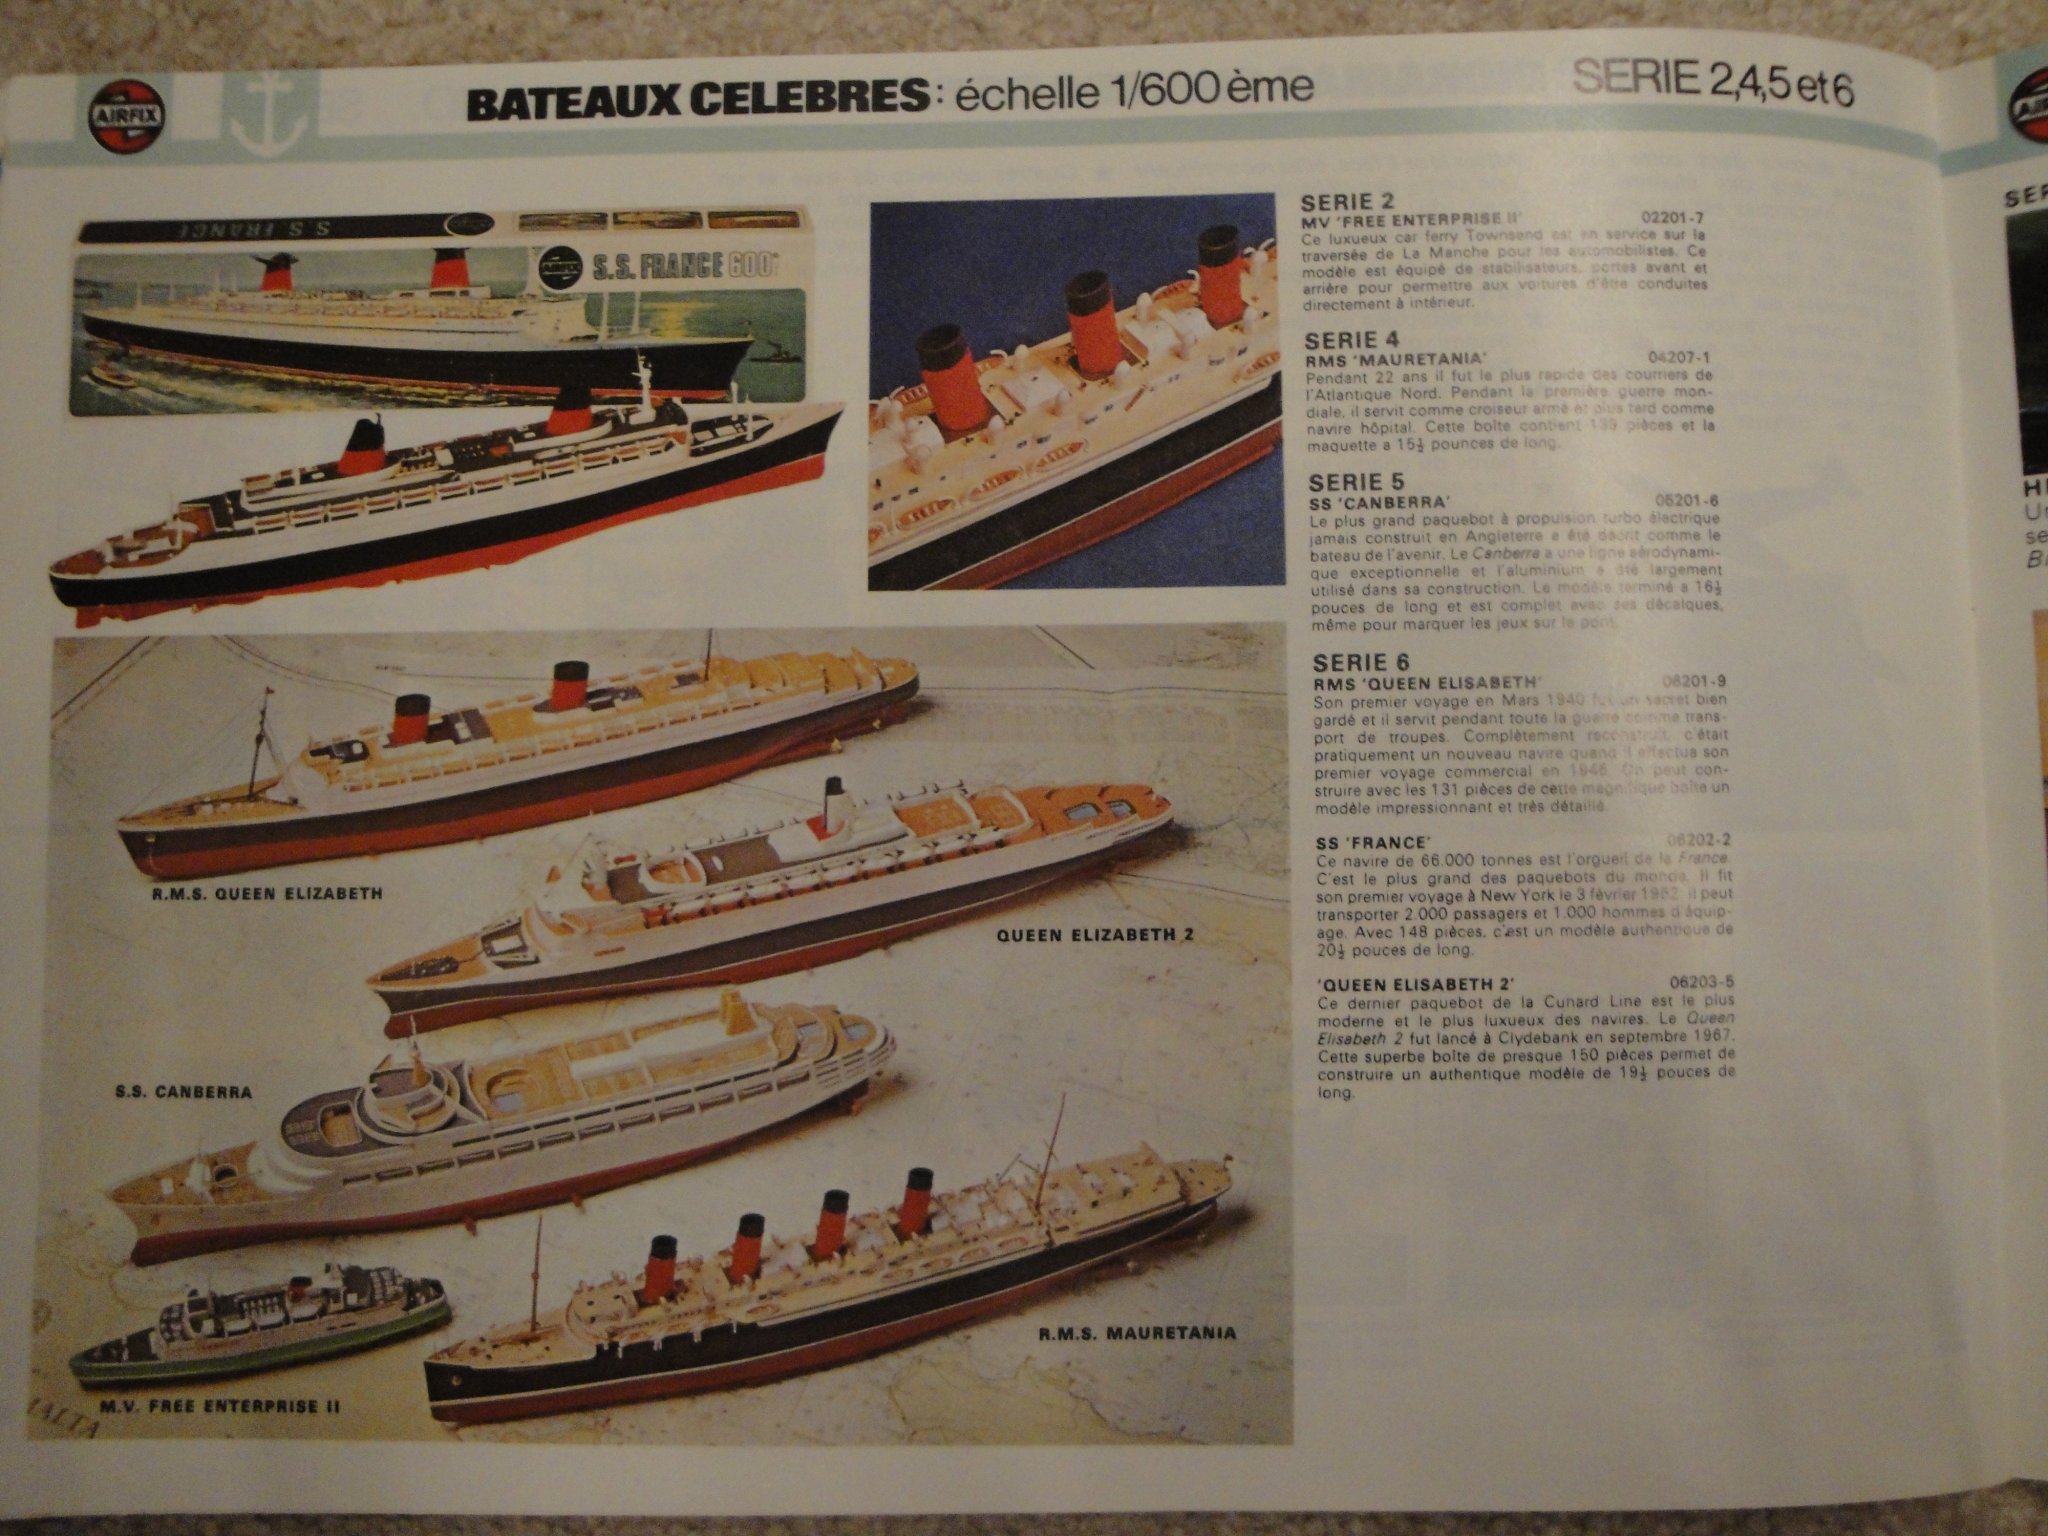
Chris, Here is a picture of a 1976 French Airfix catalogue, showing all liners available at 1/600: My next AIRFIX catalog is from 1990 (quantum leap there...) and the liners are no longer available. They were all dropped from production, sometime in between. Yves

-
Another nice project of a legendary ship. You are building yourself a very nice collection of 1/600 scale liners. Yves
-
It takes a lot of guts to do that. The result is worth (no pun intended) it. Yves
-
There are quite a few Build Logs of the Saint Elme, on the French forums. Below are a few links and you may have to register to be able to display the pictures: - This one is very detailed and brings a lot of additional details: https://www.laroyale-modelisme.net/t23693-replique-du-saint-elme-au-1-20?highlight=St+Elme - Another one with a different color scheme: https://www.laroyale-modelisme.net/t12507-saint-elme-echelle-1-20e?highlight=St+Elme - Nice pictures of a finished model: https://www.laroyale-modelisme.net/t24969-chalutier-st-elme?highlight=St+Elme Overall, you have made a lot of great progress and are ahead of most Build Logs. Yves
-
Both boats are splendid. I love these hull shapes. Yves
- 261 replies
-
- 3
-
-
- muirneag
- vanguard models
- (and 2 more)
-
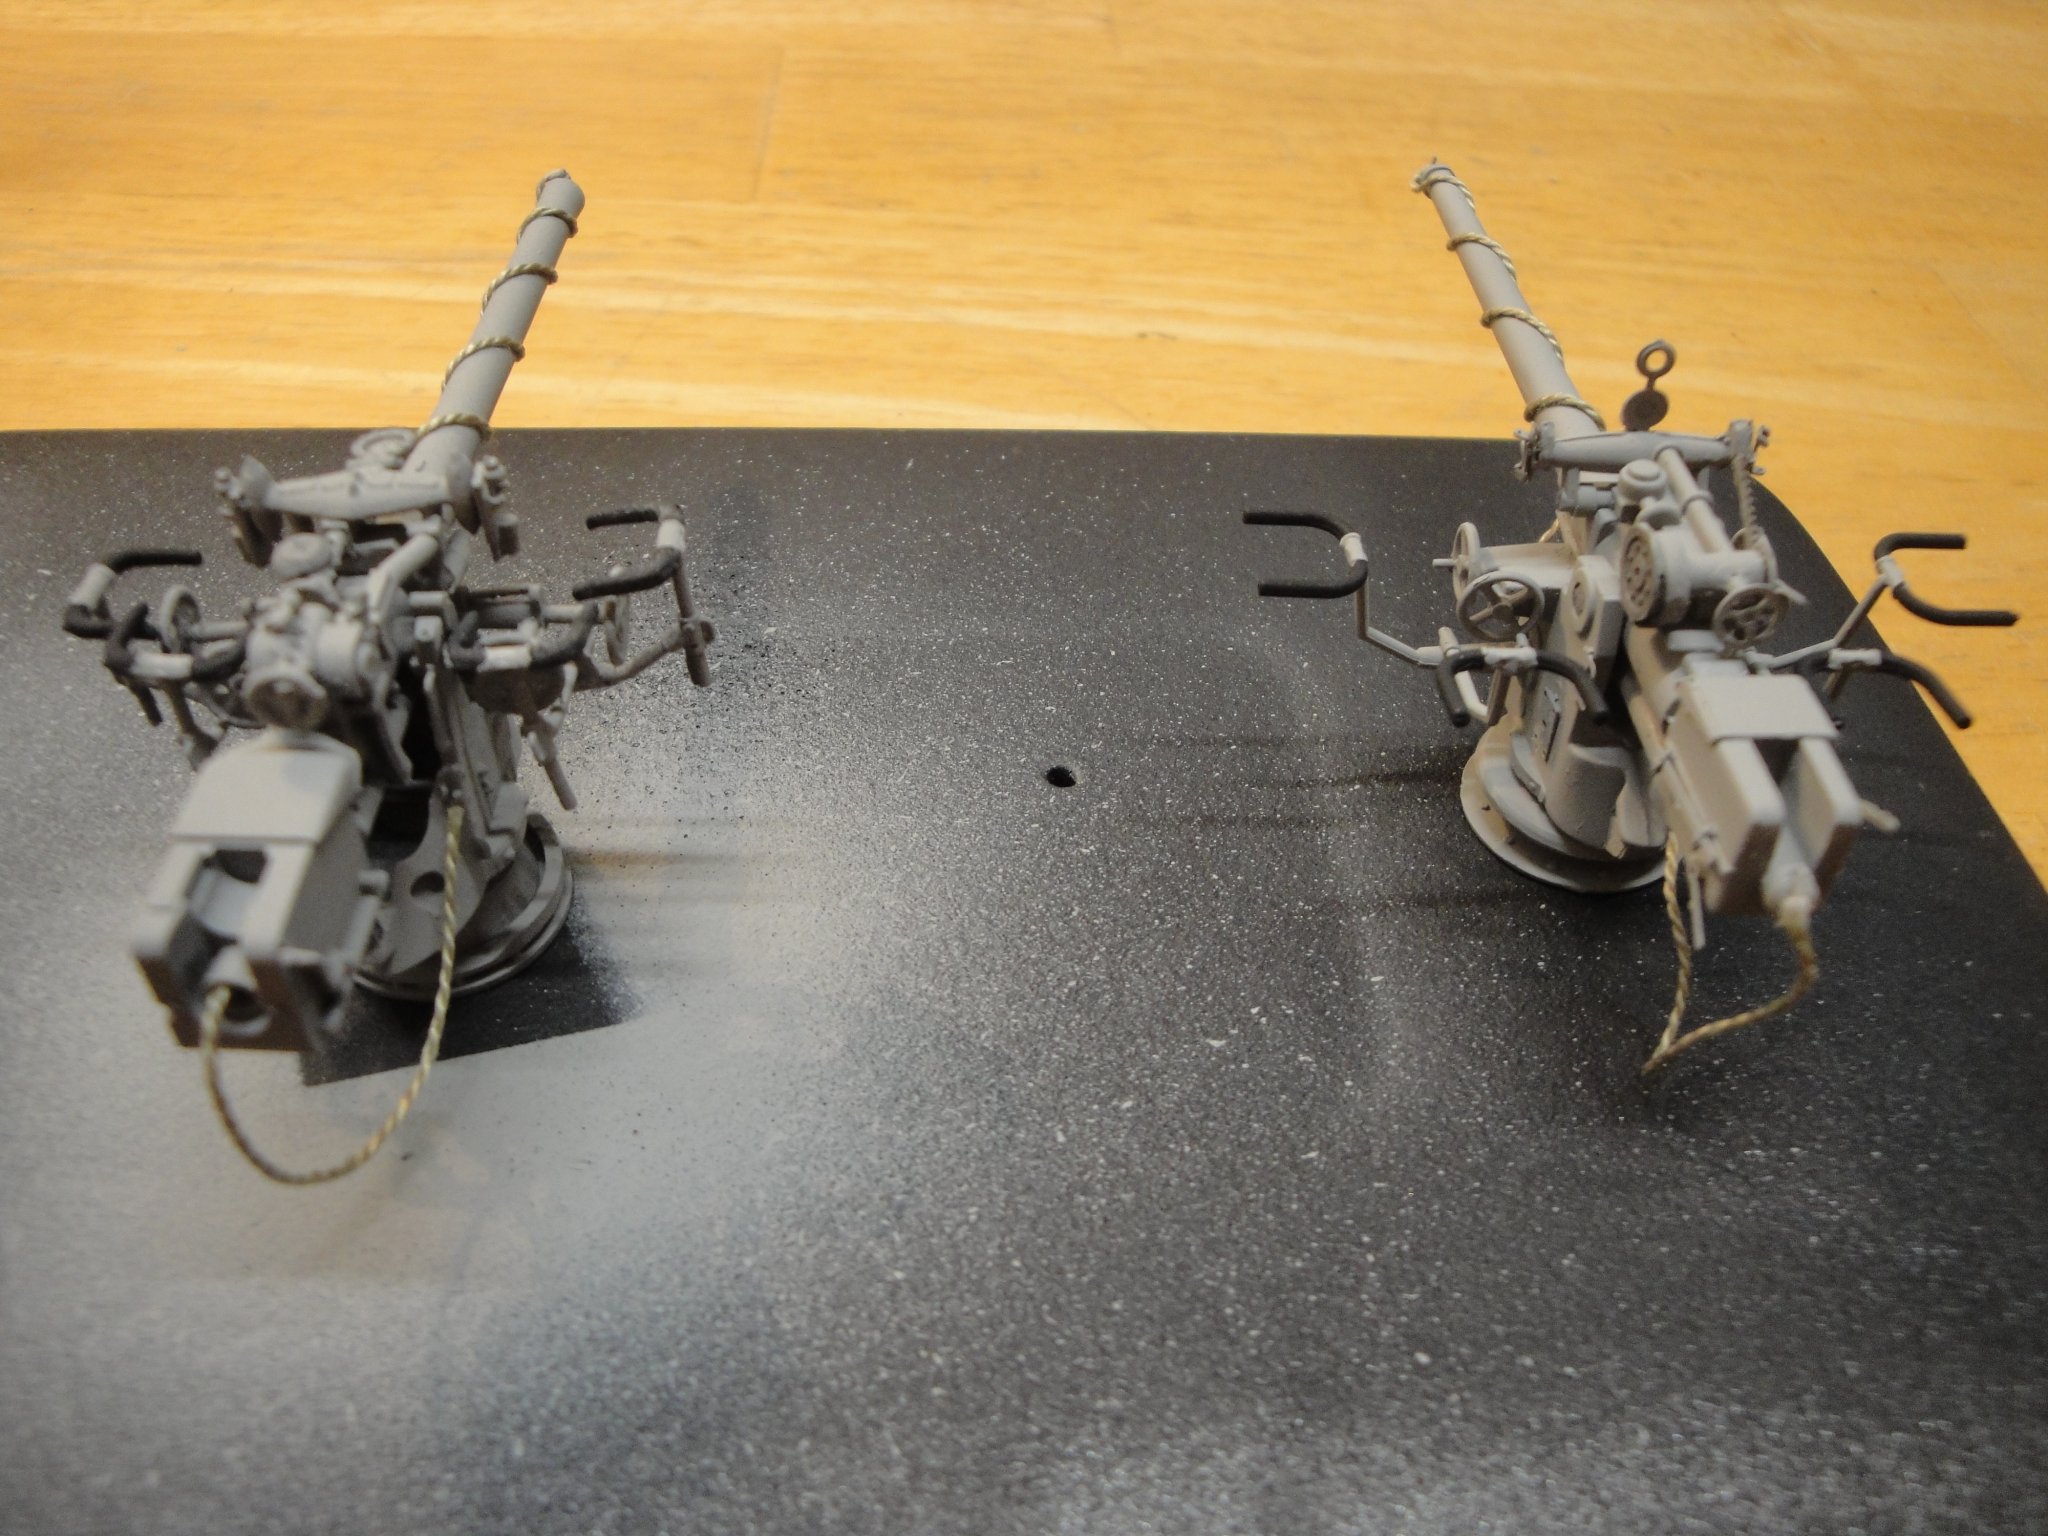
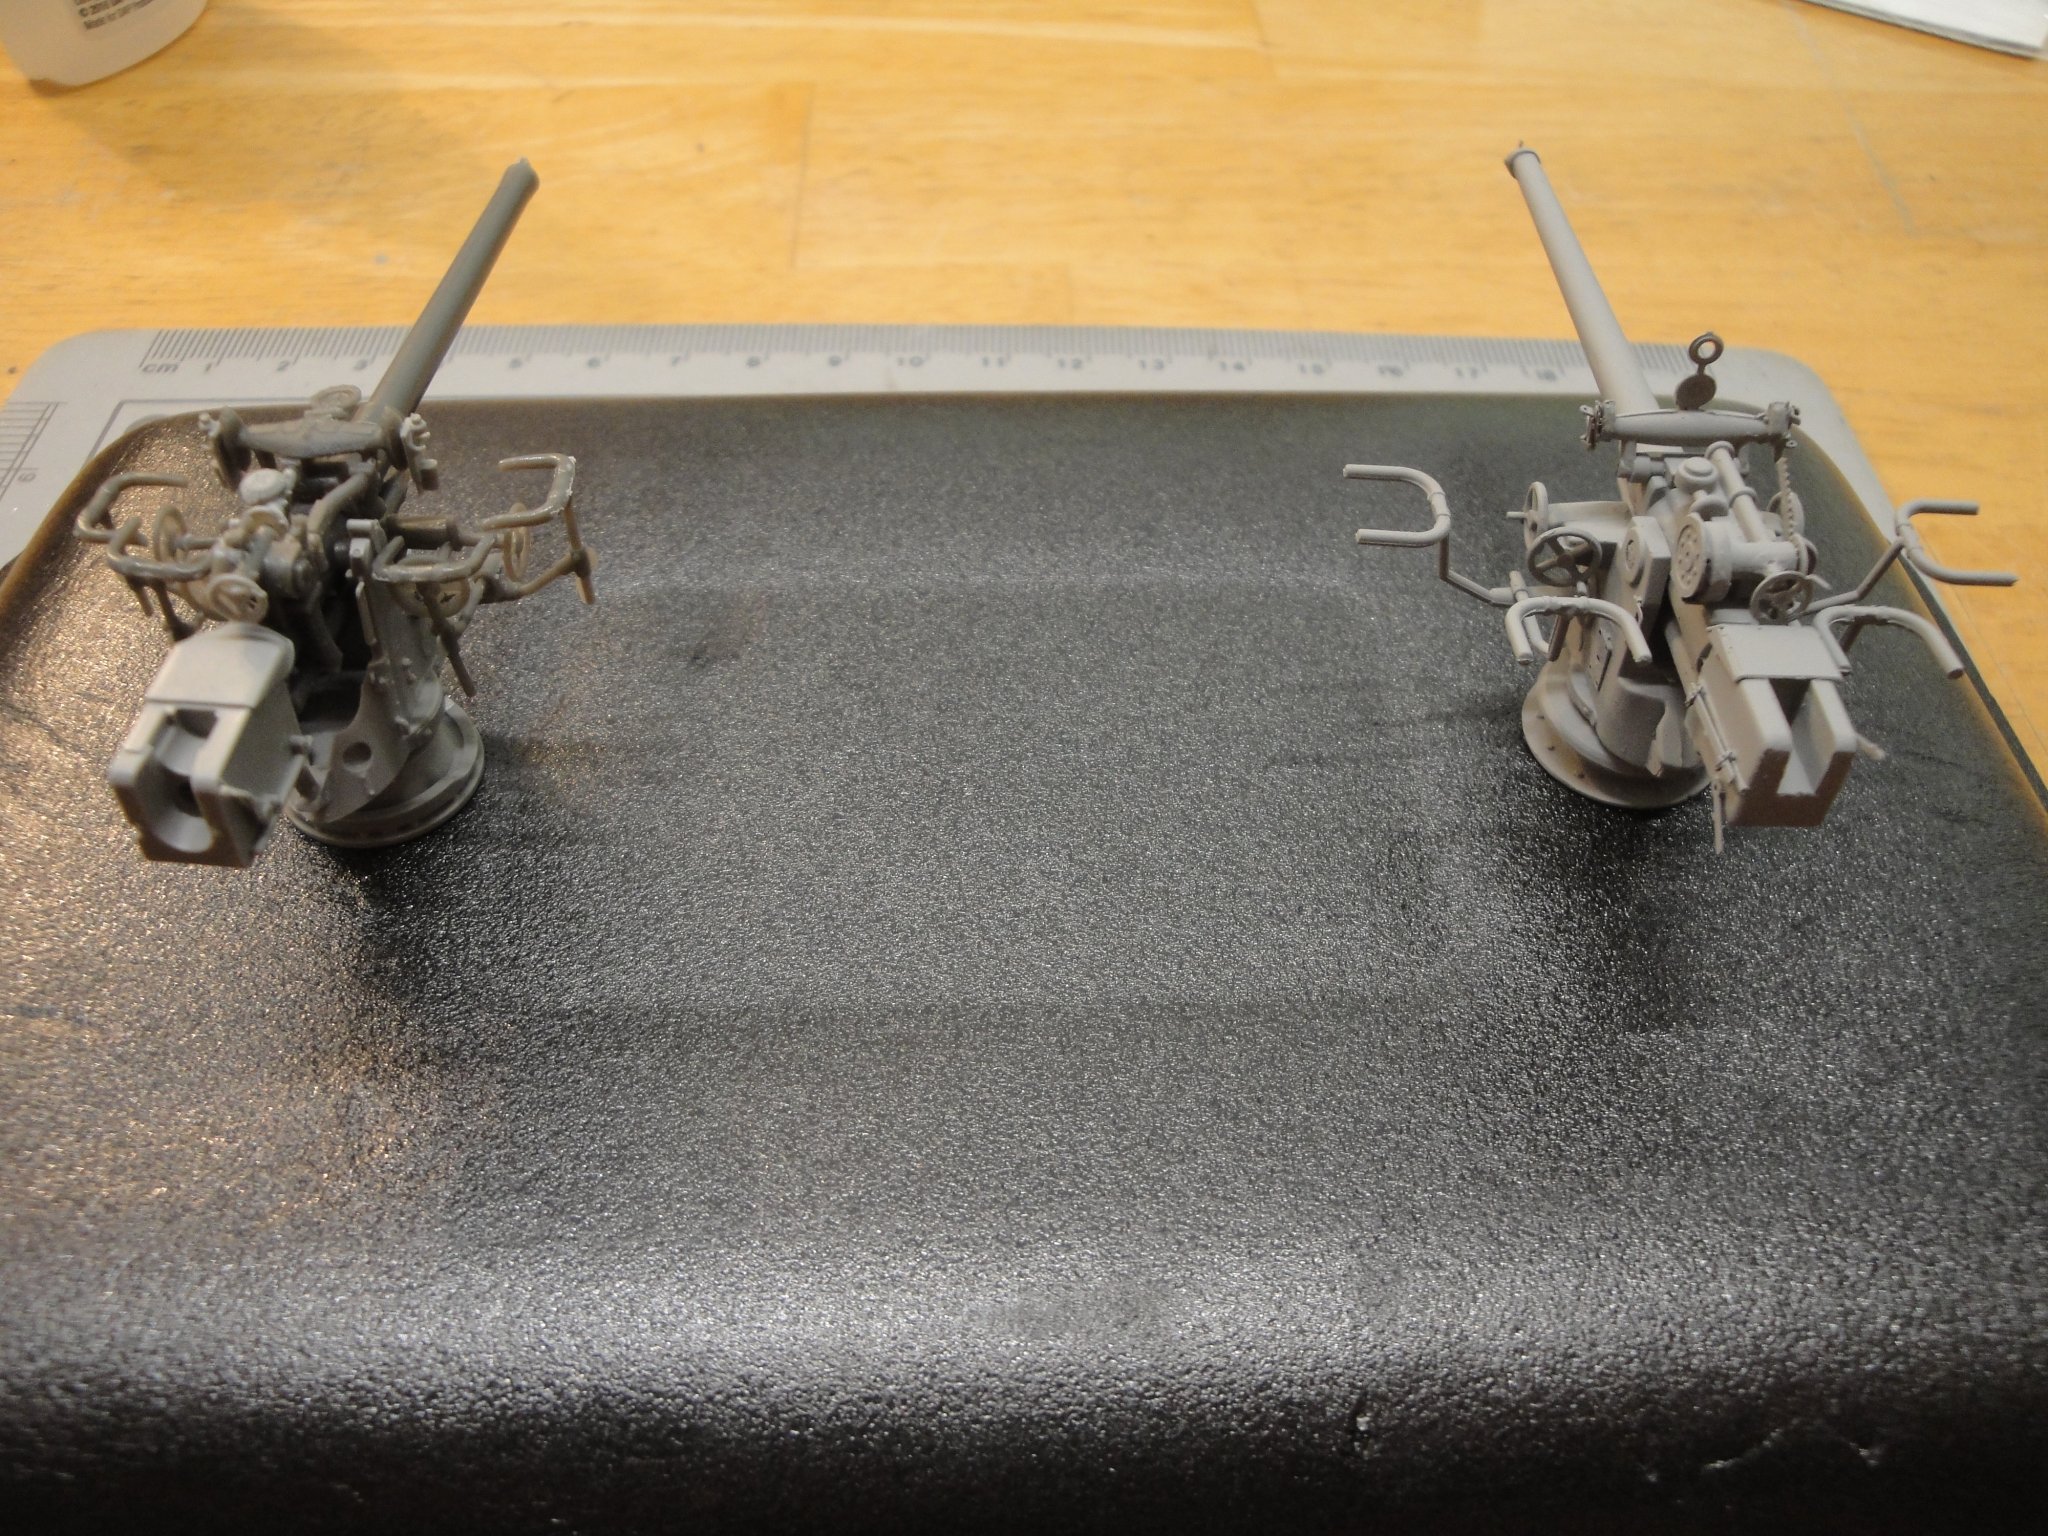
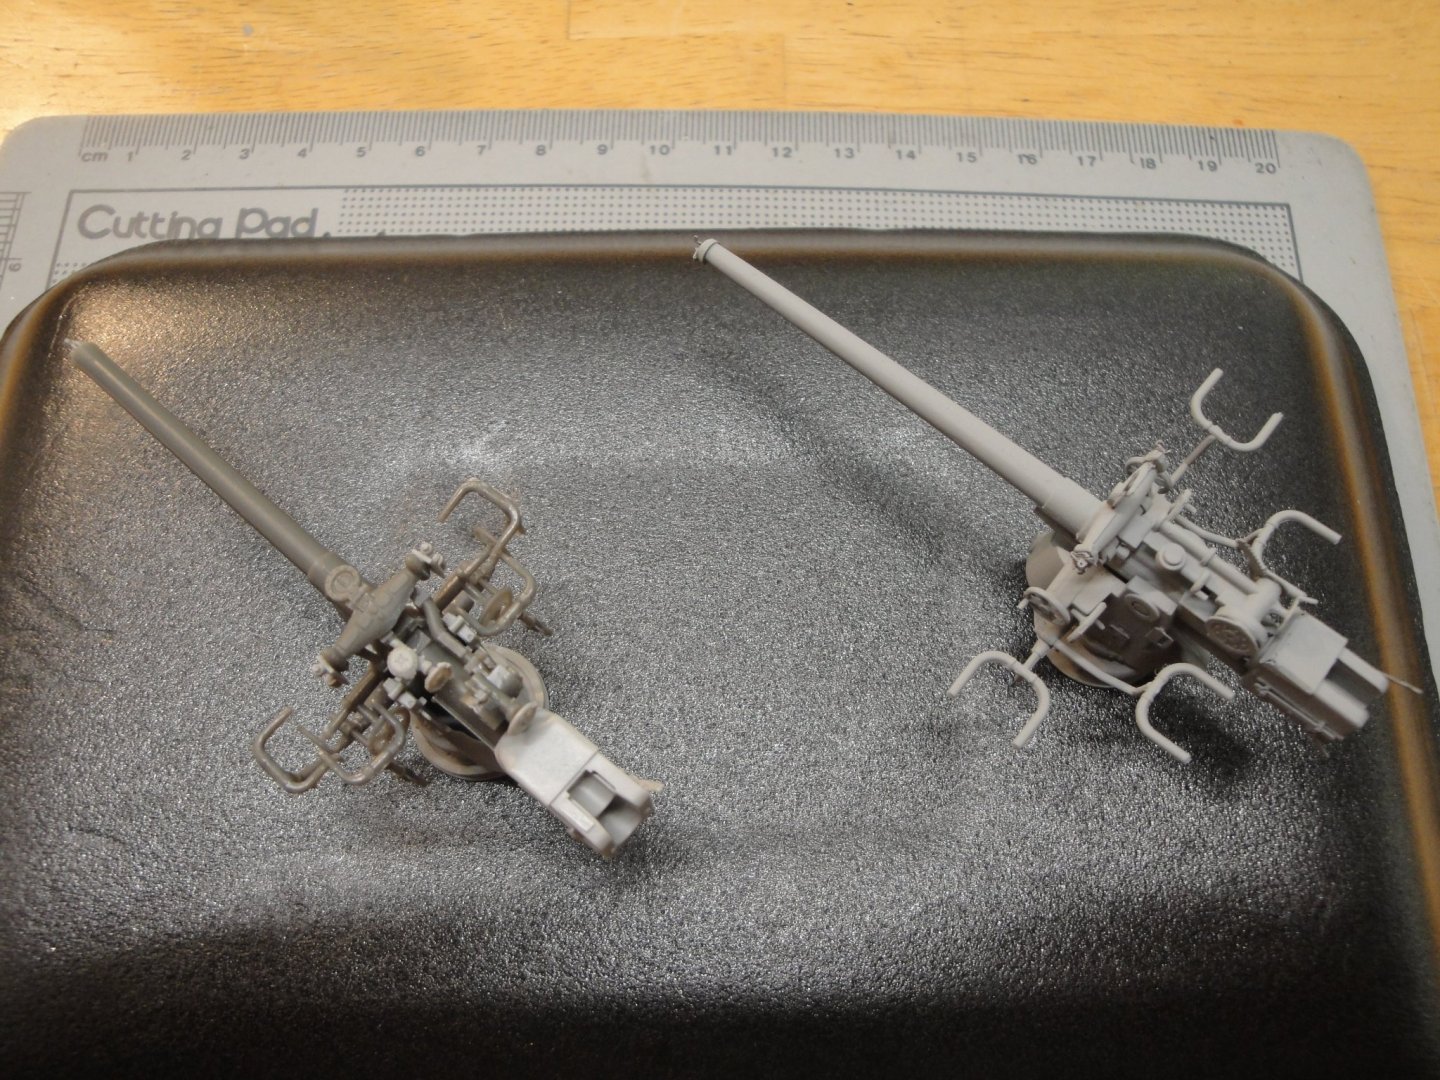
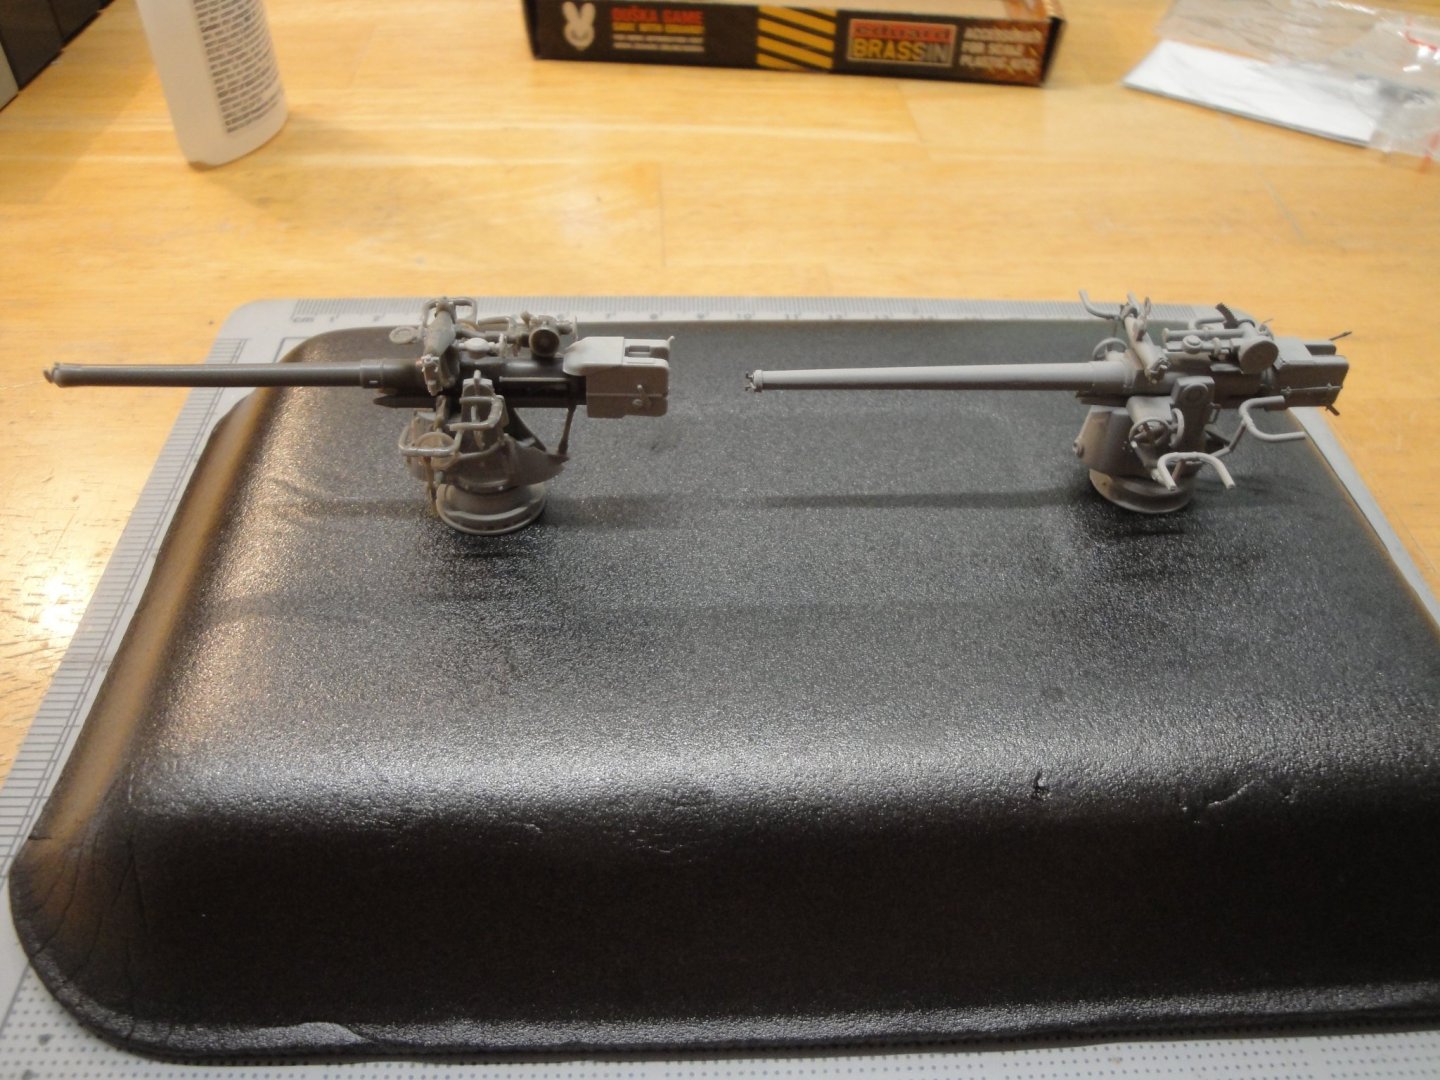
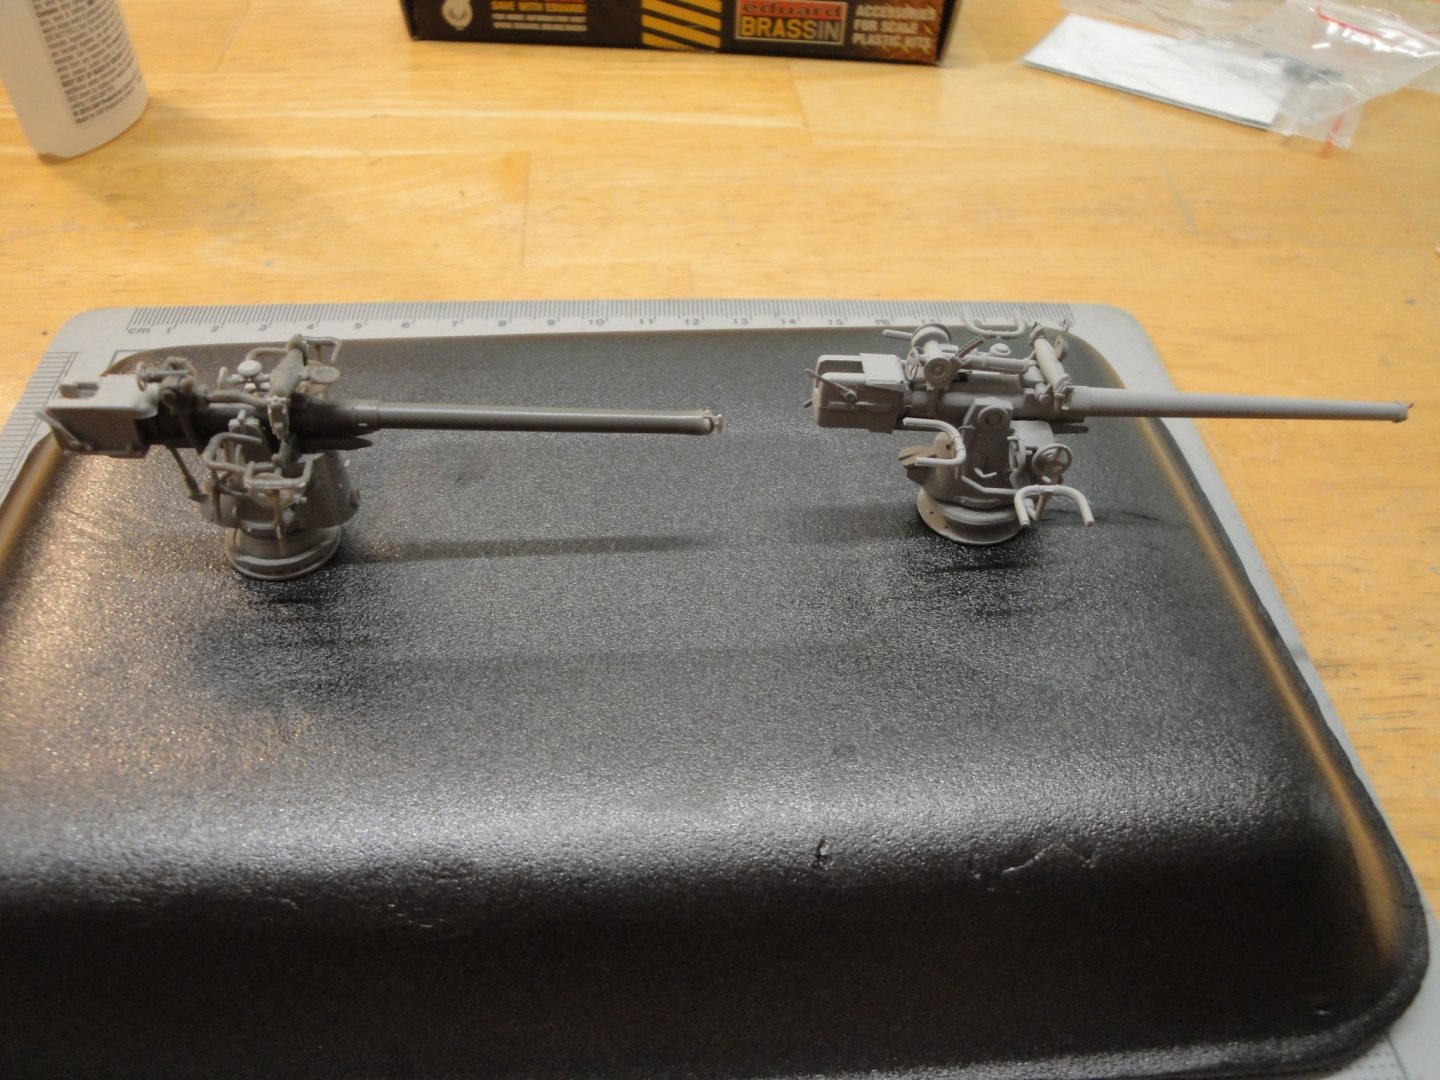
Even though, the Eduard resin kit is not yet painted, I wanted to compare it with the Trumpeter/RCSubs combo kit. The Trumpeter gun is not fully finished and lots of painting details must be applied to it: Close-up on each gun: And in situ, on the deck: Not sure yet, which one to chose for the final model. We will see after the painting, if I manage to paint that resin easily.... :-( Yves


- 760 replies
-
- 10
-
-
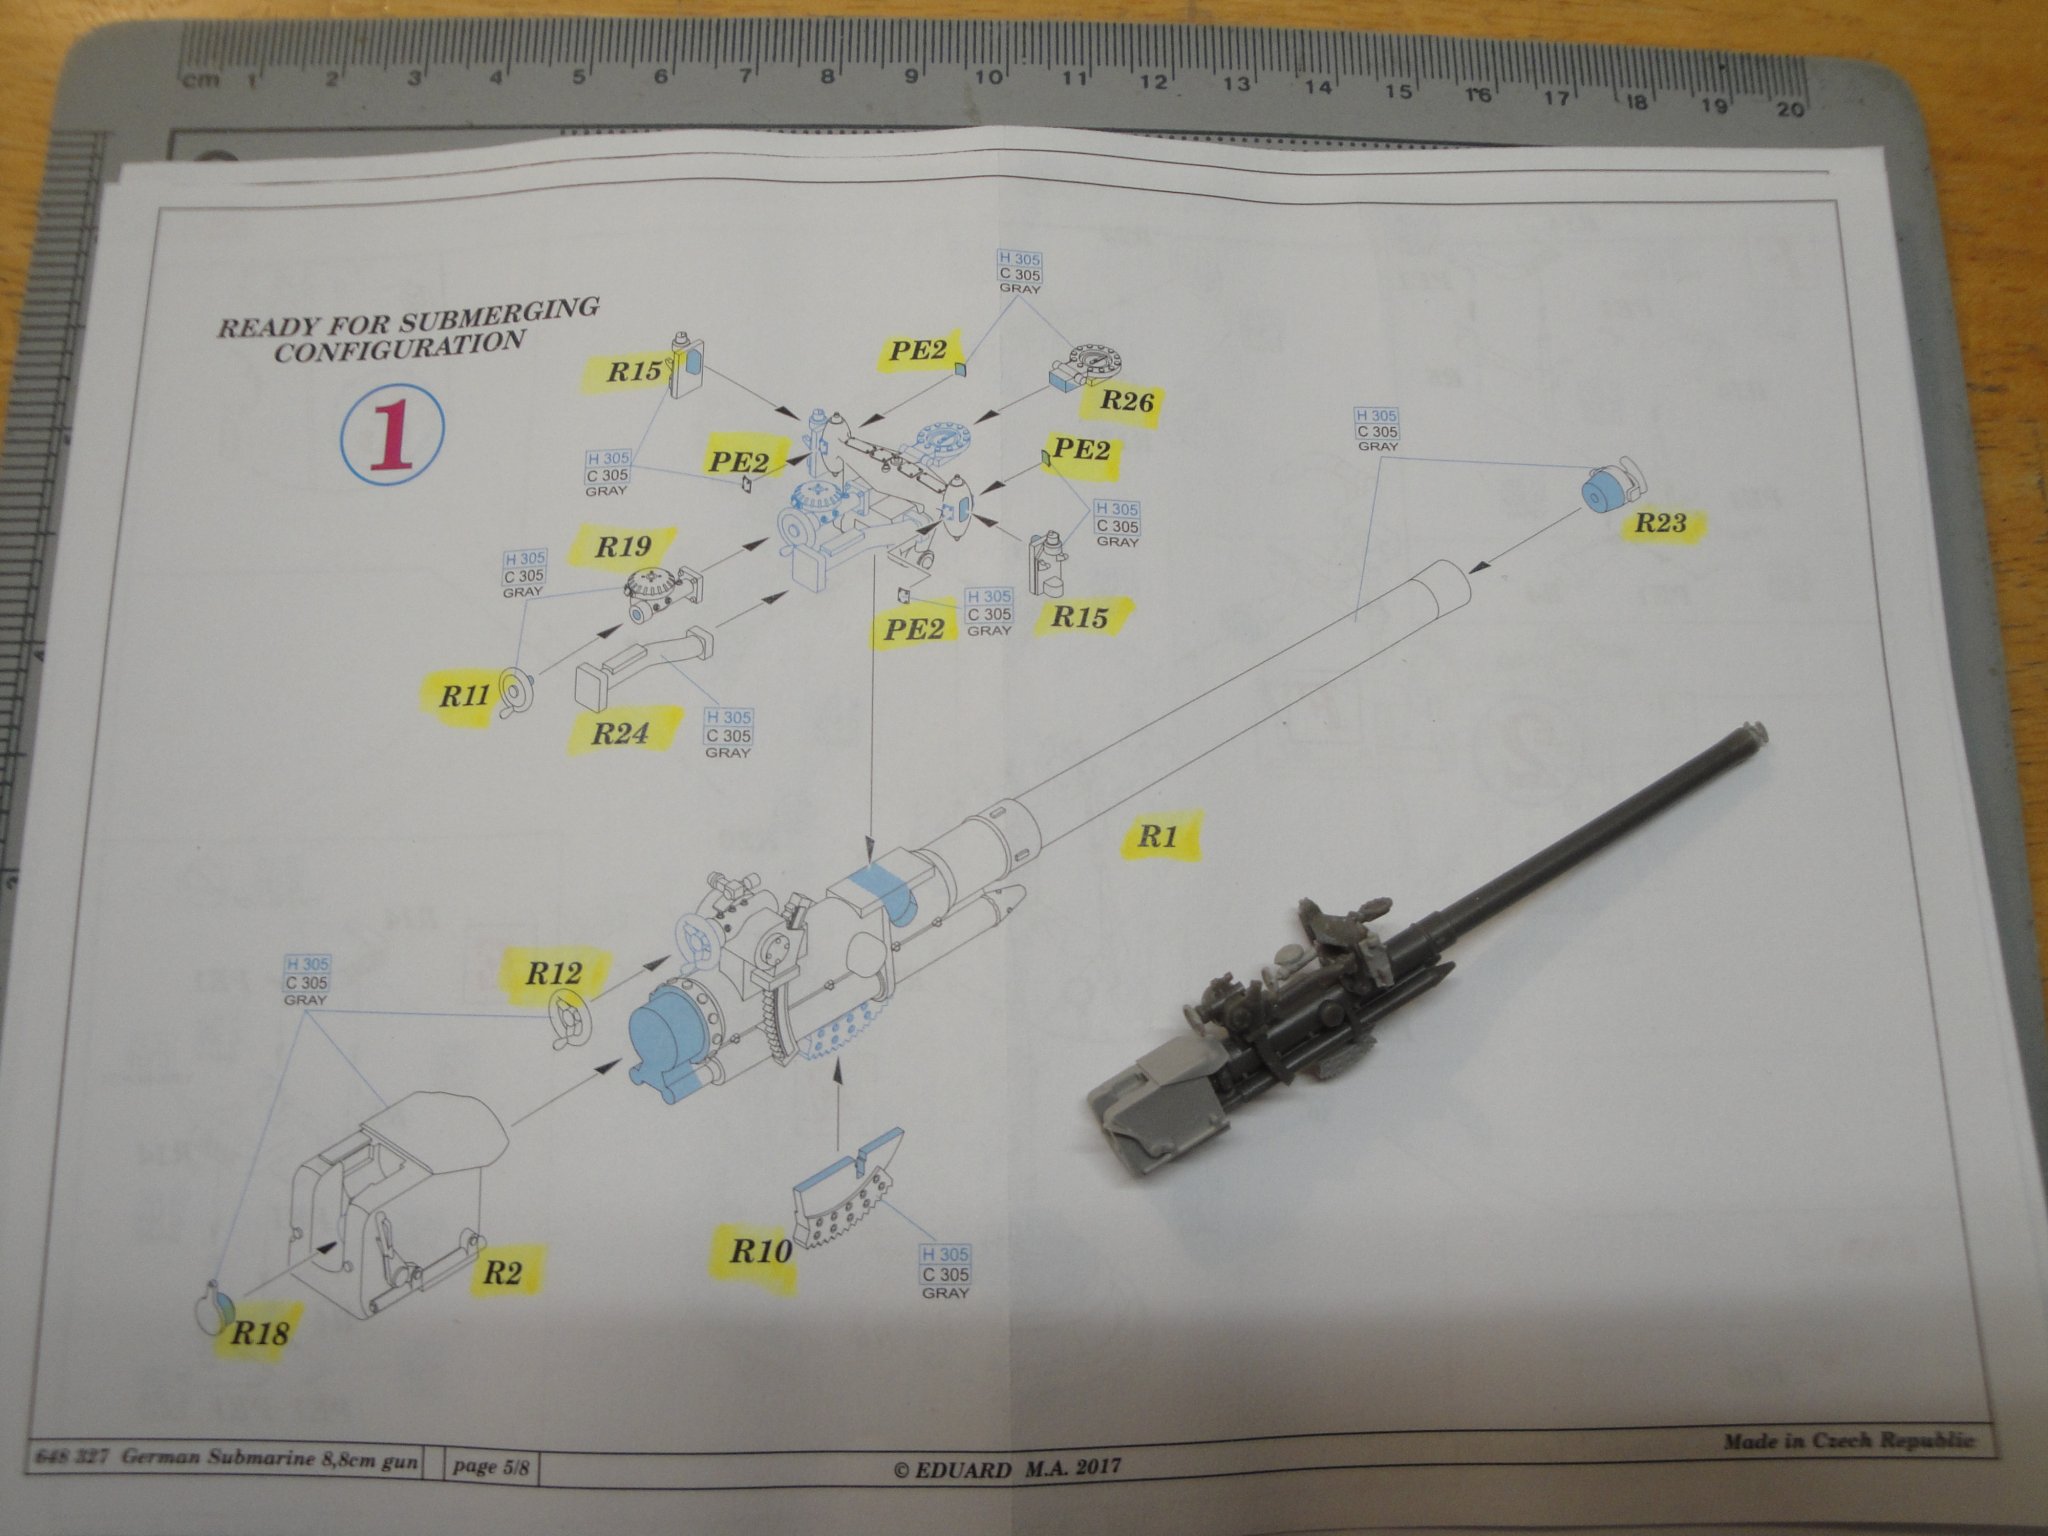
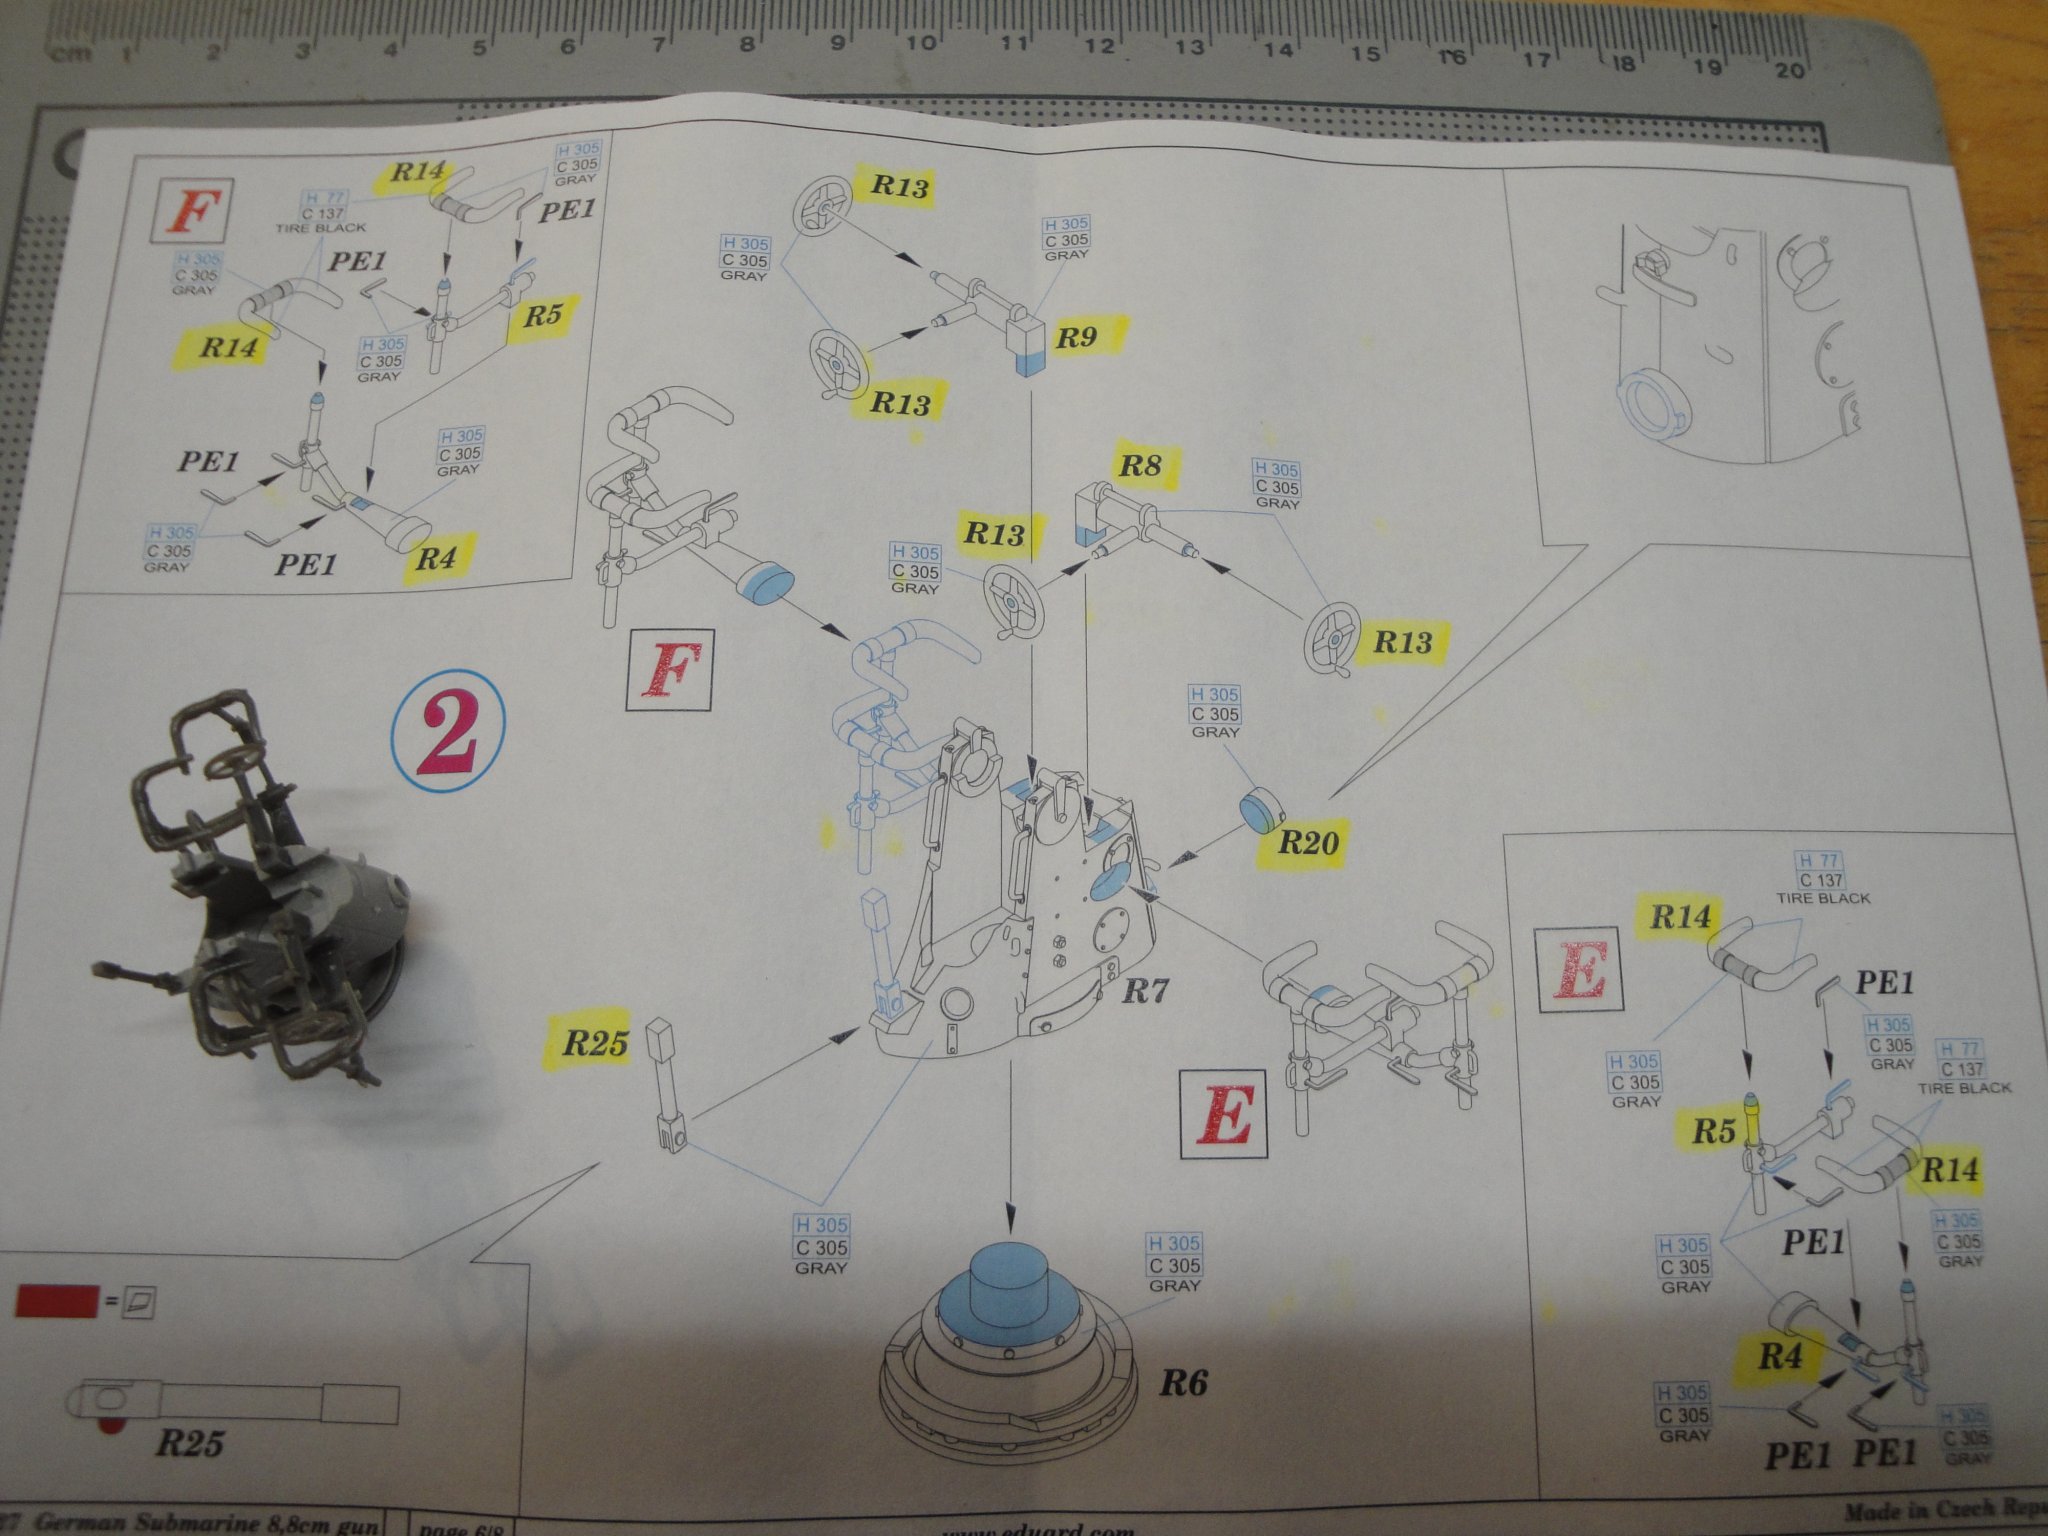
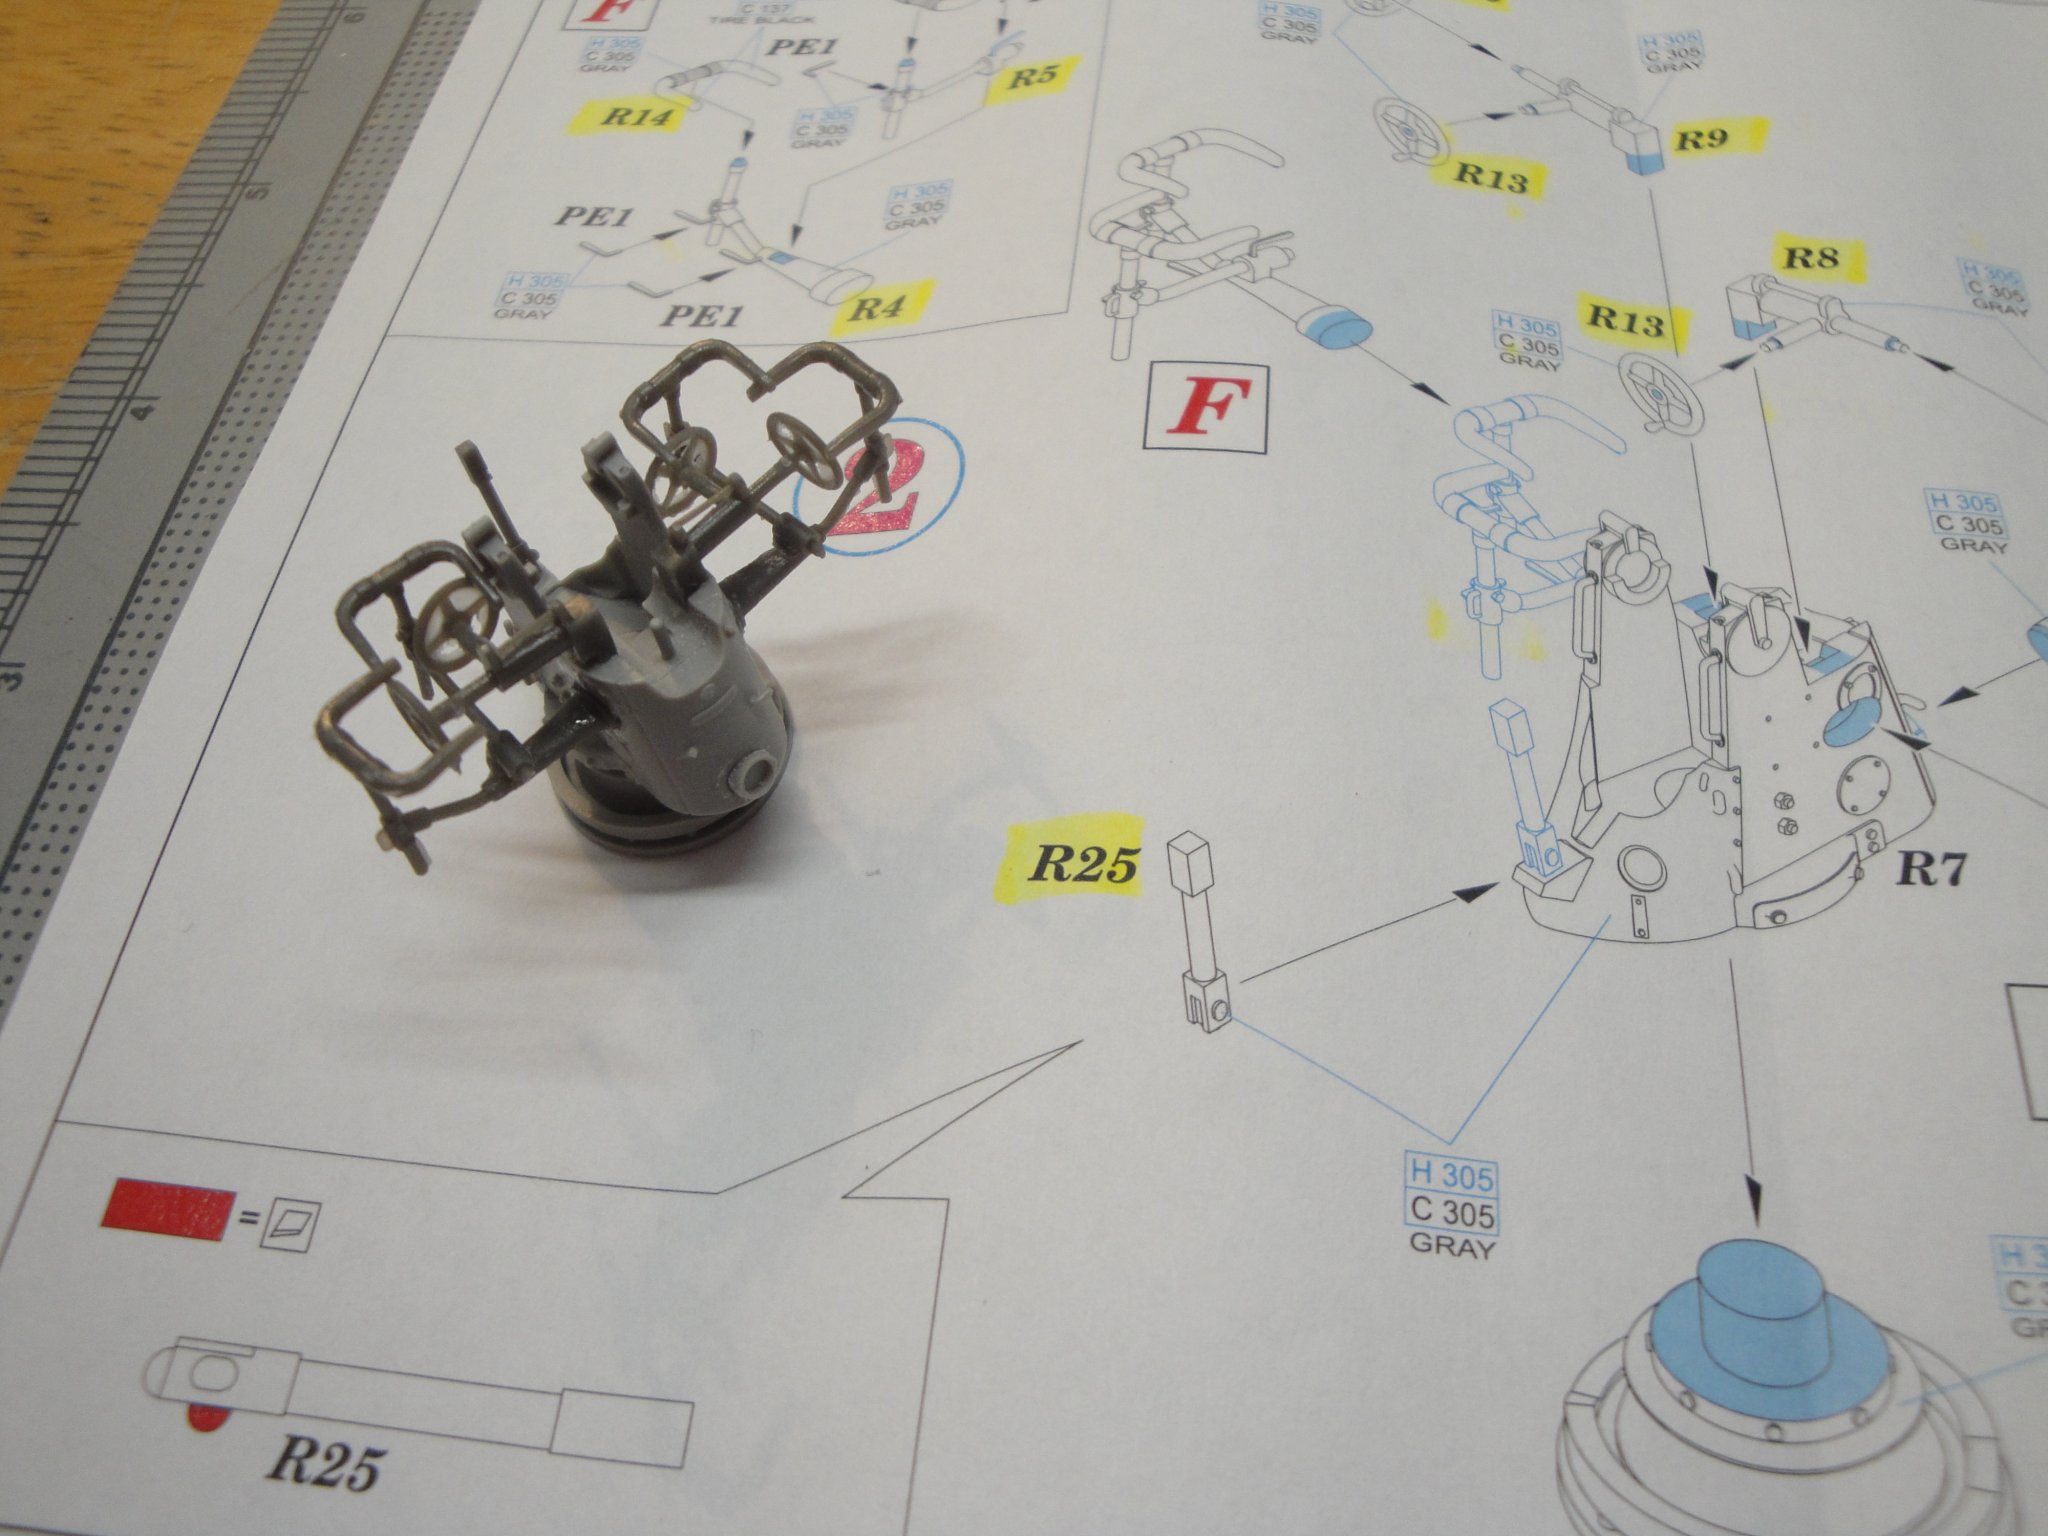
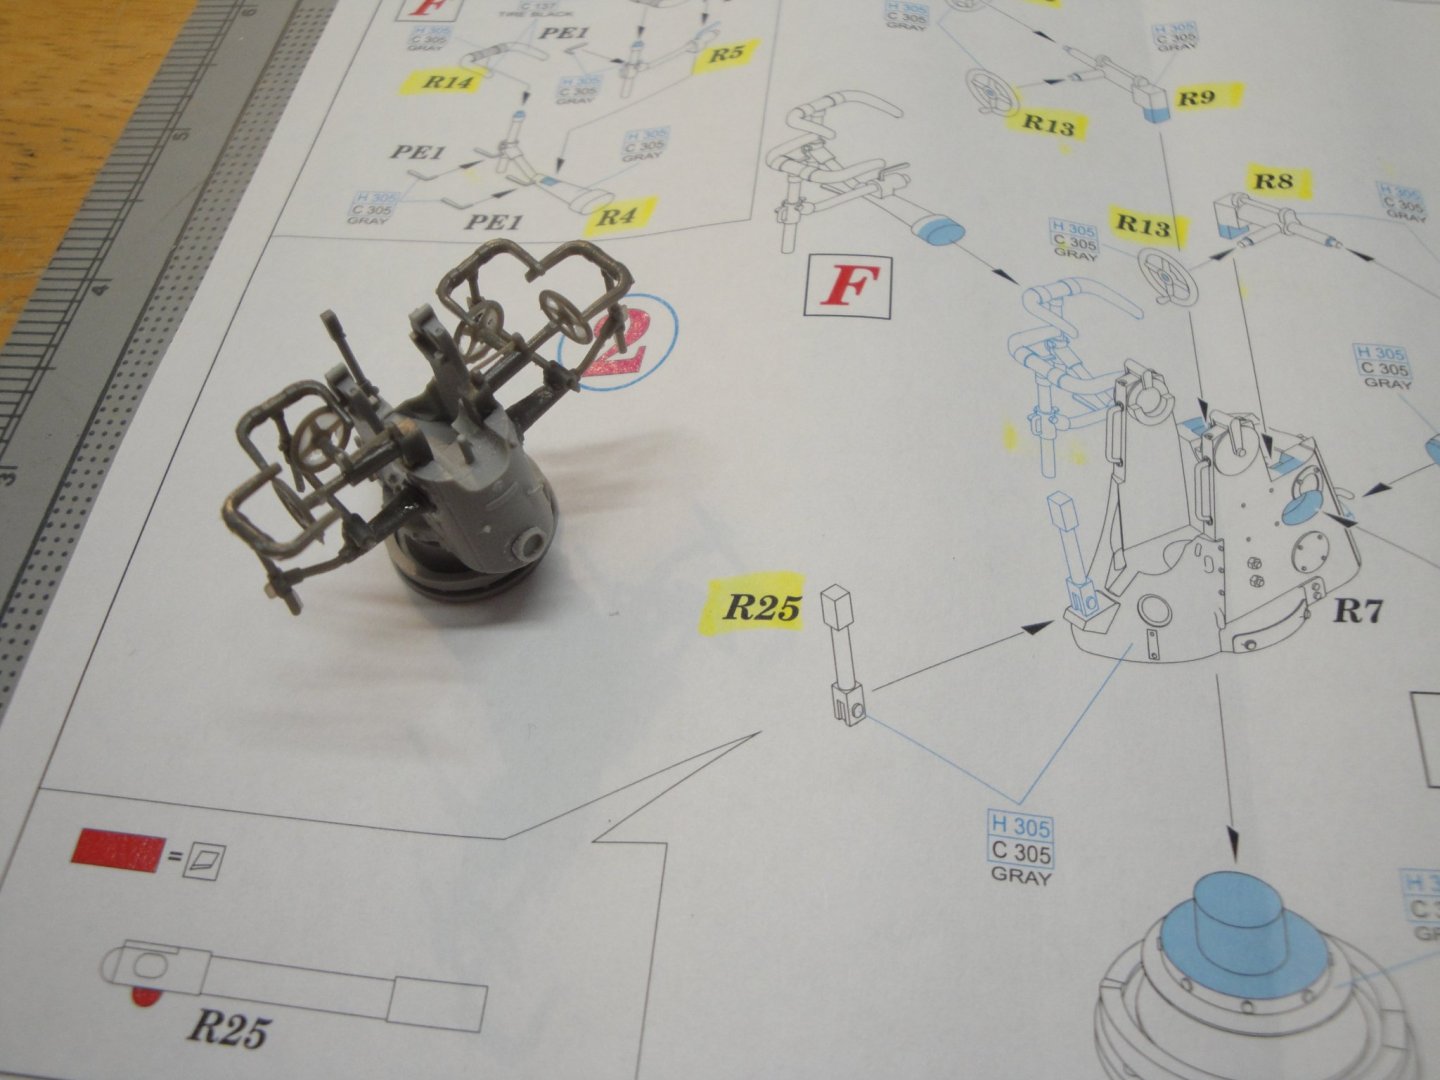
I started the assembly of the resin bit by Eduard. This is my first attempt at putting together a 3D printed resin kit. I have to say that for me, this is quite different from regular plastic kits or wooden kits. The printing process leaves tons of materials to clean up and gluing the resin parts does not provide for such a nice and strong bond as the welding reaction obtained with polystyrene. I used Cyano-Acrylate glue as the regular plastic glue is totally inoperative on 3D printed resin parts. I cannot really say that I like it overall.... Anyway, these are the various steps of the construction. The main gun is represented as in the Submerged configuration: The drawback of the Eduard kit is that the gun cannot rotate or swivel. Everything has to be glued. Yves


-
18th Century Harbour Crane by Ekis - Shipyard - 1/72 - CARD
yvesvidal replied to Ekis's topic in Completed non-ship models
What a fantastic model. I love the presentation. Yves -
What a great project. Very excited to follow you. Yves
-
Fantastic project and such an elegant boat. The scale of 1/24 is a good choice as it will allow you to place some sailors on the deck (if they request it) and will compare favorably with other Yawls and Schooners at the same scale, on the market. It should make up for a very impressive model, even bigger than the Amati Dorade. I will be watching your work with passion. Yves
-
I bet you that even Airfix does not have such a nice model in their collection. Very well done. So, what is the next one? Titanic 1/200 by Trumpeter? Yves
- 28 replies
-
- 4
-
-
- airfix
- queen elizabeth
- (and 2 more)
-
Kevin, You wish you had a "James H." ahead of you, with his wonderful pictures and instructions. It looks right from our perspective. Yves
- 322 replies
-
- 3
-
-
- enterprise
- caf
- (and 1 more)