


SJSoane
-
Posts
1,621 -
Joined
-
Last visited
Content Type
Profiles
Forums
Gallery
Events
Posts posted by SJSoane
-
-
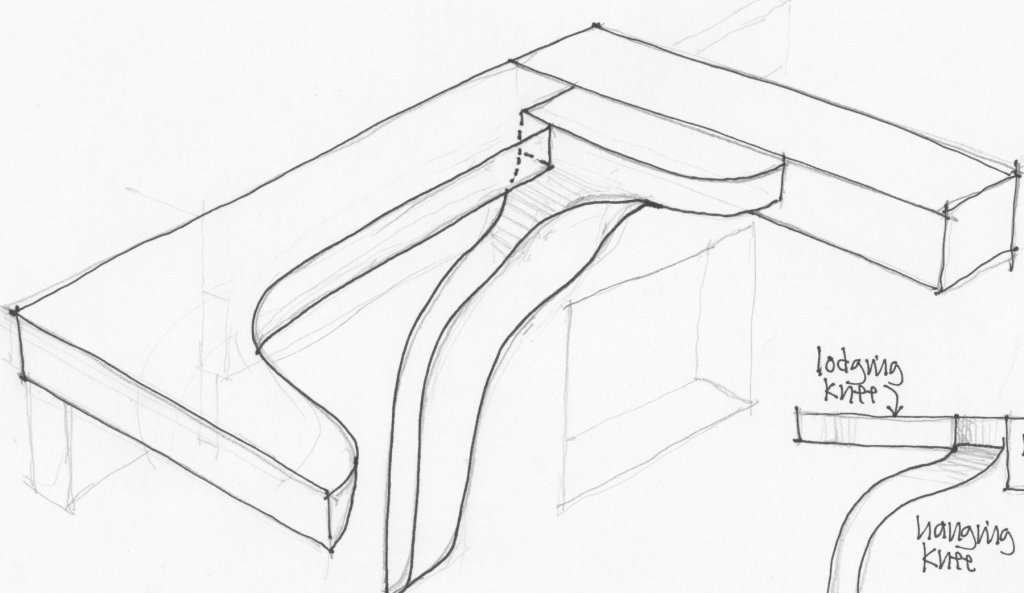
It will be a while before I start constructing these knees, but while drawing them I realized just how complex they will have to be. Gary, your drawing really helped me see that the transverse arm has to bend straight down at the side in order to clear the end of the lodging knee, and then the hanging arm can curve back to avoid the port.
This rough sketch shows how the hanging knee needs to bend twice--an S curve-- in the fore and aft direction.
Mark
-
Thanks, Gary, those are very helpful drawings. It looks like they do bend that far when needed. I can hardly imagine what part of a tree gives that kind of a compass timber with a wide sweep in one direction, and a 3'-9" athwartship arm at right angles to it--they must have been rare and therefore very expensive.
Yes, those look like they will take a little ingenuity in laying out and forming, and also very wasteful of wood! Some large piece of those is going to be short grain and therefore a little fragile.
Your Alfred quarter galleries are looking great.
Best wishes,
Mark
- Hubac's Historian, mtaylor and druxey
-
 3
3
-
-
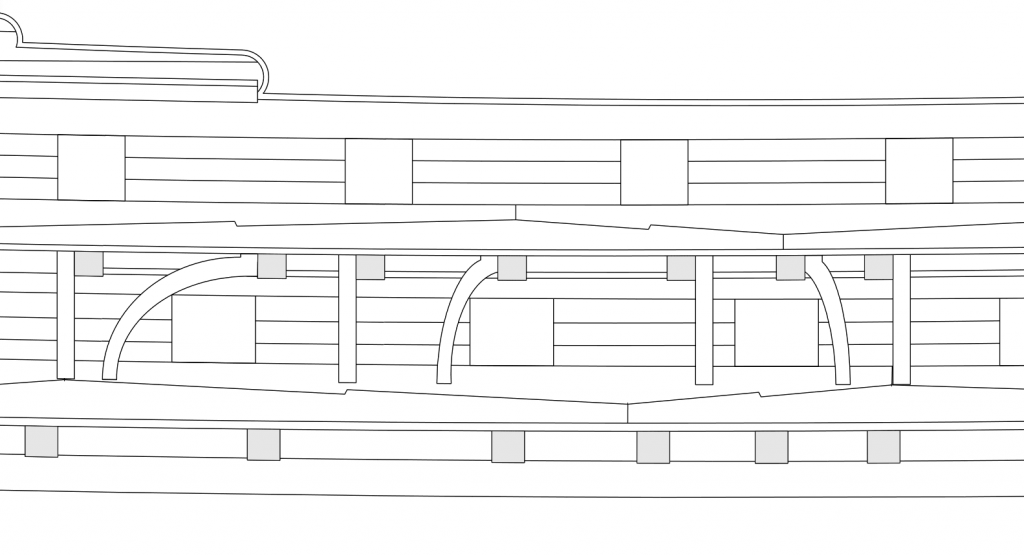
At last, on to cutting wood again. I will begin work on the spirketting on the gun deck, and in preparation I have been elaborating my drawings to include the strake locations, and also the knees and standards.
I drew for the first time the location of the hanging knees, including the compass knees that need to bend around gunports. I have discovered a few locations where the hanging knee has to bend all the way across the gunport, making a very large knee indeed (see left-most curved knee in drawing below).
Does this look right, or would they have reversed the lodging knee and the handing knee at these locations, to leave less of a distance to curve around? I just don't recall seeing any examples of knees bending quite this far. I imagine this would have been very expensive.
Best wishes,
Mark
-
-
-
Visitors kept me out of the shop for a while, but back to work.
I managed to obtain some Van Dyke walnut crystals, and they work best of all the stain possibilities. Thanks, Gaetan and Ed, for the suggestion. They dissolve easily in hot water, continue to work when cold, and require only a momentary soak. The color is just right for hemp, and the color will be permanent.
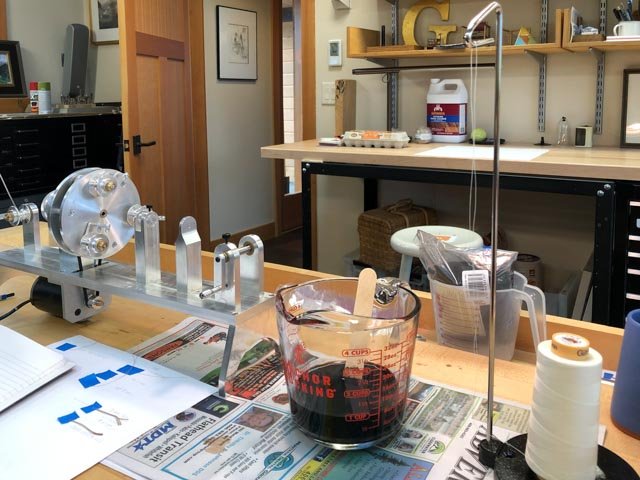
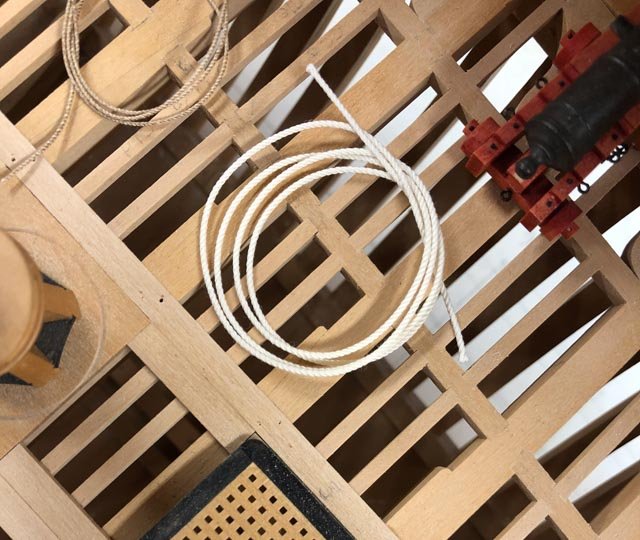
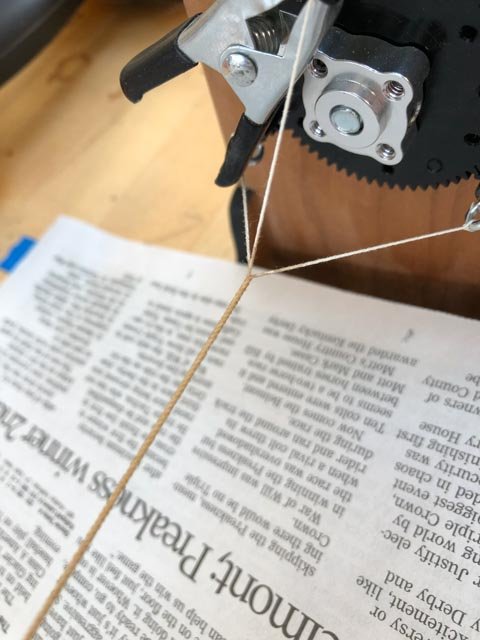
I initially tried soaking a finished rope for a few minutes, and had the same problem of the rope stretching and coming unraveled. So I tried first soaking individual strands, by running them through the glass jar of stain and onto a spool on the back of the Jim Byrnes ropewalk, as seen below. But this proved to be too inconsistent in the stain; the rope had different densities of color in different strands, which looked a little like a barber pole, as seen in the tan rope on the deck below (the white rope is unstained in this photo). And I had no idea of how much thread to spool up for a rope. This did not work very well.
So then I hit on the idea that does work well. Chuck suggests wetting the line after turning it, and then pulling it tighter, to help harden it. I thought, why not use the stain itself as the wetting agent for hardening? I brushed on the stain, and used a rag to work it it to the rope. I then had to pull the tailstock further away to take up the sudden slack, proving that the water is lengthening the threads somehow. And now the rope is tight, stained evenly, and ready to go. I was even able to wax the line while in the ropewalk, since the color was not already applied.
And best of all, since I need to wet the rope to harden anyway, staining is not an additional, laborious step.
So, rope staining problem solved.
Best wishes,
Mark
- JOUFF, paulsutcliffe, KARAVOKIRIS and 3 others
-
6
-
Thanks, Ed, this is exceedingly helpful. I somehow managed to get through my entire education without a class in chemistry, so this world of particles, suspensions, etc. is largely a mystery to me. I appreciate your continuing guidance.
The further irony is that I took physics instead of chemistry, and now what I learned all those many years ago is shockingly out of date...
Best wishes,
Mark
-
Nicolas, I look forward to when you start!
Ed, thanks for your advice about the dye. From your books and postings, I have been cognizant of the fading problem with certain stains, and I assumed that would also apply to dyes. But I could not find information about which are fugitive. So it sounds like RIT will fade.
I am still concerned about my ropes made up of Gutermann 50 cotton thread becoming stretchy after soaking in hot water, and then losing their twist. I assume this has to do with hot water, although it could be the RIT dye itself. If they don't stretch with the walnut dye, then it is the RIT dye for sure, and not just the hot water.
Meanwhile, I have picked up two other possible sources of dye: 1) Minwax oil based stains, and 2) Dr. Ph. Martin's Bombay India Ink. The ink is advertised as lightfast and archival. I have a brown, sepia, and black, and will see if I can approximate a tan with appropriate thinning and mixing.
Do you have any advice about these two other possible dyeing solutions?
Best wishes,
Mark
- Hubac's Historian, mtaylor and EdT
-
3
-
Hi Nicolas,
Welcome to ship modelling, and to Model Ship World. As you have seen in my build log and all the others, there are many dedicated and skilled people on this web site who can help with everything from research to skills and materials. I am quite sure I would not have gotten this far without the help of this group.
Working on a project is a great way to learn. The Bellona is only my second ship model, started long after building my first, a Bluejacket wood schooner kit when I was 16. I learned everything while actually working on the Bellona. It does mean that you have to be willing to try some things, and throw away the results if they are not good enough.
You might find interesting a little essay I wrote a while ago about craftsmanship in ship modeling. You can see it at:
Be sure to start a build log for your project right away. As soon as you get your plans, you will have lots of questions for us all!
Best wishes,
Mark
-
Hi Landrotten, Richard and Gaetan,
These are really interesting ideas! I will start messing around in the shop and see what might work. I will feel a little like a mad scientist in the lab, trying to invent a lightbulb.
It would be great if something like this could work, because I did manage to find the right formula in RIT dye for good looking running rigging.
Best wishes,
Mark
-
Mark, I vaguely remember seeing or hearing about a device like you describe. I couldn't track it down anywhere. Does anyone have a recollection of what it might look like, or where I might find a description?
Part of the trick would be that the thread needs to soak for 3 minutes, so it would have to be pulled through in measured batches. Starting to sound Rube Goldberg!
Mark
-
-
-
Ed, thanks so much for another master class in ship model building. You set the highest bar for the rest of us, but show us step by step how you achieve it. Can't wait to hear about your next project!
Mark
- druxey and paulsutcliffe
-
2
-
Hi everyone,
Unfortunately, the train left the station quite a long time ago, when I purchased the thread for the Bellona--some Gutermann 50, and a variety of DMC Cordonnet sizes--all in Ecru color. I don't fancy throwing it away and buying again. So I will have to learn how to color what I have.
After a few more experiments, I am quite sure that the RIT dye in the required 140 degree water, has affected the cotton thread. A rope that is tightly wrapped and stable lengthwise before going into the dye, becomes stretchy after soaking in the hot dye--even after only three minutes. This lets go the tension holding the rope together. So hot water is out of the question for me.
Other option to explore, after casting around this site and the internet:
Walnut stain mentioned above: I looked up the link, and the product is no longer available.
Minwax stain, fruitwood for running and jacobean for standing. I will try this, but read concerns about an oil based stain causing problems when using glue on rigging. Anyone have experience with this?
General waterbased dye stain. Chuck used this some time ago in experiments. Does anyone have suggestions for which colors will work?
Transtint analine dyes. I am using these for the very nice red in my hull, mixed into a polyurethane sealer. But I don't see subtle enough colors for rigging in the color chart. Does anyone have suggestions for colors here?
Richard's reference to Rob Napier's use of a product from Pro Chemical and Dye. I have his book on the Princess Royal--a terrific book--and I will pick up a copy of the one on the Valkenisse.
As long as I am retired and in no rush, I might as well explore this whole question of coloring rope. I have found it to be an elusive topic so far!
Best wishes,
Mark
-
Hi Gaetan,
The rope is five threads each on 3 hooks, and holds together when I remove it from the ropewalk. It just starts to unravel after sitting in the hot water required for the RIT dye. I will look into the walnut shell ideas.
druxey, if only I had known I could buy the Gutermann in a color that would work....oh, well, the price of learning!
Mark
- Captain Poison, druxey and mtaylor
-
3
-
Hi everyone,
After taking time off to build some garden trellises, I got back to work on the Bellona. And now the cannon are cast, I turned back to the ropemaking.
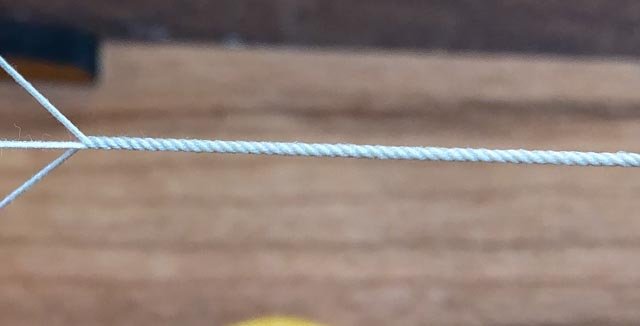
Here is some 7" circumference breech rope (.035" diameter at 3/16" scale), made with 5 threads on three hooks, using Chuck's great Syren ropewalk. I am getting the hang of this now; I was under-turning before, worried about breakage. But I really cranked it up at both ends, and it came out well. I also solved the problem of getting the tension the same on all hooks, by using a small clamp to hold the 5 threads together at a hook at the same tension as the others, then tying off before removing the clamp. Pretty reliable method now.
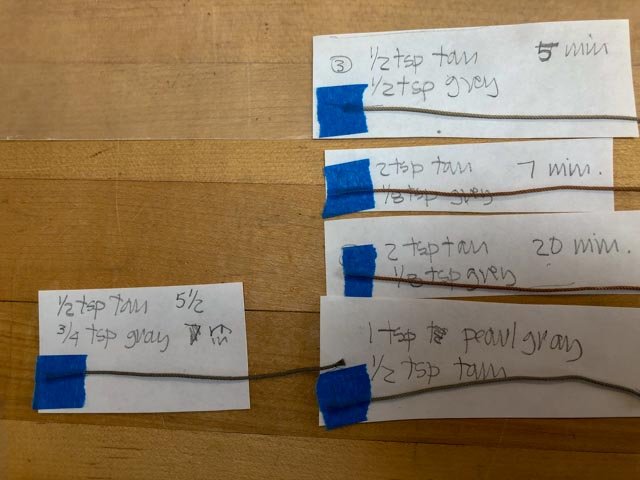
The next step is more problematical, dying the rope. I have been using RIT dyes, and started with a formula posted by Bob Westcott, based on N. Roger Cole's article on Alert Provenance and Construction. These turned out to be way too intense and too yellow for my Gutermann 50 cotton thread. So I started experimenting with difference mixes of RIT tan and pearl grey, and at different intensities and times (see experiments below).
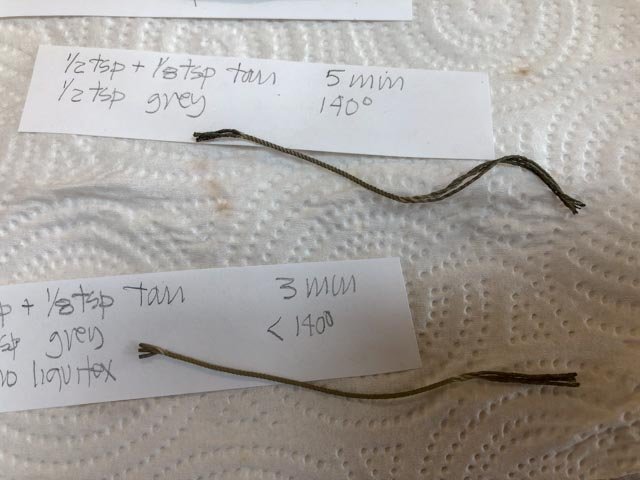
I am finding this to be unreliable. The same mix and time gives different results when I try to reproduce it. On an earlier test, the hot water needed for the RIT dye suddenly made my rope stretchy. When I turned up a really tight rope for the next effort, it actually began unraveling in the hot water, as seen below.
So I am not so enthusiastic about RIT dye, right now. Does anyone have experience with wood stains as a colorant? Would these be damaging to the cotton over time?
I will keep experimenting!
Mark

-
Hi Gary,
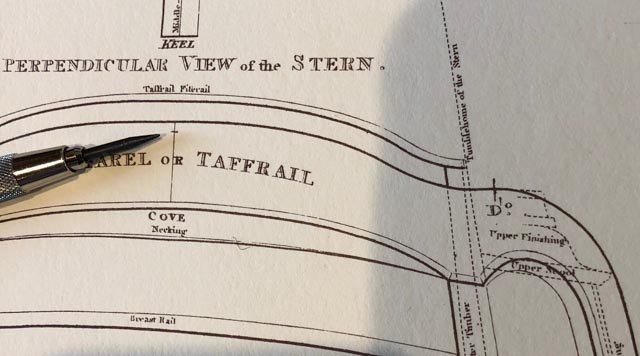
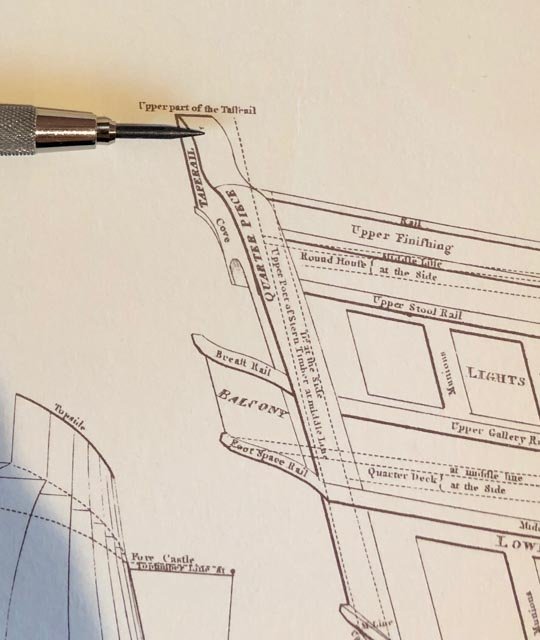
I looked up Steel's dimension from top of keel to top of taffrail for an 80 gun ship, which is 53'-4".
I then measured 53'-4" against the drawing of the 80 gun ship in the folio of drawings. It comes up to the pencil mark pointed to by the pencil below. It looks 5" short.
And then I measured up the same point in the view of the stern, and it also comes up 5" short of the top of the taffrail. But this stern drawing also clearly shows that the open railing on top of the taffrail is above this 53'-4" dimension figure given by Steel.
So it answers one question; is the railing within or above the given dimension--it is above. But it doesn't answer why the given dimension in the tables does not match the actual dimension in the drawing. Maybe the 5" shortage is to the top of the rough framing, whereas what we are seeing in the drawing includes a railing installed on top of the rough framing, but below the uppermost open railing.
I hope that makes sense!
Best wishes,
Mark
-
-
Hi Marc,
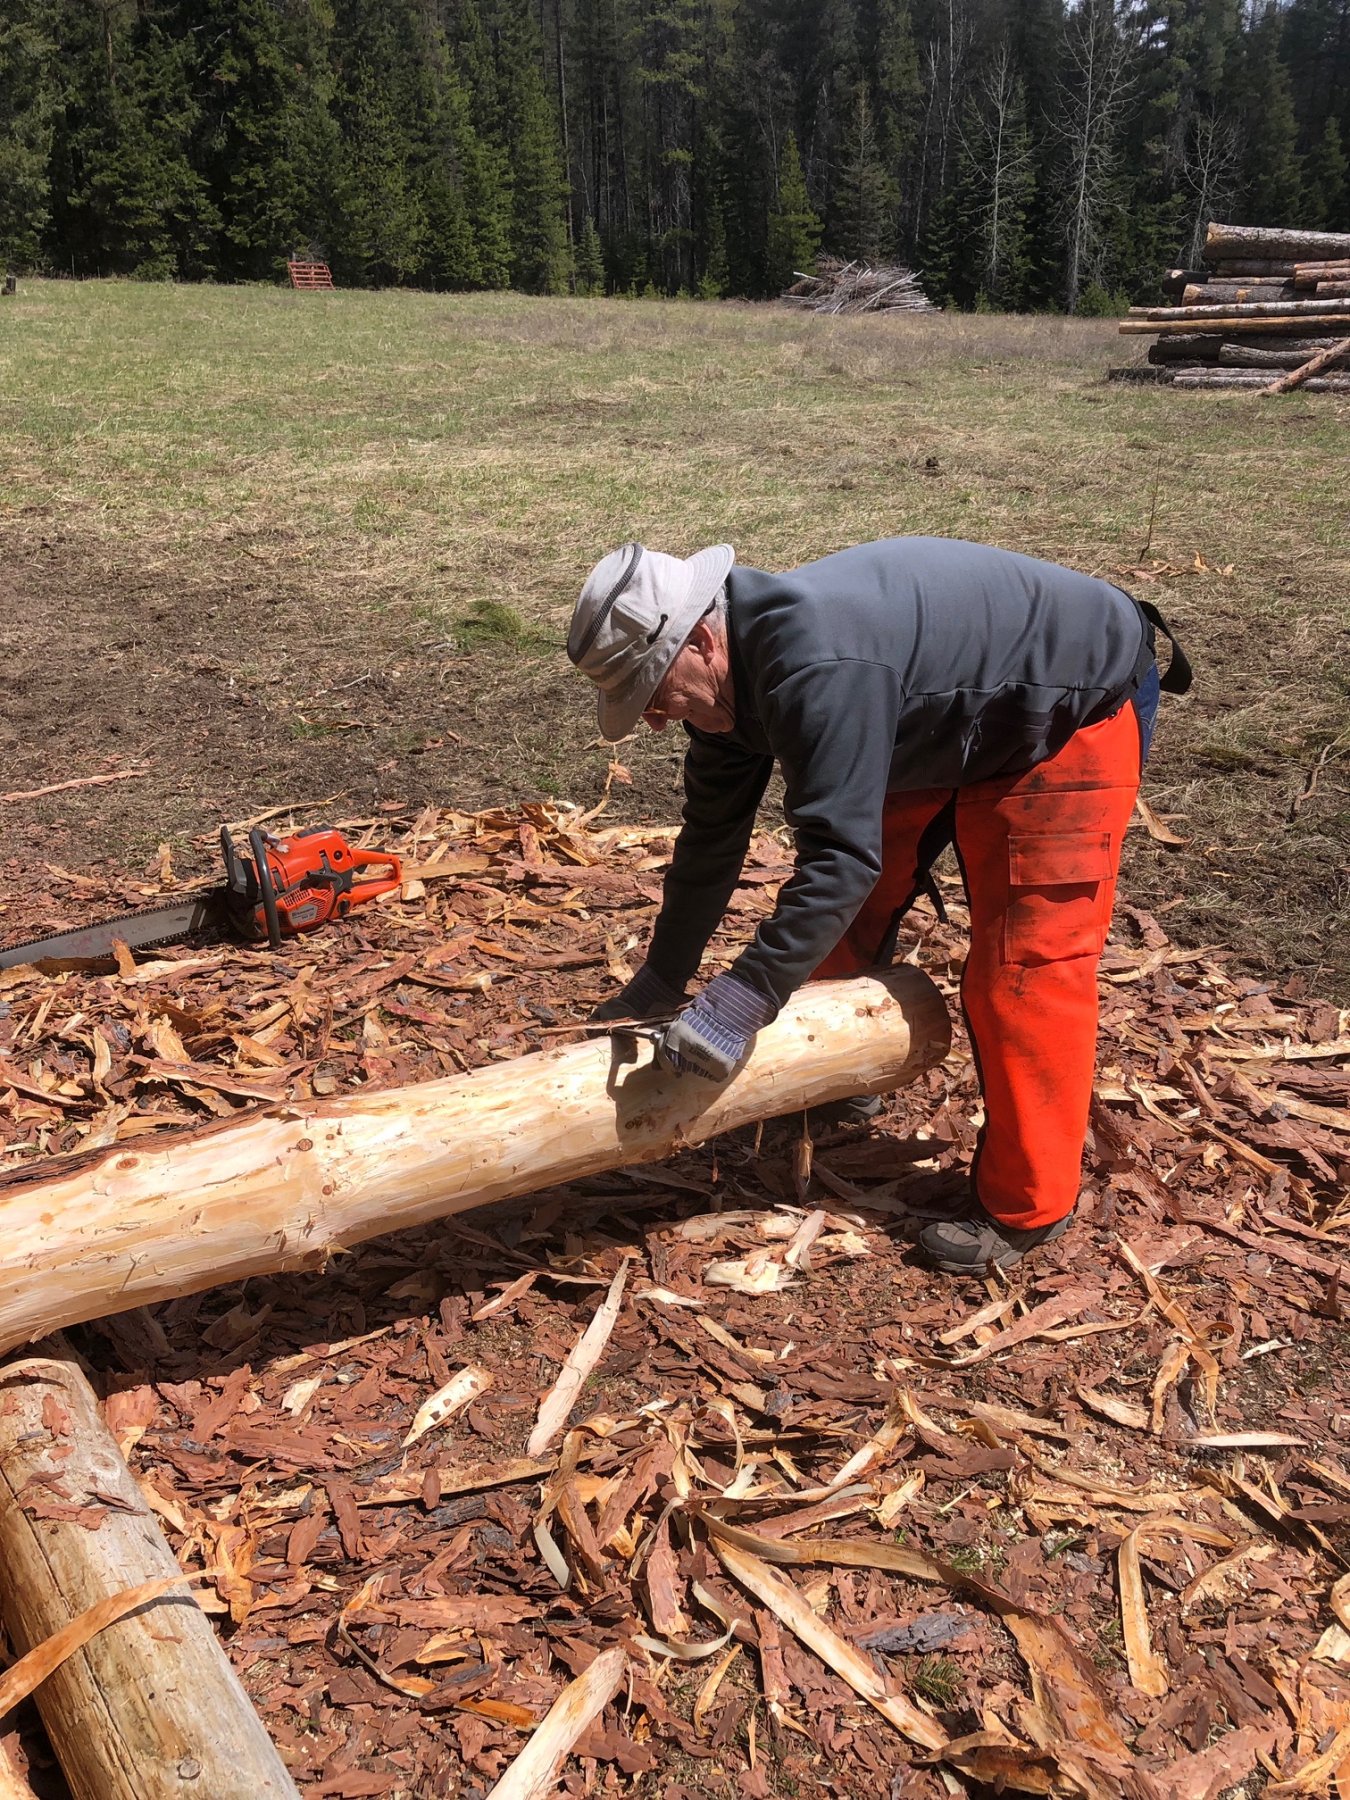
We stripped 144 linear feet of 12" diameter logs--I did half--and I discovered muscles today that I did not even know existed. This is definitely a young person's sport!
Mark
- Hubac's Historian, gjdale, druxey and 2 others
-
5
-
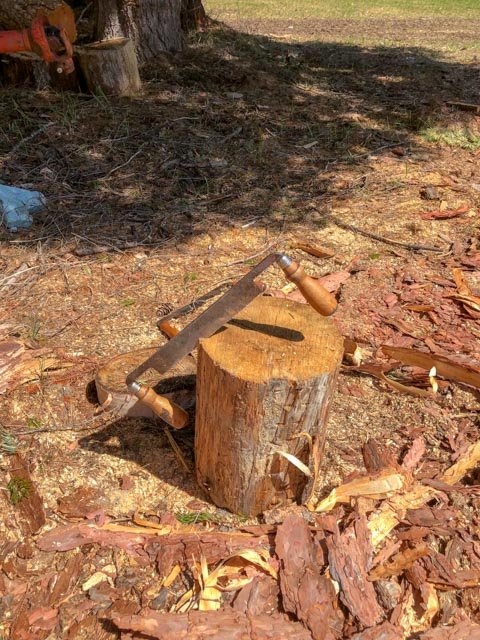
I took some time off from the ship after competing the cannon to help a neighbor get some logs for a dock project nearby. I learned how to use a draw knife for stripping the bark.
This gave me a great sense of the woodsmen who found and prepared the trees for ship construction. I can hardly imagine what it would be like to do this all day, every day, for your entire working life.
I borrowed the orange kevlar chaps, which helped avoid knife cuts to the shins. They are also supposed to prevent cuts from chainsaws, but I didn't test them for effectiveness.
Now if I could only find some boxwood trees in this Rocky Mountain softwood forest....😀
Mark

- egkb, Jorge Diaz O, mtaylor and 4 others
-
7
-
Marc, the weathered wood looks great. Those are artist's colors?
Mark
-
druxey, Greg and Mark, thank you so much for your kind comments. Even more importantly, thank you for your continued support and advice as I undertook this challenging new task. You and many other members of Model Ship World helped me through some very complex processes. I am not entirely sure that I would have persevered if I had not obtained such good advice at difficult moments. And it is very satisfying to obtain new skills, perhaps one of the biggest driving forces for me in building this ship model. I am sorry I failed at creating the King's cyphers, but Chuck saved the day for me with his excellent laser cut examples, made to measure.
I am looking forward to working in wood again, but remind myself that my skills at the start of learning miniature woodworking were as non-existent as my skills at the start of learning to cast metal. One just has to jump in, expect mistakes and mis-steps, get good advice from all of you, be willing to throw away poor efforts, and just keep on going. As Gaetan said when I initially feared cutting deck mortises by hand, do something enough times and you will get very good at it. Having said this, I doubt I will be casting 74 cannon again in my lifetime!
Mark


HMS Bellona 1760 by SJSoane - Scale 1:64 - English 74-gun - as designed
in - Build logs for subjects built 1751 - 1800
Posted
Hi Siggi and druxey, I didn't see your posts before I posted my drawing. You both confirm what I now see is an S curve in the fore and aft direction, at least on the upper surface of the hanging knee where it has to clear the lodging knee. This may take some modeling in clay to visualize when I get to building them.
I am also thinking that I may build these with a hidden joint between the transverse and hanging arms, so the grain runs along each arm. Carving this out of a solid blank would leave short grain in one arm or the other.
I still have to finish the gun deck and then frame the upper deck before I begin to tackle this, so I am some way out. But it is always nice to see what is coming down the road later on!
Mark