


SJSoane
-
Posts
1,641 -
Joined
-
Last visited
Content Type
Profiles
Forums
Gallery
Events
Posts posted by SJSoane
-
-
Hi druxey,
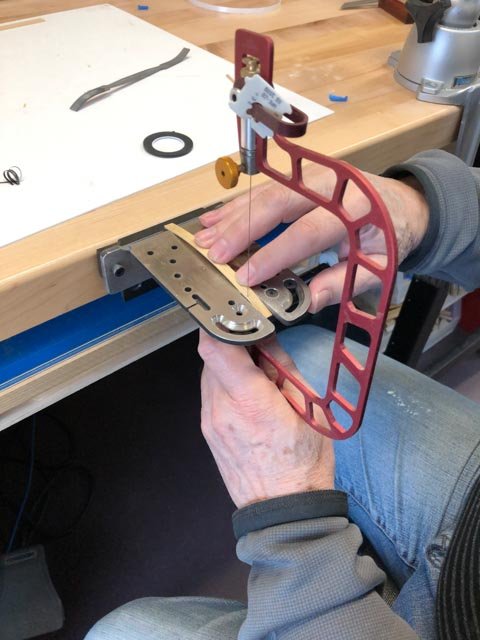
The challenge I haven't figured out is how to clamp this curved piece with its edge available to a plane. After I saw close to the line, I clamp the piece on the diagonal at the corner of a small vise, and work the edge with a riffler. But the further away from where it is clamped, the more the piece slips within the vise. I need a curved face vise!
Mark
-
Hi druxey, Johann and Paul, thanks so much for your kind comments. New Year's Eve is a good time to reflect on the year past and the year yet to come. I am reminded just how special this website community really is.
Starting on the next strake at the bow, I rethought some construction issues. I decided to steam the plank before cutting to shape, since I have found that my card patterns just never seems to match the reality once the plank is curved onto a twisting, bending surface. So bend first, then trim to fit. But that then creates some issues. How to draw the curving upper edge, which is an S curve on a curved surface? After plotting the various points, I used the artist's tape to construct a fair edge, then drew a pencil along the upper edge of the tape. Way better than fiddling with a flexible curve, or cutting a card template.
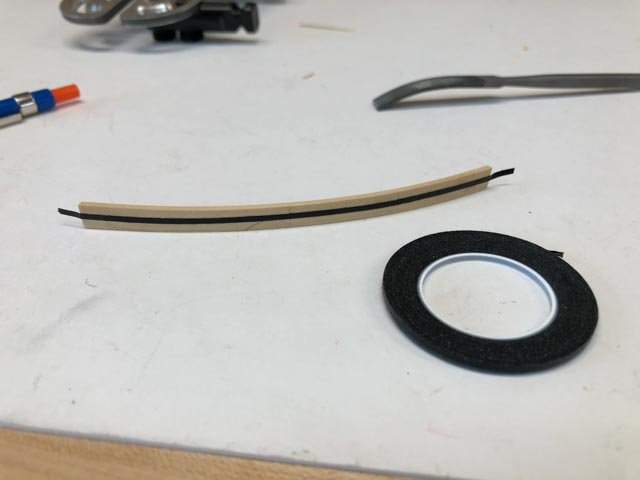
Next, how to cut the piece to width, when the piece cannot be easily clamped or held onto a flat surface for sawing? I found that the Knew Concepts saw and sawing plate worked perfectly for this, by fitting the curved piece down into the wide slot at the front. As long as I carefully pulled down for a cut and feathered the pressure when pulling the saw back up, it cut very nicely the full length of the piece without binding or vibrating.
- Archi, davec, Captain Poison and 12 others
-
 15
15
-
-
-
Hi Siggi,
I am glad to hear you are feeling better. We will all look forward to more ship building in the new year!
Mark
- FriedClams, jansmiss, mtaylor and 1 other
-
4
-
The holiday season sure takes a toll on getting ship work done!
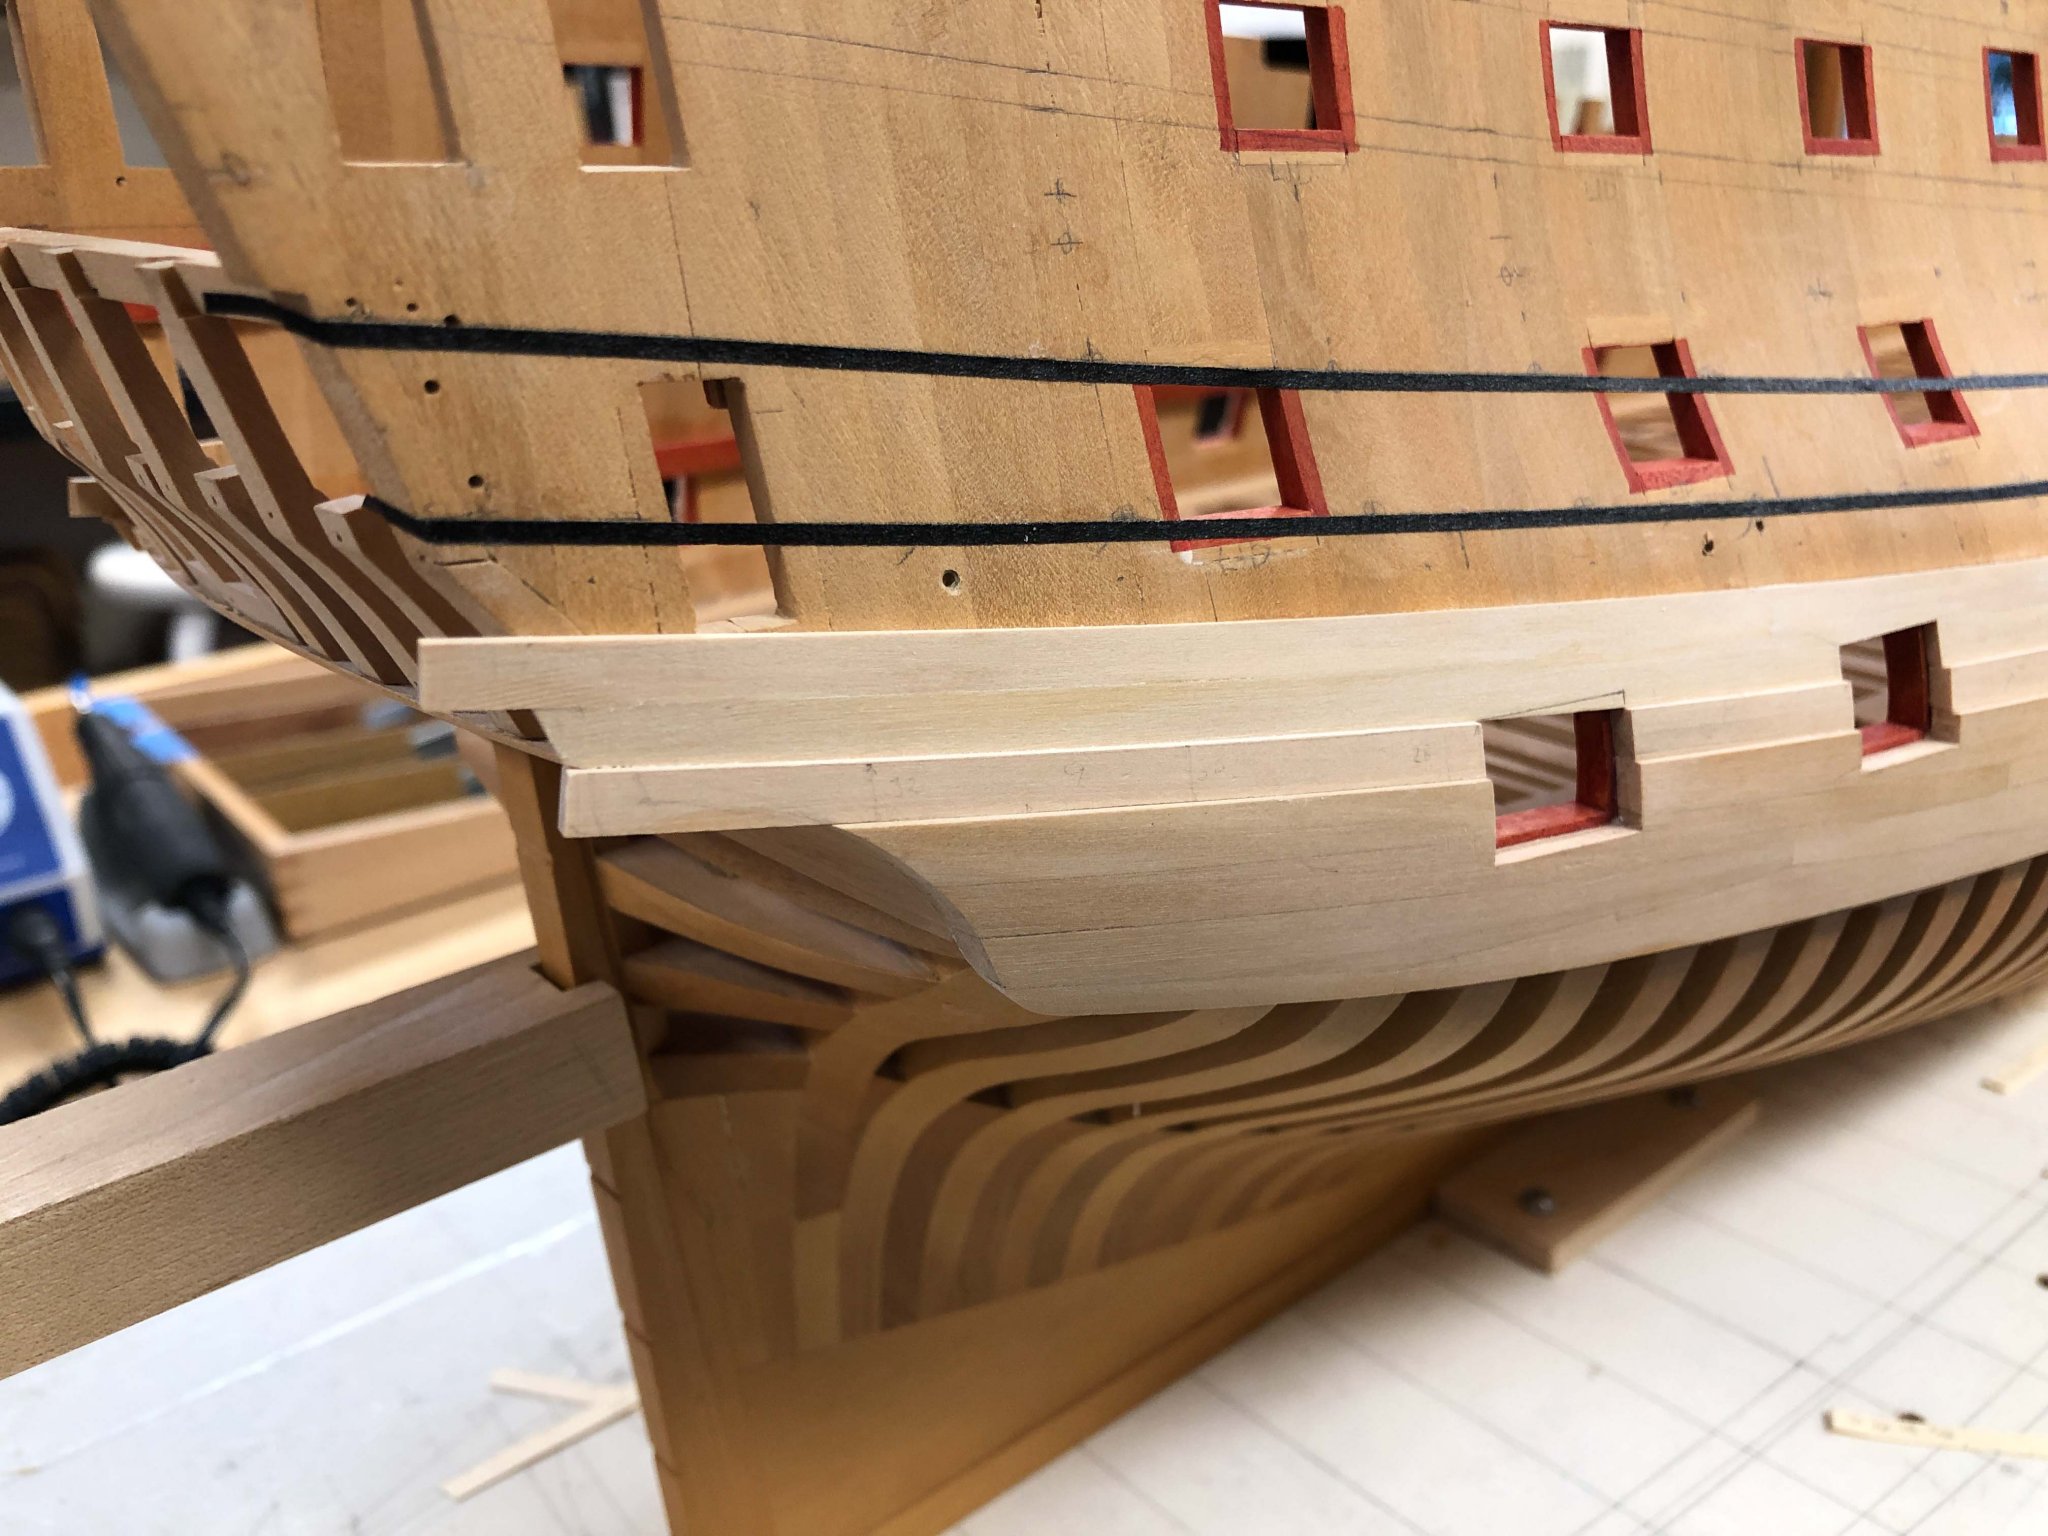
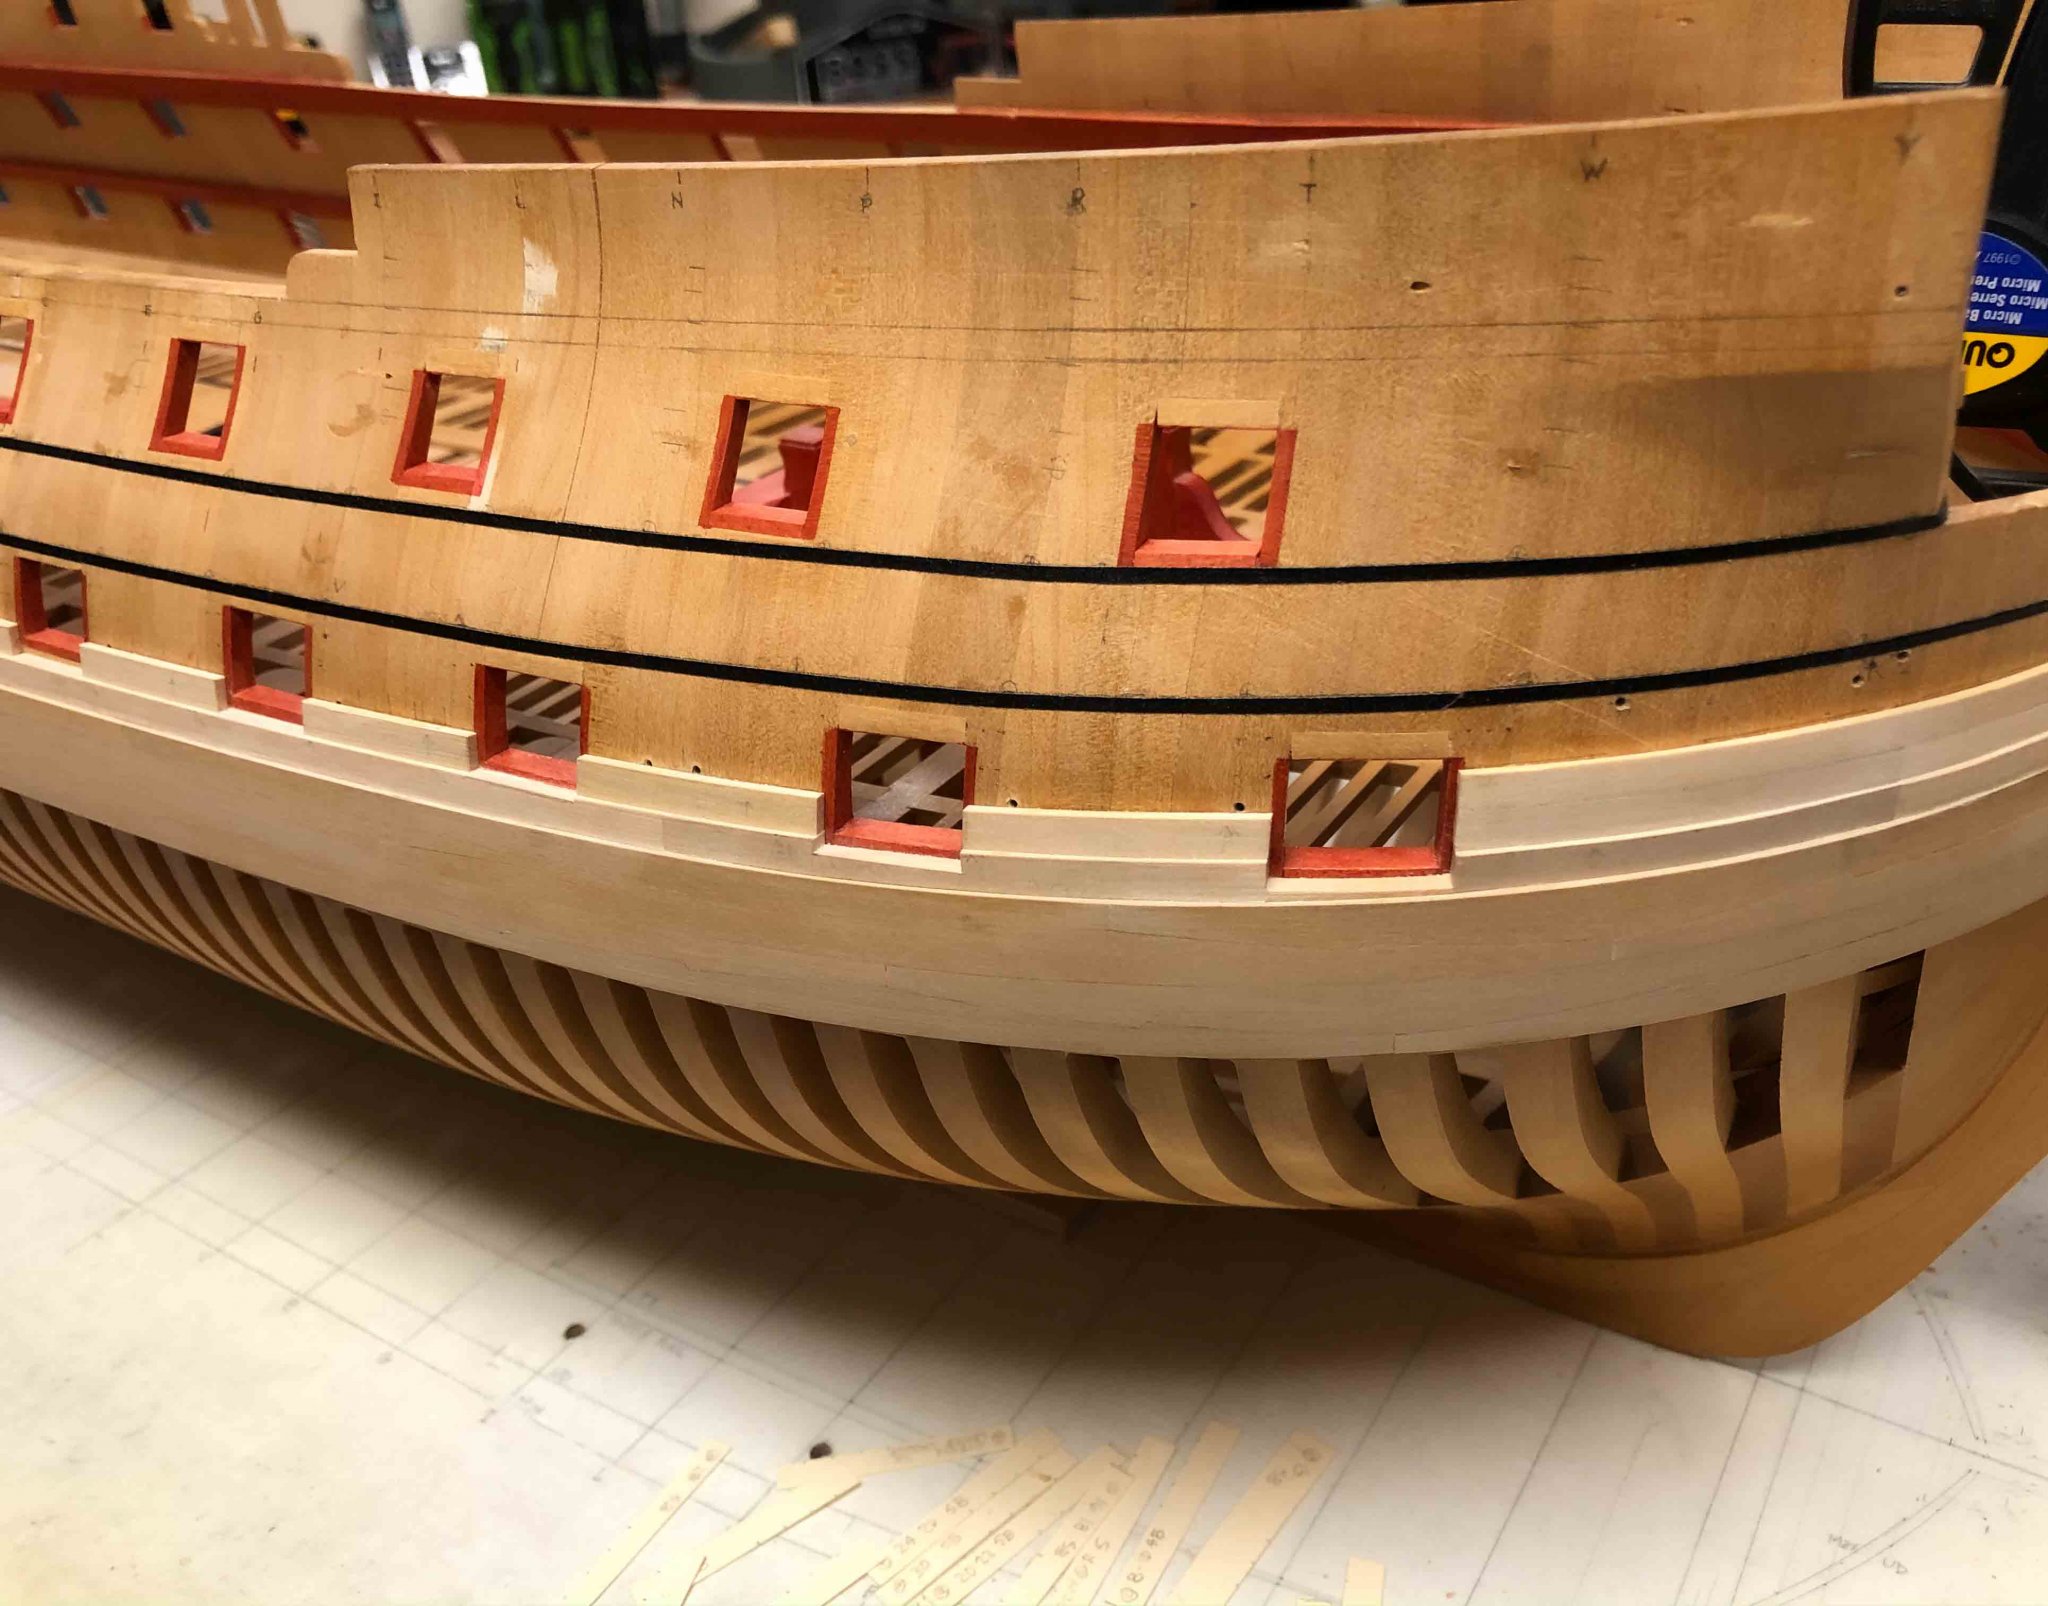
Back in the shop, I have finished the 2nd strake of 4" planking above the black strake. I did not realize that the planking hollows in just forward of the side galley doors, and then straightens out a bit right at the stern edge. It forms a slight S curve. In hindsight this makes sense, because the curved tumblehome further forward eventually needs to fair into a flat side counter. I never could visualize this when studying the drawings, now it is very clear when the planking highlights to shape in a horizontal direction. These ships are endlessly fascinating!
On to the third strake...
Mark


-
-
-
Marc,
I just had a chance to catch up with your build. As usual, exceptional historical research and reasoning; not to mention, terrific craftsmanship!
Best wishes,
Mark
- mtaylor, druxey, Hubac's Historian and 3 others
-
6
-
-
-
Thanks, Beckmann, Marc and druxey for your kind comments.
I thought a lot about darkening the joints in the planking, and tried a few experiments with different techniques. In the end decided that I liked best the look of the original Admiralty models, which did not seem to have blackening other than the slightly darker line of the glue. For me, this helps with the atmospheric effect of scale. That is, if you imagine standing far enough away from the real ship to see it like you see the model, you would not see joints in the planking. I know I am going against the grain of current model making practices, but I like the look.
You can see here how the joints in the main wales are showing, due only to the variations in wood color, and the glue line. Although the wales will be painted black, the planking above will receive only the clear finish and will look like the wales do right now. You can also see how my wood darkens quite a bit over time, which tends to show more wood variation. The final color will be like the hull frames below the wales, which have darkened over many years, and are also finished with the clear polyurethane.

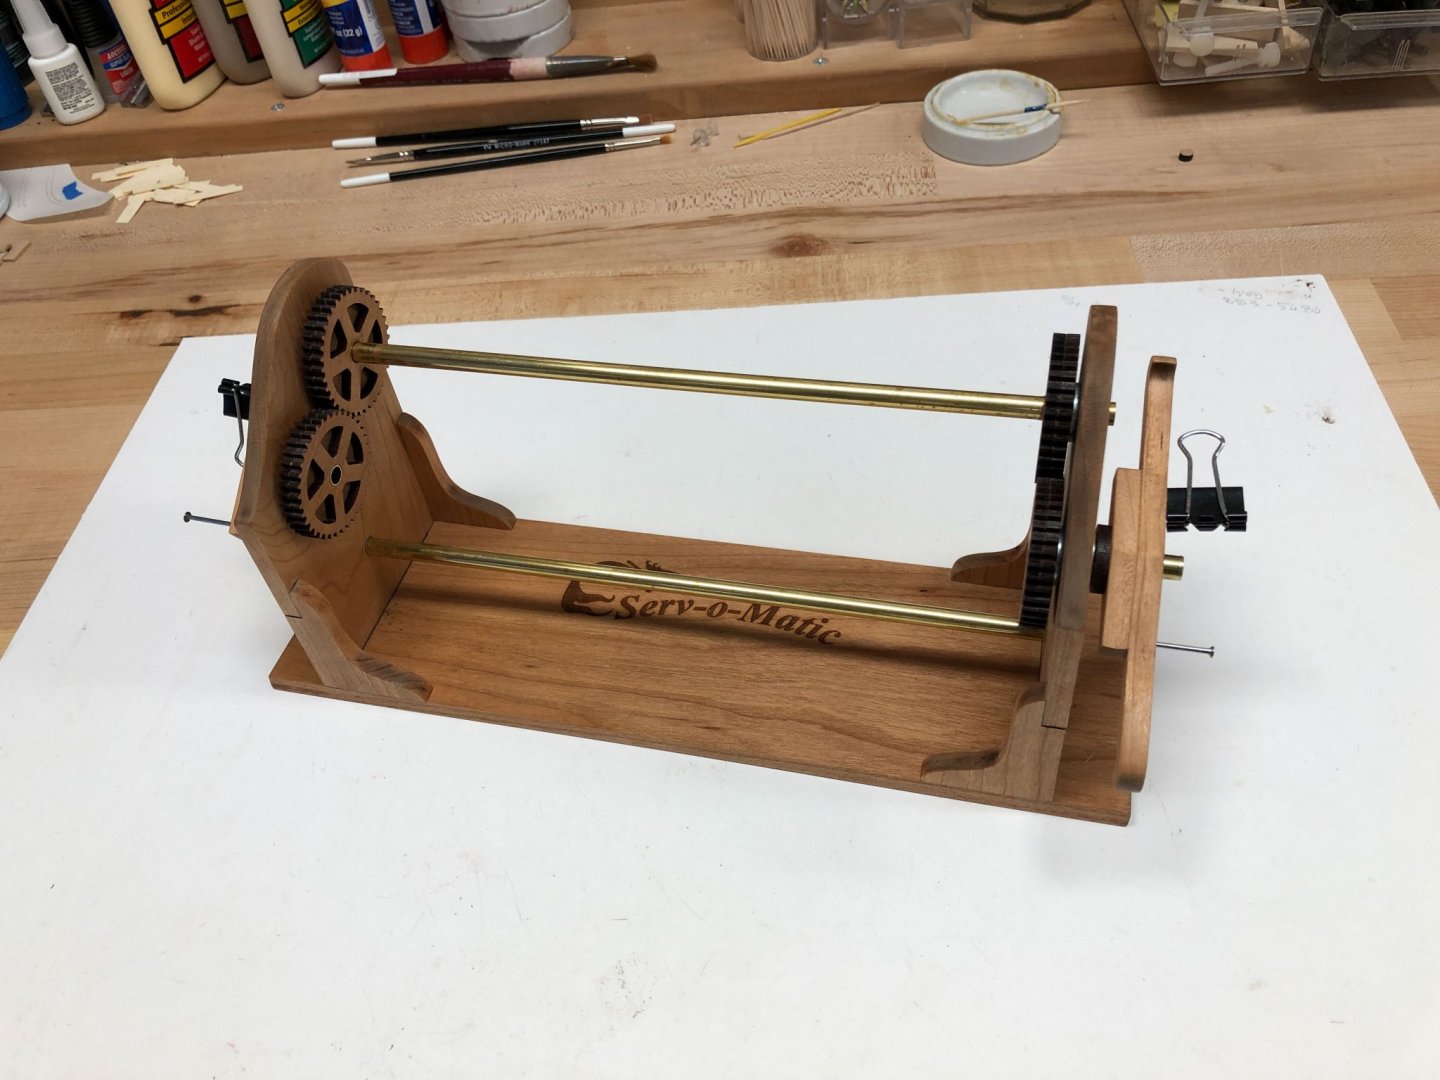
I mentioned that I needed a little project to take my mind off the test and fit, test and fit tedium of a complex plank. My project was building Chuck's Syren Serv-o-Matic. I haven't had a chance to put it to the test yet, but it sure looks pretty! Thanks, Chuck. Goes well with the ropewalk.
- KARAVOKIRIS, GrandpaPhil, Chuck and 12 others
-
15
-
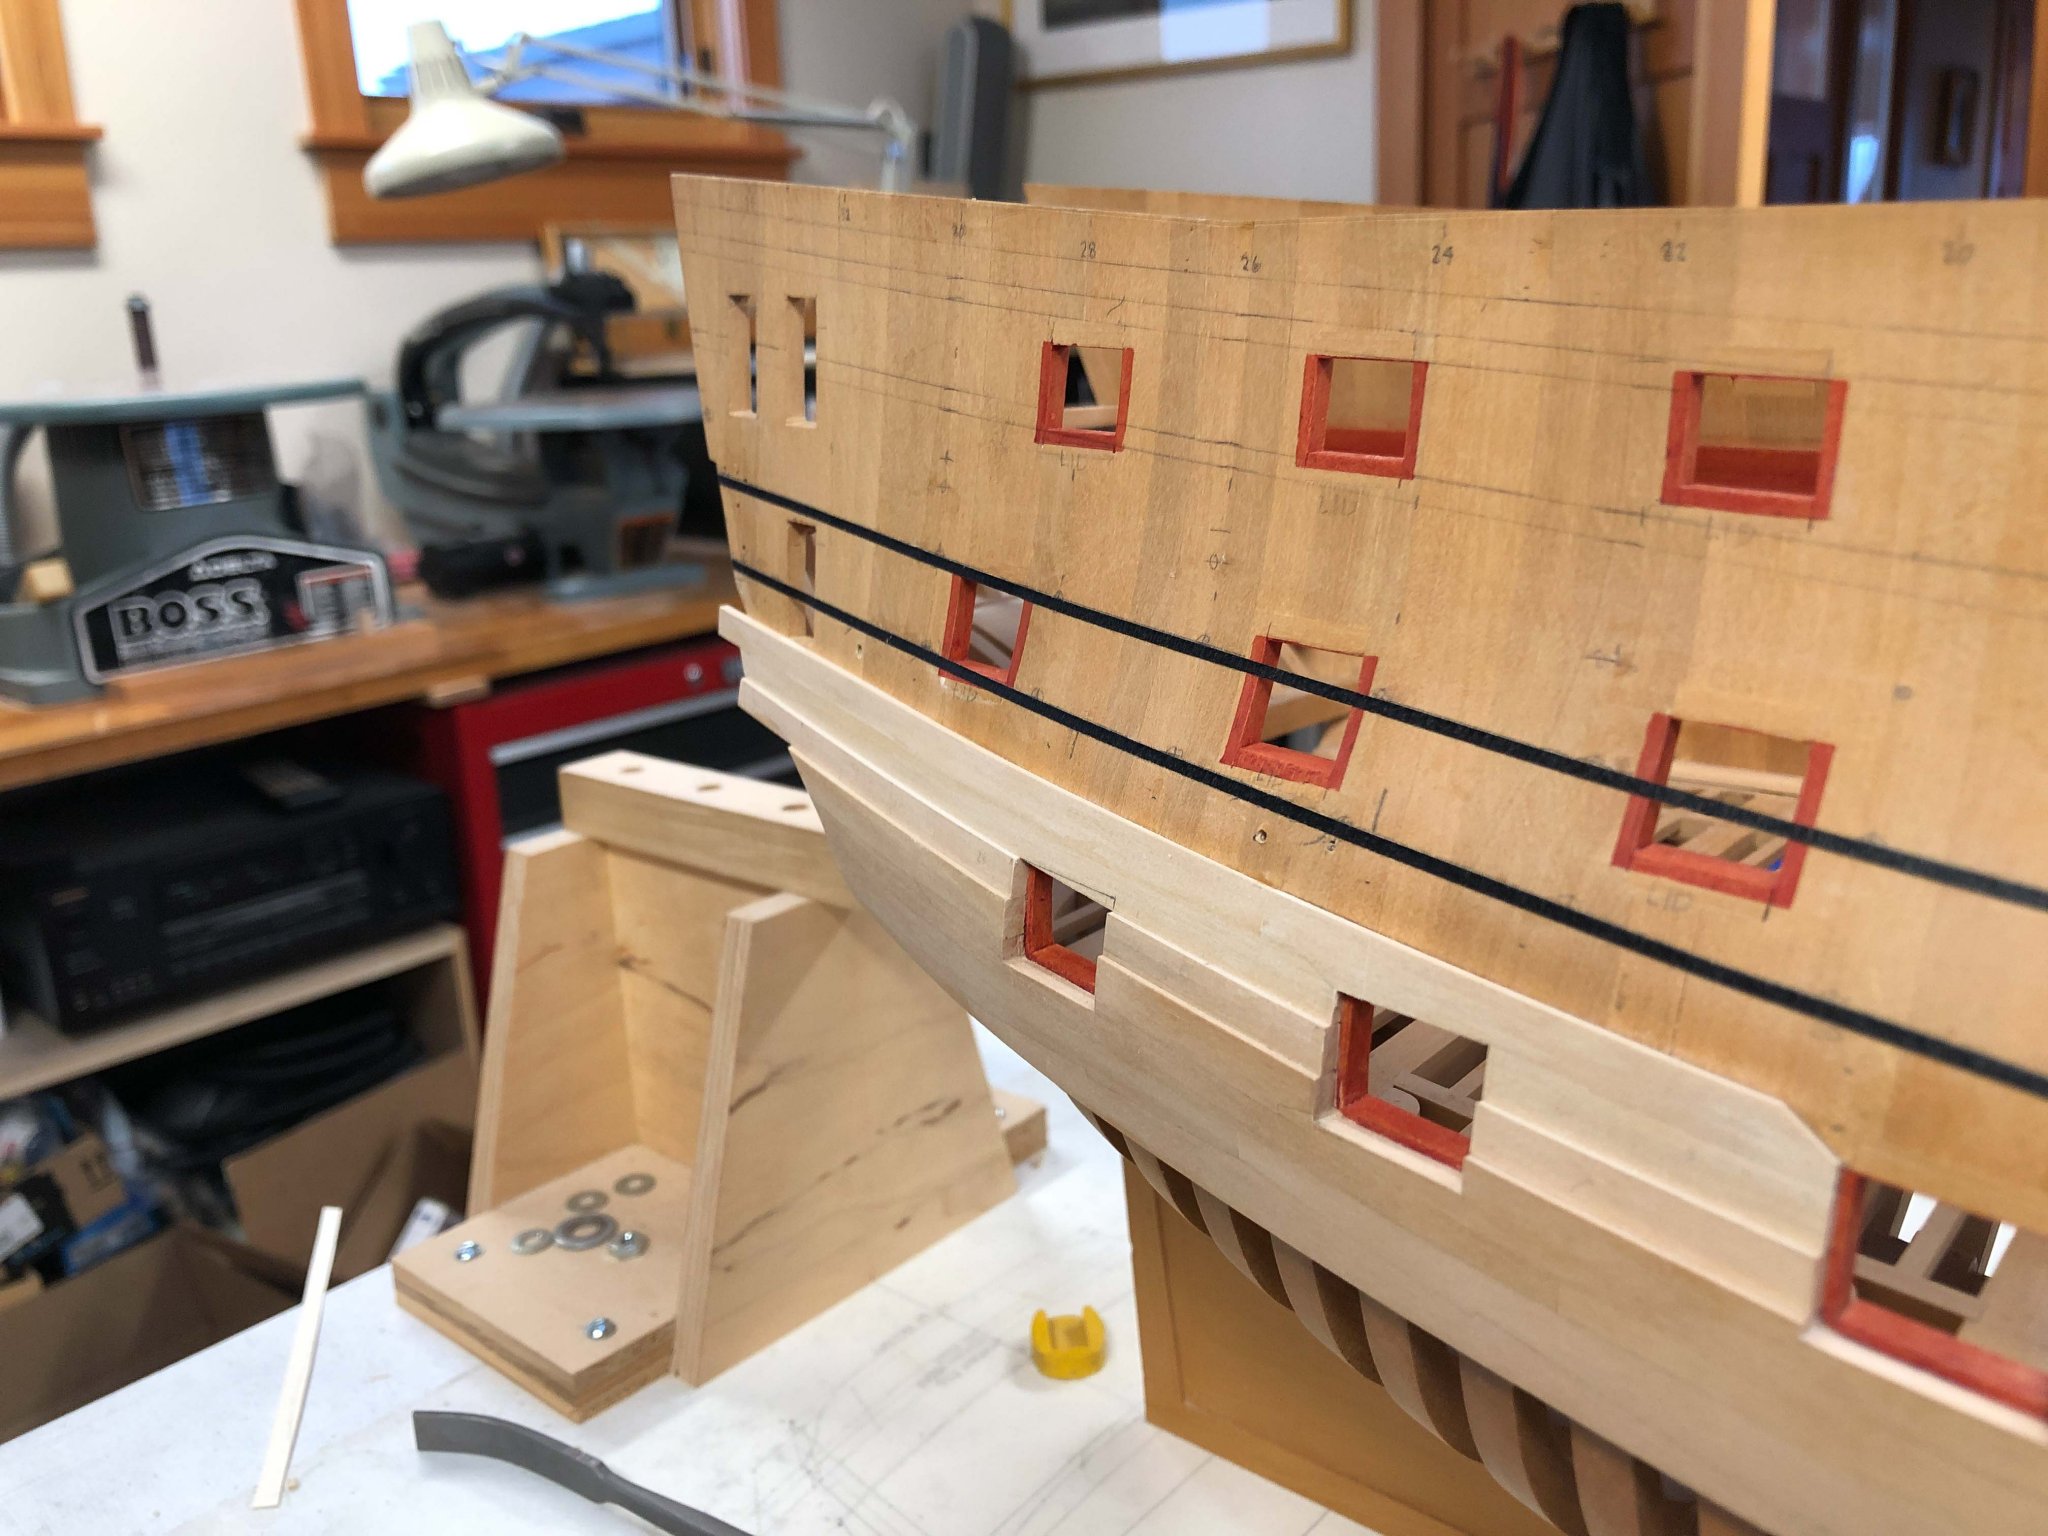
Almost to the stern with the second strake of 4" planking. Here was my first drop down to a port head, creating a pretty complicated piece to shape. Lots of transfer marking of high spots, and then filing, marking and filing. With patience, just about any piece can be made. But I do need other little projects to turn to when I lose my patience, then I can come back to finish with a little better mental attitude.
Mark
- JOUFF, John Cheevers, mtaylor and 16 others
-
19
-
-
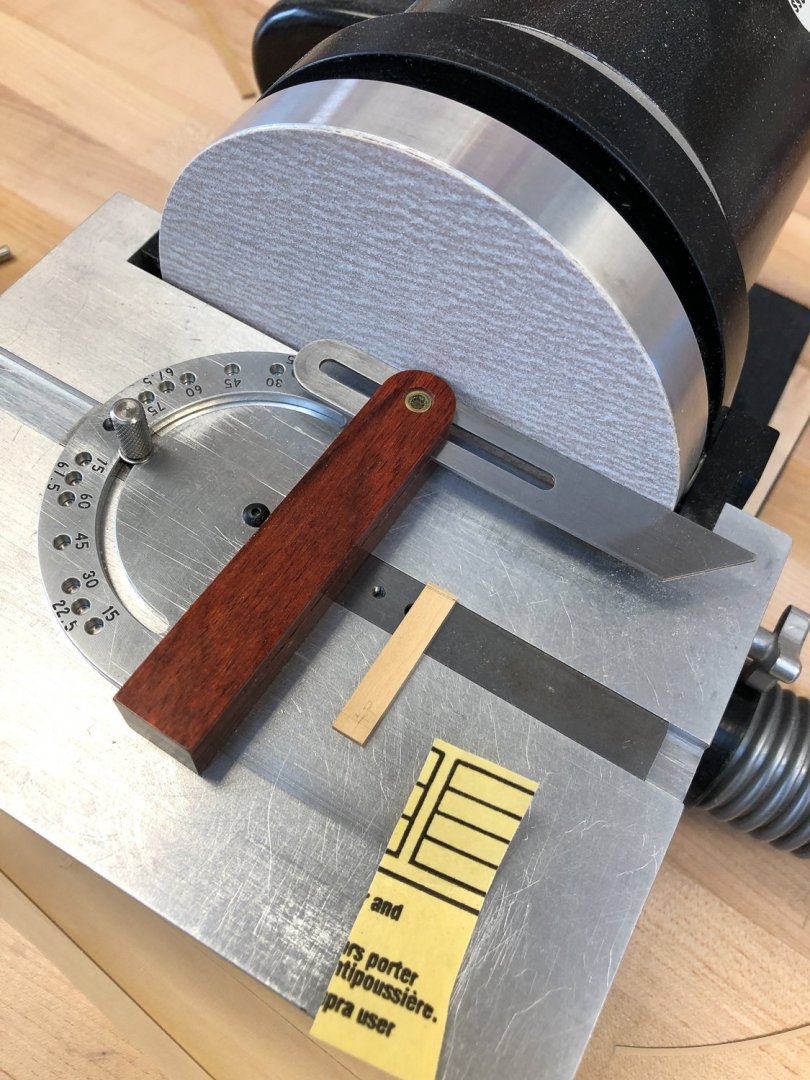
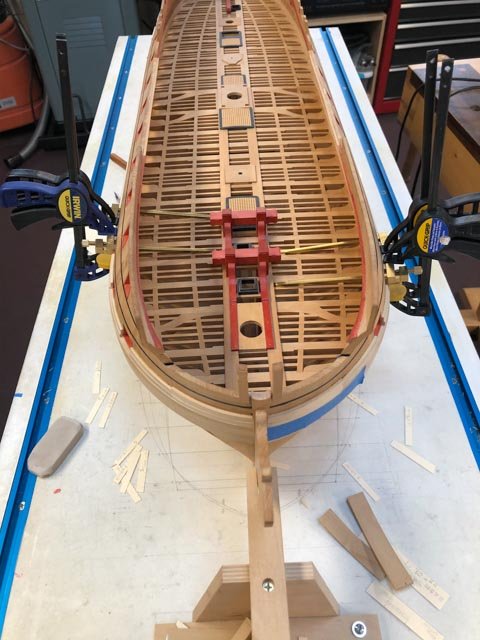
Slow work, I have started the second strake of the 4" planking (this is a photo 1500 pixels high, and 240 ppi resolution).

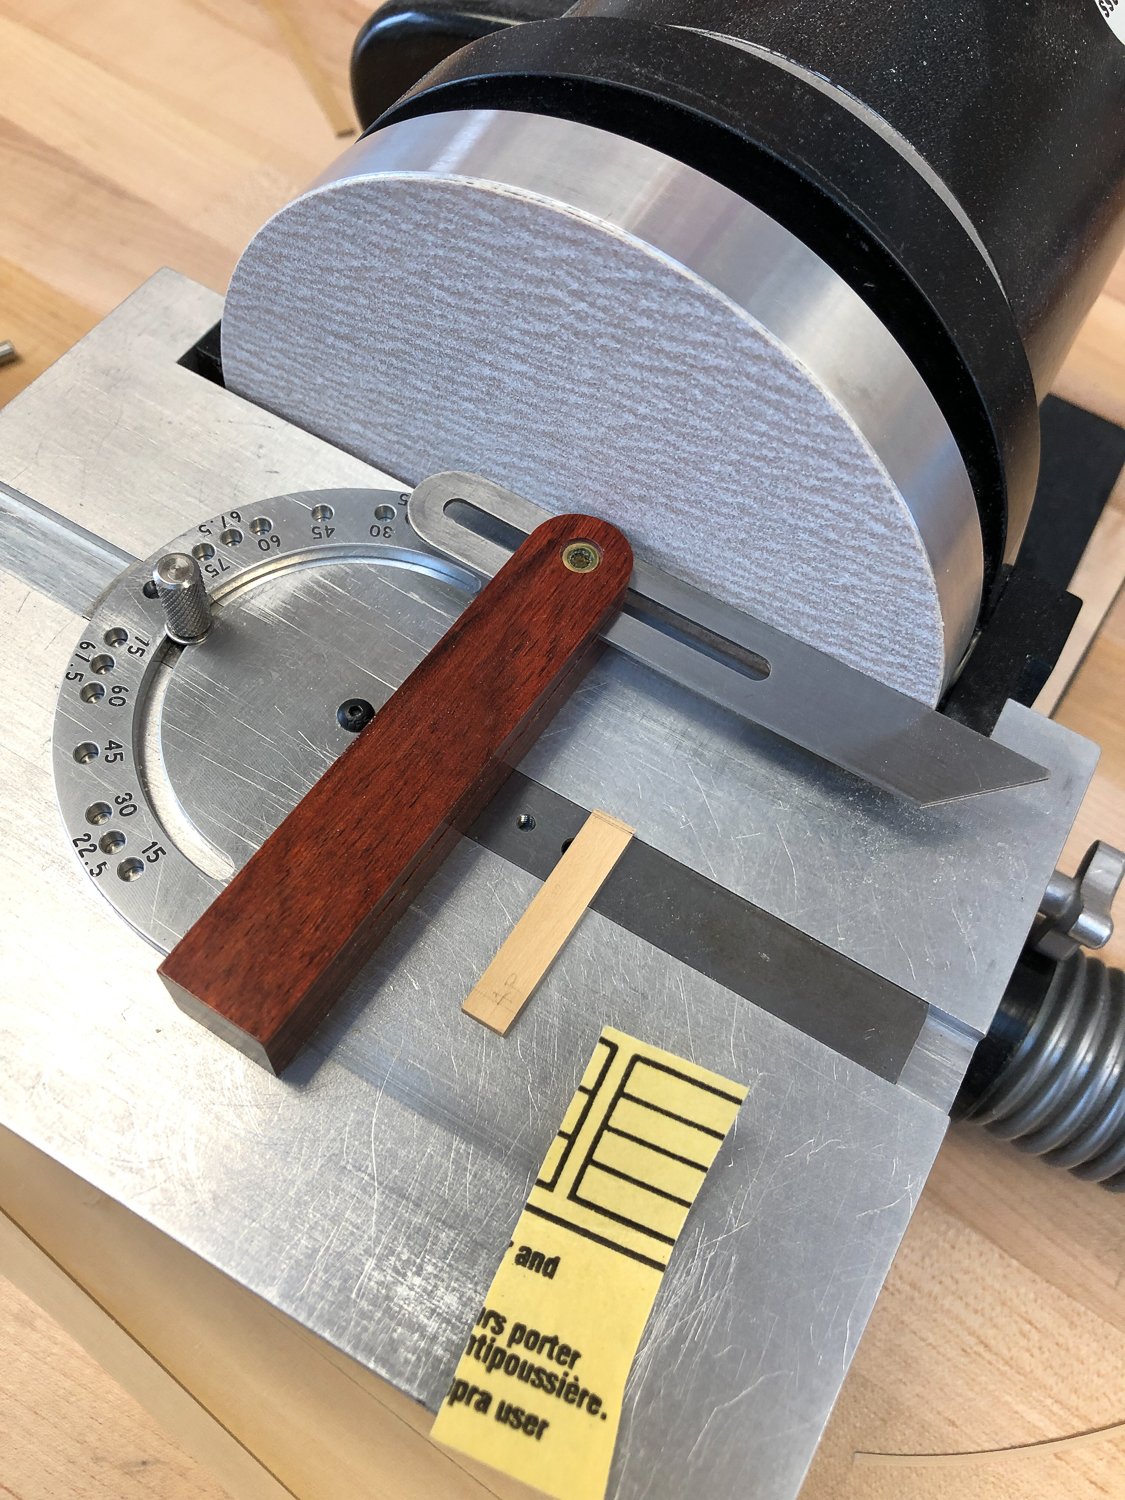
My jig in the port hole helps me find the exact angle for the adjacent plank. I hold up a small spacer against the jig and on top of the plank, then draw a line.
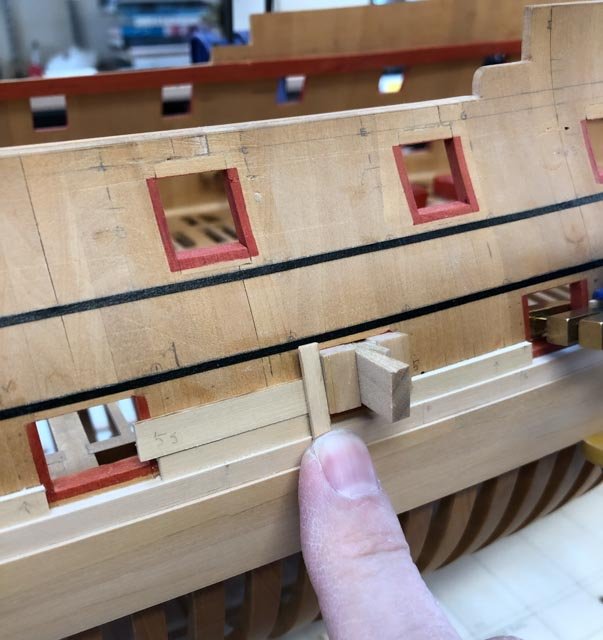
I use this line to set an angle gauge, which I then use to set the angle of the miter gauge on the disk sander. The sanding paper on the disk sander is used to hold the small wood piece against the miter gauge. This allows me to control light presses of the wood into the disk sander.
-
-
Hi Greg,
I understand Hollywood actresses in older days always had their pictures taken with a gauze effect that covered up imperfections. I can see the value of that! Those super resolution closeups reveal more imperfections than I can see with my naked eye, and I much prefer to see it just as I see it without magnification.
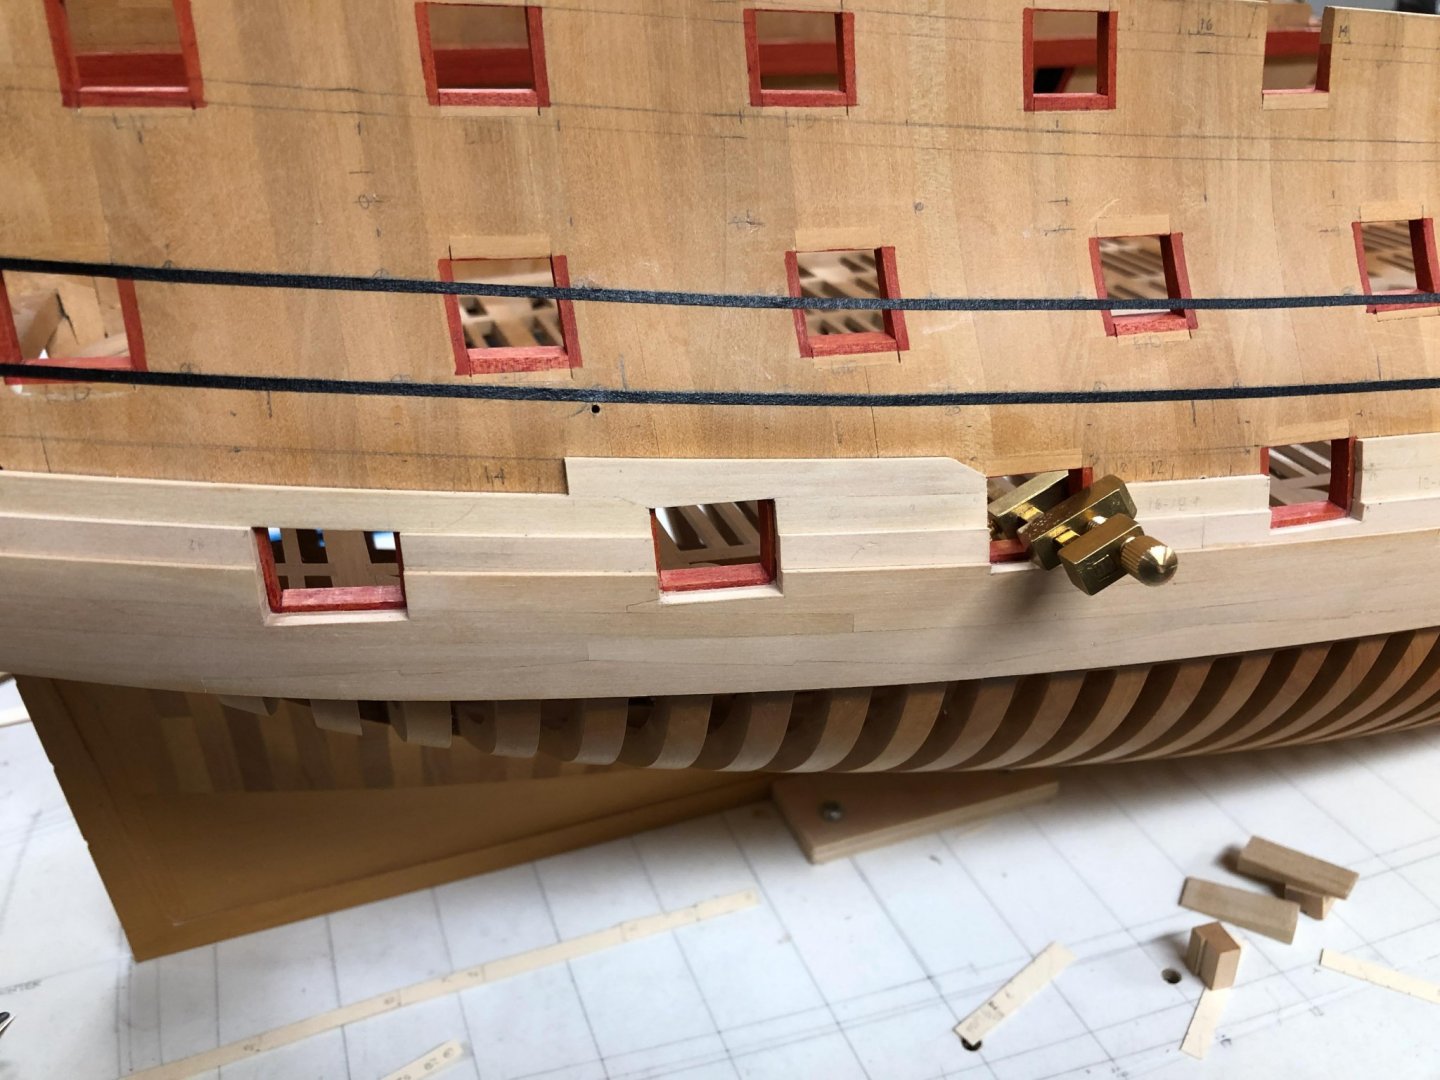
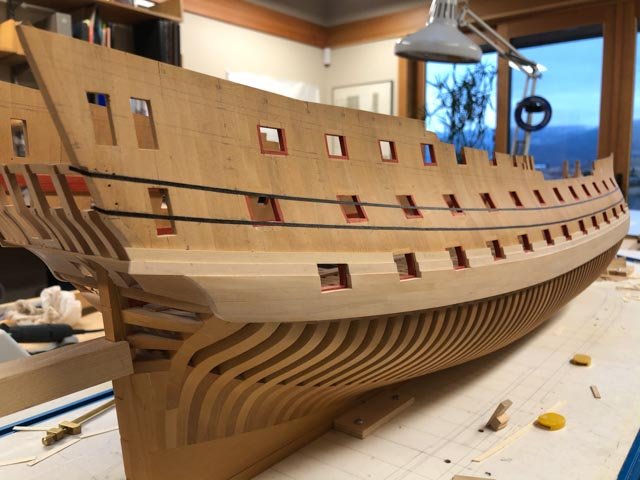
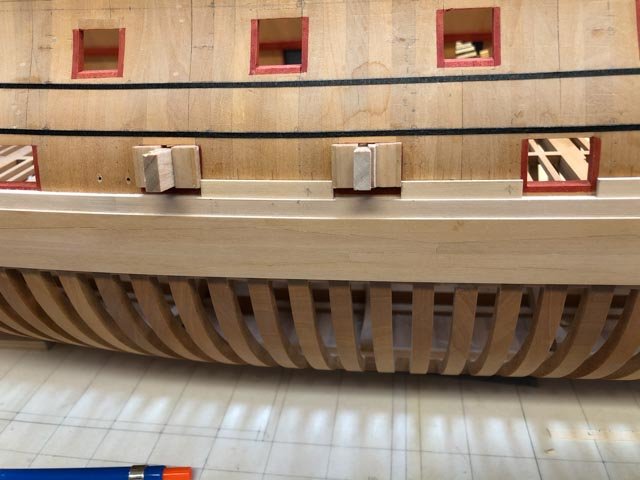
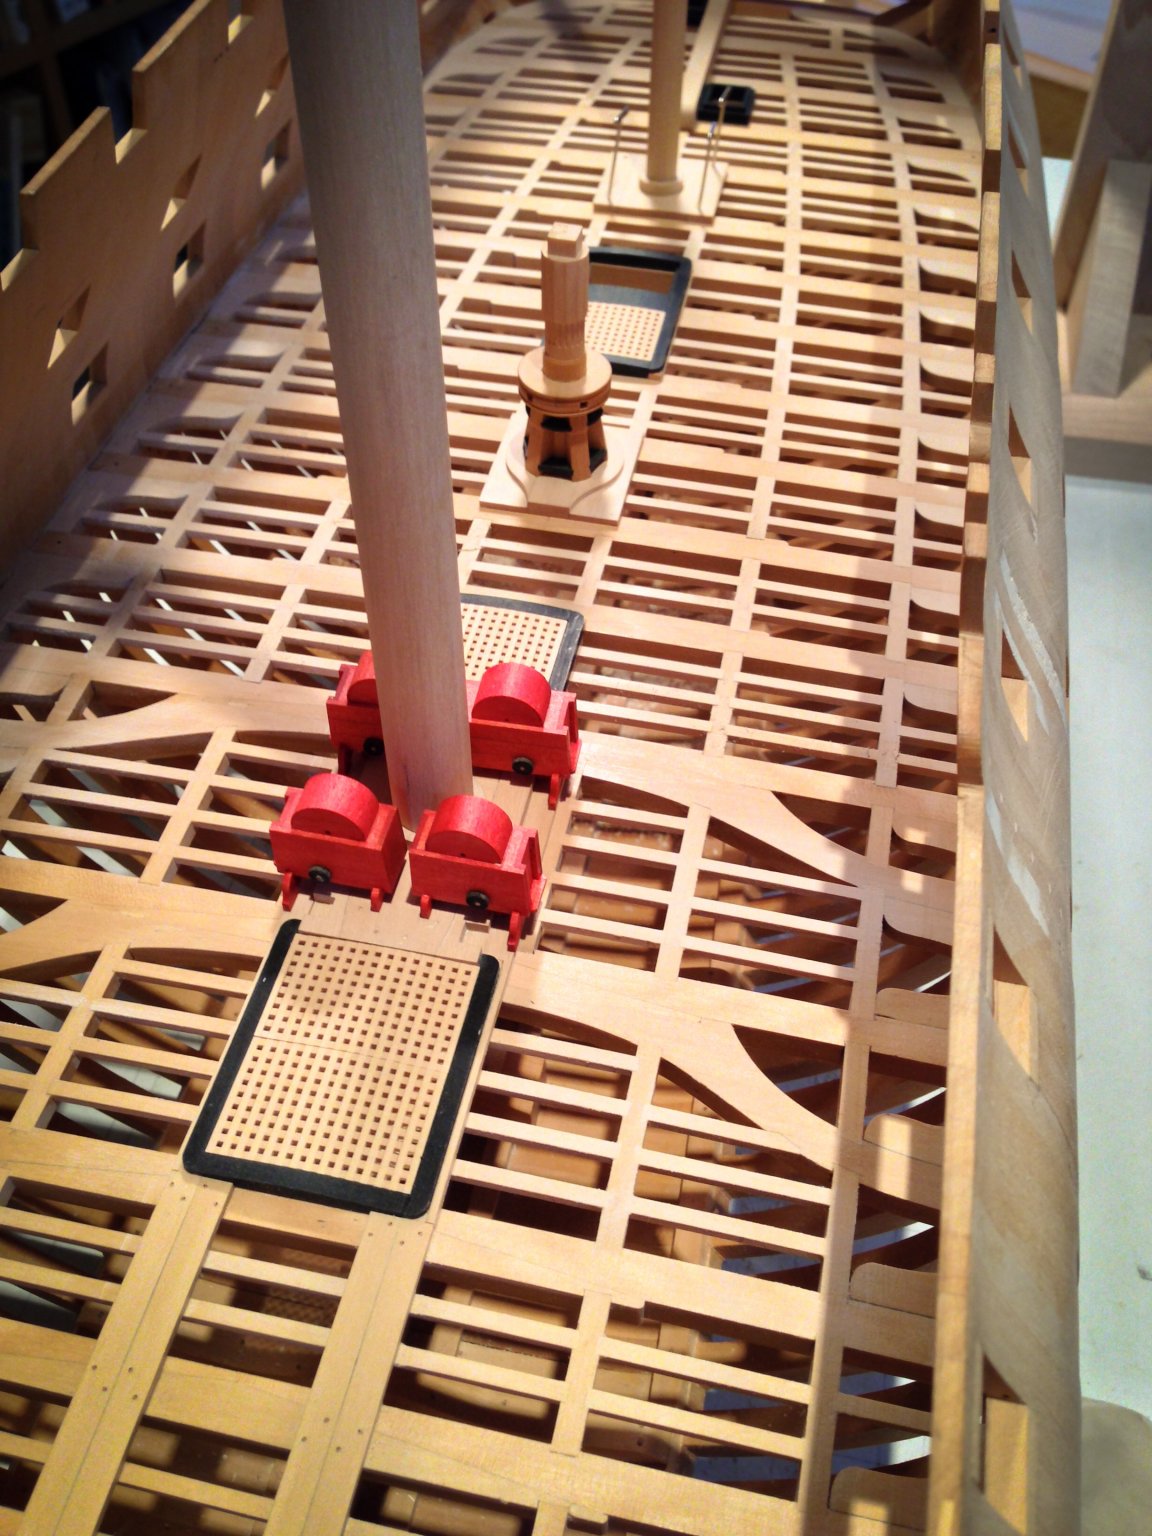
Having said that, I promise to increase my resolution when I get past the interim stages, i.e., after I sand and paint to my final finish. Then it is what it is! So here, for example, is the gun deck at its final finish, at a higher resolution.

At a little lower resolution, because it still needs some work with sanding, trimming etc., is the next strake of 4" planks at the bow.
This was a little trickier, working around the remnants of my mistaken hawse piece, and bending from the stem to the first port. But it is coming along! The hawse piece will cover up the planking forward of where the black strake changes color.

- Edwardkenway, paulsutcliffe, AON and 18 others
-
21
-
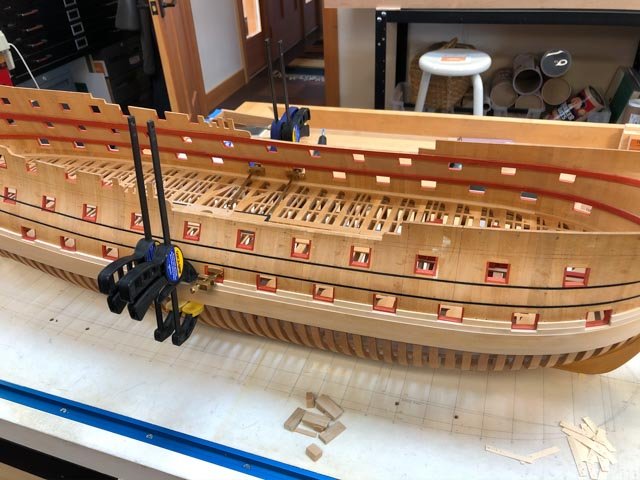
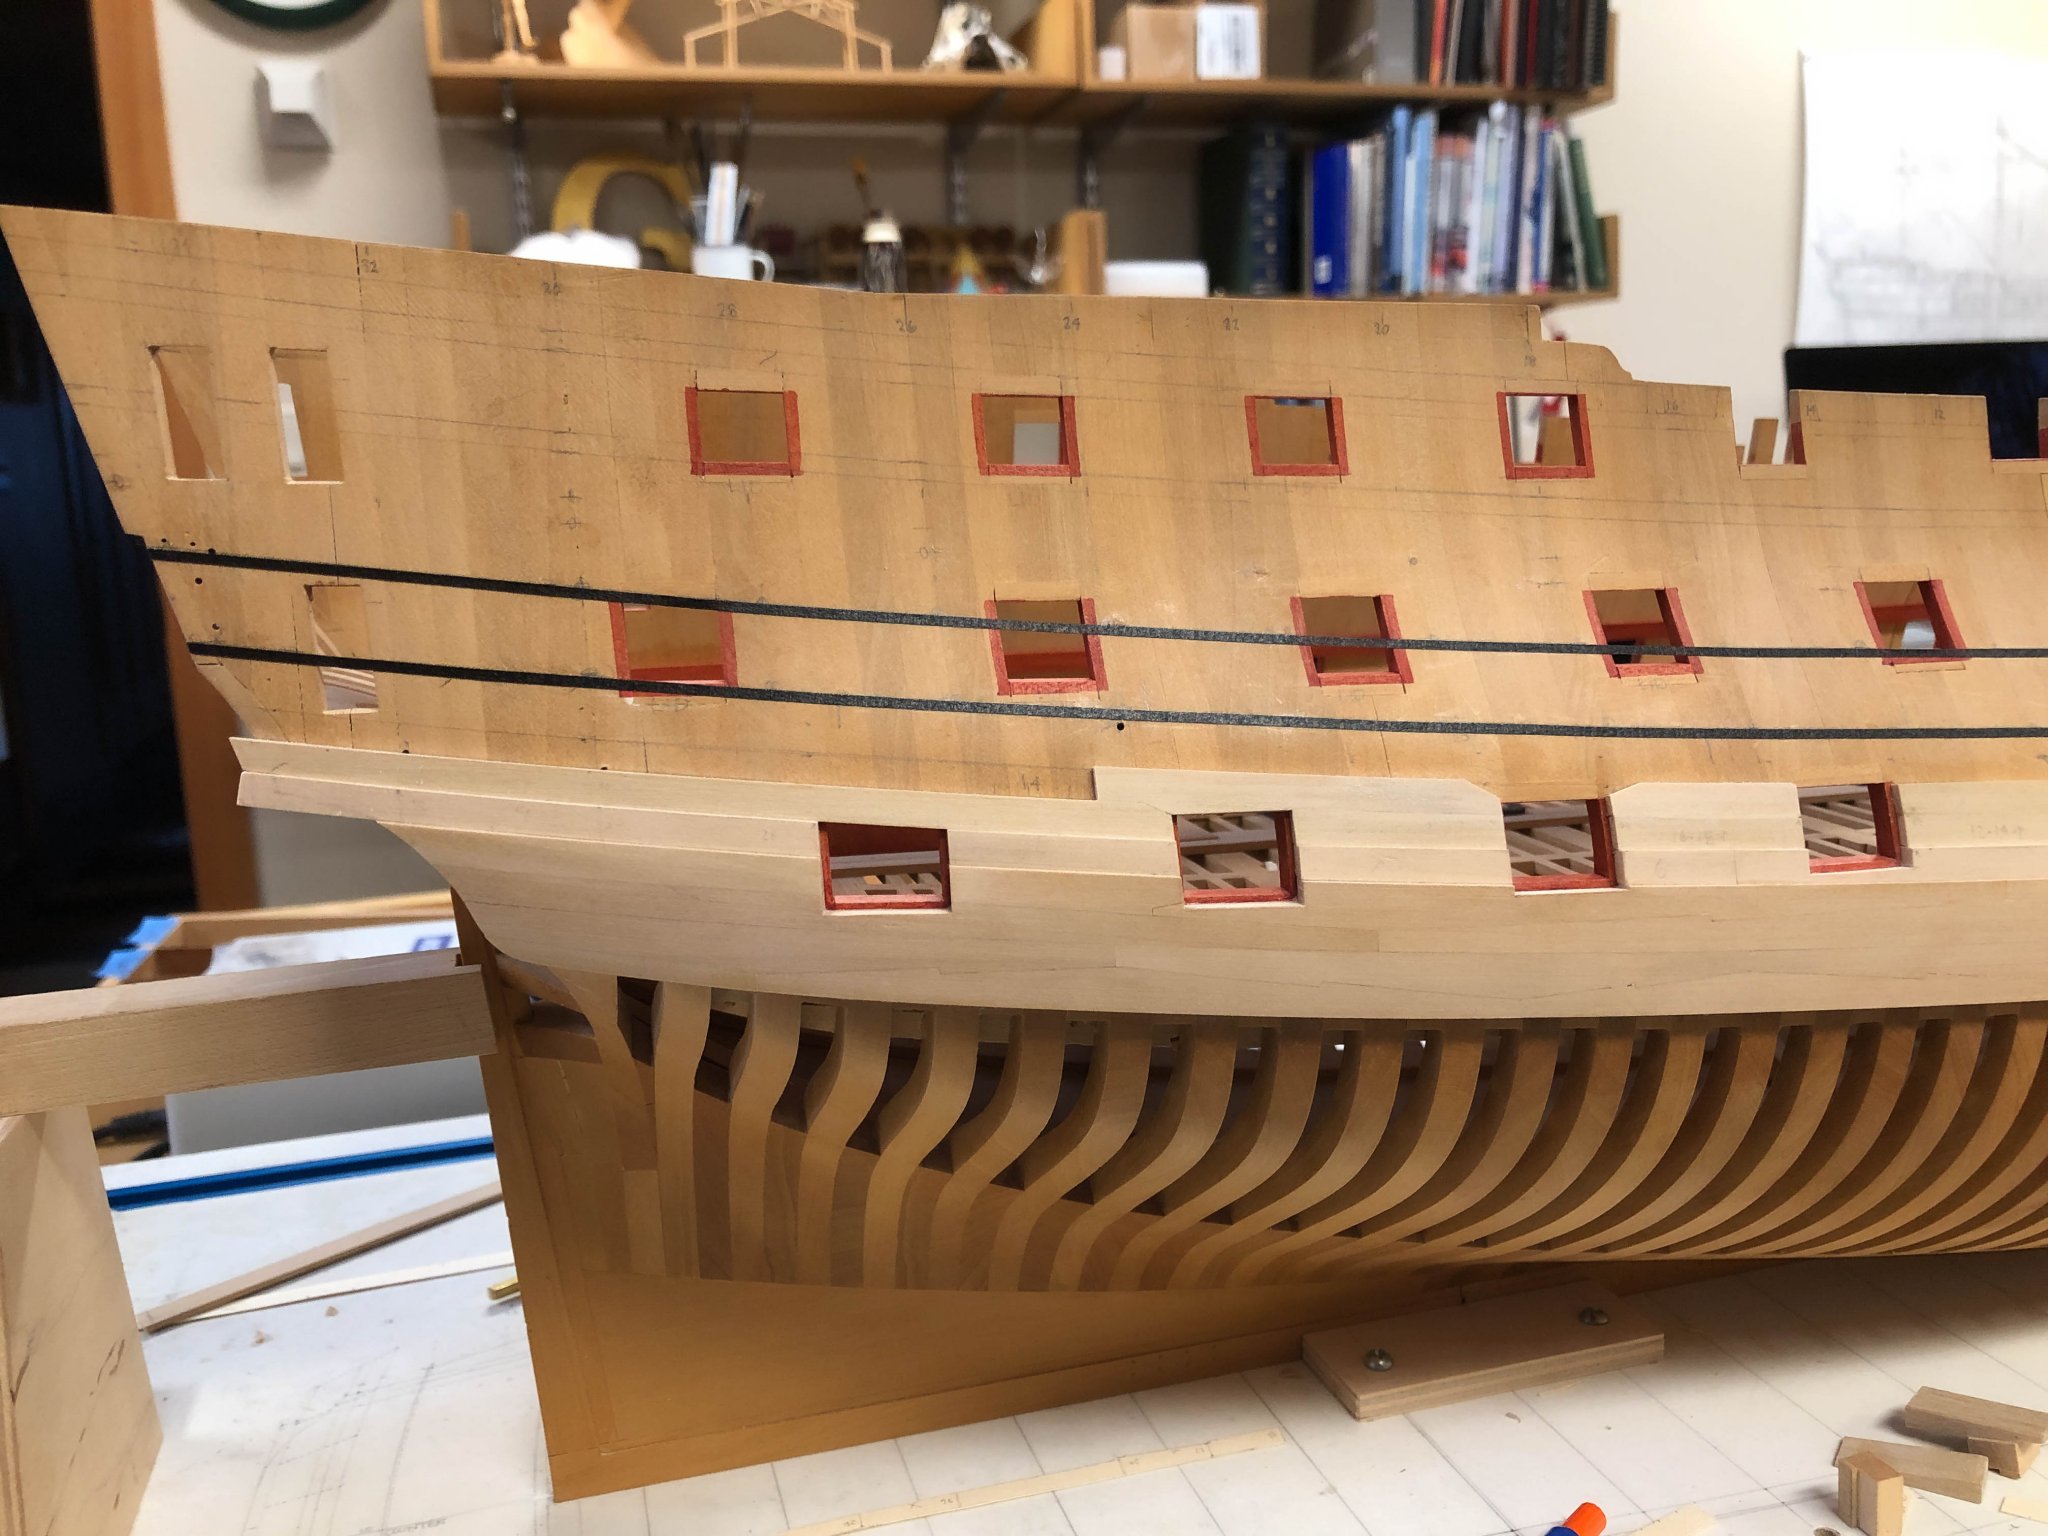
Small progress, finishing the first strake of 4" planking above the black strake. The aft-most last planks here were surprisingly challenging to shape. The uppermost curve did not fit any of my sanding templates, appearing to be more of a part of an ellipse than a circle. Although it is an arc of a circle when drawn straight on in the sheer elevation, because of the tumble-home in, and raking back, the actual curve is something more complex. Now I understand this, the next planks in this area should go more smoothly--or so I naively think before I actually try-- 🙂
I decided to trim the upper edges of the planking at the gun ports by turning the hull upside down and using a sanding stick through the opposite ports, as I learned from the Fully Framed Model books, and as I did when I first cut the ports in the hull. It is otherwise too hard to see the edge of the port framing to which the planking needs to align. The aft-most port has not yet been trimmed at the top in this photo.
Mark
- Edwardkenway, druxey, Siggi52 and 12 others
-
15
-
-
Looking nice, Alan!
I agree, captive nuts work well if you can get to the bolt heads (or nuts on threaded rod) from below. I also keep a small wrench of the right size next to my model, so if we suddenly have to leave the house in an emergency I can get the cat, wife and ship model all out together in short order! Hate to lose a ship model for want of a wrench to release it...🙂
Mark
-
thanks, druxey. I have been out of touch with my friend for 45 years or so, but I still owe him a great deal for that important lesson on craftsmanship early in life.
Gaetan, I entirely agree with your view that the goal is to have fun in the construction process, not to create a perfect model. And an important lesson I learned from you a number of years ago is that the more one repeats a process (in the case you advised me on, hand cutting the mortises for the gun deck carlings and ledges) the better and faster one gets. Which gets closer to perfection, but never all the way! And thank you for the kind comment about my specialty.
Best wishes,
Mark
- JpR62, mtaylor, Edwardkenway and 1 other
-
4
-
Thanks so much, druxey, Marc and Mark, for your kind comments.
A few thoughts with coffee before launching into more planking this morning:
Marc, when I started, I saw the craftsmanship of the original dockyard model builders as something to aspire to, but not something I could ever fully reach. In more recent years, though, I have seen that their perfection is not quite perfect, and so the bar is a little lower than I originally thought. The most interesting evidence is in Rob Napier's Legacy of a Ship Model, which shows that the old craftsmen sometimes screwed up, and they found interesting and satisfying ways to fix their errors. And sometimes, they let the mistakes stand as built if they were not going to be seen readily.
That gave me greater leeway to worry a little less about getting it absolutely right the first time--which can become a debilitating thought in your head--knowing that I can probably fix it if I mess up. I have done enough of these now to feel confident in being able to do them in the future. A case in point was making the hawse liners in the wrong wood, and needing to pare these down to be covered by real hawse liners in boxwood. Tedious to fix, but it works.
Mark, I think I mentioned a number of years ago on this build log that I learned the value of jigs from a moonlighting project I did while in architecture school. A friend and I had a project to build scale models of the condominiums soon under construction at the Big Sky Ski Resort in Montana just north of Yellowstone National Park. It had a very tight deadline. I was frantically cutting and gluing parts on the models, while my friend was building a jig. I urged him to stop messing around and start helping with the models. He ignored me, finished the jig, and then started cranking out perfectly crafted window and door frames, way faster than I would ever have done without a jig. I learned my lesson then and there.
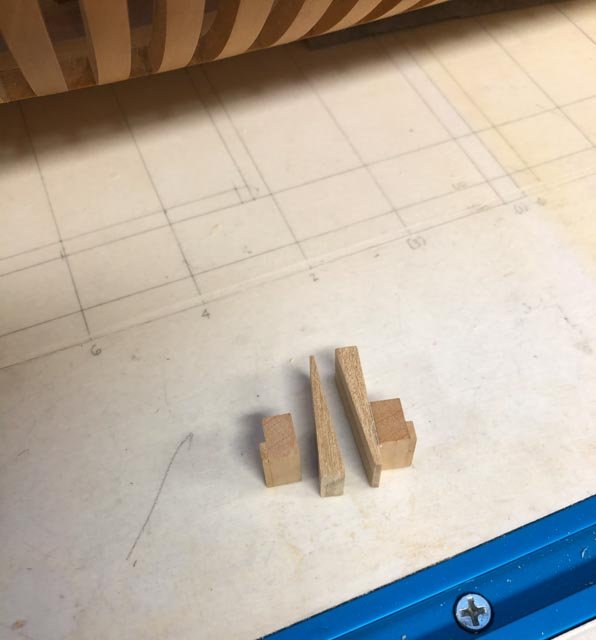
I started the Bellona using lots of jigs. I cut the stem knee with a full sized router and a jig, for example. I did not trust my hand tool skills, and jigs reduce risk. But as my hand skills have improved, I have used jigs less to control a tool, and more for alignment and fitting issues like the reveal around the gun ports. Also, they are great for making repetitive identical parts. By the way, I modified my gun port jig a little, gluing a wedge to one side. My fingers were too clumsy to hold all four pieces in place while I pushed in the locking wedge, sometimes while also holding the plank so it could be scribed against the jig...
Back to work!
Mark
-
I have been pulled away from the shop for a time, but back to planking.
This is a fairly tedious repetitive job. The row of planking above the black strake is mostly between ports, so no longer strakes are possible yet.
In the past, I would work up one side, then the other. Getting started on the second side was always an uphill battle, because I had already worked out all of the problems and now it was just a slog on the other side.
So this time, I decided to work up each side in parallel. This also allows me to leave one side glued, work on the other side, and the the first side is ready to go again.
My little jigs for the reveal on each side of the port are working well. I first use these to get the angle for cutting the end of the plank, and then as a go - no go for fitting the planks between the ports.
It is taking about ½ hour per plank between each port...
Mark
- Edwardkenway, GrandpaPhil, gjdale and 17 others
-
20
-


Swan class 3D model in progress
in CAD and 3D Modelling/Drafting Plans with Software
Posted
Astonishing work. It brings the ship alive like nothing I have ever seen. It somehow seems more realistic than photos of an actual ship.
Mark