-
Posts
1,641 -
Joined
-
Last visited
Content Type
Profiles
Forums
Gallery
Events
Posts posted by SJSoane
-
-
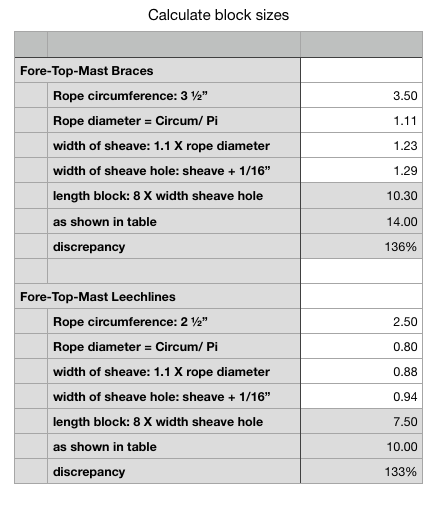
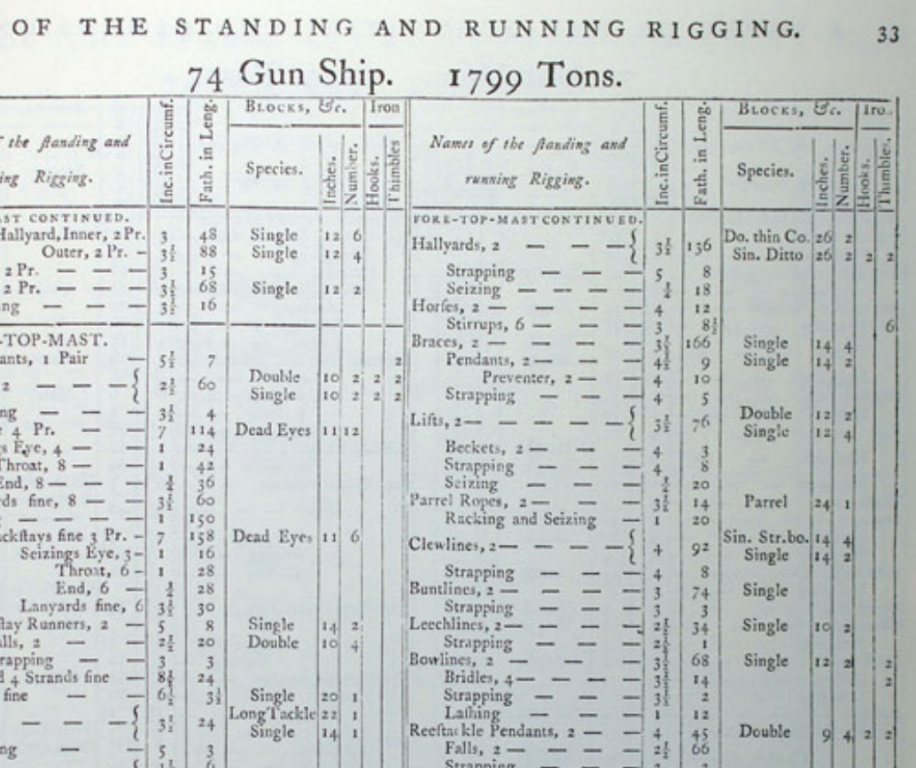
Switching back to the block sizes for a minute, I used a spreadsheet to calculate the block sizes according to Steel's directions, and compared the results to the blocks in his table. I did modify this somewhat, when I realized that a calculation based on the circumference of the rope would usually create a block with an inch and fraction length; but the lengths were always even integers. So I rounded up to the next full inch size. This brought the calculated blocks closer to the ones listed in the tables, usually within an inch or two although still smaller.
The biggest discrepancy concerned the long-tackle or fiddle blocks.
As seen below, I looked at the spritsail halyard, which according to the table is a 3 ½" circumference rope, with a 24" long tackle block.
But using Steel's own formulas, the block would be only 17" long. He describes this block following all of the rules for a single block, only ⅔ times longer, and with the lower part of the block including the second sheave as ⅔ less than the upper part of the block.
Lees' Masting and Rigging used different formulas that still arrived at a 17" long block. His formulas give a somewhat thinner and narrower block given the same length. And he give no sources for this formula. (p. 166)
17" is a long way from 24", we don't need Alan and druxey's calipers to see this difference. But I have found no other sources that could resolve this discrepancy.
I suppose I could work backwards from 24" to determine what the proportions would be for all of the other parts relative to a 3 ½" circumference rope. Presumably, this would create a top sheave larger in diameter than would be required for a single block running the same circumference rope. Maybe the lower sheave should be the size for the single, and the upper 5/3 bigger?
Who to trust?
Mark

- daHeld73, paulsutcliffe and mtaylor
-
 3
3
-
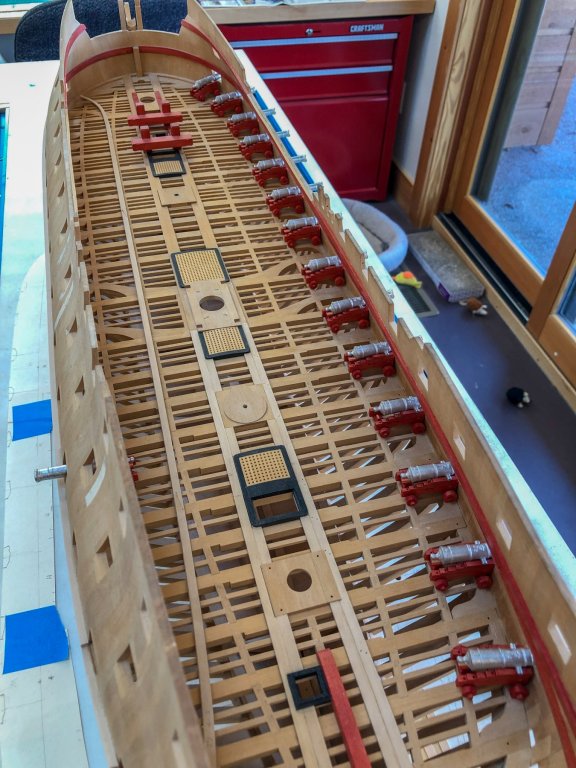
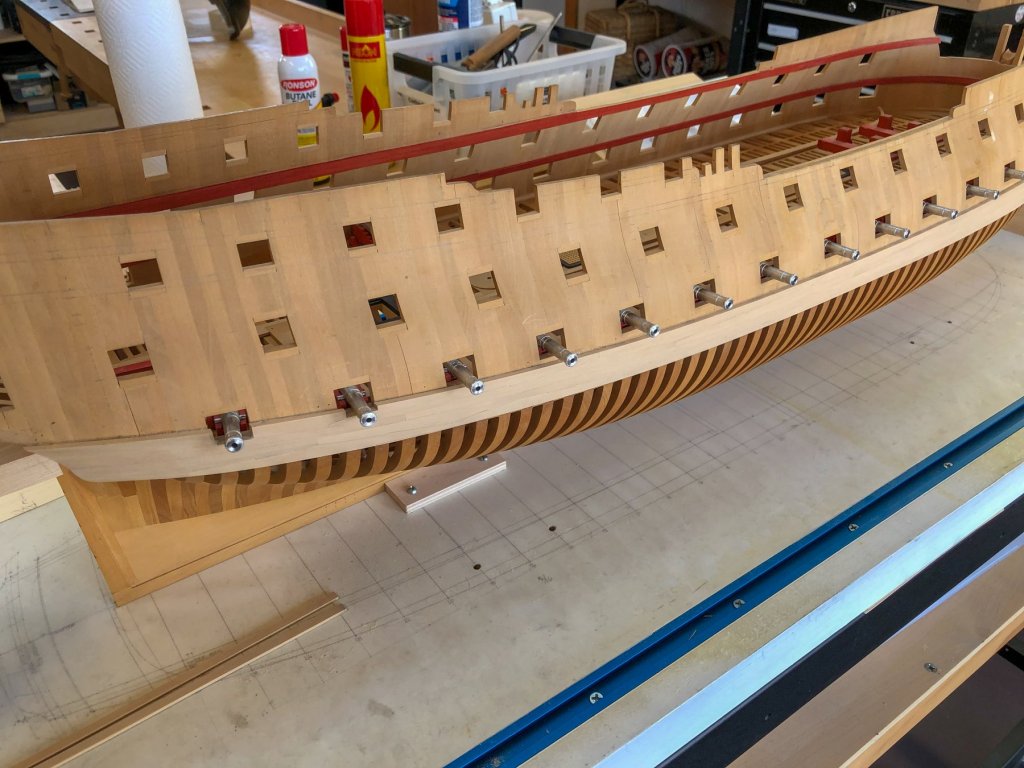
After a long few days, I have only the 9# guns left to drill. Just 18 to go!
Just for fun, I put the 32# into their carriages and into the starboard ports. They are a little low because the deck is not yet in, but it gives a good sense of what the gundeck must have been like. And how awful it would have been to see that ship approaching you with guns run out and a hostile intent!
Mark
- Captain Poison, Jorge Diaz O, AON and 18 others
-
 21
21
-
Alan, you are right, we seem to have an irresistible desire to get it "exactly right", even though the difference is imperceptible--until druxey gets his calipers out, of course. It is like wanting to solve a math or engineering problem, where there is a great feeling that one has found the right answer, not an almost answer. But what a crazy attitude to bring to this hobby, where everything is approximate. Oh, well!
It still amazes me to see how much full size boat construction is done by eye, not by precise measurements. There is a lesson here!
Mark
-
Thanks, druxey, I am glad I didn't overlook something. You and Alan are probably on the right line of thinking that this has to do with the dates.
The Bellona was built in 1760, 30 years before Steel's tables or formulas. Since everything grew as the century wore on, I would think the Bellona's sizes would be at the smaller end of possibilities, likely smaller than in the tables at the end of the century.
So I will likely stick with the formulas, assuming this was an earlier tradition passed down to Steel even as the blocks were being made larger in practice, as reflected in his tables.
Oh, boy, more fun with a spreadsheet...
Mark
-
Hi druxey,
I got them from:
and these are repeated in David Antscherl's Fully Framed Model Vol. IV p. 63. They also can be found in Lees' Masting and Rigging, p. 164, but there are some discrepancies in this source relative to the other two. Lees, for example, has the sheave diameter as 4 times the width of the sheave, but the other two are five times. Also, Lees has the width of the sheave hole as a sixteenth more than the sheave, but the other two have it as 1/16" larger.
Mark
- daHeld73, paulsutcliffe and mtaylor
-
 3
3
-
On 4/11/2019 at 2:04 AM, KORTES said:
Jack-pins.
I found the technology of making jack-pins in the report of Uriy Kimborovich (bim), that he used for his schooner “Izmail”, for what I’m very grateful to him. I made a simple device out of the materials I had.
Material - pear tree. Firstly I prepared the bars of the desired diameter, and so as not to waste too much material (for the support fixture in the collet) I was carving from a long rod, as the length of the coordinate table would allow me.This is a very interesting way of turning small, thin pieces. I have not seen this before. Very clever!
Mark
-
Thanks, druxey and Marc, for your thoughts on boring cannon. I do remember the advice I got from Gaetan years ago about how one's skills and speed increase through repetition. This is proving to be very true.
However, taking a break from drilling cannon, I started looking again at the rigging for the cannon. I dug out my old spreadsheets, and noticed for the first time a big discrepancy in Steel's tables for sizing rigging and blocks.
What he says about the sizes of blocks does not correspond to the blocks listed in his master table, a reproduction of which can be seen here:
https://maritime.org/doc/steel/tables/pages/032-ShipOf74Guns.htm
So here is what I found. Look at the table:
Look at these examples to explore:
Fore-Top-Mast Braces
rope circumference: 3 ½"
Single Block length: 14"
Fore-Top-Mast Leechlines
rope circumference: 2 ½"
Single Block length: 10"
But when we follow his instruction on sizing blocks (see spreadsheet below), this is what we find:
The Fore-Top-Mast Braces single block should be 10.3" long
The Fore-Top-Mast Leechlines single block should be 7 1/2" long
This isn't just a little off, it is off by over 30%. Every block in the table appears to be larger than what his proportional rules would specify.
Am I misunderstanding something here? And if not, should I be following his table, or following his calculations?
Best wishes,
Mark
- daHeld73, paulsutcliffe and mtaylor
-
 3
3
-
On 4/9/2019 at 5:05 PM, AON said:
I have no idea why my photos get turned or become out of sequence when loaded.
I've tried to correct this but possibly I need a sprinkle of holy water to correct the problem.
Alan,
I just discovered the other day--after suffering from the same problem--that you can drag photos directly into the text box where you want them, rather than dragging them into the attachment box at the bottom. They still show up in the attachment box, but they stay in the right order in the text box. I am not sure of the effect of holy water as well....
Mark
-
Beautiful, crisp, craftsmanship!
Mark
- Stuntflyer, FrankWouts, Martin W and 3 others
-
 6
6
-
Here is the sequence I am going through for facing and boring the muzzles.
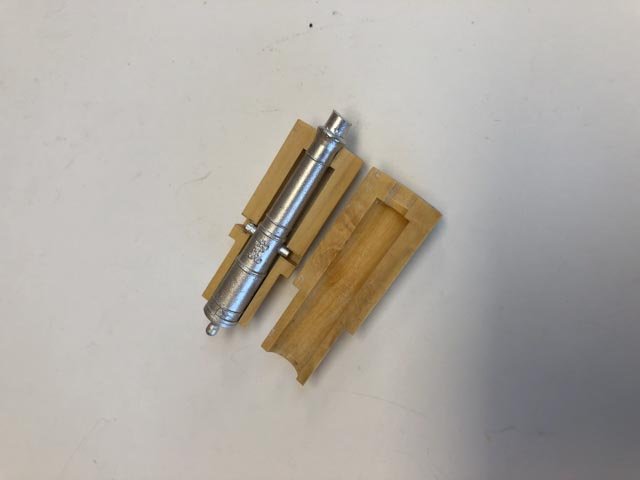
First, the barrel is put in the centering jig:
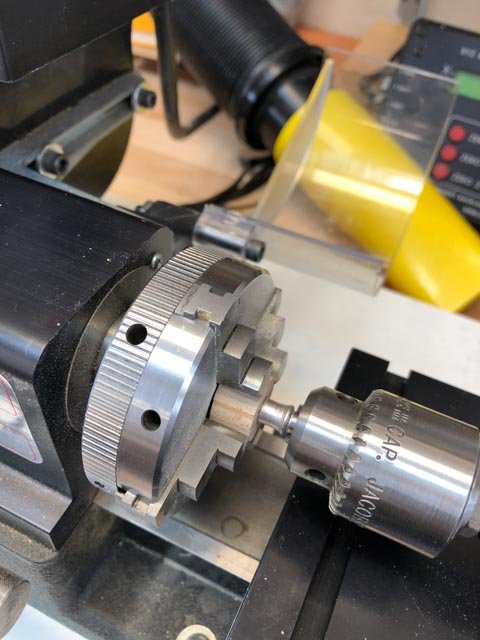
Then the jig is mounted in the 4 jaw chuck, using the drill chuck in the tailstock to grip the cylinder at the front of the barrel, to ensure it is centered before tightening up the 4-jaw chuck:
Then the cut-off tool is run up against the long cylinder cast at the front of the cannon, to true it up. I do this turning the chuck by hand. I also true up the outermost edge of the swell of the barrel, also turning the chuck by hand. The pewter is really easy to trim:
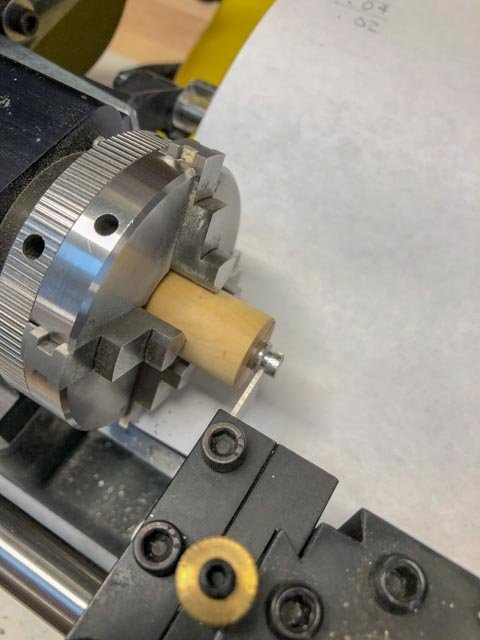
I cut off the excess, using a hand saw:
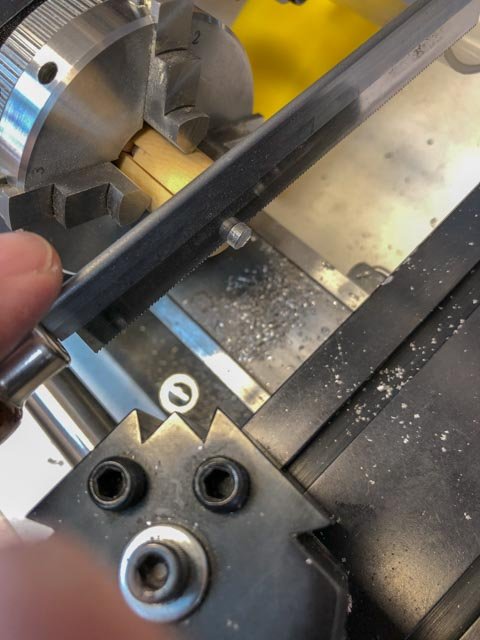
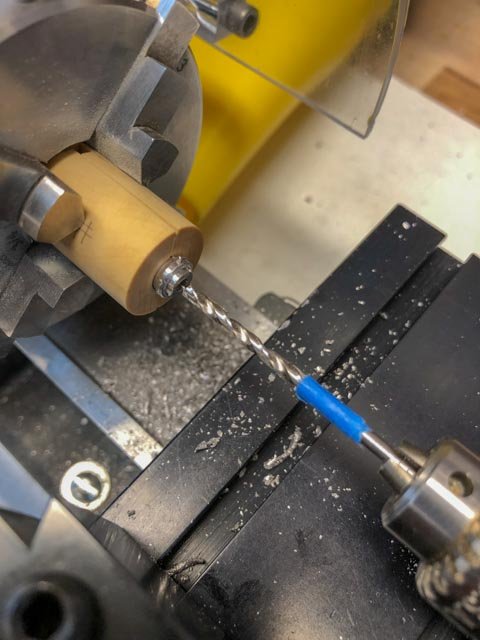
Then, I center drill and drill the bore:
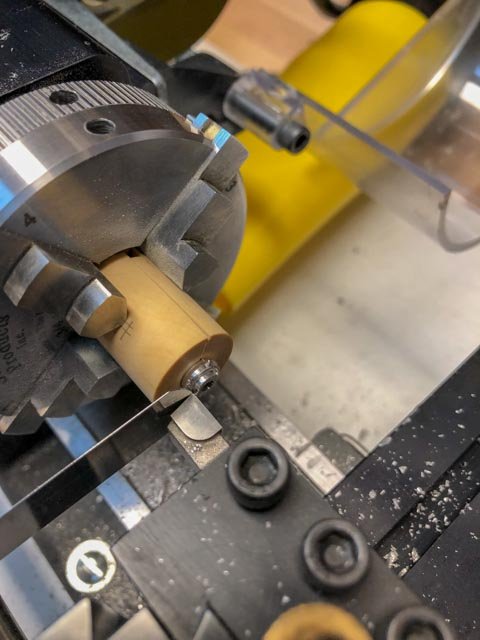
Next, to keep the foremost moulding the same thickness, I run the cutter up against a .10" feeler gauge, and set the digital readout to 0".
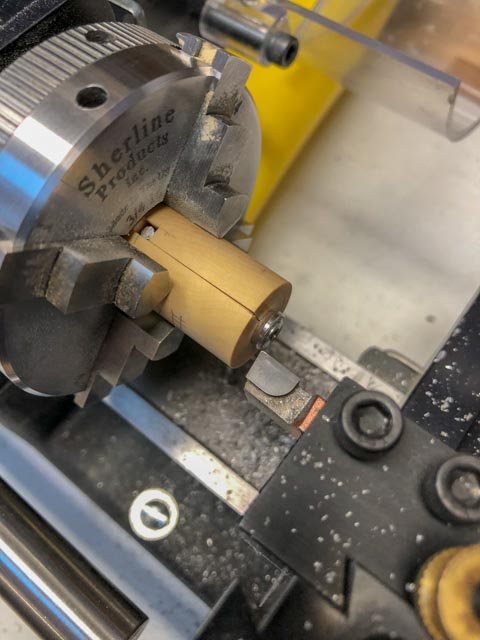
Back up the cutter, face the barrel down until I hit 0" on the digital readout. This trims up the face so the moulding is exactly .10" wide. Done. Next. Only 60 to go....
-
Hi Greg,
I thought about upgrading my Sherline lathe and mill to CNC a while ago, but somehow it seems like a steep learning curve and price. Have you considered this?
Mark
-
Hi Mark, I knew you were kidding, but your comment did make me curious about how this process could scaled up beyond the needs of one ship. I know now that I would get too bored doing this regularly, even if I could figure out ways to speed it up with multiple moulds.
I had jewelry friends who did lost wax, and I did look into the idea a number of years ago. But the cost of the equipment quickly killed that idea for me. Now if I made my cannon out of gold, it might be worth it, because I could sell them as jewelry for pirates!😀
Mark
- daHeld73, paulsutcliffe and mtaylor
-
 3
3
-
- Canute, mtaylor and paulsutcliffe
-
 3
3
-
Thanks, Marc, Greg, Rob, Gaetan and Mark. After working all winter on these cannon, it is very gratifying to get to this milestone.
Mark, I have endless admiration for those who make these commercially. I would never have guessed how long this would take. Admittedly, I had a large learning curve, and a few setbacks; and now I know more of what I am doing, it started to go faster.
One would have to make multiple masters of each size, so it would be possible to pour in gangs rather than singly. Even so, the most laborious part is dusting with the talcum powder so there is just enough even coverage without blocking up details, and this would still have to be done for every pour. I would have to charge $100 a cannon just to make it worth my sanity!
When I started this quest for cannon, I explored the different ways this might be done: a duplicator on the lathe, 3-D printing, and casting. From my perspective now, even if I had been able to make the duplicator work, it would never have achieved the detail and consistency of the casting, and it would have been even more tedious. 3-D printing is still an interesting option, although it turned out to be beyond my budget to have them printed commercially, or to gear up with a 3-D printer of my own. So I defaulted to casting, which in the end gave a very satisfactory outcome. Maybe that is why it has been used for centuries. Now if only I had the equipment to do lost-wax casting....😀
Best wishes,
Mark
-
Thanks, Ed, it is fascinating to see the logic to the grouping and arrangement. It seems to be a very rational way of managing so many intersecting lines, according to function and geometry, and location.
It would be interesting to look at a typical maneuver in John Harlands' Seamanship in the Age of Sail, like tacking or shortening sail, to see how the lines needed for that task are distributed around the ship. Would they have been grouped into specific location so a small crew could efficiently manage without running around the entire ship? Or did a crew always have to be large enough to man every necessary line at the same time? I am sure members of Model Ship World who are sailors and have sailed on a tall ship would know this.
I still cannot fathom how a sailor in the middle of the night in a storm would reliably grab just the right line off a crowded pin rail. I wonder if they glanced aloft just to confirm, or if they always knew for sure.
Ed, your model makes clearer than anything I have seen so far just how many lines were involved in managing these majestic ships--and I remember reading you left some off!
Thanks again, this was very interesting to read.
Mark
- EdT, BETAQDAVE, paulsutcliffe and 3 others
-
 6
6
-
-
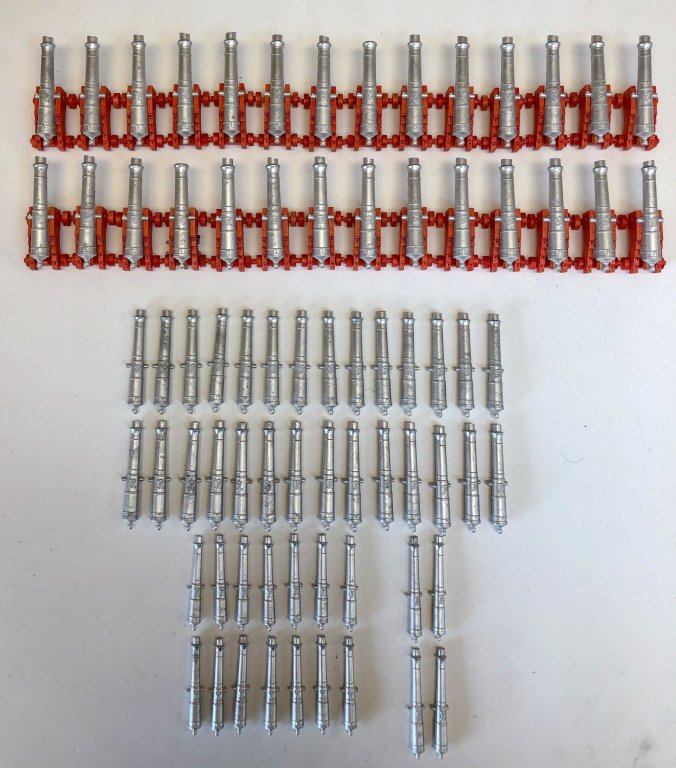
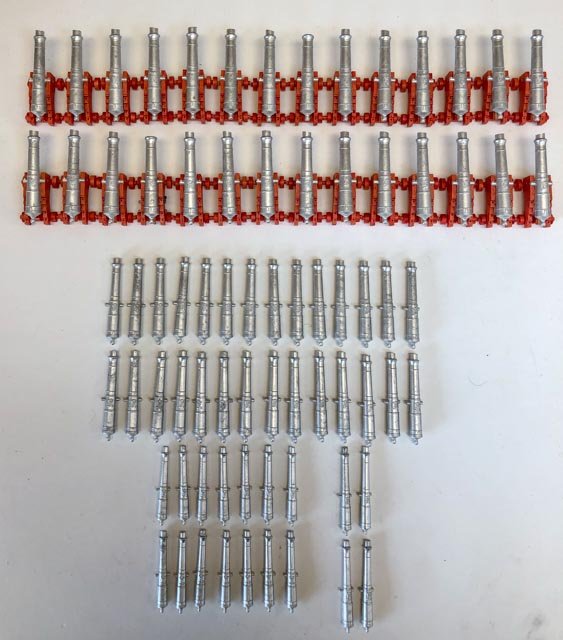
The cannon are all cast!
It is fascinating to see all of the cannon together. 74 guns provides a lot of firepower, when you see them all in one place. And I am glad at this point that I did not build a first rate ship with 100+ guns. This got very weary after a while.
Next, cleaning up with files, facing and boring the muzzles.
And then messing with blacking.
A big step completed!
Mark
-
Hi everyone,
More casting, I have only 11 of the 32# and 9 of the 18# to go. The 9# in long and short are done. I couldn't be patient enough to wait until all were cast, to see how they look lined up in the 32# carriages:
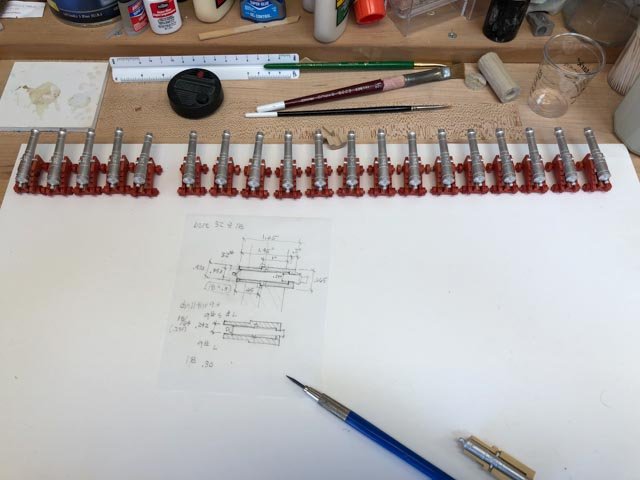
However, I got up this morning to cast the final cannon, and my MicroMark butane burner died. It won't start. The sparker still works, and trying to fill it quickly has the butane coming out at the nozzle, so I assume it is full. There are no instructions for cleaning, so I appear to be dead in the water. I will have to buy another one, or figure out how to melt the pewter another way. I have a stand-up micro butane torch for soldering, but the heat point is too fine to heat up the entire ladle of pewter.
So, moving on for a moment, I made the fixture for the 18# cannon, for facing and boring the muzzle. Much cleaner this time, now you helped me with the boring tool. Worked perfectly. This time, I glued thickish paper between two halves of the blanks, so I could easily split these apart when finished turning.
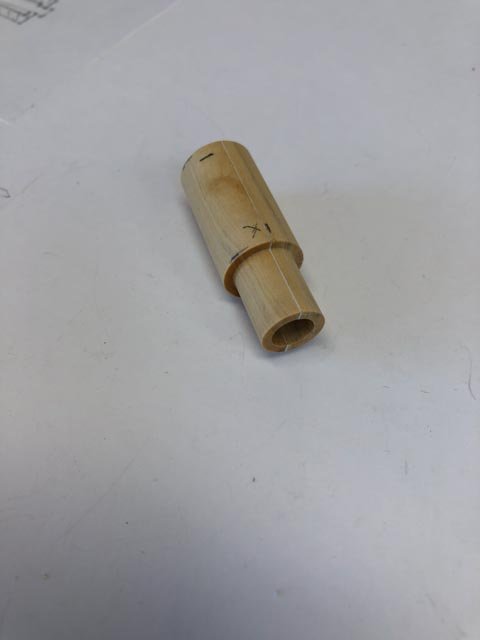
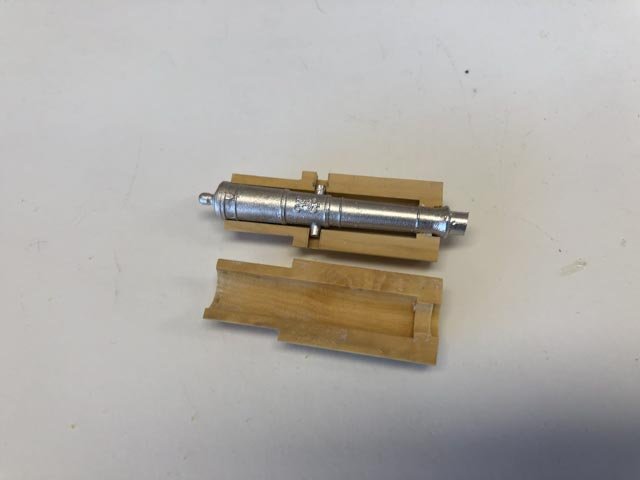
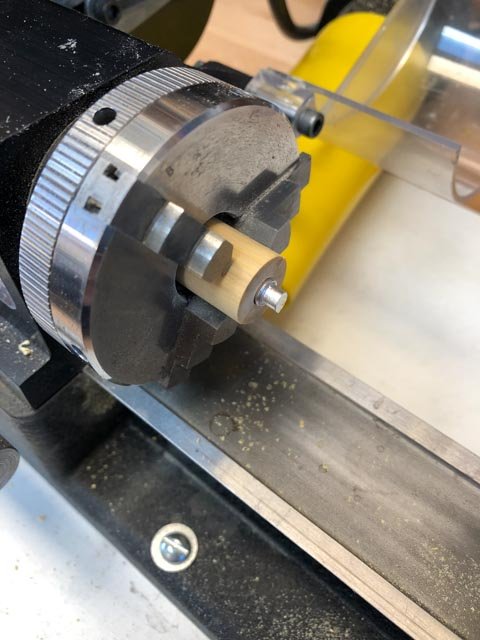
-
Thanks, Gaetan, it worked perfectly!
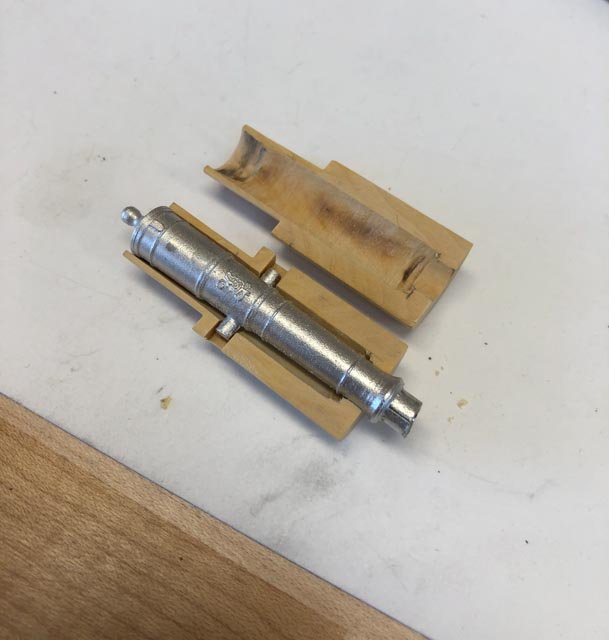
So here is the fixture for drilling and facing the 32# cannon. This one is a little ragged inside because of my boring challenges. Now I have that figured out, the 18# and 9# fixtures ought to come out a little more elegantly. This one needed a little adjustment internally with a flexible shaft cutter.
Mark
- KARAVOKIRIS, dvm27, John Cheevers and 9 others
-
 12
12
-
Thank you Mark, Landrotten Highlander, and Gaetan, for these ideas. And Gaetan, I look with envy at your full size lathe. I will likely never be able to get one, but I can admire from afar!
I woke up in the middle of night, thinking that I should try cutting on the side of the hole towards the operator, rather than away from the operator as I tried yesterday. But that rubbed even worse.
As it turned out, you were all correct. I rotated the cutting edge 90 degrees, and it works perfectly cutting on the side of the hole closest to the operator. Thanks!
So it is interesting why the Sherline setup has a flat cut on the top of the boring bar for the set screw, when the bar needs to be 90 degrees to this arrangement. I then realized that they originally sold these for a boring head for the mill, which does use the flat to locate the bar correctly. They say that the bars can be used in the lathe, but as far as I can find, Sherline did not explain to rotate the bar in the lathe setup.
There is an interesting lesson here. I knew something wasn't working well yesterday with chattering and burning, but I just kept on going thinking that I might be able to correct with a different feed speed or RPM adjustment. I did not take the time to rethink why this setup was not working well, or try other things like rotating the head. I know that machines speak to you, if only you are willing to listen. I did not listen well yesterday!
Thanks again, everyone,
Mark
- dvm27, paulsutcliffe, GrandpaPhil and 7 others
-
 10
10
-
Hi druxey,
Good question, I could not find any instructions on the Sherline pages, except to line up the notch in the top of the boring bar itself, with the top set screw in the boring mount. But it sure does act like it is rubbing. The cutting edge as I have it set up appears to be meaning to cut at the back lower edge of the relief hole, cutting as the wood is starting to climb up around and back to the front.
I also experimented with the angle of the boring bar to the axis of the lathe, because sometimes the bar started to rub at the outer edge of the hole as it got deeper. Didn't seem to make any difference to the quality of the cut.
Maybe I should try flipping it upside down, although the flat would not align with the set screw.
Mark
-
Looking great Michael. And I thought I was the only one who played with wind up rubber band planes. Never could get them to work very well.
Mark
- FriedClams, Keith Black and mtaylor
-
 3
3
-
Thanks, Michael, you and druxey gave me good advice on this. I admit to being happier working with wood than plaster, though....😀
I spent the day building a fixture for the 32# guns, in order to mount the casts in the lathe for drilling and facing the muzzles.
These are shaped so the hind end can go into the Sherline lathe headstock as far as possible, so the fore end does not project too far beyond the jaws of the chuck. This is to keep everything as concentric as possible at the face. Things get tight at the rear of the headstock, due to the Morse taper there. There will obviously be more clearance with the smaller guns.
These still have to be drilled so the trunnions can recess into the fixture.
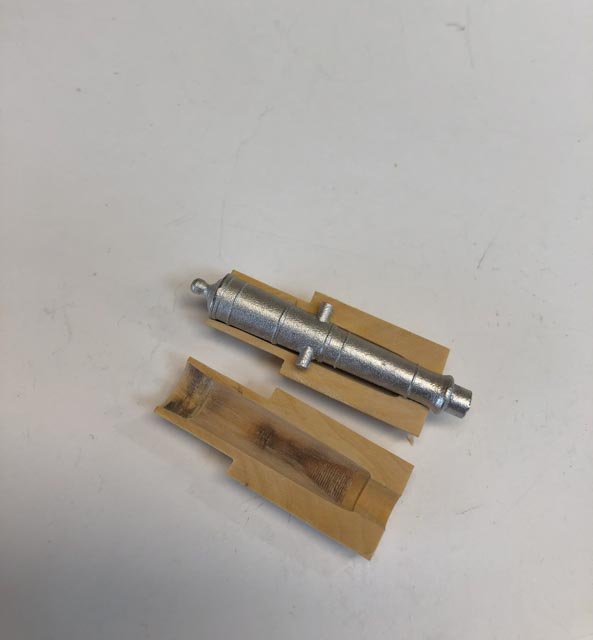
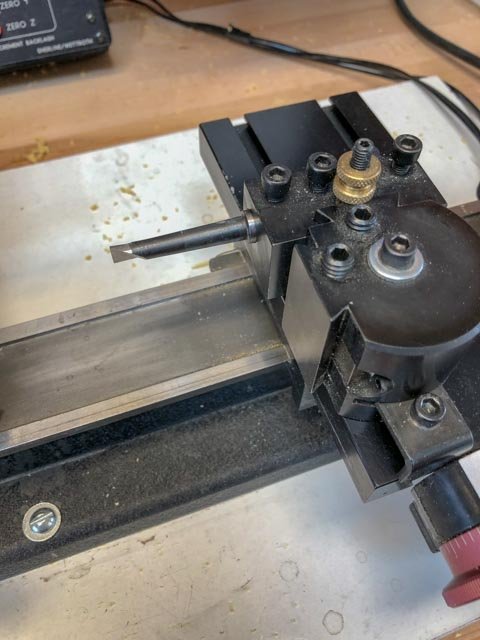
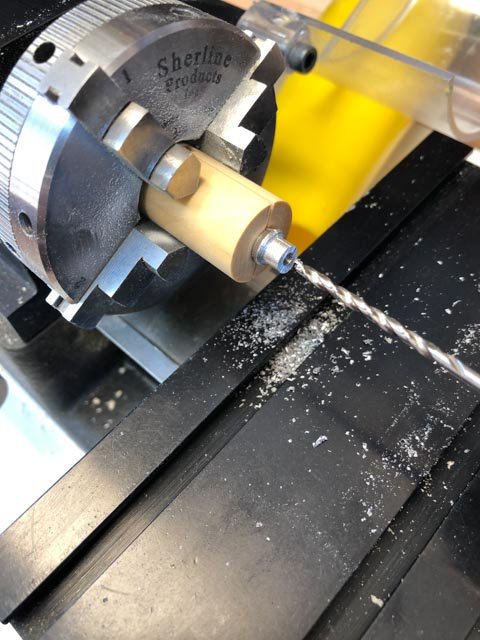
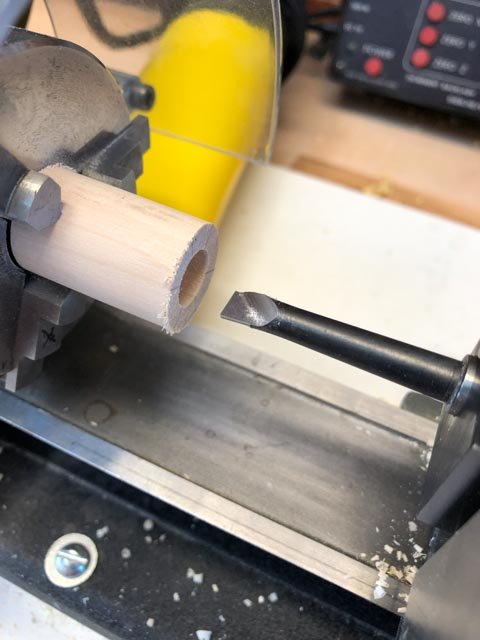
You will see some burning on the inside of the fixtures. This is because I had to make very precise diameter holes to grab the front and rear of the cannon, and these dimensions were not an exact size of drill. So I used the Sherline boring tools in the lathe (see below). I could not get these to work very well. They cut grooves, and burned the boxwood I am using for the fixture (so the chuck jaws don't compress these too much, and throw things out of true). And I was taking such light cuts that it took a long, long time to bore out from the closest drill size I had first used for initial clearance.
Does anyone have any thoughts about what I am doing wrong with the boring tool?
This is the first time I have used them, so I haven't yet seen them work well.
Mark
-
Hi vossiewulf, yes, that was my understanding. I wasn't sure just how much a difference it would make until I tried the experiment. Its value is now very obvious to me!
Mark
- mtaylor, daHeld73 and michael mott
-
 3
3



HMS Bellerophon 1786 by AON – scale 1:64 – 74-gun 3rd Rate Man of War - Arrogant-Class
in - Build logs for subjects built 1751 - 1800
Posted
Alan, fascinating!
Mark