


SJSoane
-
Posts
1,641 -
Joined
-
Last visited
Content Type
Profiles
Forums
Gallery
Events
Posts posted by SJSoane
-
-
Thanks, Marc, Mark and Michael, for the good thoughts. My challenges with technology in photo etching have spooked me a little when I get outside the realm of wood.
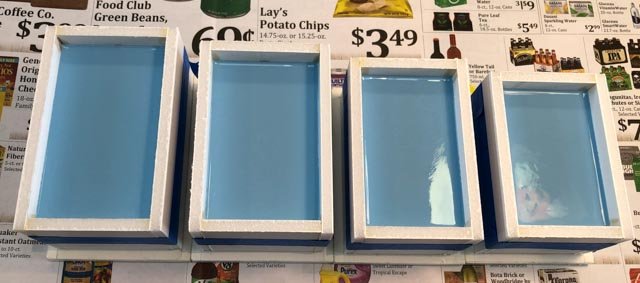
So here is the first pour of rubber. Won't know if I got a good pour without bubbles for another 4 hours or more.
Also, let me know if that is a good buy for potato chips in the background...😀
Mark
- Mike Y, paulsutcliffe, dvm27 and 8 others
-
 11
11
-
Michael,
That was fascinating reading on the history of navigation lights. Thanks!
Mark
- mtaylor and michael mott
-
2
-
Hi everyone,
The sprues are now installed in the moulds, as well as the locating dimples. I took extra care this time to clean up the clay at the edge of the master. Last time, I left the clay either a tiny bit high or low, and this creates a thin edge on one side of the mould or the other, which deteriorated over time. So I spent a lot of time with a sharpened toothpick to get these as clean as I can.
Probably pouring rubber tomorrow. I did read on the instructions on the rubber mould material that I should use the rubber to rubber release even on the box sides and the clay. When in doubt, read the instructions...😀
Mark
- mtaylor, paulsutcliffe, robdurant and 10 others
-
13
-
Outstanding craftsmanship, Johann!
Mark
- paulsutcliffe, mtaylor and BETAQDAVE
-
3
-
16 hours ago, michael mott said:
Thank you Gentlemen, I am not sure why I did that considering some years ago I did an exhibit on the shipping disaster that talked about the collision in the St Laurence Seaway about the Empress of Ireland that resulted in the loss of many lives. I made a mock bridge with the wheel and the lights in order for the visitors to understand how the lights and signals worked.
Michael
So here is a dumb question; when did the convention of red and green lights come into international usage?
Mark
-
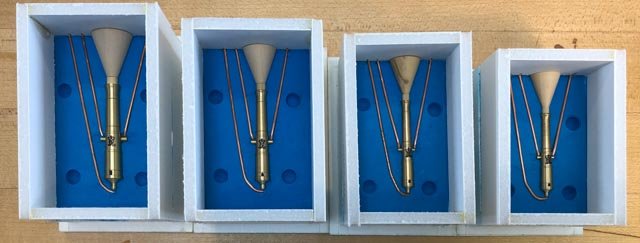
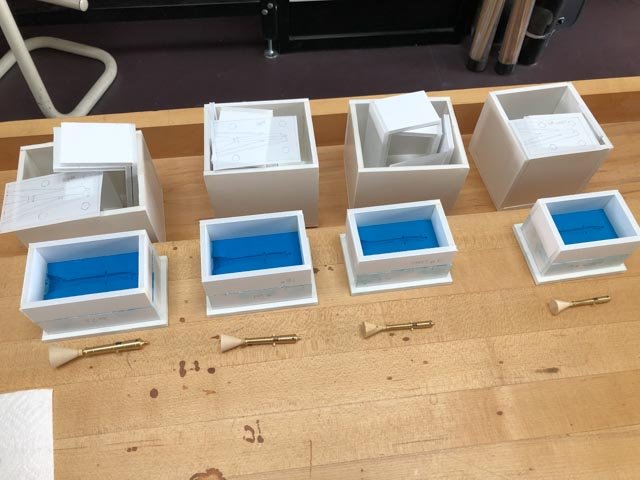
Putting aside the breeching rope for some thinking time, I have moved on to casting the cannon. I am setting the masters in the clay moulds, ready for the rubber mould pour.
Can someone remind me what to use for a release agent between the clay and the rubber mould material? I can't find this anywhere in my notes or sources. Do I just use the release material for rubber to rubber?
Mark
- billocrates, daHeld73, KORTES and 6 others
-
9
-
This seems to be just like the world of CAD in architecture; you start out with what looks like it should be fairly automatic and rational, and end up with hours of tweaking to make it really right. My reality never quite matched the smooth and simple tutorials.
It is fascinating to see you all working out the kinks in these programs for shaping ship hulls.
Mark
-
Reading Steele's Masting and Rigging tables, he identifies certain specific lines as "cable laid". This includes large stays, but also sheets and tacks. So it is not necessarily specific to standing or running rigging. Would "cable laid" in Steele's tables be the S direction as Bob explains so well above?
Mark
-
Hi everyone,
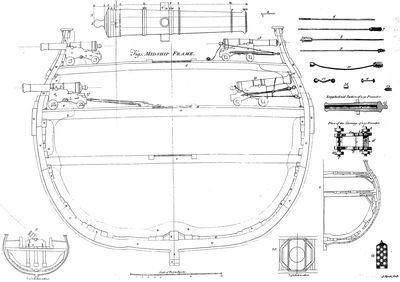
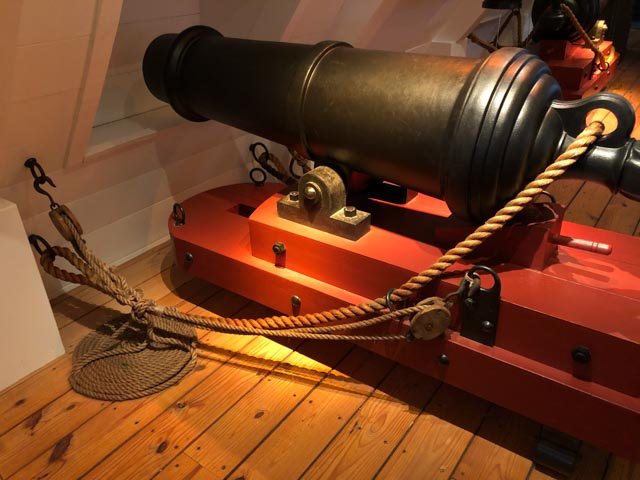
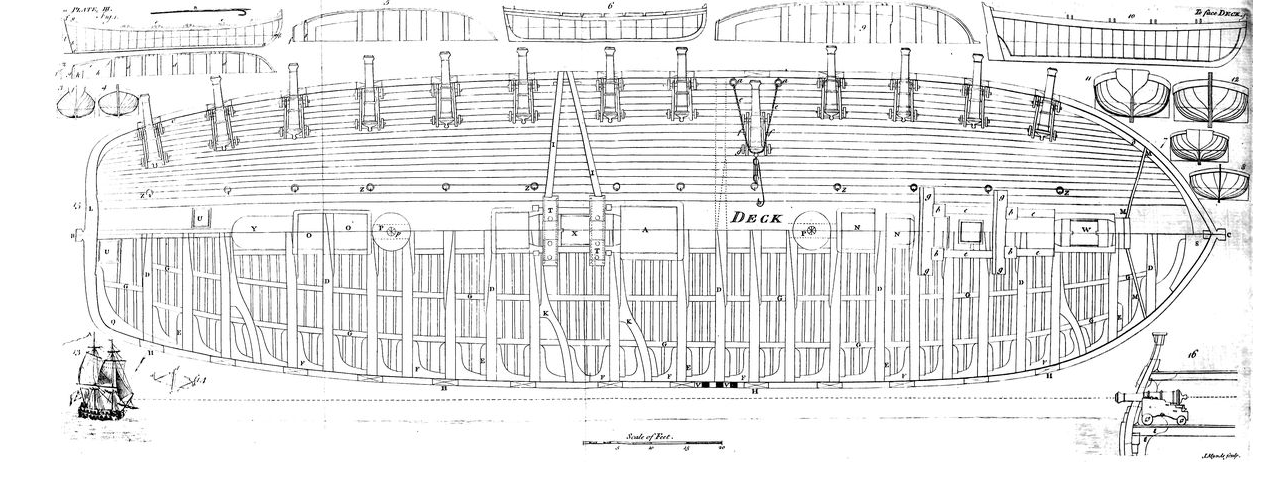
Yes, the upper drawing in Falconer (18) clearly shows the rig without a breech rope. Why the tackle is shown tied to the button I have no idea.
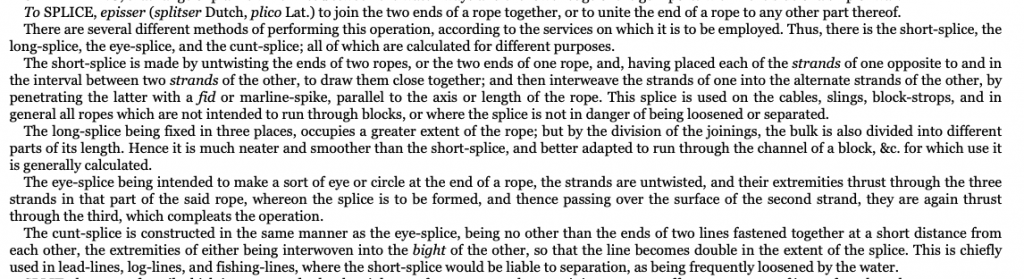
As we all look at (19) more carefully, it is admittedly a little confusing. That rope shown in the breech position is clearly too thin. And yet, it reeves through the ring and eyebolt on the side of the carriage, which is where the breech rope goes. And Falconer's text referring to this drawing says that it shows the breeching rope "where it is employed to lash the cannon when it is housed during the course of a voyage." I have no idea why he shows such a thin line for what he is calling the breech rope. I can't imagine replacing the thick breech rope for a thinner line when the cannon is stored.
When we look at the gundeck plan, his text referring to this says "the use of the breeching, as it checks the recoil of the cannon, is shewn in plate III. DECK." So this shows the gun run inboard for loading, not for storage.
druxey, I think you are right that the breech rope must have been tightened up at one end when the cannon was stored. Falconer's deck drawing shows the rope as too long in its action length to tighten up for its storage length. I also find it interesting that the position when pulled fully inboard does not leave a lot of room for swabbing out the cannon and inserting a new ball. The ramming rod must have been projected out the gunport when in use. I wonder how many fell overboard in the heat of the moment?
So one lesson from this closer inspection is that the drawings themselves might have some inconsistencies in them (like the thickness of the breech rope); and so might we fear that the arrangement of the breech rope at the button is also simplified?
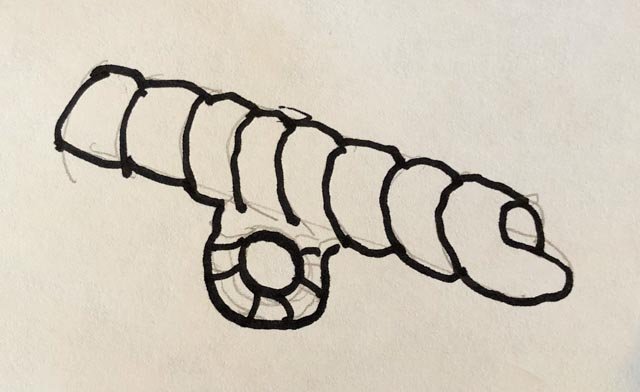
And likewise with the photo of section of the Royal George; might we fear that the breech ropes were replaced much later in a renovation of the model, by someone who did not know any better? How far can we trust our primary sources?
Need that time machine again. Druxey, I hope your steampunk design is well underway!
Mark


-
Thanks, everyone, for continuing ideas about what I had assumed until now was a very straightforward detail.
Gaetan, I like your idea of giving the ship to French, and renaming it Le Bellona, because Boudriot's drawings are a delight to view. But I think the British on this website would object to me giving over a British ship to the French without a battle....😊 Beautiful photos of your old project, by the way.
druxey, I have been thinking again that a cut splice would also be consistent with the drawings we see in my favorite source, Falconer. Falconer does list this splice (he spells it the pre-Bowlderized form below). He does not explicitly refer to the breech rope for this splice; although this is not in itself a reason to reject the idea.
And Kevin, your very interesting drawing could be a cut splice as well, but with some seizing at the joins.
Paul, thanks for going out into the cold to get a picture! It looks to me like this cannon is of the later date, when a cast iron ring was formed into the cannon itself. As we have all struggled here with how this worked earlier, it is very easy to see now what an important invention this was, to cast the ring right into the cannon. Elegant solution to a difficult detail.
Chuck, your detail is consistent with earlier comments druxey made, referencing a "turn around" the cascable. This one makes the most sense, along with the cut splice, as a clean and functional answer to this detail. I just wish the Falconer drawings showed something closer to this, and I would be happier with taking it up. It is an outside possibility that Falconer simplified his drawings at such a small scale, I will admit.
At this point, the ideas most appealing to me are the simple drape over the button with a seizing, as Siggi recently showed (most consistent with the two contemporary sources, the Royal George section and the Falconer drawings), or a cut splice, which is more functional, and could be inferred in the Falconer drawing but not the Royal George section. I may decide this once I start trying to rig the cannon, and see what suggests itself as more appropriate.
Best wishes,
Mark
-
-
Wow, a masterpiece!
Mark
- Jack12477, dvm27, popeye the sailor and 1 other
-
4
-
-
Hi druxey,
Good point about the problem if the breech slipped up over the barrel. After reading Falconer, I will assume it was seized onto the button; and this would have been a good reason why!
Do you have an idea how a grommet would have been formed on the middle of the breech rope? Would the ring of the grommet have legs on either side that are wrapped into the seizing around the breech rope?
Mark
-
Gaetan,
Amazing work. Your tools down in the hold show just how large this project really is!
Mark
- FriedClams and mtaylor
-
2
-
Michael,
I add my congratulations. Astonishing work. We can learn so much from you.
So how, exactly, did you make the circular former for the top? I see a file working on the side but not how you turned a perfect convex circle. Done on the lathe? And what pressed the metal into the former, once you had it in the vise?
Mark
-
Never hurts to read the text...
Falconer does say that the breech rope is fastened to the button, which he calls the pumiglion or pummelion. But he also shows in figure III on the deck view to which this entry refers, that the breech rope simply sits on top of the button, and does not wrap around it.
So, I think at this point I am going with it sitting on top, with a simple seizing or grommet with seizing, to the button. Does anyone have an image of how a grommet would be fastened to the breech rope?
Come to think of it, the drawing of the deck below would also allow of a cut splice, although that is not quite what we see in the previous side view.
Mark


-
Now, on to the breech rope question.
Apologies again to Siggi, druxey, Dan, Alan, Greg, Oldpaperone, Paul, Mark, Alex and Hubac's Historian, for not replying sooner to your all helpful comments. I will never forget my password when traveling again! I hope I will address all of your thoughts in the following:
After looking at the various sources you have provided, it still looks like Falconer is closest to contemporary, unmodified material. I think it is showing the breech rope, even though it is too thin, because it reeves through the ring and eyebolt on the side of the gun carriage, just where many other sources show it. Even the carronnade shown below (from the Mariners Museum at Newport News, Virginia) shows the breech rope reeving through the ring and eyebolt on the side of the carriage.
Now Falconer shows it lying over the top of the button, not wrapped around. This corresponds to the 1756 cross section of the Royal George, which Siggi showed us. At that scale of drawing, I doubt Falconer would have shown a seizing or not; he does not show the details of the fastening at the ring at the side of the ship, either.
So maybe a seizing with a quick few turns around the button and breech rope? Or, as Paul suggests, a grommet seized to the breech rope and then to the button?
Or, what if it were not seized at all? I studied this with a quick sketch below. The danger would be that the breech rope would accidentally slip up over the barrel (B), or down under (C), when the gun was pulled into the firing position and the breech rope was slack, or when it recoiled.
But the sketch shows that neither situation would have been disastrous, because the ring and eyebolt fastening the breech rope to the sides of the carriage would have retained the gun in roughly the same way. A is the desired arrangement, showing how the breech rope pulls down on the button thanks to the side ring. But B does the same thing although the rope is sliding a bit on the top of the barrel. And C catches into the carriage itself. B and C might have allowed a greater distance of recoil, but not dramatically so. The ring on the side ensures that the forces acting along the line of retention is parallel to the deck and the gun recoil, no matter what happens to the breech rope at its inboard end.
Oldpaperone, your drawings are very interesting, showing I think French guns? As I read them, there appears to be an additional hole in the side of the carriage, through which the breech rope is sometimes pulled. I don't believe there is a similar hole in the British carriages. Does anyone have further information about how that hole was used?
Alex, it is interesting that Falconer's upper drawing shows the gun tackles tying up somehow to the button, with the breech rope removed. I confess I don't understand that at all. And a cut splice would be logical here; can we see the lower Falconer drawing as a cut splice? I should probably read through Falconer to see if he says anything about this.
Thanks again, everyone, for your helpful comments and insights!
Mark

-
Twenty hours of traveling yesterday, with flight delays, and a ground blizzard driving 67 miles home from the airport. But a good trip. Here are some highlights before jumping into the Bellona gun question.
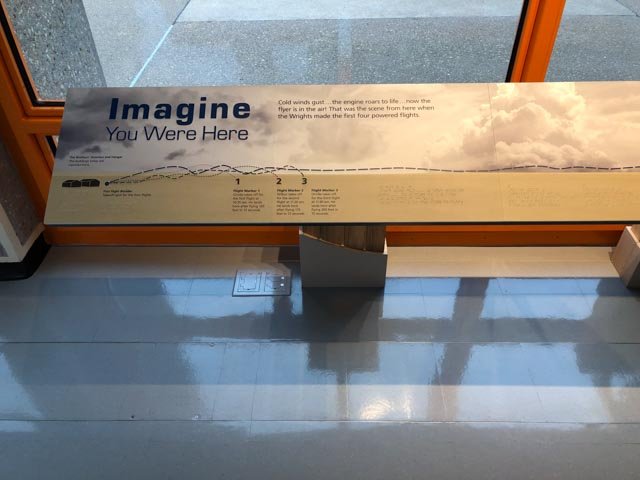
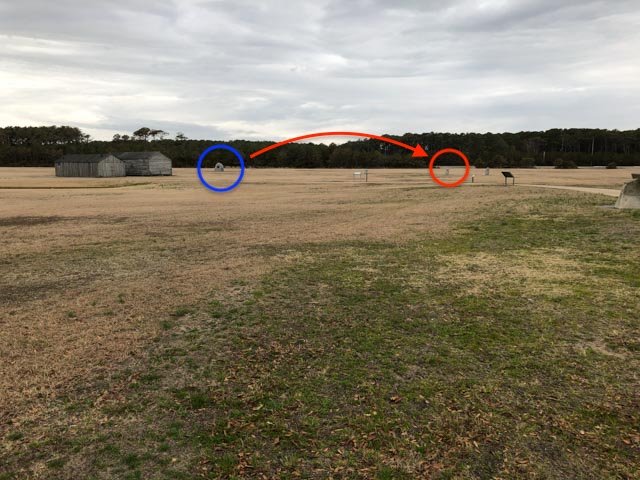
1. The location of the first powered man flight, at the Wright brothers museum at Kitty Hawk, North Carolina. The first flight took off at the blue circle, and landed at the red. Subsequent flights the same day went much further, as the plaque shows. 66 years later, we landed on the moon.
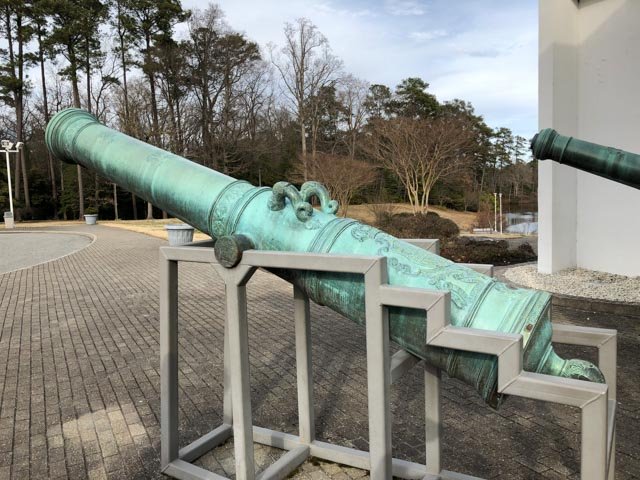
2. A 28# gun from the Mariners Museum at Newport News, Virginia. The gun is mid 18th century Spanish, except for the more elaborate detailing, it has much the same configuration as the British guns of the time. This museum has a large section on the Monitor and Merrimack (or Virginia as renamed by the Confederacy), which engaged in the Battle of Hampton Roads in 1862 nearby. The turret of the Monitor has been recovered, and is in restoration in this museum.
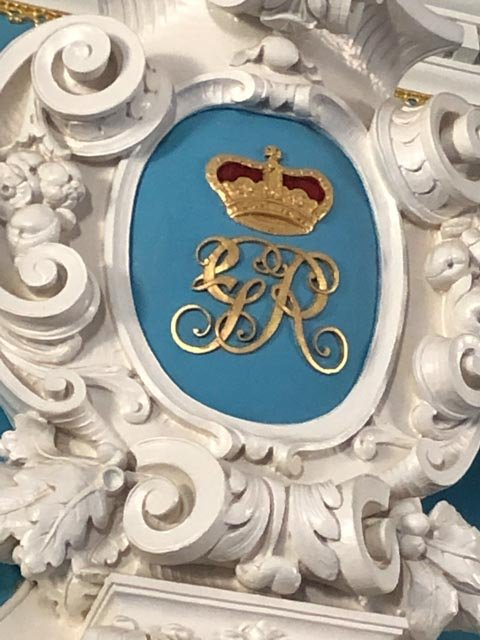
3. The Royal Cypher (George II) above a door at the Governor's Palace at Colonial Williamsburg, Virginia. This was when the British still owned Virginia, obviously.
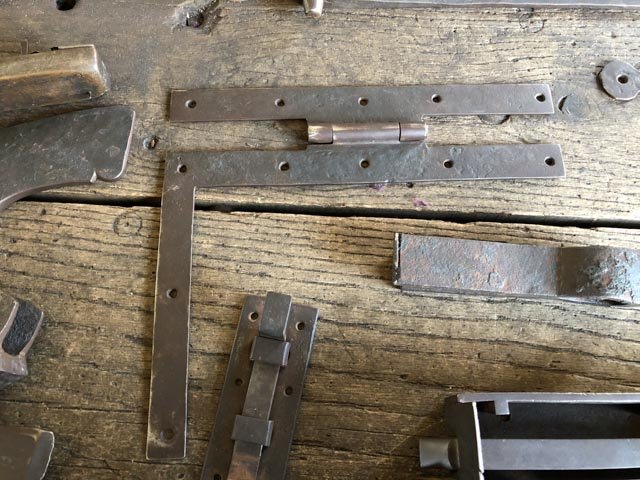
4. A door hinge reproduction made by the apprentices at the blacksmith shop in Colonial Williamsburg. I believe these are the exact same design as those used on British 18th century ship partition doors.
Now on to the Bellona gun question!
Mark
-
Hi everyone,
I apologize for not answering these recent many great comments. We traveled to Virginia and North Carolina this last week, and I forgot to take my password for the website; I could read the comments on my phone, but not post!
I will address these in the morning, and also post a couple of interesting things I saw at the Mariner's Museum in Newport News, as well as at Colonial Williamsburg.
Mark
-
The Falconer drawing is about the right time for the Bellona, and is contemporary. So a good guide here. I see the breech rope lying on top of the button, not wrapping around, and also more permanently seized around the bulwark eyebolt without a hook.
It does seem very hit and miss whether that breech rope would stay in place in the heat of battle, when the gun is run out and the rope is slack. In a recoil, it looks like it could slip up over the top of the barrel, or even slide down and catch the carriage below, allowing an unexpectedly long recoil. Maybe just a light seizing run around the button that the Falconer drawing does not show?
Mark
-
-
-
Hi Mark and Alan, Interesting you would mention the end of the breech rope. I happened to see a secondary source drawing with the rope end forming an eye through the bulwarks eyebolt. That couldn't be right later in the century, because the rope would be permanently connected at both ends, with no way to remove the cannon with the breech rope rove through the cast ring on top of the button. Maybe when the rope just looped around the button this might be possible. But it does seem logical and efficient to have hooks at the ends. This would also alleviate the problems I mentioned earlier of how tightly the loop around the button would have to be seized or not.
Sure wish I could see a drawing!
And Mark, you are so right about why anyone would do a drawing at the time when everyone knew how it worked.
Mark
- mtaylor, paulsutcliffe and daHeld73
-
3


Soleil Royal by Hubac's Historian - Heller - An Extensive Modification and Partial Scratch-Build
in - Kit build logs for subjects built from 1501 - 1750
Posted
Hi Marc
Many apologies, this is the first I came across your build site. I will be looking in regularly now!
Mark