HOLIDAY DONATION DRIVE - SUPPORT MSW - DO YOUR PART TO KEEP THIS GREAT FORUM GOING! (Only 20 donations so far - C'mon guys!)
×


dvm27
-
Posts
2,457 -
Joined
-
Last visited
Content Type
Profiles
Forums
Gallery
Events
Everything posted by dvm27
-
The ratio is one part blackening solution to five to seven parts water (precision not required here). I keep my Sparex in the crock pot, covered, for months on end and reuse as needed. When finished it can be neutralized with baking soda and flushed. Then just rinse out the crock pot. Never leave your crock pot unattended for a day or so or you will be purchasing a new one!
-
You just need to define your goals Bob. I'm a perfectionist so it may take a decade to finish a project. For me, as Wefalck states "the path is the goal". Others may care less about the overall quality and wish to build many more models in their lifetime. The problem comes when one is both a perfectionist and also wishes to build many models in their life. I'm afraid only a few modelers can pull that off!
-
Here's the page in archjofo's log https://modelshipworld.com/topic/1029-la-créole-1827-by-archjofo-scale-148-french-corvette/page/52/ It really is a treasure and someone should index it.
-
Make sure to check out his Jefferson model under construction. It's perfection in building!
-
I recently contacted Glen Grieco, professional ship model builder for Texas A&M University https://nautarch.tamu.edu/model/ regarding his choice of materials. If the splice or knot cannot be secured by the rope itself he uses shellac exclusively to adhere them. He also uses it to seal the hull before painting or a natural finish. He builds museum quality models for museums with specific criteria for materials so that's good enough for me!
-
Can you provide a link for those needles Justin?
-
 Simple, Sir. Just click on the link at the top of the page for the NRG Online Store.
 -
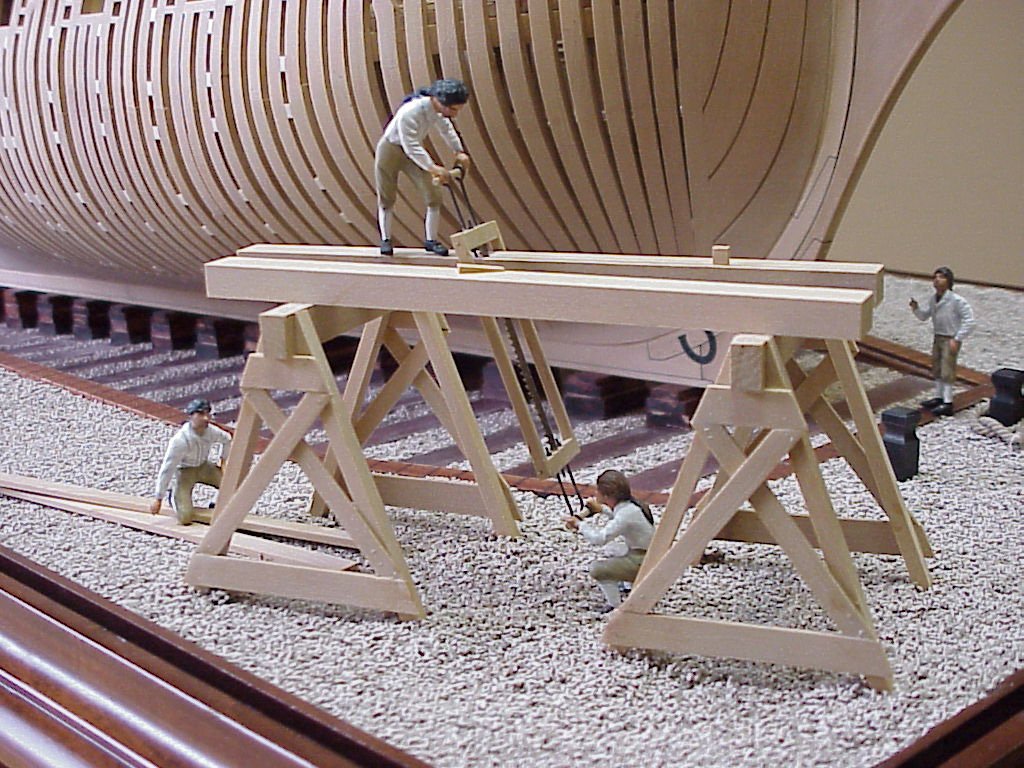
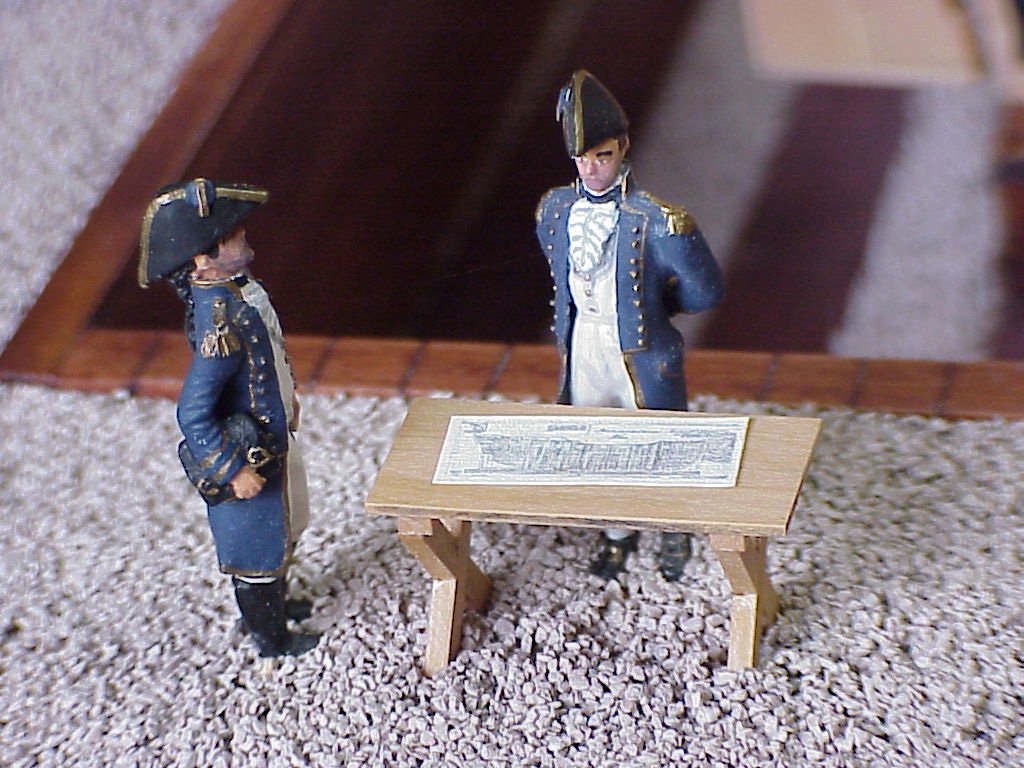
That's certainly true Maury. I commissioned a few figures long ago from Dynamic Dioramas in 1:48 scale for my dockyard model. I think they add nicely to the final display. The sawyers are an homage to Harold Hahn's diorama in the Mariners Museum.
- 23 replies
-
- 10
-

-
Very nice, Tom. At some point in the future I can envision having these printed on 3D color printers. I have seen examples in miniaturemuseums such as Gulliver's gate in New York and they are very realistic. Price, though, is a bit high for now but I'll bet people would be willing to pay for a realistic period crew.
-
HMS FLY by cafmodel - 1/48
dvm27 replied to cafmodel's topic in - Build logs for subjects built 1751 - 1800
If I’m not mistaken that is a correctly tabled joint on the rudder. That’s a level of realism that I’ve not seen before on a model. Well done! -
I've seen the construction of this lovely model under development by David Antscherl. You've made an excellent choice for a first wooden model. Hats of to Model Shipways for having a Master Modeler design an entry level kit!
- 30 replies
-
- 6
-
-
- grand banks dory
- model shipways
- (and 1 more)
-
Sherline makes an 8 axis mill. Wish it was available when I purchased mine a decade ago!
- 589 replies
-
- 2
-
-
- le gros ventre
- cargo
- (and 1 more)
-
Thanks Derek! Those video tours are indeed spectacular Gaetan - Our plans are available now at a very reasonable price from SeaWatch books, publisher of the Swan series. I discovered that the 3D files were way too large to copy and distribute on a thumb drive. However, they are easily accessible from Google Drive. For those ordering the files once payment is received (PayPal to dvm27@comcast.net) I will send a link to access the files.
-
The tapered bowsprit with its hardware looks spectacular, Keith. I also used a cupped hand for taper turning but I wear a cheap workman’s glove from Home Depot. Worn through a couple but no longer burn my hand!
-
HMS FLY by cafmodel - 1/48
dvm27 replied to cafmodel's topic in - Build logs for subjects built 1751 - 1800
Love to see how the stern elements fit together with the sternpost and inner post tapers. -
Echo by davec - FINISHED - cross-section
dvm27 replied to davec's topic in - Build logs for subjects built 1751 - 1800
That’s a beautiful cross section Dave. The wood palette you’ve chosen is very pleasing. -
Thanks for the master class in machining. May I inquire as to your source for the very smallest end mills you use? I'm curious what the smallest size end mill may be used on brass without breaking or severe deflection.
-
Don't forget to check out the beautiful Fair American model at the USNA which served as the basis for the Model Shipways version as well as Clay Feldman's book on scratch building the FA.
-
Well thank you Kevin but all the credit goes to Denis (Herask). I never dreamed that he could do what he did when I contacted him years ago! Thanks all for your order. I am overwhelmed by the response. It will take me a couple of weeks to produce all these thumb drives but I will get them out as soon as I can.
- 18 replies
-
- 11
-
-
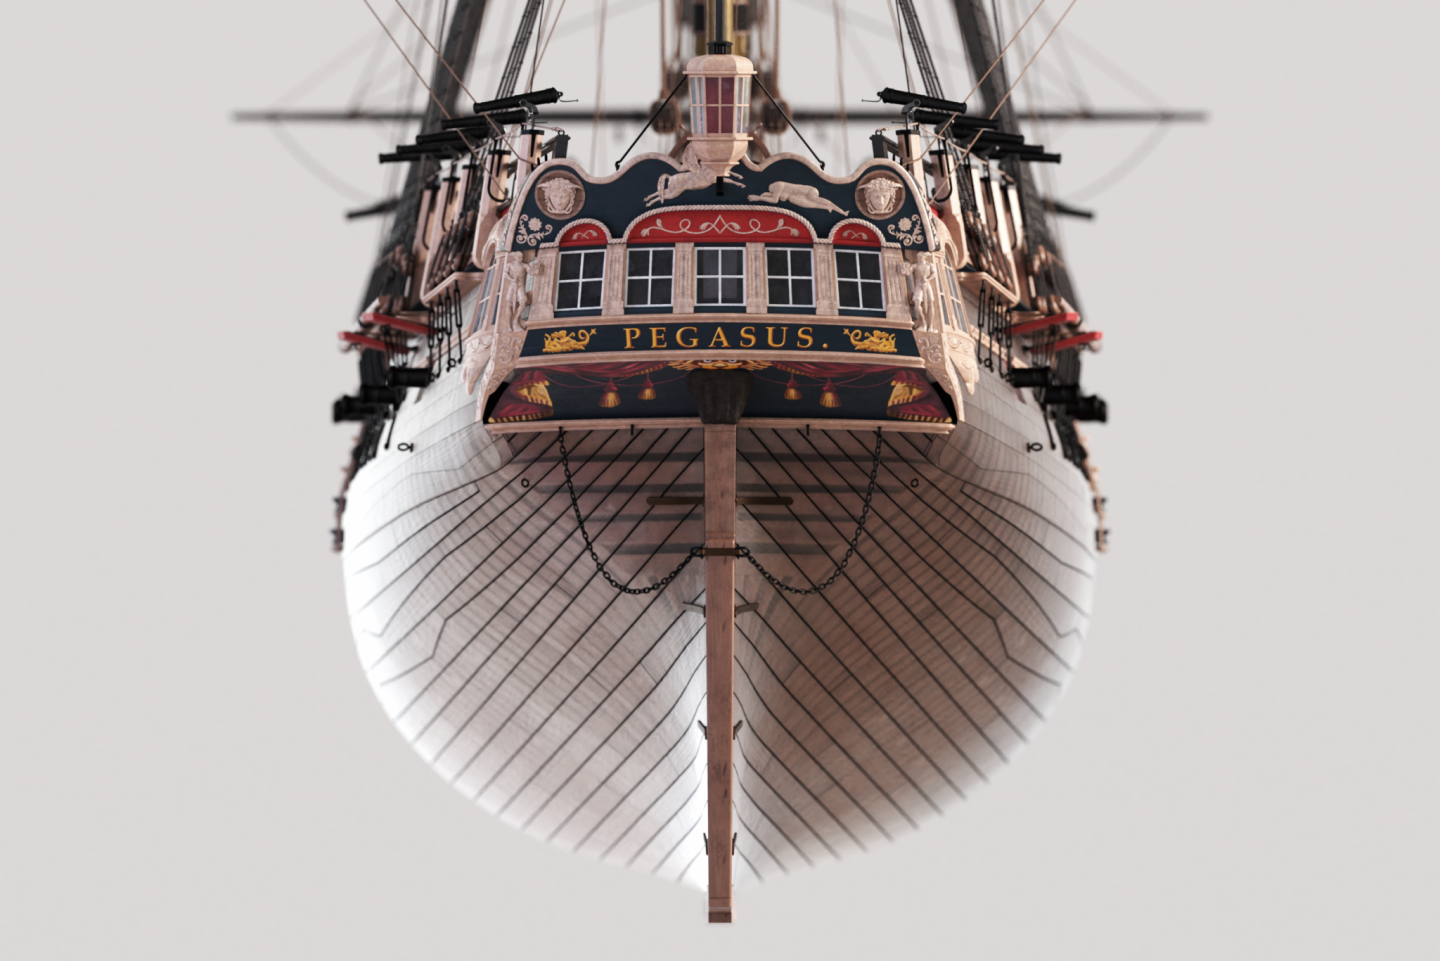
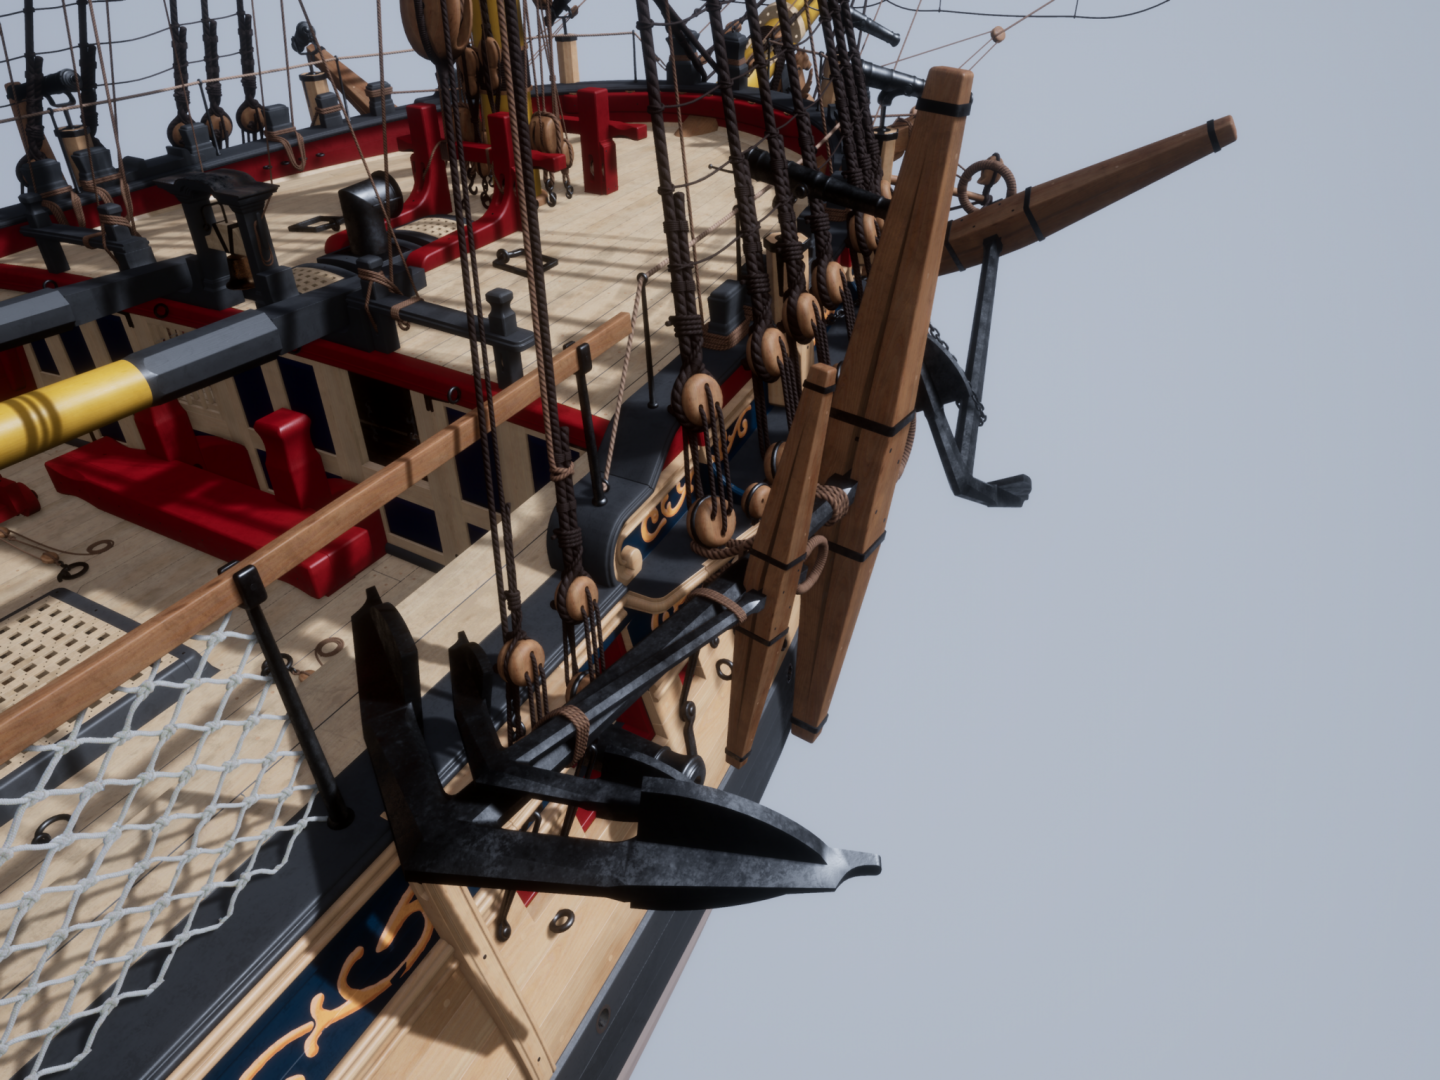
Correct. It all starts with the plans. SeaWatch Books now carries the plans we used to sell. They include the shear, body and half breath along with all the lofted frames. This will build you a generic Swan class model. There are differences between ships in the class and the NMM plans show these differences. Theoretically if you wanted to build Pegasus you get by with just the SeaWatch plans and the books. But the new 3D product will make the build 1000 times easier. More information on the build and wood required is available on our website www.admiraltymodels.com. You van email me at dvm27@comcast.net if you have any other questions. Greg
-
After many years in the making, our Swan class 3D model developed by Denis based on The Fully Framed Model series by David Antscherl and Greg Herbert is finally available. Provided on a thumb drive, we are now able to provide 13 GB of amazing high resolution 3D renderings including the following: Every chapter of Volumes 1-4, The Fully Framed Model, HMN Swan Class Sloops 1767-1780 is covered in meticulous detail, covering every aspect of the build. Also included: 3D video tours of the fully framed model and the completed, rigged model (including interior tours) Superimposed framing on completed model Video tutorial of Dennis's frame making techniques (just a taste - not a full instructional as that would be a CD in itself) If you are building or contemplating building a fully framed model or are just interested in the way a in a British navy vessel, c. 1770, was actually constructed then you will enjoy this product. If you enjoy The Anatomy of a Ship series but wish more detail was included this will be of great interest to you. To my knowledge this is the most complete study of a contemporary ship to date. The volume of work is too large to publish in a book thus the renderings are provided on a thumb drive. Cost of the entire compilation is $48 including postage US. Overseas customers $53. Payment via Paypal. Please direct all enquiries to dvm27@comcast.net.

- 18 replies
-
- 24
-
-
Glazing
dvm27 replied to Kurt Johnson's topic in Discussion for a Ship's Deck Furniture, Guns, boats and other Fittings
I have never had luck cutting these cover slips to shape to shape. Even took them to a stained glass shop and frustrated the heck out of them. Mica, on the other hand is quite easy to work with and is easily cut. -
Bravo, Ben! Just one of the many ways to make your version unique.
- 399 replies
-
- 5
-
-
- winchelsea
- Syren Ship Model Company
- (and 1 more)
-
Thin hull planking
dvm27 replied to Gerarddm's topic in Building, Framing, Planking and plating a ships hull and deck
Some of the Russian ship model "Masters" use boxwood and ebony veneer for their 1:48 models. But they use ply interior construction so have a very broad surface for plank adhesion.