dvm27
-
Posts
2,468 -
Joined
-
Last visited
Content Type
Profiles
Forums
Gallery
Events
Everything posted by dvm27
-
 Nice job on those steps, Kevin. You may find it convenient to use built up card patterns of the area in order to get the actual shape to transfer to the wooden blank. It's very simple and wastes no wood. I just use pieces of index card stock glued together progressively with white glue. You'll find this method particularly useful later on when determining bulkhead shapes as they meet the hull. In case you're wondering, the pencil lines are placed to help position them in the mill vice. Each line is parallel to the surface that needs to be cut and would line up with the top of the mill vice jaws.
-
Nice work on those complicated outer counter timbers. If you nailed them on the first attempt extra kudos!
- 589 replies
-
- 3
-

-
- le gros ventre
- cargo
- (and 1 more)
-
Lists lining cannonports
dvm27 replied to TomJonas's topic in Building, Framing, Planking and plating a ships hull and deck
Perhaps he is referring to port stops? -
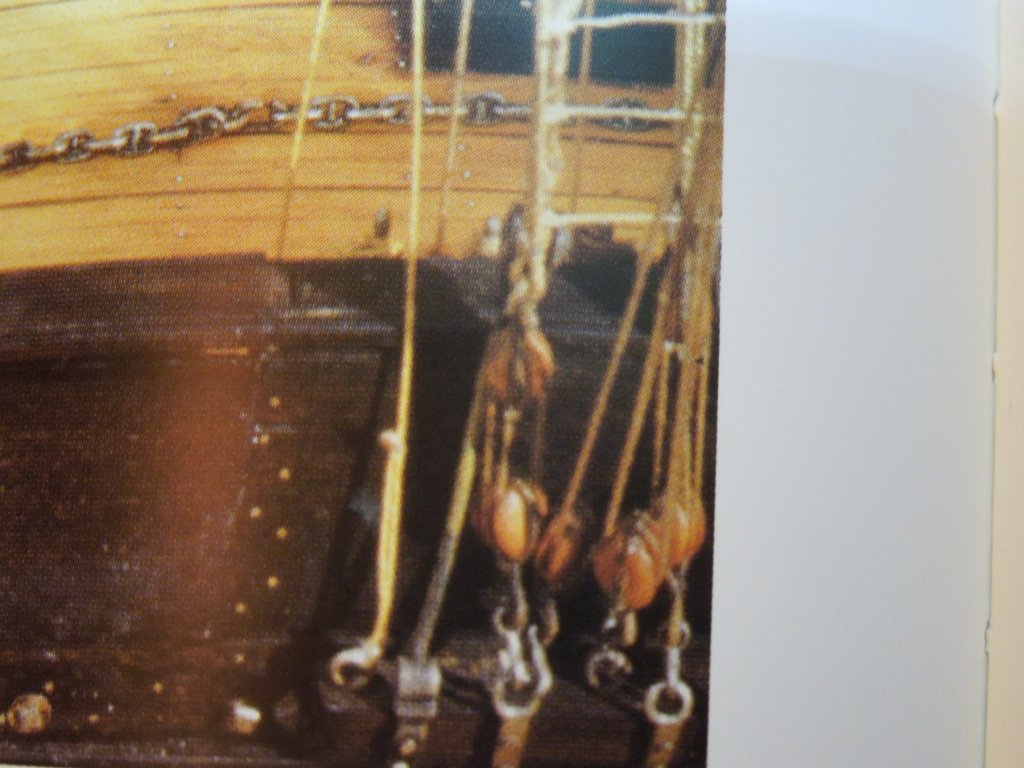
I studied all the photos under high magnification. There are many lines converging on the channels but I'm pretty sure each of the shroud lines ends up on a 4-5 ft. tall iron stave. Not sure how the shroud is attached up top but the stave appears to terminate within a shackle on the channel. This shackle, in turn, pierces the channel and ends up as a link which is bolted to the hull. At lease that's my impression from studying the photos. I am not well versed in French ship building though.
-
I do have this lovely book. It has beautiful photos of most details of the model but, unfortunately, not this area. However, in the attached photo blown up it does appear to match DJ's illustration. Other photos show a similar arrangement. I cannot discern any shrouds ending in the usual deadeye arrangement. They appear to end in some sort of long iron stave.
-
Well, as you're finding out, building a plank of frame model can be...frustrating! But the only strake of significance is #15 where the deck beams seat. Your plan of correction is a good one. I promise you that you will never even see those other strakes after the lower deck is installed.
-
Sopwith Camel F.1 - Model Airways - 1/16 Scale (3/4" = 1')
dvm27 replied to DocBlake's topic in Non-ship/categorised builds
Look forward to your build, Doc. I'm also an aviation enthusiast and my favorite TV show is Airplane Disasters (go figure). I'm sure you're familiar with Tom's YouTube videos on building airplane models like yours but for others check this one out. It's ingenious. -
Geez, Ed, has it really been six years? Is it just me or does time seem to speed up as you get older!? It's been a wonderful log, full of innovative techniques and building excellence. Many of us have dreamed of taking on a clipper ship but few have the talent, skill and patience required for such a complex project. Bravo!
- 3,618 replies
-
- 4
-
-
- young america
- clipper
- (and 1 more)
-
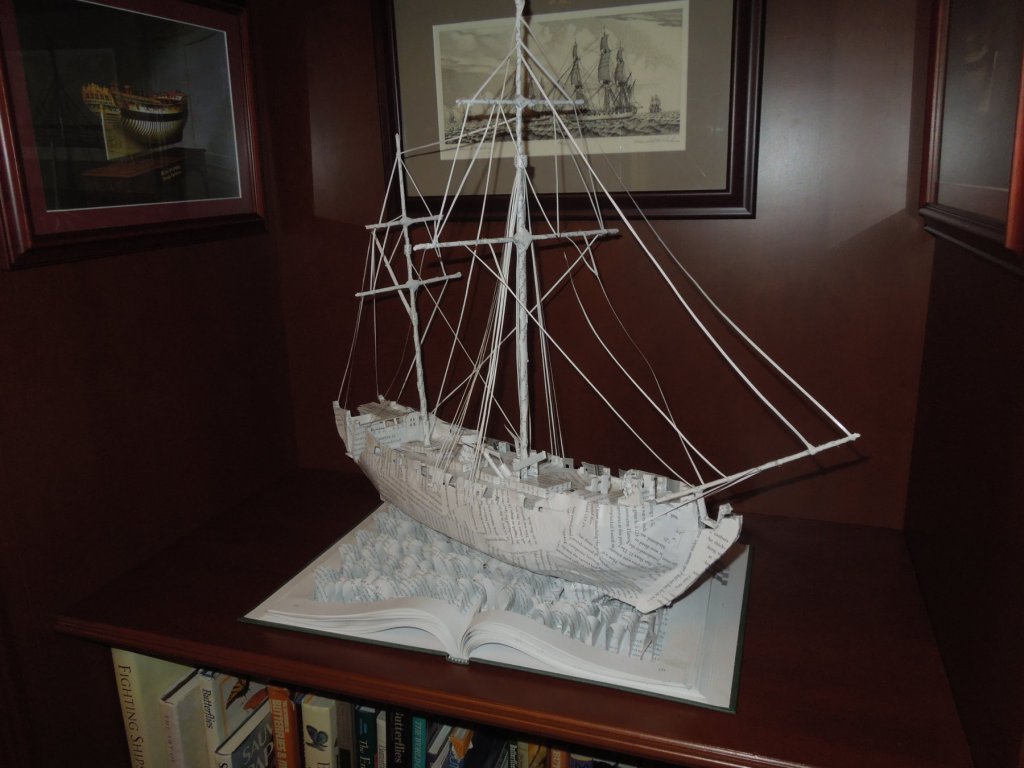
So what do you get PopPop on his 65th birthday when he already has everything he needs for his hobby? A paper on bulkhead model made from the pages of his own book. They even bought their own copy for the artist to make the model from the plans. If you look closely it has all the details of my model. Definitely one of the coolest gifts I've ever received!
- 345 replies
-
- 42
-
-
How did I know that several months ago when you had no idea how to cast that the results would be a magnificent set of cannons? Well done, Mark!
-
Admiralty model query
dvm27 replied to iMack's topic in Building, Framing, Planking and plating a ships hull and deck
Don't know if you have Simon Stevens new book Navy Board Ship Models Mark but his description of the frame making process on these models echos Bob's thoughts on their construction: "Navy Board models followed a construction sequence that had a noticable difference from that used on full-sized ships. Each complete frame was cut out from planks of wood, probably with a frame saw, rather than made up of separate floor timber, futtocks and top timbers. The hull would then be constructed of a run of complete frames glued together" Following this, a section of every alternate frame or frame pair was removed with a chisel. These chisel marks are easily viewed with magnification. In actuality, building a Navy Board ship model this way would be very quick and easy. On would just need to lay out the entire frame pattern over a suitably dimensioned plank of wood, cut out the frame in one piece and move onto to the next. All the frames could be temporarily tacked together, faired and the lines of floor heads marked out. Disassemble, remove alternate frame sections and reassemble. The model below was actually made of solid plywood frames except for the visible frames on each end.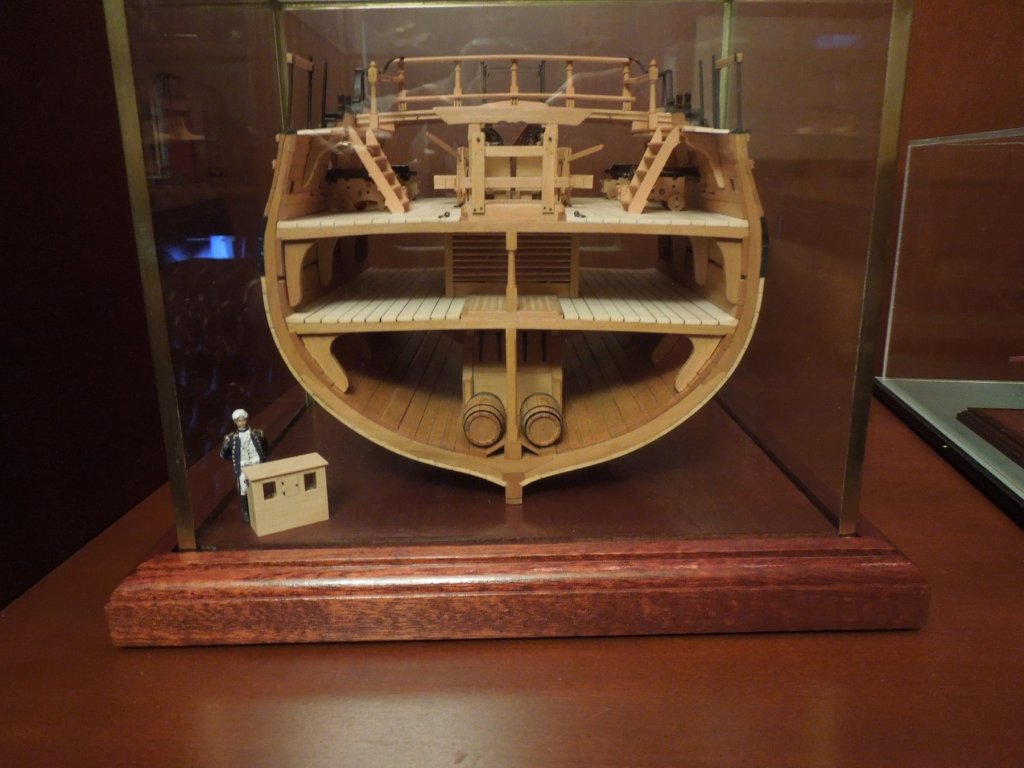
-
Your work is an inspiration for those of us who have little patience for rigging. When in port if the sails were unbent would these lines have been handled in a similar manner? There's always the guestion of how to handle the running rigging when sails are not included on the model.
- 3,618 replies
-
- 3
-
-
- young america
- clipper
- (and 1 more)
-
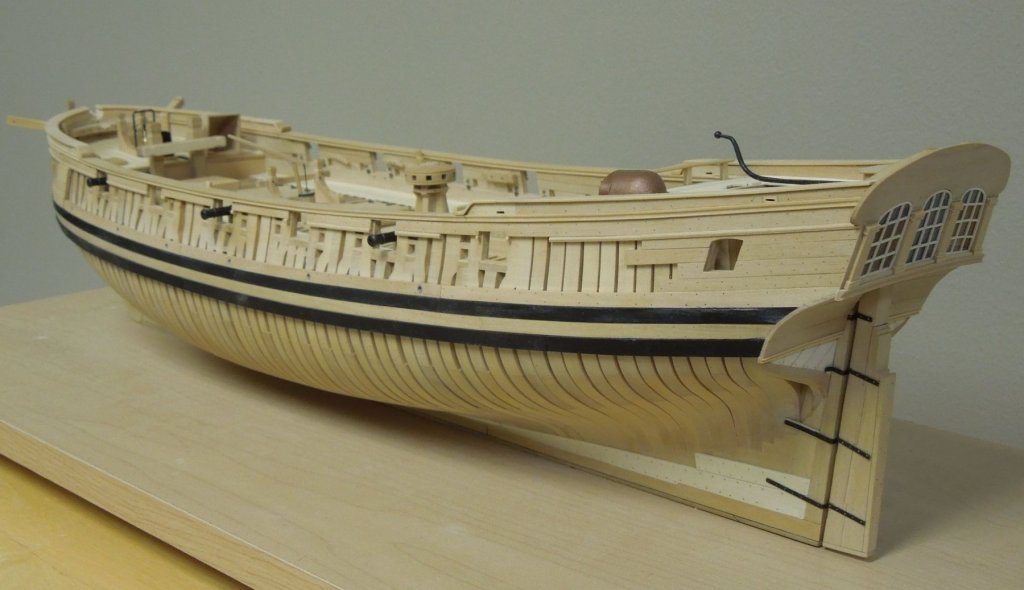
That bow view looks spot on Ben. Well done! That aft second strake above the wales looks like it was a doozie to make.
-
Sweet work, Chuck! Those laser cut window patterns do a great job in establishing a nice smooth run of stern lights. I'm intrigued by the tafferel with side lights lying on the base. Was this an earlier attempt to frame the area or is it to be applied over the work you just completed?
- 1,784 replies
-
- 5
-
-
- winchelsea
- Syren Ship Model Company
- (and 1 more)
-
Nicely framed, Chuck. I look forward to your usual excellent planking job. Have you ever considered a varnished finish like so many Navy Board models had? The finish holds up even after centuries.
- 1,784 replies
-
- 4
-
-
- winchelsea
- Syren Ship Model Company
- (and 1 more)
-
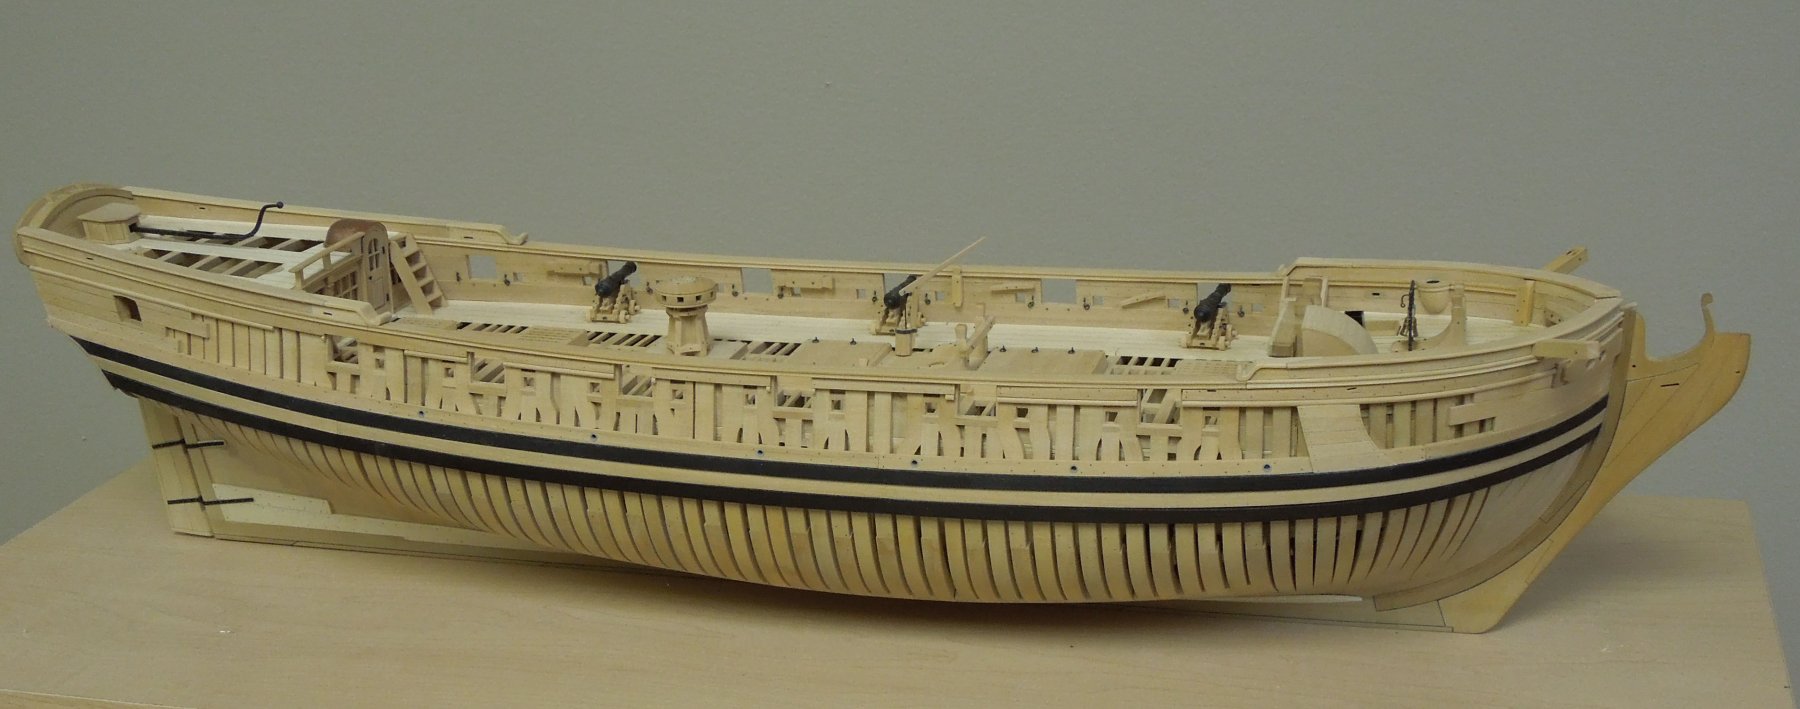
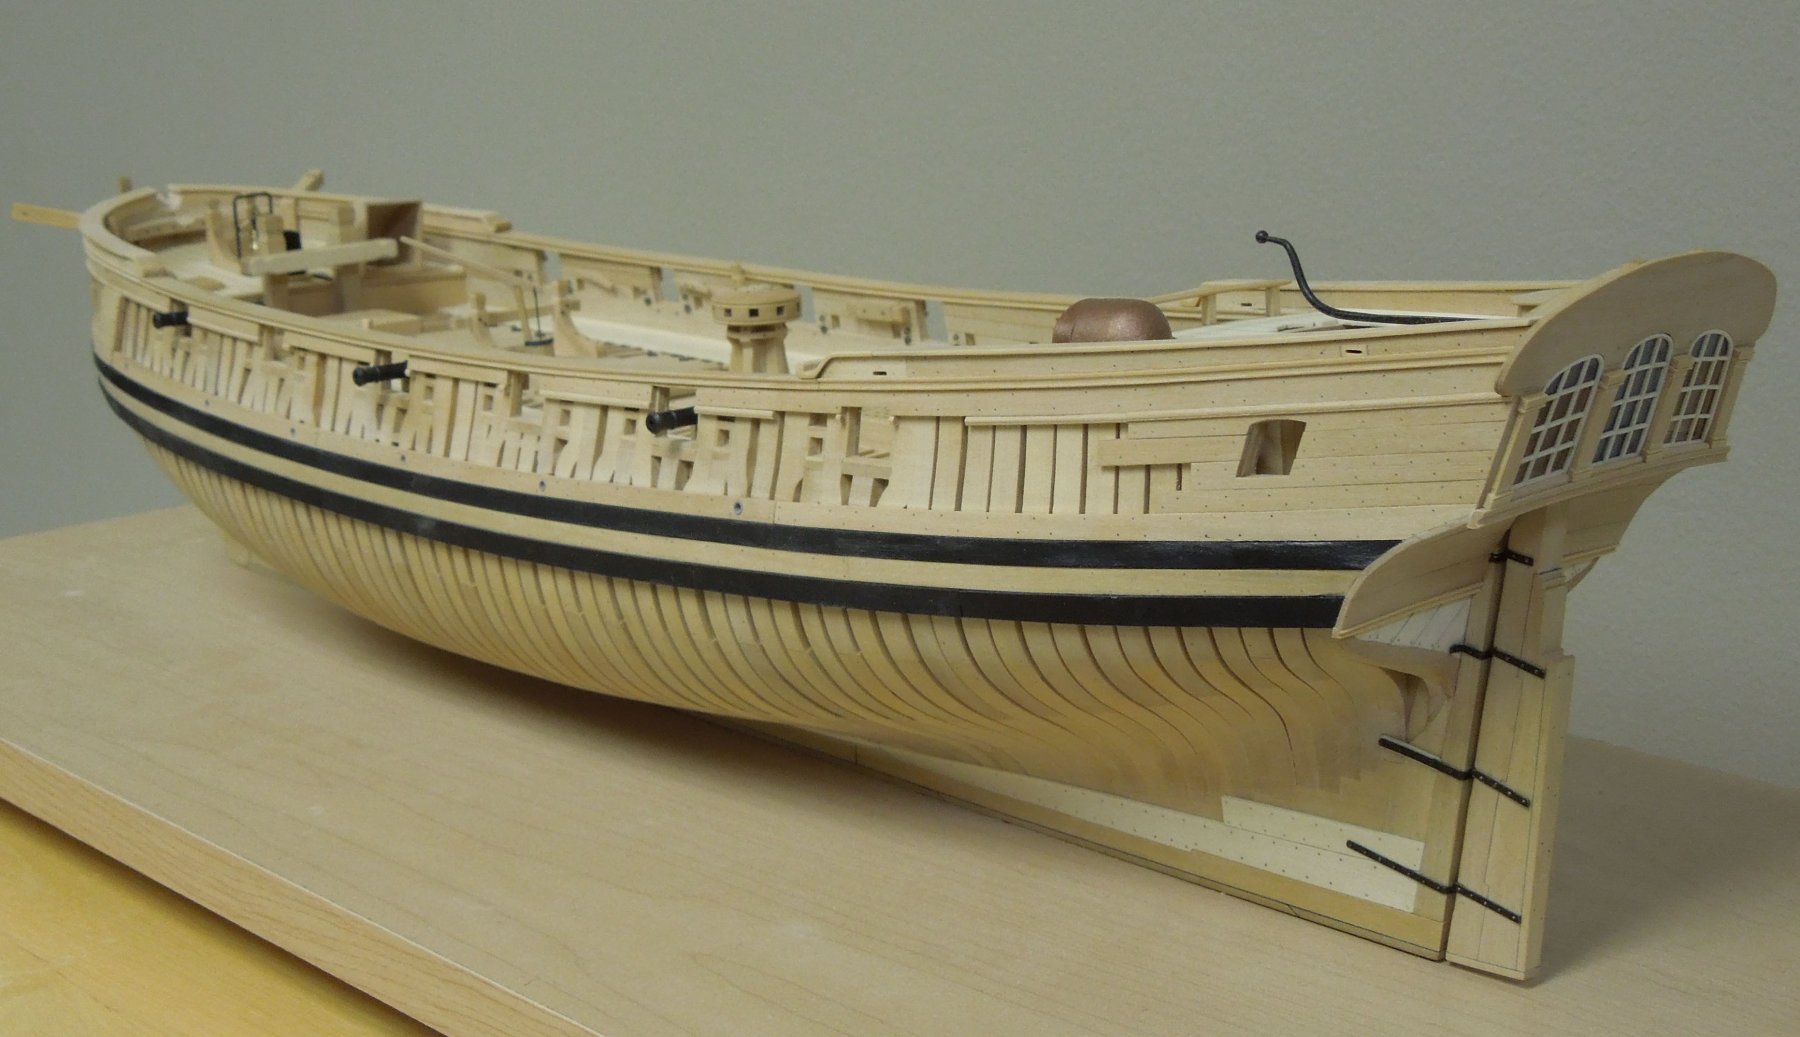
Thanks for the kind words. I am just about ready to turn the model over to David, who will provide and extensively document the carvings on Speedwell. We are toying with the idea of making castings of the carvings available so that builders of the model who lack this skill (like me) may have another option. While David is handling that I will be preparing masts and spars and will commence rigging once the carvings are finished. There is just enough rigging on her to be interesting without being boringly repetitive (no disrespect, Ed). A 2019 publication date may be a tad optimistic as my job leaves little time fo ship model making these days but here are a couple of updated photos. She has a sweet hull doesn't she?


- 25 replies
-
- 20
-
-
If I'm not mistaken the Bellona model depicts it in it's launching cradle. You've a lovely model Kevin and quite frankly I think it would be best displayed on pedestals or cradle within a simple case.
-
The best looking cannons I've seen are made by CNC, at a very high rate. Can't add the touch hole details or monogram but the barrels are perfect with incredibly delicate astragals and reinforcing rings.
-
Awesome work, Mark. The only thing that would make it better is if you were to take higher resolution photos so that we might better enjoy all the fine details you incorporate.
-
Very nice video, Kevin. If you flood the threaded hole to receive the bolt with super glue it hardens it and makes it less likely to be stripped after repeated use.
-
Just be aware that the blackened brass colored surface may not stand up to being hammered in place. But if you pre-drill the hole and gently push the pin into place you may preserve the finish. Those track fixing pins are designed to be nailed in so their surface finish may stand up to hammering.
-
Great video, Kevin. Two suggestions to improve my version. Replace those bolts with threaded knurled thumb screws and place brass washers where the bolts enter the jig as the constant tightening and loosening of the screws can deform the wood. It'll speed up the process considerably.
-
Spectacular work as always Amalio. Your avatar figurehead is gorgeous. Any chance you could provide us with a larger photograph of her?
-
Very nice job, Alan. That's exactly how I did it. But I agree that checking Kevins Thorn videos is a good idea as he ofter takes a different approach than I did with great results.