
HOLIDAY DONATION DRIVE - SUPPORT MSW - DO YOUR PART TO KEEP THIS GREAT FORUM GOING! (Only 20 donations so far - C'mon guys!)
×


dvm27
-
Posts
2,457 -
Joined
-
Last visited
Content Type
Profiles
Forums
Gallery
Events
Everything posted by dvm27
-
 We used to sell the plans on Mylar but now they are sold by Sea Watch Books and are printed on paper. You could have the paper deck plan copied onto Mylar at a print shop but as Druxey noted make sure they match perfectly.
 -
I did the same with my Swan class model, Ben. Looks like your Mylar pattern fit better than mine. Well done! Tony, you can make little pin pricks through the Mylar to transfer marks. It's very accurate. I also made deep pin pricks at the fore end of the pattern as registration marks to relocate the pattern each time it was removed.
-
My only problem with earlier CNC carvings and moldings was that they looked like they were done on a machine. You have achieved a level of proficiency that makes your work look very natural, like they could have been made by a talented sculptor. Who could have a problem with that?
- 589 replies
-
- 7
-

-
- le gros ventre
- cargo
- (and 1 more)
-
HMS Winchelsea (1764) 32 gun frigate GROUP PROJECT INFO
dvm27 replied to Chuck's topic in Group Projects on Model Ship World
I did that on my Hannah model Jim and the result was too much black (I assume you're talking about for deck planking). Perhaps a grayish black would work better. I think the pencil edge blackening technique is more subtle and doesn't over power the surrounding work. Definitely experiment first and don't forget the finish. You don't want the black paint to run if applying a finish over it.- 58 replies
-
- 10
-
-
Yes, Volume Two has four sheets of plans (masting and sparring, standing rigging, running rigging square yards and running rigging fore and aft gaffs). All line sizes and falls are illustrated.
-
It is indeed, Carlos. Just received my copy and am very pleased with the final product. Hopefully, those looking for a smaller project but at a scale that is accessible for much detailing (1:48) will give it a try. With the two volume Speedwell book and plans you can't ask for a better set of instructions. Now maybe some enterprising third party will offer a set of carvings for the project like what happens in the model aircraft industry with photo etched upgrades.
-
That looks terrific, Toni. Looks like you've mastered those tricky gains fore and aft.
-
I was also somewhat confused by that at first Karl. But since then I have noted a red muzzle and plug on other Navy Board models. Not sure if it a modeler's convention or just decorative but the practice is contemporary to other models of this period.
-
All I know is that my cable bill with Xfinity is over $300/month but I can't watch a damn Apple TV movie because of some digital buffoonery . Watching a WW2 movie with Tom Hanks on a computer screen just seems wrong. It was made for a 60" screen (at least)!
-
Couldn't agree more Allan. Been using them for a couple of years and haven't had to sharpen yet. Don't want to mess up that perfect finish he honed!
-
I haven't seen the Triton cross section framing plans but if all the floors, futtocks and toptimbers are the same thickness this is a modelers convention to make the construction easier. Her timbers would have diminished in thickness as well. We chose a section of Echo that had only one cast toptimber. It's not that difficult to do. Plans and build instructions are all free on our Admiralty Models build site.
- 221 replies
-
- 2
-
-
- queen anne barge
- Syren Ship Model Company
- (and 1 more)
-
Might I suggest checking out this series on YouTube https://www.youtube.com/c/MiniMachining/playlists. There are complete videos of setting up and using Sherline mills and lathes. In addition check out the videos by Blondi Hacks https://www.youtube.com/channel/UC7Jf7t6BL4e74O53dL6arSw. She's a wonderful teacher and has comprehensive videos on using the mill and lathe. Between those two you should be able to become comfortable with both. Above all remember that these tools are designed to machine metal and are not toys. They do a great job on wood but be sure to observe all safety operations and use eye protection.
- 3,618 replies
-
- 4
-
-
- young america
- clipper
- (and 1 more)
-
Very nice job on that Constitution, Bill. I hope you encase it so your grandkids can continue to enjoy it. Agree with you regarding those clunky plastic sails. I like the idea of furled sails on your Cutty Sark model but they can be hard to do convincingly.
-
What a beautiful model Chris! I'll bet it's going to be very popular. Just curious, do you do your on PE in house? It's very well done.
-
Blackening brass advice
dvm27 replied to Bossman's topic in Metal Work, Soldering and Metal Fittings
Those look great. If you're wanting to go a step further you can use a felt or flannel polishing pad attached to your Dremel or regular drill at low speed. It gets into all the nooks and crannies and creates a perfect uniform polished finish. Depends on your preference. -
I'd be surprised if the full sized ships were this perfect. Your attention to detail is inspiring - as much woodworking as it is art.
-
Really nice job Jamie! I think I tackled that model 50 years ago with very poor success. Those pine hulls needed a lot of work. Hope you're putting it in a case.
- 41 replies
-
- 1
-
-
- thermopylae
- scientific models
- (and 3 more)
-
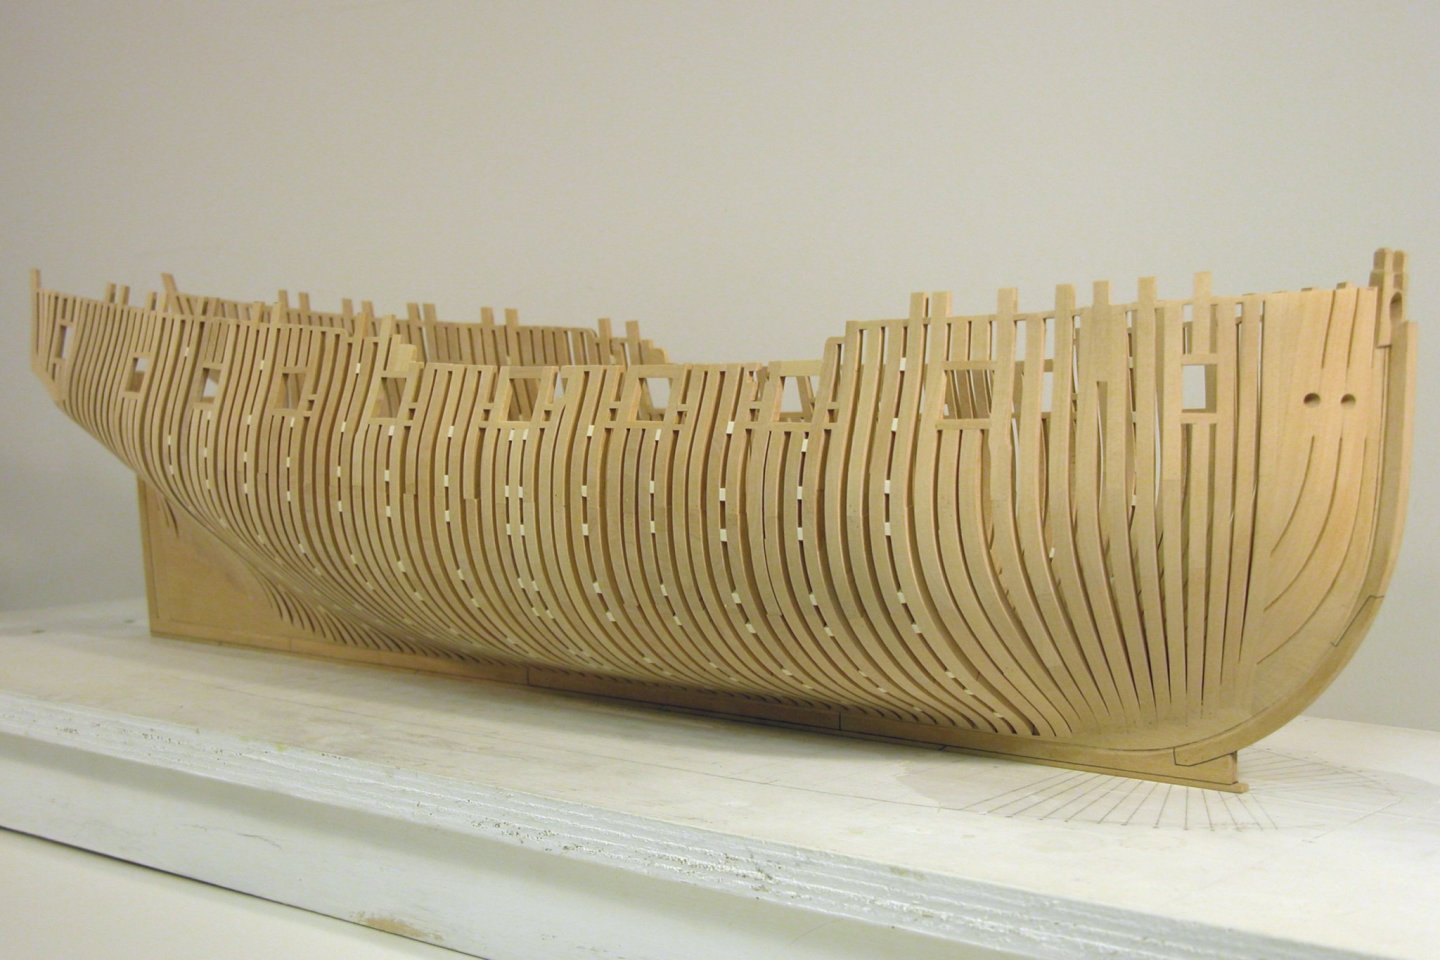
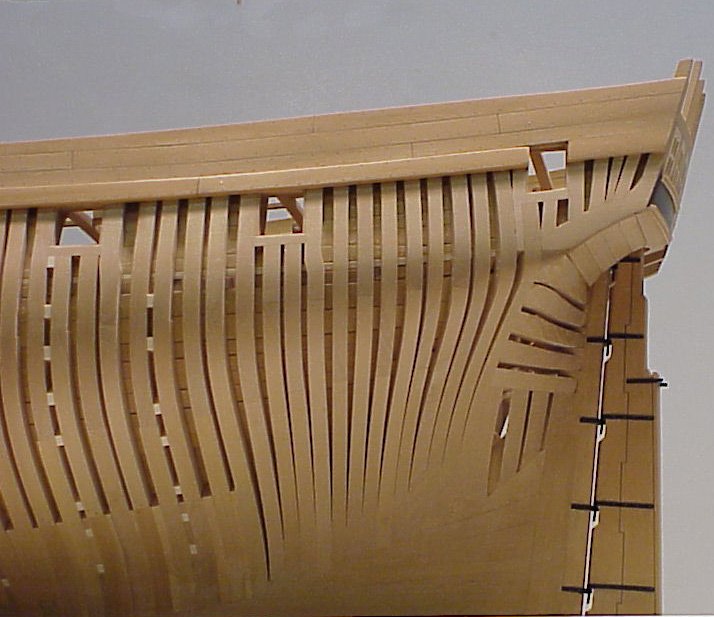
Have you laid out the station lines on your building board? On the sheer plan each floor/lower futtock is inked in. Make sure all these lines are transferred to the building board. Only at each station line only will you be adding the fillers. They may vary in width as the sided dimension of the futtocks also varies. Sided means seen from the side (or lateral view in your medical parlance). The spacers are generally 3" sided at the keel and narrower higher up. There is one triple frame at the dead flat. So in the photo below all the spacers are at the station lines and are easily seen as they are holly (in contrast to the boxwood frames). In addition, there are fillers between the floors/first futtocks). It may be convenient to fit them before raising the frames. I did no do this but it would have been easier. Feel free to PM me if this is not clear.
- 257 replies
-
- 10
-
-
- pegasus
- Swan-class
- (and 1 more)
-
Swan-Class Sloop by garyb - 1:48
dvm27 replied to garyb's topic in - Build logs for subjects built 1751 - 1800
By all means Henry, post a build log. As well, study the build videos posted by Kevin. They are very detailed and he happily shows his mistakes and how to correct them. In addition check out the many Swan class logs. Amongst them are Dan, Toni, Remco and Ben. They may already be tagged. If not perhaps Chuck can show how it's done. Greg -
Blackening brass advice
dvm27 replied to Bossman's topic in Metal Work, Soldering and Metal Fittings
I agree with Alan. Second attempts have not turned out as well for me. Go back to bare metal using a wire wheel to get in all the nooks and crannies. Congrats on the good results for the other batch! -
Your beautiful run of planking and ports with nary a wave or undulation to be seen reminds me of...the Navy Board models I worshipped as a teenager at the Naval Academy. Although the original model shipwrights might harumph at the amount of time it's taken you to get this far I'm sure they would wholeheartedly approve of the result!
-
Lower cost (?) shiny metal parts
dvm27 replied to Patrick Matthews's topic in Metal Work, Soldering and Metal Fittings
The Shapeways part is a roller coaster. After painting I am placing it in an epoxy resin cube and making a lamp out of it for a grandson. Lots of cool epoxy resin videos on YouTube with 3D printed parts inside. -
Lower cost (?) shiny metal parts
dvm27 replied to Patrick Matthews's topic in Metal Work, Soldering and Metal Fittings
My last Shapeways product was painted then immersed in epoxy resin. The paint leached into the resin, ruining the project. I just read where direct sunlight will cure the resin so I will leave the next one out over a sunny day, then paint it. Perhaps a varnish after to seal? -
Haven't seen your log for awhile Michael. She's looking beautiful. Will be quite a showpiece when you're done.
- 221 replies
-
- 2
-
-
- queen anne barge
- Syren Ship Model Company
- (and 1 more)
