HOLIDAY DONATION DRIVE - SUPPORT MSW - DO YOUR PART TO KEEP THIS GREAT FORUM GOING! (Only 53 donations so far out of 49,000 members - C'mon guys!)
×


augie
-
Posts
4,669 -
Joined
-
Last visited
Content Type
Profiles
Forums
Gallery
Events
Everything posted by augie
-
 Sand the CA off with 150 grit paper on a block. You fingers will be sensitive like a safe cracker!
- 956 replies
-
- 3
-

-
- andrea gail
- trawler
- (and 1 more)
-
With clinker planking, the edges of the planks overlap. With carvel planking, the edges of the planks meet. It looks like this: http://en.wikipedia.org/wiki/Carvel_(boat_building)#mediaviewer/File:Clinker-carvel.svg Double planking is as you described. The hull is planked then filled and sanded and then another complete final layer added over it.
-
That would be Robert Shaw, may he rest in Peace. Another good choice!
- 956 replies
-
- 1
-
-
- andrea gail
- trawler
- (and 1 more)
-
Thanks for the additional info on the 'beat to quarters' routine, Mobbsie. A whole different time line then what we think of today. I knew they put all the ship's boats overboard and I have also heard that on some smaller ships they would actually take the binnacle below.
- 2,191 replies
-
- 3
-
-
- confederacy
- Model Shipways
- (and 1 more)
-
Please use Clint Eastwood or Gregory Peck instead of George Clooney
- 956 replies
-
- 2
-
-
- andrea gail
- trawler
- (and 1 more)
-
Why not? A coat of natural stain would bring out the depth beautifully!
-
Looks like you're off to a fine start. That swiss pear looks fabulous. Keep us posted on your progress.
-
Great start on the breech lines. They'll go faster now. Well done, mate!
- 1,616 replies
-
- 1
-
-
- caldercraft
- agamemnon
- (and 1 more)
-
Hope it works for you fellas. I've used it on anchor stocks, barrel rings, mast bands......
-
Yes, you'll like the wood stocks. By the way, if you need to make black iron bands for them, think about black heat shrink electrical tubing. I've got an assortment in flat black I think I picked up at Radio Shack...... probably 1/2" down to 1/16". It takes paint and dullcoat well. If not, there's always thick paper.
-
That's an impressive amount of work ----- and lumber. And thanks for the scale shot .... reminds us just how big 1:48 actually is.
-
If you ever need to glue something over paint again, try carefully poking some tiny holes in the paint. This usually helps adhesion.
-
That's good to know. Welcome to MSW. Really glad you've started a build log. It's the best way to make contact, ask questions and treat us all to your progress. Don't be concerned about your language skills. Your English sounds fine to me ...... and is certainly better than my Russian from college 50 years ago. Be patient as there is no time limit on builds. We have some on here running more than a decade. The subject you've chosen should be very interesting due to it's relatively large scale and clinker planking. Glad to have you aboard !!!
-
You're taking the right approach starting with something that can be completed in a reasonable amount of time while serving as a good foundation for future builds. If I may ask, where are you from? Always nice to associate a place with a name.
-
Glad to see her underway. The framing looks good and your new version of the lifesaver is a vast improvement over the metal castings. Well done!
-
She's going to have one impressive stern.
-
Looking really good. Now you come to the fun part of rigging.
- 1,756 replies
-
- 2
-
-
- constitution
- constructo
- (and 1 more)
-
You should feel good about that Larry. Mine usually have 4 wall sides.
-
Really? I never heard that. Thanks Mark. I respect your input.
- 2,191 replies
-
- 1
-
-
- confederacy
- Model Shipways
- (and 1 more)
-
Darn it. Since you did both sides we can't blame the finish (I've seen full size doors warp if only one side is done). I'm stuck. Since it's only 1/16" I guess playing with the 'feet' will solve it...... if you have a 'wall side'.
-
I'm with Russ.....her beautiful lines are starting to shine. Have a safe trip!
-
Bowsprit looks good. Sorry about the display board. Did you stain/finish it on both sides?
-
As always, I appreciate hearing from everyone who has stopped by. Chuck has designed some really nice features and MS has done a really nice job on the kit. It would take me 10 years to scratch this lady and, frankly, I don't have the patience. But she teaches you a LOT.....information that will come in handy down the road. Dave --- I've often wondered the same thing over the years as I've toured various warships from this period all over the world. Maybe someone knowledgeable on the period can comment on how this worked out once she was cleared for action?
- 2,191 replies
-
- 1
-
-
- confederacy
- Model Shipways
- (and 1 more)
-
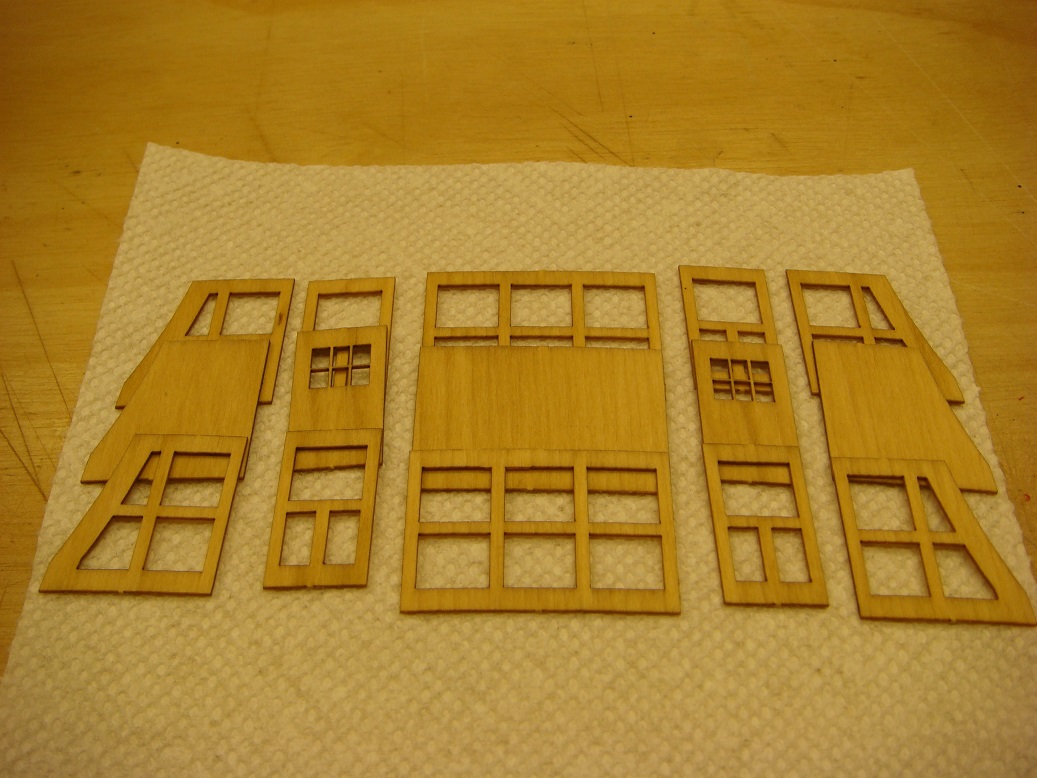
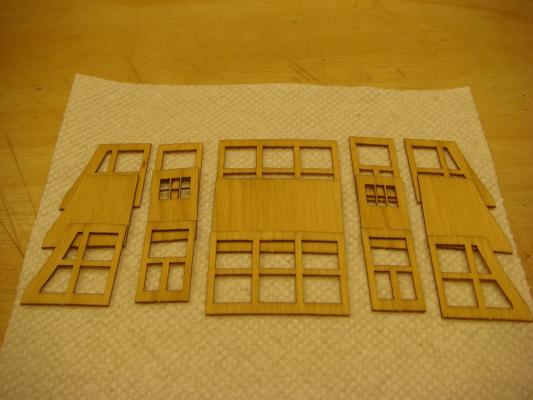
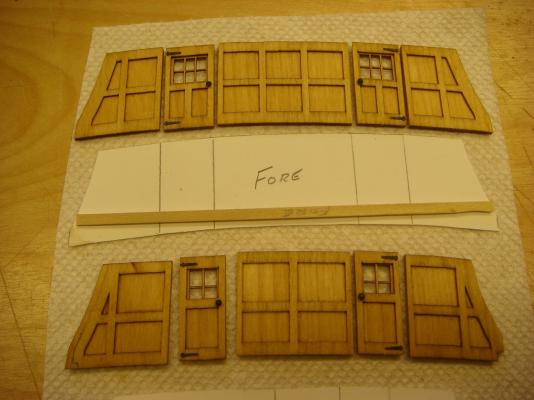
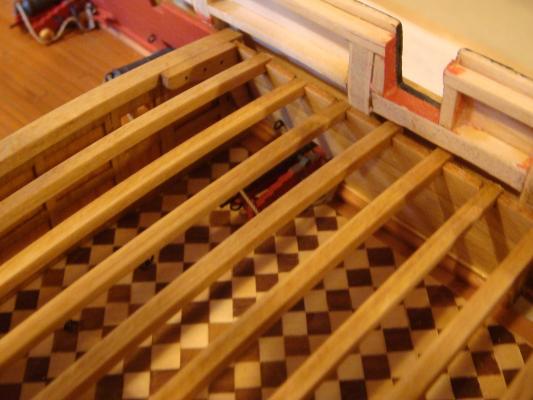
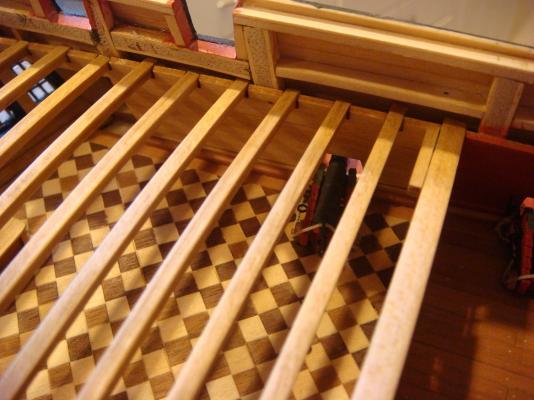
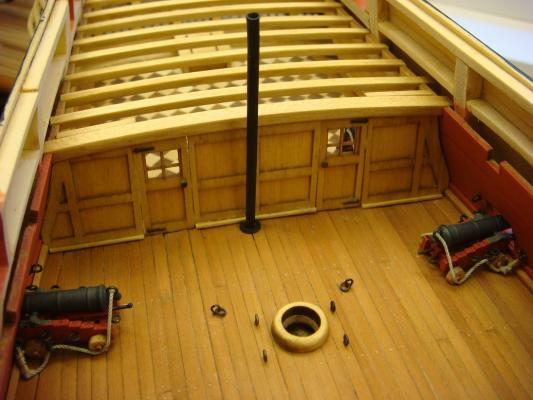
The New Year brings with it ....... a small update! There are two bulkheads under the quarterdeck. They are constructed from laser cut pieces and laminated: Here they are, laminated and the blackened brass hardware affixed to the doors: The farthest aft of the two encloses the Great Cabin. It, in combination with the deck beams I've put in, pretty much covers the checkerboard floor. But we'll still be able to see it as only 1/2 of the quarterdeck will be planked: Another view, showing the first of the hanging knees installed: There will be both hanging and lodging knees installed for each of the deck beams as we move forward. I've installed wire inserts to simulated the bolts in the knees. Here's the aft bulkhead taken from the front. I've also added the mizzen mast cap, some eyebolts and the speaking tube (only temporarily). It's made from painted brass tubing and extends up to the quarterdeck just where the ship's wheel will go. I'm not sure what the helmsman would communicate to those down below but I can't shake the mental image of John Wayne at the helm bellowing down "Engine room, more steam". We'll be moving forward now to install that second bulkhead. But first some gangway railings and the capstan need to be installed. Best to all for 2015 !
- 2,191 replies
-
- 37
-
-
- confederacy
- Model Shipways
- (and 1 more)