-
Posts
2,214 -
Joined
-
Last visited
Content Type
Profiles
Forums
Gallery
Events
Everything posted by EdT
-
As suggested, Frank, pva glue is easy to soften with isopropanol. I made my spalls of soft pine and glued them with Titebond (pva). Those and the softwood spacers I used between frames were easily removed using a single edged razor blade lightly tapped into the glue joint. A bit of filing removed any glue traces. I could have used isopropyl, but it leaves the glue residue gummy for a while, making immediate removal less easy. But either would work well. Keeping the spalls in place will be useful later until some sort of ribbands or logitudinal planks can be added. Ed
- 649 replies
-
- dunbrody
- famine ship
-
(and 2 more)
Tagged with:
-
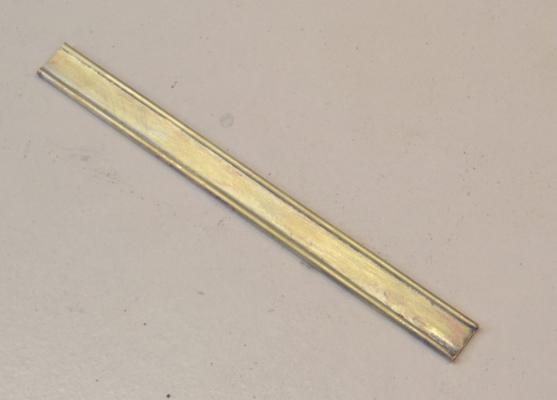
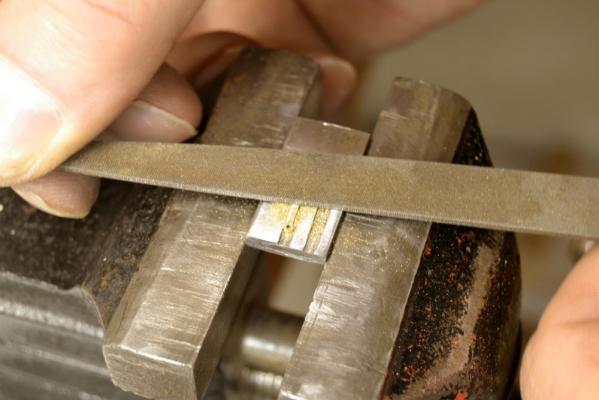
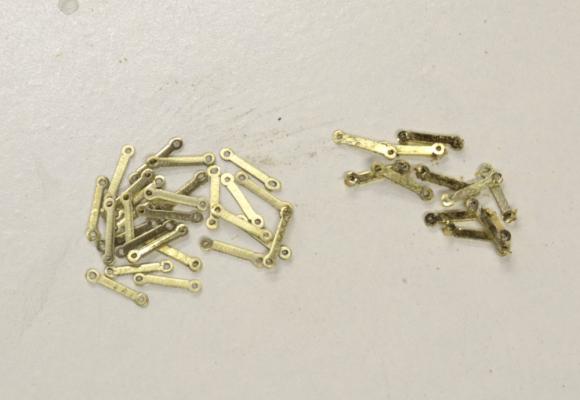
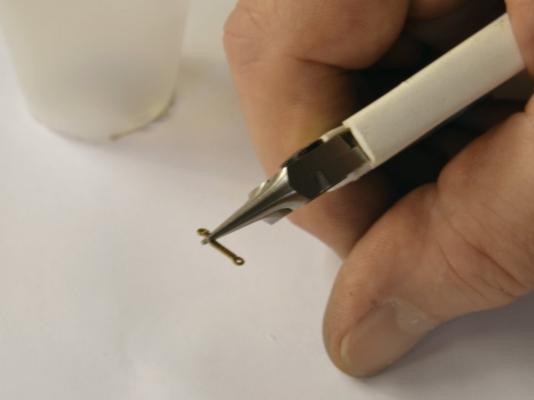
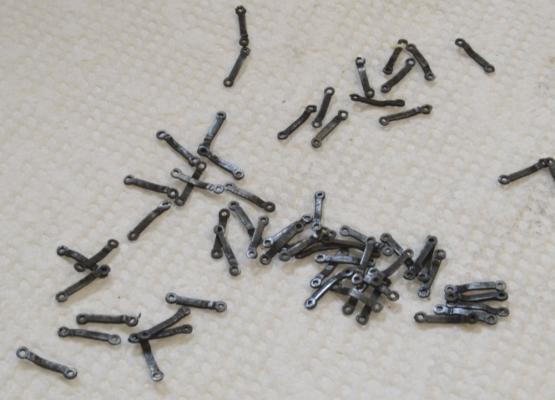
Young America - extreme clipper 1853 Part 157 –Deadeye Chain Backing Plates Each of the larger channel chains is bolted to the hull through a backing plate (or preventer plate) for additional support. These larger chains anchor the chain deadeyes for the lower shrouds and topmast backstays. Chains supporting lighter rigging have a single bolt and no backing. These plates are about 3’ long and about 1” thick with bolt holes at each end. They are bent in an offset to fit over the chains. The chain fabrication will be covered later. The first step in making the numerous required plates was to solder brass tubes to the edges of a brass plate. This fabricated piece is shown in the first picture after pickling and buffing to remove oxide. I used wire silver solder and black paste flux for this. The tubes were held for soldering with pins. I used a small oxy-propane torch on the first side, then running out of O2 used a larger propane torch on the other side. I normally use a small propane torch but in this case the large joints benefited from the extra heat. The individual backing plates were then sliced off this strip in the circular saw using a screw slotting blade. They were sliced off slightly over thickness. In the next step the plates were filed smooth on one side, then flipped and filed to final thickness on the other. The next picture shows this being done with the aid of a holding fixture. The fixture has two milled slots, one slightly deeper for the first filing, the second milled to the final thickness for final sizing. Both sides were polished with abrasive sticks. The next picture shows plates before and after filing. Each plate was then bent as shown in the next picture to form the offset. Finally, the plates were pickled in acetic acid (white vinegar), given a degreasing bath (TIVA®) and submerged in a very dilute solution of Birchwood Casey® blacking. They are shown after drying below. Around 50 of these are required, but quite a few extras were made to account for expected attrition at each step and shape issues.. Chain fabrication and the 16” deadeye itting will be covered in the next part. Ed
- 3,618 replies
-
- young america
- clipper
-
(and 1 more)
Tagged with:
-
Gerald, I am in complete awe at your work. The tooling alone is on a different plane relative to what most of us are doing. This is masterful work. I wanted to comment on your application of the "license concept. I have been thinking a lot about similar ideas in my own work. My choice of term for this is "interpretation" - but semantics are not important. If "license" is applied to accomodate the differences that scale imposes on model construction, I see it perhaps as a subset of an overall model interpretation that embraces both the accomodation to scale in construction and also the design decisions that must be made in the absence of precise detail of the original subject. These decisions can range from the shape of the hull to the choice of iron or rope strapped blocks. All modelers must deal with the structural accomodation to scale - glue vs. bolts, solder vs. rivets - but if one takes a set of prepared detailed plans and builds from them, one may not necessarily have to deal with the broader interpretive issues. One can "merely" build - a task not to be diminished by any means. However, if one is providing plans and even construction methods that others will rely on, there is a burden of responsibility for setting the degree of historical authenticity that must be shouldered. In theory the degree of this can range from broad artistic license to rigorous historical accuracy. In practice the reality is somewhere in between - and the right level may and perhaps should fit the modeler's goals. I sense that although the example you used in discussing "license" focused on construction, that you, too, may be thinking of this broader issue. If so, you are not alone. Ed
- 281 replies
-
- falls of clyde
- tanker
-
(and 2 more)
Tagged with:
-
I believe that testing is critical for finishes, no matter what you think you know or don't know. I would always recommend testing any finish before using. Ed
- 3,618 replies
-
- young america
- clipper
-
(and 1 more)
Tagged with:
-
Lovely, lovely work, Druxey. For some reason, I do not use rubber bands, perhaps because the box I had was so old that they broke whenever I stretched them. I have forgotten how useful they can be. Thanks for the reminder. Photography is often too discerning of our errors and unrepresentative of the actual visual effect, especially on reflective surfaces, but what would we do without it? Larch was a commonly used wood on American ships. The shipyard name for this here was hackmatack, more properly tamarack, the same as European larch - about 75% the strength of white oak. Thank you, Bill C. Ed
- 641 replies
-
- greenwich hospital
- barge
-
(and 1 more)
Tagged with:
-
Thanks for your comment, rob, and for the likes. Gaetan, The dye completely penetrates and there is no build up. I dilute the Tung Oil (` 50% mineral spirits or turpentine) to increase penetration and use only pure unmodifiedTung oil. (Some Tung Oil finishes have additives to shorten drying time or are partly polymerized to insrease build up and gloss.) The first two, sometimes three, coats are completely absorbed into the wood. The deadeyes are end grain. I only want to use enough to put a slight sheen on the wood and do not want any build up. The excess oil is wiped off after each application. So any oil build up is undetectable. Oil and finish should only be mixed if they have a common solvent. The dye crystals I am using are soluble in water, but I do not know if they are soluble in oil - probably not. They may be soluble in alcohol or turpentine. I don't know. Actually, it is better if they are not soluble in the finish, because then the finish will not leach out the color. The water-soluble walnut dye, once it has dried, is not affected by the oil. If you stain a piece of wood with a stain that is soluble in oil, mineral spirits or turpentine, apply the oil stain (for example Minwax) and let it dry. Then apply oil and wipe it off with a clean rag as directed. You will notice that the rag will be darkened with stain, meaning some of the stain has been removed. Dyes - water or alcohol soluble - will not be affected when oil or for example Wipe-On Poly is applied. I believe the water soluble walnut stain could be mixed with a diluted acrylic medium (water based emulsion), but this would limit its penetration in wood. I might try that on a rigging stain to see how it works. It may eliminate a step. I have not tried this. We can never learn enough about finishes. Ed
- 3,618 replies
-
- young america
- clipper
-
(and 1 more)
Tagged with:
-
Gaetan, I am not adding the binding agent to the dye, but applying it after the dye dries. On the deadeyes I am applying 3 coats of diluted tung oil after the dye dries. Ed
- 3,618 replies
-
- young america
- clipper
-
(and 1 more)
Tagged with:
-
Thank you for the interesting note, Gaetan. I love the references to guarding the pot and also on letting the dew dry. Aniline is an organic compound discovered in the early 19th century. In the late 1800's it found use as a dye material and a substitute for natural indigo dyes (blue). This was the beginning of major new developments in synthetic dyes of all colors. (If you have heard of the company BASF, the A stands for aniline.) I believe most dyestuffs today are aniline based. The aniline molecule has a complex structure that is broken down by UV light, hence aniline dyes will fade over time. I am not a dye expert but after experiencing fading problems - first using fabric dye (Rit) on model railroad scenery and wood structures and then later (and of more concern) using synthetic dyes on fine furniture projects - I looked further into these materials. I no longer use synthetic dyes for this reason. Vegetable dyes do not exhibit this problem, but have been largely replaced by synthetics. For example colors of antique oriental carpets retain their true color over long periods of time. The other reason I avoid dyes, especially on wood, is because unless fixed they remain soluble as I mentioned in the post. They need to be fixed with a binder like Tung Oil, linseed, soya, shellac, varnish, acrylic, etc. Pigmented dyes, inks and paints generally do not fade, so in the past I have used thinned acrylic artists' paints to dye rigging and/or wood. These also have their own binder built into the finish. Based on someone's post on MSW and the use of walnut stain for rigging by Bernard Frolich (The Art Of Ship Modeling), I searched and found natural walnut dye - Van Dyke crystals. I believe this should be a good choice for coloring hemp running rigging. Yarns of hemp were treated - before laying up into rope- by passing them through a tar bath, hence their brownish color. This seemed to fade over time toward white - probably as the tar solution evaporated or was washed out. I expect to treat standing rigging with a diluted black acrylic gouache - perhaps with some burnt umber. This will provide the color and binder for moisture resistance. I am basing this choice on American practice as described by S.B. Luce (Seamanship, 1868). This describes treating standing rigging with a "coating of blacking made of tar, whiskey, lamp black, litharge and sea water." Tar was probably coal or pine tar. Litharge is lead oxide of some type, probably to add body to the mix. I assume whiskey is spirits (alcohol). While tar is more brown, the lamp black (carbon black) would make this permanently black. A little carbon black goes a long way. Ed
- 3,618 replies
-
- young america
- clipper
-
(and 1 more)
Tagged with:
-
Gaetan, you are right that it is never too late. Of course Young America is quite large even at 1:72. Everything you say rings true. Every time I drop a small part on the floor I curse the small scale while looking for it. I am sure the larger scale has its challenges in that more detail must be incorporated. You have clearly mastered that. Ed
- 728 replies
-
- le fleuron
- 64 gun
-
(and 1 more)
Tagged with:
-
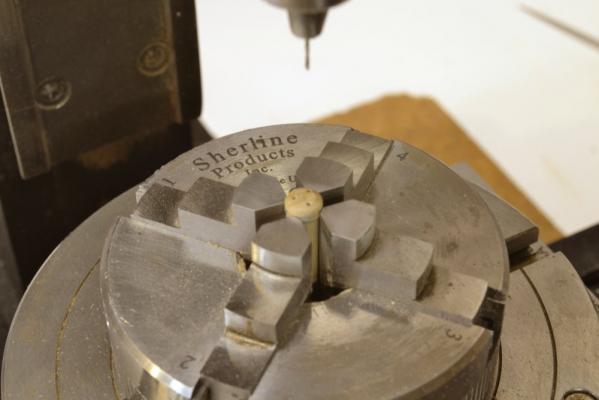
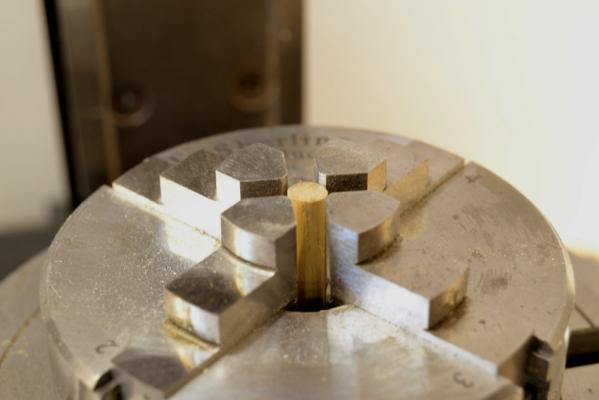
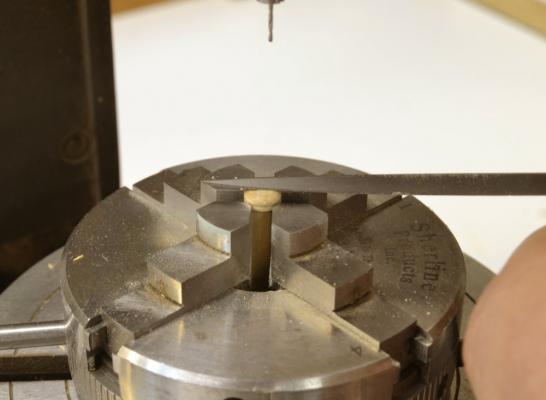
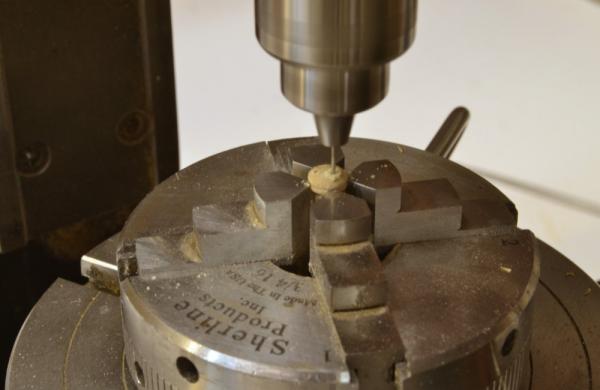
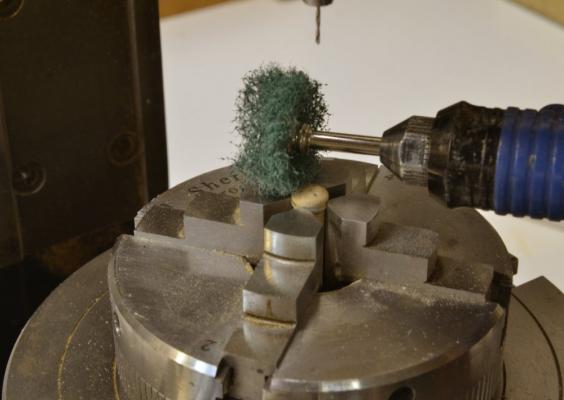
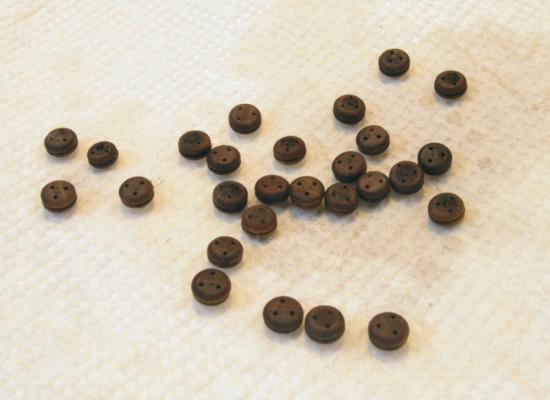
Young America - extreme clipper 1853 Part 156 – Channel Deadeyes 2 The first picture shows one of the 16” (.222” actual) deadeyes with its three holes drilled. This was done in the milling machine using a four jaw centering chuck and a calibrated rotary table. To retrace the steps, the rotary table with the chuck was first centered in the lathe, by eye in this case. The x-axis feed was then locked to prevent me adjusting it by mistake. The y-axis was then moved so the drill would be off center by one-half the deadeye radius – then also locked. The next picture shows the setup ready to receive a deadeye. A dowel was placed in the chuck to set the deadeye height, to help level the deadeye for drilling, and to prevent me dropping deadeyes into the abyss. This is smaller in diameter to avoid fouling the jaws. In the next picture a deadeye has been placed and the chuck jaws tightened. In this picture the nib left after parting in the lathe is being filed off. This side of the deadeye was then sanded. The other side was sanded and polished in the lathe. The next picture shows a hole being drilled. The holes are 1.1 times the diameter of the 5” (circumference) lanyards, in this case 5”/3.14 or 1.6” (.022” actual). They are spaced at 120 degrees using the graduations on the rotary table. To keep the small drill from skating on the curved deadeye face, the bit is chucked short and the hole is started with very light pressure using the Sherline® sensitive drilling attachment – an indispensable tool, shown before in these posts. The table is then rotated 120 degrees for the next hole. The next picture shows how this side of the deadeye was then polished using a Scotchbrite® wheel.. The next picture shows the 16” channel deadeyes just after removal from the Tung oil jar. These were first dyed using a saturated water solution of Van Dyke® crystals. This non-fading vegetable dye is made from black walnut husks. As long as there are undissolved crystals in the jar, the solution is saturated and will remain at a constant maximum concentration. I hope to use diluted solutions of this later to dye hemp rigging. Some readers will know that I am not a fan of dyes – for two reasons: most solution dyes are aniline based and will fade on exposure to light, and secondly solution dyes remain soluble after drying and therefore can smudge and run if wetted. I have not relented. This natural walnut dye should never fade and finishing the deadeyes with Tung oil will prevent later smudging. I considered dyeing these black using India Ink, but after comparing decided to go with the walnut, which I believe is a more realistic color. I used oil diluted with 50% mineral spirits and expect 2 or 3 more dips on these before getting the desired polish. That will consume 2 or 3 days before these are ready to be bound on the channels. This should allow time to make the chain, bindings and preventer plates – and to prepare the channels. There are other sizes to make as well. Ed
- 3,618 replies
-
- young america
- clipper
-
(and 1 more)
Tagged with:
-
Beautiful work as always, Gaetan. Oh, how I envy your scale. Ed
- 728 replies
-
- le fleuron
- 64 gun
-
(and 1 more)
Tagged with:
-
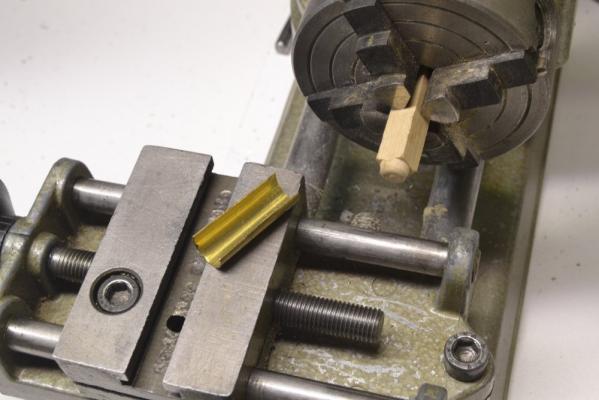
Thanks, everyone. Carl,I'm trying to get adjusted to "repetitive". There is a lot of that kind of work ahead. Druxey, the stop snaps over the cross feed bed rod. It is made from a piece of brass tube slit longitudinally slightly off center. A picture is attached below. This can be used in any setup by making the first of a number of repetitive cuts, loosening the tool in the holder, bringing the cross feed up against the stop, then resetting the tool in the holder.
- 3,618 replies
-
- young america
- clipper
-
(and 1 more)
Tagged with:
-
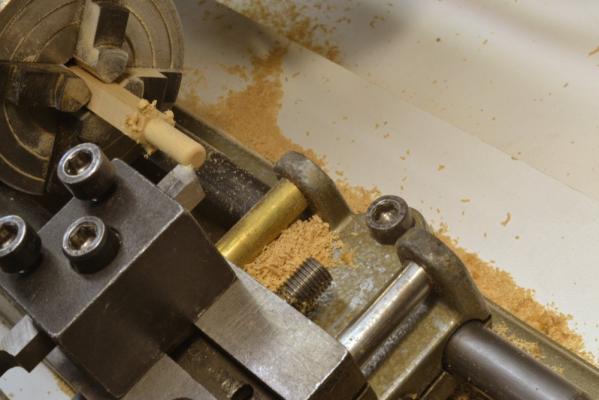
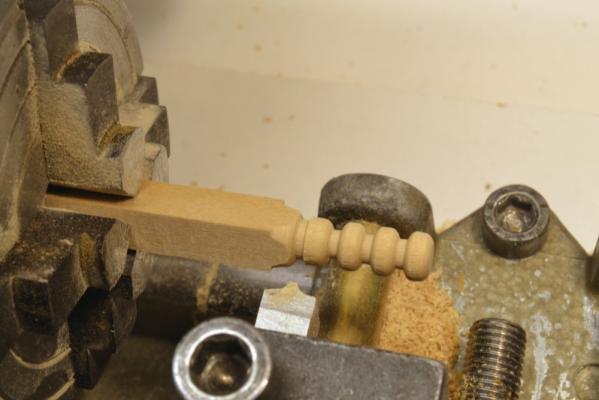
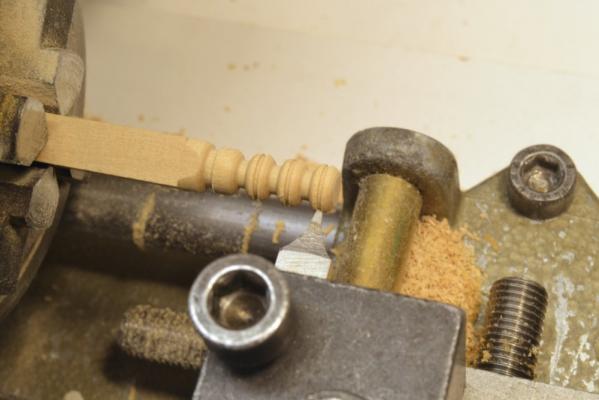
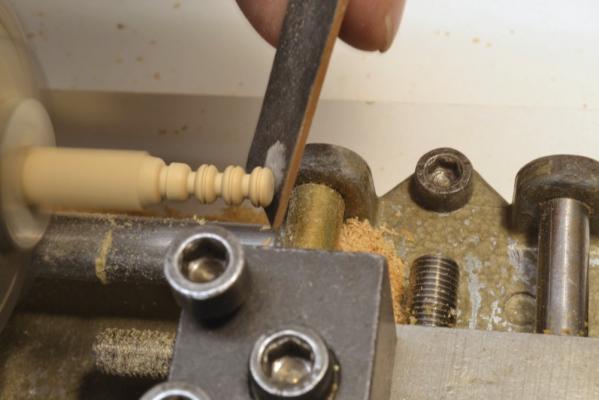
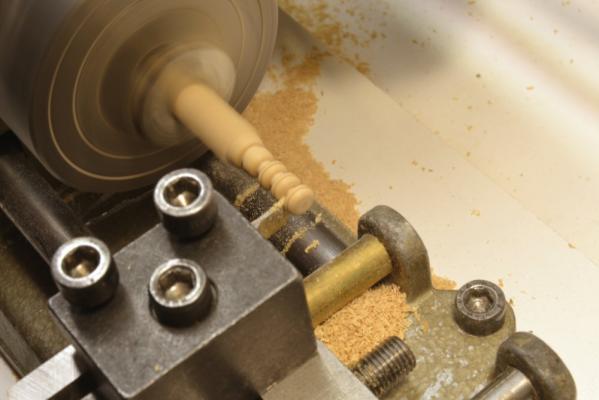
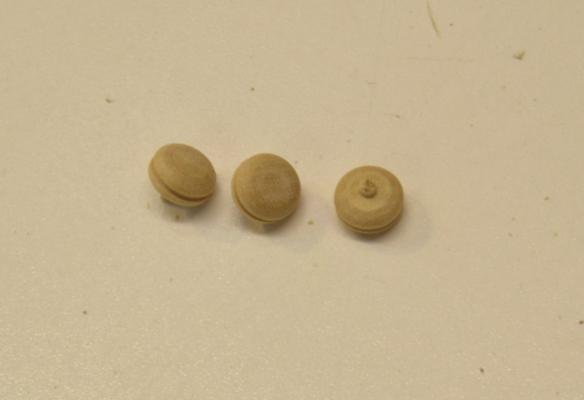
Young America - extreme clipper 1853 Part 155 – Channel Deadeyes 1 The next major task on the model is to fit out the channels with deadeyes, chains, bindings and backing (preventer) plates. You may notice in these posts that some of the terminology diverges from what most of us are used to – namely British RN usage. I am trying very hard to use 19th Century American terms, gleaned mostly from texts from the period. So, the first step is to make the 16” chain deadeyes for the fore and main mast lower shrouds. There are 24 of these required at this stage. For dimensions of this type of rigging component, I am relying largely on James Lees book, unless other specific references can be found. The deadeye dimensions thus used are thickness slightly larger than half the diameter and holes located at one-half the radius. In the first picture, a square of boxwood has been chucked in the lathe, partially turned to the 16” (.222”) diameter, and rounded at the end. I tried Castelo and pear for these but ultimately went with the harder European Boxwood – from a stock of slightly off-color material that I have and designate as Boxwood ‘B’. This left a minimum of fuzz and chips on the turnings. The cutter in the picture was rounded on both sides of the center for the 16” deadeye rounding. The brass stop on the cross-feed lathe rails was used to set the depth of cut. In the next picture, the rounding on three deadeyes has been cut and the cut point for the fourth located. The deadeye thickness was set with the z-axis calibration wheel on the lathe. After the first three deadeyes are finished and parted off, the cutter will be indexed for the next three from the fourth cut shown. Three is about the maximum for this unsupported turning. In the next picture the grooves for the iron bindings (strops) are being cut using another special cutter sized to fit the iron ring. These grooves were centered and cut to depth by eye. The next step was to sand and polish each deadeye before parting as shown in the next picture. This was done with sanding and polishing sticks. The polished deadeye was then parted off as shown in the next picture. The last picture shows three parted off deadeyes. The nibs left from the parting will be removed in the drilling step – to be described in the next post. Ed
- 3,618 replies
-
- young america
- clipper
-
(and 1 more)
Tagged with:
-
Looks like you've got it to me, Maury. "Cute" is my favorite word for model parts. Ed
- 525 replies
-
- anchor hoy
- hoy
-
(and 1 more)
Tagged with:
-
Druxey, In my experience metallic paint is always difficult (i.e. disappointing). To simulate brass and gold or silver braid or buttons on military miniatures I worked through a lot of different materials. In the end the best result came using metal powder purchased from an art dealer mixed with a binder just before use. Oil based binders, however, darken with age as I am sure you know. There are now some acrylic products sold for miniatures painting that do not yellow that work fairly well. I believe Liquitex sells a gold acrylic. Miniatures paint from a company called Vallejo is about the same. Good Luck. Ed
- 641 replies
-
- greenwich hospital
- barge
-
(and 1 more)
Tagged with:
-

HMS Naiad 1797 by albert - FINISHED - 1/48
EdT replied to albert's topic in - Build logs for subjects built 1751 - 1800
I don't know what more can be said, Alberto. The model is simply beautiful. Ed -

HMS Victory by EdT - FINISHED - 1:96 - POB
EdT replied to EdT's topic in - Build logs for subjects built 1751 - 1800
Its been a while since I commented on, or even looked at, this log, but there have been some "likes" lately and I wanted to thank those who have posted those. Completing this model seems like ancient history, but it still occupies prominent space just over my shoulder as I type these words. Thanks. Ed -
I would say that he upper face of the wing transom at the post should be at the base of the lower counter, that is, at the top of the stern post rabbet. In addition to supporting the stern, it beds the ends of the fore and aft hull planking and marks the beginning of the athwartship counter planking above. This planking transition is usually covered by a tuck rail. Ed
- 525 replies
-
- anchor hoy
- hoy
-
(and 1 more)
Tagged with:
-
Frank, Its good to see you getting off the ground with the model. I look forward to following your progress on this interesting and unique project. Ed
- 649 replies
-
- dunbrody
- famine ship
-
(and 2 more)
Tagged with:
About us
Modelshipworld - Advancing Ship Modeling through Research
SSL Secured
Your security is important for us so this Website is SSL-Secured
NRG Mailing Address
Nautical Research Guild
237 South Lincoln Street
Westmont IL, 60559-1917
Model Ship World ® and the MSW logo are Registered Trademarks, and belong to the Nautical Research Guild (United States Patent and Trademark Office: No. 6,929,264 & No. 6,929,274, registered Dec. 20, 2022)
Helpful Links
About the NRG
If you enjoy building ship models that are historically accurate as well as beautiful, then The Nautical Research Guild (NRG) is just right for you.
The Guild is a non-profit educational organization whose mission is to “Advance Ship Modeling Through Research”. We provide support to our members in their efforts to raise the quality of their model ships.
The Nautical Research Guild has published our world-renowned quarterly magazine, The Nautical Research Journal, since 1955. The pages of the Journal are full of articles by accomplished ship modelers who show you how they create those exquisite details on their models, and by maritime historians who show you the correct details to build. The Journal is available in both print and digital editions. Go to the NRG web site (www.thenrg.org) to download a complimentary digital copy of the Journal. The NRG also publishes plan sets, books and compilations of back issues of the Journal and the former Ships in Scale and Model Ship Builder magazines.


