
DONATION DRIVE - SUPPORT MSW - DO YOUR PART TO KEEP THIS GREAT FORUM GOING!
×


popeye the sailor
-
Posts
16,007 -
Joined
-
Last visited
Content Type
Profiles
Forums
Gallery
Events
Everything posted by popeye the sailor
-
 I have books on modeling in general........touches on just about anything. wish I could help. sure.......do a search and I'm sure you'll come up with something interesting. your model is coming along superbly........looks great!
 -
just fill it in.......it should blend in with the counter once sanded. glad to see your still working on her..........great looking hull
- 79 replies
-
- 1
-

-
- marisstella
- barque
- (and 1 more)
-
I would imagine they weren't dry docked, unless there was a refit scheduled. they likely took care of anything above the waterline until then. during wartime, these vessels had to be ready in an instant.......I'm sure a few nations learned that lesson in history. #2 is the way to go.......you've done well with what you've done so far you've put a nice spin on sub modeling....the detail is over the top! absolutely love it!
-
she looks fabulous! the artwork is amazing..........you've done a superb job detailing her
- 146 replies
-
- 2
-
-
- deagostini
- vasa
- (and 1 more)
-
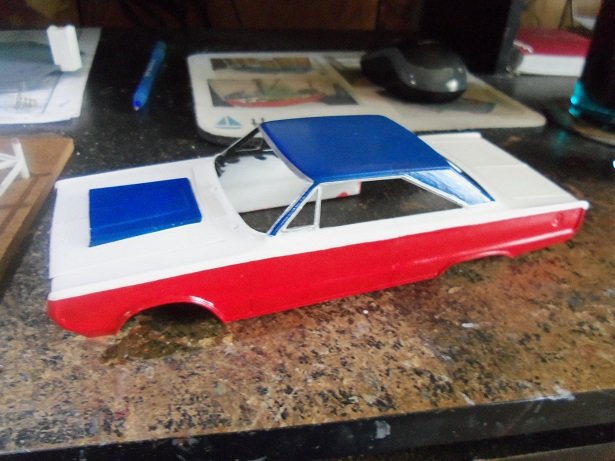
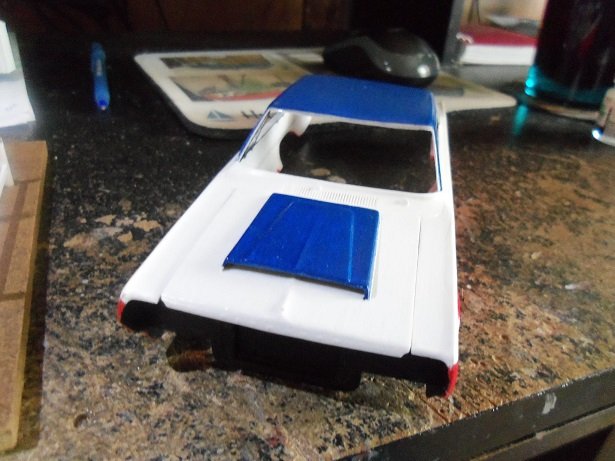
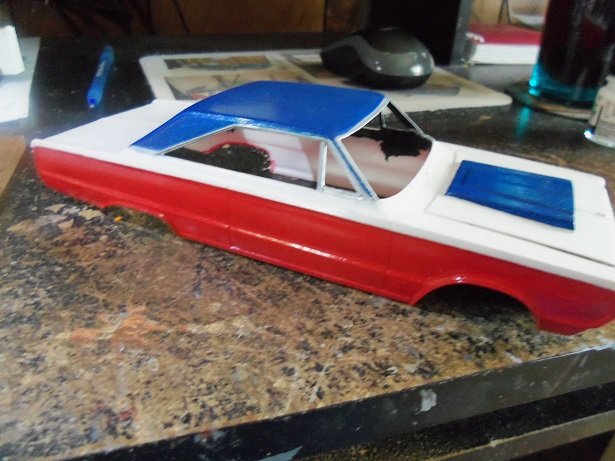
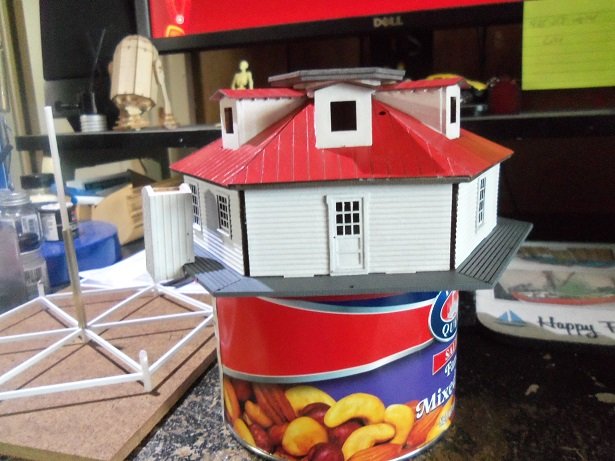
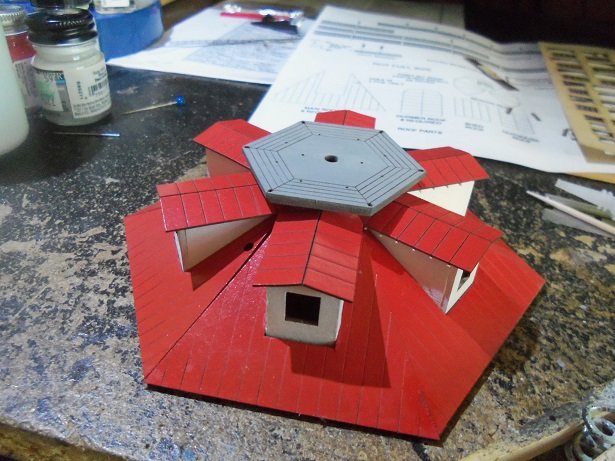
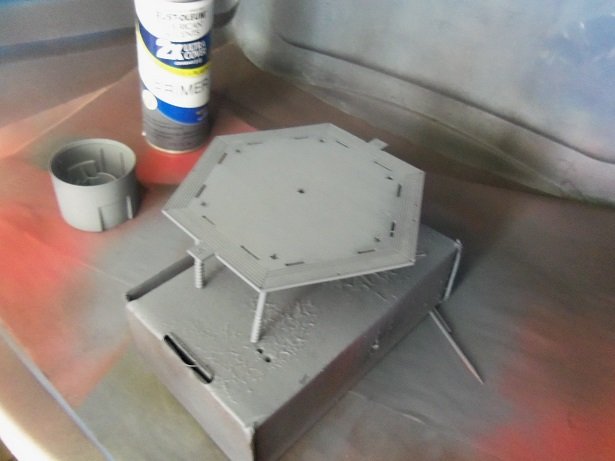
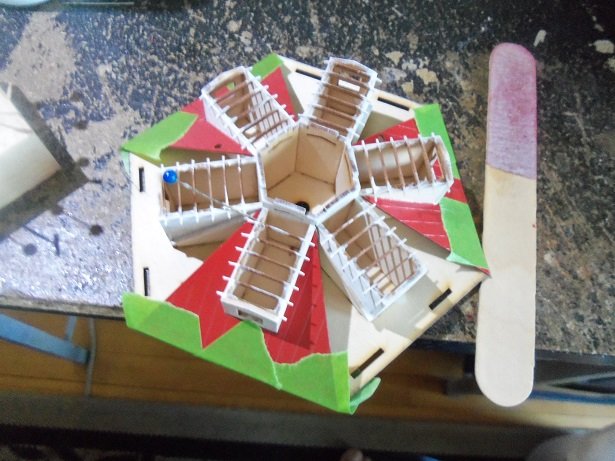
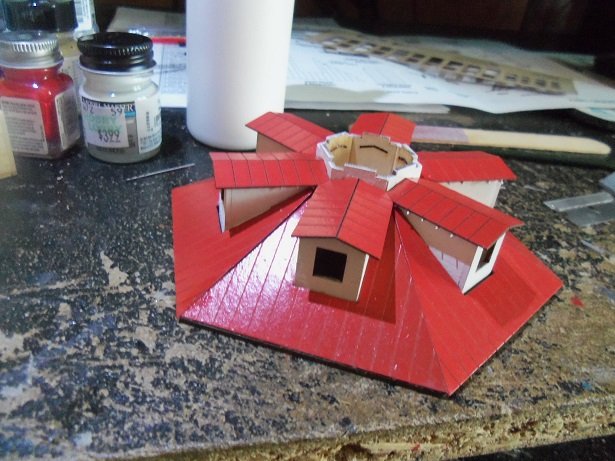
the body is good enough for presentation.........I put the metal flake paint on the roof. I'll play with it some more as I assemble it more soon
-
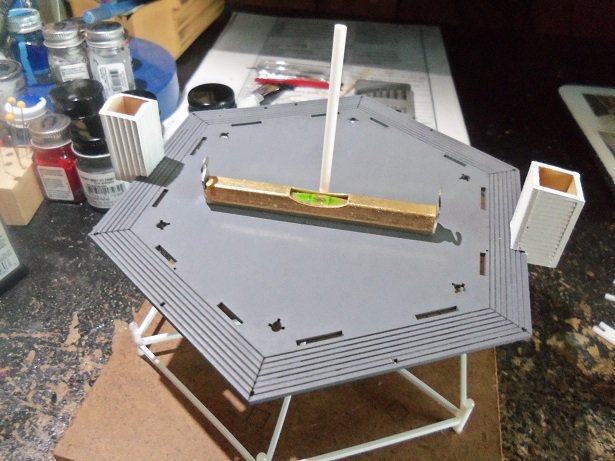
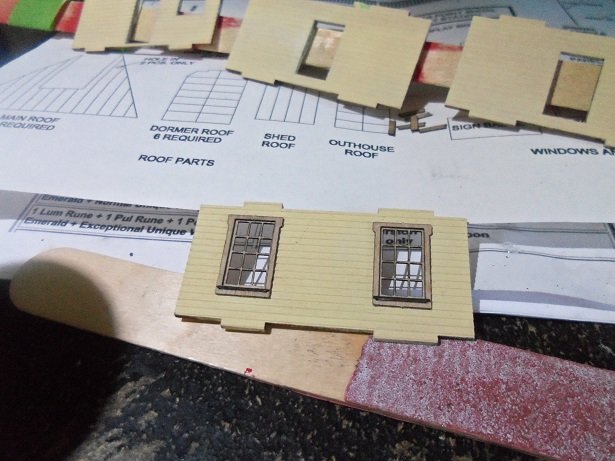
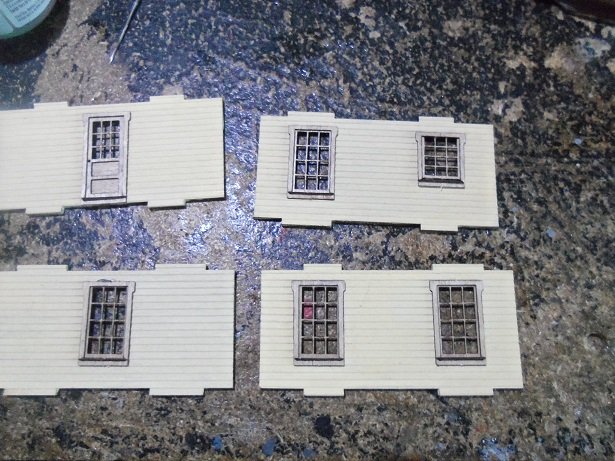
thinking about where I might have out that level..........oh...I know! it was in my Home Depot "modeler's" tool box! it actually didn't take much fiddling to get it level I used the airbrush on the first floor walls....this is the first time in quite a while, that I used a gravity feed with a needle. the EZ airbrush I usually used doesn't have any moving parts, except for the trigger. I wasn't totally happy with it's performance, but it did what I wanted it to........the char would have given the windows an ashen quality if I had used a brush. I went over them later with a brush. once they were totally dry, I assembled the building together.....dry fit. then I can install the corner pieces...........leaving it with the ability to cement in the cello, and assemble it later when the screw pile is fully assembled. the triangular corner pieces were cut and cemented in place, completing the wall fabrication. more to come
- 97 replies
-
- 15
-
-
catching up on your project Niles was so much fun! amazing the amount of progress you've made........and so much detail too. the engine looks fantastic....very well done, and the hatches in the deck looks as though they were laser cut...........very nice! superb job thus far
-
hello there J...........MAN!.........you've made quite a bit of progress since I last looked in rigging looks great and a neat idea for the sails....furled is the happy medium really looks great.......looks like your almost finished!
-
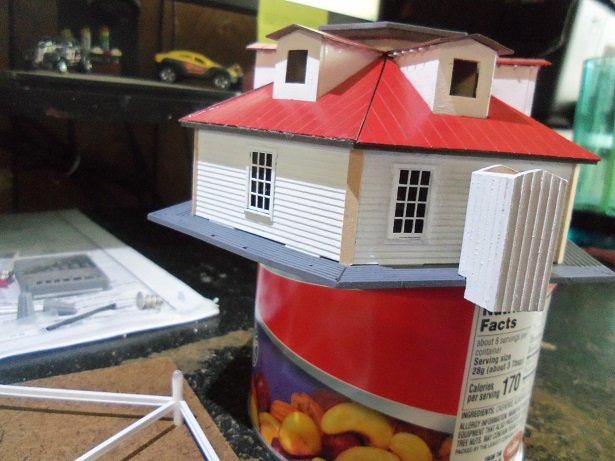
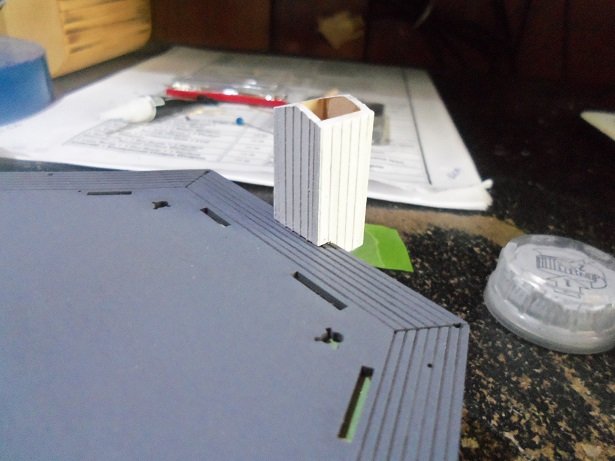
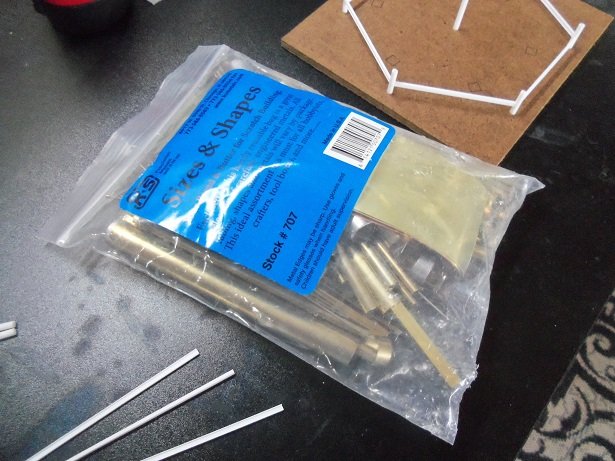
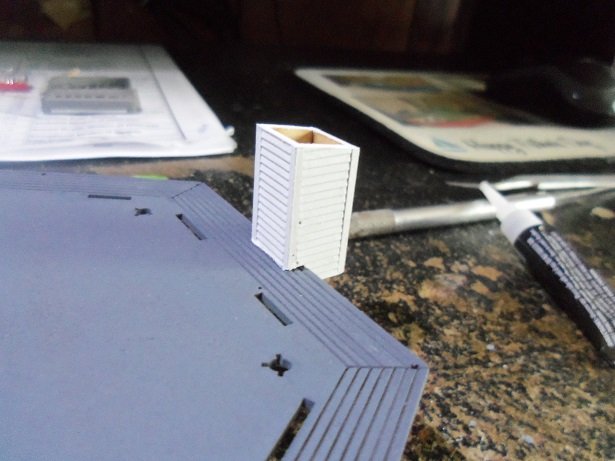
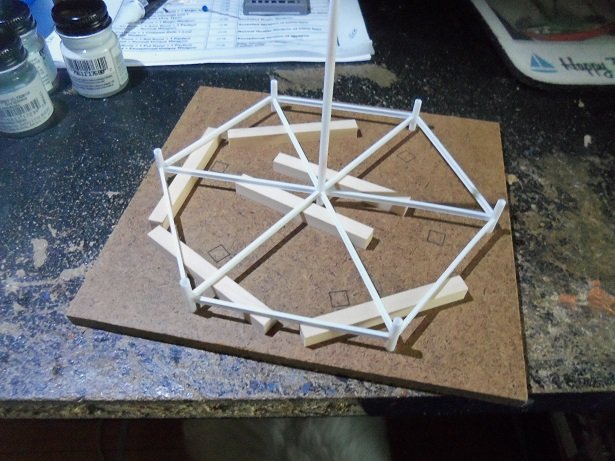
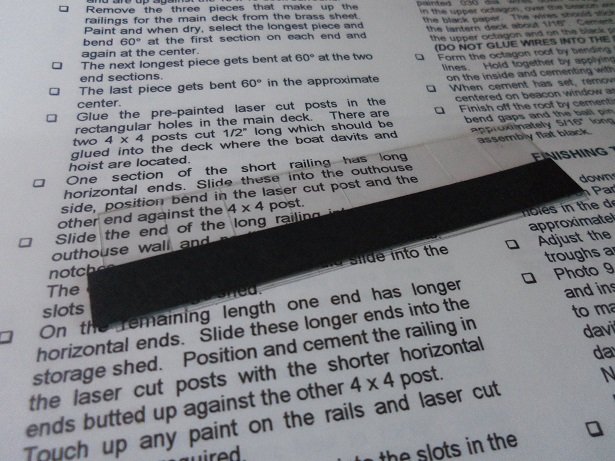
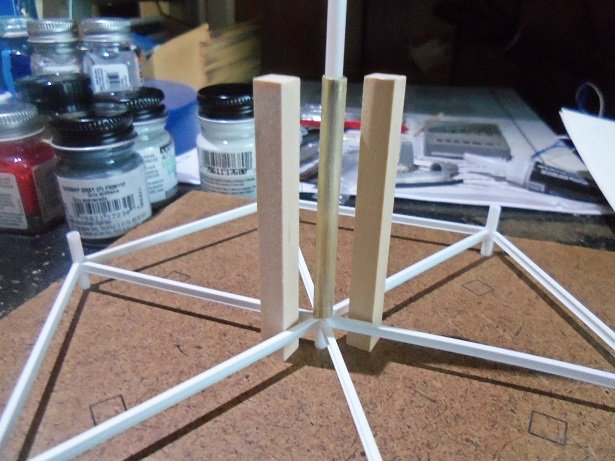
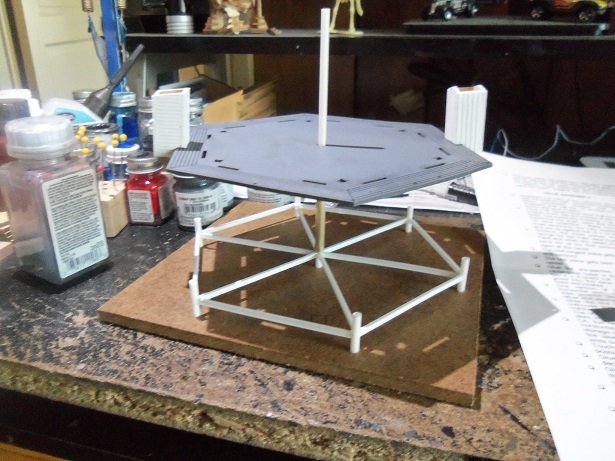
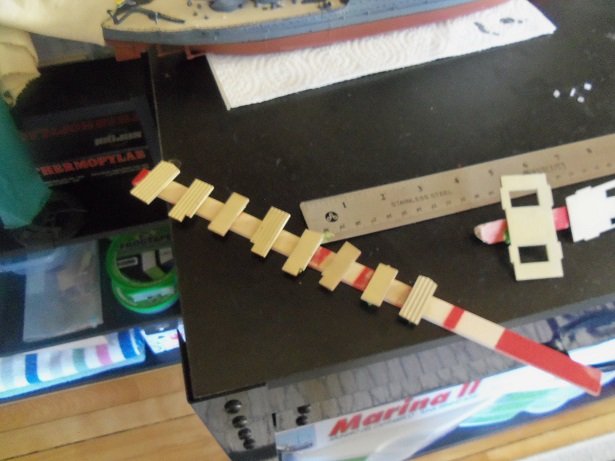
some how........Paul Simon was thinking when he penned his song studies do show though that couples are more happy when they try to keep it 'interesting' I'll break the manotany for you as best I can. I love that lighthouse John........with a little modification, it can also be modeled from this kit it has the same screw pile design........note all the truss cables to support it....I'll be doing the same for this one too! thanks to all who have joined in.......I hope you enjoyed the video. if I can find the right scale of Popeye figures, I can put a model concept of mine into play ....but ........that's a future thing anyway....I have started my vacation and managed to get a bit more done on the lighthouse. I finally opened the electronic part of the kit and took a look.......I wonder how the wires are going to fit down that center tube I think I have some smaller wiring in my electronic's box...I'll see if I can change this up some......this won't happen til later, when I know how much of that tube will be sticking out of the top, in the beacon. the dormer windows have all been assembled, punched out, and painted. the kit give a very generous supply of clear cello, which still needs to be cut and cemented in the windows. the one on the far left is broken on one corner.......gotta fix it. it will be interesting to see how much paint that will need to be trimmed. the outhouse was assembled and cemented in place on the first floor deck. I never forgot about the 'brass assortment pack' that I saw from Hobby Lobby. I should have bought it when I had the chance. they don't seem to carry it anymore. I was looking through Micromark at the time I started the Progress build, when I saw it.....I thought....PERFECT!!!!! it will give me all the metal parts to make some of the fittings I kinda procrastinated though......dragged my feet on buying it........until now! ........there is all kinds of odds and ends in here! even square and triangular tubing.........hollow tubing of all different sizes, and shaped metal strips! there are some shaped strips that could very easily be used to make an automotive chassis frame............but we won't go down that slippery slope {fighting the urge HARD}. ordering and receiving this at this point in time, gave me an idea about the spacing issue......hmmmm the shed was assembled and cemented to the deck. at first, I though that they might have made a mistake with the dimensions of this structure.......having to add the 1/32 strip wood to the front and back sides. but, seeing it together and painted, it looks great defining the clapboard sides. I wondered why there are no doors on these two structures, but I'll look at this when the first floor walls are in place. I'll try not to cement them in place, so I can make this mod, if I see it can be done. six more of the 'I' beams were cut to add the braces for the center tube. as this is being assembled, I'm sure that CA is running down to the base, cementing the posts to it. it's a good thing I'm planning to use it as the base.......this was my intent from the beginning. even though I drilled out the holes, the post still fit in them pretty tight......it would likely be a bad thing to try and remove it now. I have a plan to dress it up so it looks nice.......got to paint it first. the wood that was to be used as the spacers, was used again for this part of the assembly as well. all these parts are at the same height..........I'm forever checking for any connections that come loose......a couple of them already have. while I was looking at the electronic parts, I read about the beacon, and how it was assembled. they show the clear cello window that will surround the light...it has been scored so it can be bent into shape. at the bottom is a black strip of card with adhesive on it, to be run along the bottom of the cello strip. noting that there is a slot for the formed cello window to fit into, in the deck, I though to apply the black strip a tiny bit above the cello edge.....I think it's probably .5 mm........just enough to fit it into place. time to put that thought of mine into play............I want a spacer........but I don't want to cement those wood pieces on the base for fear of marring the surface {it's what they suggest, since the base is actually a jig}. selecting a piece of brass tubing that fits over the center plastic tube {now that I have an ample supply}, it was marked to the height of the wood pieces, and cut to length with a tubing cutter. so when the first floor deck is slid over the center tube, it will have a stop now......all I need to do is cut all the support beams and set them in place, using a ruler or something suitable, to level the deck before gluing. I think I have a 'plumb level' around somewhere. continuing with the frame and base, there are six round beads that fit in top of the posts......not sure what they are made of, but they are clear. the tops of the post have been beveled to accept the balls...the support beams will need to be beveled as well. still a bit more to go before that happens more soon


- 97 replies
-
- 15
-
-
thanks John........I saw it....I couldn't resist thanks for the like everyone
-
you'll be doing an entire tutorial just on the wheels!
-
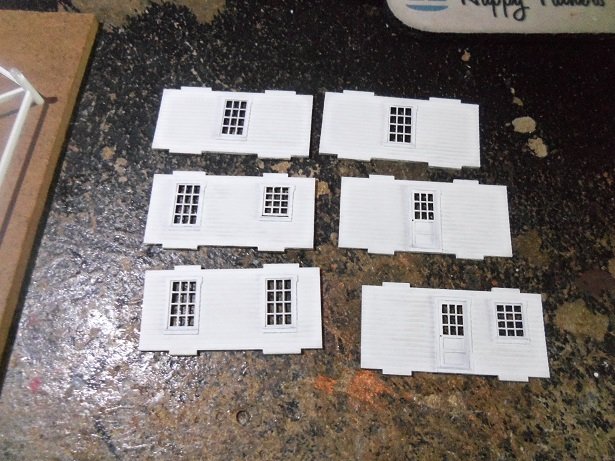
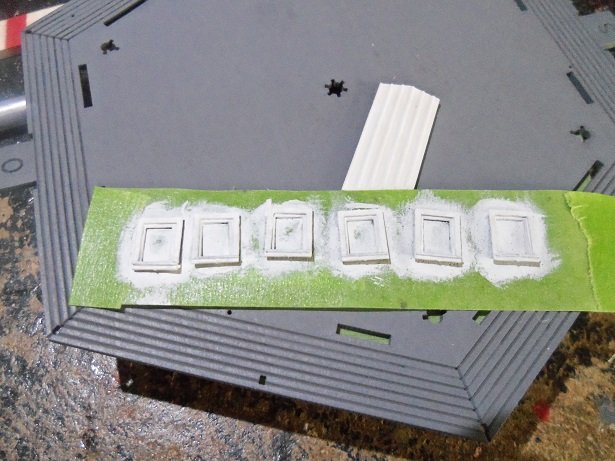
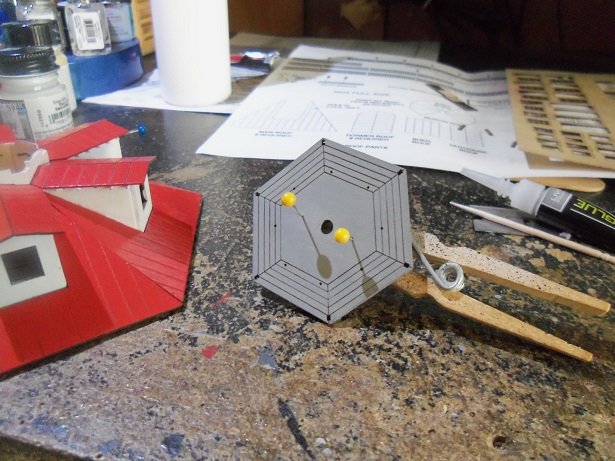
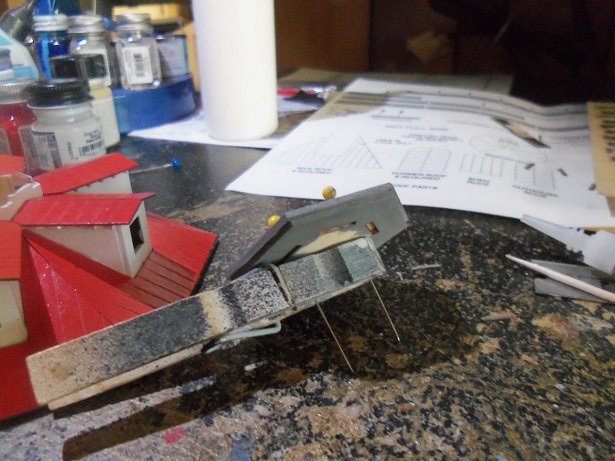
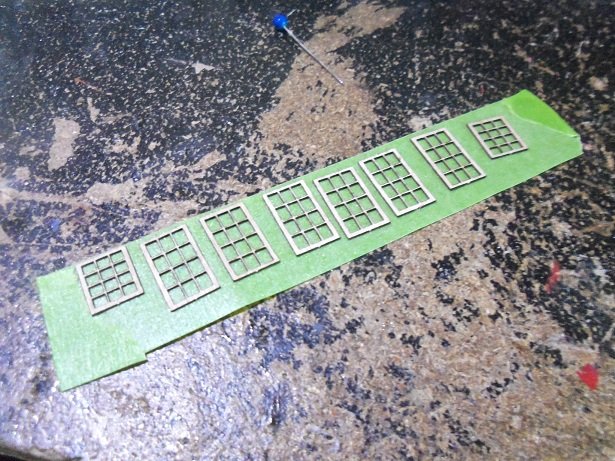
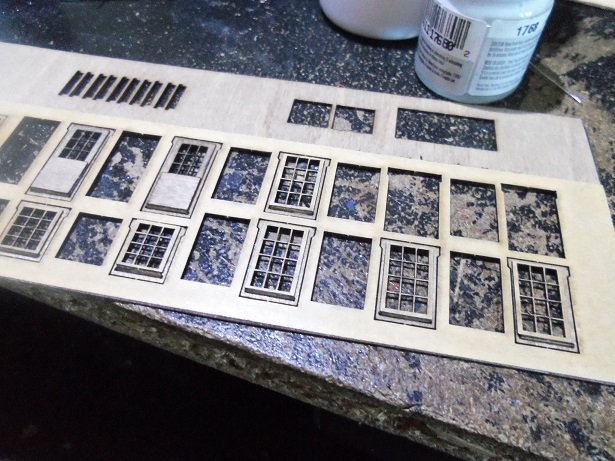
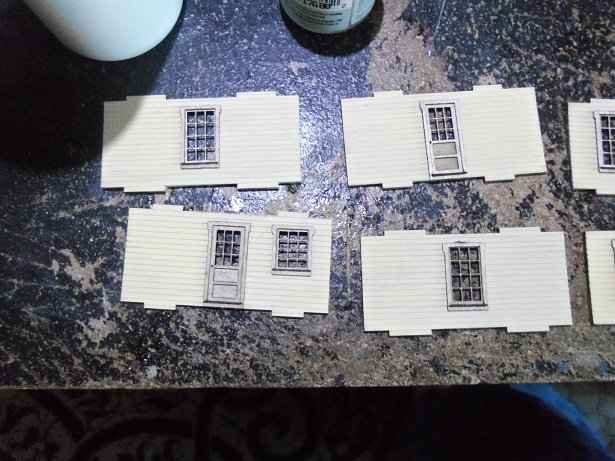
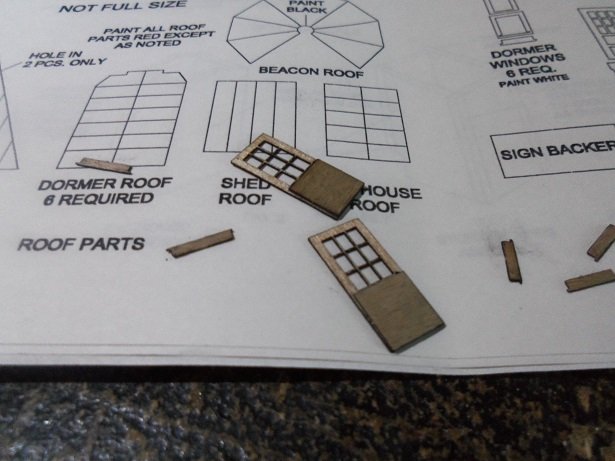
thanks to all who have joined in following the build I have an update that I should have posted earlier, but it's been busy 'round here. celebrated my birthday on Saturday....the highest point of the weekend. work is no fun......and I had to work on my birthday too. it didn't dampen my spirits though so....on with the update while I was writing the previous post, I was assembling and painting the beacon deck, which is comprised of two parts. these two parts had to be lined up while they were assembled and drying......why I'm not sure, but I'mm follow the directions anyway. it can be seen that the bottom half has the slots that fit on top of the roof assembly. I still have a little more to do with the roof, but it won't interfere if I cement in into place. the windows and doors are a bit confusing.........not a lot of text on them. they have an adhesive backing....peel off the paper and stick them into place. I wasn't sure how to go about painting them........each window and door is made up of two or three parts. what makes them confusing, is they they have clear cello added to them after painting, and I wasn't sure if I should paint then before they are assembled, or after. I decided to paint all the parts separately. starting with the window and doors, I stuck them to the sticky side of the tape, in order to paint them. that's when I noticed all the char that was coming off them. this is either very thin wood, or card...hard to tell really, but I think this adhesive stuff is what added to the char issue {depends when they were laser cut, I guess}. the doors are on another piece of tape. the door and window frames need to have a sill added to the bottoms. I did this to all but the dormer windows, which in my opinion, should have been done before the roofs were added. I went by the instructions........what can I say >shrug< once this was done, I began to have second thoughts about painting them separately. they are to be white....the same as the walls. so the heck with it.........I'll assemble them and cement them in place before I paint the walls. I've primered the walls already. a couple of them are missing..........I installed them in one of the walls to see if this would work out. ...and then I did the rest. good thing I noticed that I oriented a couple wrong before the glue dried. to combat the char issue, I'll airbrush them rather than use a brush. the dormers........I'll have to assemble them and figure a way to airbrush them. if I use the tape, I'll have to clean out the individual panes of paint build up. one more day..........then I'm on vacation first real vacation in quite a while........usually I took days off here and there, spreading them out over the course of the year. should be fun

- 97 replies
-
- 11
-
-
great looking model.......the display adds a really nice touch
-
sounds like a very interesting model.......do you have the others on order?
-
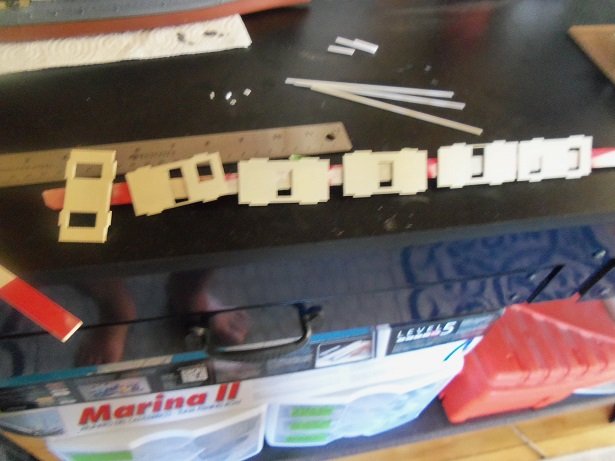
thanks Jack........and to those who hit the like button I'm not liking these frames too much.......they don't fit too well together. one would think that the window frames fit inside the outer frames.......well........they don't really. they kinda overlap a little.........and so far, the instructions have been a bit vague on a few things. I tried my stick tape method, but all that did was remove some of the char {which is a good thing}. I seem to have hit on something though.......I just hope the remnants of char on these parts don't mess with the paint.
-
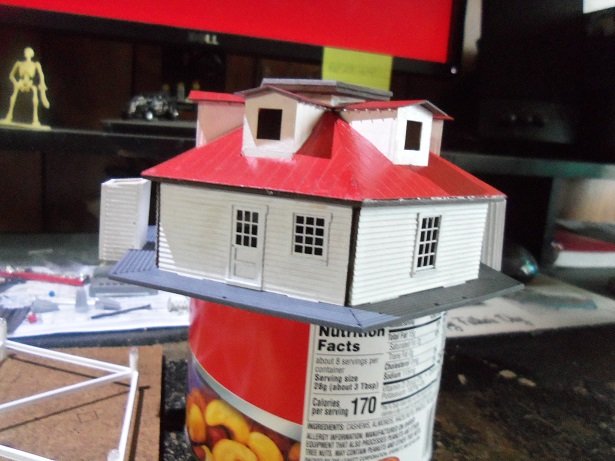
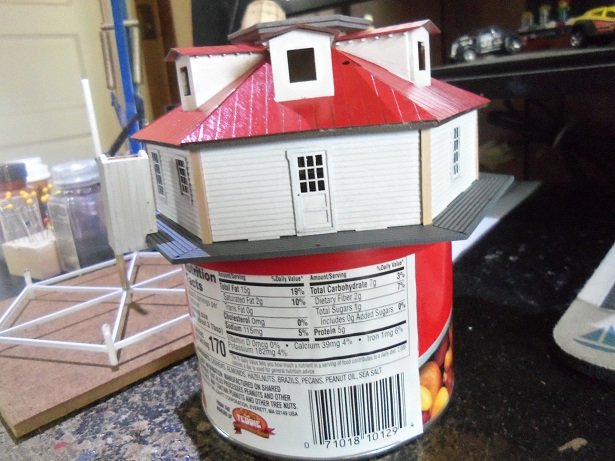
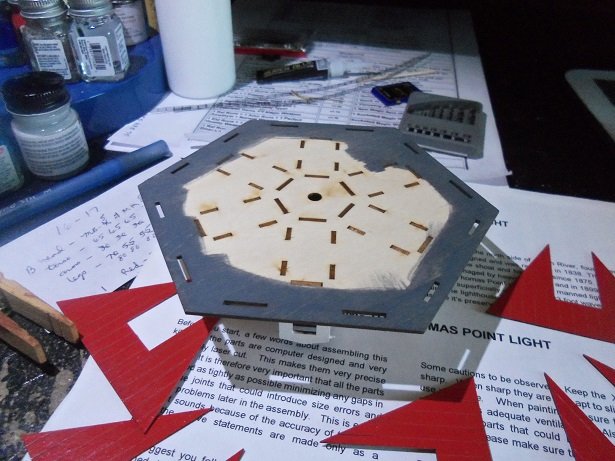
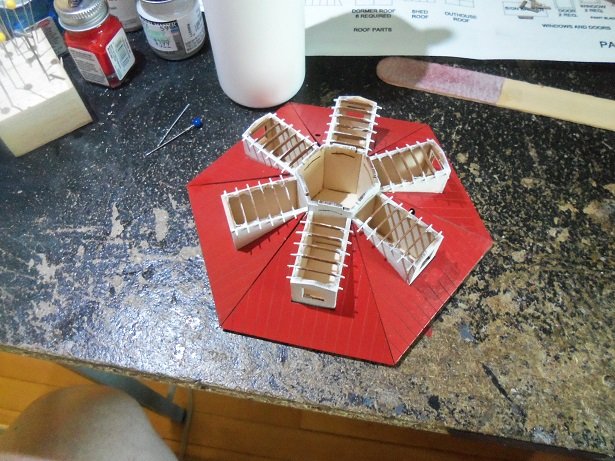
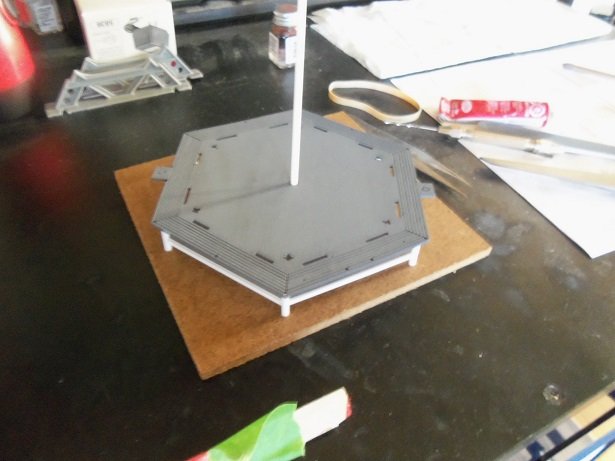
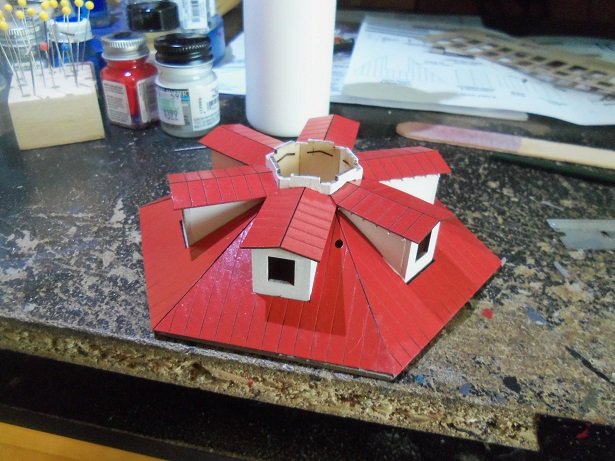
what can I say........it's the kind of day I've been hav'in Third floor moved out..........I was put in charge of bring'in his 'leavings' to the curb..........'bout 100 bags worth! the neighbors will be cry'in on the fence tonight! they already complained about him putt'in a few pieces of furniture out there last week! did the lawn work too......all that is out of the way for next week......my birthday the following week I'm on vacation.....we go to the seafood festival out at Hampton Beach.......plan on gett'in fat on the beach I did this first......painted the underside of the roof gray I did this the other day.......painted the bottom floor gray making head's or tail's of the doors and windows......there is a sticky backing to them. I put the bottom part on the doors.......I hope I don't get any paint on the sticky part, because I have the clear cello to put on the after. I tried to think of a good way to cement on the main roof parts, so they would match up all the way around. these parts are made of card, and painting them did put a bit of a warp to them. I taped them down to keep them flush while they dried. I kept the corners flush to the edges....hope they all fit OK. one thing this kit doesn't tell you, is the orientation of the first floor walls. I have already primed them, so I could match them up with the slots. I also had to judge where the two smoke stacks would be on the model. the first floor walls, as well as the shed and outhouse walls have been primed for paint now.....to think of a different way to set the bottom floor up with the spacers, so they can be better removed. I still need to add the other six formers for the bottom frame of the screw pile. that will raise it up to add the upper braces for the floor. the six holes can be seen around the inner part of the deck. there are also holes to run the many truss lines that help support it. the dormer roofs were cemented in place next.......the idea about the rafters was a success. I did need to trim a couple, but that was no big deal here....I'll turn it around......... I had a bit of a laugh, because it looks the same all the way around more on the lighthouse soon!
- 97 replies
-
- 20
-
-
doin' some roof'in today........ man walks into a bar "what'll ya have?" "I'll have a shingled roof", the man replies "ne'er 'erd of it!", the bartender bristled. "sure ya 'ave', the man torted........"it's on the house!"
-
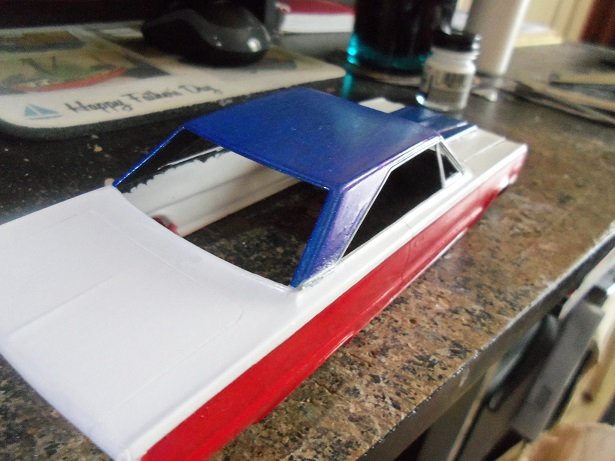
the log isn't dead yet.........I've been doing a bit of painting here and there on the body I think it looks almost good enough to continue. something soon
-
sweet look'in truck 'n trailer Danny! I've been look'in for a Freightliner kit. Wal Mart uses International and Volvo as well. looks pretty cool what you built!
-
it's OK.....wood wasn't my first model either
-
look'in super Phil.........
-
it's a real treat to check in to see that you've made such good progress with the cannons and lids really looks great Michael!
-
superbly done! great looking repair as well
-
thanks Ziggy.........but no.........#3 is firmly in place and I'm not changing it I had them all on there at a time earlier, and I though it would look good painted........that's the reason why I painted it. I appreciate the offer though. the model has been moved to the main table....yesterday I had no gumption to do anything. today I feel a little more alive
