


popeye the sailor
-
Posts
15,993 -
Joined
-
Last visited
Content Type
Profiles
Forums
Gallery
Events
Posts posted by popeye the sailor
-
-
thanks for the compliment OC..........the initial Pho-par is what got the Murphy ball rolling with this one. as I've come to know.....there's always one project that's not gonna go the way it was planned. Ideas may look good on paper, but in application, they fall flat. small bites.......chew......and then swallow
")
-
well....tell Sven thanks for me........and thanks to you as well
") if it wasn't from the subtle 'push' from Ken, I wouldn't have tried to do it. I hope I can pull it off........so far.........so good! big thanks to you Ken 👍
if it wasn't from the subtle 'push' from Ken, I wouldn't have tried to do it. I hope I can pull it off........so far.........so good! big thanks to you Ken 👍
not to disappoint you.....here is a small but productive update. I had trimmed the larger pieces of wood and split it all........guess I'll have no use for the pseudo wood load.
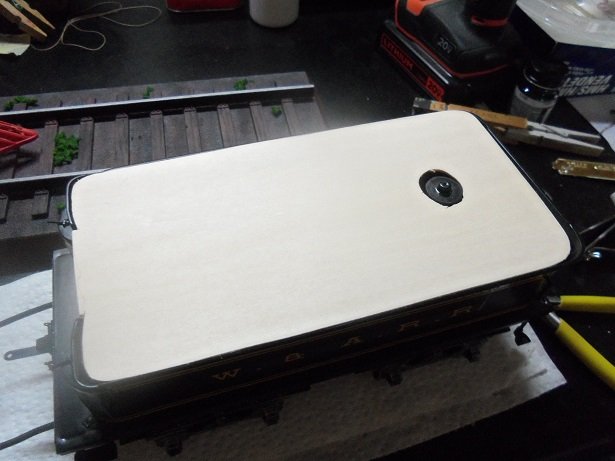
looking at the platform I made, I felt that it should fit lower in the tender. I trimmed a little off the three sides, and was satisfied with how it fit. it is now cemented in place.
filling it out starts in the front.......I have to build up the load front face first, then pile over it in somewhat of a heap. I'll do fairly neat rows until I get back to the water fill, which I want to leave accessible to some degree. I only used the testor's green tube glue along the bottom.......the rest is done with white glue.
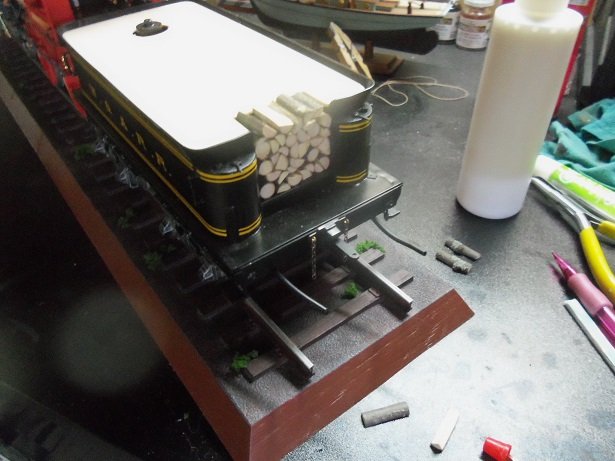
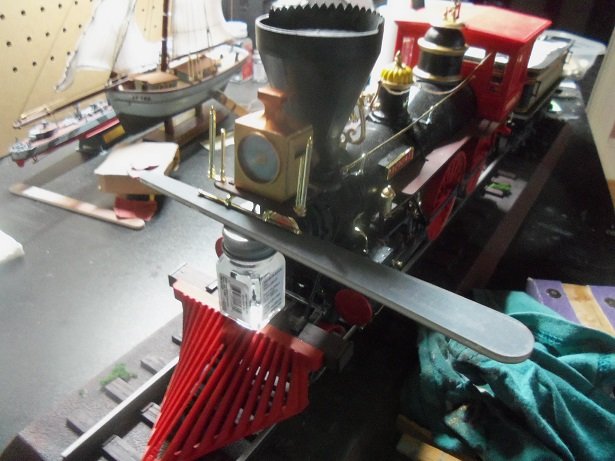
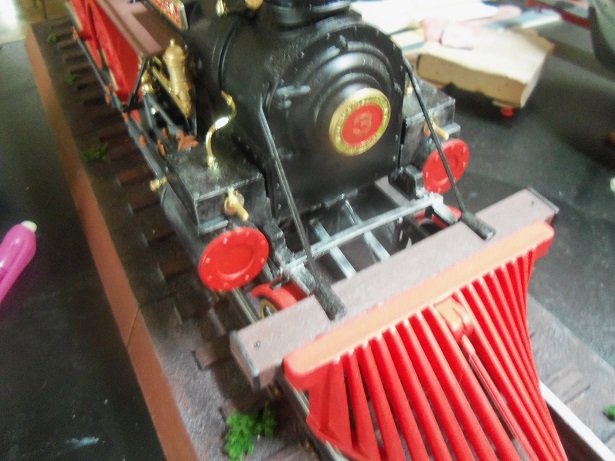
while this was drying, I installed the headlamp. there are no braces or brackets for it, other than the two that connect it to the loco. I will leave it braced up until tomorrow.
things got rather busy 'round here, so I didn't get much further with the wood load. I did manage though, to paint the edging around the platform with flat black, so it wouldn't be seen through the piled wood. I hope to get back to it later.

thanks to everyone who hit the like button........and thanks for look'in in
more to come soon!
- hexnut, GrandpaPhil, marktiedens and 13 others
-
 16
16
-
so many odd shaped parts..........masterful work!
love that gun........so freak'in neat! 
- Canute, mtaylor, Old Collingwood and 1 other
-
4
-
thanks, but the body doesn't look smooth.......I'm still not happy with it. but I will finish it........one never knows. it could come out look'in halfway decent
I actually started to write this reply a few hours ago.........been real busy 'round here. thanks for the vote of confidence
- Old Collingwood, mtaylor, lmagna and 1 other
-
4
-
 glad I'm not getting chastised for cutting my own wood. believe it or not.......I'm sitting here at my desk, and that's all I can smell. hopefully I won't need much more, but all that I cut has been split and ready for stacking. as luck wood have it, I happen to have some testor's in the green tube for the wood to plastic adhesion........I can use white glue for the rest. I should have more on this later on.....stay tuned
thanks for the kind word and to those who hit the like button
-
plastic is too hot going into the molds.......the quick cool is what creates the sink holes. I used to work in injection molding......made Chrysler window transmission grommets, Caterpillar hydraulic wiper rings, and various neoprene seals. very nice work none the less
the body looks really good...I do believe I see a hint of blue
- druxey, Old Collingwood, mtaylor and 2 others
-
5
-
-
I use three pairs of glasses........my normal 1.25 reading glasses.........1.50 and a pair of 2.00. works well for me
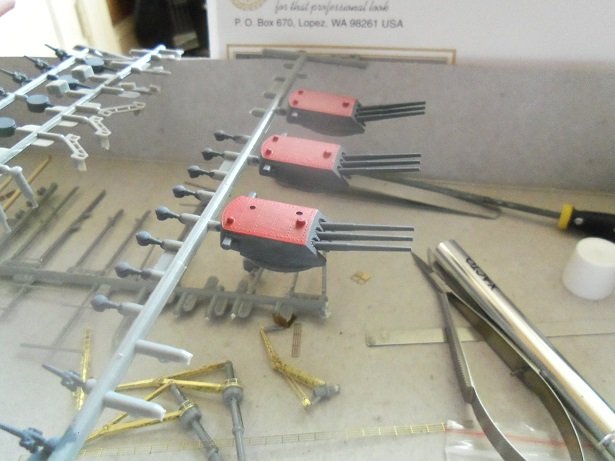
I'm beginning to dabble in PE myself Mike.....not the most friendly stuff, but when you get done, it looks good you'll have fun
- mtaylor, Canute and Landlubber Mike
-
3
-
awesome..........has to be your most life like yet
- Canute, cog, Old Collingwood and 2 others
-
5
-
I though the same thing when I saw how thin the bulwark posts were. how well did the parts come out of the parts panels?......noticed on the stern, one of the post lost a layer of plywood {last picture, port side}. I'm sure it's nothing you haven't dealt with
pleased to follow along
- Canute, mtaylor, Old Collingwood and 1 other
-
4
-
a little forward roll on this project. as mentioned, the body still looks a bit rough. my painting didn't help matters much either. I did get it to look halfway decent though........once the decals are on, it should look OK.
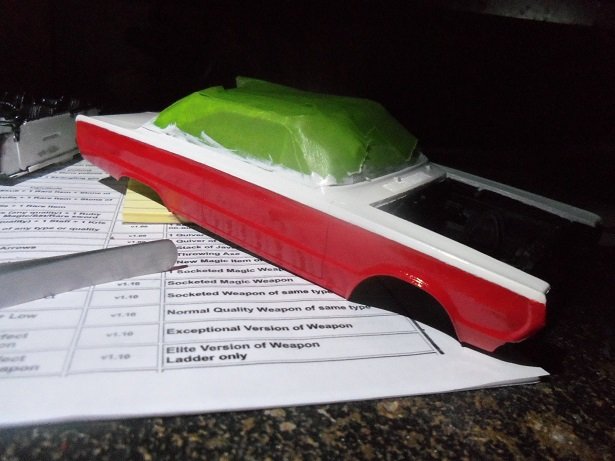
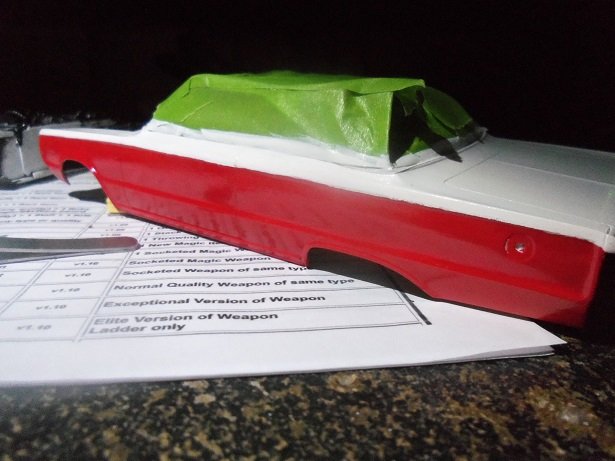
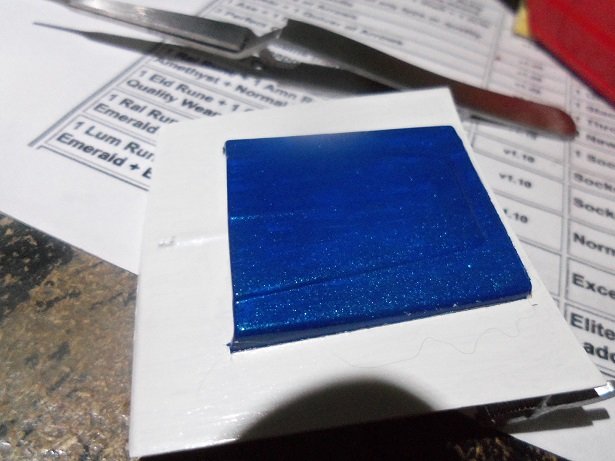
noticed some minor touch ups on the trunk. I painted the blue this morning.......I'm going to treat it with that paint, I used on the hood scoop. it says to use flat black.......but as I proved here....if I had used flat black, I would have had a shiny black hood scoop.
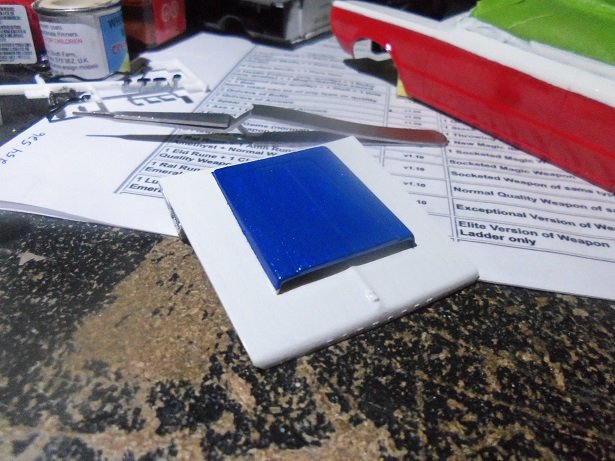
I painted the hood scoop blue....if you look close, you can see the glitter in the paint
- hexnut, Old Collingwood, src and 6 others
-
9
-
-
OK.....all that chopping has me puckered! .......and I'm only part way done
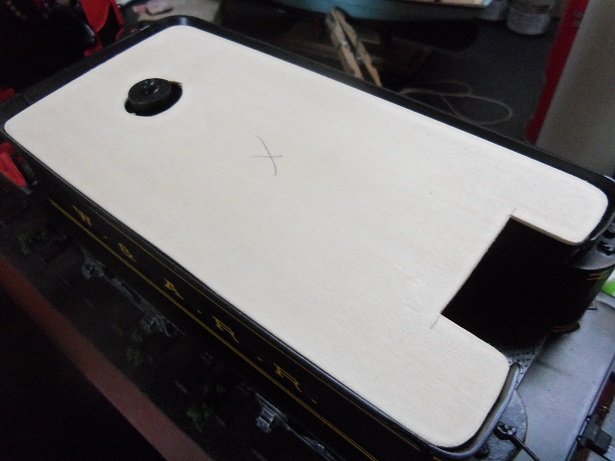
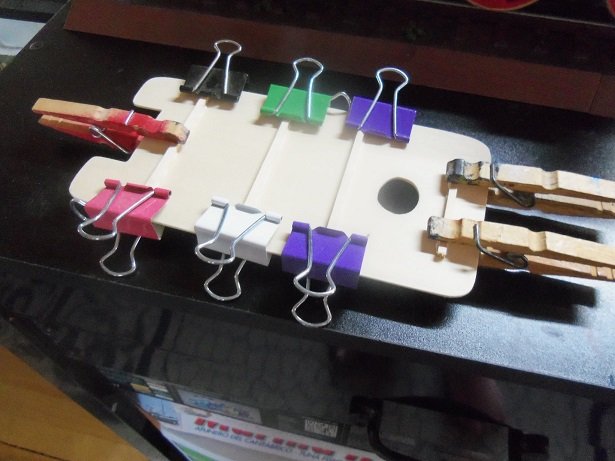
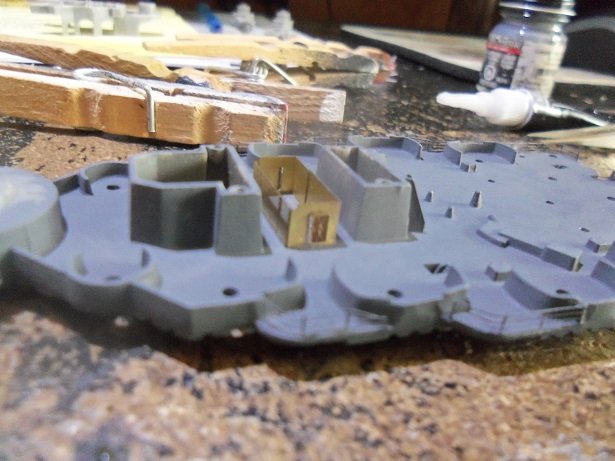
 of course, I'm not going to totally fill the tender, so I need to make a platform to base the load on. when the thought hit me.......I went in and traced the wood load on some 1/16 basswood sheet stock.
I had to cut the hole for the water fill port.......that I'm going to try and leave visible. the grab handles were cemented on the valve chest boxes, as I mentioned earlier. I didn't break anything else off.......clumsy oaf that I am {ask the admiral, she'll tell ya}
I was concerned about the weight of the wood on the platform, so I added some supports under it. you can see that I cut a section out of the front. there is another part that fits in the gap between the tender walls, in the front. this needs to be filled in as well.....I may have to cut in deeper {not sure yet}.
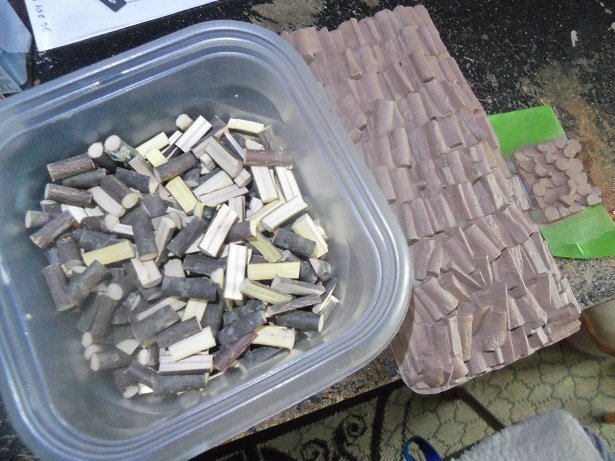
once dry, I checked it to be sure I didn't have to adjust them at all. >film on that at Eleven< this brings us to the actual wood.......I started to cut it up today. I'm really not sure how much I'll need........of course I'll have to split some of it. the jig did move with all the vibration....I'll have to trim some of the wood back to the proper size
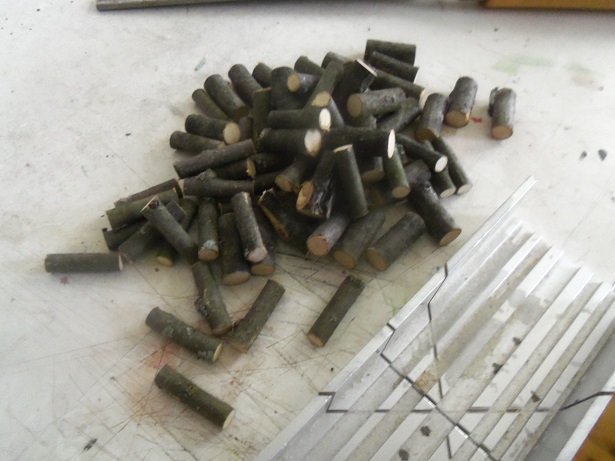
supposedly, they are all to be the same length as the wood on the plastic part........I'll just have to periodically check the jig and reset it every now and again. splitting the larger pieces can be done with a razor blade...but I think I'll try a utility knife blade {no bar across the non blade side}. I did buy one of those 'choppers' from Micro Mark.......but I think what I'm about to do will void the warranty
here's what some of it will look like/
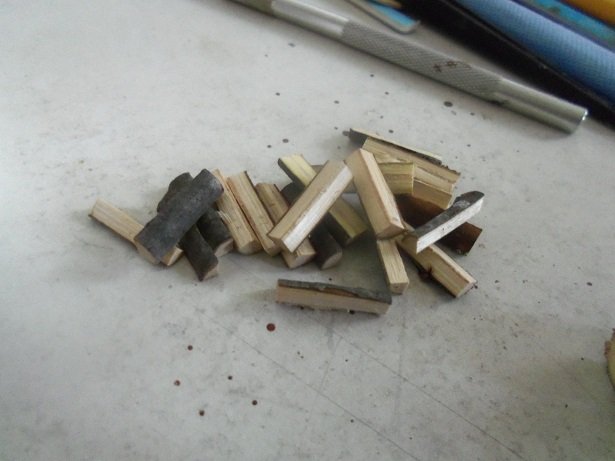
did my bess ta keep the lichen on them there logs ........gotta love it........nature's detail
- GrandpaPhil, marktiedens, pjofc4 and 12 others
-
15
-
-
ya had me with the Focke Wulf............such a great job on her. one of my favorite single fixed wing
you've done a superb job on these planes......I too hope you do a log here on one of your projects. now that you whet my appetite........where are the tanks?!?!?!
truly nice work!
-
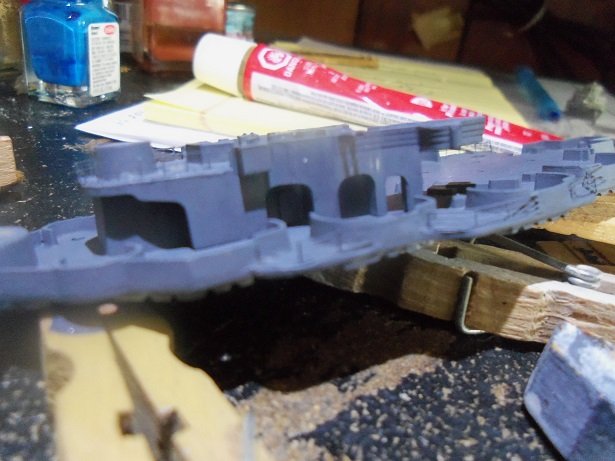
I did some mess'in 'round with the model today........started off, I just felt destructive
 so I removed the railings from a few parts.
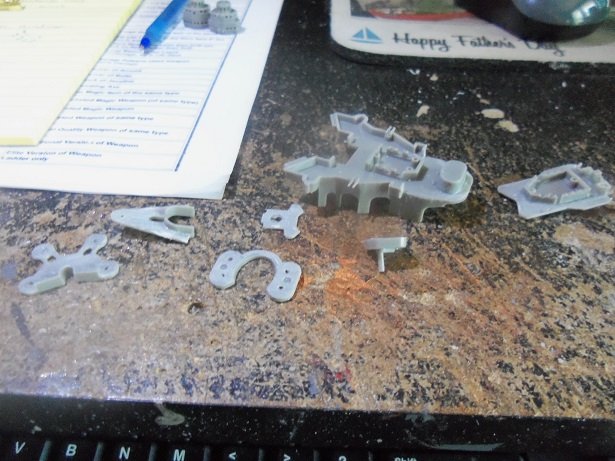
I began with the big part...guess you could call it the third level ........I only removed the front part of the casements. it's a weird shape......and they just had to mold those two guns on deck. ....could have upped the parts count by two!

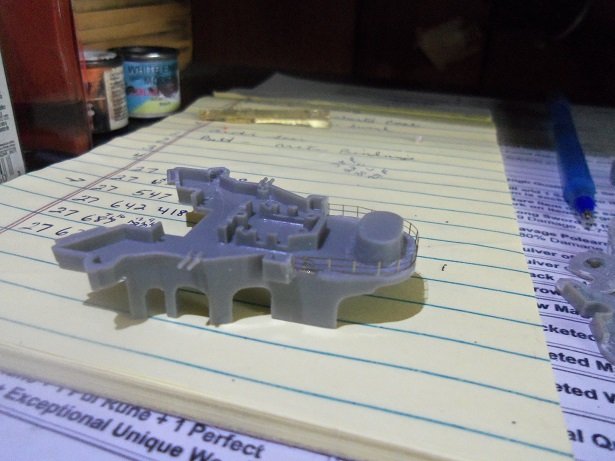
now......I have information that there was another building on the second level deck.......in between the two existing structures. I was going to add it, but then I changed my mind, since it would hardly be seen. I changed my mind yet again........
yup! ...........added PE doors on it too, I did. the third level was painted......and cemented in place. depending on the light........yea, it's hard to see.
you can barely make out the door.........it can be seen a bit better in this shot.....
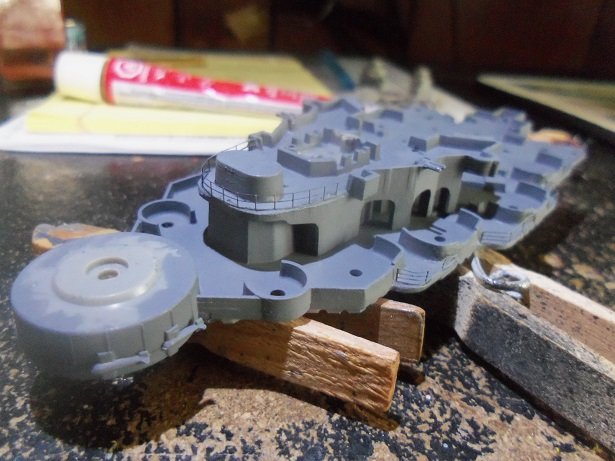
as mentioned, I did paint the turrets
I painted the other smaller guns and the search lights too. I'm going to check to see if I can use the part of the original catapult, that has the locator pins. it doesn't say so in the directions I got with the PE, but it makes sense
I'll see if I can get more done
-
look really good......not familiar with the two turrets mid ship......are they launchers of sorts?
- Old Collingwood, Canute and mtaylor
-
3
-
in the last photo of plans, I see that they have the main and mizzen confused......should be the other way around
before you go any further, make sure that the studding sail booms are toward the front of the yard, rather than on top. the studding sails when rigged will over lap the central sail.
toward the front, angled slightly upward.........most ship that have these sails are positioned this way. I also notice that extra yard or gaff you referring to on the Bluejacket plans.........I believe it's wrong. there is no gaff that high up on the mizzen mast......if there is an upper sail from the spanker, it won't need one anyway. there are no yards on the mizzen either.......at least, not that I'm aware of. the problem with a yard that high on the Mizzen, would meant that there would also be a lower topsail yard, to secure the lower corners of the sail. I believe you can see this sail rigging on a sloop or a barque. I like your picture there.........good depiction of what she looked like
-
-
great way to display the ship's boats........else they wouldn't be seen. they'd be stowed away inside. she looks amazing!
- Old Collingwood, RGL, Piet and 2 others
-
5
-
you'd need a diagram of the shunts and leads to map out the series. yes....that would truly be insane
 awesome job!
-
-
-
Ferrari 250 GT California Spyder by CDW - FINISHED - Italeri - 1:24 Scale - PLASTIC
in Non-ship/categorised builds
Posted
I recall some older kits that supplied springs........that was short lived. great idea for the extra detail file")