


popeye the sailor
-
Posts
16,007 -
Joined
-
Last visited
Content Type
Profiles
Forums
Gallery
Events
Everything posted by popeye the sailor
-
 I got back into building the Guillow's model aircraft. I've built a Spitfire MK 1 so far, but afraid to fly it. at the moment I have a Fokker Dr 1 in the closet....need to finish sanding and shape the wings and stuff. I tend to buy direct or from stores, so I know little of all that nonsense......living in the states helps too
 -
great to see an update J..........looks really good
- 258 replies
-
- 2
-

-
- harriet lane
- model shipways
- (and 1 more)
-
all the additions look awesome........you did a great job! hope your feeling better......that had to hurt
-
looks great! good to see an update.
-
I just use clothes pins........I flip the wood parts over on the spring , and it give it an inverted look
- 89 replies
-
- 1
-
-
- constitution
- revell
- (and 1 more)
-
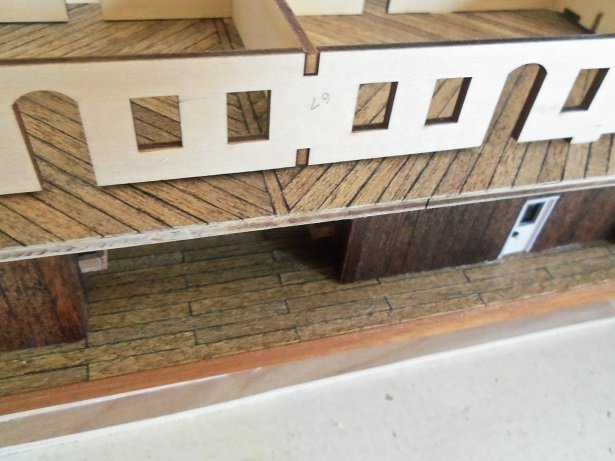
yes....you made me chuckle.........thanks for the fine comments everyone getting out of work @ 3:30 in the afternoon...{a little after 4:00, I walk through the door} is kinda nice. now if I can just get through with all the nuances that I've been fielding so far, I might be able to think about doing something on the models again. it's been a while since I've done anything during the work week.......always too dragged out and tired. correct Lou........herringbone. amazing how quickly the planking went doing it this way. good idea Piet........for those who want to freefall, strap on a 2 x 4..........it should work well thanks OC......all in the way I cut the planking. I hardly made any adjustments at all thanks Michael! I can't wait to see a finish on it! for the calking, I got the idea from our wonderful moderators, John and Danny.......archive pens. I get mine from Hobby Lobby, and have a variety of different tips { I use three of them}. one time, I got stupid and left the cap loose, and almost ruined the pen. but I bought a bottle of India Ink, and a couple of squirts revived the pen. it won't soak into the wood like magic marker. I stain the planking before I apply it to the edges. I had to do a dry fit after the deck was trimmed. I was also curious how much of the deck showed outside of the second level structure. I like what shows I'm pretty sure that the center line is correct......although the dividing wall inside the structure doesn't agree. I think it makes a nice floor pattern inside. I may omit the window on both sides, where the smoke stacks will be placed. it doesn't make sense to have them showing. I took these the other day. thanks again for the kind comments........and thanks to all who hit the like button

-
looks really super glen!!
-
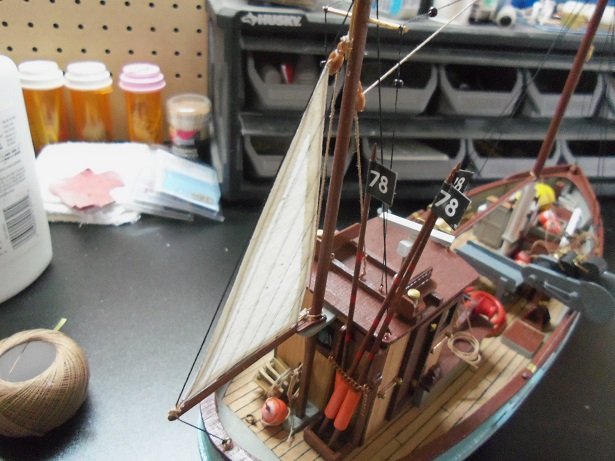
made a little headway.......the fore sail is almost done!
- 378 replies
-
- 8
-
-
- t78 norden
- billing boats
- (and 1 more)
-
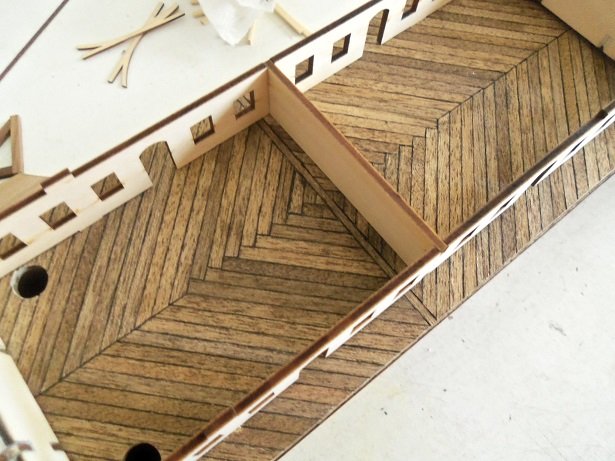
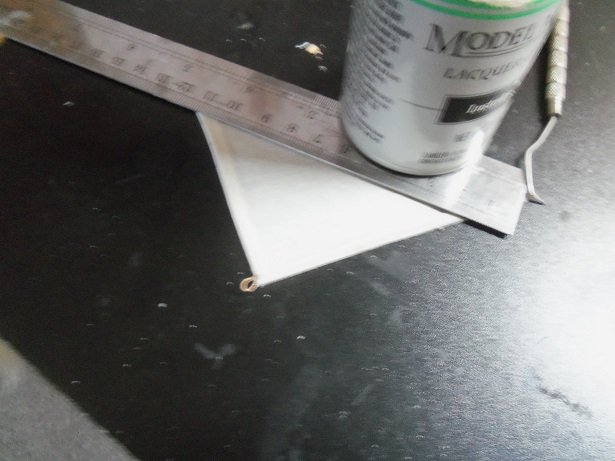
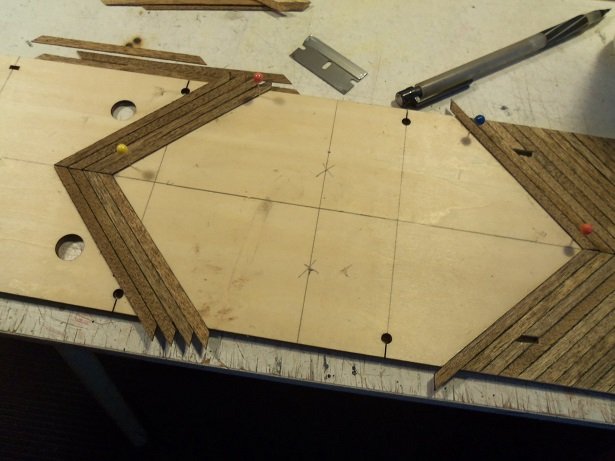
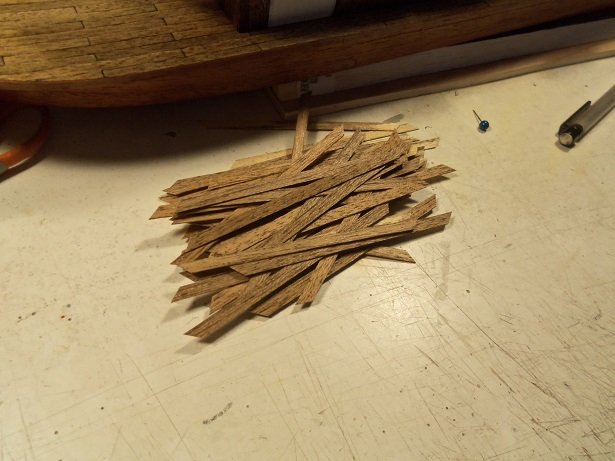
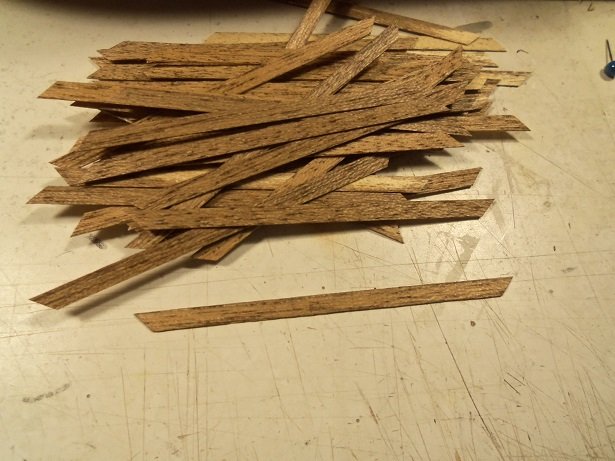
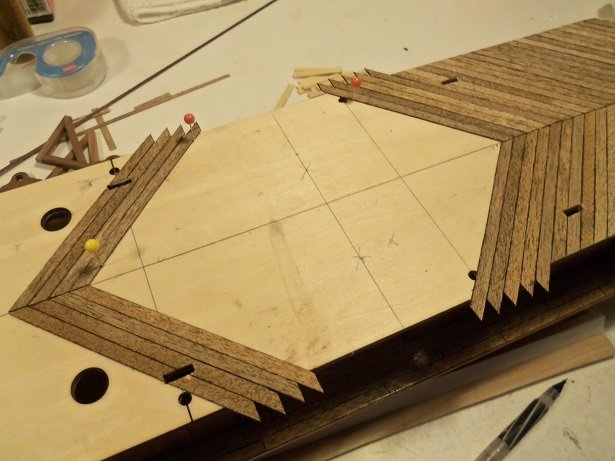
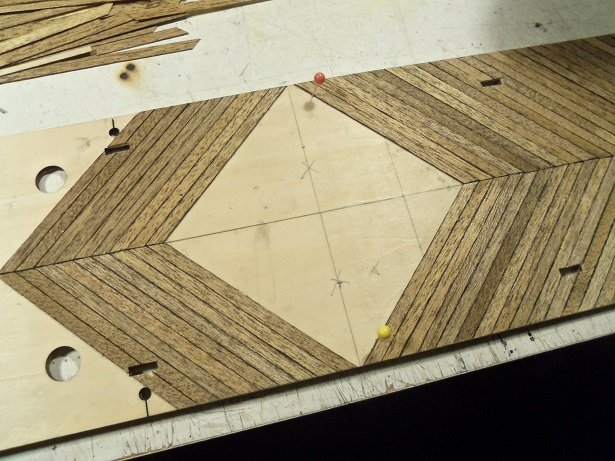
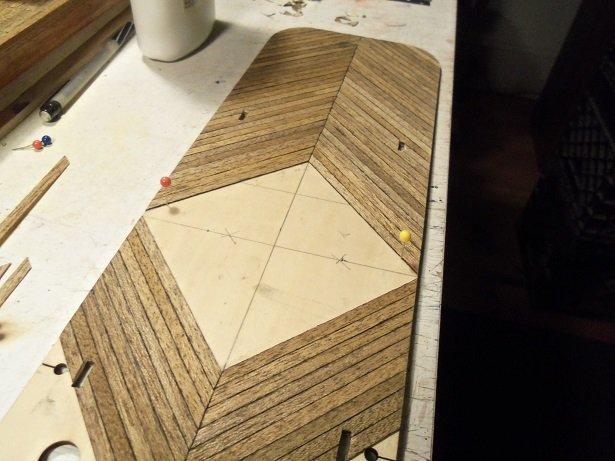
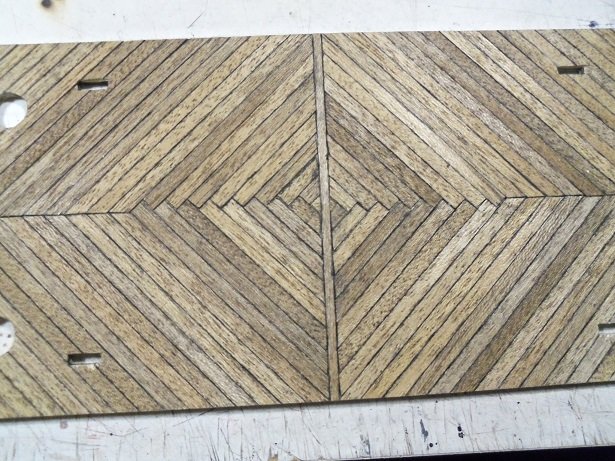
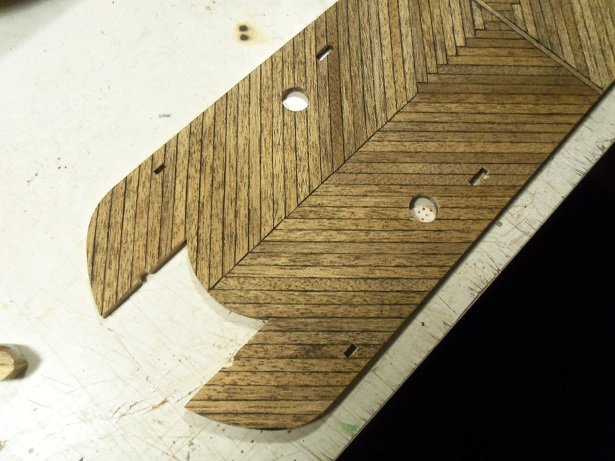
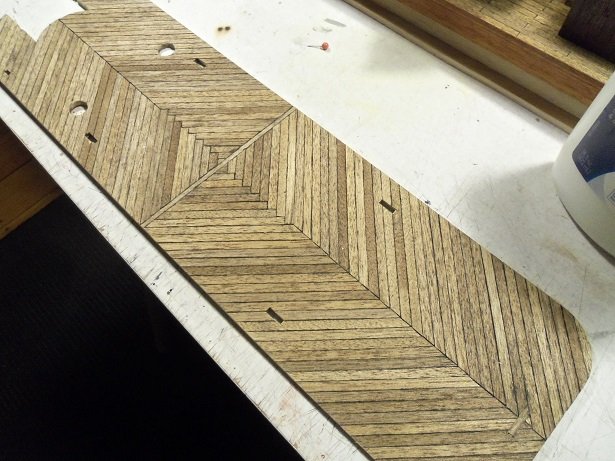
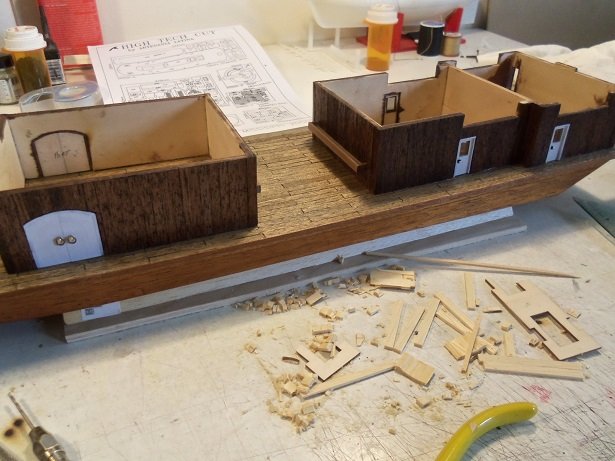
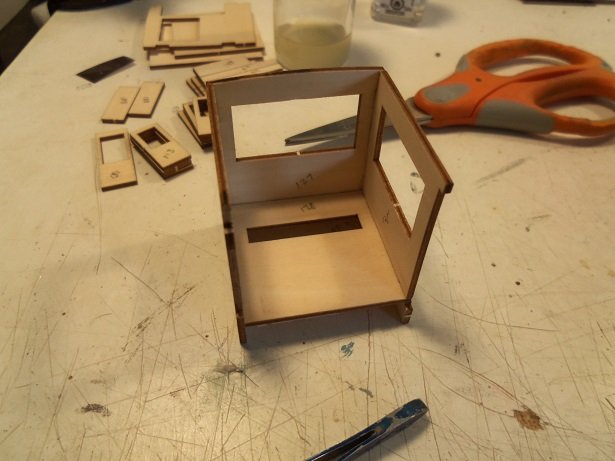
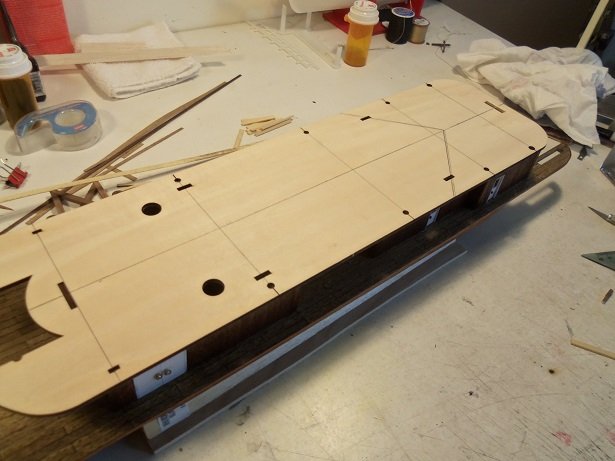
yepper folks! it's true {head hang'in low}...........I'm a plank o holic. lately, everything I see, I want to plank over it. the second level deck is completely planked, trimmed, and sanded around the edges. I just need to lightly sand the surface, go over it again lightly with the stain, and give it the seal coat. as seen in the earlier picture, I came up with a different design for the deck. I actually think I cut down on the odd cuts I'd would need to make, to do per the instructions. a bunch of planking was measured and cut to size. I began to lay the planking aftward in the angle pattern. as can be seen, I already trimmed it around the edge, to keep from nick'in it with a sleeve or anything that might pull it up. I cut out the slots for the structure, but I made a goof.....I cut out the one for the lower structure by mistake. I filled it in with a piece of planking, rather than pull the bad ones up. the idea of going in the opposite direction towards the forward, sounded like a good idea. so, when I got further towards the middle, I drew a center lineand lines for the opposite angle. I began the planking at the forward end. I was running low on planking, so I cut some more. looking at the ends, they are unique. depending where they are to be placed, the plank can be turned around to meet the angle needed. I thought to even the center up, so they will be equal when they reach the center line. I worked inside the box, as it started to take shape. till finally, I had a neat little box. note that it's open slightly on both sides. there is a reason. so at this point, I continued with the forward area, working my way to the end. I was cutting out the holes as I went along......still need to cut out the pole holes. I'll do that later with a drill bit. once finished, and and a chance to dry, the end was trimmed and sanded around the edges. all that was left, was the box. it was planked a bit differently......the center butts will not be seen. a center line plank was laid {a 3 mm plank}, and then both sides were filled in. the right side is planked opposite the left side. kind of gives it an optical look. the only thing I haven't done, is dry fit the structure on to see what can be seen along the sides. my guess would be.....not much. do me a favor though...... ..please don't stare into it for too long. I'm not sure what effect it will have on humans


-
thanks for the good word Kevin and Lou. 1:72.......gee, if I had the panels with the hull parts {just the hull parts}, I could make use of all the mahogany planking I have on hand. I received the replacement planking for the Nordkap the other day. it will take a while yet....I'm not break'in any speed records. as a matter of fact, I just got done planking the second level deck......the whole thing! my neck is killing me right now yup Lou.......I keep this up and I'll be look'in to have phalangeoplasty done on my hands. I'll never be able to play the piano again not that I know how thanks to all who hit the like button
-
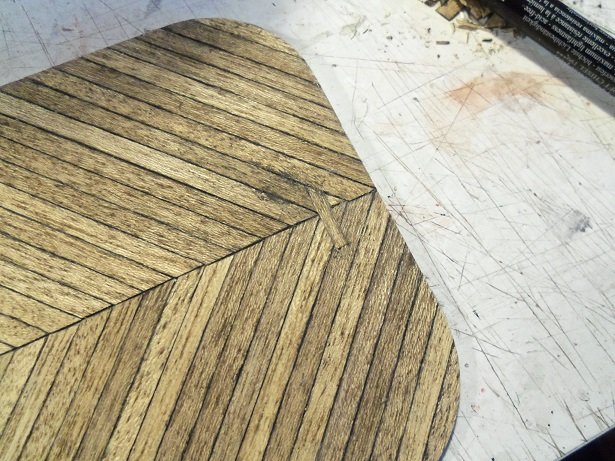
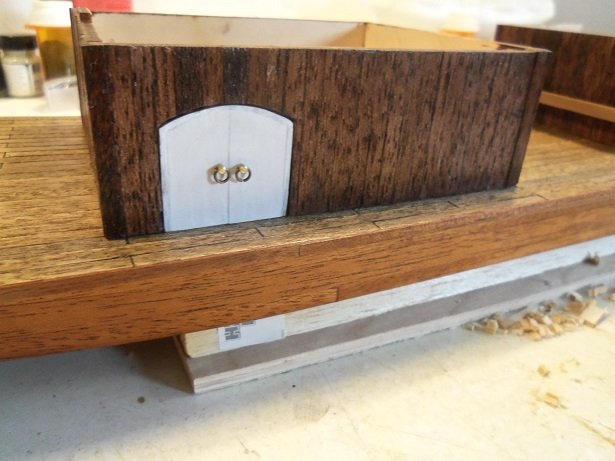
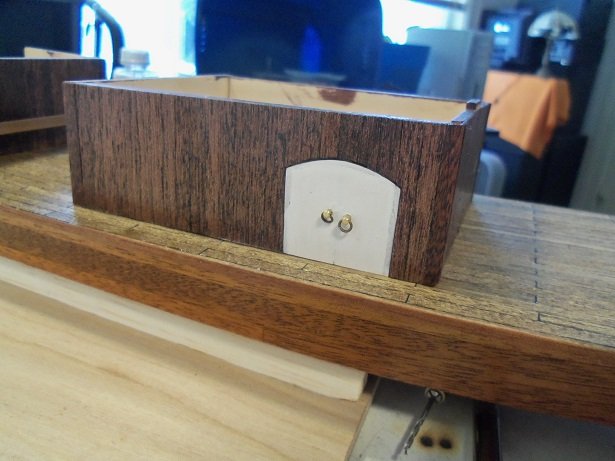
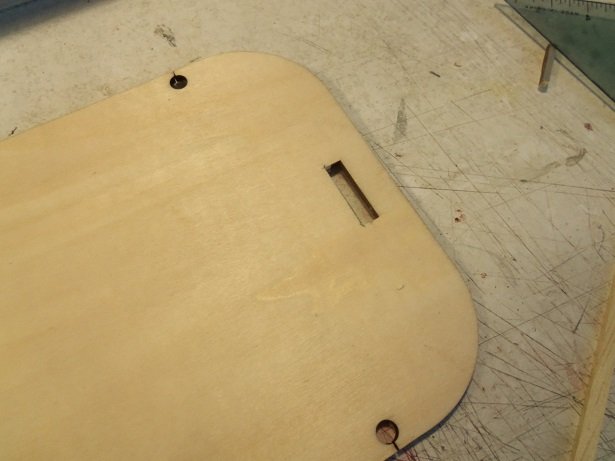
thanks John! still feel like a sow process. there are a few more parts to be added before the second level can go on. then I think it will gain momentum. I love to plank.......but I think I'm getting planker's cramp! I do have a small update to show. the forward structure doors are done and have been cemented in place. I still need to put the hinges on them, but I can do it on the model. the structure is now cemented to the model. it might be the way the rings are positioned, but it looks like one may be larger than the other. I will check that out I took the rubber bands off the helm structure and removed the wall I didn't cement. I can work on the interior now. I had started to map out the planking for the second level deck.......first thing was to make the adjustment on the offending slot. while I was doing that and cutting planking for the deck, my x-actor rolled off the table. I'd say it's a finely balanced tool.......good thing my foot wasn't there already happened to me once........I was wearing shoes {good thing}. to finish off the slot adjustment, a piece will be cemented in to lessen the gap that will be created. I haven't done it yet..... I decided that I would do something a little different with this deck. seems like a lot of cutting and fitting. it seems odd to me that they would plank a deck like that anyway. so I mapped out whole planks going in one direction, joining diagonally. I may......I think it would look just as cool.....to go to the other end and do the same thing, but in the opposite direction. it will merge in the middle. here is where I am now with the mapping. go to the aft end........then plot the middle and draw in the other lines.
-
coming along nicely Piet armament looks really good.
- 378 replies
-
- 4
-
-
- java
- pacific crossroads
- (and 2 more)
-
congratz Mike! she looks absolutely amazing! you done a great job
-
oh shoot! I think your right John! I've got a bunch of pictures saved up. that's gonna be a super project when I get around to it. the ship is a shade over 32 inches long..... thank you Nils.......it doesn't take much to dress up a kit...many folks here do just that .....and your scratch building is amazing!
- 378 replies
-
- 4
-
-
- t78 norden
- billing boats
- (and 1 more)
-
cameras can be our own worst enemies! looks very good though.......your quite the artist!
-
thanks for the kind comments.....and thanks for all who hit the like button currently working on the fore sail and the life preservers. after that, there are two more aspects that will finish the model......more tomorrow if I can get to the table. thanks John......I'll try to get the preservers done, so you can see how they look thanks John.......I think that is a picture of the St Romanus, another North sea trawler. if you want to see some other great looking trawlers, go here http://www.hullmodelboatgroup.co.uk/ most of the models here are scratch built. I believe the fish are made of rice, or whole spice {cumin, caraway etc} thanks Pat......sorry mate, plastic don't taste very nice thanks for such a kind comment
- 378 replies
-
- 4
-
-
- t78 norden
- billing boats
- (and 1 more)
-
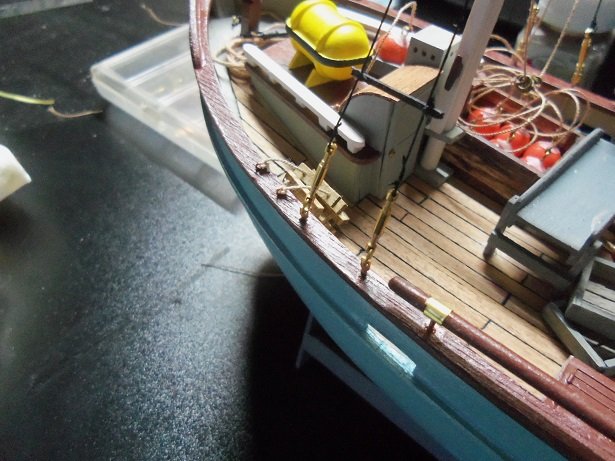
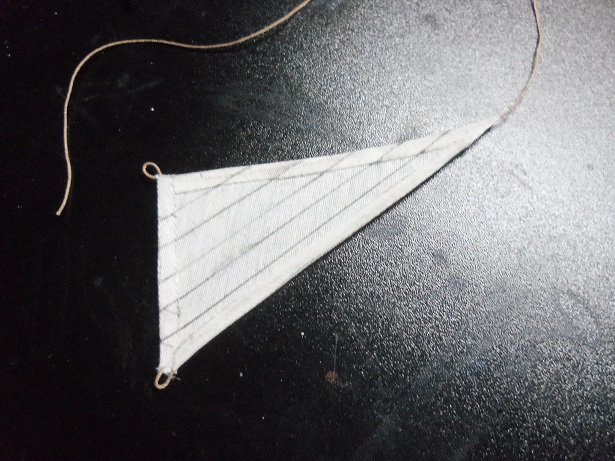
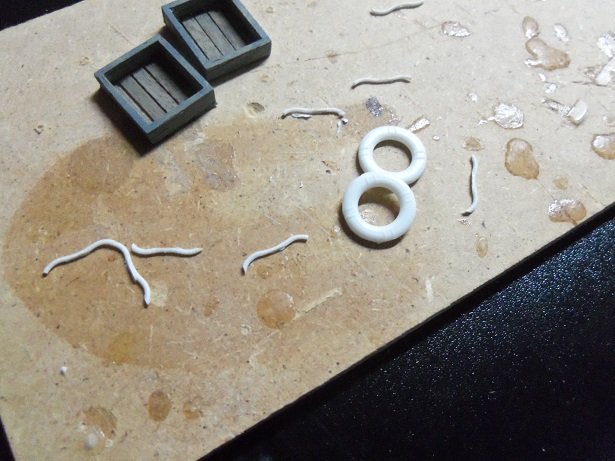
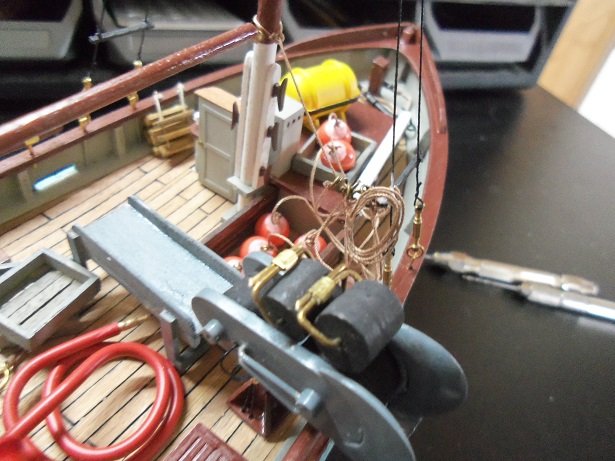
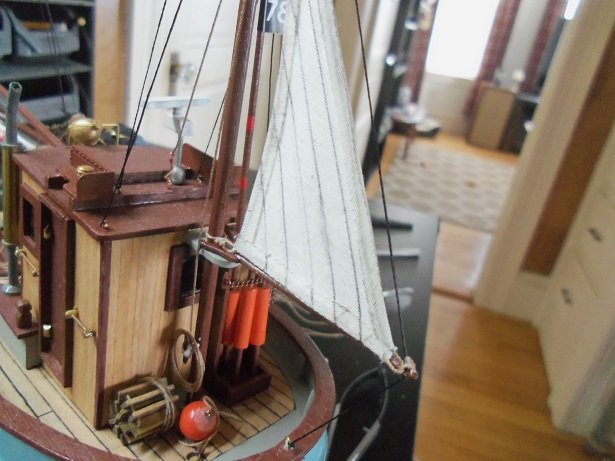
this morning, I though I'd do some of the last bits to the Norden. as I had mentioned earlier, I had strung the buoy rings on the guy rope I rigged up for them. I also rolled up the ladder, I had set up on the port side. like john, I wasn't too keen on the plastic plates with the fish detail on them. I think I had another build that had them to......I believe it was the Mary Ann. I tossed them out.........now I'm wishing I had hoarded them as well. I have this idea of cutting the fish from the parts and laying them in the trays. they might look a bit more natural. I rigged an extra single block and cleat to the aft mast, and prepared the aft sail. simply.......fold over the edge pleats and trap some thread in between, creating an eyelet at both ends of the bottom. I traced the pleat lines on both sides of the sail. as I mentioned.......for two sails, I wasn't going to get too fancy. now if I were working on a Bluenose or something, it might be a different story as I've done for all my other builds, a suggestion made by John {Jim Ladd}...{what John.....since the Nordkap } is to remove the fake rope off of the life preservers, and put some real stuff on them. it can be a pain, depending on how cooperative the procedure goes, but I like the way they come out. it starts by removing the fake rope. I save these pieces.......depending on how well they are removed, I think they could be used as regols for the gun port lids on sailing ships at this time, they have been painted red....soon to be rigged up. after the buoy rings were gathered, the guy rope was tied to the spreader on the starboard shroud. I made up a rope coil for it, to finish it off. the aft sail being done, and the tackle added to the mast, the sail was hung and tied. a rope coil was made for it as well. if I get more done.......got an errand to run.......I'll post it tonight thanks for look'in in!

- 378 replies
-
- 12
-
-
- t78 norden
- billing boats
- (and 1 more)
-
thanks Lawrence...there's really not much more to go. thanks for the fine comment......really appreciate ya follow'in along
- 378 replies
-
- 3
-
-
- t78 norden
- billing boats
- (and 1 more)
-
true........although they are not pointy however, I may snag 'em on my socks
-
hey! glad I'm not too late after seeing your Bismark Danny, I wouldn't miss this one for anything!
-
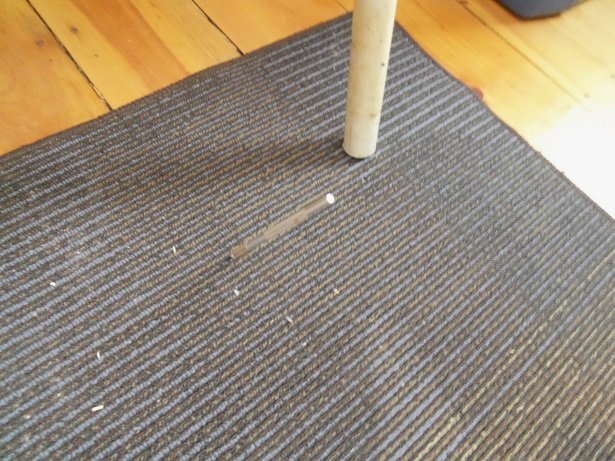
thanks Piet.......yea...once you start browsing through, it's very easy to over do it. I have others I'd like to have gotten, but the amount got too scary! I may look at unpainted ones, although, I still don't think I can give them the same love and detail, as the finished ones. yes Sam.......another one. when will I learn nawwwww! it's too much fun! welcome aboard and enjoy... I hope I can keep from becoming too boring I've heard a lot about the carpet monster of late........something I forgot to touch on in my last update. I was assembling the rings and the pins for the doors. I was using the kit supplied rings and found that they were a bit too small, so I opted for the antiqued ones I mentioned earlier. before I knew it, one of the tiny rings flew off to god knows where.......I couldn't find it. switching over to the antiqued ones wasn't much better......I lost two of them. one thing looking for lost parts is good for, is that for us older folks, it gives us the opportunity to stretch the 'ole vertebrae in many contorted ways in looking for the other ones, I found the first brass colored ring.....it landed in the doorway of the spare room! I never though it went that far! as for the antiqued ones........they are still among the missing, and likely won't be found until they are either picked up by the vacuum, or I start on another project.