


popeye the sailor
-
Posts
16,007 -
Joined
-
Last visited
Content Type
Profiles
Forums
Gallery
Events
Everything posted by popeye the sailor
-
 thanks OC and piet for the kind comments and thanks to all for the likes. I haven't gotten much further......but I did do a little trimming. one more day at work......then it will be play time
 -
.......now you have an idea of what it's like when I browse craft stores now now SHE'S the the one who plays the impatient one
- 378 replies
-
- 6
-

-
- t78 norden
- billing boats
- (and 1 more)
-
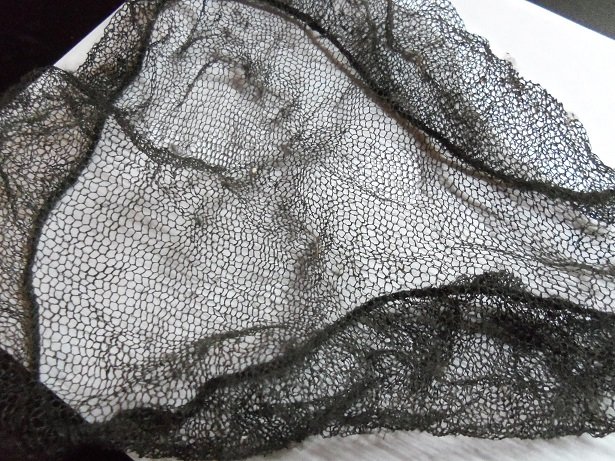
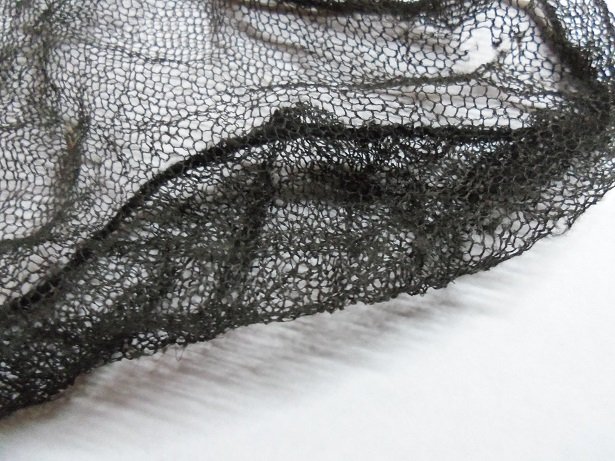
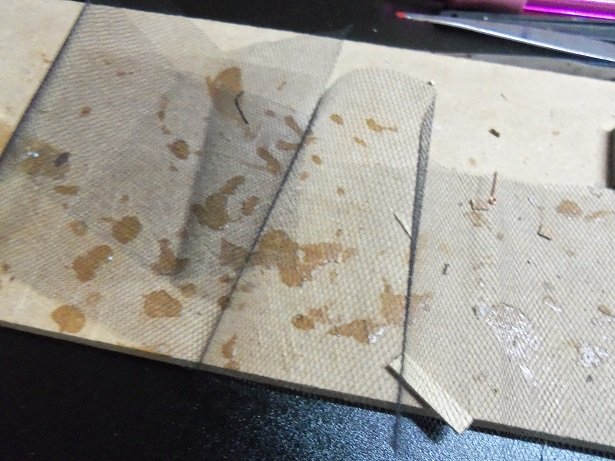
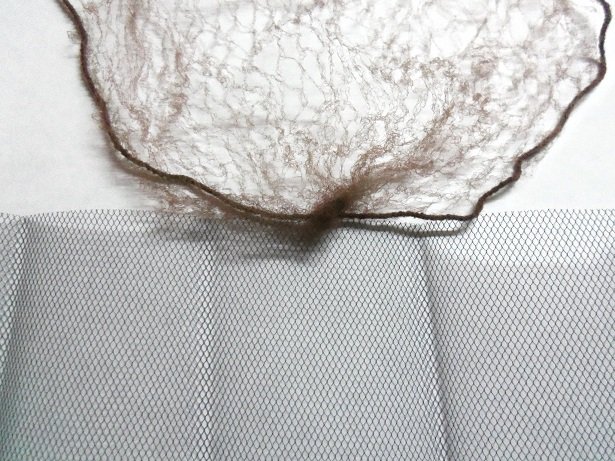
thanks for the suggestion Pat.......yes,,,,exactly! I need to lose the stiffness......when laying on the deck, it needs to fall into a pile on the deck, and not look poofy.....it a bit hard to describe. it can't be too perfect. lets put on our imagination glasses for a moment, I have this to show you. I brought home the hair net I got off the trailer floor. now....this thing has been walked on.....rolled over......and probably exposed to the weather, so it's pretty beat up. but it is still intact for the most part. there is no shine to this netting........it looks worn.......there are some small holes {nothing major}, and it is not stiff. think of how this would look lying on the deck. these holes are much smaller, than the ones I bought. I even like the head band that goes around the edge. I imagined it also attached to a boom, with something inside to balloon it out. how limp it is and how it bunches.......imagine.......a grown man daydreaming over this. I am certifiable '''''oh, I gotta go! the nurse is calling me
- 378 replies
-
- 7
-
-
- t78 norden
- billing boats
- (and 1 more)
-
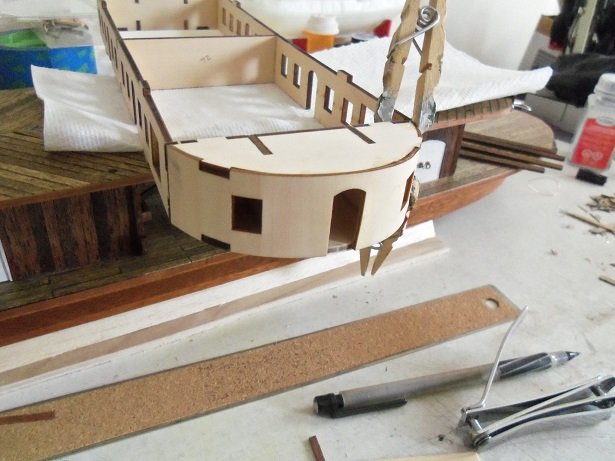
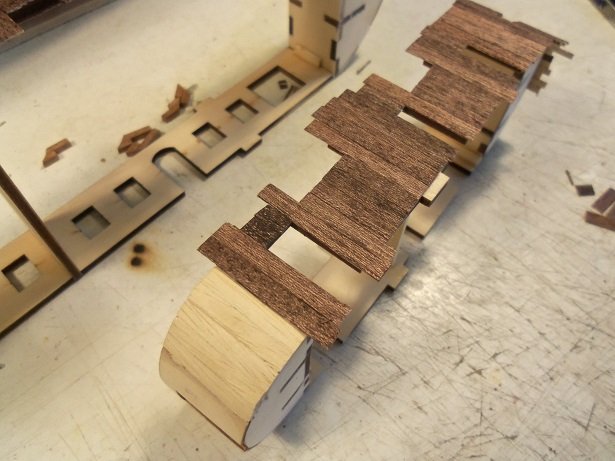
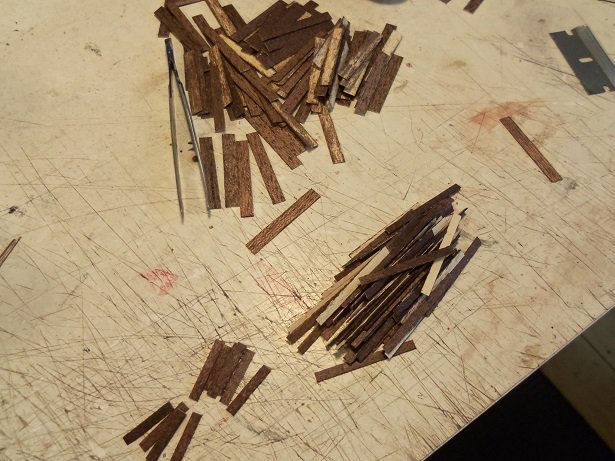
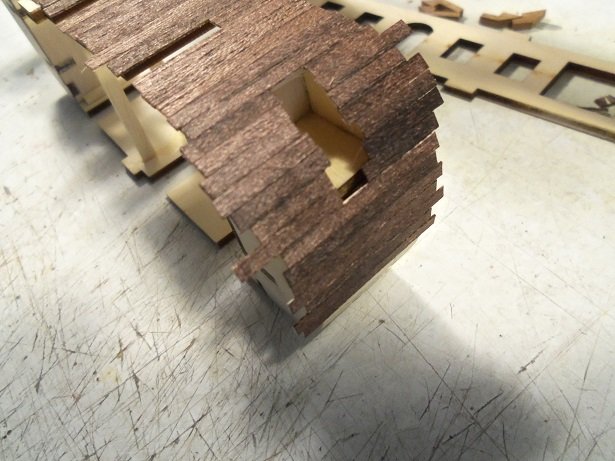
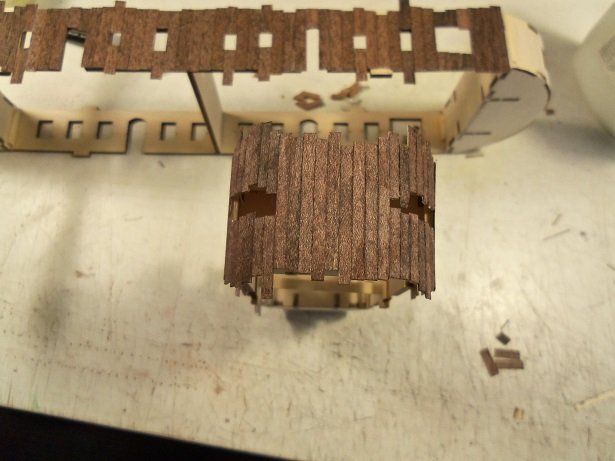
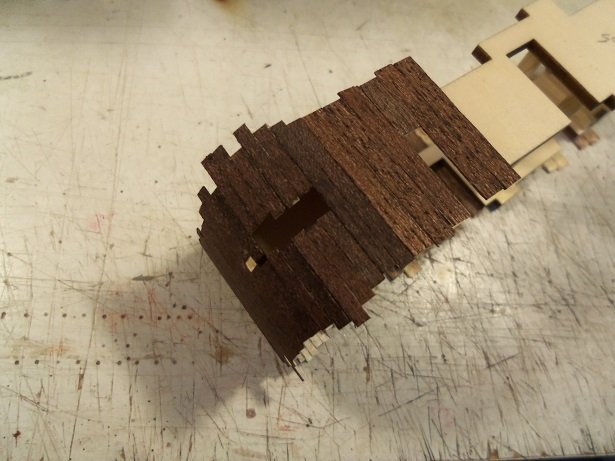
thanks gents .......I gave it a shot. it was suggested to me, to sit down with a model and lose myself in it. instead I replaced the radiator in our car. I yam undaunted. something else will come along.......you betcha! Friday........I did some of the structure planking for the second and third levels. if I could multitask.......I'da given the second level deck a lacquer coat. before I could do the planking, I needed to cement in place, the opposite end panel. I still need to cut out the windows on the other end. I soaked this one for a short time...didn't break like the other one. after sanding it to a rounded appearance, the planking started. note the plank on the far left.......the first one. it's lifting....something I dreaded. I will do something to hold the edge down, but I think I'll resort to using narrower planking on the ends. it will navigate the curvature much better. the third level was an after thought.......it's the same shape....why not! I started just shy of the turn....that way I could start the narrower planking without too much of a bump. I was also mindful of the tabs too....not leaving as much to trim away after. so I cut the two wood piles... changing over to the narrower planking, I continued with the third level. we had run an errand, which gave this time to dry. lengths were cut in half to go around the windows. ....and finding a good place to return to the regular planking, I kept going around the other side. trimming these structures is going to be a nightmare.....I can feel it. it will get even more interesting when I begin on the windows and doors I should finish off the coral gates......


-
holy cow Mike.....your moving right along! the rigging looks super...stabilizer and rudder looks sweet! your making me want to bring my Fokker out again.it's in the closet at the moment.......lot of sanding and shaping the leading and trailing surfaces of the wings, as well as the fuselage. it's nothing like what your doing though.......really nice work there!
-
thanks for the good word folks.....and those that hit the like button. figured that since tomorrow, I'll be back to work again....I'll bring home the net for you all to see. I also really should soak these nets to see if they will limber up...haven't done it yet. I hope to have an update on this tomorrow thanks again everyone!
- 378 replies
-
- 5
-
-
- t78 norden
- billing boats
- (and 1 more)
-
thanks for the good luck wishes.......I wish I had good news to report. I got the results back the same day...I failed to pass the test. I had problems with a couple parts of the test, which I'm sure affected the overall score. I guess I've been out of the loop too long,,,that and the industry has changed so much. I quit the garage back in 2000, to work in a warehouse. then in 2004, went to work for Wal Mart transportation, where I've spent most of my 13 years, working on trailers. oh well.....the hunt continues.......or I could try for getting into another facet of the post office. thanks for the thoughts and wishes I've been planking the structures...second and third level. they are both the same, so it makes sense to do one, and then the other, for the first to dry. it will keep the conga line going. I'll have some sort of update for you soon
-
awwwww........that's just new project jitters once you start........ don't mind me....I'm to the point where I don't think about it.......I just start chuck'in wood together I let the admiral yell at me afterwards you've put so much into shadow........imagine what you could do with this new project.
-
yup........this is about as bad, as when I thought the wind would clean the dust from my first build of the Revell U.S.S. United States. I left it on the porch and the wind blew it from the porch, to the driveway below. it wasn't salvageable. so sorry to hear
- 22 replies
-
- 3
-
-
- notre dame
- hydroplane
- (and 1 more)
-
catching up Russ......a good bit of progress I've had the same problem with tape.......I use two different types myself. she looks very nice though.....the colors work very well together. if your ship has it, you could do a waterline stripe, and make short work of it. even though all it boils down to really, is just some minor touch ups. the hatch looks great! another problem I run into, is when I leave the tape on too long, the paint will create a raised line that I have to lightly sand off, or hand rub, using a soft cotton cloth. wonderful progress.......well done
- 420 replies
-
- 4
-
-
- captain roy
- lugger
- (and 2 more)
-
that one picture........really shows how sweet she looks! the finish paints are really cleaning her up nicely. the big day is coming when we will get to see her finished, but your next project may just dwarf her really looks good!
-
a winch that detailed......definitely should be painted, blackened, weathered, and aged. it looks so good! nicely done Frank.....the winch is perfect!
-
glad to hear your still working on this project....can't wait till the sawdust starts flying
-
catching up is so much fun .........when there's so much progress! you have really done quite a bit....amazed at the detail you've put into her! truly wonderful model......very cleanly done
-
glad to see an update Michael......I know full well how life can get in the way. you've made some great progress......really looking super
- 749 replies
-
- 3
-
-
- albertic
- ocean liner
- (and 2 more)
-
superb rigging Nils........do you normally use jogs to create the pulley assemblies? I think it's ingenious........I can never seen to estimate how long to make one that will fit
- 692 replies
-
- 3
-
-
- eagle of algier
- chebec
- (and 2 more)
-
such amazing progress.........one can see that you enjoy sculpting very beautiful work......the stern is a work of art! I'm sure there's more to be added.
- 1,035 replies
-
- 8
-
-
- royal katherine
- ship of the line
- (and 1 more)
-
thanks Kevin.........haven't done much with her yesterday. the admiral wanted her treadmill moved out in an open spot of the room, so I did some rearranging in there. now I won't hear her complain that I've taken over the room staining some planking before I go to my test today.........fingers crossed
-
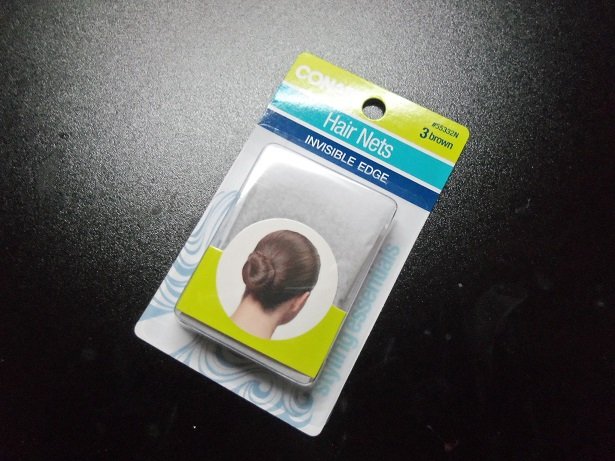
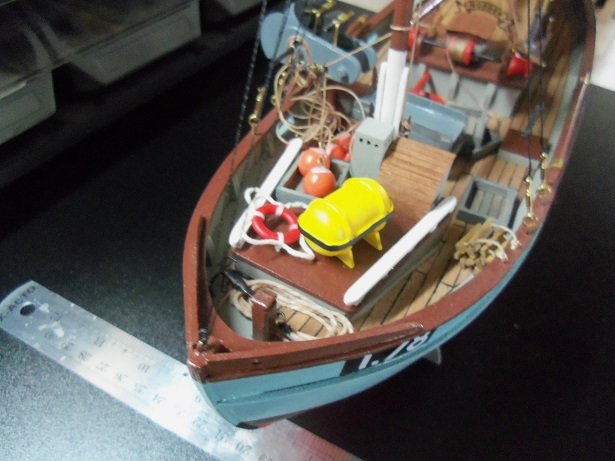
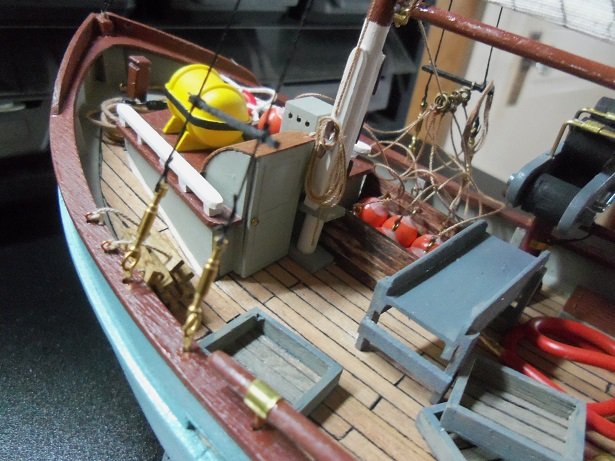
thanks Lawrence......I don't normally do my sails this way, but for only two of them, I made a concession I sew my own though......not as lucky as you are still need to finish trimming the rest of the fish.......I think they will look better loose {so to speak}. not much left to do.......feel like I'm sneaking up on the finish. so yea.......yet again, I forgot to bring that hair net I found home......I still will {it's too cool not to}. I went out and bought a package of hair nets....I looked at those scrunchies that women use, but I haven't seen the right color. I also have the model shipways netting that I got in the Nordkap box. it's already pre cut to size.....I just have to cut the length. the mesh is good, but I haven't gotten it wet, to see if it will relax. it's kinda stiff and still has the folds in it from packaging. so I still have some testing to do yet. the admiral even made a suggestion of using tulle......so I got out a sheet of that as well, along with the mesh fabric I bought from Hobby Lobby some time ago. from that box of odds and ends I showed earlier, I mentioned that I found only the crows nest parts from the Half Moon. I trimmed one of them and hung a preserver on the back wall of the pilot house. the other one ended up on top of the fore cabin roof. the hair net.........thumbs down. the mesh is too large and seems to be too loosely woven. I suppose stretching it out and spraying it with paint or diluted white glue, might help.......but it could be used for larger models. the other hair net isn't like this.........I'll get a picture up here.......I won't forget. the last thing I did, after cutting out the rest of the fish......was to trim the haul line for the main stay sail and made a rope coil for it. so now.....all that's left are the fish and the net.
- 378 replies
-
- 10
-
-
- t78 norden
- billing boats
- (and 1 more)
-
well......I finished cutting up those plastic plates......I got a total of ten fish out of them. more than enough to add to the boat.......now to get them trimmed and painted. I also managed to forget the hair net that I found at work.....I like the looks of it too....DRAT! I have a few options here that I can look at...we will later then there the placement of the life preservers.......that will be covered as well........I'll have an update soon
- 378 replies
-
- 7
-
-
- t78 norden
- billing boats
- (and 1 more)
-
thanks OC and Patrick........gonna be a broken week.....I have a test to take on Thursday for a new job. haven't done this type of work for a few years....I hope I can remember it all so far today, I did a bit more on the Norden to finish her up.......for the T.D., I want to start doing the planking on the second level structure and a few more things to the first level. I hope to have something to show very soon here thanks for the good word! you don't have to thank me Michael......I'm just passing it along. the sharpie ink is a lot thinner, and will penetrate the wood easily. it was a great suggestion by our wonderful moderators. of course by my blunder, I found that it is easy to revitalize these pens as well, by simply adding India Ink to them....I let one dry out by mistake. I tried the pencil......I tried the crayon.....I've even tried the thin strip mahogany method. but, as soon as I tried the archive pen...I was hooked I'm just a humble modeler, amazed by your work