


popeye the sailor
-
Posts
16,007 -
Joined
-
Last visited
Content Type
Profiles
Forums
Gallery
Events
Everything posted by popeye the sailor
-
 thanks Piet..........almost update time again she's gone through a major change in the last day or so. did you change your user name?
- 453 replies
-
- 6
-

-
- thermopylae
- sergal
- (and 1 more)
-
awesome job on this build!
-
sounds unanimous to me belay that order........give 'er a dry dock of 'er own! it'll still be a while......this was something I was toss'in 'round in my head. by that time, I should have a name for 'er. thanks all for the help.......couldn't see leav'in 'er in with the other two......that wouldn't be right either.
-
masting looks great Rob! gett'in pretty close to rigging time
- 1,208 replies
-
- 4
-
-
- great republic
- clipper
- (and 1 more)
-
I've done a carrier before.......but not the scale you and Greg are attempting. I have a couple plastic ship kits in the stash.....but I'm still trying to bring down the unfinished roster. I don't think I'm doing too good. I can at least flounder in my own turmoil, and live vicariously though your and Greg's. perhaps the next millennium, I may sink my teeth into one of these models
-
hi Don.....I'm typing with one hand again......holding a rub rail. the finish you see there is just the stain.......but I think the aft deck has a coat of the bottled lacquer {which I have now run out of}. I just finished giving both decks two coats of the new lacquer......which I find is a flat........says dull coat on the cap. it really doesn't matter which one you use.....the semi gloss tends to dull out as it cures. it gives a nice hard finish and is a bit more scratch resistant.......that's why I like it. there is one draw back though. the bottled lacquer is not as bad, but the rattle can lacquer can be very touchy to temp and humidity, due to the addition of propellant in the formula. when I {if you have to do it} decant my paints, I leave the caps loose for at least 12 hours, lightly shaking it every once in a while. if you have to use the rattle can.......be sure the temp is around 70 degrees with low humidity. it's worth the effort though...... thanks Carl!
- 453 replies
-
- 6
-
-
- thermopylae
- sergal
- (and 1 more)
-
thanks Patrick......still a bit to go yet. for as long as this project has taken, it's going to be a very happy ending not that I'm tired of it, but because I'm not use to having a project last this long.....I know I have others. fear not though......there are a couple more fishing boats in the que........namely {namelessly}, the boat that spawned from the Holiday harbor project. I'm still at odds with it.......I'm thinking of continuing her here in this log, rather than start a separate one for her. I value any thoughts that you fine folks may have. ...as for a case.......nawwww, wish I could, but my budget doesn't allow for it. we do keep our eyes on the flea markets and stuff.......recently we heard that Hallmark is closing in the mall. they are selling off everything, even their cases. it would be cool to pick up a case like that. we keep looking thanks for the good word my friend!
-
thanks Kees.........and all who hit the like button. I wish I had done more, but the sizing of the portholes might not have been a good thing, if I had assembled the nets before hand. there is not much else that requires me not to add them now. the portholes need the window maker.......and then the aft deck can be done. drat! I still need to get new ink cartridges!
-
man those rooms are tiny! I see you already have the closets shelved off. it will be interesting to see what feng shui you add to them. I hope to draw some of your style for one of my builds really cool stuff....awesome job!
-
I saw the bulkheads in a row.......then you have made great progress recovery must be going well at your house......glad to hear it!
-
sneaky.........you built the hull without showing us >must review entire log to see< grand looking structure you have there.........nicely detailed overlay form very well done!
-
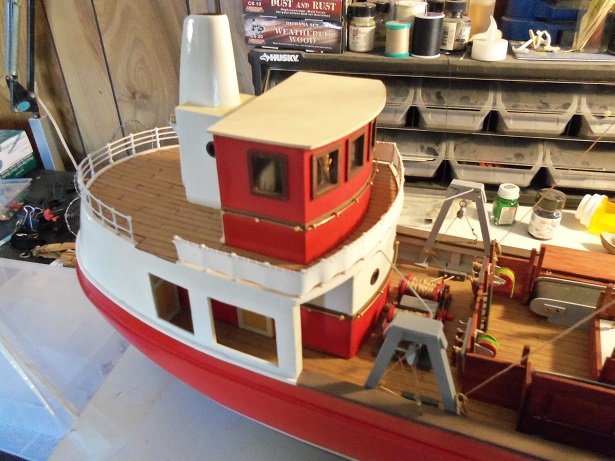
a little more has been done to the build........nothing yesterday though. I got side tracked doing video production. we have a couple of bins of VHS tapes...movies...........we bought a VHS to DVD program for the computer. I tried three computers, until I found the one that will handle the program. I had to give up my keyboard {hence my not being here yesterday}....but for my sacrifice, I got a brand new one of course, the first tape I had to burn was our wedding video........I looked like a dork! anyway........I did finish the aft deck. the two deck in relation, look pretty good it was sanded and scraped.....and given the stain coat. it really changed the way it looks. I have run out of the semi gloss lacquer. I had gone to Hobby Lobby.......and my luck, they don't carry it in the bottle.......I had to get a rattle can. so I decanted some and I had to wait for the propellant to escape, before I can use it. I'll be giving her a coat or two today. I had better hurry though.......it's my youngest son's birthday, and I promised a taco supper for him and his girlfriend. fun times had by all!
- 453 replies
-
- 9
-
-
- thermopylae
- sergal
- (and 1 more)
-
we pick our own challenges.....model manufacturers have come so far, in offering us these options. one could simply throw it together and be done with it, but for those who want more out of the experience, chose to take a more detailed approach. I wish I knew if this was available to me, when I was a young pup, putting all those plane and car models together. take short breaks in between, to give your eyes a rest.
-
wow Nils........the progress you've made is astounding........so much detail added ! you've really gone above and beyond I did notice a couple of eye bolts that were partially open.......did you not close them, or is that from stress? sorry if I sound picky.......but I'd rather say something, rather than hear that something you may not have noticed right away, spoils it for you
- 2,625 replies
-
- 5
-
-
- kaiser wilhelm der grosse
- passenger steamer
- (and 1 more)
-
I've done that as well......and it works particularly well with the second planking. it melds the plank well at the turn. I hope you make provision in regards to visibility........you don't want to go all out, only to close it up, never to be seen
-
there are quite a few folks, who will plank from the keel up. I tried it and found it hard to hold the straight line. deck and aft quarters is looking real nice E.J.
-
thanks to all who hit the like button thanks Bob. thanks John........so they would be framed in between beams. looking at the stagger lines, I have them at every bulkhead, as well as at every half measurement. on some POB kits, it might be hard to map out, due to the bulwark posts.......but on this one, it could have been done easily, since the posts are to be removed. in the future, I will be sure to map the deck out before they are assembled. bad on me for forgetting to do it on this one
- 453 replies
-
- 6
-
-
- thermopylae
- sergal
- (and 1 more)
-
hmmmmm cross eyed you say?!?!? only remedy I know of is to go out and get kicked by a mule that........and keep your eyes further than 2" away from your work take your time .....you'll get there
-
sorry to hear that there are ills in the house. I hope they get better soon I would imagine you'd want to use plastic.......Plastruct and evergreen has a fine selection of I beams and such. they also carry a good selection of different moldings as well.
-
drat! I just noticed that the starboard stern light is pointed upward. gotta fix that!
-
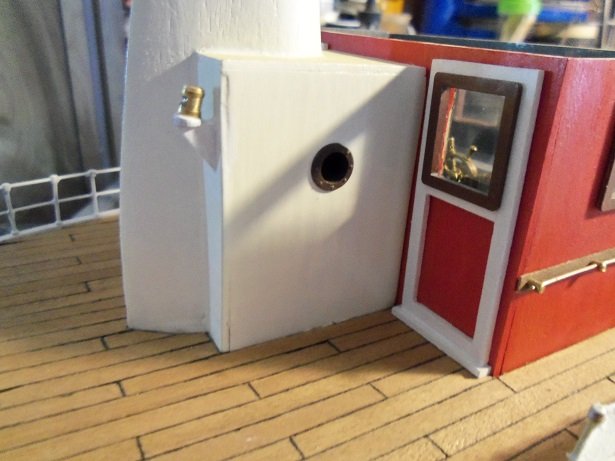
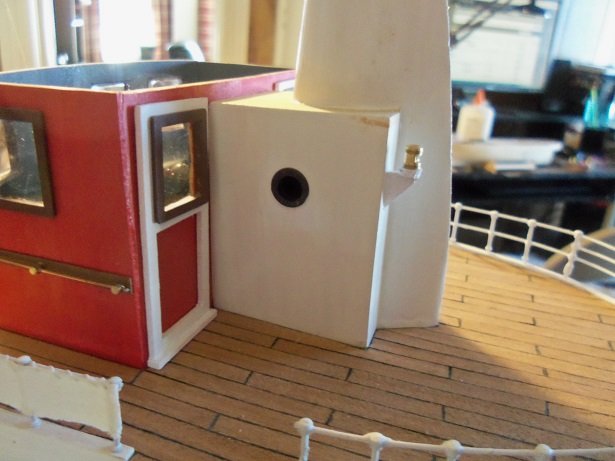
got a chance to do a little bit to this build as well yesterday. before I get the nets up, I wanted to finish with the portholes in the cabin behind the helm room. now that they are fitted, I can fill them in with window maker and get'em installed. I had one made for the helm room, but now I can't find it. that would be the roof........I made another one. I'll get some more done soon.
- 747 replies
-
- 11
-
-
I've had some that were supposed to be 1:1 to the model....the Thermopylae kit is one of them. but I don't think I need to use the plans like you'll need to use them. nice looking kit BWT
- 682 replies
-
- 3
-
-
- halifax
- lumberyard
- (and 1 more)
-
sad....huh Sjors........what do you do when they don't need you anymore?!?!? your not losing a dependent model.......you've gained a ship!
- 1,616 replies
-
- 9
-
-
- caldercraft
- agamemnon
- (and 1 more)
-
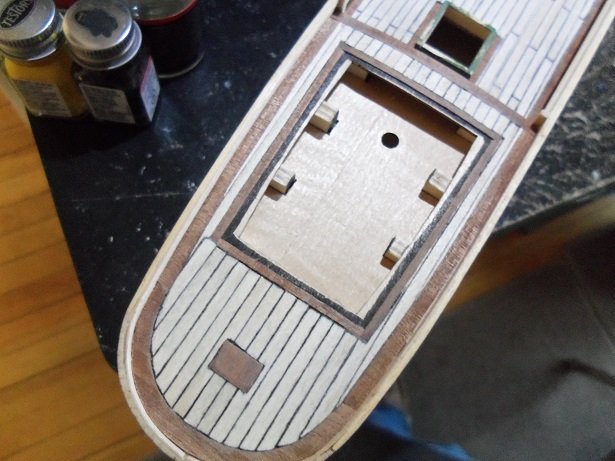
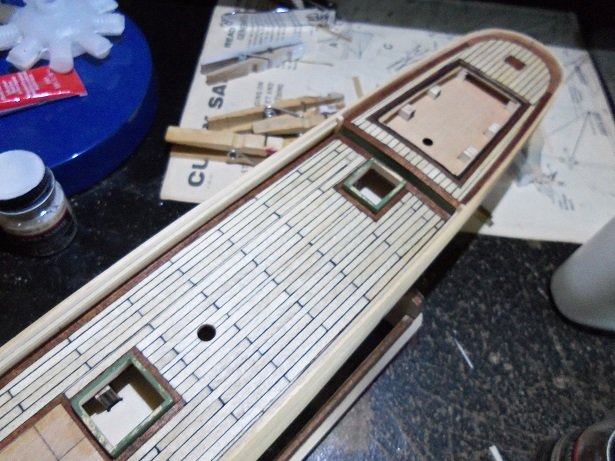
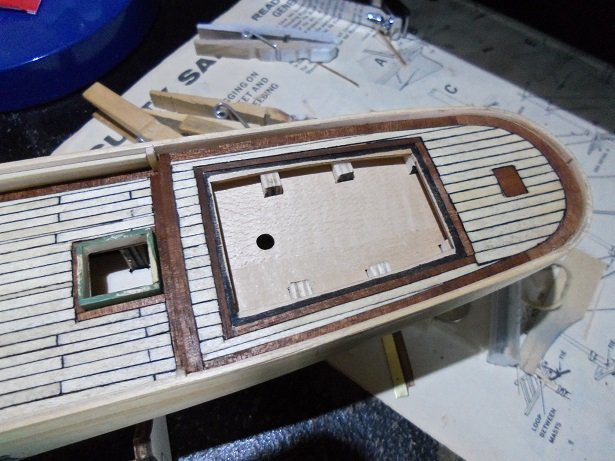
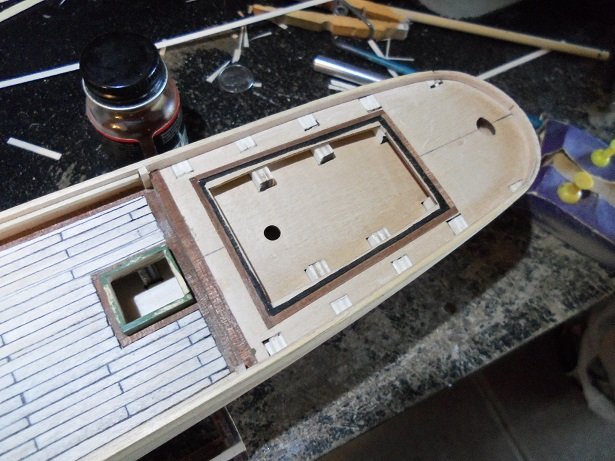
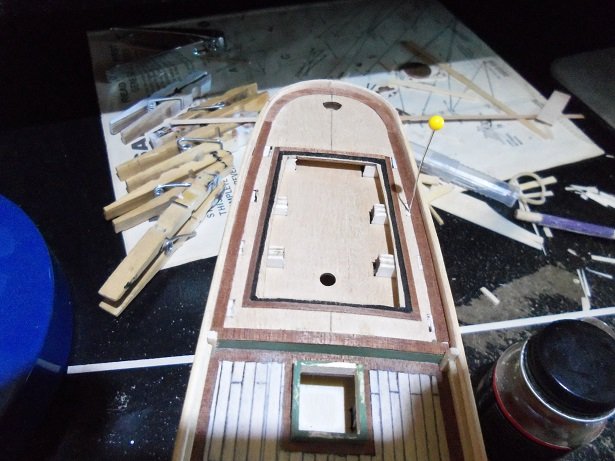
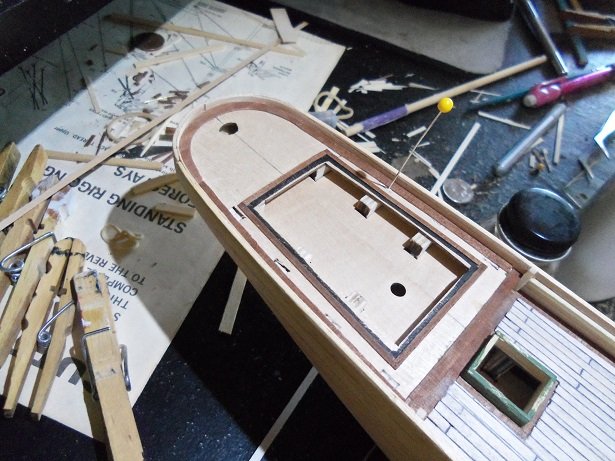
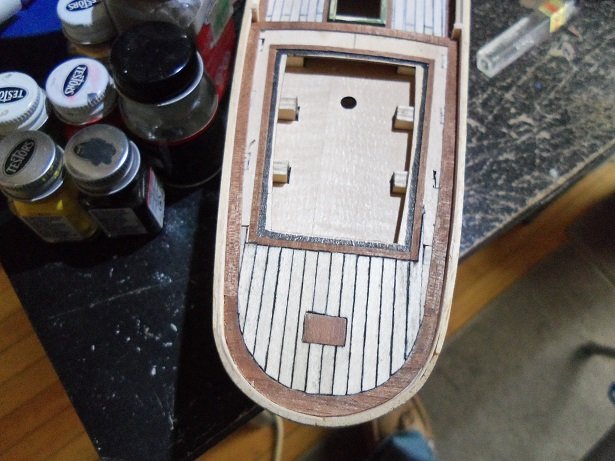
I also started with the poop deck {aft deck}. first was to border off the aft cabin. I ran the archive pen around the inside edges, just in case there were any gaps around the structure. it took some doing........that piece of waterway around the transom was very brittle.......it broke a few times, while I was sanding and shaping it. it actually came out better than I thought it would, considering what I went through to make it. add the sides and it was complete.......only some minor trimming involved. then the planking began........ the hole for the rudder.......don't know why it was needed........the rudder doesn't come through it. the wheel pad was added......there isn't a wheel box, like the Cutty has. it still needs to be made yet. I'll get the rest of this done today........perhaps I'll throw just say the heck with it and do the fore deck too. I can always snake the anchor chain in place when the time comes.
- 453 replies
-
- 15
-
-
- thermopylae
- sergal
- (and 1 more)